1
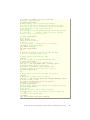
Quick Intro to Git and Project Hosting
Services
Hans Petter Langtangen1,2
1
Center for Biomedical Computing, Simula Research Laboratory
2
Deptartment of Informatics, University of Oslo
Oct 4, 2015
Version control systems allow you to record the history of files and share files
among several computers and collaborators in a professional way. Especially
when working with software development or technical writing, it is essential to
have file changes documented and to ensure that every computer and person
involved in the project have the most recent updates of the files.
Projects that you want to share among several computers or project workers
are most conveniently stored at some web site "in the cloud", here called project
hosting services. For efficient access to the files, and the possibility to work
offline, you interact with local copies of the files on your computers. I strongly
recommend you to use such sites and version control for all serious programming
and scientific writing work.
Essence.
The essence of project hosting services is that you have the files associated
with a project in the cloud. Many people may share these files. Every time
you want to work on the project you explicitly update your version of the
files, edit the files as you like, and synchronize the files with the "master
version" in the cloud. It is a trivial operation to go back to a previous
version of a file, corresponding to a certain point of time or labeled with
a comment. You can also use tools to see what various people have done
with the files throughout the history of the project.
1
Motivation
Greg Wilson’s excellent Script for Introduction to Version Control provides
a detailed motivation why you will benefit greatly from using version control
systems. Here follows a shorter motivation and a quick overview of the basic
concepts.
c 2015, Hans Petter Langtangen. Released under CC Attribution 4.0 license
1.1
Why not Dropbox or Google Drive?
The simplest services for hosting project files are Dropbox and Google Drive. It
is very easy to get started with these systems, and they allow you to share files
among laptops and mobile units with as many users as you want. The systems
offer a kind of version control in that the files are stored frequently (several
times per minute), and you can go back to previous versions for the last 30
days. However, it is challenging to find the right version from the past when
there are so many of them and when the different versions are not annotated
with sensible comments. Another deficiency of Dropbox and Google Drive is
that they sync all your files in a folder, a feature you clearly do not want if
there are many large files (simulation data, visualizations, movies, binaries from
compilations, temporary scratch files, automatically generated copies) that can
easily be regenerated.
However, the most serious problem with Dropbox and Google Drive arises
when several people edit files simultaneously: it can be difficult detect who did
what when, roll back to previous versions, and to manually merge the edits when
these are incompatible. Then one needs more sophisticated tools, which means
a true version control system. The following text aims at providing you with the
minimum information to started with Git, the leading version control system,
combined with project hosting services for file storage.
1.2
Repositories and local copies
The mentioned services host all your files in a specific project in what is known
as a repository, or repo for short. When a copy of the files are wanted on a
certain computer, one clones the repository on that computer. This creates a
local copy of the files. Now files can be edited, new ones can be added, and files
can be deleted. These changes are then brought back to the repository. If users
at different computers synchronize their files frequently with the repository, most
modern version control systems will be able to merge changes in files that have
been edited simultaneously on different computers. This is perhaps one of the
most useful features of project hosting services. However, the merge functionality
clearly works best for pure text files and less well for binary files, such as PDF
files, MS Word or Excel documents, and OpenOffice documents.
1.3
Installing Git
The installation of Git on various systems is described on the Git website under
the Download section. Git involves compiled code so it is most convenient to
download a precompiled binary version of the software on Windows, Mac and
other Linux computers. On Ubuntu or any Debian-based system the relevant
installation command is
Terminal> sudo apt-get install git gitk git-doc
c 2015, Hans Petter Langtangen. Released under CC Attribution 4.0 license
2
This tutorial explains Git interaction through command-line applications in
a terminal window. There are numerous graphical user interfaces to Git. Three
examples are git-cola, TortoiseGit, and SourceTree.
1.4
Configuring Git
Make a file .gitconfig in your home directory with information on your full
name, email address, your favorite text editor, and the name of an “excludes file”
which defines the file types that Git should omit when bringing new directories
under version control. Here is a simplified version of the author’s .gitconfig
file:
[user]
name = Hans Petter Langtangen
email = [email protected]
editor = emacs
[core]
excludesfile = ~/.gitignore
The “excludes file” is called .gitignore and must list, using the Unix Shell
Wildcard notation, the type of files that you do not need to have under version
control, because they represent garbage or temporary information, or they can
easily be regenerated from some other source files. A suggested .gitignore file
looks like
# compiled files:
*.o
*.so
*.a
# temporary files:
*.bak
*.swp
*~
.*~
*.old
tmp*
temp*
.#*
\#*
# tex files:
*.log
*.dvi
*.aux
*.blg
*.idx
*.nav
*.out
*.toc
*.snm
*.vrb
# eclipse files:
*.cproject
*.project
# misc:
.DS_Store
c 2015, Hans Petter Langtangen. Released under CC Attribution 4.0 license
3
Be critical to what kind of files you really need a full history of. For example,
you do not want to populate the repository with big graphics files of the type
that can easily be regenerated by some program.
2
GitHub
Go to github.com and create an account. Then go to your account settings (icon
in the upper left corner of the page), choose SSH Keys, and provide your SSH
key unless you have already registered this key with another GitHub account (see
Appendix A). Often, it is just a matter of pasting the contents of id_rsa.pub or
id_dsa.pub files, located in the .ssh subdirectory of your home directory, into
the Key box in the web page. Make sure to just cut and paste the text from,
e.g., id_rsa.pub without any extra whitespaces or other text. How to generate
these files is described in the link generating SSH keys above the SSH Keys box.
If the account is a project account and not a personal account, I do not
recommend to provide an SSH key although it can be done (see Appendix A). It
is easier to log in and add collaborators using their personal GitHub usernames.
2.1
Creating a new project
Click on New repository on the main page and fill out a project name, here My
Project, click the check button Initialize this repository with a README, and
click on Create repository. Unless you pay, all repos are public, but students and
teachers can request free, private repos.
The next step is to clone the project on your personal computer. Click on
the SSH button to see the address of the project, and paste this address into a
terminal window, after git clone:
Terminal> git clone git://github.com:user/My-Project.git
Make sure you substitute user by your own username on GitHub.
The result of the git clone command is a new directory My-Project. It
contains the file .git, which shows that it is a Git repository. It also contains a
default README.md file with the project name and description. The extension .md
signifies a file written in the Markdown format. You may use the reStructuredText
format as an alternative (README.rst), or simply write a plain text file (README),
but the git mv command must be used to change the filename.
You can now add files and directories into the My-Project directory. When
your initial file collection has the desired form, you must run
Terminal> git add .
Terminal> git commit -am ’First set of files.’
Terminal> git push -u origin master
The daily file operations are explained in Section 3.
c 2015, Hans Petter Langtangen. Released under CC Attribution 4.0 license
4
Collaborating. To give others permissions to push their edits of files to the
repository, you click on the Settings link in the right sidebar, then click on
Collaborators on the left, and fill in the name of a collaborator (her or his
username on GitHub). Many find it convenient to be notified in email when
others have pushed a new version of the files to the repo. Click on Service Hooks
in the project’s Settings menu, choose Email, fill in at most two whitespaceseparated email addresses, mark the Send from Author and Active boxes, and
click on Update Settings. More addresses must be dealt with through a mailing
list and filling in the name of that list.
Anyone who participates in a project (has write access) or watches a project
(having clicked the watch button) can monitor the development of the activity on
their GitHub main page. Go to Account Settings and choose Notification Center.
There you see two sections, Participating and Watching, for those participating
in the project (granted write access) and those watching the project (having
clicked the watch button), respectively.
2.2
Wiki pages
With every GitHub project there is an option to create wiki pages. Click on
the Wiki button in the right sidebar on the main page of the project. Click
on New Page to create a new page. The wiki pages can be written in different
markup languages. Markdown is the default choice, but you can alternatively
use MediaWiki and reStructuredText. Unfortunately, GitHub wiki pages do not
allow LATEX mathematics through MathJax, even though MediaWiki has support
for LATEX (the reason is security issues).
The wiki pages can be written and maintained through the web browser
interface, but it is usually more convenient to clone them on your computer as
this makes it easy to add figures and other documents you may want to link to.
It also makes it straightforward to edit the wiki text in your favorite text editor.
The wiki pages are stored in a separate repo and can be cloned by
Terminal> git clone git://github.com/user/My-Project.wiki.git
This command makes a local copy of the pages in the directory My-Project.wiki,
which you may prefer to have at the same level as the project directory itself in
your directory tree.
Each wiki page has its own file, where the extension reflects the markup
language used, e.g., .md for Markdown, .rest for reStructuredText, .mediawiki
for MediaWiki, and .creole for Creole wiki. The wiki files are handled as other
files in a GitHub project, i.e., you need to pull before editing and then perform
commit and push. After the push you can reload the page in the web browser to
monitor the effect.
You may consider having the original text in doconce format and generate
the wiki in the reStructuredText or MediaWiki format.
Do changes, commit the usual way, and push by
Terminal> git push [email protected]:user/My-project.wiki.git
c 2015, Hans Petter Langtangen. Released under CC Attribution 4.0 license
5
The address can be stored as url in .git/config in the root directory of the
wiki project so that just a standard git push works.
2.3
Project web pages
HTML pages stored in your repo cannot be linked to and properly rendered
as web pages. Say you have some HTML file doc/file.html in the repo. The
normal link to the file is
https://github.com/user/my-project/blob/master/doc/file.html
which shows up as a nicely typeset, colorful HTML code. The raw text file,
https://raw.githubusercontent.com/user/my-project/master/doc/file.html
shows up as pure text in a browser. If one wants to see the file rendered as
HTML code, one can view it through htmlpreview.github.io. This means
that one can use the link
http://htmlpreview.github.io/?https://raw.githubusercontent.com/user/my-project/master/doc/file.html
to produce the HTML document in a browser.
However, there is another technique available where all HTML files in a
special branch gh-pages of the repository are automatically rendered correctly
as HTML documents in a browser. This is the recommended technique for
publishing a collection of HTML files related to the project in a simple and
convenient way. The recipe is described in detail below.
1. Go to the project page on github.com and click Settings.
2. Click on Automatic Page Generator under the GitHub Pages.
3. Proceed clicking Continue to Layouts, choose a design of the index.html
page that GitHub will create for you, and click Publish.
4. Go to the root directory of the project, My-Project and run git fetch
origin.
5. Run git checkout gh-pages.
You have now a new branch called gh-pages of your project containing an
index.html file and directories for JavaScript programs and CSS style sheets in
the root directory. The gh-pages branch will also all files not contained in the
master branch, typically redundant files you have generated and which should
not be stored in the version control system (remove these manually with git
rm). You can populate the root directory and subdirectories of your gh-pages
branch with HTML and other files as you like. The key issue is that the people
out there will only see the web pages that correspond to your HTML files in the
gh-pages branch!
The index.html page is invoked by the web address
c 2015, Hans Petter Langtangen. Released under CC Attribution 4.0 license
6
http://user.github.io/My-Project/index.html
where user is the GitHub username and My-Project is the project name.
The web pages and project files are now in two different branches. To see
the branches, type git branch, and the one you are in will be marked with * in
the output. Switching to the master branch is done by git checkout master.
Similarly, git checkout gh-pages switches to the gh-pages branch.
My personal preference is to have the master and gh-pages synchronized,
at least in projects where I want to link to various source code files or other
files from the web documentation. Sometimes I also update files in the gh-pages
branch without remembering to switch to the master branch. To this end, one
needs to merge the branches, i.e., automatically edit files in the current branch
such that they are up-to-date and identical to files in another branch.
To merge the current branch with some branch named otherbranch, run
Terminal> git merge otherbranch
Git applies smart algorithms that very often manage to merge the files without
human interaction. However, occasionally these algorithms are not able to resolve
conflicts between two files. A message about the failure of the merge is seen in
the terminal window, and the corresponding files have markers in them showing
which sections that needs manual editing to resolve the conflicts. Run git diff
to show the problems (you can tailor this command to your needs as explained in
Section 3.4). After a manual edit, do git commit -a. More details on merging
appears in Section 3.2.
If you want to keep the master branch and the gh-pages branch synchronized,
start with merging the gh-pages branch with the master branch and push the
complete file collection to the gh-pages branch. Then switch to the master
branch and merge with gh-pages so you get the autogenerated index.html file
and associated files and directories for web pages in the root directory of the
master branch as well:
Terminal>
Terminal>
Terminal>
Terminal>
Terminal>
git merge master
touch .nojekyll
git push origin gh-pages
git checkout master
git merge gh-pages
You must add an empty file .nojekyll in the top directory of the project pages if
you want to use Sphinx-generated HTML pages (or other pages using javascripts,
style sheets, and images in subdirectories whose names start with an underscore).
You can now add the documentation to the project files and maintain them
in the master branch. Before publishing documents online, make sure to update
the gh-pages branch by
Terminal>
Terminal>
Terminal>
Terminal>
Terminal>
Terminal>
Terminal>
git
git
git
git
git
git
git
commit -am ’Ensure commit of master branch’
push origin master
checkout gh-pages
pull origin gh-pages
merge master
push origin gh-pages
checkout master
c 2015, Hans Petter Langtangen. Released under CC Attribution 4.0 license
7
Personally, I like to move the generated index.html file and all associated
scripts, stylesheets, and images from the root directory to some more isolated
place, say doc/web:
Terminal> git mv index.html params.json stylesheets/ images/ \
javascripts/ doc/web/
The URL of the index.html file is
http://user.github.io/My-Project/doc/web/index.html
Linking to source code files or other files in the project is easy: just find
the file in GitHub’s web interface, choose which version of the file you want to
link to (nicely HTML formatted version or the raw file), right-click on the link,
choose Copy Link, and paste the link into the document you want. You can
test that the link works by the Unix command curl -O <link>. Note that the
link to a file is different from the source file’s intuitive path in the repository.
Typically, a source file dir/f.py in project prj is reached through
https://github.com/user/prj/blob/master/dir/f.py?raw=true
Sometimes you want to link to another HTML file, PDF file, movie file, or a
file that is to be interpreted as a web resource by the browser. Do not use the
path to the file in the repo as explained above as it will just bring the reader to
the repo page. Instead, make sure the file is in the gh-pages branch and use a
local link, like ../doc.pdf, or the complete gh-pages URL to the file, say
http://user.github.com/My-Project/doc/misc/doc.pdf
Tip.
The ordinary GitHub URL of image files can be used in web pages to insert
images from your repo, provided the image files are in the raw format
- click the Raw button when viewing a file at github.com and use the
corresponding URL in the img tag in the HTML code.
2.4
User web pages
GitHub also allows you to create user pages and organization pages not tied to
any specific project. Your personal site has address http://user.github.com.
Go to your home page on github.com and click New repository, and give it the
project name user.github.com. Then follow the instructions that come up:
Terminal>
Terminal>
Terminal>
Terminal>
Terminal>
Terminal>
Terminal>
mkdir user.github.com
cd user.github.com
git init
# make an index.html file with some test text
git add index.html
git commit -m ’First commit’
git remote add origin \
[email protected]:user/user.github.com.git
Terminal> git push -u origin master
c 2015, Hans Petter Langtangen. Released under CC Attribution 4.0 license
8
Go to http://user.github.com and see how the index.html is rendered. You
can now add various contents as in any ordinary Git repository. If you want to
use Sphinx generated HTML pages, recall to add an empty file .nojekyll.
3
Using Git
Most Mac and Linux users prefer to work with Git via commands in a terminal
window. Windows users may prefer a graphical user interface (GUI), and there
are many options in this respect. There are also GUIs for Mac users. Here we
concentrate on the efficient command-line interface to Git.
3.1
Basic Git commands
Cloning. You get started with your project on a new machine, or another user
can get started with the project, by running
Terminal> git clone [email protected]:user/My-Project.git
Terminal> cd My-Project
ls
Recall to replace user by your real username and My-Project by the actual
project name.
The pull-change-push cycle. The typical work flow with the "My Project"
project starts with updating the local repository by going to the My-Project
directory and writing
Terminal> git pull origin master
You may want to do git fetch and git merge instead of git pull as explained
in Section 3.4, especially if you work with branches.
You can now edit files, make new files, and make new directories. New files
and directories must be added with git add. There are also Git commands for
deleting, renaming, and moving files. Typical examples on these Git commands
are
Terminal>
Terminal>
Terminal>
Terminal>
Terminal>
git
git
git
git
git
add file2.* dir1 dir2
rm file3
rm -r dir2
mv oldname newname
mv oldname ../newdir
# add files and directories
When your chunk of work is ready, it is time to commit your changes (note the
-am option):
Terminal> git commit -am ’Description of changes.’
If typos or errors enter the message, the git commit –amend command can be
used to reformulate the message. Running git diff prior to git commit makes
it easier to formulate descriptive commit messages since this command gives a
c 2015, Hans Petter Langtangen. Released under CC Attribution 4.0 license
9
listing of all the changes you have made to the files since the last commit or pull
command.
You may perform many commits (to keep track of small changes), before you
push your changes to the global repository:
Terminal> git push origin master
Do pull and push often!
It is recommended to pull, commit, and push frequently if the work takes
place in several clones of the repo (i.e., there are many users or you work
with the repo on different computers). Infrequent push and pull easily leads
to merge problems (see Section 3.2). Also remember that others (human
and machines) cannot get your changes before they are pushed!
Do not forget to add important files.
You should run git status -s frequently to see the status of files: A for
added, M for modified, R for renamed, and ?? for not being registered in
the repo. Pay particular attention to the ?? files and examine if all of
them are redundant or easily regenerated from other files - of not, run git
add.
Make sure you have a .gitignore file.
The simplest way of adding files to the repo is to do
Terminal> git add .
The dot adds every file, and this is seldom what you want, since your
directories frequently contain large redundant files or files that can easily
be regenerated. You therefore need a .gitignore file, see Section 1.4,
either in your home directory or in the root directory of the repo. The
.gitignore file will ignore undesired files when you do git add ..
Viewing the history of files. A nice graphical tool allows you to view all
changes, or just the latest ones:
Terminal> gitk --all
Terminal> gitk --since="2 weeks ago"
You can also view changes to all files, some selected ones, or a subdirectory:
c 2015, Hans Petter Langtangen. Released under CC Attribution 4.0 license
10
Terminal>
Terminal>
Terminal>
Terminal>
git
git
git
git
log
log
log
log
-p
# all changes to all files
-p filename
# changes to a specific file
--stat --summary
# compact summary
--stat --summary subdir
Adding –follow will print the history of file versions before the file got its present
name.
To show the author who is responsible for the last modification of each line
in the file, use git blame:
Terminal> git blame filename
Terminal> git blame --since="1 week" filename
A useful command to see the history of who did what, where individual edits of
words are highlighted (–word-diff), is
git log -p --stat --word-diff filename
Removed words appear in brackets and added words in curly braces.
Looking for when a particular piece of text entered or left the file, say the
text def myfunc, one can run
Terminal> git log -p --word-diff --stat -S’def myfunc’ filename
This is useful to track down particular changes in the files to see when they
occurred and who introduced them. One can also search for regular expressions
instead of exact text: just replace -S by -G.
Retrieving old files. Occasionally you need to go back to an earlier version
of a file, e.g., a file called f.py. Start with viewing the history:
Terminal> git log f.py
Find a commit candidate from the list that you will compare the present version
to, copy the commit hash (string like c7673487...), and run
Terminal> git diff c7673487763ec2bb374758fb8e7efefa12f16dea f.py
where the long string is the relevant commit hash. You can now view the
differences between the most recent version and the one in the commit you
picked (see Section 3.4 for how to configure the tools used by the git diff
command). If you want to restore the old file, write
Terminal> git checkout c7673487763ec2bb374758fb8e7efefa12f16dea f.py
To go back to another version (the most recent one, for instance), find the commit
hash with git log f.py, and do get checkout <commit hash> f.py.
If f.py changed name from e.py at some point and you want e.py back,
run git log –follow f.py to find the commit when e.py existed, and do a
git checkout <commit hash> e.py.
In case f.py no longer exists, run git log – f.py to see its history before
deletion. The last commit shown does not contain the file, so you need to check
out the next last to retrieve the latest version of a deleted file.
Often you just need to view the old file, not replace the current one by the
old one, and then git show is handy. Unfortunately, it requires the full path
from the root git directory:
c 2015, Hans Petter Langtangen. Released under CC Attribution 4.0 license
11
Terminal> git show \
c7673487763ec2bb374758fb8e7efefa12f16dea:dir1/dir2/f.py
Reset the entire repo to an old version. Run git log on some file and
find the commit hash of the date or message when want to go back to. Run
git checkout <commit hash> to change all files to this state. The problem of
going back to the most recent state is that git log has no newer commits than
the one you checked out. The trick is to say git checkout master to set all
files to most recent version again.
If you want to reset all files to an old version and commit this state as the
valid present state, you do
Terminal> git checkout c7673487763ec2bb374758fb8e7efefa12f16dea .
Terminal> git commit -am ’Resetting to ...’
Note the period at the end of the first command (without it, you only get the
possibility to look at old files, but the next commit is not affected).
Going back to a previous commit. Sometimes accidents with many files
happen and you want to go back to the last commit. Find the hash of the last
commit and do
Terminal> git reset --hard c867c487763ec2
This command destroys everything you have done since the last commit. To
push it as the new state of the repo, do
Terminal> git push origin HEAD --force
3.2
Merging files with Git
The git pull command fetches new files from the repository and tries to perform
an automatic merge if there are conflicts between the local files and the files in
the repository. Alternatively, you may run git fetch and git merge to do the
same thing as described in Section 3.4. We shall now address what do to if the
merge goes wrong, which occasionally happens.
Git will write a message in the terminal window if the merge is unsuccessful
for one or more files. These files will have to be edited manually. Merge markers
of the type »»>, ======, and ««< have been inserted by Git to mark sections of
a file where the version in the repository differ from the local version. You must
decide which lines that are to appear in the final, merged version. When done,
perform git commit and the conflicts are resolved.
Graphical merge tools may ease the process of merging text files. You can
run git mergetool –tool=meld to open the merge tool meld for every file that
needs to be merged (or specify the name of a particular file). Other popular merge
tools supported by Git are araxis, bc3, diffuse, ecmerge, emerge, gvimdiff,
kdiff3, opendiff, p4merge, tkdiff, tortoisemerge, vimdiff, and xxdiff.
c 2015, Hans Petter Langtangen. Released under CC Attribution 4.0 license
12
Below is a Unix shell script illustrating how to make a global repository in
Git, and how two users clone this repository and perform edits in parallel. There
is one file myfile in the repository.
# !/ bin / sh
# Demo script for e x e m p l i f y i n g git and merge
rm - rf tmp1 tmp2 tmp_repo
# Clean up p r e v i o u s runs
mkdir tmp_repo
# Global r e p o s i t o r y for testing
cd tmp_repo
git -- bare init -- shared
cd ..
# Make a repo that can be pushed to t m p _ r e p o
mkdir _tmp
cd _tmp
cat > myfile << EOF
This is a little
test file for
exemplifying merge
of files in different
git directories .
EOF
git init
git add .
# Add all files not m e n t i o n e d in ~/. g i t i g n o r e
git commit - am ’ first commit ’
git push ../ tmp_repo master
cd ..
rm - rf _tmp
# Make a new hg r e p o s i t o r i e s tmp1 and tmp2 ( two users )
git clone tmp_repo tmp1
git clone tmp_repo tmp2
# Change myfile in the d i r e c t o r y tmp1
cd tmp1
# Edit myfile : insert a new second line
perl - pi -e ’s / a little \ n / a little \ ntmp1 - add1 \ n /g ’ myfile
# R e g i s t e r change in local r e p o s i t o r y
git commit - am ’ Inserted a new second line in myfile . ’
# Look at changes in this clone
git log -p
# or a more compact summary
git log -- stat -- summary
# or g r a p h i c a l l y
# gitk
# R e g i s t e r change in global r e p o s i t o r y t m p _ r e p o
git push origin master
cd ..
# Change myfile in the d i r e c t o r y tmp2 " in p a r a l l e l "
cd tmp2
# Edit myfile : add a line at the end
cat >> myfile << EOF
tmp2 - add1
EOF
# R e g i s t e r change locally
c 2015, Hans Petter Langtangen. Released under CC Attribution 4.0 license
13
git commit - am ’ Added a new line at the end ’
# R e g i s t e r change g l o b a l l y
git push origin master
# Error message : global r e p o s i t o r y has changed ,
# we need to pull those changes to local r e p o s i t o r y first
# and see if all files are c o m p a t i b l e before we can update
# our own changes to the global r e p o s i t o r y .
# git writes
# To / home / hpl / vc / s c r i p t i n g / manu / py / bitgit / src - bitgit / t m p _ r e p o
# ! [ rejected ]
master -> master ( non - fast - forward )
# error : failed to push some refs to ...
git pull origin master
# git writes :
# Auto - merging myfile
# Merge made by r e c u r s i v e .
# myfile |
1 +
# 1 files changed , 1 i n s e r t i o n s (+) , 0 d e l e t i o n s ( -)
cat myfile # s u c c e s s f u l merge !
git commit - am merge
git push origin master
cd ..
# Perform new changes in p a r a l l e l in tmp1 and tmp2 ,
# this time causing hg merge to fail
# Change myfile in the d i r e c t o r y tmp1
cd tmp1
# Do it all right by pulling and u p d a t i n g first
git pull origin master
# Edit myfile : insert " just " in first line .
perl - pi -e ’s / a little / tmp1 - add2 a little /g ’ myfile
# R e g i s t e r change in local r e p o s i t o r y
git commit - am ’ Inserted " just " in first line . ’
# R e g i s t e r change in global r e p o s i t o r y t m p _ r e p o
git push origin master
cd ..
# Change myfile in the d i r e c t o r y tmp2 " in p a r a l l e l "
cd tmp2
# Edit myfile : replace little by modest
perl - pi -e ’s / a little / a tmp2 - replace1 \ ntmp2 - add2 \ n /g ’ myfile
# R e g i s t e r change locally
git commit - am ’ Replaced " little " by " modest " ’
# R e g i s t e r change g l o b a l l y
git push origin master
# Not p o s s i b l e : need to pull changes in the global r e p o s i t o r y
git pull origin master
# git writes
# C O N F L I C T ( content ) : Merge c o n f l i c t in myfile
# A u t o m a t i c merge failed ; fix c o n f l i c t s and then commit the
result .
# we have to do a manual merge
cat myfile
echo ’ Now you must edit myfile manually ’
c 2015, Hans Petter Langtangen. Released under CC Attribution 4.0 license
14
You may run this file git_merge.sh named by sh -x git_merge.sh. At
the end, the versions of myfile in the repository and the tmp2 directory are in
conflict. Git tried to merge the two versions, but failed. Merge markers are left
in tmp2/myfile:
<<<<<<< HEAD
This is a tmp2-replace1
tmp2-add2
=======
This is tmp1-add2 a little
>>>>>>> ad9b9f631c4cc586ea951390d9415ac83bcc9c01
tmp1-add1
test file for
exemplifying merge
of files in different
git directories.
tmp2-add1
Launch a text editor and edit the file, or use git mergetool, so that the file
becomes correct. Then run git commit -am merge to finalize the merge.
3.3
Git working style with branching and stashing
Branching and stashing are nice features of Git that allow you to try out new
things without affecting the stable version of your files. Usually, you extend
and modify files quite often and perform a git commit every time you want to
record the changes in your local repository. Imagine that you want to correct a
set of errors in some files and push these corrections immediately. The problem
is that such a push will also include the latest, yet unfinished files that you have
committed.
Branching. A better organization of your work would be to keep the latest,
ongoing developments separate from the more official and stable version of
the files. This is easily achieved by creating a separate branch where new
developments takes place:
Terminal>
Terminal>
Terminal>
Terminal>
Terminal>
Terminal>
Terminal>
Terminal>
Terminal>
Terminal>
Terminal>
git branch newstuff
# create new branch
git checkout newstuff
# extend and modify files...
git commit -am ’Modified ... Added a file on ...’
git checkout master
# swith back to master
# correct errors
git push origin master
git checkout newstuff
# switch to other branch
git merge master
# keep branch up-to-date w/master
# continue development work...
git commit -am ’More modifications of ...’
At some point, your developments in newstuff are mature enough to be incorporated in the master branch:
Terminal>
Terminal>
Terminal>
Terminal>
git
git
git
git
checkout newstuff
merge master
checkout master
merge newstuff
# synchronize newstuff w/master
# synchronize master w/newstuff
c 2015, Hans Petter Langtangen. Released under CC Attribution 4.0 license
15
You no longer need the newstuff branch and can delete it:
Terminal> git branch -d newstuff
This command deletes the branch locally. To also delete the branch in the remote
repo, run
Terminal> git push origin --delete newstuff
You can learn more in an excellent introduction and demonstration of Git
branching.
Stashing. It is not possible to switch branches unless you have committed the
files in the current branch. If your work on some files is in a mess and you want
to change to another branch or fix other files in the current branch, a “global”
commit affecting all files might be immature. Then the gitstash command is
handy. It records the state of your files and sets you back to the state of the last
commit in the current branch. With git stash apply you will update the files
in this branch to the state when you did the last git stash.
Let us explain a typical case. Suppose you have performed some extensive
edits in some files and then you are suddenly interrupted. You need to fix some
typos in some other files, commit the changes, and push. The problem is that
many files are in an unfinished state - in hindsight you realize that those files
should have been modified in a separate branch. It is not too late to create
that branch! First run git stash to get the files back to the state they were
at the last commit. Then run git stash branch newstuff to create a new
branch newstuff containing the state of the files when you did the (last) git
stash command. Stashing used this way is a convenient technique to move
some immature edits after the last commit out in a new branch for further
experimental work.
Warning.
You can get the stashed files back by git stash apply. It is possible
to multiple git stash and git stash apply commands. However, it is
easy to run into trouble with multiple stashes, especially if they occur in
multiple branches, as it becomes difficult to recognize which stashes that
belong to which branch. A good advice is therefore to do git stash only
once to get back to a clean state and then move the unfinished messy files
to a separate branch with git stash branch newstuff.
3.4
Replacing pull by fetch and merge
The git pull command actually performs two steps that are sometimes advantageous to run separately. First, a get fetch is run to fetch new files from the
c 2015, Hans Petter Langtangen. Released under CC Attribution 4.0 license
16
repository, and thereafter a git merge command is run to merge the new files
with your local version of the files. While git pull tries to do a lot and be
smart in the merge, very often with success, the merge step may occasionally
lead to trouble. That is why it is recommended to run a git merge separately,
especially if you work with branches.
To fetch files from your repository at GitHub, which usually has the nickname
origin, you write
Terminal> git fetch origin
You now have the possibility to check out in detail what the differences are
between the new files and local ones:
Terminal> git diff origin/master
This command produces comparisons of the files in the current local branch and
the master branch at origin (the GitHub repo). In this way you can exactly see
the differences between branches. It also gives you an overview of what others
have done with the files. When you are ready to merge in the new files from the
master branch of origin with the files in the current local branch, you say
Terminal> git merge origin/master
Especially when you work with multiple branches, as outlined in Section 3.3,
it is wise to first do a get fetch origin and then update each branch separately.
The git fetch origin command will list the branches, e.g.,
* master
gh-pages
next
After updating master as described, you can continue with another branch:
Terminal>
Terminal>
Terminal>
Terminal>
git
git
git
git
checkout next
diff origin/next
merge origin/next
checkout master
Configuring the git diff command. The git diff command launches
by default the Unix diff tool in the terminal window. Many users prefer to use
other diff tools, and the desired one can be specified in your /.gitconfig file.
However, a much recommended approach is to wrap a shell script around the
call to the diff program, because git diff actually calls the diff program with
a series of command-line arguments that will confuse diff programs that take
the names of the two files to be compared as arguments. In /.gitconfig you
specify a script to do the diff:
[diff]
external = ~/bin/git-diff-wrapper.sh
It remains to write the git-diff-wrapper.sh script. The 2nd and 5th commandline arguments passed to this script are the name of the files to be compared in
the diff. A typical script may therefore look like
c 2015, Hans Petter Langtangen. Released under CC Attribution 4.0 license
17
# !/ bin / sh
diff " $2 " " $5 " | less
Here we use the standard (and quite primitive) Unix diff program, but we can
replace diff by, e.g., diffuse, kdiff3, xxdiff, meld, pdiff, or others. With a
Python script you can easily check for the extensions of the files and use different
diff tools for different types of files, e.g., latexdiff for LATEX files and pdiff
for pure text files.
Replacing all your files with those in the repo.
Occasionally it becomes desirable to replace all files in the local repo with
those in the repo at the file hosting service. One possibility is removing
your repo and cloning again, or use the Git commands
Terminal> git fetch --all
Terminal> git reset --hard origin/master
Merging with just one file from another branch.
Say you have two branches, A and B, and want to merge a file f.txt in A
with the latest version in B. To merge this single file, go to the directory
where f.txt resides and do
Terminal> git checkout A
Terminal> git checkout --patch B f.txt
If f.txt is not present in branch A, and if you want to include more
files, drop the –patch option and specify files with full path relative to the
root in the repo:
Terminal> git checkout A
Terminal> git checkout B doc/f.txt src/files/g.py
Now, f.txt and g.py from branch B will be included in branch A as well.
3.5
Team work with forking and pull requests
In small collaboration teams it is natural that everyone has push access to the
repo. On GitHub this is known as the Shared Repository Model. As teams grow
larger, there will usually be a few people in charge who should approve changes
to the files. Ordinary team members will in this case not clone a repo and push
changes, but instead fork the repo and send pull requests, which constitutes the
Fork and Pull Model.
c 2015, Hans Petter Langtangen. Released under CC Attribution 4.0 license
18
Say you want to fork the repo https://github.com/somebody/proj1.git.
The first step is to press the Fork button on the project page for the somebody/proj1
project on GitHub. This action creates a new repo proj1, known as the forked
repo, on your GitHub account. Clone the fork as you clone any repo:
Terminal> git clone https://github.com/user/proj1.git
When you do git push origin master, you update your fork. However, the
original repo is usually under development too, and you need to pull from that
one to stay up to date. A git pull origin master pulls from origin which
is your fork. To pull from the original repo, you create a name upstream, either
by
Terminal> git remote add upstream \
https://github.com/somebody/proj1.git
if you cloned with such an https address, or by
Terminal> git remote add upstream \
[email protected]:somebody/proj1.git
if you cloned with a [email protected] (SSH) address. Doing a git pull upstream
master would seem to be the command for pulling the most recent files in the
original repo. However, it is not recommended to update the forked repo’s files
this way because heavy development of the sombody/proj1 project may lead to
serious merge problems. It is much better to replace the pull by a separate fetch
and merge. The typical workflow is
Terminal>
Terminal>
Terminal>
Terminal>
Terminal>
git fetch upstream
# get new version of files
git merge upstream/master
# merge with yours
# Your files are up to date - ready for editing
git commit -am ’Description...’
git push origin master
# store changes in your fork
At some point you would like to push your changes back to the original
repo somebody/proj1. This is done by a pull request. Make sure you have
selected the right branch on the project page of your forked project. Press the
Pull Request button and fill out the form that pops up. Trusted people in the
somebody/proj1 project will now review your changes and if they are approved,
your files are merged into the original repo. If not, there are tools for keeping a
dialog about how to proceed.
Also in small teams where everyone has push access, the fork and pull request
model is beneficial for reviewing files before the repo is actually updated with
new contributions.
3.6
Cloning a repo with multiple branches
An annoying feature of Git for beginners is the fact that if you clone a repo, you
only get the master branch. There are seemingly no other branches:
Terminal> git branch
* master
c 2015, Hans Petter Langtangen. Released under CC Attribution 4.0 license
19
To see which branches that exist in the repo, type
Terminal> git branch -a
* master
remotes/origin/HEAD -> origin/master
remotes/origin/gh-pages
remotes/origin/master
remotes/origin/next
If there is only one remote repo that you pull/push from/to, you can simply
switch branch with git checkout the usual way:
Terminal> git
Terminal> git
* gh-pages
master
Terminal> git
Terminal> git
gh-pages
master
* next
checkout gh-pages
branch
checkout next
branch
You might need to do git fetch origin to see new branches made on other
machines.
When you have more than one remote, which is usually the case if you have
forked a repo, see Section 3.5, you must use do a checkout with specifying the
remote branch you want:
Terminal> git checkout -b gh-pages --track remote/gh-pages
Terminal> git checkout -b next --track upstream/next
Files can be edited, added, or removed as soon as you have done the local
checkout.
It is possible to write a little script that takes the output of git branch -a
after a git clone command and automatically check out all branches via git
checkout.
3.7
Git workflows
Although the purpose of these notes is just to get the reader started with Git, it
must be mentioned that there are advanced features of Git that have led to very
powerful workflows with files and people, especially for software development.
There is an official Git workflow model that outlines the basic principles, but it
can be quite advanced for those with modest Git knowledge. A more detailed
explanation of a recommended workflow for beginners is given in the developer
instructions for the software package PETSc. This is highly suggested reading.
The associated "quick summary" of Git commands for their workflow is also
useful.
3.8
Git tips
How can I see which files are tracked by Git? git ls-files is the
command:
c 2015, Hans Petter Langtangen. Released under CC Attribution 4.0 license
20
Terminal>
Terminal>
Terminal>
Terminal>
git
git
git
git
ls-files
# list all tracked files
ls-files -o
# list non-tracked files
ls-files myfile
# prints myfile if it’s tracked
ls-files myfile --error-unmatch
The latter command prints an error message if myfile is not tracked. See man
git-ls-files for the many options this utility has.
How can I reduce the size of a repo? The command git gc can compress
a git repository and should be run regularly on large repositories. Greater effect
is achieved by git gc –aggressive –prune=all. You can measure the size of
a repo before and after compression by git gc using du -s repodir, where
repodir is the name of the root directory of the repository.
Occasionally big or sensitive files are removed from the repo and you want to
permanently remove these files from the revision history. This is achieved using
gitfilter-branch. To remove a file or directory with path doc/src/mydoc
relative to the root directory of the repo, go to this root directory, make sure all
branches are checked out on your computer, and run
Terminal> git filter-branch --index-filter \
’git rm -r --cached --ignore-unmatch doc/src/mydoc’ \
--prune-empty -- --all
Terminal> rm -rf .git/refs/original/
Terminal> git reflog expire --expire=now --all
Terminal> git gc --aggressive --prune=now
Terminal> git push origin master --force # do this for each branch
Terminal> git checkout somebranch
Terminal> git push origin somebranch --force
You must repeat the push command for each branch as indicated. If other users
have created their own branches in this repo, they need to rebase, not merge,
when updating the branches!
How can I restore missing files? Sometimes you accidentally remove files
from a repo, either by git rm or a plain rm. You can get the files back as long
as they are in the remote repo. In case of a plain rm command, run
Terminal> git checkout ‘git ls-files‘
to restore all missing files in the current directory.
In case of a git rm command, use git log –diff-filter=D –summary to
find the commit hash corresponding to the last commit the files were in the repo.
Restoring a file is then done by
Terminal> git checkout <commit hash> filename
3.9
More documentation on Git
• Git - the simple guide
• Web course on Git
c 2015, Hans Petter Langtangen. Released under CC Attribution 4.0 license
21
• Everyday GIT With 20 Commands Or So
• Git cheat sheet
• Atlassian Git Tutorials
• Atlassian Git Workflows
• GitHub Guides:
– Getting your project on GitHub
– Repositories, branches, commits, issues, and pull requests
– GitHub (web) pages
– Understanding the GitHub Flow
• Git branching
• Git top 10 tutorials
• Lars Vogel’s Git Tutorial
• How to use Git with Dropbox
• Git Community Book (explains Git very well)
• Git for Designers (aimed a people with no previous knowledge of version
control systems)
• Git Magic: Basic Tricks
• The official Git Tutorial
• Git Tutorial Video on YouTube
• Git Questions
• Git Reference (can also be used as a tutorial on Git)
• Git User Manual
• Git home page
• Quick intro to Git and GitHub (somewhat like the present guide)
• Git/GitHub GUIs on Windows and Mac
• 10 Things I hate about Git
c 2015, Hans Petter Langtangen. Released under CC Attribution 4.0 license
22
A
Working with multiple GitHub accounts
Working against different GitHub accounts is easy if each project you work with
on each account adds you as a collaborator. The term "you" here means your
primary username on GitHub. My strong recommendation is to always check
out a project using your primary GitHub username.
Occasionally you want to create a new GitHub account, say for a project XYZ.
For such a non-personal account, do not provide an SSH key of any particular
user. The reason is that this user will then get two GitHub identities, and
switching between these identities will require some special tweakings. Just
forget about the SSH key for a project account and add collaborators to repos
using each collaborators personal GitHub username.
If you really need to operate the XYZ account as a personal account, you must
provide an SSH key that is different from any other key at any other GitHub
account (you will get an error message if you try to register an already registered
SSH key, but it is possible to get around the error message by providing an
id_rsa.pub key on one account and an id_dsa.pub on another - that will cause
trouble). Jeffrey Way has written a recipe for how to operate multiple GitHub
accounts using multiple identities.
To debug which identity that is used when you pull and push to GitHub
accounts, you can first run
Terminal> ssh -Tv [email protected]
to see your current identity and which SSH key that was used to identify you.
Typing
Terminal> ssh-add -l
lists all your SSH keys. The shown strings can be compared with the string in
the SSH key field of any GitHub account.
c 2015, Hans Petter Langtangen. Released under CC Attribution 4.0 license
23