1
ACA Capture Pro
User Manual
http://www.acasystems.com
Mar 03, 2010
ACA Capture Pro
http://www.acasystems.com
Content
1. Professional Windows screen capture software: ACA Capture Pro.............................................. 3
With ACA Capture Pro, you can: .............................................................................................. 4
2. How to purchase ACA Capture Pro............................................................................................... 4
3. Other ACA Systems Product ......................................................................................................... 5
4. Contact ACA Systems ................................................................................................................... 6
5. System Requirements..................................................................................................................... 6
6. Install and Uninstall ....................................................................................................................... 7
7. Taking Your First Capture ............................................................................................................. 7
Example: How to capture a part of desktop screen.................................................................... 8
8. ACA Capture Pro Menu................................................................................................................. 9
9. File Menu ..................................................................................................................................... 10
10. Edit Menu................................................................................................................................... 11
11. View Menu................................................................................................................................. 12
12. Capture Menu............................................................................................................................. 13
13. Output Menu .............................................................................................................................. 16
14. Tools Menu ................................................................................................................................ 17
15. Help Menu ................................................................................................................................. 18
16. Image Capture............................................................................................................................ 19
How to capture screenshot from desktop................................................................................. 19
Timer Capture .......................................................................................................................... 19
DirectX/Direct3D screen capture............................................................................................. 20
Screen Magnifier...................................................................................................................... 20
17. Web Capture .............................................................................................................................. 20
Capture web content to an image............................................................................................. 21
Capture web images or Flash................................................................................................... 21
18. Video Capture ............................................................................................................................ 22
How to recording screen video by ACA Capture Pro.............................................................. 23
Video Capture Options ............................................................................................................ 23
19. Icon Capture............................................................................................................................... 24
20. File Operate................................................................................................................................ 25
Save as (Converting images) ................................................................................................... 25
Print image ............................................................................................................................... 26
Copy a file................................................................................................................................ 26
Move a file ............................................................................................................................... 26
Delete a file .............................................................................................................................. 26
Rename a file ........................................................................................................................... 26
Edit an image ........................................................................................................................... 26
View image in full-screen mode .............................................................................................. 27
Play a Flash file........................................................................................................................ 28
Play a video file ....................................................................................................................... 28
21. User License Terms ................................................................................................................... 28
22. About ACA Capture Pro Activation .......................................................................................... 31
23. Unregistered Copy Limitation ................................................................................................... 31
2
ACA Capture Pro
http://www.acasystems.com
1. Professional Windows screen capture
software: ACA Capture Pro
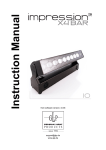
Welcome to ACA Capture Pro! You have chosen a professional and powerful windows screen
capture software. It can capture image, icon, web page, web image, web flash, video, and so on.
With ACA Capture Pro's many features, you can save time and enhance your screenshots.
The screenshot of ACA Capture Pro main window
3
ACA Capture Pro
http://www.acasystems.com
We've made many new and exciting changes to ACA Capture Pro, it's very easy to use, it's for any
computer user who needs to capture more than a few screens for any purpose. This section of the
documentation is meant to give you a quick overview. New users of the product should start
reading the first few help topics. They'll cover the most basic features of how to use the program.
With ACA Capture Pro, you can:
•
•
•
•
•
•
Image capture: We perfected windows screen capture and improve it with every release,
such as full screen (include DirectX game screen), windows, object, ellipse, polygon,
rectangle, menu...etc.
Web image capture: ACA Capture Pro can capture all images that appear on the web
pages.
Web page capture: ACA Capture Pro can capture a long web page to an image file, even
if it scrolls off-screen.
Web Flash capture: ACA Capture Pro can capture all flash files that appear on the web
pages.
Icon capture: You can use this tool to capture any icons whatever from a file, a directory,
or whole harddisks on your computer.
Video capture: You can capture the action from your Windows screen and saves it as a
standard, easily edited, AVI (Audio-Video Interleaved) movie file.
This help document is designed to get you started with ACA Capture Pro quickly.
if you have any questions or problems about ACA products, please contact us at any time.
2. How to purchase ACA Capture Pro
You can license the program right from our web pages at http://www.acasystems.com/, we offer
many different ways to order, including secure web forms, phone, fax and mail ordering, and
processing of corporate purchase orders.
NOTE: Prices are subject to change without notice.
Visit our web site to purchase any of ACA Systems products:
http://www.acasystems.com/en/buynow.htm, Return Customer Discount (20% off) and Nonprofit/Educational Org Discount (35% off) are available on the order page.
All minor and maintenance upgrades to purchased versions are available at no additional cost.
Please review the ACA Capture Pro upgrade page for more information.
To be notified about product upgrades, please sign up for our mailing list at:
http://www.ACASystems.com/en/maillist.htm
4
ACA Capture Pro
http://www.acasystems.com
3. Other ACA Systems Product
In addition to this fine product, we make several other powerful utilities. Drop by our web pages at
which always contains links where you can download the latest versions of all of our programs or
those programs that meet our standards so that we're confident enough in them to offer them for
sale through our site.
At the time this file was written, here's a list of software we either have authored or sell on our site.
•
ACA HTML to Image Converter - Convert the HTML web page to image or thumbnail
of a specified size in batch, save the long web page, .MHT, .TXT file as JPG, GIF, PNG,
BMP, TIFF, WMF and EMF image by one click.
URL: http://html-to-image.acasystems.com/
•
ACA Screen Recorder - it allows you to record the action from your Windows screen as
an AVI movie. You can include cursor movements and sound, and take advantage of many
other options.
URL: http://www.acasystems.com/en/screenrecorder/
•
ACA Audio Recorder - It's a direct and real-time sound recorder software which offers
professional recording features with WAV, AVI and MP3 support.
URL: http://www.acasystems.com/en/audiorecorder/
•
ACA Color Picker - It's an utility that captures the color value of any screen pixel and
displays its value in a value of formats such as CMY, Decimal, Hexadecimal, HSB/HSV,
HSL, HSL (Windows), HTML and RGB.
URL: http://www.acasystems.com/en/color-picker/
•
ACA WebThumb ActiveX Control - A HTML to image SDK for desktop program and
web application developer, it takes the snapshots of given URLs as JPG, GIF, PNG and
BMP image, it helps you convert the web page to images in batch, capture full length
website screenshots, generate thumbnail image previews of web pages. With a few function
calls, you can add "HTML to image", "HTML to PNG", "HTML to JPG" feature to your
application.
URL: http://www.acasystems.com/en/web-thumb-activex/
•
ACA 80x15 Brilliant Button Maker - A free online button generator, easy and fast to use.
It makes possible to create 80x15 Brilliant Buttons (also known as "Antipixel Buttons" or
"Badges") without the need of programs like Photoshop.
URL: http://www.acasystems.com/en/button-maker/
To get more information of our products, visit out website at http://www.acasystems.com/.
5
ACA Capture Pro
http://www.acasystems.com
4. Contact ACA Systems
Before contacting us for technical support, please check first the "Frequently Asked Questions
(FAQ)" list at our web site. The answer to your question may be already there! Click below to
access the FAQ page right from within the help system:
FAQ URL: http://www.acasystems.com/en/faq.htm
Support for ACA Capture Pro is always close at hand, a support ticket will get the quickest
response. Be certain to provide as much background information as possible.
Ticket Support Systems: http://www.acasystems.com/support/
Include (at least) the following information if you encounter a problem with the software:
•
•
•
•
Your operating system, for example Windows 7, Windows Vista, Windows XP
Professional or Windows 2000 Professional.
How much RAM your computer has installed (sometimes called "memory" but different
from "hard disk space," something about which many novice users get understandably
confused). If you don't know how to check this, open an Explorer window (not Internet
Explorer, Windows Explorer) and select Help/About. It should show you a listing on the
bottom of the dialog: Physical memory available to Windows. That will give you the RAM,
but not swap file, available to the system for most versions of Windows.
Your computer's CPU and speed (for example, Pentium IV, 2GHZ).
A concise description of the problem and exactly what you did to get it to happen. If you
can get it to repeat at will, please give us every step from beginning until the end, that
will help us replicate your problem. Explain it so we can re-create it here, and we'll do
our best to find out what causes it and get back to you with a possible solution.
You can contact us with ACA Systems Support Systems: http://www.acasystems.com/support/.
To be notified about product upgrades, please sign up for our mailing list at:
http://www.ACASystems.com/en/maillist.htm.
5. System Requirements
To install and launch ACA Capture Pro, your system must meet these specifications:
•
•
•
•
•
•
Windows XP, Windows 2003, Windows Vista, Windows 2008, Windows 7 or later version
A mouse or other pointing device
400 MHz CPU processor(1G MHz recommended)
256 MB RAM (512 MB recommended)
10 MB of hard-disk space for program installing
6
ACA Capture Pro
•
•
•
•
•
http://www.acasystems.com
For Microsoft Office Document(Word, Excel, PowerPoint) output, the Microsoft Office
2000 or later version
For mail output, a 32-bit MAPI mail client
For printed output, a Windows-supported printer capable of printing bitmaps
For capture WEB PAGE, WEB IMAGE and WEB FLASH, Microsoft Internet Explore 6.0
or later version
For audio recording and playback, a Windows-supported sound card and microphone
6. Install and Uninstall
ACA Capture Pro supports for Windows standard Install/Uninstall package.
•
Get ACA Capture Pro Installation Program
You can visit our website at http://www.acasystems.com/ or other download sites,
download the newest version for ACA Capture Pro.
•
Installing ACA Capture Pro
Before installing, see System Requirements.
Run the ACA Capture Pro installation program.
Follow the instructions on the installation wizard.
Uninstalling ACA Capture Pro
o
o
•
Click the [Start] button, select Program |ACA Systems| ACA Capture Pro | Uninstall
ACA Capture Pro.
Any files you've created and left in your ACA Capture Pro folder will remain behind, and
in which case you will have to manually delete these.
7. Taking Your First Capture
Taking screen captures by ACA Capture Pro is very easy and simple. There are multiple ways
to start capturing an image:
•
•
Best Choice: the best way to start capturing an image is to use hotkey.
Select the command from Capture menu.
7
ACA Capture Pro
http://www.acasystems.com
Screenshot: the Capture menu of ACA Capture Pro
•
Press the appropriate toolbar button.
Screenshot: the toolbar of ACA Capture Pro
We recommend you to use hotkeys because it is easier and faster.
Example: How to capture a part of desktop screen
1. Launch ACA Capture Pro, then press the hotkey Ctrl+Shift+F2, or select the menu
Capture > Region.
2. A large cross cursor will appear. Drag the cross cursor across the screen to capture a region
then release.
3. The screenshot will be displayed within the Preview window, allowing you to preview,
save, delete, copy, print or mail it.
8
ACA Capture Pro
http://www.acasystems.com
8. ACA Capture Pro Menu
Screenshot: The menu bar of ACA Capture Pro
The menu bar of ACA Capture Pro has the following menu items:
•
File menu
The File menu contains menu items that open images, save as images and print images.
•
Edit menu
The Edit menu contains menu items that copy to clipboard, file copy, file move, file delete,
file rename and file edit.
•
View menu
The View menu contains menu items that view image and control the interface.
•
Capture menu
The Capture menu contains menu items that activate screen capture modes and wizards.
•
Output menu
The Output menu contains menu items that output captured image.
•
Tools menu
The Tools menu contains menu items that set wallpapers and configure options.
•
ACA Family menu
The ACA Family menu contains menu items that access other ACA Systems products.
•
Help menu
The Help menu contains menu items that register, access this help file and our website.
9
ACA Capture Pro
http://www.acasystems.com
9. File Menu
Screenshot: The File menu of ACA Capture Pro
•
•
Save As: Saves the current image to a specified file name.
Shell Explorer: Windows allows you to associate a number of actions for each file type.
The default action is usually open, which is normally invoked when you double-click on an
image in Windows Explorer. ACA Capture Pro also supports these actions.
The command of Shell Explorer explores the folder specified by selected file.
•
•
•
•
•
Shell open: Opens the selected file.
Shell edit: Launches an editor and opens the selected file for editing.
Shell print: Prints the selected file.
Shell properties: Displays the file properties.
Exit: Exits ACA Capture Pro.
10
ACA Capture Pro
http://www.acasystems.com
10. Edit Menu
Screenshot: The Edit menu of ACA Capture Pro
•
•
•
•
•
•
•
•
•
Copy to clipboard: Copies the current image to the clipboard.
Copy to folder: Copies the selected images to the specified folder.
Move to folder: Moves the selected images to the specified folder.
Delete: Deletes the selected images.
Rename: Renames the current image.
Edit: Edits the current image using default image editor.
Edit with: Edits the current image using your specified image editor.
Select all: Selects all files.
Invert selection: Changes the current selection such that everything previously unselected
will now be selected.
11
ACA Capture Pro
http://www.acasystems.com
11. View Menu
Screenshot: The View menu of ACA Capture Pro
•
•
•
•
•
•
•
•
•
•
•
•
•
Skin: Changes the skin of ACA Capture Pro.
Status bar: Shows or hides the status bar.
Toolbar: Shows or hides the toolbar.
Navigation pane: Shows or hides the navigation pane
Zoom: When you view an image in the Preview it is, by default, displayed at normal size.
You can adjust the size using zoom commands with the several manual and automatic
zooming adjustments available to you.
Icon frames: Selects a specified frame from a icon.
Large icon: A large icon and the file name is displayed. Icons are displayed in multiple
columns
Small icon: A a small icon with the file name displayed to the right of the icon. Icons are
displayed in multiple columns.
List: A small icon with the file name displayed to the right of the icon. Icons are displayed
in a list.
Details: Same as List mode but with columns of detailed information; including Size, Type,
Date, Image Properties, and Description.
Refresh: Refreshes the current folder
View in full screen: In full-screen mode, the window borders, menu bar, status bar and
tool bar are hidden and the window fills the screen so that only the image is visible.
Language: Chooses a language.
12
ACA Capture Pro
http://www.acasystems.com
12. Capture Menu
Screenshot: The Capture menu of ACA Capture Pro
•
Full screen: Captures the image of the entire desktop and all applications visible on it.
The hotkey is PrintScreen.
TIPS: If you want to capture the full screen of game, please use ScrollLock or
PrintScreen key, see DirectX/Direct3D and Video Player Capture.
•
•
•
Active window : Captures only the "topmost" window, or the window that currently has
focus. The default hotkey is Ctrl+Shirt+F12.
Window or control - Capture an entire window or just a predefined area within a window
such as a control or button. When clicked, a cursor
will appear, and a red blinking
frame will appear around the target object.
1. Move your mouse to the object that you want to capture.
2. Click with your left mouse button or press Enter key to select and capture the
region around which the blinking frame surrounds.
3. Click your right mouse button or press Esc key to abort this command.
ToolTip control: A ToolTip control displays a small pop-up window that contains a line of
text that describes the purpose of a tool. They appear automatically, or pop up, when the
13
ACA Capture Pro
http://www.acasystems.com
user pauses the mouse pointer over a tool. To capture a ToolTip control, please follow the
steps below:
1. Move the mouse pointer over a tool.
2. Press Ctrl+Shift+T (the default hotkey for ToolTip capture) when the ToolTip
control appears.
Screenshot: The Tooltip control
•
Region: Captures the image from the selected region. When clicked, a large cross cursor
will appear.
1. Click using your left mouse button to indicate where you want to start the capture
area, and then release it.
2. Drag the outline to enclose the area you want to capture, the size (in pixels) of the
capture will be shown within the help window.
3. Click the left mouse button or press Enter key to complete the capture.
4. Click your right mouse button or press Esc key to abort this command.
The default hotkey is Ctrl+Shift+F2.
•
Fixed region: Captures the image from the region that specified the width and height.
When clicked, the Capture Fixed Region dialog opens.
1. Input the width and height of fixed region by pixel on the dialog, then press OK
button.
Screenshot: The Capture Fixed Region dialog
2. A cursor
will appear, and a fixed rectangle will be shown in screen.
3. Move the mouse pointer, click the left mouse button or press Enter key when the
image to be captured is covered by the rectangle.
4. Click your right mouse button or press Esc key to abort this command.
14
ACA Capture Pro
•
http://www.acasystems.com
Polygon: Captures the image from a polygon region. When clicked, a large cross cursor
will appear.
o Press the left mouse button or press Enter key to accept the first position.
o Move the mouse pointer to next point, and press the left mouse or Enter key.
o Repeat s2 until complete. Double click the left mouse button to end this screen
capture operation.
o Click your right mouse button or press Esc key to abort this command.
The default hotkey is Ctrl+Shift+F3.
•
Round: Captures the image from a round region. When clicked, a cursor
will appear.
0. Press the left mouse button or press Enter key to accept the center of the circle
1. Move the mouse pointer.
2. Press the left mouse button or press Enter key when the image to be captured is
covered by the round.
3. Click your right mouse button or press Esc key to abort this command.
The default hotkey is Ctrl+Shift+F4.
•
Ellipse: Captures the image from an ellipse region. When clicked, a cursor
will appear.
0. Press the left mouse button or press Enterkey to accept the first position.
1. Move the mouse pointer.
2. Press the left mouse button or press Enterkey when the image to be captured is
covered by the ellipse.
3. Click your right mouse button or press Esc key to abort this command.
The default hotkey is Ctrl+Shift+F5.
•
Menu: Shows the help dialog of menu capture. To capture a screenshot from a menu:
o Click the menu that you want to capture, stay on the menu.
o Press the hotkey, the default hotkey is Ctrl+Shift+F6
Figure: How to capture a screenshot from a menu
•
•
Start auto-timer: Enables program to perform unattended captures at intervals that you
define.
Predefine capture: You can predefine a specific part of the screen. When you want to
capture echo time, you can directly press the hotkey without selecting the screen area.
15
ACA Capture Pro
http://www.acasystems.com
When clicked, the Predefine Capture dialog opens, you can adjust the predefined start X,
Y, Width, Height and the hotkey.
The default hotkey is Ctrl+Shift+D.
•
•
Web content to image: Capture a long WEB PAGE to an image file, even if it scrolls offscreen.
0. Click the menu Capture | Web content to image, then type the URL of web page.
Ex: http://www.acasystems.com.
1. Click the Start button.
Web images or Flash: Get all images or Flash on a web page.
0. Click the menu Capture | Web images or Flash, then type the URL of web page
that including the images or Flash. Ex: http://www.acasystems.com.
1. Click the Start button.
Note: ACA Capture Pro only captures the standard web images or Flash. It doesn't
support for dynamic images or Flash that outputed by IFRAME, JavaScript or CSS.
•
•
•
Video: Captures the actions from your Windows screen and the the sounds from your
Microphone or media player, then saves it as a standard, easily edited, AVI (Audio-Video
Interleaved) movie file.
Icon: Performs fast scan of all local hard disks for icon images.
DirectX capture: Allows you to capture the DirectX/Direct3D game or video player
screen
13. Output Menu
Screenshot: The Output menu of ACA Capture Pro
•
Save to file: The captured screenshot will be saved as a file. The default save format is
BMP (Bitmap format), you can change the image format by clicking menu Tools | Options
| Save. As the compression of BMP to JPG/JPEG/PNG/TIF/GIF file will occupy more
CPU times, if you want capture faster, we recommend you to choose BMP format.
16
ACA Capture Pro
http://www.acasystems.com
The completed image files lists in Images folder.
•
Save to clipboard: Send the captured screenshot to the Windows clipboard, it can be put
in different Windows programs.
Most Windows programs accept data pasted from the clipboard, you can use Ctrl+V or the
menu selection Edit | Paste.
•
•
•
•
Save to memory: The captured screenshot will be saved in memory, click the Unsaved
Images item on the Folders tree for listing these images, you can view, save, print, copy or
delete them. Application will pop a notify message to you if they haven't been saved when
you are ready to exit the application.
Send to Microsoft Word document: Send captured screenshot to Microsoft Word
document. If your computer does not install Microsoft Word, the menu item will be grayed.
It is only supported if Microsoft Word 2000(or later) has been configured.
Send to Microsoft Excel document: Send captured screenshot to Microsoft Excel
document. If your computer does not install Microsoft Excel , the menu item will be grayed.
It is only supported if Microsoft Excel 2000(or later) has been configured.
Send to Microsoft PowerPoint document: Send captured screenshot to Microsoft
PowerPoint document. If your computer does not install Microsoft PowerPoint, the menu
item will be grayed. It is only supported if Microsoft PowerPoint 2000(or later) has been
configured.
TIPS: When you select Microsoft Office(Word, Excel or PowerPoint) document as the
output option, you can adjust the settings by clicking menu Tools | Options | Office.
•
Mail to friends as an attachment: Mail the captured screenshot to friend as an attachment.
It is only supported if you have a 32-bit MAPI mail client installed (e.g., Microsoft
Outlook Express).
TIPS: You can type the E-mail address of each recipient by clicking menu Tools | Options
| Save, application will auto fill these addresses to mail recipient.
14. Tools Menu
Screenshot: The Tools menu of ACA Capture Pro
•
Set wallpaper: Sets a screenshot image as the Windows desktop wallpaper.
o Centered: Places the image in the center of the screen. If the size of the image is
larger than the screen, it is shrunk to fit
17
ACA Capture Pro
o
o
o
http://www.acasystems.com
Stretched: Displays the image in the full of the screen. If the size of the image is
not same as the screen, it is stretched to fit.
Titled: Displays the image in full dimensions in a tiled pattern that fills the entire
desktop.
Remove: Removes the wallpaper.
The selected image is saved as "ACA Capture Pro Wallpaper.bmp" in the Windows folder.
ACA Capture Pro automatically changes the wallpaper settings in the Control Panel to
display the image.
•
Options: Changes the options of the application
15. Help Menu
Screenshot: The Help menu of ACA Capture Pro
•
•
•
•
•
•
•
•
•
•
Help document - CHM format: Opens the CHM help document.
Help document - PDF format: Opens the PDF help document (Requires Adobe Reader).
Help document - online format: Opens the online help document.
Visit acasystems.com: Opens our website http://www.acasystems.com/.
Contact support: Send message to ACA Systems support.
Check for a new version: You can check for a new version at any time, and upgrade it
when there is an upgrade available for your product.
Automatically check for updates: Enables/disables the automatically check.
About: Show the about dialog.
Buy now: Opens the order page to purchase a license.
Register: Enters the license code of ACA Capture Pro.
18
ACA Capture Pro
http://www.acasystems.com
16. Image Capture
ACA Capture Pro can help you capture, print and save most computer screen data, it easy to
capture full screen(include DirectX/DirectX3D game screen), window, object, ellipse, polygon,
rectangle or menu as a BMP,TIF, PNG, GIF or JPEG file, it also can send captured image to
Microsoft Office document (Word, Excel, PowerPoint). Use captured images from ACA Capture
Pro to show of your product on the web, enhance technical or sales document and embed captures
into presentations.
To make a screenshot, set up the Output options of ACA Capture Pro, and select a command from
Capture menu, toolbar, or press the hotkey combination. We recommend you to use hotkeys
because it is easier and faster. Depending on the output options you have set, ACA Capture Pro
takes the screenshot, allows you to preview, save, delete, copy, print or mail it.
The default saved format is BMP, you can change it on the Options dialog. As the compression of
BMP to JPG/JPEG/PNG/GIF file will occupy more CPU time, so if you want capture faster, we
recommend you to choose BMP format.
Double click preview area or select menu View | Full Screen, you can view image in full screen
mode.
How to capture screenshot from desktop
ACA Capture Pro uses different screen capture modes to capture images from the Windows
desktop. Each mode is designed to capture a specific area from the Windows desktop. Knowing
which screen capture mode to use is one of the keys to successfully using ACA Capture Pro.
There are multiple ways to start capturing an image:
•
•
•
Best Choice: the best way to start capturing an image is to use hotkey.
Select the command from Capture menu.
Press the appropriate toolbar button.
TIPS: To include the cursor in your captured image, please check the Include cursor image
option by clicking menu Tools | Options.
All of capture commands, see Capture Menu.
See also: Take your first capture.
Timer Capture
The auto-timer enables program to perform unattended captures at intervals that you define.
To access the auto-timer, select the menu Capture | Start auto-timer, the Timer Capture dialog
opens, it allows you to set the program to capture screens at predefined times. This is useful, for
example, for batch processes that operate on a regular basis and for which screen shots are
necessary.
19
ACA Capture Pro
http://www.acasystems.com
The following table summarizes the description and use of each option on the Timer Capture
dialog:
Option
Frequency
Screen
Area
Start Timer
Cancel
Description
Set the timed capture frequency in seconds.
Set the captured region, you can select from Full Screen, Active window or Selected
region.
Setting up the timer capture.
Close the dialog
To shut down an active timed capture, either:
•
•
Select the menu Capture | Stop auto-timer, or
Press the hotkey sequence, the default hotkey is Ctrl+Shift+F9.
DirectX/Direct3D screen capture
ACA Capture Pro allows you to capture the DirectX/Direct3D game or video player screen. To
enable this function, select menu Capture | Enable DirectX Capture, then check the "Enable
Capture DirectX/Direct3D Primary Surface, DirectX Overly" option to enable program to
capture from software using Microsoft DirectX and Direct3D technology or an overlay screen,
such as that you would see inside the region of a DVD player application, or a game like Empire
Earth.
Please use Scroll Lock key as the hotkey to capture game/video screens. Games that are currently
running may need to be closed and re-started for captures to work correctly.
Screen Magnifier
While region capture is activated (including region, fixed region, round, ellipse, and polygon
capture mode), the following additional useful options apply, and will be shown in a small window
as a screen magnifier. You can use the mouse or the following keys:
Mouse Buttons
Left button
Accept this position.
Double click left button Finish operation (only on Polygon Capture mode)
Right button
Abort operation
Keyboard Keys
F1
Toggle help text and zoom on/off
Arrow keys
Move pointer by one pixel.
+
Hide/show mouse pointer
X/Y
Lock/Unlock X or Y axis movement.
Esc
Abort operation (same as right mouse button)
Enter
Accept this position (same as left mouse button)
C
Switch pixel color text (only on Region Capture mode)
17. Web Capture
20
ACA Capture Pro
http://www.acasystems.com
ACA Capture Pro can help you capture a long web page to an image file, even if it scrolls offscreen. you can also use ACA Capture Pro to get all images or flash on a web page.
Capture web content to an image
1. Click the menu Capture | Web content to image, then type the URL of web page. Ex:
http://www.acasystems.com.
2. Click the Start button.
Screenshot: capture web content to an image
With this feature, you can convert the web contents to image or thumbnail of a specified size, save
the long web page as JPG, GIF, PNG or BMP by one click.
Capture web images or Flash
1. Click the menu Capture | Web images or Flash, then type the URL of web page that
including the images or Flash. Ex: http://www.acasystems.com.
2. Choose the element type: Flash or Images.
3. Click the Start button.
21
ACA Capture Pro
http://www.acasystems.com
Screenshot: capture web images or Flash
Note: ACA Capture Pro only captures the standard web images or Flash. It doesn't support for
dynamic images or Flash that outputed by IFRAME, JavaScript or CSS.
18. Video Capture
ACA Capture Pro captures the actions from your Windows screen and the sounds from your
microphone or speak, then saves it as a standard, easily edited, AVI (Audio-Video Interleaved)
movie file. This format can be played under Windows, as well as the Internet, unlike other
programs that use proprietary formats that may need special viewers and be difficult, if not
impossible, to edit
Features include:
•
•
•
•
•
•
•
•
•
System-wide hot keys to start, stop recording.
Show flashing rectangle when recording or paused.
The System Tray Icon is handily to control VIDEO capture.
Easy precision visual screen area or window selection.
Multiple video compression choices.
Automatically incrementing file names for captures.
Frame rate and video compressor choices.
Audio compressor choices.
Mouse cursor recording can be turned on or off, true shape of the cursor is recorded.
22
ACA Capture Pro
http://www.acasystems.com
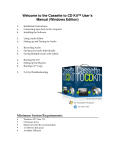
How to recording screen video by ACA Capture Pro
This procedure shows how to create an AVI video file from your screen actions, please following
these steps:
1. Select the menu Capture | Video.
2. Click Start Rec button to begin recording, the application window will be minimized to
allow the capture, double click system tray icon of ACA Capture Pro to restore the main
window.
3. Click Stop Rec button to stop recording. All completed video files lists in the Video virtual
folder.
Screenshot: recording screen video by ACA Capture Pro
Video Capture Options
This procedure shows how to set the video capture options of ACA Capture Pro.
•
Screen Area
You can choose from Full screen or Selected region.
23
ACA Capture Pro
http://www.acasystems.com
You can select capture area graphically from screen. You can also directly enter your
choice of the X and Y screen coordinates, along with the width and height in pixels, to
precisely define your capture area, or fine tune a previous capture.
•
Video/Audio
If you want record audio when capturing video, please select the Record Audio check box.
A Windows-supported sound card and microphone must be configured.
The Record rate in frames per second (FPS) choices let you specify how many movie
frames per second will be recorded. If you enter too high a number, and your computer is
not fast enough to capture and compress them, ACA Capture Pro will drop some frames, or
stop completely and tell you about the error.
The Video compressor select box allows you to select the CODEC, which is the program
that will compress your pictures to make AVI files smaller and enable them to play faster.
We recommend the Auto Select setting, which will select MS RLE compression for 8 bit
color mode, MS Video 1 compression for all higher color modes, and no compression for 4
bit color. Please note that if you want to record AVI files in True Color mode (24 or 32
bit), the default MS Video 1 compressor will still write them as 16 color bitmaps, losing
some of the color resolution. For recording in 16 bits per pixel (65536 colors mode), you
could try using Intel Indeo Video codec in "Quick Compress" mode, which will be about
10-20% faster in compressing, than MS Video 1, the "Auto-Select" choice of ACA Capture
Pro.
The video compressor Settings button is enabled for some CODECes, which allow you to
configure additional parameters, specific to the particular codec. E.g. for Intel Indeo Video
you can select there "Quick Compress" or regular compression, a numeric password
protection for the file you create etc.
•
Hotkey
The default hotkey for starting and stopping is Ctrl+Shift+F8. Click hotkey Settings
button to configure it. Please note that you should know the hotkey to stop AVI recording if
you use iconize or hide, or you may have difficulty terminating a recording.
•
The AVI File Name
Select Options from Tools menu, you can configure the save filename on Save page.
All completed video files lists in Video virtual folder.
19. Icon Capture
ACA Capture Pro performs fast scan of all hard disks for icon images. The program handles lots
of different file formats, like DLL, EXE, ICO etc. This procedure shows how to capture icons from
you computer, following these steps:
24
ACA Capture Pro
http://www.acasystems.com
1. Click the menu Capture | Icon.
2. Choose a capture type:
o If you want to scan a specified file, please select Capture from a executable file,
then click Browse button, choose a specified file (*.dll, *.exe)
o If you want to scan a specified folder, please select Search from a specify path,
click Browse button, choose a path.
o If you want to scan all hard disks in your computer, please select Search from my
computer.
3. Click Start Capture button.
Screenshot: Capture icon by ACA Capture Pro
The completed icon files lists in Icon virtual folder.
20. File Operate
Save as (Converting images)
ACA Capture Pro can save your image as a BMP, TIF, PNG, ICO, EMF or JPEG files.
1. Select an image in the list view.
2. Click the menu File | Save As.
3. Choose a file folder and input the file name, select the file type to save from the Files of
type option.
4. CLick the Save button. ACA Capture Pro will save the current image as the specify type
and filename.
25
ACA Capture Pro
http://www.acasystems.com
Print image
1. Select an image in the list view.
2. Click the menu File | Print.
3. ACA Capture Pro will load the standard print component of Windows, please follow the
screen instructions.
Copy a file
1. Right-click the file that you want to copy, and then click Copy to folder.
2. Choose a destination path, then click OK button
Move a file
1. Right-click the file that you want to move, and then click Move to folder.
2. Choose a destination path, then click OK button
Delete a file
1. Right-click the file that you want to delete, and then click Delete.
2. Click OK button in the confirmation window.
Rename a file
1. Right-click the file that you want to rename, and then click Rename.
2. Type the new name, and then press Enter.
Edit an image
ACA Capture Pro doesn't support for edit feature directly, but you can edit your objects in external
image-editing applications, such as MS Paint, or Adobe PhotoShop. To do this, it is not necessary
exit ACA Capture Pro and then opens the image file with the other application. Instead, you can
define image-editing programs that you would like to associate with images by selecting menu
Edit | Edit with | Organize favorite editors. Then, invoke the program from the ACA Capture
Pro, edit the file in the other application, then save the file to return to ACA Capture Pro.
•
Organize favorite editors
1. Click menu Edit | Edit with | Organize favorite editors.
2. In this options dialog, you can add, edit or modify an image editor, you can also
choose one as the default editor.
3. Click OK button.
26
ACA Capture Pro
http://www.acasystems.com
Screenshot: Organize favorite editors
•
Edit an image
1. Click the file that you want to edit.
2. Click the menu Edit | Edit..., ACA Capture Pro will load the default image editor to
edit the specify image file.
3. You can also click the menu Edit | Edith width..., and then choose an image editor.
Screenshot: Edit menu
View image in full-screen mode
27
ACA Capture Pro
http://www.acasystems.com
You can click menu View | Full-Screen to view the image in full-screen mode. In full-screen
mode, the window borders, menu bar, status bar and tool bar are hidden and the window is
expanded to fill the screen, so that only the image is visible on your monitor.
The hotkeys and mouse actions in full-screen mode:
Hotkey
Page Up
Page Down
Space
Esc
Enter
Mouse
Click the right button
Double click the left button
Descriptions
View the previous image
View the next image
View the next image
Return to the normal mode
Return to the normal mode
Descriptions
Pop up menu.
Return to the normal mode
Play a Flash file
ACA Capture Pro supports for playing the Flash file. The Flash will auto play when you select it in
Flash virtual folder, you can play, pause, back, forward or full view it. The play action lists:
Buttons
>
||
|<
<<
>>
>|
F
Descriptions
Play
Pause
Seek to start
Back
Forward
Seek to end
Full screen
Play a video file
Right-click the video file, and then click Play AVI video. ACA Capture Pro will load the default
video player in your system to play the video file.
21. User License Terms
END-USER LICENSE AGREEMENT FOR ACA CAPTURE PRO (EULA)
Copyright © 2011, ACA Systems, All Rights Reserved
ACA CAPTURE PRO ("SOFTWARE PRODUCT") is a shareware. All rights reserved by ACA
Systems. By receiving and/or using this SOFTWARE PRODUCT, this agreement is a binding
28
ACA Capture Pro
http://www.acasystems.com
legal agreement between ACA Systems and the purchasers, users or evaluators of SOFTWARE
PRODUCT, it applies to the trial and registered version.
Your agreement to this license by using, copying, transmitting, distributing or installing
SOFTWARE PRODUCT, you agree to all of the terms of this agreement.
Please read the license terms below. If you do not agree to all of the terms of this license, then do
not use, copy, transmit, distribute, or install SOFTWARE PRODUCT, and please remove this
software from your computer right now.
1. SOFTWARE PRODUCT License
The SOFTWARE PRODUCT is protected by copyright laws and international copyright
treaties, as well as other intellectual property laws and treaties. All associated
documentation and written materials that accompany this program remains the property of
ACA Systems and are used only under revocable license.
The author exclusively owns all copyrights to SOFTWARE PRODUCT.
The author reserves all rights not expressly granted here.
You may not reverse engineer, decompile, or disassemble the SOFTWARE PRODUCT,
except and only to the extent that such activity is expressly permitted by applicable law not
withstanding this limitation.
All title and copyrights in and to the SOFTWARE PRODUCT (including but not limited to
any samples, images, photographs, animations, video, audio, music, text, and "applets,"
incorporated into the SOFTWARE PRODUCT), the accompanying printed materials, and
any copies of the SOFTWARE PRODUCT, are owned by ACA Systems or its suppliers.
The SOFTWARE PRODUCT is protected by copyright laws and international treaty
provisions. Therefore, you must treat the SOFTWARE PRODUCT like any other
copyrighted material except that you may either (a) make one copy of the SOFTWARE
PRODUCT solely for backup or archival purposes, or (b) install the SOFTWARE
PRODUCT on a single computer provided you keep the original solely for backup or
archival purposes. You may not copy the printed materials accompanying the SOFTWARE
PRODUCT.
2. GRANT OF LICENSE
You may install and use an unlimited number of copies of the SOFTWARE PRODUCT.
You may reproduce and distribute an unlimited number of copies of the SOFTWARE
PRODUCT; provided that each copy shall be a true and complete copy, including all
copyright and trademark notices, and shall be accompanied by a copy of this EULA.
Copies of the SOFTWARE PRODUCT may be distributed as a standalone product or
included with your own product as long as The SOFTWARE PRODUCT is not sold or
included in a product or package that intends to receive benefits through the inclusion of
the SOFTWARE PRODUCT. The SOFTWARE PRODUCT may be included in any free
or non-profit packages or products.
Without prejudice to any other rights, ACA Systems may terminate this License if you fail
to comply with the terms and conditions of this License. In such event, you must destroy all
copies of the SOFTWARE PRODUCT and all of its component parts.
29
ACA Capture Pro
http://www.acasystems.com
3. Evaluation and Registration
If you use this software after the 14-day evaluation period a registration fee is required. See
the web site at http://www.acasystems.com/ for information about online ordering and
quantity discounts. When payment is received you will be sent a registration number of
latest version of ACA HTML to Image Converter.
Unregistered use of SOFTWARE PRODUCT after the 14-day evaluation period is in
violation of international copyright laws.
4. Distribution of the Evaluation Version
Distribution of Evaluation Version Provided that you verify that you are distributing the
evaluation version, you are hereby licensed to make as many copies of the evaluation
version of this software and documentation as you wish; give exact copies of the original
evaluation version to anyone; and distribute the evaluation version of the software and
documentation in its unmodified form via electronic means. There is no charge for any of
the above. Anyone distributing the shareware version of SOFTWARE PRODUCT for any
kind of remuneration must contact ACA Systems prior to including it within any
distribution media.
5. Registered Version
Your license covers the version or versions of the SOFTWARE PRODUCT as specified at
the time you received it. All versions of the same "master" number (for example, 4.0, 4.5,
4.7 - all 4.anything) are covered by your license. If you download and install a "point"
release and need a new number because of changes to the program, please contact us. We'll
provide you with a free upgrade to the "point" release.
6. NO WARRANTIES
The Author of this Software expressly disclaims any warranty for the SOFTWARE
PRODUCT. The SOFTWARE PRODUCT and any related documentation is provided "as
is" without warranty of any kind, either express or implied, including, without limitation,
the implied warranties or merchantability, fitness for a particular purpose, or noninfringement. The entire risk arising out of use or performance of the SOFTWARE
PRODUCT remains with you.
NO LIABILITY FOR DAMAGES
In no event shall the author of this Software be liable for any special, consequential,
incidental or indirect damages whatsoever (including, without limitation, damages for loss
of business profits, business interruption, loss of business information, or any other
pecuniary loss) arising out of the use of or inability to use this product, even if the Author
of this Software is aware of the possibility of such damages and known defects.
Should you have any questions concerning this license, or if you desire to contact us for any reason,
please visit our support systems: http://www.acasystems.com/support/.
30
ACA Capture Pro
http://www.acasystems.com
22. About ACA Capture Pro Activation
If you want to use ACA Capture Pro after the evaluation period a registration fee is required, you
click http://www.acasystems.com/en/buynow.htm to get a registration number. To activate your
ACA Capture Pro, follow the steps below:
1. Click http://www.acasystems.com/en/screencapturepro/download.htm to download the
screen capture software - ACA Capture Pro, and then install it.
2. Launch ACA Capture Pro, choose on the option "I have a registration number and want
to activate ACA Capture Pro", and then click on the Next button.
3. Enter your name and registration number carefully as it is shown in the figure, if your
registration number is shown in an email from ACA Systems or an authorized reseller, we
suggest that you use Copy/Paste method to complete the input.
Screenshot: Enter license code
4. Click on the Finish button.
When the registration number has been verified, it automatically unlocks (activates) the software.
23. Unregistered Copy Limitation
•
•
ACA Capture Pro is limited for 14 days without registration.
The video will be watermarked without registration.
31