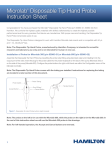
1
Microlab 300 Series Pipettor
®
User Manual
Warranty Information
Hamilton Company warrants this equipment1 to be free of defects in
material and workmanship for 12 months from the date of receipt. The
warranty does not cover normal wear and tear of the syringes, valves or
equipment. The warranty extends to the buyer of record on the original
purchase order to Hamilton Company. Hamilton Company or an authorized
Hamilton representative agrees to repair or replace, at its option and free of
charge to the buyer at a normal place of business or at a Hamilton repair
facility, any part or parts that under proper and normal use appears to be
defective during the warranty period.2 Abuse, unauthorized replacement of
parts, modifications or adjustments made by other than Hamilton Company
or its authorized representative voids this warranty.
This warranty grants you specific rights. No other warranties, expressed
or implied, including implications of warranties of merchantability and
fitness for a particular product, are made. Hamilton Company’s product
liability shall be limited to repair, replacement or price refund of any
defective product.2
Hamilton Company endeavors to provide prompt and satisfactory service.
1- All Hamilton Company valves are warranted to be free of defects in material and workmanship at the time
of delivery.
2- Hamilton Company reserves the right to refuse to accept the return of any instrument or valve that has been
used with radioactive or microbiological substances, or any other material that may be deemed hazardous to
employees of Hamilton Company.
©2012 Hamilton Company. All rights reserved.
2
Compliance
This equipment has been tested and complies with the limits for a
class B digital device, pursuant to Part 15, Federal Communication
Commission (FCC) Rules. These limits are designed to provide
reasonable protection against harmful interference in an installation. This
equipment generates, uses and can radiate radio frequency energy,
and if not installed and used in accordance with the instructions, may
cause harmful interference to radio communications. However, Hamilton
Company cannot guarantee that no interference will occur in a particular
installation. If this equipment does cause harmful interference to radio or
television reception, which can be determined by turning the equipment
off and on, the user is encouraged to try to correct the interference by
one or more of the following measures:
Turn the Microlab® 300 off and on to determine whether it is generating interference.
Reorient or relocate the receiving antenna.
Increase the separation between the equipment and receiver.
Connect the equipment into an electrical outlet on a circuit that is isolated from the
circuit to which the receiver is connected.
Consult the dealer or an experienced radio/TV technician for help.
This equipment has been verified to comply with the limits for a class
B computing device, pursuant to FCC Rules. In order to maintain
compliance with the FCC regulations, shielded cables must be used with
this equipment. Operation with non-approved equipment or unshielded
cables is likely to result in interference to radio and TV reception.
The user is cautioned that changes and modifications made to the
equipment without the approval of the manufacturer could void the
user’s authority to operate this equipment.
Microlab® 300 User Manual
3
Table of Contents
Warranty Information ..................................................................................2
Compliance ................................................................................................3
Table of Contents ............................................................................................4
Welcome .........................................................................................................8
Intended Use ...................................................................................................9
CHAPTER 1: Introduction ................................................................................10
1.1 Introduction of the Microlab 300 Series Pipettor ....................................11
1.2 Safety Precautions ...............................................................................11
1.2.1 General Safety Information .............................................................11
1.2.2 Operating the Microlab 300 Series Pipettor ....................................12
1.2.3 Electrical ........................................................................................12
1.2.4 Biohazard ......................................................................................13
1.2.5 Protective Equipment......................................................................14
CHAPTER 2: Instrument Setup ........................................................................15
2.1 Overview of Microlab 300 Parts List ......................................................16
2.2 Describing Instrument Components .....................................................17
2.2.1 Description of the Front View of the Syringe Drive Unit ....................17
2.2.2 Description of the Rear View of the Syringe Drive Unit ....................18
2.2.3 Description of the Rear View of the Controller .................................19
2.3 Selecting the Proper Location...............................................................20
2.4 Charging the Controller.........................................................................20
2.5 Installing the Controller and Syringe Drive Unit ......................................21
2.6 Installing the Cable Management System .............................................22
2.7 Installing the Disposable Tip Hand Probe ..............................................24
2.8 Installing the Fill and Probe Tubing ........................................................26
2.9 Applying Power to the Instrument .........................................................28
2.10 Priming the Instrument ........................................................................28
2.11 Using the ClickSure™ Tips ...................................................................29
2.12 Installing the Printer (Optional) .............................................................29
4
CHAPTER 3: Introducing the Microlab 300 Software ......................................31
3.1 User Interface Flow Chart .....................................................................32
CHAPTER 4: Disposable Tip Hand Probe Configuration and Operation ........33
4.1 Configuring the Disposable Tip Hand Probe..........................................34
4.2 Operating the Disposable Tip Hand Probe ............................................35
CHAPTER 5: Configuration Menu ....................................................................37
5.1 Overview of Screen Terminology ...........................................................38
5.1.1 Icon Screens ...................................................................................38
5.1.2 Run Screens ..................................................................................39
5.1.3 Data Entry Screens ........................................................................40
5.1.4 Pop-up Control ..............................................................................41
5.1.5 Pick List .........................................................................................41
5.1.6 Linked Method Screens .................................................................42
5.1.7 Numeric Keypad ............................................................................43
5.1.8 Alphanumeric Keypad ....................................................................44
5.2 Liquid Classes ......................................................................................45
5.2.1 Liquid Class Parameters ................................................................45
5.2.2 Standard Liquid Classes ...............................................................48
5.2.3 Creating Liquid Classes .................................................................48
5.2.4 Editing/Deleting Liquid Classes......................................................49
5.2.5 Import/Export Liquid Classes ........................................................49
5.3 Hardware Configuration ........................................................................49
5.4 Software Configuration .........................................................................50
5.4.1 Setting the Date and Time .............................................................50
5.4.2 Setting the Elevation ......................................................................50
5.4.3 Calibrating the Controller Touchscreen ..........................................51
5.4.4 Screen Power Off ..........................................................................52
5.4.5 Firmware/Software Versions .........................................................52
5.4.6 SD Card Capacity and System Memory ........................................53
5.4.7 System Trace Logging ...................................................................53
5.4.8 System Calibration Date ................................................................53
5.5 Security Settings ..................................................................................53
5.6 Log Settings .........................................................................................54
5.7 User Accounts ......................................................................................54
5.7.1 Add User ........................................................................................55
5
5.7.2 Edit User .......................................................................................55
5.7.3 Export and Import Users ...............................................................55
CHAPTER 6: Wizards.......................................................................................56
6.1 Wizard Basics ......................................................................................57
6.1.1 Run ................................................................................................57
6.1.2 Empty Tip ......................................................................................57
6.1.3 Favorites ........................................................................................57
6.1.4 Advanced Settings ........................................................................58
6.2 Pipette Wizard ......................................................................................58
6.3 Reverse Pipette Wizard ........................................................................59
6.4 Dilution Wizard .....................................................................................59
6.5 Aliquot Wizard ......................................................................................59
6.6 Serial Dispense Wizard.........................................................................60
CHAPTER 7: Method Linker.............................................................................61
7.1 Overview of Linked Methods .................................................................62
7.2 Creating Linked Methods......................................................................62
7.3 Running Linked Methods ......................................................................63
7.4 Editing/Deleting Linked Methods ..........................................................65
CHAPTER 8: Utilities ........................................................................................66
8.1 Priming the Instrument..........................................................................67
8.2 Moving the Syringes .............................................................................67
8.3 Viewing Log Files .................................................................................67
8.4 Transferring Error Logs .........................................................................67
8.5 Updating the Instrument Firmware and Software ..................................68
CHAPTER 9: Best Pipetting Practice...............................................................69
9.1 Preparing to Pipette..............................................................................70
9.2 Aspirating Liquid ..................................................................................70
9.3 Dispensing Liquid ................................................................................70
9.4 Pipetting Highly Viscous Solutions .......................................................71
CHAPTER 10: Icon Index .................................................................................72
CHAPTER 11: Care and Maintenance ..............................................................80
11.1 Daily Maintenance ...............................................................................81
11.2 Weekly Maintenance...........................................................................81
11.3 Yearly Maintenance.............................................................................81
6
11.4 Instrument Calibration .........................................................................81
11.4.1 Calibration Routine ........................................................................82
11.4.2 Calibration using the Liquid Class Wizard ......................................83
11.5 Cleaning the Microlab 300 ..................................................................85
11.5.1 Deciding When to Clean the Microlab 300 ...................................85
11.5.2 Cleaning the Fluid Path ................................................................86
11.5.3 Cleaning the Exterior of the Microlab 300.....................................86
11.5.4 Cleaning the Disposable Tip Hand Probe ....................................87
11.6 Storing the Microlab 300 .....................................................................87
11.7 Replacement Component Installation ..................................................88
11.7.1 Valve Replacement .......................................................................88
11.7.2 Syringe Replacement ...................................................................89
11.7.3 Tubing Replacement.....................................................................90
11.7.3.1 Removing Old Probe Tubing ..........................................................91
11.7.3.2 Installing New Probe Tubing .........................................................91
11.7.4 Battery Replacement ....................................................................92
11.7.5 O-ring Replacement .....................................................................92
CHAPTER 12: Troubleshooting ........................................................................93
12.1 Troubleshooting Guide ........................................................................94
12.2 Getting Technical Support ..................................................................96
12.3 Returning Instruments for Repair ........................................................97
Appendices .....................................................................................................98
Appendix A – Technical Specifications ........................................................98
Appendix B – Replacement Parts and Accessories ....................................101
Appendix C – Chemical Compatibility .........................................................105
Appendix D – Instrument Performance Test Reports ..................................108
Glossary ..........................................................................................................109
Index ................................................................................................................120
7
WELCOME
Welcome
Welcome to the World of Hamilton Precision Instruments.
Congratulations on purchasing the Hamilton Microlab 300 Series Pipettor. The
Microlab 300 is a hand-operated, semi-automatic, precision pipetting device that
provides accurate liquid handling via one pipette probe over the complete pipette
volume range of 0.5 µL to 1 mL.
The Microlab 300 functions on the principle of air displacement. At the heart of
each Microlab 300 Series Pipettor is a precision stepper-drive motor combined
with our uniquely designed Gastight syringes. The result is a precise and
accurate instrument that is easy to set up and operate.
Proper handling and maintenance of your new Microlab 300 will increase the
lifespan of the instrument. To learn about proper care and maintenance of your
investment, please read this entire manual, including the warranty information.
Hamilton Company thanks you for purchasing the Microlab 300 Series Pipettor.
8
INTENDED USE
Intended Use
This manual applies to both the Microlab 300 and the Microlab 300 IVD
products. The Microlab 300 is a hand-operated bench top device designed
for precision liquid handling. The unit is intended for indoor laboratory use by
authorized technical staff. The unit is also intended for manufacturing purposes
with an emphasis on reproducibility through pre-prescribed run-only methods.
Conventions Used in this Manual
Throughout this manual symbols are used to represent various kinds of information.
WARNING! Information that is essential for avoiding personal injury is flagged
with the International Warning Symbol.
Biohazard: Information that alerts the operator to situations where special
care is required to remain protected from chemical or biochemical hazards.
Important! Information that is essential for avoiding damage to equipment.
Note: Interesting information or information that can help improve
system performance.
Microlab® 300 User Manual
9
CHAPTER 1: INTRODUCTION
CHAPTER 1:
Introduction
This chapter provides a brief overview of the Microlab 300 Series Pipettor
including the following discussions:
1.1 Introduction of the Microlab 300 Series Pipettor
1.2 Safety Precautions
10
CHAPTER 1: INTRODUCTION
1.1 Introduction of the Microlab 300 Series Pipettor
The Microlab 300 is a precision liquid handling device designed to pipette
volumes of liquid from 0.5 to 1,000 µL. The system’s syringes and valve work
together to aspirate and dispense fluid according to the air displacement
principle, while the single pipette probe uses ClickSure™ tip technology to
ensure a tight seal for optimal pipetting results. Finally, the Microlab 300 is
controlled by a large touchscreen interface which guides users step-by-step
through complete pipetting protocols. This instrument comes complete with the
Syringe Drive Unit, Controller, SD card, valve, syringes, tubing, hand probe and
Cable Management System. Chapter 2 will discuss the proper installation of
Microlab 300 Series Pipettor components.
Note: The ambient temperature of the instrument location should continuously
remain below 35 °C (95 °F).
1.2 Safety Precautions
For proper handling and care of the Microlab 300, it is essential that operating and
service personnel follow general safety procedures and safety instructions described
in this manual. Service maintenance must be performed only by authorized service
technicians. Hamilton Company strongly recommends reading this information
before proceeding with the remaining chapters in this manual.
1.2.1 General Safety Information
The Microlab 300 should be placed in a location where personnel have easy
access to the front, back and sides for ease of operation and maintenance. Before
operating the instrument, determine the amount of space needed for efficient and
safe operation of the Microlab 300. Choose an area that is clean, dry, level and
away from hazardous chemicals, radiation and hazardous biological substances.
Also, the area should be free from corrosives. Leave enough space around the unit
for ventilation. Avoid placing the instrument near other instruments or objects that
could inhibit or stop air flow, or otherwise cause overheating of the electronics.
Cleaning, dismantling and performing maintenance on the Microlab 300 should
be performed only by properly trained personnel who know how to avoid
possible dangers. Only certified repair technicians are authorized to perform
mechanical maintenance on the Microlab 300.
Microlab® 300 User Manual
11
CHAPTER 1: INTRODUCTION
When transporting the Microlab 300 for repair or shipment, it should be properly
packaged inside the original shipping container. All Microlab 300 instruments
returned to Hamilton Company for repair must be decontaminated before
packaged for shipping.
Only the original approved parts and accessories may be used with the
Microlab 300. Any alterations or modifications to the instrument may be
dangerous and will void the warranty.
1.2.2 Operating the Microlab 300 Series Pipettor
When using the Microlab 300, Good Laboratory Practices (GLP) should be
observed. During the operation of a Microlab 300, remain clear of moving parts.
Never try to remove valves, syringes or tubing when the Microlab 300 syringe
drive mechanism is moving. Never move the Microlab 300 while it is in operation.
If a spill occurs, power off the instrument and wipe it down with the appropriate
disinfectant or chemical cleaner. Remember to analyze the aspects of the spill to
determine what safety precautions should be followed to prevent future spills.
Important! There are openings at the bottom of the syringes on the front of
the Syringe Drive Unit. Prevent fluid from entering through these holes as this
could damage the internal system electronics.
1.2.3 Electrical
The Microlab 300 must be turned off and disconnected from the power source
when removing any mechanical or electrical components.
Important! The power supply provided with the Microlab 300 is the only
power source approved for connecting to the instrument. Unapproved power
supplies can cause overheating, burning, melting and short-circuiting of the
device. The use of so-called “substitute” or “alternative” power supplies
is prohibited. Also, ensure the power source is plugged into a power outlet having
the voltage and frequency that matches the power supply input requirements.
Check to ensure the appropriate power cord for your country was received. (See
Appendix B for appropriate power cords.) Only connect the Microlab 300 power
supply to a grounded outlet.
12
CHAPTER 1: INTRODUCTION
Charge the Controller overnight prior to use. Ensure the temperature of the
Controller charging location remains below 35 °C (95 °F).
Avoid damaging the power cord while operating the instrument. Do not bend it
excessively, step on it or place heavy objects on the power cord. A damaged
power cord can easily become a shock or fire hazard. Never use a damaged
power cord.
1.2.4 Biohazard
If the Microlab 300 becomes contaminated with a biohazardous or chemical
material, it should be cleaned in accordance with the maintenance procedures.
See Chapter 11, Care and Maintenance Section 11.5. Observe and perform the
given maintenance procedures. Failure to do so may impair the reliability and
correct functioning of the Microlab 300.
If working with biohazardous samples, observe and perform the maintenance
procedures with a focus on cleaning and decontamination. Wear gloves when
handling the instrument and components. Avoid touching tips discarded into
waste container. Any surfaces on which liquid is spilled must be decontaminated.
If working with biohazardous or chemical materials, the user must not touch them.
Biohazard: Material used with the Microlab 300 may be considered
biohazardous. Dispose of hazardous or biologically contaminated materials
according to the practices of your organization. Discard all materials in a safe
and acceptable manner and in compliance with all federal, local, regulatory
and jurisdictional requirements. Always observe Good Laboratory Practices
(GLP). Wear suitable protective clothing, safety glass and protective gloves,
particularly when handling biohazardous samples and when dealing with spilled
liquids and contaminated areas of the instrument. Avoid touching tips discarded
into the laboratory-supplied waste bin. Any surfaces on which liquid is spilled
must be decontaminated.
Microlab® 300 User Manual
13
CHAPTER 1: INTRODUCTION
1.2.5 Protective Equipment
It is the user’s responsibility to know and understand the level of protective
equipment that must be worn when working with radioactive, biohazardous and
harsh chemicals. When using the Microlab 300 wear personal protective apparel,
including disposable gloves. Thoroughly wash hands after removing gloves, and
dispose of gloves as biohazardous waste. Do not put your hands or face near the
syringe drive mechanism while the instrument is running.
14
CHAPTER 2: INSTRUMENT SETUP
CHAPTER 2:
Instrument Setup
This chapter provides detailed information on the installation of the Microlab 300
hardware including:
2.1 Overview of Microlab 300 Parts List
2.2 Describing Instrument Components
2.3 Selecting the Proper Location
2.4 Charging the Controller
2.5 Installing the Controller and Syringe Drive Unit
2.6 Installing the Cable Management System
2.7 Installing the Disposable Tip Hand Probe
2.8 Installing the Fill and Probe Tubing
2.9 Applying Power to the Instrument
2.10 Priming the Instrument
2.11 Using the ClickSure™ Tips
2.12 Installing the Printer (Optional)
Microlab® 300 User Manual
15
CHAPTER 2: INSTRUMENT SETUP
2.1 Overview of Microlab 300 Parts List
The Microlab 300 instrument comes with everything needed for installation. For
replacement parts, please refer to Appendix B Replacement Parts and Accessories.
Carefully unpack the Microlab 300 components and verify that all parts have been
received. The parts list for the instrument is displayed in the table below.
Table 2-1 Microlab 300 Parts List
Component
Part Number
Quantity
Microlab 300 User Manual
67258-01
1
Hardware Quick Start Guide
67273-01
1
Software Quick Reference Card
67274-01
1
Syringe Drive Unit
Includes valve, 1.25 mL syringe,
and 25 µL syringe pre-installed
66260-01
1
Controller
Includes Controller cable and SD card
65800-01
1
Disposable Tip Hand Probe
Includes instruction sheet
63960-01
1
Cable Management System
Includes instruction sheet, Accessory Holder,
Cable Manager, and Probe Holder
65160-01
1
12 gauge fill tubing
61614-01
1
Power supply
61092-01
1
Power cord 1
Reference
Appendix B
1
1 – This is a country specific power cord. Reference Appendix B for the appropriate part number.
16
CHAPTER 2: INSTRUMENT SETUP
2.2 Describing Instrument Components
This section shows detailed diagrams of the front and back of the
Microlab 300 Syringe Drive Unit and Controller. It also provides a description of
the buttons and port receptacles required to install and operate the
Microlab 300 Pipettor as described in following chapters.
2.2.1 Description of the Front View of the Syringe Drive Unit
Valve
Syringe Drive
Figure 2-1: Front View of the Microlab 300 Syringe Drive Unit
Valve Actuator
The valve actuator turns the valve automatically to aspirate and dispense liquids.
Valve direction is dependent on the volume being aspirated or dispensed.
Microlab® 300 User Manual
17
CHAPTER 2: INSTRUMENT SETUP
Syringe Drive
The syringe drive mechanism positions the Hamilton precision syringes with the
high-resolution stepper motor. The syringes are threaded into the valve and the
plunger is attached to the syringe drive with a thumbscrew. The syringe drive
moves up and down to dispense and aspirate fluid accordingly.
2.2.2 Description of the Rear View of the Syringe Drive Unit
POWER
CONTROLLER
Power On/Off Switch
!
1
PROBE
2
e
24VDC
Probe Receptacle
ACCESSORY
Accessory Receptacle (6 pin mini DIN)
2.5A
CONTROLLER
Controller Receptacle (6 pin mini DIN)
PN
SN
REV
66260-01
ML300XX00001
X1
VDC Receptacle
Figure 2-2: Accessory Receptacle and Controller Receptacle
Power on/off (I/O) Switch
The Power on/off switch is located in the upper right corner on the back of the
Syringe Drive Unit. The switch toggles on or off (I = on, O = off).
Probe Receptacles
There are two probe receptacles located on the back of the instrument under
the Power switch. The Disposable Tip Hand Probe may be inserted into either
receptacle. When a signal is received by the Syringe Drive Unit through the probe
receptacle, the syringe drive moves to perform the next action in the current method.
18
CHAPTER 2: INSTRUMENT SETUP
Accessory Receptacle (6 pin mini DIN)
This port will be used for future expansion of the system.
Controller Receptacle (6 pin mini DIN)
The Controller receptacle is located in the lower right corner on the back of the
Syringe Drive Unit. This port is used to connect the Controller to the Syringe
Drive Unit using the grey Controller cable.
VDC Receptacle
The VDC receptacle is located in the lower right corner on the back of the Syringe
Drive Unit. The port is used to connect the power cord to the Microlab 300 system.
2.2.3 Description of the Rear View of the Controller
Ethernet RJ-45
VDC Receptacle
Controller Receptacle
OTG USB
USB Port
Figure 2-3: Rear View of the Controller
VDC Receptacle
The VDC receptacle is located on the back of the Controller. This port is used for
charging the Controller. It is only used when the Controller is not attached to the
Microlab 300 Syringe Drive Unit.
Microlab® 300 User Manual
19
CHAPTER 2: INSTRUMENT SETUP
Note: A Controller power supply is not shipped with the Microlab 300 because
the Controller receives power through the Controller receptacle when connected
to a powered Syringe Drive Unit.
OTG USB Port
The OTG USB port is located on the back of the Controller. This port is used for
diagnostics and testing at Hamilton Company prior to shipment.
USB Port
The USB port is located on the back of the Controller. This port is used for
connecting the Microlab 300 to the Printer Kit (p/n 61500-04).
Controller Receptacle
This port is located on the back of the Controller. This port is used for connecting
the Controller to the Syringe Drive Unit, from which it receives input power.
Ethernet RJ-45
The Ethernet receptacle is located on the back of the Controller. This port will be
used for future expansion of the system.
2.3 Selecting the Proper Location
When selecting a location for your Microlab 300, choose an area that is clean,
dry, level and away from hazardous chemicals, radiation and/or hazardous
biological substances. Leave enough space around the unit for ventilation.
Make sure there is a power source nearby to connect the power cord.
2.4 Charging the Controller
Upon receiving a system, it is recommended to charge the Controller.
Step 1. Connect the provided power cord to the power supply unit.
Step 2. Plug the power cord into a wall outlet.
Step 3. Insert the power supply into the Controller VDC receptacle. The Controller powers up
and displays the Main Menu.
Charge the Controller overnight prior to use. Ensure the temperature of the
Controller charging location remains below 35 °C (95 °F).
20
CHAPTER 2: INSTRUMENT SETUP
2.5 Installing the Controller and Syringe Drive Unit
The Syringe Drive Unit is the core of the Microlab 300 Series Pipettor. It contains
a precision drive motor, the syringe drive mechanism, the valve assembly, the
power button and all cable receptacles. The Controller contains the software
necessary to communicate user inputs on the touchscreen, like volume, to the
Syringe Drive Unit, resulting in precision pipetting. This section describes the
installation of the Controller and Syringe Drive Unit.
Controller
CONTROLLER
Syringe Drive Unit
Figure 2-4: Assembly of Controller and Syringe Drive Unit
Step 1. Place the Syringe Drive Unit in the selected location.
Step 2. Place the Controller on top of the Syringe Drive Unit as shown in Figure 2-4.
Microlab® 300 User Manual
21
CHAPTER 2: INSTRUMENT SETUP
Important! The controller should be charged for 12 hours prior to use
(see Section 2.4).
Step 3. Next, plug one end of the grey Controller cable into the Controller receptacle on the
back of the Controller and the other end of the cable into the Controller receptacle
on the back of the Syringe Drive Unit.
Step 4. Finally, insert the SD card label-side up into the left-side of the Controller.
The Controller is now properly installed on the unit.
As shown below, the Controller can tilt at different angles for user comfort and
preference; in addition, this Controller may also be hung on a wall.
Front Screen
CONTRO
LLER
Figure 2-5: Controller
2.6 Installing the Cable Management System
The Cable Management System is designed to hold the Disposable Tip Hand
Probe. Included with the Cable Management System is a Cable Manager
that eliminates unnecessary cord clutter on the workstation. The unit comes
with three pieces that are easily assembled: the Accessory Holder, the Cable
Manager and the Probe Holder as shown in Figure 2-6.
22
CHAPTER 2: INSTRUMENT SETUP
Step 1. Determine on which side of the pump to install the Cable Management System. Remove
the two plastic screws and carefully install the Accessory Holder with the metal screws
and washers as shown in Figure 2-7. Hand-tighten each screw until snug.
Step 2. Loosen the metal thumbscrew on the end of the Accessory Holder. Then, thread the
metal rod through the hole and tighten the thumbscrew as shown in Figure 2-7.
Step 3. Attach the Probe Holder by loosening the thumbscrew. Position onto the metal rod
and tighten as shown in Figure 2-8.
Step 4. Attach the Cable Manager onto the metal rod as shown in Figure 2-9.
Cable Manager
Probe
Holder
Accessory
Holder
Figure 2-6: Cable Management System
Microlab® 300 User Manual
Figure 2-7: Assembly of the Accessory Holder
23
CHAPTER 2: INSTRUMENT SETUP
Figure 2-8: Assembly of the Probe Holder
Figure 2-9: Assembly of the Cable Manager
The Cable Management System is now properly installed on the instrument.
2.7 Installing the Disposable Tip Hand Probe
Step 1. Plug the probe cable into one of the two probe receptacles on the rear of the Syringe
Drive Unit.
Step 2. Thread the tubing and probe cable through the Cable Manager starting after the
third tubing clip. Weave under each tab as shown in Figure 2-10.
Note: The Disposable Tip Hand Probe comes with the tubing pre-installed.
Instructions for installing this tubing on the Microlab 300 are located in Section
2.8. Instructions for replacing the tubing are located in Section 11.7.3.
WARNING! Keep fingers away from hinged openings to prevent pinching
of fingers.
Step 3. Set the Disposable Tip Hand Probe in the Probe Holder as shown in Figure 2-11.
24
CHAPTER 2: INSTRUMENT SETUP
Figure 2-10: Threading the tubing and cables through the Cable Manager
Figure 2-11: Assembly of the Disposable Tip Hand Probe
Note: The entire Cable Management System can be adjusted to the desired
position or height of the user. Users may also use a standard ring stand, rather
than the metal rod provided, to accommodate the Cable Management System as
well as other ring-stand accessories.
Microlab® 300 User Manual
25
CHAPTER 2: INSTRUMENT SETUP
2.8 Installing the Fill and Probe Tubing
The Microlab 300 Series Pipettor uses 12 gauge tubing for pipetting applications.
The tubing comes in two different types: fill tubing and probe tubing. The fill
tubing has a blunt end that is designed to go into a reservoir of liquid. The probe
tubing is preinstalled in the Disposable Tip Hand Probe. Instructions for replacing
the probe tubing are found in Section 11.7.3.
Step 1. Before installing the tubing, pre-wet both tubing fittings with deionized water.
Step 2. Make sure the tubing is free of crimps or blockages. Crimping or blocking within the
tubing may cause leaks or air bubbles. If the tubing is damaged, do not use it and
replace with new tubing.
Step 3. Insert the fill tubing fitting in the left port on the valve and turn clockwise to tighten as
shown in Figure 2-12.
Figure 2-12: Assembly of Fill and Probe Tubing
Step 4. Place the blunt end of the fill tubing in an appropriate reservoir filled with deionized
water. Cover the reservoir with an appropriate cap or Parafilm® to prevent
contamination of system fluid.
Note: The fill tubing can be shortened by cutting it to meet specific
customer needs.
26
Step 5. Insert the probe tubing in the right port on the valve and turn clockwise to tighten.
CHAPTER 2: INSTRUMENT SETUP
WARNING! Keep fingers away from syringe drive and from between
syringe plunger and bottom of syringe barrel to prevent pinching of fingers.
Congratulations, you have successfully completed the hardware installation of the
Microlab 300 Series Pipettor.
(Double Click to Calibrate Screen)
CONTROLLER
Figure 2-13: Final Assembly of the Microlab 300 Series Pipettor
Note: With all components installed, the device becomes slightly top
heavy. Use caution when operating and avoid bumping and pushing the unit
to prevent knocking it over.
Microlab® 300 User Manual
27
CHAPTER 2: INSTRUMENT SETUP
2.9 Applying Power to the Instrument
The Controller is powered via the connection to the Syringe Drive Unit.
Step 1. To power up the instrument, plug the country-specific power cord into the power supply.
Step 2. Make sure the Syringe Drive Unit Power switch is set to the O (off) position. Then
plug the power supply into the VDC receptacle on the Syringe Drive Unit and plug the
power cord into a wall outlet as shown in Figure 2-14.
Step 3. Flip the Power switch on the Syringe Drive Unit upwards to the I (on) position. It takes
approximately one minute for the Controller to boot up completely.
Power Supply
(p/n 51092-01)
Power Cord
(User Defined)
Figure 2-14: Power Cord and Power Supply Installation
2.10 Priming the Instrument
This section will describe how to properly prime the Microlab 300 before
running a method.
Step 1. Select the Prime button on the Controller Main Menu screen.
Step 2. Select the appropriate number of cycles and press the Run button. One cycle consists
of one complete syringe aspiration and a complete dispense. The recommended
number of prime cycles is 10.
Step 3. Continue priming until there is no air present in the fluid path.
28
CHAPTER 2: INSTRUMENT SETUP
Important! If air bubbles are still present after several priming cycles,
verify that all syringe and tubing connections are secure and repeat the
priming until the air is purged from the system.
2.11 Using the ClickSure™ Tips
The Microlab 300 uses disposable tips for liquid handling. The system is optimized
using validated ClickSure disposable pipette tips which are available in different
sizes, purities and with or without a filter.
The Microlab 300 is only functional if a ClickSure tip has been attached. You can
either attach the pipette tip by hand or directly insert the end of the probe into a tip
held in the tip packaging box. If attaching a pipette tip by hand, it must be handled
in such a way to avoid contamination and heating of the tip.
Load the ClickSure tip by applying light pressure. A tip is properly loaded when an
audible “click” is heard and the O-ring sits comfortably within the O-ring groove of
the ClickSure tip.
Important! To preserve tips for future use, the tip package can be
resealed by pressing the adhesive lid back onto the tip box.
2.12 Installing the Printer (Optional)
The printer upgrade kit that is compatible with the Microlab 300 is part number
61500-04. The printer upgrade kit contains an HP printer and an additional
accessories box. Components required for connecting the printer to the
Microlab 300 include black and color inkjet cartridges, a USB cable, a power
supply and a country-specific power cord. All other components in the HP printer
box are NOT required to connect to the Microlab 300.
Step 1. Power off the Microlab 300.
Step 2. Insert of end of the USB cable into the USB port on the back of the Controller as
shown in Figure 2-15.
Step 3. Insert the other end of the USB cable into the printer connection port.
Step 4. Connect the power supply to the printer.
Microlab® 300 User Manual
29
CHAPTER 2: INSTRUMENT SETUP
Step 5. Connect the power cord to the power supply.
Step 6. Plug the power cord into a wall outlet. The Microlab 300 is now connected to the printer.
Step 7. Power the Microlab 300 on and then power the printer on.
Figure 2-15: Installation of the Printer
30
CHAPTER 3: INTRODUCING THE
MICROLAB 300 SOFTWARE
CHAPTER 3:
Introducing the
Microlab 300 Software
The Microlab 300 Series Pipettor comes with user-friendly software, allowing users to
easily create, save and execute complete pipetting protocols. This chapter provides
an overview of the user interface such that a user can navigate the screens.
3.1 User Interface Flow Chart
Microlab® 300 User Manual
31
CHAPTER 3: INTRODUCING THE
MICROLAB 300 SOFTWARE
3.1 User Interface Flow Chart
The flowchart below shows the interrelationship among the major screens in the
Microlab 300 Series Pipettor user interface. The Main Menu screen provides
access to all other screens within the user interface. Press the Icon buttons on
the Main Menu screen to navigate through the interface. Press the Back button
to return to the previous screen.
Main Menu
Prime
Prime
Cycles
Wizards
Linked
Method
Method
Selector
Configuration
Liquid
Classes
Prime
Hardware
Move
Syringes
Software
Log
Viewer
Aliquot
Security
Settings
Error Log
Serial
Dispense
Log
Settings
Update
Pipette
Reverse
Pipette
Linked
Method Editor
Dilution
Linked
Method Run
Users
32
Utilities
CHAPTER 4: DISPOSABLE TIP HAND PROBE
CONFIGURATION AND OPERATION
CHAPTER 4:
Disposable Tip Hand Probe
Configuration and Operation
This chapter discusses details on the Disposable Tip Hand Probe and will cover the
following topics:
4.1 Configuring the Disposable Tip Hand Probe
4.2 Operating the Disposable Tip Hand Probe
Microlab® 300 User Manual
33
CHAPTER 4: DISPOSABLE TIP HAND PROBE
CONFIGURATION AND OPERATION
4.1 Configuring the Disposable Tip Hand Probe
The probe buttons can be set for right-handed or left-handed use within the
Configuration menu of the Microlab 300 Controller.
Step 1. Select Configuration from the Main Menu screen.
Step 2. From the Configuration screen, select Hardware.
Step 3. Choose whether the probe will be used in the right- or left-hand mode.
Probe Cable
Probe Tubing
Scroll Wheel
Accept Button
Cancel Button
Figure 4-1: Disposable Tip Hand Probe buttons (right handed)
34
Tip Eject Button
CHAPTER 4: DISPOSABLE TIP HAND PROBE
CONFIGURATION AND OPERATION
4.2 Operating the Disposable Tip Hand Probe
The Disposable Tip Hand Probe is held differently than a traditional pipette.
Reference Figure 4-2 for instructions on how to properly hold the hand probe.
Figure 4-2 Holding the Disposable Tip Hand Probe
Accept button
Located next to the thumb; used to activate pipetting functions and to choose
OK from pop-up screens.
Cancel button
Located on the opposite side of the Accept button; used to activate Empty Tip
function or to choose Cancel from pop-up screens.
Scroll button
Located top center of the probe; used to access method Favorites and to select
items from a list box.
Microlab® 300 User Manual
35
CHAPTER 4: DISPOSABLE TIP HAND PROBE
CONFIGURATION AND OPERATION
Tip Eject button
Located near the index finger; used to eject ClickSure tip.
Note: For tips on cleaning the Disposable Tip Hand Probe, reference
Section 11.5.4.
Biohazard: When using the Microlab 300, always observe Good Laboratory
Practices (GLP). Wear suitable protective clothing, safety glasses and protective
gloves, particularly when handling biohazardous samples and when dealing with
spilled liquids and contaminated areas of the instrument. Avoid touching tips
discarded into the laboratory-supplied waste bin. Any surfaces on which liquid is
spilled must be decontaminated.
36
CHAPTER 5: CONFIGURATION MENU
CHAPTER 5:
Configuration Menu
This chapter describes how to configure the instrument including the
following topics:
5.1 Overview of Screen Terminology
5.2 Liquid Classes
5.3 Hardware Configuration
5.4 Software Configuration
5.5 Security Settings
5.6 Log Settings
5.7 User Accounts
Microlab® 300 User Manual
37
CHAPTER 5: CONFIGURATION MENU
5.1 Overview of Screen Terminology
This section describes the features of the eight major screen types used
throughout the user interface.
5.1.1 Icon Screens
5.1.2 Run Screens
5.1.3 Data Entry Screens
5.1.4 Pop-up Control
5.1.5 Pick List
5.1.6 Linked Method Screens
5.1.7 Numeric Keypad
5.1.8 Alphanumeric Keypad
5.1.1 Icon Screens
The icon screens allow basic navigation through the user interface. General
screens like the Main Menu or Wizard menu commonly use this screen to display
all possible navigation options.
Icon Buttons
38
CHAPTER 5: CONFIGURATION MENU
Icon Buttons
These buttons allow major navigation among functions within the user interface.
Back Button
Pressing this button in the lower-left of the screen displays the previous screen.
Small Icon Buttons
These buttons at the bottom of each screen provide additional functionality to
change values on the current icon screen.
5.1.2 Run Screens
These screens enable control and monitoring of all aspects of the pipettor’s
activities. Buttons and icons are used to change parameters, and indicators are
designed to give current and future system status.
ClickSure
Tip Volume
Indicator
Parameter
Adjustment
Buttons
Fluid
Direction
Indicator
Parameter Indicator
Back Button
Small Icon Buttons
Parameters Adjustment Buttons
These buttons show the current dispense setting. The exact function for these
buttons are defined in greater detail in the Wizards and Linked Method sections
of this manual.
Microlab® 300 User Manual
39
CHAPTER 5: CONFIGURATION MENU
Parameter Indicator
This indicator shows the value of a parameter but does not allow for the
adjustment of the parameter.
Back Button
Pressing this button in the lower-left of the screen displays the previous screen.
ClickSure Tip Volume Indicator
This indicator shows the current volume of solution in the ClickSure tip.
Small Icon Buttons
These buttons provide additional functionality to the Run screen. The exact
function for these buttons is defined in greater detail in the Wizards and Linked
Method sections of this manual.
Fluid Direction Indicator
This indicator shows the direction of fluid movement in or out of the ClickSure tip
in the next step.
5.1.3 Data Entry Screens
Data Entry screens allow the inputting of values for several parameters. The
values that can be changed are displayed in a table format. Editing a value is
enabled when the selected row is highlighted.
40
CHAPTER 5: CONFIGURATION MENU
5.1.4 Pop-up Control
The Pop-up Control appears as a modal window within the current screen. All
buttons outside of the modal window will be disabled until the “OK” button is
pressed to close the modal.
5.1.5 Pick List
The Pick List screen allows the user to select from a list of options. Options can
include a choice of settings or applications to activate. All buttons outside of the
Pick List screen remain disabled until the “Accept” or “Cancel” button is pressed
to close the screen.
Microlab® 300 User Manual
41
CHAPTER 5: CONFIGURATION MENU
5.1.6 Linked Method Screens
There are two main screens in the Linked Method. The first screen is the Linked
Method Editor. This screen allows the user to add and delete different Wizards
and steps in a Linked Method.
The second screen is the Linked Method Run screen. This screen displays the
different applications within the Linked Method that are run throughout the method.
42
CHAPTER 5: CONFIGURATION MENU
5.1.7 Numeric Keypad
This screen appears when changing a numeric value. The screen initially displays
the current parameter value. Pressing a keypad button automatically clears the
current value.
Value
Indicator
Range
Indicator
Keypad
Buttons
Microlab® 300 User Manual
43
CHAPTER 5: CONFIGURATION MENU
Value Indicator
This indicator displays the current value that will be stored when the Enter button
is pressed.
Keypad Buttons
These buttons are used to add and clear numbers from the Value Indicator.
Range Indicator
For most parameters only specific values are acceptable. The Range Indicator
displays the valid values for the parameter that is currently selected. If a value
is entered outside of that range the font color will turn red until an allowed
value is entered.
5.1.8 Alphanumeric Keypad
This screen appears when changing an alphanumeric value. The screen initially
displays the current parameter value. Pressing a keypad button automatically
clears the current value.
Value
Indicator
Keypad
Buttons
Shift
Button
Delete
Button
Keypad
Toggle
Value Indicator
This indicator displays the current value that will be stored when the Save button
is pressed.
44
CHAPTER 5: CONFIGURATION MENU
Keypad Buttons
These buttons are used to add or clear the numbers or characters from the
Value Indicator.
Shift Button
This button toggles the letters from lower case to upper case.
Keypad Toggle
This toggles the keypad between letters and numbers.
Delete Button
This removes one character at a time from the Value Indicator.
5.2 Liquid Classes
The Microlab 300 instrument allows for the use and creation of Liquid Classes.
Liquid Classes are designed to compensate for the liquid’s density, viscosity,
surface tension and/or vapor pressure to maintain accuracy and precision. In
the software, users may use the Liquid Classes that come standard on the
instrument or create unique Liquid Classes to get the best pipetting accuracy for
the given liquid of choice.
This section describes Liquid Class parameters and how Liquid Classes can
be used.
5.2.1 Liquid Class Parameters
5.2.2 Standard Liquid Classes
5.2.3 Creating Liquid Classes
5.2.4 Editing/Deleting Liquid Classes
5.2.5 Import/Export Liquid Classes
5.2.1 Liquid Class Parameters
Microlab 300 Liquid Classes include all parameters that a user may adjust to
fine-tune pipetting accuracy. Changes in the Liquid Class will not affect the
dispensing precision. Precision can be improved by replacing worn parts.
Microlab® 300 User Manual
45
CHAPTER 5: CONFIGURATION MENU
Liquid Class parameters include density, aspirate speeds, dispense speeds,
post-aspiration delays, post-dispense delays, blow out delays and number of
pre-wet cycles as described below.
Density
Defines the mass of the fluid per unit volume. Density is measured in g/mL.
Number of Replicates
Defines the number of times a particular volume will be pipetted and weighed
during gravimetric calibration. The software will calculate the average mass from
these replicates and use this average mass value and the density to adjust the
data points of a Liquid Class curve.
Pre-Blowout Delay
Defines the amount of time the system waits after dispensing fluid and before
dispensing the blowout.
Post-Blowout Delay
Defines the amount of time the system waits after dispensing the blowout and
before re-aspirating the blowout volume in preparation for the next pipetting activity.
Aspirate Speed
Defines how quickly the fluid is aspirated. Slower speeds may be used for
viscous and/or volatile fluids to prevent cavitation and/or boiling. Speed
options include:
Fast: 7.5 µL/sec for volumes ≤15 µL, 300 µL/sec for volumes >15 µL
Recommended: 5 µL/sec for volumes ≤15 µL, 200 µL/sec for volumes >15 µL
Slow: 2.5 µL/sec for volumes ≤15 µL, 100 µL/sec for volumes >15 µL
Post-Aspirate Delay
Defines the amount of time the system waits after an aspiration to allow the
system to reach mechanical and pressure equilibrium. The operator is
expected to maintain the tip within the fluid during this time interval. Longer
delays may be needed to adjust for faster aspirate speeds and/or more
viscous fluids.
46
CHAPTER 5: CONFIGURATION MENU
Dispense Speed
Defines how quickly the fluid is dispensed. Slower speeds may be used for
viscous fluids to allow them to flow to the end of the tip increasing dispense
accuracy. Speed options include:
Fast: 7.5 µL/sec for volumes ≤15 µL, 300 µL/sec for volumes >15 µL
Recommended: 5 µL/sec for volumes ≤15 µL, 200 µL/sec for volumes >15 µL
Slow: 2.5 µL/sec for volumes ≤15 µL, 100 µL/sec for volumes >15 µL
Post-Dispense Delay
Defines the amount of time the system waits after a dispense and before a
subsequent dispense to allow the system to reach mechanical and pressure
equilibrium. The operator is expected to maintain the tip in a proper
dispensing position during this time interval. Longer delays may be needed to
adjust for faster dispense speeds.
Post-Dispense Audible
If enabled, an audible buzzer will indicate that a dispense is complete.
Number of Pre-wet Cycles
The number of aspiration and dispense cycles that will occur prior to aspiration of
the desired volume to wet the inside of the ClickSure tip.
The tip type and size used to create a Liquid Class are also important. Liquid
Classes must be defined for each of the ClickSure tip sizes and types. The user
must select which tip size and type (non-sterile, sterile or sterile/filtered) that is to
be used and create a Liquid Class. For example, if a user uses only sterile/filtered
tips but uses volumes across the volume range of 0.5 to 1,000 µL, the user must
create two Liquid Classes, one for each tip size.
The Microlab 300 SD card can store hundreds of Liquid Class files. For archiving
purposes Hamilton has provided a PC application available online called
LyncStore. This application allows for management and archiving of Liquid Class
files transferred from the SD card to a PC. From this PC application you can filter,
archive and view Liquid Class files.
Learn more about the LyncStore at www.hamiltoncompany.com.
Microlab® 300 User Manual
47
CHAPTER 5: CONFIGURATION MENU
5.2.2 Standard Liquid Classes
The Microlab 300 offers three standard Liquid Classes for the user:
Default300Aqueous: Developed using deionized water per ISO-8655 standards
Default300Volatile: Developed using 99.5% isopropyl alcohol
Default300Viscous: Developed using 87 mg/mL Bovine Serum Albumin (BSA)
5.2.3 Creating Liquid Classes
Step 1. To create a new Liquid Class, enter the Configuration menu from the Main Menu
screen. Then select Liquid Classes.
Step 2. Select one of the standard Liquid Classes that is closest to the properties of your liquid.
Step 3. Press the Duplicate button, name the new Liquid Class and press Save.
Note: Duplication will copy all of the pipetting parameters of the selected
Liquid Class, including pipetting speeds, blowout properties, and aspiration or
dispense delays, etc. It will also duplicate the points of calibration (volume and
mass) used to create that liquid compensation curve. After duplicating a Liquid
Class, Hamilton recommends checking all parameters and data points and
modifying them accordingly.
Step 4. After the Liquid Class is created, press the Edit button next to the Liquid Class that was
created. This will take the user to the Liquid Class settings screen.
Step 5. Enter the Liquid Density (g/mL) and Number of Replicate parameters by highlighting
the parameter and inputting the appropriate value.
Step 6. Select the tip size and type that you want to modify by pressing the Edit button.
Enter the appropriate values for the additional parameters. The additional
parameters include Pre Blowout Delay, Post Blowout Delay, Aspiration Speed, Post
Aspirate Delay, Dispense Speed, Post Dispense Delay, Post Dispense Audible and
Number of Pre-wet Cycles. For details on these parameters, reference Section 5.2.1.
Note: If pipetting over the complete volume range of the Microlab 300 using
a single tip type, it will be necessary to create two Liquid Classes, one for the
50 µL tip and one for the 1 mL tip.
Step 7. Once all parameter values have been entered, select the Data Points button in
the lower right part of the screen. All data points will be pre-populated from the
duplication of the original curve.
Step 8. Add or delete volume points using the icons at the bottom of the screen.
48
CHAPTER 5: CONFIGURATION MENU
Note: In the data points screen there will be a high and low volume point
for each tip size that cannot be modified. For example, the 50 µL tip has a high
point of 50 µL and a low point of 1 µL. When creating the calibration curve it is
recommended that these high and low volume points be used.
Step 9. Now, the system can be gravimetrically calibrated. Refer to Section 11.4 for
instrument calibration.
5.2.4 Editing/Deleting Liquid Classes
To edit an existing Liquid Class, the file must be selected from the Liquid Classes
Edit Classes screen. The user may edit the Liquid Class accordingly by following
the instructions in Section 5.2.3 beginning at Step 4.
To delete a file, the user may select the file from the Liquid Classes Edit Classes
screen and press the Delete button.
Note: The standard Liquid Classes Aqueous, Volatile and Viscous may not be
deleted from the instrument or modified. They may be duplicated to create new
Liquid Classes as described in Section 5.2.3.
5.2.5 Import/Export Liquid Classes
To import Liquid Classes from the SD card or to export Liquid Classes to the SD
card, the user simply presses the Import or Export buttons on the Edit Classes
page and then selects the files that need to be imported or exported. The imported
files will propagate in the Liquid Classes screen. The exported files will be saved on
the SD card. These can then be transferred onto another instrument or to a PC.
5.3 Hardware Configuration
The Hardware Configuration allows the user to manipulate the different hardware
components that are connected on the Microlab 300 instrument. At this point
in time, there is only the Disposable Tip Hand Probe which needs hardware
configuration. The Disposable Tip hand probe can be configured to right- or
left-hand use as described in Section 4.1 As more hardware components are
developed for the instrument, they will be added here.
Microlab® 300 User Manual
49
CHAPTER 5: CONFIGURATION MENU
5.4 Software Configuration
The Software Configuration menu allows the user to review and modify
software settings.
5.4.1 Setting the Date and Time
5.4.2 Setting the Elevation
5.4.3 Calibrating the Controller Touchscreen
5.4.4 Screen Power Off
5.4.5 Firmware/Software Versions
5.4.6 SD Card Capacity and System Memory
5.4.7 System Trace Logging
5.4.8 System Calibration Date
5.4.1 Setting the Date and Time
To set the Date and Time, the user must press the Configuration button from the
Main Menu screen and then the Software button. From here the user will need to
press the Controller View button. Using the toggle buttons, the user can highlight
and select Date and then use the change buttons to set the appropriate date.
Likewise, this process may be repeated for setting the Time.
5.4.2 Setting the Elevation
As discussed in Section 5.2.2, the Microlab 300 ships with three standard Liquid
Classes for pipetting aqueous, volatile and viscous solutions. The Microlab
300 standard Liquid Classes were developed under factory conditions at
1,300 meters above sea level. However, as altitude increases and air pressure
decreases, the volume aspirated by the Microlab 300 syringes is reduced. Thus,
the instrument must be calibrated at ambient air pressure to accurately aspirate
and dispense the defined volume.
The three standard Liquid Classes can be adjusted to compensate for the
difference in elevation at a customer site. Within the Controller screen in the
Software configuration menu, a user can input the elevation of his laboratory
(measured in meters). The three standard Liquid Classes will automatically be
adjusted based on the new elevation.
50
CHAPTER 5: CONFIGURATION MENU
Note: When creating new liquid classes, there is no need to compensate
for elevation because the data collected and entered into the software was
gathered in real-time and not at the factory. Elevation compensation will only
be used for the three standard Liquid Classes shipped with the system.
5.4.3 Calibrating the Controller Touchscreen
The controller touchscreen is calibrated before it leaves Hamilton Company. If the
clicked area on the touchscreen does not seem to align with the image on the
screen, it is probably time to recalibrate the screen.
Step 1. To reset the touchscreen calibration, select the Software icon from the Configuration
screen. Next select the Controller View button and scroll down to the Screen
Calibration option and press Calibrate. The following screen should appear.
Step 2. Press the center of the cross.
Step 3. The cross will move to different locations on the screen. Each time the cross stops
moving, press the center.
Step 4. Once all 5 positions have been recorded, press anywhere on the screen to store the
calibration values.
Microlab® 300 User Manual
51
CHAPTER 5: CONFIGURATION MENU
If the calibration is so far off that it is impossible to navigate to Screen Calibration,
as described in Step 1, it is possible to get to the calibration program during
system start up. Turn the instrument Off and then On. The initial splash screen
will display followed by a completely black screen. After a few seconds, the
splash screen will appear again. Double click the screen as indicated to enter the
calibration program.
5.4.4 Screen Power Off
The Microlab 300 touchscreen is designed to turn off after an extended period of
inactivity. The default setting for the power off is 10 minutes. If desired, the power
off time can be increased in the Controller configuration screen.
5.4.5 Firmware/Software Versions
The Microlab 300 is controlled by a combination of three different programs.
There is firmware on the Syringe Drive Unit which is controlled by software that is
running an operating system installed on the Controller. The version information
for all three of these programs can be viewed in the Software configuration menu
within Versions. Versions of all Wizards and Linked Methods may also be viewed
in this screen.
52
CHAPTER 5: CONFIGURATION MENU
The most current version of the Microlab 300 firmware and software is posted
at www.hamiltoncompany.com/microlab300 under the Technical Information
menu. This file can be used to update an older Microlab 300 to the current
version of firmware and software. To update the system, download the file and
transfer it to the SD card provided with the system. Insert the SD card into the
side of the controller. Then navigate to the Utilities menu and select the Update
icon. Press start to begin the update and follow on-screen instructions to
complete the update.
5.4.6 SD Card Capacity and System Memory
In the Controller configuration screen, there are indicators showing percent
memory used on the SD card and the system memory.
5.4.7 System Trace Logging
If the Microlab 300 is having technical difficulties, Hamilton Technical Support
staff may require more detailed system trace logs to troubleshoot the problem.
This can be enabled within the software configuration menu in the Controller
screen. Simply select System Trace Logging and turn this feature on. The
system will automatically log additional data from the software application and
report this information in the Error log (refer to Section 8.4 for discussion of
Error Logs).
Note: The System Trace Logging will be reset to Off if the instrument is
powered off.
5.4.8 System Calibration Date
After a system has been calibrated, the calibration date can be stored.
5.5 Security Settings
For laboratories requiring traceability, the Microlab 300 provides the option for
users to log in before they can create, edit or run methods. To enable the use of
passwords and user accounts, select Security Settings. This screen manages
the use of user accounts, the expiration of the user keys and the maximum
Microlab® 300 User Manual
53
CHAPTER 5: CONFIGURATION MENU
number of times an incorrect user key can be entered before the user account
is locked. The first time user accounts are enabled the system will automatically
create an Administrator account (User ID = Admin and User Key = 7913).
Once user Accounts are enabled, the system will force the user to log in as the
Administrator before any other settings can be adjusted.
5.6 Log Settings
The Microlab 300 Controller provides the ability to save a log of pipetting
activities to the SD card. Logging can be enabled per Wizard or Linked Method.
For regulated customers requiring 21 CFR Part 11 compliance, Electronic
Signatures can be enabled if the Security Settings are also enabled. Once
Electronic Signatures are enabled, all Wizards and Linked Methods must be
logged. If multiple systems are used by the same laboratory, a unique Controller
name can be entered to simplify the management of log files. The Controller
name can be set within the Log Settings Configuration menu. Log files created
on the Microlab 300 can be viewed and printed directly from the Controller by
purchasing the printer upgrade kit (p/n 61500-04). For more details on the printer
option refer to Section 2.12.
The Microlab 300 SD card can store hundreds of log files depending on the
number of activities recorded in each log. For archiving purposes Hamilton has
provided a PC application available online called LyncStore. This application
allows for management and archiving of files transferred from the SD card to a
PC. From this PC application you can filter, archive, view and print log files.
Learn more about the LyncStore at www.hamiltoncompany.com.
5.7 User Accounts
User accounts may be created to add a level of security to the Microlab 300
system. The Users screen gives the system’s administrator the ability to add
users, edit existing users and export and import users via the system’s SD card.
To enter this screen, User accounts must be enabled under Security settings and
a user with access to modify accounts must be logged into the system. For each
account that is created, a role (or multiple roles) is assigned to indicate the level
of security for each user. Roles include Operator, Configure Hardware, Manage
Users, Program Wizards and Linked Methods.
54
CHAPTER 5: CONFIGURATION MENU
5.7.1 Add User
The Administrator or a user who has the ability to create and edit user accounts
may add new users to the system. To add a new user, simply fill in the User ID,
First Name, Last Name and set the user role. Once all the settings are input, the
Users button on the bottom left of the screen will be enabled. Press this button
to exit the screen and save the new account. When you exit the screen, the
system will automatically generate a user key for the new account. Record the
User ID and the User Key for future reference. It is suggested to modify the user
key for the new account upon initial log in to the instrument.
5.7.2 Edit User
This screen is used to modify the settings of an existing user account. A user
account consists of a User ID, First Name, Last Name, enabled or disabled flag,
user key and user roles. The user roles define what Controller settings a specific
user is able to change. Only one account can be set to have Administrator access.
All other users can have at least one of the following roles: be able to operate
the Wizards or Linked Methods in a run-only mode, be able to modify probe
handedness, be able to manage user accounts, or be able to program Wizards or
Linked Methods. In addition to editing account information, the Edit User screen
allows for the deletion of a user or to reset a user key in the event it is forgotten.
5.7.3 Export and Import Users
To export users, simply press the Export Users button and the data will be saved
on the SD card. To import user accounts onto your Controller, insert the SD card
that contains the desired user files and press the Import Users button. The user
accounts will be uploaded from the SD card onto the new Controller.
The Microlab 300 SD card can store many user accounts. For archiving
purposes Hamilton has provided a PC application available online called
LyncStore. This application allows for management and archiving of files
transferred from the SD card to a PC. From this PC application you can filter,
archive and view user accounts.
Learn more about the LyncStore at www.hamiltoncompany.com.
Microlab® 300 User Manual
55
CHAPTER 6: WIZARDS
CHAPTER 6:
Wizards
This section discusses the Wizards for the Microlab 300, including discussions
on the following Wizards:
6.1 Wizard Basics
6.2 Pipette Wizard
6.3 Reverse Pipette Wizard
6.4 Dilution Wizard
6.5 Aliquot Wizard
6.6 Serial Dispense Wizard
56
CHAPTER 6: WIZARDS
6.1 Wizard Basics
To simplify the programming of the Microlab 300, Wizards were created for
common pipetting applications. These Wizards are designed to enable the user
to quickly change from one pipetting technique to the next with minimal time and
hassle. This section of the manual describes the features that are common to
most Wizards.
6.1.1 Run
6.1.2 Empty Tip
6.1.3 Favorites
6.1.4 Advanced Settings
6.1.1 Run
Run is a small icon button present on every Run screen. This button
serves a similar purpose to the Accept button on a hand probe.
When the Run button is pressed the instrument will begin to perform
the programmed action. To stop immediately press the Back button
on the bottom left of the screen or the Cancel button on the hand probe.
6.1.2 Empty Tip
Empty Tip is a small icon button used to empty the volume within a
ClickSure tip after an aspiration. This button can be used anytime
there is fluid remaining inside the tip. The user will be warned that
they are going to empty the tip; this warning allows the user to
properly direct the flow into a reservoir or a waste container.
6.1.3 Favorites
Operations that are performed frequently can be stored as Favorites
and then recalled for use at a later time. Press the Favorites button
to store the current Wizard setup as a Favorite or to change the
current Wizard setup to a previously stored Favorite setting. When
selecting a previously stored Favorite, the menu will display only the Favorites that
were stored for the given Wizard being executed.
Microlab® 300 User Manual
57
CHAPTER 6: WIZARDS
6.1.4 Advanced Settings
For most applications, the default settings in each Wizard will
provide the best results. For applications that require greater control
over the instrument, the Advanced menu provides an interface to
adjust the following settings:
Liquid Classes are designed to help the user compensate
varying fluid properties. By compensating for different liquid
properties, the dispenses from the instrument will be more
accurate and precise. The instrument comes with three
standard Liquid Classes. Users may also create custom Liquid Classes.
See Section 5.2.3 for more details.
Pre-wet (Pipette and Dilution Wizards only). Pre-wet is the
optional process of aspirating and dispensing sample to coat
the inside of a pipette tip prior to aspirating a defined sample
volume. The pre-wet function helps ensure accuracy of
viscous liquids by decreasing the cohesive forces between tip and sample.
Pre-wet also helps with volatile fluids as evaporation within the tip can
cause a significant loss of sample before delivery. Pre-wet increases the
humidity within the tip, thus reducing both the amount of variation and
sample evaporation. It is recommended to use this setting for volatile or
viscous fluids to improve pipetting accuracy. If enabled, the ClickSure tip
will be pre-wetted three times prior to the sample aspiration.
Mix (Pipette and Dilution Wizards only.) This setting allows a
user to mix after performing a pipetting or dilution step. The
user may select the volume to mix. If enabled, pressing the
Accept button will begin the repeated aspiration and dispense
cycle. Pressing the Accept button again will end the mixing cycle.
6.2 Pipette Wizard
This Wizard is used to aspirate and dispense single samples. Once
the system is primed, pressing the Accept button causes the
defined amount of sample to be aspirated into the ClickSure tip. A
second press of the Accept button causes the liquid to be
dispensed from the ClickSure tip into the destination vessel.
58
CHAPTER 6: WIZARDS
6.3 Reverse Pipette Wizard
This Wizard is used to aspirate and dispense single samples.
During a Reverse Pipette, the system will aspirate slightly more
volume than what is defined. Once the system is primed, pressing
the Accept button causes the defined amount of sample to be
aspirated into the ClickSure tip plus an additional amount of sample (5 µL when
using a 50 µL tip and 25 µL when using a 1 mL tip). A second press of the
Accept button dispenses only the defined sample volume, leaving the additional
volume in the tip. If the user chooses to repeat the Reverse Pipette function, the
additional volume will not be re-aspirated. This volume can be removed from the
tip by selecting the Empty Tip icon at the bottom of the Wizard Run screen.
6.4 Dilution Wizard
This Wizard is used to dilute sample with diluent up to 1 mL total
volume. Once the system is primed, pressing the Accept button
causes the defined amount of diluent to be aspirated into the
ClickSure tip. A second press of the Accept button causes the
defined amount of sample to be aspirated in the tip. A third trigger of the Accept
button will simultaneously dispense both diluent and sample into the desired
vessel. The user may also add an Air Gap between the sample and the diluent to
ensure that mixing does not occur prior to dispensing.
6.5 Aliquot Wizard
This Wizard is used to repetitively dispense aliquots of the same
volume at the press of a button. The total volume (which is the sum
of all the aliquots) is drawn into the ClickSure tip and then multiple
dispenses are performed based on the volume selected. The
volume of each dispense is controlled by the Parameter Adjustment button. The
number of aliquots dispensed is indicated on the screen of the Controller. In this
Wizard, the system will also aspirate an additional amount of sample volume
(5 µL when using a 50 µL tip and 25 µL when using a 1 mL tip) to ensure the
pipetting accuracy of each dispense.
Microlab® 300 User Manual
59
CHAPTER 6: WIZARDS
6.6 Serial Dispense Wizard
This Wizard is used to repetitively dispense aliquots of differing
volumes at the press of a button. The total volume (which is the
sum of all the serial dispenses) is drawn into the ClickSure tip and
then multiple dispenses are performed as specified. The current
dispense volume is controlled by the Parameter Adjustment button. The current
dispense volume can be changed at any time. The Edit Steps button shows how
many dispenses have been completed out of the total number of dispenses that
are programmed. In this Wizard, the system will also aspirate an additional
amount of sample volume (5 µL when using a 50 µL tip and 25 µL when using a
1 mL tip) to ensure the pipetting accuracy of each dispense.
Edit Steps
This is the entire list of programmed dispenses that can be edited by pressing
the Parameter Adjustment button. This will bring up the programmed dispense
volumes. These volumes may be modified, deleted, or additional volumes may
be added.
Hold
The Serial Dispense Wizard dispenses volumes from the Edit Steps one at a time
in order from the first dispense to the last. When the last dispense is reached it
starts over with the first dispense volume. Enabling the Hold functionality causes
the current dispense to be dispensed repeatedly until the Hold is disabled at
which time the Serial Dispense Wizard will move to the next dispense.
Discrete
The Discrete functionality in the Serial Dispense Wizard allows the user to
aspirate and dispense each volume in the Edit Steps one at a time rather than
aspirating the total volume of dispenses. The Discrete functionality can be
enabled within the Advanced button of the Serial Dispense Wizard.
60
CHAPTER 7: METHOD LINKER
CHAPTER 7:
Method Linker
This chapter provides details regarding Linked Methods and includes a
discussion of the following topics:
7.1 Overview of Linked Methods
7.2 Creating Linked Methods
7.3 Running Linked Methods
7.4 Editing/Deleting Linked Methods
Microlab® 300 User Manual
61
CHAPTER 7: METHOD LINKER
7.1 Overview of Linked Methods
Linked Methods are useful when a user wants to complete an entire pipetting
application from start to finish without having to access each Wizard
separately. A Linked Method is a sequence of pipetting Wizards and/or
Favorites strung together.
(image of Method Linker)
Linked Methods serve as electronic SOPs and produce one log file upon
completion. All parameters of each Wizard or Favorite can be modified during
the creation of a Linked Method. Instructional prompts can also be added to
provide details to the users during the run (e.g. pipette Solution A). Once created,
a Linked Method becomes a run-only protocol. Users will not be able to modify
any of the parameters when running the method.
7.2 Creating Linked Methods
Step 1. Select the Linked Method icon from the Main Menu screen.
Step 2. Press the New button in the lower right corner. Input the name of the method and
press the Save button.
Step 3. To select one of these options, press the button next to the application and
select Accept.
62
CHAPTER 7: METHOD LINKER
Note: If a step is added that is not needed, it may be selected and deleted. If
the steps are not in the correct order, a user may move any step by first selecting
the step and using the left and right arrows to move the step to the proper location.
Step 4. To change the parameters of a step, select the step. The user is notified that the
step is selected when the step becomes highlighted in blue.
Step 5. Press the Edit button. The user will be able to add notes to the method by selecting
the Information button, loop a step in a method n times, select the volume to
dispense, select the tip size, set the Liquid Class, set the tip type, and set the prewet and mix settings. Repeat this with all the steps in the method.
Important! If a user has already created a Favorite of any Wizard, it is
possible to use the Favorite as a step in a Linked Method rather than
recreating the parameters. Select the method icon in the sequence that you
would like to replace with a Favorite of that method. Select the Edit small icon
button. On the Settings screen, select the Favorites icon in the bottom
toolbar. Finally, press Select to choose the desired Favorite.
Step 6. When the parameters of each step have been modified, save the method. You will
be directed to the list of Linked Methods on the system.
Note: Linked Methods may be duplicated. Simply select the Linked Method
that you would like copied and press the Duplicate button. All parameters will be
copied and may be modified by selecting the file and pressing the Edit button.
7.3 Running Linked Methods
Step 1. To run a Linked Method select the Linked Method icon from the Main Menu.
Step 2. Select the appropriate Linked Method from the list and press the Run button. The
Linked Method Overview screen will display indicating the sequence of steps in the
Linked Method.
Microlab® 300 User Manual
63
CHAPTER 7: METHOD LINKER
Step 3. Press the Accept button on the probe to begin the method. The user will be
presented with the Run screen of the active Wizard. Each time the user completes
a step in the Linked Method, the Linked Method Overview screen will graphically
display the progress.
Note: Pressing the Information button at the bottom of each run screen displays the pipetting details and parameters being used in the active Wizard.
Important! If a user makes an error when running a Linked Method,
pressing the Cancel button on the probe will bring the user to the Linked
Method Overview screen. The user can select any of the steps in the sequence and continue the method at the desired step. If Security is enabled,
the user will be asked to provide a written justification of the error and reason
for cancellation. This justification will appear in the log file.
Step 4. Continue pipetting until the method is complete. An audible beep will indicate that the
method run is complete. At this time, if logging is enabled, a log file will be generated
and stored on the SD card.
64
CHAPTER 7: METHOD LINKER
7.4 Editing/Deleting Linked Methods
To edit or delete a Linked Method, select the file that needs to be modified and
press the Edit button. If the file needs to be deleted, select the file and press the
Delete button.
Microlab® 300 User Manual
65
CHAPTER 8: UTILITIES
CHAPTER 8:
Utilities
This chapter focuses on the Utilities of the instrument. In this chapter the following
topics will be discussed:
8.1 Priming the Instrument
8.2 Moving the Syringes
8.3 View Log Files
8.4 Transferring Error Logs
8.5 Updating the Instrument Firmware and Software
66
CHAPTER 8: UTILITIES
8.1 Priming the Instrument
This section describes how to properly prime the Microlab 300 before beginning
to pipette.
From the Main Menu on the Controller screen select the Prime button. Select the
appropriate number of cycles and press the Run button. One cycle consists of
one complete syringe aspiration and a complete dispense. The recommended
number of prime cycles is 10. If there is still air in the fluid path after the priming,
verify that all tubing and syringe connections are tight and repeat the priming until
all air bubbles have been removed from the system.
8.2 Moving the Syringes
To remove or install new syringes on the Microlab 300 Series Pipettor, the
user must first lower the syringe drive. To raise or lower the syringes, press the
Utilities button from the Main Menu and then select the Move Syringes button.
There will be two buttons on this page one for raising the syringes and one for
lowering the syringes.
8.3 Viewing Log Files
In the Log Viewer, the user may view log files for methods that have been
executed on the instrument or print the log file directly from the Controller when
connected to the printer upgrade kit (p/n 61500-04). The log file shows the
details of the method run including number of loops, tip size, tip type, mix mode,
cancellations, sample volume, Liquid Class, and pre-wet mode. The user may
also use the LyncStore online service provided by Hamilton to store and view
method logs.
Learn more about the LyncStore at www.hamiltoncompany.com.
8.4 Transferring Error Logs
The Error Log screen provides the means to transfer all error logs from the
instrument onto the Microlab 300 SD card by pressing the Run button. These files
can then be sent to Hamilton for diagnostics.
Microlab® 300 User Manual
67
CHAPTER 8: UTILITIES
8.5 Updating the Instrument Firmware and Software
The Update screen allows the user to update the instrument to the latest
firmware and software. The update will be downloaded from the website onto
the SD card. The SD card can then be placed in the instrument. By selecting
Update from the Utilities menu, the instrument will receive the newest firmware
and software updates.
68
CHAPTER 9: BEST PIPETTING PRACTICE
CHAPTER 9:
Best Pipetting Practice
To achieve the highest precision and accuracy, we recommend that you follow
the following pipetting tips explained in this chapter including:
9.1 Preparing to Pipette
9.2 Aspirating Liquid
9.3 Dispensing Liquid
9.4 Pipetting Highly Viscous Fluids
Microlab® 300 User Manual
69
CHAPTER 9: BEST PIPETTING PRACTICE
9.1 Preparing to Pipette
Always place the liquid in a suitable vessel. The liquid and the ClickSure tip should
have approximately the same temperature.
Use ClickSure filtered tips to prevent contamination by aerosols or foaming
solutions in the tip.
Use ClickSure tips only once.
Check whether the set aspiration and dispensing speeds as well as pipetting delays
are suitable for the liquid. These parameters can be viewed within the Liquid Class
screen. Choose from either the standard Liquid Classes or create a new Liquid
Class as described in Section 5.2.3. Be sure that the chosen Liquid Class has been
validated for the pipetting method and liquid being used.
9.2 Aspirating Liquid
Step 1. Pre-wet the new ClickSure tip by aspirating and dispensing the liquid to be pipetted
one to three times.
Step 2. Immerse the ClickSure tip into the liquid vertically approximately 3 mm deep.
Immersing the tip too deep in the liquid will have adverse effects while immersing the
tip too shallow may result in air bubbles.
Step 3. Press the Accept button on the probe to aspirate liquid. Maintain the immersion
depth, so that no air is aspirated accidentally.
Step 4. After aspiration, keep the tip in the liquid for approximately 2 seconds, particularly for
viscous liquids.
Step 5. After aspiration, pull the tip slowly out of the liquid.
Step 6. Wipe the tip against the container wall to remove any liquid which may be present on
the outside of the ClickSure tip.
9.3 Dispensing Liquid
Step 1. When dispensing liquid, place the ClickSure tip at a slight angle against the wall of the
well or tube.
Step 2. Press the Accept button on the probe to dispense the liquid.
Step 3. Wait until no more liquid is dispensed.
Step 4. In Pipette and Dilution Wizards, a blowout can either be triggered after dispensing the
liquid or can be set to occur automatically.
Step 5. In all other pipetting Wizards, the extra volume remaining in the tip after dispense can
be removed by selecting Empty Tip on the Run screen.
70
CHAPTER 9: BEST PIPETTING PRACTICE
9.4 Pipetting Highly Viscous Solutions
Use the Reverse Pipetting Wizard for viscous solutions, when using the
Viscous300Default Liquid Class or when pipetting plasma, serum, or other liquids
with high protein content.
Use a filtered ClickSure tip.
Set Liquid Class parameters to use slow aspirating and dispensing speeds.
Set Liquid Class parameters to use an aspirate delay to allow liquid to completely
enter the ClickSure tip.
Set Liquid Class parameters to use a post-dispense delay or a pre-blowout delay to
allow the fluid to collect at the end of the tip before being blown out.
Wipe the tip against the container wall to remove any liquid which may be present
on the outside of the ClickSure tip.
Microlab® 300 User Manual
71
CHAPTER 10: ICON INDEX
CHAPTER 10:
Icon Index
This chapter will define the function and purpose of the major icons used
throughout the user interface.
Main Menu Icons
Icon
Function
Prime – Press to set the number of prime cycles and prime the instrument.
Wizards – Press to select from a list of available Wizards.
Linked Method – Press to create a Linked Method. Linked Methods are created by
linking multiple Wizards or Favorites together to create one run file.
Configuration – Press to set Liquid Class, hardware settings, software settings,
security settings, log settings and user accounts.
Utilities – Press to prime the instrument, move the syringes, view logs, transfer
error logs and update the system.
Wizards Menu Icons
Pipette – Press to enter the Run screen for the Pipette Wizard.
72
CHAPTER 10: ICON INDEX
Icon
Function
Reverse Pipette – Press to enter the Run screen for the Reverse Pipette Wizard.
Dilution – Press to enter the Run screen for the Dilution Wizard.
Aliquot – Press to enter the Run screen for the Aliquot Wizard.
Serial Dispense – Press to enter the Run screen for the Serial Dispense Wizard.
Configuration Menu Icons
Liquid Classes – Press to create, edit, import and export Liquid Classes.
Hardware – Press to select and configure the button mapping on the Disposable
Tip Hand Probe.
Software – Press to review and modify the date, time, screen calibration, screen
power off settings, internal storage usage, Wizard versions, and pump versions.
Security Settings – Press to review and modify user accounts required, max login
retries, key life span and key expiration warning. This will only be used if Security is
enabled.
Log Settings – Press to review and modify electronic signatures, enforce
adherence to the Linked Method order, view log path, select methods to log and
set a custom Controller name.
Microlab® 300 User Manual
73
CHAPTER 10: ICON INDEX
Icon
Function
Users – Press to edit, add, export or import users to the instrument.
Utilities Menu Icons
Prime – Press to set the number of prime cycles and prime the instrument.
Move Syringes – Press the raise or lower the syringe drive for syringe replacement.
Log Viewer – Press to view and print logged methods.
Error Log – Press to transfer error log files to the SD Card. This will be used for
diagnostic purposes at Hamilton Company.
Update – Press to update the Microlab 300 software and firmware to the version
that is present on the SD Card.
Main Menu Small Icons
Log In – Press to log into the instrument using an Administrator or User account.
Log Off – Press to log off of the instrument.
Favorites – Press to recall all applications that are frequently used and saved as a Favorite.
74
CHAPTER 10: ICON INDEX
Wizards Small Icon Buttons
Icon
Function
Run – Press to trigger the instrument. This icon functions identically to the
Disposable Tip Hand Probe Accept button.
Empty Tip – Press to empty the solution out of the ClickSure tip.
Favorites – Press to recall applications within the active Wizard that are frequently
used and saved as a Favorite.
Advanced – Press to see the advanced detail of the current Wizard. See Section
6.1.4 for more details.
Save – Press to save a method or setting.
History – Press to view the edit history of a method.
Select – Press to choose a setting or item from a list.
Delete – Press to delete a method or file.
Default – Press to change settings back to their Hamilton default values.
Up – Press to move a step in the Serial Dispense Editor upward in the sequence.
Microlab® 300 User Manual
75
CHAPTER 10: ICON INDEX
Icon
Function
Down – Press to move a step in the Serial Dispense Editor downward in the sequence.
Duplicate – Press to copy a step in the Serial Dispense Editor. The step will be added
directly below the step that was copied.
Delete – Press to delete a step from the Serial Dispense Editor.
Add Step – Press to add a new step in the Serial Dispense Editor. This new step
will be added to the bottom of the sequence.
Linked Method Small Icon Buttons
Icon
Function
Run – Press to trigger the instrument. This icon functions identically to the
Disposable Tip Hand Probe Accept button.
Edit – Press to edit a Linked Method or the parameters of a Linked Method step.
Delete – Press to delete a step in a Linked Method.
Duplicate – Press to copy a Linked Method.
New – Press to create a new Linked Method.
History – Press to view the edit history of a Linked Method.
76
CHAPTER 10: ICON INDEX
Icon
Function
Back – Press to move methods in a Linked Method to the left in the sequence.
Forward – Press to move methods in a Linked Method to the right in the sequence.
Add – Press to add a step to a Linked Method.
Pipette – Press to add a pipette step in a Linked Method.
Reverse Pipette – Press to add a reverse pipette step in a Linked Method.
Dilution – Press to add a dilution step in a Linked Method.
Aliquot – Press to add an aliquot step in a Linked Method.
Serial Dispense – Press to add a serial dispense step in a Linked Method.
Timer – Press to add a timer step in a Linked Method.
Mix – Press to add a mix step in a Linked Method.
Microlab® 300 User Manual
77
CHAPTER 10: ICON INDEX
Liquid Classes Small Icon Buttons
Icon
Function
History – Press to view the edit history of a Liquid Class.
Import Liquid Classes – Press to import Liquid Classes from the SD card onto
the instrument.
Export Liquid Classes – Press to export Liquid Classes from the instrument onto
the SD card.
Duplicate – Press to copy a Liquid Class.
Delete – Press to delete a Liquid Class.
User Icon Buttons
Edit User – Press to edit an existing user.
Add User – Press to add a user.
Export Users – Press to export users from the Microlab 300.
Import Users – Press to import users from the Microlab 300.
Change Key – Press to reset a user key.
78
CHAPTER 10: ICON INDEX
Icon
Function
Delete User – Press to delete a user.
Edit – Press to edit the parameters of a user account.
History – Press to view the edit history of a user account.
Microlab® 300 User Manual
79
CHAPTER 11: CARE AND MAINTENANCE
CHAPTER 11:
Care and Maintenance
This chapter contains instructions for routine maintenance procedures for the
Microlab 300, which includes the following topics:
11.1 Daily Maintenance
11.2 Weekly Maintenance
11.3 Yearly Maintenance
11.4 Instrument Calibration
11.5 Cleaning the Microlab 300
11.6 Storing the Microlab 300
11.7 Replacement Component Installation
80
CHAPTER 11: CARE AND MAINTENANCE
11.1 Daily Maintenance
It is recommended to prime the Microlab 300 Pipettor daily to ensure the accuracy
and precision of the instrument. The recommended system fluid is deionized water.
Over time solutions like water will degas which creates air bubbles in the system.
The air in the system may lead to inaccuracies during pipetting applications.
11.2 Weekly Maintenance
System fluid path requires health maintenance to prevent clogs which would
prevent device from performing per calibration. It is recommended to change the
deionized water in the fill reservoir once a week to avoid contaminants which may
cause clogs in the instrument’s fluid path and thus prevent the instrument from
performing per calibration.
11.3 Yearly Maintenance
It is recommended that the Microlab 300 be sent to a service center for cleaning
and lubrication on an annual basis. Upon receiving the instrument, a Hamilton
technician will evaluate the instrument to make sure it is in good working order.
The belts will be replaced and the lead screw and shaft will be cleaned and
replaced if necessary. The lead screw and shaft will be lubricated. Finally, the
instrument will be retested and recertified for calibration.
11.4 Instrument Calibration
Many companies require that instrumentation, including the Microlab 300, be
validated on a monthly, semi-annual or annual basis. The instrument can be sent
to Hamilton Company for recertification at any time. Simply contact Hamilton
Customer Service to obtain a Return Materials Authorization (RMA) number.
Note: Sending the Microlab 300 in for non-warranty service will be charged
to the customer.
Hamilton’s validation procedure for accuracy and precision are performed according
to the ISO-8655 standard. There are instructions on validating the Microlab 300 on
our website at www.hamiltoncompany.com/microlab300.
Microlab® 300 User Manual
81
CHAPTER 11: CARE AND MAINTENANCE
Using the density (g/mL) and the mass values of the pipetted fluid at each
volume used in calibration, the Microlab 300 determines compensation factors.
The factors are calculated from volume point to volume point for the specific
pipetting technique being used. The compensation factor is also used below
the lowest volume in the range and above the highest volume point in the range
to extrapolate additional data points beyond those measured during calibration.
Hamilton recommends completing a gravimetric test to check the validity of the
compensation factors.
Should you choose to calibrate the Microlab 300 without sending the instrument
to Hamilton Company, please follow the following calibration routine:
11.4.1 Calibration Routine
Step 1. Prime the system. Reference Section 2.10 for priming instructions.
Step 2. Enter Liquid Classes from the Configuration screen.
Step 3. Create a new Liquid Class by selecting the Microlab 300 standard Liquid Class
Aqueous300Default and then selecting Duplicate at the bottom of the screen.
Step 4. Enter a name for the new Liquid Class. It is recommended to name the calibration
Liquid Class such that it is recognized as a calibration curve. For example,
Calibration22Oct2012.
Step 5. Find the new Liquid Class on the Edit Classes screen and select Edit. Because you
duplicated the standard Liquid Class for deionized water (Aqueous300Default), all
parameters including the Liquid Density and speeds should be set appropriately for
instrument calibration using deionized water.
Step 6. Select the Number of Replicates that you will pipette at each volume point. It is
recommended that you select a number of replicates between 3 and 5.
Step 7. Select the tip size and type you would like to calibrate. Press Edit. Once again, all
parameters for the Liquid Class should not need to be modified as described in
Step 4.
Note: If pipetting over the complete volume range of the Microlab 300, it will
be necessary to perform the calibration routine with both tip sizes, once for the
50 µL tip and once for the 1 mL tip. Calibration will also need to be performed
for each tip type (non-sterile, sterile, or sterile/filtered) intended to be used with
the Liquid Class.
82
CHAPTER 11: CARE AND MAINTENANCE
Step 8. Press the Data Points icon in the lower right corner of the screen. All data points will be
pre-populated from the duplication of the original curve.
Step 9. Add or delete volume points using the icons at the bottom of the screen. For
instrument calibration it is recommended that you use a minimum of the volume
values indicated in Table 11-1. You may also select volume values that are most
commonly used in your pipetting applications.
Table 11-1 Data Points for Instrument Calibration
Tip Size
Volume (µL)
Percentage of Tip
1 mL
1000
100%
500
50%
100
10%
25
2.5%
50
100%
25
50%
5
10%
2
4%
1
2%
50 µL
Note: In the data points screen there will be a high and low volume point for
each tip size that cannot be modified. For example, the 50 µL tip has a high
point of 50 µL and a low point of 1 µL. When creating the calibration curve,
these high and low volume points will be used. Calibration will also need to be
performed for each tip type (non-sterile, sterile, or sterile/filtered) intended to be
used with the Liquid Class.
Now, the system can be gravimetrically calibrated for the selected tip size and tip type.
11.4.2 Calibration using the Liquid Class Wizard
Step 1. After adding or deleting volume points as described in Step 9 of the Calibration Routine,
select the volume value that you would like to begin calibrating.
Step 2. Select the Wizard icon in the lower right corner of the Liquid Curve Data screen. You
have now entered the Liquid Class Wizard Run screen. The number of replicates for
each volume value will be indicated by the number of lines in the table.
Microlab® 300 User Manual
83
CHAPTER 11: CARE AND MAINTENANCE
Step 3. Place a plastic or glass weighing container on the balance and adjust the weight (tare)
to zero.
Note: The recording of the weighing results requires the use of a precision
balance with a high resolution. Dispensing operations under 10 μL require a
balance with a resolution of 0.001 mg.
Step 4. Load the ClickSure tip type and size being used for calibration onto the Disposable Tip
Hand Probe.
Step 5. Press the Accept button on the probe to pre-wet the tip with deionized water.
Step 6. Press the Accept button on the Disposable Tip Hand Probe to aspirate the defined
volume of deionized water.
Step 7. Press the Accept button on the Disposable Tip Hand Probe to dispense the defined
volume of deionized water into the weighing container.
Step 8. Close the door of the balance and, after the mass has stabilized, record the mass value.
Step 9. Repeat Steps 5-8 using the same ClickSure tip for the number of replicates defined.
Step 10. Eject the ClickSure tip.
Step 11. Press the Liquid Curve Data button in the lower left corner to automatically
average the mass values provided. The averaged mass value will be populated
into the Liquid Curve Data.
Step 12. Repeat Steps 1 – 11 for the additional volume values entered in the Liquid Curve
Data screen.
You have now successfully completed instrument calibration for the tip size and
type being used. Once again, it will be necessary to perform the calibration
routine with both tip sizes, once for the 50 µL tip and once for the 1 mL tip.
Calibration will also need to be performed for each tip type (non-sterile, sterile
and sterile/filtered) intended to be used with the Liquid Class.
After calibration, validation per ISO-8655 can be performed. Please reference the
latest revision of the ISO-8655 specification for the latest procedure. To validate
the Microlab 300, follow the instructions below.
Step 1. Select Wizards from the Main Menu screen.
Step 2. Select Pipette from the Wizards screen.
Step 3. Select the Advanced button on the Run screen. Then select the Liquid Class and Tip
Type settings that you developed during the calibration routine.
Step 4. Change the Pre-wet setting to On. Then return to the Run screen.
84
CHAPTER 11: CARE AND MAINTENANCE
Note: The number of pre-wet cycles is determined in the Liquid Class. If you
need to modify the pre-wet settings, refer to Section 5.2.4 for editing Liquid
Class instructions.
Step 5. Use the parameter adjustment buttons to input the volume and tip size being tested.
It is recommended to validate each tip size at 100%, 50%, and 10% of each tip’s
total volume capacity per Table 11-1. Follow the latest revision of the ISO-8655
specification for the number of replicates to perform as well as tip reuse instructions.
Step 6. After all of the pipetting data has been collected for both tip sizes, reference Appendix
A Table A-1 to validate that your pipetting results comply within the technical
specifications of the instrument. Should the results not comply, please contact
Hamilton Company for assistance.
11.5 Cleaning the Microlab 300
This section will discuss how to properly clean the Microlab 300 and will include
discussions on the following topics:
11.5.1 Deciding When to Clean the Microlab 300
11.5.2 Cleaning the Fluid Path
11.5.3 Cleaning the Exterior of the Microlab 300
11.5.4 Cleaning the Disposable Tip Hand Probe
11.5.1 Deciding When to Clean the Microlab 300
Cleaning the Microlab 300 is dependent on how the instrument is used with
respect to the duration of use and types of solutions being used by the system.
We recommend that you clean the instrument daily. The tubing and syringes should
be purged and primed at the end of each experiment and/or each work shift. To
clean the Microlab 300, flush the system with ethanol or with 10% chlorine bleach
and deionized water solution. Avoid using caustic or acidic cleaning solutions.
Microlab® 300 User Manual
85
CHAPTER 11: CARE AND MAINTENANCE
11.5.2 Cleaning the Fluid Path
For highly critical applications, the Microlab 300 should be cleaned on a regular
basis. Use ethanol or 10% dilute chlorine bleach to clean the fluid path. See
Appendix C for chemical compatibility with the Microlab 300. Steps on cleaning
the fluid path are listed below.
When the tubing and syringes come in contact with contaminated or hazardous
samples, follow safe laboratory practices in selecting and using a cleaning fluid to
flush out the tubing and syringes.
WARNING! Follow laboratory safety procedures if the Microlab 300
instrument comes in contact with hazardous materials.
Step 1. Prepare a reservoir of cleaning fluid and place the fill tubing in the cleaning fluid reservoir.
Step 2. Direct the hand probe into the cleaning fluid reservoir.
Step 3. Press the Prime button to begin the prime cycle.
Step 4. Continue priming the system until the fluid path is clean. The number of cycles required
to clean the fluid path will depend on the level of contamination present in the system.
A good estimate is 5 – 10 cycles of the syringes or 5 – 10 times the internal volume of
the fill and probe tubing.
Step 5. When the fluid path is clean, press the Pause button to stop the priming cycle.
Step 6. Move the fill tubing from the cleaning fluid reservoir and place it into a reservoir of
deionized water.
Step 7. Direct the hand probe towards a waste container.
Step 8. Press the Prime button to continue the prime cycle.
Step 9. Continue priming the system until the fluid path is free of all cleaning fluid. Press the
Pause button to stop the priming cycle.
The system is now clean and ready for use.
11.5.3 Cleaning the Exterior of the Microlab 300
The Microlab 300 housing is moderately inert to chemical exposure. However,
some chemicals may discolor the surface of the unit.
If a spill occurs on the exterior of the instrument, wipe the surface immediately.
Wash the surface using a damp cloth with soap and water. Then dry the area.
Make sure liquids do not enter the interior of the Microlab 300.
86
CHAPTER 11: CARE AND MAINTENANCE
To disinfect the exterior surface, wipe it down with 10% chlorine bleach and
deionized water solution. Then dry the area.
Note: The cleaning guidelines presented here are meant as guide only. If
applications require different cleaning solutions, contact Hamilton Company for
more information.
11.5.4 Cleaning the Disposable Tip Hand Probe
Clean the probe with an alcohol such as methanol or ethanol. Do not soak the
probe or use acetone to clean as acetone may dissolve the plastic housing of the
probe. The Disposable Tip Hand Probe is not autoclavable.
Note: The hand probe’s fluid path is manufactured from FEP tubing that is
chemically inert. For chemical compatibility, please reference the Microlab manual
Appendix C.
Biohazard: When using the Microlab 300, always observe Good Laboratory
Practices (GLP). Wear suitable protective clothing, safety glass, and protective
gloves, particularly when handling biohazardous samples and when dealing with
spilled liquids and contaminated areas of the instrument. Avoid touching tips
discarded into the laboratory-supplied waste bin. Any surfaces on which liquid is
spilled must be decontaminated.
11.6 Storing the Microlab 300
For long term storage, prime and purge the system with ethanol to facilitate drying.
Remove the tubing and syringes. Cover the instrument to protect it from damage.
Microlab® 300 User Manual
87
CHAPTER 11: CARE AND MAINTENANCE
11.7 Replacement Component Installation
This section contains instructions for replacing the components on the Microlab 300
including the following:
11.7.1 Valve Replacement
11.7.2 Syringe Replacement
11.7.3 Tubing Replacement
11.7.4 Battery Replacement
11.7.5 O-ring Replacement
11.7.1 Valve Replacement
In this section the user will learn how to properly replace the valve onto the
Microlab 300.
Valve Shaft
Insert
Side of
Pump
Screws
Valve Stem
Valve
Actuator
Figure 11-1: Microlab 300 Valve Replacement
Step 1. Be sure both syringes have been removed from the system. Refer to Section 11.7.2
for instructions on removing the syringes.
Step 2. Remove the existing valve. The valve can easily be removed from the instrument by
simply unscrewing the two screws and pulling the valve off the instrument.
Step 3. Insert the new valve shaft into the valve actuator and rotate the valve until the valve
stem engages with the valve drive. See Figure 11-1.
88
CHAPTER 11: CARE AND MAINTENANCE
Step 4. With the valve stem and valve drive engaged, rotate the valve until the alignment pins
slip into the front of the instrument. The threaded syringe ports should point down
toward the syringe drive mechanism.
Step 5. Install the valve screws to complete the valve mounting. The final assembly of the
valve is depicted in Figure 2-12.
11.7.2 Syringe Replacement
In this section, the user will learn how to properly replace the syringes on
the instrument.
Step 1. Power the Microlab 300 on using the Power On/Off switch.
Step 2. Press the Utilities button on the Main Menu screen and select the Move Syringes
button. In the Move Syringes screen you may choose to raise or lower the syringes.
Select lower syringes. The syringe drive should move down.
Step 3. Carefully remove the syringes by turning the thumbscrews at the bottom of each syringe
counter clockwise. Then turn the glass barrel of each syringe counter clockwise.
WARNING! Be careful not to break the glass of the syringes during syringes
removal or installation. Broken glass could result in bodily harm.
Step 4. Insert the 1.25 mL syringe on the left side of the valve and turn the glass barrel
clockwise until it is finger tight. Tighten the thumbscrew at the bottom of the syringe
to secure.
Step 5. Carefully insert the 25 µL syringe on the right side of the valve and turn the glass
barrel clockwise until it is finger tight. Tighten the thumbscrew at the bottom of the
syringe to secure.
Microlab® 300 User Manual
89
CHAPTER 11: CARE AND MAINTENANCE
First, mount the threaded connection
Then, mount the Thumbscrew
Figure 11-2: Replacing Syringes on the Microlab 300
Important! Always tighten syringes so that they are finger tight. Syringes that
are over- or under-tightened can cause problems with your Microlab 300 Pipettor.
Syringes that are over-tightened may cause leaks or damage to the valve.
Syringes that are under-tightened may cause leaks.
WARNING! Use extreme caution when removing cracked or broken syringes.
Always wear protective gloves and eye wear.
11.7.3 Tubing Replacement
The Microlab 300 Pipettor has two tubing assemblies. There is a fill tubing
assembly that should be attached to the left port of the valve. To replace this
tubing, simply unscrew the existing tubing assembly and discard. Follow the
directions in Section 2.8 on installing the tubing.
The probe tubing is integrated into the Disposable Tip Hand Probe and attaches to
the right port of the valve. Follow the directions in Section 2.8 on installing the probe
tubing on the system. To replace the probe tubing, follow the instructions below.
To replace the tubing on the Disposable Tip Hand Probe, the existing tubing
needs to be removed first.
90
CHAPTER 11: CARE AND MAINTENANCE
11.7.3.1 Removing Old Probe Tubing
Step 1. Unscrew the tube fitting from the valve. Unplug the probe cable from the instrument.
Remove the tubing and probe cable from the Cable Manager.
Step 2. Unscrew the probe tip and discard.
Step 3. Cut off the tubing end with the ferrule and stainless steel ring and unthread the fitting.
Step 4. Begin by pushing the tube out through the tip of the hand probe. Then pull the
remaining tubing out and discard.
Probe Cable
Tubing Clip
Stainless Steel Ring
1/4"-28 Fitting
Tubing
Ferrule
Strain Relief
Figure 11-3: Exploded view of Disposable Tip Hand Probe cable and tubing
11.7.3.2 Installing New Probe Tubing
Step 1. Gently thread the tubing through the tip of the hand probe. The end without the flange
should go into the probe first. As the tubing is being pulled through the probe, thread
the tubing through the tubing clips on the probe cable. Pull the tubing until the flange
seats inside the end of the probe.
Step 2. Screw the new probe tip onto the probe, and tighten to ensure a good seal.
Step 3. Place the strain relief followed by the ¼”-28 threaded fitting on the non-flanged tubing
end with the threads facing the end of the tubing. Move the fitting down the tubing so
it does not interfere with the next steps.
Step 4. Place the stainless steel ring and the yellow ferrule on the non-flanged tubing end.
The correct orientation of the stainless steel ring is important; the thinner edge of the
ring should face toward the fitting as shown in Figure 11-3.
Note: Correct orientation of the ferrule is with the thinner side facing the fitting.
Microlab® 300 User Manual
91
CHAPTER 11: CARE AND MAINTENANCE
Step 5. Once all the pieces are assembled onto the tubing, wet the fitting using deionized
water. Screw the fitting into the valve while lightly pressing the tubing into the valve to
ensure a flush connection. The stainless steel ring will compress onto the ferrule and
create a tight connection between the valve and tubing.
Step 6. Re-thread the tubing and probe cable into the Cable Manager by weaving under each
tab. Plug the probe cable into one of the two probe receptacles on the instrument.
11.7.4 Battery Replacement
In the Controller, there is a battery to maintain the date and time in the event that
power is lost to the instrument. Should the battery fail, the Controller will need to
be sent in for service. The battery should have a life of 10 or more years.
11.7.5 O-ring Replacement
Step 1. Gently grasp and hold the ejection sleeve up on the probe.
Step 2. Use forceps or tweezers to remove the old O-ring from the groove on the probe.
Step 3. Discard the old O-ring.
Step 4. Gently thread the replacement O-ring onto the end of the probe and into the groove.
92
CHAPTER 12: TROUBLESHOOTING
CHAPTER 12:
Troubleshooting
This chapter includes information on troubleshooting the Microlab 300, which
includes the following topics:
12.1 Troubleshooting Guide
12.2 Getting Technical Support
12.3 Returning Instruments for Repair
Microlab® 300 User Manual
93
CHAPTER 12: TROUBLESHOOTING
12.1 Troubleshooting Guide
This section contains information on troubleshooting the Microlab 300 instrument.
Table 12-1 Troubleshooting Guide
Problem
Instrument does not
power on.
Instrument functions
normally, but display
screen fails to
illuminate.
Syringe drive is
non-responsive and
Controller displays
“Device is not
connected.”
Instrument does not
fill or dispense.
94
Possible Causes
Corrective Action
Disconnected power cord or
faulty power outlet.
Connect power cord and check
power source.
Faulty power supply.
Check the power supply to see if the
light is on when plugged in.
Controller unit not plugged into
the Syringe Drive Unit.
Check to see that the Controller unit is
plugged into the Syringe Drive Unit.
Faulty LCD.
Call the Hamilton Service Department.
Faulty pump circuit board.
Plug power supply directly into the
Controller. If the Controller illuminates
then there is an internal problem
with the Syringe Drive Unit. Call the
Hamilton Service Department.
Faulty Controller cable.
Call the Hamilton Service Department.
Power adapter is plugged into the
Controller and not the Syringe
Drive Unit.
Plug the power supply into the Syringe
Drive Unit.
Controller cable is connected into the
Accessory port and not the Controller
port on the Syringe Drive Unit.
Plug the Controller cable into the
Controller port of the Syringe Drive Unit.
Faulty or blocked tubing; blocked
or leaky fluid path.
Check tubing, valve, and syringes for
a blockage, crimps, or loose fittings;
replace tubing; either replace valve and
syringes or tighten valve and syringes.
Faulty Controller.
Call the Hamilton Service Department.
Non-functional Syringe Drive Unit.
Call the Hamilton Service Department.
Valve does not rotate (valve drives
are not engaged or valve is faulty).
Call the Hamilton Service Department.
Power is applied to Controller
and not the Syringe Drive Unit.
Plug the power supply into the Syringe
Drive Unit.
CHAPTER 12: TROUBLESHOOTING
Problem
Persistent air or leaks
in the fluid path.
System fluid leaks
from syringes.
Instrument gives
inaccurate or
imprecise results.
Possible Causes
Corrective Action
Loose, worn, or incorrect
tubing fittings.
Hand-tighten the fittings or replace old
tubing with new tubing.
Fill tubing is not fully
submerged in the reservoir.
Make sure the fill tube is fully
submerged in the reservoir.
Dispense speed is too slow to
dislodge the bubbles from the
fluid path.
Increase dispense speeds.
Damaged or worn syringe or
plunger tip.
Replace the syringe.
Damaged valve.
Replace the valve.
Loose syringes.
Tighten the syringes.
Damaged or worn syringe or
plunger tip.
Call the Hamilton Service Department.
Controller cable is connected
into the Accessory port and not
the Controller port.
Replace the syringe.
Check to see that fill tubing is totally
submerged in reservoir.
Check to see that tubing connections
are tight; replace if necessary.
Instrument does
not fill or dispense.
Air exists in the fluid path.
Check to see that the syringes are
installed correctly and that they are
not leaking.
Replace worn or leaking valves
or tubing.
Increase dispense speed to dislodge
air bubbles from the system.
Liquid Classes are not
set correctly.
Unit is overheated.
Inadequate ventilation, room
temperature too high, or duty
cycle too high.
Microlab® 300 User Manual
Reset Liquid Classes to the
application solution.
The unit is overheated. Power it off
and allow it to cool down.
Resume use at a lower duty cycle.
95
CHAPTER 12: TROUBLESHOOTING
12.2 Getting Technical Support
If a problem persists even after attempts to correct it, contact Hamilton Company
Technical Support or Service Department. To expedite service, please have the
instrument part number and serial number ready and available. Please be able to
provide application specific information (drive speeds and liquids being used).
In the United States and Canada:
In Switzerland:
Hamilton Company, Inc.
Hamilton Bonaduz AG
4970 Energy Way
Via Crusch 8
Reno, Nevada 89502
Ch-7402 Bonaduz, GR,
Switzerland
Customer Service
+1 (888) 525-2123
Customer Service
+41 81-660-60-60
Technical Support/Service
+1 (800) 648-5950
Outside the U.S.
+1 (775) 858-3000
96
Fax +41 81-660-60-70
CHAPTER 12: TROUBLESHOOTING
12.3 Returning Instruments for Repair
Before returning an instrument to Hamilton please contact Hamilton Company
and request a Returned Materials Authorization number (RMA).
Note: Do not return instruments to Hamilton Company without an RMA
number. This number assures proper tracking of your instrument. Instruments
that are returned without an RMA number will be sent back to the customer
without being repaired.
Biohazard: The Microlab 300 instrument MUST be decontaminated before
it is returned to Hamilton Company. To decontaminate the instrument, remove
health hazards, such as radiation, infectious diseases, corrosive agents, etc.
Provide a complete description of any hazardous materials that have been used
with the instrument.
Biohazard: Hamilton Company reserves the right to refuse a return
shipment of any Hamilton product that has been used with radioactive,
microbiological substances, or any other material that could be hazardous to
Hamilton employees.
Important! Do not return syringes, tubing or valves with your instrument.
Hamilton Company will assume that they pose a health hazard and will
destroy them.
Microlab® 300 User Manual
97
APPENDICES
Appendices
Appendix A – Technical Specifications
Table A-1 Technical Specifications
Problem
Possible Causes
Accuracy
Refer to Table A-2
Precision
Refer to Table A-2
Syringe size
25 µL and 1.25 mL
Volume range
0.5 – 1000 µL
Fluid path
Borosilicate glass, PTFE, CTFE, PFA, FEP
Program memory
2 GB
Communication type
Serial
Power requirements
100 – 240V 1.5A max 50 – 60 Hz
Power rating
24 VDC, 2.5A
Certifications
CE, IVD1, CSA Installation category I and Pollution degree 22
Dimensions
6.5 x 7.0 x 14 inch (165.1 x 177.8 x 355.6 mm)
Weight
6.5 lbs (2.9 kg)
Shipping dimensions
19 x 10.1 x 11 inch (482.6 x 256.5 x 279.4 mm)
Shipping weight
11.5 lbs (5.2 kg)
Operating temperature
41 – 104 °F (5 – 40 °C)
Storage temperature
-4 – 158 °F (-20 – 70 °C)
Humidity range
20 – 90% non-condensing
Compliance
FCC Part 15, Class B; EMC: EN 61326-1, Class B
Indoor Operation and Use Only
1 – only for the instruments that are designated for IVD
2 – Per Section 3.6.6.2 “pollution degree 2” is defined as “normally only non-conductive pollution occurs (addition of foreign matter,
solid, liquid or gaseous (ionized gasses), that may produce a reduction of dielectric strength or surface resistivity).” Occasionally,
however a temporary conductivity caused by condensation must be expected.
The data for accuracy and precision only applies after instrument calibration using Hamilton ClickSure pipette tips.
98
APPENDICES
Table A-2 Microlab 300 Accuracy and Precision Specifications for
Deionized Water
Volume (µL)
Accuracy (±%)
Precision (+%)
0.5
7.00%
8.00%
1.0
4.00%
4.00%
5.0
1.50%
1.00%
10
1.00%
0.90%
20
0.90%
0.65%
25
0.85%
0.60%
50
0.80%
0.50%
100
0.80%
0.40%
200
0.75%
0.35%
250
0.75%
0.35%
500
0.75%
0.35%
750
0.50%
0.20%
1000
0.40%
0.15%
The data for accuracy and precision only applies after instrument calibration using
Hamilton ClickSure pipette tips.
Microlab® 300 User Manual
99
APPENDICES
Table A-3 Microlab 300 Accuracy and Precision Specifications for Bovine
Serum Albumin (87 mg/mL)
Volume (µL)
Accuracy (±%)
Precision (+%)
1
27.99%
7.42%
5
8.42%
3.34%
10
5.61%
1.95%
25
2.34%
0.60%
50
1.60%
0.50%
100
0.86%
0.40%
500
0.57%
0.35%
1000
0.40%
0.15%
The data for accuracy and precision only applies after instrument calibration using Hamilton
ClickSure pipette tips.
Table A-4 Microlab 300 Accuracy and Precision Specifications for
Isopropyl Alcohol (99.5%)
Volume (µL)
Accuracy (±%)
Precision (+%)
1
20.53%
9.80%
5
8.71%
1.24%
10
7.60%
0.90%
25
4.02%
0.87%
50
2.70%
0.53%
100
1.82%
0.66%
500
0.76%
0.35%
1000
0.50%
0.18%
The data for accuracy and precision only applies after instrument calibration using Hamilton
ClickSure pipette tips.
100
APPENDICES
Appendix B – Replacement Parts and Accessories
Table B-1 Replacement Syringes
Description
Part Number
25 µL, Microlab 300 syringe
66088-15
1.25 mL, Microlab 300 syringe
66088-40
Thumbscrew (1/pack)
66829-01
Table B-2 Replacement Controller Parts
Description
Part Number
Controller cable
66063-01
Microlab 300 SD card
67255-01
Table B-3 Replacement Valves
Description
Part Number
Microlab 300 Valve Assembly
66008-01
Table B-4 Replacement Tubing
Description
Part Number
12 gauge fill tubing
61614-01
Microlab® 300 User Manual
101
APPENDICES
Table B-5 Disposable Tip Hand Probe and Tips
Description
Part Number
Disposable Tip Hand Probe
63960-01
Tubing Kit
67098-01
1
O-ring Kit (5 pack)
67103-01
50 µL, non-sterile ClickSure tips, 960 tips racked
235537
50 µL, non-sterile ClickSure tips, 960 bulk
235543
50 µL, sterile ClickSure tips, 960 tips racked
235536
50 µL, sterile, filtered ClickSure tips, 960 tips racked
235544
1 mL, non-sterile ClickSure tips, 960 tips racked
235539
1 mL, non-sterile ClickSure tips, 960 bulk
235545
1 mL, sterile ClickSure tips, 960 tips racked
235538
1 mL, sterile, filtered ClickSure tips, 960 tips racked
235546
Tubing clips (5 pack)
88990
1- Includes 5 ferrules, 5 stainless steel rings, 5 ¼"-28 fittings, 5 strain reliefs, 12 gauge tubing and a
probe tip.
Table B-6 Microlab 300 Cable Management
102
Description
Part Number
Cable Management System
65160-01
Accessory Holder
65176-01
Cable Manager
65169-01
Probe Holder
65461-01
Thumbscrew (1/pack)
65164-01
APPENDICES
Table B-7 Power Supply
Description
Part Number
Power supply
61092-01
Table B-8 Replacement Power Cords
Description
Country
CH
Switzerland
355008
Standard CEE 7/7
Continental Europe,
Russia, Schuko
3892-01
Standard AS 3112
Australia, New Zealand,
Argentina, China
3892-02
Standard BS 1363
UK, Ireland, Malaysia,
Middle East
3892-03
Standard NEMA 5-15p
USA, Canada, Mexico,
Central America, Brazil
3892-05
Microlab® 300 User Manual
Diagram of Plug
Part Number
103
APPENDICES
Table B-9 Accessories
Description
Part Number
Cable Management System
65160-01
Tubing Clips (5/pack)
88990
Table B-10 User Manual
104
Description
Part Number
Microlab 300 User Manual
67258-01
APPENDICES
Appendix C – Chemical Compatibility
This section contains information about chemical compatibility with the Microlab 300
instrument at room temperature. The fluid path consists of the inside syringe barrel
which is made of borosilicate glass, the tip of the syringe plunger which is made of
PTFE and the internal valve components which are made of PTFE and CTFE.
LEGEND:
0 = No data available
A = No effect, excellent
B = Minor effect, good
C = Moderate effect, fair
D = Severe effect, not recommended
Chemical
PTFE
Borosilicate Glass
CTFE (Kel-F)
Acetaldehyde
A
A
A
Acetates
A
B
A
Acetic acid
A
A
A
Acetic anhydride
A
0
A
Acetone
A
A
A
Acetonitrile
A
A
A
Acetyl bromide
A
0
0
Ammonia
A
A
A
Ammonium hydroxide
A
0
A
Ammonium phosphate
A
0
A
Ammonium sulfate
A
0
A
Amyl acetate
A
A
A
Aniline
A
A
A
Benzene
A
A
B-C
Benzyl alcohol
A
A
A
Boric acid
A
0
A
Bromine
A
A-B
A
Microlab® 300 User Manual
105
APPENDICES
106
Chemical
PTFE
Borosilicate Glass
CTFE (Kel-F)
Butyl acetate
A
A
A
Butyl alcohol
A
A
B
Carbon sulfide
A
A
A
Carbon tetrachloride
A
A
B-C
Chloracetic acid
A
A
A
Chlorine, liquid
A
A
B
Chlorobenzene
A
0
B
Chloroform
A
A
B
Chromic acid
A
A
A
Cresol
A
A
A
Cyclohexane
A
A
B
Ethers
A
A
B
Ethyl acetate
A
A
B-C
Ethyl alcohol
A
A
0
Ethyl chromide
A
0
B
Ethyl ether
A
0
A-B
Formaldehyde
A
A
A
Formic acid
A
A
A
Freon 11, 12, 22
A
A
B-C
Gasoline
A
A
A
Glycerin
A
A
A
Hydrochloric acid
A
A
A
Hydrochloric acid (conc)
A
A
A
Hydrofluoric acid
A
D
B
Hydrogen peroxide
A
A
B
Hydrogen peroxide (conc)
A
A
B
Hydrogen sulfide
A
0
A-B
Kerosene
A
A
A
Methyl alcohol
A
A
A
Methyl ethyl ketone (MEK)
A
A
A-B
APPENDICES
Chemical
PTFE
Borosilicate Glass
CTFE (Kel-F)
Methylene chloride
A
A
B
Naptha
B
0
A
Nitric acid
A
A
A
Nitric acid (conc)
A
A-B
A-B
Nitrobenzene
A
A
A-B
Phenol
A
A
B
Pyridine
A
0
A
Silver nitrate
A
A
B
Soap solutions
A
A
A
Stearic acid
A
A
0
Sulfuric acid
A
A
A
Sulfuric acid (conc)
A
A
A
Sulturous acid
A
0
A-B
Tannic acid
A
0
A-B
Tanning extracts
0
0
0
Tartartic acid
A
0
B
Toluene
A
A
B
Trichlorethane
A
A
B
Trichlorethylene
A
A
B-C
Turpentine
A
A
A
Water
A
A
A
Xylene
A
A
B-C
Microlab® 300 User Manual
107
APPENDICES
Appendix D – Instrument Performance Test Reports
The Microlab 300 is shipped with two calibration certificates that validate the
instrument successfully completed the gravimetric testing per ISO-8655.
Figure D-1 Example Calibration Certificate
108
GLOSSARY
Glossary
Accept button
This button is located on the Disposable Tip Hand Probe and is designed to
trigger the syringe drive unit to perform the next step in an application. It is also
used to select OK in popup screens or to enable the Run functionality.
Accessory Holder
This component is part of the Cable Management System and connects directly
to either side of the Syringe Drive Unit to support the Probe Holder and Cable
Manager. See Section 2.6 on functionality and assembly of the Accessory Holder.
Accessory receptacle
This is a port on the Syringe Drive Unit that will be used for future expansion of
the Microlab 300 Series Pipettor.
Aspirate
To take in a defined volume of liquid into a ClickSure tip on the Disposable Tip
Hand Probe.
Aspirate speed
Defines how quickly the fluid is aspirated. Slower speeds may be used for
viscous and/or volatile fluids to prevent cavitation and/or boiling.
Aliquot Wizard
A Wizard in which fluid is distributed multiple times in equal volume increments.
Back button
This button will take the user back to the previous screen.
Blowout
Removing excess fluid remaining in the tip using air in the system.
Button mapping
This function will allow the user to change the handedness on the Disposable Tip
Hand Probe to either left- or right-handed.
Microlab® 300 User Manual
109
GLOSSARY
Cable Management System
This is the component that attaches to either side of the Microlab 300 that holds
the Disposable Tip Hand Probe. See Section 2.6 on functionality and assembly
of the Cable Management System.
Cable Manager
This component connects to the Accessory Holder of the Cable Management
System and helps hold the probe cables and tubing off of the lab bench. See
Section 2.6 on functionality and assembly of the Cable Manager.
Cancel button
This button is located on the Disposable Tip Hand Probe and is designed to stop
the syringe drive unit from performing an application. It is also used to cancel
popup screens or to enable the Empty Tip functionality.
Change buttons
These are buttons that are used to edit fields such as date and time in the
different screens.
ClickSure tips
These are the tips that are validated for the Microlab 300 Series Pipettor and are
compatible with the Disposable Tip Hand Probe.
ClickSure Tip Volume Indicator
This indicator shows the current volume of solution in the ClickSure Tip.
Configuration screen
This is the screen on the Controller where the user can set Liquid Class,
Hardware settings, Software settings, Security Settings, Log Settings and User
accounts for the unit.
Controller receptacle
This is the receptacle where the grey, 6 pin Mini DIN Controller cable connects
from the Controller to the Syringe Drive Unit.
110
GLOSSARY
Controller unit
This component allows the user to send operating instructions to the Syringe
Drive Unit.
Cycle
A series of two strokes, aspirate and dispense, that comprise both the up and
down movements of the syringe drive mechanism.
Default
A factory setting; for example, a default aspirate speed for each syringe size.
Delete
To remove a method or file.
Delete button
This button removes one character at a time from the value indicator or removes
a method or file.
Density
Defines the mass of the fluid per unit volume. Density is measured in g/mL.
Diluent
A liquid that is added to a sample to decrease the sample’s concentration.
Dilute
To reduce the concentration of solutes in a sample by adding another fluid. The
fluid that is added is called diluent and may be deionized water, for example.
Dilution Wizard
A Wizard designed to allow the user to perform a dilution, where the diluent and
sample volumes are not greater than 1 mL.
Discrete
The Discrete functionality in the Serial Dispense Wizard allows the user to
aspirate and dispense each volume in the Edit Steps one at a time rather than
aspirating the total volume of dispenses.
Microlab® 300 User Manual
111
GLOSSARY
Dispense
To distribute fluid in a single portion or in several increments from a ClickSure tip
on the Disposable Tip Hand Probe.
Dispense speed
Defines how quickly the fluid is dispensed. Slower speeds may be used for viscous
fluids to allow them to flow to the end of the tip increasing dispense accuracy.
Display screen
The touchscreen on the Controller that allows the user to program and operate
the instrument.
Disposable Tip Hand Probe
The Disposable Tip Hand Probe is the compatible probe for the Microlab 300.
The probe accepts two ClickSure tip volume sizes, 50 µL and 1 mL.
Down
Describes the movement of the syringe drive mechanism as it moves away
from valve.
Down position
This is the position of the syringe drive mechanism when it is fully extended away
from the valve.
Edit steps
This Parameter Adjustment button is the entire list of programmed serial
dispenses that can be edited. These volumes may be modified, deleted, or
additional volumes may be added.
Ethernet RJ-45
The Ethernet receptacle is located on the back of the Controller. This port will be
used for future expansion of the system.
Fluid direction indicator
This indicator shows the direction of fluid movement in or out of the ClickSure tip
in the next step.
112
GLOSSARY
Fill tubing
A tubing line that connects the fill reservoir to the valve inlet port on the left side
of the valve.
Fluid Path
The inside surfaces of the valve, syringe(s) and tubing that contact the system fluid.
Hand probe
See Disposable Tip Hand Probe.
Hold
The Serial Dispense Wizard dispenses volumes from the Edit Steps one at a time
in order from the first dispense to the last. When the last dispense is reached it
starts over with the first dispense volume. Enabling the Hold functionality causes
the current dispense to be dispensed repeatedly until the Hold is disabled at
which time the Serial Dispense Wizard will move to the next dispense.
Icon buttons
These buttons are used to provide the major navigation from function-to-function
within the user interface.
In vitro Diagnostic Device (IVD)
Devices that are used to perform diagnoses in a controlled environment outside
of a living organism.
Keypad buttons
These buttons are used to add and clear numbers and characters from the
value indicator.
Keypad toggle
This toggles the keypad between letters and numbers.
Linked Method
The run-only electronic protocol (eSOP) comprised of a sequence of Wizards
or Favorites.
Microlab® 300 User Manual
113
GLOSSARY
Linked Method Editor
The program used to connect several Wizards in a sequence to create a
complete pipetting application called a Linked Method.
Liquid Class
A solution setting in the instrument that allows for users to customize their system
based on liquid used in the application.
Main Menu
The main screen on the Controller for the Microlab 300. This is the screen used
to navigate from and to all other screens.
Memory
The information storage capacity of the instrument.
Method
A complete series of repeatable functions that can be performed by Microlab 300
instruments. These functions may consist of pipetting, aliquoting, diluting, etc.
Mix
This is a Wizard in the Linked Method screen that allows the user to mix a sample
by aspirating and dispensing.
Number of pre-wet cycles
The number of aspiration and dispense cycles that will occur prior to aspiration of
the desired volume to wet the inside of the ClickSure tip.
Number of replicates
Defines the number of times a particular volume will be pipetted and weighed
during gravimetric calibration. The software will calculate the average mass from
these replicates and use this average mass value and the density to adjust the
data points of a Liquid Class curve.
Numeric keypad
A group of keys on the Controller display that are used to enter numeric data.
114
GLOSSARY
OTG USB Port
The OTG USB port is located on the back of the Controller. This port is used for
diagnostics and testing at Hamilton Company prior to shipment.
Parameter adjustment buttons
These buttons show the current dispense volume and tip settings. The exact
function for these buttons will be defined in greater detail in the Wizards and
Linked Method sections of the manual.
Parameter indicator
This indicator shows the value of a parameter but does not allow for the
adjustment of the parameter.
Pipette
To measure a fixed amount of liquid with a probe and then dispense that same
volume of liquid into a vessel.
Pipette Wizard
A Wizard designed to allow the user to program a pipetting application.
Power cycle
To turn the Microlab 300 off and then back on.
Power down
To turn an electrical device off.
Power on/off switch
The switch on the back of the instrument used to turn the Microlab 300 on and off.
Post-aspirate delay
Defines the amount of time the system waits after an aspiration to allow the
system to reach mechanical and pressure equilibrium. The operator is expected
to maintain the tip within the fluid during this time interval. Longer delays may be
needed to adjust for faster aspirate speeds and/or more viscous fluids.
Microlab® 300 User Manual
115
GLOSSARY
Post-blowout delay
Defines the amount of time the system waits after dispensing the blowout and before
re-aspirating the blowout volume in preparation for the next pipetting activity.
Post-dispense audible
If enabled, an audible buzzer will indicate that a dispense is complete.
Post-dispense delay
Defines the amount of time the system waits after a dispense to allow the system
to reach mechanical and pressure equilibrium. The operator is expected to
maintain the tip in a proper dispensing position during this time interval. Longer
delays may be needed to adjust for faster dispense speeds.
Pre-blowout delay
Defines the amount of time the system waits after dispensing fluid and before
dispensing the blowout.
Pre-wet
This is a step setting that allows the user to aspirate and dispense a solution x
times to pre-wet the pipette tip that is to be used in the step. This improves the
accuracy of the dispense.
Prime
The act of making the Microlab 300 ready for operation by running fluid through
the fluid path (tubing, valve, syringes) to remove all air bubbles. The system must
be primed prior to use and between fluid changes.
Probe holder
This is part of the Cable Management System that holds the Disposable Tip
Hand Probe in place.
Probe receptacle
This is the port where the hand probe connects to the Syringe Drive Unit.
Probe tubing
This is the tubing that is installed in the Disposable Tip Hand Probe.
116
GLOSSARY
Range indicator
When putting numerical values for volumes and speeds the pump will have a
range indicator depicting the acceptable range for the current setup.
Reservoir
A container that holds the deionized water used to prime the instrument.
Returned Material Authorization number (RMA #)
A number, assigned by Hamilton Company, which is used to trace an instrument
in the event it is returned for repair.
Reverse pipette
A pipetting technique during which a user aspirates more solution that what is to
be dispensed.
Reverse Pipette Wizard
This Wizard is used to aspirate slightly more volume than what is defined to
ensure an accurate dispense.
Run screen
This screen allows a user to control and monitor all aspects of the instrument’s
activities. Buttons and icons are used to change parameters and indicators are
designed to give current and future status of the instrument.
SD card
The SD card is used to store all the methods, Liquid Classes, and users that
are on the pump. It is also used to transfer any stored information to another
Controller or to a PC.
Serial dispense
During a serial dispense, a user repeatedly dispenses aliquots of differing
volumes at the press of a button. The total volume is drawn into the tip and then
multiple dispenses are performed as specified.
Serial Dispense Wizard
This Wizard is used to program a serial dispense using the instrument.
Microlab® 300 User Manual
117
GLOSSARY
Shift button
This button toggles letters from lowercase to uppercase.
Small icon buttons
These buttons provide additional functionality to change values on the
current screen.
Speed
See Aspirate speed and Dispense speed.
Syringe drive mechanism
The arms to which the syringe plungers connect. The movement of the
syringe drive arms moves the syringe plungers which displaces fluid, drawing
it through the system.
Syringe Drive Unit
The heart of the Microlab 300 that contains the valves, syringes, tubing and the
syringe drive mechanism.
Syringe initialization
Driving the syringe to the top of stroke towards the valve.
System fluid
The fluid originating from a reservoir that is pumped through the entire system
during priming. The recommended system fluid for the Microlab 300 is
deionized water.
Timer
The timer is a function in the Linked Method screen that allows the user to
insert a time delay after a given method step. This is most commonly used for
incubation times.
Tip eject button
This button on the Disposable Tip Hand Probe is pressed when a ClickSure tip is
discarded from the probe.
118
GLOSSARY
Trigger
To press a button on the Disposable Tip Hand Probe to elicit a response from
the instrument.
Tubing clip
A component that attaches to the side of a liquid reservoir to hold tubing lines in
the fluid.
Update
This button is used to update the software or firmware of the Microlab 300 instrument.
Value indicator
This indicator displays the current value that will be stored when the Enter button
is pressed.
Valve
The component that directs the flow of liquid through the system.
Valve actuator
The valve actuator is part of the Syringe Drive Unit that engages with the valve to
rotate the valve to the correct position at the correct time.
Valve drive motor
The valve drive motor is part of the drive unit that controls valve rotation.
Valve port
Openings in the valve assembly through which liquid flows. As the valve turns,
ports are opened or closed, directing the flow of liquid through the system tubing.
VDC receptacle
This is the receptacle where the power cord connects to the Syringe Drive
Unit to a wall outlet. There is also a VDC receptacle on the Controller used to
charge the Controller.
Viscosity
A property of liquid describing its resistance to flow. Alcohol, for example, has a
very low viscosity, whereas glycerin has a very high viscosity.
Microlab® 300 User Manual
119
INDEX
Index
A
Accept button.......................................................................35, 109
Accessory Holder .................................................................16, 22, 102, 109
Accessory receptacle...........................................................18, 19, 109
Air gap ..................................................................................59
Aliquot Wizard ......................................................................32, 59, 73, 77, 109
Alphanumeric keypad ...........................................................44
Aspirate speed .....................................................................46, 109
B
Back button ..........................................................................39, 40, 109
Batteries ...............................................................................92
Best pipetting practice .........................................................69–71
C
Cable Management System .................................................16, 22–24, 102, 104, 110
Cable Manager .....................................................................16, 22–24, 102, 110
Calibrating
Microlab 300 Series Pipettor............................................81–84
Touchscreen ....................................................................51
Cancel button .......................................................................34, 35, 110
Change button .....................................................................110
Chemical compatibility .........................................................105–107
Cleaning
Disposable Tip Hand Probe .............................................87
Exterior ............................................................................86
Fluid path.........................................................................86
120
INDEX
ClickSure tips .......................................................................29, 102, 110
ClickSure tip volume indicator..............................................40, 110
Configuration screen ............................................................110
Controller
Controller receptacle........................................................18–19, 110
Description ......................................................................16, 19–20
D
Data entry screens ...............................................................40
Delete button ........................................................................44, 45, 111
Density .................................................................................46, 111
Dilution Wizard .....................................................................32, 59, 73, 77, 111
Discrete ................................................................................60, 111
Dispense speed....................................................................112
Disposable Tip Hand Probe
Cleaning ..........................................................................87
Configuring ......................................................................34
Installation .......................................................................24–25
Operating ........................................................................35–36
E
Edit steps..............................................................................60, 112
Error Log...............................................................................32, 67, 74
Ethernet RJ-45 .....................................................................20, 112
F
Favorites ...............................................................................57, 74, 75
Firmware/software versions .................................................52–53, 68
Fluid direction indicator ........................................................40, 112
Microlab® 300 User Manual
121
INDEX
H
Hardware Configuration .......................................................49
Hold ......................................................................................60, 113
I
Icon buttons .........................................................................38, 39, 72–79, 113
Icon screens .........................................................................38
Installation
Cable Management System.............................................22–24
Disposable Tip Hand Probe .............................................24–25
Electrical connections ......................................................28
Printer ..............................................................................29
Syringes ..........................................................................89–90
Tubing .............................................................................90–91
Valve................................................................................88
K
Keypad buttons ....................................................................43–45, 113
Keypad toggle ......................................................................45, 113
L
Linked Methods
Creating...........................................................................62–63
Editing/Deleting ...............................................................65
Overview .........................................................................62
Running ...........................................................................63–64
Liquid Classes
Creating...........................................................................48–49
Editing/deleting ................................................................49
122
INDEX
Overview .........................................................................45
Parameters ......................................................................45–47
Standard .........................................................................48
Log files ................................................................................54, 67
Log settings ..........................................................................32, 54, 73
LyncStore .............................................................................47, 54, 55, 67
M
Maintenance
Cleaning ..........................................................................85–87
Daily ................................................................................81
Storing.............................................................................87
Weekly ............................................................................81
Yearly ..............................................................................81
Manual Conventions .............................................................9
Method Linker ......................................................................61–65
Mix ........................................................................................58, 77, 114
Move Syringes ......................................................................32, 67, 74
N
Number of pre-wet cycles ....................................................46, 47, 114
Number of replicates ............................................................46, 114
Numeric keypad ...................................................................43, 114
O
Ordering information ............................................................101–104
OTG USB port ......................................................................19, 20, 115
Overview of the Microlab 300 ..............................................11–14
Microlab® 300 User Manual
123
INDEX
P
Parameter adjustment button ..............................................39, 115
Parameter indicator ..............................................................40, 115
Performance test reports .....................................................108
Pick List ................................................................................41
Pipette Wizard ......................................................................58, 72, 115
Pop-up control .....................................................................41
Post-aspirate delay...............................................................46, 115
Post-blowout delay...............................................................46, 116
Post-dispense audible ..........................................................47, 116
Post-dispense delay .............................................................47, 116
Power on/off switch ..............................................................18
Pre-blowout delay ................................................................46, 116
Priming .................................................................................28, 32, 67, 72, 74, 116
Probe Holder ........................................................................16, 22–24, 102, 116
Probe receptacle ..................................................................18, 116
R
Range indicator ....................................................................44, 117
Replacement parts
Cable Management System.............................................102
Cable Management System thumbscrews .......................102
ClickSure tips ..................................................................102
Disposable Tip Hand Probe .............................................102
O-ring ..............................................................................102
Power cord ......................................................................103
Power supply ...................................................................103
124
INDEX
Syringe Drive thumbscrews .............................................101
Syringes ..........................................................................101
Tubing .............................................................................101
Valve................................................................................101
Returned Material Authorization (RMA) number ..................117
Reverse Pipette Wizard ........................................................59, 117
Run screens .........................................................................39, 117
S
Safety ...................................................................................11–14
Save ......................................................................................75
Scroll button .........................................................................35
SD card ................................................................................16, 53, 101, 117
Security Settings ..................................................................32, 53, 73
Serial Dispense Wizard ........................................................60, 73, 117
Shift button...........................................................................45, 118
Small icon buttons ...............................................................39, 40, 75–79, 118
Software configuration
Date and Time .................................................................50
Elevation ..........................................................................50–51
Syringe Drive Unit.................................................................118
System
Calibration date ...............................................................53
Memory ...........................................................................53
Trace logging ...................................................................53
Microlab® 300 User Manual
125
INDEX
T
Technical specifications .......................................................98
Technical support .................................................................96
Timer ....................................................................................77, 118
Tip eject button ....................................................................34, 36, 118
Touchscreen interface ..........................................................51–52
Trigger ..................................................................................119
Troubleshooting ....................................................................94–95
Tubing
Installing ..........................................................................26–27
Replacing ........................................................................101
U
Universal power supply ........................................................16, 103
Updating the instrument.......................................................68, 119
USB port ..............................................................................19, 20
User interface .......................................................................32
Users
Add .................................................................................55
Edit ..................................................................................55
Export and import ...........................................................55
Utilities ..................................................................................66–68
V
Value indicator ......................................................................44, 45, 119
Valve .....................................................................................88, 119
Valve actuator .......................................................................17, 88, 119
VDC receptacle ....................................................................18, 19, 119
Viscosity ...............................................................................119
126
INDEX
W
Wizards
Aliquot .............................................................................59
Dilution ............................................................................59
Pipette .............................................................................58
Reverse Pipette ...............................................................59
Serial Dispense ................................................................60
Microlab® 300 User Manual
127
©2012 Hamilton Company. All rights reserved.
Microsoft, .NET, Visual C# and Visual Basic are registered trademarks of Microsoft Corporation in the United States and other countries.
Parafilm® is a registered trademark of Pechiney Plastic Packaging, Inc. and Marathon Paper Mills Company. All rights reserved.
LabVIEW is a trademark of National Instruments. Neither Hamilton Company, nor any software programs or other goods or services
offered by Hamilton Company, are affiliated with, endorsed by, or sponsored by National Instruments.
All other trademarks are owned and/or registered by Hamilton Company in the U.S. and/or other countries.
Part No. 67258-01 — 11/2012
Web: www.hamiltoncompany.com
USA:
800-648-5950
+41-81-660-60-60
Europe:
Hamilton Americas & Pacific Rim
Hamilton Europe, Asia, & Africa
4970 Energy Way
Reno, Nevada 89502 USA
Tel: +1-775-858-3000
Fax: +1-775-856-7259
[email protected]
Via Crusch 8
CH-7402 Bonaduz, GR, Switzerland
Tel: +41-81-660-60-60
Fax: +41-81-660-60-70
[email protected]
To find a representative in your area, please visit hamiltoncompany.com/contacts.