1
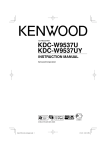
Smart Mail: User Manual of Webmail - English Version 2.0 Smart Mail: User Manual of Webmail English Version 2.0 1 Smart Mail: User Manual of Webmail - English Version 2.0 Content 1 Introduction How to start ............................................................................................................................................ 3 Webmail composition .............................................................................................................................. 4 2 Folder/ Mailbox Account/ additional folder ....................................................................................................................... 7 Create mailbox/ folder ............................................................................................................................ 8 Set mailbox/ folder.................................................................................................................................. 9 3 Send-Receive E-mail How to see new E-mail message .......................................................................................................... 10 How to read new E-mail message ........................................................................................................ 11 Composing a new E-mail message ....................................................................................................... 13 4 Address Book Create new contact ............................................................................................................................... 14 Create contact group ............................................................................................................................ 15 5 Rules and Personal Setting Create vacation message ...................................................................................................................... 16 Create rules........................................................................................................................................... 17 Change password.................................................................................................................................. 19 How to use foreign folder ..................................................................................................................... 20 Create signature format ........................................................................................................................ 20 2 Smart Mail: User Manual of Webmail - English Version 2.0 1 INTRODUCTION KSC Webmail is quite similar to other web-based E-mail services that are accessible from any standard web browsers, such as Google Chrome or Mozilla Firefox. It’s a web-based program working as clientbased program and packed with abundant functions. 1.1 How to start 1) Open web browser on your computer. Picture 1 Open web browser ** Google Chrome or Firefox are recommended. 2) Type URL, for example http://mail.th.com in the address bar on the top left of the page. You can contact Administrator or Postmaster to request for correct URL. Picture 2 Type URL to go to Webmail service. 3) At Webmail service page, fill in your email (“[email protected]”) and password. Click “Sign In” button. Picture 3 Webmail login page 4) You will get into the first page of the service. Picture 4 First page of Webmail service 3 Smart Mail: User Manual of Webmail - English Version 2.0 1.2 Webmail composition 1) Menu bar: It gives you access to sets of Webmail functions. Picture 5 Menu bar Click to lists all Mailboxes in your account. Click to to compose a new message, and send it. Click to to browse your Contact-type (Address Book) Click to setup webmail configuration Click to manage rule and auto reply message (Vacation Message) Click to log out 4 Smart Mail: User Manual of Webmail - English Version 2.0 2) Folder Tool Folder list Folder filter Total and used space Create new folder or sub-folder Picture 6 Folder management tools Section 1 Account Folder Section 2 Additional Folder Picture 7 Folder and sub-folder beneath 5 Smart Mail: User Manual of Webmail - English Version 2.0 3) Sub menu: There are sub-menus of each function. Picture below shows the sub-menu of mailbox. Section 1 You can change status, redirect and forward messages. This sub-menu appears on the top. Picture 8 Sub-menus of mailbox on the top Section 2 You can change status, move and copy messages. This sub-menu appears at the bottom. Picture 9 Sub-menus of mailbox at the bottom 4) Main Function Button: These buttons are shown in every function. Close Window Ok/ Update Cancel Help Save Edit 6 Smart Mail: User Manual of Webmail - English Version 2.0 2 FOLDER/ MAILBOX For Webmail, User can create multi-mailboxes or multi-level mailboxes. See picture 10 below, the number in the parentheses behind “INBOX” shows the number(s) of unread message(S), and the number(s) on the right shows the total message(s) in this folder. Picture 10 Mailboxes that you can create as you desire 2.1 Account/ additional folder There are 2 types of folder in Webmail system. 1) Account Folder: Sets of folder that are automatically created. You can’t delete, edit or rename, however you can create sub-folders. Inbox: Store incoming message. The new E-mail message always comes to this folder. Contacts: Store contact list. Drafts: Store draft message or message that is saved as draft. Junk: Store junk E-mail message or spam message filtered by plug-in spam. Sent Items: Store sent message. The copy of sent message is stored here. Trash: Store trash message. The deleted message is stored here. Clear this folder by clicking “Empty Trash” 2) Additional Folders: Sets of personal folders that are created by user to classify messages or information. 7 Smart Mail: User Manual of Webmail - English Version 2.0 2.2 Create mailbox/ folder User can create mailbox/ folder as desires by just follow the steps below. 1) Tools to create mailbox/ folder are in “Folder List Viewer and Management Tool” on the left. Picture 11 Tools to create new mailbox 2) Fill in the name of mailbox/ folder that you would like to create. You are able to create 5 categories of mailboxes. Mailbox: To store E-mails. Address Book: To store contacts. Calendar: To store calendar. Notes: To store notes. Tasks: To store tasks. Folder’s name Type of folder Picture 12 How to create new folder’s name 3) You can create sub-folder by using “/” between the names. For example, Contacts/Friend means “Contacts” is the main folder and “Friend” is the sub-folder, or INBOX/School/Friend means “INBOX” is the main folder, “School” is the sub-folder and “Friend” is the sub-folder under “School”. X Picture 13 How to use “/” to create sub-folder 8 Smart Mail: User Manual of Webmail - English Version 2.0 2.3 Set mailbox/ folder You can set each mailbox/ folder by clicking the sign “Settings” appeared on the right. Picture 14 “Settings” sign for mailbox setting Picture 15 How to set permission to access the folders Delete All Messages Remove Folder Rename Folder Access Control List Delete all messages in mailbox Delete folder, and delete sub-folder by enabling “Remove Sub-Folders” function Raname the folder Set permission to access each folder; Lookup – Able to see mailbox Select – Able to select and read messages in mailbox Seen – Able to see messages in mailbox Flags – Able to write and flag messages Insert – Able to add messages in mailbox Post – Able to post message in mailbox (currently not in use) Create – Able to create sub-folder in mailbox Delete – Able to delete message in mailbox Admin – Able to manage mailbox and set permission 9 Smart Mail: User Manual of Webmail - English Version 2.0 3 SEND-RECEIVE E-MAIL 3.1 How to see new E-mail message Normally after login, the system will redirect to the main page. Click “Unread” to see new E-mail message(s). Picture 16 Unread messages shown on main page Or you can access inbox. Click “INBOX” folder in “Folder List Viewer”, or click old and new E-mail messages will be shown. “Mail” button. Both Picture 17 List of old and new E-mail messages The status of each E-mail message will be shown, e.g. read, rank, attached or action (reply, forward, etc.) The details are as below. New and unread message Read message Message with attachment Message has been forwarded Message is replied Recently received message Message has been flaged 10 Smart Mail: User Manual of Webmail - English Version 2.0 3.2 How to read new E-mail message Click “From” or “Subject” of the message you desire to read. Delete: Delete message Reply: Reply to senders Reply to All: Reply to senders including CC list Forward: Forward message Redirect: Redirect to Previous: Go to previous message Delete & Next Unread: Delete message and go to next unread message Next Unread: Go to next unread message Print: Show ready to print format Unread: Set as unread message Flags: Flag the important message Unflag: Unflag the (used to) important message Take Address: Add sender’s E-mail address to address book Show message header: Show message header as raw text Show entire message: Show all details of the message Move: Move current message to selected folder Copy: Copy current message to selected folder Jump to the bottom: Go to the bottom of the message Jump to the top: : Go to the top of the message There are 2 types of received message; 1) General E-mail message Picture 18 General E-mail message 11 Smart Mail: User Manual of Webmail - English Version 2.0 2) Calendar message: It is sent from whom creates the meeting date, and the receiver is invited to the meeting. Functions in calendar consist of; Accept: Accept to join the meeting Decline: Deline to join the meeting Tentative: Not sure yet Picture 19 Calendar message 12 Smart Mail: User Manual of Webmail - English Version 2.0 3.3 Composing a new E-mail message In order to compose an E-mail message, you will need to create a new message by clicking the icon on the menu bar. The following functions will be appeared. Save in Drafts: Save message as draft Send: Send message (message will be copied to sent items folder) Address Book: See address book (to select receivers’ E-mail addresses) LDAP Search: Find information from directory Settings: Set how to send message Address Book: See address book (to select receivers’ E-mail addresses) Picture 20 Example of composing E-mail From To Cc Bcc Subject Attachment Text Encoding Notify when Delivered Notify when Read Priority Rich formatting Copy Sent In Sent Items Sender’s name and E-mail address Receiver’s name and E-mail addresss Receiver’s name and E-mail addresss (carbon copy) Receiver’s name and E-mail addresss (blind carbon copy) Message topic Attached files Language for message Notice the sender when message is received Notice the sender when message is opened Show priority of message consisting of Low, Medium, High and Undefined Show text functions consisting of bold, dark and italic Copy sent message to sent items folder 13 Smart Mail: User Manual of Webmail - English Version 2.0 4 ADDRESS BOOK Click button on menu bar to get into address book function. Picture 21 Contacts address 4.1 Create new contact Click button on sub-menu of “Contacts”. Fill in new contact information. Click confirm. button to Picture 22 Create new contact 14 Smart Mail: User Manual of Webmail - English Version 2.0 4.2 Create contact group Click button on sub-menu of “Contacts”. Fill in group’s name behind “File As”. Fill in new contact(s) behind “E-mail” or click button to find contacts from address book. Click “Add Contact” to add new contacts to the group. Click button to confirm. Picture 23 Create contact group 15 Smart Mail: User Manual of Webmail - English Version 2.0 5 RULES AND PERSONAL SETTING 5.1 Create vacation message In case user is on vacation or can’t reply to incoming message, user can creat auto-reply message by clicking “Mail Control” button on menu bar, after that click “Rules”. Fill in auto-reply messages behind “Vacation Message”. Use special text “^F” in stead of sender’s name, then click “Enable” to active the function. When user needs to cancel auto-reply message, simply delete right sign from the square behind “Enable” then click button to confirm. Picture 24 How to create auto-reply message 16 Smart Mail: User Manual of Webmail - English Version 2.0 5.2 Create rules Rules are created to manage and control incoming messages. Start from add rule’s name behind “Add New” then click “Create” button. Click “Edit” button to set rules and conditions. 3 1 2 Picture 25 Create rules’ name Picture 26 Create rules’ condition 17 Smart Mail: User Manual of Webmail - English Version 2.0 Rules consist of 2 main parts. 1) Data: Set the rules of information appeared in any message. From Sender Return-Path To Cc Any To or Cc Each To or Cc Reply-To ‘From’ Name Subject Message-id Message size Time of Day Current Date Current Day Human Generated Header Filed Any Recipient Each Recipient Existing Mailbox Source From (sender) Sender E-mail address to be replied To (receiver) Carbon copy to (receiver) To or carbon copy to anyone (receiver) To or carbon copy to a person (receiver) Reply to (receiver) From (sender) name Subject Message-id Message size Time of message received Current date (Monday, Tuesday, Wednesday, etc.) Current day Generated by human (not computer) Message’s header One recipient Every recipient Mailbox that was created Information source 2) Action: Set the rules that system must follow under some conditions If data is [ ] Then Action [ ]; follow the rules if following conditions appear Store in Store Encrypted in Mark Add Header Tag Subject Reject with Discard Stop Processing Remember ‘Form’ in Accept Request Store data in Store encrypted data in Mark Add Header Add specific message in subject Reject with Discard any action Stop processing Save sender in Accept request Parameter Mailbox’s name Mailbox’s name Header’s message message message Address book’s name 18 Smart Mail: User Manual of Webmail - English Version 2.0 Example of how to create rules Ex1- Discard (don’t receive) invalid E-mail format Data: Message-Id is not *@* Action: Discard Ex2- - Discard (don’t receive) E-mail message that requests receiver to reply to [email protected] Data: Return-Path is <[email protected]> Action: Discard Ex3- Mark flagged E-mail messages come after 8:15 a.m. Data: Time Of Day is greater 8:15 a.m. Action: Mark Flagged Ex4- If E-mail header includes “X-Spam”, add “X-Color” Header Field and add subject as [SPAM] Remark: X-Color is the color command, here is set as red Data: Header Field is X-Spam: * Action: Header X-Color: red Action: Tag Subject [SPAM] Ex5- If E-mail subject includes *list*, mark flagged this E-mail as important message Data: Sender is *list* Action: Mark Flagged Ex6- If E-mail message comes from abcdef.com, move to “ABCDEF” mailbox which is the sub-folder of “INBOX” Data: From is *@abcdef.com Action: Store in INBOX/ABCDEF Ex7- If E-mail message comes from [email protected] who are boss, mark flagged this E-mail as important message Data: From is [email protected] Action: Mark Flagged 5.3 Change password Click “Setting” button, choose “Password” tab in sub-menu Picture 27 Change password 19 Smart Mail: User Manual of Webmail - English Version 2.0 5.4 How to use foreign folder Foreign Folder means other person’s folder which has access setting (Lookup, Select, Seen, Flags, etc.) If you aer permitted to access other person’s folder, you can use mentioned folder by clicking “Management” button appeared in tools bar on the left. In Folder Aliases page, fill the reference name of folder in “Alias Name”, fill the name of foreign folder in “Folder Name” by using the format “~username/folder_path” In below example, Global Contacts is “Alias Name”, ~service/Contacts is “Folder Name”, to access Contacts folder of the user named “service”. Reference the mention folder with the name “Global Contact”. Picture 30 แสดงการใช ้งาน Foreign Folder 5.5 Create signature format To create E-mail signature, click “Setting” button on menu bar. Choose “Compose” tap in submenu. New window will be appeared. Add data and signature in the space behind “Signature”, then click button to save. Picture 31 Create signature format for E-mail message 20