1
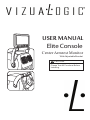
USER MANUAL
Elite Console
Center Armrest Monitor
With Adjustable Bracket
CAUTION:
Please Test All Functions Before
Installing.
Contents
Operating Instructions
USB Operations
Welc ome . . . . . . . . . . . . . . . . . . . . . . . . . . . . . . . . . . . . . . . . . . . . . . . . . . . . . . . . . . . . . . 2
S a fety Ins truc tions . . . . . . . . . . . . . . . . . . . . . . . . . . . . . . . . . . . . . . . . . . . . . . . . . 2
S witc hing DVD / U S B / Memory C a rd Mode . . . . . . . . . . . . 11
S etting R a ndom . . . . . . . . . . . . . . . . . . . . . . . . . . . . . . . . . . . . . . . . . . . . . . . . . . 11
R epea t P la yba c k . . . . . . . . . . . . . . . . . . . . . . . . . . . . . . . . . . . . . . . . . . . . . . . . . 11
C AU TIO N . . . . . . . . . . . . . . . . . . . . . . . . . . . . . . . . . . . . . . . . . . . . . . . . . . . . . . . . . . . . . . 2
WAR N IN G . . . . . . . . . . . . . . . . . . . . . . . . . . . . . . . . . . . . . . . . . . . . . . . . . . . . . . . . . . . . . 2
P R E C AU TIO N S . . . . . . . . . . . . . . . . . . . . . . . . . . . . . . . . . . . . . . . . . . . . . . . . . . . . . 3
Getting Started
Monitor F unc tion O verview . . . . . . . . . . . . . . . . . . . . . . . . . . . . . . . . . . . . . 4
When U s ing R emote C ontrol . . . . . . . . . . . . . . . . . . . . . . . . . . . . . . . . . . 5
R emote C ontrol B a ttery R epla c ement . . . . . . . . . . . . . . . . . . . . . 5
R emote C ontrol F unc tion O verview. . . . . . . . . . . . . . . . . . . . . . . . . . 5
Basic Operations
B efore U s ing the MMD . . . . . . . . . . . . . . . . . . . . . . . . . . . . . . . . . . . . . . . . . . . 7
Turning P ower O N /O F F. . . . . . . . . . . . . . . . . . . . . . . . . . . . . . . . . . . . . . . . . . . 7
P la c ing Dis c s . . . . . . . . . . . . . . . . . . . . . . . . . . . . . . . . . . . . . . . . . . . . . . . . . . . . . . . . 7
S witc hing S ourc e . . . . . . . . . . . . . . . . . . . . . . . . . . . . . . . . . . . . . . . . . . . . . . . . . . 7
F M / IR . . . . . . . . . . . . . . . . . . . . . . . . . . . . . . . . . . . . . . . . . . . . . . . . . . . . . . . . . . . . . . . . . 7
Monitor Setup
Adjus ting O S D . . . . . . . . . . . . . . . . . . . . . . . . . . . . . . . . . . . . . . . . . . . . . . . . . . . . . . 7
Adjus ting B right . . . . . . . . . . . . . . . . . . . . . . . . . . . . . . . . . . . . . . . . . . . . . . . 7
Adjus ting C ontra s t . . . . . . . . . . . . . . . . . . . . . . . . . . . . . . . . . . . . . . . . . . . 7
Adjus ting C olor . . . . . . . . . . . . . . . . . . . . . . . . . . . . . . . . . . . . . . . . . . . . . . . . 7
Adjus ting H ue . . . . . . . . . . . . . . . . . . . . . . . . . . . . . . . . . . . . . . . . . . . . . . . . . . 7
R es etting P ic ture Adjus tment . . . . . . . . . . . . . . . . . . . . . . . . . . . . 7
MMD (Open Cover Multimedia Driver)
Operations
P la ying DVD/ VC D/ C D . . . . . . . . . . . . . . . . . . . . . . . . . . . . . . . . . . . . . . . . . . . 8
Dis c Auto P la y . . . . . . . . . . . . . . . . . . . . . . . . . . . . . . . . . . . . . . . . . . . . . . . . . . . . . . . 8
DVD S etup O pera tion . . . . . . . . . . . . . . . . . . . . . . . . . . . . . . . . . . . . . . . . . . 12
G enera l S etup P a ge. . . . . . . . . . . . . . . . . . . . . . . . . . . . . . . . . . . . . . . . . . . . . 12
S etting TV Dis pla y
. . . . . . . . . . . . . . . . . . . . . . . . . . . . . . . . . . . . . . 12
S etting O S D L a ngua ge . . . . . . . . . . . . . . . . . . . . . . . . . . . . . . . . . . . . 13
S etting S c reen S a ver . . . . . . . . . . . . . . . . . . . . . . . . . . . . . . . . . . . . . . . 13
S etting L a s t Memory . . . . . . . . . . . . . . . . . . . . . . . . . . . . . . . . . . . . . . . . 13
P a s s word S etup P a ge . . . . . . . . . . . . . . . . . . . . . . . . . . . . . . . . . . . . . . . . . 13
P referenc e S etup . . . . . . . . . . . . . . . . . . . . . . . . . . . . . . . . . . . . . . . . . . . . . . 14
S etting TV Type . . . . . . . . . . . . . . . . . . . . . . . . . . . . . . . . . . . . . . . . . . . . . . . 14
S etting Audio L a ngua ge . . . . . . . . . . . . . . . . . . . . . . . . . . . . . . . . . . 14
S etting S ubtitle L a ngua ge . . . . . . . . . . . . . . . . . . . . . . . . . . . . . . . . 14
S etting Dis c Menu L a ngua ge . . . . . . . . . . . . . . . . . . . . . . . . . . . . 14
S etting P a renta l . . . . . . . . . . . . . . . . . . . . . . . . . . . . . . . . . . . . . . . . . . . . . . . 14
S etting Defa ult . . . . . . . . . . . . . . . . . . . . . . . . . . . . . . . . . . . . . . . . . . . . . . . . 14
Installation and Connections
C AU TIO N . . . . . . . . . . . . . . . . . . . . . . . . . . . . . . . . . . . . . . . . . . . . . . . . . . . . . . . . . . . 15
WAR N IN G . . . . . . . . . . . . . . . . . . . . . . . . . . . . . . . . . . . . . . . . . . . . . . . . . . . . . . . . . . 15
P R E C AU TIO N S . . . . . . . . . . . . . . . . . . . . . . . . . . . . . . . . . . . . . . . . . . . . . . . . . . . 15
P a rts Indic a tion . . . . . . . . . . . . . . . . . . . . . . . . . . . . . . . . . . . . . . . . . . . . . . . . . . 16
L imita tion . . . . . . . . . . . . . . . . . . . . . . . . . . . . . . . . . . . . . . . . . . . . . . . . . . . . . . . . . . . 17
Ins ta lla tion S teps . . . . . . . . . . . . . . . . . . . . . . . . . . . . . . . . . . . . . . . . . . . . . . . . 18
C onnec tions . . . . . . . . . . . . . . . . . . . . . . . . . . . . . . . . . . . . . . . . . . . . . . . . . . . . . . . 20
S ys tem C onnec tions . . . . . . . . . . . . . . . . . . . . . . . . . . . . . . . . . . . . . . . . . . . 21
Information
S topping P la yba c k (P R E -S TO P ) . . . . . . . . . . . . . . . . . . . . . . . . . . . . . 8
S topping P la yba c k . . . . . . . . . . . . . . . . . . . . . . . . . . . . . . . . . . . . . . . . . . . . . . . . 8
Ac c es s ories . . . . . . . . . . . . . . . . . . . . . . . . . . . . . . . . . . . . . . . . . . . . . . . . . . . . . . . 22
G enera l S pec ific a tions . . . . . . . . . . . . . . . . . . . . . . . . . . . . . . . . . . . . . . . 23
Trouble S hooting . . . . . . . . . . . . . . . . . . . . . . . . . . . . . . . . . . . . . . . . . . . . . . . . 24
P la ying S till F ra mes (PAU S E ) . . . . . . . . . . . . . . . . . . . . . . . . . . . . . . . . . . 8
F a s t-forwa rding / F a s t-revers ing . . . . . . . . . . . . . . . . . . . . . . . . . . . . 8
Wa rra nty . . . . . . . . . . . . . . . . . . . . . . . . . . . . . . . . . . . . . . . . . . . . . . . . . . . . . . . . . . . . 25
Wa rra nty C a rd . . . . . . . . . . . . . . . . . . . . . . . . . . . . . . . . . . . . . . . . . . . . . . . . . . . 26
F inding the B eginning of C ha pters . . . . . . . . . . . . . . . . . . . . . . . . . 9
S etting Dimmer . . . . . . . . . . . . . . . . . . . . . . . . . . . . . . . . . . . . . . . . . . . . . . . . . . . . . 9
S low Motion P la yba c k . . . . . . . . . . . . . . . . . . . . . . . . . . . . . . . . . . . . . . . . . . . 9
S etting Zoom In / O ut . . . . . . . . . . . . . . . . . . . . . . . . . . . . . . . . . . . . . . . . . . . . . 9
R epea ting Dis pla y P eriod (A-B ) . . . . . . . . . . . . . . . . . . . . . . . . . . . . . . 9
S etting R a ndom . . . . . . . . . . . . . . . . . . . . . . . . . . . . . . . . . . . . . . . . . . . . . . . . . . . . 9
S witc hing Angle (DVD O nly) . . . . . . . . . . . . . . . . . . . . . . . . . . . . . . . . . . . 9
U s ing N umber K ey P a d . . . . . . . . . . . . . . . . . . . . . . . . . . . . . . . . . . . . . . . . . . 9
Dis pla ying Dis c S ta tus . . . . . . . . . . . . . . . . . . . . . . . . . . . . . . . . . . . . . . . . . 10
S witc hing S ubtitles (DVD O nly) . . . . . . . . . . . . . . . . . . . . . . . . . . . . . 10
S witc hing Audio Tra c ks . . . . . . . . . . . . . . . . . . . . . . . . . . . . . . . . . . . . . . . . 10
C ha pter/ Tra c k /Title R epea t P la yba c k . . . . . . . . . . . . . . . . . . . 10
1
MMD Setup
C enter Armres t Monitor
Operating Instructions
Welcome
Thank you for purchasing the ELite Console
Monitor. This manual will help you use the
features of your new monitor.
P lea s e rea d a ll s a fety a nd opera ting ins truc tions
in this ma nua l c a refully, a nd keep this ma nua l for
future referenc e.
Safety Instructions
Please be sure to observe the following
instructions and precautions to ensure safe using of this
product. If anyone uses this product in a non-correct way
and causes the product to be broke or damaged we will
not be held responsible.
Warning:
This symbol means "Forbids this behavior."
Failure to heed them can result in serious injury
or death.
Do not operate any function that takes your
attention away from safely driving your
vehicle.
Any func tion tha t requires driver's prolonged a ttention
s hould only be performed a fter c oming to a c omplete
s top. Alwa ys s top the vehic le in a s a fe loc a tion before
performing thes e func tions . F a ilure to do s o ma y res ult
in a n a c c ident.
Do not touch the screen if it has been cracked.
Caution:
This symbol means "Please be sure to observe."
Failure to heed them can result in injury or material
property damage.
Do not repair, alter or disassemble by yourself.
Doing s o ma y res ult in a n a c c ident, fire or elec tric
s hoc k. C ons ult a reta iler or s ervic e tec hnic ia n for
ins pec tions a nd repa irs , if ma intena nc e is needed.
Halt use immediatley if an Unusual state appears.
F a ilure to do s o ma y c a us e pers ona l injury or da ma ge
to the produc t. R eturn it to your a uthorized dea ler or
nea res t s ervic e c enter for repa iring.
If the liquid crystal touches any part of your body, please
wash your hands with soap and water immediatly. If irritation
to the skin arrises contact a physician immediatly.
Do not expose the monitor to high humidity
levels.
F a ilure to do s o ma y res ult in fire or elec tric s hoc k.
Do not expose this monitor to water or any liquid.
Doing s o ma y res ult in elec tric s hoc k or damage to
the monitor.
Do not operate this monitor with wet hands.
F a ilure to do s o ma y res ult in elec tric s hoc k or damage
Do not use this monitor if the power cord has
been damaged.
Keep fingers from touching the Dvd optic eye when there
is no Dvd in the player
Doing s o ma y res ult in fire or elec tric s hoc k.
F a ilure to do s o ma y res ult in pers ona l injury or
da ma ge to the produc t.
Use only in vehicles with A 12 Volt negative ground.
Do not strike or slam the monitor down.
C hec k with your dea ler if you a re not s ure. )
If the product is used for anything other than it was designed for
it could result in fire, or electric shock or other injury.
Do not leave the disc in the car or in the player for a long period
of time.
Keep small objects such as battereis out of the
reach of children.
Doing s o ma y res ult in pers ona l injury or damage to the product.
Never expos e the dis c to direc t s unlight. H ea t a nd
humidity ma y da ma ge the dis c a nd you ma y not be
a ble to pla y it a ga in.
S wa llowing them ma y res ult in s erious injury.
If s wa llowed, c ons ult a phys ic ia n immedia tely.
Do not touch the pick-up head.
F a ilure to do s o ma y res ult in da ma ge to the produc t.
Doing s o ma y c a us e hea t to build up ins ide a nd ma y
res ult in fire.
Do not block vents or radiator panels.
Do not place hands, fingers or foreign objects in
slots or gaps.
F a ilure to do s o ma y res ult in pers ona l injury or da ma ge
to the produc t.
R ea r-S ea t E nterta inment
2
Operating Instructions
Precautions
Please read all safety and operating instructions
in this manual carefully, and keep this manual
for future reference.
Temperature
The back seat passenger must buckle the
safety belt before operating this monitor.
Do not ins e rt the U S B while driving.
F a ilure to do s o ma y re s ult in pe rs ona l
injury.
Installation
Do not operate your unit in ambient temperature
above + 50 C
32 F
122 F or below 0 C
Installation
P leas e inquire your retail s hop to c ontac t your
s pec ialized engineer or tec hnic al s taff for ins tallation.
B e s ure to c omply with this manual while
c onnec ting the c ables . Failure to do s o may res ult in
damage to the produc t.
B e s ure the s tability of the s ignal c able while ins talling.
Failure to do s o may c aus e fire or elec tric s hoc k due to
the wear of the s ignal c able.
B e s ure to c ollec t the c ables well after ins tallation.
Failure to do s o may c aus e fire or elec tric s hoc k.
Maintenance
If you have problems , do not attempt to repair the unit by
yours elf. Doing s o may res ult in pers onal injury or damage
to the produc t. Return product to you local reatil shop.
Characteristics of LCD Panel
After turning the s ys tem off, a s light ghos t of the image
will remain temporarily. This is an effec t pec uliar to LC D
tec hnology and is normal.
Under c old temperature c onditions , the s c reen may
los e c ontras t temporarily. After a s hort warm-up period,
it will return to normal.
The LC D panel is manufac tured us ing an extremely
high prec is ion manufac turing tec hnology. Its effec tive
pixel ratio is over 99.99%. This means that 0.01% of the
pixels c ould be either always O N or O F F.
Placing Disc
Ma ke s ure the la bel s ide is fa c ing you when you
pla c e the dis c .
Your pla yer a c c epts only one dis c a t a time for pla yba c k. Do not a ttempt to pla c e more tha n one dis c .
P la ying a dis c while driving on a very bumpy roa d
ma y res ult in s kips , but this will not s c ra tc h the dis c
or da ma ge the pla yer.
Damage Disc
Do not a ttempt to pla y c ra c ked, wa rped, or da ma ged
dis c s . P la ying a ba d dis c c ould s everely da ma ge the
pla yba c k mec ha nis m.
Irregular Shaped Discs
B e s ure to us e round s ha ped dis c s only for this unit
a nd never us e a ny s pec ia l s ha ped dis c s . U s e of
s pec ia l s ha ped dis c s ma y c a us e da ma ge to the
mec ha nis m.
Correct Handling
Do not drop the dis c while ha ndling.
H old the dis c s o you will not lea ve fingerprints on
the s urfa c e.
Do not a ffix ta pe, pa per, or gummed la bels to the
dis c .
Do not write on the dis c .
Do not touc h the s urfa c e.
Do not expos e the dis c to direc t s unlight.
C lea n the dis c when it is dus ty.
Ma ke s ure tha t the dis c is s mooth a nd fla t.
Do not us e c ommerc ia lly a va ila ble dis c a c c es s ories .
Incorrect
Correct
Using the remote control
Point the remote c ontrol at the remote s ens ors within 2
meters .
It may not be pos s ible to operate the remote c ontrol if
the remote c ontrol s ens or is expos ed to direc t s unlight
or interferes with objec ts .
Product Cleaning
Us e a s oft dry c loth for periodic c leaning of the
produc t. For more s evere s tains , pleas e dampen the
c loth with water only. Anything els e has the c hanc e of
dis s olving the paint or damaging the plas tic .
3
C enter Armres t Monitor
Disc Cleaning
F ingerprints , dus t, or s oil on the s urfa c e of the dis c
c ould c a us e the pla yer to s kip. F or routine c lea ning,
wipe the pla ying s urfa c e with a c lea n, s oft c loth
from the c enter of the dis c to the outer edge. If the
s urfa c e is hea vily s oiled, da mpen a c lea n, s oft c loth
in a s olution of mild neutra l detergent before
c lea ning the dis c .
Getting Started
Monitor Function Overview
8
11
12
9
10
1 2
1
3
4
5 6
7
POWER
13
11
Switch
- Press this button to open the disc cover.
12
Disc Tray
- Press PWR button to turn on or off the unit.
2
SRC
- Press S R C button to switch the display source.
DVD / AV IN1 / AV IN2
3
MUTE
䠄DVD / DVD-R / DVD-R W / DVD+ R / DVD+ R W /
VC D / C D-R OM / C D-R W䠅
13
Disc Cover
- Press MUTE button to disable or enable audio output.
4
IR Transmitter and Receiver
The receiving angle is about 30 degrees and the
receiving distance is about 2M.
5
PREV
- Press PR E V button to skip backward. (chapter).
6
NEXT
- Press NE XT button to skip forward. (chapter).
7
PLAY / PAUSE
- Press once to start playing. Press twice to pause
playing.
8
9
10
USB Port
AV Input (Game Port)
MS / MMC / SD Card Slot
R ea r-S ea t E nterta inment
4
Getting Started
When Using the Remote Control
The first time when you use the remote control, please
remove the plastic tape before using.
Remote Control Function Overview
Caution
Point the remote c ontrol a t the IR R ec iver within
2 meters .
It ma y not be pos s ible to opera te the remote
c ontrol if the remote c ontrol s ens or is expos ed
to direc t s unlight or interfere with objec ts .
The remote c ontrol is a s ma ll, lightweight
prec is ion devic e. To a void da ma ge, s hort ba ttery
life, opera tiona l errors a nd poor res pons e,
obs erve the following.
Do not s ubjec t the remote c ontrol to exc es s ive
s hoc k.
Do not put in a trous er poc ket.
K eep a wa y from food, mois ture a nd dirt.
Do not pla c e in direc t s uns hine.
R emove the ba ttery if itís not being us ed for a
long time.
B a tteries c onta in c hemic a l s ubs ta nc e, s o they
s hould be dis pos ed of properly.
Plastic Tape
Battery Replacement
1. Opening the battery case.
P ull out the battery tray.
2. Replace the battery. (CR-2025)
P ut the battery in the c as e with the (+ ) indic ation
upward as s how in the illus tration.
Battery type : Mercury Battery - CR 2025.
Placing a battery in backwards may cause a
malfunction.
1
2
3. Closing the cover.
P us h the battery tray as illus trated until a c lic k is
heard.
3
OSD
0/10
Return
Dimmer
2
3
Zoom
A-B
Random
4
5
Title
7
5
F/R
Display
8
4
Slow
1
6
19
Angle
9
USB/DVD
Source
Setup
Menu
6
7
1
8
9
10
2 CR2025
CR2025
3V
3
Warning
Do not operate any function that takes your
attention away from safely driving your
vehicle.
Any func tion tha t requires your prolonged a ttention
s hould only be performed a fter c oming to a
c omplete s top. Alwa ys s top the vehic le in a s a fe
loc a tion before performing thes e func tions .
F a ilure to do s o ma y res ult in a n a c c ident.
5
C enter Armres t Monitor
11
12
13
Sub.
15
16
11
Enter
Audio
15
VOL
RPT.
VOL
14
Mute
17
18
Getting Started
1
Power
S witc h monitor power O N/O F F
OSD Menu
E nter or exit on-s c reen dis play menu s ys tem.
2
3
OSD
4
F/R
IR Sensor
(2) P res s Twic e : S witc h IR O N/O F F.
5
USB/DVD
USB / DVD
S witc h DVD / US B / Memory C ard mode.
6
SOURCE
Display Source
Function
S witc h Number / Func tion mode.
FM Modulator (Option)
(1) P res s O nc e : S witc h F M O N/O F F. ( 87.7MHz to 88.9MHz)
Stop Playback
7
8
SETUP
DVD Setup Menu
9
MENU
Disc Menu
10
11
Cursor Buttons
Skip Backward / Forward
12
Play/Pause/Enter
ENTER
13
SUB.
14
AUDIO
Subtitle
Audio
S witc h dis play s ourc e. (DVD→AV IN1 →AV IN2)
(1) P res s O nc e: P R E -S TO P dis c playbac k.
(2) P res s Twic e : S TO P playbac k c ompletely.
E nter or exit the dis c DVD s etup menu.
R eturn to dis c c ontents menu.
(For VC D with P B C feature, P B C mus t be turned off.)
Move between the func tion items in the menu.
S kip to the previous or next c hapter / title / trac k.
(1) P res s O nc e : S tart playbac k.
(2) P res s Twic e : Paus e playbac k.
S elec t des ired s ubtitle to dis play.
S elec t des ired audio language to dis play.
S elec t des ired s earc h bac kward / forward s peed.
15
Search Backward / Forward
2X →
4X →
8X →
16X →
32X →
2X →
4X →
8X →
16X →
32X →
S elec t des ired repeat mode.
16
RPT.
17
MUTE
Repeat
(1) DVD Dis c : C hapter → Title → All→R epeat O ff
Mute
Dis able or enable audio output.
(2) C D/ VC D Dis c : R epeat 1 → R epeat All → R epeat O ff
18
19
Volume Increase / Decrease
Inc reas e / Dec reas e volume.
Number Key Pad
P res s
RETURN (1)
Return (1)
R eturns to the previous dis play.
DIMMER (2)
Dimmer (2)
VOL
0
VOL
~
9
SLOW (3)
Slow (3)
to s witc h number key pad to input data for dis c .
S elec t different LC D panel bac k-light brightnes s .
S elec t different s low playbac k modes for a VC D/DVD.
2
ZOOM (4)
A-B (5)
RANDOM (6)
TITLE (7)
DISPLAY (8)
ANGLE (9)
Zoom (4)
A-B (5)
Random (6)
Title (7)
Display (8)
Angle (9)
4
8
2
16
4
8
16
E nlarge a pic ture or ac tive image on the s c reen.
2X
3X
4X
2
3
4
R epeat playbac k of a s pec ific s e c tion within a c hapter of DVD or
a trac k.
S elec t to playbac k the c hapter / trac k randomly.
G o to dis c title.
Dis play c urrent information during playbac k.
※J P E G : C hange the brows ing effec ts during playbac k.
S elec t des ired viewing angle. (If a DVD dis c c ontains multi-angle
feature, viewing angles may be s elec ted.)
R ea r-S ea t E nterta inment
6
Basic Operations
Monitor Setup
Adjusting OSD
Before Using the MMD
Before using the MMD, please remove the card from the
Multi Media Driver (MMD).
Card
Vis ua l brightnes s , c ontra s t a nd c olor a re a djus ta ble.
· Each source is independently adjustable.
· Make adjustments within 6 seconds, otherwise the
OSD (On Screen Display) will turn off automatically.
Adjusting Brightness
1. P res s
2. P res s
Turning Power ON/ OF
1. P res s to turn O N.
2. To turn off the power, pres s a nd hold
Brightness
Adjusting Contrast
1. P res s
2. P res s
OSD
Contrast
Switching Source
1. P res s ì SRC î to c yc le through the different s ourc es .
· OSD (On Screen Display) will be turned off
automatically, when not operating more than 10
seconds.
1. P res s
2. P res s
OSD
to s elec t Color.
or
to a djus t the c olor dens ity.
C ha nge depth c a n be a djus ted from -20 (MIN) to
+ 20 (R MAX).
Color
1. P res s
2. P res s
FM ON/OFF (Option)
1. P res s
onc e: To turn O N/O F F the F M tra ns mitter.
2. When you turn on the F M, pres s
or
to
OSD
s elec t des ired F M frequenc y 87.7MHz ~ 88.9MHz or
OFF.
Hue
F/R
to
00
Resetting Picture Adjustment
1. P res s
2. P res s
IR ON/OFF
to s elec t Hue.
or
to a djus t the hue.
H ue tone c a n be a djus ted from -20 (G MIN) to
+ 20 (G MAX).
F/R
OSD
to s elec t Reset.
or
to res etting a djus tment.
R es et will be s et up in 00(media n).
To s a ve a djus tment or wa it 10 s ec onds until O S D
dis a ppea r, the a djus tment will be s a ve a utoma tic a lly.
Reset
C enter Armres t Monitor
00
Adjusting Hue
FM/IR (On/Off)
7
00
Adjusting Color Density
AV IN2
twic e: To turn O N/O F F the IR .
1. P res s
or
2. When you turn on the IR , pres s
to s elec t Contrast.
or
to a djus t the c ontra s t.
C ontra s t c a n be a djus ted from -20 (LO W) to + 20
(H IG H ).
· Be sure to put DVD in to the mortise, to ensure the
normal operation of the DVD.
· If wrong disc, upside-down disc or dirty disc have
been inserted. î NO DISCî is displayed.
s elec t O N or O F F.
00
a ga in.
O nc e the dis c is pa rtia lly pla c ed, it is dra wn in
a utoma tic a lly. P la yba c k s ta rts .
AV IN1
to s elec t Brightness.
or
to a djus t the brightnes s .
B rightnes s c a n be a djus ted from -20 (MIN) to + 20
(MAX).
Placing Discs
1. Turn on the power before pla c ing dis c s .
2. P la c e the dis c with the la bel s ide fa c ing you.
DVD
OSD
MMD Operations
Caution
Not a ll func tion will opera te for every DVD.
S ee the individua l MMDís ins truc tions for
deta ils on the fea tures s upported.
F ingerprints on a dis c ma y a dvers ely a ffec t
pla yba c k. If a problem oc c urs , remove the
dis c a nd c hec k for fingerprints on the pla yba c k s ide. C lea n the dis c if nec es s a ry.
When us ing the remote c ontrol, be c a reful to
pres s 1 button a t time. P res s ing multiple
buttons a t the s a me time ma y c a us e
erroneous opera tion.
If you s witc h the power or ignition key O F F
during pla yba c k, pla yba c k will c ontinue
where you left off when you res ume pla yba c k.
If you try to perform a n inva lid opera tion
(ba s ed on the type of dis c being pla yed),
the mes s a ge ì î will be dis pla yed on the
monitor s c reen.
A dis c type mus t ma tc h the s etting of the
s ys tem. If a wrong type dis c is ins erted, the
mes s a ge ì NO DIS C î will be dis pla yed, a nd
pla yba c k is not a va ila ble.
Stopping Playback (PRE-STOP)
during pla yba c k. ì
P R E S S P L AY
1. P res s
K E Y TO C O NTINU E î is dis pla yed, a nd pla yba c k
pa us es .
Tha t pos ition is s tored in memory.
2.
P res s Enter in the P R E -S TO P mode to return to
norma l pla yba c k.
P la yba c k s ta rts from the pos ition a t whic h it wa s
s topped.
For some disc, the position at which playback was
stopped may not be accurate.
Stopping Playback
twic e during pla yba c k.
1. P res s
î is dis pla yed, a nd pla yba c k s tops .
2. P res s
Enter
in the S TO P mode to return to norma l
pla yba c k.
P la yba c k s ta rts from the beginning.
Playing Still Frames (Pause)
to pa us e.
1. During pla yba c k, pres s
Enter
Playing DVD/VCD/CD
Place a disc with the label side facing up
To loa d dis c s , s ee ì P la c ing Dis c î on pa ge 7. P la yba c k
s ta rts .
The reverse side of a disc will not be played
automatically. Remove the disc, turn it over and
replace it.
It may take some time before playback starts after
placing a disc.
Disc Auto Play
The dis c will pla y a utoma tic a lly without pres s ing
when dis c is pla c ed.
î is dis pla yed.
2. P res s
Enter
No sound appears during the still mode.
The image or sound may stop temporarily when
playback starts from the pause mode. This is not a
malfunction.
Fast-forwarding/Fast-reversing
or
1. During pla yba c k, pres s a nd hold
to s et s ea rc h s peed (◊ 2/ ◊ 4/ ◊ 8/ x16/ x32 )
forwa rded or revers ed.
MMD Menu
1. P res s
Menu
to dis pla y MMD Menu.
2. P res s
to s elec t the des ired
item, then pres s
Enter
to c onfirm a s elec tion.
For some discs it is possible to select items directly
from the menu screen using the number keys (”0” to “9”).
MMD Menu
1. P res s
Menu
to dis pla y Video Menu.
2. P res s
then pres s
a ga in to res ume pla yba c k.
2X
4X
8X
16X
32X
2X
4X
8X
16X
32X
2. R elea s e
or
to pa us e, then pres s
return to norma l pla yba c k.
Enter
No sound appears during fast-forward / fastreverse.
Fast-forwarding / fast-reversing of a video CD is only
function if the disc incorporates playback control.
For DVD and video CD’s with playback control,
the menu screen may reappear during fastforwarding / fast-reversing.
to s elec t the des ired item, a nd
Enter
a ga in to c onfirm a s elec tion.
R ea r-S ea t E nterta inment
8
MMD Operations
Finding the Beginning of
Chapters
During pla yba c k, pres s
beginning of c ha pters .
or
Repeating Display Period (A-B)
U s e this func tion to s et a dis pla y period repea tedly.
to find the
The c ha pter / tra c k s witc hes ea c h time the button is
pres s ed, a nd pla yba c k of the s elec ted c ha pter / tra c k
s ta rts .
P res s this to s ta rt pla yba c k from the
beginning of the c urrent c ha pter or tra c k.
P res s this to s ta rt pla yba c k from the
beginning of the following c ha pter or tra c k.
R epea t A-
-S etting a dis pla y period s ta rt.
-S etting a dis pla y period end.
R epea t O ff
-C a nc eling the s etting of dis pla y period.
Setting RANDOM (On/Off)
6
RANDOM to turn the R a ndom func tion
O N or O F F.
Switching Angle (DVD only)
Setting DIMMER
Dimmer a llows you to s elec t different L C D ba c klight
brightnes s during pla yba c k.
DIMMER to turn the Dimmer func tion
O N / O F F.
O n DVDs in whic h s c enes ha ve been filmed from
multiple a ngles , the a ngles c a n be s witc hed during
pla yba c k.
1. During pla yba c k, pres s
9
ANGLE .
The a ngle s witc hes between the a ngles rec orded on
the dis c , ea c h time the button is pres s ed.
· Sometimes may be required for the angle to
change.
Slow Motion Playback
S low a llows you to s elec t different s low pla yba c k modes
for a VC D / DVD during pla yba c k.
1. P res s
3
SLOW to s elec t s low pla yba c k s peed
from norma l to Ω , 4, 8 , 16 .
2
4
8
16
2
4
8
16
2. To return to norma l pla yba c k, pres s
Using Number Key pad
func tion key to s witc h Number/F unc tion
1. P res s
mode.
2. In Number mode, inputs the numeric keys (0~ 9) da ta
for dis c .
3
SLOW
FUNCTION
3 FUNCTION KEY
repea tedly until norma l s peed pla yba c k.
· No sound is played during slow motion playback /
reverse slow motion playback.
Setting Zoom In / Out
Zooming a llows you to enla rge a pic ture or a c tive
ima ge on s c reen during pla yba c k.
1. P res s
4
ZOOM repea tedly to zoom in out on
the pla yba c k video ima ge.
2X
3X
4X
2
3
4
2. To return to norma l pla yba c k, pres s
repea tedly until ì ZO O M O F F î
9
C enter Armres t Monitor
A-B .
R epea t A-B
1. P res s
※ S upplementary explanation:
ì Chaptersî a re divis ions of movies or mus ic a l
s elec tions on DVDs .
ì Tracksî a re divis ions of movies or mus ic a l
s elec tions on video a nd mus ic C Ds .
2
5
R a ndom a llows you to s elec t to pla y the c ha pter /
tra c k ra ndomly during pla yba c k.
· Some DVDs do not have chapters.
1. P res s
1. During pla yba c k, pres s
4
ZOOM
OSD
0/10
RETURN
DIMMER
F/R
SLOW
1
2
3
ZOOM
A-B
RANDOM
4
5
6
TITLE
DISPLAY
ANGLE
7
8
9
19 NUMBER KEY PAD
MMD Operations
Displaying Disc Status
U s e the proc edure des c ribed below to dis pla y the
s ta tus (title number, c ha pter number, etc . ) of the
c urrently pla ying DVD/VC D/C D on the monitor
s c reen.
1. During pla yba c k, pres s
8
DISPLAY.
The pla yba c k s ta tus is dis pla yed.
DVD Disc
Title Elapsed
TT 01/14
CH
02/20
00:05:34
C ha pter pla yba c k time
C urrent c ha pter number
C urrent title number
Title E la ps ed
-E la ps ed pla yba c k time of c urrent
title.
Title R ema in
-R ema ining time of c urrent title.
C ha pter E la ps ed
-E la ps ed pla yba c k time of c urrent
c ha pter.
C ha pter R ema in
-R ema ining time of c urrent c ha pter.
Dis pla y O ff
-Turns off the dis pla y informa tion.
VCD / CD Disc
Title Elapsed
Track 01 / 30
05:34
Tra c k pla yba c k time
C urrent title number
S ingle E la ps ed
S ingle R ema in
-E la ps ed pla yba c k time of c urrent
title.
-R ema ining pla yba c k time of
c urrent title.
Tota l E la ps ed
-E la ps ed pla yba c k time of c urrent
dis c .
Tota l R ema in
-R ema ining pla yba c k time of c urrent
dis c .
Dis pla y O ff
-Turns off the dis pla y informa tion.
Switching Subtitles (DVD only)
With multiple s ubtitle la ngua ge DVDs , the s ubtitle
la ngua ge c a n be s witc hed during pla yba c k, or
s ubtitles c a n be hidden.
1. During pla yba c k, pres s
SUB.
.
The s ubtitle s witc hed between the la ngua ges
rec orded on the dis c a nd O F F ea c h time the button is
pres s ed.
· There may be a delay before the selected subtitle
appears.
· Not all disc with allow changing the subtitles during
playback. In these cases, select subtitles from the
MMDís menu.
· The selected subtitle language becomes the default
setting every time the power is turned on or the disc
is replaced. If the disc does not include that language,
the discís default language is selected instead.
· For some discs, the subtitles will be displayed even
when this is set to off.
Switching Audio Tracks
DVDs c a n ha ve different a udio tra c ks . Thes e a lterna te
tra c ks c a n be s witc hed during pla yba c k.
1. During pla yba c k, pres s
AUDIO
.
The s ound s witc hed between the a lterna te a udio
tra c ks rec orded on the dis c ea c h time the button is
pres s ed.
· The selected alternate track becomes the default
setting every time the power is turned on or the disc is
replaced. If the disc does not Include that track, the
discís default language is selected instead.
· Not all discs will allow changing the alternate audio
tracks during playback. In these cases, select audio
tracks from the DVD menu.
· There may be a delay before the selected alternate
track begins to play.
Video CDs With multiplex audio
Mono left
Mono R ight
Mix-Mono
S tereo
Chapter/Track/ Title Repeat
Playback
U s e this func tion to pla y the dis c ís titles , c ha pters or
tra c ks repea tedly.
1. During pla yba c k, pres s
RPT.
.
The repea t mode s witc hes ea c h time when the
button is pres s ed.
DVD Disc
C ha pter
Title
All
All
O ff
O ff
CD/VCD Disc
Tra c k
R ea r-S ea t E nterta inment
10
USB Operations
Setting RANDOM
CAUTION
· Not a ll func tion will opera te for every forma ts .
S ee the individua l U S B ís ins truc tions for deta ils
on the fea tures s upported.
· Do not us e U S B while driving your vehic le.
Alwa ys s top the vehic le in a s a fe loc a tion before
performing thes e func tions . F a ilure to do s o ma y
res ult in s erious injury or a n a c c ident.
· If you try to perform a n inva lid opera tion (ba s ed
on the type of dis c being pla yed), the mes s a ge
ì î will be dis pla yed on the
monitor s c reen.
· A dis c type mus t ma tc h the s etting of the s ys tem.
If a wrong type dis c is ins erted, the mes s a ge
ì NO T F O U ND U S B î will be dis pla yed, a nd
pla yba c k is not a va ila ble.
R a ndom a llows you to s elec t to pla y the tra c k ra ndomly
during pla yba c k.
1. During pla c yba c k, pres s
6
RANDOM .
The ra ndom mode s witc hes ea c h time when the
button is pres s ed.
MP3
R a ndom
F older
AVI
S ingle
R epea t O ne
R epea t All
R epea t O ff
Repeating Playback
Switching DVD/USB/Memory Card
Mode
After c onnec ting U S B or Memory C a rd, the unit s ha ll
s ea rc h the direc tories a utoma tic a lly, a nd s how a ll files
on the s c reen.
1. P res s
USB/DVD
to c ha nge to U S B mode or Memory
C a rd mode.
2. P res s
to s elec t des ired files or pres s
U s e this func tion to pla y the tra c ks in U S B or Memory
C a rd repea tedly.
1. During pla yba c k, pres s
RPT.
.
The repea t mode s witc hes ea c h time when the
button is pres s ed.
MP3
S ING L E
R E P E AT O NE
R E P E AT F O L DE R
R E P E AT O NE
R E P E AT AL L
F O L DE R
AVI
S ING L E
R E P E AT O F F
to s kip to the next a nd previous pa ge,
a nd then pres s
ENTER
to s ta rt o r pa us e pla yba c k.
· It may take some time to search the directories while
reading the USB or Memory Card.
3. P res s
to return to the pla yba c k menu.
Current playback information
Current playback
Chapter
Adjusting the volume
Playback / Stop
00:59 05:05
004 / 050
MP 3
MP 3
MP 3
AVI
128Kbps
2X
Fast-forwarding /
Fast-reversing
MUSIC01
MUSIC05_1
MUSIC07_2
MOVIE_03_01
PHOTO_001
Preview Area
USB
File Area
Current playback mode
Tips
When pla y photos , you c a n s ee the photos in the
P hoto P review Area .
1. P res s
ENTER to s ta rt or pa us e pla yba c k by fulls c reen a utoma tic a lly.
2. During pla yba c k, pres s
or
s ee previous
or next photo.
3.P res s
or
, the photo c a n rota te
c loc kwis e or c ounterc loc kwis e.
4.P res s
to return to index of the photos .
1
2
3
4
5
6
7
8
9
10
11
12
Slide Show
- P res s
a nd pres s
ENTER
Menu
Prev
Next
to s elec t des ired pho tos ,
to s ta rt or pa us e pla yba c k.
- P res s MENU to return to the pla yba c k menu.
11
C enter Armres t Monitor
MMD Setup
DVD Setup Operation
General Setup Page
The following steps 1 to 2 are common to each of
the DVD settings described here. Refer to each
section for details.
1. P res s a nd hold
SETUP
on the remote c ontrol.
The s etup menu a ppea rs on the monitor.
2. P res s
or
to s elec t des ired s etting item
(G enera l S etup Pa ge / Pa s s word S etup Pa ge /
P referenc e Pa ge), then pres s
.
F urther items will be dis pla yed.
GENERAL SETUP PAGE
TV DIS P L AY / O S D L ANG UAG E / S C R E E N S AVE R /
L AS T ME MO R Y
TV dis pla y, O S D la ngua ge, S c reen s a vre a nd L a s tmemory a re a djus ta ble.
1. P res s
SETUP
button on the remote c ontrol. The
s etup menu a ppea rs on the monitor.
2. P res s
or
to s elec t TV DIS P L AY /
O S D L ANG UAG E / S C R E E N S AVE R / L AS T ME MO R Y,
then pres s ENTER to c onfirm a s elec tion.
Setting TV Display (default: Wide)
· For some discs, the picture may not be set to the
selected screen size.
3. P res s
4. P res s
or
ENTER
to s elec t des ired s c reen type.
to s a ve a djus tment.
PASSWORD SETUP PAGE
PAS S WO R D MO DE / PAS S WO R D
PRFERENCE PAGE
TV TYP E / AU DIO / S U B TITL E / DIS C ME NU /
PAR E NTAL / DE FAU LT
EXIT SETUP PAGE
3. P res s
or
items , then pres s
.
4. P res s a nd hold
ENTER
. The s ettings a re s tored a nd
the s etup mode is dea c tiva ted.
5. P res s
SETUP
Wide
Normal / PS
OSD Lang
ENG
Normal / LB
Screen Saver
On
Wide
Last Memory
On
Set TV Display Mode
to c ha nge the s etting of further
ENTER
- - General Setup Page - TV Display
or ì E XIT S E TU P î to return to norma l
dis pla y.
· When settings are changed, old settings are
overwritten. Make a note of current settings before
making changes. If the vehicleís battery is
disconnected, the settings will be cleared and will
ret urn to Factory settings.
· Normal / PS (Pan-Scan)
S elec t this when c onnec ted to a c onventiona l 4: 3
s ize monitor. The pic ture will fill the entire TV
s c reen. Due to the mis ma tc h in a s pec t ra tio, pa rts
of the movie a t the extreme left a nd right s ides
will not be vis ible when pla ying a 16: 9 s ize
movie.
· Normal / LB (Letter Box)
S elec t this when c onnec ted to a c onventiona l 4: 3
s ize (norma l TV a s pec t ra tio) monitor. T here
ma y be bla c k ba nds vis ible a t the top a nd bottom
of the s c reen when pla ying a 16: 9 s ize movie.
· Wide (16:9)
S elec t this when c onnec ted to a wide s c reen TV.
This is s elec ted upon s hipment from the fa c tory.
R ea r-S ea t E nterta inment
12
MMD Setup
Setting OSD Language (default: English)
3. P res s
or
to s elec t des ired la ngua ge.
· There are 9 kinds of languages can be chosen.
(English, French, Spanish, German, Italian,
Portuguese and 、、、 )
4. P res s
ENTER
to s a ve a djus tment.
The s ettings a re s tored a nd the s etup mode is
dea c tiva ted.
- - General Setup Page - TV Display
Wide
OSD Lang
ENG
Screen Saver
On
Last Memory
On
English
French
Spanish
German
Italian
Portuguese
、、、
Password Setup Page
There is not origina l pa s s word.
1. P res s
SETUP button on the remote c ontrol. The
s etup menu a ppea rs on the monitor.
2. P res s
or
to s elec t Pa s s word S etup Pa ge.
3. P res s
to s elec t C ha nge , then pres s
F unc tion key + Number key pa d (0~ 9) to s etup
pa s s word a nd pres s ì O K î button to s a ve a djus tment.
- - Password Setup Page - Password Mode
Password
On
On
Off
Set OSD Language
Setting Screen Saver (default: On)
3. P res s
or
PASSWORD
Password Mode
OK
to s elec t s c reen s a ver O N or
O F F.
4. P res s
ENTER
to s a ve a djus tment.
- - Password Setup Page - Password Mode
- - General Setup Page - -
Password
Wide
ENG
Screen Saver
On
On
Old Password
Last Memory
On
Off
New Password
Password Mode
Setting Last Memory (default: On)
Video memory c a n c hoos e to ma nua lly O N or O F F .
or
ENTER
to s elec t la s t memory O N or O F F.
to s a ve a djus tment.
- - General Setup Page - TV Display
Wide
OSD Lang
ENG
Screen Saver
On
Last Memory
On
On
Off
Set Last Memory State
13
Confirm PWD
OK
Set Screen Saver
3. P res s
4. P res s
Change
TV Display
OSD Lang
C enter Armres t Monitor
MMD Setup
Setting Disc Menu Language (default: English)
Preference Setup
TV type, Audio, S ubtitle, Dis c Menu a nd Pa renta l a re
a djus ta ble.
1. P res s
SETUP
button on the remote c ontrol. The
s etup menu a ppea rs on the monitor.
2. P res s
or
4. P res s
or
to s elec t des ired dis c menu
la ngua ge.
5. P res s
to s elec t P referenc e S etup.
to s a ve a djus tment.
ENTER
- - Preference Page - -
3. P res s
or
to s elec t TY TYP E / AU DIO /
S U B TITL E / DIS C ME NU / PAR E NTAL / DE FAU LT, then
pres s ENTER to c onfirm a s elec tion.
TV Type
NTSC
Audio
ENG
Subtitle
Off
Disc Menu
ENG
Parental
Default
English
French
Spanish
Chinese
Japanese
Preferred Menu Language
Setting TV Type (default: NTSC)
B roa dc a s t TV S ys tem c a n be ma nua lly s witc hed.
4. P res s
5. P res s
or
to s elec t PAL / AU TO / NTS C .
to s a ve a djus tment.
ENTER
- - Preference Page - TV Type
NTSC
PAL
Audio
ENG
Auto
Subtitle
Off
NTSC
Disc Menu
ENG
Default
Set TV Standard
Setting Audio Language (default: English)
or
ENTER
4. P1tores8.s
or
to s elec t a ra ting level between
· The a re 8 kinds of levels c a n be c hos en.
(K id s a f, G , P G , P G 13, P G R , R , NC 17, Adult)
5. P res s
ENTER
to s a ve a djus tment.
- - Preference Page - -
Parental
4. P res s
5. P res s
Setting Parental (default: 8 Adult)
TV Type
AUTO
Audio
ENG
Subtitle
OFF
Disc Menu
ENG
Parental
Default
1 KID SAF
2G
3 PG
4 PG 13
5 PGR
6R
7 NC 17
8 ADULT
Set Parental Control
to s elec t des ired a udio la ngua ge.
to s a ve a djus tment.
Setting Default
U s e this func tion to res tore F a c tory s ys tem s etting.
- - Preference Page - TV Type
NTSC
Audio
ENG
Subtitle
Off
Disc Menu
ENG
Parental
English
French
Preferred Audio Language
Setting Subtitle Language (default: Off)
4. P res s
or
la ngua ge or O F F.
5. P res s
ENTER
ENTER
Spanish
Chinese
Japanese
Default
4. S elec t R E S E T to c ha nge to F a c tory s etting.
to s a ve a djus tment.
5. P res s
to s elec t des ired s ubtitle
- - Preference Page - TV Type
NTSC
Audio
ENG
Subtitle
Off
Disc Menu
ENG
Parental
Default
Reset
Load Factory Setting
to s a ve a djus tment.
- - Preference Page - TV Type
NTSC
Audio
ENG
Subtitle
Off
Disc Menu
ENG
Parental
Default
English
French
Spanish
Chinese
Japanese
OFF
Preferred Subtitle Language
R ea r-S ea t E nterta inment
14
Installation and Connections
B efore ins ta lling or c onnec ting the unit, plea s e rea d
the following a nd pa ge 2~ 3 of this ma nua l
thoroughly for proper us e.
Caution
The ba c k s ea t pa s s enger mus t fasten the safety belt
before opera ting the unit.
Warning
Make the correct connections.
F a ilure to ma ke the proper c onnec tions ma y
res ult in fire or produc t da ma ge.
Use only in cars with A 12 volt negative ground.
(C hec k with your dea ler if you a re not s ure. ) F a ilure
to do s o ma y res ult in elec tric s hoc k or injury due to
elec tric a l s horts .
Do not allow cables to become entangled in
surrounding objects.
Arra nge wiring a nd c a bles in c omplia nc e with the
ma nua l to prevent obs truc tions when driving.
Limitation
The width between the front seats must be
greater that the width of the monitor.
8” LCD Monitor 22cm
The c hink between the front s ea t a nd c enter c ons ole
box mus t be grea ter tha n the thic knes s of the bra c ket
a rms (At least 1.5cm) .
The top c over of the C enter c ons ole box s hould be
opera ted. We propos e tha t the tra ns vers e a xle mus t
be higher tha n the top c over by 3-5 cm .
B oth s ides of the bra c kets s hould not go beyond the
c a s e edge of C enter c ons ole box a nd too nea r to driver.
Do not splice into electrical cables.
Never c ut a wa y c a ble ins ula tion to s upply power to
other equipment. Doing s o will exc eed the c urrent
c a rrying c a pa c ity of the wire a nd res ult in fire or
elec tric s hoc k.
Do not damage the electrical wire when drilling
holes.
When drilling holes in the c ons ole box for
ins ta lla tion, ta kes prec a utions s o a s not to c onta c t,
da ma ge the elec tric a l wiring. F a ilure to ta ke s uc h
prec a utions ma y res ult in fire.
Keep small objects as batteries out of the
reach of small children.
Have the wiring and installation done by experts.
S wa llowing them ma y res ult in s erious injury.
If s wa llowed, c ons ult a phys ic ia n immedia tely.
Use specified accessory parts and install them
securely.
Be sure to disconnect the cable from the (-)
battery post before installing this unit.
The wiring a nd ins ta lla tion of this unit requires
s pec ia l tec hnic a l s kill a nd experienc e. To ens ure
s a fety, a lwa ys c onta c t the dea ler where you
purc ha s ed this unit to ha ve the work done.
B e s ure to us e only the s pec ified a c c es s ory pa rts .
U s e of other tha n des igna ted pa rts ma y da ma ge this
unit interna lly or ma y not s ec urely ins ta ll the unit in
pla c e. This ma y c a us e pa rts to bec ome loos e
res ulting in ha za rds or produc t fa ilure.
Arrange the wiring so it is not crimped or
pinched by a sharp metal edge.
R oute the c a bles a nd wiring a wa y from moving pa rts
(like the s ea t ra ils ), s ha rp or pointed edges . This will
prevent c rimping a nd da ma ge to the wiring. If
wiring pa s s es through a hole in meta l, us e a rubber
grommet to prevent the wires ins ula tion from being
c ut by the meta l edge of the hole.
Drilling can cause airborne debris.
Airborne debris c a n c a us e s erious injury to the eyes .
Wea r protec tive eye-wea r when drilling.
Precautions:
This will reduc e a ny c ha nc e of da ma ge to the unit in
c a s e of a s hort-c irc uit.
Be sure to connect the color coded leads
according to the diagram.
Inc orrec t c onnec tions ma y c a us e the unit to
ma lfunc tion or da ma ge to the vehic le's elec tric a l
s ys tem.
When making connections to the vehicle’s
electrical system, be aware of the factory
installed components. Do not tap into these leads
to provide power for this unit.
F a ilure to do s o ma y res ult in da ma ge to the unit or
vehic le. When it doubt, plea s e c ons ult your dea ler.
This unit uses female RCA-type jacks for
connection to other units (e.g. amplifier) having
RCA connectors.
You ma y need a n a da ptor to c onnec t other units . If
s o, plea s e c onta c t your a uthorized dea ler for
a s s is ta nc e.
15
C enter Armres t Monitor
Installation and Connections
Parts Indication
L C D Monitor
O uts ide C over O f R ight (left) B ra c ket
O pen C over DVD P la yer
P la s tic Wa s her
S igna l C a ble (blue)
Mounting P la te
O uts ide C over O f Tra ns vers e Axle
S igna l C a ble (bla c k)
Antenna
Tra ns vers e Axle
R ea r-S ea t E nterta inment
16
Installation and Connections
Caution:
Caution:
T h e b a c k s e a t p a s s e ng e r mu s t fasten
th e s a fe ty b e lt b e fo r e o p e r a ting
th e u nit.
Limitation
Please use the shape of the
c o n s o le and the position of the
folded monitor to determine the angle
and position of the bracket installation
Wh e n th e m o n ito r is fo ld e d , it s h o u ld be
pa r a lle l to th e fr o n t o f the c o n s o le bo x,
a n d k e e p d is ta n c e m o r e th a n 1 c m . ( F ig u r e B )
Vertical Installation:
The width between the front seats must be greater
than the width of the monitor.
8” LCD Monitor
22cm
If the s ha pe of c ons ole box is s imila r to F igure A,
plea s e make sure the bra c ket a nd top c over of c ons ole box
is 90 degrees , t h e n c o n t i n u e to ins ta ll.
The space between the front seat and center
console box must be greater than the thickness of
the bracket arms (At least 1.5cm).
90
22
1cm
Figure A
1.5
Both sides of the brackets should not go beyond
the cases edge of the center console box and not to close
to the driver.
When you install the bracket, please make sure
the height of the left and right bracket should be the
same, and vertical with the transverse axle.
Oblique Installation:
If the s ha pe of the c ons ole box is s imila r to F igure B ,
then let the bra c ket a nd inc line of c ons ole box stay
pa ra llel, t h e n c o n t i n u e t o ins ta ll.
B efore ins ta lla tion, plea s e ens ure the monitor will not
touc h the c a r ma ts when it’s folded down.
To ensure the top cover of the console box can be
operated, the transverse axle must be higher than
the top cover of console box 3~5cm distance..
3~5
1cm
Figure B
17
C enter Armres t Monitor
Parallel
Correct
Correct
Incorrect
Incorrect
Installation and Connections
Installation Step
the width and height of the
1 Measure
console box first.
F or exa mple:
The c ons ole box is 15(W) x 25(H ) c m. (F igure 1)
(F igure 1)
2 Adjust the width of the transverse axle.
F or exa mple:
The width of the c ons ole box is 15c m. (F igure 1)
Ac c ording to the width of the C enter C ons ole B ox,
pull out a nd a djus t the s uita ble width of the
tra ns vers e a xle . (F igure 2)
(F igure 2)
3 Choose a suitable Plastic Washer.
C hec k both s ides of the c enter c ons ole, if it ha s a
s lope, plea s e c hoos e a s uita ble pla s tic wa s her
(the thic k oblique wa s her/ thin oblique wa s her/
fla t wa s her) a nd ma ke the bra c kets perpendic ula r
to 90 degrees . (F igure 3)
3~5cm
P la s tic W a s h e r
90 degrees
(F igure 3)
4 Mark the screw positions of the disc holder.
After you dec ided on the ins ta lla tion a ngle of the
brackets plea s e ma rk the s c rew pos itions of the dis c
holder on both s ides of c ons ole box. (F igure 4)
After tha t, drill four 4 holes in the both s ide of
c ons ole box.
(F igure 3-2)
(F igure 4)
R ea r-S ea t E nterta inment
18
Installation and Connections
5 Installation of screws:
A Type
A Type (Figure 5-1)
P ut the mounting pla te ins ide of the c ons ole box,
a nd fix the mounting pla te from outs ide to ins id e
with 4pc s 4x25 s elf-ta pping s c rews . s a me a s right
bra c ket.
B Type (Figure 5-2)
U s e 4x25 s elf-ta pping s c rews a nd s pring
buc kle to fix the bra c ket on the both s ides of
the c ons ole box.
6 Drill cable hole.
After you have c hos en the s uita ble pla s tic wa s her,
please drill a 15mm hole with the pla s tic wa s her in the U
brea c h pla c e. (F igure 6)
B Type
(F igure 6)
15mm Cable Hole
7 Fix the transverse axle.
After a djus ting a nd c onfirming the width of
tra ns vers e a xle, plea s e us e the Allen K ey to tighten
the 5x12 s c rews . (F igure 7)
A lle n K e y
(F igure 7)
the outside cover of the Right/
8 Assemble
Left Brackets.
U s e 3x8 s c rews to fix the outs ide c over of the
right a nd left bra c ket a rms . (F igure 8)
The a bove shows a ll the ins ta lla tion procedure.
(F igure 8)
19
C enter Armres t Monitor
Installation and Connections
Connections
AV Connectors
Green / Yellow
Video Input Connector
This c onnec tor is us ed in c ombina tion with the video inputs of other video
produc ts (AV hea d out or TV Tuner).
White(L)
Red ( R)
Black
Blue / Yellow
Audio Input Connectors
Thes e c onnec tors a re us ed in c ombina tion with a hea d unit or TV Tuner with
a udio output c onnec tors .
Video Output Connector
This c onnec tor is us ed in c ombina tion with the video inputs of other video
produc ts (AV hea d unit or L C D monitor).
Blue
Brown / White(L)
Audio Output Connectors
Yellow / Red ( R)
Thes e c onnec tors a re us ed in c ombina tion with a hea d unit or L C D monitor
with a udio input c onnec tors .
Black
GND
C onnec t this line to the vehic leís G ND line.
Red
ACC
C onnec t this line to the vehic leís AC C line. (S witc hed 12V, ignition)
CAUTION
The fa c tory defa ult will ha ve a c onnec tor. P lea s e c ut the c onnec tor
before c onnec t to the s ys tem.
( )G ND (B la c k)
(+ )AC C (R ed)
R ea r-S ea t E nterta inment
20
Installation and Connections
System Connections
TV Tuner
Multi Media S ta tion
AV O utput
L
R V
AV Input (B la c k)
V
V
AV Input
R
R
L
L
L
L
( )12V (B la c k)
L
R
R
(B la c k)
R
V
V
(B la c k)
ACC - out
V
AV O utput (B lue)
(R ed)
(R ed)
Power F ilter(O ption)
(+ )12V AC C
(R ed)
AV 2
AV Input
TH080C
L
R
V
AV O utput
V
S igna l C a ble(B la c k)
V
Antenna (O ption)
R
R
L
AV Input
(B la c k)
S igna l C a ble(B lue) AV O utput
(B lue)
G a me P la yer
iPod
21 C enter Armres t Monitor
L
Information
Accessories
A Type
Screen
Bracket Arm
x1
x2
Plastic Washers
1 Thick oblique washer x2
2 Thin oblique washer x2
3 Flat washer x 2
2
1
3
x6
Remote Control
ZO
TIT
7
US
SE
SU
B/D
4
VO
0/1
DIM
2
ME
0
R
SL
A-B
DIS
8
5
PL
RA
AY
AN
SO
EN
VO
FU
RN
OM
LE
VD
P
B.
T.
TU
D
9
TU
ME
TE
UR
3
ND
6
GL
TIO
x8
B Type
Spring Buckles
x8
Self-tapping Screws
(F⊕4×25)
- For Spring Buckles
x8
Allen Key
x1
User Manual
N
F/R
OW
OM
USER MANUAL
E
CE
NU
DIO
L
L
MU
NC
x4
Screws (F⊕4×25)
- For Mounting Plates
R
AU
RP
1
OS
x2
x1
Screws (F⊕3×8)
- For Outside covers
of Bracket
Outside Covers Of
Bracket
RE
Mounting Plates
TE
x1
Signal Cable
x1
AV2 Cable
x1
Rubber Plugs
x1
Rubber Bars
x4
x2
R ea r-S ea t E nterta inment
22
Information
General Specifications
DISPLAY SCREEN
S ize
8 inc h
As pec t R atio
16: 10
LC D-Type
Digital type TF T Liquid C rys talDis play
DVD Loader S ys tem
O pen C over (Made in C hina)
Number of E lements
800(W)x480(H)x3
E ffec tive Number of E lements
99.9% or more
B ac k Light
LE D Lamp
GENERAL
O perating Voltage
10 - 16VDC (Typic al: 12 V)
Power C ons umption
1.2 A (MAX)
0.82 A(TYP )
0.08A (S tand by)
Video Input
1.0V p-p 75
Video O utput
1.0V p-p 75
Audio Input
2.0V rms (MAX)
Audio O utput
2.0V rms (MAX)
IR Trans mitter
C H A: 2.3MHz/2.8MHz
F M Trans mitter Modulator (O ption)
87.7MHz-88.9MHz
O perating Temperature
32∞F to + 122∞F (0∞C to + 50∞C )
Frequenc y (Wireles s )
MONITOR
S ize
8 inc h
Width
213mm
Depth
154mm
Height
34mm
Weight
0.78 K g
UNIVERSAL BRACKET
B rac ket Type
D Type
Width
150~ 260mm
Heigh
12mm
Depth
255mm
Weight
0.50kg
Note:
· S pec ific a tions a nd the des ign a re s ubjec t to modific a tion without notic e due to improvements in tec hnology.
· S ome figures a nd illus tra tions on this ma nua l ma y be different from your produc t.
23
C enter Armres t Monitor
Information
Troubleshooting
CAUTION
If you enc ounter a problem, plea s e turn the power
off, then on a ga in. If the unit s till no func tion
norma lly, plea s e review the items in the following
c hec klis t. This guide will help you is ola te the
problem if the unit is a t fa ult. O therwis e, ma ke
s ure the res t of your s ys tem is properly c onnec ted
or c ons ult your a uthorized dea ler.
No function or display.
Vehic leís ignition off.
- If c onnec te d following the ins truc tions , the unit
will not opera te with the vehic les ignition off.
Improper power lea d c onnec tions .
- C hec k if the power lea d is properly c onnec ted.
No fus e or blown fus e.
- R epla c e the fus e on the ba ttery lea d of the unit
with the proper va lue.
Vehic leís ba ttery is wea k.
- C hec k the volta ge of vehic leís ba ttery.
Disc playback sound is wavering.
Mois ture c ondens a tion in the dis c unit.
- Allow enough time for the c ondens a tion to
eva pora te (a bout 1 hour).
Unable to fast-forward or fast-reverse the disc.
The dis c ha s been da ma ged.
- E jec t the dis c a nd dis c a rd it. U s ing a da ma ged dis c
in your unit c a n c a us e da ma ge to the mec ha nis m.
Disc playback sound skips due to vibration.
Improper mounting of the unit.
- S ec urely re-mount the unit.
The dis c is very dirty.
- C lea n the dis c
The dis c ha s s c ra tc hes .
- C ha nge the dis c .
The pic k-up lens is dirty.
-Do not us e a c ommerc ia l a va ila ble lens c lea ner
dis c . C ons ult your nea res t dea ler.
Disc playback sound skips without vibration.
Dirty or s c ra tc hed dis c .
- C lea n the dis c . Da ma ged dis c s hould be repla c ed.
CD-R/CD-RW playback is not possible.
C los e s es s ion (fina liza tion) ha s not been performed.
- Perform fina liza tion a nd a ttempt pla yba c k a ga in.
Unit does not operate.
Monitorís power is not turned on.
- Turn on the monitor power.
C ondens a tion
-Wa it a while (a bout 1 hour) for the c ondens a tion to
dry.
No picture is display.
Monitorís mode is not s witc hed to the mode you
wa nt to s ee.
- S witc h to the mode you wa nt to s ee.
Monitorís pa rking brea k c ord is not c onnec ted.
- C onnec t the monitor pa rking bra ke c ord a nd s et the
pa rking brea k. (F or deta ils , refer to the monitor
ins truc tion. )
B rightnes s c ontrol is s et for minimum brightnes s
c ontrol.
- Adjus t the brightnes s .
Inc orrec t s etting of the mode.
- S witc h to the c orrec t mode.
- C hec k the c o nnec tion to the s ourc e unit.
- C hec k the power of the s ourc e unit.
Inc orrec t or open c onnec tion with the Monitor, AV
interfa c e unit.
- C hec k the c onnec tion a nd remedy.
Playback does not start.
Dis c is loa ded ups ide-down.
- C hec k the dis c a nd loa d it with the la bel s ide fa c ing
you.
The dis c is dirty.
- C lea n the dis c .
A dis c not a ble to pla yba c k with this unit is loa ded.
- C hec k if the dis c is a ble to be pla yed ba c k.
Pa renta l loc k is s et.
- C a nc el the pa renta l loc k or c ha nge the ra ting level.
S etup menu is dis pla yed.
- P res s
SETUP
to turn the menu off.
Image stops sometimes.
Dis c is s c ra tc hed.
- R epla c e with a n non-s c ra tc hed dis c .
Picture color is poor.
B rightnes s /C ontra s t/C olor c ontrols a re not s et to the
proper pos itions .
- C hec k ea c h c ontrol.
Picture was very dark when starting the machine.
The tempera ture is too low.
- Wa it a while (a bout 1 hour) for the wa rm up. After tha t,
the monitor will return to the norma l c ondition.
R ea r-S ea t E nterta inment
24
Information
Picture is unclear or noisy.
Dis c is being fa s t-forwa rded or fa s t-revers ed.
- The pic ture ma y be unc lea r, but this is norma l.
Vehic leís ba ttery power is wea k.
- C hec k the ba ttery power a nd wiring. (The unit ma y
ma lfunc tion if the ba ttery power is under 11 volts
with a loa d a pplied. )
Monitorís fluores c ent tube is worn out.
- R epla c e the monitor fluores c ent tube.
Image stops sometimes.
Dis c is s c ra tc hed.
- R epla c e with a non-s c ra tc hed dis c .
The remote control does not work.
IR R ec eived ra nge is not enough.
- The remote c ontrol c a n be us ed within 2 meters .
S omething interfere the IR tra ns mitter.
- P lea s e remove a ny pos s ible objec ts .
B a ttery is exha us ted.
- R epla c e the remote c ontrol ba ttery.
Warranty
Caution:
P lea s e ma ke s ure to rea d the us er ma nua l
c a refully.
Please make sure the unit has a serial
number before you send the unit back
to be repaire. If the unit does not have
a serial number or the serial number
has been removed Vizualogic will not
b e a b l e t o fi x t h e u n i t u n d e r w a r r a n t y .
Warranty void if seal is broken or removed.
Warranty period 90 Days:
F rom the da te of origina l reta il purc ha s e.
Vizualogic will offer a full replacement warranty.
Vizualogic will not replace the product if
there is physical damage or customer abuse to
the unit.
Spots or dotted lines-stipes appear.
The L C D pa nel is ma nufa c tured us ing a n extremely
high prec is ion ma nufa c turing tec hnology.
- Its effec tive pixel ra tio is over 99. 99%. This me a ns
tha t 0. 01% of the pixels c ould be either a lwa ys O N or
O F F.
C a us ed by neon s igns , high-volta ge power lines , C B
tra ns mitter, other vehic leís ignition plugs , etc .
- C ha nge the loc a tion of your vehic le.
Caution
Due to c ontinuous produc t improvement,
s pec ific a tions a nd des ign a re s ubjec t to c ha nge
without notic e.
Out of the Warranty period:
If the unit fails Vizualogic will, for a fee, inspect and
offer to repair any failed component.
Prior to repairs Authorization for cost will be extended
to customers.
Customer must return to Vizualogic.
Customer will pay all freight costs.
Extended Warranty available at extra cost
If the product was installed at or before the
vehicle was purchased.
Please consult your Vizualogic dealer for
more detailed information on purchasing
a Extended Warranty.
Other:
When s ending the produc t for repair, pleas e pac k the
produc t perfec tly, s o as to prevent damage again on
the way of trans port. Thanks .
25
C enter Armres t Monitor
Information
Warranty Card
Caution:
Please test all Functions Before Installing
Please record the serial number of your unit.
In the space provided below.
The serial number plate is located on the back
of the monitor.
If the units didn’t have a s erial number or it is
missing we will be unable to offer a warranty.
Under normal us age, if the produc t is out of order,
pleas e inquire your authorized retail s hop.
If you need any product s erviced, pleas e pres ent this
warranty c ard for c ertific ation.
P leas e remember to as k for the authentic ation s eal
from your authorized retail s hop.
If the authentication seal is incorrect Vizualogic will
not replace the unit under warranty.
Elite Center Console Monitor
Item
Warranty period
Elite Console
Model
Bracket Type
D Type
Color
Black
Serial number
From the date of original
retail purchasing
(This is nec es s ary.)
Purchasing Date
( YY /MM /DD)
User Name
User data
Caution:
In order to guarantee your rights , pleas e
remember to fill in the retail s hop name,
addres s and telephone number c orrectly after
purc has ing the product.
Tel.
Address
Shop Name
Tel.
Retailer data
Address
Retailerís Seal
S elling date:
(This is nec es s ary.)
R ea r-S ea t E nterta inment
26