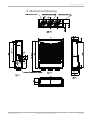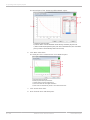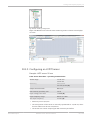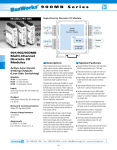
1
Modular Sensor Interface MSI 60
User Manual
1.0 5/18/2015
Table of Contents
Table of Contents
1 Getting started ..................................................................................................................................................... 4
2 System Overview ................................................................................................................................................. 5
3 Installation ........................................................................................................................................................... 6
4 Technical Data ...................................................................................................................................................... 7
5 Inputs and Outputs ............................................................................................................................................. 9
5.1 Input Channels ................................................................................................................................................................................. 9
5.2 Output Channels ............................................................................................................................................................................ 12
5.3 Communication Channels .......................................................................................................................................................... 12
6 Mechanical Drawing .......................................................................................................................................... 21
7 Starting up ......................................................................................................................................................... 22
7.1 Before Starting ............................................................................................................................................................................... 22
7.2 Assign the Mounting Location ................................................................................................................................................. 26
7.3 Feature Activation ......................................................................................................................................................................... 29
8 Math and Condition Channels .......................................................................................................................... 32
8.1 Math Channels ............................................................................................................................................................................... 32
8.2 Condition Channels ...................................................................................................................................................................... 36
9 CAN Bus .............................................................................................................................................................. 41
9.1 CAN Bus Trivia ............................................................................................................................................................................... 41
9.2 CAN Input ......................................................................................................................................................................................... 42
9.3 CAN Output ..................................................................................................................................................................................... 50
10 Analog and Frequency Inputs .......................................................................................................................... 54
10.1 Features ............................................................................................................................................................................................. 54
10.2 Measurement Channels .............................................................................................................................................................. 54
10.3 Configuring Inputs ........................................................................................................................................................................ 55
10.4 Configuring computed Sources ............................................................................................................................................... 77
10.5 Hysteresis ......................................................................................................................................................................................... 78
10.6 PWM Outputs ................................................................................................................................................................................. 82
11 Online Measurement ......................................................................................................................................... 85
11.1 Achieving an online Connection ............................................................................................................................................. 85
11.2 Setting up an online Measurement ....................................................................................................................................... 87
11.3 Online Calibration of Measurement Channels ................................................................................................................... 93
11.4 Group Adjustment ........................................................................................................................................................................ 95
11.5 Online Calibration of Multipoint Adjustment Channels ................................................................................................. 97
12 Firmware .......................................................................................................................................................... 100
12.1 Firmware and Configuration .................................................................................................................................................. 100
12.2 Firmware Update ........................................................................................................................................................................ 100
13 GPS Sensor ......................................................................................................................................................
13.1 GPS (Global Positioning System) ..........................................................................................................................................
13.2 Protocol ..........................................................................................................................................................................................
13.3 Sensor Recommendation ........................................................................................................................................................
2 / 108
Modular Sensor Interface MSI 60
103
103
103
103
Bosch Motorsport
Table of Contents
13.4 Measurement Labels ................................................................................................................................................................. 104
13.5 GPS Troubleshooting ................................................................................................................................................................ 105
14 RaceCon Shortcuts ......................................................................................................................................... 106
Bosch Motorsport
Modular Sensor Interface MSI 60
3 / 108
1 | Getting started
1 Getting started
Use the MSI 60 only as intended in this manual. Any maintenance or repair must
be performed by authorized and qualified personnel approved by Bosch Motor‐
sport.
Operation of the MSI 60 is only certified with the combinations and accessories
that are specified in this manual. The use of variant combinations, accessories
and other devices outside the scope of this manual are only permitted when they
have been determined to be compliant from a performance and safety stand‐
point by a representative from Bosch Motorsport. Read the manual carefully and
follow the application hints step by step. Don’t hesitate to contact us, contact da‐
ta can be found on the back page of this document.
Disclaimer
Due to continuous enhancements we reserve the rights to change any illustra‐
tions, photos and technical data within this manual.
4 / 108
Modular Sensor Interface MSI 60
Bosch Motorsport
System Overview | 2
2 System Overview
Bosch Motorsport
Modular Sensor Interface MSI 60
5 / 108
3 | Installation
3 Installation
Power Supply
Please ensure that you have a good ground installation. That means:
▪ A ground that has a solid, low resistance connection to the negative battery
terminal.
▪ Connection should be free from dirt, grease, paint, anodizing etc.
▪ Use large diameter wire.
▪ More metal‐to‐metal contact is better!
The following notations for power signals are used:
▪ KL 15 is a switched battery rail controlled by the IGN‐switch.
▪ KL 30 is an unswitched battery positive rail (same as battery positive termi‐
nal).
▪ KL 31 is an unswitched ground rail (same as battery negative terminal).
Notice
6 / 108
Be careful to observe current limits of wires and connector
pins!
Modular Sensor Interface MSI 60
Bosch Motorsport
Technical Data | 4
4 Technical Data
Application
AD converters with digital low pass filter
Configurable math channels
User configurable CAN in/out messages
Up to 1,000 Hz acquisition rate for all channels
3‐port network switch
Mechanical Data
Size
153 x 119 x 38 mm
Weight
645 g
Aluminum housing
High density type motorsport connectors
Vibration damped printed circuit boards
Operating temperature
‐20 to 85°C
Max. vibration
15 g sinus at 1,200 Hz for t < 5 h
Connectors and Wires
Motorsports connectors double den‐ 2 x 64 pin and 1 x 34 pin
sity
Bosch Motorsport
Mating connector AS‐2‐12‐35PN
(Red)
F02U 000 443‐01
Mating connector II
ASDD‐2‐14‐64PA (Yellow)
F02U 003 098‐01
Mating connector III
ASDD‐2‐14‐64PN (Red)
F02U 000 854‐01
Modular Sensor Interface MSI 60
7 / 108
4 | Technical Data
Inputs
Analog inputs, 0 to 5 V, 12 bit
8
Switchable pull‐up value, 3.01 kOhm
Differential analog inputs ‐5 to +5 V, 32
18 bit, 3 pull‐ups
LVDT inputs
8
Rotational inputs
4
Outputs
PWM outputs (low side switch 1 A
each)
4
Sensor supply 5 V (400 mA each),
precision: 0.1 % (up to 300), 0.2 %
(max. 300 mA)
2
Sensor supply 5 V/10 V (200 mA
each)
2
Sensor supply 12 V (800 mA, non
regulated)
1
Electrical Data
Supply voltage
7 to 18 V
Max. power consumption (w/o sen‐ 15 W
sor power supply)
Communications
Configuration via RaceCon over
Ethernet or MSA‐Box II
CAN interfaces
2
RS232 for GPS
1
Ethernet 100BaseT
3
Environment
Software Upgrade
1
CCP‐Master (ASAP 2 file from ECU
manufacturer required)
F 02U V01 012‐01
MSI 60
F 02U V01 901‐01
The required software for this device is available on www.bosch‐motorsport.com.
8 / 108
Modular Sensor Interface MSI 60
Bosch Motorsport
Inputs and Outputs | 5
5 Inputs and Outputs
The following chapter introduces the Input and Output Channels.
5.1 Input Channels
The MSI 60 provides diverse analog inputs which allows the direct connection of
a multiplicity number of sensors.
5.1.1 Basic Analog Inputs
The MSI 60 basic analog inputs accept an input signal of 0 to 5 V. A 3.01 kOhm
pull‐up resistor can be activated by software.
5.1.2 Differential Analog Inputs
The MSI 60 differential analog inputs offers a wide configurability. The inputs can
be switched between single ended or differential mode. In single ended mode
input signals of 0 to 5 V are accepted. In differential mode input signals are ac‐
cepted in the range of ‐5 V to +5 V.
Three pull‐up resistors can be activated by software. A 3.01 kOhm resistor can be
used for evaluation both ntc sensors and switches or push‐buttons.
The resistors of 4.99 kOhm and 49.9 kOhm provide the direct connection of
PT100 and PT1000 sensors.
A selectable amplification of small input signals allows the direct connection of
resistive strain gauges.
For further wiring details please refer to the given figures.
Fig. 1: Differential sensor
Bosch Motorsport
Modular Sensor Interface MSI 60
9 / 108
5 | Inputs and Outputs
Fig. 2: Differential_PT1000 sensor
Fig. 3: Differential_PT100 sensor
Fig. 4: Single ended sensor
10 / 108
Modular Sensor Interface MSI 60
Bosch Motorsport
Inputs and Outputs | 5
Fig. 5: NTC sensor
5.1.3 LVDT Inputs
The MSI 60 LVDT inputs allows the connection of various LVDT sensors. Switcha‐
ble exciting voltage and frequency are used for the correct adaption of the ap‐
plied sensor. For further wiring details please refer to the following figure:
Fig. 6: LVDT
For further details see on chapter Configuring an LVDT Sensor [} 69].
See also
2 Online Calibration of Measurement Channels [} 93]
5.1.4 Digital Inputs
The digital inputs of the MSI 60 can be switched for the direct connection of
Hall‐effect, inductive and DF11 sensors.
▪ For Hall‐effect sensors an input signal from 0 V to 5 V is accepted.
▪ For inductive sensors a zero‐crossing signal is necessary.
Connect the sensor between I_F_REVx and digital ground G_R_DIGx.
Bosch Motorsport
Modular Sensor Interface MSI 60
11 / 108
5 | Inputs and Outputs
5.2 Output Channels
This chapter describes the PWM Output and Sensor Power Supply of the MSI 60.
5.2.1 PWM Outputs
The MSI 60 has 4 low side switch outputs controlled by pulse width modulation
(PWM). Each switch is rated 1 A maximum current. Maximum PWM switch fre‐
quency is 1 kHz with a 0 % … 100 % duty cycle. Each output is short circuit pro‐
tected to GND and battery voltage. It is mandatory to connect the LS_PWM pins
to vehicle GND as indicated in the circuit diagram when using the PWM outputs.
5.2.2 Sensor Power Supply
The MSI 60 has three types of sensor power supply:
▪ One 12 V unregulated battery voltage
▪ Two fixed outputs with 5 V regulated
▪ Two switchable 5 V/10 V outputs with regulated voltage
5.3 Communication Channels
This chapter describes the Communication Channels of the MSI 60.
5.3.1 CAN Bus
The MSI 60 has 2 CAN buses configurable as input and output. Different baud
rates are selectable. Please note that the MSI 60 does not contain any CAN ter‐
mination resistors. Thus the CAN termination resistors need to be integrated into
the wiring loom.
5.3.2 Ethernet Channels
The MSI 60 has three 100 Mbit full duplex Ethernet communication ports. The
ports are internally connected with an Ethernet switch. The Ethernet ports have
'cable auto crossover' functionality.
5.3.3 RS232 Port
The MSI 60 has one RS232 serial port. The baudrate is programmable which can
be used for reception of data from a serial GPS sensor, see on GPS Sensor
[} 103].
5.3.4 Vehicle Diagnosis Connector
The Bosch Motorsport vehicle diagnosis connector is used as a standard inter‐
face to connect the vehicle to a PC e.g. via a MSA‐Box II. Loom Connector:
AS 0‐12‐35SN.
12 / 108
Modular Sensor Interface MSI 60
Bosch Motorsport
Inputs and Outputs | 5
Bosch Motorsport
PIN Name
Description
1
Terminal 30
Permanent positive
+
2
Terminal 15
Switched positive
+
3
Terminal 31
GND
+
4
CAN High
Diagnostic CAN bus
16
CAN Low
Diagnostic CAN bus
10
K‐Line
ECU diagnosis
8
Ethernet RxD + Ethernet interface
+
9
Ethernet RxD ‐
Ethernet interface
+
11
Ethernet TxD +
Ethernet interface
+
12
Ethernet TxD ‐
Ethernet interface
+
22
Screen
Cable screen
+
Modular Sensor Interface MSI 60
Used for MSI 60
13 / 108
5 | Inputs and Outputs
5.3.5 Pin Layout Connectors
5.3.5.1 Pin Layout Life Connector AS‐2‐12‐35PN (Red)
PIN Name
Description
Direction
Remark
1
V_V_BAT+_A
UBATT ECU
Input
ECU SUPPLY
2
V_V_BAT+_A
UBATT ECU
Input
ECU SUPPLY
3
I_S_T15
KL15 input signal ignition
Input
4
G_G_BAT
GND
not sc safe
to UBATT
5
G_G_BAT
GND
not sc safe
to UBATT
6
B_D_ETH0_RX‐
Ethernet Channel1 Rx minus
7
B_D_ETH0_TX‐
Ethernet Channel1 Tx minus
8
B_D_ETH1_TX‐
Ethernet Channel2 Tx minus
9
B_D_ETH1_RX‐
Ethernet Channel2 Rx minus
10
B_D_ETH1_RX+
Ethernet Channel2 Rx plus
11
B_D_ETH2_RX‐
Ethernet Channel3 Rx minus
12
B_D_ETH2_TX‐
Ethernet Channel3 Tx minus
13
B_D_ETH2_TX+
Ethernet Channel3 Tx plus
14
B_D_CAN_L_A
CAN A Low
CAN A Low
15
B_D_CAN_H_A
CAN A High
CAN A High
16
O_V_UBAT
Output switched UBATT
17
B_D_ETH0_RX+
Ethernet Channel1 Rx plus
18
B_D_ETH0_TX+
Ethernet Channel1 Tx plus
19
B_D_ETH1_TX+
Ethernet Channel2 Tx plus
20
B_D_ETH2_RX+
Ethernet Channel3 Rx plus
21
G_R_SCREEN
Screen
22
I_F_TIMESYNC
SYNCH_CLKIN
Output
Screen
5.3.5.2 Pin Layout Sensor Connector ASDD‐2‐14‐64PA
(Yellow)
14 / 108
PIN Name
Description
1
G_R_LVDT
LVDT REF GND
2
LS_SWITCH_2
Output LowSide 2
Output
1.1 A
3
LS_SWITCH_1
Output LowSide 1
Output
1.1 A
4
EXC1_4
LVDT exciting voltage +
Output
LVDT 4
5
VA_4
LVDT input A
Input
LVDT 4
Modular Sensor Interface MSI 60
Direction
Remark
LVDT GND
& SCREEN
Bosch Motorsport
Inputs and Outputs | 5
PIN Name
Description
Direction
Remark
6
EXC1_3
LVDT exciting voltage +
Output
LVDT 3
7
EXC2_2
LVDT exciting voltage +
Output
LVDT 2
8
VB_2
LVDT B
Input
LVDT 2
9
VA_1
LVDT A
Input
LVDT 1
10
SE_ANA_1
Analog input 0 to 5 V, switcha‐
ble pull‐up
Input
RPU: 3k01
11
SE_ANA_3
Analog input 0 to 5 V, switcha‐
ble pull‐up
Input
RPU: 3k01
12
UNI_ANA_16_P
Input
RPU: 3k01 or
4k99 or
49k9
13
UNI_ANA_15_N
Input
14
UNI_ANA_13_N
Input
15
UNI_ANA_12_P
Input
RPU: 3k01 or
4k99 or
49k9
16
UNI_ANA_10_N
Input
17
UNI_ANA_08_P
Input
RPU: 3k01 or
4k99 or
49k9
18
UNI_ANA_07_N
Input
19
UNI_ANA_04_P
Input
RPU: 3k01 or
4k99 or
49k9
20
UNI_ANA_06_N
Input
21
UNI_ANA_05_N
Input
22
UNI_ANA_02_P
Input
RPU: 3k01 or
4k99 or
49k9
23
UNI_ANA_01_N
24
Bosch Motorsport
Input
Reserved. Do not connect.
25
B_D_CAN B Low CAN B Low
CAN B LOW
26
G_R_DIG1
Ground Reference DIG1
REV IN
27
EXC2_4
LVDT exciting voltage ‐
LVDT 4
28
VB_4
LVDT input B
Input
LVDT 4
29
EXC2_3
LVDT exciting voltage ‐
Input
LVDT 3
30
EXC1_2
LVDT exciting voltage +
Input
LVDT 2
31
VA_2
LVDT input A
Input
LVDT 2
32
VB_1
LVDT input B
Input
LVDT 1
33
SE_ANA_2
Analog input 0 to 5 V, switcha‐
ble pull‐up
Input
RPU: 3k01
Modular Sensor Interface MSI 60
15 / 108
5 | Inputs and Outputs
PIN Name
Description
Direction
34
UNI_ANA_16_N
Input
35
UNI_ANA_15_P
Input
Remark
RPU: 3k01 or
4k99 or
49k9
36
UNI_ANA_13_P
Input
RPU: 3k01 or
4k99 or
49k9
37
UNI_ANA_11_N
Input
38
UNI_ANA_08_N
Input
39
UNI_ANA_07_P
Input
RPU: 3k01 or
4k99 or
49k9
40
UNI_ANA_06_P
Input
RPU: 3k01 or
4k99 or
49k9
41
UNI_ANA_03_P
Input
RPU: 3k01 or
4k99 or
49k9
42
UNI_ANA_02_N
Input
43
UNI_ANA_01_P
Input
RPU: 3k01 or
4k99 or
49k9
44
B_D_CAN B High CAN B High
CAN B High
45
VA_3
LVDT input A
Input
LVDT 3
46
VB_3
LVDT input B
Input
LVDT 3
47
EXC1_1
LVDT exciting voltage +
Input
LVDT 1
48
EXC2_1
LVDT exciting voltage ‐
Input
LVDT 1
49
G_R_AGND1
Reference GND1 for analog in‐
puts
Input
not sc save
to UBATT
50
SE_ANA_4
Analog input 0 to 5 V, switcha‐
ble pull‐up
Input
RPU: 3k01
51
UNI_ANA_14_P
RPU: 3k01 or
4k99 or
49k9
52
UNI_ANA_12_N
53
UNI_ANA_10_P
RPU: 3k01 or
4k99 or
49k9
16 / 108
54
UNI_ANA_04_N
55
UNI_ANA_03_N
Modular Sensor Interface MSI 60
Bosch Motorsport
Inputs and Outputs | 5
PIN Name
56
Description
Direction
UNI_ANA_05_P
Remark
RPU: 3k01 or
4k99 or
49k9
57
I_F_REV1
Revolution/Frequeny input
58
SENSPWR_5V
Sensor supply 5 V, 400 mA
max.
59
SENSPWR_5V_1 Sensor supply 5 V, 10 V, 200
0V
mA max.
60
G_R_AGND2
61
UNI_ANA_14_N
Input
62
UNI_ANA_11_P
Input
Reference GND2 for analog in‐
puts
I‐encoder
wheel /
Hall / DF11
not sc safe
to UBATT
Input
not sc safe
to UBATT
RPU: 3k01 or
4k99 or
49k9
63
UNI_ANA_09_P
Input
RPU: 3k01 or
4k99 or
49k9
64
UNI_ANA_09_N
Input
5.3.5.3 Pin Layout Sensor Connector ASDD‐2‐14‐64PN
(Red)
PIN Name
Description
Direction
Remark
1
DGND2
LVDT REF GND
LVDT GND
& SCREEN
2
LS_SWITCH_4
Output LowSide 4
1.1 A
3
LS_SWITCH_3
Output LowSide 3
1.1 A
4
EXC1_8
LVDT exciting voltage +
LVDT 8
5
VA_8
LVDT input A
LVDT 8
6
EXC1_7
LVDT exciting voltage +
LVDT 7
7
EXC2_6
LVDT exciting voltage ‐
LVDT 6
8
VB_6
LVDT input B
LVDT 6
9
VA_5
LVDT input A
LVDT 5
10
SE_ANA_5
Analog input 0 to 5 V, switcha‐
ble pull‐up
RPU: 3k01
11
SE_ANA_7
Analog input 0 to 5 V, switcha‐
ble pull‐up
RPU: 3k01
12
UNI_ANA_32_P
RPU: 3k01 or
4k99 or
49k9
Bosch Motorsport
Modular Sensor Interface MSI 60
17 / 108
5 | Inputs and Outputs
PIN Name
13
UNI_ANA_31_N
14
UNI_ANA_29_N
15
UNI_ANA_28_P
Description
Direction
Remark
RPU: 3k01 or
4k99 or
49k9
16
UNI_ANA_26_N
17
UNI_ANA_24_P
RPU: 3k01 or
4k99 or
49k9
18
UNI_ANA_23_N
19
UNI_ANA_20_P
RPU: 3k01 or
4k99 or
49k9
20
UNI_ANA_22_N
21
UNI_ANA_21_N
22
UNI_ANA_18_P
RPU: 3k01 or
4k99 or
49k9
23
UNI_ANA_17_N
24
B_D_PSI5_2
Reserved. Do not connect.
25
RS232A TX
RS232 transmit
26
G_R_DIG2
Ground reference DIG2
REV IN
27
EXC2_8
LVDT exciting voltage ‐
LVDT 8
28
VB_8
LVDT input B
LVDT 8
29
EXC2_7
LVDT exciting voltage ‐
LVDT 7
30
EXC1_6
LVDT exciting voltage +
LVDT 6
31
VA_6
LVDT input A
LVDT 6
32
VB_5
LVDT input B
33
SE_ANA_6
Analog input 0 to 5 V, switcha‐
ble pull‐up
34
UNI_ANA_32_N
35
UNI_ANA_31_P
RPU: 3k01
RPU: 3k01 or
4k99 or
49k9
36
UNI_ANA_29_P
RPU: 3k01 or
4k99 or
49k9
18 / 108
37
UNI_ANA_27_N
38
UNI_ANA_24_N
Modular Sensor Interface MSI 60
Bosch Motorsport
Inputs and Outputs | 5
PIN Name
39
Description
UNI_ANA_23_P
Direction
Remark
RPU: 3k01 or
4k99 or
49k9
40
UNI_ANA_22_P
RPU: 3k01 or
4k99 or
49k9
41
UNI_ANA_19_P
RPU: 3k01 or
4k99 or
49k9
42
UNI_ANA_18_N
43
UNI_ANA_17_P
RPU: 3k01 or
4k99 or
49k9
44
RS232A RX
RS232 receive
45
VA_7
LVDT input A
LVDT 7
46
VB_7
LVDT input B
LVDT 7
47
EXC1_5
LVDT exciting voltage +
LVDT 5
48
EXC2_5
LVDT exciting voltage ‐
LVDT 5
49
G_R_AGND3
Reference GND3 for analog in‐
puts
not sc safe
to UBATT
50
SE_ANA_8
Analog input 0 to 5 V, switcha‐
ble pull‐up
RPU: 3k01
51
UNI_ANA_30_P
RPU: 3k01 or
4k99 or
49k9
52
UNI_ANA_28_N
53
UNI_ANA_26_P
RPU: 3k01 or
4k99 or
49k9
54
UNI_ANA_20_N
55
UNI_ANA_19_N
56
UNI_ANA_21_P
RPU: 3k01 or
4k99 or
49k9
Bosch Motorsport
57
I_F_REV2
Revolution/frequency input.
58
SENSPWR_5V
Sensor supply 5 V, 400 mA
max.
59
SENSPWR_5V_1 Sensor supply 5 V, 10 V, 200
0V
mA max.
60
G_R_AGND4
Reference GND4 for analog in‐
puts
Modular Sensor Interface MSI 60
I‐encoder
wheel /
Hall / DF11
not sc safe
to UBATT
19 / 108
5 | Inputs and Outputs
PIN Name
61
UNI_ANA_30_N
62
UNI_ANA_27_P
Description
Direction
Remark
RPU: 3k01 or
4k99 or
49k9
63
UNI_ANA_25_P
RPU: 3k01 or
4k99 or
49k9
64
20 / 108
UNI_ANA_25_N
Modular Sensor Interface MSI 60
Bosch Motorsport
Mechanical Drawing | 6
6 Mechanical Drawing
Bosch Motorsport
Modular Sensor Interface MSI 60
21 / 108
7 | Starting up
7 Starting up
The following chapter explains what you have to do before starting the MSI and
how to connect it to RaceCon.
7.1 Before Starting
Install the software required for MSI 60 operation. It is developed for Windows
2000/XP/Vista/7.
Following software versions are used in this manual:
▪ MSI 60 setup, configuration and calibration: RaceCon V2.5 and following
▪ Measurement data analysis: WinDarab V7
Set up the 100 Mbit Ethernet connection to the MSI 60.
▪ All three Ethernet ports of MSI 60 are internally connected by a network
switch.
▪ All Ethernet ports have ‘cable auto crossover’ functionality.
Minimum wiring loom of the Life connector (Red):
PIN
Description
1+2+3
12 V Supply Voltage
4+5
GND Supply Voltage
18
Ethernet Tx+
7
Ethernet Tx‐
17
Ethernet Rx+
6
Ethernet Rx‐
21
Ethernet Screen
7.1.1 Starting the MSI 60
The MSI 60 powers up by turning on the ignition of the car.
The ‘Link LED’ at the PC’s network adapter will illuminate. If the LED is off, check
the wiring harness.
7.1.2 About RaceCon
RaceCon is an all integrated software tool for configuration and calibration of
Bosch Motorsport hardware products. It is used to set up, configure and calibrate
the MSI 60.
For better understanding, Bosch Motorsport offers a video tutorial that explains
many functions of RaceCon. The video tutorial is available in the ‘Software Down‐
load’ section on www.bosch‐motorsport.com.
22 / 108
Modular Sensor Interface MSI 60
Bosch Motorsport
Starting up | 7
7.1.3 Connecting the MSI 60 to RaceCon
The following screenshot shows an overview of the RaceCon main screen with its
areas. All (sub‐)windows are resizable and dockable.
1. Start the RaceCon software.
Bosch Motorsport
Modular Sensor Interface MSI 60
23 / 108
7 | Starting up
2. In the ‘File’ menu select ‘New’ to create a new project.
3. In the Toolbox select the MSI 60 and drag it into the Main Area. A pop‐up
window to specify the MSI 60 program archive appears.
24 / 108
Modular Sensor Interface MSI 60
Bosch Motorsport
Starting up | 7
4. Select the program archive delivered with the MSI 60 (.PST file). An informa‐
tion shows that the archive is valid or not.
5. Click ‘Next’.
6. Select location of MSI 60.
7. Click ‘Finish’. The MSI 60 is inserted into the project and RaceCon tries to
connect to the device. Repeat the bespoken procedure for every additional
MSI 60. If you are starting with a new delivered MSI 60 you once‐only need
Bosch Motorsport
Modular Sensor Interface MSI 60
25 / 108
7 | Starting up
to assign the mountain location(s). Please refer to Assign the Mounting Loca‐
tion [} 26] Assign.
8. RaceCon detects configuration differences between the MSI 60and the Race‐
Con project and asks for permission for data download.
9. Click ‘OK’ to proceed. The download starts and the MSI 60 carries out a reset.
After the reset RaceCon reconnects to the MSI 60. Local configuration on
both the PC and MSI 60 match (indicated by green background and dot). The
MSI 60 is now connected to RaceCon.
7.2 Assign the Mounting Location
Because up to eight MSI 60 can be used in one network for I/O expansion, the
mounting location is used for determination between the different MSI 60.
At delivery no mounting location is set. This is signaled by an orange ‘RUN’ LED
on the device. Therefore one must first assign a mounting location to the MSI 60
before it can be used in the project. The mounting location is permanently saved
in the MSI 60. If necessary you can at any time reassign a different mounting lo‐
cation following the same procedure.
A mounting location must not be used several times in one network, this would
disturb the functionality of the respective MSI 60.
26 / 108
Modular Sensor Interface MSI 60
Bosch Motorsport
Starting up | 7
1. In the Project Tree, right click on the project name e.g. ‘New Project’ and then
select ‘Show discovered devices…’.
All connected MSI 60 are listed.
2. Compare the listed device Type, FNumber and SNumber to the identification
plate to identify the device you want to make changes to:
Bosch Motorsport
Modular Sensor Interface MSI 60
27 / 108
7 | Starting up
3. Assign the desired mounting location (e.g. ‘Front’) and confirm by clicking
‘Apply’.
The mounting location is now stored in the device. The device will do a reset
and the ‘RUN’ LED on the device will change to green. The list will show the
new mounting location assignment.
It is good practice to physically label the MSI 60 with its mounting location.
Now the device is ready to be used.
A different coloring of the MSI 60 is used to indicate that the device is al‐
ready configured in the currently loaded RaceCon project or not (white/
orange).
28 / 108
Modular Sensor Interface MSI 60
Bosch Motorsport
Starting up | 7
A conflict of several connected MSI 60 using the same location is indicated
by red coloring the involved devices:
7.3 Feature Activation
▪ If you have purchased an optional software feature package, it must be acti‐
vated before it becomes operational.
▪ The feature activation status is stored permanently in the device and requires
activating once only.
▪ As the activation key is device specific, a key delivered with one MSI 60 does
not work on any other MSI 60.
▪ If you have not purchased an option package, the next steps can be skipped.
1. To activate a feature, double‐click on ‘MSI 60’ in the Project Tree and click on
the ‘Features info’ tab in the Main Area.
a) Double‐click on ‘ MSI 60’.
b) Click on ‘Features Info’. The MSI 60 ‘features info’ window appears.
Bosch Motorsport
Modular Sensor Interface MSI 60
29 / 108
7 | Starting up
*Feature status Locked (disabled)
**Unlocked (activated)
2. Double‐click on the feature you want to activate.
A feature unlock window appears.
3. Enter the activation key you received for this feature on this device and click
‘OK’ when done.
30 / 108
Modular Sensor Interface MSI 60
Bosch Motorsport
Starting up | 7
The feature’s status changes to ‘unlocked’.
4. Perform these steps to activate other features you purchased.
Switch the car’s ignition off and on again to cycle the power of the MSI 60.
Bosch Motorsport
Modular Sensor Interface MSI 60
31 / 108
8 | Math and Condition Channels
8 Math and Condition Channels
This chapter describes how to create a Math or Condition Channel.
8.1 Math Channels
Math channel
▪ Arithmetic and logical operations on up to 4 measurement channel(s)
▪ Numerical result
▪ Result can be used as input source for various display elements (numeric ele‐
ments, alarms, Bargraphs) and further calculations in the whole RaceCon
project
Conditional function
▪ Arithmetic and logical operations on one or more measurement channel(s)
▪ If‐Else structure with reset
▪ Numerical result
▪ Result can be used as input source for various display elements (numeric ele‐
ments, alarms, Bargraphs) and further calculations in the whole RaceCon
project
All math channels can be used globally in the whole MSI 60 project.
8.1.1 Creating a new Math Channel
Follow the steps shown in the screenshots.
a) Double‐click on ‘Math Channels’ in Project Tree.
b) Click on ‘Add channel’.
32 / 108
Modular Sensor Interface MSI 60
Bosch Motorsport
Math and Condition Channels | 8
The ‘create/edit math channel’ window appears.
1. Define the math channel using the following configuration possibilities:
a) Enter the name of the math channel.
b) Enter a description of the math channel.
c) Enter the formula.
d) Select the logical operator.
e) Choose a measurement channel.
f) Define a value that can be used as a constant in the formula.
g) Choose a function.
h) Describes the function selected above.
Notice
To select an input channel from a specific device, put the de‐
vice name enclosed by ´#´ in front of it, e.g. #MSI 60
Left#time_sec
2. Click ‘Finish’ when done.
The math channel is displayed in the MSI 60 math channel window.
8.1.2 Creating a new Conditional Function
Follow the steps shown in the screenshots.
Bosch Motorsport
Modular Sensor Interface MSI 60
33 / 108
8 | Math and Condition Channels
a) Double‐click on ‘Math Channels’ in Project Tree.
b) Click on the dropdown arrow beside ‘Add channel’.
c) Choose ‘Conditional Function’.
The ‘create/edit conditional function’ window appears.
1. Define the conditional function using the following configuration possibilities
in the picture above.
a) Enter the name of the conditional function.
b) Enter the If‐condition. Click on the pencil symbol to open an editor to enter
expressions.
c) Enter the Then‐condition. Click on the pencil symbol to open an editor to
enter expressions.
d) Enter the Otherwise‐condition. Click on the pencil symbol to open an editor
to enter expressions.
e) Enter the reset value (must be a number).
2. Click ‘Finish’ when done.
The conditional function is displayed in the MSI 60 math channel window.
34 / 108
Modular Sensor Interface MSI 60
Bosch Motorsport
Math and Condition Channels | 8
Notice
To select an input channel from a specific device put the device
name enclosed by ´#´ in front of it. E.g. #MSI 60 Front
Left#time_sec
The conditional function works in the following way:
The program always calculates the condition entered in the IF window and
checks if the condition is TRUE or FALSE.
If the condition entered in the IF window is TRUE, the program calculates the
condition entered in the THEN window. The returned value is the content of the
new variable (entered in ‘Name’).
If the condition entered in the IF window is FALSE, the program calculates the
condition entered in the OTHERWISE window. The returned value is the content
of the new variable (entered in ‘Name’).
The reset value is always set for the new variable (entered in ‘Name’):
▪ before If‐condition becomes TRUE for the first time after power‐up.
▪ when If‐condition changes state from FALSE to TRUE.
An example of a condition to set up the maximum front brake pressure is given
on the next page.
Example: Setting up a condition for maximum front brake pressure.
“Brake pressure front ‘p_br_front’”
▪ At power‐up, the reset value (10) is used for ‘p_br_front_mx’.
▪ ‘p_br_front’ rises to 30. As ‘p_br_front’ is > 20 (condition is TRUE), the condi‐
tion ‘max (p_br_front, p_br_front_mx)’ in the THEN window is triggered. The
condition sets the bigger value as new value for ‘p_br_front_mx’. As
‘p_br_front’ (30) is bigger than ‘p_br_front_mx’ (10), the new value for
‘p_br_front_mx’ is set to 30.
Bosch Motorsport
Modular Sensor Interface MSI 60
35 / 108
8 | Math and Condition Channels
▪ Although ‘p_br_front’ falls to 25, the value of ‘p_br_front_mx’ stays 30. This is
caused by the THEN‐condition, because p_br_front_mx’ (30) is still bigger
than p_br_front’ (25).
▪ As ‘p_br_front’ rises to 40. As ‘p_br_front’ (40) is bigger than ‘p_br_front_mx’
(30), the new value for ‘p_br_front_mx’ is set to 40.
▪ As ‘p_br_front’ falls below 20, the IF‐condition turns to FALSE. Now the OTH‐
ERWISE‐condition is triggered. Because the condition ‘p_br_front_mx’ sets the
value of ‘p_br_front_mx’ and the value that is already set to 40 before, noth‐
ing changes.
▪ When ‘p_br_front’ rises to 40, the If‐condition changes to TRUE again and
triggers the THEN‐condition. Now the reset value (10) is used for
‘p_br_front_mx’ in the THEN‐condition.
▪ Because 40 is bigger than 10 the new value of ‘p_br_front_mx’ is 40.
8.2 Condition Channels
Condition channel
▪ Logical operations on measurement channel(s)
▪ If‐Else structure with reset
▪ Logical result
▪ Result can be used as input source for alarm display elements and further
calculations in the whole RaceCon project
Condition combination
▪ Combination of several (up to 16) condition channels for more complex cal‐
culations
▪ Logical result
All condition channels can be used globally in the whole MSI 60 project.
8.2.1 Creating a new Condition Channel
Follow the steps shown in the screenshot.
36 / 108
Modular Sensor Interface MSI 60
Bosch Motorsport
Math and Condition Channels | 8
a) Double‐click on ‘Conditional Channels‘ in Project Tree.
b) Click on ‘Add condition‘.
The ‘create/edit condition’ window appears.
Define the condition channel using the following configuration possibilities:
Bosch Motorsport
Modular Sensor Interface MSI 60
37 / 108
8 | Math and Condition Channels
a) Enter the name of the condition channel.
b) Select the comparing mode:
• Constant: Compare a measurement channel with a constant value.
• Channel: Compare a measurement channel with a measurement channel.
• Range: Compare a measurement channel with a defined value range.
• Multiple: Compare a measurement channel with up to 5 constant values.
c) Depending on the chosen comparing mode, you can enter the following
values:
• Constant: Choose the measurement channel or condition, the operator and
enter the value of the constant.
• Channel: Choose the measurement channel or condition, the operator and
the measurement channel or condition to becompared.
• Range: Choose the measurement channel or condition, the operator and
define the minimum and maximum value.
• Multiple: Choose the measurement channel or condition, the operator and
enter the value of up to 5 constants.
d) Enter the minimal time to detect the signal of the measurement channel to
avoid high‐frequent switchovers.
e) Enter the time the signal of the measurement channel is delayed after its
ending.
f) Choose the output setting of the result.
• Constant TRUE/FALSE: Result is as a constant with the value TRUE or FALSE.
• Blinking: Result is a blinking if the condition is fulfilled.
• Pulse: Result is a short one‐time pulse if the condition is fulfilled.
• Toggling output: Result is a pulse that lasts until the next condition is fulfilled.
The conditional channel is displayed in the MSI 60 condition channel window.
8.2.2 Creating a new Condition Combination
Follow the steps shown in the screenshot.
38 / 108
Modular Sensor Interface MSI 60
Bosch Motorsport
Math and Condition Channels | 8
a) Double‐click on ‘Conditional Channels’ in Project Tree.
b) Click on the dropdown arrow beside ‘Add condition’.
c) Choose ‘Conditional combination’.
The ‘create/edit condition combination’ window appears.
1. Define the condition combination using the following configuration possibili‐
ties:
a) Enter the name of the condition combination.
b) Create the condition combination in the window.
• Choose a channel (condition, conditional function, math, measurement
channel with binary values) to be compared.
• Combine multiple conditions by adding ‘AND’ or ‘OR’ relations.
• To negate a condition, right‐click on the condition and select ‘Negation (!)’.
• Combine several (up to 16) conditions.
2. Click ‘Next’ to go to the next page. Choose the output setting of the result:
‐ Constant TRUE/FALSE: Result is as a constant with the value TRUE or FALSE.
‐ Blinking: Result is a blinking if the condition is fulfilled.
Bosch Motorsport
Modular Sensor Interface MSI 60
39 / 108
8 | Math and Condition Channels
‐ Pulse: Result is a short one‐time pulse if the condition is fulfilled.
‐ Toggling output: Result is a pulse that lasts until the next condition is fulfil‐
led.
3. Click ‘Finish’ when done.
The conditional combination is displayed in the MSI 60 condition channel win‐
dow.
40 / 108
Modular Sensor Interface MSI 60
Bosch Motorsport
CAN Bus | 9
9 CAN Bus
MSI 60 has 2 CAN buses. Both buses are fully configurable.
▪ Baudrate (125 kbit to 1 Mbit)
▪ 11 bit or 29 bit identifiers
▪ Input configuration: Read messages from CAN bus and convert to MSI 60
measurement/display variables. CAN bus supports row counter configura‐
tion.
▪ Output configuration: Write MSI 60 measurement variables to CAN messag‐
es, output frequency and row counter are configurable, CAN gateway func‐
tionality (transfer from one bus to the other).
9.1 CAN Bus Trivia
CAN message
▪ 11 bit (standard) or 29 bit (extended) identifier
▪ Up to 8 bytes of data payload
CAN bus
▪ Needs termination resistors (120 Ohm) in wiring harness
▪ All devices connected to the bus must use identical data rate
Configuration of MSI 60 bus data rate in ‘Properties’ menu.
Row counter concept
▪ Re‐use (multiplex) of message identifiers
▪ One byte of message contains row counter
▪ 7 bytes payload remaining
▪ Position of row counter is configurable
Bosch Motorsport
Modular Sensor Interface MSI 60
41 / 108
9 | CAN Bus
Message, Id / Row, Counter / Payload Area
9.2 CAN Input
9.2.1 Input Configuration
a) Open CAN messages overview window.
b) Create new channel to read from CAN bus.
c) Import Vector CAN database (DBC) channel configuration.
d) Export channel configuration to vector CAN database (DBC).
e) Export RaceCon CAN input configuration to file.
f) Import RaceCon CAN input configuration from file.
g) Display CAN bus properties (baudrate).
9.2.2 Create new CAN Channel
1. Right‐click on ‘CAN Input’ of desired bus (CAN1 or CAN2).
2. Select ‘New CAN Channel’ from menu.
42 / 108
Modular Sensor Interface MSI 60
Bosch Motorsport
CAN Bus | 9
3. Insert name and description of channel.
4. Click ‘OK’ when done.
The channel is listed in the Data window and a CAN channel configuration win‐
dow opens.
9.2.3 CAN Channel Configuration
a) Extraction of data from CAN bus.
b) Conversion to physical values.
c) Mini CAN analyzer functionalit.
d) Automatic assignment to measurement view.
Bosch Motorsport
Modular Sensor Interface MSI 60
43 / 108
9 | CAN Bus
9.2.4 Extracting Data from CAN Bus
Representation: Byte
Some CAN devices need to be addressed by a byte represented CAN channel.
The address can be assigned in this window and is illustrated by a bargraph.
a) Enter name of the CAN channel.
b) Enter CAN message ID. Check the box, if extended IDs (29 bit) are used.
c) If replacement values are used, specify time‐out period and raw value.
d) Check the box, if a multiplexer (row counter) is used.
e) Enter data position, length and format.
f) The bargraph shows assignment of the bytes.
• Red colored fields show the assignment of the data bytes.
• Orange colored fields show the assignment of the multiplexer bytes.
Representation: Bit
Some CAN devices need to be addressed by a bit represented CAN channel. The
address can be assigned in this window and is illustrated by a matrix table.
44 / 108
Modular Sensor Interface MSI 60
Bosch Motorsport
CAN Bus | 9
a) Enter name of the CAN‐channel.
b) Enter CAN message ID. Check the box, if extended IDs (29 bit) are used.
c) If replacement values are used, specify time‐out period and raw value.
d) Check the box, if a multiplexer (row counter) is used.
e) Enter data position, length and format.
f) The matrix table shows the assignment of the bits.
• Red colored fields show the assignment of the data bits.
• Orange colored fields show the assignment of the multiplexer bits.
9.2.5 Conversion to Physical Values
a) Enter factor (gain) for conversion to physical value.
b) Enter offset for conversion to physical value.
c) Select type of physical value.
d) Select unit of physical value.
e) Enter minimum physical limit of the channel (for manual setup).
f) Enter maximum physical limit of the channel (for manual setup).
g) Check the box to automatically adjust the limits of the channel.
9.2.6 Special Features
CAN analyzer functionality
This functionality is only available, if a MSA‐Box (I & II) is used to connect the
MSI 60 to the PC.
Choose the CAN bus that is connected to the MSA‐Box to display the raw value
and the converted physical value here.
Bosch Motorsport
Modular Sensor Interface MSI 60
45 / 108
9 | CAN Bus
Automatic creation of online measurement sheets
The CAN channel can be automatically inserted to a measurement sheet. Insert a
name for a new sheet or select an existing sheet from the listbox.
For an online view of the value measured by the MSI 60, insert the channel in an
online measurement sheet which is described in the next chapter.
9.2.7 Online View of CAN Channels in Vehicle
1. Double‐click on ‘Sheet 1’ in Project Tree.
Measurement Sheet 1 is displayed in Main Area.
2. Click on ‘Measurement elements’ in the Toolbox.
46 / 108
Modular Sensor Interface MSI 60
Bosch Motorsport
CAN Bus | 9
3. Drag the desired Measurement element (e.g. Numeric Indicator) and drop it
on the Measurement Sheet.
4. Click on folder ‘CAN Input’ of desired CAN bus to display available channels.
5. Drag desired measurement channel and drop it on the measurement ele‐
ment.
The measurement element displays the values of the assigned channel.
6. Connect PC to the vehicle and switch to ‘Race Mode’ by clicking ‘F11’ on the
keyboard to display online data.
9.2.8 Import a CAN Database (DBC) File
1. Right‐click on CAN Input of desired bus (CAN1 or CAN2).
2. Select ‘Import DBC file’ from menu.
A file browser opens.
3. Select DBC file to import and click ‘OK’ when done.
Bosch Motorsport
Modular Sensor Interface MSI 60
47 / 108
9 | CAN Bus
A channel import window opens.
4. Select desired channels on the left and use the ‘Add’ button to add them to
import list.
5. Click ‘OK’ when complete.
The channels are inserted in the Data window.
9.2.9 Export RaceCon CAN Configuration
1. Right‐click on CAN Input of desired bus (CAN1 or CAN2).
2. Select ‘Export …’ from menu.
An ‘Export Selection’ window opens.
48 / 108
Modular Sensor Interface MSI 60
Bosch Motorsport
CAN Bus | 9
3. Specify the filename.
4. Click ‘OK’ when done.
9.2.10 Import RaceCon CAN Configuration
1. Right‐click on CAN Input of desired bus (CAN1 or CAN2).
2. Select ‘Import …’ from menu.
A file browser opens.
3. Select the input file and click ‘OK’.
An ‘Import Selection’ window opens.
4. Select channels to import.
5. Drag and drop the channel to ‘CAN Input’ of desired CAN bus on right hand
side.
6. Click ‘Next’.
Bosch Motorsport
Modular Sensor Interface MSI 60
49 / 108
9 | CAN Bus
If a measurement channel belongs to more than one source (e.g. MSI 60 and
ECU MS 5.1), the ‘Solve Label Ambiguity’ window opens.
7. Assign the ambiguous channels to the desired source.
8. Click ‘Finish’.
9.3 CAN Output
This chapter describes the CAN Output Channel of the MSI 60.
9.3.1 Output Configuration
a) Open CAN output message.
b) Create new CAN output message.
c) Export RaceCon CAN output configuration to file.
d) Import RaceCon CAN output configuration from file.
e) Display CAN bus properties (baudrate).
9.3.2 Create new CAN Output Message Channel
1. Right‐click on CAN Output of desired bus (CAN1 or CAN2).
50 / 108
Modular Sensor Interface MSI 60
Bosch Motorsport
CAN Bus | 9
2. Select ‘New CAN Message’ from menu.
The ‘Create new CAN message’ window opens.
3. Enter name of message, CAN‐Id and Grid (output interval).
4. Optionally, specify a row counter (multiplexer).
5. Click ‘OK’ when done.
A CAN message configuration window opens in the Main Area.
6. Click on ‘MSI 60’ in the MSI 60 Project Tree to display all labels.
7. Select the desired measurement channel and drop it on message’s bytes.
The measurement channel is assigned to the CAN message.
9.3.3 Set up of Word Length, Byte Order and
Quantization
Word length and quantization of channel can be adapted if necessary.
Byte Order can only be changed if a channel allocates more than one byte.
9.3.4 Export RaceCon CAN Configuration
1. Right‐click on CAN Output of desired bus (CAN1 or CAN2).
2. Select ‘Export …’ from menu.
The ‘Export Selection’ window opens.
Bosch Motorsport
Modular Sensor Interface MSI 60
51 / 108
9 | CAN Bus
3. Specify the filename.
4. Click ‘OK’ when done.
9.3.5 Import RaceCon CAN Configuration
1. Right‐click on ‘CAN Output’ of desired bus (CAN1 or CAN2).
2. Select ‘Import …’ from menu.
A file browser opens.
3. Select the input file and click ‘OK’.
An ‘Import Selection’ window opens.
4. Select channels to import.
52 / 108
Modular Sensor Interface MSI 60
Bosch Motorsport
CAN Bus | 9
5. Drag and drop the channel to ‘CAN Output’ of desired CAN bus on right
hand side.
6. Click ‘Next’.
If a measurement channel belongs to more than one source (e.g. M 60 and
ECU MS 5.1), the ‘Solve Label Ambiguity’ window opens.
7. Assign the ambiguous channels to the desired source.
8. Click ‘Finish’.
Bosch Motorsport
Modular Sensor Interface MSI 60
53 / 108
10 | Analog and Frequency Inputs
10 Analog and Frequency Inputs
This chapter describes the analog and frequency inputs.
10.1 Features
8 standard analog inputs
▪ 0 to 5 V
▪ 12 bit A/D converter
▪ Switchable 3.01 kOhm pull‐up resistor
▪ 10 kHz acquisition rate, up to 1 kHz recording rate
▪ Linear phase digital filter
32 universal analog inputs
▪ Differential
▪ ‐ 5 V to 5 V
▪ Single ended 0 to 5 V
▪ 18 bit A/D converter
▪ Switchable pull‐up resistors for switches, NTC, PT100 or PT1000 sensors
▪ 200 kHz acquisition rate, up to 1 kHz recording rate
▪ Linear phase digital filter
8 Lvdt inputs
▪ Switchable 2.5/5/10 kHz
▪ 3/5/10 VRMS
2 frequency inputs
▪ Switchable Hall/inductive/DF11
▪ 20 kHz max. frequency
▪ 10 ms measurement window
4 PWM outputs
▪ Low‐side switch
▪ Up to 1 A each
▪ Output frequency selectable
10.2 Measurement Channels
For each analog channel, several subchannels are available.
54 / 108
Modular Sensor Interface MSI 60
Bosch Motorsport
Analog and Frequency Inputs | 10
▪ Measurement labels with the characters ‘raw’ show the exact values in mV.
▪ Measurement labels with the characters ‘_fi’ show filtered values.
▪ The word ‘name’ in the table is a placeholder for the channel’s name.
Measurement label
Function
raw_name
mV value of sensor
raw_name_fi
filtered mV value of sensor
name
physical value of sensor
name_fi
filtered physical value
Filtered channels are routed through digital low pass filters:
▪ MSI 60 uses A/D converter oversampling and digital filtering to recording
rate.
▪ Digital filters eliminate ‘out‐of‐band’ noise.
▪ Cut‐off frequency automatically adjusted to recording rate.
▪ Linear phase – no signal distortion.
▪ Latency compensation – no filter delay in recorded data.
10.3 Configuring Inputs
This chapter describes how to configure the Input Sensors.
10.3.1 Configuring a predefined Bosch Sensor with the
‘Bosch Sensor Wizard’
1. Click on ‘Measurement Sources’ in the Toolbox.
Bosch Motorsport
Modular Sensor Interface MSI 60
55 / 108
10 | Analog and Frequency Inputs
2. Expand the list of ‘I/O Channels’ by clicking on ‘+’ in the MSI 60 Project Tree.
3. Drag the ‘Bosch Wizard’ from the Toolbox and drop it on the desired analog
input channel in the MSI 60 Project Tree.
56 / 108
Modular Sensor Interface MSI 60
Bosch Motorsport
Analog and Frequency Inputs | 10
The ‘Bosch Sensor Wizard’ opens.
a) Choose the sensor’s category.
b) Narrow your choice by choosing a type.
c) Select the exact type.
d) Opens sensor’s datasheet.
e) These calibration values will be used.
4. Click ‘Finish’ when done.
5. The ‘Create channel on MSI 60’ window opens.
6. Enter channel name and description.
7. Click ‘Ok’ when done.
Bosch Motorsport
Modular Sensor Interface MSI 60
57 / 108
10 | Analog and Frequency Inputs
8. The channel is inserted into the MSI 60 Project Tree.
a) Channel is linked to ANA05.
b) Available measurements for channel.
c) Input pin pull‐up resistor is activated.
d) Calculation of physical value with characteristic curve.
Available measurements for channel
Measurement label
Function
raw_name
mV value of sensor
raw_name_fi
filtered mV value of sensor
name
physical value of sensor
name_fi
filtered physical value
10.3.2 Configuring a Generic linear Sensor
Example: Acceleration sensor 5 g
▪ From sensor data sheet – operating characteristics:
▪ Sensitivity 400 mV/g, Offset 2,500 mV
▪ The sensor has a linear output signal with sensitivity and offset.
1. Click on ‘Measurement Sources’ in the Toolbox.
2. Expand the list of ‘I/O Channels’ by clicking on ‘+’ in the MSI 60 Project Tree.
58 / 108
Modular Sensor Interface MSI 60
Bosch Motorsport
Analog and Frequency Inputs | 10
3. Drag the ‘Sensitivity/Offset’ analog signal source from the Toolbox and drop
it on the desired analog input channel in the MSI 60 Project Tree.
A ‘Sensitivity/Offset Wizard’ opens.
4. To activate the internal MSI 60 pull‐up resistor, check the box.
The internal MSI 60 pull‐up resistor is used to get a 5 V signal at the analog
channel of the MSI 60.
Select the 3,010 Ohm pull‐up resistor.
5. Click ‘Next’ when done.
The second part of the ‘Sensitivity/Offset Wizard’ opens.
a) Physical (channel) value.
b) Electrical (pin) value.
c) Choose unit group and unit of physical value.
d) Enter values from sensor datasheet.
6. Click ‘Next’ when done.
The third part of the ‘Sensitivity/Offset Wizard’ opens.
a) Physical limits of channel.
b) Enter physical limits of the sensor.
c) Choose datatype of the measurement variable.
d) Checkbox to enable online calibration of offset and enter desired physical offset value.
e) Enter name to automatically create a new measurement sheet.
Bosch Motorsport
Modular Sensor Interface MSI 60
59 / 108
10 | Analog and Frequency Inputs
7. Click ‘Finish’ when done.
8. Enter channel name and description.
9. Click ‘OK’ when done.
a) Channel is linked to ANA01.
b) Available measurements for channel.
c) Input pin pull‐up resistor is activated.
d) Value for sensor.
e) Adjustment is enabled.
The channel is inserted into the MSI 60 Project Tree.
Available measurements for channel
Measurement label
Function
raw_name
mV value of sensor
raw_name_fi
filtered mV value of sensor
name
physical value of sensor
name_fi
filtered physical value
Working with automatically created measurement sheets is explained in chapter
‘Setting up an online Measurement [} 87]’.
See also
2 Setting up an online Measurement [} 87]
10.3.3 Configuring a Generic nonlinear Sensor
Example: Thermistor 5 kOhm
▪ From sensor data sheet: resistance values over temperature
▪ The sensor has a nonlinear behavior.
60 / 108
Modular Sensor Interface MSI 60
Bosch Motorsport
Analog and Frequency Inputs | 10
▪ Use characteristic curve for linearization.
▪ Input voltage is the ratio between pull‐up resistor and thermistor.
+5 V
3 kΩ
Pull-up
Pin
Thermistor
1. Click on ‘Measurement Sources’ in the Toolbox.
2. Expand the list of ‘I/O Channels’ by clicking on ‘+’ in the MSI 60 Project Tree.
3. Drag the ‘Characteristic Curve’ analog signal source from the Toolbox and
drop it on the desired analog input channel in the MSI 60 Project Tree.
A ‘Characteristic Curve Wizard’ opens.
4. To activate the internal MSI 60 pull‐up resistor, check the box.
The internal MSI 60 pull‐up resistor is used to get a 5 V signal at the analog
channel of the MSI 60.
Select the 3,010 Ohm pull‐up resistor.
a) Channel is linked to ANA1.
b) Available measurements for channel.
c) Input pin pull‐up resistor is activated.
d) Characterestic curve Properties.
e) Adjustment is enabled.
5. Click ‘Next’ when done.
Bosch Motorsport
Modular Sensor Interface MSI 60
61 / 108
10 | Analog and Frequency Inputs
The second part of the ‘Sensitivity/Offset Wizard’ opens.
a) Physical (channel) value.
b) Choose ‘Ohm’ to enter datasheet values directly and select physical unit.
c) Enter resistance/temperature pairs from sensor datasheet here (the 3.01 kOhm
pull‐up resistor is automatically taken into account).
6. Click ‘Next’ when done.
The third part of the ‘Characteristic Curve Wizard’ opens.
a) Physical limits of channel.
b) Enter physical limits of the channel.
c) Choose data type of the measurement.
d) This sensor does not need offset calibration.
e) Enter name to automatically create a new measurement sheet.
7. Click ‘Finish’ when done.
8. Enter channel name and description.
62 / 108
Modular Sensor Interface MSI 60
Bosch Motorsport
Analog and Frequency Inputs | 10
9. Click ‘OK’ when done.
The channel is inserted into the MSI 60 Project Tree.
a) Channel is linked to ANA_DIFF02.
b) Available measurements for channel.
c) Input pin pull‐up resistor is activated.
d) Characteristic curve for sensor.
e) Adjustment is disabled.
Available measurements for channel
Measurement label
Function
raw_name
mV value of sensor
raw_name_fi
filtered mV value of sensor
name
physical value of sensor
name_fi
filtered physical value
Working with automatically created measurement sheets is explained in chapter
‘Setting up an online Measurement [} 87]’.
10.3.4 Configuring a PT 100 or PT 1000 Sensor
Select one of the ANA_DIFF channels.
Double click the selected channel.
Bosch Motorsport
Modular Sensor Interface MSI 60
63 / 108
10 | Analog and Frequency Inputs
Select Characteristic Curve and drop it into the Main area.
Select all items as bellow.
PT100
Signal type
Single Ended
Pull‐up value
4.99 kOhm
Input range
0 … 5,000mV
Gain
16x
+5 V
4.99 kΩ
IN+
PT 100
IN200 Ω
PT1000
Signal type
64 / 108
Single Ended
Modular Sensor Interface MSI 60
Bosch Motorsport
Analog and Frequency Inputs | 10
Pull‐up value
49.9 kOhm
Input range
0 … 5,000mV
Gain
16x
+5 V
49.9 kΩ
IN+
PT 1000
IN200 Ω
And go next.
Select all items bellow.
Bosch Motorsport
X Axis unit
mV
Y Axis group
temperature
Y Axis unit
℃
Modular Sensor Interface MSI 60
65 / 108
10 | Analog and Frequency Inputs
Relation between mV and temperature
PT 100
mV
1278
1337
1396
1454
1512
1570
1628
1685
1742
1799
1856
1912
1968
2024
℃
‐40
‐30
‐20
‐10
0
10
20
30
40
50
60
70
80
90
mV
2080
2135
2190
2245
2299
2354
2408
2462
2515
2569
2622
2675
2727
2780
℃
100
110
120
130
140
150
160
170
180
190
200
210
220
230
mV
2832
2884
2936
2987
3038
3089
3140
3191
3241
3291
3341
3391
3440
3489
℃
240
250
260
270
280
290
300
310
320
330
340
350
360
370
mV
3538
3587
3636
3684
3732
3780
3827
3875
3922
3969
4016
4062
4109
4155
℃
380
390
400
410
420
430
440
450
460
470
480
490
500
510
mV
4201
4246
4292
4337
℃
520
530
540
550
PT 1000
mV
1323
1384
1445
1505
1565
1625
1684
1744
1803
1862
1920
1979
2037
2094
℃
‐40
‐30
‐20
‐10
0
10
20
30
40
50
60
70
80
90
mV
2152
2209
2266
2323
2379
2435
2491
2547
2602
2657
2712
2767
2822
2876
℃
100
110
120
130
140
150
160
170
180
190
200
210
220
230
mV
2930
2983
3037
3090
3143
3196
3248
3300
3352
3404
3456
3507
3558
3609
℃
240
250
260
270
280
290
300
310
320
330
340
350
360
370
mV
3659
3710
3760
3810
3859
3909
3958
4007
4055
4104
4152
4200
4248
4295
℃
380
390
400
410
420
430
440
450
460
470
480
490
500
510
mV
4343
4390
4437
4484
℃
520
530
540
550
▪ X axis has 16 grids; please choose the range that will be measured.
Go Next.
66 / 108
Modular Sensor Interface MSI 60
Bosch Motorsport
Analog and Frequency Inputs | 10
Select all items bellow.
Limit minimum
Expected minimum temperature
Limit maximum
Expected maximum temperature
Output data type
8, 12 or 16 Bit
Adjustment value
Check it if adjustment value will be used, and input adjust‐
ment value
Measurement sheet Input the name of Measurement sheet if needed
Go Finish.
Bosch Motorsport
Modular Sensor Interface MSI 60
67 / 108
10 | Analog and Frequency Inputs
Put in the channel name and its description (optional).
Go OK
After sensor setup, MSI 60 Front left goes orange (different between PC and MSI
60 Front left). Then right click and select Download configuration.
Fig. 7: Before sending configuration
68 / 108
Modular Sensor Interface MSI 60
Bosch Motorsport
Analog and Frequency Inputs | 10
Fig. 8: After sending configuration
Right click MSI 60 Front left and create measuring views. It shows raw and physi‐
cal value.
10.3.5 Configuring an LVDT Sensor
Example: LVDT sensor 50 mm
From sensor data sheet – operating characteristics:
Stroke range
± 1.00 inch
± 25.4 mm
Sensitivity
0.8 V/V/inch
31.5 mV/V/mm (C)
Output at stroke ends
800 mv/V
Non‐linearity (% of FR), max.
± 0.25
Input voltage, sine wave
3 VRMS (B)
Input frequency range
400 Hz to 5 kHz
Test input frequency
2.5 kHz (A)
▪ Sensitivity 31.5 mV/V/mm
▪ The zero position of the sensor is internally represented as +2,500 mV, there‐
fore the Offset must be set to 2,500 mV.
▪ The sensor has a linear output signal with sensitivity and offset.
Bosch Motorsport
Modular Sensor Interface MSI 60
69 / 108
10 | Analog and Frequency Inputs
1. Click on ‘Measurement Sources’ in the Toolbox.
2. Expand the list of ‘I/O Channels’ by clicking on ‘+’ in the MSI 60 Project Tree.
3. Drag the ‘Sensitivity/Offset’ analog signal source from the Toolbox and drop
it on the desired LVDT input channel in the MSI 60 Project Tree.
A ‘Sensitivity/Offset Wizard’ opens.
4. Set the according operation parameter from sensor data sheet for frequency
(A) and input voltage (B).
5. Click ‘Next’ when done.
The second part of the ‘Sensitivity/Offset Wizard’ opens.
a) Physical (channel) value.
b) Electrical (pin) value.
c) Choose unit group and unit of physical value.
d) Enter values from sensor datasheet.
6. Click ‘Next’ when done.
The third part of the ‘Sensitivity/Offset Wizard’ opens.
a) Physical limits of channel.
b) Enter physical limits of the sensor.
c) Choose datatype of the measurement variable.
d) Checkbox to enable online calibration of offset and enter desired physical offset value.
e) Enter name to automatically create a new measurement sheet.
70 / 108
Modular Sensor Interface MSI 60
Bosch Motorsport
Analog and Frequency Inputs | 10
7. Click ‘Finish’ when done.
8. Enter channel name and description.
9. Click ‘OK’ when done.
The channel is inserted into the MSI 60 Project Tree.
a) Channel is linked to LVDT01.
b) Available measurements for channel.
c) Operating parameters for sensor.
d) Sensitivity and offset properties.
e) Adjustment is enabled.
Available measurements for channel
Measurement label
Function
raw_name
mV value of sensor
raw_name_fi
filtered mV value of sensor
name
physical value of sensor
name_fi
filtered physical value
Working with automatically created measurement sheets is explained in chapter
‘Setting up an online Measurement [} 87]’.
10.3.6 Configuring a Multipoint Adjustment
Example: Measurement of wheel force
▪ Physical property ‘wheel force’ not directly measureable.
▪ Load transfer through suspension kinematics.
▪ Physical value at sensor position defined by vehicle.
▪ Curve definition by online adjustment at vehicle.
1. Click on ‘Measurement Sources’ in the Toolbox.
2. Expand the list of ‘I/O Channels’ by clicking on ‘+’ in the MSI 60 Project Tree.
Bosch Motorsport
Modular Sensor Interface MSI 60
71 / 108
10 | Analog and Frequency Inputs
3. Drag the ‘Multipoint Adjustment’ analog signal source from the Toolbox and
drop it on the desired analog input channel in the MSI 60 Project Tree.
A ‘Multipoint Adjustment Wizard’ opens.
4. To activate the internal MSI 60 pull‐up resistor, check the box.
The internal MSI 60 pull‐up resistor is used to get a 5 V signal at the analog
channel of the MSI 60.
The fixed value of the internal MSI 60 pull‐up resistor is 3,010 Ohm.
1. Click ‘Next’ when done.
The second part of the ‘Multipoint Adjustment Wizard’ opens.
a) Physical (channel) value.
b) Electrical (pin) value.
c) Choose unit group and unit of physical value.
d) Select type of curve.
e) Enter physical adjustment values here (can still be edited later).
2. Click ‘Next’ when done.
72 / 108
Modular Sensor Interface MSI 60
Bosch Motorsport
Analog and Frequency Inputs | 10
The third part of the ‘Multipoint Adjustment Wizard’ opens.
a) Physical (channel) value.
b) Electrical (pin) value.
c) Enter physical limits of the sensor.
d) Choose data type of the measurement variable.
e) Enable additonal online calibration.
f) Enter name to automatically create a new measurement sheet.
3. Click ‘Finish’ when done.
4. Enter channel name and description.
5. Click ‘OK’ when done.
The channel is inserted into the MSI 60 Project Tree.
a) Channel is linked to ANA06.
b) Available measurements for channel
c) Input pin pull‐up resistor is activated.
d) Multipoint characteristic curve for sensor
e) Adjustment is enabled.
Available measurements for channel
Bosch Motorsport
Measurement label
Function
raw_name
mV value of sensor
raw_name_fi
filtered mV value of sensor
name
physical value of sensor
Modular Sensor Interface MSI 60
73 / 108
10 | Analog and Frequency Inputs
Measurement label
Function
name_fi
filtered physical value
Online definition of the curve is covered in the chapter ‘Online Calibration of
Measurement Channels [} 93]’.
Working with automatically created measurement sheets is explained in chapter
‘Setting up an online Measurement [} 87]’.
10.3.7 Digital Filter Details
MSI 60 uses A/D converter oversampling and digital filtering to recording rate.
Digital filters eliminate ‘out-of-band’ noise
Cut-off frequency automatically adjusted to recording rate
Linear phase – no signal distortion
Example:
▪ 100 Hz recording rate (10 ms)
▪ < 40 Hz passband (> 99%)
▪ > 50 Hz stopband (< 1%)
74 / 108
Modular Sensor Interface MSI 60
Bosch Motorsport
Analog and Frequency Inputs | 10
Latency compensation – no filter delay in recorded data
▪ Filtering is (smart) averaging over several samples.
▪ Filtered signal is delayed with respect to real time signal.
▪ MSI 60 filters have constant, frequency independent delay.
▪ Delay (e.g. 22 samples at 10 ms) is corrected during recording.
▪ No delay filtered vs. unfiltered in recorded data.
▪ Correction is (of course) not possible for real time data (display, online, PWM
out).
▪ Use filtered data for recording, use unfiltered data for realtime.
10.3.8 Configuring a Frequency Input
Example: Measurement of wheel speed
▪ Pulse wheel attached to wheel
▪ Each passing tooth of pulse wheel triggers Hall sensor
▪ Calculation of wheel speed with wheel circumference
1. Click on ‘Measurement Sources’ in the Toolbox.
2. Expand the list of ‘I/O Channels’ by clicking on ‘+’ in the MSI 60 Project Tree.
Bosch Motorsport
Modular Sensor Interface MSI 60
75 / 108
10 | Analog and Frequency Inputs
3. Drag the ‘Velocity’ digital signal source from the Toolbox and drop it on the
desired ‘REV’ input channel in the MSI 60 Project Tree. The ‘Velocity Wizard’
opens.
a) Number of teeth on the pulse wheel.
b) Circumference of wheel for speed calculation.
c) Choose data type of the measurement variable.
d) Choose Limit minimum speed.
e) Choose Limit minimum speed.
f) Enter name to automatically create a new measurement sheet.
4. Click ‘Finish’ when done.
5. Enter channel name and description.
6. Click ‘OK’ when done. The channel is inserted into the MSI 60 Project Tree.
a) Channel is linked to REV01.
b) Available measurements for channel.
c) Input pin has Hall interface.
d) Number of teeth.
e) Wheel circumference.
76 / 108
Modular Sensor Interface MSI 60
Bosch Motorsport
Analog and Frequency Inputs | 10
Available measurements for channel
Notice
Measurement label
Function
raw_name
mV value of sensor
raw_name_fi
filtered mV value of sensor
name
physical value of sensor
name_fi
filtered physical value
Measurement of ‘Revolution’ is similar.
10.4 Configuring computed Sources
Computed sources receive data from a measurement channel rather than an in‐
put pin.
▪ Sensitivity/Offset calculation on input channel
▪ Characteristic curve calculation on input channel
▪ Computed vehicle speed
▪ PWM output control (covered in a special section)
▪ Lap trigger (covered in a special section)
Example: Sensitivity/Offset calculation on input channel
1. Click ‘Measurement Sources’ in the Toolbox.
2. Drag the ‘Sensitivity/Offset’ computed source from the Toolbox and drop it
on ‘Computed Channels’ in the MSI 60 Project Tree.
A ‘Computed Sensitivity / Offset Wizard’ opens.
a) Choose input channel.
b) Choose unit group and unit of output.
c) Enter sensitivity and offset of conversion formula.
Bosch Motorsport
Modular Sensor Interface MSI 60
77 / 108
10 | Analog and Frequency Inputs
3. Click ‘Next’ when done.
The second part of the ‘Computed Sensitivity / Offset Wizard’ opens.
a) Enter physical limits of the channel.
b) Choose data type of the measurement variable.
c) Check the box to force the channel’s quantization if the quantization should
be a fixed value in the whole CAN system.
d) Enter name to automatically create a new measurement sheet*.
4. Click ‘Finish’ when done.
5. Enter channel name and description.
6. Click ‘OK’ when done.
The channel is inserted into the MSI 60 Project Tree.
*Working with automatically created measurement sheets is explained in chapter
‘Setting up an online Measurement [} 87]’.
10.5 Hysteresis
The hysteresis function avoids the high‐frequent switchover of the measurement
channel value. The hysteresis can be adjusted for each input measurement chan‐
nel individually and can be used for further processing.
1. Click ‘Measurement Sources’ in the Toolbox.
78 / 108
Modular Sensor Interface MSI 60
Bosch Motorsport
Analog and Frequency Inputs | 10
2. Drag the ‘Hysteresis’ computed source from the Toolbox and drop it on
‘Computed Channels’ in the MSI 60 Project Tree.
A ‘Hysteresis Wizard’ opens.
a) Choose input measurement channel.
b) Choose unit group and unit of output.
c) Enter output value of state A in the unit selected in b).
d) Enter threshold value when state changes from A to B.
e) Enter delay time when state changes from A to B.
f) Enter output value of state B in the unit selected in b).
g) Enter threshold value when state changes from B to A.
h) Enter delay time when state changes from B to A.
i) Enter time when the hysteresis function is activated after vehicle’s startup.
j) Enter the channel’s state (A or B) at startup.
3. Click ‘Next’ when done.
The second part of the ‘Hysteresis Wizard’ opens.
a) Choose data type of the measurement variable.
b) Check the box to force the channel’s quantization if the quantization
should be a fixed value in the whole CAN system.
c) Enter name to automatically create a new measurement sheet.
4. Click ‘Finish’ when done.
5. Enter channel name and description.
6. Click ‘OK’ when done.
The channel is inserted into the MSI 60 Project Tree.
Bosch Motorsport
Modular Sensor Interface MSI 60
79 / 108
10 | Analog and Frequency Inputs
a) Channels available in computed sources.
b) Available measurements for channel.
c) Calculation of hysteresis channel.
10.5.1 Special Functionality: Vehicle speed
This functionality allows:
▪ High performance vehicle owners to measure wheel spin under acceleration
and wheel slip/lock under braking.
▪ Calculating vehicle ‘speed over ground’.
Vehicle speed calculation function
▪ Calculating vehicle speed of 2 wheel drive: (Wheel speeds of non‐driven axle
as input).
Calculated speed is average of both speeds if speed difference between
wheels < limit.
Calculated speed is maximum of both speeds if speed difference between
wheels > limit.
▪ Calculating vehicle speed of 4 wheel drive: (Wheel speeds of all wheels as in‐
put).
Calculated speed is speed of 2nd fastest wheel.
10.5.2 Setting up calculated Speed
1. Click on tab ‘System Overview’.
2. Click on ‘Measurement Sources’ in the Toolbox.
80 / 108
Modular Sensor Interface MSI 60
Bosch Motorsport
Analog and Frequency Inputs | 10
3. Drag the ‘Speed’ computed source from the Toolbox and drop it on ‘Compu‐
ted Channels’ in the MSI 60 Project Tree. Do not drop it on ‘MSI 60’!
A ‘Calculated Speed Wizard’ opens.
a) Choose device.
b) Choose input source (internal / external).
c) Choose driven axle.
d) Choose individual wheel speed channels.
e) Set limit for speed difference for calculation.
4. Click ‘Finish’ when done.
The speed calculation is inserted into the MSI 60 Project Tree.
a) Speed calculation in MSI 60 Project Tree.
b) Measurement channels calculated speed and calculated distance.
c) Configuration window.
Bosch Motorsport
Modular Sensor Interface MSI 60
81 / 108
10 | Analog and Frequency Inputs
10.6 PWM Outputs
PWM
▪ Pulse Width Modulation
▪ Output frequency is constant.
▪ ‘On time’ (duty cycle) controlled by input channel.
MSI 60 has 4 PWM outputs:
▪ Low‐side switch
▪ Up to 1 A each
▪ Selectable output frequency
▪ Duty cycle controlled by characteristic curve.
82 / 108
Modular Sensor Interface MSI 60
Bosch Motorsport
Analog and Frequency Inputs | 10
Configuring a PWM Output
1. Click on ‘Measurement Sources’ in the Toolbox.
2. Drag the ‘PWM Out’ computed source from the Toolbox and drop it on the
desired ‘PWM_OUT’ channel in the MSI 60 Project Tree.
A ‘PWM Out Wizard’ opens.
Working with automatically created measurement sheets is explained in
chapter ‘Setting up an online Measurement [} 87]’.
Choosing a filtered channel as an input for ‘PWM_OUT’ will cause delayed re‐
action due to the delay introduced by the digital filter. Use unfiltered values
for this purpose.
The ‘power‐on’ state of the PWM output is ‘switch open’ (0% duty cycle).
a) Choose input channel.
b) Choose output frequency.
c) Define characteristic curve.
d) Enter name to automatically create a new measurement sheet.
3. Click ‘Finish’ when done.
4. Enter channel name and description.
Bosch Motorsport
Modular Sensor Interface MSI 60
83 / 108
10 | Analog and Frequency Inputs
5. Click ‘OK’ when done.
The channel is inserted into the MSI 60 Project Tree.
a) Channel is linked to ‘PWM_OUT01’.
b) Measurement channels.
c) Characteristic curve.
d) Output frequency.
Diagnostic channels
Notice
Measurement label
Function
pwm_err_ls_out_01_OL
PWM output 1 error open load
pwm_err_ls_out_01_OT
PWM output 1 error over temperature
pwm_err_ls_out_01_SCB
PWM output 1 error short circuit to
battery
pwm_err_ls_out_01_SCG
PWM output 1 error short circuit to
GND
The diagnosis of PWM output 2 to 4 is similar.
See also
2 Setting up an online Measurement [} 87]
84 / 108
Modular Sensor Interface MSI 60
Bosch Motorsport
Online Measurement | 11
11 Online Measurement
MSI 60 configuration
▪ System configuration (channel configuration, CAN I/O, PWM Out, etc.) is
stored in the MSI 60.
▪ Use RaceCon to create and download configuration from the PC to MSI 60
▪ Communication interface: Ethernet
▪ Communication protocol: XCP
Online measurement and calibration
▪ System status and diagnosis
▪ Check and calibrate sensors in the vehicle.
▪ Live display of sensor values on the PC
▪ Use RaceCon for diagnosis, online measurement and calibration.
▪ Communication interface: Ethernet
▪ Communication protocol: XCP
11.1 Achieving an online Connection
This chapter describes how to set up the PC for access, going online and how to
update the firmware.
11.1.1 Set up the PC for Access
1. Switch off local firewall on the PC.
2. Set IP Configuration for the Ethernet interface to ‘automatic configuration’
(DHCP).
3. Start RaceCon.
4. Establish the Ethernet connection to the vehicle.
5. Power on the vehicle.
6. Click ‘OK’ to download RaceCon configuration to device.
Bosch Motorsport
Modular Sensor Interface MSI 60
85 / 108
11 | Online Measurement
Yellow dot indicates live connection to the device, but local RaceCon configura‐
tion does not match the MSI 60’s configuration.
11.1.2 Going online
Click ‘OK’ to download RaceCon configuration to MSI 60.
The download starts.
A green dot and background on the device in the project view and the MSI 60
Project Tree indicate a successful download and system consistency.
If the system’s configuration in RaceCon has been changed, the dot and back‐
ground becomes yellow and a configuration download is necessary.
11.1.3 Configuration Download
1. Right‐click on MSI 60 in the MSI 60 Project Tree.
86 / 108
Modular Sensor Interface MSI 60
Bosch Motorsport
Online Measurement | 11
2. Select ‘Download configuration’.
The configuration download starts.
A green dot and background indicate a successful download.
11.2 Setting up an online Measurement
MSI 60 supports online measurement of sensor values and diagnostic variables.
Expand ‘Measurement Container’ and ‘Measurement Folder 1’ in the Project Tree
and double‐click on ‘Sheet1’. The ‘Sheet 1’ is opened in the Main Area.
Bosch Motorsport
Modular Sensor Interface MSI 60
87 / 108
11 | Online Measurement
From the context menu of the project, new measurement folders can be created.
From the context menu of a measurement folder, the folder can be renamed and
deleted. It also allows the creation of measurement pages.
From the context menu of a measurement page, the page can be renamed and
deleted.
88 / 108
Modular Sensor Interface MSI 60
Bosch Motorsport
Online Measurement | 11
To change between different pages, click on the tabs on the bottom of the Main
Project Area.
To add an element to a measurement sheet do following steps:
1. Drag a measurement element from the Toolbox and drop it on the measure‐
ment sheet.
2. Click on ‘MSI 60’ in the Project Tree to display all measurement channels.
Bosch Motorsport
Modular Sensor Interface MSI 60
89 / 108
11 | Online Measurement
3. Select the desired measurement channel and drop it on the measurement el‐
ement.
If the MSI 60 is online, the value is displayed.
The measurement element’s appearance can be changed using the Properties
Menu.
RaceCon offers different types of measurement elements:
a) Circular gauge
b) Temperature gauge
c) Vertical Bar graph style
d) Horizontal Bar
Measurement label
90 / 108
Modular Sensor Interface MSI 60
Bosch Motorsport
Online Measurement | 11
Numeric indicator
Oscilloscope (Chart)
11.2.1 Automatic Creation of Measurement Sheets
RaceCon can create measurement sheets automatically. You can create and use
measurement sheets with the MSI 60 as well as with all other devices connected
to RaceCon.
1. During the configuration of a measurement channel, select a measurement
sheet from the list box or enter a name for a new measurement sheet.
a) Select existing sheet from list or enter name of new sheet.
Bosch Motorsport
Modular Sensor Interface MSI 60
91 / 108
11 | Online Measurement
2. To create the sheets, right‐click on ‘MSI 60 and select ‘Create measurement
views …’ from the MSI 60 context menu.
a) Click to create measurement sheets.
The automatically created sheet is inserted in the Project Tree under ‘Measure‐
ment Container’ and ‘Device Channels’. If the MSI 60 is connected to RaceCon,
live values of the channels are shown.
a) Access to sheet
b) Raw and physical channel values
c) Characteristic values
d) Button for online offset calibration
11.2.2 Using the Measurement Sheets
1. When RaceCon is online, press the ‘F11’ key to switch from ‘Design Mode’ in‐
to ‘Race Mode’.
The measurement sheet is extended to full screen.
The button for offset calibration is active.
2. Switch between different sheets using the tabs at the bottom of the page or
the keyboard shortcuts associated with the sheets.
3. Press the ‘Esc’ key to return to ‘Design Mode’.
92 / 108
Modular Sensor Interface MSI 60
Bosch Motorsport
Online Measurement | 11
11.3 Online Calibration of Measurement Channels
▪ Analog sensors drift with age, temperature, etc.
▪ Manual calibration is necessary
▪ Solution: online offset calibration
▪ Example: acceleration sensor
Bosch Motorsport
Modular Sensor Interface MSI 60
93 / 108
11 | Online Measurement
11.3.1 Enable online offset Calibration for Measurement
Channel
During creation of the measurement channel
a) Check box to enable online offset calibration and enter
desired physical target value.
In the channel view
a) Activate switch to enable online calibration.
11.3.2 Performing the online offset Calibration
1. MSI 60 has to be connected to RaceCon to calibrate the sensor’s offset.
2. Apply the desired physical condition to the sensor (e.g. 1 G to an acceleration
sensor).
3. Open the measurement channel’s online page by double‐clicking on the
measurement channel name in the Data Area.
94 / 108
Modular Sensor Interface MSI 60
Bosch Motorsport
Online Measurement | 11
4. Enter the physical target value (e.g. 1 G) and press the ‘Calibrate’ button.
a) Calibration target value
b) Initiate calibration
The sensor’s offset is now calibrated.
11.4 Group Adjustment
Group adjustment is the simultaneous online calibration of several channels. This
is useful e.g. to set all wheel forces and damper positions to ‘0’ when the vehicle
is positioned on a flat patch.
To setup a group adjustment, right‐click on ‘Group adjustments’ in the project
tree and select ‘Add group adjustment’.
Group adjustment window is opened in the Main area with all adjustable config‐
ured channels listed.
Bosch Motorsport
Modular Sensor Interface MSI 60
95 / 108
11 | Online Measurement
a) Click to select a trigger channel.
b) Click to select activation condition.
c) Check box to add channel to group adjustment.
d) If device is online, click to test adjustment.
Select or create a trigger channel, set the trigger edge and assign the channels to
be adjusted by this trigger condition.
Add a further group by right‐click on ‘Group adjustments’ in the project tree and
select ‘Add group adjustment’.
From the context menu it is possible to rename the group.
Select the trigger channel, trigger edge and assign the channels to be adjusted.
96 / 108
Modular Sensor Interface MSI 60
Bosch Motorsport
Online Measurement | 11
11.5 Online Calibration of Multipoint Adjustment
Channels
Example: Measurement of wheel force
▪ Physical property ‘wheel force’ not directly measureable
▪ Load transfer through suspension kinematics
▪ Physical value at sensor position defined by vehicle
▪ Curve definition by online adjustment at vehicle
1. Create a multipoint adjustment measurement channel. To create a multipoint
channel, see chapter ‘Configuring a Multipoint Adjustment [} 71]‘.
2. Download the configuration on the MSI 60. To connect the MSI 60 to Race‐
Con, see chapter ‘Connecting the MSI 60 to RaceCon [} 23]’.
3. Click on the desired channel in the MSI 60 Project Tree.
Bosch Motorsport
Modular Sensor Interface MSI 60
97 / 108
11 | Online Measurement
4. Double‐click on a measurement channel in the Data Area to open the online
view.
a) Click to open measurement channels in data view.
b) Double‐click to open online view.
c) Click to open calibration window.
d) Analog and physical value.
5. Click on ‘Calibrate adjustment points’ to open calibration window.
6. Apply the desired physical condition to the sensor (e.g. by applying a force
on the wheel).
7. Enter the physical value in the value column of the desired calibration point
(e.g. 745 N).
8. Press the ‘Calibrate’ button of the desired calibration point.
9. Repeat for all curve points.
10. Click ‘Close’ when done.
The calibration curve is displayed in the online view.
98 / 108
Modular Sensor Interface MSI 60
Bosch Motorsport
Online Measurement | 11
Adjustment points vs. offset adjustment
Bosch Motorsport
Modular Sensor Interface MSI 60
99 / 108
12 | Firmware
12 Firmware
12.1 Firmware and Configuration
MSI 60 holds 3 types of data:
▪ Firmware: the software (PST program file) of the MSI 60
▪ Configuration: the configuration of Input channels, CAN I/O, PWM
▪ Calibration data: Characteristic curves and offsets created by online calibra‐
tion at the vehicle.
12.2 Firmware Update
The scheme shows the process during each connection between RaceCon and
MSI 60.
Performing the Firmware Update
Firmware update is only possible if the MSI 60 is connected to RaceCon.
The configuration of input channels, CAN I/O and PWM will not be changed.
100 / 108
Modular Sensor Interface MSI 60
Bosch Motorsport
Firmware | 12
1. In the MSI 60 Project Tree, right‐click on ‘MSI 60’ and choose ‘Synchronize’
then ‘Update firmware …’.
1. Select the destination of the firmware archive (PST).
2. Click ‘OK’ when done.
The firmware update starts. The MSI 60 displays the message ‘Updating firm‐
ware’.
When the firmware update is complete, the MSI 60 displays the message
‘Updating firmware finished. Do a power cycle.’
Notice
Do not switch off the car’s ignition or interrupt the power sup‐
ply during the update!
In case of interruption the power data will be lost or the device could be dam‐
aged.
Bosch Motorsport
Modular Sensor Interface MSI 60
101 / 108
12 | Firmware
3. Switch the car’s ignition off and on again to cycle the power of the MSI 60.
102 / 108
Modular Sensor Interface MSI 60
Bosch Motorsport
GPS Sensor | 13
13 GPS Sensor
13.1 GPS (Global Positioning System)
▪ Space‐based global navigation satellite system.
▪ GPS provides positioning, navigation, and timing services to worldwide users.
▪ GPS receiver (sensor) gives digital information about position (longitude, lati‐
tude, height), ground speed, course, and status.
Two types of GPS receivers:
▪ CAN output ‐> Read in messages via CAN Input of MSI 60 (not covered
here).
▪ Serial output ‐> Read in messages via RS232 Interface of MSI 60.
Serial Interface Characterization
▪ Voltage levels: RS232 is standard (+/‐12 V), UART (0 V/ 5 V) needs level shift‐
er.
▪ Baud rate: 9,600 is standard for GPS, MSI 60 supports 1,200 to 115,200 baud.
GPS Rx interface baud rate must match the device baud rate. MSI 60 baud
rate can be set with the ‘GPS_BAUDRATE’ characteristic.
▪ Data format: MSI 60 expects 8 data bits, no parity bit, 1 stop bit (8N1).
13.2 Protocol
MSI 60 expects NMEA Protocol (ASCII).
The following messages are decoded:
Message
Function
GGA
GPS fix information
GSA
Overall satellite data
GSV
Detailed satellite data
RMC
Recommended minimum data for GPS
VTG
Vector track and speed over the ground
On most GPS sensors, these messages are activated in the default configuration.
13.3 Sensor Recommendation
The system has been tested with a Navilock NL 403P serial GPS receiver.
This sensor is based on an UBlox5 chipset and is fully configurable with UCenter
SW.
Bosch Motorsport
Modular Sensor Interface MSI 60
103 / 108
13 | GPS Sensor
13.4 Measurement Labels
The decoded NMEA messages are copied to these MSI 60 measurement labels.
Measurement label
Function
gps_PDOP
Position Dilution Of Precision
gps_HDOP
Horizontal Dilution Of Precision
gps_VDOP
Vertical Dilution Of Precision
gps_lat
Latitude in NDEG ‐ +/‐[degree][min].
[sec/60]
gps_long
Longitude in NDEG ‐ +/‐[degree][min].
[sec/60]
gps_elv
Antenna altitude above/below mean
sea level (geoid) in meters
gps_speed
Speed over the ground in kilometers/
hour
gps_direction
Track angle in degrees
gps_declination
Magnetic variation degrees (Easterly
var. subtracts from true course)
gps_year
Years since 1900
gps_mon
Months since January ‐ [0,11]
gps_day
Day of the month ‐ [1,31]
gps_hour
Hours since midnight ‐ [0,23]
gps_min
Minutes after the hour ‐ [0,59]
gps_sec
Seconds after the minute ‐ [0,59]
gps_hsec
Hundredth part of second ‐ [0,99]
gps_smask
Mask specifying types of packages from
which data has been obtained
gps_sig
GPS quality indicator (0 = Invalid; 1 =
Fix; 2 = Differential, 3 = Sensitive)
gps_fix
Operating mode, used for navigation (1
= Fix not available; 2 = 2D; 3 = 3D)
These measurement labels are arrays, where the indexed element points to the
same satellite (E.g. gps_info_satsigstrength[3] tells the receiving signal strength
of satellite 3. Satellite 3 has the SAT‐ID given in gps_info_satid[3]).
104 / 108
Measurement label
Function
gps_info_satid[ ]
Satellite PRN number
gps_info_satinuse[ ]
Used in position fix
gps_info_satelevation[ ]
Elevation in degrees, 90 maximum
gps_info_satazimuth[ ]
Azimuth, degrees from true north, 000
to 359
Modular Sensor Interface MSI 60
Bosch Motorsport
GPS Sensor | 13
Measurement label
Function
gps_info_satsigstrength[ ]
Signal, 00‐99 dB
13.5 GPS Troubleshooting
Electrical
▪ Is the transmitter signal of the GPS sensor connected to the receiver pin of
the serial interface of the MSI 60?
▪ Is the GPS sensor powered up?
▪ Does the GPS sensor deliver RS232 signal levels?
Interface
▪ Do the baudrates of the GPS sensor and the device match?
▪ Is the GPS sensor set up for 8N1 transmission parameters?
▪ Is the GPS sensor set up for NMEA messages?
▪ Are the GGA, VTG, RMC messages activated?
▪ With a correctly wired and powered GPS sensor the changing GPS time infor‐
mation (gps_sec) can be immediately observed.
GPS sensor start‐up
▪ Does the GPS sensor ‘view’ the sky?
▪ Did the GPS sensor complete its initial start‐up procedure? This may take up
to 20 min.
▪ A correct reception is indicated when ‘gps_fix’ is showing ‘3D Fix’.
Bosch Motorsport
Modular Sensor Interface MSI 60
105 / 108
14 | RaceCon Shortcuts
14 RaceCon Shortcuts
The table shows important shortcuts simplify controlling the MSI 60 in RaceCon.
Shortcut
Function
General navigation
F1
Open RaceCon help
F2
Rename selected object
F3
Select Data Area
F4
Select Project Tree
F5
‐
F6
Start the data comparison
F7
Start dataset manager
F8
Toggle WP/RP
F9
Start measurement
CTRL + F9
Start recording
F10 or Alt
Go to menu bar
F11
Toggle display to fullscreen ‘Race
Mode’
F12
Enlarge main screen
CTRL + Tab
Switch between opened windows
Project Tree
Plus (+) at numeric pad or
right cursor
Expand selected node
Minus (‐) at numeric pad or
left cursor
Close selected node
Star (*) at numeric pad
Open all nodes
DEL
Delete selected object
Display page, measurement page
106 / 108
Cursor
Move selected display element one grid
unit in chosen direction
SHIFT + cursor
Enlarge/reduce selected display ele‐
ment one grid unit
Tab
Switch between display elements
Modular Sensor Interface MSI 60
Bosch Motorsport
Bosch Engineering GmbH
Motorsport
Robert-Bosch-Allee 1
74232 Abstatt
Germany
www.bosch-motorsport.com