1
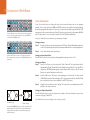
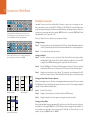
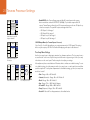
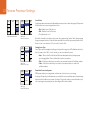
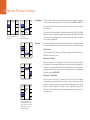
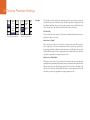
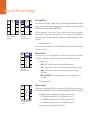
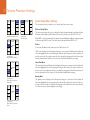
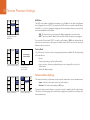
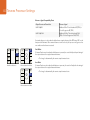
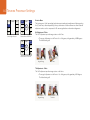
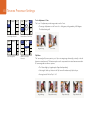
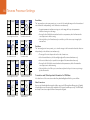
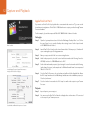
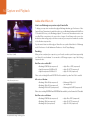
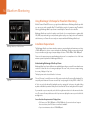
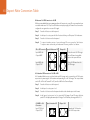
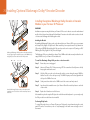
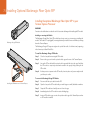
74 Installing Optional Blackmagic Dolby® Encoder/Decoder
Installing the optional Blackmagic Dolby Encoder or Decoder
Module in your Teranex 3D Processor
WARNING
Installation requires removing the lid from your Teranex 3D Processor’s chassis to access the motherboard
and should only be performed by qualified individuals. Precautions should be taken to reduce the risk
of electrostatic discharge while installing the module.
Installing the Module
By installing a Blackmagic Dolby encoder or decoder module in your Teranex 3D Processor you can input
and output Dolby Digital or Dolby E audio. When installed you can output discrete Dolby channels via
SDI, analog or AES/EBU. By installing the Dolby encoder, audio can be output via SDI, analog or AES/
EBU using the Dolby Digital or Dolby E encoded signal.
Holding the Blackmagic Dolby encoder or decoder module by
the top edges, align the module’s keyway to the SIMM slot key
and gently insert the module until it is firmly seated.
The Blackmagic Dolby encoder and decoder are 72 pin SIMM modules that are easily installed into the
empty SIMM slots on your Teranex 3D’s motherboard.
To install the Blackmagic Design Dolby encoder or decoder module:
Step 1. Ensure the power is unplugged.
Step 2. Unscrew all Teranex 3D’s 12 lid screws using a T10 Torx screwdriver. Carefully remove the lid,
keeping the earth lead secured.
Step 3. Hold the Dolby encoder or decoder module with its contacts facing the empty SIMM slot
labelled 'encode' or 'decode' respectively. The SIMM’s keyway needs to be aligned with the
slot key or the SIMM will not seat.
Step 4. Gently insert the module into the SIMM slot until the contacts are firmly seated.
Lean the Blackmagic Dolby encoder or decoder module
towards the rear of the chassis until the metal clips fasten to
both sides.
Step 5. Lean the module towards the rear of your Teranex 3D until the metal clips fasten to each side
of the module.
Step 6. Replace the lid and screw in all lid screws.
After installation, place the supplied Dolby sticker on the lid near the back panel so you can easily verify
the Dolby module or modules have been installed.
Confirming Dolby Audio
To output Dolby audio from your Teranex 3D, map your Dolby audio output channels using the control
panel LCD menus. For instructions, refer to 'output mapping' in the 'audio menu settings' section of
this manual.