1
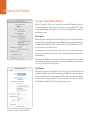
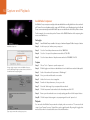
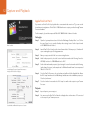
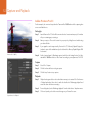
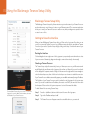
51 Capture and Playback
Apple Final Cut Pro 7
'Easy setups' for Final Cut Pro 7 are automatically installed if Final Cut Pro is installed before the Desktop
Video software. Blackmagic video hardware is fully compatible with Apple’s RT Extreme™ real time effects.
For this example, the converted output from the Teranex will be 1080i50 and we will be capturing from
a non-controllable device.
Setting Up
Apple Final Cut Pro 7
Step 1.
Launch Final Cut Pro 7 and select File>New Project.
Step 2.
Select File>Save Project As... and name your project.
Step 3.
From the Final Cut Pro menu, select 'easy setup'...to open the Easy Setup window.
Step 4.
Choose 'HD' for the 'format' and '25.00 fps' for the 'rate'. Select 'Blackmagic HDTV 1080i
50 - 10 bit' from the 'use' menu. Click 'setup' to close the window.
Step 5.
From the Final Cut Pro menu, select 'system settings' and with the 'scratch disks' tab highlighted,
select 'set' and choose the drive or drives for your scratch disks. Click 'OK'.
Capture
Select a Blackmagic Easy Setup
Step 1.
Choose File > Log and Capture to open the 'log and capture' window.
Step 2.
Press 'play' on your video source and then press the 'now' button which is under the 'capture'
heading to begin the capturing.
Step 3.
Press the ‘esc’ key at the top left of your keyboard to stop capturing.
Step 4.
Choose File > Log and Capture to close the window.
Playback
You can use the Final Cut Pro timeline to display video on a monitor or TV connected to the output of
your Teranex Processor. If you can’t see any video on your Blackmagic output, check the connections
again and ensure you have the correct output settings configured within Final Cut Pro by going to the
View > External Video and ensuring 'all frames' is selected.