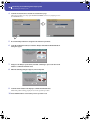
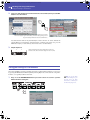
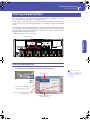
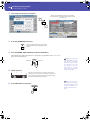
1
Pa300 Quick Guide v150 (English).book Page I Saturday, March 29, 2014 7:00 PM
Quick Guide
ENGLISH | OS Ver. 1.5 | MAN0010071
E
2
Pa300 Quick Guide v150 (English).book Page II Saturday, March 29, 2014 7:00 PM
Pa300 Quick Guide v150 (English).book Page a Saturday, March 29, 2014 7:00 PM
Important safety instructions
•
Read these instructions, and follow them carefully.
•
Keep these instructions in a safe place.
•
Heed all warnings.
THE FCC REGULATION WARNING (FOR USA)
This equipment has been tested and found to comply with the limits for a Class B
digital device, pursuant to Part 15 of the FCC Rules. These limits are designed to
provide reasonable protection against harmful interference in a residential
installation. This equipment generates, uses, and can radiate radio frequency energy
and, if not installed and used in accordance with the instructions, may cause
harmful interference to radio communications. However, there is no guarantee that
interference will not occur in a particular installation. If this equipment does cause
harmful interference to radio or television reception, which can be determined by
turning the equipment off and on, the user is encouraged to try to correct the
interference by one or more of the following measures:
•
Do not use this apparatus near water.
•
Clean only with dry cloth.
•
Do not block any ventilation openings, install in accordance with the manufacturer’s instructions.
•
Do not install near any heat sources such as radiators, heat registers, stoves, or
other apparatus (including amplifiers) that produce heat.
•
Protect the power cord from being walked on or pinched particularly at plugs,
convenience receptacles, and the point where they exit from the apparatus.
•
Only use attachments/accessories specified by the manufacturer.
•
Unplug this apparatus during lightning storms or when unused for long periods of time.
• Increase the separation between the equipment and receiver.
•
Refer all servicing to qualified service personnel. Servicing is required when
the apparatus has been damaged in any way, such as power-supply cord or
plug is damaged, liquid has been spilled or objects have fallen into the apparatus, the apparatus has been exposed to rain or moisture, does not operate normally, or has been dropped.
• Consult the dealer or an experienced radio/TV technician for help.
•
Turning off the power switch does not completely isolate this product from
the power line so remove the plug from the socket if not using it for extended
periods of time, or before cleaning. Please ensure that the mains plug or appliance couple remains readily accessible.
•
Mains powered apparatus shall not be exposed to dripping or splashing and that
no objects filled with liquids, such as vases, shall be placed on the apparatus.
• Reorient or relocate the receiving antenna.
• Connect the equipment into an outlet on a circuit different from that to which the
receiver is connected.
If items such as cables are included with this equipment, you must use those
included items.
Unauthorized changes or modification to this system can void the user’s authority to
operate this equipment.
DECLARATION OF CONFORMITY (FOR USA)
Responsible Party: KORG USA INC.
•
Install this product near the wall socket and keep the power plug easily accessible.
Address: 316 SOUTH SERVICE ROAD, MELVILLE / Telephone: 1-631-390-6500
•
Do not install this equipment in a confined space such as a box for the conveyance or similar unit.
•
When a cart is used, use caution when moving the cart/apparatus combination to avoid injury from tip-over.
This device complies with Part 15 of FCC Rules. Operation is subject to the
following two conditions: (1) This device may not cause harmful interference, and
(2) this device must accept any interference received, including interference that may
cause undesired operation.
Equipment Type: Music Arranger / Model: Pa300
CE MARK FOR EUROPEAN HARMONIZED STANDARDS
CE mark which is attached to our company’s products of AC mains operated
apparatus until December 31, 1996 means it conforms to EMC Directive (89/336/
EEC) and CE mark Directive (93/68/EEC).
And, CE mark which is attached after January 1, 1997 means it conforms to EMC
Directive (89/336/EEC), CE mark Directive (93/68/EEC) and Low Voltage Directive
(73/23/EEC).
Also, CE mark which is attached to our company’s products of Battery operated
apparatus means it conforms to EMC Directive (89/336/EEC) and CE mark
Directive (93/68/EEC).
NOTICE REGARDING DISPOSAL (EU ONLY)
If this symbol is shown on the product, manual, battery, or package, you
must dispose of it in the correct manner to avoid harm to human health
or damage to the environment. Contact your local administrative body
for details on the correct disposal method. If the battery contains heavy
metals in excess of the regulated amount, a chemical symbol is displayed
below the symbol on the battery or battery package.
PERCHLORATE (CALIFORNIA, USA ONLY)
Perchlorate Material – special handling may apply.
See www.dtsc.ca.gov/hazardouswaste/perchlorate.
IMPORTANT NOTICE TO CONSUMERS
This product has been manufactured according to strict specifications and voltage
requirements that are applicable in the country in which it is intended that this
product should be used. If you have purchased this product via the internet, through
mail order, and/or via a telephone sale, you must verify that this product is intended
to be used in the country in which you reside.
WARNING: Use of this product in any country other than that for which it is
intended could be dangerous and could invalidate the manufacturer's or distributor's
warranty.
Please also retain your receipt as proof of purchase otherwise your product may be
disqualified from the manufacturer's or distributor's warranty.
Pa300 Quick Guide v150 (English).book Page b Saturday, March 29, 2014 7:00 PM
Further notices
Automatic Power-Off
Open Source notice
To avoid wasting power, Pa300 will by default automatically
enter standby mode after two hours of non-active use (playing,
pressing buttons or using the touch-screen). Please save your
data (Performances, Styles, Songs, and so on) before taking a
prolonged pause.
Portions of this product’s software are copyright ©2007 “The
FreeType Project” (www.freetype.org). All rights reserved.
Disclaimer
Data in memory may sometimes be lost due to incorrect user
action. Be sure to save important data to the internal memory or
to an external USB device. Korg will not be responsible for damages caused by data loss.
The information contained in this manual have been carefully
revised and checked through. Due to our constant efforts to
improve our products, the specifications might differ to those in
the manual. Korg is not responsible for any differences found
between the specifications and the contents of the instruction
manual – all specifications being subject to change without prior
notice.
Cleaning
Liability
If the exterior becomes dirty, wipe it with a clean, dry cloth. Do
not use liquid cleaners such as benzene or thinner, or cleaning
compounds or flammable polishes.
Korg products are manufactured under strict specifications and
voltages required by each country. These products are warranted
by the Korg distributor only in each country. Any Korg product
not sold with a warranty card or carrying a serial number disqualifies the product sold from the manufacturer's/distributor's
warranty and liability. This requirement is for your own protection and safety.
Data Handling
Use a soft cotton cloth to clean the display. Some materials, such
as paper towels, could cause scratches and damage it. Computer
wipes are also suggested, provided they are specifically designed
for LCD screens.
Do not spray any liquid on the LCD screen directly. Always
apply the solution to your cloth first, then clean the screen.
Example screens
Some pages of the manuals show LCD screens along with an
explanation of functions and operations. All sound, style, song
or parameter names, as well as shown values, are merely examples and may not always match the actual display you are working on.
Trademarks
Acrobat and PDF are registered trademarks of Adobe Systems
Incorporated. Mac is a registered trademark of Apple, Inc.
MS-DOS and Windows are registered trademarks of Microsoft
Corporation. All other trademarks or registered trademarks are
the property of their respective holders.
Service and User’s Assistance
For service, please contact your nearest Authorized Korg Service
Center. For more information on Korg products, and to find
software and accessories for your keyboard, please contact your
local Authorized Korg distributor. For up-to-date information,
please point your web browser to our web site.
Keep your keyboard up-to-date
Your instrument can be constantly updated as new versions of
the operating system are released by Korg. You can download
the operating system from our web site. Please, read the instructions supplied with the operating system.
Copyright © 2014 KORG Italy Spa. Printed in China.
Pa300 Quick Guide v150 (English).book Page 1 Saturday, March 29, 2014 7:00 PM
Table of Contents
1
Introduction
Saving your settings to a Performance . . . . . . . . . . . . . . . . . . . . 40
Welcome! . . . . . . . . . . . . . . . . . . . . . . . . . . . . . . . . . . . . . . . . . . . . 4
What’s in the box . . . . . . . . . . . . . . . . . . . . . . . . . . . . . . . . . . . . . . .5
About this manual . . . . . . . . . . . . . . . . . . . . . . . . . . . . . . . . . . . . . .5
Contacts . . . . . . . . . . . . . . . . . . . . . . . . . . . . . . . . . . . . . . . . . . . . . . .5
Making a safety copy of your data . . . . . . . . . . . . . . . . . . . . . . . . .5
Restoring the original factory data . . . . . . . . . . . . . . . . . . . . . . . . .5
Loading the Operating System . . . . . . . . . . . . . . . . . . . . . . . . . . . .5
Selecting and saving the “My Setting” Performance . . . 42
Selecting the startup parameters (the “My Setting”
Performance) . . . . . . . . . . . . . . . . . . . . . . . . . . . . . . . . . . . . . . . 42
Saving the startup parameters into the “My Setting”
Performance . . . . . . . . . . . . . . . . . . . . . . . . . . . . . . . . . . . . . . . . 42
Overview . . . . . . . . . . . . . . . . . . . . . . . . . . . . . . . . . . . . . . . . . . . . 6
Front Panel . . . . . . . . . . . . . . . . . . . . . . . . . . . . . . . . . . . . . . . . . . . . .6
Rear Panel . . . . . . . . . . . . . . . . . . . . . . . . . . . . . . . . . . . . . . . . . . . 15
Glossary of Terms . . . . . . . . . . . . . . . . . . . . . . . . . . . . . . . . . . . 16
Sound . . . . . . . . . . . . . . . . . . . . . . . . . . . . . . . . . . . . . . . . . . . . . . . 16
Style . . . . . . . . . . . . . . . . . . . . . . . . . . . . . . . . . . . . . . . . . . . . . . . . . 16
Pad . . . . . . . . . . . . . . . . . . . . . . . . . . . . . . . . . . . . . . . . . . . . . . . . . . 16
Keyboard tracks . . . . . . . . . . . . . . . . . . . . . . . . . . . . . . . . . . . . . . 16
Performance and STS . . . . . . . . . . . . . . . . . . . . . . . . . . . . . . . . . . 17
Sequencer . . . . . . . . . . . . . . . . . . . . . . . . . . . . . . . . . . . . . . . . . . . . 17
Player . . . . . . . . . . . . . . . . . . . . . . . . . . . . . . . . . . . . . . . . . . . . . . . 17
The LOGO decoder . . . . . . . . . . . . . . . . . . . . . . . . . . . . . . . . . . . 17
Interface basics . . . . . . . . . . . . . . . . . . . . . . . . . . . . . . . . . . . . . 18
Color TouchView graphical user interface . . . . . . . . . . . . . . . . 18
Operative modes . . . . . . . . . . . . . . . . . . . . . . . . . . . . . . . . . . . . . . 20
Selected, highlighted items . . . . . . . . . . . . . . . . . . . . . . . . . . . . . 20
Non-available, grayed-out parameters . . . . . . . . . . . . . . . . . . . 20
Shortcuts . . . . . . . . . . . . . . . . . . . . . . . . . . . . . . . . . . . . . . . . . . . . 20
Easy Mode . . . . . . . . . . . . . . . . . . . . . . . . . . . . . . . . . . . . . . . . . . 21
The Style Play page in detail . . . . . . . . . . . . . . . . . . . . . . . . . . . . 22
The Song Play page in detail . . . . . . . . . . . . . . . . . . . . . . . . . . . . 23
Quick Guide
Turning the instrument on . . . . . . . . . . . . . . . . . . . . . . . . . . . 26
Turning the instrument on and viewing the main screen . . . 26
Connecting and calibrating the Damper pedal . . . . . . . . 27
Programming the Damper pedal . . . . . . . . . . . . . . . . . . . . . . . . 27
Playing the Demo . . . . . . . . . . . . . . . . . . . . . . . . . . . . . . . . . . . 29
Starting and stopping the Demo . . . . . . . . . . . . . . . . . . . . . . . . . 29
Playing Sounds . . . . . . . . . . . . . . . . . . . . . . . . . . . . . . . . . . . . . 31
Selecting a Sound and playing it on the keyboard . . . . . . . . . . 31
Playing two or three Sounds at the same time . . . . . . . . . . . . . 33
Playing different Sounds with your left and right hand . . . . . 35
Changing the split point . . . . . . . . . . . . . . . . . . . . . . . . . . . . . . . 37
Raising or lowering the Upper octave . . . . . . . . . . . . . . . . . . . . 38
Selecting and saving Performances . . . . . . . . . . . . . . . . . . 39
Selecting a Performance . . . . . . . . . . . . . . . . . . . . . . . . . . . . . . . . 39
Selecting and playing Styles . . . . . . . . . . . . . . . . . . . . . . . . . 43
Selecting and playing a Style . . . . . . . . . . . . . . . . . . . . . . . . . . . . 43
Tempo . . . . . . . . . . . . . . . . . . . . . . . . . . . . . . . . . . . . . . . . . . . . . . . 45
Intro, Variation, Fill, Break, Ending . . . . . . . . . . . . . . . . . . . . . . 46
Single Touch Settings (STS) . . . . . . . . . . . . . . . . . . . . . . . . . . . . . 47
The Pads . . . . . . . . . . . . . . . . . . . . . . . . . . . . . . . . . . . . . . . . . . . . . 48
Adjusting the balance between the Style and the keyboard . . 48
Adjusting the volume of the separate tracks . . . . . . . . . . . . . . . 49
Turning the Style tracks on/off . . . . . . . . . . . . . . . . . . . . . . . . . . 50
Adding harmony notes to your right-hand melody with
the ENSEMBLE function . . . . . . . . . . . . . . . . . . . . . . . . . . . . . 51
Song Play . . . . . . . . . . . . . . . . . . . . . . . . . . . . . . . . . . . . . . . . . . . 53
Selecting a Song to play . . . . . . . . . . . . . . . . . . . . . . . . . . . . . . . . 53
Playing back a Song . . . . . . . . . . . . . . . . . . . . . . . . . . . . . . . . . . . . 55
Changing the tracks’ volume . . . . . . . . . . . . . . . . . . . . . . . . . . . . 56
Turning the Song tracks on/off . . . . . . . . . . . . . . . . . . . . . . . . . . 58
Soloing a track . . . . . . . . . . . . . . . . . . . . . . . . . . . . . . . . . . . . . . . . 59
The SongBook . . . . . . . . . . . . . . . . . . . . . . . . . . . . . . . . . . . . . . 60
Selecting the desired Entry from the Main List . . . . . . . . . . . . . 60
Displaying Artist or Genre . . . . . . . . . . . . . . . . . . . . . . . . . . . . . . 61
Sorting Entries . . . . . . . . . . . . . . . . . . . . . . . . . . . . . . . . . . . . . . . . 62
Searching for Entries . . . . . . . . . . . . . . . . . . . . . . . . . . . . . . . . . . . 62
Adding Entries . . . . . . . . . . . . . . . . . . . . . . . . . . . . . . . . . . . . . . . . 64
Editing the Entries . . . . . . . . . . . . . . . . . . . . . . . . . . . . . . . . . . . . . 65
Creating a Custom List . . . . . . . . . . . . . . . . . . . . . . . . . . . . . . . . . 67
Selecting and using a Custom List . . . . . . . . . . . . . . . . . . . . . . . 69
Recording a new Song (Standard MIDI File) . . . . . . . . . . . 70
Preparing the Style and Sounds . . . . . . . . . . . . . . . . . . . . . . . . . . 70
Accessing the Backing Sequence (Quick Record) mode . . . . . 70
Setting the Record parameters . . . . . . . . . . . . . . . . . . . . . . . . . . . 72
Recording . . . . . . . . . . . . . . . . . . . . . . . . . . . . . . . . . . . . . . . . . . . . 72
Second-take recording (Overdubbing) . . . . . . . . . . . . . . . . . . . 74
Saving a Song . . . . . . . . . . . . . . . . . . . . . . . . . . . . . . . . . . . . . . . . . 74
Searching files and musical resources . . . . . . . . . . . . . . . . . 76
How to use the Search function . . . . . . . . . . . . . . . . . . . . . . . . . 76
Notes about searching . . . . . . . . . . . . . . . . . . . . . . . . . . . . . . . . . . 78
Appendix
Technical specifications . . . . . . . . . . . . . . . . . . . . . . . . . . . . . . 80
MIDI Implementation Chart . . . . . . . . . . . . . . . . . . . . . . . . . . 81
ToC
Table of Contents
Pa300 Quick Guide v150 (English).book Page 2 Saturday, March 29, 2014 7:00 PM
2
Table of Contents
Pa300 Quick Guide v150 (English).book Page 3 Saturday, March 29, 2014 7:00 PM
Pa300 Quick Guide v150 (English).book Page 4 Saturday, March 29, 2014 7:00 PM
4
Welcome!
Welcome!
Welcome to the world of Korg Pa300 Professional Arranger!
Pa300 is a very powerful arranger, suitable both for professional
and home entertainment use.
Styles and Songs
•
Over 300 Factory Styles with 4 Variations and 4 Fill In +
Break, plus 8 Favorite and 3 User Style banks for unlimited
storage of your custom Styles and settings.
•
Style and Pad Record, including the enhanced “Guitar
Mode 2” for even more realistic guitar parts.
Here are some of the features of your new instrument.
Physical Features and User Experience
•
61 synth-type keys with velocity.
•
Guitar Mode 2 tracks, for more realistic guitar tracks.
•
Slim and compact, lightweight, elegant cabinet design.
•
Standard MIDI File player and recorder, and MP3 player.
•
Wide 5" TFT graphic touch screen display. Professional
TouchView™ graphic interface for direct access to the onscreen controls and to the musical resources.
•
Lyrics and Score display. Multilingual extended character
set. Enhanced compatibility with Lyrics in graphical format
(+G) for Standard MIDI Files and MP3 files.
•
High-quality integrated amplification, and high-quality
output audio converters.
•
Full-featured 16-track sequencer.
•
•
RX (Real eXperience) Technology, the cutting edge engine
that drives every aspect of the Pa300 – from the synthesis to
the display and how it all works together.
Fully editable SongBook music database, for fast song
retrieving.
•
A joystick and an assignable pedal ensure total control over
the sound.
Sounds and Effects
•
Powerful sound generation system, for crystal-clear, realistic sounds.
•
128 voices of polyphony.
•
General MIDI Level 2 Sound-compatible. Enhanced Sound
compatibility for GM Songs.
•
More than 950 Sounds, plus 64 Drum Kits.
•
240 Performance locations, plus 4 Single Touch Settings
(STS) for each Style and SongBook entry, for fast setting of
keyboard sounds and effects.
•
Four Stereo Master FX, with 125 effect types. Final 4-band
Parametric EQ.
•
Edit Sound, to create and edit new Sounds.
Other Features
•
Search function, for instant retrieving of any musical
resource or file.
•
Operating System updates, to load new features and
enhancements. Don’t let your instrument get old!
•
Generous internal memory, to store a great amount of data.
•
USB 2.0 High Speed Host port, for connecting external
devices like hard disks, CD-ROM drives, USB memory
sticks, etc.
•
USB 2.0 High Speed Device port, to connect a personal
computer to your Pa300. This port can be used for file
transfer, and for MIDI connection (without the need of a
dedicated MIDI interface).
Pa300 Quick Guide v150 (English).book Page 5 Saturday, March 29, 2014 7:00 PM
What’s in the box
Making a safety copy of your data
After you buy your Pa300, please check that all the following
items are included in the package. If any of the following items is
missing, please contact your Korg dealer immediately.
Making a safety copy
•
Pa300
•
Music stand
•
AC power adapter
•
Power cable
•
Quick Guide
•
Accessory Disc (containing the Video Manual, the User
Manual, the USB driver)
About this manual
This manual is the Quick Guide, containing a series of practical
guides. In addition, in the Accessory Disc and in our web site
you will find the complete User Manual and a multilingual
Video Manual, showing how to use your Pa300 in easy steps.
Contacts
Your preferred Korg dealer not only delivers this keyboard, but
also a whole bunch of hardware and software accessories, as well
as service information. You should ask them for any help should
you eventually need.
Our international web site is www.korg.com. Korg distributors
around the world may have their own web page on the internet.
A list of all Korg Distributors can be found in our dedicated web
site (www.korg.co.jp/English/Distributors/).
5
In case you like to customize your Musical Resources (Sounds,
Performances and Styles), we suggest you use the Media > Utility
> Backup Resources command to make frequent backup copies
into compact archives.
Also, you can use the Media > Save All command to save files
that you can separately reload one by one.
Restoring a safety copy
To restore a backup, use the Media > Utility > Restore Resources.
If you saved your data with the Media > Save All command, use
the Media > Load operations to reload them.
Restoring the original factory data
In case you want to restore the original factory data, use the
Media > Utility > Factory Restore command.
Warning: This operation will overwrite all the Factory, Local,
Favorite and User data!
Loading the Operating System
Your Pa300 can be constantly updated as new versions of the
operating system are released by Korg. You can download the
operating system from our web site is www.korg.com. Please,
read the instructions supplied with the operating system on the
site.
You can see which version of the operating systems is installed in
your Pa300 by going to the Media > Utility page.
Warning: Do not install an OS other than the official OS supplied
by Korg for the Pa300. Trying to install an OS created for different
models or downloaded from unofficial web sites may cause data
loss and permanent damage to the instrument. Korg is not responsible for any damage caused by improper installation of the OS.
Introduction
Welcome!
What’s in the box
Pa300 Quick Guide v150 (English).book Page 6 Saturday, March 29, 2014 7:00 PM
6
Overview
Front Panel
Overview
Front Panel
Speakers
The integrated speakers give a faithful reproduction of the sound
of Pa300. They are automatically deactivated when inserting a
jack into the PHONES/AUDIO OUT connector.
Music stand holes
A music stand comes standard with your Pa300. Insert its legs
into these two dedicated holes.
Joystick lever
The joystick is on the left side of the front
panel.
JOYSTICK
This joystick triggers different functions,
depending on the direction it is moved
towards.
X (+/–)
Move the joystick towards the left (–) to lower the
pitch, or towards the right (+) to raise it. This
effect is called the Pitch Bend.
Y+
Move the joystick forward to trigger Modulation
Y–
Move the joystick backward, to trigger the
assigned function.
Pa300 Quick Guide v150 (English).book Page 7 Saturday, March 29, 2014 7:00 PM
Overview
7
Introduction
Front Panel
Volume controls
Mode selection
Use these knobs to control the
master volume, and to balance between the Keyboard
and the Style or the Song.
Each of these buttons recalls one of the instrument’s operating
modes. When selected, each mode excludes all the others.
MASTER VOLUME
This knob controls the overall volume of the instrument, both of the
integrated speakers and the PHONES/AUDIO OUT connector.
BALANCE
STYLE PLAY
While in Style Play and Song Play mode, this knob usually balances the volume of the Keyboard (KBD) tracks against the Style
(ACC, Accompaniment), Song and Pad tracks. This is a relative
control, whose effective maximum value is determined by the
MASTER VOLUME knob position.
Style Play mode, where you can play Styles (eight tracks of automatic accompaniments) and play up to four Keyboard tracks
and four Pad tracks. In the main page, Keyboard tracks are
shown in the right half of the display.
When moved, a magnified version of a virtual slider appears in
the display, for more accurate adjustment.
Note: This does not work in the Sequencer mode.
You can recall the main page by pressing EXIT from any of the
Style Play edit pages. If you are in a different operating mode,
press STYLE PLAY to recall the Style Play mode. If Keyboard
tracks are not shown in the display, press the TRACK SELECT
button until you can see them.
Pa300 Quick Guide v150 (English).book Page 8 Saturday, March 29, 2014 7:00 PM
8
Overview
Front Panel
This operating mode is automatically selected when turning the
instrument on. The “My Setting” Performance will be automatically selected.
Accompaniment, Memory, Manual Bass
These buttons let you turn all Accompaniment tracks on/off,
decide what should remain in memory, and how to play the bass.
SONG PLAY
Song Play mode, where you can play back Songs in Standard
MIDI File (SMF or KAR) or MP3 format. In addition to the Song
tracks, you can play up to four Keyboard tracks and four Pads
along with the Song. In the main page, Keyboard tracks are
shown in the right half of the display.
You can recall the main page of this mode by pressing EXIT
from any of the Song Play edit pages. If you are in a different
operating mode, press SONG PLAY to recall the Song Play
mode. Use the TRACK SELECT button to cycle between the
Keyboard and Song tracks.
SEQUENCER
Sequencer mode, where you can play, record or edit Songs (in Standard MIDI File format). The Backing Sequence mode lets you
record a new Song based on the Keyboard and Style tracks, and save
it as a new Standard MIDI File.
Note: In this mode, you cannot play MP3 files.
DEMO
Press the STYLE PLAY and SONG PLAY buttons together to
select the Demo mode. This mode lets you listen to some Demo
Songs, to let you experience the sonic power of the Pa300. To
exit from this mode, press any of the MODE buttons.
ACCOMP. (Accompaniment)
In Style Play and Sequencer-Backing Sequence mode, use this
button to turn the Accompaniment tracks (ACC1 ~ ACC5) on
or off.
On
After pressing START/STOP, the full accompaniment plays and follows the detected chords.
Off
No chords detected. After pressing START/STOP,
only the Drum and Percussion accompaniment
tracks can play.
You can jump to the Global > Mode Preferences > Style
Play page by keeping SHIFT pressed and pressing the ACCOMP
button.
MEMORY
This button allows you to choose whether the Lower notes and/
or chord triggering the accompaniment must remain in memory
after raising your hand from the keyboard.
On
Depending on the setting of the “Memory Mode”
parameter (in the Global > Mode Preferences >
Style Play), the sound on the left of the split point
(Lower), and/or the chords for the automatic
accompaniment can kept in memory even when
you raise your hand from the keyboard.
Off
Both the sound and chord are released as soon as
you raise your hand from the keyboard.
Special Mode Buttons
These buttons are used to recall settings, file management and
the Song Record mode.
You can jump to the Global > Mode Preferences > Style
Play page by keeping SHIFT pressed and pressing the MEMORY
button.
GLOBAL
This button recalls the Global mode, where you can adjust various global settings. Most Global settings are automatically memorized as soon as you edit them. This mode overlaps any
operating mode, that will still remain active in the background.
Press EXIT to go back to the underlying operating mode.
MAN. BASS (Manual Bass)
This button turns the Manual Bass function on or off.
On
The automatic accompaniment stops playing
(except for the Drum and Percussion tracks), and
you can manually play the Bass track on the
Lower part of the keyboard. You can start the
automatic accompaniment again after pressing
this button to turn off the Manual Bass function.
Off
The bass track is automatically played by the Style.
MEDIA
This button recalls the Media mode, where you can perform various operations on files and storage devices (Load, Save, Format,
etc…). This mode overlaps any operating mode, that still
remains active in the background. Press EXIT to go back to the
underlying operating mode.
The internal memory contains an area where to save data
(“DISK [KORG DISK]”).
RECORD
This button sets the instrument to the Style/Pad Record or Song
Record mode (depending on the current operating mode).
Note: When you press the MANUAL BASS button, the Bass track
volume is automatically set to its maximum value. The volume is
automatically set back to the original value when the MANUAL
BASS button is deactivated.
Pa300 Quick Guide v150 (English).book Page 9 Saturday, March 29, 2014 7:00 PM
Front Panel
Pads
Here you can play (and stop) the Pads, i.e. single sounds or looping sequences.
PAD 1-4
STOP
Each Pad button corresponds to a dedicated Pad track. Use these
buttons to trigger up to four sounds or sequences at the same
time.
•
Press a single PAD button to trigger a single sound or
sequence.
•
Press more PAD buttons to trigger several sounds or
sequences.
The sequences will play up to the end. Then, they will stop or
continue repeating, depending on the individual settings.
You can stop all sounds or sequences at the same time, or just
some of them:
•
Press STOP (in the PAD section) to stop all sequences at
once.
•
Press a single PAD button to stop the corresponding
sequence.
About Pad synchronization. In Style Play mode, Pads are synchronized to the Style’s Tempo. In Song Play mode, they are synchronized to the Player.
Note: There is no synchronization with MP3 files. Pads can only
be synchronized to the Tempo of the latest selected Standard MIDI
Files. Therefore, when an MP3 file is assigned to the Player, Pads
will synchronize to the Tempo of the last Standard MIDI File that
has been played back.
About Pads and the Player’s Start command. When you press
the START/STOP button to start the Player, all Pads will stop
playing.
You can jump to the Style Play > Pad page by keeping
SHIFT pressed and pressing one of the PAD buttons.
Selection
Here you can select a Style, Sound, SongBook entry, or Song.
9
For each type of Styles there are several banks, that can be
selected by touching the side tabs. Each Style bank contains various pages, each with up to eight Styles, that can be selected by
touching the lower tabs.
Styles of the Factory type are usually write-protected (unless you
uncheck the “Factory Style and Pad Protect” option in the Global
> Mode Preferences > Media page). You can use User locations
to temporarily load new Styles from an external device. Favorite
locations, too, can be used to load new Styles from an external
device, but in addition you can edit the names of these Style
banks, so that you can create a custom set of Styles.
By keeping this button pressed for about one second, the
“Write Current Style Settings” dialog box will appear.
SOUND
Use this button to open the Sound Select window and select a
Sound to be assigned to the selected track. This is the same as
touching a Sound name in the display. Repeatedly press it to
cycle between the Sound bank pages.
For each type of Sounds there are several Sound banks, that can
be selected by touching the side tabs. Each Sound bank contains
various pages, each with up to eight Sounds, that can be selected
by touching the lower tabs.
Sounds of the Factory type are write-protected. Sounds of the
Legacy type are standard Factory Sounds allowing greater compatibility with older Pa-Series instruments. Factory Sounds of
the GM type allow for compatibility with General MIDI sounds.
Sounds of the User type are locations where you can load new
Sounds from an external device. The User DK type is where you
can load new Drum Kits.
Some models could include Local-type Sounds, that are Factory
Sounds customized for a particular Country.
Hint: The page menu of the Sound Select window contains a command to access Sound editing, and customize your Sounds.
SONGBOOK
The SongBook is a database of song titles, that can automatically
choose the more appropriate Style, Standard MIDI File or MP3
file for you.
Press this button to open the SongBook (when you are in Style
Play or Song Play mode). While the SongBook is shown on the
display, you can browse through the music database.
By keeping this button pressed for about one second, a new
SongBook Entry with the current settings is added to the database. You will be able to give it a name and save.
You can jump to the SongBook > Custom List page by
keeping SHIFT pressed and pressing the SONGBOOK button.
STYLE
Use this button to open the Style Select window and select a
Style. This is the same as touching the name of the Style in the
display. Repeatedly press it to cycle between the Style bank
pages.
SONG
Press this button to open the Song Select window and choose a
Songs. This is the same as touching the Song name in the display.
Introduction
Overview
Pa300 Quick Guide v150 (English).book Page 10 Saturday, March 29, 2014 7:00 PM
10
Overview
Front Panel
Style Elements
Style Controls
This section contains the separate elements of a Style (Intro,
Variation, etc.).
Use these buttons to start/stop the accompaniment.
INTRO 1-3 buttons
These buttons turn the corresponding Intro on. Intro 1 plays a
sequence including a chord progression, while Intro 2 plays a
fixed chord. Intro 3 is usually a one-bar Count In.
After pressing one of these buttons, start the Style, and it will
begin with the selected intro. The INTRO LED will automatically go off at the end of the intro.
At the end of the Intro, the Variation whose LED was blinking
will be selected.
Press one of the INTRO buttons twice (LED blinking) to let the
corresponding Intro play in loop, and select any other Style element (Intro, Variation, Ending) to exit the loop.
VARIATION 1-4 buttons
Each of these buttons selects one of the four Variations of the
current Style. The higher the Variation number, the denser the
arrangement.
You can jump to the Style Play > Drum Map page by
keeping SHIFT pressed and pressing one of the VARIATION
buttons.
AUTO FILL
This button allows to turn the Auto Fill function on or off.
On
Off
When selecting a different Variation, the Fill having the same number of the previous Variation is
automatically selected. For example, if going from
Variation 2 to Variation 3, Fill 2 is automatically
selected.
When choosing a Variation, no fill is selected.
BREAK
This button triggers a break. Press it twice (LED blinking) to let
it play in loop. Press it again or select any other Style Element
(Intro, Variation, Ending) to exit from the loop.
ENDING 1-3 buttons
These buttons trigger the corresponding Ending. Ending 1 plays
a sequence including a chord progression, while Ending 2 plays a
fixed chord. Ending 3 starts immediately, and is just two measures long.
While the Style is running, these three buttons trigger an Ending, and stop the Style. Press one of them, and the Style will stop
running with an Ending.
Press them twice (LED blinking) to let them play in loop, and
select any other Style element (Intro, Variation…) to exit the
loop.
START/STOP
Starts or stops the Style.
You can reset all ‘frozen’ notes and controllers on the
Pa300 and any instrument connected to its MIDI OUT or the USB
Device port, by using the “Panic” (SHIFT + START/STOP) key
combination. Just press SHIFT + START/STOP to stop all notes
and reset all controllers.
SYNCHRO START / STOP button
These buttons turn the Synchro Start and Synchro Stop functions on or off. With this feature, you can choose to press the
START/STOP button to start and/or stop a Style, or just play the
keyboard in the Chord Scan area.
Start On, Stop Off
In this situation, just play a chord in the chord
recognition area to automatically start the Style. If
you like, turn one of the INTROs on before starting the Style.
Start On, Stop On
When both LEDs are lit, raising your hands from
the keyboard will momentarily stop the Style. If
you play a chord again, the Style will start again.
Start Off, Stop On
In this case, raising your hands from the keyboard
will stop the Style.
Start Off, Stop Off
All Synchro functions are turned off.
You can jump to the Global > MIDI > Setup/General Control by keeping the SHIFT button pressed and pressing the SYNCHRO START/STOP button.
TAP TEMPO/RESET
This is a double-function button, acting in a different way
depending on whether the Style is running or not.
Note: This button only works while in Style Play mode.
Tap Tempo: When the Style is not playing, you can “beat” the
tempo on this button. Tap as many times as the Time Signature’s
numerator (for example, four times with a 4/4 Time Signature, or
three times with a 3/4 one). At the end, the accompaniment
starts playing, using the “tapped in” tempo.
Reset: If you press this button while the Style is playing back, the
Style pattern goes immediately back to the beginning of measure
1.
Pa300 Quick Guide v150 (English).book Page 11 Saturday, March 29, 2014 7:00 PM
Overview
Front Panel
STS Section
Use the STS (Single Touch Settings) buttons to assign Sounds to
the keyboard.
STS 1-4 buttons
COLOR TOUCHVIEW™ GRAPHICAL DISPLAY
Use this display to interact with the instrument. To adjust the
display brightness, keep the MENU button pressed, and turn the
DIAL counter-clockwise to make the display darker, or clockwise to make it brighter.
These buttons allow to select up to four Single Touch Settings
(abbreviated as STS). Each one of the Styles and SongBook
Entries includes four Single Touch Settings (STS), to automatically configure Keyboard tracks and effects at the touch of a finger.
By keeping one of these buttons pressed for about one second, the “Write Single Touch Setting” dialog box will appear.
Note: STS contained inside Factory Styles are usually write-protected (unless you uncheck the “Factory Style and Pad Protect”
option in the Global > Mode Preferences > Media page)
Special Function Controls
Use the TRACK SELECT, SEARCH and SHIFT buttons to
choose special functions.
Player Controls
Pa300 is equipped with a Standard MIDI File and MP3 Player. Its
controls can be used in Song Play and Sequencer mode.
<< and >>
TRACK SELECT
Depending on the operating mode, this button switches between
the various track views.
STYLE PLAY MODE
Toggles between Keyboard and Style tracks.
SONG PLAY MODE
Toggles between Keyboard tracks, Song tracks 18, and Song tracks 9-16.
SEQUENCER MODE
Toggles between Song tracks 1-8 and Song tracks
9-16.
Rewind and Fast Forward commands. If you use them while the
Song is in play, they make it scroll back or forward.
When pressed once, these buttons move the Song to the previous
or following measure (with a Standard MIDI File) or to the previous or next second (with an MP3 file). When kept pressed, they
make the Song scrolling continuously until released.
In Sequencer mode, if you set a “Start from” measure other than
1, when pressing the << button the Song will rewind up to that
measure instead of the first one.
In Jukebox mode, keep the SHIFT button pressed, and
press these buttons to scroll to the previous or next Song in the
Jukebox list.
(HOME)
SEARCH
Press this button to open the Search window, and look for a
specified file or musical resource. The Search window appears
slightly different depending on the current context.
SHIFT
With this button held down, pressing certain other buttons gives
access to a second function. The list of shortcuts is in the Appendix.
Sends the Song Position back to measure 1 (i.e., the beginning of
the Song).
In Sequencer mode, if you set a “Start from” measure other than
1, the Song Position will go back to that measure (see page 124).
(START/STOP)
Starts the Song from the current Song Position, or stops it at the
current Song Position.
Introduction
Display and Brightness Controls
11
Pa300 Quick Guide v150 (English).book Page 12 Saturday, March 29, 2014 7:00 PM
Overview
12
Front Panel
Lyrics, Score
TEMPO +/– buttons
Use this button to access the Lyrics and Score pages.
TEMPO– decreases the speed of the Style or Song. TEMPO+
increases it.
LYRICS/SCORE
Press both buttons together to reset the Tempo to the value
memorized in the Style or Standard MIDI File. With MP3 files,
the original speed of the file is recalled (value reset to “0”).
When a Style is selected, this buttons recalls the Lyrics page, or
exits from it.
When a Song is selected, it cycles through the Lyrics and Score
pages. Press it a first time to see the Lyrics page, a second time to
see the Score page. Press it again to return to the main page.
TEMPO LOCK
This button turns the Tempo Lock function on or off.
On
When you select a different Style or Performance,
or select a different Song, the Tempo will not
change. You can still manually change it, by using
the TEMPO +/– buttons, or select the Tempo
value and change it by using the VALUE dial.
Off
When you select a different Style, or select a different Song, the memorized Tempo will be automatically selected.
Data Entry and Navigation
The VALUE DIAL can
be used to assign a different value to the
parameter selected in
the display, or to scroll
a list of files in the
Song Select, SongBook, Search and
Media pages.
VALUE DIAL
Turn the dial clockwise to increase the value of the selected
parameter. Turn it counter-clockwise to decrease its value.
When used while pressing the MENU button, this control always acts as a Display Brightness control.
Note: This button does not work with MP3 files.
You can jump to the Global > Lock page by keeping
SHIFT pressed and pressing this button.
METRO
Use this button to turn the Metronome click on or off. The metronome uses the same time signature as the latest selected Style
or Standard MIDI File.
EXIT
You can jump to the Global > General Controls > Basic
page by keeping SHIFT pressed, and pressing this button.
Use this button to perform various actions, leaving from the current status:
Split
•
•
Splitting the keyboard allows for separating the
chords area from the melody.
•
•
•
•
•
exit the edit menu page, without selecting any item
make the page menu disappear, without selecting any
item
return to the main page of the current operating mode
exit the Global or Media edit environment, and return to
the current page of the current operating mode
exit from the SongBook mode
exit from the Lyrics and Score pages
exit from a Style, Pad, Performance or Sound Select window
MENU
SPLIT
In Style Play, Song Play and Sequencer-Backing
Sequence mode, use this button to choose how the four Keyboard tracks are positioned on the keyboard, and how chords are
recognized by the arranger.
Note: The ACCOMP LED must be turned on for the accompaniment to play.
On
This button opens the edit menu page for the current operating
mode. After opening an edit menu, you can jump to one of the
edit sections by touching the corresponding button in the display.
By default, turning on the Split mode automatically selects the Lower chord scanning mode. In
this mode, chords are detected below the split
point. The number of notes you should play to
form a chord is defined by the “Chord Recognition” parameter.
Otherwise, press EXIT to return to the main page of the current
operating mode, or the current page of the underlying operating
mode.
Off
Tempo Section
The TEMPO and METRO buttons can be used to control the
Tempo.
The Lower track plays below the split point, while
the Upper 1, Upper 2 and Upper 3 tracks play
above it. This is called the Split keyboard mode.
The Upper 1, Upper 2 and/or Upper 3 tracks play
over the whole keyboard range. The Lower track
does not play. This is also called the Full keyboard mode.
By default, turning off the Split mode automatically selects the Full chord scanning mode. In this
mode, chords are detected over the full keyboard
Pa300 Quick Guide v150 (English).book Page 13 Saturday, March 29, 2014 7:00 PM
Overview
Front Panel
By keeping this button pressed for about one second, the
Split Point window appears. When there, play the new split point
on the keyboard.
Ensemble
The Ensemble function automatically harmonizes
the melody played with the right hand.
Transpose Section
Use these buttons to transpose the Sounds of
the single tracks, or the instrument as a whole.
UPPER OCTAVE
Use these buttons to transpose the Upper
tracks in steps of one whole octave (12 semitones; max ±3 octaves). The octave transposition value is always shown (in octaves) next to
the Sound’s name.
ENSEMBLE
This button turns the Ensemble function on or off.
When on, the right-hand melody is harmonized with the lefthand chords.
Note: The Ensemble function only works when the keyboard is in
SPLIT mode.
You can jump to the Style Play > Keyboard/Ensemble
page by keeping SHIFT pressed and pressing the ENSEMBLE
button.
Performance Select Section
Use these buttons to select a Performance. Performances memorize all Sounds assigned to the keyboard and most control panel
settings.
Press both buttons together, to reset the Octave Transpose to the
saved value.
–
Lowers the selected track by one octave.
+
Raises the selected track by one octave.
You can jump to the Style Play > Tuning page by keeping
SHIFT pressed and pressing one of the UPPER OCTAVE buttons. Hint: Go to the Tuning page to separately transpose each
track.
TRANSPOSE
These buttons transpose the whole instrument in steps of one
semitone (Master Transpose). The transpose value is usually
shown in the page header.
Press both buttons together, to reset the Master Transpose to zero.
MY SETTING
This is a special direct-access Performance, that is automatically
selected when the instrument is turned on. When pressing this
button, the Performance is immediately selected.
Keep this button pressed for about one second to save the
current settings into the My Setting Performance.
Note: You can also transpose MP3 files. Keep in mind, however,
that transposition always remains inside the range -5…+6 semitones. This range is enough to cover all keys, but allows to avoid
excessive audio degradation. Any further transposing will be
reversed to fit the range. So, you might see a +7 transpose value
(Just Fifth Up) shown in the display, but the MP3 will actually play
5 semitones lower (Just Fourth Down).
♭
Lowers the Master Transpose in steps of one
semitone.
♯
Raises the Master Transpose in steps of one semitone.
PERFORMANCE buttons
Use these buttons to open the Performance Select window, and
select a Performance.
Each Performance bank contains five pages, each with up to
eight Performances. Repeatedly press a PERFORMANCE button
to cycle between the available pages.
All Performances can be freely customized, by accessing the edit
pages of the Style Play and Song Play modes by pressing the
MENU button.
By keeping one of these buttons pressed for about one second, the “Write Performance” dialog box will appear.
You can jump to the Global > Transpose Control page by
keeping SHIFT pressed, and pressing one of the TRANSPOSE
buttons.
Introduction
range. You must always play three or more notes
to let the arranger recognize a chord.
13
Pa300 Quick Guide v150 (English).book Page 14 Saturday, March 29, 2014 7:00 PM
14
Overview
Front Panel
Power On/Off
POWER
Use this button to let the instrument exit (LED off)
or enter (LED on) standby.
Press it briefly to let the instrument exit standby.
Keep it pressed for about one second to let it enter standby.
Warning: When the instrument is in standby mode, it is still connected to the power line. Accessing the inside of the instrument can
be dangerous. To completely disconnect the instrument from the
power, unplug the power plug from the power socket on the wall.
Note: To avoid wasting power, Pa300 will by default automatically
enter standby mode after two hours of non-active use (playing,
pressing buttons or using the touch-screen). Please save your data
(Performances, Styles, Songs, and so on) before taking a prolonged
pause. You can change the auto power-off timer in Global > General Controls > Date & Power.
Pa300 Quick Guide v150 (English).book Page 15 Saturday, March 29, 2014 7:00 PM
Overview
Rear Panel
15
USB-HOST
This is a USB Type A (Master/Host) connector, USB 2.0 compliant (High Speed
only – to connect older, slower USB devices,
please use an USB hub). Use it to connect
to the Pa300 an USB Flash Memory stick,
an external CD-ROM drive, an USB hard disk. You can access
the connected device in the Media mode.
USB-DEVICE
This is a USB Type B (Slave/Device) connector, USB 2.0 (High
Speed). Use it to connect the Pa300 to a personal computer, and
transfer data to/from its internal memory (Disk). You can enable
USB connection in the “USB” page of the Media mode.
MIDI over USB is supported, so you can use this connector
instead of the MIDI ports found on older devices. The drivers
for PC and Mac, needed to make full use of this type of connection, are supplied in the Accessory Disc that comes with the
instrument, or can be downloaded from our web site.
PEDAL/DAMPER
Use this port to connect a footswitch or Damper
pedal, like the (optional) Korg PS1, PS3 or DS1H,
or a continuous/expression pedal, like the
(optional) Korg EXP2, XVP10. To program and
calibrate it, or to change its polarity, go to the
Controllers > Foot Controllers page of the Global mode.
PHONES/AUDIO OUT
Use this connector to connect a pair of headphones, or to send the audio signal (sound) to
a mixer, a PA system, a set of powered monitors, or your hi-fi system.
You can select the type of connection by using
the “Level” parameter in the Global > Audio & EQ > MP3/Output page (see page 161).
Introduction
Rear Panel
When the Headphone option is assigned to the “Level” parameter, you can connect headphones. You can use headphones with
an impedance of 16-200 Ohms (50 Ohms suggested).
When the Line Out option is assigned to the “Level” parameter,
you can connect a line-level device to this connector. Use a stereo jack to send the final stereo mix to an external device. Connect the other end of the cable to a stereo channel of your mixer,
two mono channels, two powered monitors, or the CD, LINE IN
or TAPE/AUX input of your audio system. Don’t use the
PHONO inputs of your audio system!
Adjust the output level with the MASTER VOLUME knob.
DC IN 15V power adapter connector
Plug the supplied power adapter into this
connector. When the cable is connected, the
instrument is in standby mode. To let it enter
or exit standby, use the POWER switch
located on the front panel.
Warning: When the instrument is in standby mode, it is still connected to the power line. Accessing the inside of the instrument can
be dangerous. To completely disconnect the instrument from the
power, unplug the power plug from the power socket on the wall.
Cable holder
Fix the power cable to this hook, to avoid cable
jamming.
Pa300 Quick Guide v150 (English).book Page 16 Saturday, March 29, 2014 7:00 PM
16
Glossary of Terms
Sound
Glossary of Terms
Before you begin, take a few moments to familiarize yourself
with the names and terms we will be using to talk about the various elements of the Pa300.
In this section, you will find a brief description of various key
elements of the Pa300. A professional arranger (Pa) keyboard
uses different terminology than a traditional synthesizer or
workstation. By familiarizing yourself with the names and functions in this section, you will get a better understanding of how
all the different parts of the Pa300 work together to create a realistic musical performance. This will also help you to get the most
out of the rest of the manual.
Sound
A Sound is the most basic unit of an Arranger Keyboard performance. A Sound is basically a playable instrument timbre (piano,
bass, sax, guitar…) that can be edited, saved, recalled and
assigned to any track. In the Style Play, Song Play or Sequencer
mode, Sounds may be freely assigned to Sequencer tracks, Style
tracks, or Keyboard tracks.
Style
The Style is the heart of a professional arranger keyboard. At its
basic level, a Style will consist of up to eight parts, or “Tracks”.
Drums
The Drum track will provide a repeating rhythmic phrase,
played by the standard instruments of a Drum Kit.
Percussion
An additional rhythmic phrase played by various percussion
instruments (conga, shaker, cowbell, etc.) is provided by the Percussion track.
Bass & Accompaniment
The Bass track and the (up to) five additional Accompaniment
tracks will each play musical phrases that are musically related to
and in sync with the Drum and Percussion tracks. However, the
notes being played by these tracks will change to follow the
chord progression that you play on the keyboard.
Again, any Sound you choose may be assigned to any track in a
Style.
Variation
For each Style, there are four Variations, to be used for the Verse,
Bridge and Chorus of a song. In general, each Variation is a
slightly different version of the others. As you progress from
Variation one to Variation four, the arrangements will become
more complex, and more parts (Tracks) may be added. This
allows your performance to have a more dynamic arrangement,
without losing the original “feel” of the Style.
Fill-in & Break
During a performance, a drummer may often perform a “fill” such as when transitioning from a verse to a chorus – adding
extra dynamics and keeping the beat from getting too repetitive.
The Pa300 offers four Fill-ins specifically programmed for each
Style, that may be automatically recalled when choosing the corresponding Variation (Auto Fill). A Fill-in may be drums alone
or drums with instrumentation. Then, there is even a silent
“break”.
Intro & Ending
Each Style also allows you to complete your performance with a
set of musical introductions and endings. A long and short version of the Intro and Ending are usually provided, with the former more harmonically elaborated, and the latter with a fixed
chord. A “count-in” Style Intro is also provided, as well as the
quick Ending 3.
Pad
Pads are single sounds or single-track patterns, that can be triggered by using the dedicated PAD buttons. They can be used to
play single sounds, as well as short, cycling sequences that play
in time with the Style or Standard MIDI File, and are transposed
according to the recognized chords.
Keyboard tracks
Up to four parts can be played on the keyboard in real-time.
Three of them (Upper) can be layered and played over the full
keyboard. They can also be used to created particular sound
configurations: each of these Keyboard tracks can be limited to a
particular range of keys or velocities, but in general up to three
can be assigned to play above the split point (Upper), and one
below (Lower). This allows the Upper Sounds to be layered
together. The split point can be set to any note on the keyboard.
In addition to performing along with a Style, these same Keyboard tracks will allow you to play along with the Player.
Pa300 Quick Guide v150 (English).book Page 17 Saturday, March 29, 2014 7:00 PM
Performance and STS
Ensemble
By turning the Ensemble feature on, a single note played on one
of the Keyboard tracks will be embellished by additional notes to
create a complete chord voicing. The Ensemble knows which
notes to add by looking at the chord that you are playing. In
addition, the Ensemble parameters allow you to select the type of
voicing that will be added – from a simple one-note harmony to
a full “Brass” section – even a marimba-style trill!
Performance and STS
The Performance is the most encompassing setting on the Pa300
– a single setting that can remember the Keyboard tracks (with
all the appropriate sounds) and all their transposition, effects,
etc… A Performance can be stored in one of the Performance
bank locations.
Single Touch Settings (STS) are similar to Performances, but are
associated to a Style or SongBook Entry.
Sequencer
The Sequencer acts as a recorder, so you can capture and playback your performances. The Pa300 sequencer can function in
different modes. In the Backing Sequence mode, each Style element and each Keyboard and Pads element can be recorded on a
separate track in a single pass. This can be a big help in getting a
song recorded quickly. The sequencer can also behave as a traditional 16-track linear sequencer, where each track is recorded
individually one at a time.
Player
The Player lets you playback your performances or any Standard
MIDI File or MP3 file.
17
The LOGO decoder
On the front panel of your Pa300 you have probably noticed a
series of logos, and may have even wondered what they stand for.
Well, here is a quick explanation of each one.
General MIDI (GM) is a standard that ensures
the compatibility of sounds and messages
between GM compatible instruments available
from different manufacturers. For example,
sequenced songs created on any GM equipped product and
saved in the GM format will playback correctly on the Pa300.
General MIDI 2 extends the basic features of the General MIDI,
allowing for 256 Sounds and 9 Drum Kits (instead of 128 and 1).
RX Technology is the cutting edge engine that
drives every aspect of the Pa300 – from the
synthesis to the display and how it all works
together.
TouchView is the sophisticate technology
allowing for touching the objects in the
display, instead of pointing to them
through an external device (a mouse, a series of buttons). Go
straight to the musical elements, instead of catching keys somewhere on the control panel.
Introduction
Glossary of Terms
Pa300 Quick Guide v150 (English).book Page 18 Saturday, March 29, 2014 7:00 PM
18
Interface basics
Color TouchView graphical user interface
Interface basics
Color TouchView graphical user interface
Pa300 features our exclusive easy-to-use TouchView graphic
interface, based on a touch‐panel LCD screen. By touching items
on the LCD screen, you can select pages, tabs, and parameters,
and set parameter values via on‐screen menus and buttons. Here
are the basic elements of the user interface.
Overlapping windows
Several windows, like the Style Select or Pad Select, the Global,
the Media, or the Lyrics, overlap the current window. After you
select an item in the window, or press the EXIT button, the window closes, and the underlying page is shown again. (The following example is the Sound Select window).
Menus and sections
Pages are grouped in sections, to be selected by touching the corresponding buttons in the Edit menu that opens up when you
press the MENU button.
Dialog boxes
Similar to selecting windows, dialog boxes overlap the underlaying page. Touch one of the button on the display to give Pa300 an
answer, and the dialog box will close.
Pages
Parameters are grouped into separate pages, to be selected by
touching the corresponding tabs on the lower area of the display.
Page menus
Touch the icon on the upper right corner of each page, and a
menu with suitable commands for the current page will appear.
Touch one of the available commands to select it. (Or, touch anywhere else on the screen to make it disappear, with no command
selected).
Pa300 Quick Guide v150 (English).book Page 19 Saturday, March 29, 2014 7:00 PM
19
Pop-up menus
Editable names
When an arrow appears next to a parameter name, touch it to
open a pop-up menu. Select any of the available options (or anywhere else on the screen to make the menu disappear).
When the
(Text Edit) button appears next to a name, touch
it to open the Text Edit window and edit the name.
Checkboxes
This kind of parameters are on/off switches. Touch them to
change their status.
= On
The virtual keyboard works exactly as a personal computer’s
keyboard. Some of the symbols are context-sensitive, and only
appear when they can actually be used.
= Off
Lists and scrollbars
Numeric fields
When a numeric value can be edited, touch it a second time to
open the Numeric Keypad.
Files on storage media, as well as other kinds of data, are shown
as lists. Use the scrollbar to scroll the list content. Also, you can
use the VALUE DIAL to scroll.
List
The virtual numeric keypad works exactly as the numeric keypad of a personal computer.
As an alternative, touch a numeric field and keep it held. Then
move your fingers up (or right) to increase the value, or move it
down (or left) to decrease it.
Scrollbar
When the Name label is selected, keep the SHIFT button pressed
while touching one of the arrows on the scrollbar, to scroll to the
next or previous alphabetic section.
Virtual sliders
To change a virtual slider’s position, select it, then use the
VALUE dial to change its position. As an alternative, touch a
slider with your fingers and keep it held; then move it up or
down to change its position.
This also includes the Tempo numeric field in the main page of
the Style Play, Song Play, and Sequencer modes.
Introduction
Interface basics
Color TouchView graphical user interface
Pa300 Quick Guide v150 (English).book Page 20 Saturday, March 29, 2014 7:00 PM
20
Interface basics
Operative modes
Virtual knobs
To change a virtual knob’s position, select it, then use the VALUE
dial to change its position. As an alternative, touch a knob with
your finger and keep it held; then move your fingers up (or
right) to rotate it clockwise, or move it down (or left) to rotate
the knob counter-clockwise.
Operative modes
The pages of Pa300 are grouped in various operating modes.
Each mode is accessed by pressing the corresponding button in
the MODE section on the control panel.
Each operating mode is marked with a different color code, that
helps you understand at first sight where you are.
Two special modes (Global and Media) overlap the current
operating mode, that remains active in the background.
The Song Record mode can be accessed from the Sequencer
mode, and allows for creating new Songs.
Selected, highlighted items
Icons
Various icons help identifying the type of a file, a Song, a folder.
For example:
Folder
Any operation on parameters, data or list entries, is executed on
highlighted items. First select the parameter or item, then execute the operation.
File of Style bank
Standard MIDI File
Non-available, grayed-out parameters
When a parameter or command is not currently available, it is
shown in grey on the display. This means it cannot be selected,
but may become available when a different option is selected, or
you switch to a different page.
Shortcuts
Some commands or pages can be recalled by keeping the SHIFT
button pressed, and pressing other buttons or elements in the
display. Some others can be accessed by keeping a button pressed
for more than one second. See the “Shortcuts” chapter on page
“Shortcuts” on page 364 of the User Manual for a list of available
shortcuts.
Pa300 Quick Guide v150 (English).book Page 21 Saturday, March 29, 2014 7:00 PM
21
Easy Mode
If you have never used an arranger before, we suggest you to
switch to the Easy Mode. Easy Mode allows you to play Styles
and Songs with a simple user interface, free from the many
advanced parameters that you will want to learn later.
Touch the “Easy Mode” menu item, to make the checkmark
appear:
Turning the Easy Mode on
Touch the little rectangle on the top right corner of the display,
to open the page menu:
At this point, the Easy Mode has been activated, and the elements in the display appear less crowded:
The page menu
Turning the Easy Mode off
Reverse the above operation when you want to deactivate the
Easy Mode.
Introduction
Easy Mode
Pa300 Quick Guide v150 (English).book Page 22 Saturday, March 29, 2014 7:00 PM
Easy Mode
22
The Style Play page in detail
The Style Play page in detail
To see this page, press the STYLE PLAY button.
Style name and info. Touch the Style’s name to
open the Style Select window and choose a
different Style.
Tempo. Use the
TEMPO buttons to
change it.
Length of the accompaniment pattern, and current beat.
Performance or STS. Touch it to open
the Performance Select window and
choose a different Performance.
Sounds on the keyboard will change.
Mixer. Touch here, and mix the track’s
volume and pan.
Sounds assigned to the right hand (UP1 to UP3) and to
the left hand (LOW). Touch the Sound’s name to open
the Sound Select window and choose a different Sound.
Sound icon and status. If the
icon appears, the Sound
is in mute and cannot be heard. If
the icon does not appear, the
Sound is in play and can be
heard. See page 33
Split Point. Touch here and play a
note to set the new split point.
See page 37
Effects. Touch here and choose
the effects assigned to the various tracks.
Single Touch Settings (STS). Touch one of them to choose it, or use the dedicated buttons on
the control panel. Sounds on the keyboard will change.
Notes:
• There are three Sounds for the right hand (Upper 1, Upper 2,
Upper 3), and a single Sound for the left hand (Lower). Their
names are abbreviated as UP1, UP2, UP3, LOW, and are shown
on the right side of the display.
• Right hand (Upper) and left hand (Lower) Sounds are separated by the Split Point.
• Performances and STSs are collections of Sounds. Just choose
one of them to change all the keyboard’s Sounds.
• Choose a Style to change the musical style of the accompaniment patterns.
Pa300 Quick Guide v150 (English).book Page 23 Saturday, March 29, 2014 7:00 PM
23
The Song Play page in detail
To see this page, press the SONG PLAY button.
Song assigned to the Player. Touch it to open the
Song Select window and choose a different Song.
Tempo. Use the
TEMPO buttons to
change it.
Meter (or Time Signature) and
current beat.
Current measure.
Performance or STS. Touch it to open
the Performance Select window and
choose a different Performance.
Sounds on the keyboard will change.
Mixer. Touch here, and mix the track’s
volume and pan.
Sounds assigned to the right hand (UP1 to UP3) and to
the left hand (LOW). Touch the Sound’s name to open
the Sound Select window and choose a different Sound.
Sound icon and status. If the
icon appears, the Sound
is in mute and cannot be heard. If
the icon does not appear, the
Sound is in play and can be
heard. See page 33
Split Point. Touch here and play a
note to set the new split point.
See page 37
Effects. Touch here and choose
the effects assigned to the various tracks.
Single Touch Settings (STS). Touch one of them to choose it, or use the dedicated buttons on
the control panel. Sounds on the keyboard will change.
Notes:
• As in Style Play mode, there are three Sounds for the right hand
(Upper 1, Upper 2, Upper 3), and one Sound for the left hand
(Lower). Their names are abbreviated as UP1, UP2, UP3, LOW,
and are shown in the right side of the display.
• Right hand (Upper) and left hand (Lower) Sounds are separated by the Split Point.
• Performances and STSs are collections of Sounds. Just choose
one of them to change all the keyboard’s Sounds.
• Available STSs depend on the Style or SongBook Entry you last
selected.
• Touching a Song name in the display is the same as pressing the
SONG button in the SELECTION section of the control panel.
Introduction
Easy Mode
The Song Play page in detail
Pa300 Quick Guide v150 (English).book Page 24 Saturday, March 29, 2014 7:00 PM
24
Easy Mode
The Song Play page in detail
Pa300 Quick Guide v150 (English).book Page 25 Saturday, March 29, 2014 7:00 PM
Pa300 Quick Guide v150 (English).book Page 26 Saturday, March 29, 2014 7:00 PM
26
Turning the instrument on
Turning the instrument on and viewing the main screen
Turning the instrument on
First of all, turn the instrument on and familiarize with the main screen. You can also listen to the
demos.
Display
Power button
Turning the instrument on and viewing the main screen
1
Turn Pa300 on (exit from standby) by pressing the POWER button located in the control
panel.
After you turn the instrument on, a welcome screen is shown for some seconds, then the main
display appears.
2
When you want to put Pa300 to standby, keep the POWER button pressed for about
one second, and release it when the screen appears dimmed.
After having pressed the POWER button, the display brightness will be dimmed. At this point,
the shutdown procedure will begin and last for a few seconds. Please do not disconnect the
power cable during this procedure.
Pa300 Quick Guide v150 (English).book Page 27 Saturday, March 29, 2014 7:00 PM
Connecting and calibrating the Damper pedal
Programming the Damper pedal
27
Connecting and calibrating the Damper pedal
If you want to play Piano, you will want to connect a Damper pedal to sustain notes while playing.
You can connect a Korg PS1, PS3 or DS1H to the PEDAL/DAMPER connector on the back of the
instrument.
Damper/Assignable pedal connector
Calibrating the Damper pedal will let you use the full run of the pedal, without “dead spots”. Also, this
might be the only way to connect a third-party Damper pedal that seems to work in reverse, sustaining the notes when they are not pressed!
1
Connect the Damper pedal to the PEDAL/DAMPER connector on the back of the instrument.
2
Press the GLOBAL button to access the Global mode.
Menu of the Global mode
Global mode is where you can set some global parameters, like this one or the Master Tuning.
These settings are not tied to any specific operative mode, so they are programmed in these separate pages.
3
Touch the Controllers button to access the Controllers section of the Global mode.
If you have not yet chosen a different page, the “Hand Controller” page will appear (being the
first one in the Controllers section).
Quick Guide
Programming the Damper pedal
Pa300 Quick Guide v150 (English).book Page 28 Saturday, March 29, 2014 7:00 PM
28
4
Connecting and calibrating the Damper pedal
Programming the Damper pedal
Touch the Foot Contr. tab to select the “Foot Controllers” page.
This is the page where you can program the PEDAL/DAMPER connector, by assigning it one of
the available functions.
5
Be sure the Damper function is assigned to the “Function” parameter.
6
Touch the “Calibration” button, to make the “Damper & Pedal/Footswitch Calibration”
dialog box appear.
7
Fully press the Damper pedal down, and while continuing to press touch the “Push”
button to confirm the maximum value.
8
When the following dialog box appears, release the pedal.
9
Touch the “Push” button in the display to confirm the minimum value.
Check if the pedal is working properly. In case it isn’t, repeat the procedure.
10
Press the EXIT button to return to the previous operative mode.
Pa300 Quick Guide v150 (English).book Page 29 Saturday, March 29, 2014 7:00 PM
Playing the Demo
Starting and stopping the Demo
29
Playing the Demo
Listen to the built-in Demo Songs to appreciate the power of Pa300. There are several Demo Songs to
choose from.
Starting and stopping the Demo
Here is how to start, choose and stop the Demo Songs.
1
Press the STYLE PLAY and SONG PLAY buttons together.
The LED of the two buttons will start blinking. Pa300 will be set in Demo mode.
At this point, if no other button is pressed, a selection of the best Demo Songs will be played
back.
2
In case you want to listen to a specified Demo Song, select one of the available options
on the display (Full Songs, Solo Instruments, Styles).
Quick Guide
Demo buttons
Pa300 Quick Guide v150 (English).book Page 30 Saturday, March 29, 2014 7:00 PM
30
Playing the Demo
Starting and stopping the Demo
3
Choose one of the Demo. To stop it, touch the STOP button on the display.
4
Exit from the Demo mode by pressing any one of the MODE buttons.
Pa300 Quick Guide v150 (English).book Page 31 Saturday, March 29, 2014 7:00 PM
Playing Sounds
Selecting a Sound and playing it on the keyboard
31
Playing Sounds
You can play up to three sounds at the same time on the keyboard. You can also split the keyboard in
two parts, to play up to three sounds with your right hand (Upper) and one with your left hand
(Lower).
Sound Select button
Quick Guide
Split button
Performance section
Selecting a Sound and playing it on the keyboard
1
Be sure the Upper 1 track is selected and set to play.
A selected track is shown with a white background. In this example, the Upper 1 track is
selected. If it is not selected, touch it once to
select it.
The fact that there isn’t a
icon over the bank icon means
that the Upper 1 track is set to
play. If it is muted, touch the
bank icon to set it to play.
2
If you want to play the Sound on the whole keyboard, be sure the keyboard is in Full
Upper mode (i.e., the SPLIT LED is turned off). If it is split in two parts, press the SPLIT
button to turn its LED off.
(Full) Upper
i Note: Be sure tracks
Upper 2 and Upper 3 are
muted and are not playing. If
you hear more than one
sound, see also page 33 for
how to mute tracks.
Pa300 Quick Guide v150 (English).book Page 32 Saturday, March 29, 2014 7:00 PM
32
3
Playing Sounds
Selecting a Sound and playing it on the keyboard
Touch the Upper 1 track’s area in the display to open the Sound Select window.
Type of Sounds.
Sound’s name
The currently
selected Sound
appears in the page
header.
Target track for the
selected Sound
i Note: You can also open
the Sound Select window by
first touching the track to
which to assign the new
Sound, then pressing the
SOUND button in the SELECTION section.
Sound bank icon
The selected Sound is highlighted.
Touch a Sound’s name to select it.
Touch one of the side tabs to select a
different Sound bank.
Touch one of the lower tabs to select
a different Sound page.
A Previous and Next Page pair of button may appear
in this area, when more than six pages are available.
As an alternative, repeatedly press the SOUND button
to cycle between the pages.
4
Select a Sound from the Sound Select window, then press the EXIT button to close the
window.
The Sound Select window closes, and the
main screen appears
again, with the selected
Sound assigned to the
Upper 1 track.
5
Play the Sound on the keyboard.
i Note: Selection windows
may automatically close
after a selection. To do this,
uncheck the “Display Hold”
box in the Global > General
Controls > Interface page. In
this case, press the EXIT button only if you don’t make
any selection but want to
close the window.
Pa300 Quick Guide v150 (English).book Page 33 Saturday, March 29, 2014 7:00 PM
Playing Sounds
Playing two or three Sounds at the same time
33
Playing two or three Sounds at the same time
You can layer all three Upper tracks and play them on the keyboard.
Please note how the
icon appears in the Upper 2
and Upper 3 status boxes.
These tracks will not be heard.
1
Touch the
icon in the Upper 2 status box, to set the Upper 2 track to play.
2
Quick Guide
After touching in this
area, the
icon
disappears. The
Upper 2 track will be
set to play and will be
heard.
Play the keyboard.
Note how the ‘Dark Pad’ Sound (assigned to the Upper 2 track) has been layered
with the ‘Grand Piano RX’ (assigned to the Upper 1 track).
3
Touch the
icon in the Upper 3 status box, to set the Upper 3 track to play.
As above, after touching in this area, the
icon disappears. The Upper 3
track will be set to play
and will be heard.
4
Play the keyboard.
Note how the ‘Strings Ens.2 GM’ Sound (assigned to the Upper 3 track) has been
added to the ‘Dark Pad’ (assigned to the Upper 2 track) and the ‘Grand Piano RX’
(assigned to the Upper 1 track).
5
Touch the bank icon in the Upper 3 status box, to mute the Upper 3 track again.
Pa300 Quick Guide v150 (English).book Page 34 Saturday, March 29, 2014 7:00 PM
34
6
Playing Sounds
Playing two or three Sounds at the same time
Play the keyboard.
Note how the ‘Strings Ens.2 GM’ Sound (assigned to the Upper 3 track) has been
muted again. Only tracks Upper 1 and Upper 2 can be heard at this time.
7
Touch the bank icon in the Upper 2 status box, to mute the Upper 2 track again.
8
Play the keyboard.
Note how the ‘Dark Pad’ Sound (assigned to the Upper 2 track) has been muted
again. Only track Upper 1 can be heard at this time.
Pa300 Quick Guide v150 (English).book Page 35 Saturday, March 29, 2014 7:00 PM
Playing Sounds
Playing different Sounds with your left and right hand
35
Playing different Sounds with your left and right hand
You can play a single Sound with your left hand, in addition to playing up to three Sounds with your
right hand.
Press the SPLIT button to turn its LED on, and split the keyboard in the Lower (left
hand) and Upper (right hand) parts.
Upper
Lower
2
Be sure the Lower track is set to play.
If the Lower track is muted, touch its
icon to make it disappear from this area.
If the Bass & Lower Backing function is turned on,
and the Style is not running, the Lower track will
always play.
3
Play the keyboard.
Note how the keyboard is split in two parts, each playing different
sounds.
Lower
Upper
Quick Guide
1
Pa300 Quick Guide v150 (English).book Page 36 Saturday, March 29, 2014 7:00 PM
36
4
Playing Sounds
Playing different Sounds with your left and right hand
Return to the full keyboard playing mode by pressing the SPLIT button to turn its LED
off.
(Full) Upper
5
Play the keyboard.
Note how the keyboard once again plays the Upper tracks over the entire
length of the keyboard.
Upper
Pa300 Quick Guide v150 (English).book Page 37 Saturday, March 29, 2014 7:00 PM
Playing Sounds
Changing the split point
37
Changing the split point
If you are not comfortable with the selected split point, you may set the split point to a different key.
Touch the Split tab to see the Split Point panel.
2
Touch the keyboard in the display, then play the lowest note of the Upper section on
the keyboard.
i Hint: As an alternative,
keep the SPLIT button
pressed to open the Split
Point dialog.
Quick Guide
1
Lower
3
Upper
As an alternative, touch the Split Point parameter to select it, and use the VALUE dial to
select the new split point.
When you change the split point, the “Global” parameter is automatically unchecked. This is
because you are setting a “local” or “temporary” split point, and not the “global” one, used across
the whole instrument.
To change the “global” split point, go to the Global > Mode Preferences > Style page, and set the
“Split Point” parameter.
You can save the “local” split point into a Performance, as described in the following pages (see
“Saving your settings to a Performance” on page 40).
Pa300 Quick Guide v150 (English).book Page 38 Saturday, March 29, 2014 7:00 PM
38
Playing Sounds
Raising or lowering the Upper octave
Raising or lowering the Upper octave
If all Upper tracks sound too high or too low, you can quickly change which octave they are playing
in.
1
Use the UPPER OCTAVE buttons on the control panel, to transpose all Upper tracks at
the same time.
i Note: The Octave Transpose value for each of the
keyboard track is shown
under the Sound’s name.
Each time you press this button, the
pitch will be lowered by one octave.
2
Each time you press this button, the
pitch will be raised by one octave.
Press both UPPER OCTAVE buttons together to reset the octave to the value saved in
the current Performance.
Pa300 Quick Guide v150 (English).book Page 39 Saturday, March 29, 2014 7:00 PM
Selecting and saving Performances
Selecting a Performance
39
Selecting and saving Performances
Performances are the musical heart of Pa300. Unlike selecting single Sounds, selecting a Performance will immediately assign several Sounds to the Keyboard tracks, the needed effects and transpositions, plus many more setting parameters. Performance can be considered a snapshot of the
current configuration of Sounds.
You can save these settings to a Performance memory location. While many Performances are already
supplied with the instrument, you can customize each of them to your own taste, and then save them
in their customized version.
Similar to Performances, but optimized for the Style or SongBook Entry they are associated to, you
can also save your settings to a Single Touch Setting (STS). Four STSs are supplied with each Style or
SongBook Entry, and can be selected with the four dedicated buttons under the display.
Note: Style tracks are saved
to a third object called the
Style Settings.
Please note that settings saved in the “My Setting” Performance are automatically selected when
the instrument is turned on (exit from standby). This means you can save your preferred startup
settings to this Performance (see below for more information).
Performance section
Quick Guide
Single Touch Settings (STS) section
Selecting a Performance
1
Touch the Performance area in the display, to open the Performance Select window.
i Hint: You can also open
the Performance Select window by pressing one of the
buttons in the PERFORMANCE section. This will let
you jump directly to the
desired Performance bank.
The selected Performance is highlighted. Touch a Performance name
to select it.
Touch one of the side tabs to select a
different Performance bank.
Touch one of the lower tabs to select a
different Performance page.
Pa300 Quick Guide v150 (English).book Page 40 Saturday, March 29, 2014 7:00 PM
40
2
Selecting and saving Performances
Saving your settings to a Performance
Select one of the Performances in the Performance Select window, then press the EXIT
button to close the window.
After pressing the EXIT button, the Performance Select window closes, and the
main screen appears again. Sounds, Effects, and other settings, change according to the setting memorized in the selected Performance.
Note that Selection windows may automatically close after a selection. To do this, uncheck the
“Display Hold” box in the Global > General Controls > Interface page. In this case, press the
EXIT button only if you don’t make any selection but want to close the window.
3
Play the keyboard.
Settings memorized in the selected Performance have been
selected. Sounds, effects and other settings have been recalled.
Saving your settings to a Performance
The Sounds and Effects assigned to the Keyboard tracks, together with the parameters you can access
by pressing the MENU button while in Style Play and Song Play mode, can be saved into a single Performance, to be quickly recalled at a later time.
1
Keep one of the PERFORMANCE buttons pressed for about one second to open the
Write Performance dialog box.
i Hint: To open the Write
Performance dialog box, you
can also choose the ‘Write
Performance’ command you
can find in the page menu.
Pa300 Quick Guide v150 (English).book Page 41 Saturday, March 29, 2014 7:00 PM
Selecting and saving Performances
Saving your settings to a Performance
2
41
If you like, you may assign a new name to the Performance.
Use the ‘<–’ and ‘–>’
buttons or the DIAL to
move the cursor.
Touch the ‘Backspace’ symbol to delete
just a single character, ‘Clear’ to delete
the whole string.
Use the alphabetic
characters to enter
text.
(Text Edit) symbol to open the
Text Edit dialog box.
3
Touch the Shift key to
switch between capitals
and small characters.
When done, touch OK to confirm the
new name, or Cancel to abandon all
changes.
Select a bank and Performance location in memory, where you would like to save the
Performance.
The selected Performance location is highlighted. Touch a
Performance’s name to
select it.
Touch one of the side tabs to select a
different Performance bank.
4
Touch one of the lower tabs to select
a different Performance page.
When you have edited the name to the Performance, and selected the target location,
touch OK to save the Performance to memory (or Cancel to stop the operation).
! Warning: Saving a Performance to an already used
location overwrites any existing data at that location. The
old data are lost. Make a
backup of all your important
data.
Quick Guide
Touch the
Pa300 Quick Guide v150 (English).book Page 42 Saturday, March 29, 2014 7:00 PM
42
Selecting and saving the “My Setting” Performance
Selecting the startup parameters (the “My Setting” Performance)
Selecting and saving the “My Setting” Performance
There is a special Performance, where you can save your preferred settings for things like Keyboard
Sounds, Effects, Transposition. It also memorizes a preferred Style (that is only recalled when turning
the instrument on). This Performance is automatically selected when the instrument is turned on
(exit from standby). It is called the “My Setting” Performance.
‘My Setting’ Performance
Selecting the startup parameters (the “My Setting” Performance)
After having done some changes to the Sounds, transposition, or other parameters, you can return to
the startup situation by pressing the MY SETTING button in the control panel.
•
Press the MY SETTING button to recall the “startup” settings.
Saving the startup parameters into the “My Setting” Performance
You can save the startup settings (Sounds and other settings, including most of the settings on the
control panel and the selected Style) into this special Performance.
•
Keep the MY SETTING button pressed for about one second, until the “Write Startup
Settings” dialog box appears, then touch the OK button to confirm saving to memory.
Pa300 Quick Guide v150 (English).book Page 43 Saturday, March 29, 2014 7:00 PM
Selecting and playing Styles
Selecting and playing a Style
43
Selecting and playing Styles
Pa300 is an arranger, i.e. a musical instrument providing automatic accompaniments, or arrangements. Each arrangement style is called, as a consequence, a Style.
A Style is made of several Style Elements (Intro, Variation, Fill, Break, Ending), corresponding to the
various sections of a song. By selecting Style Elements, you can make your playing more varied and
musical.
When selecting a Style, Sounds, Effects and various configuration parameters for the Style tracks are
also selected. These are called the Style Settings. Four STSs are assigned to the STS buttons. Selecting
a Style also selects the four Pads it contains. Pads are single sounds or single-track patterns, that can
be triggered with the dedicated PAD buttons.
Use the Style controls to start or stop the Style.
Quick Guide
Style Select button
Style Elements
Style Controls
Selecting and playing a Style
1
Touch the Style area in the display. The Style Select window appears.
Type of Style.
The selected Style is highlighted.
Touch a Style’s name to select it.
Touch one of the side tabs to select a
different Style bank.
Touch one of the lower tabs to select
a different Style page.
i Hint: You can also open
the Style Select window by
pressing the STYLE button in
the SELECTION section of the
control panel.
Pa300 Quick Guide v150 (English).book Page 44 Saturday, March 29, 2014 7:00 PM
44
2
Selecting and playing Styles
Selecting and playing a Style
Select a Style from the Style Select window.
After pressing the EXIT button, the Style Select window
closes, and the main screen appears again, with the selected
Style ready to go.
3
Be sure the ACCOMP. LED is turned on.
For the accompaniment tracks to play, the LED of
this button (meaning “Accompaniment”) must be
turned on.
4
Press the SYNCHRO-START/STOP button to turn the START LED on.
This will turn the Synchro-Start function on, and let the accompaniment start as soon as you
play a chord on the keyboard.
START LED
5
STOP LED
Play the keyboard.
i Note: You could simply
press START/STOP to start the
Style, but the Synchro-Start
function allows you to make
the Style start in sync with
your playing on the keyboard. Therefore, it may be
considered a “more musical”
way of starting a Style.
When the Syncho-Start function is turned on, the Style starts
playing as soon as you play a note or chord in the chord scan area.
Play chords with your left hand, and the melody with your right
hand. The arranger will follow your playing.
6
Press START/STOP to stop the Style.
i Note: The chord scan
area depends on the status of
the SPLIT LED and the Chord
Recognition parameter (see
Global > Mode Preferences >
Style).
Pa300 Quick Guide v150 (English).book Page 45 Saturday, March 29, 2014 7:00 PM
Selecting and playing Styles
Tempo
45
Tempo
While a Tempo setting is saved with each Style or Performance, you can change it to be whatever you
like. You can use either of the following two methods.
Use the TEMPO + or – buttons to change the Tempo value.
•
Press the TEMPO – and + buttons together to recall the saved Tempo value.
•
As an alternative, keep the SHIFT button pressed, and use the VALUE dial to change the
Tempo. The selected tempo will be shown in a small window.
•
If you like to keep the currently selected Tempo value unchanged, turn on the LED of
the TEMPO
(LOCK) button.
When the Tempo Lock function is turned on, the Tempo will not change when selecting a different Style (or a different Song in Song Play mode).
i Hint: As an alternative to
using the TEMPO buttons,
hold the Tempo value in the
display, then move your finger up/down or left/right (or
change the value with the
VALUE dial).
Quick Guide
•
Pa300 Quick Guide v150 (English).book Page 46 Saturday, March 29, 2014 7:00 PM
46
Selecting and playing Styles
Intro, Variation, Fill, Break, Ending
Intro, Variation, Fill, Break, Ending
When playing Styles, you can select various “Style Elements” to cover the various sections of a song. A
Style is made of three Intros (or two Intros and a Count-In), up to four basic patterns (Variations),
four Fills, a Break, and three Endings.
1
Make sure the SYNCHRO-START LED is turned on (otherwise, press the button to turn it on).
Activating the Synchro Start function is not mandatory, but it might be handy.
2
Press one of the INTRO buttons to set the corresponding Intro to play.
3
Play the keyboard.
The Style starts with the selected Intro. When the Intro is completed, the basic pattern (selected Variation) starts to play.
4
Be sure the LED of the AUTO FILL button is turned on.
When the Auto Fill function is turned on, a Fill is automatically performed before switching to a
different variation.
5
While playing, press one of the VARIATION buttons, to select a different variation of
the basic pattern.
If you turned the Auto Fill function on in the previous step, a Fill will be performed before the
Variation begins.
When the Fill ends, the selected Variation
will start playing.
Pa300 Quick Guide v150 (English).book Page 47 Saturday, March 29, 2014 7:00 PM
Selecting and playing Styles
Single Touch Settings (STS)
6
47
When you like to stop playing, press one of the ENDING buttons to stop the Style with
an Ending.
When the Ending is finished, the Style automatically stops.
Single Touch Settings (STS)
Each Style may come with up to four Keyboard track settings, called the STS (short for “Single Touch
Settings”). STSs are very similar to Performances, but they are fine-tuned to the Style they are associated to.
In case it is not shown, touch the STS Name tab to see the STS Name panel.
2
Press one of the four STS buttons under the display, or touch the name of an STS in the
STS panel in the display.
3
Play the keyboard.
Quick Guide
1
i Note: You can also find
four STSs with each of the
SongBook Entries. This allows
for linking STSs to Songs.
Settings memorized in the selected STS have been selected.
Sounds, effects and other settings have been recalled.
4
Try all the other STSs, and see how settings change with each of them.
Pa300 Quick Guide v150 (English).book Page 48 Saturday, March 29, 2014 7:00 PM
48
Selecting and playing Styles
The Pads
The Pads
Each Style or SongBook Entry can assign different sounds or patterns to the four PADS. These sounds
or patterns can be played along with the Keyboard and Style tracks.
1
If you want to see which sounds or patterns are associated to the four Pads for the current Style, touch the Pad tab to see the Pad panel.
2
Press one of the four PADS to play the corresponding Pad.
3
If the selected PAD triggers an endless pattern (i.e. a guitar arpeggio), press the same
PAD button again to stop it.
4
Select a different Style, and see how the sounds or patterns assigned to the PADS
change.
5
Press more PAD buttons at once, to play two or more sounds or patterns at the same
time.
6
Press STOP to stop all the Pads at the same time.
Adjusting the balance between the Style and the keyboard
Balancing between the Keyboard and Style tracks may be useful, to gently fade them and adjust their
respective volume.
•
While the Style is playing, use the BALANCE knob to balance between the Keyboard
(KBD) and Style’s Accompaniment (ACC) volume.
This knob also balances between the Keyboard and the Pad tracks. Also, it balances between the
Keyboard and the Song tracks (in Song Play mode).
i Hint: You can open the
Pad Select window to assign
a different sound or pattern
to the Pads, by pressing SHIFT
+ one of the PADs.
Pa300 Quick Guide v150 (English).book Page 49 Saturday, March 29, 2014 7:00 PM
Selecting and playing Styles
Adjusting the volume of the separate tracks
49
Adjusting the volume of the separate tracks
1
Touch the Volume tab to see the Volume panel.
2
Hold & drag the Virtual Sliders in the display to adjust each Keyboard track’s volume.
3
To separately adjust each Style track, press the TRACK SELECT button to change the
track’s view.
Quick Guide
You can adjust the volume of each of the Style and Keyboard tracks, for example to soften the bass a
little, or to make the keyboard solo louder.
i Hint: As an alternative,
you can change each track’s
volume, by touching a track’s
area to select it, then using
the VALUE dial to change the
volume.
In Style view, all separate
Style tracks are shown, and
their volume can be
adjusted by dragging the
corresponding sliders.
4
To return to the Keyboard Tracks view, press the TRACK SELECT button again.
Pa300 Quick Guide v150 (English).book Page 50 Saturday, March 29, 2014 7:00 PM
50
Selecting and playing Styles
Turning the Style tracks on/off
Turning the Style tracks on/off
You may easily turn on or off any Style track while you are playing. For example, try muting all
accompaniment tracks, while drums and bass continue to play.
1
Be sure the Volume panel is shown, or touch the Volume tab to show it.
2
While the Style is playing, touch the Play button to set the track to Mute.
i Note: While in the Normal view of the Style Play
mode, you can see Style
tracks grouped in just three
“grouped” tracks. To see each
Style track as separate, individual tracks, just press the
TRACK SELECT button.
Mute the ACCOMP track. All accompaniment tracks will
go silent (apart from Drum, Percussion and Bass).
3
To set the tracks back to the Play status, touch the Mute icon on the muted track.
Set the ACCOMP track to Play. All accompaniment
tracks will return to their original volumes.
4
To mute/unmute each single Style track, first press TRACK SELECT to switch to the Style
Tracks view, then repeat the above procedure.
5
Press the TRACK SELECT button again to go back to the Normal view.
i Hint: To turn all Accompaniment tracks (including
the Bass track) off while you
are not in the Main page,
press the ACCOMP button on
the control panel to turn its
LED off.
Pa300 Quick Guide v150 (English).book Page 51 Saturday, March 29, 2014 7:00 PM
Selecting and playing Styles
Adding harmony notes to your right-hand melody with the ENSEMBLE function
51
Adding harmony notes to your right-hand melody with the
ENSEMBLE function
Chords played with your left hand may be applied to the right-hand melody.
1
Press the SPLIT button to turn its LED on and split the keyboard.
The Ensemble function only works in Split mode.
Press the ENSEMBLE button to turn its LED on.
3
Play chords with the left hand and single notes in the right hand.
Quick Guide
2
Notice how the right hand is automatically harmonized, according to the chords composed with your left hand.
4
To select a different harmonization style, keep the SHIFT button pressed, and press the
ENSEMBLE button to open the Ensemble page.
This is a fast ‘shortcut’ to recall this page. The longer procedure would have consisted in accessing the Edit mode by pressing the MENU button, touching the Keyboard/Ensemble section, and
then going to the Ensemble page.
While the Ensemble parameter is
selected, use the VALUE dial to
select one of the available harmonization types.
Pa300 Quick Guide v150 (English).book Page 52 Saturday, March 29, 2014 7:00 PM
52
5
Selecting and playing Styles
Adding harmony notes to your right-hand melody with the ENSEMBLE function
When the right harmonization type has been selected, press the EXIT button to go
back to the main page.
While in an Edit page,
press EXIT to go back to
the Main page of the current operating mode.
6
Press the ENSEMBLE button again to turn its LED off. The automatic harmonization will
be turned off.
Pa300 Quick Guide v150 (English).book Page 53 Saturday, March 29, 2014 7:00 PM
Song Play
Selecting a Song to play
53
Song Play
Pa300 is equipped with an onboard Player that can read Songs in Standard MIDI File (MID), Karaoke™ (KAR) and MP3 format. It may be of great interest to singers and guitar players to know that if a
Standard MIDI File or an MP3 file contains lyrics and chords, they can be seen in the display. Lyrics in
the graphical “+G” format are also supported.
In addition to lyrics and chords, with Standard MIDI Files and Karaoke files you can also see the score
in traditional notation.
Quick Guide
The SONG PLAY button
Player controls
Selecting a Song to play
1
Press the SONG PLAY button to switch to the Song Play mode.
i Hint: In Style Play mode,
you can pre-select the Song
to be assigned to the Player.
This way, you will be ready to
start it, as soon as you switch
to Song Play mode.
After pressing the SONG PLAY button, the main page of the Song
Play mode appears.
The Song area of the
Style Play main page.
Pa300 Quick Guide v150 (English).book Page 54 Saturday, March 29, 2014 7:00 PM
54
2
Song Play
Selecting a Song to play
Touch the Player area to open the Song Select window.
This window is very similar to the one you can see when pressing the MEDIA button on the control panel, and touching the Load tab to see the Load page. This page is, however, “filtered” to
only show Song files.
i Hint: As an alternative,
you can open the Song Select
window by pressing the
SONG button in the SELECTION section of the control
panel.
3
Scroll through the list and select the Song to play.
Use the scroll bar or the VALUE DIAL
to see all the Songs in the list. Keep
SHIFT pressed and touch the Up/
Down arrow to jump to the next/
previous alphabetic section.
The selected Song is highlighted. Touch a Song’s
name to select it.
Touch the Select button to select the highlighted Song, and assign it to the Player.
Use the Device pop-up menu to select
one of the available mass-storage devices.
4
Use the Open and Close buttons to
browse through the folders.
Use the Locate button to ‘locate’ and go to
the folder of the selected Song.
When the Song is selected, touch the Select button to confirm your selection; this will
automatically close the Song Select window.
Selected Song
After touching the Select button in the display, the main page of
the Song Play mode will appear again.
Pa300 Quick Guide v150 (English).book Page 55 Saturday, March 29, 2014 7:00 PM
Song Play
Playing back a Song
55
Playing back a Song
Once a Song has been selected, it may be played back by the Player.
1
Press the
(START/STOP) button in the PLAYER section to start playback.
2
Use the PLAYER control section to control the Song’s playback.
Press the FAST FORWARD button once to go forward. Keep it pressed to go forward more.
Press the HOME button to move to
the beginning of the Song.
Press the REWIND button once to go
back. Keep it pressed to go back more.
3
Quick Guide
After pressing the
(START/STOP) button, the button’s LED turns on, and the measure counter begins to
show the current measure number.
Press the START/STOP button to stop the Song at the
current position. Press it again to resume playback.
When you want to stop the song and go back to the beginning, press the
button.
When the Song is stopped,
the LED on the START/STOP
button turns off.
(HOME)
i Note: In any case, the
Player will automatically stop
when the end of the Song is
reached.
Pa300 Quick Guide v150 (English).book Page 56 Saturday, March 29, 2014 7:00 PM
56
Song Play
Changing the tracks’ volume
Changing the tracks’ volume
While playing back a Standard MIDI File, you may wish to change each track’s volume, to create a mix
“on the fly”.
1
Be sure the Volume panel is shown, or touch the Volume tab to show it.
2
As seen for the Styles, you can hold & drag the Virtual Sliders on the display to adjust
each track’s volume. Use the TRACK SELECT button to cycle between track groups.
Use the TRACK
SELECT button to
cycle between different groups of tracks
3
In Normal view, you can adjust each Keyboard track’s volume.
i Hint: As an alternative,
you can change each track’s
volume, by touching a track’s
area to select it, then using
the VALUE dial to change the
volume.
Keyboard tracks
Pa300 Quick Guide v150 (English).book Page 57 Saturday, March 29, 2014 7:00 PM
Song Play
Changing the tracks’ volume
4
57
Press the TRACK SELECT button once to see tracks 1-8 (Track 1-8 view).
i Note: Changes to Song
tracks will not be saved, and
are reset each time you press
the
(Home) button. To
save changes, you must edit
the Song in Sequencer mode.
In Track 1-8 view, the first 8 tracks
of the selected Song are shown.
Press TRACK SELECT once again to see tracks 9-16 (Track 9-16 view).
Quick Guide
5
In Track 9-16 view, the second
group of 8 tracks of the selected
Song are shown.
6
Press TRACK SELECT again, to return to the Normal view (Keyboard tracks).
Keyboard tracks
7
Press the
8
While listening to the Song, switch from Normal view to Track 1-8 and Track 9-16 view,
to see which tracks are playing.
(START/STOP) button to start the Song.
To see if a track is playing, look at the label with its name, and see if it is changing color.
Pa300 Quick Guide v150 (English).book Page 58 Saturday, March 29, 2014 7:00 PM
58
•
Song Play
Turning the Song tracks on/off
Touch each track’s channel strip, to see each track’s detail in the Track Info line.
Selected track
•
Assigned Sound. Touch it to
open the Sound Select window.
Sound bank
Program Change
Also, you can see which type of Sound is assigned to each track in the Sound area of the
Track 1-8 and Track 9-16 views.
Octave Transpose
Sound bank icons. Touch to open the
Sound Select window.
Turning the Song tracks on/off
While playing back a Standard MIDI File, you may wish to mute one or more tracks, for example to
sing along with the Song, or play an instrumental part live on the keyboard.
To mute/unmute Song tracks you simply touch the Play/Mute icon in the Volume panel.
Pa300 Quick Guide v150 (English).book Page 59 Saturday, March 29, 2014 7:00 PM
Song Play
Soloing a track
59
Soloing a track
Opposite to the above, you may want to make a single track of a Standard MIDI File play alone. This
is called the Solo function.
1
While the Song is playing, keep the SHIFT button pressed and touch the track you want
to listen to in Solo mode.
2
To set all tracks back to the Play status, keep the SHIFT button pressed again, and
touch the track that is currently in Solo mode.
Quick Guide
Please remember that you can also use the Solo function in Style Play and Sequencer mode. The
Solo command can also be selected from the page menu.
Pa300 Quick Guide v150 (English).book Page 60 Saturday, March 29, 2014 7:00 PM
60
The SongBook
Selecting the desired Entry from the Main List
The SongBook
One of the most powerful features of Pa300 is the onboard music database, that allows you to organize
your Styles and Songs for easy retrieving. Each Entry of this database may include the artist, title,
genre, number, key, tempo, and meter (time signature) of a specified song. When selecting one of the
Entries, the associated Style, Standard MIDI File or MP3 file – as well as the Style Play or Song Play
mode – is automatically recalled.
In addition to helping you organize your shows, the SongBook allows you to assign up to four Pads,
and up to four STSs to each Entry. Also, you can link a text file to any Entry, to be used as the Lyrics of
a song, even if there are no Lyrics events in the associated Standard MIDI File or MP3 file, or if you
prefer to play the song live with the backing of the Styles.
You can add your own Entries to the SongBook, as well as edit the existing ones. Korg already supplies
some hundred Entries as standard. Furthermore, the SongBook allows you to create various custom
lists, that may suit your different types of show.
The SONGBOOK button
Selecting the desired Entry from the Main List
A large database is already included with the instrument, and you can later customize it. You may
browse through this database in a variety of ways.
1
While you are in Style Play or Song Play mode, press the SONGBOOK button to open
the SongBook window.
Style, Standard MIDI File(s) or MP3 file(s) currently
assigned to the arranger or player(s)
Use the scroll bar or the
VALUE DIAL to see all the
Songs in the list. Keep SHIFT
pressed and touch the Up/
Down arrow to jump to the
next/previous alphabetic
section.
SongBook Main List
Touch this checkbox
to turn the view filter
on.
Touch this button to
edit the view filter.
Adds the selected Entry to
the Custom List (if activated – see page 67).
Touch this button to
select the current Entry to
play.
Pa300 Quick Guide v150 (English).book Page 61 Saturday, March 29, 2014 7:00 PM
The SongBook
Displaying Artist or Genre
2
61
Browse through the Entries.
Icons in the Type column will help you identify the type of the Entry. The Genre column is
shown by default, but you can switch to the Artist column (see “Displaying Artist or Genre”
below).
3
When the Entry you are looking for becomes visible in the display, select it and touch
the Select button in the display.
After selecting an Entry, the corresponding Style, MID, KAR or MP3 file will be recalled,
together with the relevant operating mode (Style Play or Song Play). Up to four STSs and four
Pads will also be recalled. Any TXT file associated with the Entry can be seen in the Lyrics page.
The selected Style, MID, KAR or MP3 file will be shown in the top area of the screen.
For space matters, either the Genre or Artist column can be seen in the display. You cannot see both at
the same time.
1
Touch the page menu icon to open the page menu.
i Note: The Artist and Key
fields of all supplied Entries
have been intentionally left
empty.
2
Choose Show Artist (now Genre) to switch from Genre to Artist in the List view. The Artist column will be shown.
3
Open the page menu again, and choose the Show Genre (now Artist) item. The Genre
column will be shown again.
Quick Guide
Displaying Artist or Genre
Pa300 Quick Guide v150 (English).book Page 62 Saturday, March 29, 2014 7:00 PM
62
The SongBook
Sorting Entries
Sorting Entries
You can change the order of the Entries shown in the display.
1
You can change the sorting order by touching one of the labels in a list of names.
Touch the Name label…
…to alphabetically reorder
the names in the list.
You can do the same by touching the Type, Name, Genre, Artist, Key, Number, Tempo or Meter
label.
2
Each time you touch the same label again, the order changes between ascending and
descending.
Searching for Entries
The SongBook database may be really huge. You can, however, look for (say) specific artists or song
titles, using the filtering functions.
1
Touch the Filter button in the display, to open the Filter dialog box.
Available search
criteria. “Genre”
and “Artist” are
both considered, even
though only one
of them may be
shown in the List
Pa300 Quick Guide v150 (English).book Page 63 Saturday, March 29, 2014 7:00 PM
The SongBook
Searching for Entries
2
63
Touch the
(Text Edit) button next to the search criteria (even more than one) you
want to enter.
3
Touch OK in the display, and close the Text Edit dialog box. The entered text is now the
search criteria.
4
Touch OK to close the Filter dialog box and return to the SongBook page.
Once the Filter dialog box has been closed by touching OK, the Filtered check box is automatically checked, and the filter is activated. Only Entries matching the entered criterion are seen in
the Main List.
5
To see the whole SongBook database again, touch the Filtered check box again, to
make the check mark disappear.
Quick Guide
For example, you may want to find all songs containing the word “love” in the title (in any position in the string). If so, select the ‘Name’ criterion, and enter the word ‘love’. Capitals are not relevant for the search.
Pa300 Quick Guide v150 (English).book Page 64 Saturday, March 29, 2014 7:00 PM
64
The SongBook
Adding Entries
Adding Entries
You can add your own Entries to the SongBook database.
1
Go to the Style Play or Song Play mode, depending on the type of Entry you want to
add to the SongBook database.
2
Select the Style, Standard MIDI File or MP3 file to be added to the SongBook.
3
Edit the Keyboard and Style tracks the way you prefer, by selecting different Sounds
and Effects, or editing any other relevant parameter.
Please note that changes to Standard MIDI File tracks will not be saved as SongBook data. Only
the data included in the Standard MIDI File will be used.
4
When ready, keep the SONGBOOK button pressed for about one second to create a
new SongBook Entry with the current settings.
5
Touch the
(Text Edit) button to assign a name to the Entry, then touch OK to save
the Entry to the SongBook database.
Pa300 Quick Guide v150 (English).book Page 65 Saturday, March 29, 2014 7:00 PM
The SongBook
Editing the Entries
65
Editing the Entries
You can edit any SongBook Entry and customize it according to your taste. When done, you can overwrite the current Entry or save it as a new Entry.
1
Press the SONGBOOK button to access the SongBook pages.
2
Touch the Book Edit 1 tab to see the Book Edit 1 page and see the linked Musical
Resources.
While in the Book Edit 1 page, you will be able to see the name of the selected Style or Song, and
choose whether to replace them or not.
Name of the Style or Song file linked to the Entry.
Name of the Entry
Song Selection number (ID number for
numeric selection)
Quick Guide
If checked, the current Style track settings, or the path of the
Song file (shown on the right), are saved with the Entry. If
unchecked, current settings are left unchanged.
This parameter is automatically checked when touching the
New Song button to create a new Entry.
If checked, you can either save all the current STSs into the
Entry, or choose a single STS where to save the current Keyboard track settings.
3
When done with this page, touch the Book Edit 2 tab to see the Book Edit 2 page and
edit the SongBook database details.
Database Entry’s
parameters
4
Touch the
parameters.
(Text Edit) button next to the field(s) you want to edit. Set all the other
You can write the Genre and Artist name. Select the Meter (Time Signature) and Key of the
Song. You can specify a Tempo value matching the Song’s Tempo by using the TEMPO controls,
and a Master Transpose value by using the TRANSPOSE controls on the control panel.
i Note: The Master Transpose might not change, if a
Lock is preventing it. See
Global > General Controls >
Locks.
Pa300 Quick Guide v150 (English).book Page 66 Saturday, March 29, 2014 7:00 PM
66
5
The SongBook
Editing the Entries
When done with this page, touch the Book Edit 3 tab to go to the Book Edit 3 page,
where you can and set the Synchro and Memory parameters, and link a text file to the
Entry.
Synchro (for Style) and Memory (for Style
and Songs) On/Off status
6
After having filled up all the desired fields (be as comprehensive as you can), touch the
Write button in the display to open the Write dialog box.
7
Touch the
(Text Edit) button to assign a name to the Entry, then touch OK to save
the Entry to the SongBook database.
Select Rename/Overwrite to replace an
existing Entry. This option is automatically selected when editing an existing
Entry; it cannot be selected when saving
a new Entry. Warning: the older Entry
will be deleted!
Select New Song to add a new Entry to
the SongBook database. This option is
automatically selected when a new Entry
has been created (by touching the New
Song button).
Entry’s name. By default it is the same name of the associated Style, Standard MIDI File of MP3 file. The name can be up to 16 characters long.
Text file linked to the Entry
(or loaded in the Lyrics
page). This text will be seen
in the same way of ordinary
Lyrics in the display.
Pa300 Quick Guide v150 (English).book Page 67 Saturday, March 29, 2014 7:00 PM
The SongBook
Creating a Custom List
67
Creating a Custom List
You can create several Custom Lists in the SongBook, to make a set of Entries suitable for your various shows. Before starting a new Custom List, be sure you have added all needed Entries to the SongBook main database (see “Adding Entries” above).
1
While in SongBook mode, open the page menu and check the ‘Enable List Edit’ item.
2
Select a Custom List to be edited.
To edit an existing list, touch the Custom List tab to open the Custom List page, and select one of
the available Custom Lists. To create a new list, touch the List Edit tab to open the List Edit page,
and touch the New List button to create a new, blank list.
3
Touch the Book tab to open the Book page and see the full database. Use the various
sorting, searching and filtering options (seen above) to find the Entries you are looking
for. Touch the Add to List button when the desired Entry has been selected.
Use the scroll bar or
the VALUE DIAL to see
all the Songs in the
list. Keep SHIFT
pressed and touch the
Up/Down arrow to
jump to the next/previous alphabetic section.
SongBook list
Touch this checkbox
to turn the view filter
on (if any).
Touch this button to edit the
view filter.
Adds the highlighted Entry to the
Custom List.
Quick Guide
After you check the
‘Enable List Edit’ item,
the List Edit page
becomes available.
Pa300 Quick Guide v150 (English).book Page 68 Saturday, March 29, 2014 7:00 PM
68
4
The SongBook
Creating a Custom List
When finished adding Entries to the Custom List, touch the List Edit tab to go to the List
Edit page, and use the various commands to edit the list.
List name
Scrollbar
Select an Entry to be edited
from the list
Use the vertical arrows
to move the selected
Entry up or down in the
list.
Touch Del Song to delete
the selected Entry.
5
Touch Write to save the current
Custom List.
Touch New List to create a new Custom List. Touch
Del List to delete the current Custom List. Warning:
Del List will delete the current Custom List.
When the Custom List is ready, touch the Write button in the display to save it to memory. Assign a new name to the Custom List.
Use the arrows or the VALUE DIAL
to move the cursor.
Touch Delete to delete just a
single character, Clear to
delete the whole string.
Use alphabetic characters to enter text.
Touch the
(Text Edit) symbol to open the
Text Edit dialog box.
6
Touch the Shift key to switch
between capitals and small
characters.
When done, touch OK to confirm the
new name, or Cancel to abandon all
changes.
When finished editing the Custom List, open the page menu and uncheck the ‘Enable
List Edit’ item.
Pa300 Quick Guide v150 (English).book Page 69 Saturday, March 29, 2014 7:00 PM
The SongBook
Selecting and using a Custom List
69
Selecting and using a Custom List
After having created one or more Custom Lists, you can select one and use it for your show.
1
Touch the Custom List tab to select the Custom List page.
2
Use the List pop-up menu to select one of the available Custom Lists.
Entry in play. To select a different one, highlight it and
touch the Select button in
the display.
Use the List pop-up menu to select
one of the available Custom Lists.
3
Touch Next to select the next Entry in the list.
(This command can also be assigned to a footswitch).
Select one of the Entries in the list (it turns blue), then touch the Select button in the
display to confirm selection (the selected Entry turns green). Press the PLAY button to
start playing back the selected Song.
Quick Guide
Touch Select to set the
highlighted Entry to play (if
different than the one automatically selected).
Pa300 Quick Guide v150 (English).book Page 70 Saturday, March 29, 2014 7:00 PM
70
Recording a new Song (Standard MIDI File)
Preparing the Style and Sounds
Recording a new Song (Standard MIDI File)
There are several ways to create a Song on the Pa300. The easiest and fastest is to use the Styles to
record what you are playing the keyboard, while the arranger gives you the accompaniment tracks.
SEQUENCER button
Player controls
Style Controls
Style Elements
Preparing the Style and Sounds
Before accessing the Record mode, we suggest you prepare the Style and Sounds with which to record
your Song.
1
Select a Style with which you want to record.
2
Select the Sounds by choosing a Performance or STS.
That’s all! You are ready to access Record mode.
Accessing the Backing Sequence (Quick Record) mode
1
Press the SEQUENCER button to switch to the Sequencer mode.
After pressing the
SEQUENCER button, the main
page of the Sequencer mode
appears.
Pa300 Quick Guide v150 (English).book Page 71 Saturday, March 29, 2014 7:00 PM
Recording a new Song (Standard MIDI File)
Accessing the Backing Sequence (Quick Record) mode
2
71
Press the RECORD button to open the Song Record Mode Select dialog box.
Press the RECORD button, to
open the Song Record Mode
Select dialog box
Select the Backing Sequence (Quick Record) option and touch OK to enter the Backing
Sequence Record mode.
Quick Guide
3
After having chosen the Backing Sequence
(Quick Record) option, the Backing
Sequence Record page appears.
Pa300 Quick Guide v150 (English).book Page 72 Saturday, March 29, 2014 7:00 PM
72
Recording a new Song (Standard MIDI File)
Setting the Record parameters
Setting the Record parameters
When you enter Backing Sequence Record, the latest selected Style and Sounds are already selected,
and all tracks are ready to record. You could simply start recording as if you were playing with the
Styles. However, there are some further settings that you may want to do.
•
If you like, adjust any editable parameter in the display.
Touch the Style parameter (or the STYLE button)
to open the Style Select
window, and select a different Style.
Track(s) status. ‘Rec’ means they are ready to
record. ‘Play’ means they are recorded and you
can hear them. ‘Mute’ means they cannot be
heard.
Measure counter. The
negative number (-1) is
the precount, after which
you can start recording.
Style’s Tempo. Change it,
if you like.
Style’s Meter (or Time
Signature). It’s just an
indicator, you cannot
change it.
Grouped tracks. During Quick Record, you cannot access each separate Song
track. For ease of use, just two ‘master’ tracks are provided: Kbd/Pad (Keyboard/Pads) and Ch/Acc (Chord/Accompaniment).
Touch the Perf/STS
parameter to open the
Performance Select window, and select a different Performance (as seen
on page 39). As an alternative, you use the PERFORMANCE or STS
buttons.
Recording
1
Select the Style Element you wish to use before starting to play.
Select any of the Variations before starting to record.
Select one of the Intros to start with an introduction.
2
Start recording, by pressing the START/STOP button.
3
Play as if you were performing live with the Styles.
During recording, select any Style Element (Intro, Variation, Break, Ending…) you like.
Please remember that, while recording in Backing Sequence Record mode, you cannot use the
SYNCHRO, TAP TEMPO/RESET, BALANCE controls.
Pa300 Quick Guide v150 (English).book Page 73 Saturday, March 29, 2014 7:00 PM
Recording a new Song (Standard MIDI File)
Recording
4
73
When finished recording your Song, press the
(START/STOP) button to exit
recording, and return to the main page of the Sequencer mode.
After pressing the START/STOP button, the main
page of the Sequencer mode will appear again.
While in the main page of the Sequencer mode, press the
the PLAYER section to listen to the recorded Song.
(START/STOP) button in
The Backing Sequence Song has been converted to an ordinary Song (in Standard MIDI File, or
“MID”, format). If you like it, you can save it. You can then read it in Song Play mode, or transfer
it to any external sequencer.
6
If you want to edit the Song, press MENU to access Edit mode.
Quick Guide
5
Pa300 Quick Guide v150 (English).book Page 74 Saturday, March 29, 2014 7:00 PM
74
Recording a new Song (Standard MIDI File)
Second-take recording (Overdubbing)
Second-take recording (Overdubbing)
You may want to record an additional “grouped” track, or replace a previously-recorded track. A good
idea may be to record all chords and Style Element changes during the first take, then record Keyboard tracks and Pads during the second take.
1
Press the RECORD button to enter Record mode again. When the Song Record Mode
Select dialog box appears, select Backing Sequence (Quick Record) again.
2
If you are recording just one of the “grouped” tracks, set to Play the track to be preserved.
For example, if you only want to record the Keyboard tracks again, set the Kbd/Pad track to Rec,
and the Ch/Acc track to Play.
3
Press the START/STOP button to start recording the selected track.
With the above example, chords will play as recorded; you can record what you play on the keyboard (and the Pads).
4
Repeat the recording procedure, and press the
(START/STOP) button in the
PLAYER section to stop recording and return to the main page of the Sequencer mode.
5
While in the main page of the Sequencer mode, press the
the PLAYER section to listen to the recorded Song.
(START/STOP) button in
Again, the Backing Sequence Song has been converted to an ordinary Song.
Saving a Song
After having recorded a Song that you like, it is a good idea to save it, to avoid losing it when the
instrument is turned off (or put in standby).
1
While in the main page of the Sequencer mode, touch the page menu icon to open the
page menu.
Pa300 Quick Guide v150 (English).book Page 75 Saturday, March 29, 2014 7:00 PM
Recording a new Song (Standard MIDI File)
Saving a Song
2
75
Select the Save Song command to open the Save Song window.
This window is very similar to the one you can see when pressing the MEDIA button on the control panel, and touch the Save tab to see the Save page. This page is, however, “filtered” to only
see Song files.
After you select the Save song
command, the Save Song page
appears.
Select a device and folder where you want to save your Song.
Use the scroll bar to see all Songs in the
list. Keep SHIFT pressed and touch the
Up/Down arrow to scroll to the next/previous alphabetic section. As an alternative, you can use the VALUE DIAL.
If a Song is selected (highlighted) it
will be overwritten. If no Song is
selected, a new Song file will be created on the target device.
To deselect a Song, select the same
storage device again.
Touch the Save button to save the Song to
the current folder.
Use the Device pop-up menu to select one of
the available storage devices
4
Use the Open and Close buttons to
browse through the folders.
Touch the Save button in the display to open the Save Song dialog box.
Touch the Text Edit
icon to edit the Song’s
name.
5
Touch OK in the display to save the Song, or Cancel to stop the Save operation.
In case you prefer to exit
this page without saving
the Song, press the EXIT
button.
Quick Guide
3
Pa300 Quick Guide v150 (English).book Page 76 Saturday, March 29, 2014 7:00 PM
76
Searching files and musical resources
How to use the Search function
Searching files and musical resources
With Pa300, you can press the SEARCH button to search for files or musical resources.
How to use the Search function
Depending on the page you are in, you can search for different types of data. For example, while in
Media mode you can only search for files, while in Style Play or Song Play mode you can search for
several different types of data (Styles, Songs, Lyrics…).
There are some pages where the Search function is not available, since there are no relevant data to
search for that page (for example, the pages of the Global mode).
Here is the general procedure.
1
Press the SEARCH button to open the Search window.
2
If needed, touch the “Type” pop-up menu, and choose the type of item you are looking
for.
When choosing Files, Songs or Lyrics, the “Browse” button will be activated, to allow for searching files in the storage devices.
Pa300 Quick Guide v150 (English).book Page 77 Saturday, March 29, 2014 7:00 PM
Searching files and musical resources
How to use the Search function
3
77
In case you are searching for a file in a storage device, touch the “Browse” button to
open the Media window.
When you see the folder containing the file you are looking for,
touch it, then touch the Select
button to close the Media window. The name of the selected
folder will be shown in the title bar
of the Search window.
4
Use the Open and Close
buttons to browse
through the folders
In case you are lost among the directories, touch the “Root” button to go
to the root of the selected device
Quick Guide
Use the Device pop-up
menu to select one of the
available storage devices
Type the name of the file to be searched.
There is no difference between upper and lower cases (“LOVE” is the same as “Love” or “love”).
5
When finished entering the name, touch the “Search” button.
After a while, the list of files found begins to appear in the display.
After you have touched the “Search” button, its name changes to “Stop”. If needed, touch this
button to stop the ongoing search. The name of the button reverts to “Search”. Any file found will
remain in the display, until you do a new search.
The time needed to complete a search depends on the size of the device(s) and the number of
files.
i Note: Only one search at
a time can be carried on.
Please wait for the current
search to be completed, or
touch the Stop button in the
display to stop the current
search and do a new one.
i Hint: You can touch the
Cancel button in the display,
or press the EXIT button in the
control panel, to exit from
this window and carry on
other operations. The search
will continue in the background.
Pa300 Quick Guide v150 (English).book Page 78 Saturday, March 29, 2014 7:00 PM
78
6
Searching files and musical resources
Notes about searching
You can touch one of the found items to select it, and then touch the “Info” button to
see information on it.
Touch OK to close the Info dialog box.
7
If you want to return to the main Search page and type a search string again, touch the
icon. Otherwise,
8
If you have found what you were looking for, touch its name and then touch the
“Select” or “Locate” command.
9
You can exit from the Search window at any time, by pressing the EXIT or SEARCH button.
Notes about searching
Wildcards
During search, the string entered will be search as a whole word or as part of a word. For example, if
you entered “love”, Pa300 will find “Love” and “LoveSong”, or any other word containing the string
“love”.
You can use the wildcards “?” (any single character) and “*” (any sequence of characters) to search
exactly that string. For example, “*love” will find “MyLove”, but not “LoveSong”. “??love” will find
“MyLove” but not “TrueLove”.
Also, if you are looking for words that can be spelled in a slightly different way, you can use the “?”
wildcard to find all occurrences; “gr?y” will find out both “gray” and “grey”.
Pa300 Quick Guide v150 (English).book Page 79 Saturday, March 29, 2014 7:00 PM
Pa300 Quick Guide v150 (English).book Page 80 Saturday, March 29, 2014 7:00 PM
80
Technical specifications
Technical specifications
KORG Pa300
Features
KORG Pa300
Features
Keyboard
61 keys with Velocity
Search
Style, Song, Performance, SongBook, Sound and Lyrics TXT
Compatibility
i-Series: Style
Display
5” 480 x 272 TFT Graphical Color TouchView
Sounds
Factory: More than 950 (including Stereo Piano and
GM 2 Sounds), 64 Drum Kits
Pa-Series: Style, Performance, Sound, Song, SongBook and Pad
User: 256 Sounds, 128 Drum Kits
Tone Generator: 128 voices - Filters with Resonance
General Controls
Master Volume, Real Time-Acc/Seq Balance Volume,
Ensemble, Octave Transpose, Master Transpose,
Tempo Lock, Quarter Tone Arabic Scale, User Scale
memorized inside Performance/STS, Search, Lyrics,
Score, Dial, Tempo, Metronome, Split
Connections
Control Input: Assignable Pedal/Footswitch (Damper)
Full Sounds/Drumkits editing capability
Effects & EQ
4 Stereo Master FX / 125 Effects types
Three band EQ for each track
Master 4 band Parametric EQ
Controllers
Joystick
Styles
Factory: More than 310 preloaded Styles
User: Up to 1,040 available Style locations including
the Favorite/User banks
Headphone/Audio Out: Unbalanced Stereo Jack
USB to MIDI using the USB Device port - 8 user-definable MIDI Presets
USB
To Device: 1 (Rear)
Structure: Eight Style tracks, 4 Single Touch Settings
and one Style Performance per Style, 4 Pads
Style controls: 3 Intros, 4 Variations, Break, 3 Endings,
Autofill (4 Fills), Synchro Start/Stop, Tap Tempo/Reset,
Manual Bass, Bass Inversion, Memory, Accompaniment On/Off, Snare & Kick Designation
To Host: 1 (Rear)
2.0 Hi-Speed connections
Mass Storage/Disk
USB
Amp/Speaker
System
Amplification: 13W x 2
Others: Guitar Mode 2, Parallel and Fixed NTT
Style Record with Step Record, Track and Event Edit
functions
Performance/STS
Extenral Power Supply: AC 100-240 V
Power Consumption: 18 Watt
Up to 4 x Styles, up to 4 x SongBook entries
My Setting special Performance
Weight
8.35 kg – 18.41 lbs
Four Keyboard tracks (Upper 1, 2, 3, Lower)
Accessories
Owner’s Manual, Music Stand, Accessory DVD (including Video Manual), External Power Supply Adapter
and Power Cable
4 Pad tracks + Stop button
Song Play
Player with Select, Start/Stop, Home, Rewind and Fast
Forward controls
Jukebox function - Compatible with SMF (formats 0
and 1) and MP3 – Lyrics (compatible with CDG), Score
Options
1,030 x 378.3 x 127 mm
40.55 x 14.89 x 5 in
EXP2, XVP10 Expression Pedal
DS1H Damper Pedal
PS1, PS3 Switch Pedal
Quick Record (Backing Sequence), Multitrack and
Step Record functions
Full featured sequencer - 16 tracks - Up to 100,000
events - SMF format
SongBook
Speakers: 100 mm x 2 Double Cone Speakers in Bass
Reflex Box
Dimensions
(W x D x H) without
music rest
Pads
Sequencer
Power
240 Realtime Performance locations
STS: Memorize Realtime tracks
Realtime Tracks
USB-MIDI Interface
Fully programmable music database, based on Styles,
SMF, Karaoke, MP3 with automatic selection of Style
Play and Song Play modes - User-definable custom
lists - Filtering options
Specifications and appearance are subject to change without notice
for improvement.
Pa300 Quick Guide v150 (English).book Page 81 Saturday, March 29, 2014 7:00 PM
MIDI Implementation Chart
81
MIDI Implementation Chart
KORG Pa300
OS Version 1.5 - March 01, 2014
Function
Recognized
Default
1–16
1–16
Changed
1–16
1–16
Default
Mode
Note
Number:
Velocity
Aftertouch
Program
Change
Messages
X
System
Real Time
Aux
Messages
Notes
Mode 1:OMNI ON, POLY
Mode 3:OMNI OFF, POLY
X
Altered
****************
0–127
0–127
True Voice
****************
0–127
Note On
O
9n, V=1–127
O
9n, V=1–127
Note Off
O
8n, V=0–127
O
8n, V=0–127
Poly (Key)
O
Mono (Channel)
O
Player data only
*1
O
O
Player data only
*1
O
O
0, 32
O
O
Bank Select (MSB, LSB)
*1
1, 2
O
O
Modulations
*1
6
O
O
Data Entry MSB
*1
38
O
O
Data Entry LSB
*1
7, 11
O
O
Volume, Expression
*1
10, 91, 93
O
O
Panpot, A/B Master FX Send
*1
64, 66, 67
O
O
Damper, Sostenuto, Soft
*1
65, 5
O
O
Portamento On/Off, Portamento Time
*1
71, 72, 73
O
O
Harmonic Content, EG time (Release, Attack)
*1
74, 75
O
O
Brightness, Decay Time
*1
76, 77, 78
O
O
Vibrato Rate, Depth, Delay
*1
80, 81
O
O
Sound Controller (1, 2)
98, 99
O
O
NRPN (LSB, MSB)
*1, 2
*1, 3
100, 101
O
O
RPN (LSB, MSB)
120, 121
X
O
All sounds off, Reset all controllers
O
True #
0–127
****************
O
0–127
*1
*1
*1
0–127
O
O
Song Position
X
X
Song Select
X
X
Tune
X
X
Clock
O
O
*5
Commands
O
O
*5
Local On/Off
X
X
All Notes Off
X
O (123-124)
Active Sense
O
O
Reset
X
X
System Exclusive
System
Common
Memorized
3
Pitch Bend
Control
Change
Remarks
*4
*1: Sent and received when MIDI Filters In and Out are set to Off in Global mode.
*2: Sound parameters, Selection of SongBook entries, Drum Kit Family settings.
*3: LSB, MSB = 00,00: Pitch Bend range, =01,00: Fine Tune, =02,00: Coarse Tune.
*4: Includes Inquiry and Master Volume messages, FX settings, Quarter Tone settings. GM Mode On.
*5: Transmitted only when the Clock Send parameter (Global mode) is set to on.
Mode 2:OMNI ON, MONO
Mode 4:OMNI OFF, MONO
O: Yes
X: No
Appendix
Basic Channel
Transmitted
Pa300 Quick Guide v150 (English).book Page 82 Saturday, March 29, 2014 7:00 PM
82
MIDI Implementation Chart
Pa300 Quick Guide v150 (English).book Page III Saturday, March 29, 2014 7:00 PM
Pa300 Quick Guide v150 (English).book Page IV Saturday, March 29, 2014 7:00 PM
Address
KORG ITALY SpA
Via Cagiata, 85
I-60027 Osimo (An)
Italy
Web
www.korg.com
www.korg.co.jp
www.korg.co.uk
© KORG Italy 2014. All rights reserved
PART NUMBER: MAN0010071