1
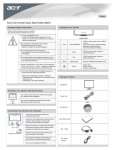
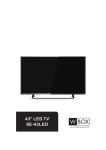
TME42 LCD MONITOR With FHD LED 1920 x 1080 pixel resolution panel Please read this manual carefully for proper usage before installation and use.It is recommended to keep this manual properly for future check. Contents Features……………………………………………1 Safety warning and notice………………………1 Mounting and Connecting………………………3 Packing list……………………………………3 Mounting the Monitor set……………………………3 Connecting peripheral equipment…………………4 Panel Control Keys………………………………7 Remote Control……………………………………7 Basic Operations…………………………………8 Turning on/Standby……………………………8 Signal source selection………………………8 Menu operation description……………………8 Menu setting list………………………………9 USB multimedia function……………………10 Troubleshooting…………………………………12 Technical Specifications………………………13 Features 1. LCD panel with no glint and low radiation can ease eyes' fatigue and protect eyes. 2. High-quality LCD with LED backlight panel is adopted with high brightness, high contrast, wide viewing angle, and super fast response time. Super fast response time can greatly eliminate the shadow of moving images. 3. De-interlacing image disposal is adopted. Today's most advanced technique for movement compensation, can completely improve the saw tooth and vague edges of the athletic picture. 4. There are four smart sound modes and four smart image modes. 5. Dynamic contrast technology can obviously improve the definition and contrast of the picture 6. With perfect timing function, you can set time to turn off. It will be turned off in state of no signals, too. 7. Auto Adjustment can help you to setup the image into the best performance in a few seconds instead of complicated adjustment in PC mode. 8. Auto color balance adjustment technology can make the machine to reach the best color setting in PC mode. 9. Support hi-definitionYPbPr and HDMI. 10. All functions can be realized with remote control, which is really a convenient operation. 11. Power is designed to save energy. 12. Input ports include VGA, YPbPr, HDMI, CVBS, USB. 13. Output ports include AV and Earphone . 14. Supports USB interface. USB Support Full HD Streaming media. 15. U ltra-thin and super narrow design . Safety warning and notice Thank you to choose the LCD Monitor with LED backlight made by our company, a valuable product with excellent quality and multiple functions. This machine will bring you more audiovisual enjoyment. Its design can insure user's safety. All machine are strictly tested before leaving factory. But incorrect use can lead to electric shock or fire. In order to ensure safety and extend its life, please read the manual and marking label carefully before using it and comply with the following safety instructions. Please k eep the user manual for later use. Warning May result in casualties Attention Indicate the behaviors that must be prohibited May result in personal injury or property losses Indicate the operations that must be performed 1 Safety warning and notice Under Following Conditions ● ● ● ● Power failure or unstable voltage. Abnormal sound or smell from the device. AC power cord is damaged. Monitor set is damaged due to falling off, knock or impact. ● Any liquid or foreign matters enter intoMonitor the set. Turn off the Monitor set immediately, unplug the power cord from the power outlet, and contact authorized maintenance personnel. ● If coal gas or other flammable gases leak, do not unplug the power cord of the Monitor set or other electric appliances; instead, close the valve of the gas immediately and open the doors and windows. Warning ● ● ● ● ● ● ● ● ● ● ● ● ● Only use 100- 240V AC 60/50Hz power supply. This Monitor must be connected to a three pin socket outlet for safety. All cables can be connected or pull out only after power supply is turned off. Do not fix theMonitor set on instable position, or else it may cause falling off, damage, or even fire. Do not put the Monitor set in the environment: 1. With direct sunshine, moisture, overheating, undercooling or heavy dust; 2. With flammable or explosive substance; 3. With flammable or corrosive gas; 4. In bathroom, kitchen, etc. Do not use damaged or improper power socket, and ensure that the plug and socket are connected properly. Keep the power plug and socket free of dust and metal pieces. Do not damage the power cord: 1. It is prohibited to refit the power cord; 2. Do not put heavy object on the power cord; 3. Keep the power cord away from heat source; 4. Do not drag the power cord when unplugging. Do not connect too many appliances to one power strip, or else it may cause fire due to high power consumption. Monitor set, or else it may cause electric Do not let open flame (e.g. lit candle) approach the shock or fire. Monitor set, to avoid electric shock or fire Do not put the container filled with water on the caused by water drop of splashing. Do not penetrate any sharp object, metal or liquid into the signal connector or air vents, to avoid short circuit and product damage as well as electric shock. The slots on the case is designed to release heat so as to assure that all inside components will not reach an extra high temperature and can work normally for a long time. Please do not cover the holes while place it. Do not touch the plug with wet hands, or else it may cause electric shock. Do not turn on the Monitor set in thunderstorm weather; unplug the power plug avoid lightning strike. Do not disassemble the Monitor set by yourself, or else it may cause electric shock or fire. Contact qualified personnel for maintenance. 2 Safety warning and notice Attention ● ● ● ● ● ● ● ● ● ● ● ● ● ● ● Do not let children climb onto the Monitor set. Keep the small accessories away from children's reach to avoid swallowing. If theMonitor set won't be used for a long time, please turn off the device and unplug the power cord. Before cleaning the Monitor set, unplug the power cord and wipe with soft cloth; do not use chemical reagents and avoid foreign substances entering into the device. Improper cleaning may damage the appearance or erase the printing information on the product. Monitor set, please disconnect all wires and move slowly to To adjust the position or angle of the avoid falling off. Do not rub with hard object, knock at, bend or squeeze the screen. Do not use machine immediately after transfering machine to the places with high temperature from low temperature, which will cause fogging inside machine and failures. If the screen is broken and the liquid splashes on skin, please wash with clean water immediately for 15 minutes, and go to see your doctor. To carry the Monitor set with hands, please grasp the corners and hold the bottom; do not apply force on the panel. Displaying the same image for a long time or active image with fixed words, icons will leave "image persistence" on screen which will not disappear after powering off for a long time. This undesirable phenomenon is not covered by warranty. Healthy Monitor watching: 1. Watch in appropriate light; poor light or long time watching may hurt your eyes. 2. If a headset is used, adjust the volume appropriate to avoid hurting your hearing. Unplug the power cord of the device to cut off the power supply. If a power plug or appliance coupler is used as disconnecting device, it should ensure easy operation. Power plug shall be connected reliably. Loose power plugs may cause sparkle and fire. All the technical specifications in the user manual and on the packaging are subject to changes without prior notice. If there is slight deviation between the user manual and actual operation, the latter shall prevail. Mounting and Connecting Packing list 1. The Monitor set; 2. User Manual; 3: Remote control; 4: Power cord (or attached to Monitor set) Mounting the Monitor set Insert the base into the support hole in the rear enclosure in the arrow direction shown in the picture, aligning the screw hole in the rear enclosure and the screw hole in the base, and then tighten the screw. Remark: The actual base and appearance may be different from the picture; please refer to the device. 3 Mounting and Connecting Screw The base ● ● ● ● The Monitor set should be mounted near the AC power socket for easy plugging and unplugging. For your safety, please select appropriate wall mount bracket or base. Monitor To avoid hurt, it is required to place the set on stable plane, or fix on firm wall. Monitor set on the wall. Improper mounting may result in instable Ask qualified personnel to mount the Monitor set. Mount on the base Mount on the wall 30cm 10cm 30cm 10cm 10cm 10cm 7cm 10cm Obstruct the air circulation Wall Ventilation ● Please keep this space at least around the Monitor , as shown in the figure. ● Do not cover the air vents or insert any object into the enclosure. ● Do not put the device in limited space, e.g. bookcase or embedded closet, unless the Monitor set is properly ventilated. Obstruct the air circulation Wall Tips on Installation ● Do not place the Monitor set at any place susceptible to mechanical vibration. ● Do not place the Monitor set at any place that insects may enter. ● Do not mount the Monitor set against air conditioner, or else the internal panel of the display may condense moisture and cause failure. ● Do not place the Monitor set at any place with strong magnetic field, or else it may be interfered with and damaged by electromagnetic wave. Connecting peripheral equipment You can connect various devices to the Monitor set and view high quality images. If the video device has HDMI, YPbPr/YCbCr, AV, PC and other video output/input ports. You can select one of them and connect to corresponding input or output ports of the Monitor set. After connected, press "SOURCE" key, then menu of signal 4 Mounting and Connecting source will be displayed on the screen. Press the " ▲/▼" key to select the input signal, and press confirm. The connecting mode is shown in the figure. "OK "key to Connecting power supply To power socket (100-240VAC 60/50Hz) USB 1 interface Power cord USB 2 interface W R HDMI signal cable Earphone port G B R Audio cable HDMI signal cable YPbPr cable G Green (Y signal cable) B Blue (Pb/Cb signal cable) W White(AUDIO-L signal cable) R Red (AUDIO-R and Pr/Cr signal cables) Connect t o the device with YPbPr/YCbCr output interface Component input connection Connect to the AV device with HDMI interface HDMI input connection Remark: 1. The VIDEO-2 and component Y signal of the device share same input interface. AV2 and component audio share same input interface. 2. If an earphone is inserted, the speaker of the Monitor set turns off automatically. 5 Mounting and Connecting R W Y Y R W W Y R Y Yellow (VIDEO signal cable) W White(AUDIO-L signal cable) R Red (AUDIO-R signal cable) Audio cable Video cable Audio cable Video cable Video cable Audio cable VGA input connection Connect to the devices with AV output interface (e.g. DVD, VCR, game console) Connect to the devices with AV input interface (e.g. Monitor) AV output connection AV input connection Note: The peripheral equipment and cables described in this manual should be purchased separately. 6 PC audio cable VGA cable Panel Control Keys UP 1) Power LED indicator and 2 remote receiving window. 2) SOURCE: Press this key 3 to enter the menu of signal source and choose signal source. 4 3) UP/DOWN: In OSD menu, press the two keys to adjust the items, which have the same 5 1 functions as ▲/▼ key on the remote control. 6 4) VOL+/VOL-: Press these two keys to add or reduce volume. 7 In OSD menu, press the two keys to adjust the analog value of selected item, which have the same functions as / key on the remote control. 5) MENU: Press this key to enter main menu. 6) Power on/Standby. 7) Power switch (press '' I '' end to turn power on, and press ''O'' end to turn power off) Note: Different models may have different appearances; please refer to the actual device. DOWN Remote Control Remote Control Key Instruction Invalid Power Mute Numerical key Smart sound Smart image OK Cursor Key Menu UP Volume UP/DOWN DOWN INFO Info Time Invalid Color 16:9 COLOR P N AUDIO PLAY PAUSE STOP ROTATE PREV. NEXT REV. F WD. Source Zoom Return NICAM(optional) Color system Key POWER( ) MUTE( ) Numerical key F1 SMART S SMART P / / ▲▼/ VOL+/VOLMENU SOURCE UP/DOWN Function Switch between normal working and standby Turn off the sound Numerical input button Freeze picture Switch the audio mode among Standard, Music, Movie, User Switch the image mode among Standard, Soft, User, Bright ▲/▼: select functions; /: adjust the analog value Turn up/down the volume Press this key to call out the main menu Press this key to display signal source selection menu In OSD menu, press the two keys to adjust the items, which have the same functions as ▲/▼ key on the remote control. System information display switch INFO Time setting key; press this key to set the power off time Time ( ) Press this key to return Return ( ) Switch the display mode 16:9 Switch color temperature Color Select color system P/N AUDIO(optional) Select NICAM mode Confirm the operation OK PLAY ( ) PAUSE ( ) STOP ( ) Used for operations in USB mode ROTATE ( ) PREV. ( ) NEXT ( ) REV. ( ) F WD. ( ) Remark: The picture may be different from the remote control; please refer to the actual product. 7 Remote Control Installing battery Remove the battery cover, and insert two AAA (1.5V) batteries; make sure that the polarity of the battery is consistent with the marks "+/-" in the battery slot. Precautions of remote control usage ● Point the remote control to the receiver window. The objects between remote control and the receiver window may disturb the normal operation. ● Keep the remote control away from strong vibration. In addition, do not set or put the remote control in direct sunshine, which may result in deformation of the remote control. ● The remote control may be invalid if the receiver window is in direct sunshine or strong light; in this case, please adjust the angle of the light or the device, or approach the remote control to the receiver window. ● The effective range of the remote control may be affected if the battery voltage is low; in this case, please replace with a new battery; if the remote control won't be used or battery voltage is too low, please take out the battery to avoid corrosion due to battery liquid leakage. ● Do not mix different types of batteries, or used and new batteries. ● Do not throw the batteries into fire, charge or break up, or charge, short circuit, disassemble, heat or burn the used batteries. Please follow the environmental protection regulations to disposal of the batteries. Basic Operations Turning on/Standby Monitor set, and press " " key on the remote Insert the power plug into the outlet. Press " " button on the control or on the control panel to turn on the Monitor set. Press " " key again to switch the Monitor set to standby state. ★ Special note This device adopts energy saving technology: 1. If there is no signal input in power on state, the Monitor set enters standby state automatically after five minutes. 2. When the schedule power off time is reached, the Monitor set enters standby state automatically. Input Source Signal source selection AV1 AV2 YPbPr PC HDMI1 HDMI2 USB1 USB2 Press ''SOURCE'' key either on the remote control or on the control panel. The menu of ''Input Source'' will be displayed on the screen. Then press "▲/▼" key on remote control or "UP/DOWN" key on the control panel to choose the signal source. Press ''OK'' key on the Monitor will switch the current signal remote control or ''MENU" key on the control panel and source to the signal source you choose. Menu operation description Press ''MENU'' key on the remote control or on the control panel, then the Monitor will display the main menu. 1. Press "/" key on the remote control or ''VOL+/VOL-'' key on the control panel to select the adjustment sort menu, which includes 3 sorts: PICTURE, SOUND, OSD. 2. Press "▼" key on the remote control or ''DOWN'' key on the control panel to enter the adjustment sort menu. 3. Press "▲/▼" key on the remote control or ''UP/DOWN'' key on the control panel to select what is needed to adjust in sort menu. 4. Press "/" key on the remote control or ''VOL+/ VOL-'' key on 8 Picture Mode Contrast Brightness Saturation Hue Sharpness Aspect Ratio Color Temp. Noise Reduction Adjust Soft 48 48 50 50 55 Full Standard Off Select Menu:Exit Basic Operations The control panel to adjust the value or setting. 5. When the main menu appears on the screen, press "MENU" key to exit; when submenu appears on the screen, press "MENU" key to return to previous menu; press "SOURCE" key to show the signal source selection menu, and press it again to exit from the menu. 6. In the process of menu operation, the unavailable options in current state will be in gray. 7. The menu operation in this manual uses the example in Monitor state; the operations in other state are same as the Monitor state. Note: "", " ", " ▲" and " ▼"key in this Manual stand for the direction cursor keys on the remote control unless specifically defined. The operating instructions in the text below are all based on keys on the remote control. Please understand the keys on the panel by yourself. Menu setting list Refer to the table below for the specific menu settings. Picture Mode Contrast Brightness Saturation Hue PICTURE SOUND OSD Sharpness Adjust the overall effect of images: Standard, Soft, User, Bright. Adjust the overall layering of images: increase the analog value to improve the contrast and decrease the analog value to reduce the contrast (0-100). Adjust the overall brightness of images: increase the analog value to improve the brightness and decrease the analog value to reduce the brightness (0-100). Adjust the color depth of images: increase the analog value to improve the depth and decrease the analog value to reduce the depth (0-100). Adjust the hue of images: increase analog value to increases green and decrease analog value to increases purple(0-100). Adjust the sharpness of images: increase the analog value to increases the definition and decrease the analog value to reduce the definition (0-100). Adjust the aspect ratio: Full, 4:3, Subtitle, Film. Adjust the overall color temperature of images: Standard, Warm, Cool. Set the grade of noise reduction: Middle, High, Off, Low. Aspect Ratio Color Temp. Noise Reduction Remark: The values of Contrast, Brightness, Hue, Saturation and Sharpness adjusted by the user will be saved automatically. Select the audio mode: Standard, Music, Movie, User. Sound Mode Adjust the treble: increase the analog value to increase the treble and decrease the Treble analog value to reduce the treble (0-100). Adjust the bass: increase the analog value to increase the bass and decrease the Bass analog value to reduce the bass (0-100). Adjust balance degree of right&left sound track: move the analog value to left to increase the left volume; move the analog value to right to increase the right volume Balance (L50-R50). Generally, the balance is set to 0. Remark: The values of treble and bass adjusted by the user will be saved automatically. Set the menu language: There are many languages to select. OSD Language Adjust duration of OSD menu: 15, 30, 45, 60. Unit: second. OSD Duration Adjust the menu transparency: increase the analog value to increase the transparency OSDTransparency and decrease the analog value to reduce the transparency (0-100). Set up whether screen turns to blue when there is no signal: On and Off. Blue Screen Set the waiting time of standby: Off, 15M, 30M, 45M, 60M,90M, 120M, 240M. unit: min. Sleep Time Restore factory settings. Recall Note: With the mode of AV, YPbPr, PC, HDMI, all functions and adjustments are similar with Monitor. User can check it at convenience. HDMI connector can realize DVI connector function with external HDMI/DVI commutator. 9 Basic Operations USB multimedia function Connect the USB storage device to the USB interface in the USB signal source and press "OK" key to confirm. Monitor set, press "SOURCE" key to select the Remark: 1. Compatible USB media files: video, audio, picture, and text. The nonstandard USB storage devices may be incompatible; please replace with standard devices; 2. Stream media system has limitation on every kind of file format, and will report error if beyond system limit; 3. Do not unplug the USB device while playing, or else it will cause system or device error; 4. The system supports USB flash drive and removable hard disk with standard USB1.1 and USB2.0 interface transmission protocol. The file format of USB device must be FAT or FAT32, instead of NTFS. 5. The USB interface of this Monitor set can supply a voltage of 5V and the maximum current is 500mA; accurate identification of the multimedia player will be affected when a storage device above 500mA is used, which is a normal phenomenon. USB 2.0 Press " / " key to select file type menu, which includes PHOTO, MUSIC, MOVIE and TEXT. PHOTO Select to enter the menu, select a disk, and press "OK" key to read the files. PHOTO MUSIC MOVIE TEXT Select to return to disk selection interface. Press " ▲/ / / " key to select PHOTO, and press "OK" key to ▼ confirm (the selected file has a red check mark in the lower right; you can select multiple files and add to the playing list), and then press "PLAY" key to play the files. If you press "PLAY" key directly without selecting any file, the system will add all the files in the folder to the playing list. Basic functions: While playing, press "INFO" key to show the basic operation function bar in the bottom of the screen (press " key to hide the function bar). Play/Pause: Press " / " key to select this function, and press "OK" key to play or pause. Previous: Press " / " key to select this function, and press "OK" key to play previous picture. Next: Press " / " key to select this function, and press "OK" key to play next picture. Stop: Press " / " key to select this function, and press "OK" key to stop playing and return to previous menu. Repeat: Press " / " key to select this function, and press "OK" key to select repeat one or repeat all or not repeat. Background music: Press " / " key to select this function, and press "OK" key to play the background music (music files and picture files should be saved in the same folder, or select music files in the music folder first). Playing list: Press " / " key to select this function, and press "OK" key to show the playing list. File info: Press " / " key to select this function, and press "OK" key to show the picture info, including resolution, size, etc. 10 ▼" Basic Operations Rotate CW: Press " / " key to select this function, and press "OK" key to rotate the picture clockwise. Rotate CCW: Press " / " key to select this function, and press "OK" key to rotate the picture counterclockwise. Zoom in: Press " / " key to select this function, and press "OK" key to zoom in the picture. Zoom out: Press " / " key to select this function, and press "OK" key to zoom out the picture. Catch the picture: Catch the picture then set it for logo when turn on the Monitor (optional). MUSIC The basic operation is similar to Basic functions: PHOTO ; please refer to above operation. Fast rewind: Press " / " key to select this function, and press "OK" key to play fast rewind. Press "PLAY" key on the remote control to play normally. Fast forward: Press " / " key to select this function, and press "OK" key to play fast forward. Press "PLAY" key on the remote control to resume normal playing. Timing: Press " / " key to select this function, and press "OK" key to select the playing time. Refer to PHOTO for other functions. MOVIE The basic operation is similar to PHOTO; please refer to above operation. Basic functions: A-B playing: Press " / " key to select this function, and press "OK" key to set point A and point B. The video playing will repeat between A and B. Slow playing: Press " / " key to select this function, and press "OK" key to slow the playing. Press "PLAY" key to resume normal playing. Single step: Press " / " key to select this function, and press "OK" key to play the video step by step. Press "PLAY" key to resume normal playing. Aspect ratio: Press " / " key to select this function, and press "OK" key to switch among Auto, 4:3 and Full. This function doesn't support some HD video. Refer to PHOTO and music for other functions. Remark: Zooming function doesnt support ' some HD video. TEXT The basic operation is similar to PHOTO; please refer to above operation. 11 Troubleshooting Problem Monitor image is good, but Reason Solution Monitor sound setting is improper. Enter “Monitor " setting menu and reset the sound system. No screen display, no sound, indicator is off. Power plug is loose, or power supply isn't connected. 1.Check if the power cord is connected properly. 2.Check if the " " button on the panel is on. Monitor image has point, line or stripe interference. The signal is interfered with by automobile, neon light, or hair drier. Do not use hair drier near the device, reduce the interference. Monitor doesn't have sound. 1.Volume is too low. 2.Sound is turned off. 3.Sound system is improper. 1.Adjust the volume properly. 2.Press the Mute key on the remote control to turn on the sound. 3.Enter " Monitor " setting change the sound system. PC doesn't have display, no signal input, red indicator flashes. Signal cable is loose or falls off. Check whether the signal cable is loose or falls off, and reconnect the cable. Remote control distance becomes short, out of control. 1.The receiver window is blocked. 2.Battery voltage of the remote control is too low. 1.Move the object to avoid blocking the receiver window. 2.Replace the battery. PC display is blurry. 1.Adjustment is improper. 2.Display mode is improper. 1.Use automatic adjustment. 2.Use recommended mode. PC image offset, can't fit the screen or beyond the screen. 1.Adjustment is improper. 2.Display mode is improper. 1.Use automatic adjustment. 2.Enter "Geometry" to adjust the vertical or horizontal position. 3.Use recommended mode. Noise Signals at turning off. Electrical release at turning off. It is normal. Can't operate the device. External factors, such as lightning and ESD, may interfere with the normal operation. Press " " button to turn off electrical source, then press " " button to turn on the Monitor again after 1-2 minutes. there is noise. 12 Technical Specifications Master unit Panel size Max. Resolution Best Resolution Pixel Pitch Active Area Power Supply Power Consumption of Speaker Dimension(L×H×W)and Weight 42" 1920×1080 1920×1080@60Hz 0.4845mm×0.4845mm 930.24mm×523.26mm 100-240VAC 60/50Hz 8W+8W Excluding base Unpacking: 972×583×72(mm)3 Includingbase Unpacking: 972×634×72(mm)3 Net Weight: 11.5kg Packing: 1165×687×160(mm)3 Gross Weight: 14kg Operating environment: temperature: 5℃~40℃; RH: 10%~85%; atmospheric pressure: 86kPa~104kPa Storage environment: temperature: -20℃~55℃; RH: 5%~95%; atmospheric pressure: 86kPa~104kPa Technical specifications for Monitor 1. AV video input: 75Ω, 1 Vp-p, RCA terminal 2. AV audio input: 20kΩ, 500mV RMS 3. YPbPr / HDMI video input: 480i, 480P, 576i, 576P, 720P, 1080i, 1080P VGA display mode 42" NO. 1 2 3 4 5 6 7 8 Mode VGA SVGA XGA WXGA WUXGA Resolution 720×400 640×480 800×600 1024×768 1280×720 1360×768 1600×900 1920×1080 Refresh rate 70Hz 60Hz 60Hz 60Hz 60Hz 60Hz 60Hz 60Hz Recommended mode:1920X1080@60Hz Power management Mode Normal working Standby PowerLEDstate Off On Power consumption 42" ≤98W ≤0.5W 13