1
Getting Started with the
Livescribe Platform SDK
Livescribe™ Platform SDK
Version 1.0.1
Copyright and Trademarks
LIVESCRIBE, PULSE, and PAPER REPLAY are trademarks or registered
trademarks of Livescribe, Inc. Anoto is a trademark of Anoto Group AB.
Microsoft and Microsoft Word are either registered trademarks or
trademarks of Microsoft Corporation in the United States or other
countries. MyScript is a registered trademark of Vision Objects, Inc. All
other brand and product names are trademarks of their respective
owners.
Copyright © 2007-2009 Livescribe, Inc. All rights reserved.
GetStartedSDK-1.0.1-SDK-1.0.1-REV-A
8/31/2009 4:15 PM
ii
Contents
Preface ......................................................................................... 7
About this Document ................................................................... 7
About the Platform SDK Documentation Set.................................... 7
End-User Documentation ............................................................. 9
Introduction .................................................................................10
Supported Development Platforms................................................10
Notes and Warnings ...................................................................10
Do Not Distribute Livescribe Binaries .........................................10
Expect Continued Support of Current API ...................................10
Contents of the SDK ......................................................................11
Plugins and Features ..................................................................11
Directory Structure of the SDK.....................................................11
Setting Up Your IDE.......................................................................13
Hardware and Software Requirements ..........................................13
Two Options for Installing Livescribe Features ................................13
Installing Eclipse and Livescribe Features Together ......................14
Adding Livescribe Features to Existing Eclipse .............................14
Installation Instructions ..............................................................14
iii
Updating Livescribe Desktop.....................................................14
Copying the Livescribe Platform SDK .........................................15
Installing the JDK ...................................................................16
Installing Ghostscript ..............................................................16
Option 1: Installing Eclipse and Livescribe's Features Together......18
Option 2: Adding Livescribe Features to Existing Eclipse ...............18
Updating the Livescribe Features .....................................................20
Upgrading from a Penlet SDK 0.9 Feature......................................20
Deprecation Errors ..................................................................22
Installing Features (Plugins) in SDK 1.0.1......................................22
Introducing the Eclipse Features......................................................24
Livescribe Projects in Eclipse........................................................24
Livescribe Perspectives in Eclipse .................................................24
Penlet Perspective...................................................................25
Paper Design Perspective .........................................................25
Penlet JARs ...............................................................................26
Creating a Very Simple Penlet .........................................................27
Creating an Open Paper Penlet ........................................................34
Examining the strokeCreated Method ............................................39
The canProcessOpenPaperEvents Method ......................................40
iv
Creating a Fixed Print Application ....................................................41
Design and Create Page Images...................................................41
Create a Penlet Project ...............................................................42
Create a Paper Product Project.....................................................44
Set Up the Paper Product Project ..............................................44
Design the Paper Product ............................................................46
Import the Livescribe Flip Pad Insert Card AFD File ......................46
Link the Paper Product to the Penlet ..........................................49
Create Active Regions (Shaping) ...............................................50
Examine the Livescribe Standard Controls ..................................52
Auto-generate Event Code for Your Active Region........................54
Complete the Penlet Programming................................................55
Import the Hello World Audio File..............................................55
Set Up the Media Player...........................................................57
Edit the PenDown Method ........................................................58
Print and Test the Paper Product and Penlet...................................58
Command Reference......................................................................61
Menus ......................................................................................61
Livescribe ..............................................................................61
File > New .............................................................................61
v
Context Menu.........................................................................61
Alphabetical Reference................................................................63
Add Images, Sounds, or Resources ...........................................63
Additional Configuration Page ...................................................64
Add Paper Area Handler...........................................................65
Add/Remove Event Handlers ....................................................65
Add System Sounds to the Selected Project................................66
ARW Editor ............................................................................67
Event Configuration Page .........................................................68
Initialize Text in Configuration File ............................................69
Import ..................................................................................70
Intelligent Character Recognition (ICR) Configuration ..................71
Livescribe Penlet Project Creation Wizard ...................................72
Livescribe Resource Converter ..................................................73
Penlet Project Creation Page.....................................................75
Smartpen Debug View .............................................................76
Smartpen Info View ................................................................78
Remove Paper Area Handler .....................................................79
Rename Paper Area Handler .....................................................80
Glossary ......................................................................................81
vi
Getting Started with the Livescribe Platform SDK
Preface
About this Document
This document, Getting Started with the Livescribe Platform SDK,
describes how to get started using the Livescribe Platform SDK to develop
penlets for the Pulse™ smartpen. It discusses the contents of the SDK
and what kind of penlets you are permitted to develop. It then describes
how to set up your IDE (Integrated Development Environment) and
create some simple Hello World penlets. Finally, it provides reference
information on the wizards, views, and dialogs of the Penlet perspective
within the IDE.
About the Platform SDK Documentation Set
The Livescribe Platform SDK documentation set includes the following
documents in PDF format.
Introductory Documentation:
•
Read Me First: introduces the components of the Livescribe
Platform, lists system requirements, and provides download
instructions.
•
Livescribe Developer License Agreement: The Livescribe license
agreement for third-party developers, in TXT and PDF formats. All
developers must accept this agreement before downloading the
Platform SDK.
•
Introduction to the Livescribe Platform: describes the Livescribe
Platform, the Pulse smartpen and Livescribe dot paper, and Pulse
smartpen applications.
•
README.txt: provides a quick overview of how to set up your
development environment. It is aimed at experienced developers
and presents information with minimal context. For full
instructions, see Getting Started with the Livescribe Platform SDK
instead.
7
Getting Started with the Livescribe Platform SDK
•
(This Document) Getting Started with Livescribe Platform SDK.
•
Eclipse Help: basic coverage of the Livescribe IDE plug-in with
Eclipse.
•
Release Notes: covers late-breaking information, fixed bugs, and
known issues.
•
Glossary: terms and definitions (located in Getting Started with
the Livescribe Platform SDK).
Penlet Development Documentation:
•
Developing Penlets: the primary programming guide for open
paper (OP) and fixed print (FP) penlet development.
•
Livescribe Platform API javadoc: API reference for packages,
classes, and methods.
•
User Experience Guidelines: presents user interface guidelines for
creating penlets to ensure a consistent user experience across all
smartpen applications.
•
Development Guidelines: presents guidelines for creating penlets
and paper products that conform to Livescribe standards and legal
requirements.
Paper Product Development Documentation:
•
Developing Paper Products: introduces the Livescribe Paper
Designer and processes for designing paper products for the Pulse
smartpen.
8
Getting Started with the Livescribe Platform SDK
End-User Documentation
To learn about the Pulse Smartpen and Livescribe Desktop from a user’s
perspective, please consult their user guides. They are available at
http://www.livescribe.com. Click on the Support button and locate the
Documents list in the right-hand column. Links to the following
documents in PDF format are available:
•
Getting Started: introduces the Pulse Smartpen. A dot-enabled
version of this document is included in the Pulse Smartpen box.
•
Pulse Smartpen User Manual: explains Pulse Smartpen features
and use.
•
Livescribe Desktop User Manuals for Mac OS X and Windows:
explain Livescribe Desktop features and use.
9
Getting Started with the Livescribe Platform SDK
Introduction
This section describes the development platforms supported by the Livescribe
Platform SDK, as well as some issues pertaining to developers on particular
platforms. It also contains some important notes and warnings that developers
should keep in mind.
Supported Development Platforms
The Livescribe Platform SDK supports the following development platforms:
•
Windows XP SP2/SP3 and Windows Vista
Notes and Warnings
As you undertake your first penlet development, please keep the following notes and
warnings in mind.
Do Not Distribute Livescribe Binaries
The Livescribe Platform SDK includes development tools for generating application
resources, installing penlets to and uninstalling penlets from the smartpen. You may
freely use these tools while developing penlets, but the Livescribe Developer License
Agreement prohibits you from distributing these tools to your customers.
The Livescribe online store will be the venue for sale and distribution of your penlets
to smartpen users. Please post questions on specific binaries to the Livescribe
Developer Forums and the Developer Team will provide answers.
Expect Continued Support of Current API
The Livescribe Platform exposes a Java API for developing smartpen applications.
You can depend on the packages and classes already exposed will continue to be
supported in the future. Upcoming releases of the SDK will contain new packages
and classes to support additional functionality without disturbing the existing API.
Any removal of APIs will follow standard Java deprecation procedures.
10
Getting Started with the Livescribe Platform SDK
Contents of the SDK
The Livescribe Platform SDK includes the Livescribe Platform API, documentation,
sample code, and a set of development tools. The official IDE for penlet development
is Eclipse plus custom plugins for Eclipse created by Livescribe. The Livescribe API
and all tools are immediately accessible from within Eclipse, once the plugins are
installed.
Plugins and Features
An Eclipse feature is a package of one or more Eclipse plugins. Livescribe publishes
Eclipse features that contain the plugins you need for developing penlets and paper
products. When you see the word feature, remember it is a specialized term in
Eclipse and refers to a group of plugins that are installed, uninstalled, and managed
as a group.
Directory Structure of the SDK
The top-level of the SDK 1.0.1 contains a directory reflecting the current version
number of the Platform SDK, such as 1.0.1. The tree below that directory is as
follows:
•
CoreUtilities
Directory subtree for developing penlets, using one of the Core Utilities
options. Contains the Livescribe Smartpen API classes, Javadoc for the
Livescribe Smartpen API, development tools, and project files for importing
the Livescribe Smartpen API into Eclipse or NetBeans as a project.
CoreUtilities is for Windows developers only.
If you are using Eclipse with Livescribe Plugins, you can ignore the
CoreUtilities directory subtree.
•
Docs
Directory subtree containing documentation for the SDK.
•
DeveloperDocs
Documentation for third-party developers in PDF format:
•
Getting Started with the Livescribe Platform SDK
•
Introduction to the Livescribe Platform
11
Getting Started with the Livescribe Platform SDK
•
•
Developing Penlets
•
Developing Paper Products
•
User Experience Guidelines
penprofile-apidoc
Javadoc for the Smartpen Java API. To launch the Javadoc outside of the
Eclipse IDE, click on index.html .
•
License
The Livescribe license agreement for third-party developers, in TXT and
PDF formats. All developers must accept this agreement before
downloading the Platform SDK.
•
•
Livescribe Developer License Agreement
EclipsePlugins
Zip archive that contains Livescribe's custom Eclipse features. Each feature
consists of Eclipse plugins created by Livescribe to provide specialized
functionality for penlet development.
•
EclipseFullInstall
Zip archive that contains a full distribution of Eclipse with Livescribe's custom
Eclipse features already installed.
•
Resource
In the audio subdirectory, you will find WAV files for the sounds that
Livescribe uses in its own penlets. To ensure consistency across all
applications on the smartpen, third-party developers should include these
audio files in their penlet projects, as needed.
•
Samples
Sample projects for simple Hello World penlets and a sample paper project.
For more samples, go to http://www.livescribe.com. In the Developer
Forums, find Sample Code & Docs & FAQs.
•
README.txt
This file provides a quick overview of how to set up your development
environment. Aimed at experienced developers, it briefly describes set up for
the three development environment options described above. For more
detailed instructions, see Getting Started with the Livescribe Platform SDK.
12
Getting Started with the Livescribe Platform SDK
Setting Up Your IDE
The basic environment for developing penlets and paper products consists of
•
Eclipse
•
Eclipse plugins from Livescribe
•
the JDK (Java Development Kit)
•
and a postscript rasterizer, such as Ghostscript.
In addition, to create background images for your paper product, you will need a
graphics authoring tool that produces EPS files. Two excellent choices are Adobe's
Illustrator and the open source program Inkscape.
Hardware and Software Requirements
Penlet and paper product development requires the following hardware and
software:
•
The Windows operating system (Windows XP, Windows Vista).
•
A USB connection to a Livescribe Pulse Pen
•
The Pulse Pen driver and smartpen communication software. (Installing
Livescribe Desktop automatically installs these for you.)
•
Eclipse v3.4 (Ganymede) or higher.
•
The Java Development Kit (v1.6 or higher; also known as JDK 6)
•
Ghostscript
Two Options for Installing Livescribe Features
The Livescribe Platform SDK supports installation of our Eclipse features (which are
packages of plugins) in two ways. You may choose the one that suits your
development needs.
13
Getting Started with the Livescribe Platform SDK
Installing Eclipse and Livescribe Features Together
Option 1: If you do not have Eclipse 3.4 installed on your computer already, you
can choose to quickly install Eclipse and Livescribe's Eclipse features. The Livescribe
Platform SDK includes a zip file with the full distribution of Eclipse and the Eclipse
features. You merely decompress the zip archive on your file system and you are
ready to start developing for the Livescribe Platform.
Adding Livescribe Features to Existing Eclipse
Option 2: On the other hand, you may already be using Eclipse 3.4 for other kinds
of Java development. If so, you can add the capability to develop Livescribe penlets
and paper products to your existing Eclipse distribution. The Livescribe Platform SDK
includes a zip file that contains just Livescribe's Eclipse features. In Eclipse terms,
this zip file is an update site. Start your existing Eclipse and use the Update Manager
to install Livescribe's Eclipse features.
Installation Instructions
Setting up the IDE for Livescribe penlet and paper development consists of these
steps:
1. Updating Livescribe Desktop (Windows) to version 1.6 and updating pen
software to version 1.6.
2. Copying the Livescribe Platform SDK to your file system.
3. Installing the JDK.
4. Installing Ghostscript.
5. OPTION 1: Installing Eclipse and Livescribe's Eclipse Features.
OR
OPTION 2: Adding Livescribe's Eclipse features to an existing Eclipse.
Updating Livescribe Desktop
Your Livescribe Desktop application must be up to date. You should install all
available updates. That way, you can be sure to have the latest USB drivers required
by the smartpen and that your smartpen firmware image is also up to date.
14
Getting Started with the Livescribe Platform SDK
1. Install Livescribe Desktop from www.livescribe.com. On the web site, click
Support > Getting Started > Livescribe DesktopXP/Vista(32bit).
2. Launch Livescribe Desktop and select Help > Check for Updates .
3. If your smartpen or desktop software is not up to date, an online wizard will
offer to download and install available updates. You should accept each
update until the wizard indicates that your smartpen and desktop software
are up to date.
Copying the Livescribe Platform SDK
Copying the Livescribe Platform SDK to your file system consists of downloading the
SDK zip file from the Livescribe web site and then unzipping it on your computer.
1. Go to http://www.livescribe.com/developer.
2. If you have not done so already, make sure to register as a Livescribe
Developer by clicking the Register button in the lower left-hand panel. Once
you have registered, click the Login button in the upper right and enter your
e-mail address and password.
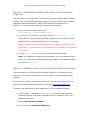
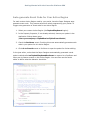
4. The first time you log on as a developer, you'll see a Download link. Click
the link and read the Livescribe Developer License Agreement. Click the
button entitled I Agree at the bottom the page and then click the SDK link on
the page that follows.
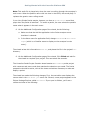
Note: During subsequent logons with your developer account, you will be
taken directly to the developer welcome page. In the right-hand column,
click on Downloads. Then click on the SDK link.
5. Save the download to your computer. It is a zip archive.
6. Unzip the archive to a directory on your computer file system. The top-level
directory of the unzipped archive reflects the current version number of the
Livescribe Platform SDK.
7. Note the location of the Livescribe Platform SDK. You will need it when you
install the Livescribe plugins.
15
Getting Started with the Livescribe Platform SDK
Installing the JDK
1. Install JDK 6 or above.
The latest version is called the Java SE Development Kit.
2. Go to http://www.java.sun.com
3. Click the Java SE link and then the Downloads tab.
4. Download Java SE Development Kit (JDK) 6 Update X (where X is the
latest update number).
Note: You must install the Java Development Kit (JDK). The Java Runtime
(JRE) alone will not suffice.
5. Verify that the JAVA_HOME system environment variable is set to the path of
the JDK. For example: C:\Program Files\Java\jdk1.6.0_06.
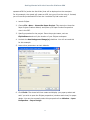
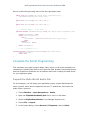
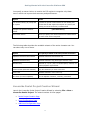
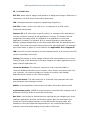
Installing Ghostscript
Ghostscript is an open source project that includes a RIP (Raster Image Processing)
engine that can be used as a Postscript and PDF viewer. You will need Ghostscript, or
a similar program, in order to render images onscreen in the Paper Design
perspective. Ghostcript is available as a free download. Go to
http://www.ghostscript.com for a list of download sites.
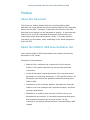
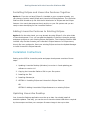
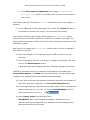
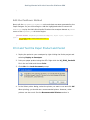
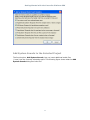
If you do not have Ghostscript installed, you will see the following error message
when you try to use the canvas:
16
Getting Started with the Livescribe Platform SDK
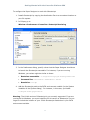
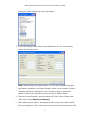
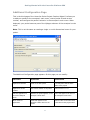
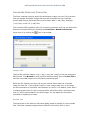
To configure the Paper Designer to work with Ghostscript:
1. Install Ghostscript by copying the distribution files to a convenient location on
your file system.
2. In Eclipse, go to
Window >Preferences >Livescribe >Postscript Rendering
3. In the Preferences dialog, specify values that the Paper Designer should use
to launch the Ghostscript executable. For instance, if you are running
Windows, you values might be similar to these:
•
Rasterizer executable: C:\Program Files\gs\gs8.64\bin\gswin32c.exe
•
Command line: %executable% -dUseCIEColor –dFirst
•
Resolution: 150 dpi
4. Add the Ghostscript path to the PATH environment variable (in the System
Variables of the System dialog). For instance, in this case, you'd add:
C:\Program Files\gs\gs8.64\bin
Warning: The 64-bit version of Ghostscript is not currently supported. If you are
running 64-bit Windows, you must install the 32-bit version of Ghostscript. Do not
forget to include the location of your 32-bit Ghostscript distribution in your PATH
environment variable.
17
Getting Started with the Livescribe Platform SDK
Option 1: Installing Eclipse and Livescribe's Features
Together
Your first option is to install Eclipse 3.4 with the Livescribe Eclipse Features already
installed. This is the simplest and fastest way to set up your Eclipse IDE for penlet
and paper product development. One zip file contains a full distribution of
Eclipse 3.4, including the pre-installed Livescribe Eclipse features.
1. In the Livescribe Platform SDK, go to
EclipseFullInstall\platformSDK10win32.zip
2. Unzip the file. For instance, you might unzip it to: C:\eclipse3.4 .
Eclipse does not use a dedicated installer program. Simply copy the Eclipse
distribution to the desired location on your file system.
Note: Do NOT include a space in the path of your Eclipse installation. A path
with spaces in it will prevent you from deploying your penlets to the smartpen
from Eclipse.
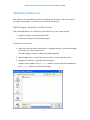
3. Find the eclipse.exe file on your file system and launch Eclipse.
Note: The installation process does not create an icon in the Windows Start
menu. You must open Windows Explorer and navigate to the directory where
you copied eclipse.exe .
Option 2: Adding Livescribe Features to Existing Eclipse
You second option is to add Livescribe's Eclipse features to your existing Eclipse
distribution. This option assumes that you have Eclipse 3.4 (Ganymede) already
installed.
If you find your Eclipse has become corrupted or is not the right version, you can
download the latest Eclipse distribution for free from http://www.eclipse.org.
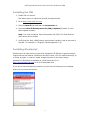
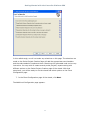
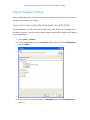
In Eclipse, you install features and update them, using the Update Manager.
1. Launch Eclipse. (Navigate to your ECLIPSE_HOME directory and launch the
executable directly: the Eclipse installation does not create an icon in the
Windows start menu.)
2. Select Help >Software Updates.
3. Then click on the Available Software tab.
18
Getting Started with the Livescribe Platform SDK
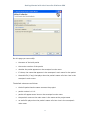
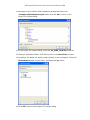
4. Click Add Site.
5. Click Archive to create an update site for your Livescribe feature. The update
site is called an archive because the feature is packaged as a zip file.
6. In the SDK, navigate to 1.0.1\EclipsePlugins\platformSDK10updatesite.zip.
Select the zip file and click Open.
7. In the Add Site dialog, click OK.
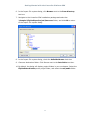
On the Available Software tab, the Livescribe update site should automatically
appear in the list of update sites. The top-level node will display the location
of the zip file on your file system.
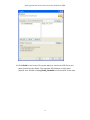
8. Select the check box for the Livescribe update site. Then click Install to start
the installation wizard.
9. On the Install page of the wizard, click Finish
OR
If you have not accepted the Livescribe license, the Next button will be
ungrayed. Click Next. On the Review Licenses page, click I accept the
terms of the license agreement. Then click Finish.
10. Click Yes to restart Eclipse.
11. When Eclipse launches, you may have to select your workspace. Then click
OK.
12. You should see Livescribe's Pen Debug and Pen Info views. If not, select
Window > Open Perspective > Other > Paper Design and Window >
Open Perspective > Other > Penlet. Then click OK.
19
Getting Started with the Livescribe Platform SDK
Updating the Livescribe Features
You can keep your Livescribe Eclipse features up to date by simply installing the
latest version of each feature as they become available. Feature updates are
performed by Eclipse's Update Manager.
We use local, archived sites to update Livescribe's Eclipse features. With this
approach, the simplest method for acquiring updates is to download the latest
version of the Livescribe Platform SDK from the Livescribe web site. Then activate
the Update Manager, and navigate to the new feature in the SDK and install it as a
new update site. As a result, each new version of the feature will constitute its own
update site.
This approach to updating does not make use of the Update Manager's Update
button on the Installed Software tab. The Update button (the Install button on the
Available Software tab) is appropriate for an Eclipse remote update site.
Upgrading from a Penlet SDK 0.9 Feature
You may have been using a pre-release version of the Livescribe Platform SDK,
which was called the Penlet SDK at that time. To upgrade from Penlet SDK 0.9 to
Livescribe Platform SDK 1.0.1, perform the following steps:
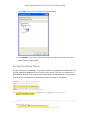
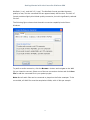
1. Remove the 0.9.1 feature as follows:
a.
Select Help->Software Updates->Installed Software.
b. Highligh the feature, such as Livescribe Penlet SDK.
c. Click Uninstall.
2. Quit Eclipse.
3. On your file system, navigate to the location where Eclipse is installed.
Find the plugins directory and remove the following:
•
com.livescribe.sdk.lib_0.9.1 (a directory)
•
com.livescribe.sdk.help_0.9.1 (a directory)
•
com.livescribe.sdk_0.9.1.jar. (a file)
4. Restart Eclipse.
At this point, your old penlet projects are broken and don't look like penlet
projects in the Eclipse IDE.
20
Getting Started with the Livescribe Platform SDK
If you skipped step 2 and 3 above, your penlet projects look fine in the
Eclipse IDE, but they are actually broken in subtle ways.
5. Install the Platform SDK 1.0.1 update.
Instructions are essentially the same as for installing For instructions, see
Installing Features (Plugins) in SDK 1.0.1.
Now the penlet projects look like penlet projects again. However, they display
in the Eclipse IDE as broken projects because their library references are
pointing to the 0.9.1 feature.
6. Do the following for each old penlet project:
a. Open the build.xml file and change the first property line from:
<property name="common.builddir" value="<your directory
here>\eclipse\plugins\com.livescribe.sdk.lib_0.9.1" />
to:
<property file="build.properties" />
b. Right-click the project's top node in Project Explorer.
Select Create Distribution.
The build.xml file should now be free from errors.
To verify visually: close the build.xml file, refresh the project, and reopen
the build.xml file..
c. Now you should fix the build path.
Right-click the project's top node in Project Explorer.
Select Build Path -> Configure Build Path from the context menu.
d. In the build path editor, select the Libraries tab.
There should be 3 libraries: j2me.jar, java-main.jar, livescribe.jar .
e. Select the libraries and remove them.
f.
On your file system, find the .classpath file. It is located at the root
directory of the project. Open the file in a text editor.
g. Find the line that looks like this:
<classpathentry kind="src" path="src"/>
After it, add this line:
<classpathentry kind="con" path="PENLET_CONTAINER/libraries"/>
21
Getting Started with the Livescribe Platform SDK
h. Right-click the project's top node in Package Explorer.
Select Refresh from the context menu.
Your project is converted to Platform SDK 1.0.1!
Deprecation Errors
You may see deprecation errors in the source code. Some reasons might include:
•
The AreaEnterExitListener interface was changed to
RegionEnterExitListener.
•
The PenTipListener interface has a method whose name has changed from
removePentipListener to removePenTipListener.
Please refer to the Javadoc of the Livescribe API for further information on specific
API changes.
Installing Features (Plugins) in SDK 1.0.1
1. Launch Eclipse and select Help > Software Updates.
2. Click on the Available Software tab.
3. Click on Add Site.
4. Click on Archive.
5. In the SDK, navigate to
EclipsePlugins\platformSDK10updatesite.zip .
Select the zip file and click Open.
6. In the Add Site dialog, click OK.
On the Available Software tab, a new Livescribe update site should
automatically appear in the list of updates sites. The top-level node will
display the location of the zip file on your file system.
7. Select the check box for the new Livescribe Platform SDK feature. Then click
Install to start the installation wizard.
8. The Install page of the wizard should say that since the feature is already
installed, an update will be performed instead. Click Finish.
9. Click Yes to restart Eclipse.
10. When Eclipse launches, you may have to select your workspace. Then click
OK.
22
Getting Started with the Livescribe Platform SDK
11. Livescribe's Penlet perspective should be showing. If not, select Window >
Open Perspective > Penlet. Then click OK.
23
Getting Started with the Livescribe Platform SDK
Introducing the Eclipse Features
Livescribe's plugins for Eclipse are packaged as two Eclipse features:
•
the Penlet feature
•
the Paper Design feature
Each feature is designed for a particular kind of project. The Penlet feature allows
you to create a penlet project. The Paper Design feature (also called the Paper
Designer) allows you to create a paper project.
Livescribe Projects in Eclipse
In Eclipse, a workspace manages one or more projects. A project is typically a
directory structure containing many files that make up an application.
A Livescribe paper project is used to store files associated with the design and
creation of Livescribe dot paper. A Livescribe penlet project is used to store code and
resources that are compiled into a penlet.
The paper you create typically has a dedicated Java penlet associated with it that
interacts with pre-defined active regions on the paper. Each paper project contains
one principle file called an AFD, as well as some auxiliary files. The AFD is a
proprietary document format, similar to a zip archive, which contains files and
information about a given paper product.
Livescribe Perspectives in Eclipse
Eclipse uses perspectives to help organize projects. A perspective is a collection of
views (windows) and associated actions (toolbar buttons and menu options) that are
required for a particular kind of project.
The Livescribe Eclipse features provide two perspectives: a Penlet and a Paper
Design perspective. Each one contains all views and actions you need to use the
feature. You display a perspective by selecting Window > Open Perspective, and
then selecting Paper Design or Penlet from the popup menu.
24
Getting Started with the Livescribe Platform SDK
NOTE: The text editor, which contains the source code of a penlet, is the same in
either perspective. When you change perspectives, the text editor will continue to
display the same source files.
Penlet Perspective
The Penlet feature contains these capabilities:
•
Livescribe Penlet Project Creation Wizard - The project wizard simplifies
the process of creating penlet projects.
•
Views - two views, Smartpen Info and Smartpen Debug, that provide
information about the state of the connected pen.
NOTE: The views window may be so narrow that the full title is not visible
(such as Smar instead of Smartpen Debug). Expand a view by clicking and
dragging the left border.
•
Actions - Toolbar buttons and menu options allow you to deploy penlets to a
pen.
•
Dialogs - allow you to convert resources (images, audio files) for usage on
the pen or add system sounds (*.wav) to a penlet project.
•
Image Editor - a simple editor for setting pixel values in a smartpencompatible ARW file.
•
Package Explorer: a tree control that displays the projects in the
workspace. The name of each project appears on the top-most level. Click the
plus next to a project name and drill down to see the various files that make
up the project. Although penlet and paper projects appear in this view,
Package Explorer is designed to drill down into Java projects such as penlets.
To drill down into paper projects, switch to the Paper Design perspective.
•
Import Project Wizard - The SDK makes it possible to import penlet
projects created outside of the SDK.
For detailed information on using the Penlet feature, please see the section titled
"Creating Your First Penlet" in this manual.
Paper Design Perspective
The Livescribe Paper Design Perspective is optimized for working with paper projects.
You will be asked to switch to this perspective when creating a new paper projects.
25
Getting Started with the Livescribe Platform SDK
The views used by the Paper Design perspective are:
•
Thumbnails: a list of page images, providing a quick way to navigate the
pages of the document.
•
Package Explorer: a tree control that displays the projects in the
workspace. The name of each project appears on the top-most level. Click the
plus next to a project name and drill down to see the various files that make
up the project. Both penlet and paper projects will appear in this view.
•
Outline: a list of all the graphical elements and active regions defined on the
page
•
Properties: properties of the currently selected item.
The Paper Design feature is a very powerful tool. For detailed information on using it
to create paper products, please see the manual titled Developing Paper Products in
the Livescribe Platform SDK.
Penlet JARs
Penlets are deployed to the pen in the form of Java archive (JAR) files. Each archive
contains a Java class that extends the Penlet class, and accompanying classes and
resources. The contents of a penlet JAR is similar to regular Java archives, but there
are a few significant differences:
•
Penlet classes are based on the Java Platform, Micro Edition (J2ME),
specifically the Connection-Limited Device Configuration (CLDC). This means
penlet classes can't access all of the libraries supplied with standard Java.
•
Like all J2ME CLDC classes, classes in a penlet JAR must be preverified. The
off-pen preverification step checks the classes for safety and security, and
thereby reduces the processing performed by the smartpen's KVM (Kernelbased Virtual Machine).
•
Penlet JARs contain resources such as audio or image files that can be played
or displayed on the pen. These resources will be discussed in a later section.
•
The JAR that Eclipse builds for a project can be found in the project's dist/lib
folder in the Project Explorer.
26
Getting Started with the Livescribe Platform SDK
Creating a Very Simple Penlet
This section walks through the creation of a very simple penlet, called HelloWorld.
This penlet will appear as one of the available penlets on your smartpen's main
menu. When launched, it will display the text 'Hello World' and play an audio file that
says 'Hello World'. To launch the penlet, you need a Nav Plus. No other paper is
required.
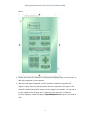
The numbered steps below are actions you take to create the sample. We will use
the Livescribe Penlet Project Creation Wizard to create the project. Then we will
deploy (install) the penlet to your Pulse smartpen. In between steps, we will stop to
explore the dialogs and wizards of Livescribe's Penlet feature and examine some of
the source code generated by the wizard.
1. Select Window > Open Perspective > Penlet. The Penlet perspective
should appear, with the views and toolbars you need already displayed.
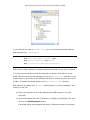
2. Select File > New > Project... and open the Livescribe entry in the New
project dialog. Select Livescribe Penlet Project and click Next.
The project wizard constructs a complete file hierarchy for the penlet, including
directories for source files, class files, and resources. It creates an Ant script and
adds libraries required for penlet development.
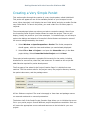
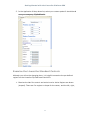
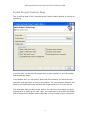
The first page of the wizard is the Project Creation Page. It is divided into two
sections. The first section asks for the project name, the project's directory location,
the penlet class name, and the package name.
All four fields are required. The usual rules apply to Java class and package names:
no reserved words and no unusual punctuation.
The bottom half of the Penlet Project Creation Page allows you to initialize the source
file in your penlet project. Several different project templates are available. Each one
will cause the appropriate source code and resources to be included in your new
project.
27
Getting Started with the Livescribe Platform SDK
You can create several projects, selecting different options each time. In this way,
you will quickly become familiar with the UI of the Penlet feature and the source
code required for common smartpen functionality.
3. In the Penlet Project Creation Page, enter HelloWorld as the name of both the
project and the penlet class.
Enter examples.helloworld as the name of the package.
4. Choose two options in the Initial Content group:
•
Display "Hello World" as text
•
Play a "Hello World!" sound
5. Click Next at the bottom of the page.
6. In the Penlet Project Creation page of the wizard, click Next.
The Event Configuration page appears. On this page you can request that one or
more event listeners be added to your project. An event listener is a Java interface
that your penlet's primary class must implement. For each event listener you select,
the code generator in the wizard creates stubs of the event handlers that make up
the interface. You are responsible for providing the actual code of the event
handlers.
28
Getting Started with the Livescribe Platform SDK
In this walkthrough, we will not make any selections on this page. The selections we
made on the Penlet Project Creation Page will add the appropriate event handlers
and the code needed to implement them. Examining this generated code can be very
instructive. You may wish to create several penlet projects, experimenting with
different options on the Penlet Project Creation page of the wizard. With that
experience, you will be ready to run the wizard and select options on the Event
Configuration page.
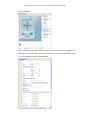
7. In the Event Configuration page of the wizard, click Next.
The Additional Configuration page appears.
29
Getting Started with the Livescribe Platform SDK
On this page you can modify:
•
the name of the built penlet
•
the version number of the penlet
•
whether the penlet appears on the smartpen's main menu
•
if it does, the name that appears in the smartpen's main menu for the penlet
•
the audio file (if any) that plays when the penlet's name rolls into view in the
smartpen's main menu.
The default values are as follows:
•
the built penlet has the same name as the project
•
penlet version is 1.0.0.
•
penlet will appear as an item on the smartpen's main menu
•
the penlet's name on the main menu is the same as the project name
•
no audio file plays when the penlet's name rolls into view in the smartpen's
main menu
30
Getting Started with the Livescribe Platform SDK
Note: This audio file is played only when the user is scrolling through the smartpen's
main menu. When the penlet's name rolls into view in the OLED, the sound plays. It
replaces the generic menu-rolling sound.
In our Very Simple Penlet sample, however, we have a HelloWorld.wav sound that
plays when the penlet is launched.. To launch a penlet, the user selects the penlet's
name when it appears in the main menu.
8. On the Additional Configuration page of the wizard, do the following:
a. Make sure that the Add the application to the Pulse smartpen menu
checkbox is selected.
b. In the Menu name for application field, change HelloWorld to Hello World
Sample (which is a friendlier name to display on the smartpen's main
menu).
The wizard writes this information to menu.txt, and places the file in the project's res
directory.
9. On the Additional Configuration page of the wizard, Click Finish and wait for
the wizard to complete your project. This can take a few seconds.
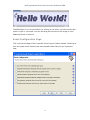
The Livescribe Penlet Project Creation wizard creates a HelloWorld penlet project
with resources and source code that matches the selections you made. The Penlet
perspective should be active, with all the views and actions necessary to code and
deploy a penlet.
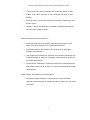
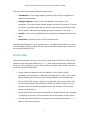
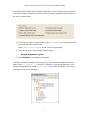
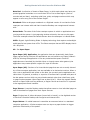
The wizard has made the following changes: First, the text editor now displays the
source code in the HelloWorld.java source file. Second, a new project appears in the
Eclipse Package Explorer called HelloWorld. If you open its folders, you'll see a
structure similar to the following:
31
Getting Started with the Livescribe Platform SDK
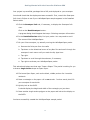
If you examine the code in HelloWorld.java, you'll see that the following code has
been inserted into activateApp():
if ( reason == Penlet.ACTIVATED_BY_MENU ) {
this.label.draw("Hello world!", true);
this.display.setCurrent(this.label);
this.player.play("/audio/helloworld.wav");
}
This first line checks whether the penlet has been activated through menu selection.
If so, the second and third line tell the smartpen to display "Hello World" on the
OLED. The fourth line tells the smartpen to play the helloworld.wav audio file. In the
Project Explorer, drill down in the HelloWorld project by clicking the plus icon next to
a folder. The audio file should appear in the HelloWorld/res/audio directory.
Now that you've created your HelloWorld penlet project, it's time to package it and
install it on the pen.
10. Dock your smartpen in its cradle and plug the USB connector in to your
computer.
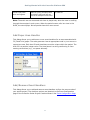
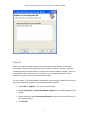
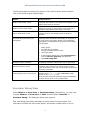
11. Click the Smartpen Info tab, if necessary, to display the Smartpen Info view.
Click on the Read Smartpen button.
A progress dialog should appear that says: Collecting smartpen information.
32
Getting Started with the Livescribe Platform SDK
Identifying information about your smartpen should appear in the table below
Connected Smartpens. The Mode value should be Normal. You will probably also
see data in the Installed Penlets and Installed Documents tables.
12. If your have more than one smartpen connected, make sure the checkbox of
the correct smartpen is selected in the Connected Smartpens table.
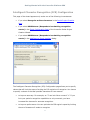
13. In the Project Explorer, right-click on the project name, which is the top-most
node in each project. In our case, it is the text HelloWorld with the penlet
project icon in front of it:
14. Select Deploy Penlet from the popup menu.
IMPORTANT: Wait until all progress messages in Eclipse and on the
smartpen itself have disappeared. Your smartpen should be displaying the
date and time before you proceed.
Your project is preverified, packaged into a JAR, and deployed to your smartpen.
You should check that the deployment was successful. First, consult the Smartpen
Info view in Eclipse to see if your HelloWorld sample appears in the Installed Penlets
table.
15. In the Installed Penlets table of the Smartpen Info view, find your penlet.
You may need to scroll.
16. On your Pulse smartpen, try actually running the HelloWorld penlet.
a. Remove the Pulse pen from its cradle
b. Tap down on the directional arrow of any Nav Plus and scroll through the
smartpen's main menu until you reach the My Apps item.
c. Tap right.
You are now in a submenu that contains the names of all penlets that you
installed on the smartpen.
d. Tap left to scroll through your applications. (There may be only one.)
e. Tap right to activate your HelloWorld penlet.
This activation plays the helloworld.wav audio file which welcomes you with "Hello,
world!"
33
Getting Started with the Livescribe Platform SDK
Creating an Open Paper Penlet
Now let's create a different simple penlet, called HelloOpenPaper. We assume that
you have already created the previous sample, HelloWorld, and are familiar with the
basics of the Livescribe Penlet Project Creation Wizard. If not, please go to Creating
a Very Simple Penlet now.
The HelloOpenPaper penlet will appear as one of the available penlets on your
smartpen's main menu. When launched, it will display the text 'Draw a shape' on the
smartpen OLED. The user draws a polygon of some kind. In response, the penlet will
create a dynamic region with that shape and display the text 'Box height: YY, Box
width: ZZ' on the smartpen's OLED.
The numbered steps below are actions you take to create the sample. We will use
the Livescribe Penlet Project Creation Wizard to create the project. Then we will
deploy (install) the penlet to your Pulse smartpen.
1. Select Window > Open Perspective > Penlet. The Penlet perspective
should appear, with the views and toolbars you need already displayed.
2. Select File > New > Project... and open the Livescribe entry in the New
project dialog. Select Livescribe Penlet Project and click Next.
The Livescribe Penlet Project Creation Wizard starts. It constructs a complete file
hierarchy for the penlet, Ant scripts, and libraries required for penlet development.
The Project Creation Page is divided into two sections. The top section asks for the
project name, the project's directory location, the penlet class name, and the
package name.
All four fields are required. The usual rules apply to Java class and package names:
no reserved words and no unusual punctuation.
34
Getting Started with the Livescribe Platform SDK
The bottom half of the Project Creation Page allows you to initialize the source file in
your penlet project. We want a penlet that can recognize dynamic regions drawn by
the user on Open Paper.
3. In the Penlet Project Creation Page, enter HelloOpenPaper as the name of both
the project and the penlet class.
Enter examples.helloopenpaper as the name of the package.
4. Choose one option in the Initial Content group:
•
Recognize dynamic regions
5. Click Finished at the bottom of the page.
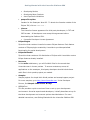
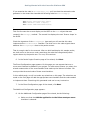
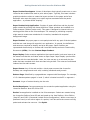
The Eclipse window changes in two ways. First, the text editor displays the source
code in the HelloOpenPaper.java source file. Second, a new project appears in the
Eclipse Package Explorer called HelloOpenPaper. If you open its folders, you'll see a
structure similar to the following:
35
Getting Started with the Livescribe Platform SDK
If you examine the code in HelloOpenPaper.java, you'll see that the automatic code
generator in the wizard has inserted the following code into activateApp():
public void activateApp(int reason Object[] args){
this.display.setCurrent(this.label);
this.label.draw ("Draw a shape");
this.context.addStrokeListener(this);
}
This first line sets the current display on the OLED to the label object that was
created in the initApp() method.. The second line displays the text 'Draw a shape' to
the OLED.
Check the signature of the HelloOpenPaper class and you will see that this class
implements the StrokeListener interface. The third line in the code snippet above
attaches the HelloOpenPaper class to the penlet context.
That is enough code for the moment. After we build and deploy this sample penlet,
we shall return to the source code, examining the code that recognizes dynamic
regions drawn by the penlet user. For now, let's continue.
6. In the Penlet Project Creation page of the wizard, click Next.
The Event Configuration page appears. On this page you can request that one or
more event listeners be added to your project. For each event listener you select, the
wizard creates stubs of the event handlers that make up the listener interface. You
must provide the actual code of these event handlers.
In this walkthrough, we will not make any selections on this page. The selections we
made on the first page will add the appropriate event handlers and the code needed
to implement them. Examining this generated code can be very instructive.
7. In the Event Configuration page of the wizard, click Next.
The Additional Configuration page appears.
8. On the Additional Configuration page of the wizard, do the following:
a. Make sure that the Add the application to the Pulse smartpen menu
checkbox is selected.
36
Getting Started with the Livescribe Platform SDK
b. In the Menu name for application field, change HelloOpenPaper to
Hello Open Paper (which is a friendlier name to have on the smartpen's
main menu).
The wizard writes this information to menu.txt, and places the file in the project's res
directory.
9. On the Additional Configuration page of the wizard, Click Finish and wait for
the wizard to complete your project. This can take a few seconds.
The Livescribe Penlet Project Creation wizard creates a HelloOpenPaper penlet
project with source code that matches the selections you made on first page. The
Penlet perspective should be active, with all the views and actions necessary to code
and deploy a penlet.
Now that you've created your HelloOpenPaper penlet project, it's time to package it
and install it on the pen.
10. Dock your smartpen in its cradle and plug the USB connector in to your
computer.
11. Click the Smartpen Info tab, if necessary, to display the Smartpen Info view.
Click on the Read Smartpen button.
A progress dialog should appear that says: Collecting smartpen information.
Identifying information about your smartpen should appear in the table below
Connected Smartpens. The Mode value should be Normal. You will probably also
see data in the Installed Penlets and Installed Documents tables.
12. If your have more than one smartpen connected, make sure the checkbox of
the correct smartpen is selected in the Connected Smartpens table.
13. In the Project Explorer, right-click on the project name, which is the top-most
node in each project. In our case, it is the text HelloOpenPaper with the
penlet project icon in front of it:
14. Select Deploy Penlet from the popup menu.
IMPORTANT: Wait until all progress messages in Eclipse and on the
smartpen itself have disappeared. Your smartpen should be displaying the
date and time before you proceed.
37
Getting Started with the Livescribe Platform SDK
Your project is preverified, packaged into a JAR, and deployed to your smartpen.
You should check that the deployment was successful. First, consult the Smartpen
Info view in Eclipse to see if your HelloOpenPaper sample appears in the Installed
Penlets table.
15. Click the Smartpen Info tab, if necessary, to display the Smartpen Info
view.
Click on the Read Smartpen button.
A progress dialog should appear that says: Collecting smartpen information.
16. In the Installed Penlets table, find your penlet. You may need to scroll.
The name will be HelloOpenPaper.
17. On your Pulse smartpen, try actually running the HelloOpenPaper penlet.
a. Remove the Pulse pen from its cradle
b. Tap down on the directional arrow of any Nav Plus and scroll through the
smartpen's main menu until you reach the My Apps item.
c. Tap right.
d. Tap down to scroll through the submenu, if necessary.
e. Tap right to activate your HelloOpenPaper penlet.
This activation displays text that says "Draw a Shape." The penlet is waiting for you
to draw a single-stroke shape on Open Paper.
18. Find some Open Paper, such as the blank, middle portion of a Livescribe
notebook.
19. Draw a rectangle on the paper—all in one stroke. In other words, don't lift
your smartpen for each side.
20. Quickly look at the OLED.
It should display the height and width of the rectangle you just drew.
21. Draw another single-stroke polygon on the paper and look at the display on
the OLED.
You have successfully created the HelloOpenPaper sample penlet!
38
Getting Started with the Livescribe Platform SDK
Examining the strokeCreated Method
As promised earlier, we will now take a closer look at some of the code for the
HelloOpenPaper penlet.
1. In Eclipse, find the text editor displaying the source code for HelloOpenPaper
class.
2. Scroll down, if necessary, until you see the strokeCreated method.
The strokeCreated method is an event handler specified by the StrokeListener
interface. Since the HelloOpenPaper.java class implements that interface, the
Livescribe Penlet Project Creation Wizard inserted code in the strokeCreated method
for you.
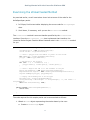
public void strokeCreated(long time, Region regionId, PageInstance page) {
StrokeStorage ss = new StrokeStorage(page);
Stroke stroke = ss.getStroke(time);
// Create a polygon with the number of points in the stroke
int numPoints = stroke.getNumberofVertices();
polygon = new Polygon(numPoints);
// Add points to the Polygon
for (int i = 0; i < numPoints; i++) {
polygon.setXY(i, stroke.getX(i), stroke.getY(i));
}
// Create a Region and add
Region polygonRegion = new
RegionCollection regions =
regions.addRegion(polygon,
it to the document on the pen
Region(regionId.getAreaId());
this.context.getCurrentRegionCollection();
polygonRegion);
// Display the bounding box of the Polygon
Rectangle box = polygon.getBoundingBox();
String boxString = "Box height: " + box.getHeight() + ", Box width: " +
box.getWidth();
this.label.draw(boxString, true);
}
public boolean canProcessOpenPaperEvents() {
return true;
}
The code required for this sample penlet can be summarized as follows:
1. Obtain a Stroke object representing the stroke drawn by the user:
a. Create a StrokeStorage object.
39
Getting Started with the Livescribe Platform SDK
b. Call getStroke method on that object to return a Stroke object for the
stroke that the user created at the time passed in to this event handler.
2. Create a shape from that Stroke:
a. Call getNumberofVertices method on that Stroke to return the number of
vertices in the shape.
b. Note: For the sake of this simple example, we required that the user draw
the shape in one stroke—without picking up the smartpen! .
c. Ceate a new Polygon object with that number of vertices.
d. Set the X and Y coordinates for each vertex of that Polygon, using the
Stroke.
3. Create a Region using that shape:
a. Create a Region object and add it to the current Regions collection. Notice
that when you add the Region, you pass in the Polygon you created a few
lines above.
4. Display the height and width of that shape, on the smartpen's OLED.
a. Finally, you want to display some feedback to the user of this sample. So
you call getBoundingBox method on the Polygon object. Then get the height
and width of the bounding box and pass it to the label.draw method for
display on the OLED.
The canProcessOpenPaperEvents Method
Locate the canProcessOpenPaperEvents method at the end of the HelloOpenPaper.java
file. It is another event handler specified by StrokeListener. You must implement
this method and return true, if you wish your penlet to be able to receive any
events—such as strokes—from Open Paper.
40
Getting Started with the Livescribe Platform SDK
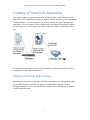
Creating a Fixed Print Application
This section walks through the basic steps of developing a simple Fixed Print (FP)
application. An FP application consists of a paper product and one or more associated
(linked) penlets. . For this example, you will be creating a simple “Tap and Play”
application. You will create an Active Region that a smartpen will respond to when
the user taps on it. In this case, the response will be to play a “Hello World” audio
file.
For introductory information about Livescribe paper products and penlets, refer to
Introduction to the Livescribe Platform.
Design and Create Page Images
Generally, the first step in creating a Fixed Print application is to design the images
for the paper product, including the background and other page art. For this
example, however, you will use predefined artwork from Livescribe that is used for
the Flip Pad insert card.
41
Getting Started with the Livescribe Platform SDK
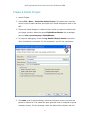
Create a Penlet Project
1. Launch Eclipse.
2. Choose File >New > Livescribe Penlet Project. This starts the Livescribe
Penlet Project Creation Wizard, and opens up a Penlet Perspective view in the
IDE.
3. Follow the wizard dialogs to create the basic penlet you want to interact with
your paper product. Name the penlet FlipPadInsertPenlet with a package
name of com.<yourcompany>.flipPadPenlet.
4. To help with debugging, check the Log Penlet lifecycle events. Leave the
other checkboxes unchecked. For this application, you will not need them.
5. Click Next, and in the next dialog, check the smartpen events you want the
penlet to respond to. The wizard will auto-generate code to respond to typical
smartpen events. For this example, check the Menu Event Listener and Pen
42
Getting Started with the Livescribe Platform SDK
Tip Listener checkboxes.
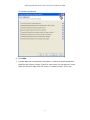
6. Click Next.
7. Provide additional configuration information, including a specific application
identifier and version number. Specify a menu name for the example. Leave
blank the Sound to play when the menu is invoked text box. This is not
43
Getting Started with the Livescribe Platform SDK
required for this example.
8. Click Finish.
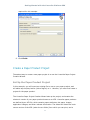
Create a Paper Product Project
The easiest way to create a new paper project is to use the Livescribe Paper Project
Creation Wizard.
Set Up the Paper Product Project
In this example, you will import an existing file to use as your paper product, and
will add a tap and play button (Active Region) to it. However, you must first create a
project for the paper product.
The Livescribe Paper Project Creation Wizard sets up the project, and creates the
electronic version of your paper product known as an AFD. Livescribe paper products
are defined by an AFD file, which contains paper attributes, dot space, images,
application linkages, and other relevant information. The wizard will create the main
source version of the AFD (under the src folder) from which you can print, and a
44
Getting Started with the Livescribe Platform SDK
separate AFD file (under the dist folder) that will be deployed on the smartpen.
For this example, the wizard will create an AFD, but you will not be using it. Instead,
you will use the pre-defined AFD from the Livescribe Flip Pad insert card.
1. Launch Eclipse.
2. Choose File >New > Livescribe Paper Project. This starts the Livescribe
Paper Project Creation Wizard, and opens up a Paper Product Perspective
view in the IDE.
3. Specify properties for the project. Enter the project name, such as
FlipPadInsert and verify the location of your Eclipse workspace.
4. Uncheck the Use Background Image(s) checkbox. You will not need this
for this example.
5. Leave other parameters as their defaults.
6. Click Finish. The wizard will then create and display your paper product and
ask if you wish to open the Eclipse perspective (windows and views) for paper
design. You can also manually select this perspective from Window > Open
Perspective > Paper Design.
45
Getting Started with the Livescribe Platform SDK
Design the Paper Product
After creating the paper product project with the wizard, you can then use the Paper
Designer to complete your design.
Import the Livescribe Flip Pad Insert Card AFD File
For this example, you will import the Flip Pad insert card AFD file as a starting point.
Normally, however, you will use the custom paper product AFD created by the wizard
in the steps above.
7. Choose File > Import.
8. In the Import dialog, open the General folder, and then choose Filesystem,
and click Next.
9.
10. In the Import File system dialog, click Browse next to the From directory
text box.
46
Getting Started with the Livescribe Platform SDK
11. Navigate to the Livescribe SDK installation package and select the
\Samples\FlipPadPaperProject folder, and click OK to return to the
Import File system dialog.
12. In the Import File system dialog, check the LS_FLNP_Card.afd check box
13. Choose a destination folder. Click Browse next to the Into folder text box.
14. By default, the dialog will display project folders in your workspace. Select the
FlipPadInsert paper project folder, and select the src folder.
15. Click OK to return to the Import File system dialog.
47
Getting Started with the Livescribe Platform SDK
16. Click Finish in the Import File system dialog to import the AFD file to your
paper product project folder. The imported AFD displays in the Project
explorer tree. Double-click LS_FLNP_Card.afd to view the AFD in the main
48
Getting Started with the Livescribe Platform SDK
drawing area and in the thumbnail views of the Paper Designer.
Link the Paper Product to the Penlet
Associate (or link) the Flip Pad insert card AFD to the penlet you created earlier
(FlipPadInsertPenlet). Because you are using an existing Livescribe AFD, notice
that the AFD already has standard Livescribe penlets (like Paper Replay) and system
penlets linked to it.
1. In Project Explorer, open the folder for your paper product.
2. Open the src folder.
3. Double-click the imported AFD file called LS_FLNP_Card.afd, not the custom
AFD you created with the wizard.
4. Select File >Properties.
5. Select the Document tab.
6. Click Edit Application List to open the dialog.
49
Getting Started with the Livescribe Platform SDK
7. From the drop-down list, select the application package and class name for
the custom penlet you created earlier. For example:
(com.<yourcompany>.flipPadPenlet.flipPadInsertPenlet).
8. Click Add.
9. Click OK to close the Edit Application List.
10. Click OK to close the Documents window.
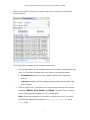
Create Active Regions (Shaping)
Use the Paper Designer graphical tools to draw active regions (controls, tap-and-play
areas, and so on) that your penlet will respond to. This process is also known as
shaping.
To create an active region on your page:
1. Select a shape (such as an ellipse) from the Active Regions folder in the
palette.
2. Click in the editor canvas to place the element on your page. For this
example, draw the ellipse over top of the Livescribe Dot Paper logo as shown
50
Getting Started with the Livescribe Platform SDK
below.
3. Resize and move the element by clicking and dragging them in the canvas, or
edit the properties in the inspector.
4. With the new region selected, use the property inspector to specify the
region’s name, Area Id, and the penlet that will respond to this region. The
Area Id is what links specific regions on the page to the penlet. You can set it
to any integer value as long as it is unique for the penlet it is linked to.
For this example, name the region TapAndPlaySound and give it an Area Id
of 1.
51
Getting Started with the Livescribe Platform SDK
5. In the Application Id drop down list, select your custom penlet It should be 4:
com.yourcompany.flipPadPenlet.
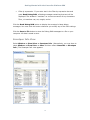
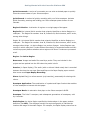
Examine the Livescribe Standard Controls
Although you will not be changing them, it is helpful to examine the pre-defined
regions on the Livescribe Flip Pad Insert Card AFD.
1. Examine the Nav Plus control and notice how its Active Regions are drawn
(shaped). There are five regions to shape for the center, and the left, right,
52
Getting Started with the Livescribe Platform SDK
top, and bottom.
2. Also, notice the properties that have been pre-set for one of the regions. For
example, the NavPlus left arrow has an Area Id of 1 and the Application Id is
1: com.livescribe.runtime.SystemPenlet.
53
Getting Started with the Livescribe Platform SDK
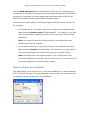
Auto-generate Event Code for Your Active Region
For each custom Active Region used by your penlet, have the Paper Designer autogenerate event code. This process saves time when programming your penlet. To
trigger auto-generation of event code for an Active Region:
1. Select your custom Active Region (the TapAndPlaySound region).
2. In the Property Inspector, if not already selected, choose your penlet in the
Application Id drop down menu.
(com.<yourcompany>.flipPadPenlet.flipPadInsertPenlet).
3. Check the PenDown event. Checking this event automatically generates stub
code in your penlet for this Active Region.
4. Click Go to Function next to PenDown to open the penlet for further editing.
In the java editor, notice that the Paper Designer automatically generated a stub
penlet method called onTapAndPlaySoundPenDown to respond to a PenDown and
other pen tip listener events on this Active Region. You can then use the Penlet
editor to define what the behavior should be.
54
Getting Started with the Livescribe Platform SDK
Here is a code listing showing some of the auto-generated code:
public void penDown(long time, Region region, PageInstance page) {
penDownEventDelegator(time, region, page);
}
public void singleTap(long time, int x, int y) {
}
public void doubleTap(long time, int x, int y) {
}
// *** GENERATED METHOD -- DO NOT MODIFY ***
/**
protected boolean penDownEventDelegator(long time, Region region, PageInstance page)
{
boolean eventHandled = true;
switch (region.getAreaId()) {
case 1:
eventHandled = onTapAndPlaySoundPenDown(time, region, page);
break;
default:
eventHandled = false;
}
return eventHandled;
}
// *** END OF GENERATED CODE ***
protected boolean onTapAndPlaySoundPenDown(long time, Region region,
PageInstance page) {
return true;
}
}
Complete the Penlet Programming
This completes your paper product design. Next, return to the Penlet perspective to
complete your penlet code. Refer to the Livescribe SDK Javadoc, Developing Penlets,
and User Experience Guidelines for information about how to design the best penlet
for your application goals.
Import the Hello World Audio File
For this example, you will design your application to play a Hello World audio file
when a specific Active Area is tapped by the user. To enable this, first import the
audio file as a resource.
1. Choose Window > Open Perspective > Penlet.
2. Open the FlipPadInsertPenlet.java file to view it in the editor.
3. Select the FlipPadInsertPenlet in the Package Explorer tree.
4. Choose File > Import.
5. In the Import dialog, choose General / Filesystem, and click Next.
55
Getting Started with the Livescribe Platform SDK
6. In the Import File system dialog, click Browse next to the From directory
text box.
7. Navigate to the Livescribe SDK installation package and select the
\Samples\FlipPadPaperProject\Resource folder, and click OK to return
to the Import File system dialog.
8. In the Import File system dialog, check the HelloWorld.wav check box
9. Choose a destination folder. Click Browse next to the Into folder text box.
10. By default, the dialog will display project folders in your workspace. Select the
FlipPadInsertPenlet penlet project folder, and select the res/audio folder.
56
Getting Started with the Livescribe Platform SDK
Click OK to return to the Import File system dialog.
11. Click Finish in the Import File system dialog to import the wav file to your
paper penlet project folder.
Set Up the Media Player
To play a sound on a smartpen, your penlet needs to instantiate the MediaPlayer. To
do this, add the highlighted lines of code to your penlet. The first line imports the
MediaPlayer libraries. The second line declares player as MediaPlayer for this penlet.
The third line instantiates the MediaPlayer when the penlet is initialized.
package com.yourcompany.flipPadPenlet;
import
import
import
import
import
com.livescribe.penlet.Penlet;
com.livescribe.penlet.Region;
com.livescribe.ui.MediaPlayer;
com.livescribe.afp.PageInstance;
com.livescribe.event.PenTipListener;
public class FlipPadInsertPenlet extends Penlet implements PenTipListener {
private MediaPlayer player;
public FlipPadInsertPenlet() {
}
/**
* Invoked when the application is initialized. This happens once for an application
instance.
*/
public void initApp() {
this.player = MediaPlayer.newInstance(this);
this.logger.info("Penlet FlipPadInsertPenlet initialized.");
57
Getting Started with the Livescribe Platform SDK
}
Edit the PenDown Method
Next, edit the onTapAndPlaySoundPenDown stub code that was auto-generated by the
Paper Designer for your Active Region. Add the highlighted code to instruct the
MediaPlayer to play the Hello World audio file when the smartpen detects a penDown
event on the TapAndPlaySound Active Region.
protected boolean onTapAndPlaySoundPenDown(long time, Region region, PageInstance
page) {
this.player.play("/audio/helloworld.wav");
return true;
}
Print and Test the Paper Product and Penlet
1. Deploy the penlet to your smartpen by right-clicking the Penlet project and
selecting Deploy to Smartpen.
2. Print your paper product using the AFD. Right-click the LS_FLNP_Card.afd
file in the src folder and choose Print.
3. Click OK at the Lock document prompt.
4. In the Select printer dialog, select the printer you want to use and click OK.
When printing, you should use a recommended printer. However, other
printers can also work. See the Recommended Printers section in
58
Getting Started with the Livescribe Platform SDK
Developing Paper Products for more information.
5. In the next dialog, select the printing properties to use. For this example,
choose the settings below.
Note: When testing your paper product, you will use the default developer
test pattern provided by the Paper Designer. When you are ready to publish
the paper product for distribution, you will need to obtain a unique dot
pattern license from Livescribe using the Livescribe Pattern Server.
6. From the Project Explorer, select the source AFD file in the src folder, and
right-click to select Deploy to Smartpen.
7. After deploying your penlet, and deploying and printing your paper product,
test your application. Tap on any of the printed controls to see that they work
59
Getting Started with the Livescribe Platform SDK
as expected. All the standard Livescribe controls should work like any other
Livescribe paper products. You should be able to tap on the Record button to
start Paper Replay. Tapping the Nav Plus should invoke the Main Menu.
8. On the Main Menu, scroll down to the menu item called My Apps. From there,
locate your new application (Flip Pad). Right tap on the Nav Plus to start the
application.
9. Next, tap on the custom Active Area you defined for the Livescribe Dot Paper
logo. It should play the Hello World wav file as you intended.
60
Getting Started with the Livescribe Platform SDK
Command Reference
This section is a reference of the wizards and dialogs of the Penlet Feature.
Menus
These are the menus available in the Penlet perspective that apply to penlet
development.
Livescribe
To access this menu, select Livescribe on the main menu bar at the top of your
Eclipse window.
The Livescribe menu has one item.
Menu Item
Action
Resource Converter
Displays the Livescribe Resource Converter
File > New
To access this menu, select File > New on the main menu bar at the top of your
Eclipse window.
The File > New menu contains two items that pertain to development on the
Livescribe Platform.
Menu Item
Action
Livescribe Penlet Project
Launches the Livescribe Penlet Project Creation Wizard
Livescribe Paper Project
Launches the Livescribe Paper Product Wizard. For details,
see the manual titled Developing Paper Products.
Context Menu
To access this menu, highlight the top node of a penlet project in one of the
resource navigation views: Project Explorer, Package Explorer, and Navigator. A long
61
Getting Started with the Livescribe Platform SDK
context menu appears. Near the end are the menu items pertaining to development
for the Livescribe Platform.
The items in the context menu are:
Menu Item
Description
Deploy Penlet
Uploads the penlet JAR to the smartpen
Remove Penlet
Uninstalls the penlet from the smartpen
Add/Remove Event Handlers
See Add/Remove Event Handlers
Add Paper Area Handler
See Add Paper Area Handler
Remove Paper Area Handler
See Remove Paper Area Handler
Rename Paper Area Handler
See Rename Paper Area Handler
Add Images or Sounds
See Add Images, Sounds, or Resources
Add System Sounds
See Add System Sounds to the Selected Project
Create Distribution
Creates a deployable JAR file for the project
62
Getting Started with the Livescribe Platform SDK
Alphabetical Reference
This section is an alphabetical reference of dialogs and wizards. Look up an item by
the name of the page (in a wizard) or the name of the dialog.
Add Images, Sounds, or Resources
This command allows you to add one of the following to your penlet project:
•
image for display on the smartpen OLED
•
sound to be played on your penlet project.
To access this command:
1. Right-click the top node of the project in Package Explorer. Select Add Images
or Sounds from the context menu.
The Add Images, Sounds, or Resources dialog appears.
2. Select Image Files or Audio Files from the Files of type drop-down box.
3. Navigate to the file(s), highlight, and click Open.
Images will be added to the res/images directory and sounds will be added to
the res/audio directory of the penlet project.
63
Getting Started with the Livescribe Platform SDK
Additional Configuration Page
This is the third page of the Livescribe Penlet Project Creation Wizard. It allows you
to add your penlet to the smartpen's main menu, control penlet ID and version
number, and configure the penlet's behavior in the smartpen's main menu. When
deployed, your penlet becomes part of the MyApps submenu of the smartpen's main
menu.
Note: This is not the same as creating a single- or multi-dimensional menu for your
penlet.
The Additional Configuration page appears. On this page you can modify:
Field Label
Explanation
Default Value
Application identifier
Name of the built penlet
The built penlet has the same
name as the project
Application version
number
The version number of the penlet
Penlet version is 1.0.0.
Add the application to
the Pulse smartpen
menu
Whether the penlet appears on the
smartpen's main menu.
Penlet will appear as an item on
the smartpen's main menu
Menu name for
application
Name that appears in the
smartpen's main menu for the
penlet.
Penlet's name on the main menu
is the same as the project name
64
Getting Started with the Livescribe Platform SDK
Sound to play when
menu item appears
Audio file (if any) that plays when
the penlet's menu item rolls into
view in the smartpen's main menu.
No audio file.
Note: The audio we are concerned with here is played only when the user is scrolling
through the smartpen's main menu. When the penlet's name rolls into view in the
OLED, the sound plays. Not all penlets have this menu sound.
Add Paper Area Handler
This dialog allows you to add one or more event handlers for an area associated with
FP (Fixed Print) paper. The code generator inserts appropriate code in your source to
support an area. Each Area ID and Area Name must be unique within the penlet. The
Area ID is a positive integer value. The Area Name is a string conforming to Java
naming conventions (e.g., no spaces allowed).
Add/Remove Event Handlers
This dialog allows you to add and remove event handlers to/from the source code of
your penlet project. The checkbox options are identical to the Event Configuration
page of the Livescribe Penlet Project Creation Wizard. See Event Configuration Page.
65
Getting Started with the Livescribe Platform SDK
Add System Sounds to the Selected Project
The fourth option, Add System Sounds, lets you insert additional audio files
(*.wav) into the currently selected project. The following figure shows what the Add
System Sounds dialog box looks like.
66
Getting Started with the Livescribe Platform SDK
Click the Play button to hear the sound produced by the audio file. To choose one or
more system sounds, click the corresponding checkboxes in the dialog. Then click
OK to add them to the currently selected project. The selected WAV files will be
placed in the /res/audio directory.
ARW Editor
ARW is a proprietary monochrome format used specifically with the Pulse smartpen.
The SDK's Resource Converter converts existing images to ARW, but can't be used to
edit them.
Images are found in the res/images directory of your penlet project. To activate the
ARW editor, double-click on an ARW file in the Package Explorer. The ARW editor
appears in its own window.
67
Getting Started with the Livescribe Platform SDK
The ARW editor is a 1-bit pixel editor. By clicking in the editor, you can convert dark
pixels to light or vice-versa. You can also drag the mouse over the image to color
additional pixels in the area.
Event Configuration Page
This is the second page of the Livescribe Penlet Project Creation Wizard. Checking an
item will create event listeners and event handler stubs that you can implement
later.
68
Getting Started with the Livescribe Platform SDK
Option
Listener Adds These Methods:
Can receive events from unclaimed
paper space
canProcessOpenPaperEvents and sets return value to
true.
RegionEnterExitListener
regionEnter
regionExit
HWRListener
hwrCrossingOut
hwrError
hwrResult
hwrUserPause
MenuEventListener
handleMenuEvent
PaperListener
onNewDocument
onNewPage
PenTipListener
penDown
penUp
singleTap
doubleTap
StrokeListener
strokeCreated
SystemEventListener
handleSystemEvent
Initialize Text in Configuration File
This page of the wizard appears only if you chose Read properties from a
resource file on the Penlet Project Creation Page. Specify name-value pairs, which
will be written to the config.txt file. The penlet reads this file when it is launched.
And your code can read these pairs at runtime.
69
Getting Started with the Livescribe Platform SDK
Import
When you create a penlet project using Livescribe's Penlet feature, the Eclipse
workspace recognizes the project as being Livescribe-specific. However, projects
created outside the Penlet feature, such as the Livescribe sample projects, won't be
recognizable. This means you won't be able to run the deploy action on these
projects or perform similar Livescribe-specific tasks.
For this reason, the Eclipse feature provides an import project wizard for converting
externally-generated projects into Livescribe-specific projects.
1. Select File > Import. . The Import wizard starts.
2. Select Livescribe > Livescribe Penlet Project from the Select page of the
wizard.
3. Select the option labeled Select archive file. Browse to the root directory of
your penlet project.
4. Click Finish.
70
Getting Started with the Livescribe Platform SDK
Intelligent Character Recognition (ICR) Configuration
This page of the wizard appears only under one of the following circumstances:
•
if you select Recognize written characters in the Penlet Project Creation
Page.
•
if you select HWRListener (Responds to handwriting recognition
events) in the Event Configuration Page of the Livescribe Penlet Project
Creation Wizard.
•
if you select HWRListener (Responds to handwriting recognition
events) in the Add/Remove Event Handlers dialog.
The Intelligent Character Recognition (ICR) Configuration page allows you to specify
values that will limit the scope of writing the ICR engine's will recognize. You choose
to specify a subset of the total possible characters for two reasons:
•
to improve accuracy. For example, an "I" can look like a numeral "1." If you
limit your penlet's recognition capabilities to only numerals, you have
increased the chances for accurate recognition.
•
to improve performance. You can optimize the ICR engine's speed by limiting
the set of characters if needs to recognize.
71
Getting Started with the Livescribe Platform SDK
You specify a custom lexicon to restrict the ICR engine to recognize only these
terms—which can improve both accuracy and performance.
Option
Action
The minimum delay (ms) interpreted
as a pause
Specifies the period of time without the user making new
strokes that the ICR engine will interpret as a pause (and
usually, the end of the stroke). In milliseconds.
Configure the penlet's character
subset
Use Custom lexicon
(See table below)
Words you specify here will be inserted in a custom lexicon.
No other words will be recognized.
The following table describes the available subsets of the entire character set. You
can select only one of these.
Option
You specify a subset of the total possible characters
Alphabetic characters and numbers
Alphabet characters and numerals only
Alphabetic characters only
Alphabet characters only (both upper and lower case)
Numbers only
Numerals (1 2 3, etc.) only—no decimal points, commas, nor
positive/negative signs allowed.
Custom subset (Add each character)
Only the characters you enter in the field
Lower case
Alphabet characters—lower case only.
No subset (Use entire alphabet)
Uses all alphabet characters, numerals, punctuation
Livescribe Penlet Project Creation Wizard
Launch the Livescribe Penlet Project Creation Wizard by selecting File > New >
Livescribe Penlet Project. The wizard consists of three pages:
•
Penlet Project Creation Page
•
Event Configuration Page
•
Additional Configuration Page
72
Getting Started with the Livescribe Platform SDK
Livescribe Resource Converter
The Pulse smartpen can play audio files and display images, but only if the resource
files are suitably formatted. Image files must be converted into the Livescribespecific ARW format, and audio files must be either WAV (*.wav) files, WavPack
(*.wv) files, or AAC-LC (*.aac) files.
The Livescribe IDE provides a utility for converting resources, and you can access the
Resource Converter dialog by choosing the Livescribe > Resource Converter
menu item or by clicking the
icon in the toolbar.
Images Tab
The first tab converts images (*.gif, *.jpg, *.png, and *.bmp) to the pen-supported
ARW format. Click Browse to bring up a file selection dialog, then click Save File to
save the converted image into the currently-selected project.
Below the file selection text box, the preview canvas shows what the converted
image will look like. If the original image is a color image, each color in the image
will be converted to a luminance value between 0.0 and 1.0. By default, pixels with a
luminance greater than 0.5 will be colored white, while those with a luminance less
than 0.5 will be colored black in the ARW image. You can adjust the luminance
threshold by adjusting the scale.
Sounds Tab
The second tab in the Resource Converter dialog makes it possible to convert audio
files. The Pulse smartpen supports three different file formats: WAV (*.wav),
73
Getting Started with the Livescribe Platform SDK
WavPack (*.wv), and AAC-LC (*.aac). The WavPack format provides the same
quality as wav, but the converted files are approximately half the size. The AAC-LC
format provides slightly-diminished quality conversion, but with significantly-reduced
file size.
The following figure shows what the audio conversion capability looks like on
Windows.
To perform audio conversion, click the Browse... button and navigate to the WAV
file you intend to convert. Select one of the two conversion choices and click Save
File to add the converted file to your penlet project.
Note: Not all audio files can be converted or played on the Pulse smartpen. To be
convertible, all WAV files must be sampled at 16kHz, with 16 bits per sample.
74
Getting Started with the Livescribe Platform SDK
Penlet Project Creation Page
This is the first page of the Livescribe Penlet Project Creation Wizard. It consists of
two halves.
In the top half, you specify the project name, project location on your file system,
and the package name.
In the bottom half, you can specify what kind of functionality you would like the
automatic code generator to insert in your penlet. The corresponding listeners and
stubs for the associated event handlers will be generated for you by the wizard.
This generated code provides simple actions. You can learn some basics of penlet
programming by studying the code. Later, you might want to start with the default
code of these event handlers and modify them to fit the needs of your new penlet.
75
Getting Started with the Livescribe Platform SDK
The following table summarizes the options of the Initial Content section (bottom
half) of the Penlet Project Creation Page:
Option
Inserts code for:
Display "Hello World" as text
Displaying "Hello World" on the OLED of the smartpen. Text
displays when penlet is launched.
Display a "Hello World" image
Displaying an image (in ARW format) on the OLED of the
smartpen. Image displays when penlet is launched.
Play a "Hello World" sound
Playing a sound on the smartpen when the penlet is
launched.
Log Penlet lifecycle events in the
debug RAM
Outputting debug statements that identify the execution of
life cycle events in the penlet. Output is to the Smartpen
debug RAM. The debug RAM may be viewed via the Debug
View in Eclipse.
1.
Deploy penlet.
2.
Use a Nav Plus to navigate
through the smartpen's main menu.
3.
Launch the penlet.
4.
In the Smartpen Debug View, select LifeCycleEvents
from the Filter by application drop-down box.
5.
Click Read Debug RAM.
Recognize written characters
Recognizing characters written by the user on Open Paper.
Recognize dynamic regions
Creating a region when the user draws a shape on Open
Paper. Subsequently, when the user interacts with the shape,
the penlet is activated.
Read Properties from a resource file.
Writing a single name=value pair (CONFIGDATA=Hello
World!) to the config.txt file.
When launched, the penlet reads this property and displays
the name and its value on the smartpen OLED.
Smartpen Debug View
Select Window -> Show View -> Smartpen Debug. (Alternatively, you may have
to select Window -> Show View -> Other and then select Livescribe ->
Smartpen Debug.) The Smartpen Debug view appears.
This view displays the debug messages currently stored on the smartpen. The
information includes the most recent penlet- and system-related events. You can
76
Getting Started with the Livescribe Platform SDK
examine this output to discover the events that occurred during the smartpen's
recent operation.
The Debug RAM messages can be filtered in three ways:
•
Filter by application- If the smartpen's penlets are listed in the Smartpen Info
view, you can filter messages that were output by a particular penlet.
•
JavaRuntime displays the log messages output by the smartpen's
runtime.
•
<System> displays the log messages generated by the smartpen's lowlevel firmware.
•
Filter by logger level - The data log on the smartpen can have four types of
messages: DEBUG, INFO, WARN, and ERROR. This drop-down list allows
you to limit displayed messages to one of these types.
Note: These log messages will be output to the data log only if the penlet
code calls the appropriate methods (debug, info, warn, or error) of the
Logger class.
77
Getting Started with the Livescribe Platform SDK
•
Filter by expression - If you enter text in the Filter by expression box and
press Read Debug RAM, all debug messages containing that text will be
displayed. The wildcard * matches 0 or more occurrences of any characters.
Thus, c*t matches: cat, cot, caught, and ct.
Click the Read Debug RAM button to display the smartpen's latest debug
messages. You must click this button whenever you modify any of the filter settings.
Click the Save to File button to store the Debug RAM messages to a file on your
computer. All data is saved as text.
Smartpen Info View
Select Window -> Show View -> Smartpen Info. (Alternatively, you may have to
select Window -> Show View -> Other and then select Livescribe -> Smartpen
Info.) The Smartpen Info view appears.
78
Getting Started with the Livescribe Platform SDK
Click the Read Smartpen button in the Smartpen Info view. If no smartpens are
connected, the first table will respond with the message No Smartpens Connected. If
a smartpen is connected, its penlet classes and penlet documents (AFDs) will be
listed in the Installed Penlets and Installed Documents tables.
You can also use these tables to uninstall your penlets and documents (AFDs) from
the smartpen.
•
To uninstall one of your penlets, right-click its name in the Installed Penlets
table and select Remove penlet "MyPenletName"
For instance, if you right-
click on the HelloWorld penlet, the context menu item says: Remove penlet
HelloWorld.
Note: You cannot uninstall the system penlets or the penlets that come
bundled with the Pulse smartpen.
•
To uninstall any document, right-click its name in the Installed Documents
table and select Remove Document Name. For instance, if you right-click on
the Tutorial document, the context menu item says: Uninstall Tutorial.
Note: Be careful when removing documents. If you uninstall one of the
Livescribe notebooks or notepads, such as Lined Journal 3, your smartpen will
no longer recognize that Livescribe paper product.
Remove Paper Area Handler
This dialog allows you to remove one or more event handlers for an area associated
with FP (Fixed Print) paper. The code generator removes code from your source that
it originally inserted to support the event handler(s).
79
Getting Started with the Livescribe Platform SDK
Rename Paper Area Handler
This dialog allows you to rename an event handler for an area associated with FP
(Fixed Print) paper.
80
Getting Started with the Livescribe Platform SDK
Glossary
This section lists terms and definitions important to developing applications for Pulse
smartpens.
3D Recording Headset: Earphones with embedded microphones that capture
multi-directional, far-field audio and place objects in the sound landscape
surrounding you.
Active Area: See Active Region.
Active Ink: Digitized writing/drawing that can be viewed in Livescribe Desktop—in
normal mode or in animation mode. Clicking on a note starts playing the audio at the
associated point in the audio stream. Related concepts: Animation
Active Region: A portion of paper defined such that when a user taps on it, the
associated penlet responds. You can think of an Active Region like a paper button or
control. Active Regions may overlap in which case their Z-order defines the ordering
of events delivered and their occlusive property defines whether active regions with
lower Z-orders are processed at all. Active Regions can be dynamic (created at
runtime – like the Livescribe Piano) or static (pre-defined in a paper product’s AFD
and established at penlet installation time – like standard Paper Replay controls).
See Dynamic Regions and Static Regions.
Active Verb: Small applications that can be activated on the Pulse smartpen by
writing a single word. The user must first enter the Active Verb mode by performing
a defined action. At present, that action consists of the user double-tapping the
center of a Nav Plus.
AFD: The persistent electronic representation of a paper product. It is used for
communication between the Livescribe system components (that is: the Pulse
smartpen, Livescribe Desktop, Livescribe Online, and Livescribe Developer Tools). A
ZIP-like archive that can hold arbitrary content, it is accessed via the Anoto
Functionality Platform Document API. Each step in the application and UGC lifecycle
adds or removes items in an AFD. The components of an AFD include: Anoto License,
GFX File, Regions File, Info File, Java JAR, Resources, and Tools Data.
AFP: Anoto Functionality Platform. Software modules created by Anoto and licensed
by Livescribe. Contains the functionality for creating AFDs, printing paper products,
and licensing Anoto dots. All AFP services are abstracted by Livescribe’s Java
Abstraction Layer.
81
Getting Started with the Livescribe Platform SDK
Animation: A mode for displaying Paper Replay notes in Livescribe Desktop. Normal
mode reveals all the notes when the page is first displayed. Animation mode initially
hides (or grays out) the notes. As the audio plays, notes are revealed onscreen in
sequence with the audio stream. To the user, the notes look like they are writing
themselves on the screen as the audio plays.
Anoto License: License for Anoto pattern page(s). A component of an AFD (Anoto
Functionality Document).
Anoto pattern: consists of small dots (100 micrometers in diameter) arranged with
a spacing of approximately 0.3 mm on an imaginary square grid.
Anoto Units: An Anoto Unit (AU) is the native resolution of the smartpen. One AU =
0.3/8 mm or roughly 677 DPI. This unit is the maximum precision of the Pulse
smartpen and also the maximum precision that, for example a paper product’s page
size or an active region can be set to.
APM: Audio Punctuation Mark. The sounds the Pulse smartpen makes that give the
user audio feedback.
Application Id: A locally-unique identifier within an AFD that specifies what penlet
class name to link the Active Region to. The Application Id is a part of the Region Id.
For Static Active Regions, it occupies the same location in the Region Id as the
Instance Id. The application Id is only relevant when creating paper products and will
be translated in the smartpen to the Instance Id of the application. See Area Id,
Region Id, and Instance Id.
Application Mapping: A key-value pair table that resides in the AFD. The table has
one entry for each application used on each paper product, and each key-value pair
contains the Application Id and the class name.
At run time, when a Static Active Region is tapped by the user, the system takes the
Application Id from the Active Region and fetches the class from the current
document’s Application Mapping table. With the class name, the system looks up the
Instance Id for the current smartpen. It then modifies the event Region Id and
exchanges the Application Id with the Instance Id. Therefore, Static Regions (drawn
using the Paper Designer) use an Application Id that will be translated at run time to
the Instance Id.
In contrast, Dynamic Regions (drawn at runtime and generated by penlet code), use
the Instance Id of the application that created it.
For example, assume a smartpen has two applications, Paper Replay and Timer, with
the following Instance Ids at run time:
82
Getting Started with the Livescribe Platform SDK
Class = com.livescribe.paperreplay Instance Id = 10
Class = com.livescribe.timer Instance Id = 11
The Application Mapping Table for the smartpen is:
Application Id = 1 Class = com.livescribe.timer
Application Id = 2 Class = com.livescribe.paperreplay
Here, a Static Region, like the Record button for Paper Replay, would have Area Id =
2 and Application Id = 2. At run time, when the Static Region is tapped by the user,
the event that is thrown will have Area Id = 2 and Instance Id = 10 (since Paper
Replay has Instance Id = 10 in this particular smartpen)
Area: A collection of regions, possibly in multiple AFDs, with the same Area Id and
that thus provide the same functionality.
Area Id: A 16-bit number that is a subset of the Region Id. It represents a smartpen
behavior or action triggered when a user interacts with an Active Region. It is up to
the developer to define which Area Id maps to which behavior, and implement the
corresponding code. Multiple Active Regions on the same page or multiple pages, can
share the same Area Id. In this case, each region will map to the same behavior in
the penlet. For example, the mute button on each page of a Livescribe notebook is
represented by multiple Active Regions (one per notebook page), but each share the
same Area Id. Therefore, when a user taps on the Mute button on any page, the
same Area Id is generated, which triggers the penlet code that activates the mute
function. AreaId starts on 1 since the AreaId 0 is reserved for the system Crop
region. See Application Id, Region Id, and Instance Id.
Claimed Open Paper: an expanse of dot paper that a penlet has claimed at run
time by means of a Dynamic Region.
Claiming: The process by which a penlet associates a user Active Region with an
expanse of dots in a paper product. When claimed, the dots become “active.”
Claiming can happen at penlet installation (for Static Regions) or during penlet
runtime (for Dynamic Regions).
Class Name: The base class in a penlet that subclasses com.livescribe.penlet.Penlet.
The class name links an Active Region in a paper product to the penlet.
Custom Paper Product: A paper product that contains pre-printed graphics (other
than lines) on more than 15% of its surface Region.
Data On Display: The state of an application indicating it has some data to display
to the user when the Pulse smartpen goes into Notes Mode. This state allows the
83
Getting Started with the Livescribe Platform SDK
system to delay showing the Default Screen. For example, a calculator application
might have some result (such as data on the display). The Data On Display state
allows the system to write out the result without activating Notes Mode.
Default Screen: This is the screen that is shown on the display when no application
owns the display.
DFU: Device Firmware Upgrade. The process of upgrading the Pulse smartpen
firmware. This process is also known as flashing the Pulse smartpen.
Dot Paper: Physical paper with predefined Livescribe dot pattern printed on it.
Dots: Navigation points printed on dot paper that allow the Pulse smartpen to know
its own location on the paper. Developed by Anoto, Inc.
DRM: Digital Rights Management.
Dynamic Region: An Active Region created during run time on Open Paper in
response to user interaction with the Pulse smartpen. The penlet creates dynamic
regions that encompass the written input and can be tapped on like a “paper button”
to trigger behavior in the penlet. For example, in Piano, the user creates dynamic
regions when drawing piano keys and rhythm and instrument buttons. In Paper
Replay, the user creates dynamic regions as the user takes notes during a recording.
Later, the user taps on a note and the associated point in the audio starts to play.
See Open Paper, Active Region, Static Region, Claiming, Linking, and Fixed
Print.
Fixed Print (FP): Refers to a region of dot space on a Livescribe page that is preclaimed by a Pulse smartpen application during application development. No other
application can claim these Regions dynamically at runtime. Usually, printed graphics
on the page identify these Regions to the Pulse smartpen user as “paper controls” for
operating the application. Fixed Print regions can also pre-claim Active Regions for
interpreting strokes. Open Paper, Active Region, Static Region, Claiming,
Linking, and Fixed Print.
Fixed Print Application: An application that owns one or more Fixed Print (static)
regions. The region is defined during the development of the application. Tapping on
one of the static regions activates the application. An FP application can also be
activated from the Main Menu system. All FP applications must be bound to a Paper
Product via its AFD file.
Flashing a Pulse smartpen: See DFU.
84
Getting Started with the Livescribe Platform SDK
FP: See Fixed Print.
GFX File: Anoto dots for page(s) and reference to background image in Resources. A
component of an AFD (Anoto Functionality Document).
ICR: Intelligent character recognition (handwriting recognition).
Info File: Creator, version info, and so on. A component of an AFD (Anoto
Functionality Document).
Instance Id: A 16-bit number to specify locally in a smartpen which application is
running, and which instance of that application is running. The Instance Ids are
assigned by the system either on installation of an application or when that
application is started. The Instance Id for a specific application varies between
different smartpens depending on user actions and what order the applications are
installed. There may be multiple Instance Ids for the same application. For example,
each Piano drawn on paper is a new instance. See Application Id and Region Id.
JAR: Archive file of Java classes for a Pulse smartpen penlet. A component of an AFD
(Anoto Functionality Document).
Linking: The process by which a paper product’s AFD is associated to one or more.
Linking is done by the developer in the Paper Designer by adding applications to the
paper product’s application list.
Livescribe Desktop: The computer component of the Livescribe Platform.
Livescribe Desktop that allows you to transfer, store, search, and replay notes from
your computer. You can also upload your content to the Web, and manage
applications and content on your Pulse smartpen.
Livescribe Online: The web community of Livescribe Pulse smartpen users who
post and share Pulse smartpen content.
MIDlet: A Java application conforming to the Mobile Information Device profile.
myLivescribe profile: 250MB of personal space a Livescribe Pulse smartpen user is
allotted at Livescribe Online to store and share notes.
Nav Plus: A pre-printed or hand-drawn plus sign that lets you navigate your Pulse
smartpen applications and files via the Menu system. Nav Plus controls are preprinted on Livescribe paper products, on the USB mobile charging cradle, and
elsewhere. Users can create these dynamically on any unclaimed dot space by
drawing a cross and double tapping on the center of the cross.
85
Getting Started with the Livescribe Platform SDK
Note Pad: A collection of sheets of Open Paper, in which each sheet may have preprinted graphical materials on no more than 15% of its surface Region (such as
controls and tool bars), excluding ruled lines, grids, and page numbers which may
appear on all or any part of the surface Region.
Notebook: Either a dot paper notebook or a Digitized version of one that the Pulse
smartpen can interact with and that Livescribe Desktop can recognize and interact
with.
Notes Mode: The state of the Pulse smartpen system in which no applications are
running and the system is just capturing strokes written by the user on dot paper.
The Pulse smartpen shows the Default Screen when the smartpen is in Notes Mode.
OLED: Organic Light-Emitting Diode. A display technology that requires no backlight
and draws far less power than LCDs. The Pulse smartpen has an OLED display that is
18 x 96 pixels.
OP: See Open Paper.
Open Paper (OP) Application: An application that can dynamically claim Open
Paper regions during runtime. OP applications are not bound to any Paper Product’s
AFD file, allowing the application to use any unclaimed dot space. Once OP
applications are launched (by the Main Menu or through some other gesture) the
application may create dynamic regions for input UI controls.
Open Paper (OP): Sections of a Livescribe dot page that are not currently claimed
by a Pulse smartpen application, but are available to be claimed at runtime. When a
user runs an application and writes on the dots, the currently active application can
claim them. In general, a surface, or a portion of surface that is printed with parts of
the dot pattern and on which no pre-printed materials other than ruled lines, grids,
or page numbers appear. Open Paper has an Area Id of 0. When the system detects
actions on Open Paper such as penDown, a Region Id with an Area Id of 0 is passed
to the appropriate event handlers.
Page Viewer: Livescribe Desktop mode that allows users to view individual pages or
sets of thumbnails of pages from their Paper Sources.
Page: Single piece of either dot paper (loose-leaf or bound), or the digitized version
of one that Livescribe Desktop can recognize and interact with.
Paper Button: So called because it resembles an onscreen button in a standard
computer application. A Pulse smartpen user can tap on a paper button to trigger
particular functionality of the penlet.
86
Getting Started with the Livescribe Platform SDK
Paper Product Developers: A team of developers that typically create one or more
Livescribe dot enabled files used to print active paper. Typically, this team includes:
graphic/production artists to create the layout and art for the paper and a Java
developer who maps the paper art to static regions associated with the penlet
application – a process called “shaping”.
Paper Product Only Application: Consists of paper definitions and the physical
paper created by printing with these definitions. Paper products are installed on a
Pulse smartpen (without penlet code). This paper is designed to interact with preexisting penlet code on the Pulse smartpen. For example, a publishing company
might want to create new notebooks for Livescribe, branded with a special
background image.
Paper Product: Any open paper or note pad printed with any part of the dot pattern
and that are used along with a penlet in an application. In general, the definitions
and resources required to identify and print dot paper. Paper Products are
represented electronically to Penlets and Livescribe Desktop as Anoto Functionality
Documents (AFDs). See also Custom Paper Product.
Paper Replay: Pulse smartpen application that records audio (such as a lecture) at
the same time that the user takes notes on Open Paper. Paper Replay synchronizes
the notes with the recorded audio. Later, the user can tap on a note and play the
audio that was recorded while that note was being written. The notes are considered
indexes into the audio stream.
Paper Source: Any of the real-world or virtual paper sources that Livescribe
Desktop can recognize and work with, including notebooks and journals.
Pattern Page: Identified by a page address: segment.shelf.book.page. For example,
1.2.3.4 denotes pattern page 4 in book 3, which is located on shelf 2 in segment 1.
Pencast: A type of content sharing via the web.
Penlet Developers: Java programmers who create the penlet application using the
Livescribe Platform Java API and an IDE.
Penlet: Java application installed on the Pulse smartpen. Penlets are created using
the Livescribe Platform Java API and are based on the Java Platform, Micro Edition
(Java ME) and CLDC (Connected Limited Device Configuration). When a user taps (a
penDown event) on an active region of a penlet, it will de-active the current running
penlet and activate the new one. See Syslet.
87
Getting Started with the Livescribe Platform SDK
Quick Commands: A series of commands you can write on dotted paper to quickly
learn the current status of your Pulse smartpen.
Quick Record: A method of quickly recording with your Pulse smartpen. Activate
Quick Record by pressing and holding your Pulse smartpen power button for two
seconds.
Region Collection: A collection of regions on a single page of dot paper.
Region Id: An internal 64-bit number that uniquely identifies an Active Region to a
smartpen. The Region Id encodes: Area Id, Instance Id, Occlusiveness, and Z-order,
among other things.
Region Id: An internal 64-bit number that uniquely identifies an Active Region to a
smartpen. The Region Id encodes: Area Id, Instance Id, Occlusiveness, and Z-order,
amongst other things. An Active Region is a portion of paper. Active Regions may
overlap in which case their Z-order defines the ordering of events delivered and their
occlusive property defines whether active regions with lower Z-orders are processed
at all.
Region: See Active Region.
Resources: Images and audio files used by a penlet. They are included in the
project and are packed into the JAR when the penlet is built.
Session: (in Paper Replay). The audio (with or without linked notes) that is recorded
between the time the user taps Start and Stop on the Paper Replay paper controls.
Also known as a Paper Replay Recording.
Share: Upload file(s) to online account (myLivescribe), presumably for sharing with
others.
Smartpen Application: The combination of a penlet and Paper Product that enables
a Pulse smartpen to interact with dot paper.
Smartpen Movie: An animation that plays on the Pulse smartpen’s OLED.
Smartpen: The Pulse™ smartpen, and subsequent generations of smartpens, sold
by Livescribe.
Static Region: An Active Region specified by the developer in the paper product
definition (see AFD). The dot paper usually has a printed graphic to indicate the
location and usage of the static Region. For example, the Paper Replay control bar at
88
Getting Started with the Livescribe Platform SDK
the bottom of each page in a Livescribe notebook is implemented as a group of static
regions. See Active Region, Dynamic Region, Claiming, Linking, and Fixed
Print.
Syslet: A special kind of system-level penlet that provides system-level functionality
for menuing and volume control. Unlike normal penlets, when a penDown occurs on
a Region ID of a syslet, the currently active penlet does not lose focus. See Penlet.
TTS: Text to Speech.
UGC: User Generated Content. Data generated by a Pulse smartpen user. This
information can be shared with the Livescribe Online community.
USB Mobile Charging Cradle: The included cradle that charges and connects your
Pulse smartpen to your computer.
User Input: The most common way for users to enter commands and data to a
penlet is by writing or tapping on paper. User input is captured through smartpen
events (such as penDown and strokeCreated) which are handled by a penlet.
Virtual Notebook: Collection of digitized pages gathered into a notebook that does
not necessarily have a physical paper counterpart.
Virtual Page: Collection of ink or audio or both, gathered from other pages,
collected into a digitized page that does not necessarily have a physical paper
counterpart.
Web Services: A comprehensive set of on-line services to support users,
developers, and Pulse smartpen partners.
89