1
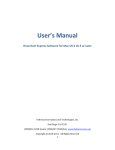
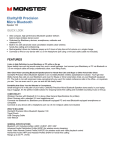
 User Manual
Contents What’s in the box? ........................................................................................................ 3 Introduction .................................................................................................................. 4 Specifications ................................................................................................................ 7 Getting Started .............................................................................................................. 9 System requirements .............................................................................................. 9 Physical set‐up ...................................................................................................... 10 Installing the drivers .............................................................................................. 11 PC: instructions for installation of AMCAP driver: .......................................... 11 MAC: instructions for installation of webcam monitor driver ......................... 14 Functionality................................................................................................................ 20 (PC) ....................................................................................................................... 20 (Mac) .................................................................................................................... 25 Troubleshooting/FAQS ................................................................................................ 30 Cleaning and handling ................................................................................................. 35 Warranty Information ................................................................................................. 36 Contact details/more information ............................................................................... 39 What’s in the box? 1. Agent V6 with USB cord (1) 2. Primary Stand (2) 3. Desktop stand (3) 4. Macbook/iMac clip (4) 5. LCD Clip (5) 6. Cord wrap (6) 7. Lens protector/ cleaner, (7) 8. Tripod Adaptor (8) 9. User Manual (9) (underside of lens unit __inner box) 10. Quickstart Guide (10) (underside of lens __unit inner box) Introduction Congratulations on purchasing the aGent V6 edition webcam. The aGent V6 is a true piece of revolutionary technology. It is compatible with both PC and Mac operating systems and its 5 layer glass; true Full HD 2.0 megapixel lens provides some of the sharpest picture around. The aGent V6 also includes a whole host of other features including bright light autoexposure, internal digital stereo microphone, 3 different stands, a protective lens cloth and a downloadable driver software suite with an amazing range of features. Manufactured to the highest standards, the aGent is backed by a 2 year warranty, so you can be confident that you have made the right choice. The V6 has a number of upgrade features from its earlier editions. Its new sensor is able to achieve some of the greatest picture clarity on the market, and an upgraded inbuilt digital stereo microphone that runs solely through the USB cord will ensure you will sound crystal clear every time. A range of new features and additions to the accessory list have also been included to help you get the most out of your new aGent webcam. Introduction (continued) The aGent V6 can be used for a number of different purposes, which will be run through in this manual including, but not limited to: ‐
Video email/capture, editing and special effects using the Webcam monitor/AmCap applications; ‐
Video conferencing with MSN, Skype, Yahoo messenger, iChat and many others; and ‐
Video up to an incredible full HD 2MP resolution, or 8MP snapshot interpolated resolution. The following manual will provide you with a step by step procedure for setting up and using your webcam. We hope this helps you on your way to having a most enjoyable experience with your aGent V6. Specifications PC and Mac Compatibility Windows® XP, Vista, 7 and over Min Operating system Mac OSX 10.4.3 or higher, G4 and Intel Macs Full HD 2MP. Up to 5MP by interpolation Video Capture Full HD 2MP. Up to 8MP by interpolation Still Capture image 5 Layer glass 2.0 MP resolution Lens UVC Plug and play for Windows XP SP2 , Vista, 7 and over, Mac OSX 10.4.3 or greater, and iChat 10.4.9 or later Casing German quality steel casing Webcam Software Compatibility Works with iChat, MSN, Yahoo, Skype, AOL, Oovoo and all other major chat programs Driver Software Plug and play webcam with additional Mac and PC drivers and utilities and webcam software (downloadable) 1 x USB 2.0 connection Connections Specifications (continued) Focus adjustment Manual focus and auto exposure with bright light technology Digital zoom 4X (with compatible driver ) Continuous speed shooting 30 frames per second Cables 1 x USB cable: 5”8 in/175 cm Video Input Motion sensor software, automatic face tracking technology (with compatible software driver) Peripheral Devices Graphics card Image focus length 5cm – infinity Brightness/Contrast Automatic colour compensation and brightness adjustment Dynamic Range Greater than 72 db Warranty 24 Month limited warranty. Refer to warranty section. Getting Started System requirements PC •
•
•
•
•
•
•
Windows XP, Vista, Windows 7 or higher Pentium III 300 (Pentium III 500 recommended), Celeron, AMD Athlon processor 512 MB RAM (or minimum OS requirement, whichever is higher) 200 MB free hard drive space 1 available USB port CD‐ROM drive 16‐bit colour display adaptor. MAC •
•
•
•
•
OSX 10.4.3 or higher, G4, G5 and Intel Macs 500 MHz processor 512 MB RAM 200 MB Free hard drive space 1 Available USB port. Physical set‐up Your package includes a number of different stands to suit your preferences. Simply screw the stand into tripod adaptor then into the webcam lens unit. Note: the macbook clip reversed is the iMac clip. iMac Clip LCD clip
Macbook/laptop clip Installing the drivers PC: instructions for installation of PC driver: The PC driver allows the user utilise a great number of features, such as facetracking, zoom, video recording, image capture, image manipulation and more. i.
Plug the aGent webcam into a USB port (not through a USB hub) and set position desirably. See page 7 for some ideas. The Webcam should install automatically with notification appearing in the bottom right hand corner of your screen notifying you that the device is ready to use. ii.
iii.
If you would like additional functionality we recommend downloading the aGent V6 driver from our website http://aGent.liquiddigital.com.au/download.htm Follow instructions on the installation wizard to install the aGent V6 driver. iv.
After installation is complete, click finish, and then restart your computer. v.
Open AMCAP either through the desktop shortcut or through the windows start bar – look for AMCap, under the ‘VIMICRO USB 2.0 UVC Camera’ folder. vi.
If the aGent V6 is not automatically selected, do so in the devices menu. Select ‘aGent V6 HD’. Be sure to also select ‘Microphone ’. If the picture does not appear, select preview in the options menu vii.
To manually adjust the focus, turn the focus ring at the front of the webcam. MAC: instructions for installation of webcam monitor driver The aGent V6 is plug‐and‐play for all Mac users. No driver is required, however, for added functionality you may wish to install the included Webcam Monitor driver. i.
Plug the aGent webcam into a USB port (not through a USB hub) and set position desirably. ii.
Download the V6 webcam driver from http://agent.liquiddigital.com.au/download.htm i) Plugging in the USB ii) Inserting the CD iii.
Open the downloaded folder and click on Agent V6 Driver Installer.mpkg…………. iv.
v.
The installation screen will appear. Please follow the onscreen instructions vi.
Open the application folder on your hard drive and find Webcam Monitor (normally under ‘applications’). This will open the webcam image. vii.
To alter the video and audio settings go to the ‘Monitor’ tab. Here you will find the video and sound settings as well as the image size controls and recording options. viii.
viii.
To select the aGent webcam go to ‘Video Settings’, ‘Source’ and select ‘aGent V6 HD’ To adjust image quality/speed of frames select the compression tab and adjust accordingly. A higher image quality will reduce the video speed and vice versa. ix.
To setup the microphone, select Monitor>Sound Settings. Under the Source tab, select ‘aGent V6 HD’. When you tap, or talk into the microphone, the level bars should rise and fall. From this menu, you can also adjust gain and volume, by shifting the bars across to your desired level. To switch between mono and stereo modes, select ‘sample’ and adjust accordingly. To adjust compression settings, select the ‘compression’ tab and adjust accordingly. Functionality (PC) The driver for PC is called AMCap and can perform an amazing range of functions. You may first want to get the basics settings sorted. Changing the settings To adjust the video settings, such as contrast, brightness etc, click on ‘Video Capture Filter’ under the options menu. Select the ‘Video Proc Amp’ Tab. Click ‘Apply’ once the changes have been made. Special effects Whilst in the preferences menu, you can also select a whole range of other functions, such as face tracking, face effects, zoom, flip and others. •
Use the feature tab to choose from a range of screen effects •
Use the face effects tab to choose from a whole range of amusing novelty face effects •
Use the Camera control tab to modify exposure levels •
Use the Face tracking tab to utilise the zoom and face tracking features. Capturing images and videos To capture a still image, use the ‘Get Image’ application that appears in the program bar in the bottom right hand corner of your screen. Right click it, and then select your desired image size. Get Image icon used to capture still images After the image appears on your screen, you can save as required by simply clicking on file> save. Please note, that in order for this to function correctly, you will have to select ‘RGB format’ in the colour space box in the preferences menu. To do this, click on ‘Video capture pin’ under the options menu and then change accordingly if it has not defaulted to this option. To record videos, first select a file path for which you want the file to be saved under. To do this, click on file>set capture file and save accordingly. You can then select the desired output size by clicking on options>Video capture Pin. Click on the output size dropdown menu to select the appropriate size. Please note that the majority of special effects will not work on resolutions greater than 640 X 480. Please note that increasing the output size and frame rate will increase the file size To start recording, click on ‘Start Capture’ under the capture menu. To stop recording (if a time limit has not been set or if you want to finish recording early) click on ‘stop capture’, under the capture menu. To find the video file you just recorded, simply go the folder that you chose the video file to be saved and the video file will be there in avi format. Webcam Monitor (Mac) Changing the settings To adjust settings, such as Saturation, Brightness and Contrast, select the ‘Adjustments’ tab under Monitor > Video settings Capturing still images and videos Included in the software bundle is the application Camgrabber. This can be used to capture still images. To record videos in Webcam Monitor, click on monitor>’Record Without Hogging Machine’ (or Record Until MouseClick). You will now be prompted to select the file path and file name of the video you wish to record The video will now begin recording and can be stopped at the users prompt. The video will now be saved at the selected location with an image such as the one below. Special effects To utilise a whole range of special effects, we recommend you utilise the Camtwist application that is available via link from the download section of www.liquiddigital.com.au . Please note that this will not install automatically, and you will need to select the application in the installation process. Once installed: 1.
Open Camtwist 2.
Select ‘webcam’ 3.
Under tools menu select ‘preview’ 4.
Open ‘webcam monitor’ Mac driver 5.
Select ‘monitor’ 6.
Select ‘video settings’ 7.
Select ‘source’ 8.
Select ‘camtwist
Add on Features Get the most out of your aGent V6 webcam with these fantastic add on products. Attach your professional lenses! With our optional lens adaptor you can attach any normal photographic 37mm lens. The adaptor is compatible with both the aGent webcam range and the discontinued Apple iSight. Click here for more details of the aGent/iSight lens adaptor unit. Mini Tripod Your aGent V6 comes with tripod mount so why not make use of it. The aGent V6 mini tripod has extendable legs and lightweight and compact. It’s the perfect size for the accompanying webcam.
Suction Cup Gorilla Tripod Get every angle anywhere? This handy suction cup tripod allows you to position your aGent V6 at any angle. Simply stick the suction cup to any smooth flat surface. Includes a quick slide attachment. Troubleshooting/FAQS What is the difference between the V5 and V6 edition webcams? The V6 has an upgraded sensor and controller for outstanding picture quality. The clarity is by far the best yet in the aGent series and is amongst the best in the market. The V6 also has an upgraded inbuilt microphone, for improved sound quality. There are also new additions to the accessories list to help you get the best experience out of your new aGent webcam such as the new attachment system featuring the clip on iMac/laptop clip and the new LCD clip. My operating system is lower than OSX 10.4.3. Can I still use the aGent webcam? If you at least have OSX version 10.4 (Tiger), but less than OSX 10.4.3, you can get a free update by following the instructions here: http://support.apple.com/kb/HT1338 The aGent V6 will not work on operating systems below OS 10.4.3 on Mac. I only get a blank screen in Webcam Monitor/Amcap? If you have a Mac, please refer to page 12 of this manual. If you have a PC, please refer to section 10 of this manual. My PC/Mac is not picking up the Webcam? Please ensure that the driver is installed and that your system specifications match those required in page 5 of this manual. If you have further problems, please contact us. My picture is blurry/out of focus. How do I fix this? You may find that the aGent is not automatically focused perfectly considering your circumstances. To get your desired clarity, turn the manual focus ring at the front of the webcam. This part is shown in page 4 of this manual. How do I adjust basic settings such as brightness and sharpness? ‐ Generally, each piece of software that the aGent V6 can be used with will have a webcam settings option. If you are using Webcam Monitor/Amcap, please refer to 14 of this manual. If you are using a chat program such as MSN messenger, refer to the chat programs section of this manual, beginning on page 18. I can’t get my aGent webcam setup on Skype. To use Skype you will need to ensure that the webcam is not in use by another program. Please close other programs that may be using the webcam. I can’t get the microphone to work when chatting. Refer to the setup options beginning on page 19 of this manual. We recommend that you first check whether the volume bars rise and fall when you talk. This means the microphone is working. If it does not register, ensure that you have selected ‘aGent V6’ from the audio/microphone selection box. Is the aGent V6 compatible with iMovie? It is possible to import movies recorded on the aGent V6 into iMovie however the aGent V6 will not connect to iMovie directly. We recommend recording video through webcam monitor and importing the video into iMovie. Is the aGent V6 compatible with Photobooth? Yes it is compatible with the latest version of Photobooth. Is the aGent V6 compatible with iChat? The V6 is plug‐and‐play with iChat AV. How do I use special effects whilst using a chat program? Easy! For Mac users, Camtwist is the best option and downloadable through a link on our download page at www.liquiddigital.com.au . You can utilise a whole range of special effects whilst chatting as normal. Please refer to page 17 of this manual for further instructions. Is the webcam compatible with Mac minis? Absolutely! You will just need to make sure that you have the minimum system requirements. What size is the webcam? Approximately 78mm x 30mm Can I use the webcam with my telescope? Customers have noted that the aGent’s size is particularly perfect for a 1 1/4" focuser. The webcam uses objects’ sharpness as a criterion, so customers have used it successfully through a telescopic eyepiece in the past. Contact us for more details and url’s of other buyers experiences Important note: Disassembling the webcam will void the warranty. Please consider this when purchasing the webcam for this purpose. What sort of warranty does the aGent V6 come with? The aGent V6 comes with a 2 year manufactures warranty. Please refer to page 29 of this manual for more information. Can I attach different lenses to the webcam? Absolutely! Simply buy the aGent/iSight webcam lens adaptor from our website and you can attach many different professional photography lenses such as UV filters, fisheye lenses and the list goes on! Cleaning and handling To clean the outside of the aGent V6 and its components, use a soft, lint‐free cloth that has been slightly dampened. Ensure the aGent and the components are unplugged and that you avoid getting any moisture in any of the openings. Please refrain from using and aerosol sprays, abrasives, alcohol or anything of that nature. When transporting the webcam, we recommend using the box provided as a means of protecting the webcam. We strongly recommend that you do not attempt repairs or disassembling, as it presents a hazard to your safety, and my void the warranty. If there is an issue with the webcam, please contact us. Warranty Information 1.1 Limited Warranty: Liquid Digital Solutions declares that any hardware product accompanying this document is free from any significant defects in material and workmanship for a period of two (2) years from the date of purchase. This warranty is limited to the original purchaser, and is not transferrable. This Warranty gives you specific rights under the relevant law. 1.2 Warranty Claims: Liquid Digital Solution’s liability and your remedy for any breach in the aforementioned warranty shall be, at our discretion, to repair and replace the hardware, or to refund the price paid, minus any shipping costs involved in returning the product back to Liquid Digital Solutions. This is subject to the product being returned to a place, as Liquid Digital Solutions directs, with a copy of the sales receipt or invoice. Any replaced hardware will be warranted for the remainder of the original warranty period, or thirty (30) days, whichever is longer. Such remedies will be void if failure of the hardware is a result of misuse, abuse, accident, or unauthorised modification or disassembly. Upon request by Liquid Digital Solutions, you must provide proof of the original purchase of the hardware by a dated invoice or receipt. 1.3 Customer Support: Before submitting a warranty claim, please ensure that you have followed the installation and set‐up instructions carefully. We recommend that any issues you may have with the webcam first be bought to our support team, who may be able to rectify the problem, or provide advice on how to do so. For support, please contact [email protected] with a description of the problem you are having and the operating platform in use with the webcam. General Exclusions and Limitations 2. To the full extent permitted by law, but subject always to 1.1 and 1.2, the Standard Warranty will not apply: 2.1 If the product has not been installed, operated, maintained or used in accordance with the manufacturer's instructions or specifications provided with the product. 2.3 To damage, malfunction or failure resulting from alterations, accident, misuse, abuse, fire, liquid spillage, mis‐adjustment of customer controls, use on an incorrect voltage, power surges and dips, thunderstorm activity, acts of God, voltage supply problems, tampering or unauthorised repairs by any persons, use of defective or incompatible accessories, the operation of a computer virus of any kind, exposure to abnormally corrosive conditions or entry by any insect, vermin or foreign object in the product. 2.4 To damage arising during transportation, installation or while moving the product, or to any transportation costs of the product or any parts thereof to and from the owner, unless otherwise specified in these warranty terms. 2.5 To any third‐party software or hardware not contained in the product as originally configured by the manufacturer. 2.6 To any failure, to the extent that the failure is not a failure of the product to perform in accordance with its specifications. 2.7 To replacement or repair of any (1) consumables (including batteries and cables), or (2) lost parts or accessories. 2.8 Liquid Digital Solutions will not be liable for any loss, damage or alterations to (1) third party hardware or software; or (2) programs, data or information stored on any media or any part of the product, no matter how occurring; or for any loss or damage arising from loss of use, loss of profits or revenue, or for any resulting indirect or consequential loss or damage. Contact details/more information For more information and downloads, please visit: www.liquidigital.com.au To contact us: [email protected]