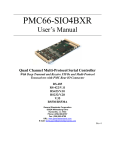
1
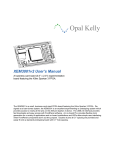
Opal Kelly
XEM3050 User’s Manual
A compact (75mm x 50mm) integration board featuring the Xilinx Spartan-3 FPGA and on-board SDRAM,
SSRAM, and SPI Flash.
The XEM3050 is a compact USB-based FPGA integration board featuring the Xilinx Spartan-3 FPGA, 64
MB 2x16-bit wide SDRAM, 512 kx18 SyncSRAM, 8 Mb non-volatile flash, high-efficiency switching power
supply, Xilinx configuration PROM, and two high-density 0.8-mm expansion connectors. The USB 2.0 interface provides fast configuration downloads and FPGA-PC communication as well as easy access with
our popular FrontPanel software and developer’s API. An on-board clock generation device has three
independent PLLs and five flexible outputs available to the FPGA, SDRAM, and expansion connectors.
Software, documentation, samples, and related materials are
Copyright © 2006-2014 Opal Kelly Incorporated.
Opal Kelly Incorporated
Portland, Oregon
http://www.opalkelly.com
All rights reserved. Unauthorized duplication, in whole or part, of this document by any means except for brief
excerpts in published reviews is prohibited without the express written permission of Opal Kelly Incorporated.
Opal Kelly, the Opal Kelly Logo, and FrontPanel are trademarks of Opal Kelly Incorporated.
Linux is a registered trademark of Linus Torvalds. Microsoft and Windows are both registered trademarks of
Microsoft Corporation. All other trademarks referenced herein are the property of their respective owners and no
trademark rights to the same are claimed.
Revision History:
Date
Description
20071205
Initial release.
20080107
Added missing FPGA pin names from JP3 connection reference.
20080311
Clarified PLL connections.
20080806
Fixed typo in clock to FPGA pin mapping.
20090130
Added missing pin mapping for HI_MUXSEL.
20090205
Fixed incorrect I2C constraints.
20091113
Added MUXSEL pin location to Quick Reference.
20090521
Fixed grammatical typos in SDRAM section.
20091208
Fixed typo on FPGA pin mapping for pin SDRAM1-D15.
20100618
Replaced missing notes on SSRAM connections.
20100720
Added additional notes regarding GSI SSRAM naming.
20140331
Replace pin list tables with reference to Pins.
Contents
Introducing the XEM3050 . . . . . . . . . . . . . . . . . . . . . . . 5
PCB Footprint. . . . . . . . . . . . . . . . . . . . . . . . . . . . . . . . . . . . . 5
BRK3010 Breakout Board . . . . . . . . . . . . . . . . . . . . . . . . 5
Functional Block Diagram. . . . . . . . . . . . . . . . . . . . . . . . . . . . 6
Power Supply. . . . . . . . . . . . . . . . . . . . . . . . . . . . . . . . . . . . . 6
Supply Heat Dissipation (IMPORTANT!!). . . . . . . . . . . . . 6
DC Power Connector. . . . . . . . . . . . . . . . . . . . . . . . . . . . 7
Expansion Bus Power . . . . . . . . . . . . . . . . . . . . . . . . . . . 7
USB Bus Power. . . . . . . . . . . . . . . . . . . . . . . . . . . . . . . . 7
USB 2.0 Interface. . . . . . . . . . . . . . . . . . . . . . . . . . . . . . . . . . 7
On-board Peripherals. . . . . . . . . . . . . . . . . . . . . . . . . . . . . . . 7
Serial EEPROM. . . . . . . . . . . . . . . . . . . . . . . . . . . . . . . . 8
Cypress CY22393 PLL. . . . . . . . . . . . . . . . . . . . . . . . . . . 8
Xilinx Configuration PROM. . . . . . . . . . . . . . . . . . . . . . . . 8
16-MByte Synchronous DRAM (2x 32-MByte) . . . . . . . . 8
9-Mb Word-Wide Synchronous SRAM . . . . . . . . . . . . . . 8
8-Mb SPI Serial Flash . . . . . . . . . . . . . . . . . . . . . . . . . . . 8
LEDs and External LED Connections . . . . . . . . . . . . . . . 8
Expansion Connectors. . . . . . . . . . . . . . . . . . . . . . . . . . . . . . 9
FrontPanel Support. . . . . . . . . . . . . . . . . . . . . . . . . . . . . . . . . 9
Programmer’s Interface. . . . . . . . . . . . . . . . . . . . . . . . . . 9
Applying the XEM3050 . . . . . . . . . . . . . . . . . . . . . . . . . 11
Host Interface. . . . . . . . . . . . . . . . . . . . . . . . . . . . . . . . . . . . . 11
MUXSEL. . . . . . . . . . . . . . . . . . . . . . . . . . . . . . . . . . . . . . 12
I2C Connections. . . . . . . . . . . . . . . . . . . . . . . . . . . . . . . . 12
LEDs. . . . . . . . . . . . . . . . . . . . . . . . . . . . . . . . . . . . . . . . . . . . 13
PLL Connections . . . . . . . . . . . . . . . . . . . . . . . . . . . . . . . . . . 14
Memory Clocks . . . . . . . . . . . . . . . . . . . . . . . . . . . . . . . . 14
JTAG. . . . . . . . . . . . . . . . . . . . . . . . . . . . . . . . . . . . . . . . . . . . 14
JP1 - JTAG Connector. . . . . . . . . . . . . . . . . . . . . . . . . . . 14
JTAG Connection Chain. . . . . . . . . . . . . . . . . . . . . . . . . . 14
SPI Flash Connections. . . . . . . . . . . . . . . . . . . . . . . . . . . . . . 15
SDRAM Connections. . . . . . . . . . . . . . . . . . . . . . . . . . . . . . . 15
Clock Configuration (Source Synchronous). . . . . . . . . . . 17
Synchronous SRAM. . . . . . . . . . . . . . . . . . . . . . . . . . . . . . . . 17
SSRAM / FPGA Connections . . . . . . . . . . . . . . . . . . . . . 18
Expansion Connectors. . . . . . . . . . . . . . . . . . . . . . . . . . . . . . 18
JP2. . . . . . . . . . . . . . . . . . . . . . . . . . . . . . . . . . . . . . . . . . 19
JP3. . . . . . . . . . . . . . . . . . . . . . . . . . . . . . . . . . . . . . . . . . 19
Setting I/O Voltages. . . . . . . . . . . . . . . . . . . . . . . . . . . . . 19
Considerations for Differential Signals. . . . . . . . . . . . . . . 20
BRK3010 Breakout Board. . . . . . . . . . . . . . . . . . . . . . . . . . . . 21
Xilinx Configuration PROM. . . . . . . . . . . . . . . . . . . . . . . . . . . 21
Generate an FPGA Programming File. . . . . . . . . . . . . . . 21
Generate a PROM Programming File . . . . . . . . . . . . . . . 21
Programming the Configuration PROM. . . . . . . . . . . . . . 23
XEM3050 User’s Manual
Booting from PROM. . . . . . . . . . . . . . . . . . . . . . . . . . . . . 24
XEM3050 Mechanical Drawing. . . . . . . . . . . . . . . . . . . 26
BRK3010 Mechanical Drawing . . . . . . . . . . . . . . . . . . . 27
4
www.opalkelly.com
XEM3050 User’s Manual
Introducing the XEM3050
The XEM3050 is a compact (75mm x 50mm, 2.95” x 1.97”) FPGA board featuring the Xilinx
Spartan-3 FPGA. Designed as a full-featured integration system, the XEM3050 provides access
to over 110 I/O pins on its 676-pin Spartan-3 device and has 64-MByte of SDRAM, 1-MByte of
SSRAM, and 1-MByte of Flash memory available to the FPGA. The XEM3050 is designed to
work with small to medium-sized FPGA designs with a wide variety of external interface requirements.
PCB Footprint
A mechanical drawing of the XEM3050 is shown at the end of this manual. The PCB is 75mm
x 50mm with four mounting holes spaced as shown in the figure. These mounting holes are
electrically isolated from all signals on the XEM3050. The two connectors (USB and DC power)
overhang the PCB by approximately 4mm in order to accomodate mounting within an enclosure.
The XEM3050 has two high-density 80-pin connectors on the bottom side which provide access
to many FPGA pins, power, JTAG, and the microcontroller’s I2C interface.
BRK3010 Breakout Board
A simple breakout board (the BRK3010) is provided as an optional accessory to the XEM3050.
This breakout board provides easy access to the high-density connectors on the XEM3050
by routing them to lower-density 0.1”-spaced thru-holes. The breakout board also provides a
convenient reference for building boards that will mate to the XEM3050. (NOTE: The XEM3010
and XEM3050 have compatible expansion connectors, so the BRK3010 is the breakout board for
both XEM3010 and XEM3050 devices.)
A mechanical drawing of the BRK3010 is also shown at the end of this document.
www.opalkelly.com
5
XEM3050 User’s Manual
Functional Block Diagram
PROM
(16Mb)
USB
2x SDRAM
(16Mx16)
USB Micro
(CY68013A)
Host Interface
Bus
PLL
(CY22393)
Spartan-3 FPGA
(XC3S4000-5FGG676)
3 PLL CLKs
58 I/O
2 GCLK
1 PLL CLK
58 I/O
2 GCLK
Flash
(8Mb)
4 LEDs
XBUS (JP2)
1 PLL CLK
YBUS (JP3)
Power Supply
The XEM3050 is designed to be operated from one of two power sources, depending on user
requirements. One of these two sources provides power for the two high-efficiency switching
regulators on-board to provide 3.3v and 1.2v. 2.5v and 1.8v are derived from the 3.3v supply using small low-dropout (LDO) regulators.
The two sources and the respective XEM3050 configuration for each are shown in the table below. In both configurations, the XEM3050 requires a clean, well-regulated supply between 4.5v
and 5.5v.
Power Source
XEM3050 Configuration
DC Power Jack (P1)
No configuration is required. Attach a DC power source to P1 that
supplies a clean, regulated voltage of 4.5v to 5.5v.
Expansion Connector
(JP3)
No configuration is required. Provide a clean, regulated voltage of
4.5v to 5.5v to the VDC pins on JP3.
IMPORTANT NOTE: Only one power source should be connected at any time. Attaching multiple power sources could damage the XEM3050 and possibly the power source, and void the
warranty on the XEM3050.
There are two switching regulators on-board, one for the 3.3v supply and one for the 1.2v supply.
The 3.3v supply is specified to provide up to 3 A of continuous current. The 1.2v is specified to
provide up to 6 A of continuous current. It is unlikely that the XEM3050 will consume this much
current, so much of this power will be available to expansion devices using the expansion connectors. However, you should perform all due diligence to determine the power requirements of
your design and those of your attached components.
Supply Heat Dissipation (IMPORTANT!!)
Due to the limited area available on the small form-factor of the XEM3050 and the density of logic
provided, heat dissipation may be a concern. This depends entirely on the end application and
cannot be predicted in advance by Opal Kelly. Heat sinks may be required on any of the devices
6
www.opalkelly.com
XEM3050 User’s Manual
on the XEM3050. Of primary focus should be the FPGA (U12), the two switching power supplies
(U1, U4), and the two SDRAM (U14, U15). Although the two switching supplies are high-efficiency, they are very compact and consume a small amount of PCB area for the current they can
provide.
If you plan to put the XEM3050 in an enclosure, be sure to consider heat dissipation in your
design.
DC Power Connector
The DC power connector on the XEM3050 is part number PJ-102AH from CUI, Inc. It is a standard 2.1mm /5.5mm power jack. The outer ring is attached to DGND. The center pin is attached
to +VDC on expansion connector JP3 as well as the inputs to the two switching regulators on the
XEM3050.
Expansion Bus Power
The expansion bus has pins for +VDC, +3.3V, and +1.2V, making it flexible for nearly any supply
scenario. In particular, the following scenarios have been considered:
•
•
•
•
+VDC is provided to an expansion device which use or regulate it as necessary.
+VDC is provided by an expansion device to power the XEM3050.
+3.3V and/or +1.2V are provided to expansion devices as regulated, reliable supplies.
+3.3V and/or +1.2V are provided by an expansion device to power the XEM3050. In this
case, the switching regulators on the board must be removed. This option may be useful
to applications where a switching supply is not desired.
USB Bus Power
The USB 2.0 specification allows for up to 2.5 W (500mA at 5v) to be provided to external peripherals over the USB cable. Due to the potentially high power requirements of the XEM3050,
USB power has not been connected. However, the XEM firmware reports to the USB hub as a
500-mA device. Therefore, if you choose, you can hardwire the USB power to VDC to bus power
the XEM.
Before relying on USB power, you should be aware of the limitations and the fact that using USB
power may render the XEM3050 a USB-noncompliant device.
USB 2.0 Interface
The XEM3050 uses a Cypress CY7C68013A FX2LP USB microcontroller to make the XEM a
USB 2.0 peripheral. As a USB peripheral, the XEM is instantly recognized as a plug and play
peripheral on millions of PCs. More importantly, FPGA downloads to the XEM happen blazingly
fast, virtual instruments under FrontPanel update quickly, and data transfers are much faster than
the parallel port interfaces common on many FPGA experimentation boards.
On-board Peripherals
The XEM3050 is designed to compactly support a large number of applications with a small number of on-board peripherals. These peripherals are listed below.
www.opalkelly.com
7
XEM3050 User’s Manual
Serial EEPROM
A small serial EEPROM is attached to the USB microcontroller on the XEM3050, but not directly
available to the FPGA. The EEPROM is used to store boot code for the microcontroller as well
as PLL configuration data and a device identifier string.
The PLL configuration data is loaded from EEPROM and used to reconfigure the PLL each time
a new configuration file is loaded to the FPGA. Therefore, stable and active clocks will be present on the FPGA pins as soon as it comes out of configuration. The stored PLL configuration
may be changed at any time using FrontPanel’s PLL Configuration Dialog.
The EEPROM also stores a device identifier string which may be changed at any time using
FrontPanel. The string serves only a cosmetic purpose and is used when multiple XEM devices
are attached to the same computer so you may select the proper active device.
Cypress CY22393 PLL
A multi-output, triple-PLL clock generator can provide up to five clocks, three to the FPGA and
another two to the expansion connectors JP2 and JP3. The PLL is driven by a 48-MHz signal
output from the USB microcontroller. The PLL can output clocks up to 150-MHz and is configured through the FrontPanel software interface or the FrontPanel API.
Xilinx Configuration PROM
A 16-Mbit Xilinx PROM (XCF16P) is included on some variants of the XEM3050. This PROM
allows the XEM3050 to operate without its USB tether by automatically configuring the on-board
FPGA during power-up. This PROM may be programmed over the board’s JTAG port using a
Xilinx configuration cable and the iMPACT software.
16-MByte Synchronous DRAM (2x 32-MByte)
The XEM also includes two 32-MByte SDRAM with fully-independent 16-bit word-wide interfaces
to the FPGA. These SDRAMs are attached exclusively to the FPGA and do not share any pins
with the expansion connector. The maximum clock rate of the SDRAM is 133 MHz. None of the
pins (control, address, or data) are shared between the two SDRAM busses.
The SDRAM is a Micron MT48LC16M16A2BG-75:D (or compatible).
9-Mb Word-Wide Synchronous SRAM
One synchronous SRAM (512k x 18 configuration) is included with dedicated address, data, and
control lines routed to the FPGA. The SSRAM is a GSI Technology GS881Z18BGD-200 (or
equivalent).
8-Mb SPI Serial Flash
One ST Microelectronics M25P80-VMW6G (or equivalent) SPI serial flash is connected to the
FPGA for non-volatile storage.
LEDs and External LED Connections
Four on-board LEDs are provided for general use. In addition, a 5-pin expansion connector (JP4)
allows the connection of a external LEDs. Four pins of this connector are wired to FPGA pins via
series 330-Ω resistors.
8
www.opalkelly.com
XEM3050 User’s Manual
Expansion Connectors
Two high-density, 80-pin expansion connectors are available on the bottom-side of the XEM3050
PCB. These expansion connectors provide user access to several power rails on the XEM3050,
two clock generator outputs, four FPGA clock inputs, the USB microcontroller I2C lines, the JTAG
chain, and 116 non-shared I/O pins on the FPGA.
The connectors on the XEM3050 are Samtec part number: BSE-040-01-F-D-A. The table below
lists the appropriate Samtec mating connectors along with the total mated height.
Samtec Part Number
Mated Height
BTE-040-01-F-D-A
5.00mm (0.197”)
BTE-040-02-F-D-A
8.00mm (0.315”)
BTE-040-03-F-D-A
11.00mm (0.433”)
BTE-040-04-F-D-A
16.10mm (0.634”)
BTE-040-05-F-D-A
19.10mm (0.752”)
FrontPanel Support
The XEM3050 is fully supported by Opal Kelly’s FrontPanel software. FrontPanel augments
the limited peripheral support with a host of PC-based virtual instruments such as LEDs, hex
displays, pushbuttons, toggle buttons, and so on. Essentially, this makes your PC a reconfigurable I/O board and adds enormous value to the XEM3050 as an experimentation or prototyping
system.
Programmer’s Interface
In addition to complete support within FrontPanel, the XEM3050 is also fully supported by the
FrontPanel programmer’s interface (API), a powerful C++ class library available to Windows and
Linux programmers allowing you to easily interface your own software to the XEM.
In addition to the C++ library, wrappers have been written for C#, Java, Python, and Ruby making
the API available under those languages as well. Sample wrappers are also provided for Matlab
and LabVIEW.
Complete documentation and several sample programs are installed with FrontPanel.
www.opalkelly.com
9
XEM3050 User’s Manual
10
www.opalkelly.com
XEM3050 User’s Manual
Applying the XEM3050
Host Interface
There are 24 pins that connect the on-board USB microcontroller to the FPGA. These pins comprise the host interface on the FPGA and are used for configuration downloads. After configuration, these pins are used to allow FrontPanel communication with the FPGA.
If the FrontPanel okHostInterface module is instantiated in your design, you must map the interface pins to specific pin locations using Xilinx LOC constraints. This may be done using the
Xilinx constraints editor or specifying the constraints manually in a text file. An example is shown
below:
Xilinx constraints for okHostInterface pin mappings:
www.opalkelly.com
11
XEM3050 User’s Manual
NET
NET
NET
NET
NET
NET
NET
NET
NET
NET
NET
NET
NET
NET
NET
NET
NET
NET
NET
NET
NET
NET
NET
NET
NET
NET
NET
“hi_in<0>”
“hi_in<1>”
“hi_in<2>”
“hi_in<3>”
“hi_in<4>”
“hi_in<5>”
“hi_in<6>”
“hi_in<7>”
“hi_out<0>”
“hi_out<1>”
“hi_inout<0>”
“hi_inout<1>”
“hi_inout<2>”
“hi_inout<3>”
“hi_inout<4>”
“hi_inout<5>”
“hi_inout<6>”
“hi_inout<7>”
“hi_inout<8>”
“hi_inout<9>”
“hi_inout<10>”
“hi_inout<11>”
“hi_inout<12>”
“hi_inout<13>”
“hi_inout<14>”
“hi_inout<15>”
“hi_muxsel”
LOC
LOC
LOC
LOC
LOC
LOC
LOC
LOC
LOC
LOC
LOC
LOC
LOC
LOC
LOC
LOC
LOC
LOC
LOC
LOC
LOC
LOC
LOC
LOC
LOC
LOC
LOC
=
=
=
=
=
=
=
=
=
=
=
=
=
=
=
=
=
=
=
=
=
=
=
=
=
=
=
“AF14”;
“AB5”;
“AC5”;
“AF12”;
“AE5”;
“AF5”;
“AF6”;
“AE6”;
“AD14”;
“AE12”;
“AA12”;
“AB12”;
“AB13”;
“AC13”;
“AA14”;
“Y14”;
“W14”;
“Y15”;
“AF11”;
“AE11”;
“AE10”;
“AE9”;
“AF8”;
“AE8”;
“AF7”;
“AE7”;
“AF13”;
Each of the samples installed with FrontPanel includes a copy of a template constraints file that
lists all the XEM3050 pins and maps them to the appropriate FPGA pins using LOC (location)
constraints. You can use this template to quickly get the pin locations correct on a new design.
MUXSEL
MUXSEL is a signal on the XEM3050 which selects the signal path to the FPGA programming
signals D0 and CCLK. When low (deasserted), the FPGA and USB microcontroller are connected. When high (asserted), the FPGA and PROM are connected.
In normal USB-programmed operation, J1 pulls MUXSEL low, connecting the FPGA and USB
microcontroller at all times. This allows USB-based programming of the FPGA and subsequent
USB communication with the FPGA design after configuration.
In order to allow the PROM to configure the FPGA, J1 switched to the PROM position. However,
if the USB is to communicate with the FPGA post-configuration, MUXSEL must be deasserted.
Therefore, the FPGA outputs MUXSEL so that, post-configuration, the FPGA can deassert MUXSEL and communicate over USB even after the PROM has configured it.
The end result is that your FPGA design should tie HI_MUXSEL to 0. This is the case regardless
of how the design was configured (via PROM or USB) and even if you have a PROM-less version
of the XEM3050. For example, in Verilog:
assign hi_muxsel = 1’b0;
I2C Connections
The FPGA on the XEM3050 is attached to the I2C lines from the USB microcontroller. In order
to avoid contention with the I2C bus, these lines should be set to high-impedance within your
12
www.opalkelly.com
XEM3050 User’s Manual
design. If this is not done, FrontPanel may timeout or hang when trying to communicate with the
XEM3050, particularly when programming the on-board PLL.
The following lines in your UCF (contraints) file will attach pull-ups to the I2C lines:
NET “i2c_scl”
NET “i2c_sda”
LOC = “AD9” | PULLUP;
LOC = “AD8” | PULLUP;
In addition, you will need to set these signals to high-impedance in your HDL. Here is an example of how to do this in Verilog:
assign i2c_sda = 1’bz;
assign i2c_scl = 1’bz;
LEDs
There are four LEDs and four external LED pins on the XEM3050. Each is wired directly to the
FPGA according to the tables below.
The LED anodes are connected to a pull-up resistor to +3.3VDD and the cathodes wired directly
to the FPGA. To turn ON an LED, the FPGA pin should be brought low. To turn OFF an LED,
the FPGA pin should be brought high.
The external LED connector is wired a bit differently. JP4-1 is attached to +3.3VDD. JP4-2
through JP4-5 are each attached through a 330-Ω resistor to an FPGA pin. Externally, you
should connect the four LED anodes to JP4-1 (+3.3VDD). The four cathodes should be attached
to the other pins on JP4.
LED
FPGA Pin
D2
Y17
D3
Y16
D4
W16
D5
W15
Ext LED
FPGA Pin
JP4-2
AF4
JP4-3
AD4
JP4-4
AE4
JP4-5
AB6
www.opalkelly.com
13
XEM3050 User’s Manual
PLL Connections
The PLL contains six output pins labelled SYS_CLK1 through SYS_CLK6. Three are available to
the FPGA and three are available to the expansion connectors as shown in the table below.
PLL Pin
Clock Name
Connection
CLKA
SYS_CLK1
FPGA - AE14
CLKB
SYS_CLK2
FPGA - AE13
CLKC
SYS_CLK3
FPGA - AD13
CLKD
SYS_CLK4
JP2-11
CLKE
SYS_CLK5
JP3-8
XBUF
SYS_CLK6
JP3-7
Memory Clocks
The memory clocks (SDRAM and SSRAM) are not connected directly to the PLL. Rather, their
clocks must be sourced from the FPGA in a source-synchronous configuration. Xilinx has a
number of application notes discussing clocking strategies and how they apply to the DCMs and
I/O registers.
JTAG
JP1 - JTAG Connector
JP1 is the 0.1”, 6-pin JTAG connector on-board and connects to the on-board JTAG chain which
includes the FPGA, configuration PROM, and expansion connector. These pins can be connected to an external JTAG command converter (such as the Xilinx JTAG cables) for additional
programming capability. The JP1 pins are connected as shown below:
JP1 Pin
Signal
1
+2.5VDD
2
TMS
3
TCK
4
TDO
5
TDI
6
DGND
JTAG Connection Chain
The JTAG chain is configured as shown in the diagram below. The PROM and expansion port
of this chain may be bypassed using optional 0-Ω resistors, as shown. R20 bypasses the PROM
and is inserted on PROM-less versions of the XEM3050. R20 is not inserted on XEM3050 versions with the PROM.
R37 bypasses the expansion connector and is inserted on all versions of the XEM3050. If your
application places additional components in the JTAG chain, you must remove R37. Note that
the JTAG signal level on the XEM3050 is 2.5-v. If your expansion board extends this chain, it
must also operate at 2.5-v or use level translation to be compatible.
14
www.opalkelly.com
XEM3050 User’s Manual
TDO
TDO (JP2-8)
XBUS
(JP2)
TDI (JP2-9)
JTAG
(JP1)
TDO
FPGA
TDI (JP1-5)
TDI TDO
R37
PROM
(XCF16P)
TDI
R20
SPI Flash Connections
The on-board SPI flash device is attached to the FPGA according to the following table.
Flash Pin
Signal
CLK
AD25
CS
AE24
DOUT
AE23
DIN
AF24
SDRAM Connections
The Micron SDRAMs are connected exclusively to the 3.3v I/O on Bank 0 and Bank 1 of the
FPGA. The tables below list these connections. SDRAM0 is U14 on the PCB. SDRAM1 is U15.
www.opalkelly.com
15
XEM3050 User’s Manual
16
SDRAM0 Pin
FPGA Pin
SDRAM0 Pin
FPGA Pin
CLK
C10
A10
A3
CKE
C9
A11
D9
CS
A4
A12
D11
WE
A5
D0
B11
CAS
C8
D1
B10
RAS
B6
D2
A10
BA0
D7
D3
A8
BA1
B5
D4
B9
LDQM
B7
D5
A7
UDQM
C12
D6
B8
A0
D6
D7
A6
A1
B4
D8
E11
A2
B3
D9
A11
A3
C4
D10
D13
A4
D5
D11
B12
A5
C5
D12
E12
A6
C6
D13
A12
A7
D8
D14
E13
A8
D10
D15
C13
A9
E9
www.opalkelly.com
XEM3050 User’s Manual
SDRAM1 Pin
FPGA Pin
SDRAM1 Pin
FPGA Pin
CLK
D16
A10
A19
CKE
A17
A11
E16
CS
A20
A12
E15
WE
A21
D0
E22
CAS
D19
D1
C23
RAS
B21
D2
E18
BA0
D18
D3
D22
BA1
B20
D4
C22
LDQM
B22
D5
A23
UDQM
C15
D6
B23
A0
B18
D7
A22
A1
B19
D8
C17
A2
B17
D9
C19
A3
D17
D10
C18
A4
A15
D11
D20
A5
A14
D12
E21
A6
A16
D13
C21
A7
B15
D14
E20
A8
D14
D15
D21
A9
B16
Clock Configuration (Source Synchronous)
The XEM3050 has been designed to support SDRAM clocking in only the “source synchronous”
mode. Note that the two SDRAM clocks are independent, so you will need to configure the generation of both output clocks.
In this mode, the clock signal is sourced by the FPGA rather than the PLL. The FPGA pin N9 is
configured as an output and provides the clock signal to the SDRAM. Typically, this setup uses
the DDR features of the IOB to provide a clock that is well-synchronized with the signals output
to and input from the SDRAM, thus minimizing signal skew with respect to the clock.
Synchronous SRAM
The SSRAM has a full 18-bit wide data bus (2 bytes + 2 parity bits). The CLK pin is attached
directly to the FPGA with the intent that the FPGA provide a synchronous clock in the so-called
“source synchronous” manner. This helps align clock and data between the FPGA and SSRAM.
The redundant chip enable pins of the SSRAM have been tied to enable, as appropriate. E2 is
tied to +3.3VDD and E3 is tied to DGND. Both byte enabled (BW1 and BW2) are tied to DGND.
FT controls flow-through or pipeline mode and is left unconnected which selects pipelline mode
on the SSRAM due to an internal pull-up.
High-performance operation of the SSRAM is possible, but requires careful consideration of all
FPGA timing parameters. We strongly recommend a thorough timing analysis to achieve high
performance, reliable operation. A good understanding of the SSRAM and FPGA timing parameters in the datasheets is critical to this analysis. Delays from the FPGA pads to the internal
www.opalkelly.com
17
XEM3050 User’s Manual
fabric can be significant and cause problems at high clock rates. You must consider all delays
when determining timing.
SSRAM / FPGA Connections
SSRAM manufacturers may use slightly different terminology in pin naming. Most of the pin
namings below are easily associated with the manufacter’s own naming.
•
•
•
•
CE below is an active-low CLK enable.
ADV_LD is the burst-order advance pin.
ZZ is a sleep-enable.
MODE is the linear burst order select (low=linear, high=interleaved).
SSRAM Pin
FPGA Pin
SSRAM Pin
FPGA Pin
SSRAM Pin
FPGA Pin
CLK
AD15
A6
AD23
D1
AF17
ADV_LD
AB15
A7
AD22
D2
AF15
CE
AB16
A8
AE22
D3
AF19
CE1
AE15
A9
AF22
D4
AE20
OE
AE16
A10
AC19
D5
AD18
WE
AC16
A11
AC20
D6
AF21
MODE
AA20
A12
AC21
D7
AE21
ZZ
AF20
A13
AD19
D8
AA17
DP0
AE18
A14
AD21
D9
AB17
DP1
AF23
A15
AC18
D10
Y18
A0
AA18
A16
AB18
D11
Y19
A1
AB19
A17
AB14
D12
AA19
A2
AF16
A18
AC17
D13
AB20
A3
AE17
A19
AD17
D14
AB21
A4
AA16
A20
AB22
D15
AC22
A5
AA15
D0
AE19
Expansion Connectors
Opal Kelly Pins is an interactive online reference for the expansion connectors on all Opal Kelly
FPGA integration modules. It provides additional information on pin capabilities, pin characteristics, and PCB routing. Additionally, Pins provides a tool for generating constraint files for place
and route tools. Pins can be found at the URL below.
18
http://www.opalkelly.com/pins
www.opalkelly.com
XEM3050 User’s Manual
JP2
JP2 is an 80-pin high-density connector providing access to FPGA Banks 2 and 3. Pins 77 and
79 of this connector are wired to global clock inputs on the FPGA and can therefore be used as
inputs to the global clock network.
Pin 11 on this connector is SYSCLK4 and is directly connected to CLKD on the Cypress
CY22393 PLL. Using FrontPanel’s PLL Configuration Dialog, you can configure the clock signal
present on this pin.
Pin mappings for JP2 are listed at the end of this document in the “Quick Reference” section. For
each JP2 pin, the corresponding board connection is listed. For pins connected to the FPGA,
the corresponding FPGA pin number is also shown. Finally, for pins routed to differential pair I/
Os on the FPGA, the FPGA signal names and routed track lengths have been provided to help
you equalize lengths on differential pairs.
JP3
JP3 is an 80-pin high-density connector providing access to FPGA Banks 6 and 7. Pins 77 and
79 of this connector are wired to global clock inputs on the FPGA and can therefore be used as
inputs to the global clock network.
Pin 8 on this connector is SYSCLK5 and is directly connected to CLKE on the Cypress CY22393
PLL. Pin 7 is SYSCLK6 and is connected to XBUF on the PLL. Using FrontPanel’s PLL Configuration Dialog, you can configure the clock signal present on these pins.
Pin mappings for JP3 are listed at the end of this document in the “Quick Reference” section. For
each JP3 pin, the corresponding board connection is listed. For pins connected to the FPGA, the
corresponding FPGA pin number is also shown. Finally, for pins routed to differential pair I/Os
on the FPGA, the FPGA signal names and routed track lengths have been provided to help you
equalize lengths on differential pairs.
Setting I/O Voltages
The Spartan-3 FPGA allows users to set I/O bank voltages in order to support several different
I/O signalling standards. This functionality is supported by the XEM3050 by allowing the user to
connect independent supplies to the FPGA VCCO pins on four of the FPGA banks.
By default, ferrite beads have been installed which attach each VCCO bank to the +3.3VDD
supply. If you intend to supply power to a particular I/O bank, you MUST remove the appropriate
ferrite beads. Power can then be supplied through the expansion connectors.
The table below lists details for user-supplied I/O bank voltages
I/O Bank
Expansion Pin
FPGA Pins
Ferrite Bead
2
JP2-55
G24, J19, K19, L18, L24, M18, N17, N18
FB1
3
JP2-35
P18, P17, R18, T24, T18, U19, V19, Y24
FB2
6
JP3-36
P9, P10, R9, T3, T9, U8, V8, Y3
FB3
7
JP3-56
N9, N10, M9, L3, L9, K8, J8, G3
FB4
www.opalkelly.com
19
XEM3050 User’s Manual
Clock Inputs and Bank Voltages
Note that the four clock inputs available on the expansion connectors are connected to FPGA
banks 0 and 1. Bank voltages for these two banks are fixed on the XEM3050 to +3.3VDD. However, Xilinx Answer Record #18095 states:
Differential Input Buffers are powered by VCCAUX and are not VCCO-dependent. Consequently, you can put LVDS_25 and LVPECL_25 input buffers in a
3.3V bank without damaging the device. Instantiating a LVDS_25 or LVPECL_25
input buffer in 3.3V bank does not generate a software error.
For more information on this, please refer to the Xilinx Answer Record and other references available within that record.
Considerations for Differential Signals
The XEM3050 PCB layout and routing has been designed with several applications in mind,
including applications requiring the use of differential (LVDS) pairs. Please refer to the Xilinx
Spartan-3 datasheet for details on using differential I/O standards with the Spartan-3 FPGA.
FPGA I/O Bank Voltages
In order to use differential I/O standards with the Spartan-3, you must set the VCCO voltages for
the appropriate banks to 2.5v according to the Xilinx Spartan-3 datasheet. Please see the section above entitled “Setting I/O Voltages” for details.
Characteristic Impedance
The characteristic impedance of all routes from the FPGA to the expansion connector is 50-Ω,
with the exception of routes that are labelled with (†) in the mapping table. These exception
routes are routed on inner layers without a proximity ground plane and therefore do not match the
50-Ω impedance exactly.
Differential Pair Lengths
In many cases, it is desirable that the route lengths of a differential pair be matched within some
specification. Care has been taken to route differential pairs on the FPGA to adjacent pins on the
expansion connectors whenever possible. We have also included the lengths of the board routes
for these connections to help you equalize lengths in your final application. Due to space constraints, some pairs are better matched than others.
Digitally Controlled Impedance (DCI)
The Xilinx Spartan-3 supports digitally controlled impedance. This functionality is supported
when precision resistors are connected externally between the FPGA VRN/VRP lines and
+VCCO/DGND, respectively. Pads for these resistors have been placed and routed on the
XEM3050, but resistors have NOT been installed. The end-user must install these resistors in
order to use DCI. The table below lists the resistor designators and the banks they control.
20
Resistor
FPGA Pin
FPGA Signal
Connection
R27
C26
L01P_2/VRN_2
+VCCO2
R26
C25
L01N_2/VRP_2
DGND
R28
AA21
L01P_3/VRN_3
+VCCO3
R29
AA22
L01N_3/VRP_3
DGND
www.opalkelly.com
XEM3050 User’s Manual
Resistor
FPGA Pin
FPGA Signal
Connection
R33
AD1
L01P_6/VRN_6
+VCCO6
R32
AD2
L01N_6/VRP_6
DGND
R30
F6
L01P_7/VRN_7
+VCCO7
R31
F5
L01N_7/VRP_7
DGND
BRK3010 Breakout Board
The BRK3010 is a simple two-layer “breakout board” which can be used to evaluate or transition to the XEM3050. It provides standard 0.1” thru-hole connections to the 0.8-mm high-density
connectors on the XEM3050. Please visit the Pins reference for the XEM3010 for pin mapping
details.
Schematics and layout files for the BRK3010 are available on the Opal Kelly website.
Xilinx Configuration PROM
Some versions of the XEM3050 are built with a Xilinx configuration PROM inserted. This PROM
allows the FPGA to be configured upon power-up without a USB connection as some applications may require the FPGA to control a user’s device and only occasionally be connected to a
PC. The USB connection may therefore be used for extracting acquired data, adjusting parameters, and so on.
Getting the XEM3050 to boot from a PROM-based FPGA configuration is a multistep process
consisting of the following steps:
1. Generate an FPGA programming file.
2. Generate a PROM programming file from the FPGA programming file.
3. Program the PROM.
Generate an FPGA Programming File.
This step is performed for either PROM-boot or USB-boot and is the final step in a typical FPGA
synthesis flow. It is assumed that the user is already familiar with this procedure and it will not be
covered here.
Generate a PROM Programming File
In this step, the Xilinx iMPACT tool is used to format a PROM programming file with the FPGA
programming file created previously. In the next step, the PROM programming file will be transferred (e.g. via JTAG) to the PROM.
Start iMPACT
Once the FPGA programming file (bitfile) has been created, you can start iMPACT from within
Project Navigator by clicking on “Generate PROM, ACE, or JTAG File” in the processes list.
www.opalkelly.com
21
XEM3050 User’s Manual
This will start iMPACT. When asked, tell it you would like to create a PROM File.
Setup PROM File Format
At the next screen, select “Xilinx PROM” as a target with the “MCS” format. Here you can also
specify a filename for your programming file.
Select the PROM Device
At the next screen, check “Enable Revisioning”. This is necessary in order to enable some
features of the Xilinx PROM that allow it to boot the FPGA as a programming master. Select the
PROM device as “xcf16p,” the device on the XEM3050, and add it to the list.
22
www.opalkelly.com
XEM3050 User’s Manual
Add Bitfiles to PROM
The final step in creating the PROM is to add your bitfile to the PROM. Simply select the file (e.g.
counters.bit) that you generated previously. Once you complete the Wizard, the MCS programming file will be created in the directory specified. In our case, we have CountersPROM.mcs.
Programming the Configuration PROM
Once we have a PROM programming file, we can transfer that file to the Xilinx Configuration
PROM on the XEM3050 using a JTAG cable. The Xilinx Parallel IV or Xilinx USB JTAG cables
will work just fine for this process.
Connecting to the JTAG Chain
At this point, you may attach your programming cable to the XEM3050. Be sure to connect the
pins correctly or you could damage the XEM3050 or the programming cable.
If you are still in iMPACT, you can switch to Configuration Mode using the “Mode” menu at the top
of the window. Allow iMPACT to automatically discover the JTAG chain and you will end up with
a graphical representation of the chain.
www.opalkelly.com
23
XEM3050 User’s Manual
Assign the PROM Configuration File
Assign the PROM configuration file (CountersPROM.mcs) that you created in the previous step
to the XCF16P device. You may bypass the XC3S4000 device since we will only be configuring
the PROM.
Program the PROM
Once a configuration file has been assigned to the PROM device, you will be able to program it
by right-clicking on the device and selecting “Program...” from the context menu. In the options
dialog, setup the following options:
•
•
•
•
•
Select Rev 0 and “ER” to erase any existing configuration
PROM is Configuration Master
Internal Clock
Clock Frequency set to 20 MHz
I/O Configuration is Serial Mode
Once you acknowledge this dialog, the programming operation will start. Once complete, the
PROM should be setup with your new FPGA programming file!
Booting from PROM
In order to boot the XEM3050 from PROM, you must remove the jumper on J1. This allows the
PROM to configure the FPGA from power-on.
24
www.opalkelly.com
XEM3050 User’s Manual
If your FPGA design has MUXSEL=0, the design will still be able to communicate with FrontPanel
if it is connected to a PC.
www.opalkelly.com
25
XEM3050 User’s Manual
XEM3050 Mechanical Drawing
4X
50.00
47.00
2.50
42.33
31.50
17.60
67.57
72.00
75.00
31.43
2.33
0
-4.00
3.00
0
3.00
0
9.00
12.00
45.00
12.60
8.10
1.57
0
49.50
0
5.00
0
7.20
0
All dimensions in mm.
26
www.opalkelly.com
XEM3050 User’s Manual
96
100
84.31
66.91
72.04
26.92
28
32.03
13.19
0
4
BRK3010 Mechanical Drawing
0
3
4
2.50
24.80
32.27
33.90
0.90
2.80
71.12
0.10
2.54
88.30
0.60
15.24
66.73
72
0.10
2.54
146
150
All dimensions in mm.
[inches]
www.opalkelly.com
27