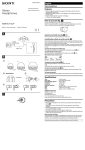
1
EX1200 SERIES HIGH-DENSITY SWITCH/MEASURE AND CONTROL SYSTEMS USER’S MANUAL P/N: 82-0127-000 Rev June 25th, 2015 VTI Instruments Corp. 2031 Main Street Irvine, CA 92614-6509 (949) 955-1894 VTI Instruments Corp. TABLE OF CONTENTS TABLE OF CONTENTS ................................................................................................................................................ 2 Certification .......................................................................................................................................................... 5 Warranty ............................................................................................................................................................... 5 Limitation of Warranty ......................................................................................................................................... 5 Trademarks ........................................................................................................................................................... 5 Restricted Rights Legend ...................................................................................................................................... 5 DECLARATION OF CONFORMITY ............................................................................................................................... 6 GENERAL SAFETY INSTRUCTIONS............................................................................................................................. 7 Terms and Symbols .............................................................................................................................................. 7 Warnings............................................................................................................................................................... 7 SUPPORT RESOURCES ............................................................................................................................................... 9 SECTION 1.................................................................................................................................................................. 10 INTRODUCTION ....................................................................................................................................................... 10 Features............................................................................................................................................................... 10 EX1200 System Specifications ........................................................................................................................... 13 EX1200 Series 1 U, Full Rack Mainframe Dimensional Diagram ..................................................................... 15 EX1200 Series 1 U, Half Rack Mainframe Dimensional Diagram .................................................................... 16 EX1200 Series 3 U Mainframe Dimensional Diagram ...................................................................................... 17 EX1200 Series 3 U Mainframe Front Panels ...................................................................................................... 18 EX1200 Series DMM Specifications .................................................................................................................. 19 Explanation of Specifications ............................................................................................................................. 27 Maximizing Measurement Performance ............................................................................................................. 29 SECTION 2.................................................................................................................................................................. 31 PREPARATION FOR USE........................................................................................................................................... 31 Unpacking........................................................................................................................................................... 31 Determine System Power Requirements ............................................................................................................ 31 Installation Location ........................................................................................................................................... 31 Warm-Up Time................................................................................................................................................... 32 Plug-in Module Installation ................................................................................................................................ 32 Removing Plug-in Modules ................................................................................................................................ 33 EX1202/EX1262 Mainframe Installation Options ............................................................................................. 33 EX1206/EX1266 Mainframe Installation Options ............................................................................................. 42 3U Mainframe Installation Options .................................................................................................................... 47 Blanking Panel .................................................................................................................................................... 51 Connecting/Disconnecting Line Power .............................................................................................................. 51 Software Installation ........................................................................................................................................... 51 Driver Installation ............................................................................................................................................... 52 Network Configuration ....................................................................................................................................... 53 Network Troubleshooting ................................................................................................................................... 53 Time Configuration ............................................................................................................................................ 59 SECTION 3.................................................................................................................................................................. 61 BASIC MAINFRAME OPERATION ............................................................................................................................. 61 Input Connections ............................................................................................................................................... 61 DMM Bus ........................................................................................................................................................... 65 LED Indicators ................................................................................................................................................... 66 Locking ............................................................................................................................................................... 66 Triggering ........................................................................................................................................................... 66 SECTION 4.................................................................................................................................................................. 67 BASIC EX1200 DMM OPERATION ......................................................................................................................... 67 Overview ............................................................................................................................................................ 67 DMM Input Connections .................................................................................................................................... 68 2 EX1200 Series Preface www.vtiinstruments.com DMM MEASUREMENT BASICS ............................................................................................................................... 70 Select an Input Connector ................................................................................................................................... 70 Configure the Measurement ............................................................................................................................... 71 Configure Triggering .......................................................................................................................................... 71 Take the Measurement ........................................................................................................................................ 74 Retrieve the Data ................................................................................................................................................ 74 DMM FUNCTIONS .................................................................................................................................................. 75 Range .................................................................................................................................................................. 75 Resolution ........................................................................................................................................................... 76 Integration/Aperture Time .................................................................................................................................. 77 Auto-Zero ........................................................................................................................................................... 77 Limits .................................................................................................................................................................. 78 Math Functions ................................................................................................................................................... 78 DC Voltage Measurements ................................................................................................................................. 79 AC Voltage Measurements ................................................................................................................................. 82 DC and AC Current Measurements .................................................................................................................... 85 Resistance Measurements ................................................................................................................................... 86 Frequency/Period Measurements ........................................................................................................................ 88 Temperature Measurements ................................................................................................................................ 91 Self-Test ............................................................................................................................................................. 98 SECTION 5.................................................................................................................................................................. 99 SCANNER OVERVIEW .............................................................................................................................................. 99 Overview ............................................................................................................................................................ 99 SECTION 6................................................................................................................................................................ 101 TRIGGERING ......................................................................................................................................................... 101 Overview .......................................................................................................................................................... 101 SECTION 7................................................................................................................................................................ 103 WEB PAGE OPERATION......................................................................................................................................... 103 Introduction ...................................................................................................................................................... 103 General Web Page Operation ........................................................................................................................... 104 Soft Front Panel Main Page .............................................................................................................................. 105 Scanner Soft Front Panel .................................................................................................................................. 106 Instrument Soft Front Panels ............................................................................................................................ 113 Switch Soft Front Panels .................................................................................................................................. 113 DMM Soft Front Panel ..................................................................................................................................... 116 DMM Calibration Web Page ............................................................................................................................ 121 Network Configuration ..................................................................................................................................... 124 Time Configuration .......................................................................................................................................... 125 LXI Synchronization ........................................................................................................................................ 127 LXI Identification ............................................................................................................................................. 129 Blink LAN Indicator ......................................................................................................................................... 130 Change Password .............................................................................................................................................. 130 Upgrade ............................................................................................................................................................ 131 SECTION 8................................................................................................................................................................ 136 PROGRAMMING..................................................................................................................................................... 136 Programming References.................................................................................................................................. 136 SECTION 9................................................................................................................................................................ 137 MAINTENANCE ..................................................................................................................................................... 137 Replaceable Fuse .............................................................................................................................................. 137 DMM Removal/Replacement ........................................................................................................................... 137 EX1200 DMM CALIBRATION/VERIFICATION....................................................................................................... 140 Introduction ...................................................................................................................................................... 140 Required Resources .......................................................................................................................................... 140 Setting Up the Instruments ............................................................................................................................... 140 EX1200 Series Preface 3 VTI Instruments Corp. Connecting to the EX1200................................................................................................................................ 141 Login into SFP .................................................................................................................................................. 142 Time Configuration .......................................................................................................................................... 143 Performing Calibration ..................................................................................................................................... 143 Performing Verification .................................................................................................................................... 145 APPENDIX A............................................................................................................................................................. 147 ONBOARD MEMORY ............................................................................................................................................. 147 Memory Listings and Clearing Procedures....................................................................................................... 147 APPENDIX B ............................................................................................................................................................. 149 POWER CONSUMPTION ......................................................................................................................................... 149 Plug-in Module Power Consumption ............................................................................................................... 149 APPLICATION NOTE .............................................................................................................................................. 150 Overview .......................................................................................................................................................... 150 EX12x2 and EX12x6 Power Consumption Calculation ................................................................................... 150 EX12x8 Power Consumption Calculation ........................................................................................................ 151 INDEX ....................................................................................................................................................................... 153 4 EX1200 Series Preface www.vtiinstruments.com CERTIFICATION VTI Instruments Corp. (VTI) certifies that this product met its published specifications at the time of shipment from the factory. VTI further certifies that its calibration measurements are traceable to the United States National Institute of Standards and Technology (formerly National Bureau of Standards), to the extent allowed by that organization‟s calibration facility, and to the calibration facilities of other International Standards Organization members. Note that the contents of this document are subject to change without notice. WARRANTY The product referred to herein is warranted against defects in material and workmanship for a period of one year from the receipt date of the product at customer‟s facility. The sole and exclusive remedy for breach of any warranty concerning these goods shall be repair or replacement of defective parts, or a refund of the purchase price, to be determined at the option of VTI. Note that specifications are subject to change without notice. For warranty service or repair, this product must be returned to a VTI Instruments authorized service center. The product shall be shipped prepaid to VTI and VTI shall prepay all returns of the product to the buyer. However, the buyer shall pay all shipping charges, duties, and taxes for products returned to VTI from another country. VTI warrants that its software and firmware designated by VTI for use with a product will execute its programming when properly installed on that product. VTI does not however warrant that the operation of the product, or software, or firmware will be uninterrupted or error free. LIMITATION OF WARRANTY The warranty shall not apply to defects resulting from improper or inadequate maintenance by the buyer, buyersupplied products or interfacing, unauthorized modification or misuse, operation outside the environmental specifications for the product, or improper site preparation or maintenance. VTI Instruments Corp. shall not be liable for injury to property other than the goods themselves. Other than the limited warranty stated above, VTI Instruments Corp. makes no other warranties, express or implied, with respect to the quality of product beyond the description of the goods on the face of the contract. VTI specifically disclaims the implied warranties of merchantability and fitness for a particular purpose. TRADEMARKS Java Runtime Environment™ are trademarks or registered trademarks of Sun Microsystems, Inc. or its subsidiaries in the United States and other countries. LabVIEW™ and LabWindows/CVI™ are trademarks of National Instruments Corporation. Visual Basic®, Windows®, and Internet Explorer® are registered trademarks of the Microsoft Corporation or its subsidiaries. Linux® is a registered trademark of the Linux Foundation. IVI™ is a trademark of the IVI Foundation. Bonjour™ is a trademark of Apple, Inc. RESTRICTED RIGHTS LEGEND Use, duplication, or disclosure by the Government is subject to restrictions as set forth in subdivision (b)(3)(ii) of the Rights in Technical Data and Computer Software clause in DFARS 252.227-7013. VTI Instruments Corp. 2031 Main Street Irvine, CA 92614-6509 U.S.A. EX1200 Series Preface 5 VTI Instruments Corp. DECLARATION OF CONFORMITY Declaration of Conformity According to ISO/IEC Guide 22 and EN 45014 MANUFACTURER’S NAME VTI Instruments Corporation MANUFACTURER’S ADDRESS 2031 Main Street Irvine, California 92614-6509 PRODUCT NAME High-Density Switch/Measure and Control System MODEL NUMBER(S) EX12X2 and EX12x6 Mainframes and Plug-in Modules PRODUCT OPTIONS All PRODUCT CONFIGURATIONS All VXI Technology, Inc. declares that the aforementioned product conforms to the requirements of the Low Voltage Directive 73/23/EEC and the EMC Directive 89/366/EEC (inclusive 93/68/EEC) and carries the “CE” mark accordingly. The product has been designed and manufactured according to the following specifications: SAFETY IEC 61010-1:2001 (2nd Ed.); EN 61010-1:2001 (2nd Ed.) EMC IEC 61326-1:2006 EN55011 Class A Group IEC 61000-4-2 IEC 61000-4-3 IEC 61000-4-4 IEC 61000-4-5 IEC 61000-4-6 IEC 61000-4-8 IEC 61000-4-11 CISPR 11 (2004) Class A ICES-001 (Issue 4) AS/NZS CISPR 11 (2nd ED) Class A FCC Part 15 Subpart B Class A This product was tested in a typical configuration. I hereby declare that the aforementioned product has been designed to be in compliance with the relevant sections of the specifications listed above as well as complying with all essential requirements of the Low Voltage Directive. February 2010 Steve Mauga, QA Manager 6 EX1200 Series Preface www.vtiinstruments.com GENERAL SAFETY INSTRUCTIONS Review the following safety precautions to avoid bodily injury and/or damage to the These precautions must be observed during all phases of operation or service of this Failure to comply with these precautions, or with specific warnings elsewhere in this violates safety standards of design, manufacture, and intended use of the product. Note product contains no user serviceable parts or spare parts. product. product. manual, that this Service should only be performed by qualified personnel. Disconnect all power before servicing. TERMS AND SYMBOLS These terms may appear in this manual: WARNING Indicates that a procedure or condition may cause bodily injury or death. CAUTION Indicates that a procedure or condition could possibly cause damage to equipment or loss of data. These symbols may appear on the product or in the manual: ATTENTION - Important safety instructions Indicates hazardous voltage. Frame or chassis ground Indicates that the product was manufactured after August 13, 2005. This mark is placed in accordance with EN 50419, Marking of electrical and electronic equipment in accordance with Article 11(2) of Directive 2002/96/EC (WEEE). End-of-life product can be returned to VTI by obtaining an RMA number. Fees for take-back and recycling will apply if not prohibited by national law. WARNINGS Follow these precautions to avoid injury or damage to the product: Use Proper Power Cord Use Proper Power Source User Proper Fuse Power Consumption EX1200 Series Preface The power cable provided with this instruments meets the required regulatory and statutory safety standards as indicated by this product‟s declaration of conformity. VTI recommends that the power cord provided be used with the instrument that it is provided with. If a different power cord is must to be used, however, it is the responsibility of the user to select a power cord that meets any and all regulatory and statutory requirements for their industry and country. To avoid electrical overload, electric shock, or fire hazard, do not use a power source that applies other than the specified voltage. The mains outlet that is used to power the equipment must be within 3 meters of the device and shall be easily accessible. To avoid fire hazard, only use the type and rating fuse specified for this product. Prior to using EX1200 series plug-in modules, it is imperative that the power consumption of all modules that will be installed in the 7 VTI Instruments Corp. mainframe be calculated for all power supply rails. The required information can be found in Appendix B of the EX1200 Series User’s Manual (P/N: 82-0127-000). Failure to do so may result in damaging the switch card and the mainframe. Avoid Electric Shock To avoid electric shock or fire hazard, do not operate this product with the covers removed. Do not connect or disconnect any cable, probes, test leads, etc. while they are connected to a voltage source. Remove all power and unplug unit before performing any service. Service should only be performed by qualified personnel. Ground the Product This product is grounded through the grounding conductor of the power cord. To avoid electric shock, the grounding conductor must be connected to earth ground. Operating Conditions To avoid injury, electric shock or fire hazard: Do not operate in wet or damp conditions. Do not operate in an explosive atmosphere. Operate or store only in specified temperature range. Provide proper clearance for product ventilation to prevent overheating. When selecting the installation location, be certain that there is enough space around the power plug and the outlet so that they are readily accessible. Do not insert the power cord into an outlet where accessibility to the plug cord is poor. All unused slots should be closed with the dummy filler panels to ensure a proper air circulation. This is critical to avoid overheating of the cards. DO NOT operate if any damage to this product is suspected. Product should be inspected or serviced only by qualified personnel. The operator of this instrument is advised that if the equipment is used in a manner not specified in this manual, the protection provided by the equipment may be impaired. Conformity is checked by inspection. Improper Use 8 EX1200 Series Preface www.vtiinstruments.com SUPPORT RESOURCES Support resources for this product are available on the Internet and at VTI Instruments customer support centers. VTI Instruments Corp. World Headquarters VTI Instruments Corp. 2031 Main Street Irvine, CA 92614-6509 Phone: (949) 955-1894 Fax: (949) 955-3041 VTI Instruments Cleveland Instrument Division 5425 Warner Road Suite 13 Valley View, OH 44125 Phone: (216) 447-8950 Fax: (216) 447-8951 VTI Instruments Lake Stevens Instrument Division 3216 Wetmore Avenue, Suite 1 Everett, WA 98201 Phone: (949) 955-1894 Fax: (949) 955-3041 AMETEK Instruments India Pvt. Ltd. #74/75, Millers Road Bangalore – 560 052 India Phone: +91 80 4040 7900 Fax : +91 80 4170 0200 Asia Support Phone: +852 9177 6127 Technical Support Phone: (949) 955-1894 Fax: (949) 955-3041 E-mail: [email protected] Visit http://www.vtiinstruments.com for worldwide support sites and service plan information. EX1200 Series Preface 9 VTI Instruments Corp. SECTION 1 INTRODUCTION FEATURES High-density Switch Subsystem with Scanning Measure and Control The EX1200 systems (EX1200s) are the highest density scanning switch/measure and control subsystem on the market today with the capacity to switch up to 576 channels of voltage or temperature in a 1U mainframe. A variety of modules can be utilized to build a comprehensive switching system capable of routing dc to RF signals, as well as power signals up to 16 A. Input channels can be routed directly to an optional 6½ digit DMM through an internal multiplexer bus to simplify cabling. Analog and digital I/O modules can be added to control external devices. The EX1200s provide a scalable architecture available as a half rack, 1U mainframe capable of accepting up to two plug-in modules in addition to the optional DMM, as well as a full rack, 1U version capable of accepting up to six plug-in modules and the optional DMM. This level of scalability offers system developers the ability to easily construct small to large systems with a common platform that maximizes reusability of engineering development. Optimized Performance EX1200s leverages the same technology that made VTI‟s VXI-based SMIP switching family the most successful modular switching platform for high-performance requirements in the most demanding and complex application spaces. Now, VTI makes this powerful, cost-effective solution commercially available for functional test systems, process monitoring, signal switching, automotive ECM, temperature/data logging, and cable harness and battery testing. The primary functions of EX1200s focus on signal switching, data logging, level detection, and control. The compact 1U design provides the granularity to address small channel requirements while allowing for multiple boxes to be “daisy-chained” together through the communications interface based on Ethernet to accommodate larger applications. Measurement Integrity VTI has a long history of delivering high-density, modular switching solutions for the most demanding applications in the military and aerospace market. VTI has years of experience in designing switching systems that preserve the integrity of the signal that are routed between highperformance instrumentation and complex designs under test. This provides the test developer with the assurance that the switching system will not interfere with the signals of interest. When tests are run in an uncontrolled environment, it is difficult to maintain predictable data over a wide range of temperatures. The EX1200 system multimeter improves the accuracy of test data by incorporating multiple calibration sets. Up to eight calibration sets can be stored on an EX1200, allowing the system to be „fine-tuned‟ at various temperatures, thus returning reliable, accurate, environment-independent data. 10 EX1200 Series Introduction www.vtiinstruments.com More than Switch and Measure EX1200s include a wide range of modules that can be used to create a stimulus/response test subsystem. Analog output modules can be used as part of the test sequence to generate waveforms or set control levels and can be synchronized with measurement inputs. Digital I/O modules are also available and can be used to control external devices such as relay coils, or as bus emulation with pattern generation capability of up to 10 MHz. Inputs can be constantly monitored, independent of the scanlist with an event detector in order to detect fault conditions that must be immediately serviced by the test system. Fast Throughput The full-featured scanlist and tight synchronization with the internal DMM minimizes processor overhead and reduces the overall test execution time. Channel lists can be stepped through in sequence and synchronized with DMM measurements. No processor intervention is required, thus the overall time to complete test can be limited to integration/settling time of DMM and settling time of relays. Low Cost of Ownership EX1200s can be used to mix thermocouple, RTD, thermistor, and voltage channels in a single mainframe to offer maximum flexibility for multiple applications and seamless network integration with other instruments. This scalable architecture in a small footprint optimizes the cost/channel across a wide range of channel counts. The Ethernet-based communication interface is based on an industry standard that is built to stand the test of time and eliminates concerns related to interface obsolescence and support cost commonly found on PC-based architectures. Since EX1200s interface over a standard LAN connection, it is not affected by computer bus obsolescence. Maintenance Friendly The EX1200 systems interface with the host computer using low-cost, readily available, and lightweight Ethernet cabling. In addition, the switch modules are pluggable from the front, resulting in very low MTTR, simplified wiring to termination panels, and a reduction in sparing costs. The onboard relay monitor tracks relay actuations and stores the data in memory simplifying predictive maintenance. Embedded monitor and control panels provide immediate access to instrument functions and require no third party software beyond standard web tools creating a framework for simplified front-line maintenance. “Best-in-Class” Software VTI delivers a variety of software utilities and options that are designed to accelerate the time it takes to begin using an EX1200. It is delivered with an embedded web interface that provides virtual control of all functions in the module without the need for any third party software aside from a standard web browser and Java Runtime Environment™ (JRE). These graphical front panels have been designed to closely emulate actual front panel controls to optimize ease of use. The functionality has been implemented such that most operations can be accessed through a very clean main panel with no function panel being more than one layer deep. More than an Embedded Control Panel Each switch and instrument has its own embedded web interface that can be used to directly monitor and control operation of the device. In addition, a powerful soft front panel dedicated to scanning measurement operations is provided. Operators can quickly setup a list of channels to be measured at programmable intervals with desired functions per channel (e.g. dc voltage, temperature, resistance, etc.) as well as the state of discrete switches and analog and digital output channels at the beginning of each scan step. This robust utility provides a very quick and easy mechanism for defining test sequences where stimulus and switch settings need to be modified during the test and input channels can be measured to verify how they respond to these changes. EX1200 Series Introduction 11 VTI Instruments Corp. EXLab - Setup and Run EX1200s are supported by the popular EXLab turnkey software package. It allows end users to quickly setup a data-logging test scenario and begin collecting data within minutes. The EXLab intuitive GUI significantly shortens the time-consuming tasks of test setup and configuration – from setting channel configurations and display routines, to creating and exporting data files. Test engineers can begin monitoring, recording, and analyzing data faster than ever before. Setup is quick and easy with EXLab auto instrument discovery and intuitive GUI for setting channel configurations. EX1200 instruments are auto-identified and once setup is complete, engineers are immediately ready to capture, display, and analyze data. With EXLab and an EX1200, engineers can design a mixed signal distributed measurement system including voltage, thermocouple, RTD, and digital inputs. A wide range of graphical displays are available to generate customized displays of multiple channels simultaneously. EXLab systems save time and reduce the frustration normally associated with software development efforts. Flexible Application Programming Options Every EX1200 series module is delivered with an application programming interface (API) that conforms to the industry standard IVI™ specifications for its class. The IVI drivers port seamlessly into the most commonly used application development environments such as LabView™, LabWindows/CVI™, C++®, and Visual Basic®, among others. The intuitive APIs simplify programming and expose all available instrument functionality, eliminating the need for low-level coding. The EX1200 series driver is designed to support advanced functionality such as: End-end path-level programming across mainframes Logical channel naming Relay odometer for predictive maintenance Scanning of multiple channels LXISync API for sophisticated triggering options While IVI is intended for Windows®-based operating systems, VTI‟s innovative approach to driver development allows users to develop their applications using an IVI-like interface that can be imported into Linux® and other operating systems. This flexibility provides system developers with true OS independence without the need to sacrifice the convenience that instrument drivers deliver. 12 EX1200 Series Introduction www.vtiinstruments.com EX1200 SYSTEM SPECIFICATIONS GENERAL SPECIFICATIONS MODULE SLOTS 1 U Mainframes EX1202 (EX1262) EX1206 (EX1266) 3 U Mainframes EX1208 (EX1268) DIMENSIONS 1 U Mainframes EX1202/EX1262 EX1206/EX1266 3 U Mainframes EX1208/EX1268 Two standard plug-in module (PIM) slots (plus 6½ digit DMM) Six standard PIM slots (plus 6½ digit DMM) Sixteen standard PIM slots (plus 6½ digit DMM) Embedded, ½ rack U mainframe (17.22” D, 8.61” W, 1.75” H) Embedded, 1 rack U mainframe (17.22” D1, 17.27” W, 1.75” H) Embedded, 3 rack U mainframe (19.49” D2, 16.72” W, 5.22” H) Note : Add 0.5” to depth for DMM handles. Note2: Add 1.0” to depth for DMM handles. 1 WEIGHT 1 U Mainframes EX1202/EX1262 EX1206/EX1266 3 U Mainframes EX1208/EX1268 ENVIRONMENTAL Operating temperature Operating altitude Operating humidity Storage temperature Storage altitude Storage humidity Shock and vibration 4.9 lbs (2.3 kg) 7.1 lbs (3.2 kg) 16.2 lbs (7.4 kg) 0 °C – 55 °C 10,000 ft (3,000 m) maximum 5% - 95% non-condensing @ 0°C - 30°C, 5% - 75% non-condensing @ 30 °C – 40 °C, 5% - 45% non-condensing @ 40 °C – 50 °C (per 3.8.2 of MIL-PRF-28800F Class 3) -40 °C – 70 °C 15,000 ft (4,500 m) maximum 5% – 95%, non-condensing Per 3.8.5 of MIL-PRF-28800F, Class 3 POWER SPECIFICATIONS AVAILABLE POWER1 EX1202/06/62/66 EX1208/68 USEABLE POWER1 EX1202/EX1206 EX1262/EX1266 EX1208/68 (Slots 1 – 5) EX1208 (Slots 6 – 10) EX1268 (Slots 6 – 10) EX1208/68 (Slots 11 – 16) 120 W 120 W per segment, 360 W total 115 W 110 W 102 W 97 W 102 W 102 W *The EX12x8 mainframe is powered by four power supplies and each power supply is used for a finite number of mainframe slots. For more information, see the Power Consumption in Appendix B. MAXIMUM CURRENT PER RAIL1,2 EX1202/EX1206 EX1262/EX1266 EX1208/68 (Slots 1 – 5) EX1208/68 (Slots 6 – 10) EX1208/68 (Slots 11 – 16) 3.3 V 6.00 A 6.00 A 14.99 A 14.99 A 14.99 A 5V 13.420 A 13.410 A 13.582 A 13.362 A 13.355 A 24 V 3.320 A 3.074 A 2.950 A 2.950 A 2.950 A Note1: The EX12x8 mainframe is powered by four power supplies and each power supply is used for a finite number of mainframe slots. For more information, see the Power Consumption in Appendix B. Note2: For more information on calculating power consumption, please refer to the Power Consumption in Appendix B. Note3: These values indicate the maximum current provided by the power supply. This value is limited by the carrying capacity for that rail. See the Maximum Current Carrying Capacity per Slot specification for more information. MAXIMUM CURRENT CARRYING CAPACITY PER SLOT 6A 3.3 V rail 3.75 A 5 V rail 1.6 A 24 V rail INPUT POWER RATING 230 VA EX1262/EX1266 EX1200 Series Introduction 13 VTI Instruments Corp. POWER SPECIFICATIONS EX1208/EX1268 LINE VOLTAGE 920 VA 90 V to 250 V LINE FREQUENCY Manually set to 50 Hz or 60 Hz (default) LXI SPECIFICATIONS LXI CLASS COMPLIANCE EVENT RESPONSE TIMES Event Source → Trigger Destination LXI → LXI LXI → DIO LXI → LAN LXI → BPL DIO → LXI DIO → DIO DIO → LAN DIO → BPL LAN → LXI LAN → DIO LAN → LAN LAN → BPL BPL → LXI BPL → DIO BPL → LAN BPL → BPL LXI Version 1.4 Specification with Extended functions LXI Wired Trigger Bus, LXI Event Messaging, LXI Clock Synchronization, LXI Timestamped Data, LXI Event Logs Minimum Typical Maximum 48 ns 34 ns 1.4 ms 75 ns 175 ns 160 ns 1.4 ms 200 ns 3.6 ms 3.6 ms 15 ms 3.8 ms 74 ns 64 ns 1.6 ms 10 ns 54 ns 38 ns 1.45 ms 80 ns 180 ns 165 ns 1.45 ms 205 ns 3.8 ms 3.8 ms 17 ms 4.0 ms 79 ns 69 ns 1.65 ms 15 ns 58 ns 44 ns 1.5 ms* 85 ns 185 ns 170 ns 1.5 ms* 215 ns 4.5 ms 4.5 ms 25 ms* 4.8 ms 84 ns 74 ns 1.7 ms* 20 ns * The maximum time for events routed to the LAN depend on many factors (network traffic, bandwidth, etc.) and can vary dramatically . TIMESTAMP ACCURACY 200 µs CLOCK SPECIFICATIONS Clock oscillator accuracy Synchronization accuracy Timestamp Accuracy Resolution 14 ±50 ppm Reports “synchronized” when < ±200 µs of the 1588 master clock As good as time synchronization down to 50 ns 25 ns EX1200 Series Introduction www.vtiinstruments.com EX1200 SERIES 1 U, FULL RACK MAINFRAME DIMENSIONAL DIAGRAM EX1200 Series Introduction 15 VTI Instruments Corp. EX1200 SERIES 1 U, HALF RACK MAINFRAME DIMENSIONAL DIAGRAM 16 EX1200 Series Introduction www.vtiinstruments.com EX1200 SERIES 3 U MAINFRAME DIMENSIONAL DIAGRAM EX1200 Series Introduction 17 VTI Instruments Corp. EX1200 SERIES 3 U MAINFRAME FRONT PANELS 18 EX1200 Series Introduction www.vtiinstruments.com EX1200 SERIES DMM SPECIFICATIONS GENERAL SPECIFICATIONS MEASUREMENT FUNCTIONS DC voltage (DCV), true rms AC voltage (ACV) DC current (DCI), true rms AC current (ACI) 2-wire ohms (2W-R), 4-wire ohms (4W-R) PHYSICAL Dimensions COOLING Recommended airflow ENVIRONMENTAL Operating temperature Operating altitude Operating humidity Storage temperature Storage altitude Storage humidity Shock and vibration WARM-UP TIME (8.6 in x 4 in x 0.6 in) 5.9 L/s (12.5 CFM) minimum 0 °C – 55 °C 10,000 ft (3,000 m) maximum 5% - 95% non-condensing @ 0°C - 30°C, 5% - 75% non-condensing @ 30 °C – 40 °C, 5% - 45% non-condensing @ 40 °C – 50 °C (per 3.8.2 of MIL-PRF-28800F Class 3) -40 °C – 70 °C 15,000 ft (4,500 m) maximum 5% – 95%, non-condensing Per 3.8.5 of MIL-PRF-28800F, Class 3 30 min LINE FREQUENCY Manually set to 50 Hz or 60 Hz (default) LIMITS Programmable lower and upper limit values READING BUFFER STATISTICS Count, Minimum, Maximum, Average TRIGGER Type Automatic or programmable delay MAXIMUM NON-DESTRUCTIVE INPUTS SIGNAL HI or Sense HI to LO HI or Sense HI to Guard HI or Sense HI to Chassis (GND) LO or Sense LO to Guard LO or Sense LO to Chassis (GND) Guard to Chassis (GND) Maximum common mode voltage Using external probe Current input protection NOTE CAT-I INPUTS LIMIT 450 V 450 V 450 V 200 V 450 V 450 V 450 V 1.5 kV 3 A, 250 V fuse, externally accessible All accuracy specifications on the following pages are after 30 minute warm-up with trigger auto-delay, range auto-delay, and auto-zero ON. TCal , is the temperature at which the DMM was calibrated as reported by the DMM‟s internal temperature sensor. The DMM is calibrated at approximately TCal = +32 °C ± 5 °C internal temperature (see the DMM calibration log file for the exact temperature) EX1200 Series Introduction 19 VTI Instruments Corp. RESOLUTION INTEGRATION TIME (PLC) 60 HZ APERTURE TIME 167 ms 10 16.7 ms 1.0 1.67 ms 0.1 0.167 ms < 0.01 Aperture Time is programmable from 10 µs to 2.184 s PLC = Aperture Time * Line Frequency 50 HZ APERTURE TIME 200 ms 20 ms 2 ms 0.2 ms RESOLUTION 6 ½ digits 5 ½ digits 4 ½ digits 3 ½ digits DC VOLTAGE – 1 YEAR ACCURACY RANGE 100 mV, 6 ½ digit 1 V, 6 ½ digit 10 V, 6 ½ digit 100 V, 6 ½ digit 300 V, 6 ½ digit 100 mV, 5 ½ digit 1 V, 5 ½ digit 10 V, 5 ½ digit 100 V, 5 ½ digit 300 V, 5 ½ digit 100 mV, 4 ½ digit 1 V, 4 ½ digit 10 V, 4 ½ digit 100 V, 4 ½ digit 300 V, 4 ½ digit RESOLUTION 0.1 µV 1 µV 10 µV 100 µV 100 µV 1.00 µV 10.00 µV 100.00 µV 1.00 mV 1.00 mV 10.00 µV 100.00 µV 100 mV 10.00 mV 10.00 mV INPUT RESISTANCE* 10 G / 10 M 10 G / 10 M 10 G / 10 M 10 M 10 M 10 G / 10 M 10 G / 10 M 10 G / 10 M 10 M 10 M 10 G / 10 M 10 G / 10 M 10 G / 10 M 10 M 10 M TCAL 5 °C % READING % RANGE 0.0150% 0.0060% 0.0060% 0.0010% 0.0035% 0.0007% 0.0050% 0.0009% 0.0055% 0.0035% 0.0150% 0.0068% 0.0060% 0.0011% 0.0035% 0.0008% 0.0050% 0.0010% 0.0055% 0.0037% 0.0150% 0.0075% 0.0060% 0.0012% 0.0035% 0.0009% 0.0050% 0.0011% 0.0055% 0.0040% 0 °C TO +55 °C < 30% RANGE > 30% RANGE 15.0 µV 30.0 µV 30.0 µV 300.0 µV 300.0 µV 3.0 mV 3.0 mV 30.0 mV 30.0 mV 30.0 mV 15.3 µV 33.0 µV 33.0 µV 330.0 µV 330.0 µV 3.3 mV 3.3 mV 33.0 mV 33.0 mV 33.0 mV 15.6 µV 36.0 µV 36.0 µV 360.0 µV 360.0 µV 3.6 mV 3.6 mV 36.0 mV 36.0 mV 36.0 mV * Selectable input resistance to support external high-voltage probe. 10 GΩ Typical; > 1 G Worst Case - 10.0 MΩ 1%. Over-range: 20% of range, except 300 V range Normal Mode Rejection Ratio (NMRR) at power line frequency 0.1%: 60 dB for 1 PLC, 10 PLC, 100 PLC. Common Mode Rejection Ratio (CMRR): 140 dB at DC. Input bias current: <100 pA typical at 23 °C. DC CURRENT – 1 YEAR ACCURACY RANGE 1 mA, 6 ½ digit 10 mA, 6 ½ digit 100 mA, 6 ½ digit 1 A, 6 ½ digit 3 A, 6 ½ digit 1 mA, 5 ½ digit 10 mA, 5 ½ digit 100 mA, 5 ½ digit 1 A, 5 ½ digit 3 A, 5 ½ digit 1 mA, 4 ½ digit 10 mA, 4 ½ digit 100 mA, 4 ½ digit 1 A, 4 ½ digit 3 A, 4 ½ digit RESOLUTION 1 nA 10 nA 100 nA 1 µA 1 µA 10.0 nA 100.0 nA 1.0 µA 10.0 µA 10.0 µA 100.0 nA 1.0 µA 10.0 µA 100.0 µA 100.0 µA MAXIMUM BURDEN VOLTAGE* <0.1 V <0.1 V <0.6 V <0.4 V <0.9 V <0.1 V <0.1 V <0.6 V <0.4 V <0.9 V <0.1 V <0.1 V <0.6 V <0.4 V <0.9 V TCAL 5 °C % READING % RANGE 0.0500% 0.0500% 0.0500% 0.0700% *0.1000% 0.0500% 0.0500% 0.0500% 0.0700% *0.1000% 0.0500% 0.0500% 0.0500% 0.0700% *0.1000% 0.0100% 0.0060% 0.0060% 0.0070% 0.0060% 0.0105% 0.0061% 0.0061% 0.0072% 0.0061% 0.0110% 0.0062% 0.0062% 0.0073% 0.0062% 0 °C TO +55 °C < 30% RANGE > 30% RANGE 396 nA 4.35 µA 43.5 µA 435 µA 4.40 mA 399 nA 4.38 µA 43.8 µA 438 µA 4.42 mA 402 nA 4.41 µA 44.1 µA 441 µA 4.44 mA 4.35 µA 43.5 µA 435 µA 4.40 mA 4.40 mA 4.38 µA 43.8 µA 438 µA 4.42 mA 4.42 mA 4.41 µA 44.1 µA 441 µA 4.44 mA 4.44 mA * Add 0.15% of reading above 2 A. Over-range: 20% of range, except 3 A range 20 EX1200 Series Introduction www.vtiinstruments.com 2-WIRE RESISTANCE – 1 YEAR ACCURACY RANGE RESOLUTION 100 Ω, 6½ digit 1 kΩ, 6½ digit 3 kΩ, 6½ digit 10 kΩ, 6½ digit 100 kΩ, 6½ digit 1 MΩ, 6½ digit 10 MΩ, 6½ digit 100 MΩ, 6½ digit 100 Ω, 5½ digit 1 kΩ, 5½ digit 3 kΩ, 5½ digit 10 kΩ, 5½ digit 100 kΩ, 5½ digit 1 MΩ, 5½ digit 10 MΩ, 5½ digit 100 MΩ, 5½ digit 100 Ω, 4½ digit 1 kΩ, 4½ digit 3 kΩ, 4½ digit 10 kΩ, 4½ digit 100 kΩ, 4½ digit 1 MΩ, 4½ digit 10 MΩ, 4½ digit 100 MΩ, 4½ digit 100 µΩ 1 mΩ 10 mΩ 10 mΩ 100 mΩ 1Ω 10 Ω 100 Ω 1 mΩ 10 mΩ 100 mΩ 100 mΩ 1Ω 10 Ω 100 Ω 1000 Ω 10 mΩ 100 mΩ 1Ω 1Ω 10 Ω 100 Ω 1000 Ω 10000 Ω TCAL 5 °C % READING % RANGE 0.1000% 0.0600% 0.0500% 0.0100% 0.0200% 0.0150% 0.0100% 0.0090% 0.0100% 0.0009% 0.0250% 0.0008% 0.0550% 0.0010% 0.1200% 0.0050% 0.1500% 0.0700% 0.0550% 0.0150% 0.0250% 0.0200% 0.0110% 0.0110% 0.0100% 0.0011% 0.0260% 0.0008% 0.1000% 0.0040% 0.1250% 0.0055% 0.1500% 0.1500% 0.1000% 0.0250% 0.0400% 0.0300% 0.0250% 0.0150% 0.0180% 0.0025% 0.0270% 0.0008% 0.1200% 0.0050% 0.1300% 0.0090% 0 °C TO +55 °C < 30% RANGE > 30% RANGE 0.60 Ω 0.75 Ω 0.75 Ω 3.00 Ω 3.00 Ω 3.00 Ω 3.00 Ω 3.90 Ω 3.90 Ω 78.0 Ω 78.0 Ω 1.68 kΩ 1.68 kΩ 45.0 kΩ 45.0 kΩ 45.0 kΩ 0.63 Ω 0.78 Ω 0.78 Ω 3.30 Ω 3.30 Ω 3.30 Ω 3.30 Ω 4.20 Ω 4.20 Ω 81.0 Ω 81.0 Ω 4.50 kΩ 4.50 kΩ 45.3 kΩ 45.3 kΩ 45.3 kΩ 0.66 Ω 0.81 Ω 0.81 Ω 3.60 Ω 3.60 Ω 3.60 Ω 3.60 Ω 8.70 Ω 8.70 Ω 84.0 Ω 84.0 Ω 4.53 kΩ 4.53 kΩ 45.6 kΩ 45.6 kΩ 45.6 kΩ 4-WIRE RESISTANCE – 1 YEAR ACCURACY RANGE RESOLUTION 100 Ω, 6½ digit 1 kΩ, 6½ digit 3 kΩ, 6½ digit 10 kΩ, 6½ digit 100 kΩ, 6½ digit 100 Ω, 5½ digit 1 kΩ, 5½ digit 3 kΩ, 5½ digit 10 kΩ, 5½ digit 100 kΩ, 5½ digit 100 Ω, 4½ digit 1 kΩ, 4½ digit 3 kΩ, 4½ digit 10 kΩ, 4½ digit 100 kΩ, 4½ digit 100 µΩ 1 mΩ 10 mΩ 10 mΩ 100 mΩ 1 mΩ 10 mΩ 100 mΩ 100 mΩ 1Ω 10mΩ 100 mΩ 1Ω 1Ω 10 Ω TCAL 5 °C % READING % RANGE 0.0140% 0.0070% 0.0100% 0.0010% 0.0100% 0.0010% 0.0100% 0.0010% 0.0100% 0.0009% 0.0150% 0.0070% 0.0100% 0.0014% 0.0110% 0.0020% 0.0110% 0.0020% 0.0100% 0.0012% 0.0160% 0.0150% 0.0150% 0.0030% 0.0150% 0.0040% 0.0150% 0.0040% 0.0150% 0.0025% 0 °C TO +55 °C < 30% RANGE > 30% RANGE 11.7 mΩ 39.0 mΩ 39.0 mΩ 390 mΩ 390 mΩ 390 mΩ 390 mΩ 3.90 Ω 3.90 Ω 78.0 Ω 12.0 mΩ 42.0 mΩ 42.0 mΩ 420 mΩ 420 mΩ 420 mΩ 420 mΩ 4.20 Ω 4.20 Ω 81.0 Ω 27.0 mΩ 81.0 mΩ 81.0 mΩ 720 mΩ 720 mΩ 720 mΩ 720 mΩ 7.20 Ω 7.20 Ω 84.0 Ω Over-range: 20% beyond range EX1200 Series Introduction 21 VTI Instruments Corp. BURDEN VOLTAGE (VRMS FOR ACI, VDC FOR DCI) AC CURRENT RANGE 1 mA (DCI only) 10 mA 100 mA 1A 3A <0.1 V <0.1 V <0.6 V <0.4 V <0.9 V Over-range: 20% of range, except 3 A range SHUNT RESISTANCE CURRENT RANGE (ACI & DCI) 1 mA (DCI only) 10 mA & 100 mA 1A&3A 68.1 Ω 4.1 Ω 0.1 Ω DCV, DCI, 2W-R, AND 4W-R READING RATE* INTEGRATION TIME (PLC) 10 PLC 1 PLC 0.1 PLC 0.01 PLC MAX. READINGS/SECOND [60 HZ (50 HZ)] 5.9 (4.9) 59 (49) 599 (499) 2000 (1666) DIGITS 6½ 5½ 4½ 3½ NORMAL-MODE NOISE REJECTION (AC NMR) 60 dB 60 dB 0 dB 0 dB DC COMMON MODE REJECTION (DC CMR) 140 dB 140 dB 80 dB 80 dB * Auto-zero off, trigger and sample delay = 0 AC VOLTAGE – 6 ½ DIGITS – 1 YEAR ACCURACY RANGE RESOLUTION 100 mV 100 nV 1V 10 V 100 V 1 µV 10.0 µV 100.0 µV 300 V 100 µV FREQUENCY RANGE 3 Hz - 5 Hz >5 Hz - 20 Hz >20 Hz - 45 Hz >45 Hz - 20 kHz >20 kHz - 50 kHz >50 kHz - 100 kHz >100 kHz - 300 kHz 3 Hz - 5 Hz >5 Hz - 20 Hz >20 Hz - 45 Hz >45 Hz - 20 kHz >20 kHz - 50 kHz >50 kHz - 100 kHz >100 kHz - 300 kHz 3 Hz - 5 Hz >5 Hz - 20 Hz >20 Hz - 45 Hz >45 Hz - 20 kHz >20 kHz - 50 kHz >50 kHz - 100 kHz >100 kHz - 300 kHz TCAL 5 °C % READING % RANGE 1.0000% 0.0400% 0.3500% 0.0400% 0.1000% 0.0500% 0.1000% 0.0500% 0.6000% 0.0800% 0.6000% 0.0800% 5.0000% 0.5000% 1.0000% 0.0300% 0.3500% 0.0300% 0.0600% 0.0300% 0.0600% 0.0300% 0.1200% 0.0500% 0.6000% 0.0800% 5.0000% 0.5000% 1.0000% 0.0900% 0.3500% 0.0900% 0.0600% 0.0900% 0.0600% 0.0900% 0.1200% 0.1500% 0.6000% 0.2400% 5.0000% 1.5000% 0 °C TO +55 °C < 30% RANGE > 30% RANGE (0.1% Rdng + 40 ppm Rng)/°C (0.04% Rdng + 40 ppm Rng)/°C 375 µV 2.25 mV 195 µV 0.81 mV 282 µV 2.82 mV 282 µV 2.82 mV (0.2% Rdng + 0.02% Rng)/°C (0.1% Rdng + 40 ppm Rng)/°C (0.1% Rdng + 40 ppm Rng)/°C 0.225% Range 2.25% Range 0.081% Range 0.81% Range 0.282% Range 2.82% Range 0.282% Range 2.82% Range (0.2% Rdng + 0.02% Rng)/°C (0.1% Rdng + 40ppm Rng)/°C (0.1% Rdng + 40ppm Rng)/°C 3.60 V 3.60 V 0.99 V 0.99 V 3.75 V 3.75 V 3.75 V 3.75 V (0.2% Rdng + 0.02% Rng)/°C Specifications are for sine wave input > 5% of range for 100 mV – 100 V ranges, >15% for 300 V range, with Low AC filter selected. Volt-hertz product is limited to 1.5x10⁷ V•Hz. Over-range: 20% beyond range, except 300 V range. Input Impedance: 1 MΩ 2% in parallel with < 100 pF. 22 EX1200 Series Introduction www.vtiinstruments.com AC VOLTAGE – 5 ½ DIGITS – 1 YEAR ACCURACY RANGE RESOLUTION 100 mV 1µV 1V 1 0µV 10 V 10 0µV 100 V 1mV 300 V 1 mV FREQUENCY RANGE 20 Hz - 45 Hz >45 Hz - 100 Hz >100 Hz - 20 kHz >20 kHz - 100 kHz 20 Hz - 45 Hz >45 Hz - 100 Hz >100 Hz - 20 kHz >20 kHz - 100 kHz 20 Hz - 45 Hz >45 Hz - 100 Hz >100 Hz - 20 kHz >20 kHz - 100 kHz 20 Hz - 45 Hz >45 Hz - 100 Hz >100 Hz - 20 kHz >20 kHz - 100 kHz 20 Hz - 45 Hz >45 Hz - 100 Hz >100 Hz - 20 kHz >20 kHz - 100 kHz READING < 30 mV < 300 mV <3V < 30 V < 300 V 0 °C TO +55 °C ACCURACY READING 378 µV 198 µV > 30 mV 198 µV 285 µV 2.28 mV 1.23 mV > 300 mV 0.84 mV 2.85 mV 22.8 mV 12.3 mV >3V 8.4 mV 28.5 mV 228 mV 123 mV > 30 V 84 mV 285 mV 3.63 V 1.83 V 1.02 V 3.78 V ACCURACY 2.28 mV 1.23 mV 0.84 mV 2.85 mV 22.8 mV 12.3 mV 8.4 mV 28.5 mV 228 mV 123 mV 84 mV 285 mV 3.63 V 1.83 V 1.02 V 3.78 V Specifications are for sine wave input > 5% of range for 100 mV – 100 V ranges, >15% for 300 V range, with High AC filter selected. Volt-hertz product is limited to 1.5x10⁷ V•Hz. Over-range: 20% beyond range, except 300 V range. Input Impedance: 1 MΩ 2% in parallel with < 100 pF. AC VOLTAGE – 4 ½ DIGITS – 1 YEAR ACCURACY RANGE RESOLUTION 100 mV 10 µV 1V 100 µV 10 V 1mV 100 V 10 mV 300 V 10 mV FREQUENCY RANGE 20 Hz - 45 Hz >45 Hz - 100 Hz >100 Hz - 20 kHz >20 kHz - 100 kHz 20 Hz - 45 Hz >45 Hz - 100 Hz >100 Hz - 20 kHz >20 kHz - 100 kHz 20 Hz - 45 Hz >45 Hz - 100 Hz >100 Hz - 20 kHz >20 kHz - 100 kHz 20 Hz - 45 Hz >45 Hz - 100 Hz >100 Hz - 20 kHz >20 kHz - 100 kHz 20 Hz - 45 Hz >45 Hz - 100 Hz >100 Hz - 20 kHz >20 kHz - 100 kHz READING < 30 mV < 300 mV <3V < 30 V < 300 V 0 °C TO 55 °C ACCURACY READING 381 µV 201 µV > 30 mV 201 µV 288 µV 2.31 mV 1.26 mV > 300 mV 0.87 mV 2.88 mV 23.1 mV 12.6 mV >3V 8.7 mV 28.8 mV 231 mV 126 mV > 30 V 87 mV 288 mV 3.66 V 1.86 V 1.05 V 3.81 V ACCURACY 2.31 mV 1.26 mV 0.87 mV 2.88 mV 23.1 mV 12.6 mV 8.7 mV 28.8 mV 231 mV 126 mV 87 mV 288 mV 3.66 V 1.86 V 1.05 V 3.81 V Specifications are for sine wave input > 5% of range for 100 mV – 100 V ranges, >15% for 300 V range, with High AC filter selected. Volt-hertz product is limited to 1.5x10⁷ V•Hz. Over-range: 20% beyond range, except 300 V range. Input Impedance: 1 MΩ 2% in parallel with < 100 pF. EX1200 Series Introduction 23 VTI Instruments Corp. AC CURRENT – 6 ½ DIGITS – 1 YEAR ACCURACY RANGE RESOLUTION 10 mA 10 nA 100 mA 100 nA 1A 1 µA 3A 1 µA FREQUENCY RANGE 20 Hz - 45 Hz >45 Hz - 20 kHz 20 Hz - 45 Hz >45 Hz - 20 kHz 20 Hz - 45 Hz >45 Hz - 20 kHz 20 Hz - 45 Hz >45 Hz - 20 kHz TCAL 5 °C % READING %RANGE 0.6000% 0.0350% 0.5000% 0.0300% 0.3200% 0.0350% 0.2500% 0.0300% 0.3000% 0.0300% 0.2500% 0.0300% 0.4000% 0.0300% 0.3000% 0.0300% 0 °C TO +55 °C < 30% RANGE > 30% RANGE 200 µA 200 µA 100 µA 100 µA 411 µA 2 mA 177 µA 500 µA 4.11 mA 10 mA 1.77 mA 4 mA 30.2 mA 30.2 mA 17.6 mA 17.6 mA Specifications are for sine wave input > 5%, with Low AC filter. AC CURRENT – 5 ½ DIGITS – 1 YEAR ACCURACY RANGE RESOLUTION 10 mA 100 nA 100 mA 1 µA 1A 10 µA 3A 10 µA FREQUENCY RANGE 20 Hz - 45 Hz >45 Hz - 20 kHz 20 Hz - 45 Hz >45 Hz - 20 kHz 20 Hz - 45 Hz >45 Hz - 20 kHz 20 Hz - 45 Hz >45 Hz - 20 kHz READING < 10 mA < 30 mA < 0.3 A <3A 0 °C TO 55 °C ACCURACY READING 200 µA 100 µA 414 µA > 30 mA 180 µA 4.14 mA > 0.3 A 1.80 mA 30.4 mA 17.8 mA ACCURACY 2 mA 500 µA 10 mA 4 mA Specifications are for sine wave input > 5%, with High AC filter. AC CURRENT – 4 ½ DIGITS – 1 YEAR ACCURACY RANGE RESOLUTION 10 mA 1 µA 100 mA 10 µA 1A 100 µA 3A 100 µA FREQUENCY RANGE 20 Hz - 45 Hz >45 Hz - 20 kHz 20 Hz - 45 Hz >45 Hz - 20 kHz 20 Hz - 45 Hz >45 Hz - 20 kHz 20 Hz - 45 Hz >45 Hz - 20 kHz READING < 10 mA < 30 mA < 0.3 A <3A 0 °C TO 55 °C ACCURACY READING 200 µA 100 µA 417 µA > 30 mA 183 µA 4.17 mA > 0.3 A 1.83 mA 30.6 mA 18.0 mA ACCURACY 2 mA 500 µA 10 mA 4 mA Specifications are for sine wave input > 5%, with High AC filter. CREST FACTOR* ADDITIONAL ERROR (% READING) 1–2 2–3 3–4 4–5 0.05% 0.15% 0.30% 0.40% * For non-sine wave inputs AC FILTER FILTER TYPE LOW* MEDIUM* HIGH BANDWIDTH 3 Hz - 300 kHz 20 Hz - 300 kHz 20 Hz - 300 kHz SELECTION Can be selected only in 6½ digits Can be selected only in 6½ digits Can be selected in 6½, 5½, and 4½ digits * Line frequency default to 60 Hz, integration time default to 0.01 PLC, and auto-zero settings default to ON in Low and Medium filter settings 24 EX1200 Series Introduction www.vtiinstruments.com AC FREQUENCY AND PERIOD* RANGE FREQUENCY RANGE MODE 100 mV to 300 V 3 Hz to 1.5 MHz Slow Medium Fast RESOLUTION DIGITS 6½ 5½ 4½ 1 YEAR ACCURACY PPM READING OFFSET PPM 60 0.3 60 3.0 60 30.0 * Input signal > 10% of range. TEMPERATURE ACCURACY - THERMOCOUPLES Type Min -200 J -200 K* -200 T** -200 E -50 S -50 R 250 B -200 N Values in °C Max 1200 1372 400 900 1768 1768 1820 1300 -100 ±0.25 ±0.25 ±0.25 ±0.25 ±0.40 0 ±0.20 ±0.20 ±0.20 ±0.20 ±1.00 ±1.00 100 ±0.20 ±0.20 ±0.20 ±0.20 ±0.75 ±0.75 ±0.25 ±0.25 300 ±0.25 ±0.20 ±0.20 ±0.20 ±0.65 ±0.60 ±1.65 ±0.25 500 ±0.30 ±0.35 ±0.25 ±0.25 ±0.65 ±0.60 ±1.10 ±0.30 700 ±0.30 ±0.35 900 ±0.35 ±0.45 1100 ±0.45 ±0.55 ±0.30 ±0.65 ±0.60 ±0.80 ±0.35 ±0.35 ±0.70 ±0.60 ±0.70 ±0.40 ±0.70 ±0.65 ±0.65 ±0.40 1400 ±0.50 ±0.75 ±0.70 ±0.65 Conditions • Requires use of breakout box that is in a thermally stable environment. • 30 minute warm-up • Guaranteed maximum limits are two times (2x) the typical values • Exclusive of thermocouple errors • Exclusive of noise • Common mode voltage = 0 * 1400 accuracy is for 1372 °C ** 500 accuracy is for 400 °C SYSTEM SPEED EVENT Function Change DCV/DCI 4-W resistance (100 Ω, 1 kΩ) 2-W resistance (<1 MΩ) ACV ACI (0.01 A & 0.1 A) Range Change DCV/DCI 4-W resistance (100 Ω, 1 kΩ) 2-W resistance (<1 MΩ) ACV (0.1 V to 100V) ACI (0.01 A & 0.1 A) Auto-Range Time DCV/DCI 4-W resistance (100 Ω to 100 kΩ) 2-W resistance (100 Ω to 100 kΩ) ACV (0.1 V to 100 V) ACI (0.01 A & 0.1 A) Max. reading rate* Max. internal trigger rate* Max. ext. trig. rate to memory* 9/s 9/s 1/s 0.4/s (High filter) 0.25/s (High filter) 300/s 300/s 2/s < 1.25/s (High filter) < 0.2/s (High filter) < 30 ms < 60 ms < 3.0 s < 2.0 s (High filter) < 4.0 s (High filter) 2000/s (see DC Voltage Reading Rates tables below) 2000/s 2000/s * Auto-zero off, trigger and sample delay = 0, 0.01 PLC EX1200 Series Introduction 25 VTI Instruments Corp. ACV & ACI READING RATE FILTER SETTING LOW MEDIUM HIGH READING RATE 3 readings/second; Auto-zero ON, sample delay = 10 PLC 20 readings/second; Auto-zero ON, sample delay = 10 PLC 2000 readings/second; Auto-zero off, sample delay = 0, 0.01 PLC CONNECTOR INFORMATION TYPE 5 banana jacks Connector pin locations and signals can be found in Figure 4-1. 26 EX1200 Series Introduction www.vtiinstruments.com EXPLANATION OF SPECIFICATIONS This section provides explanatory notes for EX1200 DMM specifications that may be misunderstood. Memory This is the internal FIFO/buffer memory of the EX1200 mainframe. This does not include any buffer memory that the individual plug-in cards may have. Some plug-in cards, such as the EX1200-7500, EX1200-3608, and EX1200-7416, have onboard buffers that allow them to perform high-speed operations. Saved States The DMM can store its configurations inside a non-volatile memory. Recalling these “saved states” directly from the memory saves programming effort and will speeds up the scanning process. Measurement Integration Time Unlike data acquisition instruments that measure instantaneous values, the EX1200 DMM uses an integrating ADC for measurements which allows it to take multiple samples and average them by integrating them over a fixed period of time. This time is referred to as the aperture time and is usually measured in power line cycles (PLC) counts. One PLC is equal to the time period of the mains power voltage waveform (i.e., for a 60 Hz mains power, 1 PLC = 16.67 ms, whereas for a 50 Hz mains power, it is 20 ms). If the integration time is set to a multiple of PLCs, these errors (and their harmonics) will average out to approximately zero. This is, however, only applicable for dc measurements. True RMS The internal DMM of EX126x mainframes measure the root mean square (RMS) value of the applied waveform unlike the “average measurement” instruments. As a result, the values returned by the EX1200 DMM are closer to the readings of an analog instrument. A complex algorithm calculates the true RMS value of the applied waveforms (refer to the Crest Factor section for errors related to measuring non-sinusoidal waveforms). The inputs are always ac coupled, thus removing all dc components. AC Signal Filters The EX1200 DMM has three different ac filters to allow for a balance between low frequency accuracy and faster settling times for ac voltage and current measurements. Selection of the appropriate filter improves the accuracy of reading as well as the scanning speed. Remember that the minimum frequency input of the Low filter is 3 Hz. This means that the dc component of nonsymmetrical waveform inputs (such as pulse trains) are rejected before true RMS measurements are made. Power Supply Each EX1200 mainframe has an inherent limitation on the maximum power it can supply to the plug-in cards/modules. Please refer to the power consumption specifications of the plug-in cards before configuring the cards. This data can be found in the EX1200 Switch Cards User’s Manual. Exceeding these power limits may damage the power supply of mainframe. EX1200 Series Introduction 27 VTI Instruments Corp. Crest Factor Although the EX1200 DMM is a true RMS ac multimeter, calibration and all other accuracy specifications are applicable only to sinusoidal waveforms. If the input waveform is nonsinusoidal, it will affect the accuracy of the reading. It is important to consider the crest factor of the input waveforms to determine the percent error contributed by them. The crest factor of a waveform is the ratio of its peak value to its RMS value. The larger the crest factor, the greater the energy contained in higher frequency harmonics, and, hence, the larger the error introduced. See Crest Factor in Section 4 for more information. Resistance Measurements When making 4-wire ohms measurements, it is important to note that the range of the EX1200 DMM is reduced. In 4-wire ohms mode, the only valid ranges are between 100 Ω and 100 kΩ. Readings per Second Reading rate is affected by the measurement function and options selected for each measurement. In general, options that require additional processing, such as ac filtering, increased resolution, use of the “auto” modes, decrease the reading rate of a measurement. A tradeoff always exists between speed and accuracy. To achieve the maximum reading rate, auto-zero should be disabled, the trigger delay should be set to 0, a fixed range should be used, and the aperture time should be set to 0.01 PLC. Common Mode Voltage It is possible to measure differential voltages using the DMM. This means both input terminals can have a common voltage level (with reference to ground) and the DMM will still measure the differential signal between the HI and LO terminals (VMEAS). In theory, differential measurements eliminate the effects of common mode voltage (VCM). However, it is not possible to completely eliminate the effects of common mode voltage. The common-mode rejection ratio (CMRR) of the DMM measures the tendency of the device to reject input signals common to both input leads. Common Mode HI + - VMEAS + - VCM LO FIGURE 1-1: RECOMMENDED COMMON MODE CONNECTIONS 28 EX1200 Series Introduction www.vtiinstruments.com MAXIMIZING MEASUREMENT PERFORMANCE This section discusses tips and procedures that can help maximize the actual performance realized with the EX1200 DMM and aid the user in avoiding some common pitfalls associated with making measurements. Warm-up Time For the most accurate DMM measurements, the EX1200 should be warmed up for 30 minutes. Auto-zero As is true with most test equipment, measurements are affected by temperature changes in the environment as well as component drift. The auto-zero feature of the EX1200 DMM compensates for these changes by using internal references to adjust the gain and offset of reading to ensure accuracy. For this reason, it is recommended that the auto-zero feature always be enabled. The additional operations, however, decrease measurement speed. In cases where measurement speed is more important than accuracy, the auto-zero feature can be disabled which will nearly double the measurement speed. For more information on auto-zero, refer to Auto-Zero in Section 4. Cabling In most circumstances, a shielded cable should be used to obtain the most accurate measurement. The shield of the cable should be connected to chassis ground at the EX1200 and left floating at the DUT. However, if the device under test (DUT) is in an environment with a substantial amount of noise, such as near a motor, the shield should be attached to the ground of the device that is generating the noise to provide the most direct path to ground. In 4-wire measurements, if all four wires are enclosed with a common shield, the above practices should be followed. If there is a shield around both the Sense pair of wires and the Current Source wires, both shields may be connected to chassis ground. If only one pair of wires is shielded these should be the sense lines and the above practices should be observed. The user should consider they type of cable being use when taking measurements. Transient errors may occur when initial contact is made if the input connector and mating connector are at different temperatures and are made of dissimilar metals. This can create a thermoelectric voltage which is a common error source. If both the EX1200 DMM and the mating connector are at the same ambient temperature, this error typically dissipates to less than 0.1 ºC within 3 minutes. However, if a mating connector at room temperature is plugged into a DMM at a substantially different ambient temperature, a significant initial error may appear. This error will also take longer to decay to a level of insignificance. This error mechanism is not affected by calibration and is avoided by allowing for a thermal equilibrium delay after initial insertion. To reduce the affect of thermocouple voltages and temperature variations in low-level voltage measurements, it is recommended that connections be made using copper-to-copper crimped connections. In addition to ensuring thermal stability, to ensure the highest degree of reading reliability, cables used with the mating connector should be insulated with dithiolate. High-Resistance Measurements When making high-resistance measurements, it is important to take test cable leakage due to insulation into account. Cable jackets with poor insulators can allow voltage to leak from the test system and can create a significant measurement error. This error increases if this measurement is performed in a humid environment as this will increase the conductance of the insulation. Contamination of the cabling or input connector with high-resistance surface films, such as the oil present on fingertips, should also be avoided. To maximize high resistance measurement readings, care should be taken to maintain a “clean” test environment. EX1200 Series Introduction 29 VTI Instruments Corp. Low-Resistance Measurements When making low-resistance measurements and using switch cards, it is important the type of relay being used by the switch card. Solid-state relays tend to have a higher input impedance and more capacitance than mechanical relays, making mechanical relays preferable when performing measurements of this type. Solid state switches also have leakage currents that should be accounted for when measuring resistance or high-impedance voltage sources. 30 EX1200 Series Introduction www.vtiinstruments.com SECTION 2 PREPARATION FOR USE UNPACKING When an EX1200 system is unpacked from its shipping carton, the contents should include the following items: An EX1200 High-Density Switch/Measure and Control System Mainframe Getting Started with LXI-based VTI Systems and Local Area Networks application note EX1200 Series User‟s Manual (this manual) VTEX Switch Driver Programmer‟s Manual VTEX Scanner Driver Programmer‟s Manual VTEX System Driver Programmer‟s Manual VTI Instruments Corp. Drivers and Product Manuals CD Power line cord All components should be immediately inspected for damage upon receipt of the unit. DETERMINE SYSTEM POWER REQUIREMENTS The power requirements of the EX1200 mainframes are provided in the Specifications section of Section 1. As with any backplane-based system where modules share power, such as VXI and PXI, the possibility exists where certain plug-in module combinations can draw too much power from a power supply rail. As such, It is imperative that the chassis provide adequate power for the modules installed. For more information on EX1200 mainframe power consumption, please refer Appendix B. The user should confirm that the power budget for the system (for the chassis and all modules installed therein) is not exceeded on any voltage line. It should be noted that if the mainframe cannot provide adequate power to the module, the instrument might not perform to specification and possibly damage the power supply. In addition, if adequate cooling is not provided, the reliability of the instrument will be jeopardized and permanent damage may occur. Damage found to have occurred due to inadequate cooling will void the warranty on the instrument in question. INSTALLATION LOCATION EX1200s are designed to be largely insensitive to external electrical, magnetic, and thermal disturbances. However, as with all precision instrumentation, certain precautions, if taken into consideration, can help achieve maximum performance. 1) The unit, particularly its front panel, should be located away from sources of high or low temperatures. When used in a rackmount application with other heat-generating instruments, EX1200s should be located as far away from the other instruments as possible, 1U minimum. Multiple EX1200s, however, can be stacked directly on top of one another without any performance degradation. 2) Care should be taken to ensure that the fans at the rear and the air vents at the front of the mainframe are not obstructed to allow for proper cooling. EX1200 Series Preparation for Use 31 VTI Instruments Corp. 3) All unused slots should be closed with blanking panels to ensure a proper air circulation. This is critical to avoid overheating of the cards. For more information, see the Blanking Panel description in this section. 4) The front panel of an EX1200 should not be exposed to strong air currents. Typical problematic sources include building ventilation and instrument or cabinet fans. 5) The unit should be located away from sources of high magnetic fields such as motors, generators, and power transformers. 6) When selecting the installation location, be certain that there is enough space around the power plug and the outlet so that they are readily accessible. Do not insert the power cord into an outlet where accessibility to the plug cord is poor. WARM-UP TIME The specified warm-up time for the EX1200 systems is 30 minutes. If, however, the unit is being subjected to an ambient temperature change greater than 5 ºC, extra stabilization time is recommended to achieve maximum performance. NOTES It is important to note that, if connected to a high energy source, damage to the EX1200 system and the plug-ins installed can occur. To avoid damage due to high energy sources, the following precautions should be made: 1) Limit the input current and/or power to the values listed in the plug-ins maximum specifications. 2) Employ current/power limiting devices (such as fuses) to ensure that excessive current/power is mitigated in the event a system fault occurs. PLUG-IN MODULE INSTALLATION Before installing a plug-in module into an EX1200 system, make sure that the mainframe is powered down. Insert the module into the base unit by orienting the module so that the metal cover of the module can be inserted into the slot of the base unit. Position the cover so that it fits into the module‟s slot groove. Once the module is properly aligned, push the module back and firmly insert it into the backplane connector. See Figure 2-1 for guidance. Guide PCB FIGURE 2-1: MODULE INSTALLATION (EX1200-3048 USED AS EXAMPLE) 32 EX1200 Series Preparation for Use www.vtiinstruments.com REMOVING PLUG-IN MODULES An extractor handle (P/N: 41-0472-058) is provided is with all EX1200 mainframes to assist with removal of the module after installation. To remove a module, ensure that the captive screws have been removed from the EX1200 mainframe. Next, insert the insertion screw between the head of the screw and the front panel for the plug-in module, as shown in Figure 2-2. FIGURE 2-2: USING THE EXTRACTOR HANDLE EX1202/EX1262 MAINFRAME INSTALLATION OPTIONS EX1202 and EX1262 have three options which can installed prior to installation: NOTE Tabletop Installation Option (P/N: 70-0373-100) Rack Ears, Half Rack Width Option (P/N: 70-0373-101) Rack Ears, Dual Half Rack Width Option (P/N: 70-0373-102) Rackmount Installation, Half Rack Width Option (P/N: 70-0373-103) Rackmount Installation, Dual Half Rack Width Option (P/N: 70-0373-104) These options are not included with the EX1200 system and must be ordered separately. Tabletop Installation Option (P/N: 70-0373-100) The rackmount installation option includes all the parts necessary to mount an EX1200 system to the front of a standard test rack. Required Tools 1) #2 Phillips screwdriver Parts List Item# 1 2 3 4 Qty 4 4 14 2 Description Feet, Corner, Rubber, “U” Shaped Screw, 6-32 x 1/2”, Pan Head Phillips, Zinc Screw, 6-32 x 7/16”, Pan Head Phillips, Zinc Screw, 6-32 x 3/8”, Pan Head Phillips, Zinc VTI P/N 37-0281-201 37-0044-050 37-0044-044 37-0044-037 Assembly Procedure 1) Place the chassis on a protected work surface with its input connectors facing front. 2) Using Figure 2-3, locate the installation locations for each rubber foot. 3) Using the #2 Phillips screw driver, install the front left rubber feet using two (2) 6-32 x 7/16” pan head Phillips screws to secure the top and two (2) Screw, 6-32 x 3/8” pan head Phillips screws to secure the bottom of the foot. Use one (1) 6-32 x 1/2” pan head Phillips screw to secure side of this foot. EX1200 Series Preparation for Use 33 VTI Instruments Corp. 4) Using the #2 Phillips screw driver, install the four rubber feet using four (4) 6-32 x 7/16” pan head Phillips screws to secure the top and bottom and one (1) 6-32 x 1/2” pan head Phillips screw to secure side of each foot. FIGURE 2-3: TABLETOP INSTALLATION DIAGRAM (EXPLODED FRONT VIEW) 34 EX1200 Series Preparation for Use www.vtiinstruments.com Rack Ears, Half Rack Width Option (P/N: 70-0373-101) The tabletop installation option can be used when an EX1200 is not installed in a rack, but will be employed as a bench top or desktop instrument. Required Tools 1) #2 Phillips screwdriver Parts List Item# 1 2 3 Qty 1 1 10 Description Bracket, Rack Ear, Single Half Rack, EX1262/02 Bracket, Long Rack Ear, Single Half Rack, EX1262/02 Screw, 6-32 x ¼”, F/H Undercut Phillips, Zinc VTI P/N 41-0493-009 41-0493-011 37-0114-025 Assembly Procedure 1) Place the chassis on a protected work surface with its input connectors facing front. 2) Using a #2 Phillips screwdriver, install the rack ears (P/N: 41-0482-009 and 41-0493-011) on the front of the EX1200 using five (5) 6-32 x 3/8” flat head Phillips stainless steel screws (P/N: 37-0114-025) per rack ear. Note that the “Optional Mounting Locations” in Figure 2-4 allow the EX1200 to be installed in a rack either flush or recessed. 3) Place the EX1200 in the desired rack slot and secure the front rack ears with hardware provided with the rack. FIGURE 2-4: RACKMOUNT EARS INSTALLATION DIAGRAM (EXPLODED FRONT VIEW) EX1200 Series Preparation for Use 35 VTI Instruments Corp. Rack Ears, Dual Half Rack Width Option (P/N: 70-0373-102) The rackmount installation option includes all the parts necessary to mount an EX1200 system to the front of a standard test rack. Required Tools 1) #2 Phillips screwdriver Parts List Item# 1 2 3 4 5 6 Qty 1 1 1 13 2 4 Description Bracket, Rack Ear, Single Half Rack, EX1262/02 Bracket, Front Mating, EX1262/02 Bracket, Rear Mating, EX1262/02 Screw, 6-32 x ¼”, F/H Undercut Phillips, Zinc Screw, 4-40 x 3/8”, Flat Head Phillips, 82°, Stainless Steel Screw, 4-40 x 0.187 Pan Head Phillips, Zinc VTI P/N 41-0493-009 41-0493-006 41-0493-007 37-0114-025 37-0100-037 37-0011-018 Assembly Procedure 1) Place the chassis on a protected work surface with its input connectors facing front. 2) Using a #2 Phillips screwdriver, install the rack ears (P/N: 41-0482-009) on the front of the EX1200s using five (5) 6-32 x 3/8” flat head Phillips stainless steel screws (P/N: 37-0114025) for each rack ear. One ear should be installed on the left side of one chassis, while the other ear is installed on the right side of the other chassis. Note that the “Optional Mounting Locations” in Figure 2-5 allow the EX1200 to be installed in a rack either flush or recessed. 3) Install the front mating bracket (P/N: 41-0493-006) on the right EX1200 using three (3) 6-32 x 3/8” flat head Phillips stainless steel screws (P/N: 37-0114-025). 4) Install the rear mating bracket (P/N: 41-0493-007) on the right EX1200 using two (2) 4-40 x 0.187 pan head Phillips screws (P/N: 37-0011-018). 5) Connect the two EX1200s by installing two (2) 4-40 x 3/8” flat head stainless steel Phillips screws (P/N: 37-0100-037) through the right EX1200 capture the front mounting bracket. Then, use two (2) 4-40 x 0.187 pan head Phillips screws (P/N: 37-0011-018) to connect the rear mating bracket to the right EX1200. 6) Place the EX1200 in the desired rack slot and secure the front rack ears with hardware provided with the rack. 36 EX1200 Series Preparation for Use www.vtiinstruments.com FIGURE 2-5: DUAL HALF RACK EAR INSTALLATION DIAGRAM (EXPLODED FRONT VIEW) EX1200 Series Preparation for Use 37 VTI Instruments Corp. Rackmount Installation, Half Rack Width Option (P/N: 70-0373-103) The rackmount installation option includes all the parts necessary to mount an EX1200 to the front and rear of a standard test rack. Required Tools 1) #2 Phillips screwdriver 2) 5/16” wrench or socket Parts List Item# 1 2 3 4 5 6 7 8 Qty Description 1 1 2 2 10 2 6 4 Bracket, Rack Ear, Single Half Rack, EX1262/02 Bracket, Long Rack Ear, Single Half Rack, EX1262/02 Bracket, Unit Support, EX1202/62 Bracket, Rear Rack Support, EX1202/62 Screw, 6-32 x ¼”, F/H Undercut Phillips, Zinc Screw, 6-32 x 3/8” Pan Head Phillips, Sq Cone SEMS Zinc Screw, 8-32 x 3/8” Pan Head Phillips, Sq Cone SEMS Zinc Nut, Hex, KEPS, 8-32 Steel/Zinc VTI P/N 41-0493-009 41-0493-011 41-0482-010 41-0482-011 37-0114-025 37-0028-037 37-0073-037 37-0200-832 Assembly Procedure 1) Place the chassis on a protected work surface with its input connectors facing front. 2) Using a #2 Phillips screwdriver, install the rack ears (P/N: 41-0482-009 and 41-0493-011) on the front of the EX1200 using five (5) 6-32 x 3/8” flat head Phillips stainless steel screws (P/N: 37-0114-025) for each rack ear. Note that the “Optional Mounting Locations” in Figure 2-6 allow the EX1200 to be installed in a rack either flush or recessed. 3) Next, attach the unit support brackets (P/N: 41-0482-010) to the EX1200 using two (2) 6-32 x 3/8” pan head Phillips SEMS screws (P/N: 37-0028-037) for each bracket (see Figure 2-6). 4) Place the rear rack support brackets (P/N: 41-0482-011) on the inside of the unit support brackets installed in step 3 and loosely secure them using two (2) 8-32 x 3/8” pan head Phillips SEMS screws (P/N: 37-0073-037) and two (2) KEPS hex nuts (P/N: 37-0200-832) per bracket. Loosely installing the hardware will allow the rear support bracket to adjust to the proper length once installed in a rack. 5) Place the EX1200 in the desired rack slot and secure the front rack ears with hardware provided with the rack. Once the front bracket are secured, slide the rear support brackets so that they can be attached to the rack as well. After securing the rear support brackets, tighten the screws and KEPS nuts installed in step 4. 38 EX1200 Series Preparation for Use www.vtiinstruments.com FIGURE 2-6: HALF RACK WIDTH RACKMOUNT INSTALLATION DIAGRAM (EXPLODED FRONT VIEW) EX1200 Series Preparation for Use 39 VTI Instruments Corp. Rackmount Installation, Dual Half Rack Width Option (P/N: 70-0373-104) The rackmount installation option includes all the parts necessary to mount an EX1200 to the front and rear of a standard test rack. Required Tools 1) #2 Phillips screwdriver 2) 5/16” wrench or socket Parts List Item# 1 2 3 4 5 6 7 8 9 10 11 Qty 2 1 1 2 2 2 4 13 2 6 4 Description Bracket, Rack Ear, Single Half Rack, EX1262/02 Bracket, Front Mating, EX1262/02 Bracket, Rear Mating, EX1262/02 Bracket, Unit Support, EX1262/02 Bracket, Rear Rack Support, EX1262/02 Screw, 4-40 x 3/8”, Flat Head Phillips, 82°, Stainless Steel Screw, 4-40 x 0.187 Pan Head Phillips, Zinc Screw, 6-32 x ¼”, F/H Undercut Phillips, Zinc Screw, 6-32 x 3/8” Pan Head Phillips, Sq Cone SEMS Zinc Screw, 8-32 x 3/8” Pan Head Phillips, Sq Cone SEMS Zinc Nut, Hex, KEPS, 8-32 Steel/Zinc VTI P/N 41-0493-009 41-0493-006 41-0493-007 41-0482-010 41-0482-011 37-0100-037 37-0011-018 37-0114-025 37-0028-037 37-0073-037 37-0200-832 Assembly Procedure 1) Place the chassis on a protected work surface with its input connectors facing front. 2) Using a #2 Phillips screwdriver, install the rack ears (P/N: 41-0482-009) on the front of the EX1200s using five (5) 6-32 x 3/8” flat head Phillips stainless steel screws (P/N: 37-0114025) for each rack ear. One ear should be installed on the left side of one chassis, while the other ear is installed on the right side of the other chassis. Note that the “Optional Mounting Locations” in Figure 2-7 allow the EX1200 to be installed in a rack either flush or recessed. 3) Next, attach a unit support bracket (P/N: 41-0482-011) to each EX1200 using two (2) 6-32 x 3/8” pan head Phillips SEMS screws (P/N: 37-0028-037) for each bracket (see Figure 2-7). Note that the bracket should be installed on the same side as the rack ear installed previously. 4) Place the rear rack support brackets (P/N: 41-0482-011) on the inside of the unit support brackets installed in step 3 and loosely secure them using two (2) 8-32 x 3/8” pan head Phillips SEMS screws (P/N: 37-0073-037) and two (2) KEPS hex nuts (P/N: 37-0200-832) per bracket. Loosely installing the hardware will allow the rear support bracket to adjust to the proper length once installed in a rack. 5) Install the front mating bracket (P/N: 41-0493-006) on the right side of the EX1200 where the rackmount/support brackets installed on the left using three (3) 6-32 x 3/8” flat head Phillips stainless steel screws (P/N: 37-0114-025). 6) Install the rear mating bracket (P/N: 41-0493-007) on the right side of the EX1200 where the front mating bracket was installed previously using two (2)4-40 x 0.187 pan head Phillips Zinc screws (P/N: 37-0011-018). 7) Connect the two EX1200s by installing two (2) 4-40 x 3/8” flat head stainless steel Phillips screws (P/N: 37-0100-037) through the right EX1200 capture the front mounting bracket. Then, use two (2) 4-40 x 0.187 pan head Phillips Zinc screws (P/N: 37-0011-018) to connect the rear mating bracket to the right EX1200. 8) Place the EX1200 in the desired rack slot and secure the front rack ears with hardware provided with the rack. Once the front bracket are secured, slide the rear support brackets so that they can be attached to the rack as well. After securing the rear support brackets, tighten the screws and KEPS nuts installed in step 4. 40 EX1200 Series Preparation for Use www.vtiinstruments.com FIGURE 2-7: DUAL HALF RACK INSTALLATION DIAGRAM (EXPLODED FRONT VIEW) EX1200 Series Preparation for Use 41 VTI Instruments Corp. EX1206/EX1266 MAINFRAME INSTALLATION OPTIONS EX1206 and EX1266 have three options which can installed prior to installation: NOTE Tabletop Installation Option (P/N: 70-0361-100) Rack Ear Installation Option (P/N: 70-0361-101) Rackmount Installation Option (P/N: 70-0361-102) These options are not included with the EX1200 system and must be ordered separately. Tabletop Installation Option (P/N: 70-0361-100) The tabletop installation option can be used when an EX1200 is not installed in a rack, but will be employed as a bench top or desktop instrument. Required Tools 2) #2 Phillips screwdriver Parts List Item# 1 2 3 4 Qty 14 4 4 2 Description Screw, 6-32 x 7/16”, Pan Head Phillips, Zinc Screw, 6-32 x 1/2”, Pan Head Phillips, Zinc Feet, Corner, Rubber, “U” Shaped Screw, 6-32 x 3/8", Pan Head Phillips, Zinc VTI P/N 37-0044-044 37-0044-050 37-0281-201 37-0044-037 Assembly Procedure 1) Place the chassis on a protected work surface with its input connectors facing front. 2) Using Figure 2-8, locate the installation locations for each rubber foot. 3) Using the #2 Phillips screw driver, install the four rubber feet using four (4) 6-32 x 7/16” pan head Phillips screws to secure the top and bottom and one (1) 6-32 x 1/2” pan head Phillips screw to secure side of each foot. 42 EX1200 Series Preparation for Use www.vtiinstruments.com FIGURE 2-8: TABLE TOP FEET INSTALLATION DIAGRAM (EXPLODED FRONT VIEW) EX1200 Series Preparation for Use 43 VTI Instruments Corp. Rack Ear Installation Option (P/N: 70-0361-101) The rackmount installation option includes all the parts necessary to mount an EX1200 system to the front of a standard test rack. Required Tools 1) #2 Phillips screwdriver Parts List Item# 1 2 Qty 2 10 Description Rack Ear, EX1200 Screw, 6-32 x ¼”, F/H Undercut Phillips, Zinc VTI P/N 41-0472-008 37-0114-025 Assembly Procedure 1) Place the chassis on a protected work surface with its input connectors facing front. 2) Using a #2 Phillips screwdriver, install the rack ears (P/N: 41-0482-009) on the front of the EX1200 using five (5) 6-32 x 3/8” flat head Phillips stainless steel screws (P/N: 37-0114-025) for each rack ear. Note that the “Optional Mounting Locations” in Figure 2-9 allow the EX1200 to be installed in a rack either flush or recessed. FIGURE 2-9: RACK EAR INSTALLATION DIAGRAM (EXPLODED FRONT VIEW) 44 EX1200 Series Preparation for Use www.vtiinstruments.com Rackmount Installation Option (P/N: 70-0361-102) The rackmount installation option includes all the parts necessary to mount an EX1200 to the front and rear of a standard test rack. Required Tools 1) #2 Phillips screwdriver 2) 5/16” wrench or socket Parts List Item# 1 2 3 4 5 6 7 Qty 2 2 2 10 2 6 4 Description Rack Ear, EX1266 Bracket, Unit Support, EX1200 Bracket, Rear Rack Support, EX1200 Screw, 6-32 x ¼”, F/H Undercut Phillips, Zinc Screw, 6-32 x 3/8” Pan Head Phillips, Sq Cone SEMS Zinc Screw, 8-32 x 3/8” Pan Head Phillips, Sq Cone SEMS Zinc Nut, Hex, KEPS, 8-32 Steel/Zinc VTI P/N 41-0472-008 41-0482-010 41-0482-011 37-0114-025 37-0028-037 37-0073-037 37-0200-832 Assembly Procedure 1) Place the chassis on a protected work surface with its input connectors facing front. 2) Using a #2 Phillips screwdriver, install the rack ears (P/N: 41-0472-008) on the front of the EX1200 using five (5) 6-32 x 3/8” flat head Phillips stainless steel screws (P/N: 37-0114-025) for each rack ear. Note that the “Optional Mounting Locations” in Figure 2-10 allow the EX1200 to be installed in a rack either flush or recessed. 3) Next, attach the unit support brackets (P/N: 41-0482-010) to the EX1200 using two (2) 6-32 x 3/8” pan head Phillips SEMS screws (P/N: 37-0028-037) for each bracket (see Figure 2-10). 4) Place the rear rack support brackets (P/N: 41-0482-011) on the inside of the unit support brackets installed in step 3 and loosely secure them using two (2) 8-32 x 3/8” pan head Phillips SEMS screws (P/N: 37-0073-037) and two (2) KEPS hex nuts (P/N: 37-0200-832). Loosely installing the hardware will allow the rear support bracket to adjust to the proper length once installed in a rack. 5) Place the EX1200 in the desired rack slot and secure the front rack ears with hardware provided with the rack. Once the front bracket are secured, slide the rear support brackets so that they can be attached to the rack as well. After securing the rear support brackets, tighten the screws and KEPS nuts installed in Step 4. EX1200 Series Preparation for Use 45 VTI Instruments Corp. FIGURE 2-10: RACKMOUNT HARDWARE INSTALLATION DIAGRAM (EXPLODED FRONT VIEW) 46 EX1200 Series Preparation for Use www.vtiinstruments.com 3U MAINFRAME INSTALLATION OPTIONS EX1200s have three options which can installed prior to installation: Tabletop Installation Option (P/N: 70-0370-100) Rack Ear Installation Option (P/N: 70-0370-101) Rackmount Installation Option (P/N: 70-0370-102) These options are not included with the EX1200 system and must be ordered separately. Tabletop Installation Option (P/N: 70-0370-100) The tabletop installation option can be used when an EX1200 is not installed in a rack, but will be employed as a bench top or desktop instrument. Required Tools 1) #2 Phillips screwdriver Parts List Item# 1 2 3 Qty 8 2 28 Description Feet, Corner, Rubber, “L” Shaped Shim, Bottom, Rubber Feet, EX1267/8/9 Screw, 6-32 x 7/16”, Pan Head Phillips, Zinc VTI P/N 37-0281-200 41-0494-022 37-0044-044 Assembly Procedure 1) Place the chassis on a protected work surface with its input connectors facing front. 2) Using Figure 2-11, locate the installation locations for each rubber foot. Note the location of the two shims (P/N: 41-0494-022) that are required for the two bottom, front locations. 3) Using the #2 Phillips screw driver, install the eight rubber feet using four (4) 6-32 x 7/16” pan head Phillips screws to secure the top and bottom and one (1) 6-32 x 1/2” pan head Phillips screw to secure side of each foot. EX1200 Series Preparation for Use 47 VTI Instruments Corp. FIGURE 2-11: TABLE TOP FEET INSTALLATION DIAGRAM (EXPLODED FRONT VIEW) 48 EX1200 Series Preparation for Use www.vtiinstruments.com Rack Ear Installation Option (P/N: 70-0370-101) The rackmount installation option includes all the parts necessary to mount an EX1200 system to the front of a standard test rack. Required Tools 1) #2 Phillips screwdriver Parts List Item# Qty 1 2 3 4 2 2 4 8 Description Bracket, Rack Ear, EX1267/68/69 Handle, 0.25 dia x 1.25 H X 4.0 L, 8-32, Aluminum, Black Screw, 8-32 x 1/2", Flat Head Phillips, 82°, Stainless Steel Screw, 6-32 x 3/8", Flat Head Phillips, 82°, Stainless Steel VTI P/N 41-0494-010 37-0254-000 37-0129-050 37-0173-037 Assembly Procedure 1) Place the chassis on a protected work surface with its input connectors facing front. 2) Using a #2 Phillips screwdriver, install the rack ears (P/N: 41-0482-009) on the front of the EX1200 using four (4) 6-32 x 3/8” flat head Phillips stainless steel screws (P/N: 37-0173-037) for each rack ear. 3) Install the handles (P/N: 37-0254-000) using two (2) 8-32 x 1/2" flat head Phillips screws. FIGURE 2-12: RACK EAR INSTALLATION DIAGRAM (EXPLODED FRONT VIEW) EX1200 Series Preparation for Use 49 VTI Instruments Corp. Rackmount Installation Option (P/N: 70-0370-102) The rackmount installation option includes all the parts necessary to mount an EX1200 to the front and rear of a standard test rack. Required Tools 1) #2 Phillips screwdriver 2) 5/16” wrench or socket Parts List Item# Qty 1 2 3 4 5 6 7 8 9 2 2 2 2 8 8 4 4 4 Description VTI P/N Bracket, Rack Ear, EX1267/68/69 Bracket, Rack Ear, Support, EX1267/8/9 Bracket, Rack Ear, Rear Unit, EX1267/8/9 Handle, 0.25 dia x 1.25 H X 4.0 L, 8-32, Aluminum, Black Screw, 8-32 x 1/2" Flat Head Phillips, 82°, Stainless Screw,6-32 x 3/8", Flat Head Phillips, 82°, Stainless Steel Screw, 6-32 x 1/4" Pan Head Phillips, Sq Cone SEMS Zinc Screw, 8-32 x 3/8" Pan Head Phillips, Sq Cone SEMS Zinc Nut, Hex, KEPS, 8-32 Steel/Zinc 41-0494-010 41-0494-020 41-0494-021 37-0254-000 37-0129-050 37-0173-037 37-0028-025 37-0073-037 37-0200-832 Assembly Procedure 1) Place the chassis on a protected work surface with its input connectors facing front. 2) Using a #2 Phillips screwdriver, install the rack ears (P/N: 41-0494-010) on the front of the EX1200 using four (4) 6-32 x 3/8” flat head Phillips stainless steel screws (P/N: 37-0173-037) for each rack ear. Note that the “Optional Mounting Locations” in Figure 2-11 allow the EX1200 to be installed in a rack either flush or recessed. 3) Next, attach the unit support brackets (P/N: 41-0494-020) to the EX1200 using two (2) 6-32 x 3/8” pan head Phillips SEMS screws (P/N: 37-0028-037) for each bracket (see Figure 2-11). 4) Place the rear rack support brackets (P/N: 41-0494-021) on the inside of the unit support brackets installed in Step 3 and loosely secure them using two (2) 8-32 x 3/8” pan head Phillips SEMS screws (P/N: 37-0073-037) and two (2) KEPS hex nuts (P/N: 37-0200-832). Loosely installing the hardware will allow the rear support bracket to adjust to the proper length once installed in a rack. 5) Place the EX1200 in the desired rack slot and secure the front rack ears with hardware provided with the rack. Once the front bracket are secured, slide the rear support brackets so that they can be attached to the rack as well. After securing the rear support brackets, tighten the screws and KEPS nuts installed in Step 4. 50 EX1200 Series Preparation for Use www.vtiinstruments.com FIGURE 2-13: RACKMOUNT HARDWARE INSTALLATION DIAGRAM (EXPLODED FRONT VIEW) BLANKING PANEL When a chassis is not fully populated, blanking panels (P/N: 41-0472-012) should be installed into the empty slots to maintain proper air flow through the chassis. Blanking panels should be ordered with the mainframe if empty slots are anticipated. CONNECTING/DISCONNECTING LINE POWER When connecting the power cord to an EX1200 series mainframe, there should be no connections to the front panel of any plug-in cards that may be installed and the power switch at the rear of the mainframe should be in OFF position. Connect the power line cord to the EX1200 series mainframe outlet, then connect all input signals to the plug-in cards, then turn the power supply ON. Do not touch exposed pins or connectors. SOFTWARE INSTALLATION The fastest way to begin controlling an EX1200 is to discover the unit using LXI Discovery Tool utility and then manipulate the instrument‟s Java-based SFP. To do this, the following is required: A PC or laptop computer Microsoft™ Windows™ XP/7/8 OS and Internet Explorer™ (IE) An internet connection Java™ Runtime Environment (JRE) version 6.0 (or later) LXI Discovery Tool EX1200 Series Preparation for Use 51 VTI Instruments Corp. An executable for installing JRE is available on the VTI Instruments Corp. Drivers and Product Manuals CD provided with the EX1200. If JRE is currently installed on the host PC, the software installation instruction for this software can be skipped. The LXI Discovery Tool searches for all LAN-based VTI devices on the network and can be downloaded from LXI Consortium Website. This utility leverages Apple‟s Bonjour plug-in, please use version v2.0.2 and later for proper operation of the LXI Discovery Tool.. . Java Installation Java Runtime Environment (JRE) is required to access the SFP page of the EX1200. Prior to installing JRE, ensure that all IE sessions have been closed. To install JRE, insert the VTI Instruments Corp. Drivers and Product Manuals CD into the host PCs CD-ROM and, using Windows Explorer, navigate to the <CD-ROM Drive>:\EX Platforms Requisites directory. Next, run the JRESetup.exe program. Once installation begins, simply follow the on-screen instructions. DRIVER INSTALLATION To monitor and/or control the EX1200‟s instruments programmatically (via a user generated program or through tools such as HP VEE, National Instrument‟s Switch Executive, etc.), two additional components must be installed: the IVI Shared Components library and the provided VTI Instruments driver. Follow these steps: IVI Shared Components Installation If this component was installed during a previous LXI instrument installation, please proceed to Switch Instrument Driver Installation. First, close all other open programs, leaving only Windows Explorer open. Navigate to the <CD-ROM Drive>:\LXI Drivers\EX Platform Requisites directory on the CD and run the IVISharedComponents1.5.0.exe program. Next, follow the on-screen instructions. Do not proceed to the next step until this installation completes successfully. If instructed to reboot the PC, it will be necessary to do so at that time. Switch Instrument Driver Installation If the VTEXSwitch instrument driver was installed previously on the host PC, proceed to System/LXISync Instrument Driver Installation. To install the VTEXSwitch instrument driver, navigate to <CD-ROM Drive>:\LXI Drivers\EX Switch Driver, IVI on the CD and run the .msi installer located in this directory. System/LXISync Instrument Driver Installation NOTE Complete this step only if the LXISync capabilities of the EX1200 platform are required. Also, if this driver was installed previously on the host PC, software installation is now complete. To install the System/LXISync Instrument driver, navigate to <CD-ROM Drive>:\LXI Drivers\EX System Driver, IVI on the CD and run the .msi installer located in this directory. Please refer to VTEX Switch Driver Programmer’s Manual for programming guidelines. Additional information about IVI drivers can be found on the web at http://ivifoundation.org. Information about the LXI standard and LXI technology can be found at http://www.lxistandard.org. 52 EX1200 Series Preparation for Use www.vtiinstruments.com NETWORK CONFIGURATION By default, the EX1200 will attempt to locate a DHCP server. If one is found, the IP address assigned by the DHCP server will be assumed. Otherwise, after a timeout of 20 seconds, the unit will attempt to obtain an IP address by using Auto IP. Auto IP is a mechanism for finding an unused IP address in the range 169.254.X.Y where X is in the range 1 - 254 and Y is in the range 0 - 255. The device will first attempt to obtain the specific address 169.254.X.Y, where X and Y are the second-to-last and last octets of the device‟s MAC address. However, X will be set to 1 if it is 0 in the MAC address, and to 254 if it is 255 in the MAC address. If this address is already in use, the unit will attempt to obtain other IP addresses in a pseudorandom fashion until it finds one that is available. To illustrate the Auto IP mechanism, Table 2-1 lists the Auto IP default address for some example MAC addresses. MAC Address 00:0D:3F:01:00:01 00:0D:3F:01:01:01 00:0D:3F:01:A3:28 00:0D:3F:01:FE:FE 00:0D:3F:01:FF:FE Auto IP Default Address 169.254.1.1 169.254.1.1 169.254.163.40 169.254.254.254 169.254.254.254 TABLE 2-1: AUTO IP DEFAULT ADDRESS ASSIGNMENT If a static IP address assignment is preferred, one can be optionally assigned via the embedded web page interface. This is done by clicking the Network Configuration link, disabling DHCP, and then assigning a static IP address. For more information, see Network Configuration in Section 7. However, a much more convenient and recommended way to obtain the benefits of a static IP address is to employ DHCP, but assign the instrument a reserved IP address in your company‟s DHCP server configuration. This reserved address, linked to the EX1200‟s MAC address on the DHCP server, would be assigned to the EX1200 at power up initialization without having to manually set it on the EX1200. The DHCP server configuration provides a centralized, controlled database of assigned IP addresses, preventing accidental assignment of the same IP address to multiple instruments. Consult your company‟s Information Technology department for assistance. VXI-11 Device Discovery is also supported by the EX1200. This allows all EX1200s on a local network to be found without knowledge of their MAC address or IP address with the use of a broadcast message. To return an EX1200 to the default network settings, the Reset Button can be used. For more information, see Reset Button in Section 3. NETWORK TROUBLESHOOTING If an error occurs when trying to discover the EX1200 (see Web Page Operation in Section 7 for more information on discovery), it may be necessary to change the network settings for the EX1200 and the host PC. By using the following methodology, most network-related issues can be resolved: 1) 2) 3) 4) 5) Restore the EX1200’s Default Network Settings Determine PCs Network Settings Set the EX1200 to Auto IP or Set the EX1200 to Static IP Restore the Host PCs Network Settings Using Multiple Network Cards EX1200 Series Preparation for Use 53 VTI Instruments Corp. Restore the EX1200’s Default Network Settings It may be the case that the EX1200 is in an unknown network configuration. The EX1200 can be returned to its default state by pressing the Reset Button located at the rear of the chassis. 1) Power off the EX1200. 2) Press and hold the reset button until the LAN LED flashes green (approximately 5 s). 3) Release the reset button. Determine PCs Network Settings 1) Ensure that all host PC Ethernet connections are made that will be used while controlling the EX1200. If the PC will be connected to a LAN, ensure that the LAN connection is made. 2) From Windows , navigate to Start→Settings→Network Connections. 3) Right click on the connection that will be used to communicate with the EX1200, then select Properties (see Figure 2-14). Some PCs have multiple network connections, so it is important to make certain that the connection used to communicate with the EX1200 is selected. FIGURE 2-14: NETWORK CONNECTION PROPERTIES 4) Select Internet Protocol (TCP/IP), then click the Properties button as shown in Figure 2-15. FIGURE 2-15: LOCAL AREA CONNECTION PROPERTIES DIALOG BOX 54 EX1200 Series Preparation for Use www.vtiinstruments.com 5) Determine if the PC is set to use auto or static IP. Figure 2-16 shows examples of both auto and static IP address configurations. FIGURE 2-16: DYNAMIC (LEFT) AND STATIC (RIGHT) IP ADDRESS CONFIGURATIONS 6) If set to use a static IP, record the IP address, subnet mask, and default gateway for use later. Select Obtain an IP address automatically to establish a connection to the EX1200. Click the OK button and proceed to Set the EX1200 to Static IP. If set to use a dynamic IP, click the OK button and proceed to Set the EX1200 to Auto IP. Set the EX1200 to Auto IP 1) Remove all network connections from the PC except for the connection to the EX1200. Wireless adapters should be disabled as well. 2) Apply power to the EX1200 and wait for the LAN LED to turn green. 3) Discover EX1200 using LXI Discovery Tool as described in the Web Page Operation in Section 7. The steps taken previously should ensure that discovery works. 4) Once connected to the EX1200, click on Network Configuration in the command menu. 5) Select DHCP and AutoIP in the IP Address Source field and ensure that Static IP is not selected. Figure 2-17 shows the proper configuration. Click the Submit button to save all changes. EX1200 Series Preparation for Use 55 VTI Instruments Corp. FIGURE 2-17: EX1200 SET TO USE AUTO IP Set the EX1200 to Static IP 1) Disconnect all network connections from the PC except for the connection between the PC and the EX1200. 2) Apply power to the EX1200 and wait for the LAN LED to turn green. 3) Discover EX1200 using LXI Discovery Tool as described in the Web Page Operation in Section 7. The steps taken previously should ensure that discovery works. 4) Once connected to the embedded web interface, click on the Network Configuration link in the command menu. 5) Select the Static checkbox in the IP Address Source field and ensure that DHCP and AutoIP are not selected. 6) In the IP Address field, enter an appropriate IP address for the EX1200. Use the IP address obtained the Determine PCs Network Settings step to determine the network address. The network address is the first three digits of the IP address (10.1.0 in the example provided). The last digit of the IP address (the node), is a number, 0 through 255, that is not currently assigned to any other device on the network. Ensure that a unique IP address is assigned to the EX1200 by consulting a network administrator. 7) In the Subnet Mask field, enter the subnet mask in the Determine PCs Network Settings step. 8) In the Gateway Address field, enter the same gateway address in the Determine PCs Network Settings step. 9) Click Submit to save all changes made to the Network Configuration page. 56 EX1200 Series Preparation for Use www.vtiinstruments.com FIGURE 2-18: EX1200 SET TO USE STATIC IP Restore the Host PCs Network Settings 1) Power down the EX1200 and reconnect it to the LAN in its desired location. 2) If the PC was originally set to use a static IP address, use the procedure in Determine PCs Network Settings to change the PCs IP address back to its original state. 3) Power on the EX1200 and wait for the LAN LED to turn solid green. 4) Discover the EX1200 using LXI Discovery Tool as described in Web Page Operation in Section 7. Using Multiple Network Cards When multiple network cards exist in a single PC, it may be necessary to define a static IP address to both the host PC NIC card that will interface with the EX1200 mainframe as well as the EX1200 itself. This process is only necessary if a DCHP server is not connected to the network to which the device is connected and typically occurs when the NIC is connected directly to the instrument. The following process can be used to ensure proper functionality. 1) Navigate to Start → Settings → Network Connections. 2) Disable all network interfaces except the one that is connected to the EX1200 mainframe. This is done by right clicking on the interface, then selecting Disable. 3) Open the web page of the EX1200 mainframe. 4) Click the IP Configuration link. A prompt may appear to log into the EX1200 mainframe. 5) Unselect DHCP and AutoIP and ensure that Static is selected. 6) Enter an IP address into the IP Address field. Although any valid network IP address can be used, 192.168.1.2 is used in this example. For more information on valid IP addresses, please consult with an IT administrator. 7) Set the Subnet Mask. For this example, the subnet mask is 255.255.255.0. EX1200 Series Preparation for Use 57 VTI Instruments Corp. FIGURE 2-19: COMPLETED EX1200 MAINFRAME STATIC IP CONFIGURATION 8) Click the Submit button. Once this is done, it is no longer possible to communication with the EX1200 mainframe. This is normal and is addressed in the following steps. 9) Set a static IP address for the NIC card by doing the following: a) Navigate to Start → Settings → Network Connections. b) Right click on the NIC card that the EX1200 mainframe is connected to and select Properties. c) Select Internet Protocol (TCP/IP) and click Properties. FIGURE 2-20: TCI/IP SELECTION d) Click the Use the following IP address radio button. 58 EX1200 Series Preparation for Use www.vtiinstruments.com e) f) Enter the desired IP address. If using the IP from the example above, 192.168.1.1 can be used. If not automatically completed after the IP address is entered, set the Subnet mask field to 255.255.255.0. FIGURE 2-21: COMPLETED NIC STATIC IP CONFIGURATION g) Click OK to exit the network configuration properties. TIME CONFIGURATION The EX1200 will initially be configured to receive its time through PTP (Precision Time Protocol). The user can also set time using SNTP (Simple Network Time Protocol) or the time can be set manually. The manual setting is necessary if the network environment is such that the unit cannot reach the Internet. For more information, see Time Configuration in Section 7. EX1200 Series Preparation for Use 59 www.vtiinstruments.com SECTION 3 BASIC MAINFRAME OPERATION INPUT CONNECTIONS This section describes the connectors that are available on the EX1200 mainframe. Tables are provided to indicate the pin mapping used for these connectors and a brief description of the connectors functionality is provided as well. Ethernet Connector EX1200s use a 10/100BaseTX RJ-45 connector to connect to PCs, LANs, and other networking devices. The RJ-45 connector provides auto-MDIX functionality that automatically handles crossover in point-to-point connections. The unit will also detect and correct pairs that are wired backwards. Therefore, crossover cables can be used, but are not required. Digital I/O The EX1200 features an 8-channel digital I/O (DIO) port on the rear panel of the instrument. This port can be used as an arm/trigger source, for presentation of output triggers from plug-in modules or the integrated DMM and as a general purpose output device. The digital I/O connector is a standard DB-9 with the following pin assignment: Pin 1 2 3 4 5 6 7 8 9 Function DIO Channel 0 DIO Channel 1 DIO Channel 2 DIO Channel 3 DIO Channel 4 DIO Channel 5 DIO Channel 6 DIO Channel 7 GND 1 2 6 3 7 4 8 5 9 TABLE 3-1: DIGITAL I/O CONNECTOR & PIN ASSIGNMENT As a general purpose output device, each DIO channel can be independently programmed with regards to its output functionality and its static level to assume when enabled as an output. When not enabled as an output, a channel becomes tri-stated, preventing conflict with other potential voltage drivers. Reference the port‟s electrical specifications in Table 3-1 for voltage tolerance limits and output drive capabilities. Regardless of output functionality, each channel provides constant input functionality. That is, the input level on each channel can be accessed without a specific enable function call. Moreover, the base functionality of the DIO channels is not affected by triggering, scanning, or any other instrument process. Unless linked to a backplane trigger line, as discussed below, its operation is completely autonomous. EX1200 Series Basic Mainframe Operation 61 VTI Instruments Corp. When enabled as an output, each channel also has the ability to generate a 1 µs pulse upon command. An example application of this pulse is to use the EX1200 to externally trigger another piece of test equipment. The specific operation of the pulse depends on the static level programmed for that channel. When a channel is programmed with a static level of high, the pulse will be low-going. When a channel is programmed with a static level of low, the pulse will be high-going. Each pulse generation requires a separate function call. For expanded and more automated operation, each DIO channel can be independently linked to any of the EX1200‟s backplane trigger lines, allowing any trigger condition (such as an over-limit, or measurement complete event) that can be asserted by a plugin-module or the integrated DMM on those backplane lines to be exported to any of the DIO channels. The electrical specifications for the digital I/O port are provided in Table 3-. Particular note should be given to the VINPUT specification of -0.5 V to 5.5 V. Exceeding that value with an external voltage source, even through a resistance, could permanently damage the EX1200. Characteristic VINPUT VIH VIL VOH (IOH = -32 mA) VOL (IOL = 64 mA) Value -0.5 V to 5.5 V 2 V min 0.8 V max 2 V min 0.55 V max TABLE 3-2: DIGITAL I/O PORT ELECTRICAL SPECIFICATIONS Trigger Bus The EX1200 provides an compatible trigger bus connector set on the rear panel of the instrument. Both connectors have the same pin assignments and are wired in parallel. For more information on the Trigger Bus and creating an appropriate cable, please visit www.lxistandard.org and refer to LXI Standard Revision 1.2 and LXI Trigger Bus Cable and Terminator Specifications Rev 1.1. Pin 1 2 3 4 5 6 7 8 9 10 11 12 13 Function +3.3 V GND RP_TRIG_P1 RP_TRIG_N1 GND RP_TRIG_P3 RP_TRIG_N3 GND RP_TRIG_P5 RP_TRIG_N5 RESERVED RP_TRIG_P7 RP_TRIG_N7 1 2 14 3 15 4 16 Pin 14 15 16 17 18 19 20 21 22 23 24 25 5 17 6 18 7 19 8 20 Function RP_TRIG_P0 RP_TRIG_N0 RESERVED RP_TRIG_P2 RP_TRIG_N2 GND RP_TRIG_P4 RP_TRIG_N4 GND RP_TRIG_P6 RP_TRIG_N6 RESERVED 9 21 10 22 11 23 12 24 13 25 TABLE 3-3: TRIGGER BUS CONNECTOR PIN ASSIGNMENT For proper operation, each trigger bus connector must be populated with either a cable or a termination. Since the two connectors per unit are in parallel, they are electrically equivalent with respect to receiving the cable or termination. VTI Instruments P/N: 70-0322-000 provides two 62 EX1200 Series Basic Mainframe Operation www.vtiinstruments.com termination assemblies, which is sufficient to connect any number of instruments, since a termination is only needed at each end. An example of a three-unit trigger bus installation is shown in Figure 3-1. FIGURE 3-1: TRIGGER BUS CABLING EXAMPLE As a general purpose output device, each Trigger Bus channel can be independently programmed with regards to its output functionality and its static level to assume when enabled as an output. When not enabled as an output, a channel becomes tri-stated, preventing conflict with other potential voltage drivers. Regardless of output functionality, each channel provides constant input functionality. That is, the input level on each channel can be accessed without a specific enable function call. Moreover, the base functionality of the Trigger Bus channels is not affected by triggering, scanning, or any other instrument process. When enabled as an output, each channel also has the ability to generate a 1 µs pulse upon command. The specific operation of the pulse depends on the static level programmed for that channel. When a channel is programmed with a static level of high, the pulse will be low-going. When a channel is programmed with a static level of low, the pulse will be high-going. Each pulse generation requires a separate function call. A common application of the pulse generation is multiple-unit synchronization. Referring to Figure 3-1 above, each unit can be configured to trigger on the same Trigger Bus channel. Then one unit is selected as a master and is used to output a signal on the designated Trigger Bus channel line, serving as a common trigger source for all three instruments. The default selections for each Trigger Bus channel are: output enable is off output level is 0 The electrical specifications for the trigger bus are provided in Table 3-. Characteristic Logic Type VIT+ VITVOS Value M-LVDS Type 2 150 mV max 50 mV min 1 V typical TABLE 3-4: TRIGGER BUS ELECTRICAL SPECIFICATIONS EX1200 Series Basic Mainframe Operation 63 VTI Instruments Corp. In addition to a single-master/multiple-slaves configuration, the Trigger Bus can be configured in Wired-OR mode. This mode allows multiple instruments to bring an LXI Trigger Bus channel to a “1” state. The channel will only go back to “0” when all instruments have released it. This is useful if multiple instruments in parallel operation must all complete before another instrument can begin its operations. Each channel is programmable as to whether it is in Wired-OR or MasterSlave mode. When an Trigger Bus channel is configured for Wired-OR mode, exactly one instrument on the bus must provide a bias on the channel. This is what allows the channel to fall deterministically back to a “0” state when all other devices release it. Each channel is programmable as to whether it will provide the Wired-OR Bias when it is in Wired-OR mode. The default selections are: Wired-OR mode is off Wired-OR Bias mode is off DMM Front Panel Connectors (Optional) These connections allow for use of the onboard DMM in measurements. The DMM and its connections are further discussed in Section 4. DMM Bus I/O For EX1200 mainframes with a DMM, it is possible to access the DMM through the DMM bus as an alternative to the front panel banana jacks (see DMM Input Connections in Section 4 for more detail on the DMM front panel connector). Alternatively, the bus can be used to route signals to an external DMM though this connector. To use the onboard DMM, the DMM inputs must be assigned to the backplane instead of the front panel. Please see Table 3- below for a description of the bus signals. Note that, when IN and OUT DMM Bus connectors exist on a mainframe, the pin mapping for each connector is identical. Pin 1 2 3 4 5 6 7 8 9 Function +SHI N/C +HI N/C +DAMPS -SLO GUARD -LO N/C TABLE 3-5: DMM BUS I/O PIN SIGNALS 64 EX1200 Series Basic Mainframe Operation www.vtiinstruments.com Reset Button A reset button is accessible through a hole in the rear panel of the EX1200 and can be used to restore default switch and network settings. This is useful for recovering from an incorrect or unknown network configuration. There are three modes of operation for this button which are based on the time the reset button is depressed. The reset is implemented according to the LXI LAN Configuration Initialize (LCI) Mechanism specification. Debounce Protection Mode To prevent unintentional resets of the EX1200, there is a debounce protection mechanism. If the reset button is depressed for less than 1 s, the activation of the reset button is treated as unintentional and no action is taken. Device Reset Mode Depressing the button for a longer time (greater than 1 s but less than or equal to 10 s) causes the EX1200 to reset in the same manner as clicking the Reset button on the browser interface. All switch modules, for instance, will move their switches to the predefined “reset” state. There is no LED indication for this reset mode. Device Reboot/LCI Reset Mode To perform an LCI reset and an immediate reboot of the EX1200, depress the reset button for longer than 10 s, wait for the LAN LED to flash red, then release the button. This will return the EX1200 to the power-on default state. The network configuration will be restored to factory defaults in accordance with the LCI reset procedure described in the LXI Specification. The EX1200 reverts to the default network configuration (DHCP and Auto IP enabled) instead of its previous settings. VXI-11 Discovery (supported by the VISA IO-Libraries) can be used to determine the IP address of the instrument. DMM BUS Some mainframes (EX1262, EX1266, EX1268, and EX1269) provide a five-line bus routed through the backplane to the onboard DMM. The lines are analogous to the five front panel banana-jack connections on the DMM (see Section 4). The bus is also accessible via the 9-pin rear DMM BUS I/O connector which allows a signal to be routed to an external DMM or to extend the bus to multiple mainframes. Voltage and Resistance Measurements 4-Wire Resistance K76 K79 BPL_HI BPL_LO CH2_COMH (Pin E17) CH2_COML (Pin E16) K80 CH1_COMH (Pin A15) CH1_COML (Pin A14) K81 BPL_SHI BPL_SLO CH2_COMH (Pin E17) CH2_COML (Pin E16) DMM Bus +HI, -LO +SHI, -SLO +DAMPS CH1_COMH (Pin A15) CH1_COML (Pin A14) DMM Bus K77 CH2_COMH (Pin E17) CH2_COML (Pin E16) DMM Bus CH1_COMH (Pin A15) CH1_COML (Pin A14) Current Measurements (2 A Max) K78 BPL_DAMPS BPL_LO Voltage and resistance measurements Sense lines for 4-wire resistance measurements (used with +HI and -LO) Current measurement (used with -LO) FIGURE 3-2:TYPICAL DMM BUS CONNECTIVITY (EX1200-3072 SHOWN) Figure 3-2 shows typical connections available through a switch module to the DMM bus on the backplane. This direct backplane connection is not available on all cards (refer to the EX1200 Series Switch Card User’s Manual for specific plug-in module capabilities). The DMM can be configured to take readings through the front panel banana-jacks or the backplane bus programmatically or through the SFP/browser interface of the DMM. Please see Section 4 for more information on taking measurements with the DMM. EX1200 Series Basic Mainframe Operation 65 VTI Instruments Corp. Slots configured for a matrix bus are not tied to a DMM bus. To use the onboard DMM with a matrix bus card, external wiring should be used to connect the desired front panel matrix output to the DMM, either through the front panel banana-jack connectors or through the 9-pin DMM bus I/O connector. LED INDICATORS The EX1200 has three dual-color status LEDs. The 1588 LED indicates IEEE 1588 synchronization status, the LAN LED indicates the LAN status, and the PWR LED provides power and failure status for the EX1200 system. The different LEDs states are illustrated in Table 3-3. LED 1588 LAN PWR Activity & Color Solid green Flashing green once/second Flashing green twice/second Solid red No activity/color Solid green Flashing green Solid red Solid green Solid red Solid red for 5 s, then solid green Description The device clock is an IEEE 1588 slave. The device clock is an IEEE 1588 master. The device clock is an IEEE 1588 grandmaster. An IEEE 1588 fault has occurred. The device clock is not synchronized. Normal operation. The device has received a device identification command. A LAN fault has been detected. The devices power supplies are operating normally. The power supply is not functioning normally. Condition normally occurs at power up. TABLE 3-3: EX1200 LED STATES LOCKING Depending on the mechanism used to communicate with the EX1200A, locks can be established to prevent any unintentional use of the mainframe while it is in use. When using the API of any driver, except for VTEXSystem, a lock is established when they are initialized. The user does not have to request a lock. If the lock fails, the initialize call will return an error and the driver will not be useable. Because the VTEXSystem driver capabilities may be needed by one or more driver sessions, no lock is established by this driver. When the mainframe is accessed via the SFP, a lock can be established for each SFP by clicking on the Lock button. SFPs do not lock by default except for those of switch plug-in modules. When a switch SFP is initialized, the SFP attempts to get a lock. If it is successful, the SFP opens in Synchronous Control mode. If the attempt fails, the switch opens in Monitor Only mode. Both Synchronous Control and Asynchronous Control modes require a lock. For more information on switch SFP operating modes, see Switch Soft Front Panels in Section 7. Once established, a lock cannot be broken by any other session. If the lock is being held by some other active driver or SFP session, the only ways to gain control of the mainframe is to either close the active session or to reboot the mainframe. If a lock is established by an application that has crashed, the mainframe will typically release the lock after the TCP timeout occurs. TRIGGERING EX1200s support a full function trigger model with a separate arm source and trigger source event structure. For a complete explanation of the trigger model, see Section 5. In summary, an acquisition sequence is enabled with a trigger initialize command. Scanning is then initiated upon the receipt of the programmed arm source event followed by the receipt of the programmed trigger source event. Trigger and arm source events can be independently programmed from a variety of sources including Immediate, Timer, Digital I/O, the Trigger Bus, and alarms. 66 EX1200 Series Basic Mainframe Operation www.vtiinstruments.com SECTION 4 BASIC EX1200 DMM OPERATION OVERVIEW Some EX1200 series mainframes (hence referred to as EX126x) include an onboard DMM (please refer to EX1200 Series DMM Specifications for details regarding functions, ranges, and accuracy). The DMM can be used in three different ways: By directly connecting the DUT to the front panel connectors Connection of the DUT to a switching plug-in module with access the DMM backplane (described later in this section). Utilizing the rear panel DMM bus D-sub connector (see Table 4-1). The DMM Bus connector can also be used to extend DMM use to other EX1200 instruments to use a single DMM. Programming access to the DMM is provided through a soft front panel which resides on the web server of the EX1200, the Windows based IVI drivers (both IVI-C and IVI-COM), and through a multi-platform driver. To exercise the complete capabilities of the DMM, as well as to achieve required accuracies/speeds, it is important to understand DMM operation. This section of the manual provides basic information on how to use the onboard DMM. Programming information can be found in the VTEXDMM help file provided with the DMM driver. Programming examples are provided to facilitate the use and understanding of the VTEXDMM driver and can be found at the following location: <Local Hard Drive>:\Program Files\IVI Foundation\IVI\Drivers\VTEXDmm\Examples. Information regarding use of the DMM via the embedded webpage can be found in the DMM Soft Front Panel description in Section 7. WARNING The EX1200 DMM is a CAT-I measuring device. As such, it is designed to make measurements for circuits that are not connected to mains power. Under DMM installation CAT I and A, the EX1200 DMM CANNOT be used for measurements in measurement categories II, III, and IV per EN 61010. Basic EX1200 DMM Operation 67 VTI Instruments Corp. DMM INPUT CONNECTIONS Front Panel Connector The EX126x DMM‟s hardware interface is made available on the front panel of the instrument. The DMM front panel has the following features: five banana jack inputs, a fuse, and three status LEDs as seen in Figure 4-1 (LED operation is detailed in the LED Indicators section of Section 3). FIGURE 4-1: INPUT PIN LOCATIONS AND SIGNALS Standard banana plugs can be used to interface other external instruments with the DMM. The fuse located on the front panel is for current input protection and is user-replaceable. It is a 3.15 A, 250 V fuse and can be replaced with VTI P/N: 35-0054-315. NOTE Use sheathed-type probes for voltage and current measurements at the front panel of DMM. Rear Panel Connector EX126x mainframes provide an onboard DMM with a five-line analog bus routed through the backplane to the DMM. This bus is available through rear panel DMM Bus connector that can be used to extend the analog backplane to other EX1200 series mainframes. To ensure high signal integrity, environmental noise and cable length should be accounted for prior to routing these lines. CAUTION When voltages are switched across the backplane using a multiplexer or matrix switch card, these voltages are present on the DMM Bus connector. Caution must be observed when handling this connector. Also, when the DMM bus is extended to other EX1200 mainframes, the user must ensure that no two devices are using the bus simultaneously. 68 Basic EX1200 DMM Operation www.vtiinstruments.com Pin 1 2 3 4 5 6 7 8 9 Function +SHI N/C +HI N/C +DAMPS -SLO GUARD -LO N/C Front Panel Equivalent Sense HI N/A HI N/A Input I Sense LO (Ground Stud on Rear Panel) LO N/A TABLE 4-1: DMM BUS I/O PIN SIGNALS Using the DMM Bus with Switch Cards Some switch cards and plug-in instruments can access the EX1200 DMM without external wiring as they can connect across the backplane to the DMM bus. Refer to the user documentation for the specific plug-in modules for information regarding connection to the DMM bus. Basic EX1200 DMM Operation 69 VTI Instruments Corp. DMM MEASUREMENT BASICS When making a measurement, the following sequence should be followed: Select an Input Connector Configure the Measurement Configure Triggering Take the Measurement Retrieve the Data These steps are discussed in detail in the following sections for IVI-COM. SELECT AN INPUT CONNECTOR There are two connections that can be used to take a measurement: the front panel banana jacks or the DMM Bus. The banana jacks on the front panel allow connection to the DMM via the front panel, while the DMM Bus allows for connection from either the DMM Bus rear panel connector or from switch cars that have access to the EX1200 DMM bus via their backplane connectors. Figure 4-2 shows how the EX1200 backplane switches between the DMM Bus and front panel. Note that certain switch cards and instruments can connect to the DMM Bus as well. DMM Bus (DB-9 Connector on Rear Panel) EX1200 Backplane DMM Front Panel (Banana Jacks) 6 ………... DMM Matrix Matrix Matrix EX12004128 EX12004128 EX12004128 Slot 1 Slot 2 Slot n FIGURE 4-2: DMM BACKPLANE CONNECTIVITY IVI-COM Programming Interface The VTEXDmmInputSelectEnum interface provides properties for setting the input connector. 70 Basic EX1200 DMM Operation www.vtiinstruments.com CONFIGURE THE MEASUREMENT A simple DMM measurement can be configured by setting the function, range, and resolution. There are many other parameters that may need to be configured depending on the type of measurement being performed. This is explained in detail in later sections. Function: Selects the measurement type (DCV, DCI, ACV, ACI, 2-wire resistance, 4-wire resistance, temperature, frequency, or period). Range: Selects the measurement range. The range should be set to the closest possible range that is greater than or equal to the value passed as this parameter. Resolution: Selects the measurement resolution. The fastest aperture time that will provide this amount of resolution will be selected. If the amount of resolution is not possible, the longest aperture will be selected. IVI-COM Programming Interface The VTEXDmmFunctionEnum interface provides properties and methods for selecting the measurement function. The IVTEXDmm.Configure interface provides method for setting the range and measurement function selection. CONFIGURE TRIGGERING The EX1200 DMM trigger model is divided into five states: IDLE, INITIATE, WAITING FOR TRIGGER, WAITING FOR SAMPLE TRIGGER, and ACQUISITION (see Figure 4-3). A system reset condition puts the EX1200 DMM in the IDLE state. The DMM Initiate() API call begins the acquisition sequence by transitioning the instrument into the INITIATE layer. As this occurs, the reading buffer memory is cleared. As soon as the initiate process is complete, the device transitions to the TRIGGER state. The DMM remains in the TRIGGER state until a specified TRIGGER event occurs. After receiving a trigger, the DMM will wait the specified trigger delay until it takes a measurement. A delay allows a signal to stabilize if needed. If a user-configured delay is used, it will override the automatic trigger delay used by EX1200 DMM. Triggers can also be generated by software commands or may be set to immediate, which causes a transition from the TRIGGER state to the ACQUISITION state. The SAMP TRIGGER acts as a secondary trigger. The same principles that apply to the TRIGGER state apply to the SAMP TRIGGER state. Using the INTERVAL setting, the DMM can be configured to take multipoint readings with a defined time interval. NOTE The first measurement is taken when a Trigger event occurs (along with the corresponding delay) and that the DMM will not wait for a Sample Trigger to occur per the IVI specification. Each state has input values which can be set by the user: Trigger Input Options Trigger Input Source: sets the trigger line that moves the DMM from the Wait-For-Trigger state to the Delay state. Trigger Input Slope: indicates whether a rising or falling edge will move the DMM from the Wait-For-Trigger state to the Delay state. Trigger Input Count: sets the number of times the Wait-For-Trigger state will be entered each time a measurement is initiated. Trigger Delay: indicates the delay that occurs between when the trigger occurs and when the measurement is actually taken. Valid values are 0 s to 4294.967295 s. Auto-Delay: allows the DMM to automatically set the trigger delay based on the measurement configuration. Basic EX1200 DMM Operation 71 VTI Instruments Corp. 72 Sample Trigger Options Sample Trigger Source: sets the trigger line that moves the DMM from the Wait-ForSample state to the Take Measurement state. Sample Trigger Slope: indicates whether a rising or falling edge will move the DMM from the Wait-For-Sample state to the Take Measurement state. Count: sets the number of samples to that will be taken per trigger event. Delay: indicates the delay that will occur between getting a Sample Trigger to taking a measurement. Interval: when set to Interval, an internal time periodically sends a sample trigger. This parameter sets the time between sample triggers. Trigger Output Options (a trigger can be generated either when the measurement completes, or when the read value is out of tolerance) Measurement Complete Trigger: sets the trigger line that will be pulsed when the Measurement Complete state is reached. Over Limit Trigger: sets the trigger line to pulse when an over-limit condition occurs. High Limit: sets the high input level for the over-limit condition. Low Limit: sets the low input level for the over-limit condition. Basic EX1200 DMM Operation www.vtiinstruments.com Trigger Model Status IDLE LAYER IDLE INIT ABORT (From any layer) No INIT LAYER Yes INIT CONT? INITILIZED = 0 ARM ACTIVE = 0 TRIG ACTIVE = 0 SAMP ACTIVE = 0 DEVICE ACTIVE = 0 INITILIZED = 1 ARM ACTIVE = 0 TRIG ACTIVE = 0 SAMP ACTIVE = 0 DEVICE ACTIVE = 0 No ARM IMM Wait for ARM Event SW ARM ARM:Count > 0 or ARM INF? Yes ARM Event ARM LAYER INITILIZED = 1 ARM ACTIVE = 1 TRIG ACTIVE = 0 SAMP ACTIVE = 0 DEVICE ACTIVE = 0 ARM Delay Decrement ARM:COUNT No ARM INF? Yes No TRIG IMM Wait for TRIG Event SW TRIG Yes TRIG:Count > 0 or TRIG INF? TRIG Event TRIG LAYER INITILIZED = 1 ARM ACTIVE = 0 TRIG ACTIVE = 1 SAMP ACTIVE = 0 DEVICE ACTIVE = 0 TRIG Delay Decrement TRIG:COUNT No TRIG INF? Yes No SAMP IMM Wait for SAMP Event SW SAMP Yes SAMP:Count > 0 or SAMP INF? INITILIZED = 1 ARM ACTIVE = 0 TRIG ACTIVE = 0 SAMP ACTIVE = 1 DEVICE ACTIVE = 0 SAMP Event SAMP LAYER SAMPLE Delay Decrement SAMP:COUNT No SAMP INF? Yes Acquire ADC Counts DEVICE LAYER Store Reading AUTO RANGE? and HW OVERFLOW? and not RANGE MAX? No INITILIZED = 1 ARM ACTIVE = 0 TRIG ACTIVE = 0 SAMP ACTIVE = 0 DEVICE ACTIVE = 1 Yes Calibrate Reading Range Delay Range Up Yes AUTO RANGE? and OVER LIMIT? and not RANGE MAX? No Range Down Yes AUTO RANGE? and UNDER LIMIT? and not RANGE MIN? No FIGURE 4-3: TRIGGER MODEL Basic EX1200 DMM Operation 73 VTI Instruments Corp. IVI-COM Programming Interface The IVTEXDMM.Trigger interface provides properties and methods for setting the input trigger. The IVTEXDMM.Trigger.Multipoint interface provides properties and methods for setting the sample trigger and setting the measurement complete output trigger. TAKE THE MEASUREMENT Once the DMM has been configured, the measurement must next be initiated. Once initialized, the DMM moves from the Idle State through the trigger model. IVI-COM Programming Interface The IVTEXDmmMeasurement interface provides properties and methods for reading the FIFO count and measured values. Initiate method can be used for initiating the DMM. FIFOCount can be used to get a count of the measured values available in the DMM after it is initiated. RETRIEVE THE DATA The DMM stores the measured samples into FIFO until retrieved. This data can be accessed upon completion of the measurement and must be retrieved to be read. The data is automatically deleted from FIFO once it has been retrieved. IVI-COM Programming Interface The IVTEXDmmMeasurement interface provides properties and methods for reading the FIFO count and measured values. Read and ReadMultiPoint can be used to retrieve the measured value without timestamp. Read will be used for retrieving single measurement at a time whereas the ReadMultiPoint can retrieve a block of data. ReadTimeStamped and ReadMultiPointTimeStamped can be used for retrieving measured values with time stamp. The ReadTimeStamped will be used for retrieving single measurement with timestamp whereas ReadMultiPointTimeStamped can retrieve a block of data with time stamp. Note that all four read measurement functions initiate the DMM and retrieve the measured values, whereas fetch only retrieves the measured values without initiating the DMM. 74 Basic EX1200 DMM Operation www.vtiinstruments.com DMM FUNCTIONS This section of the manual discusses each measurement function of DMM and aids in understanding some of the DMM specifications. Understanding the operation of the DMM and each of its functions helps optimize the configuration of the DMM for measurement accuracy/speed. Note that DMM performance is the same whether the front panel or DMM Bus interfaces is used. The examples provided in the following sections provide signal routing using only the front panel. Some functions are common to the majority of measurements taken by the DMM. These functions are explained below. RANGE The selected measurement range of a function affects both the ultimate digits and accuracy of the measurements as well as the maximum signal level that can be measured. The multimeter can automatically select the range, using auto-ranging, or a fixed range can be set using the manual ranging options. Auto-ranging is convenient because the multimeter automatically selects the appropriate range for each measurement. However, if the range is known to the user, manual ranging can provide for faster measurements by reducing the processing overhead associated with determining the appropriate range for each measurement. The range setting for each measurement function is saved in volatile memory when changing functions. Selecting a function returns the instrument to the last range selected for that function. Note, however, that when the instrument is reset or power cycled, the functions return to their default values Table 4-2 lists the valid measurement ranges for each measurement function: Function DC Voltage AC Voltage DC Current AC Current 2-Wire Resistance 4-Wire Resistance Frequency Time Per od Temperature Ranges 100 mV, 1 V, 10 V, 100 V, 300 V 100 mV, 1 V, 10 V, 100 V, 300 V 1 mA, 10 mA, 100 mA, 1 A, 3 A 10 mA, 100 mA, 1 A, 3 A 100 Ω, 1 kΩ, 10 kΩ, 100 kΩ, 1 MΩ, 10 MΩ, 100 MΩ 100 Ω, 1 kΩ, 10 kΩ, 100 kΩ 1.5 MHz 0.3333 s Fixed based on the type of tra sducer selected TABLE 4-2: DMM FUNCTION RANGES Over-Ranging Each range can measure a signal that is within 120% of its range. This is, however, not applicable for ranges whose limits are maximum specified levels (such as the 300 V dc range). Input values that exceed the maximum readings cause an “OVERFLOW” error, indicating that the DMM cannot measure the input signals at the current range. Auto-Range When auto-range mode is enabled, the EX1200 DMM automatically selects the input range. This is done by validating the input signal, then the range with best resolution to cover the entire dynamic range of the signal is selected. The thresholds for auto-ranging are 6% and 120% (lower and upper) for voltage-based measurements (ACV, DCV, frequency, and period) and 10% and 120% for current measurements (ACI and DCI) . Thus, if the unknown signal is more than 120% of the initially assumed range, then the DMM automatically switches to the next highest range. Similarly, if the unknown signal is less than 6% of the assumed range, the DMM automatically drops to the next lowest available range. Basic EX1200 DMM Operation 75 VTI Instruments Corp. For example, if a 9 V signal is fed to the DMM and auto-range is enabled, the 10 V range is selected in order to display 9.00000 V (the total number of digits is based on the resolution selected). If a 1.12 V signal is fed to the DMM, the 1 V range is selected rather than the 10 V range, as the input is within 120% of the range value. If, however, 1.3 V is fed to the DMM, the 10 V range would be used. Refer to Table 4-2 for valid ranges the auto range mode can select. The auto-range mode is useful when the incoming signal voltage range is unknown or when it varies largely over time. However, auto-range requires more time to complete the measurement (slower scan rates) due to increased internal processes than if a manual range is selected. Auto Range OFF and Auto Range Once In Auto Range OFF mode, the last selected range, whether it was selected automatically or manually, is used. This feature can be used to turn off measurement auto-ranging and fix the range to its last know best fit. When Auto Range Once is used, auto-ranging is performed for the first measurement only and automatically disabled for further readings/scans. NOTES For temperature measurements, the DMM internally determines and selects the range. This means that range cannot be selected for temperature measurements. For thermocouple measurements, the instrument internally selects the 100 mV range. For thermistor and RTD measurements, the DMM auto-ranges to the correct range for the transducer resistance measurement. If a positive, real number is passed in the API that is not one of the valid ranges for the selected function, it will be coerced to next highest range available. Range Delay When the range of a function is changed, the DMM requires time to settle to the new range. The “range change delay” is the amount of time the DMM takes to settle between measurements for the same function on different ranges when in auto-range mode. This affects the speed of the scanning operation. It is advised to group the channels in such a way that the number of range changes are minimum in a given scan cycle. The range delay is the inverse (1/x) of the range change event specification on page 19. Function DCV and DCI 4-wire resistance (100 Ω, 1 kΩ) 2-wire resistance (<1 MΩ) ACV (0.1 V to 100 V, high filter) ACI (0.01 A & 0.1 A, high filter) Range Change Event 300/s 300/s 2/s < 1.25/s < 0.2/s Range Delay 3.33 x 10⁻³ s 3.33 x 10⁻³ s 0.5 s 0.8 s 5s TABLE 4-3: RANGE DELAY RESOLUTION To further optimize the speed and accuracy of DMM measurements, the resolution of the measurement reading can be adjusted for most functions. Resolution is expressed in terms of number of significant digits the multimeter can measure: 3½, 4½, 5½, or 6½-digits. The DMM determines the aperture time based on the following algorithm: 76 Basic EX1200 DMM Operation www.vtiinstruments.com X = Resolution/Range Where Range =100V if userRange=300V, =1A if userRange=3A, = userRange otherwise if (X <= 1e-6) { numberOfPLC=10; } else if (X <= 1e-5) { numberOfPLC=1; } else if (X <= 1e-4) {// 4.5 digits numberOfPLC=0.1; } else {// 3.5 digits numberOfPLC=0.01; } apertureTime=numberOfPLC/PowerLineFrequency; Note that the EX1200 DMM‟s resolution is related to aperture time and can be modified to set this property. NOTE When the DMM is set to measure ac voltages using Low/Medium filter option, the data is automatically measured with 6½ digit accuracy. INTEGRATION/APERTURE TIME The EX1200‟s DMM uses a slope integrating ADC to quantify the analog signal levels into digital values. The digital bits of resolution are directly proportional to the amount of time used to integrate the signal. Integration time is typically specified in number of power line cycles (PLC), except in the case of frequency and period functions. When integration time is selected as a whole number of PLC, this helps increase the rejection of common mode and normal mode power line noise. Aperture time is related to PLC, but is a read-only property and cannot itself be modified. Aperture time is, instead, controlled by manipulating the resolution. The integration time can be changed by using the resolution property. This relationship is defined by the algorithm in the Resolution discussion above. For frequency and period measurements, resolution is set by specifying the aperture time. The aperture time for the frequency and period functions default to 100 ms. Valid aperture times vary with the selected resolution: 10 ms for 4½-digits, 100 ms for 5½-digits or 1 s for 6½-digits. Since the resolution, integration/aperture time, and number of PLC settings are inter-related, some consideration must be made when configuring these features. The last of these related parameters to be defined determines the actual resolution of the measurement. AUTO-ZERO The auto-zero function greatly enhances the accuracy of the measurement, especially when the ambient temperature is constantly changing. When auto-zero is enabled (auto-zero ON), the multimeter internally disconnects the input signal following each measurement, takes a “zero” reading, and then a fixed reference reading. These three readings are combined to give a highaccuracy measurement value. Auto-zero eliminates the negative effects of internal offset and gain errors that occur with temperature changes and aging. Auto-zero requires two background measurements so the DUT measurement rate will be reduced.. As is true with resolution, however, performing auto-zero requires two additional measurements to be taken, decreasing the overall reading rate speed. Basic EX1200 DMM Operation 77 VTI Instruments Corp. Auto Zero Off The auto-zero function can be disabled programmatically to achieve higher measurement speeds. Once the auto-zero is disabled, the DMM no longer takes the new zero and reference measurements, but, instead, uses the last known zero and reference values to calculate the signal level. VTI recommends, however, that auto-zero be performed as frequent as possible, especially when the ambient temperature fluctuates significantly. Auto Zero Once This option enables auto-zero for the first measurement and then disables auto-zero for all subsequent measurements. Even after disabling the auto-zero, the last measured zero and reference readings are used for all successive measurements. LIMITS It is possible to perform lower and upper limit check functions after every measurement. The DMM validates the measured reading against these limits and provides a trigger interrupt when the reading is outside of the limit requirements. The limits can be set to any value between 0% and ±120% of the highest range for the present function. The upper limit should always be larger than the lower limit. The interrupt can be routed to be any valid LXI trigger output, including the general purpose DIO lines available at the rear panel. In this way, a limit violation can act as a „trigger source‟ and initiate an appropriate action. For example, a measurement channel can be configured to validate an upper and lower voltage limit and trigger an alarm when any deviations are found. These functions are volatile, however, and must be programmed in the same manner whenever power is cycled or upon reset. The default value for both upper and lower limit is ±infinity. MATH FUNCTIONS The EX1200 DMM allows the user to define gain and offset readings for each measurement. By doing so, the user can define custom conversion factors (i.e. define custom transducers). As with limits, the math functions are volatile and must be reasserted upon power cycle/reset. These gain and correction factors are applied after calibration constants and auto-zero calculations are performed but before limits are evaluated. Using this methodology, a custom linearization formula (Y = mX+c) can be defined for every measurement. Note that the gain and offset factors apply to all functions (dc and ac volts, dc and ac current, 2- and 4-wire resistance, frequency, and period) except for temperature. The default value for gain and offset are “1” and “0”, respectively. 78 Basic EX1200 DMM Operation www.vtiinstruments.com DC VOLTAGE MEASUREMENTS DC voltage (DCV) measurements are one of the simplest measurements to take with a DMM. The DMM measures the average voltage value of the connected signal differentially. This means that floating signals can be measured as well as signals containing large common mode voltage offsets (refer to the EX1200 Series DMM Specifications for maximum signal details). When in DCV mode, there are several options that can be configured, as discussed below. Sense HI Input HI Input LO Sense LO DMM Front Panel DC Voltage Source TABLE 4-4: DMM CONNECTIONS FOR DCV MEASUREMENTS NOTE Although the DMM can measure up to 300 V rms (200 V from LO or Sense LO to Guard), this may exceed the maximum switching value of the plug-in module installed in the system. Ensure that voltage, current, and power specification for the plug-in modules are not exceeded when measurements are taken. Input Resistance Selection On the 100 mV, 1 V, and 10 V ranges the user has the option of either >1 GΩ or 10 MΩ input impedance. The >1 GΩ setting is appropriate when the device being measured requires a very light load, but this setting can cause measurement errors when high parasitic capacitance exists on the input path. This capacitance can exist when long shielded cables are used or many multiplexer cards are connected to the same bus. This capacitance must be sufficiently discharged before the measurement is taken or the capacitance‟s charge will be included in the measurement. The 10 MΩ input impedance selection provides this discharge path; unless the very high input impedance is required it is recommended to use the 10 MΩ setting. The default input resistance is set to HIZ. When the mainframe is power cycled or reset, the default value is applied. Thermal EMF Related Errors Thermoelectric voltages are the most common source of error in low-level dc voltage measurements. Thermoelectric voltages are generated when circuit connections are made using dissimilar metals at different temperatures. Each metal-to-metal junction forms a thermocouple which generates a voltage proportional to the junction temperature (typically on order of a few microvolts). To minimize errors of this nature, precautions should be taken that include using copper-to-copper crimped connections. Basic EX1200 DMM Operation 79 VTI Instruments Corp. When using switch multiplexer modules such as the EX1200-3048, each input channel pair (HI and LO) is routed through relays which are close to one another on the PCB to maintain the same average temperature. Because of this proximity, the relays generate approximately equal thermoelectric voltages on both the HI and LO channels, making the differential reading across these two switches approximately cancel the thermoelectric voltages. HI VT1 VS = Source Voltage VT1/VT2 = Thermoelectric Voltage for Switch 1 and 2 VREADING = Voltage Displayed by DMM VM DMM VT2 VREADING = VS + (VT1 - VT2) LO Switch Pair FIGURE 4-4: NEGATION OF SWITCH THERMOELECTRIC VOLTAGES Measuring Voltages with High Output Resistance Source loading errors occur when the output resistance of the DUT is a significant percentage of the DMM‟s own input resistance. HI VS = Ideal DUT Voltage RS = DUT Source Resistance Ri = Multimeter Input Resistance (10 M or 10 G) RS VS Ri DMM Error % = 100 x RS RS + R i LO FIGURE 4-5: ERROR CALCULATION FOR HIGH OUTPUT RESISTANCE LOADS To reduce the effects of source loading error and to minimize noise pickup, the input resistance of the DMM can be set to HIZ mode (> 10 GΩ) for the 100 mV dc, 1 V dc, and 10 V dc ranges. The input resistance is maintained at 10 MΩ for the 100 V dc and 300 V dc ranges. Common Mode Rejection An ideal DMM would be floating and isolated from earth-referenced circuits. In practice, though, there is a finite resistance between the DMM‟s input LO terminal and earth/chassis ground (see Figure 4-6). This can cause errors when small voltages which are actually floating relative to earth ground are measured (as for a photovoltaic cell, for example). HI VTEST DMM RS LO Vf Ri > 10 G VF = Float Voltage Rs = DUT Source Resistance Imbalance Ri = Multimeter Isolation Resistance Error (v) = Vf x Rs Rs + R i FIGURE 4-6: COMMON MODE REJECTION ERROR 80 Basic EX1200 DMM Operation www.vtiinstruments.com Power Line Noise Rejection An intrinsic characteristic of integrating ADCs is their ability to reject spurious signals. When the PLCs is set to an integer value, the integrating technique rejects power-line related noise present with a dc signal on the input. This is called normal mode rejection, or NMR. (Note that common mode rejection is with a voltage being common to both input terminals, while NMR is with an ac voltage between the two input terminals). Normal mode noise rejection is achieved when the DMM measures the average of the input by “integrating” it over a fixed period. Noise Caused by Magnetic Loops When measurements are taken near magnetic fields, precautions should be taken to avoid inducing voltages in the measurement conductors. This is especially important when working near conductors carrying large currents. To reduce noise pickup loop area, use twisted-pair connections to connect to the DMM or dress the input cables as close together as possible. Hanging or vibrating input cables can also induce error voltages. Be certain that the input cables are tied down securely when operating near magnetic fields and, whenever possible, use magnetic shielding materials or physical separation to reduce problems related to magnetic field sources. DMM Backplane BPL_HI BPL_LO BPL_SHI BPL_SLO CH 1 CH 2 CH n EX1200 Mainframe EX1200 Multiplexer Cards Magnetic Source FIGURE 4-7: MAGNETIC LOOP NOISE Basic EX1200 DMM Operation 81 VTI Instruments Corp. Noise Caused by Ground Loops When measuring voltages in circuits where the DMM and the DUT are referenced to a common earth ground, but at different points, a “ground loop” is formed. As shown in Figure 4-8, any voltage difference between the two ground reference points (V ground) causes a current to flow through the measurement leads. This causes errors such as noise and offset voltage (usually power line related) which are added to the measured voltage. RL HI VTEST DMM RL LO RL = DUT Source Resistance Imbalance Ri = Multimeter Isolation Resistance Vground = Voltage Drop on Ground Bus Ri > 10 G Vground FIGURE 4-8: A GROUND LOOP The best way to eliminate ground loops is to maintain the DMM‟s input isolation from earth ground by not connecting the input terminals to ground. If the DMM must be earth-referenced, be sure that the DMM and the DUT are connected to the same common ground point. This will reduce or eliminate any voltage difference between the devices. It is also recommended that the DMM and DUT be connected to the same electrical outlet whenever possible. AC VOLTAGE MEASUREMENTS The EX1200 DMM can measure the true RMS ac voltages within the limits specified. AC voltage (ACV) measurements differ from the DCV measurements because simple integration and averaging of the input signal will not yield the RMS value. Taking an ACV measurement uses the same set up as a DCV measurement, with the HI and LO leads being connected to the source. Be certain to observe the maximum specification ratings before connecting to the DMM. As with DCV measurements, the source can be connected through the front panel or through the DMM Bus backplane bus via a switch multiplexer module or the DMM bus rear panel connector. Sense HI Input HI Input LO Sense LO DMM Front Panel AC Voltage Source FIGURE 4-9: DMM CONNECTIONS FOR ACV MEASUREMENTS 82 Basic EX1200 DMM Operation www.vtiinstruments.com NOTE Although the DMM can measure up to 300 V rms (200 V from LO or Sense LO to Guard), this may exceed the maximum switching value of the plug-in module installed in the system. Ensure that voltage, current, and power specification for the plug-in modules are not exceeded when measurements are taken. True RMS The EX1200 DMM measures the “heating” potential of an applied signal. Unlike an “average responding” measurement, true RMS measurements can be used to determine the power dissipated in a resistance, even by a non-sinusoidal signal. The power is proportional to the square of the measured true RMS voltage independent of wave shape. Readings of this type are more accurate and closer to the expected reading of an analog instrument. A complex algorithm calculates the true RMS voltage of the applied waveforms. When measuring non-sinusoidal waveforms, crest factor error can occur. For more information on these errors, refer to the Crest Factor discussion later in this section. AC Filters Theoretically, a true RMS DMM is insensitive to the frequency of the applied signal. This means that it can measure the RMS value of signals that have both ac and dc components. This, however, is not the case for the EX1200 DMM, as it measures only the RMS of the of ac component of the signal. Here, the unwanted frequencies (including DC) are rejected by the signal conditioning stage before the RMS value is evaluated. This is similar to an ac coupled input system with a selectable cut-off frequency. Low frequency accuracy is severely impacted by harmonics generated during the RMS conversion. To get better low frequency accuracy in SLOW/MEDIUM mode, the dmm employs low pass digital decimation filters. 1) Low Filter: This filter guarantees frequency accuracy between 3 Hz to 300 kHz. This filter has a sharp cutoff and hence a large settling time. The ADC integration time is fixed at 0.01 PLC and auto-zero is forced on. The resultant resolution is always 6½ digits 2) Medium Filter: This filter guarantees frequency accuracy between 20 Hz and 300 kHz. This filter does not have as sharp a cutoff as the SLOW filter, hence the settling time is smaller compared to the SLOW mode. The ADC integration time is fixed at 0.01 PLC and autozero is forced on. The resultant resolution is always 6½ digits 3) High Filter: This filter allows frequencies between 200 Hz and 300 kHz. This mode uses the ADC‟s frequency response to reject the RMS convertor harmonics. The integration time and auto-zero settings can be manipulated in this mode allowing for flexible reading rates. Because of the correlation between filter bandwidth and reading rate, choosing the correct filter to satisfy the bandwidth requirements for an application is important for measurement optimization. Crest Factor It is often thought that the sine wave accuracy specification of a true RMS DMM apply to all waveforms. This, however, is not the case. The input signal can dramatically affect measurement accuracy of EX1200 DMM. Because of this, calibration and accuracy specifications are only applicable to sinusoidal waveforms. Crest factor is a common way to describe the shape of a waveform. Crest factor is a waveform‟s ratio between its peak value and its RMS value. For a timecontinuous repetitive signal, the crest factor is approximately equal to the square root of the inverse of the duty cycle. The larger the crest factor, the greater the energy contained in the higher frequency harmonics, resulting in greater error. It is important to consider the crest factor of input waveforms to determine the percent error contributed by them (see Crest Factor for typical crest factors for most common waveforms). Basic EX1200 DMM Operation 83 VTI Instruments Corp. Waveform Sine Example Crest Factor 1.414 Full-wave Rectified Sine 1.414 Half-wave Rectified Sine 2 Triangle 1.732 Square Wave (Symmetrical) 1 Repeating Pulse (PWM) T t1 t1 T FIGURE 4-10: CREST FACTORS FOR COMMON WAVEFORMS Crest factor related errors are specified in the DMM specifications on page 19. The specifications are for non-sine waveforms that are above 100 Hz when the Low filter (3 Hz) is used. The measurement error can be determined for non-sinusoidal input using the deratings specified in the datasheet. Loading Errors In ACV mode, the input of the EX1200 DMM appears as a 1 MΩ resistance in parallel with 100 pF of capacitance. The cabling used to connect the signals and the switch module used to route the signals to the multimeter also add additional capacitance and loading. When connected to high output impedance sources, like high-voltage probes, an error will be present as the result of loading on the source. This error can be calculated using the following equation: 1 % Error 100 1MRs 1 2fCin 1M R s 2 1M 1 1M Rs Where: Rs = source resistance f = input frequency Cin = input capacitance (100 pF) plus cable capacitance plus switch capacitance 84 Basic EX1200 DMM Operation www.vtiinstruments.com Low-Level AC Voltages and Shielding When measuring ac voltages less than 100 mV, be aware that these measurements are especially susceptible to errors introduced by external noise sources. Exposed (unshielded) cabling acts as an antenna and the EX1200 DMM will measure the signals received. The entire measurement path, including the power line, acts as a loop antenna. Circulating currents in the loop creates error voltages across any impedances in series with the DMM‟s input. For this reason, low-level ac voltages should be input to the multimeter through shielded cables. The shield should be connected to the input LO terminal. Make sure the DMM and the ac signal source are connected to the same electrical outlet whenever possible. This minimizes the difference in the earth potentials and avoids forming ground loops. If ground loops cannot be avoided, the area of the loops should be minimized. Measurements of high-impedance sources are more susceptible to noise pickup than measurements of low impedance sources. To reduce noise pick-up, place a capacitor in parallel with the DMM‟s input terminals (HI and LO). The correct capacitor value can only be determined by experimentation, as the capacitance also contributes some loading error, while helping reduce noise pick up. Reverse Connections and AC Common Mode Offset Ideally, a DMM reads the same voltage regardless of how the source is connected to the DMM (HI and LO). In practice, errors are generated when the DMM‟s input LO terminal is driven with an ac voltage relative to earth. The most common situation where unnecessary turnover errors are created is when the output of an ac calibrator is connected to the multimeter “backwards.” Because of the capacitance between the LO input terminal and earth (approximately 200 pF for the EX126x), the source experiences a loading differential depending on how the input is applied. The magnitude of this error is dependent upon the source‟s response to this loading. The DMM‟s measurement circuitry, while extensively shielded, responds differently in the backward input case due to slight differences in stray capacitance to earth. Because of this, the 100 V ac and 300 V ac ranges may latch up for high-voltage, high-frequency “backward” inputs. Therefore, only drive the high terminal when measuring ac voltages. The grounding techniques described for dc common mode problems can be used to minimize ac common mode voltages (refer the Common Mode Rejection discussion earlier in this section). DC AND AC CURRENT MEASUREMENTS The EX1200 DMM can directly measure ac and dc current (ACI and DCI) within its specified limits. Note that the front panel terminals are different for connecting a current signal (I and LO). Sense HI I Input LO Sense LO DMM Front Panel Current Source FIGURE 4-11: DMM CONNECTIONS FOR CURRENT MEASUREMENTS The current signal input is passed through an internal precision shunt resistor (4.1 Ω for 10 mA and 100 mA ranges, 0.1 Ω for 1 A and 3 A ranges and 68.1 Ω for DCI 1 mA range) and the resultant voltage drop is measured. Using this value and the shunt resistor value, the current input level is calculated. In order to protect the shunt resistor (and the DMM) from the high-current spikes, the input current is passed through a fuse (described earlier). When making current Basic EX1200 DMM Operation 85 VTI Instruments Corp. measurements with motors and other devices with a high starting current, be certain that the current rush does exceed the fuse‟s rating. The shunt resistance value applicable for each current range varies, making the selection of the proper range crucial for DMM safety. For example, if a 2 A current input signal is being measured while the DMM‟s current range is manually set to 100 mA can seriously damage the DMM circuitry. When current is passed through a switch multiplexer, the path dedicated for current measurements must be used. For example, the EX1200-3048 has three dedicated channels for current measurement. While making voltage measurements, the DMM is connected in parallel with the DUT measurement point and, hence, will not interrupt DUT operation. Current measurements, however, need the DMM to be placed in series with a wire, in which the current needs to be measured. If current measurements are required on more than one channel (wire) without disturbing/interrupting the current path, an MBB (Make-Before-Break) switch topology must be selected. The previous discussions regarding DCV measurements and ACV measurements, such as ac filter settings, aperture, PLC count, integration time, etc., are applicable to the respective current measurements as well. RESISTANCE MEASUREMENTS The EX1200 DMM offers two methods for measuring an unknown resistance: 2-wire and 4-wire. These methods are discussed below. 2-Wire Resistance Measurements When a 2-wire resistance measurement is made, the EX1200 DMM sends a known dc current, ITEST (also referred to as an excitation or test current), through the unknown resistance (RDUT) and then measures the resulting dc voltage (VMEAS). VMEAS ITEST RDUT RLEAD RLEAD This calculation assumes the that the leads have the same resistance. The DMM then calculates the resistance by taking the ratio of the measured voltage over the supplied current. In this method, the test current is passed through the DMM‟s HI and LO terminals and the voltage developed between these terminals is measured. However, since the connecting wires/leads are in series with resistance being measured, the lead resistance (RLEAD) is added to the resistance measured. This lead resistance error is inherent to 2-wire measurements. When the lead resistance small compared to the RDUT, this error it typically negligible. +VMEAS Sense HI Input HI RLEAD RDUT ITEST Input LO -VMEAS RLEAD Sense LO EX1200 DMM Resistance Source FIGURE 4-12: DMM CONNECTIONS FOR 2-WIRE RESISTANCE MEASUREMENTS 86 Basic EX1200 DMM Operation www.vtiinstruments.com Minimizing Lead Wire Resistance Errors While the best way to minimize lead wire resistance is to use the 4-wire method, this may not be practical for all applications, especially when the wiring density is high. When 4-wire measurements are impractical, the user can offset the lead resistance of the 2-wire resistance to obtain a more accurate value. Typically, this is done by shorting the test leads, measuring the lead resistance, then performing the actual measurement. Knowing the lead resistance allows the user to remove this error source from all subsequent measurements using the application software. Test Current Selection The test current amplitude is user-configurable for 2-wire and 4-wire resistance measurements. Table 4-5 shows the available test currents for the range and resolution selected. Range 100 Ω 1 kΩ 10 kΩ 100 kΩ 1 MΩ 10 MΩ 100 MΩ Test Current 1 mA 1 mA 100 µA, 500 µA 10 µA, 50 µA 5 µA 700 nA, 10 MΩ 700 nA, 10 MΩ TABLE 4-5: SELECTABLE TEST CURRENTS Selecting a higher test current generates a higher voltage drop for a given resistance, and, as such, improves the signal to noise ratio, improving measurement accuracy. Higher test currents are especially helpful when measuring low resistances. Increasing the test current, however, can lead to self-heating errors which are discussed later in this section. 4-Wire Resistance Measurements The 4-wire resistance measurement method is the most accurate way to measure low resistances. Lead wire and contact resistance errors are reduced significantly using this method, as the voltage is measured through the sense lines, leaving RLEAD from the HI and LO inputs essentially ignored. The 4-wire resistance method is often used in automated test applications where long cable lengths, numerous connections, or switches exist between the multimeter and the DUT. The recommended connections for 4-wire resistance measurements is shown in Figure 4-13. Input HI +VMEAS Sense HI -VMEAS Sense LO RLEAD RDUT Input LO EX1200 DMM RLEAD Resistance Source FIGURE 4-13: DMM CONNECTIONS FOR 4-WIRE RESISTANCE MEASUREMENTS The desired resistance is calculated as: RDUT VMEAS ITEST Basic EX1200 DMM Operation 87 VTI Instruments Corp. Common Error Sources The errors discussed previously for DC Voltage Measurements also apply to resistance measurements. Additional error sources unique to resistance measurements are discussed below. Self-Heating Error When a current passes through a resistor, heat is generated in the resistance source. This is unavoidable. When testing resistive devices, a “self-heating” error can occur. When the DUT is heated, the temperature of the DUT increases, changing the DUT‟s resistance value. The magnitude of this error depends on the DUT‟s temperature coefficient, and, thus, cannot be specified. To minimize this error, it is best practice to minimize the time that the current is applied to RDUT. Settling Time Related Errors In some cases, the test lead resistance combined with the RDUT capacitance is large enough to where the RC time constant is significant. Settling due to RC time constant effects can be quite long, particularly when resistances above 100 kΩ are measured. For example, certain types of precision resistors have a large, lumped capacitance tied across its terminals to arrest noise. In these cases, taking a resistance reading without calculating the setting time results in an erroneous reading. The same is true for when the input impedance of a power supply module is measured where the input does not have a large amount of capacitance. In cases like this, using the Auto Delay trigger setting may not help. To reduce this error, the settling time of the resistor should be manually calculated/observed and this time should be programmed as the trigger delay (see Trigger Settings in Section 7 for additional information on trigger delay). Errors in High Resistance Measurements When measuring large resistances (MΩ or larger), significant errors can occur due to insulation resistance and surface cleanliness. To reduce errors of this type, a “clean” high-resistance system should be maintained. Test cables and fixtures are susceptible to leakage though moisture absorption in insulating materials and “dirty” surface films. Selecting the proper cable insulation can also reduce error. Nylon and PVC are relatively poor insulators (109 Ω) when compared to PTFE (Teflon®) (1013 Ω). Leakage from nylon or PVC insulators can easily contribute a 0.1% error when measuring a 1 MΩ resistance in humid conditions. Physically touching the RDUT while the resistance is being measured should be avoided, as the body acts as a leakage path for the test current. Also, another instrument should not be connected in parallel with the test resistor, as the input impedance of that instruments will appear in parallel to the test resistance resulting in the combined resistance values to be read by the DMM. FREQUENCY/PERIOD MEASUREMENTS The EX1200 DMM uses the reciprocal counting technique to perform frequency measurements with a 24 MHz oscillator driving the counter circuitry. Frequency measurements are always returned in hertz (Hz). Period measurements use the same technique, but the frequency measurement is inverted to measure the period (T = 1/f). Period measurements are always returned in seconds (s). Configuring Frequency/Period Measurements The EX1200 DMM can measure the frequency and time period of any time-continuous waveform (sine wave, square wave, triangular wave, etc.) with oscillations that are approximately 0.1*VRANGE. Note that the DMM uses 10% of the selected range for threshold detection. For example, if the DMM is set to the 10 V range, an input signal will only be detected if the amplitude is greater than 1 V. For more information on voltage settings, please refer to the AC Voltage Measurements discussion in this section. The range of frequency measurements is 3 Hz to 1.5 MHz and, making the reciprocal period measurements 660 ns to 0.33 s. 88 Basic EX1200 DMM Operation www.vtiinstruments.com The resolution of frequency measurements is set from one of the following options: Slow Mode, Medium Mode, Fast Mode, and User Mode. Table shows the settings used for each mode. Mode Slow Medium Fast User Digits 6½ 5½ 4½ 4½, 5½, or 6½ Aperture/Gate Time 140 ms 14 ms 1.4 ms See Table 4-7 TABLE 4-6: FREQUENCY RESOLUTION MODES NOTE Larger aperture/gate times increase the number of input signal cycles averaged for a reading. This improves reading accuracy, but reduces scan speed. The DMM keeps the gate open for one full waveform cycle up to the timeout value. So, if the input frequency is 3 Hz, the time needed for the measurement reading to be returned can be up to 0.67 s. The default timeout is 1 s. When in User mode, the following limits must be observed when setting the aperture time: User Mode Resolution (Hz) Min Max 0.0025 4.167e-8 Aperture Time (s) 33.33e-6 s 1s TABLE 4-7: RESOLUTION AND APERTURE LIMITS FOR USER MODE Frequency and period measurement rates are dictated by the aperture time. The settling time (trigger delay) is the same as the ACV slow mode setting. Note that the maximum measurement time is no more than the following: Measuremen t Time Aperture Time 2T where T = period of input waveform Also note from Table 4-6 that aperture and resolution have an inverse relationship and can be interchanged using the following formula: Aperture Time (seconds) 24 106 Basic EX1200 DMM Operation 1 Resolution (Hz) 89 VTI Instruments Corp. Connecting to the DMM For front panel measurements, the ac signal should be connected to the HI and LO input jacks of the EX1200 DMM using suitable connectors. Although not preferred in fixed installation, measurements of this type can be used to quickly make readings and troubleshoot field wiring issues. Sense HI Input HI Input LO Sense LO DMM Front Panel Frequency Source TABLE 4-8: DMM CONNECTIONS FOR FREQUENCY MEASUREMENTS Connecting a frequency signal via the EX1200 DMM bus requires a making connections similar to those used for voltage measurements. DMM Backplane BPL_HI BPL_LO BPL_SHI BPL_SLO Frequency Sources CH 1 CH 2 CH n EX1200 Mainframe EX1200 Multiplexer Cards TABLE 4-9: FREQUENCY MEASUREMENT CONNECTIONS VIA EX1200 DMM BUS 90 Basic EX1200 DMM Operation www.vtiinstruments.com TEMPERATURE MEASUREMENTS EX1200‟s internal DMM can make temperature measurements by connecting sensors to its inputs. By doing so, it can be used as a high-channel count data logger. Three categories of sensors are supported: thermocouples, RTDs (resistance temperature devices), and thermistors. Table 4-10 indicates each category and the types of sensors supported by the EX1200 DMM. Category Thermocouple RTD Built-in Sensor Support B, E, J, K, N, R, S, T PT100, D100, F100, PT385, PT3916 Thermistor 2.2 kΩ, 5 kΩ, 10 kΩ Custom Sensor Support Cannot be defined at the instrument level. R0 (reference temperature) α (or “A”) β (or “B”) δ (or “delta”) A, B, C (curve fitting constants) TABLE 4-10: SUPPORTED TEMPERATURE SENSORS NOTE Temperature measurement values are returned in degrees Celsius (°C) and cannot be configured for Fahrenheit (°F) or Kelvin (K). Configuring Temperature Measurements Temperature measurements require the following information to be properly configured. Input As with other measurement functions, the DMM‟s input can be routed from the external front panel or via the internal DMM bus. If the thermocouples are being connected to switch cards with DMM access, then internal input mode should be selected. Digits The resolution, or number of digits, can be set for temperature measurements. Either 3½, 4½, 5½, or 6½ digits can be selected. Resolution should be optimized based on application and required results. While lower resolution yields faster sampling rates, it also decreases the accuracy of the reading. Unlike other functions, the digits of a temperature measurement do not directly correlate to the number of significant digits for a given measurement, but follow the values listed in Table 4-11. Transducer Type Type B TC Type E TC Type J TC Type K TC Type N TC Type R TC Type S TC Type T TC RTD Thermistor 6.5 digits 5.5 digits 4.5 digits 3.5 digits 0.01 °C 0.001 °C 0.001 °C 0.001 °C 0.001 °C 0.01 °C 0.01 °C 0.001 °C 0.01 °C 0.01 °C 0.1 °C 0.01 °C 0.01 °C 0.01 °C 0.01 °C 0.1 °C 0.1 °C 0.01 °C 0.1 °C 0.1 °C 1 °C 0.1 °C 0.1 °C 0.1 °C 0.1 °C 1 °C 1 °C 0.1 °C 1 °C 1 °C 10 °C 1 °C 1 °C 1 °C 1 °C 10 °C 10 °C 1 °C 10 °C 10 °C TABLE 4-11: TEMPERATURE RESOLUTION Built-in Sensor Support To simplify temperature measurement configuration, several sensor have been predefined in the SFP and in the driver APIs. See Table 4-10 for a list of predefined sensors. All constants and conversion parameters needed for these sensors are built into the DMM allowing them to be directly configured and used. Basic EX1200 DMM Operation 91 VTI Instruments Corp. Custom/User-Defined Sensors Although several sensors are predefined for temperature measurements, the EX1200 DMM also offers the ability to define custom sensors to add flexibility to a test system. For thermocouples, custom types are defined at the application level by using the measured voltage value and passing it to a software-defined look-up table. For custom RTDs or thermistors, the parameters defined in Table 4-10 must be defined as appropriate. Using a Thermocouple To perform a temperature measurement using thermocouples, a reference junction temperature must be used to calculate the hot junction temperature. The reference junction temperature can be obtained using a known, fixed junction temperature, an external thermistor or RTD measurement, or by using the onboard, internal thermistor of an EX1200 series terminal block (on supported terminal blocks only). When a fixed reference temperature is used, it must be provided as a value -20°°C and +80°°C (again, all temperature measurements must be made in °C). For measurements using an external or fixed reference, a reference temperature must be stored from a previous RTD or thermistor reading. To do so, set a multiplexer card channel up for an RTD/thermistor measurement and then set this measurement as the external reference. When a measurement is initiated on this channel, it will be handled as an external reference and the temperature will be stored in the volatile memory of the reference register. Any thermocouple measurements made after the reference temperature has been defined will use this value. The external reference value will be used until another external reference measurement is made or until the mainframe is powered off. Fixed temperature references typically provide the best accuracy, provided the fixed temperature is maintained at a constant temperature. Although the internal isothermal block references of the provided by the EX1200 series terminal blocks provide less accuracy than a fixed reference, it does provide the advantage of requiring no external wiring and simplifying test setup. Note that the fixed reference is supported using the EX1200 DMM. To use external reference, the scanner driver must be used. Connecting to the DMM Any thermocouple can be connected to the front panel terminals of the DMM using suitable connectors. Though this method is not preferred in fixed installation, this can be used to quickly make readings, and troubleshoot field wiring. Sense HI Thermocouple Sensor Input HI Input LO Sense LO DMM Front Panel FIGURE 4-14: DMM/THERMOCOUPLE CONNECTIONS 92 Basic EX1200 DMM Operation www.vtiinstruments.com Programming Interface The VTEX DMM, and VTEX Scanner drivers provide the access to the features of EX1200 DMM. Refer to the below functions of the driver in its documentation. IVTEXDmmTemperature Interface IVTEXDmmTemperature..::.Thermocouple Property Using an RTD RTDs are resistance-based passive transducers where the output resistance varies with changes in temperature. This non-linear relationship is characterized, resulting in the standardization of RTDs. As such, the EX1200 supports several types of RTDs, allowing for the automatic conversion of resistance readings to temperature values. RTDs supported include: PT100 (default), D100, F100, PT385, and PT3916. Custom RTDs are supported as well. Simply input the R0 (nominal resistance at 0°C temperature), α (alpha), β (beta), δ (delta) characteristics for the RTDs being used. The DMM can measure RTDs with R0 values between 49 Ω to 2.1 kΩ. R0 is typically the numeric value of the RTDs name (for example, a PT100 RTD has an R0 of 100 Ω, a PT385 has an R0 of 385 Ω). The temperature-resistance correlation for an RTD is calculated using the Callendar-Van Dusen equations. Two equations are used: one for temperatures between -200 °C and 0 °C and one for between 0 °C and 630 °C. For T < 0°C: RT R0 1 AT BT 2 CT 3 T 100 For T > 0°C: RT R0 1 AT BT 2 Where: RT = resistance of RTD at temperature, T, in ohms. R0 = nominal resistance of RTD (resistance at 0 °C) T = temperature in °C A = α[1+ (δ/100)] B = -αδ/1 x 104 C = -αβ/1 x 108) For the RTD‟s with built-in support, the following Callendar-Van Dusen RTD parameters are used: RTD Type PT100 D100 F100 PT385 PT3916 Basic EX1200 DMM Operation Standard ITS-90 ITS-90 ITS-90 IPTS-68 IPTS-68 α 0.003850 0.003920 0.003900 0.003850 0.003916 β 0.10863 0.10630 0.11000 0.11100 0.11600 δ 1.49990 1.49710 1.49589 1.50700 1.50594 R0 100 Ω 100 Ω 100 Ω 385 Ω 3916 Ω 93 VTI Instruments Corp. 2-Wire Measurement Connections A 2-wire RTD measurement is connected in the same manner as a 2-wire resistance measurement. The HI and LO terminals of the DMM are connected to the RTD‟s two terminals (no polarity restrictions). Sense HI Input HI Input LO Sense LO RTD DMM Front Panel FIGURE 4-15: RTD 2-WIRE CONNECTION TO DMM FRONT PANEL When using the DMM bus backplane through a switch multiplexer, as shown in Figure 4-16, observe the common practices introduced in the voltage and resistance measurement discussions above. Shielding greatly reduces the effect of external interferences/noises. It should also be noted that the shields should only be connected to ground at one end of the cable and not both. DMM Backplane BPL_HI BPL_LO BPL_SHI BPL_SLO RTDs CH 1 CH 2 CH n EX1200 Mainframe EX1200 Multiplexer Cards FIGURE 4-16: RTD 2-WIRE CONNECTION VIA THE EX1200 DMM BUS 94 Basic EX1200 DMM Operation www.vtiinstruments.com 4-Wire Measurement Connections The 4-wire RTD measurement method is the most accurate method of the two methods, as the set up automatically removes connection lead and switch resistance. This method does, however, does increase setup cost, as additional cabling is required. Sense HI Input HI Input LO Sense LO RTD DMM Front Panel FIGURE 4-18: RTD 4-WIRE CONNECTION TO DMM FRONT PANEL If the RTD is connected to a multiplexer card, the wiring is similar to that used for 4-wire resistance measurements (Kelvin method). To properly operate an EX1200 multiplexer cards in 4-wire mode, refer to the EX1200 Switch Card User’s Manual for more information. DMM Backplane BPL_HI BPL_LO BPL_SHI BPL_SLO CH1_1 RTD . . . CH2_1 EX1200 Mainframe EX1200-3048 FIGURE 4-19: RTD 4-WIRE CONNECTION VIA THE EX1200 DMM BUS Programming Interface The VTEX DMM and VTEX Scanner drivers provide the access to the features of EX1200 DMM. Refer to the below functions of the driver in its documentation. IVTEXDmmTemperature Interface IIviDmmTemperature..::.RTD Property Basic EX1200 DMM Operation 95 VTI Instruments Corp. Using a Thermistor While RTDs can be used over a wide temperature range, thermistors offer a higher sensitivity to temperature change, although they must operate in a more restricted temperature range. Thermistors are resistance-based passive transducers whose output resistance varies with temperature changes. By measuring the resistance of the thermistor, the temperature can be derived. The following thermistors are predefined on the EX1200 DMM and use built-in software conversions: 2.252 kΩ (default), 5 kΩ, and 10 kΩ. Custom thermistors can be defined by providing the appropriate variables in the Steinhart-Hart equation: A, B, and C (refer to the thermistor manufacturer‟s data sheet for more information). The equation is as follows: TK 1 A B ln R C ln R 3 Where: TK = calculated temperature in Kelvin ln(R) = natural log of measured resistance value of thermistor T = temperature in °C A, B, C = curve-fitting constants Curve fitting constants used by the DMM for supported thermistor types: 2252 Ω at 25 °C (Series 44004) 0.0014733 0.0002372 1.074 x 10⁻⁷ Constant A B C 5000 Ω at 25 °C (Series 44007) 0.0012880 0.0002356 9.557 x 10⁻⁸ 10 kΩ at 25 °C (Series 44006) 0.0010295 0.0002391 1.568 x 10⁻⁷ TABLE 4-12: THERMISTOR CURVE FITTING CONSTANTS Connecting to the DMM Any thermistor can be connected to the front panel terminals of the DMM using suitable connectors. Though this method is not preferred in fixed installation, this can be used to quickly make readings, and troubleshoot field wiring. Since thermistors is a bilateral resistive device, there are no polarity restrictions. Sense HI Input HI Input LO Sense LO Thermistor DMM Front Panel FIGURE 4-20: DMM/THERMISTOR CONNECTIONS 96 Basic EX1200 DMM Operation www.vtiinstruments.com If the thermistors are connected to a multiplexer card, the wiring is similar to that of a 2-wire voltage measurement without the polarity constraints, as the thermistors are bilateral passive devices. DMM Backplane BPL_HI BPL_LO BPL_SHI BPL_SLO Thermsitors CH 1 CH 2 CH n EX1200 Mainframe EX1200 Multiplexer Cards FIGURE 4-21: THERMISTOR CONNECTIONS VIA DMM BUS Programming Interface The VTEX DMM and VTEX Scanner drivers provide the access to the features of EX1200 DMM. Refer to the below functions of the driver in its documentation. IVTEXDmmTemperature Interface IIviDmmTemperature..::.Thermistor Property Scanlist Application Note When using scanlist with temperature measurements, it is important not to make any configuration modification between running the scan list and reading the data. For example, using the following sequence would result in an erroneous reading: 1) 2) 3) 4) Set up config “CJC” with 10k thermistor Run scanlist Change “CJC” to use 5k thermistor instead Read back data The EX1200 performs the needed temperature calculation based on the current settings. As a result, the data taken with the 10k thermistor would have 5k-related math applied, resulting in incorrect data. In the same respect, if the temperature configurations are deleted after the scan list is run and the user attempts to read the data, an “Bad Configuration Index” error will occur. This is the result of the EX1200 attempting to perform calculations without configuration data. Basic EX1200 DMM Operation 97 VTI Instruments Corp. SELF-TEST The EX1200 DMM self-test performs various hardware checks to ensure that the DMM is functioning properly. The process is takes approximately two minutes to complete and checks the following: 98 Communication lines for the controller board, digital FPGA, and analog FPGA. SRAM memory Power supply, fuse, and shut down capabilities Onboard temperature sensor DCV analog path DC protection circuit DCI analog path Current input fuse 2- and 4- wire resistance, ohms overload ADC overload Frequency testing ACV testing Basic EX1200 DMM Operation www.vtiinstruments.com SECTION 5 SCANNER OVERVIEW OVERVIEW The purpose of the VTEXScanner driver is to make it easy to control any VTI instrument where taking measurements on multiple modules is the primary purpose of the device. While controlling the instrument in the same way is possible by using a combination of other VTI drivers, this is often cumbersome due to the need to instantiate and initialize multiple drivers, and arrange scanlists and triggers exactly. The VTEXScanner driver abstracts many of these details and allows application programmers the flexibility to program at a high level and rely on the details being correct. In addition, the VTEXScanner driver incorporates an IVILxiSync-compatible interface to make programming triggering and arming familiar. This model is interchangeable with IVILxiSync unless otherwise noted, but does not present an IVILxiSync Interface in COM. The VTEXScanner driver must expose certain segments of other drivers to allow the user to configure them. These sections are only documented here if they are changed from the drivers they were taken from. For more information regarding the scanner and its operation, please refer to the VTEXScanner Programmer’s Manual and the Scanner Soft Front Panel description in Section 7. EX1200 Scanner Overview 99 www.vtiinstruments.com SECTION 6 TRIGGERING OVERVIEW The EX1200 is a bridge device and, therefore, does not expose a triggerable action. However, for ease of use, the scanner driver exposes a trigger model which functions like the SCPI 1999 Trigger Subsystem and works on the device and all installed plug-in cards. The user should be able to program to this representation except where otherwise noted. This is illustrated in Figure 6-1. The trigger model is sectioned into five layers: IDLE, INIT, ARM, TRIG, and DEVICE. The EX1200 system reset condition places it in the IDLE state. A Scanner Initiate() API call begins the acquisition sequence by transitioning the instrument into the ARM layer. As this occurs, the reading buffer memory is cleared. Upon entering the ARM layer, the ARM Count is reset to its specified value. The instrument remains in the ARM layer until the specified ARM event occurs. Once that occurs the ARM Count is decremented, and the instrument transitions into the TRIG layer. The instrument remains in the TRIG layer until the specified TRIG event occurs. Once that occurs, the instrument transitions into the DEVICE layer. In the DEVICE layer, channels in the scanlist are measured the requested sample count number of times, and stored into local memory (FIFO). If there are more steps in the scanlist, the instrument stays in the TRIG layer until the specified TRIG event (and subsequent device action) occurs enough times to finish the scanlist. Once the scanlist is complete, the instrument then evaluates the remaining ARM Count and repeats the ARM layer action if it is nonzero. However, since each transition into the TRIG layer restarts the scanlist, each additional ARM layer action results in the full specified number of TRIG Count actions through the TRIG layer and DEVICE layer. Once the ARM Count reaches zero, the instrument transitions back into the IIDLE layer. If the Arm Count is the special value indicating “Infinite”, the ARM layer is automatically reentered. However, unlike with an Initiate() API call, the reading buffer memory is not cleared. EX1200 Triggering 101 VTI Instruments Corp. Trigger Model Status IDLE LAYER IDLE INIT ABORT (From any layer) No INIT LAYER Yes INIT CONT? INITILIZED = 0 ARM ACTIVE = 0 TRIG ACTIVE = 0 SAMP ACTIVE = 0 DEVICE ACTIVE = 0 INITILIZED = 1 ARM ACTIVE = 0 TRIG ACTIVE = 0 SAMP ACTIVE = 0 DEVICE ACTIVE = 0 No ARM IMM Wait for ARM Event SW ARM ARM:Count > 0 or ARM INF? Yes ARM Event ARM LAYER INITILIZED = 1 ARM ACTIVE = 1 TRIG ACTIVE = 0 SAMP ACTIVE = 0 DEVICE ACTIVE = 0 ARM Delay Decrement ARM:COUNT No ARM INF? Yes No TRIG IMM Wait for TRIG Event SW TRIG Yes TRIG:Count > 0 or TRIG INF? TRIG Event TRIG LAYER INITILIZED = 1 ARM ACTIVE = 0 TRIG ACTIVE = 1 SAMP ACTIVE = 0 DEVICE ACTIVE = 0 TRIG Delay Decrement TRIG:COUNT No TRIG INF? Yes No SAMP IMM Wait for SAMP Event SW SAMP Yes SAMP:Count > 0 or SAMP INF? INITILIZED = 1 ARM ACTIVE = 0 TRIG ACTIVE = 0 SAMP ACTIVE = 1 DEVICE ACTIVE = 0 SAMP Event SAMP LAYER SAMPLE Delay Decrement SAMP:COUNT No SAMP INF? Yes Acquire ADC Counts DEVICE LAYER Store Reading AUTO RANGE? and HW OVERFLOW? and not RANGE MAX? No INITILIZED = 1 ARM ACTIVE = 0 TRIG ACTIVE = 0 SAMP ACTIVE = 0 DEVICE ACTIVE = 1 Yes Calibrate Reading Range Delay Range Up Yes AUTO RANGE? and OVER LIMIT? and not RANGE MAX? No Range Down Yes AUTO RANGE? and UNDER LIMIT? and not RANGE MIN? No FIGURE 6-1: EX1200 SERIES TRIGGER MODEL 102 EX1200 Triggering www.vtiinstruments.com SECTION 7 WEB PAGE OPERATION INTRODUCTION To open the embedded web page, start the LXI Discovery Tool utility by navigating to Start → Programs → LXI Discovery Tool. Once the utility is run, LXI Discovery Tool will scan the network to discover all LAN-based VTI instruments. Once the scan is complete, the tool shows all the instruments that were discovered, as shown in Figure 7-1. To open the web page, click on the Open Web Page. The IP address of the EX1200 can also be viewed from this window as well as its firmware version. FIGURE 7-1: LXI DISCOVERY TOOL DISPLAYING ALL THE INSTRUMENTS ON THE LAN NETWORK Alternatively, the EX1200 may also be discovered using Internet Explorer‟s Bonjour for Windows plug-in. The IP address of the EX1200 can also be entered into the address bar of any web browser to view the embedded web page. By default, the EX1200 will first attempt to use DHCP to set its IP Address. If DHCP is not available on the network it is connected to, it will instead use Auto IP. Determining the Auto IP address is discussed in the Network Configuration discussion in Section 2. Other discovery methods, such as VXI-11, can be used as well. EX1200 Series Maintenance 103 VTI Instruments Corp. GENERAL WEB PAGE OPERATION When initial connection is made to the EX1200, the instrument home page, Index, appears (see Figure 7-2). This page displays instrument-specific information including: Model Manufacturer Serial Number Description LXI Class LXI Version Hostname MAC Address IP Address Netmask Instrument Address String Firmware Version IEEE 1588 Time FIGURE 7-2: EX1200 MAIN WEB PAGE The Index is accessible from any other instrument page by clicking on the EX1200 web page header. The EX1200 Command Menu is displayed on the left-hand side of every internal web page. The entries on the command menu represent three types of pages: Status Action Entry 104 This type of page performs no action and accepts no entries. It provides operational status and information only. The Index page is an example of a status page. This type of page initiates a command on the instrument, but does not involve parameter entry. The Reboot page is an example of an action page. This type of page displays and accepts changes to the configuration of the instrument. The Time Configuration page is an example of an entry page. EX1200 Triggering www.vtiinstruments.com Use of the entry-type web pages in the EX1200 are governed by a common set of operational characteristics: Pages initially load with the currently-entered selections displayed. Each page contains a Submit button to accept newly entered changes. Leaving a page before submitting any changes has the effect of canceling the changes, leaving the instrument in its original state. Navigation through a parameter screen is done with the Tab key. The Enter key has the same function as clicking the Submit button and cannot be used for navigation. VTI Instruments Logo The VTI Instruments logo that appears on the upper left of all EX1200 web pages is a link to the VTI Instruments corporate website: http://www.vtiinstruments.com. SOFT FRONT PANEL MAIN PAGE The Soft Front Panel page displays a list of instruments that are available to command in the EX1200 series chassis. After selecting an instrument, the soft front panel specific to that instrument will appear. An example of the EX1200 SFP page can be seen in Figure 7-3. FIGURE 7-3: EX1200 SOFT FRONT PANEL MAIN PAGE EX1200 Series Maintenance 105 VTI Instruments Corp. Once a soft front panel is selected, a popup will appear displaying the appropriate information. When the current SFP is no longer needed, simply click on the grey “X” in the upper right corner to close the SFP and return to the main Soft Front Panel page. FIGURE 7-4: SFP POPUP FOR SCANNER SCANNER SOFT FRONT PANEL The EX1200 scanner allows the user to configure setup a scanlist. The Scanlist field allows for the creation of a list which can be sequentially executed once the Arm and Trigger requirements have been met. For more information on controlling the scanner programmatically, please refer to the VTEXScanner Programmer’s Manual included with the EX1200 system. NOTE Scanner is only available when a switch card is installed in an EX1200 series mainframe. Tab Bar The general purpose of the Tab bar located at the top of the scanner SFP is to allow the user access to all the components of the EX1200 system to which they are connected. Device Information: When clicked, a screen appear that provides SFP and firmware version information for the scanner. The user is also provided information for each card that has been installed in the EX1200 system. This information includes the instrument‟s model number and its hardware version. FIGURE 7-5: SCANNER SOFT FRONT PANEL 106 EX1200 Triggering www.vtiinstruments.com Slot x: One Slot tab will appear for each switch/instrument installed in the EX1200 system. This provides the ability to monitor the state of the relays or control them directly. When a plug-in card is initially accessed from the Tab bar, the switch‟s SFP appears in Monitor Only mode. To control the plug-in card, simply click on the Control Mode button and select either the Synchronous Mode or Asynchronous Mode. These SFPs are also available as a standalone via the Soft Front Panel main page. Please refer to Switch Soft Front Panels in this section for more information regarding use of the switch SFPs. DMM/DMM Calibration: If a DMM module is installed in the EX1200 system, the DMM and DMM Calibration tabs will be present. The DMM tab allows for direct control of the DMM module, while the DMM Calibration tab provides the calibration logic for the DMM module. Like the Slot tabs, the DMM tab can be accessed as a standalone via the Soft Front Panel pain page. Please refer to DMM Soft Front Panel and DMM Calibration in this section for more information regarding use of the these SFPs. Status Display The Status Display field emulates a display that might appear on the physical front panel of a scanning DMM, as it displays measurements taken by instruments commanded by the scanner as it progresses through a scanlist. The following information may be provided in this field: Scan Count: Displays the current scan number. The scan count increases each time the scanlist repeats. When no scan is running, the field appears blank. Scan Delay: Indicates the minimum time to complete each scan step. For instance, if this is set to 1.0 and a scan step completes in only 0.75 seconds, the scanner waits another 0.25 seconds before advancing to the next step. Scan Status: Displays the operation currently being performed by the scan engine. These operations include: Idle, Waiting for Scan Trigger In, Waiting for Step Trigger In, Measuring DCV on 1!CH1_1, etc. When the time between scans is faster than 0.25 seconds, the display value will no longer correlate to the actual status, as it cannot refresh faster than this rate. Last Measurement: If a DMM module is installed, its last measurement is shown here. Last Channel: Displays the last known scanned channel. This is based on the current programmed scanlist. If the scanlist is modified, this display may be inaccurate. System Buttons The four orange buttons at the top right of the Status Display are system buttons that affect the functionality of the EX1200 system and all installed modules. Lock/Unlock: Requests (or releases) exclusive access to the EX1200 system. Reset: Resets the SFP and the connected modules to power-on defaults. Figure 7-5 shows the default values for the scanner. Save/Load: These functions allow the user to either save or load the present DMM, scanlist, and trigger configurations. Saving a configuration allows the user to use the same settings at a later time. When the Save button is clicked, the user is prompted to choose a file name where the data will be saved. To load a saved state, simply click on the Load button, select the desired file from the dialog box that appears, and then click OK. EX1200 Series Maintenance 107 VTI Instruments Corp. Scanlist Field The Scanlist field allows for the creation of a list which can be sequentially executed once the Scan and Step Trigger requirements have been met. Each scan step consists of two phases: the setup phase and the sweep phase. The setup phase consists of general purpose switching and setup, where the sweep phase performs measurements on its defined channels. In general, the following sequence should be followed to create a scanlist and retrieve its measurement data: 1) 2) 3) 4) 5) 6) 7) Use the DMM Configuration Manager to create the required DMM configurations. Click on the Add Step button. Use the Setup Wizard to configure matrix switch channels. Use the Sweep Wizard to set up measurements on multiplexer switch channels. Select scan and step trigger inputs from the Trigger Properties field. Initiate the scanlist using either the Initiate button. Enable Get Continuous to populate the Results field as data is acquired, or use the Get button to retrieve data as desired. 8) Review the data or save it to a file using the Save Data button. If necessary, the sequence of the scanlist can be altered by clicking on the appropriate step or sweep phase and using the Move Step Up or Move Step Down buttons. Once a scanlist has been configured, it can be exported for use in another EX1200 system or to be saved for future use by using the Export Scanlist button. When the Export Scanlist button is clicked, a string describing the contents of the current scanlist is displayed. This string can be copied and pasted into the VTEXScanner driver‟s list property to move the scanlist to a driver application. This same string can be used to import a scanlist by clicking on the Import Scanlist button and pasting a string into the dialog box that appears. Additional details for each part of the Scanlist field are provided below. Notes on Web Page Use After clicking Initiate, it will take about 2 to 3 seconds for the scan to begin. No action can be performed during this time. To monitor this, use the status indicator at the top left of the DMM display. Once it moves from the Idle state, it is OK to perform other actions. If a scan has been initiated and seems to be stuck in the Waiting For Scan Trigger In or Waiting For Step Trigger In states, check the Trigger Properties field. In order for a scan to begin immediately without interaction with other instruments, both inputs (the Scan Trigger In and Step Trigger In) should be set to Immediate. Setup Field From the Setup field, the user defines the sequence of connections that will be made and/or broken during the setup phase. After clicking on the white entry box, the user can 1) click on the black configuration button on the right to start the Switch Wizard or 2) enter a valid setup substep string directly into the box. The wizard provides the most common and useful options in an easy to use interface. The buttons and menus available in the wizard provide the following functions: FIGURE 7-6: SWITCH WIZARD 108 EX1200 Triggering www.vtiinstruments.com Connect/Disconnect: This button toggles between Connect and Disconnect. When Connect is selected, the path defined to the right of the button will be made. Choosing Disconnect will open the defined path. A → B Drop Menus: From these menus, the input and output of each required path can be defined. These menus are populated with the channels information for each plug-in card installed in the EX1200. When 1!CH1_1 is displayed, this indicates Slot 1, channel CH1_1 has been selected. + / - Buttons: The +/- buttons allow the user to add or delete connections from the given scanlist. Wait before next checkbox: When selected for a connection, the scan list will wait until the relay has settled before advancing to the next step in the scanlist. Sweep Field The Sweep phase of the scan step occurs last and consists only of measurement operations. These measurements can be performed on any of the channels which have the ability to connect to the DMM via the backplane (see the EX1200 Switch Card User’s Manual for information regarding switch card capabilities). After clicking on the white entry box, the user can 1) click on the black configuration button on the right to start the Sweep Wizard (see Figure 7-7). or 2) enter a valid sweep sub-step string directly into the box. The wizard allows the user to scan any from any connected switch card, in ascending order, and allows for one DMM configuration to be selected per channel. The buttons and menus available in the wizard provide the following functions: FIGURE 7-7: EX1200 SWEEP WIZARD Function drop menu: By selecting a specific function from this drop menu, the Sweep Wizard will only show channels that are capable of performing the selected DMM function. Only show configs… check box: When selected, the Sweep Wizard menu will only display DMM configuration that use the function selected by the Function drop menu. Enabled/Channel: The Enabled checkboxes allow the user to select the Channels that will be connected to the backplane for each sweep. DMM Config: This drop menu allows the user to select one of the predefined DMM configurations. See the DMM Configuration Manager for more information on defining. Note, if no DMM configurations are saved, an Error will be reported. EX1200 Series Maintenance 109 VTI Instruments Corp. Break Before Make checkbox: When selected, the scanner ensures that channel selected has completely settled before it connects to another channel. Deselecting this option increases scan speed, but introduces the of input channels potentially being shorted to each other for a short time. Notes on Web Page Use If a DMM configuration cannot be found in the Sweep Wizard drop menu, it may be because the channel is not capable of that type of measurement. Use the Filter channels by available function drop-down to show only channels capable of a particular DMM function. Also note that multiple channels can be configured simultaneously using Shift+Click or Ctrl+Click. To select multiple, consecutive channels, select the first channel in the series, then Shift+Click the last channel that will have the same configuration. To select non-consecutive channels, use Ctrl+Click to select each channel. Once all channels have been selected, right click on one of the selected channels to see the options provided in Figure 7-7. DMM Configuration Manager Clicking on the DMM Configs button will open the DMM Configuration Manager. From here, up to 64 different DMM configurations can be defined and used in conjunction with the sweep phase of the scanlist. FIGURE 7-8: DMM CONFIGURATION MANAGER 110 Name: Allows the user to define a name for the DMMs configuration. Once defined, this name appears in the DMM Configs section of the Sweep Wizard. Function: Indicates the DMM function which will be used with the current setting. Functions include: DC Volts, AC Volts, DC Current, AC Current, 2W Ohms, 4W Ohms, Frequency, Period, and Temperature. Option: Indicates whether the HIZ or 10 M(Ω) mode of operation has been selected. Range: Indicates the voltage range the DMM will use when a measurement is taken in this configuration. The ranges are: Auto Range On, Auto Range Off, Auto Range Once, 100 mV, 1 V, 10 V, 100 V, and 300 V. The Auto Range function allows the DMM to select the range automatically as a function of voltage applied to the channel. When Auto Range Off is selected, the EX1200 will use the range last range to which the EX1200 was set. Digits: Indicates the number of significant digits the DMM will use during the measurement. Aperture Time: Indicates the time, in seconds, over which the DMM will integrate the analog inputs. The longer the time, the more accurate the reading. Valid values vary depending on the power line frequency and the mode setting. For 60 Hz PLF: 0.00167, 0.0167, 0.167, and 1.67. For 50 Hz PLF: 0.0002, 0.002, 0.02, 0.2, and 2.0. For Frequency and Period modes: 0.0014, 0.014, and 0.14. Auto Zero: Indicates whether auto zero is on or off. Auto zero removes the internal voltage offset due to temperature. EX1200 Triggering www.vtiinstruments.com Trigger Delay: indicates the delay, in seconds, that occurs between connecting a switch channel to the DMM and when the measurement is taken. Valid values are 0 s to 4294.967295 s. An option to select Auto appears when this field is selected. Auto delay allows the DMM to automatically set the trigger delay based on the measurement configuration. Gain: Indicates the m in an mx+b calculation performed on the measurement data before it is returned. Offset: Indicates the b in an mx+b calculation performed on the measurement data before it is returned. New button: Adds a new DMM configuration. Delete button: Removes the selected DMM configuration. Done button: Closes the DMM Configuration Manager dialog box. Notes on Web Page Use The DMM Configuration Manager only shows the most common options. To fully configure the DMMs, select the DMM tab and use its Save/Load/Delete buttons. Trigger Properties Field From the Trigger Properties field, the user configures the various triggering capabilities of the scan engine. Scan/Step Trigger In: For the Scan Trigger, the scan engine waits for the selected event to occur before starting each iteration of the scanlist. For the Step Trigger, the scan engine will wait for the selected event to occur before starting each scan-step. Immediate: When selected, the scanner proceeds through immediately, without waiting for any external signal. Software: When selected, the scanner proceeds through the scanlist in steps and will wait for a software trigger before executing the next scan step or scanlist iteration. LXI0 – LXI7: Indicates the LXI Trigger bus line that will advance the scanner to the next step or scanlist iteration. LAN0 – LAN7: Indicates the LAN event that will advance the scanner to the next step or scanlist iteration. DIO0 – DIO7: Indicates the digital I/O channel that will advance the scanner to the next step or scanlist iteration. Alarm0: Indicates the Alarm event that will advance the scanner to the next step or scanlist iteration. Notes on Web Page Use It is important to only send triggers other than Immediate when the EX1200 is expecting to receive triggers. If the period of an alarm is set too fast, if the Send Software Trigger button is clicked when the EX1200 is not in the Waiting for Trigger state, etc. the scan engine will flag an error and abort the scan. To wait for a trigger between measurements, place these triggers in separate scan steps (i.e., separate rows in the Scanlist table). The Step Trigger In field triggers advances between scan steps. EX1200 Series Maintenance 111 VTI Instruments Corp. If a hardware trigger (an LXI, LAN, or DIO line) is selected as either the Scan Trigger or Step Trigger source, and the Rise/Fall slider will appear. This slider allows the user to choose which edge polarity will be accepted as the arm or trigger source or which will be asserted as a trigger output. FIGURE 7-9: RISE/FALL OPTION FOR HARDWARE EVENTS If Alarm0 is selected as either the Arm or Trigger source, a Configure button will appear. Clicking on this button provides the following configuration options: Time: Indicates the IEEE 1588 time at which the alarm will begin firing. Now button: Clicking this button retrieves the current IEEE 1588 time from the EX1200 system and places it on the Time field. Period: Indicates the time, in seconds, to wait between alarm firings. Repeat: Indicates the number of times the alarm will fire. A “0” in this field results in infinite firing. FIGURE 7-10: ALARM CONFIGURE OPTIONS Notes on Web Page Use To create a trigger that repeats at a specified time interval, set one of the trigger inputs to ALARM0. Then configure the alarm with Time and Repeat set to 0. Now, when Period is defined, an infinitely running timer is created which triggers at the defined period. 112 Step/Scan Complete Out: When each scan step (each row of the scanlist table) is completed, Step Complete is asserted. When the last step in the scanlist is completed, Scan Complete is asserted. Use these options to define which trigger lines to assert for these events. None: When selected, no event is performed upon completion of the scan-step or scanlist. LXI0 – LXI7: Triggers the selected LXI Trigger bus line at the end of the scan step or scanlist. LAN0 – LAN7: Triggers the selected LAN event at the end of the scan step or scanlist. DIO0 – DIO7: Triggers the selected digital I/O channel at the end of the scan step or scanlist. Scan Count: Indicates the number of times the full scan list will be run. This value must be between 1 and 2,147,483,648. If set to 0 or a negative number, the arm count is infinite. EX1200 Triggering www.vtiinstruments.com Scan Delay: Indicates the minimum time to complete each scan step. For instance, if this is set to 1.0 and a scan step completes in only 0.75 seconds, the scanner waits another 0.25 seconds before advancing to the next step. Abort: This button causes advancement of the current scanlist to be stopped, allowing configuration to be changed or a new scanlist to be defined. Send Software Trigger: This button sends a software trigger signal to the device. If Software is the selected Scan Trigger or Step Trigger, this will cause the device to begin the next scan-step or scanlist iteration, respectively. Results Field Below the scanner configuration fields, a Results field is provided that is populated with data this is collected during the sweep steps of the scanlist. The table consists of the following data fields: Time: Indicates the IEEE 1588 time of the measurement. Channel: Indicates the switch channel on which the measurement was taken. Value: Indicates the data that was measured. Units: Indicates the engineering units of the measurement data. To the right of the Results Field are options that affect when data is displayed and what is done with the data once the scan is complete. Get Continuous: When enabled, all available data is pulled into the table as soon as possible. This also disables the Get and Get All options. Get button: When clicked, measurement data is immediately pulled from the FIFO memory. Get Continuous must be OFF in order for this option to be available. Get All: When Get All is selected, clicking the Get button causes all of the currently available data to be retrieved from memory. Get Count field: Indicates the number of data points that will be returned when the Get button is clicked. FIFO Count field: Indicates the number of data points available in the FIFO memory. Clear Table button: When clicked, all of the data currently in the table is erased. Clear FIFO button: When clicked, any data points currently stored in the FIFO memory will be erased. Save Data button: When clicked, the data in the table can be saved. A .csv (comma separated value) file is generated by default. This format is readable by most spreadsheet programs. INSTRUMENT SOFT FRONT PANELS Each plug-in instrument, such as the EX1200-3608, has a unique, onboard soft front panel. From the soft front panel, the user can access the instruments functionality and configure it for use. For more information on instrument soft front panels, refer to the instrument‟s user‟s manual. SWITCH SOFT FRONT PANELS Each switch card has its own, unique soft front panel which paths to be defined, relays to be opened and closed relays, and for user defined states to be created which can be recalled for later use. Monitor and Control Tab By default, the SFP opens to the Monitor and Control view. From this view, the user can see the logical diagram for the selected plug-in module. To control a switch, for example, simply click on the pin that needs to be activated to cause the internal relay to actuate and connect to the pin indicated. Horizontal and vertical scroll bars allow the user to navigate larger diagrams by scrolling. The user may also change the magnification of the schematic. Near the upper right corner of the web page is a size selection menu. By clicking on either the up or down arrow, the EX1200 Series Maintenance 113 VTI Instruments Corp. size of the schematic can be changed from to any of the following sizes: Tiny, Small (default), Medium, and Large. FIGURE 7-11: TYPICAL SWITCH SOFT FRONT PANEL For switches that support read-back, the relays are color coded to provide the user an indication of the relay states. The Color Legend provides the meaning of each color. Dark blue relays have been commanded closed. This color should appear each time a relay is selected and working properly. A light blue relays may be found on a latching relay. It indicates that, although the relay has not been commanded closed, read-back indicates that it is closed. If a port turns red after being commanded, this indicates that the relay has failed to close and may require repair. For switches that do not support read-back, relays will appear dark blue for all states. The main toolbar of the SFP provides the following functionality: Control Mode: Three control modes are available for EX1200 modules. Monitor Only: In this mode, the user can view the actions the various EX1200 components while the module is actively performing automated test. The image is refreshed every 3 s. In this mode, no modifications can be made. If a another user has established a session with the EX1200, all other sessions established after that will be “Monitor Only” sessions until the previous session has ended. Synchronous Mode: In this mode, the user can manipulate the relays in the EX1200 in real time. As the user clicks a port or sets a value and it affects the EX1200 at that time. Asynchronous Mode: In this mode, the user may manipulate all relays, but the actions do not occur until after the Apply button is clicked. Clicking on the Revert button will cause the plug-in to revert to the state they were in the last time Apply was clicked. Notes on Web Page Use Before controlling relays, set the control mode to either Synchronous or Asynchronous. 114 Saved States button: This button allows the user to either save, load, or erase a switch configuration. Saving a state allows the user to use the same switch set up at a later time. When the Save button is clicked, a prompt will appear. The user selects a number, 0 through 127, from this field. Click OK to save the current state as the state number entered. To load or EX1200 Triggering www.vtiinstruments.com erase a saved state, simply click on the Load or Erase button, select the desired state number from the dialog box that appears, and then click OK. Path button: This button opens the Path configuration window. From this window, the user can define channel-to-channel relationships by entering the desired path in the New Path text box using the formatting described in the Help discussion. Clicking on the Connect button will close the relays required to establish the Path. Once defined, the path can be found in the Established Paths text box. The path can then be established or removed by using the Reconnect and Disconnect buttons. The Details button provides information about the path selected in the Established Paths text box. FIGURE 7-12: PATH CONFIGURATION WINDOW Reset button: This button clears the existing state of the relays and places them back in their default positions. Device Info If the Device Info tab is clicked, information regarding the selected instrument will be displayed including the versions of the SFP, firmware, hardware, and configuration. FIGURE 7-13: DEVICE INFORMATION WEB PAGE EX1200 Series Maintenance 115 VTI Instruments Corp. DMM SOFT FRONT PANEL The DMM Soft Front Panel provides an interface for the user to configure and perform measurements with an EX1200 DMM. Note that this option is only available on EX1200 systems where the DMM is installed. FIGURE 7-14: DMM SOFT FRONT PANEL Tab Bar The general purpose of the Tab bar located at the top of the scanner SFP is to allow the user access to all the components of the EX1200 system to which they are connected. Device Information: When clicked, a screen appears that provides SFP and firmware version information for the DMM. Monitor and Control: When clicked, it provides the ability to set the DMM‟s options, perform measurements, and collect data. Calibration: This tab provides the calibration and verification routines, as well as access to the stored adjustment data. Status Display The Status Display field functions similarly to a DMM front panel display on a standard, standalone DMM while its takes measurements. It provides information regarding the measurements being taken as well additional data. 116 Auto?: AUTO is displayed if the DMM is currently set to auto-range mode. This area will be blank otherwise. Current Action: Indicates the DMM‟s current action, such as Idle, Measuring, or Waiting for Trigger. Internal Temperature: Indicates the current internal temperature of the DMM. Last Measurement: Displays the latest measurement taken by the DMM. EX1200 Triggering www.vtiinstruments.com System Buttons To the right of the Status Display are two system buttons that affect the functionality of the EX1200 system and all installed modules. Lock/Unlock: Requests (or releases) exclusive access to the EX1200 system. Reset: Resets the SFP and the connected modules to power-on defaults. Self Test: Performs a self-test operation of the DMM hardware. See Self-Test in Section 4 for more information. Basic Settings Field The Basic Settings field allows the user to select the type of measurement that will be made by the DMM as well as specifying simple measurement parameters. NOTE Measurement Mode buttons: These buttons control the type of measurement the DMM will make. V--: Sets the DMM to take dc voltage measurements (DCV). V~: Sets the DMM to take ac voltage measurements (ACV). Hz: Sets the DMM to take frequency measurements. A--: Sets the DMM to take dc current measurements (DCI). A~: Sets the DMM to take ac current measurements (ACI). 1/Hz: Sets the DMM to take period measurements. Ω 2W: Sets the DMM to take 2-wire resistance measurements. Ω 4W: Sets the DMM to take 4-wire resistance measurements. °C: Sets the DMM to take temperature measurements. Range: Indicates the input range the DMM will use when a measurement is taken. The drop menu provides different ranges depending on the Measurement Mode that was selected. For DCV and ACV the following ranges are available: Auto Range On, Auto Range Off, Auto Range Once, 100 mV, 1 V, 10 V, 100 V, and 300 V. For DCI and ACI the following ranges are available: Auto Range On, Auto Range Off, 10 mA, 100 mV, 1 A, and 3 A. Hz measurements are performed at 1.5 MHz range, while 1/Hz measurements are at 0.3333 s. For Ω 2W and Ω 4W measurements, the ranges are: Auto Range On, Auto Range Off, 100 Ω, 1 kΩ, 10 kΩ, and 100 kΩ. The Ω 2W also provides 1 MΩ, 10 MΩ, and 100 MΩ ranges. When Auto Range is selected, all measurements dynamically determine the most appropriate range. Selecting Auto Range Off causes all future measurements to use the last actual range. The Auto Range Once function is equivalent to using Auto Range On for one measurement, then switching to Auto Range Off for the subsequent measurements. Option: Provides various options depending on the Measurement Mode selected above. For DCV: Provides a 10 M(Ω) or HIZ option. The 10 M option should be used to minimize noise pickup, while HIZ should to reduce loading errors. For ACV, ACI, Hz, and 1/Hz: Provides High Filter, Medium Filter, and Low Filter options. The High option utilizes the fastest, but least accurate, ac filter. The Low option selects slowest, most accurate ac filter. The Medium Filter option provides a compromise between the speed and accuracy of the other two filters. For DCI: No options are provided. For Ω2W & Ω4W: Provides the HI_I and LO_I options. The HI_I option uses the high test current value, while the LO_I uses the low current value. Only the 10 kΩ and 100 kΩ ranges offer two current sources; this option will have no effect on other ranges. Input: Indicates whether the input is from an Internal source or from the banana jacks on the DMM‟s Front Panel. EX1200 Series Maintenance 117 VTI Instruments Corp. Digits: Indicates the number of significant digits that will be used when measurements are taken. Note that this property and Aperture Time are interrelated hardware settings. Thus, changing one affects the other. Optional Settings Some functions require optional settings. These settings are displayed only if a function requiring them is selected. Otherwise, this space is left blank. These options apply only to ac and dc current measurements. Minimum: Specifies the minimum expected frequency. Maximum: Specifies the maximum expected frequency. These options apply only to frequency and period measurements. Voltage Range: select the voltage range that will be used when the frequency/period measurement will be made. Same options apply as for the DCV and ACV modes above. These options apply only to temperature measurements. When Thermocouple is selected as the transducer, the following options are available: TC Type: Select the TC that will be used during the measurement. Select from Type B, Type E, Type J, Type K (default), Type N, Type R, Type S, or Type T. Reference Junction: Determines whether the reference junction is Fixed (default) or External. Fixed Reference Junction: If Fixed is selected above, enter the temperature of this reference junction here. When Thermistor is selected as the transducer, the following options are available: R: Indicates the resistance value for the thermistor. Select from 2252 Ω, 5 kΩ, 10 kΩ (default), and User Resistance. A, B, and C: If User Resistance is selected for R, the user must provide the SteinhartHart equation coefficients for the thermistor. Is Reference Junction check box: When checked, this indicates that the thermistor is being used as a reference junction. When 2/3/4W RTD is selected as the transducer, the following options are available: Type: Indicates the RTD type that will be used for measurement. Select from PT100 (default), D100, F100, PT385, PT3916, User. R, A, B, and Δ: If User is selected for Type, the user must provide the CallendarVan Dusen equation coefficients for the RTD. Is Reference Junction check box: When checked, this indicates that the RTD is being used as a reference junction. Trigger Settings In the Trigger Settings field, the user can change the setting that control the triggering capabilities of the DMM. 118 Trigger Input: Each time a trigger input event occurs, the DMM enters the Sample Trigger layer. Source: Indicates the event type that will cause a trigger input event. These include Immediate, External, Software, BPL0 – 7. Route: This button appears when a backplane line (BPL0 – 7) is selected for Source. Clicking this button launches a dialog box that allows the user to select an external trigger line (LXI0 – 7, DIO0 – 7, LAN0 – 7, or ALARM0) to connect to the chosen backplane line. Slope: For hardware trigger lines, this parameter indicates the slope of level change, either Rising or Falling, that will cause a trigger input event. The slope parameter has not effect when Immediate or Software is selected. Count: Indicates the number of trigger input events that will be accepted before returning to the Idle state. Valid values are -1 and 1 to 2,147,483,647, where “-1” sets an infinite count. EX1200 Triggering www.vtiinstruments.com Auto Delay checkbox: When enabled, the DMM delays the measurement until it detects that its inputs have settled. Delay: Indicates the time, in seconds, the DMM will wait after getting a trigger input event before proceeding to the Sample Trigger layer. Valid values are -1.0 and 0 to 4294.967295. When set to -1.0 this is equivalent to using Auto Delay. Sample Trigger: Specifies the sample trigger event that cause the DMM to take additional measurements. For every sample trigger event, the DMM takes one measurement. Source: Specifies the event type that will cause a sample trigger event. These include Immediate, External, Software, Interval, and the DMM backplane lines (BPL0 – 7). Route: This button appears when a backplane line (BPL0 – 7) is selected for Source. Clicking this button launches a dialog box that allows the user to select an external trigger line (LXI0 – 7, DIO0 – 7, LAN0 – 7, or ALARM0) to connect to the chosen backplane line. Slope: For hardware trigger lines, this parameter indicates the slope of level change, either Rising or Falling, that will cause a sample trigger event. Count: Indicates the number of sample triggers that will be accepted before returning to the Trigger layer. Valid values are -1 and 1 to 2,147,483,647, where “-1” sets an infinite count. Delay: Indicates the time, in seconds, the DMM will wait after getting a sample trigger event before it performs a measurement. Valid values are 0.0 to 4294.967295. Interval: When Interval is selected as the Source, this indicates the time, in seconds, between sample trigger events. Valid values are 0.0 to 4294.967295. Trigger Output: These parameters specify the trigger events generated by the DMM. Measurement Complete: Upon completion of a measurement, the selected event will occur. These events include None, External, and BPL0 – 7. Over Limit: When a measurements exceeds the High and/or Low Limit settings, the selected trigger event is asserted. These include None, External, and BPL0 – 7. Route: This button appears when a backplane line (BPL0 – 7) is selected for Source. Clicking this button launches a dialog box that allows the user to select an external trigger line (LXI0 – 7, DIO0 – 7, LAN0 – 7, or ALARM0) to connect to the chosen backplane line. High Limit: Indicates the upper bound of the Over Limit event. Low Limit: Indicates the lower bound of the Over Limit event. Notes on Web Page Use If a measurement has been initiated and seems to be stuck in the Waiting For Trigger state, check the Trigger Properties field. In order for a scan to begin immediately without interaction with other instrumentation, both inputs (the Trigger Input Source and Sample Trigger Source) should be set to Immediate. If the EX1200 stops taking measurements unexpectedly, check the Trigger Input Count and Sample Trigger Count settings. They control the number of measurements taken before the DMM needs to be initiated again. Advanced Settings NOTE Math: Allows the user to make corrections to the measurement readings using an mx + b equation. Gain: Sets the gain correction factor. Represents the m in the mx + b equation. The default value is gain = 1. Offset: Sets the offset correction factor. Represents the b in the mx + b equation. The default value is gain = 0. Incorrectly setting the gain and offset parameters can result in invalid measurements. EX1200 Series Maintenance 119 VTI Instruments Corp. Range Delay: The amount of time the DMM takes between measurements on the same function, but on different ranges. Auto checkbox: When selected, the auto range function is enabled. Delay (sec): Sets the range delay. Valid values are between 0 and 4294.967295 s. Auto Zero: When enabled, the DMM automatically tares itself against an internal reference before each reading. Power Line (Hz) drop menu: Selects either 50.0 Hz or 60.0 Hz as the ac frequency of the DMM‟s power source. Aperture Time: Indicates the time, in seconds, over which the DMM will integrate the analog inputs. The longer the time, the more accurate the reading. Note that this property and Digits are interrelated hardware settings. Thus, changing one affects the other. Valid values vary depending on the power line frequency and the mode setting. For 60 Hz PLF: 0.00167, 0.0167, 0.167, and 1.67. For 50 Hz PLF: 0.0002, 0.002, 0.02, 0.2, and 2.0. For Frequency and Period modes: 0.0014, 0.014, and 0.14. Saved Configurations Field The Saved Configurations field allows the user to store, recall, and remove predefined settings for the DMM. To save a configuration, simply define the configuration using the DMM soft from panel, then click on the Save button in the Saved Configurations field. A prompt will appear requiring a name for the configuration. Once a name is entered (only alphanumeric characters, dash (-), and underscore(_) are allowed), click the OK button in the prompt to save these settings. To recall a saved configuration, press the Load button, select the name of the configuration that is required, then click on the OK button. To delete a preconfigured state, simply click the Delete button, select the state, the press OK. All saved configurations can be easily cleared at once by selecting “Delete All Stored Configurations” from the list in the Delete dialog. Measurement Field From the Measurement field, the user can start a measurement. Initiate: This button initiates a measurement, moving the internal state machine from „Idle‟ to „Waiting for Trigger‟. Software Trigger Button The Send button will send a software trigger to the DMM. This causes the trigger model to advance if the selected Sample Trigger Source or Trigger Input Source is Software. Readings Field Below the DMM configuration fields, a data field is provided, with options, that is populated as measurements taken by the EX1200‟s DMM are read from FIFO. No.: Indicates the row number, for reference. Time: Indicates the IEEE 1588 time the measurement was taken. Value: Displays the measurement data. Unit: Indicates the engineering units of the measured data. Function: Indicates the function used when taking the measurement was taken. Option: Indicates the function options (if applicable) used when the measurement was taken. Range: Indicates the range that was used when the measurement was taken. Limits: Indicates the trigger output limits met when the measurement was taken. The following control options are provided: 120 Get Continuous checkbox: If enabled, this button disables the Get button and continually populates the data table as data is acquired. EX1200 Triggering www.vtiinstruments.com Get button: When clicked, data is immediately pulled from FIFO memory. Get All checkbox: When enabled, clicking the Get button will retrieve all of the current data. Once the FIFO is empty, it will stop acquiring retrieving data. Get Count field: Indicates the number of data points that will be returned when the Get button is clicked. Should be less than or equal to the FIFO Count. FIFO Count field: Indicates the number of data points available in the FIFO memory. Clear Table button: When clicked, all of the data currently in the table is erased. Clear FIFO button: When clicked, any data points currently stored in the FIFO memory will be erased. Save Data button: When clicked, the data in the table can be saved. A .csv file is generated by default. DMM CALIBRATION WEB PAGE When the Calibration tab is clicked on the DMM SFP, a screen appears that allows the user to access the calibration and verification routines used during production test. Calibration Functions Field The Calibration Functions field defines the type of calibration which will be performed as well as they functions which will be calibrated. When Calibration is selected, new calibration constants (adjustments) are generated and saved. Verification uses the current calibration constants and verifies that the DMM meets its published 6½ digit specifications. Simple Verification is similar to Verification, but uses looser specifications. It is useful as a quick “sanity test” to ensure the hardware is working properly. Calibration/Verification/Simple Verification drop menu: Select between the Calibration, Verification, and Simple Verification from menu. Function sliders: The sliders provided in the Calibration Functions field allow to user to perform a full calibration/verification or to perform calibration/verification on a subset of the DMM‟s functions. All: Calibration/verification of all functions will be performed when selected. Also causes all sliders to move to the ON position. Low Frequency AC: Calculates the adjustment factors that are used in low frequency ac measurements. Note, there is no verification component for this function. DC Voltage: Calculates gains and offsets for dc voltage measurements. DC Current: Calculates gains and offsets for dc current measurements. AC Voltage DAC: Calculates an adjustment factor for the DAC used in the ac voltage measurement circuit. Note, there is no verification component for this function. EX1200 Series Maintenance 121 VTI Instruments Corp. AC Voltage: Calculates gains and offsets for ac voltage measurements. AC Current: Calculates gains and offsets for ac current measurements. Resistance: Calculates gains and offsets for 2-wire and 4-wire resistance measurements. Reference Instruments Field The calibration and verification routines use VXI-11 to communicate with reference instruments. As such, a hostname and device identifier (typically a GPIB address for a LAN-GPIP gateway) must be specified for each instrument. Note that, while any LAN/GPIB gateway should work, only the Agilent E5810A has been tested. Calibrator: Specifies the calibrator that will be used for calibration. Currently only supports F5700 and F5700A. An F5720A amplifier must be connected to the calibrator. External DMM: Specifies the DMM which will be used for calibration. Currently only supports HP3458A. Function Generator: Specifies the function generator that will be used. Currently only the HP33120A and HP33220A are supported. Connect button: Once the fields have been populated, the user can attempt to connect to these instruments by using the Connect button. If an instrument is found, it will be identified and its identification displayed to the right. If identification or calibration information is missing from any of the devices, the user will be prompted to enter it before continuing. Note that only the instruments necessary for the selected calibration function(s) will be enabled in this field. The following table indicates which procedures require each instrument. Calibration/Verification Routine All Low Frequency AC DCV All other routines Required Instrument(s) Calibrator, External DMM, Function Generator External DMM, Function Generator Calibrator, External DMM Calibrator Calibration Data Field The Calibration Data field defines the type of calibration which will be performed as well as the functions which will be calibrated. Dataset: Indicates the identification number of the current dataset. The DMM can store nine sets of adjustment data in its flash memory; dataset 0 is the factory calibration and is loaded when the instrument is reset and at power-on. Load Data: Loads the selected adjustment dataset from flash and into memory. Any further measurements will be adjusted by the loaded dataset. Save Data: Saves the current adjustment data into the selected dataset. Dump Current Data: Saves the currently loaded adjustment data in a .csv format, by default. The user will be prompted to provide a storage location. Auto-Save: When selected, the data obtained while running a calibration procedure will be automatically saved to the selected dataset upon completion, provided all calculated adjustments are within tolerances. Temperature Field The Temperature field provides the internal and external temperature during calibration. 122 Internal: Displays the current internal temperature of the DMM. External: The current ambient temperature should be entered here when a calibration or verification procedure is started. EX1200 Triggering www.vtiinstruments.com Calibration Status Field The Calibration Status field provides an indication of how close calibration is to completion. Begin calibration by clicking on the Initiate button in this field. Results Panel The Results panel provides access to the results of the calibration or verification operation. Calibration/verification begins by clicking on the Initiate button. The following options are provided in the panel: Technician: This field must be filled in prior to saving the results data. It identifies the person who performed this calibration or verification. Reason: This field must be filled in prior to saving the results data. The contents should explain the reason the operation was performed, for instance, a reference to a support case or RMA number. Calibration Results: When a calibration is performed, the Results field is populated as the calibration procedure progresses and the following information is provided. Function: Indicates the DMM function to which the adjustment applies. Option: Indicates the option of the DMM function to which the adjustment applies. Item: Indicates the adjustment type that was made (gain, offset, etc.). Range: Indicates the measurement range to which the adjustment applies. Minimum: Indicates the smallest allowed value of the adjustment. Maximum: Indicates the largest allowed value of the adjustment. Value: Indicates the calculated value of the adjustment. Pass/Fail: If the calculated adjustment is within tolerances, Pass is indicated. If the adjustments are not within tolerances, Fail is indicated. Verification Results: When a verification is performed, the Results field is populated as the verification procedure progresses and the following information is provided. Function: Indicates the DMM function being tested. Option: Indicates the DMM function option being tested. Range: Indicates the DMM range being tested. Magnitude: Indicates the ideal magnitude for the given test point. Frequency: Indicates the ideal frequency for the given test point. Reading: Indicates the value measured by the DUT. Reference: Indicates the value measured by the reference DMM or reported by the calibrator. Minimum: Indicates the smallest allowed value of the reading. Maximum: Indicates the largest allowed value of the reading. Error: Indicates the difference between the Reading and Reference. Error Ratio: Indicates the ratio of the error to the allowed error band. The closer the value is to zero, the better the result. If this value is below -100%, then the reading exceeds its minimum; if above +100%, the reading exceeds the maximum. Pass/Fail: If the measurements are within tolerance, Pass is indicated. If the adjustments are not within tolerances, Fail is indicated. Save button: When clicked, the calibration or verification data can be saved to a .csv file. Clear button: When clicked, all the data in the results field will be erased. EX1200 Series Maintenance 123 VTI Instruments Corp. NETWORK CONFIGURATION The EX1200 Network Configuration page can be seen in Figure 7-15. By default, the EX1200 will attempt to locate a DHCP server. If one is found, the IP address assigned by the DHCP server will be assumed, along with subnet masks, gateway, etc. Otherwise, after a timeout of 20 seconds, the unit will attempt to obtain an IP address by using Auto IP (IPv4 Dynamic Link Local Addressing). NOTE The EX1200 can be returned to a known, default network configuration by using the LCI (LAN Configuration Initialize) Mechanism. See Reset Button for more information. Auto IP is a mechanism for finding an unused IP address in the IANA assigned range 169.254.X.Y (169.254/16) where X is in the range 1 to 254 and Y is in the range 0 to 255. The device will first attempt to obtain the specific address 169.254.X.Y, where X and Y are the second-to-last and last octets of the device‟s MAC address. However, X will be set to 1 if it is 0 in the MAC address, and to 254 if it is 255 in the MAC address for conformance with the Auto IP specifications. If this address is already in use, the unit will attempt to obtain other IP addresses in the 169.254/16 range in a pseudorandom fashion until it finds one that is available. To illustrate the Auto IP mechanism, Table 7-1 lists the Auto IP default address for some example MAC addresses. MAC Address 00:0D:3F:01:00:01 00:0D:3F:01:01:01 00:0D:3F:01:A3:28 00:0D:3F:01:FE:FE 00:0D:3F:01:FF:FE Auto IP Default Address 169.254.1.1 169.254.1.1 169.254.163.40 169.254.254.254 169.254.254.254 TABLE 7-1: AUTO IP DEFAULT ADDRESS ASSIGNMENT If a static IP address assignment is preferred, one can be optionally assigned via the embedded web page interface. This is done by clicking the Network Configuration link, disabling DHCP and Auto IP, enabling Static, and then assigning a static IP address, subnet mask, and gateway address, and, optionally, up to three DNS servers (see Figure 7-15). NOTE The 169.254/16 subnet is reserved by the IANA for Auto IP usage. It should not be used for either DHCP or static IP configurations. However, a much more convenient and recommended way to obtain the benefits of a static IP address is to employ DHCP, but assign the instrument a reserved IP address in your company‟s DHCP server configuration. This reserved address, linked to the EX1200‟s MAC address on the DHCP server, would be assigned to the EX1200 at power up initialization without having to manually set it on the EX1200. The DHCP server configuration provides a centralized, controlled database of assigned IP addresses, preventing accidental assignment of the same IP address to multiple instruments. Consult your company‟s Information Technology department for assistance. VXI-11 Device Discovery is also supported by the EX1200. This allows all EX1200s on a local network to be found without knowledge of their MAC address or IP address with the use of a broadcast message. Should problems arise with network configuration, please refer to Network Troubleshooting in Section 2 for assistance. 124 EX1200 Triggering www.vtiinstruments.com FIGURE 7-15: EX1200 NETWORK CONFIGURATION NOTE If problems are experienced connecting to the EX1200, please refer to the Network Troubleshooting process in Section 2. TIME CONFIGURATION This entry page is used to change the time configuration of the EX1200. As the EX1200 has no notion of “wall clock” or calendar time and no battery-backed clock or any other mechanism to retain time between reboots and power-cycles, the time must be set by the user. By default, the instrument‟s time and date at power-up are midnight, January 1, 1999 (as defined by the microcontroller). Three time source options are provided: PTP (Precision Time Protocol or IEEE 1588 synchronization), SNTP (simple network time protocol), or manual. The default time source is PTP. Time Zone: allows the user to select an appropriate time zone. Time Source: allows the user to set the EX1200s date by entering the month (MM), day (DD), and year (YYYY), respectively. Set Time: for the PTP and Manual Time Source, allows the user to set the EX1200s time by entering the hour (HH), minute (MM), and second (SS), respectively. If the EX1200 is set as an IEEE 1588 Master, the hour should be entered using the 24-hour format. NTP Servers: for the SNTP Time Source, allows the use to add/remove/save NTP servers to which the EX1200 will synchronize its time. Time Status: this section of the web page provides the mainframe‟s current time configuration settings. Using PTP Time To configure the EX1200 to use PTP time as the clock source: 1) Set Time Source to PTP. The page will change so that it can be configured. 2) Click Submit to start using PTP time. EX1200 Series Maintenance 125 VTI Instruments Corp. If a PTP master clock does not exist on the network, an LXI device on the network will begin serving as the PTP time master. The Time Configuration page allows for PTP time to be set manually. From the Time Configuration page, select the Set Time checkbox, then select the Grandmaster radio button from the Target field, and then configure the time by hand. Note that the Time field should be completed using a 24-hour format. FIGURE 7-16: PTP CONFIGURATION PAGE To use the EX1200 as the PTP clock that will serve time on the LXI network, select the Self radio button in the Target field. The EX1200 then becomes the PTP master clock. While this ensures measurement synchronicity between the units that to this clock, the overall timestamp accuracy is not as accurate because of the time‟s hand-set nature. For higher overall timestamp accuracy, use a PTP master clock that is synchronized to a global time source like, such as GPS. Using SNTP/NTP Time By selecting SNTP from the Time Source menu, the EX1200 can be synchronized with an SNTP server. The Time Zone drop menu allows the user to select the local time zone. SNTP, or NTP (Network Time Protocol), servers are specified in the NTP Servers field, by IP address or hostname, as shown in Figure 7-17. Once configured, the user must click Submit in order for the changes to take effect. To configure the EX1200 to use NTP time as its clock source: 1) Select SNTP from the Time Source field. The page will change so that it can be configured. 2) Add/Remove NTP servers use the appropriate buttons until the EX1200 is configured to communicate to the desired server(s). 3) Click the Save button to save the server configuration. 4) Click Submit to begin using NTP time. NOTES 126 1) If the Submit button is clicked before saving an NTP configuration, the EX1200 will start using NTP time, but will use the last previously saved server configuration. 2) Specifying SNTP or NTP servers by hostname requires that the instrument has DNS, either by DHCP or Static IP. EX1200 Triggering www.vtiinstruments.com FIGURE 7-17: SNTP CONFIGURATION PAGE Using the Manual Time Setting If a PTP master or an SNTP server is not available, time can be configured manually by the user by selecting Manual in the Time Source drop menu. Note, manually set time sources are not very accurate and that this configuration should only be used if timestamp accuracy is not vital to a measurement. To use a manually set time source: 1) Select Manual from the Time Source field. The page will change so that it can be configured. 2) Select the Set Time checkbox. 3) Enter the required data into the Date and Time fields that appear. Note that the Time field should be entered using the 24-hour format. 4) Click the Submit button to begin using the manual time source. LXI SYNCHRONIZATION The LXI Synchronization status page provides information about the EX1200s synchronization characteristics. Note that PTP must be selected in the Time Configuration web page in order for this page to be populated as see in Figure 7-18. For more information, please refer to LXI Standard Revision 1.2, Section 9, Rule 9.6. and IEEE 1588-2002, Precision Clock Synchronization Protocol for Networked Measurement and Control Systems. EX1200 Series Maintenance 127 VTI Instruments Corp. FIGURE 7-18: LXI SYNCHRONIZATION WEB PAGE IEEE 1588 Parameters PTP Grandmaster Clock MAC: indicates the MAC address of the device on the network to which all other IEEE 1588 compliant devices are synchronized. PTP Parent Clock MAC: indicates the MAC address of the device to which the EX1200 is synchronized. On a LAN that consists of multiple subnets, this indicates the MAC address of the parent clock on that particular subnet. PTP Version: indicates the version of the IEEE 1588. A “1” indicates compliance to Version 1, or IEEE 1588:2002. PTP State: indicates whether the EX1200 is a master, slave, faulty, disabled, passive, or unlocked. Current PTP Time: indicates the number of seconds since midnight January 1, 1970 UTC (coordinated universal time). Current Local Time: indicates the date and time (in 24-hour format). Grandmaster Traceability to UTC: indicates how the grandmaster is synchronized to the UTC. The values provide an indicator of how closely synchronized the grandmaster is to UTC time. Value ATOM GPS NTP HAND INIT DFLT Clock Source UTC Atomic Clock GPS Receiver Network Time Protocol Manually/Automatically Set User Defined None UTC Synchronization Less than 100 ns Less than 100 ns Less than 50 ms Less than 10 s Not specified None TABLE 7-2: UTC GRANDMASTER CLOCK IDENTIFIERS Current Variance of Parent: this function not currently supported by the EX1200. IEEE 1588 Domain: indicates the instrument‟s PTP subdomain. Typically, this indicator is _DFLT. 128 EX1200 Triggering www.vtiinstruments.com LXI Module to Module Parameters LXI Domain: an 8-bit number, 0 to 255, that indicates the domain the EX1200 is using for LAN events. All events sent by this device will include this data. Likewise, the device will only accept events that include the same LXI Domain data. Wired Trigger Parameters Wired-OR Bias: indicates whether the Wired-OR bias for each Trigger Bus channel (LXI0 through LXI7) is enabled or disabled. LXI IDENTIFICATION This status page provides the user information about the EX1200 mainframe as well as all the plug-in modules that are installed. Firmware, driver, and network information can also be collected from this page. Note that the page name adjusts to identify the model of the mainframe (as seen in “EX1266 LXI Identification” show in Figure 7-19). FIGURE 7-19: LXI IDENTIFICATION PAGE EX1200 Series Maintenance 129 VTI Instruments Corp. BLINK LAN INDICATOR This action page is used to identify the EX1200 that is being commanded in the current session. When the Turn on button is pressed, the LAN LED located on the front panel of the EX1200 will blink. When the Turn off button is pressed, the LAN LED returns to its normal operation. FIGURE 7-20: DEVICE IDENTIFY WEB PAGE CHANGE PASSWORD Once connected to the EX1200, the user should define a password. No password is defined by default. To create a password, click on the Change Password link in the command menu, then enter the desired password in both text fields. From this point forward, pages that modify instrument configuration (e.g., SFP) require this password to initially login. It is only necessary to enter a password once per session. FIGURE 7-21: EX1200 PASSWORD PAGE 130 EX1200 Triggering www.vtiinstruments.com NOTES 1) 2) The instrument password uses lower-case letters. This password mechanism provides only the most basic security. Applications requiring additional security should consider using private, dedicated subnets, firewalls, etc. to limit access to the instrument on the network. UPGRADE This action page is used to upgrade the embedded firmware of the EX1200 controller and DMM (if installed) as well as the plug-in modules. Prior to initiating the firmware upgrade process, a new, uncompressed firmware image must be obtained from VTI Instruments and be accessible from the computer that is connected to the EX1200. Unless specifically noted by VTI Instruments, firmware upgrades do not alter the non-volatile configuration settings (network configuration, time configuration) of the EX1200. NOTE Do not power cycle the EX1200 during the firmware upgrade process. If power is lost during the upgrade, the instrument may be put into an inoperable state, requiring return to the factory. An uninterruptible power supply may be used to avoid this risk. FIGURE 7-22: UPGRADE WEB PAGE Perform the following steps to conduct a firmware upgrade: 1) 2) 3) 4) 5) Remove Temporary Internet Files. Perform a Reboot or a power cycle. Connect to the EX1200 via the embedded web page. Click on the Upgrade link. Click on the Browse button and select the firmware image file to be uploaded to the instrument. 6) Click the Submit button to initiate the upgrade process. During the firmware upgrade, an Upgrade Status window will appear (see Figure 7-23). Note that, if a DMM is not installed in the system, one fewer step be reported. Controller/DMM firmware upgrades typically take about 5 minutes to complete. Upon completion of the upgrade, click on the Reboot button. After rebooting has completed (approximately one minute), click on the Index link in the Command Menu to continue operating the EX1200 using the web interface. Note that the “Rebooting” prompt will not refresh itself. EX1200 Series Maintenance 131 VTI Instruments Corp. FIGURE 7-23: COMPLETED CONTROLLER AND DMM UPGRADE During a plug-in module firmware upgrade, an Upgrade Status window similar to the one shown in Figure 7-24 appears. A step will appear for each plug-in module installed in the mainframe. Each plug-in module takes approximately one minute to upgrade. Upon completion of the upgrade, a hard power cycle is required in order for the upgrade to take affect. Note that clicking the Reboot button will not be sufficient for this operation. FIGURE 7-24: COMPLETED PLUG-IN MODULE FIRMWARE UPGRADE 132 EX1200 Triggering www.vtiinstruments.com Remove Temporary Internet Files The initial steps of firmware upgrade involve preparing the host PC. The instructions that follow provide guidance for removing cookies from IE and clearing the cache retained by Java. Clearing Cookies from Internet Explorer 8 For Internet Explorer 8, the following steps can be taken to delete existing cookies (for other browsers, please refer to the browser‟s on-line help documentation): 1) Open Internet Explorer. 2) Click on the Tools icon and select Internet Options from the drop menu. 3) When the Internet Options window appears, click on the Delete button in the Browsing history section. 4) When the Delete Browsing History window appears, click on the Delete cookies… button. A confirmation dialog box will appear. Click the Yes button to remove the cookies present on the host PC. EX1200 Series Maintenance 133 VTI Instruments Corp. Clearing Java Cache Once the cookies have been deleted from the host PC, the Java cache should be deleted next. For Java version 6, the cache can be removed by performing the following steps: 1) Navigate to the Control Panel (Start → Settings → Control Panel). 2) Double click the Java icon in the Control Panel. 3) When the Java Control Panel opens, click on the Settings button in the Temporary Internet Files section of the window. 134 EX1200 Triggering www.vtiinstruments.com 4) When the Temporary Internet Files window opens, click the Delete Files… button. A confirmation dialog box will appear. Click to OK button delete the cache. EX1200 Series Maintenance 135 VTI Instruments Corp. SECTION 8 PROGRAMMING PROGRAMMING REFERENCES EX1200 systems ship with several programmer‟s guides that define APIs and provide practical examples which assist the programming with sequencing, syntax, and the use of other IVIspecified APIs. These guides include: VTEXSwitch Programmer‟s Manual (P/N: 82-0117-000) VTEXScanner Programmer‟s Manual (P/N: 82-0128-000) VTEXSystem Driver Programmer‟s Manual (P/N: 82-0125-000) Standard IVI APIs can be found at the IVI Foundation website. 136 EX1200 Triggering www.vtiinstruments.com SECTION 9 MAINTENANCE REPLACEABLE FUSE The EX1200 DMM has a replaceable fuse located on its front panel for current input and is userreplaceable. It is a 3.15 A, 250 V fuse and can be replaced with VTI P/N: 35-0054-315. Alternatively, P/N: 2173.15XP from Littlefuse, Inc. may also be used as a replacement. DMM REMOVAL/REPLACEMENT VTI recommends annual calibration of the EX1200 DMM to assure that the instrument maintains the tightest specifications. To eliminate the need to return an entire mainframe for calibration to VTI, the DMMs for the EX1266, EX1267, EX1268, and EX1269 can be removed from mainframe. The mainframes can still be used once the DMM has been removed. Part Number 70-0401-000 70-0402-000 Description 6 SLOT LXI CHASSIS, SLIDE-IN DMM 3U LXI CHASSIS, SLIDE-IN DMM, Compatible Mainframe EX1266 EX1267, EX1268, EX1269 The following sections describe how to remove the DMM from the two mainframes. EX1266 DMM Removal Removal Procedure 1) Remove the three screws shown in Figure 9-1 using the #2 Phillips screwdriver. Retain these screws for re-installation. 2) Use the handle on the front panel of the DMM to slowly remove the DMM from the chassis. Note that once half of the DMM has been removed, remove the connector at J6 on the input board. EX1200 Series Maintenance 137 VTI Instruments Corp. FIGURE 9-1: EX1266 DMM REMOVAL NOTE The mainframe can continue to be used once the DMM has been removed. Installation Procedure 1) Using the guides shown in Figure 9-1, slide the DMM into the mainframe unit until the DMM is supported by the card guides. 2) Insert the connector removed in step 2 above and insert it into J6 on the input board. 3) Slide the DMM into the mainframe unit the front panel is flush with the front of the chassis. 4) Install the three screws as shown in Figure 9-1 using a #2 Phillips screw driver. EX1267, EX1268, and EX1269 DMM Removal Removal Procedure 1) Remove the two screws shown in Figure 9-2 using the #2 Phillips screwdriver. Retain these screws for re-installation. 2) Use the handle on the front panel of the DMM to slowly remove the DMM from the chassis. Note that once half of the DMM has been removed, the remove the connector at P2, P3, and P4. 138 EX1200 Series Maintenance www.vtiinstruments.com FIGURE 9-2: EX1267/68/69 DMM REMOVAL NOTE Once the DMM is removed from the mainframe, the chassis can no longer be used. Installation Procedure 1) Using the guides shown in Figure 9-2, slide the DMM into the mainframe unit the until DMM is supported by the card guides. 2) Insert the connector removed in step 2 above and insert it into P2, P3, and P4. 3) Slide the DMM into the mainframe unit the front panel is flush with the front of the chassis. 4) Install the three screws as shown in Figure 9-2 using a #2 Phillips screw driver. 5) Make sure the cables assemblies are inserted correctly, refer to Figure 9-3 for correct orientation. FIGURE 9-3: DMM CABLE INSTALLATION, CONNECTOR ORIENTATION EX1200 Series Maintenance 139 VTI Instruments Corp. EX1200 DMM CALIBRATION/VERIFICATION INTRODUCTION Verification is the process by which the measurements of the EX1200 DMM are compared to reference standards to determine variances between the values measured by the DMM and the values outputted by the standard. After the completion of verification, a report can be saved that shows the measured and expected values for the points measured. Using the EX1200 DMM‟s verification functionality, the user can generate “before” and “after” data for trending purposes. Calibration is the process by which the DMM is adjusted and modified through changing calibration constants (i.e. offset and gain) to more tightly correlate the values it measures with the values outputted by the reference standard. Calibration generates a list of calibration constants which can be saved and viewed upon completion, but does not generate a report with the expected and measured values. VTI recommends that the EX1200 DMM have factory calibration performed annually to ensure that the instrument maintains its accuracy and precision. The following procedure describes the resources and steps necessary to perform verification and factory calibration. REQUIRED RESOURCES Equipment Needed LAN/GPIB gateway (Agilent E5810A) 8.5 digit DMM (Agilent 3458A) Function generator (Agilent 33220A or the Agilent 33120A) Calibrator (Fluke 5700A Series II) Calibrator amplifier (Fluke 5725A, used to measure the 3 A limit) EX1200 DMM calibration/verification cable (VTI P/N: 52-0807-000) Ethernet switch Ethernet cables (straight cables) GPIB cables PC with Windows XP/Vista, 512 MB RAM, and a Pentium 1 GHz (or faster) Software Needed A web browser (Internet Explorer, Firefox, etc.) with Java support Java Runtime Environment The latest version of EX1200 firmware, available on the VTI Instruments web site. Bonjour (optional: used to discover the EX1200, requires use of IE Version 6 or higher) Agilent Connection Expert (optional: used for instrument discovery if Bonjour is not used) NOTE Before performing calibration, ensure that the EX1200 mainframe has the most current firmware version available. It can be downloaded from www.vtiinstruments.com. Refer to the Upgrade discussion in Section 7 for assistance more information on updating firmware. SETTING UP THE INSTRUMENTS 1) 2) 3) 4) 5) 6) 7) 140 Connect a GPIB cable from the LAN/GPIB gateway to the DMM. Connect a GPIB cable from the LAN/GPIB gateway to the function generator. Connect a GPIB cable from the LAN/GPIB gateway to the calibrator. Connect an Ethernet cable from the PC‟s LAN port to the Ethernet switch. Connect an Ethernet cable from the Ethernet Switch to the LAN/GPIB gateway. Connect Fluke 5700A Multifunction Calibrator with 5725A amplifier. Power up all the instruments. EX1200 Series Maintenance www.vtiinstruments.com Calibrator LAN/GPIB Gateway GPIB Cable GPIB Port GPIB Port LAN Port Ethernet Switch Interconnect Cable Ethernet Cable GPIB Cable Daisy Chain LAN Port Amplifier Ethernet Cable 8.5 Digit DMM GPIB Cable Daisy Chain GPIB Port LAN Port GPIB Port PC Function Generator FIGURE 9-4: INSTRUMENT CONNECTIVITY FOR EX1200 DMM CALIBRATION Once the standards have been connected, the following connections should be made to the EX1200: 8) Connect the EX1200 LAN port to the Ethernet switch using an Ethernet cable. 9) Connect the function generator, external DMM, and calibrator to the DMM as shown in Figure 9-5 using the EX1200 DMM calibration/verification cable (VTI P/N: 52-0807-000). Input I Output I Input I Output HI Input HI Output HI Input HI Output LO Input LO Output LO Input LO Sync HI Sense HI Sense HI Sense HI Sync LO Sense LO Sense LO Sense LO Function Generator External DMM Calibrator EX1200 DMM FIGURE 9-4: EX1200 CONNECTIVITY TO REFERENCE STANDARDS NOTE Be certain that the calibrator is in standby mode (i.e. not outputting) before the cables are connected to eliminate the possibility of having the function generator and calibrator generating outputs at the same time while shorted together. CONNECTING TO THE EX1200 There are three ways to connect to the EX1200: using the IP address of the EX1200, using Bonjour for auto-discovery, or using the Agilent Connection Expert (ACE). For more information on obtaining the EX1200‟s IP address and using this as the connection method, refer to the Network Configuration discussion in Section 2. To connect to the EX1200 via Bonjour, refer to Section 7: Web Page Operation. EX1200 Series Maintenance 141 VTI Instruments Corp. To use ACE, use the following steps: 1) Open ACE and click on the Add instrument toolbar. 2) Select Add LAN instrument on LAN and then click OK. ACE will search the network and list the LXI instruments connected to the LAN. FIGURE 9-5: ADD INSTRUMENT INTERFACE 3) To simply view the EX1200 web page, click on its webpage button. If desired, the EX1200 can be added to ACE as a LAN instrument by enabling the appropriate Select checkbox and then clicking OK. FIGURE 9-6: ACCESSING THE EX1200 VIA ACE LOGIN INTO SFP EX1200 calibration is performed using the SFP web interface. If a password has been created for the EX1200 mainframe, accessing an action or entry page for the first time during a session will cause an Error page will appear. To clear this error, click on the login link. The Login page will appear. In the Password field, enter the configured instrument password. For additional information, refer to the Web Page Operation discussion in Section 7. NOTE 142 To reset the password to factory default, click the Change Password link in the left side menu. EX1200 Series Maintenance www.vtiinstruments.com TIME CONFIGURATION When calibration is performed, the time and date of calibration is recorded, making it important to ensure that the EX1200‟s time is configured properly. To determine the time, click on the Time Configuration link in the command menu. If the time is displayed incorrectly, use the following steps to configure the time from the Time Configuration web page. 1) 2) 3) 4) 5) 6) Select the correct Time Zone from the drop menu. Set the Time Source to Manual. Enable the Set Time checkbox. Enter the date in the Date (MM:DD:YYYY) fields. Enter the time in time in the Time (HH:MM:SS) fields using a 24-hour format. Click the Submit button. 1) Select None 2) Set to Manual 3) Select Set Time 4) Set Date 5) Set Time (24 HR format) 6) Click when done FIGURE 9-7: TIME CONFIGURATION PERFORMING CALIBRATION Once connected to the EX1200 and after ensuring that the time is set properly, it can be calibrated using the SFP. The following description provides describes how this is done. Prior to beginning calibration, ensure the following: NOTE The EX1200 DMM (device under calibration), the function generator, the DMM, and the calibrator/amplifier must all be powered up for a minimum of one hour before calibration The Agilent 3458A “Auto Cal All” procedure must be performed prior to calibration. The 5700A‟s “Cal Zero” procedure must be performed prior to calibration. Ensure that the “I FUSE” is installed in the EX1200 DMM. Make sure that temporary files and java cache are removed before staring the calibration, See Remove Temporary Internet Files for more information. EX1200 Series Maintenance 143 VTI Instruments Corp. Calibration Procedure 1) Connect to the embedded web page. See Connecting to the EX1200 for assistance. 2) Click Soft Front Panel from the Index page to navigate to the Soft Front Panel page. Select the ex1200-dmm DMM from the list of available plug-in modules (the slot designation will vary depending on the mainframe being used). Select the DMM FIGURE 9-8: INSTRUMENT SFP SELECTION PAGE 3) At the top of the DMM‟s soft front panel, click the Calibration button. Calibration Tab FIGURE 9-9: CALIBRATION TAB 4) From the Calibration Functions section of the Calibration page, select Calibration from the drop down menu. FIGURE 9-10: CALIBRATION FUNCTION SELECTION 144 EX1200 Series Maintenance www.vtiinstruments.com 5) In the Reference Instruments section, select the appropriate instrument available on the GPIB/LAN network for the calibrator, external DMM, and function generator. This information can also be obtained from LAN/GPIB Gateway‟s web page. Refer to the LAN/GPIB Gateway‟s user‟s manual for more information. Device Drop Menu Enter Ambient Temperature FIGURE 9-11: DEVICE SELECTION AND TEMPERATURE FIELDS 6) Once the instruments have been selected, click the Connect button. If the connection is successful, the SFP will display the 5700A‟s calibration information. Click OK to proceed. Enter the DMM‟s serial number when prompted. 7) In the Temperature section, enter the ambient temperature, in °C, into the External field, as shown in Figure 9-11. 8) In the Calibration Status section, click the Initiate button. 9) As the calibration process progresses, prompts will appear indicating the connections that need to be made between the EX1200 DMM and the reference standards. NOTE The calibrator‟s “Aux Current Out” must be connected to the DUT‟s “Input I” jack at all times. 10) Upon completion of calibration, a window will appear indicating whether any failures occurred. Save the test logs for future reference. 11) Copy the cal constants to a file for future reference. PERFORMING VERIFICATION When verification is run, the user can generate a report that indicates the measured and expected values for the points measured during the calibration process. Performing verification before and after calibration can provide the user valuable information regarding the stability of an instrument. Prior to performing verification, ensure the following: The EX1200 DMM (device under calibration), the function generator, the DMM, and the calibrator/amplifier must all be powered up for a minimum of one hour before calibration The Agilent 3458A “Auto Cal All” procedure must be performed prior to verification. The 5700A‟s “Cal Zero” procedure must be performed prior to verification. Ensure that the “I FUSE” is installed in the EX1200 DMM. Verification Procedure 1) Follow steps 1) through 3) in the Performing Calibration section. 2) From the Calibration Functions section of the Calibration page, select Verification from the drop down menu. 3) Follow steps 5) through 9) in the Performing Calibration section. 4) When the test is finished, a popup window will tell you if there were any failures. Save the test logs and test results. 5) Copy the test logs and test results. Use these values to make the calibration report. EX1200 Series Maintenance 145 VTI Instruments Corp. NOTE 146 Detailed debug logs that describe what occurred during calibration/verification are saved to the “Current Working Directory” of the web browser (typically C:\Documents and settings\Username\Application Data\, although this varies from one browser to another). To find the actual location, open the Java Console by right clicking on the Java icon in the system tray and choose Java Console. The full path to the log will be printed there when Initiate is clicked. EX1200 Series Maintenance www.vtiinstruments.com APPENDIX A ONBOARD MEMORY MEMORY LISTINGS AND CLEARING PROCEDURES The following table provides information regarding memory contained in the EX1200 mainframes and plug-in modules. Protocol for clearing the memory is also included. Product EX1200 Chassis (All Models) Component 4 MB Flash Volatile? No No No 32 MB RAM EX1200 DMM 512 kB Flash 32 kB Serial EPROM EX1200 Switch Cards1 EX1200-7416 2 MB SRAM 8 MB Flash 2 MB SPI Flash 8 MB Flash No No No No Yes No No No Yes No No No No No No No No No No EX1200-7500 2 MB SPI Flash 512 kB RAM (x2) 8 MB Flash 2 MB SPI Flash 2 MB Static RAM 1 2 No Yes No No No No Yes Contains Time configuration data (NTP, PTP, manual) Network configuration DMM configurations (if DMM module included) SFPs LXI domain Firmware Filesystem Operating system & DMM data (if DMM module included) FPGA images User configurations Calibration constants Reading data SFP DCF2 Model & serial number file Switch card image FPGA Image Calibration SFP Stored user configurations DCF2 Model & serial number file FPGA image Event data DCF2 Model & serial number file SFP FPGA image User pattern data User Writeable? Yes Clear Procedure Go to the time configuration webpage and change the settings Yes Perform the LCI Reset action Yes Use the “DeleteAll” API No Yes No No No None Use the LXIDomain API to change the value None None Power off No Yes Yes Yes No No No None Use the “DeleteAll” API Use the Calibration APIs to overwrite the data Power off None None None No No Yes No Yes None None Use the Calibration APIs to overwrite the data None Call “Delete All” API No No None None No Yes No No None Power off None None No No Yes None None Power off For a complete list of switch cards, please refer to the EX1200 Switch Card User’s Manual (P/N: 82-0127-001). Device Configuration File EX1200 Series Maintenance 147 VTI Instruments Corp. Product EX1200-3608 EX1200-7600 148 Component 8 MB Flash Volatile? No 2 MB SPI Flash 4 MB RAM 8MB Flash No No No No Yes No 2MB SPI Flash No Contains Model & serial number file SFP User configurations Calibrations FPGA image Waveforms Model & Serial SFP FPGA Image User Writeable? No Clear Procedure None No Yes Yes No Yes No No No None Call “Delete All” API Use the calibration APIs to overwrite the data None Power off None None None Appendix A www.vtiinstruments.com APPENDIX B POWER CONSUMPTION PLUG-IN MODULE POWER CONSUMPTION The following tables provide power consumption information for the EX1200 series plug-in modules. The EX1200 mainframe power is also provided to assist in determining available power. Switch Module EX1200-2001 EX1200-2002 EX1200-2007A EX1200-2008H EX1200-3001 EX1200-3048 EX1200-3048S EX1200-3072 EX1200-3096 EX1200-3164 EX1200-4003 EX1200-4128 EX1200-4260 EX1200-4264 EX1200-5001 EX1200-5002 EX1200-5006 EX1200-6101 EX1200-6111 EX1200-6216 EX1200-6216HV EX1200-7100 7102 plug-in 7104 plug-in 7106 plug-in 7122 plug-in +3.3 V 0.131 A 0.131 A 0.135 A 0.140 A 0.135 A 0.129 A 0.131 A 0.129 A 0.140 A 0.129 A 0.137 A 0.129 A 0.014 A 0.014 A 0.129 A 0.129 A 0.140 A 0.140 A 0.140 A 0.129 A 0.140 A 0.131 A 0.131 A 0.131 A 0.131 A 0.131 A +5 V 0.0037 A* 0.0037 A* 0.0041 A* 0.005 A* 0.0041 A* 0.0041 A* 0.0041 A 0.0041 A* 0.005 A* 0.0041 A* 0.0040 A* 0.0041 A* 0.005 A* 0.005 A* 0.0041 A* 0.0041 A* 0.005 A* 0.005 A* 0.005 A* 0.0041 A* 0.005 A* 0.0037 A 0.0037 A 0.0037 A 0.0037 A 0.0037 A +24 V 0A 0A 0A 0A 0A 0A 0A 0A 0A 0A 0A 0A 0A 0A 0A 0A 0A 0A 0A 0A 0A 0A 0.005A* 0.005A* 0.005A* 0.005A* Notes *Add 75 mA per relay closure on 5 V *Add 75 mA per relay closure on 5 V *Add 40 mA per relay closure on 5 V *Add 17 mA per relay closure on 5 V *Add 26 mA per relay closure on 5 V *Add 23 mA per relay closure on 5 V N/A *Add 23 mA per relay closure on 5 V *Add 28 mA per relay closure on 5 V *Add 23 mA per relay closure on 5 V *Add 25 mA per relay closure on 5 V *Add 28 mA per relay closure on 5 V *Add 28 mA per relay closure on 5 V *Add 28 mA per relay closure on 5 V *Add 23 mA per relay closure on 5 V *Add 23 mA per relay closure on 5 V *Add 28 mA per relay closure on 5 V *Add 28 mA per relay closure on 5 V *Add 28 mA per relay closure on 5 V *Add 28 mA per relay closure on 5 V *Add 67 mA per relay closure on 5 V Values for carrier only *Add 140 mA per relay closure on 24 V *Add 140 mA per relay closure on 24 V *Add 140 mA per relay closure on 24 V *Add 280 mA per relay closure on 24 V Switch Module EX1200-1538 EX1200-3604 EX1200-3608 EX1200-7416 +3.3 V 0.380 A 0.3 A 0.3 A 0.250 A +5 V 0.0081 A 1.0 A 1.0 A 0.0051 A* +24 V 0.15 A 0.8 A 1.4 A 0.133 A EX1200-7500 EX1200-7600 0.260 A 0.129 A 0.450 A 0.0041 A* 0.0240 A 0.2 A** Notes N/A N/A N/A *Add 24 mA per relay closure on 5 V (two relays per channel used) N/A *Add 24 mA per relay closure on 5 V ** Maximum value Appendix B 149 VTI Instruments Corp. APPLICATION NOTE OVERVIEW As with any backplane-based system where modules share power, such as VXI and PXI, the possibility exists where a combination of plug-in modules may exceed the maximum power available from the power supply. There are two limitations that govern power delivery by a supply: 1) the maximum power of the power supply and 2) the maximum power that can be delivered to a single slot. To avoid potential power-related issues, these two limitations cannot be exceeded. As a reference, the power specifications for the EX1200 mainframes are provided which indicate the limitations on the power supplies and the slots. POWER SPECIFICATIONS AVAILABLE POWER1 EX1202/06/62/66 EX1208/68 USEABLE POWER1 EX1202/EX1206 EX1262/EX1266 EX1208/68 (Slots 1 – 5) EX1208 (Slots 6 – 10) EX1268 (Slots 6 – 10) EX1208/68 (Slots 11 – 16) 120 W 120 W per segment, 360 W total 115 W 110 W 102 W 97 W 102 W 102 W *The EX12x8 mainframe is powered by four power supplies and each power supply is used for a finite number of mainframe slots. For more information, see the Power Consumption in Appendix B. MAXIMUM CURRENT PER RAIL1,2 3.3 V 6.00 A EX1202/EX1206 6.00 A EX1262/EX1266 14.99 A EX1208/68 (Slots 1 – 5) 14.99 A EX1208/68 (Slots 6 – 10) 14.99 A EX1208/68 (Slots 11 – 16) MAXIMUM CURRENT CARRYING CAPACITY PER SLOT 6A 3.3 V rail 3.75 A 5 V rail 1.6 A 24 V rail 5V 13.420 A 13.410 A 13.582 A 13.362 A 13.355 A 24 V 3.320 A 3.074 A 2.950 A 2.950 A 2.950 A Note1: The EX12x8 mainframe is powered by four power supplies and each power supply is used for a finite number of mainframe slots. For more information, see the Power Consumption in Appendix B. Note2: For more information on calculating power consumption, please refer to the Power Consumption in Appendix B. Note3: These values indicate the maximum current provided by the power supply. This value is limited by the carrying capacity for that rail. See the Maximum Current Carrying Capacity per Slot specification for more information. EX12X2 AND EX12X6 POWER CONSUMPTION CALCULATION For the EX12x2 and EX12x6 mainframes, the total power useable (PUSEABLE) between the 3.3 V (P3.3V), 5 V (P5V), and 24 V (P24V) rails is defined by the Useable Power specification for the mainframe being used. These mainframes are powered by a single power supply and current on the 3.3 V rail is derived from the 24 V rail with an efficiency of 80%. When calculating the total power consumption of the cards installed in an EX12x2/x6 mainframe, the following conditions must be satisfied: 1) 2) 3) 4) 5) 150 P24V + P5V + P3.3V ≤ PUSEABLE P24V + P3.3V ≤ 84 W P5V ≤ 75 W P3.3V ≤ 24 W No rail can exceed the maximum current per rail. Particular attention should be paid to the 24 V rail. Appendix B www.vtiinstruments.com For example, an EX1266 is populated with the following three cards: EX1200-2001 with six (6) relays closed EX1200-3048 with ten (10) relays closed EX1200-3608 From the Plug-in Module Power Consumption section, the amount of current used by the switch card‟s relays can be calculated and added to the total consumption on the 5 V rail: I5V (EX1200-2001) = card‟s consumption + (number of relays closed)(relay consumption) I5V (EX1200-2001) = 0.0037 A + (6)(75 mA) I5V (EX1200-2001) = 0.454 A I5V (EX1200-3048) = 0.0041 A + (10)(23 mA) I5V (EX1200-3048) = 0.234 A With the switch card‟s total power consumption calculated on the 5 V rail, consumption for each rail can be calculated: P24V = 24 V x [I24V (EX1200-3608) + I24V (EX1200-2001) + I24V (EX1200-3048)] P24V = 24 V x (1.4 A + 0 A + 0 A) P24V = 33.6 W P5V = 5 V x [I5V (EX1200-3608) + I5V (EX1200-2001) + I5V (EX1200-3048)] P5V = 5 V x (1.000 A + 0.454 A + 0.234 A) P5V = 8.44 W P3.3V = 3.3 V x [I3.3V (EX1200-3608) + I3.3V (EX1200-2001) + I3.3V (EX1200-3048)] / 80% efficiency P3.3V = 3.3 V x (0.300 A + 0.131 A + 0.129 A) / 80% efficiency P3.3V = 2.31 W To verify that this is a valid configuration, the values can be substituted into the criteria above: 1) 2) 3) 4) P24V + P5V + P3.3V ≤ 120 W → 33.6 W + 8.44 W + 2.31 W ≤ 120 W P24V + P3.3V ≤ 84 W → 33.6 W + 2.31 W ≤ 84 W (True) P5V ≤ 75 W → 8.44 W ≤ 75 W (True) P3.3V ≤ 24 W → 2.31 W ≤ 24 W (True) (True) The remaining power for this mainframe is 75.65 W for additional cards to draw from. EX12X8 POWER CONSUMPTION CALCULATION EX12x8 mainframes are powered by four power supplies. Although these are the same power supplies as used in the EX12x2 and EX12x6 mainframes, one power supply is solely responsible for supplying the 3.3 V power while the remaining three supplies provides power to specific slots, or segments, of the backplane. The three segments use the following slots: 1 through 5, 6 through 10, and 11 through 16 (see Figure B-1). While the 5 V and 24 V rails are divided into segments, the single power supply that provides the 3.3 V rail does so for all sixteen (16) slots. Appendix B 151 VTI Instruments Corp. FIGURE B-1: BACKPLANE POWER SEGMENTS IN THE EX12X8 When power requirements are calculated for these mainframes, the calculations should consider each backplane segment as an independent power system. The total power useable (PUSEABLE) on a segment is defined by the Useable Power specification for the mainframe being used. As the EX12x8 has a power supply dedicated to generating the 3.3 V output, no efficiency correction is required, making the conditions required somewhat simplified compared to the EX12x6: 1) 2) 3) 4) 5) P24V + P5V ≤ PUSEABLE P24V ≤ 84 W P5V ≤ 75 W P3.3V ≤ 49.5 W No rail can exceed the maximum current per rail. Particular attention should be paid to the 24 V rail. To illustrate, the same cards will be used as in the previous example and they will be installed in slots 1, 2, and 3 of an EX1268. P24V = 24 V x [I24V (EX1200-3608) + I24V (EX1200-2001) + I24V (EX1200-3048)] P24V = 24 V x (1.4 A + 0 A + 0 A) P24V = 33.6 W P5V = 5 V x [I5V (EX1200-3608) + I5V (EX1200-2001) + I5V (EX1200-3048)] P5V = 5 V x (1.000 A + 0.454 A + 0.234 A) P5V = 8.44 W P3.3V = 3.3 V x [I3.3V (EX1200-3608) + I3.3V (EX1200-2001) + I3.3V (EX1200-3048)] / 80% efficiency P3.3V = 3.3 V x (0.300 A + 0.131 A + 0.129 A) P3.3V = 1.848 W For this EX1268, the remaining three slots have 77.96 W available for plug-in modules to use on the 5 V and 24 V rails, while 47.652 W remain on the 3.3 V rail on the remaining thirteen slots of the mainframe. 152 Appendix B www.vtiinstruments.com INDEX Numerics 2-wire resistance measurements ...................................................88 DMM connections ..................................................................88 2-wire RTD measurements DMM connections ..................................................................96 3U installation options ..................................................................49 rack ear ...................................................................................51 rackmount...............................................................................52 tabletop ...................................................................................49 4-wire resistance measurements ...................................................89 common error sources ............................................................90 DMM connections ..................................................................89 high resistance measurement errors ........................................90 self-heating errors ...................................................................90 settling errors ..........................................................................90 4-wire RTD measurements DMM connections ..................................................................97 A ac filter .........................................................................................28 types .......................................................................................85 AC voltage measurements ............................................................84 ac common mode offset..........................................................87 ac filters ..................................................................................85 crest factor ..............................................................................85 DMM connections ..................................................................84 load error calculation ..............................................................86 load errors ..............................................................................86 low-level measurement errors.................................................87 reverse connections ................................................................87 true RMS ................................................................................85 ACI ..........................................................See current measurements ACV ................................................. See AC voltage measurements alarm..........................................................................See LXI alarm ARM event .................................................................See triggering ARM layer ..................................................................................103 Auto IP ................................................................................. 55, 130 auto-zero .......................................................................................79 auto-zero off ...........................................................................80 auto-zero once ........................................................................80 B basic DMM operation ...................................................................69 basic mainframe operation ............................................................63 blanking panels ....................................................................... 34, 53 blink LAN indicator web page....................................................136 Bonjour................................................................................... 58, 59 C calibration ...................................................................................152 equipment needed .................................................................149 software needed ....................................................................149 change password web page.........................................................136 CMR .................................................... See common mode rejection common mode rejection ...............................................................82 common mode voltage..................................................................29 connecting and disconnecting line power .....................................53 connectors DIO ........................................................................................63 DMM......................................................................................66 DMM Bus Out........................................................................66 Ethernet ..................................................................................63 trigger bus ..............................................................................64 EX1200 Series Index cooling ......................................................................................... 33 crest factor ............................................................................. 29, 85 current measurements crest factor ............................................................................. 87 DMM connections ................................................................. 87 shunt resistor .......................................................................... 88 D DC voltage measurements............................................................ 81 common mode rejection ......................................................... 82 DMM connections ................................................................. 81 ground loops .......................................................................... 84 input resistance selections ...................................................... 81 loading errors ......................................................................... 82 magnetic loop effects ............................................................. 83 power line noise rejection ...................................................... 83 thermoelectric voltage errors.................................................. 81 DCI ......................................................... See current measurements DCV................................................. See DC voltage measurements declaration of conformity ............................................................... 6 DEVICE layer ............................................................................ 103 DHCP ........................................................................................ 129 DHCP server ................................................................................ 55 digital I/O ............................................................................... 63, 68 dimensional diagram 1U, full rack mainframe ......................................................... 16 1U, half rack mainframes ....................................................... 17 3U mainframes....................................................................... 18 DMM bus ..................................................................................... 67 DMM calibration web page ....................................................... 126 calibration data..................................................................... 127 calibration functions ............................................................ 126 reference instruments ........................................................... 127 results................................................................................... 128 status .................................................................................... 128 temperature .......................................................................... 128 DMM functions............................................................................ 77 range ...................................................................................... 77 DMM input connections .............................................................. 70 DMM bus............................................................................... 71 front panel .............................................................................. 70 rear panel ............................................................................... 70 DMM self-test ............................................................................ 100 DMM soft front panel ................................................................ 119 advanced settings ................................................................. 124 basic settings field................................................................ 120 calibration tab ...................................................................... 126 measurement field ................................................................ 124 option settings ...................................................................... 121 readings field ....................................................................... 125 saved configurations ............................................................ 124 software trigger button ......................................................... 125 status display field ............................................................... 119 system buttons ..................................................................... 120 tab bar .................................................................................. 119 trigger settings ..................................................................... 122 driver installation ......................................................................... 54 IVI shared components .......................................................... 54 switch instrument driver ........................................................ 55 system/LXISync instrument driver ........................................ 55 153 VTI Instruments Corp. E EX1202/EX1262 installation options ...........................................35 rack ear, dual half rack ...........................................................38 rack ear, single half rack .........................................................37 rackmount, dual half rack .......................................................42 rackmount, single half rack ....................................................40 tabletops .................................................................................35 EX1206/EX1266 installation options ...........................................44 rack ears .................................................................................46 rackmount...............................................................................47 tabletop ...................................................................................44 extractor handle ............................................................................35 F firmware upgrade web page........................................................137 firmware version.........................................................................106 frequency and period measurements .............................................90 aperture time...........................................................................91 configuration ..........................................................................90 DMM connections ..................................................................92 reciprocal counting technique .................................................90 front panels 3U mainframes .......................................................................19 fuse .............................................................................................146 resetting .................................. See LAN configuration initialize troubleshooting ...................................................................... 56 web page .............................................................................. 129 NTP............................................................................................ 132 O offset ............................................................................................ 80 P password .................................................................................... 136 period measurements......... See frequency and period measurements plug-in module installation ............................................................................. 34 power ........................................................................................... 33 power consumption ...................................................................... 33 power line cycles .............................................................. See PLCs programming.............................................................................. 144 programming references............................................................. 144 R Java cache...................................................................................140 range auto-once ............................................................................... 78 auto-range .............................................................................. 77 auto-range off......................................................................... 78 over-ranging........................................................................... 77 range delay............................................................................. 78 reset network configuration ............................................................ 67 reset button............................................................................. 66, 67 debounce protection mode ..................................................... 67 device reboot mode ................................................................ 67 device reset mode................................................................... 67 LCI reset mode ...................................................................... 67 resistance measurements ........................................................ 88–90 2-wire method ........................................................................ 88 4-wire method ........................................................................ 89 lead wire resistance errors ...................................................... 89 test current ............................................................................. 89 resolution .................................................................... 78, See PLCs RJ-45......................................................... See connectors, Ethernet RTD measurements ...................................................................... 95 2-wire method ........................................................................ 96 4-wire method ........................................................................ 97 Callendar-Van Dusen equations ............................................. 95 L S LAN Configuration Initialize................................................ 67, 129 LAN Instrument Connection and Upgrade utility ................. 54, 105 LED indicators .............................................................................68 limit checking ...............................................................................80 LXI alarm .....................................................................................68 LXI class ....................................................................................106 LXI Identification web page .......................................................135 LXI synchronization web page ...................................................133 LXI Trigger Bus ...........................................................................64 LXI version ................................................................................106 saved states .................................................................................. 28 scanner soft front panel DMM configuration manager .............................................. 112 results field .......................................................................... 115 status display field ............................................................... 109 sweep wizard ....................................................................... 111 switch wizard ....................................................................... 110 system buttons ..................................................................... 109 tab bar .................................................................................. 108 trigger properties field.......................................................... 114 SNTP ......................................................................................... 132 soft front panel web page ........................................................... 107 DMM ................................................................................... 119 instruments........................................................................... 116 scanlist field ......................................................................... 109 scanner ................................................................................. 108 switches ............................................................................... 116 software installation ..................................................................... 54 Java runtime environment ...................................................... 54 G gain ...............................................................................................80 gate time ......................................................... See see aperture time H high energy source considerations ................................................34 I IEEE 1588 time ..........................................................................106 index web page ...........................................................................106 installation location ......................................................................33 installation options........................................................................51 integration time............................................................. 28, 121, 124 IP address ...................................................................................106 J M MAC address ........................................................................ 55, 130 maintenance................................................................................146 DMM removal and replacement ...........................................146 fuse replacement ...................................................................146 maximizing performance ..............................................................30 memory ........................................................................................28 cleaning protocols ................................................................157 N network configuration...................................................................55 154 specifications ......................................................................... 14–27 DMM ..................................................................................... 20 LXI ........................................................................................ 15 EX1200 Series Index www.vtiinstruments.com mainframe ..............................................................................14 switch soft front panels device info tab ......................................................................118 monitor and control tab ........................................................116 T temperature measurements ...........................................................93 configuration ..........................................................................93 RTDs ......................................................................................95 thermistors ..............................................................................98 thermocouples ........................................................................94 temporary internet files ...............................................................139 thermistor measurements ..............................................................98 DMM connections ..................................................................98 fitting curve constants.............................................................98 thermocouple measurements DMM connections ..................................................................94 time configuration ........................................................................61 time configuration web page ......................................................131 TRIG event .................................................................See triggering Trigger Bus....................................................................... 64, 65, 68 trigger model ..............................................................................104 triggering .............................................................................. 68, 103 troubleshooting multiple network cards ..................................................... 56, 59 true RMS ................................................................................ 28, 85 U using multiple network cards ........................................................59 V verification .................................................................................154 VTEXDMM driver .......................................................................69 programming examples ..........................................................69 VTEXScanner driver ..................................................................101 VXI-11 device discovery ...................................................... 56, 130 W warm-up .......................................................................................26 warm-up time ......................................................................... 30, 34 WEEE.............................................................................................7 EX1200 Series Index 155