Download Arabesk 6 User manual
Transcript
Arabesk
Version 6
Manual
Legal Information
The information in this document is subject to change without notice and does not represent a commitment on the part of MacroMotion GmbH. No part of this manual may be copied,
reproduced or otherwise transmitted, in any form, for any purpose, without prior express written permission by MacroMotion GmbH. All product and company names are trademarks of
their respective owners.
We recommend that you carefully read the information in this manual, in order to avoid operator errors.
We have taken great care in developing and testing this program. Since it is currently not possible to guarantee error-free operation under all circumstances and at all times, we can
unfortunately not entirely exclude that some errors may have crept in. Hence, MacroMotion GmbH and its distributors do not guarantee a problem-free or completely error-free operation
of the product.
With respect to any warranty, liability and damage claims, the provisions of the terms and conditions of MacroMotion GmbH shall apply.
We cannot accept any liability for loss of data/time or any consequential damages that may occur as a result, particularly since we have no influence over correct software installation
and operation by the customer. MacroMotion GmbH and its dealers therefore cannot be held liable for any defects or unintentional damage in connection with the installation or use of
the program Arabesk 6.
Claims for damages and compensation, regardless of the legal basis, in particular due to breach of duties in connection with obligation or tortuous acts are therefore excluded. This shall
not apply in the case of mandatory liability, e.g. under the German Product Liability Act (Produkthaftungsgesetz), in the case of intent, gross negligence, injury of life, body or health, or
breach of essential contractual obligations. Damage compensation entitlement for breach of essential contractual obligations is, however, limited to the foreseeable damage typical of the
contract, unless there is willful intent or gross negligence or in case of injury to life, body or health. The provisions above do not imply a change of the burden of proof to the detriment of
the purchaser.
Neither MacroMotion GmbH nor its dealers are responsible for any damages resulting either directly or indirectly through the use of the software or the operating instructions. This
applies in particular to loss of profits and compensation for expenses. Any implied guarantee is excluded, including guarantee of suitability of the software or operating instructions for a
particular purpose.
For this reason, you should make a backup of your video footage before you start using the device. We recommend that you do not delete the video footage and that you create a
backup copy beforehand.
Since it is possible that changes were made to the software after the manual was prepared, the functions shown and described in this manual might differ from the software.
Arabesk 6 User manual 3
Table of contents
1. General information . . . . . . . . . . . . . . . . . . . . . . . . . . . . . . . . . . . . . . . . . . . . . . . . . . . . . . . . . . . . . . . . . . . . . . . . 4
1.1 Congratulations! . . . . . . . . . . . . . . . . . . . . . . . . . . . . . . . . . . . . . . . . . . . . . . . . . . . . . . . . . . . . . . . . . . . . . 4
1.2 Installation . . . . . . . . . . . . . . . . . . . . . . . . . . . . . . . . . . . . . . . . . . . . . . . . . . . . . . . . . . . . . . . . . . . . . . . . . . 4
1.3 Starting Arabesk 6 . . . . . . . . . . . . . . . . . . . . . . . . . . . . . . . . . . . . . . . . . . . . . . . . . . . . . . . . . . . . . . . . . . . . 4
1.4 What is Arabesk 6 . . . . . . . . . . . . . . . . . . . . . . . . . . . . . . . . . . . . . . . . . . . . . . . . . . . . . . . . . . . . . . . . . . . . 4
1.5 What is new in Arabesk 6 . . . . . . . . . . . . . . . . . . . . . . . . . . . . . . . . . . . . . . . . . . . . . . . . . . . . . . . . . . . . . . 4
1.6 The Basic, Silver, and Gold Editions . . . . . . . . . . . . . . . . . . . . . . . . . . . . . . . . . . . . . . . . . . . . . . . . . . . . . . 5
2. Reference section . . . . . . . . . . . . . . . . . . . . . . . . . . . . . . . . . . . . . . . . . . . . . . . . . . . . . . . . . . . . . . . . . . . . . . . . . 7
2.1 Clarity is very important for the main menu . . . . . . . . . . . . . . . . . . . . . . . . . . . . . . . . . . . . . . . . . . . . . . . . 7
2.2 Environment – It's all about settings . . . . . . . . . . . . . . . . . . . . . . . . . . . . . . . . . . . . . . . . . . . . . . . . . . . . . . 7
2.2.1 Assistant . . . . . . . . . . . . . . . . . . . . . . . . . . . . . . . . . . . . . . . . . . . . . . . . . . . . . . . . . . . . . . . . . . . . 7
2.2.2 Disc projects . . . . . . . . . . . . . . . . . . . . . . . . . . . . . . . . . . . . . . . . . . . . . . . . . . . . . . . . . . . . . . . . 10
2.2.3 Settings . . . . . . . . . . . . . . . . . . . . . . . . . . . . . . . . . . . . . . . . . . . . . . . . . . . . . . . . . . . . . . . . . . . . 11
2.2.4 Miscellaneous . . . . . . . . . . . . . . . . . . . . . . . . . . . . . . . . . . . . . . . . . . . . . . . . . . . . . . . . . . . . . . . 12
2.3 Preparing – A good preparation is everything . . . . . . . . . . . . . . . . . . . . . . . . . . . . . . . . . . . . . . . . . . . . . . 12
2.3.1 Movies . . . . . . . . . . . . . . . . . . . . . . . . . . . . . . . . . . . . . . . . . . . . . . . . . . . . . . . . . . . . . . . . . . . . . 12
2.3.2 Chapters . . . . . . . . . . . . . . . . . . . . . . . . . . . . . . . . . . . . . . . . . . . . . . . . . . . . . . . . . . . . . . . . . . . 13
2.4 Creating – be creative . . . . . . . . . . . . . . . . . . . . . . . . . . . . . . . . . . . . . . . . . . . . . . . . . . . . . . . . . . . . . . . . 14
2.4.1 Menu templates . . . . . . . . . . . . . . . . . . . . . . . . . . . . . . . . . . . . . . . . . . . . . . . . . . . . . . . . . . . . . 14
2.4.2 Main and chapter menu . . . . . . . . . . . . . . . . . . . . . . . . . . . . . . . . . . . . . . . . . . . . . . . . . . . . . . . 15
2.4.2.1 Designing menus with the design window . . . . . . . . . . . . . . . . . . . . . . . . . . . . . . . . . . 15
2.4.2.2 Designing menus with the toolbar . . . . . . . . . . . . . . . . . . . . . . . . . . . . . . . . . . . . . . . . 16
2.4.2.3 Control (Main menu) . . . . . . . . . . . . . . . . . . . . . . . . . . . . . . . . . . . . . . . . . . . . . . . . . . . 17
2.5 Finish – Last but not least . . . . . . . . . . . . . . . . . . . . . . . . . . . . . . . . . . . . . . . . . . . . . . . . . . . . . . . . . . . . . 21
2.5.1 Quality . . . . . . . . . . . . . . . . . . . . . . . . . . . . . . . . . . . . . . . . . . . . . . . . . . . . . . . . . . . . . . . . . . . . . 21
2.5.2 Preview . . . . . . . . . . . . . . . . . . . . . . . . . . . . . . . . . . . . . . . . . . . . . . . . . . . . . . . . . . . . . . . . . . . . 22
2.5.3 Burn disc . . . . . . . . . . . . . . . . . . . . . . . . . . . . . . . . . . . . . . . . . . . . . . . . . . . . . . . . . . . . . . . . . . . 22
2.5.4 Export disc . . . . . . . . . . . . . . . . . . . . . . . . . . . . . . . . . . . . . . . . . . . . . . . . . . . . . . . . . . . . . . . . . 23
3. The info box – everything at a glance . . . . . . . . . . . . . . . . . . . . . . . . . . . . . . . . . . . . . . . . . . . . . . . . . . . . . . . . . 23
4. Arabesk and Power Key option – does it work? . . . . . . . . . . . . . . . . . . . . . . . . . . . . . . . . . . . . . . . . . . . . . . . . 25
5. Quick guide: How do I create a disc manually? . . . . . . . . . . . . . . . . . . . . . . . . . . . . . . . . . . . . . . . . . . . . . . . . 25
4
1. General information
1.1 Congratulations!
Congratulations on the purchase of the software Arabesk 6.
We thank you for your confidence and trust you have shown
us, and we hope that the product will meet your expectations.
This manual will explain the steps necessary to burn a DVD or
a Blu-ray. The manual is for all Casablanca users working with
Bogart SE.
Feel free to contact us if you have additional questions or to
give us suggestions for improving the product. Please contact
us at the address below. Whenever you contact us, please
have your customer number or the serial number of your device at hand so that we can help you more quickly.
MacroMotion GmbH
Werftstraße 193, 24143 Kiel, Germany
E-mail: [email protected]
Up-to-date information on MacroSystem products can be
found on the Internet:
www.macrosystem.de (Germany)
www.macrosystem.us (North America)
If you have specific technical queries, please contact your local
dealer.
You may also visit our Internet Support Forum:
www.macrosystem.de/forum. In the forum, you will be able
to find assistance, step-by-step directions, and tips and tricks
for MacroSystem hardware and software products.
1.2 Installation
In order to install Arabesk 6 on your Casablanca device, it
must be equipped with at least 1 GB RAM as well as Bogart
SE 4.5c or higher. Arabesk 6 can be fully used from Bogart SE
5 onwards.
To install Arabesk 6, please insert the appropriate software
CD/DVD in the drive of your device. You should now go to the
Settings menu item in Settings. You should then click on the
System button, followed by the ‘Install product’ button. This
will open the ‘Install Product’ dialog window (the hour glass
may be displayed instead of the mouse pointer for a short
time, until the inserted CD/DVD has been read). It has a list
with the products that are already installed on your system
as well as the products included on the inserted CD/DVD.
Arabesk 6 can also be found here. Select Arabesk 6 and click
on activate. The installation starts, as can be seen from a
progress bar. A short while later, a number block appears. This
is used to enter the activation code you received from your
dealer. The product will then be active.
Tip: While Arabesk 6 is being installed, you may hear noise
from the drive.
Arabesk 6 cannot be installed as a demo version.
If you install Arabesk 6 without activating it, you will not be
able to start Arabesk 6, and when you try, you will get a message to tell you as much.
1.3 Starting Arabesk 6
To start the Arabesk 6 program, you should go to the main
menu of Bogart SE. When Arabesk 6 has been installed, you
will find an Arabesk button in the Finish menu. You start the
Arabesk 6 program, by clicking on this button with the left
trackball button.
1.4 What is Arabesk 6?
Arabesk 6 is an add-on product from our company that
enables you to burn your projects to CD, DVD or Blu-ray, or
to save them as ISO images on USB or SATA storage media.
Depending on the Bogart SE Edition (Basic, Silver or Gold),
you may work at up to 10 disc projects at the same time,
in which you can partition your movies in chapters to make
them directly accessible during play, burn several movies on
a single disk, also in different quality levels, or create main
and chapters menus for your discs. A multitude of possibilities
and templates is at your disposal to create your disc menus.
With Arabesk 6, you may also create animated disc menus as
well as multi-angle discs (discs with movie(s) that have been
recorded from several viewing angles).
In addition, you also have the possibility to verify your work
before burning a disc, thanks to the preview function.
1.5 What is new in Arabesk 6?
(if you are upgrading from Arabesk 5)
The user interface of Arabesk 6 has been completely reworked
and redesigned to make it clearer. We thought it was important to make it easier to operate the program and introduced
a type of check system for the creation of discs. It is now also
possible to create animated main and/or chapter menus for
Blu-ray discs, optionally with sound, with a duration of up to 5
minutes, and to create several disc menus in parallel, without
losing the previous main or chapter menus.
Besides this, there is a whole slew of smaller innovations that
are discussed in this manual.
Arabesk 6 User manual 5
1.6 Basic, Silver and Gold Edition
What is the functionality of…
The different versions of the Bogart SE operating system also
offer you different possibilities to design your discs in Arabesk.
With the Basic Edition you can create your discs via the Assistant, as well as make settings for the burning speed, play a
burned DVD, delete a CD-RW or DVD-RW and reset Arabesk 6
to its factory settings.
With the Silver Edition and Arabesk 6, it is also possible to create custom designs for your discs without using the Assistant.
Creating chapter menus as well as working on several disc
projects is only possible with the Gold Edition.
Other differences between the editions are pointed out in the
appropriate sections.
6
Arabesk 6 User manual 7
2. Reference
2.2 Environment – It's all about settings
2.1 Clarity is very important for the main
menu
In the Environment menu, you have the option of letting our
Assistant guide you through the creation of a menu (more
about the Assistant in the corresponding chapter).
Here, you will also find the project management of the different
disc projects you are able to work on in parallel with Arabesk
6, as well as settings you can make across the board, i.e. with
respect to all disc projects. Information about drive and storage medium can also be accessed here. If several drives are
connected, you will be able to access information about every
drive and you will have the ability to select the desired drive.
2.2.1 Assistant
The main menu of Arabesk 6 has been reorganized and is now
similar to the main menu of Bogart SE. The individual menu
items are now grouped under 4 parent menu items, namely
Environment, Prepare, Shaping and Finish. This order corresponds to the usual sequence of editing steps.
In the title bar of the menu, one sees no longer just the name
of Arabesk 6, but also the currently selected resolution, such
as SD for the Video DVD target format. The target format that
was not selected, is more pale. A short while after you hold
the mouse pointer on the resolution indicator, a help text will
appear to indicate the currently selected resolution or target
format. When you click with the left trackball button on the
resolution, you will have the option to change the target format
and therefore also the resolution.
If the RenderBooster is inserted and recognized, this will be
indicated in the title bar, to the left of the resolution.
If the RenderBooster is inserted, but not active, its indicator
will be paler and in brackets. If the RenderBooster is active, the
indicator will become white and the brackets will disappear.
When you want to use the RenderBooster, go in Arabesk 6
under Environment to Settings and place a checkmark next to
‘Use RenderBooster’.
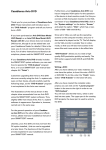
(for example, in the picture above, the RenderBooster is being
used and HD (Blu-ray) has been selected as the target format)
On the right, there is a preview window with the current view of
the main menu for the selected disc project.
In the bottom part of the screen, there is an info box that
shows you the current status of the disc project at a glance.
Please refer to the "The info box – everything at a glance"
chapter for more information.
There is, of course, a button
to open and close the drive,
and also a button
, to return to the Bogart SE main menu.
If your device has two drives or if you have connected a second, external, drive to your device, you will be asked which
drive should be opened before the drive will open.
When you use the assistant, it will conveniently guide you
through all editing necessary or optional steps for creating a
disc.
At each editing step, there is the possibility to go to the next
editing step by clicking on Next or to return to the previous
editing step by clicking on Back.
If a choice is required in an editing step in order to burn a
movie on a disc, the Next button will only become active when
the corresponding setting has been made.
In case you are not using the assistant, click on the Cancel
button to return to the Arabesk 6 main menu. After clicking on
the Cancel button, a confirmation prompt will open to confirm
that you do indeed wish to end the assistant and reject the
settings you have made so far.
The Yes button will end the assistant, whereas the No button
will take you back to the last editing step you performed with
the assistant. This prompt will appear every time you click the
Cancel button, regardless of the editing step of the assistant
that is currently active.
When the assistant starts, a dialog box will allow you to select
the format you want to use for your disc, Video DVD or Blu-ray.
Click on the corresponding button in the dialog box to make
your choice.
Once you have selected the target format of your disc, you will
be able to use the ‘Select film’ button to select the project you
want to burn on your disc.
8
set chapter marks, you may choose between ‘Every 5 minutes’
and ‘Every 10 minutes’.
Tip: If a movie is shorter than five minutes or if you do not have
the Silver or Gold Edition, the assistant will not allow you to set
chapters and this option will be omitted.
When you have selected your project, it will appear in a selectable text field in the dialog window (in the picture below,
this field contains ‘Vacation 2012’.
If you have set chapter marks, the following editing step will
allow you to use a checkmark to determine if you want to set
a chapter menu for the disc and what names the individual
scenes should get.
Click on this field to change the name of the project which will
later be shown in the main menu of the disc, next to the button
for the corresponding movie. To this end, the familiar ‘Input
text’ dialog box will appear.
The Quality editing step allows you to select between the
following quality levels: Low, Medium, High and ‘Very high’ (the
‘Very high’ quality level is only available in the Gold Edition).
In order to determine the expected storage capacity needed
for the disc, you will also be able to select the reference storage medium using the corresponding selection button.
The editing step ‘Chapters’ is used to define chapter marks
by setting a checkmark. Should you not wish to set chapter
marks, just leave the checkmark at ‘None’. Should you wish to
A choice can be made between the names of the corresponding scenes or a sequential numbering of the chapters.
In case you wish to create a chapter menu and you have set
the checkmark accordingly next to Yes, the ‘Choose template’
button will also become active, as well as the buttons to name
the chapters. Click on the ‘Choose template’ button to open a
new dialog window, ‘Load menu template...’, in which you will
be able to select a template for the chapter menu.
The chapter menu selected in the list is also displayed in a
preview window at the right-hand side of the ‘Load menu
template...’ dialog window. Confirm your selection with the OK
button. You will now be returned to the assistant and be able
to continue editing your disc.
Arabesk 6 User manual 9
Tip: A chapter menu can only be created using the predefined
templates.
The next dialog window will allow you to create a button for
the previously added movie, to represent it in the main menu
of the disc.
Click on the ‘Select scene image’ button to do this. You will
now get to the menu for selecting button patterns, and will be
able to select the scene containing the desired pattern and
then confirm the selection by clicking on OK.
Should you want to add another project, simply click on the
button ‘Choose another film’. When you have selected an
additional movie, it will appear together with the project name
in a text box in the dialog window. Click on this field to change
the name of the project or the movie which will later be shown
in the main menu of the disc, next to the button for the corresponding movie. When you click the Continue button after
adding another movie in this editing step, you will be taken to
the Quality editing step again which will allow you to select the
appropriate settings for the movie you just added. After this,
you will also be able to set chapter markers, to create a chapter menu, to create a menu button for the movie in the main
menu of the disc and to add additional movies.
If you did not add another movie and you click on the Continue
button, the next editing step will allow you to set a checkmark
to indicate if the main menu must first be shown after the disc
has been inserted in a player, or if the first movie should start
to play immediately.
You will now be able to select a pattern from the scene you
have selected, by clicking on the Position button and then
rolling through the scene using the trackball.
Once you have made your choice, click on the Continue button
to go to the next editing step of the assistant.
You are now in the ‘Menu creation’ editing step.
Once you arrived at the desired spot in the scene, click the
left button of your trackball. Should you wish to make a more
precise choice, you should use the
and
buttons in
order to advance or go back frame by frame in the movie, until
the pattern you wish to use for the button has appeared. Click
now on the OK button to confirm your selection and return to
the assistant.
In the next step, the assistant will ask you if you want to burn
an additional project (i.e. another movie) on the disc. If that is
not the case, the Next button will take you to the next editing
step.
Here, you will be able to use the ‘Select template’ button to
create your main menu. Clicking on this button will open the
‘Load menu template...’ dialog window. Also here, there are
numerous templates from Arabesk 6 at your disposal, as well
as menu templates that you have created yourself which you
have already saved.
10
made by the assistant will be preserved and can now be adjusted individually.
2.2.2 Disc projects
Once you have selected one of these templates, you should
confirm your selection with the OK button to return to the
editing step.
The next editing step, ‘Menu design – Background’, offers you
several options to create a background for your main menu.
Place a checkmark next to the desired option. If you select
the options Pattern, ‘Image from scene’ or ‘Moving scene (with
sound)’, the ‘Select pattern/scene’ button will also become
active, and using this button will take you to the corresponding
dialog window in order to add the desired pattern or the desired scene/scene image as a background to the main menu.
When you have done this, the Continue button will take you to
the last editing step of the assistant. This will allow you to set a
checkmark to indicate if the disc should be burned right away
or if you prefer to switch to the manual editing mode of Arabesk 6 (possible from the Bogart SE Silver Edition onwards).
If you have selected the ‘Burn Disc’ option and you click on
the Continue button, you will be asked to insert a writable disc
in the drive of your device, if this has not yet been done. Apart
from that, the device will now start with its calculations and
burn the disc.
If you have selected the ‘Edit Disc with Arabesk’ option, you
will be returned to the main menu of Arabesk 6. The settings
With Arabesk 6, you have the possibility to work on up to 10
disc projects in parallel and independently from each other.
However, this is only so for users of the Bogart SE Gold Edition.
The ‘Disc Projects’ menu is used to manage these individual
disc projects.
Tip: The disc projects are only available within Arabesk. These
are not Bogart SE projects.
Select: Use the Select button to select a disc project for
editing your disc, in the same way you already know from the
Bogart SE project selection. You can of course also give the
disc project its own individual name, by clicking on the text
field next to the Select button.
Target format: The format in which you want to burn your
movie can be set with the ‘Target format’ button. The target
format for your disc can be selected in the corresponding
dialog window by setting a checkmark. When you switch the
target format, a message will appear asking you if you want
the change the target format. If you want this, confirm the
dialog window with Yes. If not, click No.
When you change the target format, the display in the main
menu of Arabesk will be adjusted accordingly.
Tip: The target format is not the storage medium (CD, DVD
or BD) on which your movie is to be burned, but the format in
which the movie is to be burned to a disc. We recommend you
use a storage medium that officially matches the target format
(DVD/DVD DL for Video DVD and Blu-ray 25/50 GB for Blu-ray).
Other combinations are possible, but may lead to problems
when playing the disc.
Copy: Menus or disc projects you created can also be copied
and used for other movies that have to be burned to a disc.
When you click on the Copy button, this will open a dialog window with the currently empty disc projects. There, you will be
able to select in which disc project you want to store a copy of
the currently active disc project.
Arabesk 6 User manual 11
Remove: Click this button to delete the currently active disc
project. The system will ask you whether the entire disc project
or only the calculated data should be deleted. Set a checkmark next to the desired option and click OK to proceed with
the deletion.
Below, you will find the possible looks of the button.
Button symbol
Selected medium
CD
DVD
Tip: Large disc projects sometimes take lots of space on your
hard disc (up to 50 GByte). When space becomes tight, you
can delete ‘calculated data’ without changing the disc project itself. The data will then be recreated later on when this
becomes necessary.
Read disc: Click on this button to call up the ‘Read Disc’
dialog window. Use the selection button ‘Read from’ to select
the data type you want to read. You can select between Disc,
for a conventional ‘Video DVD’ burned with Arabesk, and ‘ISO
Image’ for ISO images that were created with ‘Export Disc’ in
Arabesk 6.
When you have set an appropriate data type, clicking on the
‘Start reading’ button will allow you to import the disc in the
currently active disc project.
If the currently active disc project is not empty, a corresponding message will appear which you will be able to confirm with
Yes to continue with the import or close with No to cancel the
import.
If you have not inserted a storage medium yet, you will be
asked to insert a storage medium. Confirm with OK when you
are finished.
Information: This provides you with information about the
active disc project. At the top of the dialog field, you can see
which disc project is currently active.
Below this, you'll find the number of inserted movies, the
total duration of all movies and the disc capacity in use of the
currently selected reference medium in the form of bars and as
a percentage.
DVD DL
Blu-ray 25 GB
Blu-ray 50 GB
Clicking on this button will open the ‘Select reference media’
dialog field.
Put a checkmark next to the desired storage medium to select
it. The dialog field after the medium will also indicate what the
currently used capacity on this medium is or will be with the
active disc project.
The button to change the reference medium can be found in
different menu items and can be used at any time to change
the reference medium within Arabesk 6.
Tip: In the next chapters, the button will be displayed with the
DVD symbol, most of the time.
2.2.3 Settings
To the right of these indicators, there is a button
with
which you can switch to an additional dialog field in which
you will be able to select the reference storage medium (CD,
DVD,…). Make your selection by putting a checkmark after the
storage medium you which to use.
Tip: These actions only concern the settings made in Arabesk,
as well as main and chapter menus of the selected disc project, not the corresponding movies in Bogart SE.
CD, DVD or Blu-ray? - The choice is yours
The storage medium on which you will burn your disc project,
is only determined by the disc which inserted when burning. In
order to see the anticipated used capacity, you can and should
select beforehand the storage medium you are likely to use.
There is a specific button for this in Arabesk 6, that is displayed differently in function of the currently selected medium.
Use this to make general settings for all disc projects.
Put a checkmark next to the options you want to use.
This way, you may select the RenderBooster for calculating
the disc, whether there should be more frequent confirmation
prompts, whether DVDs should be verified after burning, and
whether the device should switch off itself when the disc has
been burned.
The burning speed is also set here, between 1x – 18x. Alternatively, the option ‘Auto’ (automatic) can be selected. If this
12
setting is selected, the burning speed will automatically be
adjusted for the blank disc that has been inserted.
2.3 Preparing – A good preparation is
everything
Tip: As a rule, ‘auto’ should always be selected here. Only
when certain discs cause problems, should a burning speed be
set manually.
2.3.1 Movies
You also have the possibility to use the ‘Reset to factory
defaults’ button to restore your Arabesk product to its original
settings. Additionally, the menu templates you have created
yourself can also be deleted.
CAUTION, after confirming the confirmation prompt with OK,
you will lose all disc projects in Arabesk, not only the current
one. Bogart SE projects will remain unchanged. You will normally never need this option. It should only be helpful in case
of technical problems.
If you have a system with two drives, such as a Casablanca
Karat, you will also have the option ‘Use two drives’ which
you will be able to select by putting a checkmark next to it.
This option will also appear when you are using an additional
external drive.
Tip: The changes in this menu will affect all disc projects.
2.2.4 Miscellaneous
Under this menu item, you will get information about the
inserted medium as well as about the built-in drive in your
device. Here, you have the opportunity to play a Video DVD
and to copy a disc that was burned with Arabesk. When you
want to copy a disc, clicking on this button will first instruct
you to insert the original disc and subsequently an empty
disc. The corresponding drives will be opened automatically
to allow this. You may also erase a rewritable disc (which can
be recognized at the abbreviation RW, such as DVD – RW) by
clicking on the ‘Erase CD/DVD-RW’ button.
Before the disc is erased, a dialog window opens in which you
have to confirm with Yes that the data on the inserted disc
should be erased. Click on No, should you not wish to erase
the disc.
If you have a device with two drives, a dialog field will appear
asking for which drive the corresponding option should be
activated. Click on the ‘Drive 1’ or ‘Drive 2’ buttons to select
the drive you need.
If you have installed the ‘Disk-Transfer’ add-on program on
your device, Disk-Transfer Export will be available here.
Tip: Erasing a disc may take from a few minutes up to two
hours, depending on the disc and the installed drive.
A Blu-ray RE does not need to be erased, same for a DVD+RW. These media are overwritten directly, simply by burning
a new disc.
After clicking on the Movies button, a new dialog window
opens up, the top part of which indicates the currently active
disc project. Below this, a list will be displayed with the movies
that have already been inserted, and any changes, marked
with symbols that will be talked about later on.
Moreover, in the bottom third of the dialog field, there is a capacity meter for the currently selected medium type as well as
an indication of the disc fill level as a percentage and a button
to change the reference medium, when necessary. This
option is also available in all other menu points with a disc fill
level indicator.
Tip: The medium change does not happen globally for all disc
projects, but only individually for each disc project. DVD is the
standard setting for disc projects.
Should the used capacity exceed the capacity of the storage
medium, the percentage indicator and the used-capacity bar
will be displayed in red.
Add movie: In the Movies menu, you have the possibility to
use the ‘Add movie’ button to add one or more movies from
different Bogart SE projects to the previously selected ‘Disc
project’. Click on the ‘Add movie’ button to do this. The ‘Add
movie’ dialog window appears. Use the ‘Select project’ button
to select the Bogart SE project you want to burn as a disc. It
speaks for itself that you can also burn several movies on a
disc. All you have to do is to repeat the process. When you
do this, you should keep an attentive eye on the used disc
capacity. After adding to the list, the movie(s) will be listed in
the middle of the ‘Movies in disc project’ dialog window. The
duration of the movies is also indicated there.
Remove movie: Should you want to remove a movie from the
disc project, you should select the corresponding movie so
that it is marked with a line in the middle of the list and then
click on the ‘Remove movie’ button.
Arabesk 6 User manual 13
Play: A movie that is selected in the list can also be played in
this dialog window, in order to verify that the correct project
has been added. To do this, you simply use the play button
. The movie is played as it would be in the Bogart SE project, it
is not a preview, it gives information about the settings (image
quality...) made in Arabesk.
Move movie (only possible in SD disc projects): Changing the
order in the sequence in which they should be burned to a disc
is still possible, even after adding them. To do this, use the
and
‘Move movie’ buttons. This will allow you to move
the currently selected movie up or down in the list. Re-sorting makes it possible to determine any movie sequence you
desire, to use a certain movie (the first one in the list) as leader
movie or when you'd like to let all movies play automatically, in
a certain order, one after another.
Tip: At this time, only a DVD with several viewing angles can be
created. This function is not available for Blu-rays.
The scenes should be just as long as the main movie. Otherwise, the viewing angle concerned will be displayed as a still
image for the remaining time. The scenes must also all start at
the same point in time, since they can no longer be trimmed in
Arabesk.
Should you wish to remove the additional scenes again, you
should use the
button after the scene name of the viewing
angle.
The sound track you would like to add to the disc can also be
selected here.
The ‘Only project audio’ option, uses the sound of the main
movie. The Individual option will play the corresponding sound
of the viewing angle that is being played.
Select range [R] (only for Bogart SE Gold Edition): Should
you not wish to burn the entire storyboard of a project on
your disc, it is also possible to select a range that should be
burned on the disc. To do this, you should click on the ‘Select
range [R]’ button. This will call up a new menu, similar to the
trimming menu which you may know from Bogart SE. With the
and
buttons, you have the ability to trim your
movie so that only the range you need will be burned to the
storage medium.
If you have edited a movie of your disc project with this option,
an R (an abbreviation of the word Range) will appear in the
dialog window list in front of the duration of the corresponding
movie.
Tip: This will, of course, also affect the used disc capacity.
Should you wish to burn several sound tracks to the DVD, this
will require more storage capacity.
Add/Edit view angle [V] (only for Bogart SE Gold Edition):
Use the ‘Add/Edit view angle [V]’ button to create a so-called
Multi-Angle DVD, a Video DVD with sequences recorded from
different vantage points. Such a multi-angle DVD utilizes the
viewing angle option available on most DVD players. In cases
like this, there are several different versions of the same film on
the Video DVD, each filmed from a different angle. The viewer
can use the remote control at any time to switch between the
different versions or viewing angles (which explains the name).
This function is at its best when you have recorded footage
using multiple cameras and then synchronized the footage using our QuadCam product. Ideal applications are, for example,
weddings, concerts, and baseball games.
When this menu opens, the ‘Edit chapters’ dialog window
appears. At the top left, there is a Movie button to select the
movie that should be divided into chapters or of which the
chapter settings should be changed. When the Chapters dialog window is opened for the first time, the movie that was last
edited or selected in the Movie menu of the active disc project
will be set by default. If you click on the button, a new dialog
window will open with a list of the movies that have previously
been added in the Movie menu.
Should there be several, you will be able to click on a movie
you wish to select for chapter editing. It will now be highlighted
in color. If there is only a single movie in the disc project, it will
already be select by default.
The currently selected movie will also be displayed with its
Bogart SE project name next to the Movie button.
Below the button, to the left, there is a chapter list (if the
partitioning option ‘No chapters’ is currently selected, the list
is empty) with the names of the chapters, the chapter numbers
and their duration. To the right, there is a preview image which
always shows the first image of the chapter that is selected in
the list.
The scene name will only be displayed if naming is also set to
‘scene names’. If the name ‘numbered’ is selected, you will
see the chapter numbers in the list (this option is only available
in the Gold Edition).
For the production, you need a main movie that is included in
the storyboard of the corresponding Bogart SE project. The
storyboard can be created and edited as usual and should
then be added as a movie to Arabesk.
For the additional angles 1 to 4, you should select extra scenes
from the scene bin of the corresponding project that show
the same scene contents, only from a different perspective.
Use the ‘Select angle 1-4’ buttons to add the corresponding
scenes as viewing angles.
The capacity of the selected storage medium is also indicated
in the dialog field and changes in function of the settings that
have been made.
If you have edited a movie of your disc project with this option,
a V (an abbreviation of the word View) will appear in the dialog
window list in front of the corresponding movie.
2.3.2 Chapters
14
This menu is also used to define the start of the chapter in
case of custom chapter partitioning. The option for custom
partitioning of chapters is only available with the Gold Edition.
Partitioning: Use this selection button to select between the
different options to create chapters. You have the choice between ‘no chapters’, ‘each scene’, ‘every 5 minutes’, ‘every 10
minutes’ or ‘custom’ as chapter markers.
If you select the ‘custom’ option, the buttons ‘Chapter start’
and ‘Undo chapter’ will both become active in the ‘Edit chapters’ dialog window. More information can be found under the
respective subitems.
Naming (only with Gold Edition): Here, you will also be able to
use a selection button to choose between ‘scene names’ and
‘numbered’. With ‘scene names’, each chapter receives the
name of the corresponding scene from Bogart SE. If you select
‘numbered’, the chapters will be numbered consecutively,
starting with ‘Chapter 1’.
Chapter start/Undo chapter (only with Gold Edition): As soon
as partitioning has been applied, you will find the ‘Chapter
start’ and ‘Undo chapter’ buttons in the ‘Edit chapters’ menu.
These only become active when ‘custom’ has been selected
when partitioning. In this case, the chapter list will contain the
individual scenes of the movie. Each scene first belongs to
chapter 1. Should you wish to create additional chapters, you
should select the scene that should mark the start of the chapter, and then click on the ‘Chapter start’ button. After that, the
chapter designation will be indicated by a number following
the scene name. Should you wish to remove the chapter again,
you should click the scene in the list that marks the start of the
chapter and then click on the ‘Undo chapter’ button.
Play: Playing a single chapter can also be done by using the
button. When you click on the button, the chapter selected
in the chapter list will be played.
In the bottom part of the ‘Edit chapters’ dialog window, a
counter shows how many chapters there are in the currently
selected movie. The DVD standard does not allow for more
than 99 chapters per movie. In case there are more, a message will appear and Arabesk will reduce the number accordingly.
2.4 Creating – be creative
2.4.1 Menu templates
As the name of the menu item already implies, this is where
you will find menu templates in different versions that you can
use to create your movie menus and/or chapter menus.
Menu templates are predefined or self-saved design settings
for main and chapter menus. The appearance of the background as well as the appearance and positions of buttons and
text is saved in the templates. This makes it possible to easily
apply the many design settings to appealing templates. If necessary, individual changes can be applied afterwards – this is
often easier than making all the settings from scratch.
The available selection of menu templates depends on the
Bogart SE Edition you are using – templates that contain overlays or moving elements are only available starting with the
Gold Edition.
You also have the ability to save menus you created yourself in
this menu. This will allow you to use these again later on. You
may also delete menu templates that are no longer needed.
When you open the ‘Menu templates’ menu, you will get a
dialog window with the following buttons:
Load: Click on this button to call up the ‘Load menu templates’ dialog window. You will first get the opportunity to use
the selection button ‘Product’ to select which menu templates
should be displayed.
Below this, there is a list with several menu templates from
which you can choose. It is possible to scroll this list by using
the scroll bar to the right of it, or by using both arrow buttons
below the scroll bar for navigating the list. To the right, there is
a preview window in which the currently selected menu template is displayed, as well as a short bit of information about it.
If you load a menu template from the ‘Menu templates’ menu,
this will not only load the main menu but also the corresponding chapter menu (if available).
Tip: The settings in the template will only be incorporated in
the current disc project when the template is loaded. If that
disc project is modified later on (such as adding another movie
or button or creating another chapter) the new elements will
not be of the same style of the template. In such cases, the
template should simply be reloaded – these elements will then
be adjusted as well.
Save: Click on this button to call up the ‘Save menu template’
dialog window. Here, a list on the left side lists the menu
templates that have already been saved, as well as the menu
template that is to be saved, with the name <New template>.
Below this, there is a text field, <New template>, which you
may click to call up the keyboard. This way, you may give a
new template a name, when you want to save it. To the right of
the list is an image of the menu template currently selected in
the list, as well as some information about it.
Before saving, you will be able to select the entries for templates that have already been saved and that interest you, to
see them in the preview window. To save the template as a
new entry, you should first click on the new name. If you have
selected an older entry, this will be overwritten when saving
(after a confirmation prompt).
Arabesk 6 User manual 15
Tip: To create menu templates that are as universal as possible, you should take into account as many of the following
points as possible:
• Use an HD project and add only HD movies
• Most templates should include 1-4 movies
• Always create a main menu and a fitting chapter menu (if
several movies have been added, only the chapter menu of
the current movie is determinant; for a chapter menu, only
the first page is relevant)
• For all texts, use only the \ shortcut, for example \cm or \tm
• The position of button texts should not be ‘custom'
• Do not insert any additional text that applies to specific movies (it will not disappear when the movie is not present)
•P
ut a button for the chapter menu (for each movie) in the
main menu
• Insert the buttons for the previous and next pages in the
chapter menu (should be there automatically)
•P
ut a button in the chapter menu for switching to the main
menu
•M
ake buttons on which text is to be put, such as \cm ('Chapter menu’) so wide, that they can contain at least German,
English and French texts
•D
o not place the elements too close to the border (keep a
generous area free for the overscan area)
• Set Naming for the chapters to numbered
• Do not include any information concerning the number of
movies or chapters in the names of the templates
Insofar as you don't need it for your personal use, some of
these items can, of course, be ignored.
Delete: This is used to open the dialog field ‘Remove menu
template’. It is structured in the same way as both dialog fields
that precede it in this menu item. To delete a menu template,
you should select it in the list and then confirm this selection
with OK.
2.4.2 Main and chapter menu
Since designing main menus and chapter menu is largely
similar, the operation and possibilities are discussed together
in this chapter.
It speaks for itself that differences will be discussed.
Creating chapter menus is only possible with the Gold Edition.
In order to create a chapter menu, chapters must first be
created under Prepare – Chapter. If this has not happened yet
when the ‘Chapter menu’ menu is called up, you will receive
the following message:
2.4.2.1 Designing menus with the design window
With Arabesk 6, you have now, for the first time, the ability to
select individual elements in the design window for the main
menu or the chapter menus and switch to the corresponding
options of the toolbar. When designing, this saves some manual switching work.
Click the elements with the left trackball button to switch to
the corresponding option. The following table shows for which
options this is possible and how they can be selected:
Menu item
Background
Text
Buttons
Tip: Only templates you have created yourself can be deleted.
Self-created templates are saved and reloaded via the backup
function of Bogart SE. You will find this function in Bogart SE
under Settings - Archive. When backing up, you can select
the storage medium you prefer (USB media must be inserted
beforehand), confirm the selection with OK and start the data
export. Similarly, data that were stored this way can also be
reloaded.
Tip: If you use an image from a scene from one of your Bogart
SE projects in a self-created menu template, this scene will not
be saved with it, only a reference to it. If you delete the corresponding Bogart SE project, the scene will also be lost in the
saved template.
This can be avoided if you first store the scene or the pattern
from the scene in the Bogart SE imagepool and then use this in
Arabesk.
Button text
Button borders
Button shadow
Click on...
A free area, with no button or text nearby
The desired text
The desired button (more or less in the
middle)
The text of the desired button
The border (or where it is supposed to
be) of the desired button
The shadow of the desired button
The currently selected button or text is highlighted with a
dotted border.
More information about the different options can be found in
the ‘Designing menus with the toolbar’ chapter. All options are
comprehensively explained here.
In addition, you can also use the design window to change the
size of a button by going with the mouse pointer to the bottom right corner of the currently selected button. The mouse
pointer will then change to a double arrow and you can now
click and roll the track ball to change the size of the button.
Tip: When you change the size manually, starting with a default
size (small, medium, big), it will be changed uniformly, i.e. the
16
aspect ratio will be the same as for the original. After switching
to ‘free - stretched’, you will be able to change the height and
width independently of each other.
The button can also be moved by clicking on the desired
button and then taking the mouse pointer to the top left corner.
The mouse pointer now changes to a quadruple arrow. Click
once on the left trackball button and roll with the trackball to
the desired position, the button will move there. Just try it.
Tip: Size and position changes are confirmed with a left button
click and canceled with a right button click.
2.4.2.2 Designing menus with the toolbar
Of course, you can also design your main and chapter menus
with the help of the toolbar at the bottom.
In the background, you are shown how the main menu or
chapter menus will look, while the foreground has a toolbar
with the options to design disc menus.
At the left border of the toolbar, there is a
button to move
the toolbar to the top or bottom border of the screen and a
button to shrink the toolbar, so that you can see more of the
menu preview in the design window.
There is also a
button in the top left corner of the toolbar
(depending on the options, it can also look as follows:
,
). This opens the ‘Copy changes to other elements’ dialog window where you can activate one of the options ‘Copy
changes only to actual element’, ‘Copy changes also to equal
elements’ and ‘Copy changes to all elements’ by putting a
checkmark next to the option you need.
In this dialog field, the option ‘Copy changes only to actual
element’ is selected by default.
The toolbar for editing chapter menus contains also a
button. This button also opens a dialog window with the
abovementioned options, as well as the additional options
‘Copy changes only on actual page’ and ‘Copy changes on
all pages’. Both of these additional options can be selected,
independent of the other options. The option ‘Copy changes
on all pages’ is selected by default.
These options can be used to simplify the design of menus,
and to save time. For example, this makes it possible to apply
the same action to all buttons (items) with a single click or to
design the background for a menu with several screens only
once and apply it to all screens of the menu.
At the right border of the toolbar, there are the buttons Settings ( ), ‘Menu templates’ ( ) and ‘Back to Arabesk main
menu’ ( ).
The two first buttons open a new dialog window with various
setting options with respect to working in menu design. More
about this follows:
Menu templates: Clicking the ‘Menu templates’ button brings
you to the menu of the same name, in which you can load
menu templates or save menus that have been created. It
speaks for itself that the button Load in the ‘Menu templates’
dialog window can also be used here to update the main/
chapter menu that is now in Edit.
When you switch from the toolbar to the menu templates, you
also have the opportunity to assign different menu templates
to the main menu and the chapter menu. Unlike when loading
a template from the Arabesk main menu, where always both
main and chapter menus are loaded, only the main or chapter
menu is loaded here, depending on the menu one is currently
working on.
Settings: This button opens the ‘Settings menu edit’ dialog
window. Here, you can use the selection button ‘Menu format’
to specify the format of your main menu. You can also choose
between the settings ‘As first movie’, 4:3 and 16:9. One usually
leaves the setting as ‘As first movie’. The menu will then have
the same format as the first movie. The format will be shown in
brackets.
The selection button ‘View size’ determines the size of the
Design window in menu design. You can have the menu
displayed on your screen Complete(ly) (the border areas will
then usually be in the invisible overscan area), Visible, i.e. the
main/chapter menu will be reduced to fit the visible part of the
screen in order to also display the normally invisible border
areas (this setting uses the visible size which can be specified
under Bogart SE – Settings – Screen as the visible area), or
Small, in which case the main/chapter menu is reduced to fit
the area above/below the toolbar.
Tip: When the Complete option has been selected, it is possible that elements put close to the border will be cut off or
invisible on some screens.
If Bogart SE is active in two-monitor mode, editing will happen
as described, on the first monitor. The second monitor will
display a full view of the current menu.
When you put a checkmark next to the Grid option, this creates an imaginary grid on your main/chapter menu to which
buttons and text elements are aligned. When you move the elements or change their size, the grid will make it easier for you
to align the elements to each other. You can specify how fine
the grid should be with the corresponding slider (small values
result in a fine, narrow grid, large ones to a coarse, wide grid).
In order to design main/chapter menus, you have the following
options at your disposal, which can be found below the top
center selection button:
Arabesk 6 User manual 17
For the main menu:
Play successively: Plays all movies on the DVD in a row and
then returns to the disc menu.
Repeated play: When a movie has been started via the menu,
it will continuously be replayed. There is no return to the menu.
This mode is especially useful for unending presentations
(store windows...).
For the chapter menu (only with Gold Edition):
Context (Chapter menu): (only with Gold Edition)
In the chapter menu, next to these selection buttons, there
are also the
,
,
, and
buttons, with which you
can easily switch between the different screens of the chapter
menus. There is also a
button to select the movie for which
the chapter menu is to be made.
The settings you can make with the individual options of the
‘Main menu’ or ‘Chapter menu’ selection buttons are explained
below.
2.4.2.3 Control (Main menu)
The Control menu gives you the opportunity to make settings
that will become active later on, when the burned disc is being
played.
The ‘Disc-start’ function offers three possibilities:
Menu: If you select this option, the menu will appear when the
disc is inserted. The first movie will not be played automatically.
With first movie, then menu (first movie not in menu): If you
select this option, the first movie will be played automatically
after inserting the DVD. Subsequently, the menu you have
designed will appear without the movie that has already been
played, making it impossible to play it again. This means the
first movie is intended as opening credits (Intro).
With first movie, then menu (first movie also in menu): With
this option, the first movie is played immediately, followed by
the menu which contains the first movie, making it possible to
select and play again.
There is also a Movies selection button which is used to select
the following options for playing a Video DVD (not available for
Blu-ray):
Individual play: After playing a movie, the menu will be displayed again.
The Context option of the chapter menu enables you to use
the Movie function to switch between the different movies
of the disc project, in order to create their chapter menu if a
chapter menu is desired. It is identical to the
button in the
title bar.
If there is a movie that should have a chapter menu, but for
which no chapters have been added yet to the corresponding
menu, you will get the message that was already mentioned
previously.
You will get this message as long as you have not yet entered
any chapters for this movie in the Chapter menu of Arabesk 6.
The Context option also allows you to specify how many
chapters should be shown per chapter menu screen, using the
‘Chapters per page’ slider. You can choose to have from four
up to nine chapters per screen. To the right of this, you can
also see how many chapters the movie has in total and how
many pages the chapter menu currently has.
Additionally, you can browse through the pages of the chapter
menu with the ‘actual page’ slider, if the menu has several
pages. To the right of the slider, there is an indicator to show
which screen of the chapter menu is currently displayed in the
design window.
Background:
The Background option is used to individually design the
background of your main/chapter menus. You may choose
between different colors, patterns, or a scene from your own
Bogart SE projects. In addition to static backgrounds, it is also
possible to create animated backgrounds for your main/chapter menu. If you so choose, they may also be played with the
corresponding sound track.
The following functions are available in the Background menu
to do this:
18
Type: This selection button is used to specify the background type. You can choose between Color, Image, Image
(animated), Scene image and Scene (animated). Depending
on the type you have selected, the function of the button
next to the selection button also changes. Its purpose is to
select more precise settings for the ‘type’ of background. For
example, if you have chosen Color as the type, the
button
will take you to the dialog field to select the background color.
In the same way, when you have chosen another type, you
will be presented with the corresponding dialog field for the
required settings.
When selecting a scene image or an animated scene, the
button becomes active and you can set brightness, contrast
and color saturation for the active scene or scene image.
Overlay: The Overlay selection button offers you the possibility to place a mask over your background. By combining a
background image (type) with a partly transparent image in
the foreground (overlay), it is possible to design very creative
menu screens. You could, for example, run an animated scene
in the background and put a static mask in the foreground. In
addition to some examples at the end of the ‘Arabesk backgrounds’, our add-on products BorderX, Moving BorderX,
SplitX (all), TwinX and others can also be used.
None is the default option here. This means that no mask is
placed in the foreground. The
button is not active.
If you'd like to place an overlay, you have the following
options:
Static: Use this option to place a still overlay over your background image. The
button is now active and you can use it
to select the desired mask.
Animated: This allows you to superimpose an animated overlay. Also in this case, the
button becomes active, to make
it possible to select an animated mask (from ‘Arabesk background’, AnimX, ‘Moving TitleBaX’...).
Tip: Arabesk always scales backgrounds and overlays to the
full size of the menu. You should try to use images, animations
or scenes that fit the menu resolution as closely as possible, in
order to avoid distortions or blurring. Other graphical elements
or animations can be inserted by means of the Buttons menu, if
you set the button action there to None.
Audio: If you have chosen the ‘Scene (animated)’ option, you
may also play the audio of the scene you selected, by setting
a checkmark. Audio is not played by default, and this function
can only be used for the ‘Scene (animated)’ type.
In case you would like to have sound, but not an animated
scene, you should simply select as a background (with Type)
the scene with the desired sound and place an overlay (static
or animated) without transparency on top of it. The viewer will
then only see the image or the animation, but still have the
sound to go with it.
Should you wish to use an animated scene as the background,
but another sound than your original sound, some preparation
is required.
In order to accomplish this, you should create a sound mix
in the Bogart SE menu and then create a new scene with the
Bogart SE scene function and then save this scene in the
scene bin of the corresponding project. You will then be able
to select this scene in Arabesk 6 to use as a background.
Texts:
The Texts option helps you creating individual main/chapter
texts, such as a title for the main/chapter menu.
Text: Clicking on the Text button activates the keyboard,
which can be used to enter a title, just as usual, after the
existing text was deleted. If you would like to enter a text that
spans several lines, you can make a line break with the Alt
key, and then the Enter key. This will be displayed as an Enter
arrow on the text line. Alternatively, you can also use the keyboard to enter the ‘\n’ schortcut. Instead of the ‘\n’ shortcut, a
line break will be entered in the text.
Next to the Text button, you will find the
button. If you click
on this button, you will see a dialog window with texts that
were saved by default and that you can select to have automatically added to the existing text (without a space) on your
Text button. The shortcut indicated in the dialog field for the
saved text can also be entered directly in the text field. In this
case, you will see the corresponding saved text in the main/
chapter menu.
Font: Use the
button to select the font you desire, as well
as to specify the font size. The currently selected font and the
size are displayed next to the button.
Tip: The size can only be selected in steps of 5 in the selection.
When templates are used, or after a change of the target format, other values can be used as well, in order to get as close
as possible to the target.
Just as is the case with other font menus, you also have the
possibility here to import fonts or to delete fonts you no longer
need. The ‘Delete fonts’ option is only available for fonts you
have important yourself. Fonts that are available in your device
by default or that have become available thanks to an installed
add-on product, cannot be deleted.
Style: The
button gives you several different possibilities to
design the individual text items.
You have, as is also known from the Bogart SE Titler, the ability to choose patterns and colors for the text as well as the text
border, using the corresponding button. You can also create
Arabesk 6 User manual 19
a shadow for the text. Moreover, it is possible to italicize the
text and to smooth the edges with the ‘Italics’ and ‘Smooth’
functions. You have furthermore also the possibility to display
text with a 3D effect in different colors and patterns.
Tip: Some of the style options are not available with older
versions of Bogart SE.
Besides these functions, at the right-hand side of the toolbar,
you will also find the
button, to insert a new text in the
main/chapter menu (a maximum of 10 texts is possible), the
button to remove the currently selected text field in the
design window, and the
button to change the position of
the currently selected text field.
row, you can change the size of the button, by clicking the left
trackball button and changing the size by rolling the trackball.
A click on the left button will then confirm the new size (click
on the right button to cancel). If you select ‘free - evenly’, and
then move, the size of the button will change and the height
and width will change without changing the aspect ratio of
the button. Images, scenes and others are displayed without
stretching. When you use the ‘free - stretched’ function, the
height and width will not be adjusted to each other, which
means that images and scenes can be stretched.
Buttons:
Action (main menu): For buttons you have created yourself, you can specify actions that should be performed when
clicking this button in the disc menu. You have the function
‘start movie’ to start the selected movie, or the function ‘goto
chapter menu’ which will bring you to the chapter menu of
the movie by clicking on the corresponding button. The None
function makes sure that no action happens when someone
clicks on the button, but that the button may be used as a
design element (please also refer to the menu background).
With this option, buttons in your main/chapter menu can be
modified to your wishes, and new buttons can be added and
selected buttons can be removed.
The
button next to the Action selection button is used
in the main menu to select the movie it has been assigned
to, and for which the previously specified action should be
performed. In the case of buttons that have automatically been
inserted by Arabesk, the action is usually predetermined.
To this end, you have the following three selection buttons at
your disposal.
Type: Just as with the Background option, a selection button
offers you a choice between Image, ‘Image (animated), ‘Scene
image’ and ‘Scene (animated)’. In addition, you also have the
Transparent type. Just as for the Background option, the
button after the selection function changes. Its purpose is to
select more precise settings for the ‘type’ of the button. If the
type is Transparent, the button has no function.
Tip: Instead of creating the entire design of the menus with
Arabesk, there is also the possibility to do it by other means.
To to this, you could use Bogart SE and possibly an add-on
product (such as ‘Akaba 2 HD’) to create a scene with all the
graphical elements of the menu (including buttons and texts).
You could then use this scene as a background scene in Arabesk. You can then set the buttons in Arabesk to the Transparent type and place them with fitting sizes and positions on
the graphical buttons already present in the background image.
Size: The selection button ‘Size’ gives you the possibility to
choose between the functions ‘small’, ‘medium’, ‘big’, ‘free evenly’ and ‘free - stretched’. The first three functions select
preset sizes. You will use the functions ‘free - evenly’ and ‘free
- stretched’ when you select the desired function and then
change the size of the button selected in the design window,
using the trackball. To do this, you should go the bottom right
corner of the currently selected button. The mouse pointer
now changes to a double arrow. When you see this double ar-
Tip: If you have created chapters for a movie, a button ‘goto
chapter menu’ will automatically be inserted in the main menu.
This will also be shown in the info box, until you open the menu
item ‘Main menu’ for the first time to verify after the chapters
have been created.
If you remove the chapters again, the corresponding ‘goto
chapter menu’ button will also be removed.
Action (chapter menu): Just as for the main menu, you can
specify actions for the buttons you have created yourself,
which should be performed by clicking on the corresponding
button. The following functions are at your disposal to do this:
‘start movie’: to start the movie with the corresponding button,
once created
'goto main menu’: this function takes you to the main menu of
the disc when the corresponding button is clicked upon
'prev. page’: to switch to the previous screen of the chapter
menu
'next page’: to switch to the next screen of the chapter menu
'none’: To ensure that no special action will be performed with
the button
In addition to the selection buttons for the different functions,
the
button is also here for the main/chapter menu, to insert
20
a new button in the main/chapter menu, the
button to delete the currently selected buttons in the main/chapter menus,
and the
button to change the position of the currently
selected button by rolling the trackball.
Tip: To insert a new button of a certain type, you must first
insert a button with the given type and then select an image.
Once the button has been inserted, you will be able to select
its type and its image and such, as you like.
When you are in chapter editing, the design window will contain left and right (arrow shaped) buttons, used to go to the
previous or the next screen of the chapter menu. When the
disc is burned, these buttons will be adjusted for the actual
chapter menu. This means that the burned disk will not have
the ‘prev. page’ button on the first page of the chapter menu
and will also not have the ‘next page’ button on the last page
of the chapter menu. As long as you take this into account, you
can easily create all pages along with the first chapter menu
page (when the option ‘Copy changes on all pages’) has been
activated.
Button texts:
Here, you have the option to modify and design the texts for
the buttons in the main/chapter menu.
To do this, there is the Text button, which opens the keyboard,
with which you can enter your text as usual. Also here, you
will find after the Text button, a
button, which will open a
dialog window with default texts, to allow you to insert a new
button text in the main/chapter menu. You can also, just as for
the Text option, directly insert the shortcuts displayed before
the default texts in the dialog window in the text field of the
Text button, in order to display the corresponding relevant text
in the main/chapter menu.
The
button after the Font function opens a ‘Choose font’
dialog window in which you can specify the font type as well
as the size of the font. The same extra information is applicable here as for the Text menu (see there).
The
button next to the Style function gives you, as is the
case for the Text option, numerous ways to design the button
texts.
In addition, you can use the Position selection button to specify where the text you entered should be displayed next to or
on the corresponding button in the main/chapter menu of the
disc, or freely specify the text position with the
button.
Button borders:
This option for the main/chapter menu is used to use the following three options to modify the design of the button border
of the currently selected button.
Type: The selection button for the Type function includes the
options to select a color or a pattern for the button border. To
select the color or the pattern, the
button next to the Type
selection button opens a dialog field with which you can make
the corresponding settings.
In addition, you have the two following functions:
Strength: Use this slider to modify the strength of the button
border of the currently selected button. When the strength is
set to 0, no border is drawn.
Fill transparencies: By default, there is no checkmark here,
allowing the background in the interspace of the inserted button to show through (only possible for buttons with images). If
this is not desired and the face of the button should be filled,
you should put a checkmark next to ‘Fill transparencies’. In
this case, the interspaces are filled with the color or the pattern
of the button border.
Button shadow:
The ‘Button Shadow’ option for the main/chapter menu makes
it possible for you to design a shadow for the buttons in the
main/chapter menus.
There is a button for the Color function that opens a dialog field to select the color desired for the button shadow.
Semi-transparent black is the default setting.
Use the selection button for the Direction function to specify
in what direction the button shadow should be thrown (bottom
right is the default setting).
The strength of the shadow is set with the slider next to the
Strength function.
The Blur gives you the ability to ‘smudge’ the border of the
button shadow.
Tip: If the strength is set to 0 or the direction to the point, the
shadow is thrown without an offset behind the element and is
only slightly visible with a stronger blur.
Arabesk 6 User manual 21
Button activation:
With the ‘Button Activation’ main/chapter option, you specify
the look of the selection and activation of a button when navigating the main/chapter menu.
Selection color: The ‘Selection color’ button opens a dialog
field to select the color of the button border in the main/chapter of the disc, when a button is selected.
Activation color: Just as for the selection color, the ‘Activation
color’ function button opens a dialog field to select the color
that will later indicate in the main/chapter menu of the disc that
this button has been clicked on.
Tip: Both colors are always applied to the complete current
menu. They cannot be changed independently for individual
buttons. This is a specification from the DVD standard.
in the active disc project that are to be burned on a disc. You
can not only select the data rate, but also the way the calculations are made. You can select between the options ‘fast’,
‘normal’ or ‘intensive’. When the RenderBooster is used, the
calculation will always be intensive.
Selecting the type of calculation also affects image analysis
and can, together with the chosen data rate and depending
on the contents of the image, influence the quality of the disc
when it is burned later on.
The quality settings can be made independently for each individual disc project.
At the top of this dialog window, you see the name of the currently selected disc project.
Below this, there is a data rate selection button with which you
can choose between the data rates ‘low’, ‘medium’, ‘high’,
‘max’ (only with Gold Edition) and ‘individual’. If you select the
individual option, you will be able to select a separate data rate
for every movie added to the disc project with which the movie
should be burned to the storage medium. In this case, the
Adapt button to the right of it will become active.
When you click on the Adapt button, the following message
will appear:
Strength: The slider of the Strength function determines the
strength of the lines for the selection and activation colors. To
precisely cover a selected button border, the same strength
should be set as in the ‘Button Border’ menu.
Highlighting: Use the selection button for the Highlighting
function to determine how the selection or activation of a button should be indicated. You have a choice between ‘Outline
button’, ‘Underline text’, ‘Mark button area’ and ‘Mark text’.
A new dialog window, ‘Individual qualities’ appears. This is
where you can make the settings you need for the individual
movies.
Tip: There is no direct indication of button activation in the
design area of Arabesk. Please use the menu preview to check
for Video DVDs.
2.5 Finish – Last but not least
2.5.1 Quality
Use the Quality button in the main menu of Arabesk 6 to get to
the Quality dialog window. Here, you have the opportunity to
make settings with respect to calculating the movie or movies
To do this, you should select the movie to which the settings
should apply, in the list in the top area of the dialog window.
The available options correspond to those in the Quality dialog
window. You can not only select the data rate, but also the
way the calculations are made. You can select between the
options ‘fast’, ‘normal’ or ‘intensive’. When the RenderBooster
is used, the calculation will always be Intensive.
Selecting the type of calculation also affects image analysis
and can, together with the chosen data rate and depending
on the contents of the image, influence the quality of the disc
when it is burned later on.
22
When you have made the settings you want, you should confirm them with the Close button. It can be found at the bottom
right of the dialog window.
Audio can be selected with all data rates for Video DVD. In
this case, you will be able to select between ‘uncompressed’
and MP2, even with the individual data rate. Uncompressed
delivers a better sound quality than MP2, but it needs about
eight times more space on the disc. Therefore, as long as there
is enough space free, you should prefer ‘uncompressed’.
If you are using the RenderBooster to create a Video DVD, the
uncompressed option for the sound is not available.
For Blu-ray, the sound quality will be ‘Dolby Digital®’ for all
data rates.
In the bottom part of the dialog window, the capacity meter
for the currently selected storage medium will be displayed as
a bar and as a percentage and will change according to the
settings. You will, of course, also be able to use the ‘Select
reference media’ button to change your reference medium at
any time.
The Movie option has a selection button with which you can
select the movie you would like to play, in case there are several movies included in the current disc project. If there is only
a single movie in the disc menu, the selection button will not
be active. With this version, only this one movie is calculated
and played, no menu.
With Menu, all necessary menus are created and you can then
check them in the preview. Movies cannot be played in this
version, but this also saves the oftentimes lengthy calculation
times for the movies.
With the Disc option, the complete disc, including all menus
and all movies, is prepared. After this, the entire disc can be
checked. The calculation time for longer movies will also be
correspondingly high.
Should you wish to burn a Blu-ray, you only have the ability
to view the movies in the current disc project. When several
movies are added to the disc project, you will also have the
ability to use a selection button to select the movie you want.
If there is only a single movie in the disc project, the selection
button will be inactive.
Tip: Changes in the data rate also affect the disc capacity
needed. The higher the data rate, the more space a disc project needs on a disc. This may also help to reduce the data rate,
in case your disc project does not fit on the desired medium.
Tip: The switch from Arabesk to the Media Manager, to show
the preview, may take a moment. It is possible that your screen
will not display anything during that time.
2.5.2 Preview
2.5.3 Burn disc
Use this button to, as the name says, burn your disc project to
a disc.
If you have not yet inserted a storage medium, a dialog field
will ask you to insert a blank disc in the drive, after you click on
the ‘Burn disc’ button. The drive tray of your device will open
at the same time.
The Preview menu gives you the possibility to view the current disc project before burning your disc. Everything will be
displayed the way it will be burned on the disc later on. This
allows you to not only evaluate the menus, but also the image
quality of the movies and to test several settings before burning the disc.
If the target format is a Video DVD, you will be able to preview
not only the movies, but also the main menu and the chapter
menu. For Blu-ray, only movies can be previewed.
To do this, the Preview dialog window will always have a
button next to the option. When you click on one of these
buttons, the main and chapter menus and the movies will
automatically be calculated, insofar as this is necessary for the
selected preview version.
The time necessary for longer calculations will be indicated
by means of a progress bar. After the calculation, the device
switches automatically to the Media Manager and plays the
desired part. From there, one or two clicks on the right trackball button will return you to Arabesk.
If you have inserted a disc now, you should confirm the message with OK (should the message not disappear after the first
confirmation with the button, you should repeat it after a few
seconds.
In case movies or main/chapter menus must still be calculated,
these are now performed automatically. The current state of
the calculations will be indicated by means of a dialog window
with a progress bar.
The device will then start burning the disc. Also here, to inform
you about the current status, there is a dialog window with a
progress bar as well as a time indicator.
If your disc project is too big (required disc capacity >= 100%)
for the selected target storage medium, you will get the following message:
Arabesk 6 User manual 23
3. The info box – everything at a
glance
Please select a lower data rate in Quality menu or use a blank
disc with a larger capacity.
Tip: If you burn a disc with a device with two built-in drives,
drive 1 will be preferred, unless you have set a checkmark next
to ‘Prefer external DVD/Blu-ray drive’ in ‘Bogart SE – Settings
– System’.
2.5.4 Export disc
Under the ‘Export disc’ menu, the finished disc project can be
exported as an ISO file to an external USB storage medium. An
ISO file is an image of the contents of a disc. This is not meant
to be played, but to be backed up or archived. Such an ISO file
can be re-imported in Arabesk later on and then burned again.
You should first insert a USB storage device in one of the USB
ports of your device and then go to the ‘Export disc’ menu.
If you have not connected a USB storage medium for exporting the ISO file, the following error message will appear:
The info box is new in Arabesk 6. It can be found in the main
menu of Arabesk 6.
This will display messages concerning the different step, that
are completed with the following symbols:
: OK, step is completed and is OK
: Warning, the step contains erroneous or questionable
contents and should at least be checked
: Error, the step is not present or a change has been made
with negative results at this point.
These symbols appear also after the corresponding menu
items in the ranges Prepare and Shaping as well as after the
Quality menu item of the Finish menu in the main menu of
Arabesk 6.
If you would like to burn a disc, even though a menu item and/
or the info box contains a red triangle, you will get a corresponding message before the burning process starts. This can
be confirmed with Yes if the Casablanca should proceed with
the burning process anyway, or canceled with No if you would
like to make a change before the burning process starts. It will
usually not be possible to burn a disc (without errors) when
such an error is displayed.
There is a list of the most important messages in the overview, which can be seen in the table below.
If a USB storage medium is connected, the ‘Export disc’ dialog
window will open. The Destination selection button is used
to select the USB storage medium you want to use, in case
several USB media are connected to the device.
Click then on OK to confirm your choice.
A text field is opened in order to give a unique name to the ISO
file that will be exported to the destination storage medium.
Once you have given the name you want, you should close the
text field with OK and the export of the disc project will begin.
You will now see a dialog field with a progress bar which indicates the status of the export.
If you are using the RenderBooster, it will be indicated with an
RB in front of the progress bar.
Tip: Besides external USB devices, hard discs with eSATA or
Firewire interfaces can also be used (no camcorders, however).
The messages will usually disappear or be marked with the
symbol as soon as the cause has been removed. However, a
verification (call) of the corresponding menu (such as Shaping
– Main menu) may also be needed. The message regarding
a Bogart SE project that has been changed or deleted later
on, can be resolved by clicking on the red symbol next to
the Movie button and confirming the prompt that follows it.
The message ‘More movies than in template defined’ is also
resolved by clicking on the symbol next to ‘Menu templates’.
24
Symbol
for SD
for HD
Message
Meaning
No movie added yet
There is no movie in the movie list of the current disc project.
x movies added
This message appears as soon as at least one movie has been added to
the current disc project, obviously with an indication of the number (inserted here in the form of place holder ‘x’) movies that have been added.
Movie ‘xyz’ without chapters
(no chapter menu)
No chapters were created for the ‘xyz’ movie. It is therefore also not possible (or necessary) to create a chapter menu. The warning can be ignored
if no chapters and no chapter menu are desired.
Project for movie ‘xyz’ was
altered in Bogart
After adding the ‘xyz’ movie to the disc project, one of the corresponding
Bogart SE projects was changed.
Movie ‘xyz’ with x chapters
When chapters were defined for the ‘xyz’ movie, this information will
appear with the number of chapters ‘x’.
More than 99 chapters for
movie ‘xyz’
The aforementioned movie of the disc project contains more than 99
chapters.
No button for chapter menu in
main menu for movie ‘xyz’
The main menu of the aforementioned movie does not have a button to
go to the chapter menu of the movie. This can happen when the button
has been inadvertently deleted.
Main/chapter menu from menu
template, not seen
After selecting or changing a menu template, the corresponding main/
chapter menu was not tested.
More movies than in template
defined
A menu template was selected that is intended for fewer movies as the
disc project contains. The excess movies are randomly placed in the
menu and must be moved manually to the correct position.
Film 'xyz': Data rate too high
for Video-DVD
At least one movie of the disc menu is exceeds the acceptable data rate
for DVDs. This can be checked in the Quality menu item.
Not enough space on hard
drive
The expected data volume (possibly including the RenderBooster) to create the disc is too high for the remaining capacity on the hard disc.
Maybe not enough space on
disc (x%)
The (estimated) data volume for the disc project is only slightly below
100%. This means that it is possible that not all data can be burned to the
disc.
Not enough space on disc
(x%)
The data volume for the disc project is currently greater than 100%. This
means that not all data can be burned to a disc.
Burn speed is not set to ‘auto’
The burn speed was not set to ‘auto’ in the Settings, but to a fixed burn
speed (e.g. 2x or 4x) instead.
RenderBooster not found
If ‘Use RenderBooster’ was selected in the Settings, but no RenderBooster is inserted into the device or is not recognized, you will get this
message.
Arabesk 6 User manual 25
4. Arabesk and Power Key option –
does it work?
In order to work comfortably in Arabesk 6, you may also use
our paid add-on product ‘Power Key option’.
The Power Key option makes it possible to operate your
device via a high-grade USB keyboard with special Casablanca keys from our company. The Power Key option can be
activated, as is also the case with Arabesk 6, under Bogart SE
– Settings – System – Install product, with the corresponding
license code you can buy from your authorized dealer or our
web shop.
The functions of the Power Key option can be called up in
Arabesk 6 with the F1 and F2 keys of your keyboard.
5. Quick guide: How do I create a disc
manually?
This chapter describes how to proceed when creating a disc
manually. The precise steps for the individual menu items can
be found in the reference part, in the corresponding chapters.
After you have completed your Bogart SE project, you should
first start Arabesk 6 in the Bogart SE main menu.
Under Arabesk 6, in the menu ‘Disc-Projects’, you should select a new, empty project and give it the name you want (e.g.
‘Vacation 2012’).
You should then select the target format that you would like to
burn (Video-DVD for SD quality or Blu-ray for HD quality). You
can now close the Disc-Projects dialog window.
Go to the Movies menu to add the movie(s) that should be
burned to the disc, to the disc project. Trim these movies or
add additional viewing angles (only possible with Bogart SE
Gold Edition), if you so desire. You should also select the reference medium on which your disc project will likely be burned
(this can still be changed in other menu items or in later steps
of the process). Once you have selected the movies, you can
close the dialog window.
Should you want to create chapters for one or more movies
on the disc, go to the Chapters menu. Here, you will be able to
make the settings you want for each movie separately.
This is where chapters are created for your movie and where,
depending on your edition of Bogart SE, you will also be able
to change the names of the chapters.
Once all settings with respect to creating chapters have been
made, you may click on the OK button to leave the ‘Edit chapters’ dialog field.
The next step is to design your main and/or chapter menu.
You may use the menu templates to do this and select a fitting
menu template for the disc in the Arabesk 6 menu of the same
name. You can also go directly to the ‘Main menu’ or ‘Chapter
menu’ menu items to design an individual menu.
Once you have done this, you should use the Quality menu
to set the data rate with which your movie should be burned
on the disc. You may also do this, if you like, for all movies
separately, by using the individual option. Otherwise, the data
rate selection will be applied to all movies of the disc project.
At this point, you may also change your choice of storage
medium again.
Before you burn the disc project on a disc, you may use the
preview in order to make any corrections.
If the disc project corresponds to what you intended, you are
ready to burn the disc.
26
Arabesk 6 User manual 27
MacroMotion GmbH
www.macrosystem.de
Arabesk 6 E-04/2013


