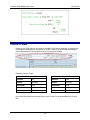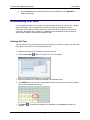
1
Hyperion Planning System Project Titan Campus-Wide Budgeting System User Guide Table of Contents WELCOME TO THE BUDGETING SYSTEM ........................................................1 INTRODUCTION ................................................................................................... 1 AUDIENCE ......................................................................................................... 1 DOCUMENTATION CONVENTIONS ............................................................................... 1 TERMS USED IN THIS MANUAL .................................................................................. 2 LOGGING INTO THE SYSTEM..................................................................................... 3 LOGGING OFF THE SYSTEM ...................................................................................... 5 FUNDAMENTAL ELEMENTS .........................................................................7 DIMENSIONS ...................................................................................................... 7 Scenario and Version Dimensions .................................................................. 7 Account Dimensions .................................................................................... 8 Project Grant Dimensions ............................................................................. 8 Entity Dimensions ....................................................................................... 8 Year Dimensions ......................................................................................... 8 Period Dimensions ....................................................................................... 8 Fund Dimensions ......................................................................................... 9 Program Code Dimensions ............................................................................ 9 MEMBERS .......................................................................................................... 9 GENEALOGICAL RELATIONSHIPS ................................................................................ 9 POINTS OF VIEW................................................................................................ 10 ELEMENTS OF THE CONTENT AREA AND DATA FORMS ....................................11 COLLAPSING AND EXPANDING DATA ENTRY AREAS AND FORMS ......................................... 12 HIDING AND SHOWING ROWS AND COLUMNS .............................................................. 12 DATA FORMS .................................................................................................... 13 APPLICATION TABS ............................................................................................. 14 MODES ........................................................................................................... 14 BUTTONS AND MENUS ......................................................................................... 14 TOOLBAR BUTTONS ............................................................................................ 16 NAVIGATION..................................................................................................... 18 Workspace Overview ................................................................................. 18 USE OF COLOUR ................................................................................................ 19 PREFERENCES ......................................................................................20 SETTING USER PREFERENCES ................................................................................. 20 General .................................................................................................... 21 Financial Reporting Options ........................................................................ 22 Setting Individual Display Options ............................................................... 23 Web Analysis Options ................................................................................ 23 Planning ................................................................................................... 25 DISABLING THE BROWSER’S SCROLLING MENUS........................................................... 31 DATA FORMS .......................................................................................33 i Campus-Wide Budgeting System User Guide WORKING WITH DATA FORMS ................................................................................ 33 Opening Data Forms in Advanced Mode ....................................................... 33 Opening Data Forms in Basic Mode .............................................................. 33 ENTERING DATA ................................................................................................ 34 How Spreading Data Works ........................................................................ 34 Grid Spread .............................................................................................. 35 DOCUMENTING PLAN DATA.................................................................................... 37 LOCK CELLS ..................................................................................................... 42 Examples of Spreading Data with Cell Locking .............................................. 42 PLANNING BY USING A SYSTEM FUNCTION .................................................................. 43 Adjust Feature .......................................................................................... 43 Cut, Copy Paste Features ........................................................................... 44 Saving and Refreshing Data........................................................................ 44 BUSINESS RULES ............................................................................................... 45 Where to Find Business Rules? .................................................................... 45 Running a Business Rule ............................................................................ 47 MANAGING PLANNING UNITS ..................................................................48 OVERVIEW OF PLANNING MANAGEMENT ..................................................................... 48 Statuses .................................................................................................. 48 Reviewer Actions ....................................................................................... 49 VIEWING PLANNING UNIT DETAILS .......................................................................... 50 Statuses and Actions ................................................................................. 52 SUBMITTING A PLAN ........................................................................................... 53 REVIEWING A PLANNING UNIT ................................................................................ 55 APPROVING A PLANNING UNIT ................................................................................ 56 REJECTING A PLANNING UNIT................................................................................. 56 COPYING DATA BETWEEN VERSIONS ......................................................................... 57 FUNDS TRANSFERS ...............................................................................60 TRANSFERRING FUNDS......................................................................................... 60 GPO Funding Allocation .............................................................................. 60 This represents the unit‘s central allocation of the University‘s GPO revenue. GPO Funding allocations are loaded to the Central Ledger in PeopleSoft FMS by central finance and are represented in the Allocation column of nQuery Ledger Summary reports. ..................... 60 Transferring GPO Funding to Another Unit .................................................... 60 Accepting / Rejecting GPO Funding Transfer ................................................. 63 Approving a Transfer ................................................................................. 64 Rejecting a Transfer .................................................................................. 65 MANAGING WORKFORCE ........................................................................67 OVERVIEW ....................................................................................................... 67 VIEWING THE STATUS OF EXISTING POSITIONS............................................................ 67 EDITING EXISTING POSITION INFORMATION................................................................ 68 PLANNING OVERTIME FOR THE YEAR ......................................................................... 69 ENTERING NEW POSITION INFORMATION ................................................................... 70 MAKING HIGH-LEVEL PLANNING ADJUSTMENT TO SALARIES OR BENEFITS............................. 71 TASK LISTS .........................................................................................73 WHAT IS A TASK LIST? ........................................................................................ 73 ii Campus-Wide Budgeting System User Guide WORKING WITH TASK LISTS .................................................................................. 73 VIEWING TASKS ................................................................................................ 73 COMPLETING TASKS ............................................................................................ 74 REPORTS ............................................................................................76 WEB ANALYSIS ................................................................................................. 76 Viewing Web Analysis Reports in HTML ........................................................ 76 Interacting with Web Analysis Reports ......................................................... 77 FINANCIAL REPORTING ........................................................................................ 84 EXPORTING REPORTS TO EXCEL .............................................................................. 87 EXPORTING IN QUERY READY MODE ......................................................................... 88 PRINTING REPORTS ............................................................................................ 88 INDEX ...............................................................................................89 iii Campus-Wide Budgeting System User Guide WELCOME TO THE BUDGETING SYSTEM Introduction In fall of 2008, UBC embarked on a review of the Consolidated Budget Process and conducted indepth interviews with the executive, administrative staff, faculty finance officers, faculty staff representatives and departmental staff about their concerns with the current budget process and software/system. It was identified that the existing processes and systems including budgeting and management reporting did not meet the needs of the campus community. The objective of this project is to implement new university wide budgeting processes and systems that meet Budget Office as well faculty and departmental requirements. The implementation phase began in mid-November 2009 and is expected to run until October 2010, in time for the 2011/12 budget cycle starting in October 2010. Audience Of all the users and all the systems, this system is available to only a minority of UBC staff. Each select user is granted certain privileges based on their roles in the organisation. The following table lists the permitted user types of this system and each type‘s permission description. TABLE 1: This table describes who can use this system USER TYPES DESCRIPTION Administrator Approver Planner Any user or employee responsible for entering financial planning information into the system. Reviewer A user or employee responsible for reviewing the completeness and accuracy of the details of the promoted financial plan. Documentation Conventions This user manual makes use of many different conventions to convey specific meanings. 1 Campus-Wide Budgeting System User Guide TABLE 2: The meaning of the documentation conventions used in this manual CONVENTION DESCRIPTION Blue underlined text Hyperlink to another topic in this document or to an external document Italicised text The name of a Web page in the Position Budget system or a section on a Web page/tab Italicised and underlined text The name of a system object, such as a dialog box or a section in the manual Large bold text in instructions Refers to a command button, Web link or menu item Text in double quotes Possible values in a drop-down list. Terms Used in this Manual TABLE 3: Clarification of the terms seen in this manual TERM DESCRIPTION Dimension A data category used to organize business data for retrieval and preservation of values. Dimensions usually contain hierarchies of related members grouped within them. For example, a Year dimension often includes members for each time period, such as quarters and months. Data Form A data form is a Hyperion object into which a user enters and manipulates financial data. Drop-down list Also known as a picklist or a pull-down menu. It is a list of options that the system displays when the user clicks the arrow at the end of the box. Example: Command button It is a user interface object that provides a simple way to trigger an event, like saving data on a Web page, or to interact with dialog boxes; performs an action. Example: Web page vs. screen A Web page is the contemporary presentation of information in an online format. ―Screen‖ is generally considered an antiquated term used to describe what is seen on the computer monitor as displayed by the system. This manual refers to the term ―page‖. View pane An essential part of a Web page; it can have different appearances. It often contains a list of form folders. In this system, the view pane is on the left side of the workspace. Position vs. job These terms are interchangeable; they mean exactly the same thing. This manual and the system both refer to the term ―Position‖. 2 Campus-Wide Budgeting System User Guide TERM DESCRIPTION Select This is the instruction to make a selection from a list of predetermined values, often in a drop-down list or search results list. Enter This is the instruction to type text manually into a field. Tab A tab is a navigational widget for switching between sets of documents or data entry interfaces. Having tabs allows an application to have multiple documents/interfaces in a single window. They are commonly used in web browsers, text editors and preference windows. Click This is the instruction to single-click the mouse button to make a selection or place the insertion point somewhere on a page. This term is used in place of ―press‖ or ―hit‖. Press The instruction to press a keyboard key or a combination of keys to initiate an action. Logging into the System Every UBC staff member authorised to work in the Budgeting System is given log in credentials and must use only his or her credentials to access the system. Any user wishing to work in the Campus-Wide Budgeting System (CWBS) must first access the Management Systems Portal. 1. Open the Web browser, i.e. Internet Explorer, Mozilla Firefox, etc. 2. Access the Management Systems Portal. 3 Campus-Wide Budgeting System User Guide 3. Find the Hyperion link on the page and click it. This opens the budgeting system‘s workspace. 4 Campus-Wide Budgeting System User Guide 4. Once logged on, navigate to the application data form and/or the report needed. Logging off the System To leave the system you may click the Log Out button does not close the Web browser. . This ends your CWBS session but Alternatively, closing the Web browser ends your working session and closes the browser completely. 5 Campus-Wide Budgeting System User Guide 6 Campus-Wide Budgeting System User Guide FUNDAMENTAL ELEMENTS Dimensions Dimensions are structural elements of an application that describe and hold data. Dimensions provide perspective on the data being analysed. The main dimensions used for Planning at UBC are Scenario, Version, Account, Entity, Year, Period, Project Grant, Fund and Program Code. Dimensions and combinations of dimensions define a Point of View. Dimensions represent categories of data. For example, when you enter budget data in a plan you must identify what item you are budgeting. Budget items such as travel expenses and salary expenses are in Account dimensions. You must also identify the time period for each item. Time items such as current quarter and next quarter are in the Period dimension. Scenario and Version Dimensions You can use the scenario and version dimensions to create individual plans that can be reviewed and approved. For each entity, the scenario and version combination contains its own set of data for accounts and for other dimensions. After entering entity data for scenarios and version you can submit or promote the data to other users for review and approval. The intersection of entity, scenario and version is referred to as a Planning Unit. Working with scenarios enables you to group data and to place each data group in a separate plan with its own review cycle. Scenario describes the type of plan data (such as budget, actual or forecast) and the time span that the plan covers. For example, your organization might require a one-year revenue plan and a three-year revenue plan. The plans might be prepared by different users and follow different review paths. For this purpose, the unit‘s administrator can create two scenarios – Current-Year Revenue and 3-Year Forecast. Scenarios are assigned start and end years and periods. You can enter data into data forms only for scenarios that are within the start and end range specified by your administrator. The scenarios used in the Campus-Wide Budgeting System are: ―Plan‖, ―Forecast‖, ―Long Range Forecast‖ and ―Actuals (ACT)‖ Access rights to scenarios are assigned by your administrator. If you do not have access to a scenario, you cannot enter data on a data form for that scenario. Versions allow for flexibility and iterative planning cycles. For examples, your application can have 4 versions – ―approve‖, ―working‖, and ―draft‖. At any given time there are several combinations of Scenario and Version accessible to users. For example, at the end of Q2, FY11 (September 2010) the following combinations are available: 7 Campus-Wide Budgeting System Actuals User Guide FY08 FY09 FY10 FY11 Approved Approved Approved Approved Plan Approved Forecast Working Long Range Forecast Working FY12 FY13 – FY15 Working Working Working Account Dimensions This dimension specifies the account from the Financial Management System (FMS) for which data is to be entered by the budget planners. Examples of accounts are ―Sales and Services‖ and ―Travel‖. Project Grant Dimensions This dimension specifies the Project Grant (PG) from FMS. PGs are generally in the format ‗12Z12345‘. Entity Dimensions This dimension specifies the organisational structure. The main structure is based on the FMS AllDeptids tree. Alternate structures are also available (e.g. by campus). Because account codes and department codes in FMS are in the same format and sometimes overlap, the departments in this system have been prefixed with a ―D‖, e.g. D321000. Year Dimensions This dimension specifies the fiscal year for which data is collected from budget planners. Examples of Year are ―FY10‖, ―FY11‖. Period Dimensions This dimension specifies the month for which the data is collected from budget planners. Examples of Period are ―April‖, ―May‖. 8 Campus-Wide Budgeting System User Guide Fund Dimensions This dimension specifies the Fund for which the data is collected from budget planners. Examples of Funds are ―G0000‖, ―R3554‖. Program Code Dimensions This dimension specifies the Program Code for which the data is to be collected from budget planners. Members The elements that compose a dimension are called members. Members are discrete components that, in combination with other members, form a dimension. For example, UBCO and UBCV are members of the Entity dimension. Data is entered at the base-level of the member, not the upper-level member of the dimension. In other words, you can enter data in the lowest level child member. All parent-level members are read-only. See the Genealogical Relationships section for more details. A dimension may have multiple members. Some of those members can have their own ―child‖ members. The values of the parent-level members are aggregated from the values of their children. Genealogical Relationships The entire system functions on the premise of parent/child relationship and point of view. The members of a dimension are arranged into hierarchies. Members that have members under them are known as ―parent‖ members. The members immediately below a member are the children of the member that is directly above them. Members that have the same parent are known as ―siblings‖. 9 Campus-Wide Budgeting System User Guide Points of View A point of view (POV) defines the context of the data. A POV defines what data is retrieved from the database and displayed on the data form. A POV is made up of intersecting data elements, such as Department, PG and Program Code, to give context to the data. FIGURE 1: The combination of the selected data elements (dimensions) gives context to the data. Examples of points of view: Example 1 Example 2 Scenario Act Scenario Plan Version Approved Version Working Fiscal Year FY09 Fiscal Year FY11 Period Apr, May, Jun Period QTR2 Department D321000 Department Faculty of Arts Users select the dimensions that make up the point of view for the selected data form to work with. 10 Campus-Wide Budgeting System User Guide ELEMENTS OF THE CONTENT AREA AND DATA FORMS The content area is the large window that takes up most of the right side of the screen. It is to the right of the view pane and it normally contains the data form. 1. The area on the left of the content area is the view pane. 5. To make more room for your work, you have a few options a) To hide or show the View pane at the page's left side, click View and then View Pane. b) Click on the View Pane or Content Area Adjuster. c) Click, hold and drag the view pane to resize it. d) Click on the upper-right corner to maximize or minimize the content area. How you navigate depends on whether you have just clicked in a cell or are editing the contents of a cell. For example, when you click in a cell, you can press the Right Arrow key to move to the next cell in the row. When you are editing data in a cell, press the Tab key to move to the next cell or click inside the cell with your mouse. 11 Campus-Wide Budgeting System User Guide 6. When clicking in a cell and not entering or editing cell data, to move: a) Forward, backward, up, or down, press the Right Arrow, Left Arrow, Up Arrow, or Down Arrow key. b) To the next cell in the column, press Enter. c) To the previous cell in the column, press Shift + Enter. 7. When entering or editing data in cells, to move: a) Forward or backward within the cell data, press the Left Arrow key or the Right Arrow key. b) To the next cell in the row, press Tab or click in the next cell. c) To the previous cell in the row, press Shift + Tab. d) To the next cell in the column, press Enter. e) To the previous cell in the column, press Shift + Enter. Collapsing and Expanding Data Entry Areas and Forms You can expand data forms and the data entry area—including the view pane—in several ways. 1. Open a data form. 2. Take an action: a) To expand and collapse: Double-click the thick black line between the row heading and the data cells. The row heading expands to accommodate the row heading or hide the column. This method is a bit tricky. You have to place the mouse button at just the right location when you do this. It may take a few tries to accomplish this. b) To resize: Click the view pane's right border, hold and drag to the right or left to resize it. c) To expand or collapse the view pane: Click View and then View Pane, or click, hold and drag the view pane to resize it. d) To hide or show the view pane: Click in the screen's upper-right corner. This button is directly above the vertical scroll bar at the very right of the window. Hiding and Showing Rows and Columns In data forms, you can choose to hide or show rows or columns that do not contain data, and rows and columns that contain nothing but empty cells or cells that contain only zeros. The ability to do this enables you to hide rows and columns that are partially filled and thus focus on totals. You can redisplay the partially filled rows by refreshing the form. 12 Campus-Wide Budgeting System User Guide To hide or show rows Right-click on a row member to display a small pop-up menu, and then perform one of the following actions: a) To hide or show rows that do not contain data, toggle the Hide/Show rows with no data option. b) To hide or show rows that contain no data and cells that contain zeros, toggle the Hide/Show rows with zeros and no data option. To hide or show columns Right click a column member to display a small pop-up menu, and then perform one of the following actions: a) To hide or show columns that do not contain data, toggle the Hide/Show columns with no data option. b) To hide or show columns that contain nothing but cells that contain no data and cells that contain zeros, toggle the Hide/Show columns with zeros and no data option. Data Forms Data forms are used to enter and manipulate data. The elements on the data form enable you to navigate the form and to select and enter data. You may enter or edit data only when your system user profile has the proper security privileges, as set by the unit‘s systems administrator. FIGURE 2: Sample data form 13 Campus-Wide Budgeting System User Guide Application Tabs You can open several applications simultaneously — or the same application multiple times — and navigate between them by clicking the tab at the bottom of the page. Modes This system operates in two modes; Advanced and Basic. The features and functionality are much more extensive in Advanced Mode than in Basic Mode. Users may switch between both modes at any time just by clicking the View menu and then either Basic Mode or Advanced Mode. Buttons and Menus You have access to only the menus that your user profile permits you to access. For example, users who are assigned the role of Administrator can access all functions on the Administration menu and users who are assigned the Interactive User role can access only some functions on the Administration menu. File Menu The following table describes the commands under the File menu. Open Opens a document, application or URL. Shortcut: press Ctrl+O or click the toolbar button ( 14 ) Campus-Wide Budgeting System User Guide Close Closes the page or data form that is currently open. Save Saves the data entered into the data forms. Shortcut: press Ctrl+S or click the toolbar button ( Print ) Prints the contents of the current page. Shortcut: press Ctrl+P or click the toolbar button ( ) Workflow Manages the Planning process or copy versions. See the section Managing Planning Units for details. Preferences Sets general, authentication, explore, Web analysis, Financial Reporting, Planning, and other settings. See the section Preferences for details. Log off Logs off the CWBS. Shortcut: click the toolbar button ( Exit ) Exits the workspace. Edit Menu The following table describes the commands under the Edit menu. Adjust Increases or decreases data values by a percentage or by a specific value. See the section Adjust Feature for details. Shortcut: press Alt+E and then J, or click the toolbar button ( Grid Spread Spreads data values across multiple dimensions on the grid. The spreading options are ―proportional‖, ―even split‖ and ―fill‖. See the section Grid Spread for details. Shortcut: press Alt+E and then G, or click the toolbar button ( Launch Rules ) ) Launches a business rule from a data form. See the section Business Rules for details. Shortcut: press Alt+E and then L Annotate Planning Unit Adds comments to a planning unit. Cell Text Adds comments to a specific cell or to a range of cells at any level in a data form. See the section Entering Cell Text for details. Shortcut: press Alt+E and then B, or click the toolbar button ( Supporting Detail Adds detail that aggregates to the cell value in a data form. See the section Entering Supporting Details for details. Shortcut: press Alt+E and then N, or click the toolbar button ( Lock/Unlock Cells ) ) Locks cells so that they are ignored when data is spread. See the section Lock Cells for details. 15 Campus-Wide Budgeting System User Guide Shortcut: press Alt+E and then K, or click the toolbar button ( ) Opens the Add/Edit Document window from which to select the document you want to add or edit. Add/Edit Document Shortcut: press Alt+E and then E, or click the toolbar button ( ) Opens the Open Document window from which to select the storage location where the document is saved. Open Document Shortcut: press Alt+E and then A View Menu The following table describes the commands under the View menu. View pane Hides or shows the view pane on the page. Shortcut: press Ctrl+Alt+1, or click the adjuster bar Refreshes the current view to reflect what is stored in the database. Refresh Shortcut: press Alt+V and then R, or click the toolbar button ( ) Instructions Views instructions related to a data form. This option is available only when the data form contains instructions. View and Account Annotations Enters, edits or views comments for a specific account, entity, scenario and version combination. Basic Mode / Advanced Mode Toggles the view for tasks between basic and advanced modes. Task List Views task lists to which you have access, views task status, and creates a task list report. Shortcut: press Alt+V and then B (for Basic Mode), or Alt+V and then V (for Advanced Mode) Shortcut: press Alt+V and then T, or click the toolbar button ( ) Toolbar Buttons The toolbar buttons provide shortcuts to Planning tasks and open dialog boxes that you can use to manage documents, task lists, and favourites. The following table describes the buttons on the toolbar. BUTTON TOOLTIP DESCRIPTION Explore Allows the user to access the root directory. This directory includes the reports. 16 Campus-Wide Budgeting System Save User Guide Saves data input on data forms. When you save data the totals are recalculated and updated values are displayed for members that are calculated dynamically. Option: File menu and then Save, or Ctrl+S Refresh Refreshes the data form with data stored in the database. Use this function to update the data on the data form without applying any entered or edited values. When you refresh data, the system warns you that you entered data but did not save. Print Prints the contents of the currently open page. Option: File menu and then Print, or Ctrl+P Adjust Increases or decreases values by a percentage or by a value. Option: Edit menu and then Adjust, or Alt+E and then J Lock/Unlock Cells Locks or unlocks cells when spreading data. Grid Spread Spreads data across dimensions on the data form. Option: Edit menu and then Lock/Unlock Cells, or Alt+E and then K Option: Edit menu and then Grid Spread, or Alt+E and then G Cut, Copy, Paste Cuts, copies or pastes values from one or more cells to one or more cells on the data form. You cannot paste into read-only cells. The system copies and pastes the stored value of the cell, not the value determined by the precision setting. Option: Edit menu and then Lock/Unlock Cells, or Alt+E and then K Cell Text Adds comments to a specific cell at any level in data forms. Option: Edit menu and then Cell Text, or Alt+E and then B Add/Edit Document Adds or edits documents to provide documentation for data in cells. Option: Edit menu and then Add/Edit Document, or Alt+E and then E Supporting Detail Adds detail that aggregates to the cell value in data forms. Task List Opens task lists – available only if a task list is assigned to you. Log off Logs off the CWBS. Option: Edit menu and then Supporting Detail, or Alt+E and then N 17 Campus-Wide Budgeting System User Guide Navigation Workspace Overview Workspace is the interface where you view and interact with data forms and reports. ELEMENT DESCRIPTION Adjuster Bar Adjusts the size of the view pane and the content area when you click on it. Content Area Displays module items, tasks or files, depending on your selection from the view pane or menu bar/toolbar. Menu bar Provides commands used to organise tasks and modules. Toolbar Provides quick access to features specific to the active module, data form or report. View pane Provides a list of objects that enable you to jump between panes. Applications bar Displays information specific to the content area. You can have many applications, data forms and reports opens at the same time, allowing you to navigate between them without having to re-launch them every time. Navigate menu Provides access to the workspace modules. 18 Campus-Wide Budgeting System User Guide Use of Colour Data forms use colour cues to indicate the allowable actions that can be performed on cells. TABLE 4: The system uses colour to visually denote special aspects of items on a form COLOUR INDICATION Pale yellow Cell is open for data entry. Dark yellow Cells whose values changed but are not yet saved in the system. Light green Information is read-only. Cannot modify contents of cell. Tan Cell is locked. Teal Cell contains a calculation. 19 Campus-Wide Budgeting System User Guide PREFERENCES Setting User Preferences In the Preferences window, for the current application, all users can set individual preferences. Administrators and application owners can also specify certain global settings for the current application. All users have access to a Preferences page. Each preference can be enabled and configured according to the users‘ personal choices. NOTE: Not all the features in the Preferences window are open to personalisation and those that are, should not necessarily be changed from their default. 20 Campus-Wide Budgeting System User Guide General All users have access to general preferences. For example, a user can set an application (e.g. UBCPlan or FundPlan) as his or her default startup item at logon. General preferences set defaults for default start page for the content area, displaying document paths, prompting to save files, and setting accessibility mode. Changes made using Preferences go into effect next time you log on. Setting the Accessibility Mode Users who are visually impaired or hearing impaired may use the Accessibility mode of the system. These settings will help such users to better see and/or hear what is on the screen. These features reside inside the Preferences window. 1. Click the File menu and then Preferences. The default General page opens. 2. On the General page, the Accessibility Mode section is the lower part of that window. 3. Select the option required and then click the OK button. 21 Campus-Wide Budgeting System User Guide Financial Reporting Options The Financial Reporting sets preferences for reports seen on the screen and then onto the hardcopies. 1. Select File, then Preferences, then Financial Reporting. 2. Select ―HTML Preview‖ or ―PDF Preview‖ to indicate your default preference when previewing reports. 3. From the section User Point of View: Select ―On‖ to enable the User Point of View to display prior to running a report or ―Off‖ to disable. ―Off‖ is the default but users should turn this function ―On‖ for efficient use of Financial Reports. Select where on the system you want to display the Point of View. ―In View Pane‖ is the default. You can also select to display above the report or book. Click Setup Members to select members you want available when using the User POV. The Setup User POV dialog is displayed. 4. Select a character for the Thousands Separator. The options are comma (,), period (.), underscore (_), and Space. 5. Select a character to represent decimal points (for example, 1,000.06) for the Decimal Separator. The options are comma (,), period (.), underscore (_), and Space. 6. From the section Export to Office Application, select either ―Office 2000‖ or ―Office 2002 or higher‖ as the version of Microsoft Office that you have installed. NOTE: If “Office 2000” is selected, Excel is the only Microsoft Office application to which you can export; If “Office 2002 or higher” is selected, 22 Campus-Wide Budgeting System User Guide Excel, Word, and PowerPoint are the applications to which you can export. 7. Check the ―Merge Equivalent Prompts‖ checkbox to respond only once or deselect to respond consecutively to prompts and variables that are repeated multiple times. 8. Select ―Show Annotation‖ to add, edit, and display annotation in a report. 9. Select ―Annotation Print Details‖ to specify how annotations should print. 10. Click OK when done. Setting Individual Display Options Your number format selections apply to all currency values displayed in all data forms within the current application and that you can access. These selections can override default settings. Use the Display Options tab to perform the following tasks: Change how numerical values are displayed Set aspects of page selection, for example, instruct the system to remember which page was previously selected and to provide a search facility when the number of pages exceeds a certain number Set the indentation of members on a page Enable the provision of a warning for large data forms Set the date format Web Analysis Options Web Analysis Options are divided into 3 tabs – Active Preferences, Default Formatting and Databases. Active Preferences The Active Preferences tab specifies the current preferences file. Selecting ―Use My Preferences‖ indicates you are using and editing the preferences file located in your Profiles folder. Selecting ―Use Shared Preferences‖ indicates you are using a shared preferences file at the specified repository location. 23 Campus-Wide Budgeting System User Guide Changing the Active Preferences does not impact opened documents in the content area. User and shared preferences are only applied to created documents subsequently. Upon editing shared preferences files, change the default behaviour for users referencing that file. To prevent users from changing your preferences, restrict yourself to using your own preferences file. Default Document Open Mode Selecting ―HTML‖ or ―Web Analysis Studio‖, as your default document open mode, opens Web Analysis documents in the default mode selected. Selecting ―HTML opens the document in the system‘s Workspace. Selecting ―Web Analysis Studio‖ launches a Web Analysis Studio session, automatically logging in and opening the selected report. 24 Campus-Wide Budgeting System User Guide Default Formatting Planning Application Settings Tab 25 Campus-Wide Budgeting System User Guide Under email address, insert your email address and ensure the Workflow and Task List Notification setting is set to ‗Yes’. This email address will now receive notifications. Do not change any other setting! Display Options The only options available for you to change are: Change how numbers display in data forms. Set aspects of page display. Remember the most recent page visited. Number Formatting On the Preferences page, you can change the formatting of numbers in the Display Options tab. 26 Campus-Wide Budgeting System User Guide If you select ―Currency Setting‖, the currency values in the data form are displayed using the formatting initially set for individual currencies. If you select another option, your selection applies to all currencies, in all data forms to which you have access in the current application. You can control the display of: The thousands separator (none, comma, dot, or space) The decimal separator (dot or comma) The display of negative numbers (a minus sign before or after the number, or the number surrounded by parentheses) The displayed color for negative numbers (black or red) To change the formatting of displayed numbers: 1. Click File, then Preferences. 2. Click the Planning icon and select Display Options. 3. Under ―Number Formatting‖, select options, as summarized in this table: OPTION Thousands Separator EXAMPLE None: 1000 Comma: 1,000 Dot: 1.000 Space: 1 000 You can enter values with or without a thousands separator. Decimal Separator Dot: 1000.00 Comma: 1000,00 You can enter values with or without a decimal separator. Negative Sign Prefixed Minus: -1000 Suffixed Minus: 1000Parentheses: (1000) Negative Color Black: Negative numbers are black Red: Negative numbers are red 4. Click Save. Note: Formatting selections take effect when you click outside the cell. If you select a setting other than “Use Application Default” for the thousands separator or the decimal separator, you must change both separators with the “Use Application Default” option. You cannot select the same option for the thousands and decimal separators. 27 Campus-Wide Budgeting System User Guide Remembering the Last Page Selected This option sets members from the page of one data form to that of other data forms. The most recently used members of the last data form you use are compared to that of the next data form you select. 1. Click File, then Preferences. 2. Click the Planning icon and select Display Options. 3. Under ―Page Options‖, select an option: ―Yes‖: Remembers selected page ―No‖: Disables this option ―Use Application Default‖: Use the application‘s default setting 4. Click Save. When you are working with a large number of pages, you can select among the pages more easily by using a Search drop-down list that the system adds to the data form when the number of pages exceeds a specified value. Enabling Warnings for Large Data Forms Because unusually large data forms may require significant time to open, you can choose to display a warning when opening data forms that are larger than a specified number of cells. When you try to open a data form that is beyond the specified size limit, Planning displays a warning about the time needed to open the data form. You can choose whether to open it. 28 Campus-Wide Budgeting System User Guide To specify the number of cells at which the warning displays: 1. Click File, then Preferences. 2. Click the Planning icon and select Display Options. 3. In ―Other Options‖, enter a number in ―Warn If Data Form Larger Than Cells Specified‖. 4. Click Save. Printing Options These settings apply regardless of how the printing feature is invoked. You can set printing options directly from a data form when you are ready to print; or you can use Preferences to set printing options. The options that you set from the Preferences page apply to all data forms to which you have access. The data form designer sets data forms' printing options. You can accept the default settings or set your own options for creating PDF files. To print to a PDF file, you must have Adobe Acrobat Reader installed on your computer. You set printing options directly from the data form when you are ready to print. Or, you can use Preferences to set printing options, which apply to all data forms to which you have access permissions. Note: To reset an option to the value your administrator set, select Use Application Default. 29 Campus-Wide Budgeting System User Guide To apply print options for printing a data form to a PDF file: 1. Click File, then Preferences. 2. Click the Planning icon and select Printing Options. 3. Set PDF options, summarized in this table: OPTION ACTION Format data Applies number format settings from the data form. Apply precision Applies the data form‘s precision settings to the displayed data. If the data form displays high precision numbers (numbers with many digits to the right of the decimal point), consider limiting precision in the PDF file. Include supporting detail Includes supporting detail in extra rows: Normal Order: inserts the Supporting Detail in the same order in which it displays in the Supporting Detail page, after the member that it is associated with. Reverse Order: inserts the Supporting Detail before the member it is associated with, and the Supporting Detail entries are reversed. Supporting Detail for children is displayed above their parents, and the order of siblings is preserved. Show account annotations Shows the data form annotations. If the data form designer enables account annotations, this option displays the annotations. Show cell text Shows associated text notes. Show attribute members Shows attribute members that are assigned to the data form. Show currency codes If the data form supports multiple currencies per entity, shows currency codes. 4. Click Save. The settings are saved and applied to all data forms that you can access. User Variable Options Under this tab, ensure that the Selected Member is cited as ‗Working‘. 30 Campus-Wide Budgeting System User Guide Disabling the Browser’s Scrolling Menus There is a setting in the Internet Explorer Web browser that affects the way the menus behave. Depending on those settings, the sub-menus of the main menus will either display correctly or they will not. When they do not, follow this procedure. While in the Internet Explorer browser, 1. Click Tools > Internet Options. 2. Click on the Security tab. 3. Click the Custom level… button. 31 Campus-Wide Budgeting System User Guide 4. Scroll through the list of Settings and find ―Allow script-initiated windows without size or position constraints‖ and set it to ―Enable‖. 5. Click OK in the Security Settings window. 6. Click OK in the Internet Options window. The menus will now scroll properly. 32 Campus-Wide Budgeting System User Guide DATA FORMS Working with Data Forms As a user of the Campus-Wide Budgeting System, you benefit from the development efforts of the Titan Development team. Through discussions and consultations with various budgeting and planning groups at the university‘s campuses, the development team created all the data forms you‘ll need to conduct all your financial planning and forecasting. All you have to do is enter or change the necessary information in the appropriate data forms. Much of the information entered in these forms is then used to generate reports. NOTE: Some of the data seen on the data forms actually come from external systems, such as FMS, RISE, Position Management, etc. and cannot be changed in the CWBS. Opening Data Forms in Advanced Mode In Advanced Mode, you can select data forms on the view pane. To open data forms in Advanced Mode: 1. If you are currently working in Basic Mode, click View from the main menu and then click Advanced Mode. 2. In the view pane's Forms area, display folders by clicking the plus sign (―+‖) next to Forms. 3. The folders available to you are displayed in the view pane. If a folder contains additional folders, displays to the left of the folder name. 4. Under Forms, click a folder name to display the data form to open in the Data Forms in Folders list. 5. Click the data form you want to work with. The data form is displayed in the content area. Opening Data Forms in Basic Mode In Basic Mode, you work primarily with task lists that the systems administrator sets up. You can open data forms in this mode only if the administrator sets up a task with a data form and assigns it to you. To open data forms in Basic Mode: 1. Open a task list in Basic Mode. 2. In the Task List area, click a task that uses a data form. The selected data form opens in the content area. 33 Campus-Wide Budgeting System User Guide Entering Data There are many ways to enter data in the data forms. Other than using the different features of the system to actually do data-entry, you must have the proper user privileges, and the data form and/or the data cell must be pale yellow. When these two requirements are met, you may enter data using any of the system features available. How Spreading Data Works The system automatically distributes values from summary periods to base periods (the bottomlevel members of the Period dimension). For example, a value entered into the YearTotal member is automatically distributed to the quarters and months, and a value entered into a quarter is automatically distributed to the months. How values are distributed (spread) depends on the account type and the data type. NOTE: Date, text values and locked cells are excluded when spreading data. Revenue and Expense Accounts If no data exists or if data is all zeros, a value entered into a summary period is divided evenly among the children of the summary period. For example, if you enter 300 into YearTotal, each quarter is set to 75 and each month in that quarter is set to 25. If values exist for the base time periods, the proportion among the base time periods is preserved. For example, if the values are January = 100, February = 100, March = 200, and Q1 = 400 and you change the value of Q1 to 200, the new monthly values are January = 50, February = 50 and March = 100. Asset, Liability, and Equity Accounts If no data exists or if data is all zeros, the value entered in a summary period is set for each base period. For example, if you enter 1000 into Q1, then January, February, and March are set to 1000. Percentages For accounts that are assigned the Percentage data type, the summary value is allocated to each base time period, regardless of whether data exists. For example, if you enter 25 in Quarter 1, January, February, and March are each set to 25. 34 Campus-Wide Budgeting System User Guide NOTE: You can temporarily lock cells to preserve their values. When spreading data, the system distributes values to all unlocked base period cells. You can review the results of your distributions before you save your entries to the database. Grid Spread With the Grid Spread feature, you can specify an amount or percentage by which the system increases or decreases values across multiple dimensions on the data form, based on the existing values in the target cells. You immediately see the result in the data form and can save the new data or discard it. When calculating the spread data, the system ignores the read-only, locked cells and the cells that have supporting detail. Grid Spread automatically distributes amounts from summary members to level 0 members based on selected criteria. When you run a grid spread action, the data form grid is loaded with the changed values. You can view and validate results before saving the data. Keep the following points in mind when doing a grid spread: The choices for grid spread are proportional spread, evenly split and fill. Grid spread actions ignore read-only, locked and supporting details cells. When using the grid spread option, users can spread data to only the cells to which they have access. Using the Grid Spread To spread values using grid spread, you must first open the data form and scroll through the list of account members until you locate the one to change: 1. Click in the YearTotal or TotalYear cell whose value you want to spread to target cells. WARNING: The selected cell must contain a value for this feature to work and should be a summary-type cell of the lowest level of an Account member. 2. Click on the Grid Spread icon ( ) or click the Edit menu, then Grid Spread. This opens the Grid Spread window and displays the value of the currently selected cell in the field Cell Value. 35 Campus-Wide Budgeting System User Guide ACTION TO PERFORM OPTIONS WHAT TO ENTER Increase or decrease the value of a selected cell by an amount Select ―By Value‖ from the Adjust Data drop-down. Enter the specific value. Do not enter the ―$‖ or commas. Select ―Increase by‖ or ―Decrease by‖ radio button as appropriate Decimals are permitted. Negative number are not. Increase or decrease the value of a selected cell by a percentage Select ―By Value‖ from the Adjust Data drop-down. Enter the specific percentage. Do not enter the ―%‖. Select ―Increase by‖ or ―Decrease by‖ radio button as appropriate Decimals are permitted. Negative numbers are not. Replace the current value of a selected cell with a new value Enter the exact amount in the Spread Value field. 3. Once you‘ve identified how to adjust the data and determined whether you want to increase or decrease it by a certain amount, selected the type of spread to apply from the Spread Type radio buttons, click the Adjust button to see the impact. The system changes the amount in the Spread Value field. This will be the amount entered in the applicable cells. If it is not the desired result, continue to play with the different grid spread options until you achieve the desired result. 4. Click the Spread button to apply the result to the account member on the data form. 5. Click Close when finished. You then return to the data form with the changed cells in highlighted yellow. 36 Campus-Wide Budgeting System User Guide 6. Click the Save button to commit the changes to the database to click Refresh to discard the changes. Documenting Plan Data You can add documentation to your plan. You can document your plan at any level. For example, specific information can be entered at the cell level (as cell text), and account-specific information can be entered. General information can be entered at the planning unit level (as comments). Documents such as reports or spreadsheets can be attached to cells. Supporting detail can be included to provide further detail for data. Entering Cell Text You may enter cell text only when you have security access to the cell(s). Likewise, you must also have access to the cell to view any associated cell text. 1. Select the intersection for ―TotalYear‖ and an account row. 2. Click the Cell Text ( ) button. This opens the Cell Text window. 3. Enter an explanation as to why you increased or decreased the Plan. 4. Click Submit when you‘re done. A flag appears in the top right corner of the cell to indicate there is text associated with the cell. 5. Click Save ( changes. ) to commit the changes to the database or click Cancel to discard the 37 Campus-Wide Budgeting System User Guide Adding / Editing Documents You can attach a URL or a document, of any type (XLS, PDF, .doc, etc), to a cell. For example, you might associate a cell with a document that explains your assumptions behind the cell‘s overtime data. 1. Click in a Period cell for an account row. 2. Click the Add/Edit Document button ( ). This opens the Add/Edit Document dialog window. This displays the content or value of the intersection of Period and Account. 3. Click the browse button ( location. ). The system opens the Select window at the default storage 4. Select a file from its network storage location. If not is at the root, continue searching through the folders until you find it. 5. Click the OK button in the Select window or double-click the document file name. This closes the Select window, inserts the filename of the selected document into the Add/Edit Document window. 6. Click the Submit button in the Add/Edit Document window. This closes the window and inserts a small flag in the top right hand corner of the cell or the data form. 38 Campus-Wide Budgeting System User Guide NOTE: The window with the submit button may have been minimized when you clicked the “browse” ( ) button. In which case, you would need to recall the window by clicking it from the status bar. 7. To view the attached document, click on the cell with the flag, click the Edit menu and then the Open Document sub-menu option. The system opens the attached document onto the page. Entering Supporting Details Supporting details enables you to calculate aggregate values and to drill down into data. For example, supporting detail can help you calculate aggregate values for expenses such as travel, salary, and projects and, thus, can help you create a corporate expense plan. Additional information about supporting detail: You must have adequate user privileges to view, create, modify or delete supporting detail. You can add supporting detail only to base periods, e.g. ―Feb‖, ―Mar‖, ―Apr‖. You can copy and paste detail information to multiple cells simultaneously. 1. Locate the lowest level account member (row) in the data form and then select the Period. That is the intersection of Period and Account. 2. At that intersection, click the Supporting Detail button ( Supporting Detail window. ). This opens the 3. Add a descriptive title in the awaiting textbox that says ―Untitled‖, e.g. ―Conference‖. 4. Click the Add Child button. This inserts a new blank row (with the text ―Untitled‖ directly below the row created in step 3 above.) 5. Enter the name of the child of the parent, e.g. ―Seminar‖ in the row that says ―Untitled‖. This creates the genealogical hierarchy of the parent (Conference) and the child (Seminar). 39 Campus-Wide Budgeting System User Guide 6. Click the Add Sibling button (to the immediate right of the Add Child button. This inserts a new blank row, with the default text of ―Untitled‖, at the same hierarchical level as Seminar. 7. Enter another child name under the parent, at the same level as the previous child, e.g. ―Workshop‖. Seminar and Workshop are now siblings under the parent ―Conference‖. 8. Enter an amount for each individual. Enter just the number; no dollar sign or separating comma. 40 Campus-Wide Budgeting System User Guide 9. Click in the parent cell, e.g. ―Conference‖, and then click Add Sibling. This adds a new row under Workshop, but at the parent level. 10. Continue to add parents and children, as required. TIP: If you create an item at the wrong hierarchical level (child instead of parent, or vice versa), click Promote or Demote as necessary. 11. Do not forget to change the operators where necessary. The options are ~, +, -, *, and /. The system calculates the totals accordingly. 12. Click Save when finished. The cell becomes a teal colour when there is supporting detail. 41 Campus-Wide Budgeting System User Guide Viewing the Supporting Details To view the supporting detail of a teal coloured cell, just double-click it. The system opens the Supporting Detail window and displays all existing information. Editing the Supporting Details You can add or change any of the existing information where required. Select the item to change and change the text, the operator, the amount, delete it, promote it, demote it, or move it up or down. Click Save when finished. Deleting the Supporting Details You can delete any or all of the existing supporting details. Select the item to delete and click the Delete button or the Delete All button. Click Save when finished. Lock Cells When spreading or manipulating data, you can temporarily lock cells while the system calculates and fills in other values. You can visually review the changes before saving them. To temporarily lock values: 1. Select the cell(s) to lock. 2. Click Edit, then Lock/Unlock Cells. A tan background indicates that a cell is locked. If you lock multiple cells, some of which are already locked, all the unlocked cells become locked. You can now spread or manipulate the other data. 3. To unlock cells, select Edit, then Lock/Unlock Cells. Examples of Spreading Data with Cell Locking Example 1 Before locking and spreading, Account A has the values described in the following table: Account A Jan 100 Feb 100 42 Mar 100 Q1 300 Campus-Wide Budgeting System User Guide You then lock the Feb and Mar values at 100 and change Q1 from 300 to 600. Because Jan, Feb, and Mar must now total 600, and Feb and Mar are locked at 100 each, Planning calculates Jan to be 400 and fills in that value. After locking and spreading, the data displays as shown in the following table: Account A Jan 400 Feb 100 Mar 100 Q1 600 Example 2 Before locking and spreading, Account B has the values described in the following table: Account B Q1 Q2 Q3 Q4 100 100 100 100 YearTotal 400 You then lock Q1 and Q2 values at 100 each and change Year Total from 400 to 800. Because the yearly total must equal 800, and Q1 and Q2 are locked at 100 each, Planning calculates Q3 and Q4 to be 300 each and fills in those values. After locking and spreading, the data displays as shown in the following table: Account B Q1 Q2 Q3 Q4 100 100 300 300 YearTotal 800 Planning by Using a System Function In addition to Grid Spread, the system provides additional built-in functionality to make the planning process more efficient and to make the information more useful. Your user profile must be configured to allow these functions. Adjust Feature This feature works the same regardless of whether you are entering data for the first time or adjusting existing data. 1. Click inside the cell where it intersects with a period, e.g. Account 641522 and Period June. 2. Click the Adjust button ( ). This opens the Adjust Data window. 3. Select the ―Increase by‖ or the ‗Decrease by‖ radio button and then enter an amount in the Spread Value field. 4. Click the Adjust Data button. 5. The system calculates the new amount based on your input and options selected and displays the results in the selected cell. 43 Campus-Wide Budgeting System User Guide 6. Click Save ( ) to close the Adjust Data window and to save the adjusted data as part of the data form. Cut, Copy Paste Features If your Web browser is Microsoft Internet Explorer 5.5 or later, you can copy and paste data values from one data form to another data form or from an application such as Microsoft Excel to a data form. The following rules apply when you paste data into a form: If the size of the destination area is a multiple of the size of the copied area, data is repeatedly pasted into the destination area. For example, if you copy the contents of two rows and then select six rows, the system pastes the contents of the two rows three times, to fill the six destination rows. You cannot paste data into read-only cells. The system copies and pastes the stored values of cells, not the values that are determined by the precision setting. When you paste data into summary periods, the system applies spreading rules for each cell in succession, working from left to right and top to bottom. Therefore, the pasted data may not match the copied data. Copying and Pasting Data 1. Select an intersection on the data form. 2. Click the Copy button ( clipboard, click Yes. ). If the system asks you about allowing access to the 3. Select the remaining months for an account row by clicking the first cell and dragging the mouse to the last cell you want as the complete selection. 4. Click the Paste button ( data. 5. Click Save ( changes. ). The remaining months have changed to reflect the copied ) to commit the changes to the database or click Cancel to disregard the Saving and Refreshing Data When you save data, total are recalculated, and updated values are displayed for members that are calculated dynamically. When you refresh data, the system warns you that you will lose any unsaved data. If you continue with the refresh operation, the form is refreshed with the last saved values from the database; the last saved values replace all values that you entered but did not save. 44 Campus-Wide Budgeting System User Guide Business Rules Business rules can be launched directly from the system menus or they can be associated with data forms. Users who have data-entry privileges on a data form can see and launch only the business rules to which they have access (based on security settings of their user profile). Some business rules launch automatically while others prompt the user for input when launched. NOTE: Some business rules must be run in a certain order. For example, if launching both a currency conversion business rule and a sub-total business rule, the currency conversion business rule must be launched before the sub-total rule. Where to Find Business Rules? Different data forms have different business rules. Regardless of the data form, there are three (3) ways to launch a business rule. - OR - 45 Campus-Wide Budgeting System User Guide While on a data form, right-click on the PG dimension. If there is a business rule attached to the open data form, the system displays a pop-up menu listing all the business rules applicable to the current data form. All you have to do is click on the rule you want to launch. FIGURE 3: Right-click to see the rules applicable to the data form you’re working with. - OR From the Edit menu and then clicking on Launch Rule. The system may open a Runti me Prom pt s window where you must identify all the applicable dimensions. 46 Campus-Wide Budgeting System User Guide Running a Business Rule 1. Select or enter appropriate data for each dimension as requested. To do this, you can enter the data manually into the data entry cell or you may select pre-defined options by clicking on the looking glass icon to reveal the list of available options. 2. Select the desired value from the left pane (i.e. Members in…) and then click the Add button to move the selection over to the right pane. 3. Click Submit. The Member Selection for Account window closes and adds the new selection to the Select Account text field. 4. Repeat steps 2 and 3 for each dimension in the window, but ignore all those fields that say ―Do not change‖. 5. Click Validate. NOTE: If you see the system message “One or more runtime prompt values are invalid…” look to see where the problem is (likely the field with the red X), correct it and then try validating the prompts again. 6. Click Launch. A Launch Successful dialog box appears when there are no errors. 47 Campus-Wide Budgeting System User Guide MANAGING PLANNING UNITS Overview of Planning Management Managing a planning unit is the capability of tracking your budget review process, identifying any problems, viewing status information, identifying the budget owners and changing the status of a budget. Planning tracks the budget by planning unit. A planning unit is a slice of data at the intersection of a scenario (Budget, Plan, Actuals), a version (Working, Approved, Draft) and an entity (e.g. Faculty of Arts, Faculty of Medicine, General Administration). It is the basic unit for preparing, annotating, reviewing, and approving plan data. At UBC workflow is enabled for all departments for Scenario = ―Plan‖ and Version = ―Working‖. Statuses A planning unit is always in one of six states. See the following table. STATE DESCRIPTION Not Started The initial state of all planning units. The budget administrator initiates the review process using the Start action. First Pass The first state for planning units selected to go through the Workflow process. There is no owner of a planning unit during First Pass. Any user with data access can enter data and promote the planning unit during the ―First Pass‖ state. Under Review This state occurs when a Promote action is taken on a planning unit and signifies that a planning unit is being reviewed by someone in the organization. Only the current owner or the budget administrator can modify data or perform an action on a planning unit when it is in the state ―Under Review‖. Signed Off This state occurs when a Sign Off action is taken on a planning unit. Only the current owner or the budget administrator can modify data or perform an action on a planning unit when it is in the state ―Signed Off‖. Ownership does not change when a planning unit is signed off. Not Signed Off This state occurs when a Reject action is taken on a planning unit. Only the current owner or the budget administrator can modify data or perform an action on a planning unit when it is in the state ―Not Signed Off‖. Approved This state occurs when an Approve action is taken on a planning unit. After a 48 Campus-Wide Budgeting System STATE User Guide DESCRIPTION planning unit is approved, the budget administrator becomes the owner of the planning unit. Only the budget administrator can modify data or perform an action on a planning unit that is in an ―Approved‖ state. After all the planning units are approved, the budgeting cycle is complete. NOTE: In all states except the ―Not Started‖ state, users with read access can view data, view the process state, view the history, and read and enter new annotations. Reviewer Actions The action taken by a reviewer on a planning unit changes the status of the planning unit, as summarized in the following table. Action Description Start The ―Start‖ action changes the status of the planning unit from ―Not Started‖ to ―First Pass‖. Any user with Write access to the planning unit data can modify data during the ―First Pass‖ state. Only budget administrators can start planning units. Exclude The ―Exclude‖ action excludes a planning unit from the review process, even if the planning unit moved through several iterations. All annotations and history associated with the planning unit are discarded. The planning unit status is returned to ―Not Started‖, and the owner is set to ―No Owner‖. Only budget administrators can exclude planning units. Promote The ―Promote‖ action submits a planning unit to a reviewer. The reviewer becomes the owner of the planning unit, and the state of the planning unit changes from ―First Pass‖ to ―Under Review‖. When a planning unit is under review, only the owner of the budget administrator can enter data into the planning unit. Sign Off The ―Sign Off‖ action enables a reviewer to sign off a planning unit without promoting it to another reviewer. The state of the planning unit changes from ―Under Review‖ to ―Signed Off‖. This feature is useful when you are reviewing several planning units, and you want to promote them as a group. Reject The ―Reject‖ action returns planning unit to its original owner or submits it to a new owner. The status of the planning unit changes to ―Not Signed Off‖. Approve The ―Approve‖ action indicates that a planning unit has passed through all required levels of review and that the planning cycle for the unit is complete. When a planning unit is approved, its status changes from ―Under Review‖ to ―Approved‖, and the budget administrator becomes the owner. Only the budget administrator can modify data for an approved planning unit. Typically, a planning unit is approved only once, but the administrator can reject a previously approved planning unit. 49 Campus-Wide Budgeting System User Guide Viewing Planning Unit Details You must be in the UBCPlan application to view planning details and must have the privileges. 1. From the main menu click File > Workflow > Manage Process. 2. The Process Definition page appears. 3. From the Scenario drop-down list, select ―Plan‖. 4. From the Version drop-down list, select ―Working‖ and then click Go. The system displays a list of planning units to which you have access. 50 Campus-Wide Budgeting System User Guide FIGURE 4: The Entity column is the planning unit; the status of the unit is based on an owner’s actions. 5. Click Details to see information about a planning unit. The Planning Unit Details page opens and displays any and all information currently associated with the planning unit. 51 Campus-Wide Budgeting System User Guide Once you are viewing the planning unit‘s details, you can do any of the following: Check the status of a planning unit Add annotations to or view annotations for a planning unit Change the status of a planning unit Statuses and Actions Actions Actions are the operations that change the status of a planning unit and direct its movement through the budget review process. Action availability is determined by the current state of the planning unit, as described in the following table: PLANNING UNIT STATE ACTIONS AVAILABLE First Pass Promote Approve Under Review Promote 52 Campus-Wide Budgeting System User Guide Sign Off Reject Approve Not Signed Off Promote Sign Off Reject Approve Signed Off Promote Reject Approve Approved Reject (budget administrators only) Next Owner When you select the next reviewer for a planning unit, you select the new owner of the planning unit. Only individuals with Read or Write access to all three members of the planning unit are available for selection. Annotations You can use annotations to provide guidelines to planners and to explain your assumptions to budget reviewers. You must have a minimum of Read access to a planning unit to view or add an annotation to the planning unit. Submitting a Plan Once you‘ve completed the planning for your department you may submit the plan to the department‘s Reviewer. WARNING: Ensure all PG budgets within the unit are complete; otherwise the overall budget may be incorrect. While in the un-submitted plan‘s data form, 1. From the main menu, click File > Workflow > Manage Process. 2. Select the correct Scenario (likely ―Plan‖) and Version (likely ―Working‖) and then click the Go button. The system displays the list of planning units. 3. Locate your department from the list displayed and then click its Details hyperlink. This opens the Planning Unit Details page. 53 Campus-Wide Budgeting System User Guide 4. Click the Change Status button. This opens the window Change Status. 5. From the Select Action drop-down list, select the most appropriate option from the list, e.g. ―Promote‖. 6. From the Select Next Owner drop-down list, select the name of the user responsible for reviewing and approving such budgetary information. 7. Enter notes, comments or instructions in the large Enter Annotation textbox. 8. Click the Submit button from the Change Status dialog box when ready to promote the plan to the next level of revision. You return to the Planning Unit Details page. 54 Campus-Wide Budgeting System User Guide 9. Click the Done button. The details page closes and returns you to the Process Definition page where you see the current status of the plan you just submitted. Reviewing a Planning Unit As a Reviewer it is your responsibility to review the details of the financial plan submitted to you by the unit‘s Preparer. When you finish reviewing the plan, you must then promote the budget to the next level of review and approval, provided you approved the budget. You may reject the plan if the information does not conform to the guidelines. You would then return the erroneous plan to the Preparer or to the user who submitted the plan to you. 1. From the main menu, click File > Workflow > Manage Process. 2. Select the correct Scenario and Version you would like to manage (Plan / Working) from the Process Definition page and then click Go. The system displays the list of planning units. 3. Click Details of the Planning Unit with your name assigned to it. This opens the Planning Unit Status window. 4. Click Change Status. The Change Status window opens. 55 Campus-Wide Budgeting System User Guide Approving a Planning Unit 1. Select ―Approve‖ as your action from the Select Action drop-down list 2. Select the name of the next owner of the planning unit from the Select Next Owner dropdown list. 3. Enter an annotation in the large freeform text field. 4. Click the Submit button when finished. The Change Status window closes and returns you to the Planning Unit Status window where the system updates the status of the review process and any annotations. 5. Click the Done button in the bottom right-hand corner of the page when finished. The system closes the Planning Unit Status page and returns to the Process Definition page. Rejecting a Planning Unit As a Reviewer, it is your responsibility to review the details of the financial plan submitted to you by the unit‘s Preparer. When you finish reviewing the plan, you must then promote the budget to the next level of review and approval, provided you approved the budget. You may reject the plan if the information does not conform to the guidelines. You then would return the erroneous plan to the Preparer or to the user who submitted the plan to you. 1. From the main menu, click File > Workflow > Manage Process. 2. Select the correct Scenario and Version you would like to manage (Plan / Working) and then click Go. The system displays the list of planning units. You see that you are the Current Owner of a Planning Unit under review for a given Department. 3. Click Details of the Planning Unit with your name assigned to it. This opens the Planning Unit Status window. 4. Click Change Status. The Change Status window opens. 5. Select ―Reject‖ as your action from the Select Action drop-down list. 6. Select original planner (or the user who sent it to you) as the next owner of the planning unit. 7. Enter an annotation in the large freeform text field to explain why you rejected it. 56 Campus-Wide Budgeting System User Guide 8. Click the Submit button when finished. The Change Status window closes and returns you to the Planning Unit Status window where the system updates the status of the review process and any annotations. 9. Click the Done button in the bottom right-hand corner of the page when finished. The system closes the Planning Unit Status page and returns to the Process Definition page. NOTE: The previous owner of the planning unit is not listed in the Select Next Owner dropdown list when the Select Action is set to “Promote”, but he or she is listed if the Select Action is set to “Reject”. Copying Data between Versions You may copy data from one version of a scenario to another version of the scenario by using the Copy Version feature. This method creates a quick starting point for the new version. NOTE: When you copy a version, source data for all years, accounts, and periods is copied to the destination versions. Be sure that you do not inadvertently overwrite data for prior years. When you copy versions for a planning unit, you can copy the planning unit‘s account annotations cell text, and supporting detail. The Copy Versions feature does not perform the following tasks: Create an entry in the planning unit history Copy of change the state of a planning unit Copy or change the ownership of a planning unit WARNING: Do not stop of load another Web page until the Copy Versions process is complete. If you stop or load before the process is complete, you cannot verify that the copy process was completed successfully. 1. Click the File > Workflow and then Copy Version. 57 Campus-Wide Budgeting System User Guide This opens the Planning Units page. Here is where you select the source scenario/version and the target version. 2. Select the Scenario you want to use as the base. 3. Select the source version from the Copy From drop-down. 4. Select the target version from the Copy To drop-down. 5. Click Go. 6. Select the applicable entity from the Available Entities pane on the left and then click the Add arrow to move that entity over to the right. 58 Campus-Wide Budgeting System User Guide 7. Click the Copy Data button when done. The system displays a ‗success‘ message when the version data is copied successfully. 59 Campus-Wide Budgeting System User Guide FUNDS TRANSFERS Transferring Funds All fund transfers takes place inside the FundPlan application. The FundPlan application contains 2 Forms folders: GPO Funding Allocation and GPO External Transfers. GPO Funding Allocation This represents the unit‘s central allocation of the University‘s GPO revenue. GPO Funding allocations are loaded to the Central Ledger in PeopleSoft FMS by central finance and are represented in the Allocation column of nQuery Ledger Summary reports. Transferring GPO Funding to Another Unit You must have the authority to execute GPO funding transfers, as well as the applicable system user privileges at all different levels. 1. Click the FundPlan option from the system‘s Home Page. This opens the FundPlan application and lists the folders and data forms applicable to Funding. 2. Select the GPO External Transfers folder from the view pane. The data forms associated with the GPO external transfers are listed in the content area on the right and in the lower portion of the view pane. 60 Campus-Wide Budgeting System User Guide 3. Select the form 1.00 Pending GPO External Transfers Out. This opens a list of all the total pending transfers by department. 4. Ensure your department, PG and FY are selected in the dimensions drop-down lists and then click Go. 5. Right-click on the text ―LINE_ITEMxx‖. The system displays a small pop-up menu. 6. Click Initiate Transfer from the pop-up menu. This opens the Initiate Transfer window. 61 Campus-Wide Budgeting System User Guide 7. Enter the data in the corresponding text fields on the Initiate Transfer window. HINT: Be sure to expand the window to see all the fields and the scrollbar and do not change any of the data in the fields marked with “Do not change”. 8. Click the Validate button after entering all the data. If you entered all the information correctly, the system displays a message saying that all runtime prompts are valid. 9. Click the Execute button to execute the transfer. As long as there are no errors, the system will list the new transfer record on the page. 62 Campus-Wide Budgeting System User Guide Accepting / Rejecting GPO Funding Transfer You can accept or reject transferred funds only when they have been transferred to your department. You must be in the FundPlan application to access this component. 1. Click Forms in the navigation view pane. This displays all the associated funding-related data folders and forms. 2. Select the GPO External Transfers folder. 3. Open the form 2.00 Pending External Transfers In . This form shows a list of all the pending transfers for all the departments you have access to. 4. Right-click on your department to see the transfers sent to you by another PG. By rightclicking the line with the pending transfer (the department), a small pop-up menu appears. 5. Click Review sending Dept detail from the pop-up menu. This page lists the total pending transfers for your department. 6. Right-click on the transfer‘s description. Another small pop-up menu appears. 7. Click Review Line Item detail from that pop-up menu. This list displays all the pending incoming transfers for your department. 8. Right-click the pending transfer and then click Review Transfer detail from the pop-up menu. 63 Campus-Wide Budgeting System User Guide Approving a Transfer 1. Right-click on the detail of a pending transfer, review the details and then click Approve Transfer from that pop-up menu. This opens the Approve Transfer window. 64 Campus-Wide Budgeting System User Guide 2. In the Approve Transfer window, enter your PG in the field Select Project Grant to Transfer to and then click Validate. The system displays the message that all runtime prompt values are valid. 3. Click Execute to approve the transfer. Rejecting a Transfer 1. Right-click on the detail of a pending transfer, review the details and then click Reject Transfer from that pop-up menu. This opens the Reject Transfer window. 65 Campus-Wide Budgeting System User Guide 2. In the Reject Transfer window, enter your PG in the field Select Project Grant to Transfer to and then click Validate. The system displays the message that all runtime prompt values are valid. 3. Click Execute to approve the transfer. 66 Campus-Wide Budgeting System User Guide MANAGING WORKFORCE Overview Most of the employee information seen in this module originates from the Position Management System. This information cannot be changed in CWBS. It can only be changed in the Position Management System. However, related information can be appended to the existing information. This system component also accepts the creation and management of positions that are not in the Position Management System, but must be considered in the overall budget plans. Viewing the Status of Existing Positions To review the status of positions in your PG as they are in the Position Management System, you must be in the UBCPlan application and you must have access to the Workforce module. 67 Campus-Wide Budgeting System User Guide 1. From the left navigation View pane click on the Forms folder and then on Workforce. The system displays all the data forms available in the Workforce folder. 2. Select from data forms 4.01 to 4.04 (e.g. 4.01 Existing Position – Status – Faculty Only) . The system displays the status of all the positions in your PG as seen in the Position Management System. This data form serves to display status information on existing data. No actions are taken on this form. To navigate to the next Workforce feature, right-click on any position listed and then select Edit Existing Position Information from the pop-up menu displayed or continue with the next section. Editing Existing Position Information Viewing existing position information allows you to review salary and benefit expense information for your PG. You may edit some of the information on this form to plan one-time payments, merit, unfunded salary increases and shift differentials. Remember, only yellow cells can accept planned financial data-entry. You must be in the UBCPlan application and you must have access to the Workforce module. 1. From the left navigation view pane click Forms and then Workforce. The system displays all the data forms available under Workforce. 2. Select from data forms 4.11 to 4.14 (e.g. 4.11 Existing Position Information – Faculty Only) . You may also have arrived to this data form by right-clicking on the position and selecting a menu option from the pop-up menu. 3. Define your Point of View by selecting all the appropriate values from the dimension drop-down lists. 4. Once you‘ve made your selections, click Go. This form displays employee information retrieved from the Position Management System. 5. Ensure the data coming from Position Management is in line with your expectations. 68 Campus-Wide Budgeting System User Guide 6. Locate the affected position and the data-entry cell where you‘ll enter the data. The cell must be yellow. Enter the amount in that cell and then click Save. Planning Overtime for the Year Anticipated overtime should be included in your department‘s plan for optimal planning. You must be in the UBCPlan application and you must have access to the Workforce module. 1. From the left navigation view pane click Forms and then Workforce. The system displays all the data forms available under Workforce. 2. Select the data form 4.40 Overtime Hours . Only those positions eligible for overtime are listed. You may also have arrived to this page by right-clicking on the position. 3. Locate the position affected by overtime, the applicable overtime data entry column and click inside the cell. 4. Enter the amount of overtime hours or dollars expected for that period. Repeat steps 3 and 4 for all positions and all periods affected. 5. Click Save when done. To advance to the next step in the process, you may right-click on any position and then select Edit New Position Information in the pop-up menu to enter data for a new employee and access the page directly, or navigate to the page through the menus and folders by following the instructions in the next procedure 69 Campus-Wide Budgeting System User Guide FIGURE 5: Right-clicking on a position in the list also allows you to navigate through the Workforce component. Entering New Position Information This system function allows you to plan for the hiring of a new employee for which there is no position in the Position Management System. You must be in the UBCPlan application and you must have access to the Workforce module. 1. From the left navigation View pane click Forms and then Workforce. The system displays all the data forms available under Workforce. 2. Select data form 4.30 New Position Information . You may also have arrived to this page already by right-clicking on the position, as described in the previous procedure. 3. Right-click on the fund and select Add To-be-hired from the pop-up menu. This launches a business rule to add and TBH (To be hired) position that will be reflected in your plan. 4. Move your mouse pointer over Add To-be-hired. This opens a sub-menu. Click one of the options presented in the pop-up menu, i.e. ―Salary‖ or ―Hourly‖. This causes another window to open. 70 Campus-Wide Budgeting System User Guide 5. Enter the appropriate data in each corresponding field and then click Validate when you‘re done. Provided there are no errors, the system will display a message that all runtime prompts are valid. Otherwise, make any necessary corrections and try validating again. NOTE: Expand the window to reveal all the data entry fields. 6. Click the Add button, to add the position to the plan. Making High-Level Planning Adjustment to Salaries or Benefits Use this feature when you need to make adjustments to salaries and benefits at a high level. You must be in the UBCPlan application and you must have access to the Workforce module. 1. Ensure you are in the 4.52 Input Financial Data by Department data form. All of the GL accounts are read-only (these have been planned based on existing positions and new positions). 2. You can make budget adjustments to any of the following high-level salary accounts and the amounts will be reflected in your plan: 71 Campus-Wide Budgeting System User Guide WF_SALFAC (Faculty Salaries) WF_SALSES (Sessional Salaries) WF_SALSTF (Staff Salaries) WF_SALSTD (Student Salaries) WF_BENEFT (Benefits) 3. Locate the salary account of interest and click it. The cell will be a pale yellow. 4. Change the amount in the months or TotalYear column as required. 5. Repeat steps 3 and 4 for each affected amount. 6. Click the Save button when finished. 72 Campus-Wide Budgeting System User Guide TASK LISTS What is a Task List? Administrators and interactive users can set up task lists that guide you through the steps to complete a budget cycle. For example, a task might help you enter data, complete data forms, run a business rule, and submit numbers for approval or promote planning units. Tasks can display instructions, due dates, completed dates, and alerts. Your administrator can also include tasks that link to other applications. Working with Task Lists The ability to maintain and distribute customised Task Lists based on different user roles and responsibilities provides users with a step-by-step guide to the budget process, but it must be set up manually. Administrators can set up task lists to help with budget cycles. For example, a task might help you complete data forms, launch business rules, or promote planning units. Tasks can display instructions, due dates, completed dates, and alerts. If your administrator assigns tasks to you, you can view them in Basic Mode or Advanced Mode. You can view: Due date—When tasks must be completed Alerts—Visual cues about your progress, and the completion date and time: o Green: On schedule o Yellow: Approaching the due date o Red: Overdue; the due date has passed and the task is incomplete Instructions—Assistance with completing tasks E-mail messages—Reminders of approaching and past-due tasks Viewing Tasks 1. Click View from the main menu, then Basic Mode, and then Task List appears in the left view pane. 73 Campus-Wide Budgeting System User Guide 2. Click the next to the Task Lists folder to display the list of all task lists to which you have access. 3. Expand the task list to view a task list by clicking it from the view pane. 4. Expand a task list folder to reveal all awaiting tasks. 5. Click on the first item. This automatically launches the required document for the selected task. 6. Click the Next button to work your way through the tasks. 7. Continue to click Next until you‘ve gone through all the tasks. 8. After completing a task, check the Complete checkbox in the bottom left corner of the content area. Upon clicking Complete the task is marked as complete and is displayed next to the task in the view pane. Completing Tasks The way you complete tasks depends on the task type. Tasks can include URLs, data forms, workflow, business rules, or descriptive tasks. For example, a task can require your entering data or launching a business rule. Tasks can also display read-only information, such as reminders or instructions. 74 Campus-Wide Budgeting System User Guide After completing task requirements, mark the task as complete. The alert changes to a date stamp showing the completion date and time. If a task has dependent tasks, you must complete those tasks before completing the primary task. You can also refer to the Task List when you are in Advanced mode: 1. From the quick-launch list at the page's top, select a task list. 2. To view a task, click View Task List. The task displays a Web page, data form, workflow, business rule, or description. 3. View instructions for the task by clicking View. 4. Complete the task activity. For example, depending on the task, you can view a Web page, enter data, complete a workflow task, launch a business rule, or read a description. 5. Complete any associated dependent tasks. 6. Click to view subordinate tasks, also called child tasks. 7. After completing the activities for the task, click Complete. If the check box is not selectable, you must complete dependent tasks before completing this task. Upon clicking Complete the task is marked as complete and is displayed next to the task in the view pane. When tasks are complete, alerts change to date stamps. 75 Campus-Wide Budgeting System User Guide REPORTS The Report section allows you to view high-quality and professionally designed reports. These reports can span anywhere from a complex critical operational report to a results sets, a chart, and a pivot table. Use the reports in this section to help you evaluate your business, expand communications, and assist in the decision-making process. The reports found here are dynamic and provide you with an almost unfiltered framework from which to view and analyze data. You can resort and apply data functions, which allow you to display different types of values. The reporting component is accessed through the Explore feature. Web Analysis Web Analysis allows users to manipulate data in documents to display specific information. Methods of manipulation include changing pages, drilling to different levels of data, changing the data displayed, and keeping or removing dimension-specific data. Web Analysis provides advanced analytical tools that enable you to perform quick, ad hoc analysis of a document. Analysis tools speed up comparisons, visually organize data, and promote conclusions. You can: Sort data Filter data Search data Define formulas Add Traffic Light Create Pinboards Set User Preferences Viewing Web Analysis Reports in HTML 1. Click the Explore toolbar button ( contain the various reports. ). The system opens the list of folders that 2. Click the Titan Reports folder. 3. Click the Production folder and then the ISPlan folder. 4. Right-click the report ―Actual Plan and Forecast Comparison‖. This file has an extension of ―Web Analysis Document‖. A sub-menu appears. 76 Campus-Wide Budgeting System User Guide 5. Click Open As > HTML. The system generates the report and displays it in HTML format on the screen. The POV is the combination of the most recent filter criteria selections. 6. Change the POV by changing any of the dimensions presented, i.e. Fund, Department, Project Grant, Program Code and Selected Period. Interacting with Web Analysis Reports 1. Open a selected Web Analysis report in HTML. 2. Move your cursor to the Account column and right-click on Expenses > Drill > Drill Down. The Expenses account expands to show the next level of account members. 77 Campus-Wide Budgeting System User Guide 3. Place the cursor on the text of an account. 4. Right-click and select Keep Only. 78 Campus-Wide Budgeting System User Guide The rest of the accounts are excluded from the report. Using Analysis Tools You must be in an open Web Analysis report to use this tool. 1. Return to the YearTotal radio button (column displayed on the right of the report). 2. Right-click on an account name (a pop-up menu appears) and select Analysis Tools and then Traffic Light…. The Traffic Lighting Control Panel opens. 79 Campus-Wide Budgeting System User Guide 3. Set Points: e.g. >= -10000 and >= 10000. 4. Click OK. The system closes the window and returns to the report. Notice the colour changes. Traffic Light Colours The colours indicate varying range sets based on the parameter thresholds you set. For example, you could define the range as ―0‖ to ―25‖. Green would indicate that the current data is 80 Campus-Wide Budgeting System User Guide somewhere between ―0‖ and ―9‖. Yellow would indicate that the data is between ―10‖ and ―19‖ and red would be ―20‖ to ―25‖. TRAFFIC LIGHT COLOUR MEANING Green Green indicates that all is fine! Yellow Yellow indicates that things are still relatively within acceptable range but you should monitor things. Red Red is an indication that potential problems are on the horizon based on the parameters set. Using Analysis Tools – Calculation 1. Stay on the same report (the one with the traffic lights). 2. Place the cursor on any of ―FY09‖ heading labels, and right-click on Analysis Tools. 3. Click on Calculation… The Calculation Definition window opens. 4. Click the Functions tab. 5. From the Function drop-down list, select ―Average‖. 81 Campus-Wide Budgeting System User Guide 6. From the Select Members pane, highlight ―FY09‖ and ―FY10‖, click the Add button (right arrow) to move the selected members (FY09 and FY10) to the ―Arguments‖ box. Notice that the Formula Box is now populated with the combination of Function and Arguments. FIGURE 6: Once member selections are made, the system creates the formula in the Formula box. 82 Campus-Wide Budgeting System User Guide 7. Click the Insert button on the middle right of the screen. The Calculation Definition is now set up. 8. Go to the top of the window and enter a name in the Name field: ―AVG FY09 FY10‖. 9. Click OK to complete the formula. The report is now added the Formula column. 83 Campus-Wide Budgeting System User Guide Financial Reporting Financial Reporting allows users to run highly formatted reports. Methods of manipulation include drilling to different levels of data, changing the data displayed. When the report is ready to be printed it will generate a PDF file. The reports can also be exported to MS Office for reports and presentations. 1. Click the Explore toolbar button ( contain the various reports. ). The system opens the list of folders that 2. Click the Titan Reports folder. 3. Click the Production folder and then the ISPlan folder. 4. Right-click the report ―Snapshot –Scenarios and Variances‖ (this file has an extension of ―Financial Reporting Report‖). A sub-menu appears. 5. Click Open In > HTML Preview. This causes the Preview User Point of View window to open. 84 Campus-Wide Budgeting System User Guide 6. Enter the member dimensions in each corresponding field and then click the OK. 7. The reporting component of the system gives you the ability the drill down through reports in both HTML and PDF. Click on the arrow next to the accounts. Hover over the sideways arrow. The tooltip says ―Expand‖. 85 Campus-Wide Budgeting System User Guide NOTE: The report can also be opened in PDF by clicking Open In > PDF Preview instead of HTML Preview. It may look as though the system is not responding, but just be patient. It is working. 8. On the POV select a different Period, e.g. ―Period: Q2‖. FIGURE 7: Clicking the button opens the Member Selection window. 86 Campus-Wide Budgeting System User Guide 9. Expand the ―Period‖ member and the ―YearTotal‖ member. 10. Select ―Q2‖ and then click OK to review the report. FIGURE 8: See the result of the change of Period from TotalYear to Q2. Exporting Reports to Excel Whether you are viewing a Web Analysis report or a Financial Reporting report, you can export the report to an Excel format. The report must be open on the screen. 1. Click the File menu. 2. Click Export. 3. Click Excel. 4. Click Fully Formatted Grids and Text. This opens the File Download window. You may choose to first open the file in Excel to view it before saving it by clicking the Open button or you may save directly from the window by clicking Save and selecting a storage location. NOTE: 1.When exporting to Excel the data will be transferred as ―values only‖ therefore if you are making changes to your spreadsheet, the totals will not change formulaically. 87 Campus-Wide Budgeting System User Guide 2. When exporting Financial Reporting grid objects to Excel the values are exported as displayed in the report. The desired number of decimal places for precision should be set in the report before exporting. Exporting in Query Ready Mode Printing Reports You can print any type of report or book. For dynamic reports and books, data is refreshed. For snapshot reports and books data is not refreshed. To print a report: 1. From the repository, open the report. Respond to prompts and modify as needed. 7. Click File, and then Print. Note: The output is fully formatted, in PDF, for end-user use. 88 Campus-Wide Budgeting System User Guide INDEX Dimensions......................................................................... 6 Documenting plan data..................................................... 35 Documents add .............................................................................. 36 Drop-down list document convention .................................................... 2 A Accepting GPO Funding Transfer .................................... 63 Add Documents ................................................................ 36 Add/Edit document documenting your plan ................................................ 36 Adjust Feature................................................................... 42 Amount Spread data by an......................................................... 33 Annotations (in plan) ..See Supporting Details, See Adding / Editing Documents, See Entering Cell Text Application Tabs ............................................................... 13 Approving/Reviewing a Planning Unit ............................. 55 E Enter Cell Text ................................................................. 35 Enter data in Data Forms.............................................................. 12 into data forms ............................................................ 31 Entering Data ................................................................... 32 Exit the system Log off .......................................................................... 5 Export reports ................................................................... 88 B Bold Text ............................................................................ 2 Budget reviewing/approving a planning unit ........................... 55 Business Rules .................................................................. 44 Buttons command ....................................................................... 2 Buttons and Menus ........................................................... 14 F Files add/edit documents ..................................................... 36 Financial Plan reviewing/approving ................................................... 55 Financial Reporting .......................................................... 85 Form definition ....................................................................... 2 Forms .......................................................... See Data Forms Data Forms .................................................................. 12 Funding Transfer ...... See Accepting/Rejecting GPO Funding Transfer C Cell Text ........................................................................... 35 documenting your plan ................................................ 35 Cells lock .............................................................................. 41 Chartfield PeopleSoft term ......................................See Dimensions Colour use of ........................................................................... 18 Command button definition ....................................................................... 2 Comments ....................................................... See Cell Text Comments (in plan) ....See Supporting Details, See Adding / Editing Documents, See Entering Cell Text Copy, Cut Paste Features .............................................. 43 Cut, Copy Paste Features............................................. 43 G Genealogical Relationships ................................................ 8 GPO Funding Transfer accepting and rejecting................................................ 63 Grid Spread ...................................................................... 33 H HTML Web Analysis reports .................................................. 76 D Data Forms ................................................................. 12, 31 Decrease by............................................. See Adjust Feature Details supporting .................................................................... 38 Dimension definition ....................................................................... 2 I Icons ..................................................... See Toolbar Buttons Increase by ............................................. See Adjust Feature Insert Cell Text ................................................................. 35 89 Campus-Wide Budgeting System User Guide Web Analysis .............................................................. 76 Reviewing / Approving a Planning Unit .......................... 55 Rules business ....................................................................... 44 L List tasks ............................................................................. 73 Lock Cells ......................................................................... 41 Log In ................................................................................. 3 Log off Exit the system .............................................................. 5 S Scenario Dimension ..................................................................... 6 Screen ........................................................... See Workspace Siblings ............................... See Genealogical Relationships Sign on ........................................... See Log into the system Simultaneous views ............................. See Application Tabs Spread Grid ............................................................................. 33 Spreading Data with locked cells ......................................................... 41 Supporting Details ............................................................ 38 documenting your plan................................................ 38 Supporting Documents add .............................................................................. 36 M Managing Planning Units ................................................. 48 Managing Workforce ........................................................ 67 Members ............................................................................. 8 N Navigation ........................................................................ 17 Navigation menu definition ....................................................................... 2 New hires entering information .................................................... 70 T Tabs application................................................................... 13 Task Lists ......................................................................... 73 Text blue underline ............................................................... 2 Italics............................................................................. 2 large bold ...................................................................... 2 To-Do List ..................................................... See Task Lists Toolbar Buttons ................................................................ 16 Transfers.... See Accepting/Rejecting GPO Funding Transfer P Page ............................................................. See Workspace Parent-Child ........................ See Genealogical Relationships Paste, Cut, Copy Features ............................................. 43 Percentage Spread data by ............................................................. 33 Picklist definition ....................................................................... 2 Plan reviewing/approving .................................................... 55 Planning Unit reviewing/approving .................................................... 55 Planning Units .................................................................. 48 Points of View .................................................................... 9 Positions viewing the status of .................................................... 67 Preferences........................................................................ 20 Print reports .......................................................................... 89 U Units ........................................................ See Planning Units User preferences ............................................................... 20 User Types ........................................................................ 1 V Version Dimension ..................................................................... 6 R Rejecting GPO Funding Transfer ..................................... 63 Relationships Genealogical .................................................................. 8 Reports.............................................................................. 76 Exporting to Excel ....................................................... 88 Printing ........................................................................ 89 Reports in HTML W Web Analysis ................................................................... 76 Workflow ............................... See Managing Planning Units Workforce ........................................................................ 67 Workload ....................................................... See Task Lists Workspace ........................................................................ 10 90