1
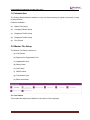
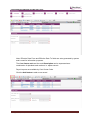
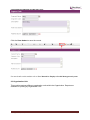
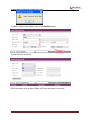
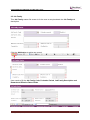
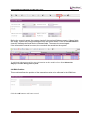
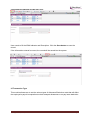
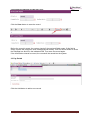
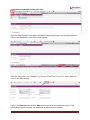
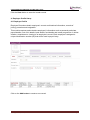
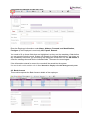
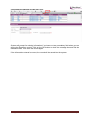
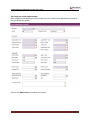
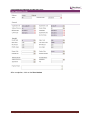
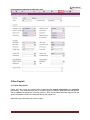
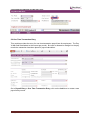
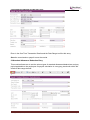
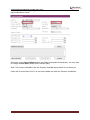
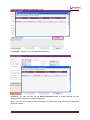
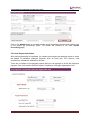
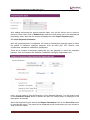
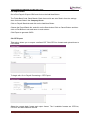
STARVISION INFORMATION TECHNOLOGY
(SDA)
HUMAN RESOURCE INFORMATION SYSTEM
(HRIS)
USER MANUAL
FOR
GETTING STARTED
VERSION 1.0
STARVISION INFORMATION TECHNOLOGY (SDA)
Table of Contents
SYSTEM FEATURES ........................................................................................................... 4
1.0 INTRODUCTION............................................................................................................. 5
2.0 MASTER FILE SETUP ................................................................................................... 5
2.1 Cost Centre………………………………………………………………………………………4
2.2 Segment for OrganisationUnit……………………………………………………………….6
2.3 OrganisationUnit………………………………………………………………………………..7
2.4 Salary Scale ................................................................................................................. 10
2.5 Job Family ................................................................................................................... 14
2.6 IR8A Position ............................................................................................................... 15
2.7 Transaction Type……………………………………………………………………………...15
2.8 Bank Information………………………………………………………………………………16
3. COMPANY DETAILS SETUP……………………………………………………………….....17
3.1 Company Master……………………………………………………………………………....17
3.2 CPF Account ............................................................................................................... 21
3.3 Pay Period ................................................................................................................... 22
4. EMPLOYEE PROFILE SETUP ....................................................................................... 24
4.1 Employee Profile………………………………………………………………………………23
4.2 Bank Account………………………………………………………………………………….25
4.3 Funds…………………………………………………………………………………………...27
4.4 Employee’s New Appointment ................................................................................... 29
5 RUN PAYROLL .............................................................................................................. .32
5.1 Check Pay Period……………………………………………………………………………..32
5.2 One Time Transaction Entry....................................................................................... 34
5.3Standard Allowance/ Deduction Entry ........................................................................ 35
Training Manual | HRIS | Version 1.0
Page 2
STARVISION INFORMATION TECHNOLOGY (SDA)
5.4 Payroll calculation ...................................................................................................... 36
3.6 Make Payment ............................................................................................................ 41
5.7 Check Payment Information ...................................................................................... 42
5.8 Export GIRO…………………………………………………………………………..43
5.9 CPF Export .................................................................................................................. 43
Training Manual | HRIS | Version 1.0
Page 3
STARVISION INFORMATION TECHNOLOGY (SDA)
System Features
Human Resources Information System (HRIS) is designed and developed to operate as web
based environment.
Consistency and Simplicity:
It is easy and simple to operate as menus and windows, together with on-line help
messages govern the entire system. In addition each module is designed with the same
operational procedure. New users need only to learn and be familiar with one module, and
soon be familiar with all of them. Hence even users with no computer experience will find it
easy to operate.
Flexible:
The system provides flexible master file maintenance for adding, modifying and deleting
master file information respectively.
Popup windows/tables:
With the prompt windows, searches through files are made simple and it allows users to
obtain prompt and accurate access data.
Reports provided:
Listing and statistical reports are provided too making checking and reporting purposes
much more efficient and effective.
Training Manual | HRIS | Version 1.0
Page 4
STARVISION INFORMATION TECHNOLOGY (SDA)
1.0 Introduction
The Getting Started feature enables to carry out the processing of payroll more easily in step
by step process
Features available: (a)
Master File Setup
(b)
Company Details Setup
(c)
Employee Profile Setup
(d)
Employee Profile Setup
(e)
Run Payroll
2.0 Master File Setup
The Master File Setup consists of: (a) Cost Centre
(b) Segment for Organization Unit
(c) Organization Unit
(d) Salary Scale
(e) Job Family
(f) IR8A Position
(g) Transaction Type
(h) Bank Information
2.1 Cost Centre
This master file captures the different cost center of the employee.
Training Manual | HRIS | Version 1.0
Page 5
STARVISION INFORMATION TECHNOLOGY (SDA)
Note: Effective Date From and Effective Date To fields are auto-generated by system
and is used for information purposes.
The Cost Centre code and the code Description can be expressed as a
combination of alphabets and numbers i.e. alpha numeric.
Payroll reports are available by Cost Center Code.
Click the Add button to add a new record.
Training Manual | HRIS | Version 1.0
Page 6
STARVISION INFORMATION TECHNOLOGY (SDA)
2.2 Segment for Organization Unit
This file allows entry of different segment code. The different segment code will help to form
the organization unit code in the Organisation Unit Master file. Note that the organization
unit code can accept max 40 characters only.
Click the Add button to add a new record.
User needs to fill the Segment Name, Segment Code and Description Fields.
Training Manual | HRIS | Version 1.0
Page 7
STARVISION INFORMATION TECHNOLOGY (SDA)
Click the Save button to save the record.
For more details on this module refer to User Manual for Employee Profile Management System.
2.3 Organisation Unit
This module captures different organization units within the Organization. Reports are
available for printing by Organisation Unit.
Training Manual | HRIS | Version 1.0
Page 8
STARVISION INFORMATION TECHNOLOGY (SDA)
Click the Add button to add a new record.
User needs to fill the Cost Centre, Segment 0, etc…
Training Manual | HRIS | Version 1.0
Page 9
STARVISION INFORMATION TECHNOLOGY (SDA)
Click the Save button to save the record.
For more details on this module refer to User Manual for Employee Profile Management
System.
2.4 Salary Scale
This master file stores Salary Coderepresenting the type of salary code employees are
covered by.
Click the Add button to add a new record.
Training Manual | HRIS | Version 1.0
Page 10
STARVISION INFORMATION TECHNOLOGY (SDA)
System will show as follows.
Enter Information such as Salary Code, Salary Scale, Salary Mode, Effective Date From,
Effective Date To and NWC Type fields.
Before the Add New button is clicked, the system checks if the required fieldis empty. If this
field is empty, system will prompt message (shown below). Click on the OK button to close
the message box and fill in the indicated field. Then save the record again.
Training Manual | HRIS | Version 1.0
Page 11
STARVISION INFORMATION TECHNOLOGY (SDA)
To add the Salary Scale details, click on the Add New button.
System will show as follows.
Enter Information such as Basic Salary, NPC Amt and Salary Point fields.
Training Manual | HRIS | Version 1.0
Page 12
STARVISION INFORMATION TECHNOLOGY (SDA)
Click the Save button to save the detail record.
Click on the Cancel button and the Exit button to go back to its previous screen. If the
information entered is correct, the record will be saved into the system.
Training Manual | HRIS | Version 1.0
Page 13
STARVISION INFORMATION TECHNOLOGY (SDA)
2.5 Job Family
This Job Family master file screen is for the user to setup/maintain the Job Familyand
description.
Click the Add button to add a new record.
User needs to fill the Job Family Code, Probation Period, Job Family Description and
Remark and Effective Dates Fields.
Training Manual | HRIS | Version 1.0
Page 14
STARVISION INFORMATION TECHNOLOGY (SDA)
Click the Save button to save the record.
Before the record is saved, the system checks if the required fields are empty. If these fields
are empty, system will prompt messages which are shown below. Click on the OK button to
close the message box and fills the indicated fields. Then save the record again.
If the information entered is correct, the record will be saved into the system.
To add detail information and for more information on this module refer to User Manual for
Employee Profile Management System.
2.6 IR8A Position
This module defines the position of the transaction value to be reflected in the IR8A form.
Click the Add button to add a new record.
Training Manual | HRIS | Version 1.0
Page 15
STARVISION INFORMATION TECHNOLOGY (SDA)
User needs to fill the IR8A Indicator and Description. Click the Save button to save the
record.
If the information entered is correct, the record will be saved into the system.
2.7Transaction Type
This module allows user to set the various types of Allowance/Deduction code that will affect
the employee’s payroll computation such as transport allowances or no pay leave deduction.
Training Manual | HRIS | Version 1.0
Page 16
STARVISION INFORMATION TECHNOLOGY (SDA)
Payroll Master File–Transaction Type
GL Interface Tab
This tab is used for uploading payroll data to financial accounting or other accounting
packages.
2.8 Bank Information
This module captures the list of standard banks’ details such as Bank Code, Branch Code,
Branch GIRO Code and Address that will be used for payroll via inter-bank GIRO.
Payroll Master File–Bank
Training Manual | HRIS | Version 1.0
Page 17
STARVISION INFORMATION TECHNOLOGY (SDA)
3. Company Details Setup
3.1 Company Master
This is to set up the company information that will be used as default values in the payroll
module. It includes information like Bank account details, Govt Rates and Business Info.
Training Manual | HRIS | Version 1.0
Page 18
STARVISION INFORMATION TECHNOLOGY (SDA)
Payroll Master File–Company Info tab
Bank A/C Tab
Details on Company/Employer’s Bank account. Payment to employees in the form of GIRO
Banking, Cheques and Cash are done through this account.
Training Manual | HRIS | Version 1.0
Page 19
STARVISION INFORMATION TECHNOLOGY (SDA)
Payroll Master File–Company-Bank A/C tab
Govt Rates Tab
This tab captures contributions by employer such as SDF (Skill Development Fund) and
MSO (Medisave-Cum-Subsidised Outpatient Scheme).
Payroll Master File–Company-Gov Rates Tab
Business Info Tab
The tab captures the details on Company business information.
Training Manual | HRIS | Version 1.0
Page 20
STARVISION INFORMATION TECHNOLOGY (SDA)
Payroll Master File–Company-Business Info Tab
3.2 CPF Account
This master file stores CPF A/C representing the type of CPF Account employees are
covered by.
Click the Add button to add a new record.
Enter Information such as CPF A/C # field.
Training Manual | HRIS | Version 1.0
Page 21
STARVISION INFORMATION TECHNOLOGY (SDA)
Click the Save button to save the record.
Before the record is saved, the system checks if the required fieldis empty. If this field is
empty, system will prompt an error message(shown below). Click on the OK button to close
the message box and fill in the indicated field. Then save the record again.
If the information entered is correct, the record will be saved into the system.
3.3 Pay Period
Click the Add button to add a new record.
Training Manual | HRIS | Version 1.0
Page 22
STARVISION INFORMATION TECHNOLOGY (SDA)
Enter the Payroll mode, Description, and select Payroll mode type from the drop-down box.
Click on the Add Button in the Pay Period window.
Enter the Pay mode, Pay Year/Mth, Pay Period, Period From, Period To, Period Date etc.
Click on the Save Button.
Click on the Cancel button and the Exit button to go back to its previous screen. If the
information entered is correct, the record will be saved into the system.
Training Manual | HRIS | Version 1.0
Page 23
STARVISION INFORMATION TECHNOLOGY (SDA)
Click the Save button to save the header record.
4. Employee Profile Setup
4.1 Employee Profile
Employee Records maintain employee’s current and historical information; records of
joining, promotion and resignation.
This module captures and maintains employee’s information such as personal particulars,
payroll details, next of kin details, bank details, fund details and career progression. It allows
creation, amendment or viewing of an employee’s record. Each employee is assigned a
unique identification number (ID) that will be used in payroll entry.
Click on the Add button to create a new record.
Training Manual | HRIS | Version 1.0
Page 24
STARVISION INFORMATION TECHNOLOGY (SDA)
Enter the Employee information under Name, Address, Personal, and identification ,
Foreigner (if the Employee is non-local), NS, Payroll, Remark.
You need to fill up those fields that are highlighted, as they are the mandatory fields before
you can save the whole record. System will prompt for missing information if you leave out
any mandatory field when you are saving the Employee record.Click on the OK button to
close the message box and fills the indicated fields. Then save the record again.
If the information entered is correct, the record will be saved into the system.
For more details on this module refer to User Manual for Employee Profile Management System.
4.2 Bank Account
This module captures the Bank Account details of the employee.
Training Manual | HRIS | Version 1.0
Page 25
STARVISION INFORMATION TECHNOLOGY (SDA)
Click on the Add button to create a new record.
System will prompt for missing information if you leave out any mandatory field when you are
saving the Employee record. Click on the OK button to close the message box and fills the
indicated fields. Then save the record again.
Click the Save button to save the record.
If the information entered is correct, the record will be saved into the system.
Training Manual | HRIS | Version 1.0
Page 26
STARVISION INFORMATION TECHNOLOGY (SDA)
4.3 Funds
Captures the Fund contributions applicable to employee.
Click on the Add button to create a new record.
Select the the Employee ID, Fund Code etc.
Training Manual | HRIS | Version 1.0
Page 27
STARVISION INFORMATION TECHNOLOGY (SDA)
System will prompt for missing information if you leave out any mandatory field when you are
saving the Employee record. Click on the OK button to close the message box and fills the
indicated fields. Then save the record again.
If the information entered is correct, the record will be saved into the system.
Training Manual | HRIS | Version 1.0
Page 28
STARVISION INFORMATION TECHNOLOGY (SDA)
4.4 Employee’s New Appointment
After creating a new Employee profile, make sure you create a new appointment record for
the new Employee profile.
Click on the Add button to create a new record.
Training Manual | HRIS | Version 1.0
Page 29
STARVISION INFORMATION TECHNOLOGY (SDA)
Define all the fields highlighted in purple accordingly. Those fields with pick-list are defined
under the Company Details Setup. Add or amend the necessary details to suit your
Organization needs.
Training Manual | HRIS | Version 1.0
Page 30
STARVISION INFORMATION TECHNOLOGY (SDA)
After completion, click on the Save button
Training Manual | HRIS | Version 1.0
Page 31
STARVISION INFORMATION TECHNOLOGY (SDA)
5 Run Payroll
5.1 Check Pay Period
Users can only close the period after completing the payroll calculation and payment
processing. This module allows user to close the previous months payroll record and system
will be updated to reflect the next pay period. It also accumulates amounts required for the
year-end taxation, which are computed during the payroll run.
Select the pay period that you want to close.
Training Manual | HRIS | Version 1.0
Page 32
STARVISION INFORMATION TECHNOLOGY (SDA)
Payroll Processing-Period Close
Click on Update icon to update the pay period ‘s status.
Payroll Processing-Period Close
Change the status to ‘Yes’. Then, the status for the pay period will be closed after you click
on Save icon.
Training Manual | HRIS | Version 1.0
Page 33
STARVISION INFORMATION TECHNOLOGY (SDA)
5.2 One Time Transaction Entry
This module provides the entry for one time transaction payroll item for employees. The Pay
Yr/Mth field is defaulted to the current pay month. But user is allowed to change it to the pay
month the transaction has taken place for payroll calculation.
Go to Payroll Entry > One Time Transaction Entry, click on the Add icon to create a new
payroll entry record.
Training Manual | HRIS | Version 1.0
Page 34
STARVISION INFORMATION TECHNOLOGY (SDA)
Enter in the One Time Transaction Details and the Date Range to effect this entry.
Save the record and run payroll to see the results.
5.3Standard Allowance/ Deduction Entry
This module allows user to set the various types of standard allowances/deductions and pay
period applicable to the employees for payroll calculation in every pay year/month within the
effective date range defined.
Training Manual | HRIS | Version 1.0
Page 35
STARVISION INFORMATION TECHNOLOGY (SDA)
Go to Payroll Entry > Standard Allowance / Deduction Entry, and click on the Add icon
to create a new payroll entry record.
Enter in the Allowance Details and the Date Range to effect this entry.
Save the record and run payroll to see the results.
5.4 Payroll calculation
Training Manual | HRIS | Version 1.0
Page 36
STARVISION INFORMATION TECHNOLOGY (SDA)
Go to Payroll Processing > Payroll Calculation, and click on the Add icon to create a new
payroll calculation record.
Select the correct Payroll Mode and all grey fields will populate automatically. You may wish
to change the Run Date (default as the current date).
Note: The Process Year/Mth is the last Payment Year/Mth period which is not closed yet.
Check the Process Date From/To to ensure the dates are within the Process Year/Month.
Training Manual | HRIS | Version 1.0
Page 37
STARVISION INFORMATION TECHNOLOGY (SDA)
Select the Payroll Run Type as ALL. There are 4 options: ALL (which computes all
transaction, pay, and also covers the computation of BONUS, FEST_ADV and
FIXED_ADV), BONUS (which only computes BONUS), FEST_ADV (which only computes
FEST_ADV) and FIXED_ADV (which only computes FIXED_ADV).
If you only wish to process only for a group of employees, you can make use of Selection
Criteria Section consisting of: Additional Selection button to display the query builder to
filter the employee records and/or with Organization Unit, Job Family, Appointment Code,
Grade, Employee ID From/To.
Training Manual | HRIS | Version 1.0
Page 38
STARVISION INFORMATION TECHNOLOGY (SDA)
Use Check… button to view the defined employees.
Otherwise, you can just click on the Show Selection button to check whether all your
employees are selected for payroll processing.
Note: You will not be able to filter employee for processing once the payroll calculation
record is created.
Training Manual | HRIS | Version 1.0
Page 39
STARVISION INFORMATION TECHNOLOGY (SDA)
Click on the Submit button to proceed with the payroll processing and the record will be sent
to the payroll job processing. (Note: The screen will proceed to the main Payroll
Processing page).
5.5 Check Payroll Calculation
After payroll processing is completed, you need to preview/print pre-payment report to check
the details of individual employee payment such as basic pay, CFP amount, fund
contributions, allowances, deductions and etc.
There are a numbers of pre-payment reports that you can generate to check the employee
payment. One such report is thePre-Payment Transaction Listing By Organization Unit.
Training Manual | HRIS | Version 1.0
Page 40
STARVISION INFORMATION TECHNOLOGY (SDA)
.
Here, you can select to ‘Print All Records’ or ‘Print Selected Records’. You will need to click
on the Selection Criteria button to define the query for certain group of employees if the
latter option is selected.
Select the Payroll Batch No and set the Report Parameters.
Click on the Click Here button to generate the report. The report will be displayed as pdf
format where you can choose to save or print the report.
5.6 Make Payment
To begin with, Go to Getting Started> Make Paymentand click on the Add icon to create a
new record.
Note: The Payment No, BankCode, etc (grey fields) will be automatically populated with the
last payment Pay Year/Month.
Training Manual | HRIS | Version 1.0
Page 41
STARVISION INFORMATION TECHNOLOGY (SDA)
Click on the AddNew icon under the Payroll Batch tab to add a new payroll payment batch.
After adding and saving the payroll payment batch, click on the Cancel icon to return to
previous screen. Next, click on Submit button and the record will be sent to the payment job
processing. (Note: after that, the screen will display the main Payroll Payment page).
5.7 Check Payment Information
After the payroll payment is completed, you need to preview/print payment report to check
the details of individual employee payment such as basic pay, CFP amount, fund
contributions, allowances, deductions, payslipsetc.
There are a numbers of payment reports that you can generate to check the employee
payment. One such report is the Payment Transaction Listing By Organization Unit.
Here, you can select to ‘Print All Records’ or ‘Print Selected Records’. You will need to click
on the Selection Criteria button to define the query for certain group of employees if the
latter option is selected.
Select the Payment Run No and set the Report Parameters.Click on the Click Here button
to generate the report. The report will be displayed as pdf format where you can choose to
save or print the report.
Training Manual | HRIS | Version 1.0
Page 42
STARVISION INFORMATION TECHNOLOGY (SDA)
5.8 Export GIRO
Go to Run Payroll >Export GIRO and click on the Add New Button.
The Fields Bank Code, Bank Branch, Bank Account No are auto filled in from the settings
done for these fields in the Company Master.
Click on Payroll Batch tab and click on the Add New Button
Choose the Payroll Batch No. and click on the Save button.Click on Cancel Button and then
click on Exit Button to exit and return to main screen.
Click Export to generate GIRO
5.9 CPF Export
This option allows you to export a defined CPF PAL/CPFLine formats and upload them to
CPF Board.
To begin with, Go to Payroll Processing > CPF Export.
Select the correct bank format and output format. The 2 available formats are CPFLine,
CPFPAL and MSO Balance Refund.
Training Manual | HRIS | Version 1.0
Page 43
STARVISION INFORMATION TECHNOLOGY (SDA)
Key in the Pay Year/Month (Enter the Year in '’yyyy’ in the first textbox and ‘mm’ in the
second textbox). Select on the Pay Period.
Click to define the export file name and directory that you wish to save it to.
Click on the Save button.
Click on the Export button and select the export format correctly.
If you registered with CPF board on the e-submission, select CPFPAL format. Otherwise, if
you subscribe to Crimson Logic services, select CPFLine format. Otherwise, if you subscribe
to government once a year, select MSO Balance Refund format.
Click Export button. A Save file dialogue box will appear. The Messages text box will also
display the export status. At the same time, you can check the summary on the export
screen to tally with you payment reports.
Training Manual | HRIS | Version 1.0
Page 44