1
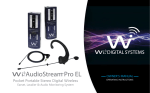
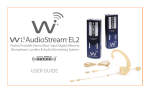
AudioStream Pro SL
TM
TM
Pocket Portable Stereo Digital Wireless
Stereo Lavalier & Audio Monitoring System
OWNER’S MANUAL
OPERATING INSTRUCTIONS
CONGRATULATIONS!
Thank You For Choosing the Wi Digital System.
Congratulations on your purchase of the Wi AudioStream Pro SL Pocket Portable Stereo Digital Wireless
Lavalier & Audio Monitoring System with 2-Way Wireless USB 2.0 Audio Interface.
Please thoroughly read this User’s Manual for all the feature operation information necessary
to install and operate your new Wi AudioStream Pro SL system.
Notice: Product specifications and package contents are subject to change without notice.
Package contents may vary according to the different regions.
For additional support, please visit www.widigitalsystems.com
TABLE OF CONTENTS
-----------------------------------------------------------------------------------------SUPPORT4
TECHNICAL
-----------------------------------------------------------------------------------------PACKING LIST5
-----------------------------------------------------------------------------------------SYSTEM CHARGING & PAIRING6
-----------------------------------------------------------------------------------------LAVALIER FITTING8
-----------------------------------------------------------------------------------------TRANSMITTER MIC CONNECTION10
-----------------------------------------------------------------------------------------TRANSMITTER PLACEMENT11
-----------------------------------------------------------------------------------------RECEIVER CAMERA CONNECTION12
-----------------------------------------------------------------------------------------14
RECEIVER SMART DEVICE CONNECTION
-----------------------------------------------------------------------------------------RECEIVER MIXER CONNECTION16
-----------------------------------------------------------------------------------------AUDIO MONITORING18
-----------------------------------------------------------------------------------------20
2-WAY WIRELESS USB AUDIO INTERFACE
-----------------------------------------------------------------------------------------MAC & PC USB SETUP22
-----------------------------------------------------------------------------------------26
iPad, Surface & Tablet PC USB SETUP
-----------------------------------------------------------------------------------------WIRELESS USB AUDIO LISTENING28
-----------------------------------------------------------------------------------------29
WIRELESS USB VoIP & PODCASTING
-----------------------------------------------------------------------------------------WI TRANSMITTER & RECEIVER FEATURES
30
-----------------------------------------------------------------------------------------38
BUTTON FUNCTIONS & LED INDICATORS
-----------------------------------------------------------------------------------------SYSTEM SPECIFICATIONS42
-----------------------------------------------------------------------------------------LAVALIER SPECIFICATIONS46
-----------------------------------------------------------------------------------------FCC NOTICE & RECYCLING INFO48
-----------------------------------------------------------------------------------------WARRANTY50
3
TECHNICAL SUPPORT
Getting Answers!
We want you to get the most from your new Wi AudioStream Pro SL stereo digital wireless audio system!
Simply logon to www.widigitalsystems.com and access the resources available online including
instructional manuals and more.
Our customer service support staff are ready to assist you with any question you may have.
Your Wi AudioStream Pro comes with 90 days of telephone support and one year of service coverage.
There are may ways to contact Wi Digital Systems customer service support.
E-Mail:[email protected]
Website:www.widigitalsystems.com/support
Technical support:
(714) 505-4567
4
PACKING LIST
Wi Transmitter
1/4”-20 Camera
Hot Shoe & Clip
Wi Receiver
Single Feed
Cable Clips
Wi Sure-Sound™ Stereo Lavalier with
Omnidirectional Microphone Capsules
Dual Feed
Cable Clip
MIC
Windscreens
1/8” to 1/8” TRS Stereo 1/8” Stereo Male to 1/4”
Cable & 1/4” Adapter Stereo Male Y-split Cable
USB
Data Cable
XLR to 1/8”
TRS Cable
MIC/Headphone
Adapter
Universal USB
AC Charger
USB Y-Split
Power Cable
Stereo XLR to 1/8”
TRS Cable
Hard Shell
Carrying Case
5
CHARGING
Charging The System
AC Charger
USB Connector
Before using your new Wi AudioStream™ Pro SL digital wireless system,
you need to fully charge the batteries for approximately 2 hours.
1. Plug the AC Charger into a power socket.
2. Connect the USB power cable to the USB port on the AC charger.
3. Connect one of the two mini USB connectors to the transmitter
USB port.
4. Connect the second mini USB connector to the receiver USB port.
5. The Power/Status LED will turn to solid Red ON.
6. When charging is complete the Red LED will turn OFF.
The system power source’s flexible design boasts 4 power options:
• 4~6 hours internal rechargeable battery use.
• 13 hours with USB AA battery adapter (optional Accessory).
• Continuous use with AC power adapter.
• Continuous use with USB port bus power
6
USB Port
K
LIN
R
WE
PO
USB Port
Mini USB
Connector
PAIRING
Pairing the Wi Transmitter & Receiver
The Wi Transmitter and Receiver are paired at the factory. Perform the
following steps ONLY if you need to reestablish connection between
the Transmitter and the Receiver.
r
p
(Tx)
k
1. First turn ON the Transmitter (Tx) and the Receiver (Rx) by pressing and
holding the POWER button
,
on each of the units for 2 seconds.
kv
p
2. Press and hold the LINK button
on the Transmitter (Tx) for 3 seconds.
The Power/Status green LED on the Transmitter will start flashing.
The Transmitter is now in a Pairing mode and ready to search for receivers.
(Rx)
z
3. Press and hold the LINK button
on the Receiver (Rx) for 3 seconds.
The Power/Status green LED on the receiver will flash momentarily.
4. Once the Transmitter pairs with Receiver, the Power/Status LED on both
devices will turn to solid green.
z
v
5. The Wi AudioStream Pro SL Transmitter and Receiver are now ready for use.
7
LAVALIER FITTING
Wi Sure-Sound Stereo Lavalier
Wi Digital Systems ultra-small 3.1mm MIC
capsule mounted on an ultra-thin rugged
cable, captures vocals clearly with excellent
rejection of wind and ambient noise.
The Wi Sure-Sound™ Stereo Lavalier is an
excellent choice for pastors, artists, fitness
instructors, speaking and singing performers
and video camera miking.
Refer to the “Lavalire Specs” on
F page
(54) for more details
8
LAVALIER FITTING
Using The Stereo Lavalier
The Wi Sure-Sound Lavalier easily accommodates
alternative mounting applications such as:
• Ties, Shirts, Jackets and Behind-the-Button Positioning
• In-Hair
• Beneath T-shirts & Blouses
• Hard to MIC Instruments
The included dual fleed and single feed lavalier
cable clips can be used to customize the fit to
supports discreet stereo or mono redundancy
miking applications with comfort and flexibility.
Ideal for presenters, reporters, worship leaders and
pastors, broadcasters, interviewers, musicians and
many more!
9
TRANSMITTER MIC CONNECTION
Connecting The Microphone To The Transmitter
Connect the 1/8” TRS jack end of the microphone cable to
the audio output port
of the Wi Transmitter.
j
F
F
For Mono MIC connection, ensure that the
Transmitter is set for Mono Mic-in Mode r
and the LED is in FAST blue flashing mode.
For Stereo MIC or Mono Redundancy MIC connection,
ensure that the Transmitter is set for Stereo Mic-in Mode
and the LED is in SLOW blue flashing mode.
F
For Camcorders or DSLRs without microphone noise filter
circuit or limited MIC gain control capability set the Transmitter
to Stereo Line-in Mode r. The blue LED will reflect
TWO FAST flashes.
F
Refer to the “Tx Button Functions”
on page (38) for more details
10
r
j
TRANSMITTER PLACEMENT
Transmitter Placement
Designed for singers, performers and
active users, the Ultra-lightweight, 1.08 Oz
discreet and unobtrusive Wi Transmitter can
easily be attached to your belt, shirt, or event
placed in your pocket without impeding your
body movement.
For best wireless performance we recommend
mounting the Wi Transmitter on your belt to the
side of your body. Avoid placing the Wi Transmitter
on your belt to the back side for your body.
11
RECEIVER CAMERA CONNECTION
Using The 1/4”-20 Hot Shoe to Mount
The Receiver to Cameras
The Wi Transmitter and Receiver are designed
to mount video camera DSLR and handheld
recorders.
1. Locate the 1/4” -20 Hot Shoe flash adapter
for cameras, tripods and bipods.
2. Fasten the 1/4” -20 Hot Shoe flash adapter
mounting screw to the belt clip 1/4” -20 nut
and tighten the top lock ring.
3. Loosen the bottom lock ring on the 1/4” -20
Hot Shoe flash adapter camera accessory.
4. Insert/slide the mounting foot of 1/4” -20 Hot
Shoe flash adapter into the camera accessory
shoe and tighten the bottom lock ring.
12
5
d
RECEIVER CAMERA CONNECTION
Audio Cable Connection
5
1. Locate the 1/8” to 1/8” TRS stereo audio cable or
the 1/8” to XLR TRS audio cable. Use the 1/8” TRS
to Stereo XLR audio cable if your camera is equipped
with Stereo/Two-Channels XLR audio input ports.
2. Insert the 1/8” TRS stereo end of the audio cable
into the Wi Receiver audio output jack.
audio result we recommend connecting
F toForthebestLine-in
input jack if available.
1/8” TRS to XLR Cable
5
3. Insert the 1/8” TRS stereo end or the XLR end of the audio
cable into the Camera MIC-IN or Line-In audio input jack.
1/8” TRS to XLR Cable
1/8” to 1/8” TRS Stereo Cable
13
RECEIVER SMART DEVICE CONNECTION
Connecting the Receiver to Smart Devices
Analog Audio Port
The Wi Receiver brings the convenience of
hands-free digital wireless miking to smartphones
and tablet to transform these smart devices into
powerful on-the-go video production tools.
This powerful system enables users to wirelessly
connect a lavalier microphone to iPhone, iPod, iPad,
Windows Surface, Tablet PC or any Smartphone and
capture superb vocals and amazing ambient sounds
easily and accurately.
14
RECEIVER SMART DEVICE CONNECTION
5
5
Using The MIC/Headphone Adapter to
Mount The Receiver to Smart Device
1. Locate the 1/8” to 1/8” stereo audio cable,
and the MIC/Headphone adapter included
in the kit
Wi Receiver
Connection
Headphone
Connection
5
2. Insert the 1/8” TRS stereo end of the cable
into the Wi Receiver audio output jack.
4. Insert the 1/8” TRS stereo end of the cable
connected to the receiver into the MIC port
on the MIC/Headphone adapter.
4. Insert the 1/8” TRS stereo end of the
headphone cable into the Headphone
port on the MIC/Headphone adapter.
6. Insert the 1/8” TRS end of the MIC/Headphone
adapter into the Smartphone or smart device
MIC/Headphone port.
15
RECEIVER MIXER CONNECTION
Connecting the Receiver to Sound Systems
The Wi AudioStream SL Pro is designed to connect
to amps, mixers, live sound systems or powered
speakers in minutes!
Simply connect the ultra compact sized Receiver to
the amplifier and speakers on stage and you are done!...
For best audio sound quality and gain feedback control, we
F recommend
connecting the Wi Receiver to (2) two channels
on the mixer or live sound system using the included Stereo
L/R 1/4” or XLR cables. No phantom power required!
This setup will allow you to reduce the gain settings by 50%
from normal mono single channel connection and expand
the vocal sound quality by slight panning the first channel
to the left and the second channel to the right .
16
RECEIVER MIXER CONNECTION
Audio Cable Connection
1. Locate the 1/8” stereo Y-split to 1/4” TRS
stereo cable or the 1/8” to XLR TRS audio
cable that comes with the system.
2. Connect the 1/8” TRS jack end of the cable
to the audio output port
of the Receiver,
then connect the left and right 1/4” TRS cable
ends to the mixing console audio input jacks.
u
3. Connect the XLR cable end to the MIC XLR
port on the mixing console.
1/8” Stereo Male to 1/4” Y-split Cable
1/8” TRS to Stereo XLR Cable
Stereo Connection Cables
1/8” to 1/8” TRS Stereo Cable & 1/4” Adapter
Mono Connection Cables
1/8” TRS to XLR Cable
u
17
AUDIO MONITORING
Audio Monitoring
The Wi AudioStream Pro SL is designed to provides
freedom of wireless movement to any conventional
headphones or in-ear personal monitors making it an
ideal system for audio listening and monitoring
applications.
You can wirelessly listen to your music from MAC, PC,
Smart device, Live Sound system or any audio source
by connecting the Wi Transmitter to your audio source
and your headphones or in-ear personal monitors to the
Wi Receiver.
The system is optimized for Wi Digital’s optional
Wi Sure-Ears model Wi-SEBD01 and Wi Micro-In-Ear
model Wi-SEMI5 personal reference monitors for
a high quality wireless monitoring experience.
18
AUDIO MONITORING
Headphone & In-Ear Personal Monitors Setup
PLEASE PROTECT YOUR EARS! Prolonged use
of headphones or In-ear personal monitors at high
volumes may affect your hearing capacity or may
result in noise induced hearing loss (NHL).
1. Connect the Wi transmitter to your audio source using
the one of the included stereo audio cable that best fit
your audio source audio port jack
2. Set the Wi Transmitter to “Stereo Line-in” mode by
pressing the MODE button
for three seconds until
the blue LED reflects “Double Blue Flashes”
r
}
the “Tx Button Functions” on page (48)
FforRefermoreto details
3. Insert the 1/8” TRS stereo end of the Headphone cable
into the Wi Receiver audio output jack
.
u
u
19
WIRELESS USB AUDIO INTERFACE
2-Way Wireless USB 2.0 Audio Interface
The 2-Way wireless USB 2.0
audio interface enables users to
wirelessly connect microphones
and In-ear monitors to iPad®,
Windows Surface®, Tablet PC
MAC and PC computers for
simultaneous two-way 2.4GHz
digital wireless studio audio
quality connectivity to practice,
record and monitor their
performance with superb tones
using the sound effects in Apple’s
Logic Pro, GarageBand software
or any Core Audio compatible
application on iPad, Tablet, Mac
or PC.
20
WIRELESS USB AUDIO INTERFACE
Wireless USB Audio Interface Features List:
The amazing 2-Way wireless USB 2.0 audio interface features special circuitry designed to deliver
professional digital wireless audio I/O performance along with low latency USB 2.0 performance.
• Wirelessly connect your iPad®, Windows Surface®, Tablet PC, MAC and PC to studio gear or
professional on-stage audio systems such as DJ gear, audio mixers, powered speaker/monitors,
amplifiers and live sound systems in minutes.
•
Convert your iPad®, Windows Surface®, Tablet PC, MAC and PC to a powerful on-the-go video
production tool without the cable clutter.
• Conduct Podcasting or voice over the internet (VoIP) chats with support for most common calling
applications including Skype®, Yahoo!®, Live™, and AIM®.
• Connect your iPad®, Windows Surface®, Tablet PC, MAC and PC wirelessly to your home theater
or stereo system while keeping your gear at your finger tips.
• Stream audio wirelessly to your favorite headphone or in-ear monitors with full access to all of the
essential audio control functions of your iPad®, Windows Surface®, Tablet PC, MAC and PC including
volume up and down, play, pause, mute, track control and MIC muting in the palm of your hand.
21
MAC USB SETUP
5
1. Locate the included USB data cable.
2. Make suer that the Transmitter and the Receiver
are turned OFF.
3. Insert the mini USB end of the USB data cable
into the Wi Transmitter USB audio interface
port located on the side of the transmitter.
4. Insert the full size USB end of the USB data cable
to your Mac laptop or desktop USB port.
5. Power up the transmitter and the receiver.
5
Connecting To Your Mac
USB
Data Cable
22
MAC USB SETUP
Configuring The Audio Ports On Your Mac
1. To select the Wi Transmitter as the computer’s audio output, open
the System Preferences from the dock or the main Apple Menu.
2. Open the Sound preferences then choose the output tab and
select Wi AudioStream Pro.
3. Adjust the Output volume slider at the bottom of the Sound dialog
box to the maximum setting and use the MAC volume control keys,
Wi AudioStream Pro Receiver’s volume controls to control the overall
output for the headphones or speakers.
4. Select the Wi AudioStream Pro as the computer’s audio input for use
with the Wi AudioStream Pro Receiver with your Lavalier or your
headphone with built-in MIC. Choose the Input tab and
Wi AudioStream Pro. Adjust the Input volume slider to set the MIC gain
23
PC USB SETUP
24
5
1. Locate the included USB data cable.
2. Make suer that the Transmitter and the Receiver
are turned OFF.
3. Insert the mini USB end of the USB data cable
into the Wi Transmitter USB audio interface port
located on the side of the transmitter.
4. Insert the full size USB end of the USB data cable
to your laptop or desktop USB port.
5. Power up the transmitter and the receiver.
6. Windows will recognize the Wi Transmitter and
automatically install the universal driver. A balloon
will pop up, telling you the computer has found the
Wi Transmitter. When Windows is finished
installing the driver, a balloon pop up will say
“Your device is installed and ready to use”.
5
Connecting To Your PC
PC USB SETUP
Windows 7/Vista/XP Optional Settings
1. Setting the Wi Transmitter as your default audio device
To set the Wi Transmitter as your default device for sound playback and recording, or to change its
settings, click the Start button, click Control Panel and then click Sound. Under the Playback and Recording
tabs, you can select the Wi USB AudioStream from the menus and use the Set Default button to set it as
the default device.
2. Setting the Wi Transmitter MIC gain
To set the gain of the microphone when using the Wi Transmitter, click on the Volume button in the Sound
recording section. Moving the slider will adjust the microphone gain.
25
iPad USB SETUP
Apple Optional USB Camera Adapters
Connecting To Your iPad
The optional Apple Lightning to USB Camera adapter Model
MD821ZM/A or 30-pin to USB Camera adapter Model MC531ZM/A
is required to set up your Wi AudioStream Pro with iPad.
Note: Before using the Wi AudioStream Pro with your
iPad, you need to fully charge the Transmitter batteries.
Your iPad will display the message “This devise uses
too much power” If the Transmitter is not fully charged.
1. Make sure that the Transmitter and the Receiver are OFF.
2. Insert the mini USB end of the USB data cable into the
USB audio interface port located on the side of the Transmitter.
3. Insert the full size USB end of the USB data cable to the USB
port on the optional Apple iPad Camera connection adapter.
4. Power up the transmitter and the receiver.
5. Apple iPad iOS will recognize the Transmitter and
automatically install the universal driver.
26
Apple 30-pin Adapter
Model MC531ZM/A
Apple Lightning Adapter
Model MC531ZM/A
SURFACE & TABLETPC USB SETUP
1. Locate the included USB data cable.
2. Make suer that the Transmitter and the Receiver
are turned OFF.
3. Insert the mini USB end of the USB data cable
into the Wi Transmitter USB audio interface port
located on the side of the transmitter.
4. Insert the full size USB end of the USB data cable
to your Windows Surface or Tablet PC USB port.
5. Power up the transmitter and the receiver.
6. Windows will recognize the Wi Transmitter and
automatically install the universal driver. The
Wi AudioStream Pro Plug-and-Paly systems is now
ready for use. No drivers are needed
5
Connecting to your Windows Surface and Tablet PC
27
USB AUDIO LISTENING
Headphone & In-Ear Personal Monitors Setup
PLEASE PROTECT YOUR EARS! Prolonged use
of headphones or In-Ear personal monitors at high
volumes may affect your hearing capacity or may
result in noise induced hearing loss (NHL).
• You can wirelessly listen to your iPad®, Windows
Surface®, Tablet PC MAC and PC computers music by
connecting your headphones or in-ear personal monitors
to the Wi Receiver.
|
}
y
{
}
• Pressing the Play
button on the Wi Receiver will
automatically start iTunes or Windows media player.
• You can remotely control the audio functions of your MAC
PC, iPad or Windows Surface Play/Pause/Mute
, Next
Track
, Prev Track , Volume UP , Volume Down
directly from the Wi Receiver using the function buttons.
y
{
|
x
}
We recommend using the Wi Sure-Ears (Wi-SEBD01)
or the Wi Micro-In-Ears (Wi-SEMI5) in-ear monitors for
a high quality monitoring experience..
28
u
x
USB VoIP & PODCASTING
5
5
USB VoIP and Podcasting
Your MIC is probably the most important part of your setup.
For VoIP application, typical headphones equipped with a
microphone are sufficient. Simply plug in your headphones
equipped with a microphone to the receiver and get started.
Microphone
Connection
Headphone
Connection
5
For Podcasting, you will need a good set of monitors when
you’re recording to monitor yourself as well as hear your
guests. We recommend using the Wi Sure-Ears (WiSEBD01) or Wi Micro-In-Ears (Wi-SEMI5) for a high quality
monitoring experience.
1. Locate the MIC/Headphone adapter
2. Insert the headphone cable jack into the
Headphone port on the MIC/Headphone adapter.
3. Insert the 1/8” TRS end of the earset or lavalier MIC
into the Microphone port on the MIC/Headphone adapter.
4. Insert the 1/8” TRS end of the Wi Receiver
Audio I/O port.
29
TRANSMITTER FEATURES
Transmitter Controls and Connections
j
Audio IN Jack: k
Power ON/OFF: Provides mono and stereo connection for your
microphone or other sound source.
Press and hold the Power button for 2 seconds
to turn the transmitter ON or OFF.
l
Power/Status LED: Displays the status of six functions: ON/OFF, Battery
Charging, Low Battery, Pairing, Mute, Operating and
Lock Modes.
o
n
m
F Refer to the “Tx Button Functions” on page (48) for more details
m Volume UP: n Volume DOWN: 30
j
Press once to increase the volume level one step
at a time. Hold to increase continuously.
Press once to decrease the volume level one step
at a time. Hold to decrease continuously.
p
l
k
TRANSMITTER FEATURES
o Mute: Press and hold for 1.5 seconds to mute or un-mute the audio.
p Link/Pair: The Link button performs two functions: Pairing and Linking.
Pairing allows the Transmitter to connect and communicate with the receiver. Press and hold for 3 seconds until the green LED display fast flashes, indicating that it is ready to pair with a Receiver. Once the Transmitter pairs with the
Receiver, the LED on both devices will turn solid green.
31
TRANSMITTER FEATURES
q
Lock: r
Mode:
Press and hold for 2 seconds to lock the function key pads on the Transmitter and
and the Receiver to preserve all settings and prevent accidental triggering of the
function buttons during operations. Press once to unlock the Transmitter and Receiver function key pads and restore normal operations.
Press and hold for 2 seconds to select the desired operation indicated
by the following blue LED flashing sequence. Continue to hold to cycle
between the three operating modes.
Stereo Mic-in Mode Solid Green LED and Slow Blue LED Flashes
Mono Mic-in Mode Solid Green LED and Fast Blue LED Flashes
Stereo Line-in Mode Solid Green LED and Two Blue LED Flashes
F Refer to the “Tx Button Functions” on page (48) for more details
32
TRANSMITTER FEATURES
r
11
q
s
s USB 2.0 Audio Interface
& Charging Port: This is a mini USB 2.0 Plug-and-Play
wireless audio interface for iPad®, Windows Surface®, Tablet PC, MAC and PC.
This is also a mini USB connection to power up and charge the internal batteries. The Transmitter can be charged using the supplied universal AC charger, via an instrument or computer USB port, or the optional AA battery power booster adapter.
11 Belt Clip: The Transmitter can be attached to belts, shirts and pants’ pockets. The compact and lightweight design is easy to wear without impeding body movement.
33
RECEIVER FEATURES
Receiver Controls and Connections
u Audio I/O Jack: v
Power ON/OFF: w Power/Status LED: x Volume UP: y Volume DOWN: 34
u
|
Stereo connection for professional Sound Systems, Monitors, Mixers, In-Ear Monitors, Headphones and more...
Press and hold for 2 seconds to turn the receiver
ON or OFF
Displays the status of six functions: ON/OFF, Battery Charging, Low Battery, Pairing, Mute and Lock mode.
Press once to increase the volume level one step
at a time. Hold to increase continuously.
Press once to decrease the volume level one step
at a time. Hold to decrease continuously.
y
{
z
w
x
v
RECEIVER FEATURES
z Link/MIC:
This multifunction button performs the Pairing and VoIP MIC activation.
Pairing allows the Receiver to be discovered by the Transmitter. Press and hold the Link button for 3 seconds until the green LED display fast flashes, indicating that it is ready to pair with a Transmitter. Once the Transmitter pairs with the
Receiver, the LED on both devices will turn solid green.
{ Next Track: |
VoIP & Microphone operations - See item #10
The Next Track function button is used to remotely control jumping to the next
track for media players or sequencing software. Press the Next Track button once
to jump to the next audio track.
Previous Track: The Previous Track function button is used to remotely control jumping to the
previous track for media players or sequencing software. Press the Previous Track
button once to go back to the previous audio track.
35
RECEIVER FEATURES
} Mute/Pause/Play: Press and hold the Mute/Pause/Play button for 1.5 seconds to mute/un-mute audio.
Press once to pause or play an audio track. This function will remotely control the
media player or sequencing software functions.
~
MIC:
Press the LINK / MIC button once to activate the Microphone.
The Blue LED on the Receiver will turn ON when the MIC is activated.
F
Refer to the “Rx Button Functions” on page (50) for more details
36
RECEIVER FEATURES
11 Charging Port: s
}
~
12
This is a mini USB connection to power
up and charge the internal batteries. The Receiver can be charged using the supplied universal AC charger, via an
instrument or computer USB port, or the optional AA battery power booster adapter.
12 Belt Clip: The Receiver can be attached to belts, shirts and pants’ pockets. The compact and lightweight design is easy to wear without impeding body movement.
11
37
Tx BUTTON FUNCTIONS
Transmitter (Tx) Button Functions
FunctionButton
ActivationHold Time
LED Status
2 sec
Solid Green
k POWER Press and Hold
Press and Hold
3 sec
Fast Green Flashes
p LINK
Click Click
Signal Re-routing
p LINK
Volume UP/Down
Click for Step, Press and hold for Auto
Click
mn
Mute ON/OFF
Press and Hold
1.5 sec
Solid Green and Blue
o
Lock Tx/Rx Key Pads
Press and Hold to Lock/Unlock Key Pad 2 sec
Solid Green Only
q
Solid Green & Blue Flashes
Stereo Mic-in Mode r MODE
Press and Hold
2 sec
Solid Green LED and
Slow Blue LED Flashes
Power ON/OFF
Pairing Mode
r
r
Mono Mic-in Mode
MODE
Press and Hold 2 sec
Solid Green LED and
(Factory Setting)Fast Blue LED Flashes
Stereo Line-in Mode
MODE
Press and Hold
2 sec
Solid Green LED and
Double Blue Flashes
38
Tx LED INDICATOR CHART
Transmitter (Tx) LED Indicator Chart
Function
Searching For Receiver
Linked to Receiver
Lock Mode
Low Battery
Charging With Power OFF
Charging With Power ON Charging Complete
LED Status
l
l
l
l
l
l
l
Flashing Green
Solid Green
Solid Green Only
Solid Green & Flashing Red
Solid Red
Solid Red & Green
Red OFF
r
o
n
q
p
l
m
k
39
Rx BUTTON FUNCTIONS
Receiver (Rx) Button Functions
FunctionButton
ActivationHold Time
LED Status
2 sec
Solid Green
v POWER Press and Hold
Press and Hold
3 sec
Fast Green Flashes
z LINK
ClickClick
Solid Green LED and
MICLINK/MIC
z
Power ON/OFF
Pairing Mode
Two Blue LED Flashes
xy
}
Play/Pause
}
Next Track
{
Prev Track
|
Volume UP/Down
Click for Step, Press and Hold for Auto Click
Mute ON/OFF
Press and Hold
1.5 sec
Click (With Optional USB Tx Dongle)
Click
Click (With Optional USB Tx Dongle)
Click
Click (With Optional USB Tx Dongle)
Click
40
Solid Green & Blue
Rx LED INDICATOR CHART
Receiver (Rx) LED Indicator Chart
Function
Searching For Transmitter
Linked to Transmitter
Key Pad Lock
Low Battery
Charging With Power OFF
Charging With Power ON
Charging Complete
LED Status
w
w
w
w
w
w
w
Flashing Green
Solid Green
Solid Green (Activated by Tx)
Solid Green & Flashing Red
Solid Red
Solid Red & Green
Red OFF
|
}
y
{
z
w
x
v
41
SYSTEM SPECIFICATIONS
Wi AudioStream Pro SL Technical Specifications
Specifications
Transmission Format:
2.4 GHz, 16-bit, 48kHz Digital Wireless
15Hz to 20kHz
Frequency Response:
Auto select
Frequency Selection:
More than 90 dB (A-weighted) for stereo line-in mode
S/N Ratio:
More than 89 dB (A-weighted) for stereo and mono MIC mode
Distortion:0.12 % THD
1/8” (3.5mm) TRS Stereo
Connectors:
1Vrms
Max Input Level:
1.2Vrms
Max Output Level:
Input Impedance:
3.3K ohm
Output Impedance:
< 10 ohm
Rechargeable Battery Life:
4~6 hours
Power Input:
5V DC, 500 mA
42
SYSTEM SPECIFICATIONS
Specifications
Battery Power Booster:
10~13 hours (With optional AA battery power booster adapter)
USB Bus Power:
Low Battery Alert:
Power-up Modes:
Antenna:
Range:
Units operating at the same time:
USB 2.0 Audio Interface:
Apple OS Support: Windows OS Support: Compatibility: VoIP Capable:
802.11g/n Network Safe:
Transmitter Weight:
Receiver Weight:
Yes
15 minutes of life left
Three (3) power-up modes (Stereo Line-in, Stereo Mic-in, Mono Mic-in)
Two internal antennas
Up to 100 ft
(Range may be dependent on line of sight and may vary due to local conditions)
9
Full Speed Two-Way USB 2.0 Wireless Audio Interface
MAC OSX and iOS
Win XP/VISTA/ Win7/Win 8
MAC, PC, iPad®, Windows Surface®
Yes
Yes
0.068 lbs (1.08 Oz) (30.8g)
0.068 lbs (1.08 Oz) (30.8g)
43
EARSET SPECIFICATIONS
Wi Sure-Sound Lavalier Technical Specifications
Omnidirectional Capsule MIC Specifications
Frequency Response:
20Hz to 20kHz
Less than 500uA
Operating Current:
Operating Voltage:
0.8V - 5V DC
Sensitivity:-32dB+/-4dB/Pascal
140 dB SPL max
Maximum SPL:
2KΩ±30%
Output Impedance:
3.1mm Capsule
Capsule Type:
Back Electret Condenser
Element:
Polar Pattern:
Omnidirectional
Configuration: Stereo or Mono MIC Redundancy
46
LAVALIRE SPECIFICATIONS
47
REGULATORY COMPLIANCE
Regulatory Compliance Information
Compliance Statement
This equipment has been tested and found to comply with the limits for a Class B digital device, pursuant to part 15 of the
FCC Rules. These limits are designed to provide reasonable protection against harmful interference in a residential installation. This equipment generates, uses and can radiate radio frequency energy and, if not installed and used in accordance
with the instructions, may cause harmful interference to radio communications. However, there is no guarantee that interference will not occur in a particular installation. If this equipment does cause harmful interference to radio or television reception, which can be determined by turning the equipment off and on, the user is encouraged to try to correct the interference
by one or more of the following measures: (1) Re-orient or relocate the receiving antenna. (2) Increase the separation
between the equipment and receiver. (3) Connect the equipment into an outlet on a circuit different from that to which the
receiver is connected. (4) Consult the dealer or an experienced radio/ TV technician for help. CAUTION: Any changes or
modifications not expressly approved by the grantee of this device could void the user’s authority to operate the equipment.
48
RECYCLING INFORMATION
Disposal and Recycling Information
Correct Disposal
This symbol indicates that your product must be disposed of properly according
to the local laws and regulations. When your product reaches its end of life,
contact the retailer where the product was purchased or your local authorities to
learn about recycling options. This product should not be mixed with other commercial waste for disposal.
49
PRODUCT WARRANTY
Product Warranty Terms
Wi Digital Systems warrants that the Wi AudioStream Pro SL is free from material defects and faulty workmanship for a
period of twelve (12) months from the date of purchase. Wi Digital Systems will repair or replace, at its option, any Product
that breaches this warranty during said period. This warranty does not cover and is void with respect to (1) Products
which have been improperly installed, repaired, modified or altered; (2) Products which have been subject to abuse,
misuse, physical damage, exposure to fire, water or excessive moisture or dampness; (3) Products on which the serial
number has been removed, altered, or rendered illegible; (4) Products that are operated outside the limits of the technical
specifications of the product.
Repair and/or replacement of the Wi Digital Systems product will be performed through Wi Digital Systems Return Material Authorization (RMA) procedure. The customer is required to contact Wi Digital Systems at www.widigitalsystems.com
to obtain the approval and procedure for returning any product under warranty.
IN NO EVENT SHALL Wi DIGITAL SYSTEMS BE LIABLE FOR ANY INCIDENTAL, CONSEQUENTIAL, DIRECT,
INDIRECT, SPECIAL OR PUNITIVE DAMAGES WHICH ARISE IN ANY WAY OUT OF THE MANUFACTURE, SALE OR
USE OF ITS PRODUCTS OR SERVICES. In the event that a court of competent jurisdiction determines that Wi Digital
Systems is in breach of any warranty, the amount of recoverable damages shall be limited to the cost of the replacement
of any Product found to be defective or nonconforming.
50
PRODUCT WARRANTY
Out of Warranty
Should your Wi AudioStream Pro SL not function properly after the warranty period has expired, please contact
Wi Digital Systems Customer Care at [email protected]
Limitations of Liability
Wi Digital Systems expressly assumes no responsibility for any error, omission, interruption, deletion, defect, delay
in operation or transmission, communications failure, theft or destruction or unauthorized access to, or alteration of,
any use of the Wi AudioStream Pro SL product. TO THE MAXIMUM EXTENT PERMITTED BY APPLICABLE LAW,
IN NO EVENT SHALL WI DIGITAL SYSTEMS OR ITS SUPPLIERS BE LIABLE FOR ANY SPECIAL, INCIDENTAL,
INDIRECT, PUNITIVE OR CONSEQUENTIAL DAMAGES WHATSOEVER, INCLUDING, BUT NOT LIMITED TO,
DAMAGES FOR: LOSS OF PROFITS OR REVENUES, LOSS OF CONFIDENTIAL OR OTHER INFORMATION ,
BUSINESS INTERRUPTION, PERSONAL INJURY, DEATH, LOSS OF PRIVACY, CORRUPTION OR LOSS OF DATA,
FAILURES TO TRANSMIT OR RECEIVE AUDIO OR ANY OTHER PECUNIARY LOSS WHATSOEVER ARISING OUT
OF OR IN ANY WAY RELATED TO THE USE OF OR INABILITY TO USE THE DEVICE OR THE SUPPORT SERVICES
OR OTHERWISE IN CONNECTION WITH ANY PROVISION OF THIS AGREEMENT, EVEN IF WI DIGITAL SYSTEMS
OR ANY SUPPLIER HAS BEEN ADVISED OF THE POSSIBILITY OF SUCH DAMAGES.
51
w w w.widigitalsystems.com
2013 Wi Digital Systems, Inc. All rights reserved. Stylized Wi logo is a registered trademark of Wi Digital
Systems, Inc. in the United States and may be a registered trademark in other countries. Wi, Digital
Wireless Stereo logos and Wi AudioStream, Wi Sure-Sound, Wi Sure-Fit, Wi Sure-Ears, Wi Micro-In-Ear
are trademarks of Wi Digital Systems, Inc. All other trademarks included herein are the property of their
respective owners. US and Foreign Patents Pending.
(Design and specifications subject to change without notice).