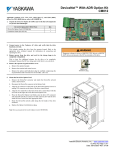
1
USER’S MANUAL
DRIVE WIZARD™
AC Drive Support Software
Release 6.1
TM.DW.04
April 2006
Thank you for choosing this YASKAWA ELECTRIC AMERICA software product. Proper
installation and use of this software will ensure proper product performance, and will prevent
damage to connected inverter products.
Please read this manual thoroughly before using this software product and operate the software
and any connected inverter products with care.
Please refer to the inverter product operation manual for proper handling and care of any
connected inverter.
NOTICE
1. This manual describes the functions of the product and relations with other
products. You should assume that anything not described in this manual is not
possible.
1.2. Although care has been given in documenting the product, please contact your
YASKAWA ELECTRIC AMERICA representative if you have any suggestions
on improving this manual.
3. The inverter product contains potentially dangerous parts under the cover. Do
not attempt to open the cover under any circumstances. Doing so may result in
injury or death and may damage the product. Never attempt to repair or
disassemble the product.
4. We recommend that you add the following precautions to any instruction
manuals you prepare for the system into which the product is being installed or
incorporated.
• Precautions on the dangers of high-voltage equipment.
• Precautions on touching the terminals of the inverter product even after
power has been turned OFF. (These terminals are live even with the power
turned OFF.)
5. Specifications and functions may be changed without notice in order to improve
product performance.
Items to Check Before Unpacking
Check the following items before removing the product from the package:
• Has the correct product been delivered (i.e., the correct model number and specifications)?
• Has the product been damaged in shipping?
2
Notice:
YASKAWA ELECTRIC AMERICA products are created and manufactured
for use according to proper procedures by a qualified operator and only for the
purposes described in this manual.
The following conventions are used to indicate and classify precautions in this
manual. Always heed the information provided with them. Failure to heed
precautions can result in injury to people or damage to property.
DANGER indicates an imminently hazardous situation which, if not avoided, will
result in death or serious injury.
WARNING indicates a potentially hazardous situation which, if not avoided, could
result in death or serious injury.
Caution indicates a potentially hazardous situation which, if not avoided, may result
in minor or moderate injury, or property damage.
YASKAWA Product References:
All YASKAWA and YASKAWA ELECTRIC AMERICA products are
capitalized in this manual.
The abbreviation “PC” means Personal Computer, and is not used as an abbreviation for
anything else.
© YASKAWA ELECTRIC AMERICA, 2006
All rights reserved. No part of this publication may be reproduced, stored in a retrieval system,
or transmitted, in any form, or by any means, mechanical, electronic, photocopying, recording, or
otherwise, without the prior written permission of YASKAWA ELECTRIC AMERICA.
No patent liability is assumed with respect to the use of the information contained herein.
Moreover, because YASKAWA ELECTRIC AMERICA is constantly striving to improve its
high-quality products, the information contained in this manual is subject to change without
notice. Every precaution has been taken in the preparation of this manual. Nevertheless,
YASKAWA ELECTRIC AMERICA assumes no responsibility for errors or omissions. Neither
is any liability assumed for damages resulting from the use of the information contained in this
publication.
3
Contents
1
Introduction .......................................................................7
Introduction to Drive Wizard™ ......................................................8
New Features for Drive Wizard™ 6.1 ...........................................9
2
Installation and Start Up...................................................10
Minimum Requirements ...............................................................11
Minimum PC Requirements for Drive Wizard™ ......................... 11
Installation ....................................................................................12
Installing the DriveWizard™ PC Software.................................. 12
Uninstalling the DriveWizard™ Software ................................... 16
3
Getting Started ..................................................................18
Connecting the drive to the PC ....................................................19
GPD515/G5, G5HHP................................................................. 19
GPD 315/V7, V7N, V7 NEMA 4................................................. 19
GPD 305/J7 ............................................................................... 19
E7, F7, G7, P7........................................................................... 19
Starting Drive Wizard™.................................................................20
Installing the Microsoft Virtual Machine ..................................... 21
Selecting a Database ...................................................................23
Going Online With the Drive.........................................................25
Working Offline.............................................................................29
Edit an Existing File ................................................................... 29
Create a New File...................................................................... 31
4
Menus ................................................................................33
File Menu .....................................................................................34
Open File ................................................................................... 34
Save Param File ........................................................................ 37
Save Param File As................................................................... 38
Close File................................................................................... 40
File New..................................................................................... 40
File Conversion.......................................................................... 43
G5 to F7 Conversion...................................................... 44
G5 to G7 Conversion ..................................................... 45
P5 to E7 Conversion...................................................... 46
P5 to P7 Conversion...................................................... 47
Print Param................................................................................ 48
Print Single Page....................................................................... 49
Compare Param File ................................................................. 49
Change Database...................................................................... 50
File Exit...................................................................................... 52
4
Communications Menu.................................................................53
Setup ......................................................................................... 53
Serial Communication.................................................... 54
Ethernet Communication ............................................... 57
Inverter Menu ...............................................................................63
Connect ..................................................................................... 63
Disconnect................................................................................. 64
Read All ..................................................................................... 65
Read Single Param ................................................................... 66
Write All ..................................................................................... 67
Write Single Param.................................................................... 69
Factory Password...................................................................... 70
Write Disable Password ............................................................ 70
Initialize Inverter ........................................................................ 73
Initialize Properties Description ..................................... 74
Auto-tune ................................................................................... 76
Autotune Properties Description .................................... 78
Reset Fault ................................................................................ 80
Monitor Menu ...............................................................................81
Start ........................................................................................... 81
Stop ........................................................................................... 81
Help Menu....................................................................................82
About ......................................................................................... 82
Web Site .................................................................................... 82
DriveWizard™ Help.................................................................... 83
5
Main Display ......................................................................84
Introduction ..................................................................................85
Navigation Tree............................................................................86
Status Bar ....................................................................................87
Status Message......................................................................... 87
Inverter Information ................................................................... 87
Status Icons............................................................................... 88
Parameter Editor Spreadsheet.....................................................89
Introduction................................................................................ 89
General definition of Parameter Groups.................................... 89
Spreadsheet Column Definitions ............................................... 90
Working Value Cell Types ......................................................... 92
Cell Attributes ............................................................................ 93
Changing Parameter Values ..................................................... 95
Differences Tab ......................................................................... 96
Adjusting Windows and Column Widths.................................... 97
5
6
Monitoring .........................................................................98
Introduction ..................................................................................99
Using the Monitor .........................................................................100
Display Features........................................................................ 102
Fault History .................................................................................103
7
Graphing ............................................................................104
Introduction ..................................................................................105
Using the Graphing Function........................................................106
Graphing Function Details............................................................109
Setup Functions......................................................................... 109
Start/Stop, Clear, and Print Buttons .......................................... 112
Save, Save As, and Load Buttons............................................. 113
Graph Properties Button............................................................ 115
Graph Column Definitions ......................................................... 116
Changing the Graphing Window (Zooming) .............................. 117
Graph Time Display................................................................... 118
8
Run Wizard ........................................................................119
Activating Run Wizard ..................................................................120
Using Run Wizard ........................................................................122
Appendix A: Toolbar Icons .......................................................123
Appendix B: Quick Reference Guide .......................................124
Appendix C: Menu Flow Chart ..................................................125
Appendix D: DriveWizard™ Supported Drives.........................126
Appendix E: Factory Only Features .........................................127
Appendix F: Adding a New Database ......................................130
Appendix G: Release History....................................................132
Appendix H: File Conversion Parameter Tables .....................136
G5 to F7/G7 Conversion Tool Table ............................................136
P5 to E7/P7 Conversion Tool Tables ...........................................140
P5+ to E7/P7 Conversion Tool Tables .........................................145
Appendix J: KVA and Control Mode Parameters ....................150
6
1
Chapter
Introduction
This chapter provides the introduction to DriveWizard™
7
Introduction to DriveWizard™
Introduction to DriveWizard™
DriveWizard™ is a PC software program designed to provide the tools necessary to make drive
installation, parameter record keeping, and maintenance as simple as possible. The following
features are provided:
•
•
•
•
•
•
•
•
•
•
•
•
•
Upload and retrieve parameter data from a drive or file
View and modify drive data with a simple user interface
Download and save such data to a drive or file
Ability to save parameter or graph data as comma separated variable (.csv) file for use with
other software applications such as Microsoft EXCEL
Comparison of drive parameter values to saved values or compare 2 saved sets of values.
Online monitoring for troubleshooting and diagnostic purposes
Fault History
Digital scope feature for graphing drive data
Basic online control of the drive to test parameter adjustments, simulate events, and to
perform motor auto-tunes.
Supports GPD515/G5, E7, F7, G7, GPD305/J7, P7, and GPD315/V7 series of Yaskawa
Electric manufactured AC drives.
Supports off-line editing of the drive parameters stored in files on the PC.
Supports multiple databases for special drive software’s
Contains parameter conversion tools to convert one drive family parameter files to another
drive family. Example: GPD515/G5 parameter file to an F7 parameter file.
This manual describes the DriveWizard™ environment and how to maneuver in it. It will also
describe how to use each feature in greater detail.
8
Introduction to DriveWizard™
New Features for DriveWizard™ 6.1
•
G5 to G7 File Conversion Tool.
This feature allows the user to convert a previously saved standard G5 drive
DriveWizard™ parameter file into a standard G7 drive DriveWizard™ parameter file.
•
GPD505/P5 & GPD506/P5+ to E7 & P7 Conversion Tool.
This feature allows the user to convert a previously saved standard GPD505/P5 or
GPD506/P5+ drive parameter file in InverterWin 3.0 into a standard E7 or P7
DriveWizard™ drive parameter file.
•
Enhanced Ethernet drive multiple IP address storage.
This feature allows the user to create a list of IP addresses as long as they wish to select a
drive to connect to in Ethernet communications. The drives can also have a tag name up
to 32 characters associated with it’s IP address to easily find a particular drive in a long
list of IP addresses.
•
Support for Ethernet Modbus TCP/IP and Ethernet/IP
Both Ethernet protocols are now supported in DriveWizard™.
•
Drive Write Protect added.
This feature allows the user to set a password and enable the write protect function.
When this function is turned on, the user of DriveWizard™ can only monitor the drive,
view drive parameters, and upload parameters from the drive. You cannot change any
parameters, download parameter files, initialize the drive, reset the drive, or utilize
RunWizard.
•
Drive Remote Reset Capability
The ability to reset a drive fault while on-line with DriveWizard™ has been added.
•
E7+ / P7+ Database
This additional database supports the new featured E7+ 4010 software and the P7+ 1020
software’s.
•
Standard G7 CASE database
This feature adds G7 CASE support by additional DriveWizard™ database supplied with
the software.
•
V7 Ethernet Database
This feature adds GPD315/V7 support for Ethernet when using a CMO9x
communications option for GPD315/V7 by an additional DriveWizard™ database
supplied with the software.
9
2
Chapter
Installation and Start
up
This chapter describes the installation process of DriveWizard™
10
Minimum Requirements
Minimum Requirements
Minimum PC requirements for DriveWizard™
The following are the minimum PC requirements for DriveWizard™
• Pentium 200MHZ Processor
• 64Mb RAM
• 40 Mb Free disk space (100 Mb for all databases installed)
• RS 232 serial port
• CD ROM drive
• 800 x 600 pixel / 256 color display
• Mouse
• Microsoft Windows 2000, Windows 98, Windows NT SP4 or greater,
Windows XP Professional operating systems. Windows 95 will work but is no
longer actively supported.
• Microsoft Java Virtual Machine Version 2919 dated 10/23/00 or later. (it is
usually included in Internet Explorer 5 (VM for IE5)or greater). Version
5.00.3802 is required for Windows XP support.
• For using the Help Function of DriveWizard™ , you must have Internet
Explorer 4.01 or greater installed along with the Microsoft HTML help viewer
files. If you have Windows 98, 2000, XP, or NT SP4 the help viewer is part of
your O/S installation. Windows 95 and ME users may have to install the help
viewer files by executing the hhupd.exe . This self-extracting file is available
on CD4005, on www.yaskawa.com, or on the Microsoft Web site.
11
Installation
Installation
Installing the DriveWizard™ PC Software
Note!
When installing a newer version of DriveWizard it is recommended that you
first uninstall the previous version and re-boot your PC to make sure the
installation executes correctly.
To install DriveWizard™, please follow these steps below based on the source of the
DriveWizard™ program:
•
From a Yaskawa CD-ROM
1. Close all open programs currently running on the PC to prevent interference with
the installation process.
2. Insert the CD-ROM into the CD-ROM drive (the D: drive for example).
3. If "Autoplay" is enabled, the CD-ROM will automatically start when the CDROM is inserted. The CD ROM main navigation menu will appear in a new
window on the PC display. Click on the Software menu button and select the
DriveWizard™ PC support tool item .
4. If "Auto play" is not enabled, a manual method may be used to start installation
once the CD-ROM is inserted in the PC CD-ROM drive.
o Open the Windows Explorer and click on drive D.
o Use the path D:\Software\DriveWizard5\Install DW to find the installation file
o Double click on the install icon to start the installation (If the CD-ROM drive
is not D: , replace D: with the appropriate CD-ROM drive letter). The
installation program will start and a welcoming screen will appear.
•
From the yaskawa.com Website.
1. Go to http://www.yaskawa.com/site/products.nsf/products/Industrial AC
Drives~DriveWizardTM.html
2. Click on the Download section.
3. You have two choices to download the main program: a single file (if you have a
fast internet connection) or multiple files (for you modem users). Select the zip
file(s) to download and save them to a folder on your hard drive.
4. Unzip the files. If you have elected to download the multiple files version, be
sure to unzip all of the files into 1 folder.
5. Close all open programs currently running on the PC to prevent interference with
the installation process.
6. In the folder that you unzipped the files you will find an icon called Install.exe.
Double click this icon to start the installation. The installation program will start
and a welcoming screen will appear.
12
Installation
The welcoming screen
will look like this.
A message will appear, welcoming you to
the DriveWizard™ program.
Click Next to continue.
The next screen is the Yaskawa Electric
America software license Agreement. You
must accept the terms to proceed with the
installation.
A warning window will pop up indicating
that you must choose the custom installation
for support of non-standard drives. Click
OK to continue. (See Table 2.1 on next
page)
13
Installation
You can choose 3 types of setups:
Typical: Which installs DriveWizard™, the
standard drives database, and DriveWizard™
Help.
Compact: Which installs DriveWizard™ and
the standard drives database
Custom: Which allows the user to select
which databases and features to install. (See
Table 2.1 on next page)
To utilize the multiple database feature of DriveWizard™ you must choose
the Custom installation option
Note!
If custom installation is checked, this
window appears. It shows there are 4
additional databases that can be
installed with the standard drives
database (see Table 2-1).
Database Name
Standard DriveWizard™ Database
G5+ HHP 1PU
G5 HHP 450A (old) & (new)
(two databases)
V7 with DeviceNet
G5 & F7 Generic Case
G7 Generic Case
V7 NEMA 4X
V7N NEMA 4X
E7+ and P7+
V7 with Ethernet
Description
Covers G5, G5+, E7, F7, G7, J7, P7, & V7 factory
standard software’s only
Covers the special G5+ one module HHP application
Covers the G5 HHP standard and variable torque
software
Covers the V7N drive with built-in DeviceNet
communications.
G5+ and F7 with CASE special software installed
G7 with CASE special software installed
Covers V7 in Standard NEMA 4X package
Covers V7 DeviceNet in Standard NEMA 4X package
Covers E7 VSE10401x and P7 VSP10102x
Covers V7 VSP018340 and VAP018350 for CMO91
and CMO93 V7 Ethernet communications kits
Table 2.1: Database Description Summary
14
Installation
Select the program group to create the
DriveWizard™ icon. "Drive Wizard" is
the default setting. After selecting the
program group or folder, click Next
to continue.
Then the PC files are copied from the
CD-ROM. The percentage of the copying
that has been completed is shown.
If DriveWizard™ has been successfully
installed, the following dialog box is
displayed. Click Finish to complete the
setup.
15
Installation
Note!
During installation occasional errors can occur, especially in laptop
computers that will prevent DriveWizard™ from installing correctly. Two
of the most common errors are: license.dat file error and –119 data move
error.
These errors are caused when the installation program cannot install
some of the active X components on the computer. The typical causes of this
are:
1. Other programs running on the PC that are interfering with the
installation process. Check the task manager to be sure that no other
programs are running. Check that other device support software’s have
closed down their communications tasks and background programs
especially if you have any other drive or PLC support products loaded on the
PC.
2. Another program is using another version of one of the active X programs
used by DriveWizard™ such as spread.ocx or strip.ocx.
Uninstalling the DriveWizard™ PC Software
It is recommended that you uninstall a previous version of DriveWizard™ before
installing the newer version. To uninstall DriveWizard™, please follow these steps
below:
1. From the Windows Start menu, select Control Panel > Add/Remove Programs
2. Select DriveWizard™ from the list of programs
16
Installation
3. Click on the Change/Remove button. The warning window comes up to ask
you if you what to remove DriveWizard™. Click on Yes to proceed.
4. The uninstall program will run and uninstall all of the DriveWizard™ programs
and add-on databases. When it is finished, click on OK to end the uninstall
process.
17
3
Chapter
Getting Started
This chapter describes how to start DriveWizard™
18
Connecting the PC
Connecting the Drive to the PC.
The following procedure concerns the easiest method of connecting your PC to the drive.
This method utilizes the PC’s serial port and the keypad port of the drive. Please refer to Chapter
2: Communications Menu for a complete description of connection methods.
Connecting the PC to the drive will depend on which model of drive you are working
with (see Fig 3.1). The following paragraphs describe how to connect your Yaskawa drive to
your PC. Please refer to the correct model of drive:
CIMR-G7 U 20P4
G7: Drive type
U: USA standard spec
A: Japanese standard spec
E: European standard spec
Figure 3.1: Example of Drive Model Number
GPD515/G5, G5-HHP:
1. Remove the operator keypad.
2. Connect cable P/N UWR00103-1 to the connector for the drive keypad (1CN). Be careful of
the small 12 pin connect as it is keyed (2 ridges on 1 side match the two slots on the right
hand side of the connector).
3. Connect the 9 pin D-sub-miniature to the PC serial port.
GPD315/V7, V7N, and V7 NEMA 4:
1. Remove the operator keypad. (refer to manual TM.V7.01 page 138)
2. Connect cable P/N UWR00468-2 to the connector for the drive keypad (1CN).
3. Connect the 9 pin D-sub-miniature to the PC serial port.
GPD305/J7
1. Remove the option port cover. (refer to Manual TM.J7.01 page 50)
2. Install serial interface adapter P/N SI-232/J7 in the port
2. Connect cable P/N UWR00468-2 to the connector on the serial interface adapter.
4. Connect the 9 pin D-sub-miniature to the PC serial port.
5. Check that the drive Modbus address parameter (n070) and the address parameter in the
DriveWizard™ communication setup window are set to the same number.
E7, F7, G7, P7:
1. Remove the operator keypad.
2. Connect cable P/N UWR00468-2 to the connector for the drive keypad (1CN).
3. Connect the 9 pin D-sub-miniature to the PC serial port.
19
Starting DriveWizard™
Starting DriveWizard™
The following section describes how to start DriveWizard™ .
1. Check to ensure the drive is on and the communication cable is connected per the prior section on
connecting the drive to the PC.
2. Click on the DriveWizard™ icon
3. The initial main screen will appear after the program finishes loading (Figure 3.2).
Figure 3.2: Initial Main Screen
L
Important !
During the program start you may have a message from the Windows
operating system indicating that the Micosoft Java Virtual machine is
missing or a software feature is not supported. The program start will then
be aborted. If this happens you must install a version of Microsoft Java
Virtual Machine that supports all of the features of Drive Wizard. A copy of
the correct version of Microsoft Java Virtual Machine is included on the CDROM or is available on drives.com web page.
Windows XP currently DOES NOT ship with JVM and JVM is not
available from Microsoft.com. It is available from drives.com . Also, the
JVM from Sun Microsystems DOES NOT WORK WITH
DRIVEWIZARD™
20
Starting DriveWizard™
Note!
Upgrading the version of the Microsoft Java Virtual machine may affect
other applications installed on your computer. Please check your other
applications if they require Microsoft Virtual Java Machine and if so, which
version is required.
If you are starting DriveWizard™ for the first time, the communications set-up window will
appear (Figure 3.3) as the software is loading. Keep the serial communications selection under
communication method (factory default). Unless you have altered the drive settings and have
another device connected to COM1, accept the default settings by clicking on OK .
Figure 3.3: Communications Setup Window
Installing the Microsoft Virtual Machine
To install the Microsoft Java Virtual Machine from the DriveWizard™ CD-ROM onto your
computer, please use the following procedure:
1. Close all open programs currently running on the PC to prevent interference with the
installation process.
2. Insert the Yaskawa CD-ROM into the CD-ROM drive (the D: drive for example.
3. If "Autoplay" is enabled, the CD-ROM will automatically start when the CD-ROM is inserted.
The CD ROM navigation menu will appear in a new window on the PC display. Select the
appropriate installation under the Microsoft Virtual Machine heading.
4. If "Autoplay" is not enabled, use the following method to start installation once the CD-ROM
is inserted in the PC CD-ROM drive:
• Open the Windows Explorer. Click on drive D and double click on file folder VM.
Select either the Win2000 if you have Windows 2000 or others for Windows 95, 98, ME,
or NT. Double click on the msjavx86 icon to start the installation. (If the CD-ROM drive
is not D: , replace D: with the appropriate CD-ROM drive letter).
21
Starting DriveWizard™
Note!
On Windows 2000 you must have service pack 2 installed for this version of
Microsoft Virtual Machine to install correctly. SP2 for Windows 2000 is
included on the DriveWizard™ CD.
To install the Microsoft Java Virtual Machine from the drive.com website onto your
computer, please use the following procedure:
1. Go tohttp://www.yaskawa.com/site/products.nsf/products/Industrial AC
Drives~DriveWizardTM.html
2. Click on the Download section.
3. Click on the Microsoft JVM link to download the file msjavx86.exe.
4. Double click on the msjavx86.exe.to run the installation program.
.
22
Selecting a Database
Selecting a Database
In order for DriveWizard™ to communicate with the drive the database that
DriveWizard™ utilizes must be correct for the specific software inside the drive. DriveWizard™
uses the database to correctly map parameters for the particular drive(s) supported, set the
monitor scaling correctly for the given drive type & size, and set up the proper communications
with the drive.
Because of the numerous drive types and special software’s created for customers and
applications, it was necessary to utilize multiple databases for DriveWizard™ . In most instances
the standard database will work with your drive but if you have a special drive or a special
application/machine, you will have to select a database specific for that drive/application.
DriveWizard™ has the ability to add special databases to the list that is shipped
with the standard software. These databases are self-installing that will automatically
add the new database to the existing list. The additional databases can be found
at/on the following:
• On the Internet athttp://www.yaskawa.com/site/products.nsf/products/Industrial AC
Drives~DriveWizardTM.html under the download section.
• CD.AFD7.01
• CD.V7J7.01
• CD.E7.01
• CD.DW.01
The installation files are contained in a WinZip file that you can copy to any directory
on your PC hard drive. Please see Adding a New Database for database installation
instructions.
The following section describes how to select a database:
1. You must be in the offline mode in DriveWizard™
2. From the File Menu select “Change Database”
3. The window in Figure 3.4 will appear
Figure 3.4: Database Select Window
23
Selecting a Database
4. Select the database best suited for your application. If your drive does not appear use the
standard database unless instructed by a Yaskawa representative to use a specific database.
5. Click on OK to use the selected database and close the window.
Note!
If the change database menu item does NOT appear under File Menu you
have only 1 database installed in your DriveWizard™ installation (Typical or
minimum selection during installation). If you determine you need a specific
database that is not standard drive, you must re-install DriveWizard™ using
the Custom install selection. (see Chapter 2 – Installation)
24
Going Online
Going Online with the Inverter
Note!
Before starting the online process, please check the following:
1. The PC is connected to the drive correctly
2. There are no other programs running on the PC that could interfere
with the PC serial port.
3. The correct database has been selected for the drive you wish to connect.
4. The communications settings for DriveWizard™ match the drive settings.
5. If you are connecting to a GPD315/V7 or a GPD305/J7, the drive must
be stopped in order to go online with the drive.
To start the online process, you can perform any one of the following operations:
•
•
Go to the main menu, click on Inverter > Connect
Type CTL + C on the PC keyboard
•
Push the
button on the toolbar.
A selection box with a list of all of the drive types that DriveWizard™ can communicate with the
selected database will pop up (Figure 3.5). Select the drive you are working with. The drive
type may be determined by examining the model number on the front of the drive (Figure 3.6).
Note!
G5 =GPD515
J7 = GPD305/J7
V7 = GPD315/V7
Figure 3.5: Select Drive Type for Standard Database
Highlight the appropriate drive series and click the Connect button. Figure 3.9 should appear
with a successful connection. If DriveWizard™ can detect the drive type, it will automatically
make the selection and Figure 3.5 will not appear.
25
Going Online
CIMR-G7 U 20P4
G7: Drive type
U: USA standard spec
A: Japanese standard spec
E: European standard spec
Figure 3.6: Example of Drive Model Number
Note!
If the communication error window (Figure 3.7) appears instead of the
manual connection window or it appears after the connection window, please
check the following:
1. Check the communication cable between the drive and the PC is the
correct type and is installed correctly.
2. The drive is powered up and the settings in the drive match
DriveWizard™ (especially for RS 422/485 and Ethernet).
3. The communication parameters in DriveWizard™ are set correctly.
4. When using Ethernet communications the Ethernet adapter in the PC is
set up correctly and a connection path from the PC to the drive has been
established.
5. When using RS 422 communications check that the wiring from the RS
422 adapter to the drive is correct
6. When using RS 485 communications be sure the echo box is checked on
the communications setup window and the wiring from the RS 485
adapter to the drive is correct.
7. When connecting to GPD315/V7 and GPD305/J7 check that the drive is
not in the run mode.
8. When using an USB to serial adapter make sure the adapter is installed
correctly and the DriveWizard™ communications COM port setting is
correct.
Figure 3.7: Communication Error Window
26
Going Online
Note!
During the going online process DriveWizard™ checks the drive software
number and size (KVA rating code) to see if it is in the database. If either the
drive rating or software number do not fit in the selected data base range
(standard database as default or no database selection), a database error
window will come up (Fig 3.8 ) and the connection process will be aborted.
Figure 3.8: Communication Error Window
Note!
During the going online process DriveWizard™ uploads the parameters from
the drive into the PC memory. If a parameter is not present in the drive or
the value is out of range, a Modbus error will be generated. A window will
pop which will display the parameters that caused the errors (see Figure 3.8).
The user has the option of saving the information as a text file for future
reference.
Figure 3.9: Modbus Communication Error Listing Window
27
Going Online
Menus and Toolbars
Navigation Tree
Monitoring
Window
Run Wizard
Parameter Editor Spreadsheet
Status Bar
Figure 3.10: Primary Working Environment (G7 shown)
•
•
•
•
•
•
The menus and toolbars are used to activate the various functions of DriveWizard™. Refer to
Chapter 4 for details.
The Navigation Tree is used to select the group of drive parameters that appear in the
Parameter Editor spreadsheet. Refer to Chapter 5 for details
The Status Bar displays status and information of various functions of DriveWizard™. Refer
to Chapter 5 for details.
The Parameter Editor Spreadsheet is used to display and modify drive parameters. Refer to
Chapter 5 for details
The monitoring window is used to select and display online monitor values from the drive.
Please refer to Chapter 6 for monitoring and Chapter 7 for graphing functions.
The Run Wizard is used to control the drive for test purposes. Refer to Chapter 8 for details.
28
Working Offline
Working Offline
You can edit an existing parameter files that have been created previously or create new
parameter files while in the offline mode.
To Edit a Existing File:
•
Go to the main menu, click on File > Open
•
Click the
button on the toolbar.
An open file selection box with the directory of parameter files will open (Figure 3.11). If no
parameter files are stored on the PC, you can use the File > New feature to create a new
parameter file
Figure 3.11: Open file Dialog Window
•
•
Select a file to open by highlighting the file name in the window. Click on the
Open button. Another window will open giving you details of the file you are about
to load into DriveWizard™ (Figure 3.12).
Click on the Load button and the file will be loaded. A display similar to Figure 3.9
will appear without the monitor or graphing tabs.
User entered file comments
appear in this area
Figure 3.12: Open file Comment Window
29
Working Offline
Note!
If the file you are opening was created with a different database than the one
you have selected, a warning will appear as in Figure 3.13. If you are using a
standard database you can usually proceed by clicking on Yes . You should
check all of the parameters for proper values and do a compare against a
drive online to insure proper parameter data. If you are not sure, click No
and check which database is selected under File > Change database. If the
drive type is not support in the database, the warning in Figure 3.14 will
appear.
Figure 3.13: Database Version Warning
Figure 3.14: Inverter Not Supported Warning
30
Working Offline
To Create a New Parameter File:
1. Go to the main menu, click on File > New. A menu as shown in Figure 3.15 will appear.
Select the drive family you are working with. Click OK when you have made your
selection.
2. A window as shown in Figure 3.16 will appear.
a. Select the KVA or rating of the drive by making a selection from the drop down
box. See the section on inverter initialization for an explanation of the model
number.
b. Next enter the drive Software Number. This number should match the software
number of the drive that the file is to be used in. The software number can be
found in drive monitor U1-14 for GPD515/G5, E7, F7, G7, P7 and U-10 for
GPD305/J7 & GPD315/V7. You must enter the proper software number.
c. Once these selections are made, click OK when finished.
Figure 3.15: Select Inverter Type Window
Window (Standard Database Shown)
Note!
Figure 3.16: Inverter Information
Do NOT use the default software number to create a file because with some
drive families it may cause DriveWizard™ to omit some parameters that you
may not be aware of. The default number is just a placeholder.
31
Working Offline
3. A warning message (Figure 3.17) will come up indicating that if the designated software
number that you entered in the software number window is not in the selected database,
the latest software number in the database will be used as a default. Click on OK to
continue.
Figure 3.17: Inverter Information
4. The file Save As window opens up (Figure 3.18). You then name and save the file in the
appropriate location on your computer. Click on Save and a file comments window
will open (Figure 3.19). Enter any comments in the window and click Save to save
the file.
Figure 3.18: File Save Dialog Window
Figure 3.19: File Information Dialog Window
32
4
Chapter
Menus
This chapter describes the menus and list of commands
33
File Menu
File Menu
Open File
Toolbar:
Menu:
Hot Keys:
File > Open File
CRTL + O
Open File opens a previously saved parameter file or a graph onto the screen. Clicking on the
menu item or the
opens a file dialog box (Figure 4.1).
Figure 4.1: Open File Dialog Window
The user selects a parameter or graph file to open by clicking on the file name. You can switch
file directories and disks in the typical Microsoft application manner. Once the file is selected,
click Open to open the file. Click on Cancel to abort the file open and close the window
After clicking on Open , a dialog box will open with a description of the file and a prompt to
ensure this is the correct file to be opened (Figure 4.2).
34
File Menu
User entered file comments
appear in this area
Figure 4.2: Description of a File to be loaded
Clicking on the Load button “loads” the data file into the Parameter Editor Spreadsheet.
If a different file is opened over an unsaved file, all the information from the
first file will be lost.
Note!
Opening a previously saved parameter file allows the parameters to be
edited without first downloading them from the drive. This does not
automatically update the current parameters in the drive if a parameter file
is being opened.
35
File Menu
L
Important !
If the rating or KVA setting of the file being opened does not match the
online drive (online mode only) a warning window will appear (Figure 4.3).
It is up to the user to decide if the selected file should be accessed or the open
file operation canceled.
Figure 4.3: KVA Mismatch Warning
Note!
If the file you are opening was created with a different database than the one
you have selected, a warning will appear as in Figure 4.4. If you are using a
standard database you can usually proceed by clicking on Yes . You should
check all of the parameters for proper values and do a compare against a
drive online to insure proper parameter data. If you are not sure, click No
and check which database is selected under File > Change database. If the
drive type is not support in the database, the warning in Figure 4.5 will
appear.
Figure 4.4: Database Version Warning
Figure 4.5: Inverter Not Supported Warning
36
File Menu
Save Param File
Toolbar:
Menu:
Hot Keys:
File > Save Param File
CRTL + S
This function is used to save the parameter working values in the Parameter Editor Spreadsheet
to an open file on the PC. This selection becomes available when either an existing parameter
file has been opened, or a connection to a drive has been established. This automatically saves
over the previous copy of the file. If you do not want the previous list erased, choose the Save
As command. Saving a file allows the parameters to be edited without first downloading them
from the drive.
Note!
1. This does not automatically update the current parameters in the drive.
The values that are currently in the drive are shown in the inverter value
column of the Parameter Editor Spreadsheet. Use the parameter
download function to update the parameter values in the drive.
2. If you connect to the drive and click on Save Parm File without opening
a file, you will be directed to the Save As function (see Save Parm As
menu item).
3. When typing in the name of the file, do not use dots to separate the file
names as DriveWizard™ cannot handle file names with dots. Example:
name1.name2.name3.PARMS
37
File Menu
Save Param File As
Toolbar:
Menu:
Hot Keys:
None
File > Save Param File As
CRTL + A
This allows the user to save a new or old file under a different name or format. Files can be
saved in a comma separated value (*.csv) and a parameters (*.PARMS) format. When saving
files, a dialog box will appear and prompt for a file name (Figure 4.6). The csv file format can be
read in other software programs such as Microsoft Excel (see Figure 4.7).
Figure 4.6: Prompt to Enter a File Name for Saving
G7
G7: Yaskawa Electric
22015
38
Friday
August 20
2004
10:27:03 AM
This is a standard G7 Parameter Table
Number
Name
Working Value Units Min
Max
Default
A1-00
Select Language
0 --
0
6
0
A1-01
Access Level
2 --
0
9999
2
A1-02
Control Method
0 --
0
4
2
A1-03
Init Parameters
0 --
0
9999
0
Figure 4.7: Sample of CSV File Output in Microsoft Excel
38
File Menu
Entering File Comments
After the file name has been entered, there is an opportunity to type in a detailed file description
(see Figure 4.8). The drive type, company name, software version, date and time are
automatically stored when saving the file.
You can type in any text you would like to be saved with the file in the space provided in the
bottom of the window. When finished, click on Save to save the file. Clicking on Cancel aborts
the file saving process and closes the window.
Figure 4.8: File Comments During Save Param File As
Note!
1. Note the software version is not shown at this time, but it is stored with
the file. Both file types (CSV, PARMS) can be imported into MS Excel.
Values can be adjusted without decimals. However, file cannot be
reloaded into DriveWizard™ once the data format has been changed.
2. Saving a file allows the parameters to be edited without first
downloading them to the drive. This does not automatically update the
current parameters in the drive.
3. When typing in the name of the file, do not use dots to separate the file
names as DriveWizard™ cannot handle file names with dots. Example:
name1.name2.name3.PARMS
39
File Menu
Close File
Toolbar:
Menu:
Hot Keys:
None
File > Close File
CRTL + E
This option is only available when editing a previously saved file while offline with the drive. It
closes the current parameter file being edited. If recent changes have not been saved,
DriveWizard™ will display a prompt with the option to save the file before closing it (Figure
4.9). If the file has been changed and is not saved, the changes will be lost.
Figure 4.9: Opportunity to Save a Changed File Before Closing
File New
Toolbar:
Menu:
Hot Keys:
None
File > File New
None
This function creates a new parameter file using
factory default values and is only available when in the
offline mode. The user can create a new file for any
drive supported by the selected database current in use
(See File > Change Database). To create a new drive
file while off-line, please follow the procedure below:
1. Clicking on File > New opens the dialog box
shown in Figure 4.10.
Figure 4.10: Selecting an Inverter Type
(Standard Database Shown)
40
File Menu
2. Select the inverter family that you wish to create the new file. Only the inverters
supported in the selected database will appear in the window. After making your
selection, click on OK and the dialog box in Figure 4.11 opens.
Figure 4.11: Selecting Inverter Information
3. Select the KVA or rating of the drive by making a selection from the drop down box.
See the section of this manual on Inverter Initialization for an explanation of the model
number.
4. Next enter the drive software number. This number should match the software number of
the drive that the file is to be used in. The software number can be found in drive
monitor U1-14 for GPD515/G5, E7, F7, G7, & P7 and U-10 for GPD305/J7 &
GPD315/V7. When the first digit of the software number starts with a 0 (in the case of
G5 HHP software numbers, use a 5 digit number. Example: G5HHP software 0211
would be entered as 10211. You must enter the proper software number.
Note!
Do NOT use the default software number to create a file because with some
drive families as it may cause DriveWizard™ to omit some parameters that
you may not be aware of. The default number is just a place-holder.
5. Select the control mode of the drive (refer to this manual section on inverter initialization
for more details). Click on OK when finished.
6. A warning message (Figure 4.12) will come up indicating that if the designated software
number that you entered in the software number window is not in the selected database,
the latest software number in the database will be used as a default. Click on OK to
continue.
41
File Menu
Figure 4.12: New File Software Warning Window
7. The File Save As window comes up and the file is saved as described in File Save As.
Note!
When creating a new parameter file, the KVA of the file must match the
KVA of the drive or an error will occur and the parameters cannot be
downloaded to the drive (Figure 4.13).
Figure 4.13: KVA Mismatch Warning
8. Review the saved file for the proper software number; drive model number, and
parameter set.
L
If a software number that is below the minimum software number is entered,
the parameter file will be blank, i.e. no parameters will appear.
Important !
42
File Menu
File Conversion
Toolbar:
Menu:
Hot Keys:
None
File > File Conversion
None
This function allows the user to convert parameter files from one standard family type of drive to
another standard family type. The conversion is done in the DriveWizard™ off-line mode only.
This function will read an existing parameter file (input file) and convert or translate the
applicable parameters to the new file created during the conversion process (output file).
Parameters in the new file (output file) not found or translated from the existing file (input file)
will be populated with factory default values of the new file (output file) drive family type.
Note!
1. The conversion is available only when the standard database is selected.
2. The conversion does not convert factory or custom parameters. See
Appendix H for details of the parameter conversion
3. Some parameters in the input or existing file will not convert to the new
or output file due to changes in drive family type software.
4. The conversions are one to one on drive rating or model type. A 2.2 kW
480 V drive converts to a 2.2 kW 480 V drive.
43
File Menu
G5 (GPD515/G5) to F7 Conversion
This selection will convert an existing G5 (GPD515/G5) file to a F7 file. The GPD515/G5 can
be any standard software number of either 1032 to1043 or 1110 to 1114. The F7 drive output
file will be the latest released software number (at this writing 3020). Parameters that are new in
F7 or not transferable from the GPD515/G5 input file will be present to the F7 factory defaults.
For a map of the parameter conversion, please see the GPD515/G5 to F7/G7 Conversion Tool
Parameter Map section in Appendix H.
To use the G5 (GPD515/G5) to F7 conversion tool, please follow the following steps:
1. Click on File > File Conversion in the top line main menu bar.
2. Figure 4.14 will appear. Click on G5 to F7 and then click on OK .
3. The File Open window (Figure 4.1) will appear. Select the G5 file you wish to convert by
clicking on the file to highlight and then click on Open . If the file that is selected is not a G5
parameter file, a warning as shown in Figure 4.15 will appear and the conversion will abort.
F
Figure 4.14: Select File Conversion Type
Figure 4.15: Select File Error
4. The conversion process now starts and there is a time delay while the conversion takes place.
The status bar will read “File Conversion in Progress” during this time. When the conversion is
completed, a File Save As window opens (Figure 4.6). Select PARMS or CSV (if you desire)
and type in the name of the F7 conversion output file you wish to save. Click on Save to save
the file. A file comment window opens to add file comments if you wish (see Save Parameter
File As section earlier in this chapter).
5. A warning window (Figure 4.16) will now appear reminding the user to set the carrier frequency
and rating of the F7 manually (C6-01, C6-02, etc) . This is because the GPD515/G5 does not have
the current rating and carrier frequency rules that the F7 has. Refer to the F7 drive manual
TM.F7.01 page 5-9 and the F7 drive Programming Manual TM.F7.02 programming page 35 for
more detail. Click on OK to complete the file save process.
Figure 4.16: Carrier Frequency Setting Warning
44
File Menu
G5 (GPD515/G5) to G7 Conversion
This selection will convert an existing G5 (GPD515/G5) file to a G7 file. The GPD515/G5 can
be any standard software number of either 1032 to1043 or 1110 to 1114. The G7 drive output
file will be the latest released software number (at this writing 22016). Parameters that are new
in G7 or not transferable from the GPD515/G5 input file will be present to the G7 factory
defaults. For a map of the parameter conversion, please see the GPD515/G5 to F7/G7
Conversion Tool Parameter Map section in Appendix H.
To use the G5 (GPD515/G5) to G7 conversion tool, please follow the following steps:
1. Click on File > File Conversion in the top line main menu bar.
2. Figure 4.17 will appear. Click on G5 to G7 and then click on OK .
3. The File Open window (Figure 4.1) will appear. Select the G5 file you wish to convert by
clicking on the file to highlight and then click on Open . If the file that is selected is not a G5
parameter file, a warning as shown in Figure 4.18 will appear and the conversion will abort.
4.
F
Figure 4.17: Select File Conversion Type
Figure 4.18: Select File Error
5. The conversion process now starts and there is a time delay while the conversion takes place.
The status bar will read “File Conversion in Progress” during this time. When the conversion is
completed, a File Save As window opens (Figure 4.6). Select PARMS or CSV (if you desire)
and type in the name of the G7 conversion output file you wish to save. Click on Save to save
the file. A file comment window opens to add file comments if you wish (see Save Parameter
File As section earlier in this chapter).
6. A warning window (Figure 4.19) will now appear reminding the user to set the carrier frequency
and rating of the G7 manually (C6-02, C6-03, etc) . This is because the GPD515/G5 does not
have the current rating and carrier frequency rules that the G7 has. Refer to the G7 drive manual
TM.G7.01 page 6-39 for more detail. Click on OK to complete the file save process.
Figure 4.19: Carrier Frequency Setting Warning
45
File Menu
P5 (GPD505/P5 or GPD506/P5+) to E7 Conversion
This selection will convert an existing P5 (GPD506/P5+ or GPD505/P5) file to a E7 file. The
P5 file must be a *.P5 or *.P5P created in InverterWin 3.0. The E7 drive output file will be
the latest released software number (at this writing 4010). Parameters that are not transferable
from the P5 input file will be present to the E7 factory defaults. For a map of the parameter
conversion, please see the GPD505/P5 to E7/P7 Conversion Tool Parameter Map or
GPD506/P5+ to E7/P7 Conversion Tool Parameter Map section under the Appendix H.
To use the P5 (GPD505/P5 or GPD506/P5+) to E7 conversion tool, please follow the following
steps:
1. Click on File > File Conversion in the top line main menu bar.
2. Figure 4.20 will appear. Click on P5 to E7 and then click on OK .
3. The File Open window (Figure 4.1) will appear. Select the P5 file you wish to convert by
clicking on the file to highlight and then click on Open . Only P5 and P5P extension files will
be seen in the open file window.
Figure 4.20: Select File Conversion Type
4. The conversion process now starts and there is a time delay while the conversion takes place.
The status bar will read “File Conversion in Progress” during this time. When the conversion is
completed, a File Save As window opens (Figure 4.6). Select PARMS or CSV (if you desire)
and type in the name of the E7 conversion output file you wish to save. Click on Save to save
the file. A file comment window opens to add file comments if you wish (see Save Parameter
File As section earlier in this chapter).
5. A warning window (Figure 4.21) will now appear reminding the user to set the carrier frequency
and rating of the E7 manually (C6-01, C6-02, etc) . This is because the GPD505/506/P5 does not
have the current rating and carrier frequency rules that the E7 has. Refer to the E7 drive manual
TM.E7.02 programming page 29 for more detail. Also, several of the functions in P5 do not
directly convert to E7 so please check the converted file for the correct drive programming
(See Appendix H for more detail). Click on OK to complete the file save process.
Figure 4.21: Conversion Warning
46
File Menu
P5 (GPD505/P5 or GPD506/P5+) to P7 Conversion
This selection will convert an existing P5 (GPD506/P5+ or GPD505/P5) file to a P7 file. The
P5 file must be a *.P5 or *.P5P created in InverterWin 3.0. The P7 drive output file will be
the latest released software number (at this writing 1020). Parameters that are not transferable
from the P5 input file will be present to the P7 factory defaults. For a map of the parameter
conversion, please see the GPD505/P5 to E7/P7 Conversion Tool Parameter Map or
GPD506/P5+ to E7/P7 Conversion Tool Parameter Map section under the Appendix H.
To use the P5 (GPD505/P5 or GPD506/P5+) to P7 conversion tool, please follow the following
steps:
1. Click on File > File Conversion in the top line main menu bar.
2. Figure 4.22 will appear. Click on P5 to P7 and then click on OK .
3. The File Open window (Figure 4.1) will appear. Select the P5 file you wish to convert by
clicking on the file to highlight and then click on Open . Only P5 and P5P extension files will
be seen in the open file window.
Figure 4.22: Select File Conversion Type
4. The conversion process now starts and there is a time delay while the conversion takes place.
The status bar will read “File Conversion in Progress” during this time. When the conversion is
completed, a File Save As window opens (Figure 4.6). Select PARMS or CSV (if you desire)
and type in the name of the P7 conversion output file you wish to save. Click on Save to save
the file. A file comment window opens to add file comments if you wish (see Save Parameter
File As section earlier in this chapter).
5. A warning window (Figure 4.23) will now appear reminding the user to set the carrier frequency
and rating of the P7 manually (C6-01, C6-02, etc) . This is because the GPD505/506/P5 does not
have the current rating and carrier frequency rules that the P7 has. Refer to the P7 drive manual
TM.P7.02 programming page 29 for more detail. Also, several of the functions in P5 do not
directly convert to P7 so please check the converted file for the correct drive programming
(See appendix H for more detail). Click on OK to complete the file save process.
Figure 4.23: Conversion Warning
47
File Menu
Print Param
Toolbar:
Menu:
Hot Keys:
File > Print Param
None
This function prints out the Parameter Editor Spreadsheet in a “WSYWYG” (What You See is
What You Get) format. The parameter group currently displayed in the Parameter Editor
Spreadsheet is printed on the selected Windows printer. There is no print preview available. The
output will be formatted identically to the cells in the Parameter Editor Spreadsheet. In other
words increasing or decreasing the width of a column or the height of a row will affect the
printout format as well as the display (refer to Chapter 6 for how to change the spreadsheet
display). When selecting this function, a printer select and configuration window will pop up
(Figure 4.24)
Figure 4.24: Print Setup Window
Note!
1. If the printer output is wider than a single sheet of paper, the column
widths within the parameter editor must be manually reduced or the
columns that cannot fit onto the first page will be printed on a second
page.
2. Another option for printing is to save the parameters to a file and import
the data into an appropriate program such as MS Excel for printing.
3. The program will use the default printer and it’s default settings. These
are changed in the printers folder of Windows.
48
File Menu
Print Single Page
Toolbar:
Menu:
Hot Keys:
None
File > Print Single Page
None
This function prints a summary of all of the current working drive parameter values available for the
selected drive in the Parameter Editor Spreadsheet.. This data is condensed onto a single page and
automatically output to a printer. Two or more pages may be printed if there are too many parameters to
fit onto the first page. The format of this print out is fixed and cannot be changed. The selected Windows
printer is used for output.
Compare Param File
Toolbar:
Menu:
Hot Keys:
None
File > Compare Param File
CTRL + B
This function is used to compare two sets of parameter data. You can compare parameter data
from the drive connected online to a file or from one file to another. This command is only
available once a file has been opened or a connection to the drive has been established.
• To use this function follow these steps:
1. Connect to a drive online (see Chapter 3) or open a parameter file.
2. Select: File > Compare Param File from the menu or enter ctrl B on the keyboard.
3. The sequence of operation for opening a parameter file is then executed.
4. Once this file is loaded the parameter data in this file is compared to the working values of the
Parameter Editor Spreadsheet. When the comparison is complete the window in Figure 4.25
appears.
5. The data is presented in a spreadsheet that the display can be changed in the same manner as the
Parameter Editor Spreadsheet.
6. To print the differences click on the Print button on the right hand side of the window. The
contents will be printed to the default Windows printer in the same manner as the Print Param
function.
7. To save the differences to a *.csv file, click on Save on the right hand side of the window. A Save
File As window will open up and you create the name and select the location of the file.
You can compare files from only from the same drive family. However, they
can be different software versions (different flash).
Note!
Example: G5 1032 to G5 1042 but not G5 to F7.
49
File Menu
Second File Opened
First File Opened
Parameter Value in Parameter
Editor Spreadsheet
Parameter Value in loaded file
Figure 4.25: Compare Parameter File Screen
This window will only display the parameters that are different. If there are no differences, the
window below will be empty. The name and location of each parameter source is displayed in
the windows title bar. “Working value” is the current setting of the first file opened, or the
current setting within the parameter editor. “File value” is the setting in the second file loaded.
Change Database
Toolbar:
Menu:
Hot Keys:
None
File > Change Database
None
This function is used to change the working database that DriveWizard™ uses to interface with
parameter files and the drive it is connected to. The selected database determines which drives
can connect online, which files can be opened, which files can be compared, and which files can
be downloaded to the drive. The selection must take place while DriveWizard™ is in the offline
mode or not connected to a drive.
Note!
If the change database menu item does NOT appear in under File Menu you
have only 1 database installed in your DriveWizard™ installation (Typical or
minimum selection during installation). If you determine you need a specific
database that is not standard drive, you must re-install DriveWizard™ using
the Custom install selection (see Chapter 2 – Installation).
50
File Menu
•
To use the Change Database function, follow these steps:
1. Be sure you have installed DriveWizard™ with a custom install that installs more than 1 database.
2. Select: File > Change Database from the menu.
3. The window in Figure 4.26 appears
Figure 4.26: Database Select Window
4. You then select the appropriate database for the drive you are working with. If the drive you are
working with is not listed as a special drive or software, then use the standard database. Select the
database by clicking on the text line.
5. If you would like the selected database to be the default every time you start DriveWizard™ ,
click the box next to the text “ Always use this database ”
6. Click on OK to finish the selection and close the window.
DriveWizard™ has the ability to add special databases to the list that is shipped with the
standard software. These databases are self-installing that will automatically add the new
database to the existing list. Please see Adding a New Database in Appendix F to see how to
install a database to an existing DriveWizard™ installed software program.
Additional databases can be found at/on the following:
• On the internet at:http://www.yaskawa.com/site/products.nsf/products/Industrial AC
Drives~DriveWizardTM.html under the download section.
• CD.AFD7.x,
• CD.V7J7.x
• CD.E7.x
• CD.DW.x
The installation files are contained in a WinZip file that you can copy to any directory on your
PC hard drive.
51
File Menu
Exit
Toolbar:
Menu:
Hot Keys:
None
File > Exit
None
This command closes the program down in the same manner as clicking on the close window
x on the top right hand corner of the window.
52
Communications Menu
Communications Menu
Setup
Toolbar:
Menu:
Hot Keys:
None
Communications > Setup
CTRL + P
The setup function configures the communications between the PC running DriveWizard™ and
the drive. There are 2 methods of connecting to the drive:
1. Serial Communications: This method connects DriveWizard™ to the drive through a PC
COM port. The serial communications can be RS 232C, RS422, or RS485 with baud
rates of 9600 bps or 19,200 bps. The RS232C can be an existing port on the PC or
through a USB to serial adapter connected to the PC’s USB port.
2. Ethernet: This method connects to the drive with a CMO9x option card through an
Ethernet network communications adapter on the PC.
A set up window is used to configure the communication method and settings to properly
connect the PC running DriveWizard™ to the drive (Figure 4.27). If the configuration is not set
correctly for your situation, DriveWizard™ will not be able to connect to the drive.
Figure 4.27: Communication Settings
53
Communications Menu
Serial Communications
Selecting serial communications in the communication method selection sets DriveWizard™ to
connect to the drive through a PC COM port. Listed below are the possible connection types and
how to set the communication configuration.
1. RS232C through PC Port: This is the most common method (only available method in
previous versions of DriveWizard™) and is used to connect to the drive via its keypad
port. Set the Com port selection to the com port number you have made the physical
connection from the PC to the drive. Leave the Slave Address to 1 unless the slave
address on the drive has been changed such as the communications adapter for
GPD305/J7. The baud rate should also remain at 9600 unless it has been changed.
L
The keypad ports of G5, V7, and J7 are fixed at 9600 for
baud rate selection. Do not use the 19200 selection if you
are connected to the keypad port.
Important !
2. RS232C through USB Adapter: This method is becoming more popular as newer PC’s
do not have a hardware serial port but only USB serial ports. DriveWizard™ treats these
devices the same as a PC hardware RS232C port so that DriveWizard™ does not know
the difference between a USB to serial adapter or a PC hardware port. The USB to serial
adapter will be assigned a new PC COM port number (usually above 4) when it is
installed in the PC.
There are many manufacturers of USB to serial adapters on the market available
in electronics stores and over the Internet. We have tested 2 adapters that are commonly
available and they function 100% with DriveWizard™:
(a) Dynex P/N DX-UBD9 available at Best Buy stores
(b) Radio Shack P/N 26-183 available at Radio Shack Stores
The USB to serial adapter always comes with a CD of the drivers required to
properly operate the adapter on your particular operating system. Follow the installation
instructions provided with the adapter. It would be a very good idea to go to the
manufacturer’s website to check for the latest driver’s for your operating system.
When the adapter is successfully installed, it will appear in the Windows Device
Manager as another serial port. Refer to Figure 4.27 for how the Dynex adapter appears.
The adapter appears under the PORTS (COM & LPT). In Figure 4.28 you can see that it
is assigned to COM 5. Therefore, to use this device in DriveWizard™ you would select
COM 5 on the Communications setting window (Figure 4.27).
54
Communications Menu
USB to Serial Adapter
Figure 4.28: Windows Device Manager showing USB to Serial Adapter
Note!
If you cannot get your USB to serial adapter to work, please check the
following:
1. Check the communications window of DriveWizard™ for the proper
settings (Figure 4.27).
2. Check that the adapter is installed correctly by checking Windows
Device Manager (Figure 4.28).
3. Check that the drivers for the adapter are the latest and the proper ones
for your Windows operating system.
4. Check that another program has not captured the USB to serial adapter
such as Palm Pilot Hot Sync or a DDE server from a data acquisition
program.
5. Sometimes re-booting your PC after installing the USB to serial adapter
will force Windows to enable the device.
55
Communications Menu
3. RS422/RS485: This method is used when there are more than one drive connected to a
serial network, serial communications is over a long distance, or it is desired to use
DriveWizard™ while retaining the drive keypad on the drive. The connection method to
the drive is through the RS422/485 terminals (or comm. adapter in the case of J7 or SIK2 in the case of G5 ). Select the PC COM port that the PC RS422/485 adapter is
connected to by setting the Com port selection . Set the Baud rate selection to the
network setting and the Slave Address to match the particular drive you wish to connect
to. Factory default setting on the Yaskawa Drives terminal block serial port is 9600 baud
and slave address 31 (1F hex)..
In the case of an RS485 2 wire network connection, the RS 485 Echo box may
have to be checked so DriveWizard will function correctly. In a 2 wire set up the
transmit and receive lines are jumped together (T+ to R+, T- to R-) so that the transmitted
message from DriveWizard appears on the receive lines as well as the actual message
from the drive. Checking the RS 485 Echo box allows DriveWizard to ignore its
transmitted message and only look at the actual message from the drive. The RS 485
adapter that you are using may have an echo cancellation feature also that prevents the
transmitted message from appearing on the receive message signal in the PC. If the echo
cancellation is selected on the converter, you should not check the RS 485 Echo box in
DriveWizard
Note!
1. While utilizing the 2 wire RS 485 communications set up and using
RunWizard to run the drive; a communications fault may occasionally occur
due to timing with some drives.
2. While utilizing the 2 wire RS 485 communications set up while going online to
the drive with a slow PC may cause a CE error on the drive. The may occur
if the online process time exceeds the CE timeout setting in the drive.
If you cannot establish communication with the drive, check the following:
1. Be sure the settings in Figure 4.27 above are correct.
2. Check that no other applications are running which requires the com port
selected (such as Hot Sync Manager for Palm Pilot).
3. Check the communication cable for proper connection.
4. Check the drive communications settings. If possible initialize the drive
through its keypad to restore the proper communications settings.
5. Check that the drive software is the correct version and/or is supported by
the database you have selected. Connecting to a drive in which the drive’s
software is not listed will give an error.
6. Check that the address of the drive and the communications window match.
7. Check that in the case of RS 422/485 that the converter settings are correct
and the converter has power or good batteries (if not self-powered.
8. For GPD315/V7 and GPD305/J7 check that the drive is stopped (not
running).
56
Communications Menu
Ethernet Communications:
Selecting this option sets DriveWizard™ to connect to the drive through an Ethernet
network to an CMO9x option card mounted on the drive. For DriveWizard™, the only settings
required are the IP address of the drive you are connecting to and whether or not you are just
monitoring or utilizing RunWizard. DriveWizard™ has the factory default setting of
192.168.1.20 in the Drive Name, Drive Address setting window so that if the card has not yet
been configured you can use this default address.
When using the GPD315/V7 CMO91 or CMO93 communications kits you will need to
select the proper database (V7 Ethernet) that supports the GPD315/V7 with these
communications kits. Also, the GPD315/V7 drive must have the proper software installed for
the CMO91 or CM093 communication kit to work properly. Refer to the CM091 or CMO93
installation guide for further information.
Figure 4.29: Ethernet Communication Settings
Control Selection
The control selection (Figure 4.29) selects whether or not RunWizard is utilized. Selecting
Monitor Only mode sets Ethernet connection to a monitor type that can be disconnected with no
faults, etc. but RunWizard and Reset Fault are disabled. Selecting Run Wizard Allowed mode
sets the Ethernet connection to a control type that allows RunWizard to function and is
constantly monitored by the CMO9x card. If communication is lost for more than 2 seconds the
CMO9x will declare an EF0 fault to the drive. The drive will alarm or fault depending on
parameter settings. The Reset Fault function is also available to reset drive faults that can be
reset remotely.
Drive Name, Drive Address
The Drive Name, Drive Address box (Figure 4.29) has the ability to allow the user to store
multiple IP or drive addresses and assign a drive name to that address. The list is stored in the
DriveWizard™ directory as a CSV file such that it can be edited in Excel or in DriveWizard™
(the list can be as long as you wish). The name should be limited to 32 characters to properly
display the name on the status bar (see STATUS BAR in Chapter 5, Monitor).
57
Communications Menu
To add a new drive name and address simply type in the new name and address in the
window and click on the Add Drive button. Be sure to separate the name and address by a colon
“ : “. To select a new drive address, click on the down arrow on the right of the box and a list of
all of the drive addresses entered into DriveWizard™ will appear and click on the desired address
to select it.
The Delete Drive button removes the current drive from the list. A warning window will
appear to check if you really wish to delete the drive from the list (Figure 4.30).
Figure 4.30: Delete Drive from List Warning
The Clear All Drives button clears the entire list of drive names and IP addresses. A
warning window comes up to warn you if you wish to continue (Figure 4.31).
Figure 4.31: Delete All Drives from List Warning
As mentioned before, the list can be edited from Excel or other application that
can edit a *.csv file. Figure 4.32 shows the IP address list being edited in Microsoft
Excel. Be sure when you save the file that you keep the same name and that it is located
in the main DriveWizard™ program file directory and is named IPList.csv. The file can
be edited, but the file name MUST remain as IPList.csv .
58
Communications Menu
Figure 4.32: IP address list in Windows Excel
Note!
1. When using a CMO91 or CM93 Ethernet for GPD315/V7 kit you must
have the proper database selected which is V7_CMO9x or V7 Ethernet
(VSP018340 and VAP018350).
2. The proper software must be loaded into the GPD315/V7 for the CM091
or CMO93 communication option card to work properly. Refer to the
CM091 or CMO93 installation guide for further information.
It is very important that the network configuration and the Ethernet adapter in the PC are
set correctly to allow DriveWizard™ messages to reach the drive correctly. A good check of this
is launching Internet Explorer on your PC and type in the IP address (Example:
http://198.162.1.20, the factory default IP address) of the drive you wish to connect with
DriveWizard™. The drive web page should come up on PC display. If is does not, then the
respective PC Ethernet adapter settings and network configuration should be investigated for
proper settings. If the web page appears DriveWizard™ should have no problem connecting to
the drive.
59
Communications Menu
To test the PC to drive Ethernet connection and verify the CMO9x card is operating
properly, a direct connection method can be utilized to check operation. Below are two
examples of connecting the PC directly to the drive equipped with a CMO9x card (Figures 4.33a
and 4.33b):
Figure 4.33a: Direct Ethernet connection of PC to drive via cross-over cable.
Figure 4.33b: Direct Ethernet connection of PC to drive via hub.
The direct connection from the PC to the drive can be made by either Figure 4.33a with a cross –
over cable or Figure 4.33b with standard cables and an Ethernet hub.
To make a direct Ethernet connection from the PC to the drive, please follow this procedure:
1. Physically connect the drive to the PC by either of the two methods show in Figure 4.32.
2. Configure the PC’s Ethernet adapter IP protocol settings to match the CMO9x card by
the following (if you are permitted to do so):
a. On you PC click on Start>Settings>Control Panel>Network or Dial up
Connections.
b. Select the Ethernet adapter you have connected the Ethernet cable to and click on
that connection to open it’s configuration dialog box (Fig. 4.34a).
c. In the window titled “ components checked that are used by this connection”,
scroll down to the item labeled” Internet Protocol (TCP/IP)” and click on that
item to select it.
d. Click on the properties button and the window in Figure 4.34b will appear.
e. Select the item ”use the following IP address:” and fill in the address window
with 192.168.1.1 as shown in Figure 4.34c. The window labeled ”subnet mask
will fill in automatically with the numbers as shown when the IP address is
entered. Leave the “Default gateway”, “Preferred DNS server”, and “Alternate
DNS server” windows blank.
60
Communications Menu
f. Click on OK to enter the information. After the window closes, Figure 4.34b will
appear. Click on OK to close this window. You may have to re-start your
computer to have your new settings take affect.
g. Launch Internet Explorer on your PC. After the program is finished loading, type
in the proper IP address and check that you can connect to the drive. If there is
doubt to the IP address, set the CMO9x card back to it’s factory defaults using the
procedure outlined in the CMO9x installation guide. If you cannot connect to the
drive, recheck all of your settings in your PC, your cable connections, and the
CMO9x for proper operation and settings.
h. Once a proper connection to the drive is establish through Internet Explorer,
DriveWizard™ should have no difficulty in connecting to the drive. The drive’s IP
address will appear in the right hand side of the status bar (see Chapter 5 Main
Display: Status Bar)
Figure 4.34a: Ethernet Adapter Properties
Figure 4.34b: Selecting Internet Protocol
61
Communications Menu
Figure 4.34c: TCP/IP Properties
Note!
1. Any questions, problems, or issues concerning the Ethernet adapter and
the connection to the CMO9x drive option should be referred the
appropriate user’s IT, Network Administrator, or computer maintenance
personnel responsible for the PC you have DriveWizard™ loaded on.
2. Remember to return your PC’s Ethernet adapter back to it’s prior
settings after completing this test!
62
Inverter Menu
Inverter Menu
Connect
Toolbar:
Menu:
Hot Keys:
Inverter > Connect
CTRL + C
The Connect function establishes communication between the PC and the drive. This function is
available only if you are offline. When executing this function a selection box with a list of all
of the drive types that DriveWizard™ can communicate with may pop up if
DriveWizard™ cannot detect the drive type automatically. Select the drive you are working
with. The drive type may be determined by examining the model number on the front of the
drive (See Figure 4.47).
The GPD315/V7 and GPD305/J7 drives must be stopped (not in the run
mode) in order for DriveWizard™ to connect to these drives.
Note!
The process continues as described in Chapter 3 – Going Online with the Drive. If there is data
in the working column of the Parameter Editor Spreadsheet that is different from the drive or
files, it will prompt the user to save this working data (Figure 4.35).
Note!
If the Working Value data is not saved, DriveWizard™ will erase it when
uploading the current parameters from the drive into the Parameter Editor
Spreadsheet.
Figure 4.35: Prompt to Save Working Data
63
Inverter Menu
Disconnect
Toolbar:
Menu:
Hot Keys:
Inverter > Disconnect
CTRL + D
The disconnect function stops the communication between the PC and the drive. This option is
not available if communication has not been established. When disconnecting, if the parameter
data in the working column of the Parameter Editor Spreadsheet differs from the drive data,
DriveWizard™ will prompt the user to save the data in the Parameter Editor Spreadsheet to a file
(Figure 4.35).
If you select no on the save working data window, the changed data in the
Parameter Editor Spreadsheet working values will be lost.
Note!
64
Inverter Menu
Read All
Toolbar:
Menu:
Hot Keys:
Inverter > Read All
CTRL + U
The Read All function reads all the allowable parameters from the drive into the “Inverter” and
“Working Value” columns of the Parameter Editor when online. When activating this function
the window in Figure 4.36 appears.
Figure 4.36: Prompt for Overwriting Working Value Column
This warning is to let the user know that the drive parameter data in the Working Value column
will be overwritten. Clicking on OK continues the operation. If you click on Cancel , no action
will be taken and the window will close.
L
Important !
If a Modbus error occurs during reading or writing parameter(s) to the
drive, this error means that there is a parameter mismatch between the
drive and DriveWizard™ . A window will appear displaying the parameters
that have errors (see Figure 3.9). Check that the database you have selected
supports the drive software.
65
Inverter Menu
Read Single Param
Toolbar:
Menu:
Hot Keys:
Inverter > Read Single Param
CTRL + SHIFT + U
The function Read Single Parm reads a selected parameter from the drive into the ”Inverter” and
“Working Value” columns of the Parameter Editor Spreadsheet (Fig 4.37). This function will
upload the parameter on the row that a cell is currently highlighted (see Chapter 5). When the
function is started, Figure 4.36 will appear to remind the user that the data for the selected
parameter in the Parameter Editor Spreadsheet will be overwritten by this operation. Clicking on
OK continues the operation. If you click on Cancel , no action will be taken and the window will
close.
Highlighted Cell
Parameter Read =b1-03
Figure 4.37: Selecting Parameter to be Read
L
Important !
If a Modbus error occurs during reading or writing parameter(s) to the
drive, this error means that there is a parameter mismatch between the
drive and DriveWizard™ . A window will appear displaying the parameters
that have errors (see Figure 3.9). Check that the database you have selected
supports the drive software.
66
Inverter Menu
Write All
Toolbar:
Menu:
Hot Keys:
Inverter > Write All
CTRL + SHIFT + D
The function Write All writes all the parameters in the “Working Value” column of the
parameter editor to the drive. The “Inverter Value” column of the parameter editor will be
updated upon completion (Figure 4.38).
Working Column
Inverter Column
Figure 4.38: Parameter Editor Spreadsheet
When the write all function is started, a download options window will appear asking the user if
they would like to skip the KVA dependents or control mode dependents during the download
process (Figure 4.39).
The purpose of these options is to allow the user to download a
parameter file to a drive of a different size or is in a different
control mode.
• A parameter that is related or changes its default, range,
scaling or is applicable due to the rating of the drive is
called a KVA dependent parameter.
• A parameter that changes it’s default, range, scaling, or
is applicable to only certain control modes is called a
control mode dependent parameter.
Figure 4.39: Download Options
Refer to Appendix J for a list of parameters that are affected by selecting these options.
The user can select either or both of these options by clicking on the appropriate box to the left
of the selection. Click on OK to proceed. The user can skip this feature and download all
parameters by leaving the selection boxes blank and just clicking on OK .
67
Inverter Menu
When this function is started, a window will appear warning the user that all of the drive
parameters will be overwritten with the data in the Working Value column of the Parameter
Editor Spreadsheet (Figure 4.40).
Figure 4.40: Parameter Download Warning
Selecting Yes will proceed with the download. No will cancel the operation and close the
window.
L
Important !
If a Modbus error occurs during reading or writing parameter(s) to the
drive, this error means that there is a parameter mismatch between the
drive and DriveWizard™ . A window will appear displaying the parameters
that have errors (see Figure 3.9). Check that the database you have selected
supports the drive software.
The download process may take over 30 seconds at times to complete
depending on the number of parameters to download.
Note!
Only the non-shaded or active parameters will be downloaded. The shaded
parameters will be ignored (see Fig 4.41) (See Chapter 5).
Non-shaded cells
Shaded cells
Figure 4.41: Shaded vs. Non-Shaded Cells
L
This feature is locked out when the Write Disable function is turned on.
Important !
68
Inverter Menu
Write Single Param
Toolbar:
Menu:
Hot Keys:
Inverter > Write Single Param
CTRL + O
The function Write Single Parm writes only the selected parameter in the “Working Value”
column of the Parameter Editor Spreadsheet to the drive. This function will download the
parameter on the row that a cell is currently highlighted. The value in the “Inverter” column of
the parameter editor for that parameter will be updated upon completion.
Values in a shaded cell may not be written with this command
Note!
The Read All, Read Single Parm, Write All, and Write Single Parm selections
are only available after communication with the drive has been established.
The following parameter groups are the only parameters written together
during a single parameter write command:
1. Accel/Decel units and related parameters:
G5, E7, F7, G7, P7:C1-01 ~ C1-10
V7: n018 ~ n022 (and n041 ~ n044 for version 24+)
2. Frequency display units and related parameters:
G5, E7, F7, G7, P7: d1-01 ~ d1-09 and o1-03.
V7: n024 ~ n032, n035, and n120 ~ n127.
3. Vf Pattern: G5, E7, F7, G7, P7:E1-03 ~ E1-13
The above parameters will have red bullets when the master parameter is
changed. See Display Attributes.
L
This feature is locked out when you have the Write Disable function turned on.
Important !
69
Inverter Menu
Factory Password
Toolbar:
Menu:
Hot Keys:
None
Inverter > Factory Password
None
Factory parameters are parameters that are to be adjusted by qualified technicians trained on the
drive factory parameter set. These parameters can have severe effects on system performance,
and therefore may be adjusted by factory representatives only.
Write Disable Password
Toolbar:
Menu:
Hot Keys:
None
Inverter > Write Protect Password
None
The write disable password allows the user to prevent DriveWizard™ from writing any
parameters, initializing the drive, or using RunWizard. In other words, the PC tool can only read
parameters and monitor data.
The write disable has two modes:
1. Prevent writing to the drive during the current on-line session only
2. Prevent writing to the drive at any on-line session.
When the write disable mode is turned on in DriveWizard™ there is a indicator in the status bar
to show that write disable is on (Figure 4.42). The download functions on the toolbar and under
the Inverter menu will be grayed out.
Write Disable On Indicator
Figure 4.42: Status Bar with Write Protect enabled
Note!
The following functions are disabled when the write disable is active:
1. Write All Parameters
2. Write Single Parameter
3. Inverter Initialize
4. Autotune
5. RunWizard
70
Inverter Menu
To enable write disable, select Inverter > Write Disable Password from the menu bar. This can
be done either off-line or on-line. The write password window comes up with all of the functions
displayed that indicates that there is no password set (Figure 4.43).
Figure 4.43: Write Password Set Window with no Password Set
To activate the write disable enter a password in the entry box (Figure 4.44). The password can
be characters or numbers. Once the password is set it remains set until DriveWizard™ is reinstalled. There are two boxes that you can check:
Write disable:
This mode disables writing to the drive while on-line with the drive for the current online session only. When DriveWizard™ is closed out or shut down, the write disable goes
off so the next time the DriveWizard™ is opened or started, there will be no write disable.
Write disable on start:
This mode disables writing to the drive all of the time until the password is entered. and
this box is unchecked. When this box is checked, DriveWizard™ automatically checks
the Write disable box when DriveWizard™ is opened.
Figure 4.44: Write Password Set Window with Password entered
When both boxes are checked writing to the drive is disabled during the current on-line session
and every time DriveWizard™ is used until the correct password is entered and the boxes are
unchecked. Once the password is entered and the appropriate selection boxes are checked, click
on OK to accept the entries and close the window. Clicking on Cancel stops the write
password process and closes the window.
71
Inverter Menu
To change the function of write disable, you click on Inverter> Write Disable Password and you
have to enter the correct password to change the function. This can be done either on-line or offline. The Window is grayed out until the correct password is given (Figure 4.45). Once the
correct password is entered, make the changes required and click on OK to change the function
and close the window. If the password is lost, re-installing DriveWizard™ will reset the function
to off and reset the password to not used.
Figure 4.45: Write Password Set Window with Password set
72
Inverter Menu
Initialize Inverter
Toolbar:
Menu:
Hot Keys:
None
Inverter >Initialize Inverter
None
This function resets the drive to its factory default parameter values. There are 4 settings that
affect which default values are used. When the Initialize Inverter is selected Figure 4.46 will
appear
Figure 4.46: Initialize Inverter Screen
Three of the four properties may be changed to ensure correct initialization. The KVA property
is read only. Once the selections have been chosen, click Initialize to complete the process.
Clicking on cancel stops the operation and closes the window. When Initialize is chosen, the
window in Figure 4.47 appears.
L
Important !
1. When the drive is initialized, all of the drive parameters are reset to their
original factory settings. This could cause machine safety issues if the
drive is not set programmed correctly.
2. You should save all of the drive parameters before performing an
inverter initialization.
3. The drive initialization function is locked out when you have the Write
Disable function turned on.
73
Inverter Menu
Figure 4.47: Initialize Warning Screen
Clicking on Yes will continue the operation. Clicking on No will return you to the Initialize
Inverter Window.
Note!
All drive parameters are initialized to factory default settings at time of
shipment.
Initialize Properties Description:
• KVA Selection
The KVA represents drive size and includes voltage. This is a read only
selection. DriveWizard™ automatically detects which drive is present. You should verify the
setting found on the external part of the drive as part of the model number (Figure 4.48).
CIMR-G5 U 20P4
G5: correct type
Ex: J7, V7
0P4: 0.4 kVA
Ex: 075: 75 kVA
U: USA standard spec
A: Japanese standard spec
E: European standard spec
Figure 4.48: Example of Model Number
74
Inverter Menu
• Control Method
The control mode parameter sets the basic control strategy of the drive.
The selections available for the connected drive vary by drive family. See Table 4.49 for a few
of the features associated with each control method.
Control Modes:
Control
Method
V/f
Control
Drive
Types
Basic
Control
Speed
Detector
Torque Torque
Limit Control
G5, E7, F7
G7, J7, P7,
V7
Voltage/Frequency Control
Not
Needed
Not
Possible
Not
Possible
V/f
Control
with PG
Feedback
Open
Loop
Vector
G5, F7, G7
Voltage/Frequ
ency Control
with Speed
Compensation
Needed
(Pulse
Generator)
Not
Possible
Not
Possible
G5, F7,
G7 (2
modes),
V7
Sensorless
vector control
Not
Needed
Possible
G5, F7, G7
Current Vector
Control
Needed
(Pulse
Generator)
Possible
Not
Possible
(Possible
G7 mode
2)
Possible
Flux
Vector
Applications
-Multiple motor
drives
-Basic adjustable
speed application
-Application
where pulse
generator is
applied to
machine side
All range of
variable speed
applications
-Simplified servo
drives
-High-accuracy
speed control
-Torque Control
Table 4.49: Selected Features of the Control Methods
Note!
Not all of the Yaskawa drives allow the setting of control mode during
initialization. Some drives only have one control mode. DriveWizard™ will
make this property available when it can be changed for initialization.
• Spec
This refers to the specification that the drive was manufactured under in the
country that it was produced. This should be set according to the nameplate specifications.
• Type
This refers to the type of factory initialization that will occur. There are three
types of initializations: 2-wire, 3-wire, and user. A 2-wire and 3-wire initialization will
determine how the drive is run and stopped through the digital input terminals. This is available
on all Yaskawa Drives. User initialization is available only on the G5, E7, F7, G7 and P7 drives.
Refer to the product manual of the respective drive for more details on 2-wire and 3-wire control.
75
Inverter Menu
Auto-tune
Toolbar:
Menu:
Hot Keys:
None
Inverter >Auto Tune
None
This menu item allows the use of the Auto Tuning features of the E7, F7, G7, and P7 drives.
You must be on line to utilize this function. To activate this function, click on Inverter > Autotune. The checklist window (Figure 4.50) will appear reminding the user to make sure all safety
precautions are taken.
Figure 4.50: Auto-tune Check Point Window
Clicking on Yes will continue the process, No will cancel the auto-tune function. When
clicking on Yes , the main auto-tune window will appear (Figure 4.51).
The auto-tune function features 3 types of motor tuning that are available on Yaskawa E7, F7,
G7 and P7 drives. They are:
1. Line to line resistance:
This tuning calculates the motor terminal resistance value. The motor does not turn
during this function.
2. Auto-tuning without motor rotation:
This tuning function calculates most of the motor parameters without turning the motor
shaft. It is available only on F7 and G7 in the Open Loop Vector and Closed Loop
Vector control modes.
3. Auto-tuning with motor rotation:
This tuning function calculates all of the motor parameters with turning the motor shaft.
It is available only on F7 and G7 in the Open Loop Vector and Closed Loop Vector
control modes. The motor mechanical load must be disconnected to allow the tuning
function to operate correctly.
76
Inverter Menu
Figure 4.51: Auto-tune Main Window
To perform an auto-tune, follow these steps:
1. Select Motor #1 or #2 by clicking on the appropriate button in the T1-00 box
2. Select which tuning method you would like to perform. The method(s) available for the
particular drive and control mode will appear normally (not grayed out).
3. Enter the data in the windows that appear for other T1 parameters. The number of T1
parameters that appear is based on the drive type and control mode it is in.
4. Click on the Load button to download the entered T1 parameters to the drive.
5. When downloading is complete the start button will become active.
6. Click on the Start button to start the auto-tune. An auto-tune run warning window will
appear (Figure 4.52). Click on OK to continue the auto-tune.
7. The status and progress of the auto-tune will be displayed in the upper right-hand side of
the window. You can stop the auto-tune at any time by clicking on the Stop pushbutton.
While the auto-tune is running the drive output current and frequency will be displayed
(see Figure 4.53). A flashing green light indicates the auto-tune is in progress and
DriveWizard™ is communicating with the drive.
8. When the auto-tune is complete DriveWizard™ will read the appropriate Ex-xx
parameters from the drive and display them in the after column of the Motor Parameter
spreadsheet.
9. You can exit the auto-tune function by clicking on Cancel or closing the window.
10. You can start another auto-tune by clicking on the Load button. Be sure to make any
changes before clicking on Load .
77
Inverter Menu
Figure 4.52: Auto-tune Run Warning Window
Figure 4.53: Auto-tune Progress Display
Auto-tune Properties Description:
T1-00 :T1-09
These are the T1 tuning parameters of the drive. Refer to the
appropriate drive manual for details of these parameters. The user
selects/enters the data for auto-tuning the drive and are downloaded to
the drive when the Load button is clicked.
Auto-tune Status
This window shows the current status of the auto-tune process. Any
errors during the auto-tune are displayed in this window.
Auto-tune progress
Load
This is a bar graph that shows the progress of the auto-tune while
running.
This button, when clicked, will cause the appropriate T1 parameters to
be downloaded to the drive. The button becomes active whenever the
auto-tune main window opens or when a T1 parameter is changed after
the load is clicked. The button is inoperative during auto-tune run.
78
Inverter Menu
Start
Stop
Cancel
Motor Parameters
L
This button starts the auto-tune process. It is active only after a load has
been completed. Once clicked, the button will not be active until another
load has been completed.
This button stops the auto-tune process. It is only active while the autotune is running. Once the auto-tune is stopped, you must reload the T1
parameters by clicking on the Load before you can start again.
This button cancels the auto-tune process and closes the auto-tune
window. If clicked during auto-tune run, the auto-tune will stop and the
auto-tune window will close.
This spreadsheet shows the appropriate Ex-xx motor parameters in the
drive. The Before column data shows the value of the parameters
when the load button is pushed. The After column data shows the
value of the parameters after the completed auto-tune. They are read
right after the drive has finished the auto-tune process.
The Auto-tune feature is locked out when the Write Disable function is
turned on.
Important !
79
Inverter Menu
Reset Fault
Toolbar:
Menu:
Hot Keys:
None
Inverter >Reset Fault
None
This menu item allows the user the ability to reset a drive fault through DriveWizard™ when in
the on-line or connected mode. DriveWizard™ will reset any drive fault that can be reset
through the operator keypad reset button command. Be aware that some faults cannot be reset
by the reset process, but only by cycling the drive main power. Please refer to the
troubleshooting section of the respective manual for your particular drive for more details.
To use this function, click on menu item Inverter>Reset Fault. If a drive fault is detected the
menu item will be enabled (see the status bar for indication that a drive fault has occurred). If no
faults are present, the menu selection will be grayed out. A warning window (Figure 4.54) will
appear to confirm that you wish to reset the fault. Click on OK to reset the fault or Cancel to
not reset the fault.
Figure 4.54: Reset warning window.
Note!
L
Important !
It is the responsibility of the user of DriveWizard™ to use this function
properly. Resetting the same faults repeatedly can cause drive damage or
failure. Also, think about the safety of those around the machine by
checking that personnel are clear of the machine before resetting a fault and
starting the machine.
1.
2.
When using Ethernet Communications you must use the Run Wizard
allowed mode to use the Reset Fault function. When you are in the
Monitor only mode the Reset Fault function is not active.
This feature is locked out when the Write Disable function is turned on.
80
Monitor Menu
Monitor Menu
Start
Toolbar:
Menu:
Hot Keys:
Monitor > Start
CTRL + G
This function will start the online monitoring operation. A connection must be established before
this function is available. When the function is started, DriveWizard™ will actively monitor the
parameters the user has chosen to observe. A blinking heart will appear in the lower right hand
side of the status bar indicating the monitor function is active (see Chapter 5, status bar). The
monitor values are updated every 500 milliseconds. Monitor parameters may be visible before
Start is pressed, but the values of the drive activity are not up-to-date.
See Chapter 6: Monitoring for more details.
Note!
You must be online with the drive for this function to work and have at least
one monitor item checked on the monitor setup screen (see Chapter 6, setting
up the monitor).
Stop
Toolbar:
Menu:
Hot Keys:
Monitor > Stop
CTRL + SHIFT +S
The Stop function is only available while DriveWizard™ is actively monitoring the drive.
Selecting Stop from the Monitoring menu will stop DriveWizard™ monitoring drive activity.
See Chapter 6: Monitoring for more details.
81
Help Menu
Help Menu
About
Toolbar:
Menu:
Hot Keys:
None
Help > About
None
Displays the version of DriveWizard™ installed.
Figure 4.55: About Window
Web Site
Toolbar:
Menu:
Hot Keys:
None
Help > Web Site
None
Will attempt to automatically connect to the drive website of YASKAWA ELECTRIC AMERICA if
internet service is available. This website is:
http://www.yaskawa.com/site/products.nsf/home/home.html
Some of the many information items available on the site are:
• Updates and other information on DriveWizard™
• Drive Product brochures and manuals
• Drive Application notes
82
Help Menu
DriveWizard Help
Toolbar:
Menu:
Hot Keys:
None
Help > DriveWizard Help
None
Activating this menu item will launch the DriveWizard™ Help application. This application functions like
Microsoft style help that Windows users are familiar with. Most of the contents of this manual are
incorporated in the DriveWizard™ help.
Note!
The DriveWizard™ Help application requires that you must have Internet
Explorer 4.01 or greater installed along with the Microsoft HTML help
viewer files. If you have Windows 98, 2000, XP, or NT SP4 the help viewer is
part of your O/S installation. Windows 95 and ME users may have to install
the help viewer files by executing the hhupd.exe . This self-extracting file is
available on Yaskawa CD’s, on yaskawa.com, or on the Microsoft Web site.
83
5
Chapter
Main Display
This chapter describes the functions and features of the main display page
84
Introduction
Introduction
The main display chapter of this manual covers three areas of the main display page:
• The Navigation Tree
• Status Bar
• Parameter Editor Spreadsheet
Figure 5.1 below outlines the items covered in this chapter.
Navigation Tree
Parameter Editor Spreadsheet
Status Bar
Figure 5.1: Main Display
85
Navigation Tree
Navigation Tree
The navigation tree allows the user to quickly switch between the parameter groups displayed in
the Parameter Editor Spreadsheet and gives the user a visual reference of the drives set of
parameters. Simply left-click on a group in the Navigation tree and that group’s parameters will
be displayed in the Parameter Editor Spreadsheet. (Figure 5.2 a,b,& c).
Figure 5.2a: G7 Navigation Tree
(G5, E7, F7, P7 Navigation Tree Similar)
Figure 5.2b: V7 Navigation Tree
Figure 5.2c: J7 Navigation Tree
86
Status Bar
Status Bar
The status bar is located at the bottom of the main display and is used to provide the user with
information and status on the drive, the drive/PC connection, and the PC DriveWizard™
software. The bar is divided into 3 main sections (Figure 5.3a):
1. Status Message
2. Drive information
3. Status icons
Status Message
Inverter Information
Status Icons
Figure 5.3a: Status Bar
Status Message
This section displays what type of communication is taking place between the drive and the PC.
Some examples are:
‘Ready’: indicates the PC and drive are ready to receive commands.
‘Read All’: the PC is reading all the parameters currently stored in the drive
‘Downloading all parameters’: the PC is writing parameters to the drive
Inverter Information
This section displays information pertaining to the drive model number and the part number of
the drive software. When Ethernet communication is used the drive name and IP address are also
displayed (see Fig 5.3b).
Example: ‘22015 / CIMR-G7*20P4’
22015: These 5 numbers indicate the last five digits of the software part number loaded into the
drive. The database you have selected must include this number in order for DriveWizard™ to
function properly.
CIMR-G7*20P4: This is the YASKAWA model number for the drive.
87
Status Bar
Figure 5.3b: Status Bar Inverter Information with IP Address
Status Icons
This icon indicates the progress of the initial communication from the drive to
DriveWizard™. The arrow slowly forms left to right, and once the arrow is fully formed, the
drive is done connecting.
These icons indicate if the DriveWizard™ Software is online with the drive.
Indicates when the DriveWizard™ Software is connected to the drive.
Indicates when the DriveWizard™ Software is not connected to the drive.
The blinking heart icon indicates the DriveWizard™ Software monitor mode is active
The blinking red bullet icon appears when the drive has a fault.
Indicates that Write Disable function is on
The lock indicates the when the factory parameters are accessible.
This icon indicates the factory parameters are not accessible.
This icon indicates the factory parameters are accessible.
88
Parameter Editor Spreadsheet
Parameter Editor Spreadsheet
Introduction
The parameter editor is probably the most commonly used feature in DriveWizard™. This is
where the drive parameters are displayed and modified. The parameters are divided in groups
that have a tab or page at the top of the spreadsheet. The drive parameters are listed in rows
while the values and attributes for each parameter are divided into columns. An example is
shown in Figure 5.4 below.
Figure 5.4: Parameter Editor Spreadsheet Example
General Definition of Parameter Groups
Drive parameters will be categorized by their function or purpose. We call these parameter
groups. These parameter groups will be shown as a page or tab on the Parameter Editor
Spreadsheet. In general there are four ways parameters can be separated into groups. You think
of the groups as separated by Subject, Range, User Application, and Unique Function,
although they are not referenced in this manner.
• Subject
Parameters within the group all have the same focus. For example, some drives may have a
“Terminals” group. All the parameters within this group would be related to adjustment of the
input and output (I/O) terminals of drive.
• Range
Parameters are all in sequence. For example, one group may consist of the parameters from
number one through forty- nine (n001 to n049). Another group may be an extended range from
one through seventy- nine (n001 to n079). There will always be a group named “All”. This
would be an entire list of the parameters within the drive.
89
Parameter Editor Spreadsheet
• User Application
There is a special group of parameters, which configures a user defined programming display. It
is named the “User” group; however, it seems very few take advantage of this convenient
feature. The user group is used in conjunction with the access level. Basically, it is a way to
specify the most commonly used parameters for the application and have the drive display only
the selected parameters. Required parameters are selected under the “User” group tab. The
access level is set to “User level” access. Once complete, only application specific parameters
will be available, or shown on the keypad display.
• Unique Function
There are a limited number of parameters that have multiple functions. These parameters have
been separated into their own parameter group to better support their unique capabilities. Most
often this will refer to the Password (access level) or initialization parameter. In such cases, the
name of the group will take on the number of the parameter.
Spreadsheet Column Definitions
Each of the drive parameters has attributes such as a maximum value, minimum value, the
display units, and it’s factory default value to name several. Also, we need to see what is
currently stored in the drive memory as well as what the current value is in DriveWizard™. To
display all of this data in an easy to read manner the data values are divided into columns (see
Figure 5.5).
Figure 5.5: Parameter Editor Columns
To utilize the Parameter Editor Spreadsheet data effectively, we must understand the meaning of
the columns. A list and description of all available columns is below.
- The actual drive parameter number may take the form similar to A1-01, n001, or 01
– The name of the parameter that can be found on either the keypad display or in the
manual. It will usually correspond to the keypad display for drives with an LCD digital operator.
For drives with an LED display, it will be similar to the manual.
– This column is where the actual editing of the parameter data takes place. It is a
temporary setting value used for making all adjustments before they are finalized and
downloaded to the drive or stored in a file. It is frequently different from those setting values
within the drive. After an upload or download, the settings in the working value column will
match the inverter value column.
90
Parameter Editor Spreadsheet
–The value of a specific parameter currently stored within the drive. After an
upload or download, the settings in the Inverter value column will match the Working Value
column.
– This is the engineering unit in which to set the parameter. Some parameters have the
ability to change the setting units of other parameters. Please take note of any unit changes when
adjusting parameter values.
– This is the minimum allowable setting that can be set in the Working Value column.
This setting may vary depending on the drive and size (KVA), control method, software version,
etc.
– This is the maximum allowable setting that can be set in the Working Value column.
This setting may vary depending on the drive and size (KVA), control method, software version,
etc.
– This is the factory default setting for each parameter upon shipment. This setting
may vary depending on the drive and size (KVA), control method, software version, etc. All
parameters may be returned to default settings by initializing the drive. It is recommended to run
the Initialize Inverter command from the Inverter menu when necessary.
– This will indicate whether or not a parameter can be adjusted while the drive is
running. The word “Yes” will be displayed in the changeable column if the parameter can be
changed while the drive is running or has been issued a run command.
91
Parameter Editor Spreadsheet
Working Value Cell Types
The data in the working value column can be of two different types that are:
• Numeric
A numeric (Figure 5.6) cell allows any value to be entered into a cell as long as the value is
within the minimum and maximum value range. Decimal places will be added if left off and
truncated if additional decimal places cannot be accepted. Please make note of the units
displayed in the adjacent column, as the support tool will not automatically convert your entry.
Figure 5.6: Numeric Cell Example of Parameter E1-04
• Selection
Selection cells (Figure 5.7), or “pull-down” cells, have a fixed set of values that can be entered
into the cell. Once selected, the available options will appear. (Figure 5.8)
Figure 5.7: Selection Cell Example of Parameter E1-03
Figure 5.8: Selection Cell Value Example
92
Parameter Editor Spreadsheet
Cell Attributes
Other useful parameter information is indicated in the parameter editor as well and are listed and
described below.
•
Green Bullet
Appears in the left most column of the parameter editor when the setting has been
adjusted in that session. This status serves as a reminder as to what has been changed. It will
easily identify all the parameters adjusted since connecting to the drive or since opening an
existing parameter file. The user can modify any incorrect adjustments.
Note!
The green bullet will only disappear if the Parameter Editor Spreadsheet is
saved to a file or another data set is loaded into the spreadsheet.
•
Red Bullet
Appears in the left most column of the parameter editor when DriveWizard™ has
adjusted the setting in that session. This happens when a master parameter (Table 5.9) that
other parameters are dependent on are changed. The software changes the values as the drive
would if the master parameter had been changed by the drive keypad. An example would be
changing the control mode in G5 (parameter A1-02).
Note!
The red bullet will change to a green bullet if the working value of the
parameter is changed by the user after the software has changed that value.
The bullet will disappear if:
• All parameters are uploaded from the drive
• All parameters downloaded to the drive
• Parameters are saved to a file.
For V7 only, the red bullets disappear when the master parameter is
downloaded to the drive.
Param
Description
Applicable Drive
Param
Description
A1-02
C1-10
C6-01
E1-03
o1-03
o2-04
o2-09
Control Mode
Accel / Decel Units
Normal / Heavy Duty
V/F Pattern
Display Units
KVA Setting
Initial Setting
G5, F7, G7
G5, F7, G7
F7
G5, E7, F7, G7, P7
G5, E7, F7, G7, P7
G5, E7, F7, G7, P7
G5, E7, F7, G7, P7
n001
n002
n018
n035
Initialize Mode
Control Mode
Accel / Decel Units
Display Mode
KVA Setting
Initialize Mode
n01
Table 5.9: Master Parameters
93
Applicable
Drive
V7
V7
V7
V7
V7, J7
J7
Parameter Editor Spreadsheet
• Underlined Data
An underline is an indication something has changed. If the setting in the Working Value
column has been adjusted or changed from factory default, the values in the Inverter and Default
columns will be underlined. The only exception to this occurs after a read from the drive or
write to the drive is executed. At this point, the Working and Inverter values will be the same;
however, the adjusted values may be different from factory default settings. In this case, related
values in the Default column will be underlined.
• Colored Text
Blue or Red text (if supported by computer) will indicate something has changed (Figure 5.10).
Blue Text indicates that the Working Value column has been adjusted or changed from factory
default. The text color in the Inverter and Default columns will be blue. The only exception to
this occurs after a read from the drive or write to the drive is executed. At this point, the
Working and Inverter values will be the same; however, the adjusted values may be different
from factory default settings. In this case, the text color in the Default column will be blue.
Red Text indicates that the Working Value is out of range for that parameter.
L
Important !
If there is an underline and/or red text in the Working Value Column, this
indicates a value has exceeded the acceptable setting range for a
parameter. It is strongly recommended you change the value within
range before saving or downloading. Trying to download an out of range
parameter will mostly cause a Modbus communication error and/or cause
a drive alarm or fault.
Red Text Example
Blue Text Example
Figure 5.10: Colored Text Example
94
Parameter Editor Spreadsheet
•
Shaded Cells
A shaded cell indicates a parameter cannot be adjusted (Figure 5.11). Shaded cells may appear
when other parameters restrict adjustment. An example would be a fixed or predefined V/F
pattern. When a fixed V/F pattern is selected, this automatically configures values for a number
of points on the V/F profile. Parameters related to these points would be in shaded cells since
those parameters can no longer be adjusted.
Shaded Cells
Figure 5.11: Shaded Cells
Changing Parameter Values
The following examples will guide you through the changing of a drive parameter in the
Parameter Editor Spreadsheet:
•
Numeric Parameter Change
To change the value of a parameter in a numeric cell, single left click on the parameter’s current
value in the working column and enter the value to change it to. If the value is out of the Min to
Max range, the value will appear as red underlined text.
Working Value Column
Out of Range Entry
Selection Cell
Data Entry
Figure 5.12: Changing a Parameter Value
•
Selection Parameter Change
To change the value in a selection cell, left click once on the cell. A dialog box will appear
prompting you with allowable values you can change the parameter to. An example is shown in
Figure 5.13.
95
Parameter Editor Spreadsheet
Figure 5.13: Example of Changing Selection Cell Parameter B1-04
Select the value to change it to from the pull-down list (Figure 5.14) and click on the Accept
button to go ahead with the change. To cancel the change, click on the Decline button and the
dialog box will disappear and no change will occur to the working value.
Figure 5.14:Cell Selection List for Parameter B1-04
Differences Tab
There is a special tab at the far right-hand side of the parameter spreadsheet tabs named
Differences (see Figure 5.15). This tab shows a list of all of the active parameters that are either
blue or red (different than factory defaults). This tab is constantly updated so any changes to
parameters are instantly shown on this view. The view can be printed the same as other
parameter groups.
Figure 5.15: Differences Tab
96
Parameter Editor Spreadsheet
Adjusting Windows and Column Widths
The working environment can be called a flexible grid - all windows and cells can be adjusted to
the user’s liking. If a window is not necessary, it can be sized to no longer be visible. If all the
columns cannot be seen, the window can be expanded accordingly. The same sizing applies to
individual columns within the main windows. The mouse pointer will change when a window or
a column can be resized, as shown in Figure 5.16 and Figure 5.17 below.
(a) Width Adjustment
(b) Height Adjustment
Figure 5.16: Mouse Pointer When Resizing Option is Available
Column Width Adjustment
Figure 5.17: Column Width Adjustment
97
6
Chapter
Monitoring
This chapter describes the functions and features monitoring drive data
98
Introduction
Introduction
The monitoring function in DriveWizard™ is used to collect and display data from the drive in a easy to
read format. When this function is in operation, DriveWizard™ constantly refreshes the monitor display
ever 500 mS. All of the data that can be monitored from the operators keypad plus additional internal
drive data are available for monitoring. The monitor window is a spreadsheet just like the Parameter
Editor spreadsheet such that the columns and the monitor window can be re-sized.
The monitored data can be graphically displayed in the graphing function that is covered in the next
chapter.
Figure 6.1: Example of Monitor Window
1. The monitor items available to the user for display are drives specific.
Note!
2. The monitor setup is saved per drive type (i.e.: G5, V7, F7, etc.) when
going offline.
99
Using the Monitor
Using the Monitor
This section will show you step by step how to set up and activate the monitor function of
DriveWizard™.
To start monitoring follow these steps:
1. Connect the drive to the PC as described in Chapter 3
2. If parameters need to be changed, do this now (refer to Chapter 5: Parameter Editor)
3. In the Monitor area, click on the Setup Tab (
). Choose the parameters to watch by
left-clicking once in the box next to the parameter number. All parameters with a check in
their box ( ) will be displayed under the Monitors Tab. To unselect a parameter, simply
left-click again and remove the check from the box ( ) next to it (see figure 6.2)
Monitor Items
Appear on
Monitors Tab
Monitor Items
Do Not Appear
on Monitors Tab
Figure 6.2: Example of Monitor Setup Window
100
Using the Monitor
4. Click on the Monitors Tab (
). All of the parameters selected in step 3 should be
displayed. If they are not, go back to the Setup Tab and make sure there are checks in the
boxes next to the parameters to be observed. The value column will be blank when the
monitor is turned off.
Figure 6.3: Monitor Window with Monitor Stopped
from the Tool Bar) to start
5. Click on the Start command under the Monitor Menu (or
monitoring the selected parameters. DriveWizard™ will start continuously monitoring these
parameters for changes in these values, and their values will be displayed under the Monitors
Tab. Note that the red heart in the lower right hand side of the status bar is flashing,
indicating that DriveWizard™ is monitoring the drive.
Monitor Active
Figure 6.4: Monitor Active – Heartbeat Icon
Note!
On the GPD315/V7, n152 (Memobus Ref Units) must be set to 1 for the
scaling of Frequency Ref (U-01) and Output Frequency (U-02) to read
correctly during monitor operation.
101
Using the Monitor
Display features
The monitor tab display can be changed to better view the monitor data:
• Viewing Bit Data
The display can be expanded to display detailed data on individual bits that are part of a monitor
item. You can tell if a monitor item is a bit display by the fact that the units, min, and max
columns will have dashes (--). To expand or collapse a bit value display, simply left click on the
number cell of the monitor item and the display will change to show or hide bit information.
Figure 6.5: Monitor Window with U10 Display Collapsed
U10 Bit Monitor
Figure 6.6: Monitor Window with U10 Display Expanded
102
Fault History
Fault History
YASKAWA ELECTRIC AMERICA drive products use fault codes to annunciate
failures due to internal or external problems. They also utilize a fault history to store previous
fault codes. Normally, up to 4 fault history codes may be held for GPD515/G5 and GPD315/V7
and up to 10 fault history codes for E7, F7 G7, and P7. These codes and all retrievable fault
history are available by accessing the Fault History Tab.
To activate a function to be monitored, the drive must be online, and the DriveWizard™
software must be in Monitor/Start mode. Click on the Fault History Tab, and a window similar to
that in Figure 6.7 will appear.
Figure 6.7: Fault History Tab for the Monitoring Functions
A brief description of the fault is given under the Fault Description column. A brief description
of the fault and its possible causes may be obtained by a single right click and the fault that has
occurred (Figure 6.8). For more information on the Faults displayed, refer to the appropriate
drive’s User Manual.
Figure 6.8: Dialog Box for the Fault U2-01
103
7
Chapter
Graphing
This chapter describes the functions and features for graphing drive data
104
Introduction
Introduction
The graphing function in DriveWizard™ is used to collect and display data from the drive in a
graphical format.. Up to 8 monitor values can be graphed at the same time. These monitor values
can be any item available from the monitoring function (see Chapter 5). The time base for
sampling is settable by the user in 1,10, 30, and 60 second intervals under serial communications
and 0.1,1.0, 10.0, 30.0 and 60.0 second under Ethernet communications. The graphing display
can be re-sized to expand or shrink either the X or Y axis of the display.
Figure 7.1: Sample of the Graphing Area
105
Using the Graphing Function
Using the Graphing Function
To start graphing follow these steps:
1. Connect the drive to the PC as described in Chapter 3
2. If parameters need to be changed, do this now (refer to Chapter 5: Parameter Editor)
3. Click on the Graph Tab (
) in the monitor area to display the graphing area. A
display similar to Figure 7.1 will appear. Before using the graphing function for the first
time, the function must be setup. On the right side of the Graph tab you will see a row of
buttons (Figure 7.2).
Figure 7.2: Graph Control Buttons
4. Click on the Setup button on the right of the graphing area and the tab for Graph #1 will
appear (Figure 7.3).
106
Using the Graphing Function
Figure 7.3: Graph Setup Window
To setup the graph:
a) Choose what to graph from the Graph Selection pull-down menu (Figure 7.4).
b) Edit the line width, scale, line style, and line symbol as you like. Refer to Graphing
Function Details later in this chapter for more details on how to set these items.
c) To graph more items, click on an unused Graph # Tab (for example,
).
And repeat a) and b) for this new tab. A maximum of 8 items may be graphed at one
time.
d) Click the OK button to exit Setup.
107
Using the Graphing Function
Figure 7.4: Selection of Graph Monitor Selection
5. You selections should now be listed below the graph spreadsheet (see Figure 7.5). If they are
not, go back into the setup section and check your settings.
6. If you wish, the sample rate or time per data point can be set to a different value other than
the default of 1 second. Go to the graph properties by clicking on the graph Properties
button. Select the desired sample time. (refer to Graph Properties later in this chapter).
7. Once the items to be graphed have been chosen, it may be beneficial to put a title on the
graph, change the background color, or change the grid’s appearance using the Properties
Button. Refer to the Graph Properties Button later in this chapter for more information.
8. To begin graphing, press the Start button. It will then change to a Stop button. The
computer will start graphing the item(s) listed below the graph.
9. When you have obtained the data needed or wish to graph different parameters, push the
Stop button to stop the computer from graphing. At this point, the graph may be examined
using the zoom arrows, printed and/or saved to a file for later use.
10. To begin a new graph, press the Clear button.
DriveWizard™ will save the graph setup when going off-line from the drive.
The settings will be saved per drive type (i.e. G5, V7, F7, etc.)
Note!
108
Graphing Function Details
Graphing Function Details
Setup Functions
To setup the graphing function, click on the setup button located on the right side of the graphing
tab window. Each graph setup tab corresponds to a row under the graphing display.
(a): The Setup Tab for Graph’s #1
(b): The information selected under the setup tab is displayed below the graph
Figure 7.5:Graph #1’s Setup
Each Tab at the top of the Setup window indicates a different possible line to use for graphing.
The information selected in that tab will be displayed in a table under the graph. For example,
Graph #1’s information is displayed under the graph next to the number 1 (Figure 7.5). Each
Graph number may be set to graph a different selection.
109
Graphing Function Details
The data being graphed is determined by what is selected from the Graph Selection pull-down
menu.(Figure 7.6).
Figure 7.6: Graph Selection Pull-down Menu
Clicking the Color button can change the color of the graph line. To pick the color of the line
displayed, simply click on the box of the color you would like. A dotted line will appear around
the box to indicate the line will be displayed in that color (
110
) (see Figure 7.7).
Graphing Function Details
To select a different color, simply click on the new color.
Figure 7.7: Color Selection Menu
:
Line Width determines how thick the line is when being graphed. When selecting line thickness,
the latest line will be foremost in the graph. For example, if line 3 is thicker than line 1, line 3
will be seen and not line 1; however, if line 1 is thicker than line 3, line 3 is still seen displayed
over line 1. To avoid accidentally hiding a line, always make sure the smallest line number has
the largest width.
:
Scale determines what the value of the item being graphed is multiplied by while being graphed.
This does not affect the scale of the value displayed in the Value column below the graph. This
is very useful for observing items with small changes in value (example: while graphing DC Bus
Voltage with very little load).
Note!
The graphing scale of 1 = 100% which is the maximum defined by the
monitor scaling. Example: U1-17 is the analog input with a scale maximum
of 200%. With a graphing scale of 1, the graph line will be at 50% when the
analog input is 100%.
111
Graphing Function Details
:
Line Style determines what type of line the graph will use when displaying data. What type of
line is being displayed for a particular item may be seen under the Line column below the graph.
The following options are available for displaying lines:
0)
1)
2)
3)
4)
Solid
Dash
Dot
Dash Dot
Dash Dot Dot
:
Line Symbol determines what type of symbol will be displayed with that item’s line on the
graph. The symbol being used for a particular item may be seen in the Symbol column below
the graph. The options for symbols are:
0)
1)
2)
3)
4)
None
Circle
Rectangle
Triangle
Diamond
Start/Stop, Clear, and Print Buttons
The following buttons control the basic actions of the graphing function
The Start button starts the computer graphing the parameters chosen in the setup menu. Once the
Start button has been pushed and graphing started, the Start button will change into the Stop
button. Push the Stop button to stop graphing the chosen parameters. If the Start button is
pressed when no parameters have been selected for graphing, Figure 7.8 will appear.
112
Graphing Function Details
Figure 7.8: Reminder to Select Parameters before Attempting to Start Graphing
The Clear button is only available after parameters have been graphed and only when graphing
is not currently taking place. This button deletes the current data held in the graph. This also
allows new items to be selected under setup and graphed.
The Print button will print the graph area currently seen in the viewing window of the graph. It
will also print the graphing start time, drive type, and software version of the drive connected to
DriveWizard™. The print function uses the default Windows printer (see Chapter 4, Print
Param).
Save, Save As, and Load buttons
The following functions are used for storing and retrieving graphs of data that have been
retrieved from the drive.
The Save button saves the graph. If the graph has not been saved before, a window will appear
prompting you to enter a name for the file along with a file description. If the graph has already
been saved under a file name, clicking this button will simply save over the previous file.
Thie Save As allows the graph to be saved under a different name. A window will appear
prompting you to enter a name for the file along with a file description.
113
Graphing Function Details
The Load button allows a previously saved graph to be loaded onto the screen and examined
from there. A graph may only be loaded when the drive is not connected to DriveWizard™.
After clicking this button, a window will prompt you to choose the graph you wish to load
(Figure 7.9). Clicking the Cancel button in this window will exit the load operation.
Figure 7.9: Opening a Graph Screen
Click the Open button to load the graph. Before the graph is loaded, another screen will appear
with the file description entered at the time the graph was saved. Click Load to finally load the
graph or click Cancel to be taken back to the list of possible files to open. (Figure 7.10)
Figure 7.10: Graph Loading Screen
114
Graphing Function Details
Graph Properties Button
The graph properties button brings up a window that sets up the main graphing display attributes.
1
2
3
4
5
Figure 7.11: Changing Graph Display Properties
There are five attributes that can be set in this window:
1) The title of the graph is entered into the Graph Title box. Once the OK button has been
pushed, the title is displayed centered above the graph area.
2) Push the Back Color button to change the background color of the graph. To pick the color
click on the box of the color you would like. A dotted line will appear around the box to
indicate the color the graph’s background will be displayed as (
color, simply click on the new color.
). To select a different
3) The pull-down menu next to Grid has four options.
0) None: The grid is not displayed.
1) Horizontal: Only horizontal grid lines are displayed.
2) Vertical: Only vertical grid lines are displayed.
3) Both: Horizontal and vertical grid lines are both displayed.
4) The color of the grid may be changed with the Grid Color button. To pick the grid color,
simply click on the box of the color you would like. A dotted line will appear around the box
to indicate the grid will be displayed as that color. To select a different color, simply click on
the new color.
115
Graphing Function Details
5) The Sample rate of the graphing data or the amount of time per point can be set with this
drop down box. Clicking on the down arrow will display a list of sample rates available (Fig
7.12) Select a new sample rate and click on OK to close the window. The default rate is 1
second
• Serial Communications: 1, 10, 30, and 60 seconds can be selected (100 mS NOT
available.)
• Ethernet Communications: 0.1, 1, 10, 30, and 60 seconds can be selected.
Figure 7.12: Sample Rate Selections (Ethernet Shown)
Graph Column Definitions
There is a spreadsheet under the graphing chart that shows all of the monitor points that are
being graphed and the current value of the graphed monitor points (Fig 7.13).
Figure 7.13: Graph Spreadsheet Columns
- The color of the line being graphed.
- The type of line used for graphing (ie solid, dash, dot, etc)
- The symbol here matches the symbol on the line for that parameter. If this box is blank,
no symbol will be displayed on the line.
- These are the numbers of the parameters currently being graphed.
- A brief description of the parameter being graphed. This
name typically matches the description given in the appropriate drive manual.
- Displays the value of the parameter being graphed. While graphing this number is
the current value of the parameter. If graphing is not taking place, click on a point in the graph
and the value of that point will be displayed here.
- The units the parameters are displayed in.
116
Graphing Function Details
- The scale at which the parameter is being graphed.
- After graphing, this is the lowest value the parameter reached over the course of
the whole graph. If nothing has been graphed yet, this (--) is displayed.
- After graphing, this is the highest value the parameter reached. If nothing has
been graphed yet, this (--) is displayed.
Changing the Graphing Window (‘zooming’)
The vertical and horizontal axis of the graphing window can be resized or zoomed in or out to
highlight the data for improved analysis. The zooming is done via mouse dragging of graph
display controls (Fig 7.14).
The vertical scale has a range from –150% to 150% of the maximum value of the parameter
being graphed. 100% of the value being graphed may be found by selecting the parameter being
graphed under the Setup Tab in the monitors area and then examining the Max column under the
Monitors Tab. The number in the Max column equals 100% on the vertical scale.
To zoom in on the vertical scale, pull the top arrow towards the bottom arrow and vice-versa.
For example, when DriveWizard™ is initially started, the vertical scale goes from –150% to
150%. To zoom in on the 0-100% area, pull the bottom arrow ( ) up until only the 0% and up
gridlines are displayed. Then pull the top arrow ( ) down until 0-100% is displayed.
The horizontal scale starts with a 0-60 second window displayed. This window can be shrunk
with the zooming arrows, or the window can increase if the graph runs for greater than 60
seconds. The arrows may then be dragged apart to view the entire graphing time period.
Likewise, after graphing, the arrows ( , ) may also be dragged closer together to zoom in on
something or farther apart to zoom out.
Vertical Scale Zoom
Horizontal Scale Zoom
Figure 7.14: Graph Zoom Controls
117
Graphing Function Details
For both the horizontal and vertical scales, the cursor can be positioned in-between a scale’s
arrows until a doubled sides arrow ( ) appears. Drag this left and right to move the whole
window you have zoomed in on. For example, a 0-10 second window can be moved to display
the 20-30 second time period.
If the graph is cleared, the horizontal scale must be reset also. This is done
by dragging the right arrow all the way right and the left arrow back to 0.
Note!
Graph Time Display
There are two displays that show the amount of time that the monitor data was stored. An
elapsed time readout on the lower left-hand side shows the total time the graphing was on. A
time display on the lower right-hand side shows the time at the vertical time marker. (Fig 7.15)
Total Stored Time
Time Stamp at Vertical Bar
Figure 7.15: Graph Time Data Marker
A vertical bar (normally at the far left-hand side of the graph display) can be dragged over the
graph. The time stamp will show the time at the bar.
The value column of the graph
spreadsheet will show the data value at the bar. The graphing must be in stopped in order to use
this function.
118
8
Chapter
Run Wizard
This chapter describes the functions and features of the Run Wizard
119
Activating Run Wizard
Activating Run Wizard
The Run Wizard allows remote control of a drive. This feature is only available after
communication with the drive has been established, and it has been enabled. The following
sections illustrate the use of this feature.
1. Connect the drive to the PC as described in Chapter 3
2. If parameters need to be changed, do this now (refer to Chapter 8: Parameter Editor)
3. Click on the Enable button in the Run Wizard (Figure 8.3a)
4. If this is the first time you are enabling Run Wizard the warning in Figure 8.1 will appear.
Click on Accept to continue, click Decline to stop the function.
5. The warning message in Figure 8.2 will appear. Click OK to continue.
Figure 8.1: Initial Run Wizard Warning Window
Figure 8.2: Run Wizard Warning Window
120
Activating Run Wizard
6. The Run Wizard is now enabled and Figure 8.3b should appear
Figure 8.3a: Before enabled
Note!
L
Important !
Figure 8.3b: After enabled
1. The Run Wizard will not enable if the drive has an alarm or fault.
Check the status bar to see if an alarm or fault is present.
2. Check also to see if the keypad removal fault is active as this will prevent
Run Wizard from operating also. The keypad removal detection
enable/disable parameter: GPD315/V7 = n10; GPD515/G5,E7, F7, G7,
P7 = o2-06.
3. When using Ethernet communications, you must be in the RunWizard
Allowed mode. (See Communications setup, Chapter 4)
1. RunWizard sets B1-01 & B1-02 to setting 2 on GPD515/G5, E7, F7, G7,
and P7 and N003& N004 on GPD305/J7 and GPD315/V7 when enabling
RunWizard. These parameters are set to their prior settings when
RunWizard is disabled. If communication is lost while using RunWizard,
you must change these settings back to their prior settings.
2. This feature is locked out when you have the Write Disable function
turned on.
121
Using Run Wizard
Using Run Wizard
After Run Wizard is enabled, enter the value (in Hertz) to run the motor at in the Speed Ref
box.
Figure 8.4: Run Wizard Speed Reference Box
To run the motor in the forward direction, click on the
Forward button. A small arrow will slowly appear across the
bottom of the Run Wizard window to indicate the motor is moving
in that direction (Figure 8.5a). To stop running the motor, click on
the STOP button .
To change the speed of the drive while running, enter the
new speed in the speed reference box and click on the Forward
button to send the new speed command to the drive
Figure 8.5a: Motor Running Forward
To run the motor in the reverse direction, click on Reverse
button. A small arrow will slowly appear across the bottom of the
Run Wizard window to indicate the motor is moving in the reverse
direction. (Figure 8.5b). To stop running the motor in the reverse
direction, click on the STOP button.
To change the speed of the drive while running, enter the
new speed in the speed reference box and click on the Reverse
button to send the new speed command to the drive
Figure 8.5b: Motor Running Reverse
The Run Wizard will become disabled if the drive has an alarm or fault.
Check the status bar to see if an alarm or fault is present.
Note!
122
Appendix A: Toolbar Icons
Drive Wizard™ Toolbar Icons: See Chapter 4 for more detailed descriptions.
Name
Open
Description
Opens a parameter file
When Available
Drive is online or offline
Save
Saves a parameter file
Print
Prints a parameter file
Start Monitor
Mode
Stop Monitor
Mode
Connect
Starts monitoring drive activity
After file opened or
After connected to drive
After file opened or
After connected to drive
While not in Monitor Mode
Stops monitoring drive activity
While in Monitor Mode
Disconnect
Write Single
Parameter
Write All
Parameters
Read Single
Parameter
Read All
Parameters
Drive is offline
Connects DriveWizard™
software to an drive
Drive is online
Disconnects DriveWizard™
software from an drive
Updates a single parameter in the Drive is online
drive
Updates all parameters in the
drive
Reads a single parameter in the
drive
Reads all parameters in the drive
123
Drive is online
Drive is online
Drive is online
Appendix B: Quick Reference Guide
Command Name
File Operations
Communication
Inverter
Operations
Monitoring
Shortcut
Save Parameter File
Ctrl + S
Save Parameter File As Ctrl + A
Description
Saves parameter file
Saves parameter file
with a specific name and
location
Close Parameter File
Ctrl + E
Closes parameter file
Compare Parameter File Ctrl + B
Compares 2 parameter
files
Communication Setup Ctrl + P
Allows settings to be
changed
Connect
Ctrl + C
Opens connection
between PC and drive
Disconnect
Ctrl + D
Closes connection
between PC and drive
Read All
Ctrl + U
Downloads all
parameters to PC
Read Single Parm
Ctrl + Shift + U Downloads selected
parameter to PC
Write All
Ctrl + Shift + D Uploads all parameters
to the drive
Write Single Parm
Ctrl + O
Uploads single
parameter to the drive
Start
Ctrl + G
Starts monitoring mode
Stop
Ctrl + Shift + G Stops monitoring mode
124
Appendix C: Menu Flow Chart
DriveWizard Menu
File
Open Parm
File
Communication
Setup
Inverter
Monitoring
Help
Connect
Start
About
Save Parm
File
Disconnect
Stop
Web Site
Save Parm
File As
Read All
Close Parm
File
Read Single
Parm
New File
Write All
File
Conversion
Write Single
Parm
Print
Parm
Write Disable
Password
Print Single
Page
Factory
Password
Compare
Parm File
Initialize
Inverter
Change
Database
Auto-tune
File Exit
Inverter
Reset
125
DriveWizard
Help
Appendix D: DriveWizard™ Supported Drives
The following tables show the supported drives and software numbers that each database
supplied with DriveWizard™ will support.
Drive
Family
G5
E7
F7
G7
J7
P7
V7
M5
MC5
PS5
Drive Type
G5
G5 CASE
G5 575V
G5+
G5 HHP
G5 HHP
G5+ HHP 1P
G5+ CASE
E7 HVAC
F7 Std
F7 CASE
G7 Std
G7 CASE
J7 Std
P7 Std
Spec
Type
A, U
U
U
A,
A,U
A,U
U
U
C, U
U
A, C, U
U
A, C, U
U
A, C, U
U
U
A, C, U
U
U
U
U
U
V7 std
V7 CASE
V7N
V7 NEMA 4
V7N NEMA 4
GPD315/V7
CMO9x Ethernet
M5
U
MC5
U
PS5
U
Drive Software
(Flash Software)
1032 ~ 1043
2000 ~ 9999
5391, 5392, 5480
1110 ~1114
5291, 0210
5293, 0211
6991
2000 ~ 9999
Any Software
E7+ VSE104010 and above
Any Software
Any Software
Any Software
Any software
10 ~ 21
Any Software
P7+ VSP121020 and above
20~30, 100 ~ 110
Per Specific Software
0010
VSP018230,VSP018240
VSP035000, VSP035010
VSP018340
VAP018350
VSM20094
5423, 6420, 6422
1014,1016,1021, 1023,
1024, Special Software’s
Database Selection
Standard
G5 CASE (1042)
G5 575 V
Standard
G5 HHP Std/450A (old)
G5 HHP Std/450A (new)
G5 HHP 1PU
Generic CASE
Standard
E7+ / P7+
Standard
Generic CASE
Standard
G7 Generic CASE
Standard
Standard
E7+ / P7+
Standard
Special Databases
V7N
V7 for NEMA 4
V7 with DeviceNet for NEMA 4
V7 Ethernet
Not Supported
Not Supported
PS5 Database
Table D.1: Standard Databases supplied with DriveWizard™
126
Appendix E: Factory Only Features
Factory Password
Factory parameters can have severe effects on system performance, and therefore are usually not
adjusted without a factory representative available. Factory Password prompts (Figure E.1) the
user to enter the password that allows these parameters to be adjusted.
Figure E.1: Factory Password Entry
On the status bar, the lock ( ) indicates whether the factory parameters have been unlocked or
not. Factory Password unlocks the access to parameters which can normally only be altered by
the factory. Once the correct password has been entered, the parameters have been unlocked
( ). See Figure E.2.
Factory Lock
Figure E.2: Status Bar
Entering the factory password also allows Flash to be written to the drive. The Flash Write
option appears under the Inverter Menu and will become visible anytime after the factory
password has been entered but will be grayed out and unavailable if DriveWizard™ is currently
online with the drive.
Note!
Situations that can cancel Drive Wizard’s factory mode:
1. Online or offline, if the user changes the working value of the access
level (n01, n001, or A1-01) to any of the non-factory access levels, it will
go back into ‘locked’ mode.
2. Online, if the access level (n01, n001, or A1-01) gets changed by the
software, either by opening another file or by initializing and reuploading, it will remain in ‘unlocked’ mode until the user clicks
‘accept’ with a working value other than factory access.
3. Offline with a factory access file open, opening another file will put it
back into ‘locked’ mode.
127
Flash Write
New software and updates may be loaded into the drive with this command. This option is only
available after the correct Factory Password has been entered and DriveWizard™ is not on-line
with the drive. If the Factory Password is entered while the drive is on-line, Flash Write will
appear, but will be grayed out and unavailable.
Flash Write is only available under Serial Communications. You cannot use this
function with Ethernet Communications. See Communications section of Chapter 4
Note!
To write flash, choose Factory Password from the Inverter menu and enter the correct password.
Flash Write should now be available under the inverter menu. Click on it and Figure E.3 Should
appear.
Figure E.3: Opening a File with Flashing Data
Select the file with the flash data in it and click the Open button to proceed. A warning will
appear (Figure E.4) because once the new data is written to the drive, the old data cannot be
retrieved.
Figure E.4: Confirmation to Flashing a Drive
128
If the file selected is not of the correct type, Figure E.5 will appear.
Figure E.5: Attempting to Open an Invalid Flash file
Click on Yes to start the Flash Write process. Click on No to not write flash and close the
Flash Write function. Once flashing has started, a progress bar (Figure E.6a) will appear until
the drive is flashed successfully (Figure E.6b).
(a). Progress Bar During Flashing
(b). Successful Flash
Figure E.6: Flashing a Drive
129
Appendix F: Adding a Database
As custom software’s and special drives are created, DriveWizard™ accommodate these items by the
creation of additional databases not supplied with the original DriveWizard™ installation. The database is
added in the same manner as a program is installed on your PC.
To add a database to your existing DriveWizard™ installation, please follow this procedure:
1. The Additional databases can be found at/on the following:
• On the internet at: http://www.yaskawa.com/site/products.nsf/products/DriveWizard.html under
the download section.
• CD.AFD7.01,
• CD.V7J7.01
• CD.E7.01
• CD.DW.01
The installation files are contained in a WinZip file that you can copy to any directory on your PC
hard drive. Copy the zip file to your hard drive.
2. Unzip the files (refer to Chapter 2 – installation for more details)
3. Close all other application programs running on your computer.
4. In the unzipped files you will find a file called Setup or Setup.exe . Double click on that icon to start
the installation process. The installation program will start and a welcoming screen will appear
The welcoming screen
will look like this.
130
A message will appear,
welcoming you to the
DriveWizard™ program.
Click Next to continue.
A window will appear listing the
database(s) that this installation
contains. Select all the databases
to be installed by clicking on the
check box.
Now click on Next . The
installation will complete and
then close the installation
program. Check for the new
database under File > Change
Database in DriveWizard™ (see
Chapter 3)
131
Appendix G: Release History
DriveWizard™ 6.1 Release April 2006
•
•
•
•
•
•
•
•
•
G5 to G7 File Conversion Tool.
This feature allows the user to convert a previously saved standard G5 drive
DriveWizard™ parameter file into a standard G7 drive DriveWizard™ parameter file.
GPD505/P5 & GPD506/P5+ to E7 & P7 Conversion Tool.
This feature allows the user to convert a previously saved standard GPD505/P5 or
GPD506/P5+ drive parameter file in InverterWin 3.0 into a standard E7 or P7
DriveWizard™ drive parameter file.
Enhanced Ethernet drive multiple IP address storage.
This feature allows the user to create a list of IP addresses as long as they wish to select a
drive to connect to in Ethernet communications. The drives can also have a tag name up
to 32 characters associated with it’s IP address to easily find a particular drive in a long
list of IP addresses.
Support for Ethernet Modbus TCP/IP and Ethernet/IP
Both Ethernet protocols are now supported in DriveWizard™.
Drive Write Protect added.
This feature allows the user to set a password and enable the write protect function.
When this function is turned on, the user of DriveWizard™ can only monitor the drive,
view drive parameters, and upload parameters from the drive. You cannot change any
parameters, download parameter files, initialize the drive, reset the drive, or utilize
RunWizard.
Drive Remote Reset Capability
The ability to reset a drive fault while on-line with DriveWizard™ has been added.
E7+ / P7+ Database
This additional database supports the new featured E7+ 4010 software and the P7+ 1020
software’s.
Standard G7 CASE database
This feature adds G7 CASE support by additional DriveWizard™ database supplied with
the software.
V7 Ethernet Database
This feature adds GPD315/V7 support for Ethernet when using a CMO9x
communications option for GPD315/V7 by an additional DriveWizard™ database
supplied with the software.
132
DriveWizard™ 6.0 Release September 2004
•
•
•
•
•
•
•
•
G5 to F7 File Conversion Tool.
This feature allows the user to convert a previously saved standard G5 drive parameter
file into a standard F7 drive parameter file.
Parameter Download KVA and Control Mode Skip
This feature allows the user to download parameters to a drive without regard to the drive
size or rating (KVA) or the drive control mode. This makes it possible to download a set
of parameters for a unique application to different size or rating of drives along with
drives that are either open or closed loop control.
Save Feature on File Comparison
A save button has been added to the File Comparison function to allow the user the
ability to save the differences between files or a file and online drive for future use.
Variable Time Base Added to Graphing Function
The ability to change the sampling time for graphing with Ethernet communications has
been added to the graphing function. The user can now adjust the sampling rate from 0.1
seconds to 60 seconds per sample. Previously the sample rate was fixed at 1 second.
Ability to Store Multiple IP Addresses for Ethernet Communications
This feature allows the user to create a list of IP addresses to select a drive to go online
with DriveWizard™ under Ethernet communications. This is helpful when connecting
to a network with a large number of drives.
Fault History Expanded to 10 Events to Match Drives.
The Fault History feature has been expanded from 4 events to 10 to match the E7, F7, G7,
and P7 drives.
Stop Button Added to Run Wizard Control Panel
A stop button has been added to Run Wizard to make the control panel more user friendly.
Expanded Parameter File Saving in CSV Format.
When saving a parameter file in CSV format, you now get the parameter description,
units, maximum value, minimum value, and factory default value. Previously you would
get the parameter number and value only.
133
DriveWizard™ 5.5 Release October 2003
•
Ethernet Communications to SI-E communications option.
This feature allows DriveWizard™ to connect via Ethernet to a V7, E7, F7, G7 or P7 inverter.
The connection is to the SI-E (CM090) communications option card only. All functions of
DriveWizard™ are available except for the flash write feature in the factory mode.
•
RS 485 support
Echo cancellation has been added to the communications set-up to allow DriveWizard™ to
communicate with a supported drive over 2 wire RS 485 network. A RS 485 adapter for the PC
is required to utilize this feature.
•
Enhanced Drive Support.
The support for E7, F7, and G7 standard drives has been upgraded and minor database bugs
repaired. P7 support has been added to the standard database and V7 NEMA 4X databases have
been added.
DriveWizard™ Release 5.3 February 2003
•
•
Create new parameter files.
This feature allows DriveWizard™ to create a new parameter file from scratch instead of using
pre-defined files or going online to the drive and saving the drive file. The user can create a file
for any drive supported by the currently selected database. The user selects the drive family,
model number (voltage and kW rating), and control mode. The software then creates a complete
parameter file for the selected inverter using factory default values.
Parameter difference tab.
A new tab has been added to the DriveWizard™ parameter editor spreadsheet called “Difference”.
This tab shows dynamically any parameters (online or offline) that are different from the factory
default settings ( any parameter values in red or blue). The contents of the tab can also be printed.
•
Auto-tune support.
DriveWizard™ will now support the auto-tune feature of E7, F7, and G7 drives. The user can
perform any of the available auto-tuning functions in the respective drive while online. A
convenient table will show key motor parameters before and after the auto-tuning sequence to
enable the user to see which parameters where changed by the auto-tune. Status and fault displays
keep the user informed of auto-tune progress and any errors occurring during the auto-tune.
•
Run Wizard.
The Run Wizard function has three changes to it:
1. The need for the Run Wizard password has been eliminated
2. The user can now change speed and motor rotation direction while the drive is running.
3. Run Wizard support for E7 has been added.
•
Communications Setup.
DriveWizard™ will now support any available COM port available in Windows from COM port
1 to COM port 99. This will allow users of Windows XP with USB only computers access to
USB to serial port converters.
•
Print Setup.
DriveWizard™ will now allow you to select and set the properties for any installed printer in the
Windows operating system.
134
DriveWizard™ Release 5.0 July 2002:
•
Multiple Database design.
This feature allows DriveWizard™ to connect to drives with special software’s. The user can
select from the standard drive database or a special database for the specific drive software.
Databases can be added by at any time running a simple database installation program.
•
•
Additions to the drives and software supported as standard in DriveWizard™ :
•
•
•
•
•
•
E7A, E7C, E7U
F7A, F7C, F7U
G7A, G7C
V7N
G5 HHP modular drive
Generic CASE support for G5.
Saving of Graphing setup.
DriveWizard™ will now save the last setup of the graphing function. This will save on having to
set up this function every time you go online with a drive. The settings are saved per drive type.
•
E1-03 parameter for G5, E7, F7, and G7 is now changeable, not just read only.
This parameter allows the user to select a pre-defined V/F pattern or create a custom V/F pattern.
This parameter is now changeable from DriveWizard™ .
•
•
Modbus communication error windows have more information.
Drive Modbus Address added to the serial communications setup menu item.
A property has been added to the serial communications to allow DriveWizard™ to address a
drive if more than 1 drive is on the serial communications port or the drive requires an address on
it’s communication port in order for DriveWizard™ to connect to
that drive.
•
Integrated online help to improve access to information on using DriveWizard™ most
of the contents of this manual are contained in the DriveWizard™ Help
135
Appendix H: File Conversion Parameter Tables
G5 to F7 and G5 to G7 Conversion Tool Parameter Table
G5
Param.
Parameter Name
F7/G7
Param.
A1-00
A1-02
A1-03
A1-04
A2-01
A2-02
A2-03
A2-04
A2-05
A2-06
A2-07
A2-08
A2-09
A2-10
A2-11
A2-12
A2-13
A2-14
A2-15
A2-16
A2-17
A2-18
A2-19
A2-20
A2-21
A2-22
A2-23
A2-24
A2-25
A2-26
A2-27
A2-28
A2-29
A2-30
A2-31
A2-32
Select Language
Control Method
Init Parameters
Enter Password
User Parameter 1
User Parameter 2
User Parameter 3
User Parameter 4
User Parameter 5
User Parameter 6
User Parameter 7
User Parameter 8
User Parameter 9
User Parameter 10
User Parameter 11
User Parameter 12
User Parameter 13
User Parameter 14
User Parameter 15
User Parameter 16
User Parameter 17
User Parameter 18
User Parameter 19
User Parameter 20
User Parameter 21
User Parameter 22
User Parameter 23
User Parameter 24
User Parameter 25
User Parameter 26
User Parameter 27
User Parameter 28
User Parameter 29
User Parameter 30
User Parameter 31
User Parameter 32
A1-00
A1-02
A1-03
A1-04
A2-01
A2-02
A2-03
A2-04
A2-05
A2-06
A2-07
A2-08
A2-09
A2-10
A2-11
A2-12
A2-13
A2-14
A2-15
A2-16
A2-17
A2-18
A2-19
A2-20
A2-21
A2-22
A2-23
A2-24
A2-25
A2-26
A2-27
A2-28
A2-29
A2-30
A2-31
A2-32
b1-01
b1-02
b1-03
b1-04
Reference Source
Run Source
Stopping Method
Reverse Oper
b1-01
b1-02
b1-03
b1-04
G5
Param.
b1-05
b1-06
b1-07
b1-08
b2-01
b2-02
b2-03
b2-04
b2-08
b3-01
b3-02
b3-03
b4-01
b4-02
b5-01
b5-02
b5-03
b5-04
b5-05
b5-06
b5-07
b5-08
b5-09
b5-10
b5-11
b5-12
b5-13
b5-14
b6-01
b6-02
b6-03
b6-04
b7-01
b7-02
b8-01
b8-02
b8-03
b8-04
b8-05
b9-01
b9-02
136
Parameter Name
Zero Speed Operation
Cntl Input Scans
LOC/REM RUN Sel
RUN CMD at PRG
DCInj Start Freq
DCInj Current
DCInj Time @Start
DCInj Time @Stop
FieldComp
SpdSrch at Start
SpdSrch Current
SpdSrch Dec Time
Delay-ON Timer
Delay-OFF Timer
PID Mode
P Gain
PID I Time
PID I Limit
PID D Time
PID Limit
PID Offset
PID Delay Time
Output Level Sel
PID Output Gain
Output Rev Sel
Fb Los Det Sel
Fb Los Det Lvl
Fb Los Det Time
Dwell Ref @Start
Dwell Time @Start
Dwell Ref @Stop
Dwell Time @Stop
Droop Level
Droop Time Delay
Energy Saving Gain
Energy Saving Freq.
Energy Save Mode
Energy Save Gain
Energy Save FT
Zero Servo Gain
Zero Servo Width
F7/G7
Param.
b1-05
b1-06
b1-07
b1-08
b2-01
b2-02
b2-03
b2-04
b2-08
b3-01
b3-02
b3-03
b4-01
b4-02
b5-01
b5-02
b5-03
b5-04
b5-05
b5-06
b5-07
b5-08
b5-09
b5-10
b5-11
b5-12
b5-13
b5-14
b6-01
b6-02
b6-03
b6-04
b7-01
b7-02
No Cnvt
No Cnvt
b8-01
b8-02
b8-03
b9-01
b9-02
G5
Param.
C1-01
C1-02
C1-03
C1-04
C1-05
C1-06
C1-07
C1-08
C1-09
C1-10
C1-11
C2-01
C2-02
C2-03
C2-04
C3-01
C3-02
C3-03
C3-04
C3-05
C3-06
C4-01
C4-02
C4-03
C4-04
C4-05
C5-01
C5-02
C5-03
C5-04
C5-05
C5-06
C5-07
C5-08
C6-01
C6-02
C6-03
C7-01
C7-02
C8-08
C8-09
Parameter Name
F7/G7
Param.
Accel Time 1
Decel Time 1
Accel Time 2
Decel Time 2
Accel Time 3
Decel Time 3
Accel Time 4
Decel Time 4
Fast Stop Time
Acc/Dec Units
Acc/Dec SW Freq
SCrv Acc @ Start
SCrv Acc @ End
SCrv Dec @ Start
SCrv Dec @ End
Slip Comp Gain
Slip Comp Time
Slip Comp Limit
Slip Comp Regen
Flux Select
Output V Limit
Torq Comp Gain
Torq Comp Time
F TorqComp @ start
R TorqComp @ start
TorqComp Delay T
ASR Gain 1
ASR Time 1
ASR Gain 2
ASR Time 2
ASR Limit
ASR Filter
ASR Switching Freq
ASR Integral Limit
Carrier Freq Max
Carrier Freq Min
Carrier Freq Gain
Hunting Prev Sel
Hunting Prev Gain
AFR Gain
AFR Time
C1-01
C1-02
C1-03
C1-04
C1-05
C1-06
C1-07
C1-08
C1-09
C1-10
C1-11
C2-01
C2-02
C2-03
C2-04
C3-01
C3-02
C3-03
C3-04
No Cnvt
C3-05
C4-01
C4-02
C4-03
C4-04
C4-05
C5-01
C5-02
C5-03
C5-04
C5-05
C5-06
C5-07
C5-08
No Cnvt
No Cnvt
No Cnvt
N1-01
N1-02
N2-01
N2-02
G5
Param.
137
Parameter Name
F7/G7
Param.
C8-30
d1-01
d1-02
d1-03
d1-04
d1-05
d1-06
d1-07
d1-08
d1-09
d2-01
d2-02
d3-01
d3-02
d3-03
d3-04
d4-01
d4-02
d5-01
d5-02
d5-03
d5-04
d5-05
d5-06
Carrier in tune
Reference 1
Reference 2
Reference 3
Reference 4
Reference 5
Reference 6
Reference 7
Reference 8
Jog Reference
Ref Upper Limit
Ref Lower Limit
Jump Freq 1
Jump Freq 2
Jump Freq 3
Jump Bandwidth
MOP Ref Memory
Trim Control Lvl
Torque Control Sel
Torque Ref Delay
Speed Limit Sel
Speed Limit
Speed Limit Bias
Speed/Torque Sw Time
No Cnvt
d1-01
d1-02
d1-03
d1-04
d1-05
d1-06
d1-07
d1-08
d1-17
d2-01
d2-02
d3-01
d3-02
d3-03
d3-04
d4-01
d4-02
d5-01
d5-02
d5-03
d5-04
d5-05
d5-06
E1-01
E1-03
E1-04
E1-05
E1-06
E1-07
E1-08
E1-09
E1-10
E1-11
E1-12
E1-13
E2-01
E2-02
E2-03
E2-04
Input Voltage
V/F Selection
Max Frequency
Max Voltage
Base Frequency
Mid Frequency A
Mid Voltage A
Min Frequency
Min Voltage
Mid Frequency B
Mid Voltage B
Base Voltage
Motor Rated FLA
Motor Rated Slip
No-Load Current
Number of Poles
E1-01
E1-03
E1-04
E1-05
E1-06
E1-07
E1-08
E1-09
E1-10
E1-11
E1-12
E1-13
E2-01
E2-02
E2-03
E2-04
G5
Param.
Parameter Name
F7/G7
Param.
E2-05
E2-06
E2-07
E2-08
E2-09
E2-10
E3-01
E4-01
E4-02
E4-03
E4-04
E4-05
E4-06
E4-07
E5-01
E5-02
E5-03
E5-04
E5-05
E5-06
Term Resistance
Leak Inductance
Saturation Comp 1
Saturation Comp 2
Motor Mech Loss
Torq Comp Iron Loss
Control Method
Max Frequency
Max Voltage
Base Frequency
Mid Frequency
Mid Voltage
Min Frequency
Min Voltage
Motor Rated FLA
Motor Rated Slip
No-Load Current
Motor 2 No of Poles
Motor 2 term Ohms
Motor 2 Leak
E2-05
E2-06
E2-07
E2-08
E2-09
E2-10
E3-01
E3-02
E3-03
E3-04
E3-05
E3-06
E3-07
E3-08
E4-01
E4-02
E4-03
E4-04
E4-05
E4-06
F1-01
F1-02
F1-03
F1-04
F1-05
F1-06
F1-07
F1-08
F1-09
F1-10
F1-11
F1-12
F1-13
F1-14
F2-01
F3-01
F4-01
F4-02
F4-03
F4-04
F4-05
PG PPR
PG Open Sel
Overspeed Sel
Speed Dev Sel
PG Rotation
PG Div Rate
Int Value Decel
Overspeed Level
Overspeed Time Dly
Ex Spd Dev Level
Ex Spd Dev Time Dly
PG Gear Teeth 1
PG Gear Teeth 2
Pgo Dectect Time
AI-14 Input Sel
DI Input
AO Ch1 Select
AO Ch1 Gain
AO Ch2 Select
AO Ch2 Gain
AO Ch1 Bias
F1-01
F1-02
F1-03
F1-04
F1-05
F1-06
F1-07
F1-08
F1-09
F1-10
F1-11
F1-12
F1-13
F1-14
F2-01
F3-01
F4-01
F4-02
F4-03
F4-04
F4-05
G5
Param.
138
Parameter Name
F7/G7
Param.
F4-06
F5-01
F5-02
F6-01
F7-01
F8-01
F9-01
F9-02
F9-03
F9-04
F9-05
F9-06
AO Ch2 Bias
DO-02 Ch1 Select
DO-02 Ch2 Select
DO-08 Selection
PO-36F Selection
E-15 Det Sel
EFO Selection
EFO Detection
EFO Fault Action
Trace Sample Time
Torq Ref Limit Sel
BUS Fault Sel
F4-06
F5-01
F5-02
F5-09
No Cnvt
No Cnvt
No Cnvt
F6-02
F6-03
F6-04
F6-06
F6-01
H1-01
H1-02
H1-03
H1-04
H1-05
H1-06
H2-01
H2-02
H2-03
H3-01
H3-02
H3-03
H3-04
H3-05
H3-06
H3-07
H3-08
H3-09
H3-10
H3-11
H3-12
H4-01
H4-02
H4-03
H4-04
H4-05
H4-06
H4-07
Terminal 3 Sel
Terminal 4 Sel
Terminal 5 Sel
Terminal 6 Sel
Terminal 7 Sel
Terminal 8 Sel
Terminal 9 Sel
Terminal 25 Sel
Terminal 26 Sel
Term 13 Signal
Term 13 Gain
Term 13 Bias
Term 16 Signal
Terminal 16 Sel
Terminal 16 Gain
Terminal 16 Bias
Term 14 Signal
Terminal 14 Sel
Terminal 14 Gain
Terminal 14 Bias
Filter Avg Time
Terminal 21 Sel
Terminal 21 Gain
Terminal 21 Bias
Terminal 23 Sel
Terminal 23 Gain
Terminal 23 Bias
AO Level Select
H1-01
H1-02
H1-03
H1-04
H1-05
H1-06
H2-01
H2-02
H2-03
H3-01
H3-02
H3-03
H3-04
H3-05
H3-06
H3-07
H3-08
H3-09
H3-10
H3-11
H3-12
H4-01
H4-02
H4-03
H4-04
H4-05
H4-06
H4-07
G5
Param.
Parameter Name
F7/G7
Param.
H5-01
H5-02
H5-03
H5-04
H5-05
Serial Comm Adr
Serial Baud Rate
Serial Com Sel
Serial Fault Sel
Serial Flt Dtct
H5-01
H5-02
H5-03
H5-04
H5-05
L1-01
L1-02
L2-01
L2-02
L2-03
L2-04
L2-05
L2-06
L3-01
L3-02
L3-03
L3-04
L3-05
L3-06
L4-01
L4-02
L4-03
L4-04
L4-05
L5-01
L5-02
L6-01
L6-02
L6-03
L6-04
L6-05
L6-06
L7-01
L7-02
L7-03
L7-04
L8-01
L8-02
L8-03
L8-05
L8-07
MOL Fault Select
MOL Time Const
PwrL Selection
PwrL Ridethru t
PwrL Baseblock t
PwrL V/F Ramp t
PUV Det Level
KEB Frequency
StallP Accel Sel
StallP Accel Lvl
StallP CHP Lvl
StallP Decel Sel
StallP Run Sel
StallP Run Level
Spd Agreee Level
Spd Agree Width
Spd Agree Lvl + Spd Agree Width + Ref Loss Sel
Num of Restarts
Restart Sel
Torq Det 1 Sel
Torq Det 1 Lvl
Torq Det 1 Time
Torq Det 2 Sel
Torq Det 2 Lvl
Torq Det 2 Time
Torq Limit Fwd
Torq Limit Rev
Torq Lmt Fwd Rgn
Torq Lmt Rev Rgn
DB Resistor Prot
OH Pre-Alarm Lvl
OH Pre-Alarm Sel
PH Loss In Sel
PH Loss Out Sel
L1-01
L1-02
L2-01
L2-02
L2-03
L2-04
L2-05
L2-08
L3-01
L3-02
L3-03
L3-04
L3-05
L3-06
L4-01
L4-02
L4-03
L4-04
L4-05
L5-01
L5-02
L6-01
L6-02
L6-03
L6-04
L6-05
L6-06
L7-01
L7-02
L7-03
L7-04
L8-01
L8-02
L8-03
L8-05
L8-07
G5
Param.
139
Parameter Name
F7/G7
Param.
L8-10
L8-17
L8-19
Ground Fault Sel
Prtct@L - Spd
OL2 Chara@L-Spd
L8-09
No Cnvt
L8-15
o1-01
o1-02
o1-03
o1-04
o1-05
o2-01
o2-02
o2-03
o2-04
o2-05
o2-06
o2-07
o2-08
o2-09
User Monitor Sel
Power- On Monitor
Display Scaling
Display Units
Address Display
Local/Remote Key
Oper STOP key
User Defaults
Inverter Model #
Operator M.O.P.
Oper Detection
Elapsed Time Set
Elapsed Time Run
Init Mode Sel
o1-01
o1-02
o1-03
o1-04
No Cnvt
o2-01
o2-02
o2-03
o2-04
o2-05
o2-06
o2-07
o2-08
o2-09
GPD 505/P5 to E7 and GPD505/P5 to P7 Conversion Tables
Table 1: Parameter Conversion
P5
Par.
P5 Parameter Name
Conversion
n001
n002
Param selection/ init
Op Mode Select
NOT CONVERTED
See Table 2
n003
n004
Motor Rated Voltage
Stop Method
n005
n006
n007
n008
n009
n010
n011
n012
Phase Rotation
Reverse Prohibited
Local/Remote
Stop Key Function
Freq Ref Setting from
Digital Operator
V/F Pattern Select
Motor Rated Voltage
Max Frequency
n003/10 = E1-01
If n004 > 1, then b1-03 =3,
else n004 = b1-03
See Table 3
n013
n014
Max voltage
Base Frequency
n015
Mid Frequency
n016
n017
n018
n019
Mid voltage
Min Frequency
Min Voltage
Accel Time 1
n020
Decel Time 1
n021
Accel Time 2
n022
Decel Time 2
n023
n024
S-curve select
Operator Display Units
n025
n026
n027
n028
n029
n030
n031
n032
Freq Reference #1
Freq Reference #2
Freq Reference #3
Freq Reference #4
Jog Reference
Freq Ref Upper Limit
Freq Ref Lower Limit
Motor Rated Current
None
None
If n009=1, then o2-05=0,
else o2-05 = 1
NOT CONVERTED
NOT CONVERTED
If n012 > 120.0 then E1-04
=120.0, else n012 = E1-04
None
If n014 > 200.0 then E1-06
=200.0, else n014 = E1-06
If n015 > 200.0 then E1-07
=200.0, else n015 = E1-07
None
None
None
If n019 > 999.9, then
n019*10 = C1-01, else n019
= C1-01
If n020 > 999.9, then
n020*10 = C1-02, else n020
= C1-02
If n021 > 999.9, then n021
*10 = C1-03, else n021 =
C1-03
If n022 > 999.9, then
n022*10 = C1-04, n022 =
C1-04
NOT CONVERTED
If n024 >39 then n024*10 =
o1-03, else n024 = o1-03
n025*10 = d1-01
n026*10 = d1-02
n027*10 = d1-03
n028*10 = d1-04
n029*10 = d1-17
n030*10 = d2-01
n031*10 = d2-02
None
140
E7/P7
Par.
E7/P7 Parameter
Name
NA
b1-01 &
b1-02
E1-01
b1-03
NA
Run Seq Select
Ref Select
Input Voltage
Stopping Method
b1-04
Reverse operation
o2-01
o2-02
o2-05
Local / Remote Key
NA
NA
E1-04
Freq Ref Setting Method
Selection
NA
NA
Max Output Freq.
E1-05
E1-06
Max Output Voltage
Base Frequency
E1-07
Mid Frequency
E1-08
E1-09
E1-10
C1-01
Mid Voltage A
Min Frequency
Min Voltage
Acceleration Time 1
C1-02
Deceleration Time 1
C1-03
Acceleration Time 2
C1-04
Deceleration Time 2
NA
o1-03
NA
Digital Operator Display
Selection
Frequency Reference 1
Frequency Reference 2
Frequency Reference 3
Frequency Reference 4
Jog Freq. reference
Freq Ref. Upper Limit
Freq. Ref. Lower Limit
Motor Rated Current
d1-01
d1-02
d1-03
d1-04
d1-17
d2-01
d2-02
E2-01
P5
Par.
P5 Parameter Name
n033
n034
n035
Motor OL Select
OH1 Stop Method
Terminal S2 Select
n036
n037
n038
n039
n040
n041
n042
n043
Terminal S3 Select
Terminal S4 Select
Terminal S5 Select
Terminal S6 Select
Terminal MA Select
Terminal M1 Select
Master Analog Input
Sel.
Terminal FI Select
n044
n045
n046
n047
n048
n049
n050
n051
n052
n053
Freq Ref Retention
Ref Loss Detect
Freq Ref Gain
Freq Ref Bias
Terminal AM Sel
Terminal AM Gain
Carrier Freq select
Pwr Loss Ride Thru sel
Spd Srch Current
Min Baseblock Time
n054
n055
Spd Search V/F
Pwr Loss Ride Thru Time
n056
n057
Number of Restarts
Restart Select
n058
Jump Freq 1
n059
Jump Freq 2
n060
Jump Bandwidth
n061
n062
n063
n064
n065
n066
n067
n068
n069
n070
n071
n072
Conversion
E7/P7
Par.
E7/P7 Parameter
Name
If n033 > 1, then L1-01 = 1
None
If n035 >1, then table 4, else
H1-03 = 0Fh
Table 4
Table 4
Table 4
Table 4
Table 5
Table 5
NOT CONVERTED
L1-01
L8-03
H1-01
Mtr OL Protect Select
OH Pre-Alarm Op Sel.
Terminal S3 Select
H1-02
H1-03
H1-04
H1-05
H2-01
H2-02
NA
Terminal S4 Select
Terminal S5 Select
Terminal S5 Select
Terminal S5 Select
Terminal M1-M2 Sel.
Terminal M3-M4 Sel.
NA
If n043 =1, then H3-08 =2,
else H3-08 = 0
NOT CONVERTED
None
n046*10 = H3-02
n047*10 = H3-03
Table 6
n049*10 = H4-02
NOT CONVERTED
None
None
If n053 > 5.0 then L2-03 =
5.0, else n053 = L2-03
NOT CONVERTED
None
H3-08
d3-01
Terminal A2 Signal
Level Select
NA
Freq Ref Loss Det Sel
Terminal A1 Gain
Terminal A1 Bias
Terminal FM Select
Terminal FM Gain
NA
Pwr Loss Det Select
Spd srch Deact Current
Pwr Loss Min Base
Block Time
NA
Pwr Loss Ride-Thru
Time
No.of Restart attempts
Auto Restart Operation
Select
Jump Frequency 1
d3-02
Jump Frequency 2
d3-04
Jump Frequency Width
o2-08
NA
NA
b2-02
b2-04
b2-03
NA
NA
NA
L3-04
Cum. Op Time Select
NA
NA
DC Inj Brkg Current
DC INJ Time @Stop
DC INJ Time @ Start
NA
NA
NA
Stall Prevent Sel. During
Decel
NA
NA
NA
L4-05
H3-02
H3-03
H4-01
H4-02
NA
L2-01
b3-02
L2-03
NA
L2-02
L5-01
L5-02
Elapsed Timer Select
Elapsed Time 1
Elapsed Time 2
DC inj Current
DC inj Time @ Stop
DC inj Time @ Start
Torq Comp Gain
Mtr Line to Line Res.
Mtr Iron Loss
Stall Prev Decel
None
If n057 = 1 then L5-02 = 0,
else L5-02 = 1
If n058 > 200.0, then d3-01
= 200.0, else n058 = d3-01
If n059 > 200.0, then d3-02
= 200.0, else n059 = d3-02
If n060 > 20.0, then d3-04 =
20.0, else n064 = d3-04
None
NOT CONVERTED
NOT CONVERTED
None
n065*10 = b2-04
n066*10 = b2-03
NOT CONVERTED
NOT CONVERTED
NOT CONVERTED
None
Stall Prev. Accel Lvl
Stall Prev Run Lvl
NOT CONVERTED
NOT CONVERTED
NA
NA
141
P5
Par.
P5 Parameter Name
n073
n074
n075
n076
n077
n078
n079
n080
n081
n082
n083
n084
Freq Detection
Torq Detect Select
Torq Detect Level
Torq Detect Time
Timer On Delsy
Timer Off Delay
DB Resistor Protect
IN Ph Loss Lvl
IN Ph Loss Dly time
Out Ph Loss Lvl
IN Ph Loss Dly Time
PID Mode Sel
n085
n086
n087
n088
n089
n090
n091
n092
n093
n094
n095
n096
n097
n102
n103
n104
n105
n106
n107
n108
n109
n110
n111
n112
n113
n114
PID Fdbk Gain
PID P gain
PID I Time
PID D Time
PID Offset
PID I Limit
Output Lag Filter
PID Fdbk Loss Select
PID Fdbk Loss Lvl
PID Fbbk Loss Time
Energy Save Sel
Energy Saving gain K2
Energy Save Vlim
@60hz
Energy Save Vlim@6hz
EnergySVTime AvgkW
Energy Save Vlim Tune
Energy Save Step V
100%
Energy Save Step V 5%
MODBUS Timeout
MODBUS Fault Stop
MODBUS Ref Unit
MODBUS Address
MODBUS Baud Rate
MODBUS Parity
Slip Comp Gain
Mtr No-load Current
Slip Comp Delay
Operator Detect Flt
Freq Agree Det Width
Loc/REM Change
n115
n116
n117
n118
Inverter KVA Select
Ct/VT Select
Low Freq OL2 Start
OL2 Level @ 0 hz
n098
n099
n100
n101
Conversion
E7/P7
Par.
E7/P7 Parameter
Name
NOT CONVERTED
None
None
None
None
None
None
NOT CONVERTED
NOT CONVERTED
NOT CONVERTED
NOT CONVERTED
If n084 >0, then B5-01 = 1,
else B5-01 = 0
NOT CONVERTED
n086*10 = b5-02
None
NOT CONVERTED
N089*10 = b5-07
n090*10 = b5-04
n091*10 = b5-08
None
None
None
None
NOT CONVERTED
NOT CONVERTED
NA
L6-01
L6-02
L6-03
b4-01
b4-02
L8-01
NA
NA
NA
NA
b5-01
NA
Torq Detect 1 select
Torq Detect 1 Level
Torq Detect 1 Time
Delay ON Timer
Delay OFF Timer
Internal DB Res. Prot.
NA
NA
NA
NA
PID Mode Sel
NA
b5-02
B5-03
NA
b5-07
b5-04
B5-08
b5-12
b5-13
b5-14
b8-01
NA
NA
NA
Proportional Gain Set
PI I Time
NA
PI Offset Set
Integral Limit Set
PI Pri. Lag filter
Fb Loss Detect Select
Fb Loss Detect Level
Fb Loss Detect Time
Energy Saving Select
NA
NA
NOT CONVERTED
NOT CONVERTED
NOT CONVERTED
NOT CONVERTED
NA
NA
NA
NA
NA
NA
NA
NA
NOT CONVERTED
None
None
NOT CONVERTED
n104 conv to hex = H5-01
n105 +1 = H5-02
None
NOT CONVERTED
NOT CONVERTED
NOT CONVERTED
None
NOT CONVERTED
None
NA
H5-05
H5-04
NA
H5-01
H5-02
H5-03
NA
NA
NA
o2-06
NA
b1-07
None
NOT CONVERTED
NOT CONVERTED
NOT CONVERTED
o2-04
NA
NA
NA
NA
Serial Flt Detect
Serial Flt Select
NA
Serial Comm Adr
Serial Baud Rate
Serial Comm Select
NA
NA
NA
Oper Detection
NA
Local / Remote Run
Selection
Inverter Model #
NA
NA
NA
142
Table 2: n002 decode
to b1- 01 & 02
n002
0
1
2
3
4
5
6
7
8
b1-01
0
0
1
1
2
2
2
0
1
b1-02
0
1
0
1
0
1
2
2
2
Table 3: n005 and n006
decode to b1- 04
n005
0
0
1
1
n006
0
1
0
1
b1-04
0
1
2
3
Table 4: Multi-Function Contact Input Select
P5
Setting
2
3
4
5
6
7
8
9
10
11
12
13
14
15
16
17
18
19
20
21
22
23
24
P5 Description
Ext. Fault NO
External Fault NC
Fault Reset
LOC/REM Select
Comm/Term Control Sw.
ESTOP NO
FV/FI Term Switch
Multi-step Spd set 1
Multi-step Spd set 2
Jog Freq Select
Accel/Decel Time Switch
Ext BB NO
Ext BB NC
Spd Srch from Max Freq
Spd Srch from set Freq
Param Write enable
PID Int Value reset
PID Control disable
Timer Start
Inv Overheat OH3
Sample/Hold analog Ref
KEB NO
KEB NC
E7/P7
Setting
24h
25h
14h
1h
6Bh
15h
0Fh
03h
04h
06h
07h
08h
09h
61h
62h
1Bh
30h
19h
18h
0Fh
1Eh
0Fh
0Fh
E7/P7 Description
Ext Flt NO Allways Det
Ext Flt NO Allways Det
Fault Reset
Local/ Remote Sel
Com/Inv Sel
Fast Stop NO
Not Used
Multi-Step Ref 1
Multi-Step Ref 2
Jog Freq Ref
Multi- Accel/Dece; 1
Ext BB NO
Ext BB NC
Speed Search 1
Speed Search 2
Program Lockout
PI Int Reset
PI Disable
Timer Function
Not Used
Ref Sample Hold
Not Used
Not Used
143
Comment
No Function in E7/P7
No Function in E7/P7
No Function in E7/P7
No Function in E7/P7
Table 5: Multi-Function Contact Output Select.
P5
Setting
0
1
2
3
4
5
6
7
8
9
10
11
12
13
14
15
16
17
P5 Description
Fault
During Run
Frequency Agree
@ Set Freq Agree
Freq Detect. 1
Freq Detect 2
Overtorque Detect NO
Overtorque Detect NC
Base Blocked
Operation Mode
Inverter Ready
Timer Output
Auto Restarting
OL Pre-Alarm
Freq Ref Loss
Comm Run CMD
PID Fdbk Loss
OH1 Alarm
E7/P7
Setting
0Eh
00h
02h
03h
04h
05h
0Bh
17h
08h
09h
06h
12h
1Eh
1Fh
0Ch
3Bh
0Fh
20h
E7/P7 Description
Fault
During Run
Fref/Fout Agree 1
Fref/Set Agree 1
Freq Detect 1
Freq Detect 2
Trq Detect 1 NO
Trq Detect 1 NC
Base Block 1
Operation Reference
Inverter Ready
Timer Output
Restart Enabled
Overload (OL1)
Loss of Ref
Run Src Com/opt
Not Used
OH Pre Alarm
Table 6: Mutli-Function Analog Output Selection
n048
0
1
2
3
H4-01
2
3
8
7
144
Comment
No Function in E7/P7
GPD 506/P5+ to E7 and GPD506/P5+ to P7 Conversion Tables
Table 1: Parameter conversion
P5+
Par.
P5+ Parameter
Name
Conversion
n001
n002
Param selection/ init
Op Mode Select
NOT CONVERTED
See Table 2
n003
n004
Motor Rated Voltage
Stop Method
n005
n006
n007
n008
n009
n010
n011
Phase Rotation
Reverse Prohibited
Local/Remote
Stop Key Function
Freq Ref Setting from
Digital Operator
V/F Pattern Select
Max Frequency
n003/10 = E1-01
If n004 > 1, then b1-03
=3, else n004 = b1-03
See Table 3
n012
n013
Max voltage
Base Frequency
n014
Mid Frequency
n015
n016
n017
n018
Mid voltage
Min Frequency
Min Voltage
Accel Time 1
n019
Decel Time 1
n020
n021
n022
n023
Accel Time 2
Decel Time 2
S-curve select
Operator Display Units
n024
n025
n026
n027
n028
n029
n030
n031
n032
Freq Reference #1
Freq Reference #2
Freq Reference #3
Freq Reference #4
Freq Reference #5
Freq Reference #6
Jog Reference
Freq Ref Upper Limit
Freq Ref Lower Limit
None
None
If n009=1, then o2-05=0,
else o2-05 = 1
NOT CONVERTED
If n011 > 120.0 then E104 =120.0, else n011 =
E1-04
None
If n013 > 200.0 then E106 =200.0, else n013 =
E1-06
If n014 > 200.0 then E107 =200.0, else n014 =
E1-07
None
None
None
If n018 > 999.9, then
n018*10 = C1-01, else
n018 = C1-01
If n019 > 999.9, then
n018*10 = C1-02, else
n019 = C1-02
n020 *10 = C1-03
n021*10 = C1-04
NOT CONVERTED
If n023 >39 then n023*10
= o1-03, else n023 = o103
n025*10 = d1-01
n026*10 = d1-02
n027*10 = d1-03
n028*10 = d1-04
NOT CONVERTED
NOT CONVERTED
n030*10 = d1-17
n031*10 = d2-01
n032*10 = d2-02
145
E7/P7
Par.
E7/P7 Parameter
Name
NA
b1-01 &
b1-02
E1-01
b1-03
NA
Run Seq Select
Ref Select
Input Voltage
Stopping Method
b1-04
Reverse operation
o2-01
o2-02
o2-05
Local / Remote Key
NA
E1-04
Freq Ref Setting Method
Selection
NA
Max Output Freq.
E1-05
E1-06
Max Output Voltage
Base Frequency
E1-07
Mid Frequency
E1-08
E1-09
E1-10
C1-01
Mid Voltage A
Min Frequency
Min Voltage
Acceleration Time 1
C1-02
Deceleration Time 1
C1-03
C1-04
NA
o1-03
Acceleration Time 2
Deceleration Time 2
NA
Digital Operator Display
Selection
d1-01
d1-02
d1-03
d1-04
NA
NA
d1-17
d2-01
d2-02
Frequency Reference 1
Frequency Reference 2
Frequency Reference 3
Frequency Reference 4
NA
NA
Jog Freq. reference
Freq Ref. Upper Limit
Freq. Ref. Lower Limit
P5+
Par.
P5+ Parameter
Name
n033
n034
Motor Rated Current
Motor OL Select
n035
n036
OH1 Stop Method
Terminal S2 Select
n037
n038
n039
n040
n041
n042
n043
n044
Terminal S3 Select
Terminal S4 Select
Terminal S5 Select
Terminal S6 Select
Terminal MA Select
Terminal M1 Select
Analog Input Select
Terminal FI Select
n045
n046
n047
n048
n049
n050
n051
n052
n053
n054
n055
n056
n057
MOP Ref Memory
Ref Loss Detect
Freq Lvl @ F Ref Loss
Terminal FV Gain
Terminal FV Bias
Terminal FI Gain
Terminal FI Bias
Terminal AM Sel
Terminal AM Gain
Carrier Freq select
Pwr Loss Ride Thru sel
Spd Srch Current
Min Baseblock Time
n058
n059
n060
n061
Spd Search V/F
Pwr Loss Ride Thru Time
Number of Restarts
Restart Select
n062
Jump Freq 1
n063
Jump Freq 2
n064
Jump Bandwidth
n065
n066
n067
n068
n069
n070
n071
n072
Elapsed Timer Select
Elapsed Time 1
Elapsed Time 2
DC inj Current
DC inj Time @ Stop
DC inj Time @ Start
Torq Comp Gain
Stall Prev Decel
Conversion
None
If n033 > 1, then L1-01 =
1
None
If n036 >1, then table 4,
else H1-03 = 0Fh
Table 4
Table 4
Table 4
Table 4
Table 5
Table 5
NOT CONVERTED
If n044 =1, then H3-08
=2, else H3-08 = 0
NOT CONVERTED
None
n047*10 = L4-06
n048*10 = H3-02
n049*10 = H3-03
n050*10 = H3-10
n051*10 = H3-11
Table 6
n053*10 = H4-02
NOT CONVERTED
None
None
If n057 > 5.0 then L2-03 =
5.0, else n057 = L2-03
NOT CONVERTED
None
None
If n061 = 1 then L5-02 =
0, else L5-02 = 1
If n062 > 200.0, then d301 = 200.0, else n062 =
d3-01
If n063 > 200.0, then d302 = 200.0, else n063 =
d3-02
If n064 > 20.0, then d3-04
= 20.0, else n064 = d3-04
None
NOT CONVERTED
NOT CONVERTED
None
n069*10 = b2-04
n070*10 = b2-03
NOT CONVERTED
None
146
E7/P7
Par.
E7/P7 Parameter
Name
E2-01
L1-01
Motor Rated Current
Mtr OL Protect Select
L8-03
H1-01
OH Pre-Alarm Op Sel.
Terminal S3 Select
H1-02
H1-03
H1-04
H1-05
H2-01
H2-02
NA
H3-08
d3-01
Terminal S4 Select
Terminal S5 Select
Terminal S6 Select
Terminal S7 Select
Terminal M1-M2 Sel.
Terminal M3-M4 Sel.
NA
Terminal A2 Signal Level
Select
NA
Freq Ref Loss Det Sel
Freq Ref Lvl@loss
Terminal A1 Gain
Terminal A1 Bias
Terminal A2 Gain
Terminal A2 Bias
Terminal FM Select
Terminal FM Gain
NA
Pwr Loss Det Select
Spd srch Deact Current
Pwr Loss Min Base Block
Time
NA
Pwr Loss Ride-Thru Time
No.of Restart attempts
Auto Restart Operation
Select
Jump Frequency 1
d3-02
Jump Frequency 2
d3-04
Jump Frequency Width
o2-08
NA
NA
b2-02
b2-04
b2-03
NA
L3-04
Cum. Op Time Select
NA
NA
DC Inj Brkg Current
DC INJ Time @Stop
DC INJ Time @ Start
NA
Stall Prev Sel. on Decel
NA
L4-05
L4-06
H3-02
H3-03
H3-10
H3-11
H4-01
H4-02
NA
L2-01
b3-02
L2-03
NA
L2-02
L5-01
L5-02
P5+
Par.
P5+ Parameter
Name
n073
n074
n075
n076
n077
n078
n079
n080
n081
n082
n083
n084
Stall Prev. Accel Lvl
Stall Prev Run Lvl
Freq Det Level
Freq Det Width
Torq Detect Select
Torq Detect Level
Torq Detect Time
Timer On Delsy
Timer Off Delay
DB Resistor Protect
IN Ph Loss Lvl
PID Mode Sel
n085
n086
n087
n088
n089
n090
n091
n092
n093
n094
PID Fdbk Gain
PID P gain
PID I Time
PID D Time
PID I Limit
PID Fdbk Loss Select
PID Fdbk Loss Lvl
PID Fbbk Loss Time
PID Output Select
Sleep Start Lvl
n095
n096
n097
n098
n099
n100
n101
n102
n103
n104
n105
n106
n107
n108
n109
n110
n111
Sleep Delay Time
Energy Save Sel
Energy Save Gain
Energy Save Vlim
@60hz
Energy Save Vlim@6hz
EnergySVTime AvgkW
MODBUS Timeout
MODBUS Fault Stop
MODBUS Ref Unit
MODBUS Address
MODBUS Baud Rate
MODBUS Parity
Slip Comp Gain
Mtr No-load Current
Slip Comp Delay
Operator Detect Flt
Loc/REM Change
n112
n113
n114
n115
n116
Low Freq OL2 Start
OL2 Level @ 0 hz
Sqr Root Gain
Inverter KVA Select
Ct/VT Select
Conversion
E7/P7
Par.
E7/P7 Parameter
Name
NOT CONVERTED
NOT CONVERTED
NOT CONVERTED
NOT CONVERTED
None
None
None
None
None
None
NOT CONVERTED
If n084 >0, then b5-01 =
1, else b5-01 = 0
NOT CONVERTED
n086*10 = b5-02
None
NOT CONVERTED
n089*10 = b5-04
None
None
None
None
If n094 > 200.0, then b515 = 200.0, else n094 =
b5-15
None
None
NOT CONVERTED
NOT CONVERTED
NA
NA
NA
NA
L6-01
L6-02
L6-03
b4-01
b4-02
L8-01
NA
b5-01
NA
NA
NA
NA
Torq Detect 1 select
Torq Detect 1 Level
Torq Detect 1 Time
Delay ON Timer
Delay OFF Timer
Internal DB Res. Prot.
NA
PID Mode Sel
NA
b5-02
B5-03
NA
b5-04
b5-12
b5-13
b5-14
b5-09
b5-15
NA
Proportional Gain Set
PI I Time
NA
Integral Limit Set
Fb Loss Detect Select
Fb Loss Detect Level
Fb Loss Detect Time
Output Level Select
Sleep Level
b5-16
b8-01
NA
NA
Sleep Time
Energy Saving Select
NA
NA
NOT CONVERTED
NOT CONVERTED
None
None
NOT CONVERTED
n104 conv to hex = H5-01
n105 +1 = H5-02
None
NOT CONVERTED
NOT CONVERTED
NOT CONVERTED
None
None
NA
NA
H5-05
H5-04
NA
H5-01
H5-02
H5-03
NA
NA
NA
o2-06
b1-07
NOT CONVERTED
NOT CONVERTED
NOT CONVERTED
None
NOT CONVERTED
NA
NA
NA
o2-04
NA
NA
NA
Serial Flt Detect
Serial Flt Select
NA
Serial Comm Adr
Serial Baud Rate
Serial Comm Select
NA
NA
NA
Oper Detection
Local / Remote Run
Selection
NA
NA
NA
Inverter Model #
NA
147
Table 2: n002 decode
decode to b1- 01 & 02
n002
0
1
2
3
4
5
6
7
8
b101
0
0
1
1
2
2
2
0
1
Table 3: n005 and n006
to b1- 04
b102
0
1
0
1
0
1
2
2
2
n005
0
0
1
1
n006
0
1
0
1
b1-04
0
1
2
3
Table 4: Multi-Function Contact Input Select
P5
Setting
2
3
4
5
6
7
8
9
10
11
12
13
14
15
16
17
18
19
20
21
22
23
24
25
26
27
28
29
P5 Description
E7 Setting
E7 Description
Ext. Fault NO
External Fault NC
Fault Reset
LOC/REM Select
Comm/Term Control Sw.
ESTOP NO
ESTOP NC
FV/FI Term Switch
Multi-step Spd set 1
Multi-step Spd set 2
Multi-step Spd set 3
Jog Freq Select
Accel/Decel Time Switch
Ext BB NO
Ext BB NC
Spd Srch from Max Freq
Spd Srch from set Freq
Param Write enable
PID Int Value reset
PID Control disable
Timer Start
Inv Overheat OH3
Sample/Hold analog Ref
KEB NO
KEB NC
Decel/Accel Prohibit
PID Input charact. change
Up/Down (n040 only)
24h
25h
14h
1h
6Bh
15h
17h
0Fh
03h
04h
0Fh
06h
07h
08h
09h
61h
62h
1Bh
30h
19h
18h
0Fh
1Eh
0Fh
0Fh
0Ah
35h
10
11
Ext Flt NO Allways Det
Ext Flt NO Allways Det
Fault Reset
Local/ Remote Sel
Com/Inv Sel
Fast Stop NO
Fast Stop NC
Not Used
Multi-Step Ref 1
Multi-Step Ref 2
Not Used
Jog Freq Ref
Multi- Accel/Dece; 1
Ext BB NO
Ext BB NC
Speed Search 1
Speed Search 2
Program Lockout
PI Int Reset
PI Disable
Timer Function
Not Used
Ref Sample Hold
Not Used
Not Used
Acc/Dec Ramp Hold
PI Input Level Sel
MOP Increase
MOP Decrease
148
Comment
No Function in E7/P7
No Function in E7/P7
No Function in E7/P7
No Function in E7/P7
No Function in E7/P7
H1-04 Only
H1-05 Only
Table 5: Multi-Function Contact Output Select.
P5
Setting
0
1
2
3
4
5
6
7
8
9
10
11
12
13
14
15
16
17
P5 Description
Fault
During Run
Frequency Agree
@ Set Freq Agree
Freq Detect. 1
Freq Detect 2
Overtorque Detect NO
Overtorque Detect NC
Base Blocked
Operation Mode
Inverter Ready
Timer Output
Auto Restarting
OL Pre-Alarm
Freq Ref Loss
Comm Run CMD
PID Fdbk Loss
OH1 Alarm
E7
Setting
0Eh
00h
02h
03h
04h
05h
0Bh
17h
08h
09h
06h
12h
1Eh
1Fh
0Ch
3Bh
0Fh
20h
E7 Description
Fault
During Run
Fref/Fout Agree 1
Fref/Set Agree 1
Freq Detect 1
Freq Detect 2
Trq Detect 1 NO
Trq Detect 1 NC
Base Block 1
Operation Reference
Inverter Ready
Timer Output
Restart Enabled
Overload (OL1)
Loss of Ref
Run Src Com/opt
Not Used
OH Pre Alarm
Table 6: Mutli-Function Analog Output Selection
n052
0
1
2
3
H4-01
2
3
8
7
149
Comment
No Function in E7/P7
Appendix J: KVA & Control Mode Parameters
The following tables detail the KVA and control mode dependent parameters in the
drives. Highlighted parameters are both KVA and Control Mode dependent.
G5, E7, F7, G7, & P7 KVA Dependent Parameters
Param.
b8-02
b8-03
b8-04
C4-02
C6-01
C6-01
C6-02
C6-02
C6-03
C6-03
C6-04
C6-05
C6-11
D3-01
D3-02
D3-03
E1-01
E1-04
E1-05
E1-06
E1-07
E1-08
E1-09
E1-10
E1-11
E1-12
E1-13
E2-01
E2-02
E2-03
E2-05
E2-06
E2-10
E2-11
E3-03
E3-04
E3-06
E3-08
Parameter Name
Energy Save Gain
Energy Save F.T
Energy Save Coeff
Torq Comp Time
Carrier Freq
Heavy/Normal Duty
Carrier Freq Sel
Carrier Freq Min
Carrier Freq Gain
Carrier Freq Max
Carrier Freq Min
Carrier Freq Gain
Carrier Freq Sel
Jump Freq 1
Jump Freq 2
Jump Freq 3
Input Voltage
Max Frequency
Max Voltage
Base Frequency
Mid Frequency A
Mid Voltage A
Min Frequency
Min Voltage
Mid Freq B
Mid Voltage B
Base Voltage
Motor Rated FLA
Motor Rated Slip
No-Load Current
Term Resistance
Leak Inductance
Torq Comp Iron L
Motor Rated Powr
Mtr 2 Max Volt
Mtr 2 Base Freq
Mtr 2 Mid Volt
Mtr 2 Min Volt
KVA
Depd
Control
Mode
Depd
Yes
Yes
Yes
Yes
Yes
Yes
Yes
Yes
Yes
Yes
Yes
Yes
Yes
Yes
Yes
Yes
Yes
Yes
Yes
Yes
Yes
Yes
Yes
Yes
Yes
Yes
Yes
Yes
Yes
Yes
Yes
Yes
Yes
Yes
Yes
Yes
Yes
Yes
No
Yes
Yes
Yes
Yes
No
No
Yes
Yes
Yes
Yes
Yes
No
No
No
No
No
Yes
No
Yes
Yes
Yes
Yes
Yes
No
No
No
No
No
No
No
No
No
No
No
No
No
No
Applicable Drive
G5
●1
●1
●1
●
E7
F7
G7
P7
●
●
●
●
●
●
●
●
●
●
●
●
●
●
●
●
●
●
●
●
●
●
●
●
●
●
●
●
●
●
●
●
●
●
●
●
●
●
●
●
●
●
●
●
●
●
●
●
●
●
●
●
●
●
●
●
Notes: 1. G5 is control mode depend only.
150
●
●
●
●
●
●
●
●
●
●
●
●
●
●
●
●
●
●
●
●
●
●
●
●
●
●
●
●
●
●
●
●
●
●
●
●
●
●
●
●
●
●
●
●
●
●
●
●
●
●
●
●
●
●
●
●
●
●
●
●
●
●
●
●
●
G5, E7, F7, G7, & P7 KVA Dependent Parameters
Param.
E4-01
E4-02
E4-02
E4-03
E4-05
E4-05
E4-06
E4-07
E4-07
E5-01
E5-02
E5-03
E5-05
E5-06
L2-02
L2-03
L2-04
L2-05
L3-12
L4-01
L4-03
L8-02
L8-04
L8-06
N1-03
N4-40
N5-02
T1-01
T1-02
T1-03
T1-04
Parameter Name
Mtr 2 Rated A
Mtr 2 Max Volt
Mtr 2 Rated Slip
Mtr 2 No Load A
Mtr 2 Mid Volt
Mtr 2 Term Resist
Mtr 2 Leak Ind
Mtr 2 Min Volt
Mtr 2 Rated Power
Mtr 2 Rated A
Mtr 2 Rated Slip
Mtr 2 No Load A
Mtr 2 Term Resist
Mtr 2 Leak Ind
PwrL Ridethru t
PwrL Baseblock t
PwrL V/F Ramp t
PUV Det Level
OV Inhib Volt Level
Spd Agree Level
Spd Agree Level +/OH Pre-Alarm Level
OH1 Fault Level
PH Loss Level
Hunt Prev Time
I Stab. Coeff Low Spd
Motor Accel Time
Tuning Mode Sel
Mtr Rated Power
Mtr Rated Voltage
Mtr Rated Current
KVA
Depd
Control
Mode
Depd
Yes
Yes
Yes
Yes
Yes
Yes
Yes
Yes
Yes
Yes
Yes
Yes
Yes
Yes
Yes
Yes
Yes
Yes
Yes
Yes
Yes
Yes
Yes
Yes
Yes
Yes
Yes
Yes
Yes
Yes
Yes
No
No
No
No
No
No
No
No
No
No
No
No
No
No
No
No
No
No
No
No
No
No
No
No
No
No
No
No
No
No
No
151
Applicable Drive
G5
E7
F7
G7
●
●
●
●
●
●
●
●
●
●
●
●
●
●
●
P7
●
●
●
●
●
●
●
●
●
●
●
●
●
●
●
●
●
●
●
●
●
●
●
●
●
●
●
●
●
●
●
●
●
●
●
●
●
●
●
●
●
●
●
●
●
●
●
●
●
●
●
●
●
●
●
●
●
●
●
●
●
●
●
●
●
G5, E7, F7, G7, & P7 Control Mode Dependent
Parameters
Param.
b1-03
b3-01
b3-02
b6-01
b6-03
b8-05
C3-01
C3-02
C3-05
C5-01
C5-02
C5-03
C5-04
C5-05
C5-06
C5-07
d5-02
E4-09
E4-10
F1-09
N5-01
Parameter Name
Stopping Method
SpdSrch at Start
SpdSrch Current
Dwell Ref @ Start
Dwell Ref @ Stop
Energy Save Time
Slip Comp Gain
Slip Comp Time
V/f Slip Comp Sel
ASR Gain 1
ASR Time 1
ASR Gain 2
ASR Time 2
ASR Limit
ASR Filter
ASR Switch Freq
Torque Ref Delay
Mtr 2 ASR P Gain
Mtr 2 ASR I Time
PG Ovrspd Time
FeedForward Sel
KVA
Depd
Control
Mode
Depd
No
No
No
No
No
No
No
No
No
No
No
No
No
No
No
No
No
No
No
No
No
Yes
Yes
Yes
Yes
Yes
Yes
Yes
Yes
Yes
Yes
Yes
Yes
Yes
Yes
Yes
Yes
Yes
Yes
Yes
Yes
Yes
152
Applicable Drive
G5
E7
F7
●
●
●
●
●
●
●
●
●
●
●
●
●
●
●
●
●
●
●
●
●
●
●
●
●
●
●
●
●
●
G7
P7
●
●
●
●
●
●
●
●
●
●
●
●
●
●
●
●
●
●
●
GPD315/V7, GPD305/J7 KVA & Control Mode
Dependent Parameters
Param.
Parameter Name
KVA
Depd
Control
Mode
Depd
N012
N014
N015
N016
N017
N036
N080
N104
N105
N106
N107
N108
N110
N111
N112
N184
Max Voltage
Mid Freq
Mid voltage
Min Freq
Min Voltage
Mtr Rated Current
Carrier Freq Sel
Torq Comp Time
Motor Iron Loss
Motor Rated Slip
Motor Term Res
Motor Leak Ind
Motor No Load A
Slip Comp Gain
Slip Comp Time
Hunting Prev Gain
Yes
No
Yes
No
Yes
Yes
Yes
No
Yes
Yes
Yes
Yes
Yes
No
No
Yes
No
Yes
Yes
Yes
Yes
No
No
Yes
No
No
No
No
No
Yes
Yes
No
N10
N13
N15
N46
N64
N65
Max Voltage
Mid Voltage
Min Voltage
Carrier Freq Sel
Motor Rated Slip
Motor No Load A
Yes
Yes
Yes
Yes
Yes
Yes
No
No
No
No
No
No
153
Applicable
Drive
J7
●
●
●
●
●
●
V7
●
●
●
●
●
●
●
●
●
●
●
●
●
●
●
●
YASKAWA ELECTRIC AMERICA, INC.
Drives Division
16555 W Ryerson Rd, New Berlin, WI. 53151, USA
Phone (800) YASKAWA (800-927-5292)
Fax 1-262-782-3418
Internet: http://www.drives.com
HT
YASKAWA ELECTRIC KOREA CORPORATION
Paik Nam Bldg 901 188-3,1-Ga Eujiro, Joong-Gu,
Seoul 150-010, Korea
Phone 82-2-784-7844 Fax 82-2-753-2639
YASKAWA ELECTRIC (SINGAPORE) PTE. LTD.
Head Office: 151 Lorong Chuan, #04-01, New Tech Park
Singapore 556741, Singapore
Phone 65-282-3003 Fax 65-289-3003
TH
YASKAWA ELECTRIC AMERICA, INC.
Chicago-Corporate Headquarters
2121 Norman Drive South, Waukegan, IL 60085, U.S.A.
Phone (800) YASKAWA (800-927-5292)
Fax 1-847-887-7370
Internet: http://www.yaskawa.com
HT
TAIPEI OFFICE (AND YATEC ENGINEERING
CORPORATION)
10F 146 Sung Chiang Road, Taipei, Taiwan
Phone 886-2-2563-0010 Fax 886-2-2567-4677
TH
MOTOMAN INC. HEADQUARTERS
805 Liberty Lane West Carrollton, OH 45449, U.S.A.
Phone 1-937-847-6200 Fax 1-937-847-6277
Internet: http://www.motoman.com
HT
YASKAWA JASON (HK) COMPANY LIMITED
Rm. 2909-10, Hong Kong Plaza, 186-191 Connaught Road
West, Hong Kong
Phone 852-2803-2385 Fax 852-2547-5773
TH
T
YASKAWA ELECTRIC CORPORATION
New Pier Takeshiba South Tower, 1-16-1, Kiagan
Minatoku,Tokyo, 105-0022, Japan
Phone: 81-3-5402-4511 Fax: 81-3-5402-4580
Internet: http://www.yaskawa.co.jp
T
HT
BEIJING OFFICE
Room No. 301 Office Building of Beijing International Club,
21 Jianguomenwai Avenue, Beijing 100020, China
Phone 86-10-6532-1850 Fax 86-10-6532-1851
TH
YASKAWA ELÉTRICO DO BRASIL COMÉRCIO LTDA.
Avenida Fagundes Filho, 620 Bairro Saude-Sao Pãulo-SP,
Brazil CEP: 04304-000
Phone 55-11-5071-2552 Fax 55-11-5581-8795
Internet: http://www.yaskawa.com.br
TH
SHANGHAI OFFICE
27 Hui He Road Shanghai 200437 China
Phone 86-21-6553-6600 Fax 86-21-6531-4242
SHANGHAI YASKAWA-TONGJI M & E CO., LTD.
27 Hui He Road Shanghai China 200437
Phone 86-21-6533-2828 Fax 86-21-6553-6677
H
H
YASKAWA ELECTRIC EUROPE GmbH
Am Kronberger Hang 2, 65824 Schwalbach, Germany
Phone 49-6196-569-300 Fax 49-6196-888-301
Internet: http://www.yaskawa.de
BEIJING YASKAWA BEIKE AUTOMATION
ENGINEERING CO., LTD.
30 Xue Yuan Road, Haidian, Beijing 100083 China
Phone 86-10-6233-9943 Fax 86-10-6243-5002
H
Motoman Robotics AB
Box 504 S38525 Torsås, Sweden
Phone 46-486-48800 Fax 46-486-41410
Motoman Robotec GmbH
Kammerfeldstraβe 1, 85391 Allershausen, Germany
Phone 49-8166-900 Fax 49-8166-9039
SHOUGANG MOTOMAN ROBOT CO., LTD.
7, Yongchang-North Street, Beijing Economic Technological
Investment & Development Area,
Beijing 100076, China
Phone 86-10-6788-0551 Fax 86-10-6788-2878
YASKAWA ELECTRIC UK LTD.
1 Hunt Hill Orchardton Woods Cumbernauld, G68 9LF,
United Kingdom
Phone 44-12-3673-5000 Fax 44-12-3645-8182
YEA, TAICHUNG OFFICE IN TAIWAN
B1, 6F, No 51, Section 2, Kung-Yi Road, Taichung City,
Taiwan R.O.C.
Phone: 866-4-2320-2227 Fax: 866-4-2320-2239
YEA Document Number: TM.DW.04 4/28/2006 Rev: 06- 04
Data subject to change without notice. Yaskawa Electric America
154