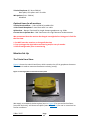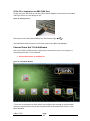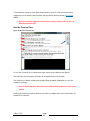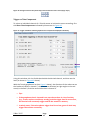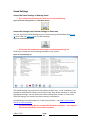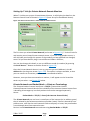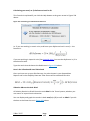
1
Version 2.2.6 User Manual For use with the 9 Mar 2015 Page 1 TABLE OF CONTENTS WELCOME TO T-LINK............................................................................................... 9 INSTALLING T-LINK AND TEXCEL T-SUITE .......................................................................... 10 Installing from a CD ................................................................................................ 10 Installing from a USB Stick/Thumb Drive ............................................................... 10 Upgrading from an older T-Link ............................................................................. 10 USB SERIAL ADAPTOR DRIVER INSTALLATION .......................................................................... 11 TEXCEL USB MONITORS DRIVER INSTALLATION ....................................................................... 11 Repair a T-Link Installation .................................................................................... 12 TEXCEL T- SUITE INSTALLS ONLY ONE DESKTOP SHORTCUT ....................................................... 12 The Programs Menu has Shortcuts for all installed Applications .......................... 12 T-LINK MINIMUM SYSTEM REQUIREMENTS ............................................................................. 13 If .Net 4.0 and Windows Installer 4.5 installation is required ............................... 13 INTRODUCING TEXCEL T-SUITE ACCESS WINDOW ............................................................... 14 Texcel Address Block.............................................................................................. 15 ACCESSING THE TECHNICAL BULLETINS ................................................................................... 15 THE FIRST TIME YOUR OPEN THE TEXCEL T-SUITE ACCESS WINDOW............................................ 16 THE FIRST TIME YOU RUN T-LINK .......................................................................................... 16 T-LINK STARTUP RUNS A DISK SPACE CHECK ..................................................................... 17 Disk Space Low Warning at 10 MB ........................................................................ 17 Disk Space CRITICAL at 1 MB ................................................................................. 17 USING YOUR MONITOR......................................................................................... 18 ITEMS IN MONITOR KIT ............................................................................................... 18 ETM – PI: ........................................................................................................................ 18 Options Available ................................................................................................... 18 ETM: .............................................................................................................................. 18 Options available ................................................................................................... 18 GTM:.............................................................................................................................. 18 OPTIONAL ITEMS FOR ALL MONITORS: .................................................................................... 19 MONITOR SET UP ...................................................................................................... 19 THE TRIAXIAL LAND CASE: ................................................................................................... 19 NECESSARY MEASURES WHEN SITING A TRIAX: ......................................................................... 20 THE MICROPHONE: ............................................................................................................. 21 GTM microphone set up: ....................................................................................... 22 ETM microphone set up:........................................................................................ 22 CALIBRATION ........................................................................................................ 23 TEXCEL’S CALIBRATION PROCESS IS TRACEABLE AND DOCUMENTED. .............................................. 23 Sensor Calibration .................................................................................................. 23 Electronic Circuit calibration .................................................................................. 23 9 Mar 2015 Page 2 RETURNING THE MONITOR FOR CALIBRATION .......................................................................... 23 When returning the monitor for calibration, include the following: .................... 23 CALIBRATION INCLUDES: ...................................................................................................... 23 WARRANTY........................................................................................................... 24 WARRANTY ON INITIAL PURCHASES................................................................................. 24 WARRANTY ....................................................................................................................... 24 EXCLUSIONS ...................................................................................................................... 24 Please note: ........................................................................................................... 24 WARRANTY ON CALIBRATION SERVICES ........................................................................... 25 WARRANTY ....................................................................................................................... 25 EXCLUSIONS ...................................................................................................................... 25 Please note: ........................................................................................................... 25 DECLARATION OF CONFORMITY ............................................................................ 26 C-TICK ............................................................................................................................. 26 CE DECLARATION OF CONFORMITY ........................................................................................ 26 FCC NOTICE ..................................................................................................................... 27 DISCLAIMERS ..................................................................................................................... 27 CONNECTING TO YOUR MONITOR ......................................................................... 28 A standard DB9 Serial Cable .................................................................................. 28 A USB to Serial Adapter – and Driver Software ..................................................... 28 Install the Supplied Driver Software BEFORE Connecting the Adapter ................. 28 CONNECTING THE MONITOR TO THE PC ........................................................................... 28 IF THE PC HAS A DB9 COM PORT CONNECTOR ...................................................................... 28 IF THE PC OR LAPTOP HAS NO DB9 COM PORT ...................................................................... 29 CONNECT FROM THE T-LINK SOFTWARE ........................................................................... 29 THE T-LINK 2 CONNECTION PROCESS ..................................................................................... 30 LOOK HARDER - CONNECTION FAIL WINDOW .......................................................................... 31 Look Harder Button ............................................................................................... 31 COMMUNICATIONS CHECKLIST .............................................................................................. 32 T-Link COM Port Suggestions................................................................................. 32 RUN THE TERMINAL TEST ..................................................................................................... 33 CALIBRATION DUE REMINDERS ............................................................................................. 34 BATTERY LOW PROMPT ....................................................................................................... 34 MONITOR CONFIGURATION .................................................................................. 35 TEXCEL SETTINGS ....................................................................................................... 35 Texcel Settings not available.................................................................................. 36 Texcel Settings Display ........................................................................................... 37 9 Mar 2015 Page 3 CUSTOM SETTINGS ..................................................................................................... 38 SENSORS .......................................................................................................................... 39 Sensor Range Selection .......................................................................................... 39 The Texcel Microphone ......................................................................................... 39 The Texcel Triaxial Accelerometer ......................................................................... 39 CONTINUOUS LOGGING AND/OR TRIGGERED EVENTS ................................................................ 40 Continuous Logging Explained ............................................................................... 40 Triggered Events Explained .................................................................................... 40 Enabling Continuous Logging AND/OR Triggered Events ...................................... 40 CONTINUOUS LOGGING INTERVAL ......................................................................................... 41 Continuous Logging Results ................................................................................... 41 Text Streaming ....................................................................................................... 42 VDV and Weighted RMS ........................................................................................ 43 TRIGGERED EVENTS ............................................................................................................ 44 Triggers .................................................................................................................. 44 Trigger on Triax Component .................................................................................. 45 Suppress Transient Triggers ................................................................................... 46 SMS Trigger Control ............................................................................................... 46 Sample Rate and Waveform Length ...................................................................... 47 Overwrite oldest waveforms when waveform memory full ................................. 48 Triggered Event Results ......................................................................................... 48 Auto Triggering ...................................................................................................... 49 Auto Retrigger Mode gives Continuous Coverage................................................. 49 ALARM ............................................................................................................................. 50 DATA ............................................................................................................................... 52 DUTY ............................................................................................................................... 54 Unattended Duty ................................................................................................... 54 TIMETABLE SELECTION ........................................................................................................ 54 Timetable Selection Options .................................................................................. 55 TIMETABLE EDITING ............................................................................................................ 55 Daily or Weekly Timetables ................................................................................... 56 Add or Edit On-Off Times ....................................................................................... 57 Add or Edit Days of the Week ................................................................................ 58 Save a Timetable .................................................................................................... 58 MANAGE SAVED TIMETABLES ............................................................................................... 59 To Rename a Timetable ......................................................................................... 60 Naming a Copied Timetable................................................................................... 60 Importing Timetables from an Old/Other T-Link Installation................................ 60 REMOTE ........................................................................................................................... 61 Modem Dial In (Circuit Switched) – Connection Setup ......................................... 62 Private Network (Packet Mode) – Connection Setup ............................................ 63 IP Login Phone Book .............................................................................................. 65 TCPIP Keep Alive Ping ............................................................................................ 66 MODEM TIMETABLE ........................................................................................................... 66 SMS ............................................................................................................................... 67 SMS Phone Book .................................................................................................... 67 SMS Messages Setup – Three Steps ...................................................................... 69 9 Mar 2015 Page 4 Step One – Set the Service Centre Number........................................................... 70 Step Two – Setting up the SMS Messages ............................................................. 71 Step Three – SMS Alarm Triggers .......................................................................... 72 Changing Settings can make the SMS Messages Invalid ....................................... 73 SMS Alarm Timeout ............................................................................................... 74 Set the SMS Alarm Trigger Threshold Levels ......................................................... 74 Enable Incoming SMS Trigger ................................................................................ 75 Warning SMS Messages ......................................................................................... 76 TECHNICAL BULLETIN TB0013 - ETM SMS CAPABILITIES ......................................................... 76 CONFIGURING THE MONITOR ............................................................................................... 77 Configured Settings Displayed to Confirm............................................................. 78 Saving your Custom Settings ................................................................................. 79 THE BUMP TEST................................................................................................................. 79 SAVED SETTINGS........................................................................................................ 80 Access the Saved Settings to Manage them .......................................................... 80 Access the Settings from Custom Settings to Select one ...................................... 80 You can also Access the Saved Settings from the Look Harder Window .............. 81 Sorting the Saved Settings List ............................................................................... 81 SAVED SETTINGS LIST TOOLBAR ............................................................................................ 81 SAVED SETTINGS EDIT WINDOW ........................................................................................... 84 RETRIEVE DATA ..................................................................................................... 85 T-LINK’S DATA RETRIEVAL IS AS EASY AS 1,2,3 ................................................................... 85 1. SELECT DATA ................................................................................................................. 85 2. SELECT EVENTS (AND SELECT SITE AND LOCATION NAMES) ..................................................... 85 3. REPORT ........................................................................................................................ 85 DATA TYPES – RESULTS ARE EVENTS AND/OR WAVEFORMS ....................................................... 86 Events are Continuous or Triggered ...................................................................... 86 Waveforms are available for Triggered Events Only ............................................. 86 ALL EVENTS AND WAVEFORMS TO THE SAME LOCATION .............................................................. 88 SELECT WHICH WAVEFORMS AND WHICH LOCATIONS ................................................................. 88 Monitoring Sessions............................................................................................... 89 Identify the Individual Waveform Events by result Information ........................... 91 SITES AND LOCATIONS ......................................................................................................... 92 Site Name restrictions............................................................................................ 92 RETRIEVE AND REPORT OPTIONS............................................................................................ 94 ALL SET UP – RETRIEVE IT .................................................................................................... 94 RE-RETRIEVING YOUR DATA ................................................................................................. 95 CLEARING THE DATA IN THE MONITOR ................................................................................... 95 HOW T-LINK SAVE’S DATA FILES TO SITES AND LOCATIONS ........................................................ 96 T-SiteExplorer......................................................................................................... 96 Event Files Not Found Message on Startup ........................................................... 96 WHERE T-LINK’S DATA IS STORED ON YOUR COMPUTER ............................................................ 97 Save your Data to a Different Place on your Computer or Network ..................... 97 Managing Multiple Data Paths with Shortcuts ...................................................... 98 T-Link’s Local LOG Files .......................................................................................... 98 9 Mar 2015 Page 5 T-Link’s Shared LOG File......................................................................................... 98 REPORTING YOUR RESULTS ................................................................................... 99 REPORTS ............................................................................................................... 100 SETTING UP YOUR PRINTING OPTIONS.................................................................................. 100 Printing Options – Personalise ............................................................................. 100 REPORT TYPES ................................................................................................................. 101 Blast Reports ........................................................................................................ 102 Waveform Reports ............................................................................................... 102 Continuous Reports ............................................................................................. 103 Spreadsheet Reports............................................................................................ 104 Monitor Reports .................................................................................................. 105 CREATING A REPORT ......................................................................................................... 106 Step 1 – Select the Report Type........................................................................... 106 Step 2 – Select Site and Monitor ......................................................................... 106 Step 3 – Select Events .......................................................................................... 107 Selecting Waveforms or Individual Events .......................................................... 107 Selecting Events not Waveforms ......................................................................... 108 The ViewW Button for Waveforms...................................................................... 109 The From File Button for Waveforms .................................................................. 109 ViewW is Supplied with T-Link ............................................................................. 109 Step 3 for ‘Blast was too small to Trigger’ ........................................................... 110 Step 3 for Continuous and Spreadsheet .............................................................. 111 Step 3 for Monitor reports .................................................................................. 111 Report Button ...................................................................................................... 112 SOME EXAMPLE REPORTS .................................................................................................. 113 An ANZECC/USA Standard Blast Report .............................................................. 113 Blast Report - Triggered Event but no Waveform ............................................... 114 Blast Report – Monitored but Failed to Trigger................................................... 115 Waveform Reports - Portrait and Landscape ...................................................... 116 Continuous Report - Amplitude Frequency Histogram ....................................... 117 Continuous Report - Noise Study Results ............................................................ 118 Continuous Report – VDV .................................................................................... 119 Spreadsheet Report - Graph by Date and Time – Standard ................................ 120 Spreadsheet Report - Graph by Date and Time – Diagnostic .............................. 121 Monitor Report – Activity Summary .................................................................... 122 Monitor Report - Settings Currently in the Monitor ........................................... 123 REMOTE CONNECTIONS ...................................................................................... 124 REMOTE COMMUNICATIONS ....................................................................................... 124 SETTING YOUR COMMUNICATIONS OPTIONS.......................................................................... 125 SETTING UP A LOCAL MODEM FOR DIAL-IN REMOTE MONITORS .............................................. 126 First Scan for a Local Modem............................................................................... 127 Test All Changes ................................................................................................... 130 9 Mar 2015 Page 6 SETTING UP T-LINK FOR PRIVATE NETWORK REMOTE MONITORS ............................................. 131 PRIVATE NETWORKS AND PACKET MODE – A NOTE ON TERMINOLOGY ...................................... 131 Specifying Private Network Access ...................................................................... 132 Before you proceed, make sure you have on hand ............................................. 132 VPN via Broadband Internet Access from the PC ................................................ 133 A Packet Mode capable Modem connected to the PC ........................................ 134 CONNECTING TO A REMOTE MONITOR ................................................................................. 135 Connection Progress ............................................................................................ 136 The Connected Monitor Control Panel ................................................................ 137 Idle Communications Timeout ............................................................................. 137 Configure, Retrieve and End the Call ................................................................... 138 Retrieve While Sampling ...................................................................................... 138 Clearing Data from the Remote Control Panel .................................................... 139 Synchronising Time from the Remote Control Panel .......................................... 139 T-OPTIONS .......................................................................................................... 140 T-LINK OPTIONS ...................................................................................................... 140 COMMUNICATIONS OPTIONS .............................................................................................. 141 Communications Options – COM Ports ............................................................... 141 ADVANCED COMMUNICATIONS OPTIONS .............................................................................. 143 Modem Advanced Options .................................................................................. 143 Advanced Communications Options – Remote ................................................... 144 Advanced Communications Options – General ................................................... 146 Advanced Communications Options – SMS......................................................... 147 PATH OPTIONS ................................................................................................................ 148 Path Options – T-Link Data Path .......................................................................... 148 Taking your existing Data to a New Path ............................................................. 149 Moving Your Monitor Information, Timetables and Saved Settings ................... 149 If your Data Path is still in My Documents........................................................... 151 Changing the T-Link Local LOG Files Path ............................................................ 152 Path Errors on T-Link Startup ............................................................................... 153 Possible Data Path Errors ..................................................................................... 154 Path Options – Data Sharing ................................................................................ 155 More Information on Data Sharing ..................................................................... 157 PRINTING OPTIONS........................................................................................................... 159 Printing Options – Printer .................................................................................... 159 Printing Options – Personalise ............................................................................. 160 Printing Options – Word Processor ..................................................................... 161 Printing Options – Spreadsheet ........................................................................... 163 Printing Options – VDV Day ................................................................................. 165 Printing Options – MonitorPro ............................................................................ 166 Printing Options – Vibration dB ........................................................................... 167 IMPERIAL UNITS ............................................................................................................... 169 What happens when I change To or From Imperial Units? ................................. 170 9 Mar 2015 Page 7 TABLE OF FIGURES .............................................................................................. 171 Windows, Word, Excel, Windows XP, Windows Vista and Windows 7 are © Microsoft Corp ModMax is © Maxon Australia 9 Mar 2015 Page 8 Welcome to T-Link Texcel Monitor Management This manual will show you how to: Set up your Monitor Configure your Monitor Prepare and use Custom Settings Retrieve the data gathered using the monitor Generate reports to view the retrieved data Setup and Connect to Monitors Remotely The following instructions are common to all GTM, ETM and ETM PI Texcel monitor models, unless stated otherwise. 9 Mar 2015 Page 9 Installing T-Link and Texcel T-Suite Administrator privileges are required to install Texcel T-Suite and T-Link on most modern Windows systems. This process installs T-Link, T-Sched, T-SiteExplorer, their manuals, and the Texcel T-Suite Access Window. Installing from a CD The CD should run Setup automatically when you put it into a CD drive. If it doesn’t start, open Explorer and browse to the CD drive, then run Setup.exe. Installing from a USB Stick/Thumb Drive When you put the USB Stick into your PC, Windows will open an AutoRun Menu something like this: Figure 1: USB Stick Install AutoRun Manu Select the option to Open folder to view files. Locate and run Setup.exe. The install process is very simple, with no options other than install location, and should only take a few minutes unless a .Net update is required. See T-Link Minimum System Requirements below. Upgrading from an older T-Link Texcel T- Suite will upgrade your existing T-Link installation, and continue to use your existing data. If you have a previous version of T-Sched or T-SiteExplorer installed, please uninstall these first! T-Sched and/or T-SiteExplorer will not be upgraded, and you will have two versions on your PC, which will cause confusion, and may cause data problems down the track. If you uninstall T-Sched or T-SiteExplorer after installing Texcel T- Suite, your new applications may fail to start with a confusing error message about CLSID and COM Factory. A Repair Install will fix this, and no data will be lost! 9 Mar 2015 Page 10 USB Serial Adaptor Driver Installation If you are going to use a USB Serial Adaptor to connect to your Texcel Monitor, make sure you install the supplied drivers at the same time. Confirm all your software is installed properly by connecting to your monitor Texcel USB Monitors Driver Installation You do not need to install drivers before connecting your monitor When you first connect the Texcel USB Monitor to your PC, Windows will run the New Hardware Wizard, and normally it will go to the Windows Update web site and find the correct drivers. This normally takes quite a while – some minutes! The New Hardware Wizard will run twice, one straight after the other! If you have no web access, or the update process fails, follow the instructions below: 1. Disconnect the Texcel USB Monitor from the PC 2. Re-connect the Texcel USB Monitor and let Windows run the Found New Hardware Wizard 3. When asked to Insert the disc that came with your device, Insert the T-Link CD and press Next 4. That should end at a screen that says “successfully installed” for “USB Hub” or “USB Serial Converter” 5. The Wizard will automatically run again! 6. Repeat step 3 7. That should end at a screen that says “successfully installed” for the “USB COM Port” You are done. If you are using a USB Stick Install: At Step 3 above, select Install from a specific location, and when prompted browse to the CDM 2.08.24 WHQL Certified folder on the USB Stick. Step by step instructions for your type of Windows can be found here: http://www.ftdichip.com/Support/Documents/InstallGuides.htm 9 Mar 2015 Page 11 Repair a T-Link Installation If you experience error messages that do not repair upon re-starting, you may need to repair the T-Link installation. This can be done by re-running the installation as given above – i.e., if you re-run Setup.exe in the same way, it will offer a repair option. Please note, this will not affect your existing data, and will repair any corruption of T-Links system files. If you are going to use a USB Serial Adaptor to connect to your Texcel Monitor, make sure you install the supplied drivers at the same time. Texcel T- Suite Installs ONLY One Desktop Shortcut Texcel 2.2 introduces the Texcel T- Suite Access, and installs only one shortcut on your desktop. Figure 2 Texcel T-Suite Desktop Shortcut Clicking this shortcut will run the T-Suite Access Main Window: See Figure 3 Texcel T-Suite Access Window The Programs Menu has Shortcuts for all installed Applications T-Link T-Options T-Sched T-SiteExplorer T-Suite 9 Mar 2015 Page 12 T-Link Minimum System Requirements Type Minimum Recommended Generic Type: x86 Windows Compatible PC 1 GHz processor, CD reader. 1 GHz or above Operating System: Windows XP (requires SP3), Vista (SP1 or later) or Windows 7. .Net 4.0 Client required* XP SP3, Vista SP2 or Windows 7 .Net 4.0 Client Required* Hard Disk Space: Approximately 35 MB. 100 MB Communications: RS232 DB9 (9 pin plug) serial port, or USB port and serial adapter cable. RAM: 512 MB. 512 MB or above Screen Resolution: 800 x 600 pixels 256 colours 1024 x 768 or higher High Colour (16-bit) *Note: T-Link runs on a platform that requires .Net 4.0 Client to be installed. The .Net 4.0 Client needs 600 MB on 32-bit system and 1.5GB on 64-bit. Note: .Net 4 Client also requires Microsoft Internet Explorer 6.0 or later to be installed on the PC. If .Net 4.0 and Windows Installer 4.5 installation is required The T-Link install CD contains a copy of .Net 4.0 and Windows Installer 4.5, both of which will automatically be installed if required. If your Windows is Updated regularly this will not be needed The install process will run a separate install for each of .Net 4.0 and Windows Installer 4.5. You will probably be required to reboot during this process. 9 Mar 2015 Page 13 Introducing Texcel T-Suite Access Window Figure 3 Texcel T-Suite Access Window The buttons on this window provide access to all of the T-Suite software and manual resources. Runs T-Link Opens the T-Link Manual as a PDF Runs T-Sched Opens the T-Sched Manual as a PDF Runs T-SiteExplorer Opens the T-SiteExplorer Manual as a PDF Run’s T-Options Access a range of Technical Support Information Opens the Texcel website in your browser Access the Texcel FAQ website in your browser Closes this Window This application uses your existing Web Browser and PDF Viewer applications. An error message if they are not configured. 9 Mar 2015 Page 14 Texcel Address Block The right had side of this window shows Texcel Contact Information: Figure 4 Texcel Contact Information Clicking on the email address will open your email application to email [email protected] Accessing the Technical Bulletins Clicking will show this window: Figure 5 Texcel Technical Bulletins Select a Technical Bulletin and click the Open Button, or double click a row to open the selected Technical Bulletin as a PDF. 9 Mar 2015 Page 15 The First Time Your Open the Texcel T-Suite Access Window Only the T-Link Application will be enabled, unless this is an upgrade installation. You must run T-Link before you can run the other Applications All Manuals and Technical information access will always be available The First Time you Run T-Link The first time you run T-Link after a new installation, you will be prompted to enter your name and define a site and location. Figure 6: T-Link's First Run It is recommended to type your name and company name correctly at this stage. The ‘Test Bench’ site and location is a good default for testing your monitor, unless you already know the site and location names you need. Note: You can change these values later as explained at the red arrow in Figure 6 Note: If you uninstall and reinstall your T-Link, this window will be skipped, because your options and site folders are saved during an uninstall. 9 Mar 2015 Page 16 T-Link Startup runs a Disk Space Check When T-Link starts up, it checks the available disk space on your T-Link Data Path. See How T-Link’s Data is stored on your Computer below. Disk Space Low Warning at 10 MB If the available disk space in your T-Link Data Path is less than 10 MB (10,485,760 bytes), a warning message is displayed: Figure 7: T-Link Data Path Disk Space Low Warning Disk Space CRITICAL at 1 MB If the available disk space in your T-Link Data Path is less than 1 MB (1,048,576 bytes), a warning message is displayed, and T-Link will not start up. Figure 8: T-Link Data Path Disk Space CRITICAL Warning You must make more space available on the disk before T-Link will start up 9 Mar 2015 Page 17 Using your Monitor Items in Monitor Kit ETM – PI: ETM Monitor in IP65 rated weatherproof pole-mounted enclosure and pole 4 channel monitor with 16 MB memory Mains Charger RS232 Serial Communications cable and USB Adapter T-Link software CD includes User Manual Triaxial Geophone (4.5 Hz to 500 Hz) Base-plate and cable Microphone (2 Hz - 500 Hz) and cable Weatherproof Enclosure Solar Panel (10 W) with stand and cable Options Available Weather Station to link to above monitor ETM: ETM Monitor in IP67 rated weatherproof carry case 4 channel monitor with 16 MB memory Mains Charger RS232 Serial Communications cable and USB Adapter T-Link software CD includes user manual Triaxial Geophone (4.5 Hz to 500 Hz) Base-plate, soil spikes and 2 m cable Microphone (2 Hz - 500 Hz) with 1.5 m cable Windsock, tripod & mounting clip Options available Modem (excludes SIM card) with antenna Solar Panel (10 W) with stand and cable Alarm Light - Flashing xenon alarm beacon with 15 m cable External 12 V Battery Cable - 2 m Auxiliary Battery – Cable and connection for additional 12 V battery GTM: GTM Monitor in IP67 rated weatherproof case 4 channel monitor with 8 MB memory Equipment backpack Tripod mounts GTM Mains Charger RS232 Serial Communications cable and USB Adapter T-Link software CD includes user manual 9 Mar 2015 Page 18 Triaxial Geophone (4.5 Hz to 500 Hz) Base-plate, soil spikes and 2 m cable Microphone (2 Hz - 500 Hz) Windsock Optional Items for all monitors: Triaxial Accelerometer – (1 Hz to 500 Hz) enables VDV 14 Hz Triaxial Geophone in Land Case with 2 m cable Splitter Box – Banana Terminals for single element geophones e.g. 28 Hz Current Source Splitter Box – BNC Connectors for single element accelerometers We recommend that the monitor be charged overnight before being put in field for the first time. 1. Do NOT leave the monitor on charge all the time 2. Top-up charge the night before monitoring and/or every 3 months 3. Check configuration prior to monitoring Monitor Set Up The Triaxial Land Case: Figure 9 shows the triaxial Land Case, which contains the 4.5 Hz geophone elements. This device is used to measure vibration as velocity (mm/s). Figure 9: Triaxial geophone Land Case with base plate We supply, as standard, the base plate (seen in Figure 9) for use on hard surfaces (concrete and rock), and three soil spikes (seen in Figure 10) for use in normal soil or similar conditions. 9 Mar 2015 Page 19 Figure 10: Triaxial geophone Land Case with soil spikes attached Necessary measures when siting a Triax: To ensure that you get consistent measurements, we suggest the following methods to couple the triax to a surface: It is essential that the land case is level and that the red arrow is pointing at the vibration source being monitored. To ensure the Land Case is level, the bubble in the circular spirit level embedded in the top of the land case must be within the inner marked circle (see Figure 11 below); Figure 11: Land Case level When using the baseplate, apply a fast curing adheasive (non elastic is preferable) on the baseplate bottom (Figure 12) and then set level on the desired surface (Figure 6): Figure 12: Adhesive on baseplate bottom 9 Mar 2015 Figure 13: Triax & baseplate glued to concrete Page 20 When retrieving the triax Land Case, first remove the baseplate, then, using a flat tip screw driver or similar tool, pry the baseplate off the surface. When using soil spikes, use constant pressure to push the spikes in until the bottom of the Land Case is in firm contact with the ground and level (as shown by the level bubble) – see Figure 14 below: Figure 14: Triax Land Case with soil spikes being pushed into the ground The microphone: In Figure 15 the microphone and hydrophobic windsock (or screen) are shown. The microphone is used mainly to monitor blast overpressure in dBL. This function is available on all models. Figure 15: Microphone and windsock The microphone set up depends upon the type of monitor purchased. The microphone is very fragile and can be damaged if not handled with care. 9 Mar 2015 Page 21 GTM microphone set up: The GTM comes with the microphone, the hydrophobic windsock and the travel pouch, as shown in Figure 16 below: Figure 16: Microphone (left), windsock (middle) and travel pouch (right) Remove microphone from the travel pouch and attach to the connector shown in Figure 17. Place the windsock over the microphone - Error! Reference source not found.. Figure 17: Microphone connector on GTM Now place monitor on to the tripod provided to elevate the microphone to the correct height above the ground. ETM microphone set up: The ETM comes with the microphone, a cable, hydrophobic windsock, and tripod. Figure 18 shows where to connect the microphone cable (indicated by the red arrows): Figure 18: Microphone connection on connector panel. 9 Mar 2015 Page 22 Calibration Texcel recommends annual calibration in accordance with AS2187.2 – 2006 – Clause J3.1.2(b). Texcel’s calibration process is traceable and documented. Sensor Calibration Sensor calibration is calibration by comparison with a reference transducer. Our reference sensors are calibrated by the Australian Government’s National Measurement Institute, at a Laboratory accredited to NATA requirements, which include the requirements of ISO/IEC 17025 and are traceable to Australian standards of measurement. Electronic Circuit calibration Electronic Circuit calibration is achieved by using a calibrated multimeters or equivalent measuring instruments. Our multimeters are calibrated at a laboratory accredited by NATA in accordance with ISO/IEC 17025, or an international test facility traceable to the Australian Government’s National Measurement Institute, or other national metrology institutes. Returning the Monitor for Calibration When returning the monitor for calibration, include the following: The monitor – ETM, ETM PI or GTM The triaxial geophone sensor - Land Case The microphone if purchased The charger Sensor cables, unless they are fixed in the PI poles Calibration Includes: When a monitor is returned to Texcel for calibration, the following work is carried out: 1. Monitor and sensors calibrated; 2. All equipment in kit thoroughly tested; 3. Firmware version upgraded (if required); 4. Software version upgraded (if required). 9 Mar 2015 Page 23 Warranty Warranty on initial purchases Warranty Texcel Pty Ltd warrants the Goods for a period of 12 months. Exclusions The warranty on Texcel monitors and accessories shall not apply to defects resulting from the following: Abnormal Use by the customer including damage to the monitor, microphone, geophone, modem or any other accessory by Abnormal Use; improper or inadequate maintenance by the customer; unauthorised modification, including mechanical damage to the microphone, modem or other accessory; internal corrosion due to condensation or water ingress. Please note: 1. The benefits provided to the Customer by this Warranty are in addition to the other rights and remedies of the Customer under the Australian Consumer Law. 2. Our goods come with guarantees that cannot be excluded under the Australian Consumer Law. You are entitled to a replacement or refund for a major failure and for compensation for any other reasonably foreseeable loss or damage. You are entitled to the goods repaired or replaced if the goods fail to be of an acceptable quality and the failure does not amount to a major failure. 3. Abnormal Use includes use of the Goods in a manner for which they were not designed or a failure by the owner to ensure that the Goods are appropriately serviced, maintained and cared for. 4. Goods mean the Texcel monitoring system and attachments. 9 Mar 2015 Page 24 Warranty on Calibration Services Warranty Our services come with guarantees that cannot be excluded under the Australian Consumer Law. You are entitled to a replacement or refund for a major failure and for compensation for any other reasonably foreseeable loss or damage. You are entitled to have the services provided again (without charge) if they are not of an acceptable quality and the failure does not amount to a major failure. The benefits provided to the Customer by this Warranty are in addition to the other rights and remedies of the Customer under the Australian Consumer Law. Exclusions Any warranty that Texcel Pty Ltd is required to provide at law for its calibration services does not cover damage or defect resulting from: Abnormal Use by the customer including damage to the monitor, microphones, geophones, modem or any other external accessory resulting from Abnormal Use; unauthorised modifications, repairs or servicing of the Goods; internal corrosion due to condensation or water ingress into the Goods; the failure of any component of the monitor that was not replaced or serviced during the Calibration Service and is no longer covered under the original purchase warranty ; and the failure of any accessory product, such as the modem or microphone, that was not manufactured by Texcel. Please note: 1. Warning: User-generated data which has been saved to this monitor may be lost as a result of the work performed during the calibration service or any other repair or maintenance. Customers are encouraged to save their data before the work is performed. Texcel will not be responsible for any data that is lost as a result of the works. 2. Abnormal Use includes use of the Goods in a manner for which they were not designed or a failure by the owner to ensure that the Goods are appropriately serviced, maintained and cared for. 3. Goods mean the Texcel monitoring system and attachments. 9 Mar 2015 Page 25 Declaration of Conformity C-Tick C-Tick indicates compliance with EMC requirements of Australia and New Zealand. Test Standards: EN55011:2007 + A2:2007 Tested in accordance with the Group 1 Class A requirements of EN 55011 CE Declaration of Conformity Texcel Pty Ltd declares that the ETM meets requirements of EMC Directive 2004/108/EC for Electromagnetic Compatibility and Low Voltage Directive 2006/95/EC for Product Safety. EMC DIRECTIVE EN 61326–1:2006 EMC requirements for Electrical Equipment for Measurement, Control, and Laboratory use. Electromagnetic Emissions EN 55011/A2:2002 Radiated and Conducted emissions (Class A) EN 61000–3–2:2000 Harmonic Emissions (Class A) EN 61000–3–3/A1:2001 Voltage Fluctuations and Flicker Emissions Electromagnetic Immunity EN 61000–4–2/A2:2001 Electrostatic Discharge EN 61000–4–3:2002 Radiated Susceptibility EN 61000–4–4:2004 Burst EN 61000–4–5/A1:2001 Surges EN 61000–4–6/A1:2001 Conducted Susceptibility EN 61000–4–8/A1:2001 Power Frequency Magnetic Field EN 61000–4–11:2004 Voltage Dips and Short Interruptions Warning This is a class A product. In a domestic environment this product may cause radio interference in which case the user may be required to take adequate measures. 9 Mar 2015 Page 26 FCC Notice This equipment has been tested and found to comply with the limits for a Class A digital device, pursuant to Part 15 of the FCC rules. These limits are designed to provide reasonable protection against harmful interference in an appropriate installation. This equipment generates, uses and can radiate radio frequency energy and, if not installed and used in accordance with the instructions, may cause harmful interference to radio communications. However, there is no guarantee that interference will not occur in a particular installation. If this equipment does cause harmful interference to radio or television reception, which can be determined by turning the equipment off and on, the user is encouraged to try to correct the interference by one or more of the following measures: Reorient or relocate the receiving antenna. Increase the separation between the equipment and receiver. Connect the equipment into an outlet on a circuit different from that to which the receiver is connected. Consult the dealer or an experienced radio/television technician for help. Disclaimers Conformity with the standards for Electromagnetic Immunity does not guarantee the equipment will be immune to electromagnetic interference of all kinds. Change or modification without the express consent of Texcel Pty Ltd voids the user’s authority to use the equipment. The use of this equipment with any third party equipment may void the above compliance declarations. GTM, ETM and ETM PI specifications and manuals are subject to change without notice. Texcel Pty Ltd assumes no liability for damage incurred directly or indirectly from errors, omissions or discrepancies between the GTM, ETM and ETM PI and its respective manual. Contact Texcel for further information. 9 Mar 2015 Page 27 Connecting to your Monitor All Texcel Monitors are delivered with cables to connect the communications port on the monitor to your PC or laptop: A standard DB9 Serial Cable You will always need the standard serial cable to connect your monitor. Figure 19: Supplied DB9 Serial Cable A USB to Serial Adapter – and Driver Software If your PC or laptop does not have an available COM Port, and it does have a USB port, you will need to us the supplied USB to Serial adapter. Figure 20: USB to Serial Adapter Install the driver software BEFORE you use the USB to Serial Adapter. Install the Supplied Driver Software BEFORE Connecting the Adapter It is important to install the supplied driver software without the Serial Adapter plugged into your PC. That way, when you plug the adapter in, the Found New Hardware Process in Windows will allocate the correct driver, and it will work easily! Connecting the Monitor to the PC Connect the DB9 Serial cable to the matching connector on your ETM or GTM. The connector on the front panel of your ETM or GTM is labelled PC. If The PC has a DB9 COM Port Connector If your PC, or laptop, has a standard DB9 COM port, the other end of the DB9 Serial Cable will connect to it, and that is all you need do. This connector will be a DB9 male connector like this: Figure 21: DB9 COM Port Connector on PC or Laptop 9 Mar 2015 Page 28 If The PC or Laptop has no DB9 COM Port In this case, you will need to use the USB to Serial Adaptor connected to a standard USB Type A Port on your laptop or PC: Figure 22: USB Type A Port These ports are usually identified by the USB Trident Logo: The DB9 Serial cable connects to the other end of the USB Serial Adapter. Connect from the T-Link Software Once your ETM or GTM monitor is physically connected to your PC or laptop, try connecting from the T-Link software. Ensure the monitor is switched on Figure 23: T-Link Main Window T-Link runs a connection process when you configure the settings or retrieve data. These are accessed from any of the three buttons at the bottom left of the T-Link Main Window: 9 Mar 2015 Page 29 Texcel Settings Custom Settings Retrieve They each run the same connection process. You will not affect the settings or data in your monitor by pressing any of these buttons! You will need to confirm any changes! The T-Link 2 Connection Process You may notice that T-Link scans the available COM Ports whenever it starts up. When you press one of the ‘connect buttons’ above, T-Link displays a ‘Communications Status’ window, to show you the progress of the connection: Figure 24: Connection Status Window T-Link opens all the usable COM ports in turn, and checks to see if a monitor is connected to that COM Port. In a normal connection, the heading shows the monitor serial number found, and a number of messages will flash past. Progress will be indicated: Figure 25: Connection Process Progress T-Link will progress to the Texcel Settings, Custom Settings or Retrieve Windows, depending on the button you clicked to connect. 9 Mar 2015 Page 30 Look Harder - Connection Fail Window If for any reason T-Link cannot find a monitor connected to your PC, it will stop after scanning the local COM ports, with the Look Harder Window: Figure 26: Look Harder Window The list of COM Ports and Baud rates checked is displayed at the Blue Arrow. If you have a long list of COM Ports and the scan takes a while, you can tell TLink which COM Ports to ignore at Communications Options – COM Ports. Look Harder Button The Look Harder Button (Red Arrow) will run the COM port scan again, but ‘try harder’ i.e. it will wait a little longer, and try a number of baud rates in case the monitor is stuck at a different baud rate. Check the monitor is switched on If this works, you will connect in exactly the same way as above. If you have to press Look Harder button often, check the Monitor Quick Find parameter in Advanced Communications Options – General below. You will need to contact Texcel to get a password to access the Advanced Communications Options. If you fail to connect, you will see the same window, with the Look Harder button disabled: Figure 27: Looked Harder Window You can either Cancel or press the Help Button shown by the Green Arrow in Figure 26 or Figure 27 above. 9 Mar 2015 Page 31 The Help Button will access the Communications Checklist. Communications Checklist The Communications Checklist window guides you through a number of steps: Figure 28: Communications Checklist Click on the numbers on the left (Red Arrows) in turn and follow the instructions. Steps 1 and 2 check whether the monitor is turned on and correctly connected – repeating some of the information shown above. At step 3, the COM Port toolbar shows on the right (Blue Arrows below). T-Link COM Port Suggestions Figure 29: T-Link COM Port Suggestions 9 Mar 2015 Page 32 T-Link shows a status for each COM Port found on your PC, and also makes some suggestions as to the best way forward. See the Green Arrows above in Figure 30 above. Please note these suggestions before proceeding to Step 4 where you can Run the Terminal Test: Run the Terminal Test Figure 30: Run the Terminal Test To run the Terminal Test, follow the 4 steps shown at the Red Arrows above. The black box at the bottom functions as a standard terminal window. The COM Ports Toolbar allows you to select from available COM ports or scan for COM Port changes. Use the Scroll Bar (Blue Arrow) to see further detail on the each of the tests shown. Running this test will confirm whether you have a problem with your serial cable, PC COM Port or monitor. 9 Mar 2015 Page 33 Calibration Due Reminders When you connect to your monitor, T-Link will check whether it is due for calibration and remind you. It will start prompting you one month before it is due, with a gentle reminder in the top right of the screen, and progress to a yellow and red warning in the middle of the screen when it is overdue: Figure 31: Calibration Due Reminders In no case will your T-Link be prevented from working normally with the monitor in question – all you have to do is click OK. If you want to prevent any Calibration Due Reminders, Contact Texcel Battery Low Prompt If the monitor’s battery is low when you connect, T-Link will prompt you to charge the monitor’s internal batteries. Figure 32: Warning - Battery Low In no case will your T-Link be prevented from working normally – all you have to do is click OK. Please follow the advice on the message and charge your monitor. 9 Mar 2015 Page 34 Monitor Configuration Texcel Settings For ease of use and convenience we have provided a number of preset configurations. Figure 33: Texcel Settings button Press the button in Figure 33 to access Texcel’s preset monitor configurations – see Figure 34: Figure 34: Texcel Settings window 9 Mar 2015 Page 35 Texcel 1 – Bench test monitor and sensors: Used to check that the monitor and sensors are working correctly; Texcel 2, 3, 4 – A Blast: These settings are generally used when monitoring the effects of explosives and when a waveform of the event is required for analysis. Choose the settings by distance from the blast or vibration source; each Setting has a different recording time and trigger level; Texcel 5, 6, 7 – Continuous at 5, 10, 15 minutes: In these settings the vector sum peak, the peak level and the frequency of the peak, for any of the 3 or 4 channels for the specified time period will be recorded. These setting are used to monitor a constant vibration source - e.g. a vibrating roller or pile driving machine; Texcel 8 – VDV: Vibration Dose Value, human response to vibration. Requires an triaxial accelerometer sensor; Texcel 9 – An A-Weighted background study: For audible noise studies. Only available with the ETM, and then only if the A-Weight option is installed. Texcel Settings not available If you select a type, that your monitor is not able to do, this fact will be displayed in a message box like this: Figure 35: Monitor cannot do Texcel Settings Once you have chosen the settings the Configure button (Figure 36) is enabled. Figure 36: Configure button Press the Configure button to configure the monitor with the selected settings. After the monitor is configured, a report of the setting details is displayed for confirmation and/or printing – see Figure 37 below: 9 Mar 2015 Page 36 Texcel Settings Display Figure 37: Texcel Settings Display – GTM Bench Test From this window, you can Save the Report to Disk Press the button at the Red Arrow to save the report as a Word compatible rtf file. Copy the Report for pasting into another document Press the button at the Blue Arrow to copy the report as a Word compatible rich text document fragment. Print the Report Press the button at the Green Arrow to print the report to your default printer. Note: This same report is available under the Monitor Reports at any time – see Figure 137 below. 9 Mar 2015 Page 37 Custom Settings T-Link also provides the ability for the user to customise the settings in the monitor. From the main menu click the button in Figure 38 to access the Custom Settings: Figure 38: Custom Settings button This displays the page shown in Figure 39. From this page you will be able to change individual settings to tailor the monitor for a wide range of site conditions. When any settings are changed they will be highlighted in red. Figure 39: T-Link Settings Editor for a GTM When connected to an ETM, two more options are shown – Alarm and Remote. 9 Mar 2015 Page 38 Sensors To select a different sensor or to change the sensor range, press the Sensors button displayed in Figure 39. From this window (Figure 40) you have the ability to change the sensor type and the maximum range of the sensor. Figure 40: Specify Sensors and Ranges window Using the drop down box (click where red arrow is pointing to activate), select the sensor you intend to use from the selection provided. Sensors that are denoted as a triax can only be used on channels 1, 2 and 3. Channel 4 is for the microphone usually. Sensor Range Selection From this window you also have the ability to choose the range (click where blue arrow is pointing to activate). The range is the maximum level to which the monitor will record - e.g. 104.17 mm/s as shown in Figure 40. The Texcel Microphone The Texcel microphone can appear as two entries on the sensor menu: Select MIC ACO (P) to enable Texcel Peak Detect to meet the “P” time-weighting characteristic as specified in AS 1259.1-1990. As required by Western Australia’s Environmental Protection (Noise) Regulations 1997. A Microphone has a fixed range. The Texcel Triaxial Accelerometer Texcel provide a smart triaxial accelerometer sensor, that can operate as an accelerometer triax, or in a band limited mode to provide VDV results in accordance with NSW EPA “Assessing Vibration: a technical guideline” of February 2006. It also appears as two items on the menu. Select the Triax ACC (Smart VDV) to enable VDV operation. Texcel provides a Technical Bulletin (TB0005) with more detail on VDV 9 Mar 2015 Page 39 Continuous Logging and/or Triggered Events After the Sensors are selected, you must choose whether you want Continuous Logging and/or Triggered Events. A Settings will not be valid without one of these two modes enabled. Continuous Logging Explained Continuous logging records results at selected time intervals. The results capture the peak over the whole interval – no sample is missed. Results include Vector Sum and peaks for all channels (including zero-crossing peak frequency). VDV and A-Weight Results are only available in Continuous Logging events provided the correct sensor is available and selected. Enabling Continuous Logging will display options for setting the Continuous Logging Interval and Result Selection – see Continuous Logging Interval below. Triggered Events Explained Triggered events record samples for a preset time period after a trigger event is detected. T-Link provides very flexible trigger conditions including triggering on the vector sum rather than an individual channel, and, with the ETM, external hardware trigger sources. Triggered Events are usually associated with capturing waveforms for graphic reports and/or further detailed analysis. Enabling Triggered Events will display options for setting Trigger Conditions, Waveform Details and Triggered Event Results selection – see Triggered Events below. T-Link allows both of these modes to operate at the same time. They operate independently, allowing waveforms to be triggered and recorded without interrupting Continuous Logging. Enabling Continuous Logging AND/OR Triggered Events Enable tick boxes for Continuous Logging and Triggered Events are in the centre of the GTM Custom Settings (Figure 39 above) or ETM Custom Settings (Figure 93 below) windows – shown here with red arrows: Figure 41: Enable Continuous Logging and/or Triggered Events 9 Mar 2015 Page 40 Continuous Logging Interval To set the time interval for continuous monitoring, use the drop down box indicated by the red arrow in Figure 42: Figure 42: Continuous Logging Enabled The time interval may be set as low as 1 second or as high as 12 hours. Continuous Logging Results From this page you can choose the event summary data that will be recorded and available for reports. Six different options are available to suit your needs – see Figure 43: Figure 43: Continuous Results 9 Mar 2015 Page 41 Compliance Results: Records the data required for compliance monitoring. Compliance Results requires the use of a triaxial sensor. Selecting Compliance Results will require the selection of Zero Crossing Results. Zero Crossing Results: Contains frequency information for the peak on the channel. With Frequency and Peak values you can estimate acceleration and displacement. All of these are reported on certain blast reports. VDV and Weighted RMS: Can only be used in Continuous mode of operation. This feature is only enabled when a VDV capable Accelerometer is selected in the Sensors. Used for Human Response to Vibration. See Figure 44. Average Results: An average (or mean) value for each channel. RMS Results: RMS (Root Mean Square) value for each channel. A-Weight Results on MIC: Can only be used with the ETM and ETM PI in continuous mode of operation and with the A-Weight option fitted. Enable Text Streaming: Available with ETM firmware versions 2.31 or greater (1.31 with GTM). Text Streaming Text Streaming is a new feature that sends a Text Stream of the event results on each Continuous Mode event out of the ETM’s (or GTM’s) COM or USB Port. This allows a locally connected PC to receive and save the Text Stream to a file and then import it to a spreadsheet or database system, or process it in any other way. Each event sends a single line of text, with the individual results delimited by the <Tab> character, and the line is terminated with <CR><LF>. This matches our event spreadsheet export file formats, and will be read directly be Excel and most other Spreadsheets (for spreadsheet import, this file is normally saved as a .txt file). The first line in the file will be a ‘header’ line with headers as defined in Technical Bulletin TB0015 - Spreadsheet Report Headers, which is accessible from the Texcel TSuite Access Window see Figure 3 above. It is recommended to use Unattended Duty when Text Streaming See Unattended Duty below. 9 Mar 2015 Page 42 VDV and Weighted RMS If you select VDV Results at the red arrow in see Figure 44 below, you have the option of setting the orientation of the ‘Z-Axis’ or ‘Foot to Head’ direction in relation to the triaxial accelerometer, and the Z-Axis Weighting : Figure 44: Continuous Results VDV You can select which channel is the Z (or vertical) axis. See the blue arrows in Figure 44 above. The default is channel 3. The chosen Z axis defaults to Wg (BS 6841: 1987) weighting, or you can choose Wb (BS 6841: 1987) or Wk (ISO 2631-1) for the Z axis at the green arrow in Figure 44 above. The X and Y axes are Wd (BS 6841: 1987) weighted. Note: Channel 1 is radial, 2 transverse and 3 vertical when the sensor is mounted in the normal orientation. Texcel provides a Technical Bulletin (TB0005) with more detail on VDV 9 Mar 2015 Page 43 Triggered Events Once Triggered Events are Enabled you can set the conditions which will cause the monitor to start recording an event, from the Triggers … button. See Figure 39 above. Triggers The sensors available in this window will reflect the sensors selected under Sensors (see Figure 40 above), or as required by your original Texcel Settings choice (see Figure 34 above). Figure 45: Trigger Conditions window for a GTM When connected to a GTM, Wire Break and Trigger Sync Options are not shown. This window allows you to choose both the trigger source (sensor/channel) and the trigger level. One or more sensors/channels may be used for the trigger source. To select trigger source/s, tick the boxes under the Enable heading, beside the source/s you would like to use. Use the drop boxes (click where red arrows point) to set a level or use the up-down arrows to the right of the drop box to adjust the level. Figure 46 shows the up-down arrows and how they function: 9 Mar 2015 Page 44 Figure 46: A single arrow for fine (small steps) and a double arrow for coarse (large steps) Trigger on Triax Component To select an individual channel of a Triaxial sensor to initiate the event recording, first tick Show Triax Components indicated by blue arrow in Figure 47. Figure 47: Trigger Conditions window geophone triax components displayed individually Using this window, tick the Enable box beside the desired channel, and then set the level (as shown in Figure 45 above). With the Texcel geophone triax (see Figure 9 above), the direction of the red arrow on the landcase (radial) is channel 1, the transverse direction (at right angles to the red arrow) is channel 2, and the vertical direction is channel 3. Tips: If the geophone triax is situated in an area where there is a lot of activity (e.g., trucks, cattle or machinery nearby), and the trigger level is set too low, the monitor will constantly trigger and fill the monitor’s memory. In windy areas, if the microphone trigger level is too low, gusts of wind may trigger the monitor constantly. 9 Mar 2015 Page 45 Suppress Transient Triggers T-Link 2 with firmware version 2.2 (or greater) will offer the ability to suppress transient trigger events. This can be useful in electrically noisy environments. When enabled, it will require that the specified trigger threshold level be maintained for 3 samples in a row before a trigger event is recorded. Click the Suppress Transient Triggers tick box (at the purple arrow in Figure 45 or Figure 47) to enable this. SMS Trigger Control This feature allows remote control of thresholds for ETMs configured with SMS. See Remote below. If an ETM Settings is Remote enabled with an SMS capable modem, the SMS Trigger Control enable will be shown next to the Triggered Events enable (see the red arrow): Figure 48: SMS Trigger Control Enable SMS Trigger Control provides remote control of the Threshold trigger enable of an ETM via simple SMS messages. All thresholds are suppressed when the ETM wakes up or goes duty, and are only enabled by receiving an SMS! With FW 2.31, the threshold triggers are NOT suppressed when the ETM wakes up or goes Duty Full details are available in the Technical Bulletin – SMS Trigger Control installed with T-Link and this manual – available from the Programs Menu\Texcel. 9 Mar 2015 Page 46 Sample Rate and Waveform Length To change the waveform parameters press the Waveform button (displayed in Figure 39 above) to show this window: Figure 49: Waveform Sampling Details window Sampling at: Use the drop box indicated by the red arrow to change the sample rate. Available sample rates vary with sensor selections, but can range from 20 Hz to 40,000 Hz. The menu shows both the sample rate and sample interval for convenience. Changing the sample rate will affect the recording times under Sampling for, MIC Samples for and Pre-Trigger. Sampling for: Is the full recording time, or waveform length, for all sensors (channel 4 may be extended – see MIC Samples for). The full recording time includes the PreTrigger time. The menu shows both length of recording time and number of points. The length of time available will vary with sample rate. Use the drop box indicated by the blue arrow to change the sampling time. Changes to waveform length will affect the Pre-Trigger time and number of waveforms and events as displayed under Data. MIC Samples for: Extends the recording time for the microphone. The menu will show the option under Sampling for as a minimum, and allows an extension of up to 128 k Points. The options will change to reflect changes made under Sampling for above. Use the drop box indicated by the green arrow to change the extension to the microphone recording time. These changes will affect the number of waveforms and events as displayed under Data. 9 Mar 2015 Page 47 Pre-Trigger: Is that part of the waveform that occurs before the Trigger point, and ensues that the event is captured in its entirety. The menu displays the option in Time, percentage, and number of points. Percentages available vary from 0% to 95%. Time and number of point options vary with sample rate and waveform length. Use the drop box indicated by the orange arrow to change the pre-trigger time. Points: By entering numbers in the Points boxes (at the black arrows) you can set the length of the waveform sections directly. You can create any length of waveform this way Overwrite oldest waveforms when waveform memory full Tick the box at the purple arrow to enable this mode. This mode means that when the waveforms are full, you have the latest waveforms instead of the first waveforms captured. If the events fill up (as well as the waveforms), no more waveforms will be captured Only available with FW 2.31 or greater (1.31 in the GTM). Triggered Event Results From this window (see Figure 50) you can choose the event summary data that will be recorded and available for the reports. Six different options are available: Figure 50: Triggered Results Peak Results (and the peak time) are always recorded for all enabled channels. 9 Mar 2015 Page 48 Compliance Results: Records the data required for compliance monitoring. Compliance Results require the use of a triaxial sensor. Selecting Compliance Results will require the selection of Zero Crossing Results. Zero Crossing Results: Contains frequency information for the peak on each channel. With Frequency and Peak values you can estimate acceleration and displacement. All of these can be reported on blast reports. VDV and Weighted RMS: Can only be used in Continuous mode of operation using an accelerometer. DISABLED IN FIGURE. Average Results: A value for each channel. RMS Results: RMS value for each channel. A-Weight Results on Mic: Can only be used with the ETM and ETM PI in Continuous mode of operation. DISABLED IN FIGURE. Auto Triggering Auto triggering allows you to record an event at a specified time interval ranging from every 5 seconds up to every 12 hours. The details of the waveform saved are the same as those set with the Waveform window above. Use the drop box indicated by the red arrow in Figure 51 to change the time interval. Figure 51: Triggered Events Auto Triggered events do not, by default, save a waveform, but once enabled, a tick box is displayed to allow waveforms to be saved. Auto Retrigger Mode gives Continuous Coverage A new Autotrigger mode called AutoRetrigger on the menu retriggers the ETM (or GTM) as soon as the previous waveform has finished. The Autotrigger period is set by the waveform length. This mode collects a sequence of waveforms that seamlessly cover a period of time. You don’t miss a sample in the waveforms Only available with FW 2.31 or greater (1.31 in the GTM). 9 Mar 2015 Page 49 Alarm Note: for the alarm to be effective you must have an Alarm Beacon. The alarm can only be used with the ETM. Figure 52: Alarm Enabled Tick the Alarm Enabled box (red arrow in Figure 52), to access the Alarm… button to set the Alarm trigger level. When the Alarm… button is pressed, it opens the Alarm Conditions window shown in Figure 53 below, which allows you to set the conditions which will cause the Alarm Beacon to start flashing: The alarm occurs in either Triggered or Continuous Mode, and you can set how long the alarm will flash for with the Alarm Timeout: Alarm Timeout: The beacon will flash for the time set here and then turn off automatically. If you are using the Alarm Button and require the alarm to be acknowledged by an operator, select Operator from this drop box. Note: An Alarm can also be acknowledged by SMS. See Technical Bulletin – ETM SMS Capabilities – on Programs Menu\Texcel. Triggered: If Triggered is selected, the alarm conditions are only applied when the monitor has been triggered – i.e. by considering the results of the triggered event only. This option is only available if Triggered Events in Figure 39 above has been enabled. Continuous: If Continuous is selected, the alarm conditions are applied all the time and the alarm occurs any time the conditions are met. This option is only available if Continuous Events in Figure 39 above has been enabled. 9 Mar 2015 Page 50 Figure 53: Select Alarm Conditions This window operates in a very similar manner to the Trigger Conditions (see Figure 45 above). This window allows you to choose both the trigger source (sensor/channel) and the trigger level. One or more sensors/channels may be used for the trigger source. To select trigger source/s, tick the boxes under the Enable heading, beside the source/s you would like to use. Use the drop boxes (click where red arrows point) to set a level or use the up-down arrows to the right of the drop box to adjust the level. Figure 54 shows the up-down arrows and how they function Figure 54: A single arrow for fine (small steps) and a double arrow for coarse (large steps) Figure 55: Select Alarm Conditions with individual components shown The Show Triax Components and Suppress Transient Triggers tick boxes also work the same as in the Trigger Conditions Window (see Figure 45 above). The Suppress Transient Triggers is a global setting, and will apply to all trigger settings in the monitor’s settings (i.e. Triggered Events and SMS Alarms too). 9 Mar 2015 Page 51 Data In T-Link you have the ability to trade off waveforms and events. T-Link will automatically allocate a minimum number of events depending on your trigger and continuous mode selections, and then fit as many waveforms in as it can. The fact that T-Link has done this is shown by the (Auto) red arrow in Figure 56: Figure 56: Data information To adjust the number of events or waveforms, press the Data … button in Figure 56, and Figure 57will appear. Figure 57: Trade-off Events and Waveforms Tick the I want to Set the Number of Waveforms or Events box to override T-Link’s internal trade-off. Clear the tick to return to T-Link’s (Auto) allocation. 9 Mar 2015 Page 52 Figure 58: Trade-off Events and Waveforms – Fixed Events Tick the I want to get ### Events box and specify smaller numbers of waveforms to get the number of events you need – for example to ensure enough days for your Continuous logging needs. Figure 59: Trade-off Events and Waveforms - Fixed Waveforms Tick the I want to only ### Waveforms box and specify the number of waveforms you need. T-link requires you to specify to fix either events or waveforms, so it can keep it the same when you change the size of the waveform. 9 Mar 2015 Page 53 Duty This function allows you to set the hours of operation for the monitor. Figure 60: Duty Without a Duty Timetable, the monitor will run continuously until switched off by the user. To change this, tick the box indicated by the red arrow (in Figure 60) to enable a Duty Timetable. Then click on the Timetable button in Figure 60 to access the Timetable Select Window (Figure 61) below. Note: The message showing at the blue arrow will depend on your settings and monitor type. Unattended Duty Ticking the box at the green arrow enables Unattended Duty mode. This hardens the ETM (or GTM) operation when unattended in these ways (among others): It will always go Duty when powered on (e.g. recovering from power fail) If you leave it at the menu, it will go Duty rather than shut down To protect itself from electrical spikes, it ignores the red power off button To turn the ETM (or GTM) Off in Unattended mode, press and hold the Zero (Back) button till it turns off (~ 10 secs) Timetable Selection Figure 61: Timetable Select window 9 Mar 2015 Page 54 Timetable Selection Options To access the options for changing the duty timetable of the monitor, highlight one of the circles indicated by the red arrows in Figure 61 above: Edit the Timetable Currently in M7002: Use the Edit Button on the right to open the Timetable Edit Window using the Current Timetable. Select a working Timetable provided by Texcel: This enables a menu of standard Timetables - use the drop box indicated by the blue arrow to view and select the choices. Once chosen, press the Edit Button to Edit that Timetable to your requirements, or press the Select Button to select that timetable into the settings – this closes this window and returns to the Custom Settings window. Select a Timetable I have Saved: Once you have saved a timetable you have created, this option will become available, and the drop box (at the blue arrow) and buttons will work on your Saved Timetables in the same way as they do in the Texcel Timetables. It is often easier to select an example timetable to start with If you just click Edit when a settings does not have a timetable, you will start with a blank timetable. Timetable Editing If you are editing a blank timetable, you must first select whether the monitor will operate on a daily or weekly basis – see Figure 62: Figure 62: Timetable Blank Timetables – Daily or Weekly 9 Mar 2015 Page 55 Daily or Weekly Timetables Select Daily or Weekly at the red arrows in Figure 62 above. These options are only available in a blank or ‘empty’ timetable. A Daily timetable operates the same on every day of the week - ignoring weekends. If you want to have different monitoring times on weekends select a weekly timetable If the daily option is selected, press the … Add New On-Offs button (blue arrow in Figure 62 above) to create monitor turn on and off times. If the Weekly option is selected, press the … Add New Days button (blue arrow in Figure 62 above) and a screen (Figure 63) will appear that allows you to select the days of the week you require: Figure 63: Timetable days of the week Once you have selected the days of operation, press the OK Button. The day will appear, and show an …Add New On-Offs button. Press the …Add New On-Offs button to set the monitor turn on time and turn off time as shown above for the daily timetable – see Figure 64 below. 9 Mar 2015 Page 56 Add or Edit On-Off Times The only difference between Daily and Weekly On-Off time editing is that in Weekly timetables, the On-Off times are managed in groups by day. Figure 64: Weekly timetable example different hours of operation Adjust the On-Off Times: By clicking the Up and Down arrows shown by the blue arrows in Figure 64, or By typing directly into the text box, as shown by the red arrows in Figure 64. Any changes are automatically updated in the graphical display. Press … Add New On-Offs to add more On-Offs on any day. Adjust the times before adding the next On-Off. Note: Once the latest timetable entry Off time is 21:30 or more, the … Add New OnOffs button will be disabled for that day. 9 Mar 2015 Page 57 Add or Edit Days of the Week In a weekly timetable, the … Add New Days button will be available until you have allocated all days. In a Daily Timetable, the… Add New Days button will not be visible. You may also have a different set of operating hours on each day – as in Add or Edit On-Off Times. The only difference between Daily and Weekly On-Off time editing is that in Weekly timetables, the On-Off times are managed in groups by day. Press any Select Button to change or add new days to the selected On-Offs, from the window in Figure 63. This will prevent you from overlapping the days. Figure 65: Delete Button Use the Delete Button (Figure 65) to delete an On-Off or a whole Day of On-Offs. At any point, press Cancel to abandon changes and return to the Timetable Select Window (Figure 61 above). Once you are happy with the timetable, Press OK to save the edited timetable into the monitor’s settings and return to the Custom Settings window (Figure 39 above). Save a Timetable You can use the Save As (Figure 66) Button to save the timetable to your ‘Managed Timetables’ so you can use it in other settings later. Figure 66: Save As This asks you to give the timetable a name as shown in Figure 67: Figure 67: New Timetable name 9 Mar 2015 Page 58 Manage Saved Timetables Saved Timetables can be managed from the Manage Saved Timetables Button (Figure 68) on the Timetable Select Window: Figure 68: Managed Saved Timetables Button This will open the window shown in Figure 69: Figure 69: Managed Saved Timetables Window The toolbar in Figure 69 works like this: Close New Copy Edit Delete Graphic Import 9 Mar 2015 Closes the window and returns to the Timetable Select Window; Create a new blank timetable; Create a new timetable from a copy of the selected Timetable; Edit the selected Timetable; Delete the selected Timetable; Shows and hides the graphic display of the selected Timetable. Imports Timetables from another T-Link installation. Page 59 To Rename a Timetable Press Edit to open the timetable for editing. Make any change to the timetable e.g. adjust a time (you can set it back again) to register a change in the Edit Window and the Save As Button (Figure 66) changes to a New Name button. Figure 70 - Rename a Saved Timetable Naming a Copied Timetable The Copy button creates a timetable named “Copy of Copied Timetable Name”. Press the Save As Button (Figure 66) to save it under a new name. Importing Timetables from an Old/Other T-Link Installation T-Link saves the Managed Timetables in a data file called MyTimetables.tda in the TLink System folder E.g.: C:\Users\Public\Documents\Texcel\T-Link\System\MyTimetables.tda See Where T-Link’s Data is stored on your Computer The file MyTimetables.tda can be copied into a new T-Link System Folder if there is not one there (while T-Link is NOT Running!), or else copy it to a convenient location (e.g. on a USB Stick) and Import it into your T-Link System as follows: Press the Import Button above. Windows will open a File Open Dialog, which will only show Texcel Data Files (*.tda). Browse to your copied MyTimetables.tda and select it. All timetables in the Data File will be imported. Timetables with the same name as one in your existing collection will be ignored Rename an existing timetable, to import one of the same name There are many types of Texcel Data files in the T-Link System folder containing e.g. SMS Phone numbers, Sensors … The Timetable Import Process will ignore any Texcel Data files that do not contain Timetables. You cannot damage the system by selecting the wrong Texcel Data File 9 Mar 2015 Page 60 Remote This function is only available with ETM and ETM PI monitors If there is a modem attached to the monitor, tick the Remote Enabled box indicated by the blue arrow in Figure 71 to gain access to Remote, Timetable and SMS windows: Figure 71: Remote Enabled box The Remote window allows you to change modem type and input a new data number if so required. (The data number in Figure 72 is for demonstration purposes only): Figure 72: Remote Settings window 9 Mar 2015 Page 61 Modem: Select the modem Type from the drop box – click where the blue arrow points. The correct modem type will be defined by the modem you purchase from Texcel for your monitor. The modem you select will enable the connection options valid for that modem You must select the modem type actually in the ETM here. You must select either Modem Dial In or Private Network, and specify the parameters correctly, before the window will allow you to save it. Time Zone: If the monitor is in a different time zone, you need to set the time difference between your PC and the monitor. Change the time where the red arrow points. This allows you to correctly synchronise the time on the monitor and also enables proper scheduled operations. Note: If you connect to a monitor in a different Time Zone from the one in which it was configured (with T-Link 2), T-Link 2 will adjust this correctly. Texcel monitors are not (yet) capable of managing daylight savings, and you must connect and synchronise the time after the daylight savings time shifts. Modem Dial In (Circuit Switched) – Connection Setup The Modem Dial In settings are part of the Remote Settings Window. See Figure 72 above. Figure 73: Remote Dial In Settings Modem Dial In (Circuit Switched) is available for nearly all modem types. The only information you need is the phone number, and this is defined by your phone service – either the ‘Data Number’ of your SIM or the dial-in number of your land-line. The baud rate is fixed for all except land-line connections. The term Circuit Switched is often used for mobile data connections, using this Dial In mode. Refer to Technical Bulletin TB0011 for instructions on setting up a Data Number on your SIM account in Australia 9 Mar 2015 Page 62 Enter the phone number at the Blue Arrow in Figure 73. Use the Phone Book to Remember your Phone Numbers These number share the SMS Phone Book Use the buttons at the Green Arrow to access phone numbers saved into your phone book: Select Number from Phone Book See Figure 74 below Manage Phone Book See SMS Phone Book below Add this Number to Phone Book This adds the number at the green arrow above to the phone book. Figure 74 Remote Dial In - Select Number from Phone Book Private Network (Packet Mode) – Connection Setup The Private Network settings are part of the Remote Settings Window. See Figure 72 above. Figure 75: Remote Private Network Settings 9 Mar 2015 Page 63 Private Network (Packet Mode) is available for selected modem types. The required information (at the blue arrows Figure 75 – User Name, Password, APN Name and IP Address) will be provided by your private network service provider. The term Packet Mode is often used for internet protocol or TCP/IP data connections, used in Private Network communications. See TB0012 (or Contact Texcel) for instructions on setting up a Private Network on your SIM account in Australia Use the IP Login Phone Book to Remember your Phone Numbers Use the buttons at the Green Arrow to access phone numbers saved into your phone book: Select Number from IP Phone Book See Figure 76 below Manage IP Phone Book See IP Login Phone Book below Add number to Phone Book This adds the number at the green arrow above to the phone book. Figure 76 IP Login Phone Book - Select Number from Phone Book 9 Mar 2015 Page 64 IP Login Phone Book The only access to the IP Login Phonebook is from the Private Network Settings see Figure 75 above. Figure 77 IP Logins Phone Book To input Network Access details for the first time, or to add new IP Logins, press the New button indicated by the red arrow in Figure 77. Figure 78 IP Login Phonebook Entry The name at the Red Arrow is what you use to select the entry from the drop down menu at the Private network Settings Window – see Figure 76 above. The information (at the blue arrows Figure 78 – User Name, Password, APN Name and IP Address) is all required, and will be provided by your private network service provider. 9 Mar 2015 Page 65 The Notes Field (green arrow in Figure 78) Is anything that helps you remember the entry. Importing IP Login Phone Books from an Old/Other T-Link Installation See Copying or Moving Managed Timetables and your Phone Books below. TCPIP Keep Alive Ping Some packet mode modems allow a Keep Alive Ping. This is a method the modem uses to keep the link to the mobile network alive while it is waiting for your connection to come in. Texcel recommends enabling this, if the option is available. This is part of Remote Setting Window - see Figure 72 above. Figure 79 Enable TCPIP Keep Alive Ping You must enter the IP address in IPV4 decimal-dot notation, as shown. If you are using a Private Network, public web addresses will not work! If you are using a Private Network, you must contact your network provider/administrator to obtain a valid Keep Alive Ping Address. Most Private Networks will provide an address for this purpose. Modem Timetable The modem timetable editing is the same editing procedure as the Duty Timetable above. The modem timetable specifies when the modem will be turned on to receive calls. You can only connect to your remote monitor during the On times of your remote Timetable. There are no restrictions or required relationships between the modem timetable and the duty timetable in the monitor, it can be Off Duty (i.e. asleep) but keep the modem on and wake up when you call it. Once remote is enabled, the settings require a modem Timetable. You will be unable to configure a monitor with remote settings until you have a valid modem timetable. 9 Mar 2015 Page 66 SMS Disclaimer: Reliability and delay when sending SMS messages is network dependent; and when, or even whether, an SMS arrives is beyond Texcel’s control. To enable the monitor to send SMS messages to nominated mobiles, press the button marked SMS in Figure 71. This will initially open a blank SMS Settings Window, as in Figure 80: Figure 80: SMS Settings Window SMS Phone Book When you have opened the SMS Settings, the first thing is update the Phone Book with the relevant contact detail. Click the button at the red arrow in Figure 80 above: Figure 81: SMS Phone Book 9 Mar 2015 Page 67 To input phone numbers and details for the first time, or to add new contacts, press the New button indicated by the red arrow in Figure 81. Figure 82: Phone Book Entry After pressing the New, Copy or Edit buttons in Figure 81, the Phone Book Entry page appears as in Figure 82. SMS Phone Type Allows you to choose what type of phone book entry this is and will affect where it appears on a menu. Most entries here will be Mobile Phone types: Mobile Phone These appear on the Send To drop box for Text or Event message types as shown in Figure 83. Texcel Monitor These appear on the Send To drop box for Trigger message type as shown in Figure 83. This is only for monitors not managed on this PC. Once you connect to a Remote Monitor from this PC, it will automatically appear in the Send To drop box. Service Centre These will be added to those in the SMS Service Centre drop box shown in Figure 83. Repeat the above process to add more contacts. When this page is completed, press OK. 9 Mar 2015 Page 68 Once all the contacts are correct and entered into the system, close the Phone Book. You will then return to the SMS Settings Window - Figure 80. Importing SMS Phone Books from an Old/Other T-Link Installation See Copying or Moving Managed Timetables and your Phone Books below. SMS Messages Setup – Three Steps Starting with the blank SMS Settings window (Figure 80), you have to complete at least three steps before the OK Button (red arrow) in Figure 83 below will be enabled: 1. Select an SMS Service Centre See Step One – Set the Service Centre Number below. 2. Select Some Messages to Send See Step Two – Setting up the SMS Messages below. 3. Specify a Valid Alarm Trigger In the box at the green arrow in Figure 83 below, you must set a valid threshold if you are sending messages On a Triggered Event or In Continuous Logging. See Step Three – SMS Alarm Triggers below. You can skip this if you are only send Warning SMS messages – See Figure 92 SMS Send Timeout There is no need to adjust the SMS Send Timeout unless you have problems sending many SMS messages each event, or under Texcel Support advice. The SMS Send Timeout should normally be left at 15 seconds. See the purple arrow in Figure 83 below. The timeout is the time the monitor waits after sending an SMS without an OK response from the network, before deciding that the message failed, and it should just send the next one – it only affects settings with multiple SMS messages. This is an example of all possible SMS Message Types with SMS Alarms sent on a Triggered Event: 9 Mar 2015 Page 69 Figure 83: SMS Settings - Valid Triggered Event Alarms Only when all the SMS Settings are all valid, will the OK button will be enabled (red arrow in Figure 83). Press this to confirm the SMS settings, and return to the Custom Settings Window – see Figure 93 below. Step One – Set the Service Centre Number Select the SMS Service Centre at the blue arrow in Figure 83 above. Select any of the entries for the service provider of the SIM account you have provided for the modem in this ETM. 9 Mar 2015 Page 70 Step Two – Setting up the SMS Messages Figure 84 shows the types of SMS messages that can be sent. Figure 84: Types of SMS Messages Event/EventAll: The text of the message includes the monitor number, time and date of the event, the vector sum and the peak microphone reading. The Event Type includes the maximum peak of a triax, while EventAll Type includes all three peaks of the triax. An Event Type SMS Alarm message is a notification only. It is not intended to be a definitive record of the event. Event Type SMS messages are NOT available in Continuous Logging ‘All the Time’ mode Text: The text of the message includes the monitor number, time and date of the threshold exceedance and the message typed in by user under “Text” in Figure 84. Trigger: Sends the text “TRIGGER” to another Texcel Monitor, causing it to trigger if Enable Incoming SMS Trigger (see Figure 85 below) is enabled on that other monitor. The above four message types are sent on an Alarm Trigger, as set in Step Three – SMS Alarm Triggers. ALL messages of these types on the list are sent, in the order shown, every time the SMS Alarm Trigger threshold is exceeded. The Warning Type is sent when Low Battery is detected on a Duty Cycle, completely independently of the SMS Alarm Trigger. Warning: This phone number is used independently of event monitoring. The Monitor uses this number to send Low Battery warnings, which the monitor checks a few times a day. The maximum number of SMS messages that be specified is 16. 9 Mar 2015 Page 71 Step Three – SMS Alarm Triggers The SMS Alarm Triggers define when and whether to send the specified SMS Alarm Type Messages – Event, EventAll and Text Type messages. This has no effect and is not needed for Warning Type SMS messages. You must select at least one outgoing SMS Message Type (see Figure 84 below) before these SMS setup settings are visible. Figure 85: SMS Alarm Triggers First select (at the red arrows in Figure 85 above) whether you want the SMS Alarms to occur based On a Triggered Event result, or In Continuous Logging. If either of these is disabled, that is because they are disabled in the main settings – see Continuous Logging and/or Triggered Events above. On a Triggered Event: The threshold conditions are only checked when an event is triggered, by considering the results of the event, at the end of the event. In Continuous Logging: The threshold conditions are based on the results of Continuous Logging. There are two options available in Continuous Logging SMS Alarm messages – see the blue arrows in Figure 85 above: All the time: The threshold is checked all the time, and the alarm can occur at any time within the Continuous Logging Interval. Because no event data is available in the middle of a Continuous Interval: The Event and EventAll Type SMS Alarm messages are not available in ‘All the time’ mode At the end of the interval: The threshold is checked at the end of each continuous interval, when the Continuous Logging Event details are known and being saved. End of Interval Mode will be disabled if your firmware is too old 9 Mar 2015 Page 72 Changing Settings can make the SMS Messages Invalid If SMS Alarm Trigger is set to In Continuous Logging and you disable Continuous Logging in the Settings, all the SMS Messages are invalid. Similarly, if SMS Alarm Trigger is set to On a Triggered Event and you disable Triggered Events in the Settings, all the SMS Messages are invalid. See Enabling Continuous Logging AND/OR Triggered Events above. In this case the SMS messages are invalidated and this is shown under SMS details in the Remote Enabled box (Figure 71 above) like this: Figure 86: SMS Messages Invalid in the Settings Click the SMS Button at the red arrow in Figure 86 above and a message like this will be displayed (in this case they were set to In Continuous Logging): Figure 87: SMS Messages Invalid - Change to Triggered Events Question Event (and EventAll) Message Types may also be invalid Because Event and EventAll Type SMS Messages are not available in All the time Continuous Logging SMS Alarm Triggers, switching to All the time mode may show this self-explanatory error: Figure 88: SMS Messages Invalid in All the time Continuous Logging 9 Mar 2015 Page 73 SMS Alarm Timeout The SMS Timeout in the SMS Alarm Triggers box (Figure 85 above) acts as an Alarm Timeout. This sets the time from when a set of SMS messages has been sent, until the next set will be allowed. Select from the drop down menu at the purple arrow in Figure 85 above. The SMS Timeout prevents a continuous stream of SMS messages. The value Duty means it will only send one SMS message in each modem duty cycle (i.e. it won’t send another one till it goes to sleep and wakes up again). The Timeout starts after the last specified SMS has been sent Note: Sending an SMS can take many seconds – 6-10 seconds per message is not an unrealistic estimate. The actual time is network dependent. So if you are sending 10 SMS Alarm messages, just sending them can take more than a minute, and even more than two minutes! Set the SMS Alarm Trigger Threshold Levels Threshold… Button: By pressing the Threshold button (at the green arrow in Figure 83 above) you set the SMS Alarm trigger conditions for when the SMS messages will be sent out. Figure 89: SMS Alarm Thresholds Setting SMS Trigger Threshold is very like that of the Alarm Beacon (See Figure 53 above) and the Triggered Event Thresholds (Figure 45 above). 9 Mar 2015 Page 74 This window allows you to choose both the trigger source (sensor/channel) and the trigger level. One or more sensors/channels may be used for the trigger source. To select trigger source/s, tick the boxes under the Enable heading, beside the source/s you would like to use. Use the drop boxes (click where red arrows point in Figure 89 above) to set a level or use the up-down arrows (blue arrows point in Figure 89 above) to adjust the level. Figure 90 shows the up-down arrows and how they function Figure 90: A single arrow for fine (small steps) and a double arrow for coarse (large steps) RMS or Peak Levels In Continuous Logging End of Interval Mode, the Alarm Trigger threshold can be set to apply to Peak or RMS levels. All other thresholds in T-Link apply to Peak Levels The top of the SMS Alarm Thresholds window (Figure 89 above) provides the additional options shown at the red arrows in Figure 91 here: Figure 91: Continuous End of Interval SMS Alarm Thresholds as RMS or Peak Enable Incoming SMS Trigger Tick the box at the black arrow in Figure 85 above to Enable Incoming SMS Triggers. This will allow this ETM to be triggered by an incoming SMS message containing the text ‘TRIGGER’. Use this if this monitor is to be triggered by another remote monitor, or from a mobile phone. 9 Mar 2015 Page 75 Warning SMS Messages T-Link 2 with firmware version 2.2 (or greater) introduces the Warning SMS Message. The monitor checks the system battery voltage periodically, and sends a Low Battery warning, with the Monitor number and an urgency rating. This check is performed entirely independently of any alarm threshold events. The warning message can be used with other SMS message types, or as the only SMS message type in the settings: Figure 92: SMS Settings - Warning SMS Only If only Warning SMS Messages are being used, no threshold settings are required. The warning SMS can be sent to more than one phone number. Technical Bulletin TB0013 - ETM SMS Capabilities See Technical Bulletin – TB0013 - ETM SMS for Remote Control and Remote Information Access abilities of your ETM. 9 Mar 2015 Page 76 Configuring the Monitor Once you have selected the settings required, and they are valid, the Configure button (Figure 93) will be enabled. Figure 93: ETM Settings window with Remote and Alarm Press the Configure button (red arrow in Error! Reference source not found. above ) o configure the monitor with the selected settings. 9 Mar 2015 Page 77 Configured Settings Displayed to Confirm After the monitor is configured, a report of the setting details is displayed for confirmation and/or printing (see Figure 94), which allows you to save or print out the report for future reference. Figure 94: An ETM Settings Report From this window, you can save the report to disk, copy the formatted report to paste into another document, or print to the default printer. Button operation is explained above at Texcel Settings Display. Note: This same report is available under the Monitor Reports at any time – see Figure 137 below. 9 Mar 2015 Page 78 After you close the settings display, T-Link offers you the opportunity to save your custom settings for later re-use, see Saved Settings below. Saving your Custom Settings This window is displayed. Press Cancel to skip saving the settings, and return to T-Link Main. Figure 95: Save your Custom Settings after Configure Type a Settings Name (at the red arrow Figure 95), that identifies the settings for you. The name is saved with the settings, and appears on the Saved Settings List when you later want to use it – see Figure 98 below. You must also type a description (at the green arrow Figure 95), before you can save the settings. The description also appears on the Saved Settings list, with the two lines separated by a dash. Two lines are not required. The above names are shown in Figure 98 below. If you skip this step, you can still use the Create Button at the Saved Settings List to create a Saved Settings from the current settings in your monitor. The Bump Test If possible Capture an event on your desktop by going duty and ‘bumping the geophone’ to confirm expected operation. This is particularly important for testing an ETM being set up for remote operation – you can verify modem initialisation and ALL SMS MESSAGES 9 Mar 2015 Page 79 Saved Settings Access the Saved Settings to Manage them Ctrl + Click Custom Settings for Quick access to Saved Settings Figure 96 Custom Settings Button on T-Link Main Window Access the Settings from Custom Settings to Select one You can also access Saved Settings on the Custom Settings Edit Window (See Figure 39 for a GTM and Figure 93 for an ETM example): Figure 97: Saved Settings Button This button will enable the Select Button on the Saved Settings List Either way it shows the Saved Settings available in the system: Figure 98: Saved Settings List The Saved Settings List presents all the settings saved in your T-Link installation, and provides a toolbar which allows you to Select, Copy, Edit, Delete, Rename or View the highlighted settings. You can also make a New settings from scratch or Create one from the settings in a monitor you have recently connected to. Saved Settings are saved under the T-Link System Folder – see How T-Link’s Data is stored on your Computer. The Saved Settings files are transferrable between computers – just copy the files to the same folder on the other computer. 9 Mar 2015 Page 80 You can also Access the Saved Settings from the Look Harder Window Figure 99: Access Saved Settings from the Look Harder Window Press the Saved Settings button (at the red arrow in Figure 99) to access the same Saved Settings List (Figure 98 above). The only difference is that the Select Button is disabled. Sorting the Saved Settings List Clicking on the headings of the lists will sort the list by that column. Clicking again will reverse the sort order. When first shown, they are sorted by monitor. Saved Settings List Toolbar Select If you go to the Saved Settings List from the Custom Settings, highlight a settings, and press this Select Button, the highlighted settings will be selected into the Custom Settings window, for use your monitor. This is the intention of Saved Settings, to allow quick re-use. New The New Button allows you to create a settings using one of the Texcel Settings as a template. The first thing the new settings requires is a monitor type to base the settings on. When you press the New Button you are presented with this window: Figure 100: New Settings - Real or Type 9 Mar 2015 Page 81 Real: allows you to select from a list of ‘real’ monitors in your T-Link system: Figure 101: New Settings - Select Real Monitor Type: allows you to base a new settings on a monitor type you may or may not own: Figure 102: New Settings - Specify Type of Monitor The Type option allows you to edit settings in a T-Link before you connect to any actual T-Link monitor. Press the OK Button (red arrow in Figure 100) to progress to selecting the Texcel Settings on which to base your new settings: Figure 103: New Settings - Select Texcel Settings Template The blocking messages for Texcel Settings as in Texcel Settings not available above are displayed here, but because these are inherently Custom Settings, a selection that uses a different monitor’s sensors will be allowed, but display a warning. Press the OK Button to select the Texcel Settings and specify a Name and Description for your new settings. This uses the same window used to Save your Settings after you Configure your monitor – see Saving your Custom Settings above. 9 Mar 2015 Page 82 Create The Create Button enables you to create a Saved Settings from the settings currently in one of your monitors. When you press the Create Button, you are presented with a selection of all the monitors you have connected to from this T-Link: Figure 104: Select a Monitor to Create a Saved Settings Press the OK Button to select the Monitor and specify a Name and Description for your new settings. This uses the same window used to Save your Settings after you Configure your monitor – see Saving your Custom Settings above. Copy The Copy Button copies the settings highlighted on the Saved Settings List, and allows you to edit that settings in the Saved Settings Edit Window, after giving the Copied settings a Name and Description on the same window used to Save your Settings after you Configure your monitor – see Saving your Custom Settings above. Edit The Edit Button opens the settings highlighted on the Saved Settings List and allows you to edit that settings in the Saved Settings Edit Window. Delete The Delete Button deletes the settings highlighted on the Saved Settings List from the list, and deletes the file from your disk. You will be asked to confirm the deletion. Rename The Rename Button opens the Name and Description Window, and allows you to rename and/or edit the description of the settings highlighted on the Saved Settings List. 9 Mar 2015 Page 83 View The View Button opens the Settings highlighted on the Saved Settings List in the Settings Report Window – see Figure 94: An ETM Settings Report or Texcel Settings Display above. Saved Settings Edit Window The Saved Settings Edit Window looks and operates the same way as the Custom Settings Edit Window, except that the Configure Button is replaced by a Save Button. Figure 105: Saved Settings Edit Window Press the Save Button to save the settings to your Saved Settings List. You must press Save once for New or Created Settings, even if no changes are recorded, to add the settings to the list. 9 Mar 2015 Page 84 Retrieve Data To retrieve the results from your monitor, press the Retrieve button (shown below in Figure 106) on the T-Link Main Window (see Figure 23 above). Figure 106: Retrieve button T-Link’s data retrieval is as easy as 1,2,3 1. Select Data Here you decide if you want to: Retrieve all events and waveforms to the same location Select which waveforms and which locations If you want to retrieve all the data – do nothing – that’s already selected See Select which waveforms and which locations for why you might want to select. 2. Select Events (and select Site and Location Names) The main thing here is to set right the Site and Location, where the results were monitored. See Sites and Locations. These Site and Location names will appear on all your reports If you are selecting which events and which waveforms, you can select different sites/locations for different monitoring sessions. 3. Report T-Link allows you to generate a report automatically as you retrieve the data if you want to. The report options available depend on the type of data you are retrieving. See Retrieve and Report options Then press the Retrieve Button to Retrieve (and Report) your selections Figure 107: Retrieve Button - Bottom right of the Retrieve Window 9 Mar 2015 Page 85 Data Types – Results are Events and/or Waveforms T-Link’s data contains your results in the form of events and waveforms. Events are Continuous or Triggered For explanations of the difference see Continuous Logging and/or Triggered Events above. Waveforms are available for Triggered Events Only The figures below show what the retrieve window looks like with the three possible sets of results – also showing available report types: If your settings do Continuous Logging ONLY: Figure 108 - Continuous Events Only If your settings have Triggered Events ONLY: Figure 109 - Triggered Events and Waveforms T-Link does allow both Continuous Logging and Triggered Events at the same time: Figure 110 - Both Continuous and Triggered Events and Waveforms Figure 108: Retrieve window Continuous events only Events, No waveforms Only events to retrieve Waveform reports N/A Continuous reports OK Spreadsheet reports OK 9 Mar 2015 Page 86 Figure 109: Retrieve window Triggered events only Events and waveforms, In equal numbers Events and waveforms to retrieve Waveform reports OK Continuous reports N/A Spreadsheet reports OK Figure 110: Retrieve window Continuous and Triggered events Events and waveform, More events than waveforms Events and waveforms to retrieve Waveform reports OK Continuous reports OK Spreadsheet reports OK 9 Mar 2015 Page 87 All events and waveforms to the same location 1. This is the default option, T-Link will automatically select all those events and waveforms you have not yet retrieved. You can think of this as ‘Retrieve New’. T-Link will not retrieve the same data twice 2. Make sure the Site and Location names are correct - Sites and Locations 3. And select any report options you want - Retrieve and Report options Then press the Retrieve Button at the bottom of the Retrieve Window: Figure 111: Press to Retrieve Data Select which waveforms and which locations All events and waveforms to the same location is the recommended and easy way to retrieve data, but there are sometimes reasons for going to the extent of selecting specific data – for example: A portable monitor may have been used at more than one Site or Location and you will then need to specify the Sites and/or Locations for each event. A monitor contains many events or waveforms you know you do not need; use the selection to retrieve only those of interest. To select events and/or waveforms, highlight the Select which waveforms and which locations option – see red arrow in Figure 112. Figure 112: Select What is Retrieved option highlighted Sometimes, if there is a lot of data in the monitor, you may not know what data has already been retrieved. In this case, press the [+] box at the blue arrow in Figure 112 to display the details as in Figure 113. 9 Mar 2015 Page 88 Figure 113: Data in Monitor Summary Press the same (now [-]) box (see blue arrow in Figure 113) to hide the data summary display. Monitoring Sessions Events not yet retrieved are presented in groups representing all the events for each time the monitor went duty and was stopped – a “Go and Stop” group or ‘Monitoring Session’. All events in a Monitoring Session must have been captured at one location, so this provides a simple way to select the events. The monitoring sessions are displayed showing you the number of events and the date and time when the monitor went duty and when it stopped. First select which monitoring session/s you wish to retrieve by ticking the box shown with the red arrow in Figure 114. Once you have seen the monitoring sessions’ events, you may wish just to Select All displayed events – select the box shown by the blue arrow in Figure 114. This is effectively the same as All events above, except you can still specify which waveforms if there are any. Figure 114: Event selection Once you have selected to retrieve the events from a monitoring session, you can select the site and location for those events, using the drop boxes shown with red arrows in Figure 115. 9 Mar 2015 Page 89 Figure 115: Select events Retrieve box ticked If the events have waveforms attached, you must select to retrieve them or they will not be retrieved: Either: Retrieve all waveforms for the group by checking the “Retrieve all # waveforms” box – see red arrow in Figure 116 below, Or : Click the [+] box (blue arrow in Figure 116) to show the individual waveforms for selecting as in Figure 117. Figure 116: Selecting Waveforms Figure 117: Select individual waveforms To select one of the waveforms, just tick the box next to it, see the red arrows in Figure 117. 9 Mar 2015 Page 90 The waveforms are identified by the date and time of the event and a summary of the results – for a standard compliance ‘blast’, the results displayed are Vector Sum, Peak dBL and ERTGZ. ERTGZ Definition ERTGZ (Estimated Range To Ground Zero) is an estimate of the distance from the trigger event to the monitor derived from the Microphone Peak Arrival Time. Identify the Individual Waveform Events by result Information To identify the results, hold the mouse over an event row, and a tool tip of the results and result ‘header’ as shown for Event 2 in Figure 118 will appear. Figure 118: Waveform with Results Tool tip The actual results shown will depend on your settings As events and waveforms are selected, Retrieve and Report options will be enabled to match the selected data – see Figure 123 above. 9 Mar 2015 Page 91 Sites and Locations Before you start retrieving anything you must set up the Sites and Locations where you want the data to be stored. To set up the Sites and Locations, press the button in Figure 119. Figure 119: Sites and Locations Button This shows the window shown in Figure 120: Figure 120: Sites and Locations To enter a new site or a new location, press the corresponding button indicated by the red arrows in Figure 120. The window for entering a new site is below in Figure 121. The window for entering a new location is below in Figure 122. Site Name restrictions Because the Site Name is a folder name in windows, it must follow Windows folder naming conventions, which will not allow ASCII/Unicode characters 1 through 31, as 9 Mar 2015 Page 92 well as quote ("), less than (<), greater than (>), pipe (|), backspace (\b), null (\0) and tab (\t). T-Link also disallows the at symbol (@). Location Names are restricted by the same characters. Also, the site names “System” and “LockedFiles” are reserved. Figure 121: Enter a New Site Name Figure 122: Enter a New Location Name Note: The information on these windows explains how Site and Location names are used in T-Link. Once the site and location have been set up, it is now time to retrieve the data. 9 Mar 2015 Page 93 Retrieve and Report options When you retrieve data from the monitor in T-Link you can now do the report at the time of retrieval. Figure 123 Data retrieval report options In Figure 123 all the report options for Waveforms are shown. The Continuous events and events drop boxes allow you to access the reports for those data types. The report options available will reflect the type of data you are retrieving. Note: All these report options are also available after you have retrieved the data from the Report Window – see Figure 128 below. All Set up – Retrieve It Once you are happy with your selections, press the Retrieve button as shown in Figure 124: Figure 124: Press to Retrieve Data 9 Mar 2015 Page 94 Re-Retrieving your Data If you need to re-retrieve the data from a monitor for any reason - you retrieved it to the wrong Site or Location, for example. Press and hold the Ctrl Key when you click the Retrieve Button on the T-Link Main Window (see Figure 23 above). T-Link will behave as if ALL the data in your monitor is being retrieved for the first time, so you can allocate the data to a different Site and/or Location. This also works when you are connected remotely, but be careful if there is a lot of data, you may have a big retrieval. Clearing the Data in the Monitor From the Retrieve Window (as in Figure 108) you can clear the data in the monitor, before or after retrieving the data. Simply press the Clear Data Button. Figure 125: Clear Data Button This will open the following Clear Data Window: Figure 126: Clear Data Window Press OK to clear all event and waveform data in the monitor. Note: Configuring a Monitor will clear any data in the monitor (you will be prompted if you have not retrieved it all). Once you have cleared the data from the monitor you cannot Re-retrieve it 9 Mar 2015 Page 95 How T-Link Save’s Data Files to Sites and Locations Sites are folders in your T-Link Data Path – see Where T-Link’s Data is stored on your Computer below. Locations appear in their Site Folder and consist of an Event File (*.evt) and any number of waveform (*.twf) and report files (*.rtf, *.xls) with the same names, but different times at the end. E.g. For a Site named ‘Test’ and a location named ‘Test bench’ The Event File for ETM 7500 will be named: "D:\Documents\Texcel\T-Link\Test\M7500 Test @ Bench.evt" A Waveform File may be named: "D:\Documents\Texcel\T-Link\Test\M7500 Test @ Bench @ 2011-10-13 17.50.00.twf" And a Report File may be named: "D:\Documents\Texcel\T-Link\Test\M7500 Test @ Bench @ 2011-10-13 17.50.00 - Report.rtf" T-SiteExplorer The Texcel Suite contains a support T-Link application called T-SiteExplorer. T-SiteExplorer allows you to delete or rename sites and locations, and move T-Link results data between existing sites and locations. Event Files Not Found Message on Startup If you get this message when you start T-Link, it means that the Event Data file referenced in the Event File Index was not found. Any data in that file will not be available for reporting. Figure 127: Event File not found message Unless you know what has happened to the file, it is usually best to say Yes. T-Link will operate normally either way. Saying Yes will not delete any data, and any data files renamed or moved in the Windows file system can be recovered by importing them with T-SiteExplorer. 9 Mar 2015 Page 96 Where T-Link’s Data is stored on your Computer T-Link automatically creates a folder in your Public Documents folder called Texcel, and a folder inside it called T-Link. If you upgrade an older version of T-Link using your My Documents folder, TLink will continue to use that This is the T-Link Data Path where all T-Link’s data is retrieved to. The default folder arrangement is as follows: C:\Users\Public\Documents\Texcel\T-Link C:\Users\Public\Documents\Texcel\T-Link\System C:\Users\Public\Documents\Texcel\T-Link\System\Settings C:\Users\Public\Documents\Texcel\T-Link\Site 1 C:\Users\Public\Documents\Texcel\T-Link\Site 2 Note: Default paths shown are for Microsoft Windows Vista and Windows 7. For Windows XP, the default T-Link folder is here: C:\Documents and Settings\All Users\Documents\Texcel\T-Link The T-Link\System Folder contains details of Monitors and indexes – this data should not be touched except under advice from Texcel. The T-Link\System\Settings contains any Saved Settings you have created. The Site 1 and Site 2 folders are actually named from the site names you supply through the Site Name Window (Figure 121 above), and contain all the data and reports generated for those sites. Figure 17 This whole folder structure can be moved anywhere on your computer or network. Save your Data to a Different Place on your Computer or Network Simply point the T-Link Data Path to the location you want to use. See Path Options – T-Link Data Path on page 148. 9 Mar 2015 Page 97 Managing Multiple Data Paths with Shortcuts T-Link 2 introduces a command line parameter to specify a temporary Data Path. Use this to make T-Link use a specific Data Path for this session. The format of the command line parameter is: /data “Full T-Link Data Path Name” Consult your System Administrator on how to create shortcuts. When run from the normal T-Link shortcut (or from the Start Menu), T-Link will revert to using the T-Link Data Path specified in T-Link Options. Do not modify the installed T-Link Shortcut This allows you to set up separate shortcuts on your Desktop (or wherever you keep your shortcuts) for keeping separate T-Link data sets. T-Link’s Local LOG Files T-Link maintains a separate Local LOG Filed Path to save the System and other LOG files (e.g. Modem LOG File see Advanced Communications Options – Remote below). This defaults to the same Public Folder, as the T-Link Data Path initially: C:\Users\Public\Documents\Texcel\T-Link If you move your T-Link Data Path, the Local LOG Files Path stays where it is. It is important that the LOG Files are accessible even if the Data Path is on a network location that is temporarily inaccessible If you do not move your T-Link Data Path, the Local LOG Files Path is not visible in Path Options in T-Link Options. T-Link’s Shared LOG File All T-Suite applications now share T-Link’s System LOG File, so it is easy to follow what has happened across different applications. When a Shared Data Path is active, all network users share the same LOG file – see TSuite creates a Shared System LOG File for all Network Users below. 9 Mar 2015 Page 98 Reporting your Results In this section you will be shown how to create various reports from data that has been retrieved. To access the reports area of T-Link, press the Report Button shown in Figure 128: Figure 128: Report Button This will show the T-Link Reports window with no Report Type selected. The Site and Monitor will conveniently default to the one you last used. Figure 129: Reports Window as first opened 9 Mar 2015 Page 99 Reports Setting Up your Printing Options T-Link will select the default windows printer, and locate Microsoft Word and Microsoft Excel automatically when it first starts. In T-Link’s First Run (see Figure 6), you are asked to enter your name and company name. Access your Printing Options from the T-Options application – see T-Link Options on page 140 below. Unless you need to change any of these things there is no need to use Printing Options. From this window you can personalise your Reports, Press the Personalise Button (shown in Figure 130) at the top right of the Report Main Window (Figure 129). Figure 130: Printing Options Button This will open the Personalise Window. Printing Options – Personalise Figure 131: Printing Options - Personalise 9 Mar 2015 Page 100 Your Company Name and Operator’s Name (red arrows in Figure 131) appear on many reports – especially the Compliance Reports. Type the names you want at the red arrows. Blast Reports allow you to use a picture file on your disk as a Logo on your printed reports. Tick the ‘Use a Logo’ box (blue arrow in Figure 131) and the Logo Details box will show. Type in the Picture File Name or click the … button (green arrow) to select the file from your disk. If you have a wide logo, you can tick the ‘Use the whole first line’ box (purple arrow). Note: T-Link does not scale your image, which will normally be located in the top left corner of the blast report sheets. To include your company logo on blast reports, you should first adjust the image to the desired size, which is recommended not to exceed 50 mm (2 inches) wide. If the logo is larger than this, you may wish to tick the option Use the whole first line, in which case your company logo will occupy the entire top line of the blast report sheets. Report Types There are a number of different report types, some are compliance reports or reports for specific purposes, but there are reports that export data for analysis, usually with Excel. Figure 132: Report Type Selection Figure 132 shows all the Report Types to select from. When you have pressed one of the buttons for the type of report you wish to generate, the Available Formats drop box will show the report Formats or Options for that Report Type. It will automatically select the last used report of that type at the Site and Location selected. There will also be a few more to choose from; just open the drop box (click at the red arrow in Figure 132) to view them. 9 Mar 2015 Page 101 Blast Reports Figure 133: Blast Report Formats The Blast Report is the Compliance report for blast monitoring. The two basic layouts both include the waveform graphics and Vector Sum Peak, Microphone peak (if MIC was used), as well as a table of results for each channel of the triax including peak, time and frequency (zero cross) of the peak, and acceleration and displacement results estimated from the zero cross frequency. If you find that you have used up all of your waveform memory in the monitor but you were able to capture the blast data, use ‘Triggered but no Waveform’ to get a textural report with all the same details as the standard Blast Report – i.e. there will be no graphic. If the monitor was set up and running, but the blast was too small to trigger the monitor, a report is available which will show when the monitor was started and stopped, and what the trigger levels were at the time – ‘Monitored but Blast was too small to Trigger’. Waveform Reports Figure 134: Waveform Report Formats Waveform Reports will work with any waveform (Blast Reports require Compliance Settings). The ‘Export to CSV’ makes a row for each sample point in the waveform, the first column is the time (negative before trigger point) and each monitored channel has a column. This allows simple graphing of the data in Excel and simple export to other data analysis programs. A table of channel settings is displayed to the right of the data columns. Landscape and Portrait Plots allows a detailed view of the waveform in printed form. Little information is on the report other than the monitor number, date and time of the event, and site and location. 9 Mar 2015 Page 102 Continuous Reports Figure 135: Continuous Report Formats Continuous Reports are specialised reports that include some analysis and formatting of the collected data for a specific purpose: Graph by Date and Time – An Excel automated report (macros must be allowed to run if they are stopped by your security settings) collects data into a preset series of graphs and plots all points in the data set against date and time – providing an immediate graphical view of the data set. The raw data is available as a separate sheet; This is the identical Report Format as available in ‘Spread Sheet’ Report types, but reports ONLY the continuous events in the selected periods. Amplitude Frequency Histogram – An Excel automated report (macros must be allowed to run if they are stopped by your security settings). All continuous events are summarised in a Frequency Histogram and plotted versus time (with a permissible level indicated) on a single printable page. The report defaults to plotting the Vector Sum, but options available in the spreadsheet allow selecting a component of the triax or the maximum component as well as selecting the number of bins for the histogram and the permissible level; Noise Study Results - An Excel automated report (macros must be allowed to run if they are stopped by your security settings). Each duty period in the selected events is reported separately. The data for the period is analysed and an LAeq, LAmax, LA1, LA10 and LA90 result generated for the period. All points are plotted with dBA on the vertical and time on the horizontal axis – the generated LA values are displayed as straight lines across the graph. The raw data is available on a separate sheet; VDV based Vibration Study – A text based report, where VDV reports are tabulated by date and time of the monitor’s duty, summarised in daytime and night-time periods as recommended in NSW EPA interim BS 6472 update. 9 Mar 2015 Page 103 Spreadsheet Reports Figure 136: Spreadsheet Report Formats Spreadsheet reports export all data to an Excel (or other) spreadsheet for analysis. They are actually exported in tab-delimited text format, and the data is left on the disk in a .txt file: Standard data reports maximum peaks for each channel and collects column headers by channel; Diagnostic reports both positive and negative peaks for each channel and collects columns by result type. Both data sets’ first columns are date, time, monitor serial, and trigger source; Graph by Date and Time – An Excel automated report (macros must be allowed to run if they are stopped by your security settings) collects data into a preset series of graphs and plots all points in the data set against date and time – providing an immediate graphical view of the data set. The raw data is available as a separate sheet; This report type is also available under Continuous Report Types, where threshold events are excluded from the report. This is useful for neat summaries when Triggered and Continuous Logging modes are used at the same time. Export Events to Spreadsheet – Just exports the selected data and opens it in the spreadsheet. Monitor Pro Export – A specific report with features for automated import by a background process. Contact Texcel if this sounds useful. 9 Mar 2015 Page 104 Monitor Reports Figure 137: Monitor Report Formats Activity Reports – Provide a text report (in Word) that displays the activity of a monitor, recording both any data related activity (when the monitor went duty, when it was stopped/turned off, any changes to trigger levels, …) at the monitor itself, and T-Links interactions with the monitor (connecting, configuring, retrieving data); History – opens the raw (unformatted) history file in Notepad. There is more information in the history file than is reported in the Activity Report, but this is mostly for use with Texcel Support; Settings Currently in Monitor – This is the same report presented after configuring a monitor from Texcel Settings (see Texcel Settings) or from the Custom Settings Window (see Custom Settings). The reason for having it here is that the report is available even if the monitor is not. 9 Mar 2015 Page 105 Creating a Report The T-Link Reports Window shows 3 sections numbered from 1 to 3. These indicate the steps you take to generate a report. The data presented and information requested will vary according to the Report Type, but the process is the same. Step 1 – Select the Report Type Figure 138: Select Report Type Click on one of the 5 report Type buttons shown by red arrows in Figure 138. A simple explanation of the Report Type is shown in orange under the buttons. Also select the Report Format from the drop box (blue arrow) if you need to. T-Link will remember the format you used last time. Step 2 – Select Site and Monitor Figure 139: Select Site and Monitor This will default to the last data you retrieved, so will often be in the right place. Select Site and Location from the drop boxes at the red arrows in Figure 139, and monitor from the drop box at the blue arrow. Note: For Monitor Type Reports, the Site and Location drop boxes will be greyed out because you only need to select a Monitor. 9 Mar 2015 Page 106 Step 3 – Select Events Figure 140: Select Events The actual display of events will depend on the Report Type selected, but the top of the Select Events section is always the same. It defaults to showing you events from the last two weeks only. The events displayed are always those events between the From Date and the To Date. The To Date always starts at ‘today’. Set the From Date by clicking at the red arrow and the To Date by clicking at the green arrow. By selecting dates, any block of events at the selected Monitor, Site and Location can be shown. You can select any date on either date control, but dates in the future will be inaccessible. Tick the Select All box (purple arrow in Figure 140) to select all displayed events. Selecting Waveforms or Individual Events Just like the Retrieve Event Selection (see Figure 114), events are displayed in Monitoring Sessions – each session representing all events captured between when a monitor went duty and was stopped. The date and time of the Go Duty and Stop are displayed in boxes as identified by the red arrows in Figure 141, and the number of events in the session is displayed as shown by the blue arrows in Figure 141. For Blast and Waveform Reports, all the events are displayed under the monitoring session headers. Select all events in a monitoring session group by ticking the boxes at the green arrows, or select individual events by ticking the boxes shown by the purple arrows. 9 Mar 2015 Page 107 Figure 141: Select Waveforms for Report Here two events have been selected. When you select more than one event and want to generate multiple reports, the boxes shown by the orange arrows in Figure 141 display, telling you how many documents will be created when you click the Report button, or how many windows will be opened if you click the ViewW button. It is easy to select a whole lot of events and tell T-Link to generate many documents or open many waveforms in ViewW. This can take quite a long time and care should be taken. Selecting Events not Waveforms If you select the Triggered Event but no Waveform Blast Report Format, you will be changed to selecting events. The Select Events window works exactly the same, except the event is displayed showing the vector sum and microphone peak results, instead of the site and location as used for the waveforms. 9 Mar 2015 Page 108 The ViewW Button for Waveforms Figure 142: ViewW Button When you are selecting Waveforms, the ViewW button will be displayed. If you click the ViewW button without any events selected, ViewW will open in the TLink Data Path, allowing easy access to all your site folders where the waveforms will be found. See How T-Link’s Data is stored on your Computer. Once you have selected an event, clicking the ViewW button, will open that waveform in ViewW directly – you will not need to browse your disk to find it. The From File Button for Waveforms Figure 143: From File Button When you are selecting Waveforms, the From File button will be displayed. If you click the From File Button, you will be able to browse your disk to find any Texcel Waveform File or files (*.TWF). Any selected Texcel Waveform Files will be printed using the currently selected Report Format. There is no way for T-Link to confirm that an opened file will print correctly with the selected template. ViewW is Supplied with T-Link ViewW is an Application for viewing and analysing Texcel Waveform files, as recorded by T-Link (and the older EasyLink) monitors. 9 Mar 2015 Page 109 Step 3 for ‘Blast was too small to Trigger’ Figure 144: Specify Details for 'Blast too small to Trigger' Specify the Date the Missed Blast occurred, by editing the displayed date text or clicking at the red arrow in Figure 144 to drop down a calendar and pick a date. Specify the Time of the Missed Blast by typing over the displayed time, or by clicking the Up Down at the blue arrow in Figure 144. The report uses the date and time to search the monitor’s history and print a report of what the monitor was doing at the time, including its Trigger Level Settings if it was monitoring at the time. If it captures no events and you want to use the ‘Missed Blast’ Report Before you demount the monitor, close off the session, and create a test session: Stop the Monitor Go Duty again Cause a Trigger Retrieve that test event to the correct site and location If it says No Monitoring Recorded (or No Dates Shown) For T-Link to allocate an empty Monitoring Session to a Site/Location, it needs to retrieve something to that location since that ‘empty session’ – follow this procedure: BEFORE you use the monitor at another location: 1. Go Duty (on the bench is ok) 2. Cause a trigger 3. Retrieve it to the correct site and location These procedures will allocate the previous ‘empty monitoring session’ (without any events) to the selected site and location, and the ‘Missed the Blast’ Report will behave correctly. 9 Mar 2015 Page 110 Step 3 for Continuous and Spreadsheet Figure 145: Select Events for Continuous and Spreadsheet Reports For Continuous and Spreadsheet Reports, the selection process is almost the same as that shown for Events and Waveforms (see Figure 141 above), except that you can only select the events in whole Monitoring Sessions. You cannot see or select individual events on this screen. For Continuous Reports, only those Monitoring Sessions that contain Continuous events are displayed and able to be selected. Spreadsheet reports report both Continuous and Triggered events in the same report. Step 3 for Monitor reports Figure 146: Specify Details for Monitor Reports Monitor Activity Reports requires you to specify a start and end date and time for the report as shown in Figure 146. Specify the Dates, by editing the displayed date text or clicking at the red arrows in Figure 146 to drop down a calendar and pick a date. Specify the Times by typing over the displayed time, or by clicking the Up Down at the blue arrow in Figure 146. The End Time defaults to the end of today – i.e. the day you are printing the report. The Start Time defaults to the beginning of the day 7 days ago, but if you change this, T-Link will remember how many days you requested and use that as the default for next time. 9 Mar 2015 Page 111 Report Button All Reports are actually printed by clicking the Report Button: Figure 147: Report Button Note: The Report Button will not be enabled until you specify enough details on the window to generate a report. 9 Mar 2015 Page 112 Some Example Reports An ANZECC/USA Standard Blast Report The example in Figure 148 shows a waveform from a series of bumps on a desk – Settings are Texcel Standard Bench test. Figure 148: ANZECC/USA Standard Blast Report from Bench Test 9 Mar 2015 Page 113 Blast Report - Triggered Event but no Waveform The ‘text Blast Report’ – also allows a comment area: Figure 149: Blast Report - Triggered Event but no Waveform 9 Mar 2015 Page 114 Blast Report – Monitored but Failed to Trigger Figure 150 - This again is a ‘desktop’ example – where the monitor only went duty for a few seconds, but the report detail is correct: Figure 150: Blast Report - Monitored but Failed to Trigger 9 Mar 2015 Page 115 Waveform Reports - Portrait and Landscape Figure 151 shows a ‘desktop’ reported in Portrait and Figure 152 the same event in Landscape: Figure 151: Waveform Report – Portrait Figure 152: Waveform Report – Landscape Note: The number of displayed waveforms will depend on the TWF file. 9 Mar 2015 Page 116 Continuous Report - Amplitude Frequency Histogram A short set of samples using an accelerometer (Geophone report will look the same): Figure 153: Continuous Report (Accelerometer) - Amplitude Frequency Histogram 9 Mar 2015 Page 117 Continuous Report - Noise Study Results This again is a ‘desktop’ example – where the monitor only went duty for a few seconds, but the report detail is correct: Figure 154: Continuous Report – Noise Study Results 9 Mar 2015 Page 118 Continuous Report – VDV This again is a ‘desktop’ example – an overnight test showing the VDV day and night summary periods: Figure 155: Continuous Report - VDV 9 Mar 2015 Page 119 Spreadsheet Report - Graph by Date and Time – Standard This is the same data reported in Diagnostic format below – so you can see the different ways the data is presented – there are more sheets in the full report: Figure 156: Spreadsheet Report – Graph by Date and Time Standard – Compliance Figure 157: Spreadsheet Report – Graph by Date and Time Standard – Peaks mm/s Figure 158: Spreadsheet Report – Graph by Date and Time Standard – Average and RMS 9 Mar 2015 Page 120 Spreadsheet Report - Graph by Date and Time – Diagnostic This is the same data reported in Standard format above – so you can see the different ways the data is presented – there are more sheets in the full report: Figure 159: Spreadsheet Report – Graph by Date and Time Diagnostic– Compliance Figure 160: Spreadsheet Report – Graph by Date and Time Diagnostic – mm/s Figure 161: Spreadsheet Report – Graph by Date and Time Diagnostic – dBL 9 Mar 2015 Page 121 Monitor Report – Activity Summary A simple Desktop Example: Monitor configured then Duty and captured 3 events which are immediately retrieved. Then the monitor is left on the desk, times out and goes to sleep to save power. Two further sessions capture 3 and 4 events respectively. A couple of days later, it is turned on again and history retrieved: Figure 162: Monitor Report – Activity Summary The Activity Report Including Filenames adds the full path and filename for any file that T-Link writes as retrieved data from the monitor; otherwise it is the same as this report. Notes: The highlights for Go Duty and Stop. Also the voltage at the end of some lines is the internal battery; For Remote Operation significantly more detail is shown including modem signal strength. 9 Mar 2015 Page 122 Monitor Report - Settings Currently in the Monitor This is a simple setting (basically Texcel 1 - Bench Top Test): Figure 163: Monitor Report - Settings Currently in the Monitor This is the same report as is available in Texcel Settings (see Figure 37) or Custom Settings (see Figure 94). Note: This report is available even if the monitor is not available. 9 Mar 2015 Page 123 Remote Connections Remote Communications Press the Remote Connect button (Figure 164) to show the T-Link Remote Control Panel (see Figure 165). Figure 164: Remote Connect Button Here you access Communications Options and all Connections to Remote ETMs. Figure 165: T-Link Remote Control Panel When you press the Remote Connect button, the Remote Control Panel shows with a dropdown of known monitors and Connect Using options. Note: When you Press the Remote Connect button, T-Link disables its local connection buttons (Texcel Settings, Custom Settings and Retrieve), until you connect to a monitor, or press the Close Button on Figure 165. 9 Mar 2015 Page 124 Setting your Communications Options T-Link will automatically find and use any COM Ports (including connected USB Serial Adaptors when properly installed). There is no need to use Communications Options unless there are problems connecting to a Monitor, or under Texcel Support advice. Press the Communications Options Button (Figure 166) to access the Communications Options. Figure 166: Communications Options Button The Communications Options here are identical to the standard Communications Options accessible from the T-Options application – see T-Link Options on page 140. 9 Mar 2015 Page 125 Setting Up a Local Modem for Dial-In Remote Monitors To Dial Up a remote Monitor, you need a modem connected to (or inside) your PC/laptop, which is connected to a telephone line. When T-Link has set up your Local Modem, it will display the detail on the Remote Control Panel as shown in Figure 167. Figure 167: Remote Control Panel with Dial-In Modem Set up The first time you select Modem Dial In (red arrow in Figure 167 above), T-Link will look for and require you to Setup your Local Modem. It will also take you through this process if the modem you last specified has changed, even if all you have done is plug it into a different COM Port; You can also change this detail, or set up a different modem by pressing the Local Modem … Button at the blue arrow in Figure 167; Once the Local Modem is set up, you can type a phone number in the Dialling Box (at the green arrow Figure 167). This option is always available; so that you can connect to a monitor you have never connected to before, however, once you have connected to a monitor, it will appear on the list and be easier to just select – see Figure 175 below. 9 Mar 2015 Page 126 First Scan for a Local Modem The setup process for the local modem scans for local modems and will show you how many modems it found. As shown at the red arrow in Figure 168. Figure 168: Local Modem Setup Window Click the drop box at the blue arrow in Figure 168 to select the modem you want to use. T-Link will automatically set up the modem for you and display the details as shown in Figure 169 below. 9 Mar 2015 Page 127 Figure 169: Local Modem Selected T-Link’s auto Selected Initialisation Strings for your modem are displayed at the red arrow in Figure 169; Press the Auto Select Button (blue arrow in Figure 169) at any time and T-Link will retest your modem and re-generate these Initialisation Strings; You can disable the use of T-Link’s auto selected initialisation strings by un-ticking the box Use T-Link Selected Initialisation Strings (green arrow in Figure 169). Important: Only do this if you are very sure you know what you are doing, or under Texcel Support direction. You should check if you need to set any more parameters for your modem. These are shown in Figure 170 below. 9 Mar 2015 Page 128 Figure 170: Local Modem Advanced Setup This modem must dial a number for an outside line (red arrows in Figure 170). Tick the box to show the text box into which you can type whatever number (or numbers) you need to dial to access an outside line through your PABX (usually a ‘9’ or ‘0’ – although do NOT type the ‘’’ characters). Sometimes you will need to append a comma, which will insert a 1 second wait after the access number is dialled to wait for the PABX to provide the outside line; Reset the modem when finished with a call (blue arrows in Figure 170). If you use this modem to connect to other equipment, and, after T-Link has used it, it won’t connect to the other equipment at all, or you have to turn it off and on again before it does, use this option. Tick the box to show the text box into which you can type the Reset Command. This would normally be ATZ or AT&F. Check your modem manual. Any changes here will require you to ‘Test All’ – see below: 9 Mar 2015 Page 129 Specify your own Initialisation Strings You can add or replace T-Link’s auto selected initialisation strings if you need to. Important: Only do this if you are very sure you know what you are doing, or under Texcel Support direction. Tick the box at the green arrow in Figure 170, and type the new string or strings into the text box at the purple arrow. Any changes here will require you to ‘Test All’ – see below. Test All Changes Before any changes to modem initialisation are allowed to be set, they have to be tested. Test All Button (orange arrow in Figure 170). If you make any changes to any of the Initialisation or Reset Strings, T-Link will want to test them on your modem before it will let you save them. The test All Button will be displayed (and the message in red) and the OK Button will be disabled. Press the Test All Button and T-Link will try all your strings – with some informative messages – if any fail, it will tell you which. If they Test OK, you will see this message, and the OK Button will be enabled: Figure 171: Local Modem Tests OK 9 Mar 2015 Page 130 Setting Up T-Link for Private Network Remote Monitors When T-Link has set up your Private Network Access, it will display the detail on the Remote Control Panel as shown in Figure 172 (here set up for Broadband Access). Figure 172: Remote Control Panel - Packet Mode Broadband Access The first time you select Private Network (red arrow in Figure 172), T-Link will look for and require you to Setup Private network Access. If you are using Modem access, it will also take you through this process if the modem you last specified has changed, even if all you have done is plug it into a different COM or USB Port; You can also change this detail, or set up a different mode (or modem) by pressing the Set IP Access … Button at the blue arrow in Figure 172; Once the Private Network Access is set up, you can type an IP Address in the IP Address Box (at the green arrow Figure 172). This option is always available, so that you can connect to a monitor you have never connected to before. However, once you have connected to a monitor, it will appear on the list and be easier to just select – see Figure 175 below. Private Networks and Packet Mode – A Note on Terminology The Communications Protocol used here is TCP/IP (Transmission Control Protocol/Internet Protocol. Much of the reliability of the Internet Protocol comes from it breaking all messages up into little packets that can be managed separately. Hence: Packet Mode = TCP/IP (= Part of the Internet Protocol Suite) The Private Network you use here is a small part of the internet (or its address space) that is isolated by the telecommunications provider (mostly Telstra in Australia) from public access, a bit like the small network inside a company or home, but protected at a much deeper level from external access.. Devices in a Private Network communicate using Packet Mode or TCP/IP. 9 Mar 2015 Page 131 Specifying Private Network Access To connect to a Monitor using Private Network (Packet Mode) communications, you need: Either Broadband Internet Access from the PC Make sure these details are set correctly: VPN software installed on the PC provided by your Private network supplier A private network account for the VPN and login details Or A Packet Mode capable Modem connected to the PC Make sure these details are set correctly: A mobile data network account – provides a SIM A private network account and login details Note: These must be set up correctly before you can proceed here. Check with your Network Supervisor or Texcel Support. The setup process will take you initially to Figure 173 with broadband selected, after that it will take you to either broadband or modem setup, depending on your current selection. Before you proceed, make sure you have on hand For each Remote ETM: 1. Username 2. Password 3. IP Address The modems must also have a correctly set up SIM and Data Plan installed – refer to Private network documentation For Modem to Modem Access The same details as for the remote ETM above For your VPN Access The VPN Client must be running on your PC, and connected to your Private network before you can connect to a Remote ETM on that private network. 9 Mar 2015 Page 132 VPN via Broadband Internet Access from the PC To select VPN Private Network access tick My Existing Broadband Access at the red arrow in Figure 173. Figure 173: Private Network Access Setup – Broadband Access Before you can confirm a Network Access you must run the Test (Press the button at the purple arrow in Figure 173. If T-Link can access the network successfully, the OK Button (green arrow in Figure 173) will be enabled. To test broadband access T-Link simply ‘pings’ the Test Address. You can change this to a different address by typing a new valid internet address at the blue arrow in Figure 173. 9 Mar 2015 Page 133 A Packet Mode capable Modem connected to the PC Figure 174: Private Network Access Setup – Modem Access Tick the A Modem Connected to this PC option at the red arrow in Figure 174, to show the Modem Access details; The details User Name, Password and APN Name will be given to you when you get a Private Network Account – these details need to be filled in correctly at the blue arrows in Figure 174; Leave the Baud Rate (green arrow in Figure 174) at the maximum of 115200 unless advised to lower it; Test All Changes When you press the Test Button (purple arrow in Figure 174), T-Link will attempt to Log onto your private network using the account details you provide. If this is successful, T-Link will enable the OK Button (orange arrow in Figure 174) so you can confirm the setup and return. 9 Mar 2015 Page 134 Connecting to a Remote Monitor While you can always type in the phone number (as shown in Figure 167 ) or IP Address (as shown in Figure 172), it will be much easier to select the remote you need from the drop box shown at the red arrow in Figure 175. This shows all monitors that you have connected to before and remembers all the address and set up details for you. Figure 175: Select your Remote Monitor If you select a Monitor, details of the remote timetable are shown, indicating whether the remote monitor’s modem is currently available (see Red Arrow in Figure 176): Figure 176: Remote Monitor Selected - Showing Timetable Once the details are correct, the Connect Now Button (Figure 177) is enabled. Figure 177: Remote Connect Now Button Press this button to connect to the remote monitor. 9 Mar 2015 Page 135 Connection Progress Progress of the connection is displayed in a Status window as shown below in Figure 178. Figure 178: Remote Connecting Status (Dial In) The connecting status is the same for Packet Mode connections: Figure 179: Remote Connecting Status (Packet Mode) Any problems with the connection will also be displayed as shown in Figure 180. Figure 180: Remote Connecting Failed (Dial In) It is important to take note of any failed message here, so it can be easily fixed or reported to Texcel Support – Here NO DIALTONE is fixed by connecting the modem to the phone line (it can also relate to the Outside Line Access). 9 Mar 2015 Page 136 The Connected Monitor Control Panel Once Connected the Remote Control Panel displays details of the remote ETM: Figure 181: Remote - Monitor Connected The Connected Monitor Details are shown in the box identified by the red arrow in Figure 181. The remote monitor is polled every second to keep the connection alive. Heading Displays: Status Whether the ETM is On Duty or At Menu (or Triggered) ETM Serial Number of Remote ETM Time Time at remote ETM – regularly updated Time Zone Time Zone in Settings of Remote Battery Battery Voltage at remote ETM – updated every 10s Sun Solar Panel Charging at remote ETM – updated every 10s Events Number of Events in ETM/Maximum Number in Settings Waveforms Number of Waveforms in ETM/Maximum Number in Settings Histories Number of Histories in ETM/Maximum Number Idle Communications Timeout If you leave the monitor connected and walk away from your desk, T-Link will wait 15 minutes (can be changed in T-Link Options Advanced Communications Options – Remote below) and then hang up. Figure 182: Remote Control Panel - Idle Timeout Here the time left before hang up is shown at the Blue Arrow. 9 Mar 2015 Page 137 Configure, Retrieve and End the Call You will note that the buttons enabled on the T-Link main screen change when a remote ETM is connected. Use the Retrieve Button (Figure 183) to Retrieve the data in the monitor. This behaves the same as described above in T-Link’s data retrieval is as easy as 1,2,3 above. Figure 183: T-Link Retrieve Button Use the Custom Settings Button (Figure 184) to Re-Configure or change any configuration details in the monitor. This behaves the same as described above in Custom Settings above. Figure 184: T-Link Custom Settings Button You will also notice the main T-Link Close button is disabled when another window is opened. T-Link requires you to correctly disconnect from the remote by pressing the End Call Button on the Remote Control Panel – see the blue arrow in Figure 181 above. Retrieve While Sampling By default T-Link will not interrupt a remote ETM sampling (Duty) to retrieve data. Some things you do, like configuring the ETM, clearing data or synchronising the time will require the ETM to stop sampling briefly. In each case you will be prompted to ask you if you are sure you want to interrupt the sampling at this time – see Figure 187 below. You can change this in Advanced Communications Options – Remote below. 9 Mar 2015 Page 138 Clearing Data from the Remote Control Panel Use the Clear Data Button (Figure 185) on the Remote Control Panel (Figure 181 above) to clear data in the remote ETM. This behaves the same as the Data Clear Button on the Retrieve Window – See Clearing the Data in the Monitor above. Figure 185: Data Clear Button on Remote Control Panel Synchronising Time from the Remote Control Panel Use the Sync Time Button (Figure 185) on the Remote Control Panel (Figure 181 above) to synchronise the time in the remote ETM. Figure 186: Sync Time Button on Remote Control Panel If the monitor is currently On Duty, you will be prompted that to synchronise the time, the sampling must be stopped. Figure 187: Sync Time requires sampling to stop? If you click Yes, the monitor will be stopped to duty, time synchronised and restarted. Note: If the remote monitor was configured with T-Link 2, a Time Sync to a different time zone will keep the correct remote time offset. 9 Mar 2015 Page 139 T-Options T-Link Options T-Link’s options are divided into four sections Communications Options: COM Port and Modem access, Local and Remote communication packet timing and Modem. Path Options: Control where T-Link saves its data. Printing Options: Select Printer, Word Processor and Spread Sheet access and also personalise your reports. Imperial Units: Switch between Metric and Imperial unit systems. All options are now accessible from the Texcel Programs Menu and from a shortcut (See Figure 188) installed to your desktop when you install T-Link. Figure 188: T-Options Desktop Shortcut This will open the T-Options Main Window: Figure 189: T-Options Main Window 9 Mar 2015 Page 140 Communications Options T-Link will automatically find and use any COM Ports (including connected USB Serial Adaptors when properly installed). There is no need to use Communications Options unless there are problems connecting to a Local Monitor, or under Texcel Support advice. Press the Communications Options Button (Figure 190) on T-Options Main Window (Figure 189) to access the Communications Options. Figure 190: Communications Options Button Communications Options – COM Ports Note: If you have T-Sched installed, a Scheduler tab will be displayed here as well – see the T-Sched manual for Scheduler Communications options. Figure 191: Communications Options – COM Ports Scan Scan for Available Ports (Default) (red arrow in Figure 191). T-Link’s normal behaviour is that at start-up (and whenever you try and connect locally) it asks Windows for its list of COM Ports. When you try and connect to a local monitor (connected to your PC), T-Link starts at the beginning of this list and looks for a monitor at each COM port. This list is displayed on this Options Window as shown on Figure 191 with purple arrows. It is also displayed (except for ones marked modem) when you see the Look Harder Window. 9 Mar 2015 Page 141 Note on USB to Serial Adaptors: It is important to note that when you connect a USB to Serial Adaptor to your PC/Laptop, Windows allocates it a COM Port Number and it de-allocates it when you unplug it - i.e. if your USB to Serial Adaptor is NOT plugged in, the COM Port it creates will not exist in Windows. This means that the default ‘Scan for COM Ports’ is the safest way to use TLink with USB to Serial Adaptors. Scan Again Now Button (orange arrow in Figure 191). Click this to see any changes to Windows List of COM Ports, i.e. when you plug in a USB adapter. Sometimes, however, it is useful to override this list – especially if you use a Blue Tooth adaptor, which will create a large number of ‘Virtual COM Ports’. This can slow T-Link down (sometimes by minutes) when it starts up and when you try and connect. Specify COM Ports (Advanced) (red arrow in Figure 191). This will turn the COM Port List into a list of tick boxes, where you can select which ports to use and which to leave out. This is shown by the purple arrows in Figure 192. Figure 192: Communications Options – COM Ports Specify Selecting only valid COM Ports here will significantly speed up the COM Port scan process when T-Link starts up or tries to connect to a local monitor. You can also disable modems that you do not want to use here. Tick only those that you do want to use; 9 Mar 2015 Page 142 Advanced Communications Options There are further Communications Options that may be useful in certain situations, but can also cause unexpected results if used inappropriately. Contact Texcel for a Password to use these Advanced Communications Options. Use these options only as directed by Texcel Support. Typing the password into the box shown at the Green Arrows in Figure 191 and Figure 192 above will add the following Advanced Communications Options: Figure 193: Advanced Communications Options – Modem Advanced Modem Advanced Options Access Modem Advanced options by ticking the box shown at the red arrow in Figure 193. These additional fields provide for modems that show particular or unusual behaviour: Has a fixed Baud Rate (blue arrow in Figure 193). This has been provided for local modems that are not able to auto-baud. The ModMax in serial port mode uses this. Identify Modem Name/Model with (green arrows in Figure 193). Some modems will be hard to identify, or will repeatedly show up as a ‘new modem’ every time you try and use them, changing these options can fix this. Note: Changing these ‘Identify fields’ will change the ID of all modems currently used and they will appear as ‘new’ the next time you use them! 9 Mar 2015 Page 143 Advanced Communications Options – Remote Click the Remote Tab (purple arrow in Figure 193) to access this window: Figure 194: Advanced Communications Options – Remote Wait for Modem Connection (red arrow in Figure 194). When dialling a remote monitor, T-Link waits this long for the modem to report ‘CONNECT’, and then gives up and reports connect failure. If you consistently get the message Failed 'Timeout' when trying to connect to a remote, increase this number; Wait before First Packet (blue arrow in Figure 194). After the remote modem reports ‘CONNECT’, T-Link waits this long before looking for the monitor – giving the connection time to ‘settle’. Increase a little if you get consistent Query Monitor Failed 'Timeout’ messages when connecting remote; Wait after Modem Connect (green arrow in Figure 194). T-Link tries to find a remote monitor for this long after a modem reports ‘CONNECT’. Increase if you get consistent Query Monitor Failed 'Timeout' messages when connecting remote; Always Stop Remote Monitor Sampling (grey arrow in Figure 194). When T-Link 2.0 (or newer) connects to a remote monitor, it will not interrupt the monitor sampling i.e. it will continue to capture events while you retrieve data. Some actions (Clear Data, Configure) will require the monitor to be stopped, and T-Link will inform you of this. Texcel Support may ask you to check this box to disable this behaviour if it cause problems 9 Mar 2015 Page 144 Connection Idle Timeout (purple arrow in Figure 194). If you connect to a remote monitor and leave T-Link sitting at the Remote Control Panel, T-Link will keep the connection open by polling the remote monitor and updating the time (and other info). If you do nothing to the remote monitor for this long, T-Link will tell the remote to Go Duty and hang up the connection; Max Dial-In Bytes in a Block and Packet Mode Bytes in a Block (orange arrows in Figure 194). With some remote connections (especially wireless), the maximum block size (number of bytes you can get at a time) critically affects reliable communications. However, small blocks make the retrieval of data take longer. For Dial-In the default value (of 2050 bytes) errs on the side of reliability. Increasing this so that waveforms do not require multiple blocks for each channel will improve data retrieval time significantly. For Packet Mode the default value is increased to 16384. Little advantage will be gained by increasing this number unless you have very large amounts of data. The advice on decreasing the number still applies! Note: The larger Packet Mode limit will only apply if the main board in your ETM is v6 or greater. Check with Texcel if upgrading to Packet Mode. However you will need to decrease this number if you see any messages like ‘PC Bad First Character’ or ‘Bad Serial’; LOG Modem Transactions and Show LOG (black arrows in Figure 194). T-Link 2 will record all the interactions with modems to a disk file automatically. This is very useful for tracking modem issues. Show LOG – tick this to get T-Link to show the modem LOG as it happens. It shows in a resizable and locatable window. LOG Modem Transactions – un-tick this to disable logging the modem activity to disk. This will prevent the disk file from being written. Not recommended. Note: The Modem LOG will be recorded in your local My Documents folder, even if TLink is saving data to a network server. The Modem LOG file will be named: …\My Documents\Texcel\T-Link\T-LinkModemLOG.txt 9 Mar 2015 Page 145 Advanced Communications Options – General Click the General Tab (orange arrow in Figure 193) to access this window: Figure 195: Advanced Communications Options – General Find a Monitor Quick (red arrow in Figure 195). This controls the time T-Link waits for Windows to open the COM Port and the monitor to respond. Increase this number if you always get ‘Look Harder’; Wait While Sampling (blue arrow in Figure 195). The time T-Link waits if it finds a monitor sampling (active) before it checks its state again; LOCAL COM Port Maximum Baud Rate (purple arrow in Figure 195). When T-Link retrieves data, it speeds up the baud rate to make the retrieval as fast as possible. Controlling this allows extended lengths of cable for local connections; Always Stop Local Monitor Sampling (orange arrow in Figure 195). This behaves in the same way as the above version for Remote Monitors, but defaults to being ticked. Again this allows managing monitors ‘local’ but on the end of a long cable; T-Link Communication Packets Properties (green arrow in Figure 195) are advanced fine control of T-Link’s packets. Do not adjust any of these parameters without advice from Texcel Support; Prompt when Monitor Calibration Due (black arrow in Figure 195). Clear this check box to prevent T-Link reminding you when a Monitor is due for Calibration 9 Mar 2015 Page 146 Advanced Communications Options – SMS Click the General Tab (black arrow in Figure 193) to access this window: Figure 196: Advanced Communications Options – SMS Trigger Mode Enabled at Start Up (red arrow in Figure 196). This is the Initial State of the Threshold Triggers when SMS Trigger Control is enabled in the settings in your ETM. If you have an ETM with FW 2.33 or later, you can choose whether the threshold triggers are enabled or disabled when the ETM wakes up or goes duty: If ticked, threshold triggers will be enabled If unticked, threshold triggers will be disabled For ETMs with FW older than 2.33, this option will have no effect! Texcel provides a Technical Bulletin (TB0014) with more detail on SMS Trigger Control . 9 Mar 2015 Page 147 Path Options T-Link will create a “Texcel” folder and “T-Link” sub-folder in the Public Documents folder of the PC that runs T-Link. This is the default T-Link Data Path into which T-Link saves all its system, data and report files. See How T-Link’s Data is stored on your Computer above. If you upgrade an older version of T-Link using your My Documents folder, TLink will continue to use that The T-Link Data Path can be re-directed to any folder on the PC or connected Network. This might be useful in the following situations: System Administrators may find the convenience of a Network folder for the T-Link Data Path easier to manage and back up. A shared folder allows users to access the data and reports from multiple PCs on the same network Users may want to use specific paths for specific monitoring tasks Unless you need to change any of these things there is no need to use Path Options. Press the Data Paths Options Button (Figure 197) on T-Options Main Window (Figure 189) to access the Path Options. Figure 197: Data Paths Options Button Path Options – T-Link Data Path Figure 198: Path Options – T-Link Data Path 9 Mar 2015 Page 148 To set the T-Link Data Path, type or paste a valid path (folder name) into the text box shown at the red arrow (Figure 198), or press the ‘Specify New Path’ button shown by the blue arrow (Figure 198) and select a folder from the “Browse For Folder” window presented by Windows. T-Options will create the folder, if it does not exist, and that its name is not longer than 80 characters before it will allow you to apply the new T-Link Data Path. Selecting a new T-Link Data Path does not copy any files from the current TLink Data Path. If you move your Data Path, T-Suite will assume that the path is being moved to a location where the data may be shared. Moving your Data Path will Set Data Sharing You can un-tick the Data Path is Shared box if you are certain the data will not be shared – data sharing can slow T-Link down marginally. See Path Options – Data Sharing. Taking your existing Data to a New Path If you create a new folder for your moved Data Path, you can just copy the entire contents (all files and folders) from the old T-Link Data Path to the new T-Link Data Path BEFORE restarting T-Link. Use T-SiteExplorer (T-Site) to Import the Old Data Once the new Data Path is set, run T-SiteExplorer (T-Site button in T-Suite) and use the Import button to select your old Event Data files. T-SiteExplorer will create the sites and locations and copy the data, and link it into the T-Link index system. It will also copy all the attached waveforms and existing reports. You can report from, and Retrieve to the existing sites and locations. Your existing Data will remain in place If you move your Data Path, T-Options will leave all the data un touched. You have to delete or back it up yourself. Moving Your Monitor Information, Timetables and Saved Settings Ensure all T-Link applications are not running when you are copying or moving files from Windows! Copying or Moving Monitor Information T-Link saves all the information (settings, history, and schedule information) in files named for the monitor serial number in the System Folder E.g.: 9 Mar 2015 Page 149 C:\Users\Public\Documents\Texcel\T-Link\System You will find a few files with the monitor serial number as a name. For example if your monitor serial number is 7500, you might find these M7500.hst M7500.tdb M7500.evt M7500.hsb There may also be dated .hsb files and .txt or .rtf reports generated from Monitor Reports above. To transfer a monitor to a new installation, copy at least those of the above named files that are present to the new system folder. There is no issue with copying all the other e.g. M7500… files to keep the full history and reports. Copying or Moving Saved Settings T-Link saves Saved Settings in uniquely named files in the System\Settings Folder E.g.: C:\Users\Public\Documents\Texcel\T-Link\System\Settings The files have a .tdg extension and are named the same as the name you give them when you save them. Do not rename them but you can copy them to another T-Link installation T-Link reads these files when it starts up, so do not copy them into a T-Link Installation while T-Link is running. Copying or Moving Managed Timetables and your Phone Books T-Link saves these items in Texcel Data files in the T-Link System folder E.g.: C:\Users\Public\Documents\Texcel\T-Link\System\MyTimetables.tda C:\Users\Public\Documents\Texcel\T-Link\System\SMS Phones.tda C:\Users\Public\Documents\Texcel\T-Link\System\IP Logins.tda See Where T-Link’s Data is stored on your Computer These files can be copied into a new T-Link System Folder if there is not one of the same name there (while T-Link is NOT running!), or else copy them to a convenient location (e.g. on a USB Stick) and Import it into your T-Link System as follows: The Managed Timetables, SMS Phone Book and IP Logins Phone Book each have an Import Button. For Timetables see For SMS Phone Book For IP Login Phone Book 9 Mar 2015 Figure 69: Managed Saved Timetables Window Figure 81: SMS Phone Book Figure 77 IP Logins Phone Book Page 150 The Import process works the same way for each of these data types. Press the Import Button on the above windows. This will open a File Open Dialog, which will only show Texcel Data Files (*.tda). Browse to your copied Texcel Data File and select it. All the data in the Data File will be imported. Any items with the same name as one in your existing collection will be ignored Rename an existing item, to import one of the same name The Import Process will ignore any Texcel Data files that do not contain the right kind of data. You cannot damage the system by selecting the wrong Texcel Data File If your Data Path is still in My Documents T-Link 2 recommends (and by default uses) Public Documents for these reasons: If multiple users Log into the same PC and use T-Link, they can all access the retrieved data and reports Some networks move My Documents paths onto server drives, and then a laptop or PC disconnected from the network will not be able to retrieve data When T-Link 2 installs over an older T-Link installation using My Documents (or if you move your path to your My Documents), T-Link Path Options will show an extra button, like this: Figure 199: T-Link Data Path still in My Documents Press Please move Data to Public Documents Button to move your T-Link Data File Path and T-Link Local LOG Files Path to the Default Public Documents folder. 9 Mar 2015 Page 151 You will be asked to confirm this operation. AND you will be prompted concerning the moving of your LOG Files – see below. Changing the T-Link Local LOG Files Path Normally the Local LOG Files Path (See T-Link’s Local LOG Files) above is not visible in T-Option’s Path Options window. It will be shown: If you have moved your T-Link Data Path, so it is in a different place If there is an error with the T-Link Local LOG Files Path Figure 200: T-Options Path Options - showing LOG Files Path It is recommended to leave the LOG Files Path in your Public Documents Folder If you do move your LOG Files Path T-Link will add the path Texcel\T-Link under the path you select This is because the path is shared will other T-Link applications (like T-Sched). It will copy the existing LOG files, so no history is lost, and rename the paths in the old LOG Files Path to .OLD. E.g. My Documents\Texcel\T-Link Will be renamed to My Documents\Texcel\T-Link.OLD So that it is obvious that the data in there is no longer current Ensure you have no files open in the old path when you do this! 9 Mar 2015 Page 152 Path Errors on T-Link Startup The T-Link Data Path is checked for existence, and permissions (Read, Write and Create) every time T-Link starts up. If any of these checks fail, T-Link will display a message, and stop. Figure 201: T-Link Startup - Data Path Error Either: Restore the connection to your Data Path Or: Run T-Options and select a new Data Path. When you run T-Options, the Data Paths button will show up red: Figure 202: T-Options Data Path Button shows Error And when you go to Data Path Options, the same error message is displayed: Figure 203: T-Link Data Path Options - With Path Error 9 Mar 2015 Page 153 Possible Data Path Errors These errors are the same for whichever T-Suite application you start up. They all share the T-Link Data Path. These errors will all prevent T-Link or T-Sched from starting, and will also leave a message in the System LOG File. T-Link Data Path NOT Found Error Figure 204: T-Link Startup Error - Path NOT Found This means that the Data Path specified cannot be found. Perhaps the network drive is inaccessible or disconnected. Your T-Suite applications will not start until this path is reconnected or you specify a new accessible Data Path in T-Options. You can always access T-Options directly from the Programs Menu T-Link Data Path NOT Accessible Error This message behaves the same as the NOT Found error above. The message means the path is found BUT you do not have permission to write files into the folder. This must be fixed before any T-Suite application will run. Disk Space is CRITICAL in T-Link Data Path Error See T-Link Startup runs a Disk Space Check above. 9 Mar 2015 Page 154 Path Options – Data Sharing Locking is disabled when you first install T-Link 2.2. You can enable locking in T-Options, under Path Options on the Data Sharing Tab, by clicking Data Path is Shared at the red arrow. Figure 205: T-Options Data Sharing If you move your Data Path, Data Sharing is automatically set. You can turn this off if the location is not shared. Sharing may be Enforced When T-Link, T-Sched or any other T-Suite Application is run and other locking activity is found, Sharing is enforced whether you have set the Data Path is Shared flag above or not. If you go into T-Options, this fact will be displayed like this: Figure 206: Data Sharing Enforced 9 Mar 2015 Page 155 The red Shared indication is always visible on the Paths page if the Data Path is Shared for any reason. Figure 207: Data Shared Shown on Paths Tab As shown, the Local LOG Files path is also visible after the T-Link Data Path is moved. How do you turn off Locking? Clear the Data Path is Shared tick box in Figure 205: T-Options Data Sharing above to turn off locking. If Sharing is Enforced (See Figure 206: Data Sharing Enforced above) you will have to Clear all Locks before you can turn off Locking. Clearing all Locks Click the Clear all Locks Button (Figure 205 above) to clear all currently active locks, and release the enforced sharing. This can lead to damaged or lost data You will be prompted like this to confirm this action: Figure 208: Confirm Clear All Locks This message means that if you Clear all Locks, and another user is currently depending on these locks you may cause damaged data! 9 Mar 2015 Page 156 You can use the Display found locks button to check who else may be using this Data Path. Display found Locks Click the Display found locks button (Figure 205 above) to display currently active locks, like this: Figure 209: Display found Locks Here you are told there is one active user, and one active file lock. Any Running T-Link Apps indicate possible data damage if locks are cleared. If no locks are currently active this message will look like this: Figure 210: Display found Locks - None Found It is safer to Clear Locks in this situation, but if another user starts after you do this data loss can still occur! It is best to leave locking enabled in remote paths More Information on Data Sharing What happens when a something is locked The main thing you will notice is that some T-Suite Applications won’t run while others are running: Only one T-Sched can be run in the T-Link Data Path (on any PC) at a time T-SiteExplorer requires that no other T-Suite Application is running at the same time T-SiteExplorer can move, rename, delete or import data, so all other T-Suite applications running on any PC on the network must be stopped first. 9 Mar 2015 Page 157 While data is being retrieved, and in certain other ‘editing’ situations, files are locked and you may see messages saying this. You will always get the option to wait and retry, and possibly talk to whoever is locking the file (you will be told who this is, and what PC they are working on). Always read the suggestion on the T-Suite Locked Item Dialog Read Technical Bulletin TB0016 – T-Suite Multi-User and File Locking Technical Bulletin TB0016 – T-Suite Multi-User and File Locking has a full description of all the messages and options you will encounter. If something is locked and I know it shouldn’t be If you get blocked by a file lock message and you know there is no-one else on the system, you will always have the option to Ignore the Lock, after you have pressed Retry once. If this persists go to T-Options and Clear All Locks – see How do you turn off Locking? above. Remember: T-Sched will validly lock files without a person in attendance T-Suite creates a Shared System LOG File for all Network Users When you enable Data Sharing, a System LOG File is created in the Shared Data Path. All T-Suite Applications from all users log their activity to this LOG File. This greatly simplifies understanding activity across a network. 9 Mar 2015 Page 158 Printing Options T-Link will select the default windows printer, and locate Microsoft Word and Microsoft Excel automatically when it first starts. In T-Link’s First Run (see Figure 6), you are asked to enter your name and company name. Unless you need to change any of these things there is no need to use Printing Options. Press the Printing Options Button (shown in Figure 211) at the top right of the Report Main Window (Figure 129). Figure 211: Printing Options Button This will open the Printing Options Window, which has 6 sections accessed by clicking on the tabs at the top. Printing Options – Printer Figure 212: Printing Options - Printer Press Select Printer (Red Arrow in Figure 212) to access your computer’s list of installed printers – the window shown will depend on the version of Microsoft Windows you are running. Press Setup Page (blue Arrow in Figure 212) to set up the margins and paper source for your printer. The window shown will be limited to those selections only and will depend both on the version of Microsoft Windows and the printer you have selected. 9 Mar 2015 Page 159 Printing Options – Personalise Figure 213: Printing Options - Personalise Your Company Name and Operator’s Name (red arrows in Figure 131) appear on many reports – especially the Compliance Reports. Type the names you want at the red arrows. Blast Reports allow you to use a picture file on your disk as a Logo on your printed reports. Tick the Use a Logo box (blue arrow in Figure 131) and the Logo Details box will show. Type in the Picture File Name or click the … button (green arrow) to select the file from your disk. If you have a wide logo, you can tick the Use the whole first line box (purple arrow). Note: T-Link does not scale your bitmap image, which will normally be located in the top left corner of the blast report sheets. To include your company logo on blast reports, you should first adjust the bitmap image to the desired size, which is recommended not to exceed 50 mm (2 inches) wide. If the logo is larger than this, you may wish to tick the option Use the whole first line, in which case your company logo will occupy the entire top line of the blast report sheets. 9 Mar 2015 Page 160 Printing Options – Word Processor Figure 214: Printing Options - Word Processor T-Link looks for an installation of Microsoft Word on your PC when it first runs. If it’s found, it will be used; otherwise T-Link will use WordPad, which is (so far) always installed on a Windows PC. This window will tell you what T-Link is using at the red arrow in Figure 214. Either way, if you get Document Reports OK (blue arrow), T-Link will print all its text based reports properly (Blast Reports, Waveform Plots, Activity Reports). T-Link 2.2 introduces Word Automation, which allows printing to a PDF. Print to PDF Using Word Automation Tick to Print to PDF (grey arrow in Figure 214) to tell T-Link or T-Sched to print Word processor Reports to a PDF. This process runs Microsoft Word to generate the same Word processor (rtf) reports, and then instructs Word to generate the pdf. The first PDF report using Word Automation can be slow (up to 30 seconds depending on your PC) for your first report. The second report in each T-Link session will be very quick. The first report has a message: 9 Mar 2015 Page 161 Figure 215: First PDF Report can be slow Clean up intermediate Word files when printing a PDF When you select PDF Printing, you are given the option to clean up the intermediate Word files by clicking Clean Site Folder of intermediate files: Figure 216: Clean up intermediate Word files when printing a PDF Only Microsoft Word 2007 and above can Create PDFs The option to Print to PDF will not be visible for older versions of Microsoft Word. You can Print to PDF from a 2007 Microsoft Office system program only after you install an add-in. At the time of writing you could download this add-in from here: http://www.microsoft.com/en-us/download/details.aspx?id=9943 If that fails Microsoft suggests ‘For more information, search for "Enable support for other file formats, such as PDF and XPS" on Office Online.’ Disable Word Automation As mentioned above the first report can be quite slow, especially on more limited PCs. T-Link Print Options allows the Word Automation process to be disabled. You will still be able to use Word to create Word processor Reports Tick to Disable Word Automation (black arrow in Figure 214) to tell T-Link or T-Sched to stop using Word Automation. You will not be able to Print to PDF if you Disable Word Automation Print Directly If you tick the Print Directly box (green arrow in Figure 214), most of your text based reports will just print, rather than open in your selected Word processor and ask you to print them from there. The only exceptions to this are Blast Reports that have ‘Edited Blast Details’ which require you to fill in certain information before they print. 9 Mar 2015 Page 162 Waveform Graphic Resolution If the wiggly lines in the waveforms in your printed Blast Reports or Waveform Plots are not clear enough, increase the ‘Waveform Graphic Resolution’ at the yellow arrow in Figure 214. Increasing this number will also increase the size of the report file on your disk. Specify a Different Word Processor Tick the box at the purple arrow in Figure 214 to open up the Specified Word Processor EXE details window as shown in Figure 217: Figure 217: Specified Word processor EXE This should only be done if you are sure of what you are doing – perhaps with the help of your System Administrator or under direction from Texcel. The ? button will give some hints for parameter specification. Printing Options – Spreadsheet Figure 218: Printing Options – Spreadsheet 9 Mar 2015 Page 163 T-Link looks for an installation of Microsoft Excel on your PC when it first runs. If it’s found, it will be used; otherwise T-Link will export some of the tab-delimited text files to notepad, but many Spreadsheet reports will not function properly. This window will tell you what T-Link is using at the red arrow in Figure 218. Either way, if you get Spreadsheet Reports OK (blue arrow), T-Link will print all its spreadsheet reports properly (Waveform Export, Continuous and Spreadsheet Reports). If you have problems here you can Specify a different Spread Sheet program by ticking the box at the purple arrow in Figure 218. The behaviour and comments for use here are the same as for Specify a Different Word Processor above. T-Link 2.2 introduces Excel Automation, which allows printing to a PDF. Print to PDF Using Excel Automation Tick to Print to PDF (grey arrow in Figure 218) to tell T-Link or T-Sched to print Spreadsheet Reports to a PDF. This process runs Microsoft Excel to generate the same Spreadsheet (xls) reports, and then instructs Excel to generate the pdf. The first PDF report using Excel Automation can be slow (up to 30 seconds depending on your PC) for your first report. The second report in each T-Link session will be very quick. The first report has a message: Figure 219: First Excel PDF Report can be slow Clean up intermediate Excel files when printing a PDF When you select PDF Printing, you are given the option to clean up the intermediate Excel (.txt and .xls) files by clicking Clean Site Folder of intermediate files: Figure 220: Clean up intermediate Excel files when printing a PDF Only Microsoft Word 2007 and above can Create PDFs The option to Print to PDF will not be visible for older versions of Microsoft Word. 9 Mar 2015 Page 164 You can Print to PDF from a 2007 Microsoft Office system program only after you install an add-in. At the time of writing you could download this add-in from here: http://www.microsoft.com/en-us/download/details.aspx?id=9943 If that fails Microsoft suggests ‘For more information, search for "Enable support for other file formats, such as PDF and XPS" on Office Online.’ Disable Excel Automation As mentioned above the first report can be quite slow, especially on more limited PCs. T-Link Print Options allows the Excel Automation process to be disabled. You will still be able to Report Spreadsheet Reports to Excel Tick to Disable Excel Automation (black arrow in Figure 218) to tell T-Link or T-Sched to stop using Excel Automation. You will not be able to Print to PDF if you Disable Excel Automation Printing Options – VDV Day The VDV Report breaks the monitored period into Day Time and Night Time, as required for such reports. See Continuous Report – VDV above. NSW EPA Guidelines define Day Time as 7:00 am to 10:00 pm (= 22:00). In T-Link this is the default, but can be adjusted (using 24-hour time) here: Figure 221: Printing Options VDV Day 9 Mar 2015 Page 165 Printing Options – MonitorPro MonitorPro is a proprietary database system that will import spreadsheet data from Texcel Monitors. MonitorPro is created and sold by EHS Data. EHS Data Limited is a UK based company, with clients using our systems worldwide who provide software systems to manage Environmental, Health and Safety Data. Information on MonitorPro and EHS Data can be found here: http://www.ehsdata.com/ Figure 222: Printing Options - MonitorPro On this window you specify a folder. T-Sched (usually) is set to report specially formatted spreadsheet data from retrieved events. MonitorPro is then set to monitor the same folder, and when it sees a new file, it imports the data from the file and deletes it. The data becomes immediately available through the MonitorPro’s extensive user interface and analysis packages. While this format is optimised for MonitorPro, it is simply a tab-delimited text file which could be imported into Excel or many other data management systems. Texcel intends this process to be a standard interface to 3 rd party data management systems Contact Texcel if you want to import data this way to a new system 9 Mar 2015 Page 166 Printing Options – Vibration dB If you want to report velocity in dB in your spreadsheet reports, click on the Vibration dB tab: Figure 223: Printing Options - Vibration dB To enable reporting vibration in dB: 1. Tick the box at the red arrow in Figure 223 above 2. Set your dB reference level in the box at the red arrow in Figure 224 below: Figure 224: Printing Options - Vibration in dB Details You must be measuring your vibration with a Velocity Sensor If you are recording vibration with an Accelerometer these options will have no effect 9 Mar 2015 Page 167 Calculating your mm/s or i/s Reference Level in dB This formula is explained if you click the Help button at the green arrow in Figure 224 above: Figure 225: Calculating your dB Vibration Reference I.e. if you are working in metric units, and know your Reference level in mm/s – the formula is: If you are working in Imperial units (See Imperial Units ) just use the Reference in i/s in the above formula. Type the result into the box at the Red Arrow in Figure 224 above. How is the Vibration dB Level Calculated Once you have set up your dB reference, the value shown in your Spreadsheet Reports and in the Graph by Date and Time Charts will be calculated like this: Vibration dB uses the Unit dBvel All Velocity Results in dB will show the unit dBvel in the Texcel system, whether you use metric or imperial units otherwise. You can display and graph the results in both mm/s (or i/s) as well as dBvel if you tick the box at the Green Arrow in Figure 224 above. 9 Mar 2015 Page 168 Imperial Units T-Link operates, by default, in Metric units, and all Texcel sensor calibrations are performed in metric units. However, T-Link monitors can be programmed to perform measurements in any particular unit with any sensitivity, and T-Link will respect the units and sensitivities in the monitor. T-Link allows you to configure a Texcel monitor, with Texcel calibrated sensors, in Imperial units. Once configured that way, all data retrieved and reports generated from that data will remain in Imperial units. PCs with US Regional Settings will start automatically in Imperial Units Either way, you can set the reported units here. Press the Imperial Units Button (Figure 226) on T-Options Main Window (Figure 189) to access the Path Options. Figure 226: Imperial Units Button The Imperial Units window is very simple. Tick the Use Imperial Units (red arrow Figure 227) box to enable imperial units, and clear it to disable it. Figure 227: Imperial Units Options Existing Sensors will be presented on the Custom Settings Sensor selection window in whichever unit is specified here. Some reports are unavailable in Imperial Units (green arrow Figure 227). 9 Mar 2015 Page 169 What happens when I change To or From Imperial Units? Data already retrieved, or still in the monitor will remain in whatever units the monitor was last configured to! Data in a monitor will only be imperial after you next configure it. Data retrieved to the disk will not change from when it was first retrieved. You cannot change the units of already captured data 9 Mar 2015 Page 170 TABLE OF FIGURES FIGURE 1: USB STICK INSTALL AUTORUN MANU.......................................................... 10 FIGURE 2 TEXCEL T-SUITE DESKTOP SHORTCUT ........................................................... 12 FIGURE 3 TEXCEL T-SUITE ACCESS WINDOW ................................................................ 14 FIGURE 4 TEXCEL CONTACT INFORMATION ................................................................. 15 FIGURE 5 TEXCEL TECHNICAL BULLETINS ..................................................................... 15 FIGURE 6: T-LINK'S FIRST RUN ...................................................................................... 16 FIGURE 7: T-LINK DATA PATH DISK SPACE LOW WARNING ......................................... 17 FIGURE 8: T-LINK DATA PATH DISK SPACE CRITICAL WARNING ................................... 17 FIGURE 9: TRIAXIAL GEOPHONE LAND CASE WITH BASE PLATE .................................. 19 FIGURE 10: TRIAXIAL GEOPHONE LAND CASE WITH SOIL SPIKES ATTACHED .............. 20 FIGURE 11: LAND CASE LEVEL ....................................................................................... 20 FIGURE 12: ADHESIVE ON BASEPLATE BOTTOM FIGURE 13: TRIAX & BASEPLATE GLUED TO CONCRETE ........................................................................................... 20 FIGURE 14: TRIAX LAND CASE WITH SOIL SPIKES BEING PUSHED INTO THE GROUND 21 FIGURE 15: MICROPHONE AND WINDSOCK ................................................................. 21 FIGURE 16: MICROPHONE (LEFT), WINDSOCK (MIDDLE) AND TRAVEL POUCH (RIGHT) ............................................................................................................................... 22 FIGURE 17: MICROPHONE CONNECTOR ON GTM ........................................................ 22 FIGURE 18: MICROPHONE CONNECTION ON CONNECTOR PANEL. ............................. 22 FIGURE 19: SUPPLIED DB9 SERIAL CABLE ..................................................................... 28 FIGURE 20: USB TO SERIAL ADAPTER ........................................................................... 28 FIGURE 21: DB9 COM PORT CONNECTOR ON PC OR LAPTOP ...................................... 28 FIGURE 22: USB TYPE A PORT ....................................................................................... 29 FIGURE 23: T-LINK MAIN WINDOW .............................................................................. 29 FIGURE 24: CONNECTION STATUS WINDOW ............................................................... 30 FIGURE 25: CONNECTION PROCESS PROGRESS ............................................................ 30 FIGURE 26: LOOK HARDER WINDOW ........................................................................... 31 FIGURE 27: LOOKED HARDER WINDOW ....................................................................... 31 FIGURE 28: COMMUNICATIONS CHECKLIST ................................................................. 32 FIGURE 29: T-LINK COM PORT SUGGESTIONS .............................................................. 32 FIGURE 30: RUN THE TERMINAL TEST .......................................................................... 33 FIGURE 31: CALIBRATION DUE REMINDERS ................................................................. 34 FIGURE 32: WARNING - BATTERY LOW......................................................................... 34 FIGURE 33: TEXCEL SETTINGS BUTTON ........................................................................ 35 FIGURE 34: TEXCEL SETTINGS WINDOW....................................................................... 35 FIGURE 35: MONITOR CANNOT DO TEXCEL SETTINGS ................................................. 36 FIGURE 36: CONFIGURE BUTTON ................................................................................. 36 FIGURE 37: TEXCEL SETTINGS DISPLAY – GTM BENCH TEST......................................... 37 FIGURE 38: CUSTOM SETTINGS BUTTON ...................................................................... 38 FIGURE 39: T-LINK SETTINGS EDITOR FOR A GTM ........................................................ 38 FIGURE 40: SPECIFY SENSORS AND RANGES WINDOW ................................................ 39 FIGURE 41: ENABLE CONTINUOUS LOGGING AND/OR TRIGGERED EVENTS ............... 40 FIGURE 42: CONTINUOUS LOGGING ENABLED............................................................. 41 FIGURE 43: CONTINUOUS RESULTS .............................................................................. 41 9 Mar 2015 Page 171 FIGURE 44: CONTINUOUS RESULTS VDV ...................................................................... 43 FIGURE 45: TRIGGER CONDITIONS WINDOW FOR A GTM ........................................... 44 FIGURE 46: A SINGLE ARROW FOR FINE (SMALL STEPS) AND A DOUBLE ARROW FOR COARSE (LARGE STEPS) ......................................................................................... 45 FIGURE 47: TRIGGER CONDITIONS WINDOW GEOPHONE TRIAX COMPONENTS DISPLAYED INDIVIDUALLY ..................................................................................... 45 FIGURE 48: SMS TRIGGER CONTROL ENABLE ............................................................... 46 FIGURE 49: WAVEFORM SAMPLING DETAILS WINDOW .............................................. 47 FIGURE 50: TRIGGERED RESULTS .................................................................................. 48 FIGURE 51: TRIGGERED EVENTS ................................................................................... 49 FIGURE 52: ALARM ENABLED........................................................................................ 50 FIGURE 53: SELECT ALARM CONDITIONS ..................................................................... 51 FIGURE 54: A SINGLE ARROW FOR FINE (SMALL STEPS) AND A DOUBLE ARROW FOR COARSE (LARGE STEPS) ......................................................................................... 51 FIGURE 55: SELECT ALARM CONDITIONS WITH INDIVIDUAL COMPONENTS SHOWN. 51 FIGURE 56: DATA INFORMATION ................................................................................. 52 FIGURE 57: TRADE-OFF EVENTS AND WAVEFORMS..................................................... 52 FIGURE 58: TRADE-OFF EVENTS AND WAVEFORMS – FIXED EVENTS .......................... 53 FIGURE 59: TRADE-OFF EVENTS AND WAVEFORMS - FIXED WAVEFORMS ................. 53 FIGURE 60: DUTY........................................................................................................... 54 FIGURE 61: TIMETABLE SELECT WINDOW .................................................................... 54 FIGURE 62: TIMETABLE BLANK TIMETABLES – DAILY OR WEEKLY ............................... 55 FIGURE 63: TIMETABLE DAYS OF THE WEEK................................................................. 56 FIGURE 64: WEEKLY TIMETABLE EXAMPLE DIFFERENT HOURS OF OPERATION .......... 57 FIGURE 65: DELETE BUTTON ......................................................................................... 58 FIGURE 66: SAVE AS ...................................................................................................... 58 FIGURE 67: NEW TIMETABLE NAME ............................................................................. 58 FIGURE 68: MANAGED SAVED TIMETABLES BUTTON .................................................. 59 FIGURE 69: MANAGED SAVED TIMETABLES WINDOW ................................................ 59 FIGURE 70 - RENAME A SAVED TIMETABLE .................................................................. 60 FIGURE 71: REMOTE ENABLED BOX .............................................................................. 61 FIGURE 72: REMOTE SETTINGS WINDOW .................................................................... 61 FIGURE 73: REMOTE DIAL IN SETTINGS ........................................................................ 62 FIGURE 74 REMOTE DIAL IN - SELECT NUMBER FROM PHONE BOOK ......................... 63 FIGURE 75: REMOTE PRIVATE NETWORK SETTINGS .................................................... 63 FIGURE 76 IP LOGIN PHONE BOOK - SELECT NUMBER FROM PHONE BOOK ............... 64 FIGURE 77 IP LOGINS PHONE BOOK ............................................................................. 65 FIGURE 78 IP LOGIN PHONEBOOK ENTRY .................................................................... 65 FIGURE 79 ENABLE TCPIP KEEP ALIVE PING ................................................................. 66 FIGURE 80: SMS SETTINGS WINDOW ........................................................................... 67 FIGURE 81: SMS PHONE BOOK ..................................................................................... 67 FIGURE 82: PHONE BOOK ENTRY .................................................................................. 68 FIGURE 83: SMS SETTINGS - VALID TRIGGERED EVENT ALARMS ................................. 70 FIGURE 84: TYPES OF SMS MESSAGES .......................................................................... 71 FIGURE 85: SMS ALARM TRIGGERS ............................................................................... 72 FIGURE 86: SMS MESSAGES INVALID IN THE SETTINGS ............................................... 73 FIGURE 87: SMS MESSAGES INVALID - CHANGE TO TRIGGERED EVENTS QUESTION .. 73 9 Mar 2015 Page 172 FIGURE 88: SMS MESSAGES INVALID IN ALL THE TIME CONTINUOUS LOGGING ........ 73 FIGURE 89: SMS ALARM THRESHOLDS ......................................................................... 74 FIGURE 90: A SINGLE ARROW FOR FINE (SMALL STEPS) AND A DOUBLE ARROW FOR COARSE (LARGE STEPS) ......................................................................................... 75 FIGURE 91: CONTINUOUS END OF INTERVAL SMS ALARM THRESHOLDS AS RMS OR PEAK ...................................................................................................................... 75 FIGURE 92: SMS SETTINGS - WARNING SMS ONLY ...................................................... 76 FIGURE 93: ETM SETTINGS WINDOW WITH REMOTE AND ALARM ............................. 77 FIGURE 94: AN ETM SETTINGS REPORT ........................................................................ 78 FIGURE 95: SAVE YOUR CUSTOM SETTINGS AFTER CONFIGURE ................................. 79 FIGURE 96 CUSTOM SETTINGS BUTTON ON T-LINK MAIN WINDOW .......................... 80 FIGURE 97: SAVED SETTINGS BUTTON ......................................................................... 80 FIGURE 98: SAVED SETTINGS LIST ................................................................................. 80 FIGURE 99: ACCESS SAVED SETTINGS FROM THE LOOK HARDER WINDOW................ 81 FIGURE 100: NEW SETTINGS - REAL OR TYPE ............................................................... 81 FIGURE 101: NEW SETTINGS - SELECT REAL MONITOR ................................................ 82 FIGURE 102: NEW SETTINGS - SPECIFY TYPE OF MONITOR.......................................... 82 FIGURE 103: NEW SETTINGS - SELECT TEXCEL SETTINGS TEMPLATE ........................... 82 FIGURE 104: SELECT A MONITOR TO CREATE A SAVED SETTINGS ............................... 83 FIGURE 105: SAVED SETTINGS EDIT WINDOW ............................................................. 84 FIGURE 106: RETRIEVE BUTTON ................................................................................... 85 FIGURE 107: RETRIEVE BUTTON - BOTTOM RIGHT OF THE RETRIEVE WINDOW ......... 85 FIGURE 108: RETRIEVE WINDOW CONTINUOUS EVENTS ONLY ................................... 86 FIGURE 109: RETRIEVE WINDOW TRIGGERED EVENTS ONLY....................................... 87 FIGURE 110: RETRIEVE WINDOW CONTINUOUS AND TRIGGERED EVENTS................. 87 FIGURE 111: PRESS TO RETRIEVE DATA ........................................................................ 88 FIGURE 112: SELECT WHAT IS RETRIEVED OPTION HIGHLIGHTED ............................... 88 FIGURE 113: DATA IN MONITOR SUMMARY ................................................................ 89 FIGURE 114: EVENT SELECTION .................................................................................... 89 FIGURE 115: SELECT EVENTS RETRIEVE BOX TICKED .................................................... 90 FIGURE 116: SELECTING WAVEFORMS ......................................................................... 90 FIGURE 117: SELECT INDIVIDUAL WAVEFORMS ........................................................... 90 FIGURE 118: WAVEFORM WITH RESULTS TOOL TIP ..................................................... 91 FIGURE 119: SITES AND LOCATIONS BUTTON .............................................................. 92 FIGURE 120: SITES AND LOCATIONS ............................................................................. 92 FIGURE 121: ENTER A NEW SITE NAME ........................................................................ 93 FIGURE 122: ENTER A NEW LOCATION NAME .............................................................. 93 FIGURE 123 DATA RETRIEVAL REPORT OPTIONS .......................................................... 94 FIGURE 124: PRESS TO RETRIEVE DATA ........................................................................ 94 FIGURE 125: CLEAR DATA BUTTON............................................................................... 95 FIGURE 126: CLEAR DATA WINDOW............................................................................. 95 FIGURE 127: EVENT FILE NOT FOUND MESSAGE.......................................................... 96 FIGURE 128: REPORT BUTTON ...................................................................................... 99 FIGURE 129: REPORTS WINDOW AS FIRST OPENED ..................................................... 99 FIGURE 130: PRINTING OPTIONS BUTTON ................................................................. 100 FIGURE 131: PRINTING OPTIONS - PERSONALISE ....................................................... 100 FIGURE 132: REPORT TYPE SELECTION ....................................................................... 101 9 Mar 2015 Page 173 FIGURE 133: BLAST REPORT FORMATS....................................................................... 102 FIGURE 134: WAVEFORM REPORT FORMATS ............................................................ 102 FIGURE 135: CONTINUOUS REPORT FORMATS .......................................................... 103 FIGURE 136: SPREADSHEET REPORT FORMATS.......................................................... 104 FIGURE 137: MONITOR REPORT FORMATS ................................................................ 105 FIGURE 138: SELECT REPORT TYPE ............................................................................. 106 FIGURE 139: SELECT SITE AND MONITOR ................................................................... 106 FIGURE 140: SELECT EVENTS....................................................................................... 107 FIGURE 141: SELECT WAVEFORMS FOR REPORT ........................................................ 108 FIGURE 142: VIEWW BUTTON .................................................................................... 109 FIGURE 143: FROM FILE BUTTON ............................................................................... 109 FIGURE 144: SPECIFY DETAILS FOR 'BLAST TOO SMALL TO TRIGGER' ........................ 110 FIGURE 145: SELECT EVENTS FOR CONTINUOUS AND SPREADSHEET REPORTS ........ 111 FIGURE 146: SPECIFY DETAILS FOR MONITOR REPORTS ............................................ 111 FIGURE 147: REPORT BUTTON .................................................................................... 112 FIGURE 148: ANZECC/USA STANDARD BLAST REPORT FROM BENCH TEST ............... 113 FIGURE 149: BLAST REPORT - TRIGGERED EVENT BUT NO WAVEFORM.................... 114 FIGURE 150: BLAST REPORT - MONITORED BUT FAILED TO TRIGGER ....................... 115 FIGURE 151: WAVEFORM REPORT – PORTRAIT ......................................................... 116 FIGURE 152: WAVEFORM REPORT – LANDSCAPE ...................................................... 116 FIGURE 153: CONTINUOUS REPORT (ACCELEROMETER) - AMPLITUDE FREQUENCY HISTOGRAM ........................................................................................................ 117 FIGURE 154: CONTINUOUS REPORT – NOISE STUDY RESULTS ................................... 118 FIGURE 155: CONTINUOUS REPORT - VDV ................................................................. 119 FIGURE 156: SPREADSHEET REPORT – GRAPH BY DATE AND TIME STANDARD – COMPLIANCE....................................................................................................... 120 FIGURE 157: SPREADSHEET REPORT – GRAPH BY DATE AND TIME STANDARD – PEAKS MM/S .................................................................................................................. 120 FIGURE 158: SPREADSHEET REPORT – GRAPH BY DATE AND TIME STANDARD – AVERAGE AND RMS ............................................................................................ 120 FIGURE 159: SPREADSHEET REPORT – GRAPH BY DATE AND TIME DIAGNOSTIC– COMPLIANCE....................................................................................................... 121 FIGURE 160: SPREADSHEET REPORT – GRAPH BY DATE AND TIME DIAGNOSTIC – MM/S .................................................................................................................. 121 FIGURE 161: SPREADSHEET REPORT – GRAPH BY DATE AND TIME DIAGNOSTIC – DBL ............................................................................................................................. 121 FIGURE 162: MONITOR REPORT – ACTIVITY SUMMARY ............................................ 122 FIGURE 163: MONITOR REPORT - SETTINGS CURRENTLY IN THE MONITOR ............. 123 FIGURE 164: REMOTE CONNECT BUTTON .................................................................. 124 FIGURE 165: T-LINK REMOTE CONTROL PANEL .......................................................... 124 FIGURE 166: COMMUNICATIONS OPTIONS BUTTON ................................................. 125 FIGURE 167: REMOTE CONTROL PANEL WITH DIAL-IN MODEM SET UP ................... 126 FIGURE 168: LOCAL MODEM SETUP WINDOW .......................................................... 127 FIGURE 169: LOCAL MODEM SELECTED ..................................................................... 128 FIGURE 170: LOCAL MODEM ADVANCED SETUP........................................................ 129 FIGURE 171: LOCAL MODEM TESTS OK ...................................................................... 130 FIGURE 172: REMOTE CONTROL PANEL - PACKET MODE BROADBAND ACCESS ....... 131 9 Mar 2015 Page 174 FIGURE 173: PRIVATE NETWORK ACCESS SETUP – BROADBAND ACCESS ................. 133 FIGURE 174: PRIVATE NETWORK ACCESS SETUP – MODEM ACCESS ......................... 134 FIGURE 175: SELECT YOUR REMOTE MONITOR ......................................................... 135 FIGURE 176: REMOTE MONITOR SELECTED - SHOWING TIMETABLE ........................ 135 FIGURE 177: REMOTE CONNECT NOW BUTTON ........................................................ 135 FIGURE 178: REMOTE CONNECTING STATUS (DIAL IN) .............................................. 136 FIGURE 179: REMOTE CONNECTING STATUS (PACKET MODE) .................................. 136 FIGURE 180: REMOTE CONNECTING FAILED (DIAL IN) ............................................... 136 FIGURE 181: REMOTE - MONITOR CONNECTED ......................................................... 137 FIGURE 182: REMOTE CONTROL PANEL - IDLE TIMEOUT ........................................... 137 FIGURE 183: T-LINK RETRIEVE BUTTON ...................................................................... 138 FIGURE 184: T-LINK CUSTOM SETTINGS BUTTON ...................................................... 138 FIGURE 185: DATA CLEAR BUTTON ON REMOTE CONTROL PANEL ........................... 139 FIGURE 186: SYNC TIME BUTTON ON REMOTE CONTROL PANEL .............................. 139 FIGURE 187: SYNC TIME REQUIRES SAMPLING TO STOP? ......................................... 139 FIGURE 188: T-OPTIONS DESKTOP SHORTCUT ........................................................... 140 FIGURE 189: T-OPTIONS MAIN WINDOW ................................................................... 140 FIGURE 190: COMMUNICATIONS OPTIONS BUTTON ................................................. 141 FIGURE 191: COMMUNICATIONS OPTIONS – COM PORTS SCAN .............................. 141 FIGURE 192: COMMUNICATIONS OPTIONS – COM PORTS SPECIFY .......................... 142 FIGURE 193: ADVANCED COMMUNICATIONS OPTIONS – MODEM ADVANCED ....... 143 FIGURE 194: ADVANCED COMMUNICATIONS OPTIONS – REMOTE .......................... 144 FIGURE 195: ADVANCED COMMUNICATIONS OPTIONS – GENERAL ......................... 146 FIGURE 196: ADVANCED COMMUNICATIONS OPTIONS – SMS ................................. 147 FIGURE 197: DATA PATHS OPTIONS BUTTON ............................................................ 148 FIGURE 198: PATH OPTIONS – T-LINK DATA PATH ..................................................... 148 FIGURE 199: T-LINK DATA PATH STILL IN MY DOCUMENTS ....................................... 151 FIGURE 200: T-OPTIONS PATH OPTIONS - SHOWING LOG FILES PATH ...................... 152 FIGURE 201: T-LINK STARTUP - DATA PATH ERROR ................................................... 153 FIGURE 202: T-OPTIONS DATA PATH BUTTON SHOWS ERROR .................................. 153 FIGURE 203: T-LINK DATA PATH OPTIONS - WITH PATH ERROR ................................ 153 FIGURE 204: T-LINK STARTUP ERROR - PATH NOT FOUND ....................................... 154 FIGURE 205: T-OPTIONS DATA SHARING .................................................................... 155 FIGURE 206: DATA SHARING ENFORCED .................................................................... 155 FIGURE 207: DATA SHARED SHOWN ON PATHS TAB ................................................. 156 FIGURE 208: CONFIRM CLEAR ALL LOCKS ................................................................... 156 FIGURE 209: DISPLAY FOUND LOCKS .......................................................................... 157 FIGURE 210: DISPLAY FOUND LOCKS - NONE FOUND ................................................ 157 FIGURE 211: PRINTING OPTIONS BUTTON ................................................................. 159 FIGURE 212: PRINTING OPTIONS - PRINTER ............................................................... 159 FIGURE 213: PRINTING OPTIONS - PERSONALISE ....................................................... 160 FIGURE 214: PRINTING OPTIONS - WORD PROCESSOR .............................................. 161 FIGURE 215: FIRST PDF REPORT CAN BE SLOW .......................................................... 162 FIGURE 216: CLEAN UP INTERMEDIATE WORD FILES WHEN PRINTING A PDF .......... 162 FIGURE 217: SPECIFIED WORD PROCESSOR EXE ........................................................ 163 FIGURE 218: PRINTING OPTIONS – SPREADSHEET ..................................................... 163 FIGURE 219: FIRST EXCEL PDF REPORT CAN BE SLOW ............................................... 164 9 Mar 2015 Page 175 FIGURE 220: CLEAN UP INTERMEDIATE EXCEL FILES WHEN PRINTING A PDF ........... 164 FIGURE 221: PRINTING OPTIONS VDV DAY ................................................................ 165 FIGURE 222: PRINTING OPTIONS - MONITORPRO ...................................................... 166 FIGURE 223: PRINTING OPTIONS - VIBRATION DB ..................................................... 167 FIGURE 224: PRINTING OPTIONS - VIBRATION IN DB DETAILS ................................... 167 FIGURE 225: CALCULATING YOUR DB VIBRATION REFERENCE .................................. 168 FIGURE 226: IMPERIAL UNITS BUTTON ...................................................................... 169 FIGURE 227: IMPERIAL UNITS OPTIONS ..................................................................... 169 9 Mar 2015 Page 176