Download Shade tutorial: 5 useful techniques
Transcript
Shade tutorial:
5 useful techniques
www.oscillator.se/3d
Shade tutorial: 5 useful techniques
Notes
Welcome to the Shade tutorial: 5 useful techniques. This is my second
tutorial for Shade (the first one is called Shoes for Poser). The purpose of this
tutorial is to demonstrate some useful techniques when modelling in Shade. But
let’s do something useful at the same time. I use Shade to create content for
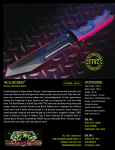
Poser, so we’ll do a fantasy sword.
These five techniques are not invented by me, nor are they very exotic. They are
just useful, and to make it easy to remember them, I have given them names:
Technique
Technique
Technique
Technique
Technique
#1:
#2:
#3:
#4:
#5:
The Lid
The Mirror-copy
Inheriting
Continuity
Memorize to fit
Some clarifications: When I write Enter modify mode, it means that you should
chose Tools > Modify > Enter Modify Mode (or use the tool box equivalent).
When I write Exit modify mode, you just have to press Enter or click the Finish
button in the tool box.
This tutorial is written for the Windows OS. If you run It on the Mac OS, just use
the Option key instead of the Z key, and the Command key instead of the X
key.
Most of the time I will give the menu path to the commands used in this tutorial.
This is just for convenience. Please use the tool box if you are more comfortable
with it (as I am).
I hope you will enjoy this tutorial! Comments, questions and criticism is always
welcome! This tutorial is dedicated to the two enthusiastic moderators, Nomi
(Noel) at Shader’s Café (www.shaderscafe.com), and Angel1 at the
Renderosity Shade forum (www.renderosity.com). Thank you both!
Oscillator
Version: 5th of April 2006
Copyright: You are welcome to pass this tutorial on to your friends, as long as
you don’t make any changes in the document. You are not allowed to sell it.
Contact: [email protected]
www.oscillator.se/3d
Shade tutorial: 5 useful techniques
Preparations
It’s a good idea to do a preliminary sketch on paper and think about which
strategy to use. As you start to gain experience modelling, you’ll learn how to
divide objects into parts which are easy to model.
But first of all, some sword terminology:
grip
blade
back
pommel
edge
guard
When modelling, you can do test renders to check out the result. Bring up the
render settings window by chosing Rendering > Rendering Settings. Go for
the Scanline Method and select the Resolution Preset 800x600, it’s quick.
In the browser, select the parts you want to render and press Ctrl+R.
We’ll start with the guard, then we’ll model the grip, the pommel and the blade. In
this way it starts easy and gets increasingly harder.
www.oscillator.se/3d
Shade tutorial: 5 useful techniques
Setting up Shade
Snap on
Use mm’s
Create a project folder on your hard disk. Name it “sword tutorial”.
Start up Shade and, if necessary, create an empty window using File > New.
Set up the perspective view: right click in the view and select Display Mode >
Shading + Wireframe. Zoom in using the Aggregate - Camera window and
switch to Eye mode. This will let us look at our model from different angles by
just pressing Space and holding the mouse-button down in the perspective
window. Do this regularly to check your modeling.
I have a widescreen display, so usually I set up my workspace with the
Aggregate window in the upper right corner, and the Browser in the lower
right. But for this tutorial, it’s easier to place it in the middle of the window.
This way it will show up properly in the screen dumps.
Use mm’s by selecting it from the popup menu in the control bar. Also, make
sure the ruler is visible by chosing View > Ruler. The ruler can be dragged
around the screen. To change between a horizontal and a vertical ruler, drag one
the corners until the width of the ruler is larger than the height (or vice versa).
Zoom in (by pressing the Spacebar and X) and clicking in the top, front or
side views until the ruler shows approximately 100 cm. Zoom out by pressing
the Spacebar and Z and clicking. You can pan by pressing the Spacebar and
dragging in the views.
Check the Snap box in the control bar. We will construct the sword using several
different pieces, and Snap aligns what we model to the grid on the screen,
thereby letting us position the pieces next to each other easily.
Just a quick note: the are many ways to model an object. This is just one
way, not necessarily the best or the quickest. But for now it serves its
purpose in showing some useful Shade techniques.
www.oscillator.se/3d
Shade tutorial: 5 useful techniques
Start with the guard
We’ll start with the guard of the sword. Chose Tools > Part > Part to create
a new part in the browser window. Rename the part in the browser “guard” by
double-clicking it and entering the new name.
Control-click in the center of the top view and side view. Next, chose Tools >
Create Disc and hold down the Alt key (to create the disc from the center) as
you in the front view draw a disc that is approximately 25 cm’s tall. Chose Tools
> Move > Scale, control-click in the center of the disc (in the front view), and
drag from the edge of the disc to the center. The disc turns into an oval, which
will be the front silhoutte of the guard.
www.oscillator.se/3d
Shade tutorial: 5 useful techniques
Adding volume to the guard
Create a curved surface by chosing Tools > Part > Curved Surface. We want
our disc-shape inside of the curved surface. To do that, we have to convert
the disc to a closed line by selecting the disc and chosing Tools > Convert
> Convert to Line Object. Drag the newly created closed line into the new
curved surface.
We could have created this closed line manually using the Create >
Closed Line tool, but by using the disc tool, we can easily create a
symmetrical shape.
Chose Tools > Copy > Translate and drag the closed line to the right in the
side View. If you zoom in the perspective view, you can se that we now have a
shape where the sides are surfaces. That’s what curved surfaces are all about
– closed (and open lines) acting as a kind of skeleton which Shade uses to make
a “skin”.
www.oscillator.se/3d
Shade tutorial: 5 useful techniques
Put a lid on the guard
Our problem is that the shape is hollow. We want to put two lids on it. That’s
easy. In the browser, copy the two closed lines inside of the curved surface
(using Edit > Copy), paste them, and drag them outside of the curved surface
but inside of the “guard” part. As they are closed lines, they function as surfaces
on their own.
Technique #1: The Lid
This is an easy way to turn a hollow curved surface into a solid shape, just
using copy and paste.
Our guard part is finished! Let’s move on to the grip.
www.oscillator.se/3d
Shade tutorial: 5 useful techniques
Getting a grip on things
This is where you
control-click before
drawing the open
line in the front
view.
We will model the grip in four parts. This way we are sure to get a symmetrical
grip.
First of all, create a new part in the root level of the browser. Rename it “grip”.
Zoom in the side view. Control-click where the second closed line ends, so the
lines we create next, starts at the right place on the Z-axis.
Chose Tools > Create > Open line and draw a line with three control points in
the front view. If it’s not already there, drag the open line into the “grip” part in
the browser.
If you need to adjust the control points, enter modify mode and adjust the
position and the handles. Make sure you exit modify mode before continuing.
If you are unsure of how to draw and edit lines, study chapter 5 of the
Shade 8 User Manual.
www.oscillator.se/3d
Shade tutorial: 5 useful techniques
A grip with a surface
Zoom out a bit. Chose Tools > Copy > Translate and drag the open line 25
cm’s or so to the right in the side view.
Now it’s time to do some work in the browser. Create a curved surface (Tools
> Part > Curved Surface), rename it “quarter1” and drag it into the “grip”
part. Now drag the two open lines into “quarter1”. Instant surface – check the
Perspective view!
If you haven’t done so already, now would be a good time to save your
Shade document. Name it “sword.shd”.
www.oscillator.se/3d
Shade tutorial: 5 useful techniques
Completing the grip
To finish the grip we need to copy our finished quarter three times.
Click the “quarter1” part in the browser to make sure it and all of its components
are selected. Chose Tools > Copy > Scale/Mirror. If the guide line of the
operation is not coming from the center (origin) of the front view, click the origin.
Drag from one grid-line above the origin to one grid-line below (it hasn’t have to
be one grid unit – just make sure you drag an equal number of grid units above
and below the origin). Shade creates a mirrored copy of the part. Rename it
“quarter2” in the browser.
Make a mirror copy of “quarter2”, but mirror-copy it across the vertical (Y) axis
in the front view. Rename the new copy “quarter3”. Do the same thing with
“quarter1” and rename it “quarter4”. The grip is finished!
Technique #2: The Mirror-copy
By thinking about symmetry in what you model, you can get away with
modeling only half, a quarter or even less. In the end you only have to copy
the parts to complete the model. This is very useful when modeling clothes
for Poser.
www.oscillator.se/3d
10
Shade tutorial: 5 useful techniques
Bite into the apple
Check this to turn
an open line into a
closed line.
You can see the
numeric values of
the position of the
cursor here. Use
it to position the
cursor exactly.
Position the new
fourth control point
at 0,0.
Next is the pommel (which is latin for “apple”). We want the pommel to have the
exact contour of the grip, but a bit larger. We’ll accomplish this by using copies
of the open lines of the grip.
Start by zooming in.
Create a new part in the root level and call it “pommel”. Copy the “quarter1” part
of the grip, paste it and drag it into the “pommel” part if necessary. Remove the
open line which is closest to the guard from the new “quarter1” part (by selecting
it and pressing the Delete key).
Next enlarge the open line by chosing Tools > Move > Uni-scale. Click the
origin (center) in the front view, and drag the open line until it is a bit larger than
the grip.
We want this line to function as a lid for the pommel. Bring up the Object
Info window by pressing Ctrl + I (the letter “I”). Check the Closed box to
turn the line into a closed line. Shade adds a line between the first and the last
control points in the open line and renames it. The problem is that this line runs
diagonally.
To fix this, we have to add a fourth contol point to the line. Enter modify mode,
hold down the Z and X keys and, in the front view, drag across the diagonal
line. A control point is added. Move this point to the origin (where the X and
Y axis meet). Sometimes the Snap function won’t let you move to 0,0. If so,
uncheck Snap, zoom in and move the point until the X and Y coordinates both
are 0. You can check this in the control bar. Exit modify mode. Check Snap in the
toolbar.
Technique #3: Inheriting
By copying an open or closed line from another part, you can make sure
that the new part will “inherit” the shape from the old.
www.oscillator.se/3d
11
Shade tutorial: 5 useful techniques
Shaping the pommel
Copy the closed line and move it outside of “quarter1”. The Lid Technique in
use once again!
Rotate the perspective view so you can see the pommel.
Chose Tools > Copy > Translate to make a copy of the closed line in
“quarter1” and move it approximately 60 mm’s to the right of the origin. Do this in
the side view.
We want the pommel to have a kind of half-sphere shape. Select the new copy
and chose Tools > Modify > Degenerate to point. All points of the closed
line are moved to the same coordinate. Enter modify mode and select all control
points of the line by pressing Ctrl + A. Drag all points in the front view so their
X and Y coordinates are both 0. You will probably have to switch off Snap and
zoom in to do this. Don’t forget to switch on Snap afterwards.
We have ended up with what looks like a quarter of a pyramid, but we want the
pommel to end in a curved kind of way. To edit the lines running between the two
closed lines, chose Tools > Modify > Switch. You can now see four open lines
in the browser.
To turn these lines into curves, we have to add handles. Hold down the Z key
and drag from the control point closest to the grip. While dragging press Shift
to get a straight handle. Repeat this for three of the open lines. Work in the side
view for the first two lines and in the top view for the third. Do not modify the line
in the center of the pommel.
Exit modify mode.
www.oscillator.se/3d
12
Shade tutorial: 5 useful techniques
Finishing the pommel
Click this arrow
to collapse the
part and hide
the second level
objects in the
browser.
First of all, collapse the “guard” and “grip” parts in the browser ny clickng
the little arrow in front of the parts. Collapse the “quarter1” curved surface in
“pommel”.
Create a new part, give it the name “quarter1b” and drag it into the “pommel”
part. Drag “quarter1” and the closed line from the “pommel” part into
“quarter1b”.
Using The Mirror-copy Technique, we’re going to make three additional
copies of “quarter1b” to finish the pommel (but we “cheat” and do it in only two
copy-operations):
1. Select “quarter1b” in the browser.
2. Chose Tools > Copy > Scale/Mirror and, in the front view, drag from one
grid line above the X-axis to one grid line below it.
3. Rename the new curved surface “quarter2b”.
4. Select both “quarter1b” and “quarter2b”.
5. Chose Tools > Copy > Scale/Mirror and, in the front view, drag from one
grid line to the right of the Y-axis to one grid line to the left of it.
6. Rename the new curved surfaces “quarter3b” and “quarter4b” respectively.
The pommel is finished. Now only the blade is left.
www.oscillator.se/3d
13
Shade tutorial: 5 useful techniques
Shade with an edge
Open line #1
Open line #2
Collapse the “pommel” part. Zoom out and rotate the perspective view. Zoom
out the other views.
Create a new part, put it in the root level of the browser and rename it “blade”.
We’ll start with the edge of the blade. Create an open line with three control
points (Tools > Create > Open line) in the side view. To make sure all control
points have handles, drag, not click, to create them.
Enter modify mode and adjust the handles of the control points to shape the
blade. Hold down the Z key and drag the handle to release the linkage of the
handles. Press the Z and X key and click a handle to delete it. Exit modify
mode.
Create a second open line with three control points and shape the upper contour
of the blade. Enter modify mode. Adjust the handles if necessary.
Finally, select the control point of the second open line (the one that connects to
the guard) and drag it a bit to the left in the top view. Exit modify mode.
www.oscillator.se/3d
14
Shade tutorial: 5 useful techniques
Giving the blade volume
Create a curved surface (Tools > Part > Curved Surface), rename it
“bladeright” and drag it into the “blade” part. Drag the two open lines from the
“blade” part into “bladeright”.
Enter modify mode.
Select the open line which defines the upper contour of the blade. Select the
middle control point and chose Tools > Modify > Switch.
Now let’s add some volume to the blade by reshaping the open line that defines
the profile of the blade (as seen from the front). Zoom in the front view. Hold
down the Z and X keys and drag across the middle of the line. A new control
point is added. Drag this point a bit to the right. Disconnect the two handles and
give them the same angle as in the picture above.
Exit modify mode.
www.oscillator.se/3d
15
Shade tutorial: 5 useful techniques
Finishing the blade #1
Select “bladeright” and make a mirror copy in the front view (The Mirror-copy
Technique again). Rename this “bladeleft”.
We now have a hole on the back side of the blade. We want to put a lid on it.
Unfortunately The Lid Technique can’t be used as the blade is composed of
two different lines. But we can solve this easily using two different techniques.
Let’s start with the first one.
Create a new curved surface in “blade”. Name it “bladeback”.
In “bladeright”, select the open line which defines the back contour. You might
have to chose Tools > Modify > Switch to be able to select it. Copy it, paste it,
and drag it into “bladeback”.
Enter modify mode. Holding down the Z and X key, remove the control point
placed at the point of the sword by clicking it. Exit modify mode. We now have
an open line with only two control points.
Let’s do the same with “bladeleft”: In “bladeleft”, select the open line which
defines the back contour. You might have to chose Tools > Modify > Switch to
be able to select it. Copy it, paste it, and drag it into “bladeback”.
Enter modify mode. Holding down the Z and X key, remove the control point
placed at the point of the sword by clicking it. Exit modify mode. We now have
an additional open line with two control points.
And we have a lid on the hole.
Technique #4: Continuity
Copy an open line from another part (or curved surface) into a curved
surface. Delete control points until the new open line fits. This new line can
be used as the start of a new curved surface and because it is a copy, it
will not leave a crack or fracture where the old and new line meets.
www.oscillator.se/3d
16
Shade tutorial: 5 useful techniques
Finishing the blade #2
When you have
drawn the second
open line, Shade
immediately draws
a surface between
the two lines. This
looks a bit strange
until you have used
the Memorize to
fit Technique on
the second open
line.
This is the second technique that can be used to create a lid.
As before, create a new curved surface in “blade”. Name it “bladeback”.
In the side view, create an open line with two control points. The exact
placement isn’t that important, you can draw it a bit above the blade. Name it
“bladebackright”.
Enter modify mode. In the browser, select the open line in “bladeright” which
runs along the back of the sword. Select the control point closest to the guard.
Chose Tools > Memory > Memorize. The position and handles of the control
point has now been saved. Select the control point of “bladebackright” which
is closest to the guard. Chose Tools > Memory > Apply. The control point is
moved and realigned.
Repeat the procedure for the control point on the middle of the back, and apply it
to the other control point of “bladebackright”.
Exit modify mode.
Create a new open line with two control points and name it “bladebackleft”.
Repeat the procedure.
We have a lid on the hole. Save the document.
Technique #5: Memorize to fit
By using the memory functions we can copy the position and direction
of control points from one line to another. This can be used to construct
curved surfaces that fit perfectly with each other.
www.oscillator.se/3d
17
Shade tutorial: 5 useful techniques
Bonus: Exporting to Poser
Collapse all root level parts in the browser.
We now have four parts: “pommel”, “blade”,
“grip” and “guard”.
To be able to use the sword as a prop in
Poser, you have to do two things in Shade:
check and adjust the normals, and convert the
curved surfaces into polygon meshes.
If the column
of check-boxes
doesn’t show,
click this arrow.
Check to invert
normals.
Enter modify mode and chose Tools >
Modify > Show Normals. Small red lines
should protrude from the surfaces – they must
not point inwards. In my model I had to adjust
one of the “lids” of the guard, the sides of the
blade and the “bladeback” surface. Check the
correct box in the browser to invert the normal
if it’s pointing in the wrong direction. Exit
modify mode.
Convert all items in the browser to polygon
meshes by selecting them one at a time and
chosing Tools > Convert > Convert to
Polygon Mesh. Use Surface Subdivision
“Fine”.
www.oscillator.se/3d
18
Shade tutorial: 5 useful techniques
Exporting the sword
Chose File > Export > Wavefront OBJ. Use the following settings and save it
with the name “sword.obj”.
www.oscillator.se/3d
19
Shade tutorial: 5 useful techniques
Setting up in Poser
Start up Poser. Open an empty window.
Chose File > Import > Wavefront OBJ and select “sword.obj”. Use the
following Prop Import Options.
Start the Group Editor by clicking the Grouping Tool button in the Pose
Room. In the Current Group Pull-down Menu you can see the parts of the
sword. This is great, because it means we can assign different materials to
different parts. We just have to select each part in turn and click the Assign
Material button. Create a “material group” (called a material class) for each part,
and give it the same name as the part.
Here are our Shade
parts.
Press this button
to create material
classes for the four
Shade parts.
www.oscillator.se/3d20
Shade tutorial: 5 useful techniques
Assigning materials
Now enter the Material Room. Select “sword” in the Object Pull-down menu.
You can now select the different “material groups” from the Material Pull-down
menu, and assign different materials to them. Browse around in the Materials
library, where you can find different metals and also a leather material for the
grip.
Add some characters and have fun!
www.oscillator.se/3d21


