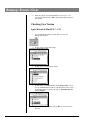
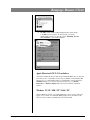
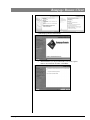
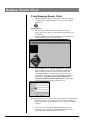
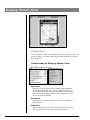
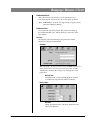
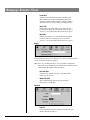
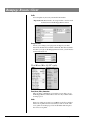
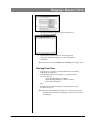
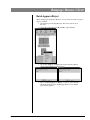
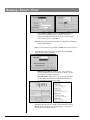
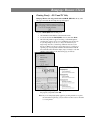
1
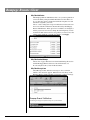
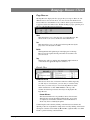
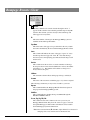
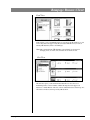
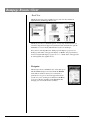
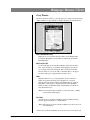
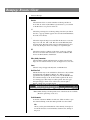
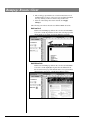
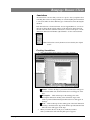
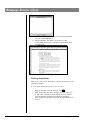
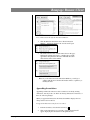
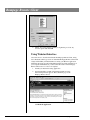
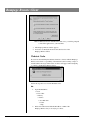
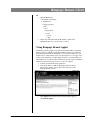
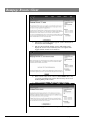
Rampage Remote Client User Rampage Remote Client Rampage Remote Client allows the viewing, annotation, approval and printing of Rampage soft proofs over the Internet. There are a few ways to use the Remote Client. You can install the Remote Client on the local computer, use the Webstart interface to access all of the same features as the Remote Client without installing the software on the local computer, or the Applet, which has some limited features. This documentation explains how to download, set up and use the Rampage Remote Client. The Webstart interface and the Applet are explained at the end. System Requirements There are some basic system requirements. Pay close attention to memory and Java requirements. See “Checking Java Version” later in this document for more information. Apple Macintosh Classic MacOS MacOS 8.1 - 9.22 RAM: 128 MB Macintosh Runtime for Java (MRJ) 2.2.5 Apple Macintosh OS X OS-X 10.2 and higher RAM: 128 MB Macintosh Runtime for Java 1.4.1 for OS X Microsoft Windows Windows 95 / 98 / ME / NT / 2000 / XP RAM: 128 MB Java Runtime Environment 1.4.1 or later Differences Between ClassicOS and OS X Although very similar, there are a few distinct differences between the MacOS Classic and OS X versions of the Rampage Remote Client. 1. ClassicOS version retains the MacOS look-and-feel, while OS X client uses the Aqua interface. 2. Printing is not available in the ClassicOS version. 3. The menus in the ClassicOS version use the term “Meta” where you would normally see the Command Key icon. So, instead of ⌘-P for print, you will see, Meta-P. You still use the Command Key, only the menu symbol has changed. Rampage Remote Client November 15, 2006 4-1 Rampage Remote Client 4. OS X already has Java installed. Make sure it is Java 1.4.1 or later. Classic OS needs Java MRJ (Java Runtime Environment) to be installed. Checking Java Version Apple Macintosh MacOS 8.1 - 9.22 1. On your Macintosh desktop, double-click on your local Macintosh hard drive. 2. Double-click on the System Folder. 3. Double-click on the Extensions folder. 4. Double-click on the MRJ Libraries folder. Important! If you do not see an MRJ Libraries folder in your Extensions folder, Java is not installed. Please proceed to the section “Obtaining Java for your Computer.” 5. Single-click the MRJLib file and type ⌘-I on your keyboard to Get info. 4-2 November 15, 2006 Rampage Remote Client Rampage Remote Client 6. The MRJ version number will be displayed. The version needs to be MRJ 2.2.5. If you have an older version, you need to download the version 2.2.5. See the section “Obtaining Java for your Computer” later in this document. Apple Macintosh OS X 10.2 and above All versions of Mac OS X come with Java pre-installed. Make sure you have the Java version 1.4.1 or later. There are two ways to find the version installed. The first way is to go to the Utilities folder on your hard drive, use the application Terminal and type “java -version”. The second way is to go to System Preferences –> Software Update and look for Java in the list of Installed Updates. Windows 95 / 98 / ME / NT / 2000 / XP On most Windows systems, you can determine the version of Java you have by typing “java -version” at a command (DOS) prompt. If you are unsure of the version, it does not hurt to install the latest version from Sun. Rampage Remote Client November 15, 2006 4-3 Rampage Remote Client Obtaining Java For Your Computer If you do not have Java installed on your computer, you will need to obtain the latest Java Runtime Engine or library. The following are web sites which have the latest Java installations for your system: You can also find a link on the Rampage Remote download page when you download the Client. Apple Macintosh Classic MacOS http://developer.apple.com/java/classic.html Apple Macintosh OS X Use Software Update in the System Preferences to obtain the latest Java for your version of Mac OS X. Windows 95 / 98 / ME / NT / 2000 / XP www.java.com Important! You must install Java before installing the Rampage Remote Client. The Client will not work if it is installed before Java. Downloading the Rampage Remote Client Before using the Rampage Remote Client you need to check the Java version (as described previously). If it is not the required version, download and install Java. 1. Launch your internet browsing application 2. Type the IP address or URL of the Rampage Remote Server, the following window appears. This is the home page of the Rampage Remote Server. 3. Click Download, the following window appears 4-4 November 15, 2006 Rampage Remote Client Rampage Remote Client Depending on the Operating System you are running you need to select the correct download location. Once you are in the correct location, click Download. The file will download to the location that is set in your browser preferences or the location you choose. When downloaded on a Mac, the file is named rremote.zip. If it unstuffs automatically, you get the installation icon rremote. If it doesn’t unstuff automatically, you will need to do it manually. When downloaded on a PC the file is named rremote.exe. To download the User documentation, select the Rampage Remote User’s Manual from the Download page. The Rampage Remote Client PDF will be downloaded to your computer. You must have a PDF reader which is available for free from Adobe. Installing the Rampage Remote Client Important! The installation routine is identical for all Operating Systems. The installation instructions begin right after you’ve downloaded or received the Rampage Remote Client installation file. 1. Locate the Rampage Remote Client installation file and doubleclick it. Note: This file is named, “rremote.” 2. The Installer will launch. It will include a small un-packing sequence. Shortly you will be presented an introduction to the installer. Click Next. Rampage Remote Client Note: If you are installing on Mac OS X, you will be prompted to type in your password. November 15, 2006 4-5 Rampage Remote Client 3. The License Agreement screen appears. Click I Accept, Next. 4. When installing on Windows the next screen asks to choose a Java version. The installer recognizes all the versions installed. Select version 1.4.1 or later. Click Next. 5. The following screen (Mac left, PC right) offers you the chance to change the default install folder. The default is the Applications folder for the Mac and the Program Files folder for the PC. Click Next. 6. The next screen (Mac left, PC right) asks where you would like to install aliases or shortcuts for the application. The default for the Mac is on the Desktop, the default for the PC is “In an existing Program Group”. Click Next. 7. The next screen (Mac left, PC right) presents you with an installation summary of where the application will install. Click the Install button to proceed. 4-6 November 15, 2006 Rampage Remote Client Rampage Remote Client 8. The Rampage Remote Client installs. 9. After installation, you are presented with a screen that explains what has been installed and where. Click Done. Rampage Remote Client November 15, 2006 4-7 Rampage Remote Client Using Rampage Remote Client 1. Launch the Rampage Remote Client either via the alias, shortcut or application icon. (This will depend on what you chose during installation.) 2. The first time you launch the client, the Release Notes will appear on the screen. This notes any fixed problems and lists any new features. 3. Click the Close button to dismiss the Release Notes window and display the Rampage Remote Client window. 4. Under the File menu go to Open Connection, the following window will appear. Type the server IP address or URL of the Rampage Remote Server, a Username and a Password. The Port should match the one on the Rampage Remote Server. If you are unsure of the Port setting, contact the Rampage Remote Administrator. Login using your Username and Password set up by the Rampage Remote Administrator. Click the OK button to log you into the Rampage Remote Server. Note: After the first login, the Server, Port and Username will be remembered. You will only have to type in the Password to login to the Rampage Remote Server unless you check the box to Save the password on this computer. 5. You are now presented with the main Rampage Remote Client screen along with a Page Browser. Click the Close button on the System Messages window to dismiss that message. 4-8 November 15, 2006 Rampage Remote Client Rampage Remote Client 6. Open the Page Browser window to fill your screen. Click the Customers & Jobs tab to view the column. 7. The Customers and Jobs are listed in the left column of the Page Browser. See the section describing the Page Browser in detail later in this document. 8. Double-click on a Job or select multiple jobs and click Find Pages. All of the Pages available to proof will appear to the right. Opening a Proof Double-click on a page to open the proof. In the proof window, you can zoom in or out, make annotations, check ink mixes, and approve/reject the page. Rampage Remote Client Note: The ability to approve, reject, download, compare and annotate is a user privilege your Rampage Remote Administrator will set up for you. November 15, 2006 4-9 Rampage Remote Client Closing a Proof Close the application when you are finished proofing. A notification is sent to the printer regarding your comments and changes. See the Notifications section for more information. Understanding the Rampage Remote Client File Menu (Mac left, PC right) Open Connection This will pop-up the Open Connection window. Type the Rampage Remote Server IP or URL, the Username and the Password to log into the Rampage Remote Server. The Port default of 1863 should be OK. Check with your Rampage Remote Server Administrator if you have any problems connecting. Close Connection Selecting Close Connection will disconnect you from the Rampage Remote Server. Download Proof When viewing a Proof, you can download a file that can be printed. See the section Downloading Proofs later in this document. 4-10 November 15, 2006 Rampage Remote Client Rampage Remote Client Print Downloaded Proof After a Proof has been downloaded, you can print the Proof to a local printer. See the section Printing Proofs later in this document. Note: RGB JPEG proofs are the only supported proof type that can be printed from Rampage Remote. Print Document View You can print the Page being viewed. This selection will bring up the standard print dialog box. The file printed is a screen shot of the Page window. Preferences Selecting this pull-down will bring up the preferences window. There are five buttons described below. Connection This only needs to be set if your site is using a SOCKS proxy server or Secure Socket Layer on your server. If you are not sure, your IT Administrator should be able to help you in setting up the correct preferences. Automatic Login Check this box if you want the Rampage Remote Client to automatically login when the Client is launched. Rulers & Guides Ruler Units Change measurement units of the Proof window between inches and centimeters. Rampage Remote Client November 15, 2006 4-11 Rampage Remote Client Locator Units Change locator units between pixels, centimeters and inches. The Locator units are displayed at the bottom of the Proof window. This X and Y coordinate indicates where the cursor is located on the proof being viewed. Guides Color Changes the color of the guides as they appear in the proof window. There are several preset colors as well as access to a color picker under the Custom Color option. Mask Color Changes the default color of the mask when comparing revisions. There are several preset colors as well as access to a color picker under the Custom Color option. Display If your monitor has been color calibrated, you can select an ICC profile to color correct a Proof when it is opened. Note: Java v1.5 on a Windows PC or v1.4.2 on a Mac is required for this feature to be enabled. If your computer does not meet the Java requirements, this feature will be grayed out. ICC Profile Folder Use the browse button to navigate to the ICC Profile folder on your system. Monitor ICC Profile Select an ICC Profile from the pop-up menu that characterizes your Monitor. Annotation Font/Size Choose the Annotation font and font size. This is the font that the Annotations will use. 4-12 November 15, 2006 Rampage Remote Client Rampage Remote Client Point Shape/Size When creating a Point Annotation, you have the choice of what shape it will be. Select the default icon shape from the pop-up menu. The choices are Target, Circle, Box or Triangle. With the Point Size slide bar, you can choose the size of the icon. Keymap Load standard keymap The two choices for standard keymap are Default and TrapIT. You can select a standard keymap and then customize. Rebind/Clear binding If a command already has a binding assigned to it, you can Clear Binding to clear the command, then highlight the entry and press Rebind or double-click the entry to type in a new key combination for that command. Notifications Receive Notifications If you have e-mail notifications enabled through your Rampage Remote user, you can select where to receive the notices. You can receive notices in two places. If in my email box is selected, you must have a valid email address in your profile. If in my Rampage Remote message center is selected, then notifications will be sent to your Message Center Inbox. For more information on the Message Center, see that section later in this chapter. Email Format Select the format you want to see the notifications. Since most email programs support HTML, that is the recommended format. Rampage Remote Client November 15, 2006 4-13 Rampage Remote Client Profile You can update any necessary User Profile information. Important! The Email needs to be set up in order to receive email notifications from the Rampage Remote Server. Change Password Allows you to change your login password. Type in your Old Password, the New Password then confirm the New Password. The next time you login to the Rampage Remote Server you will need to use the New Password. View Menu (Mac left, PC right) Zoom, Rotate, Rulers, Annotations There are many combinations of views that you are able to set on the Rampage Remote Client. These views are only available when viewing a proof. Guides Once page guides are created, you can Hide, Lock, Clear, and Save. After a set of guides has been saved and you want to use the same set of guides for another page, select Load Guides and navigate to the correct set of guides. 4-14 November 15, 2006 Rampage Remote Client Rampage Remote Client Window Menu (Mac left, PC right) Hide/Show System Window The System Messages window comes up when you first connect to the Rampage Remote Server. It shows system messages. Hide/Show Page Browser The Page Browser window shows up when you connect to the Rampage Remote Server. For more information, see the section Page Browser later in this document. Hide/Show Job Browser The Job Browser window will display stats for jobs like total pages, total pages ripped, etc. For more information, see the section Job Browser later in this document. Hide/Show Navigator The Navigator window is a thumbnail view of the entire page. Using the Hand/Move tool while zoomed in on area, click anywhere on the thumbnail view and your page window will update. Hide/Show Annotation The Annotation window will give you a numbered list of all the annotations on the page. For more information, see the section on Annotations later in this document. Hide/Show Proof Information There are three tabs in this window. Rampage Remote Client Info Shows you the general information of the currently viewed proof. It contains the status, revision number, document size, inks, and dpi of the page. Decisions Shows which users have decided whether the proof is approved or rejected. It also shows each user’s decision. History Shows the history of each page. This tab can contain information relating to the date and time the page is published for review, annotated, revised, and approved/rejected. November 15, 2006 4-15 Rampage Remote Client Hide/Show Notifications The Rampage Remote Administrator has to set your User permission to have the ability to Request E-mail Notifications. Once this is set up, you have the option to change the Notification requests for each Job that is assigned to your User. Choose a Job to change the receipt of notifications for that Job. Your User is set with the notifications checked allowed by the Rampage Remote Administrator. If the option is not available to be changed, it will be grayed out. You can also change the email frequency of each notification. Each Job needs to be set up unless you want to leave the settings at the default. If you make any changes, click Apply. Hide/Show Download Manager Shows a list of pages that have been downloaded during this session with the Rampage Remote Server. For more information, see Downloading/Print Proofs later in this document. Hide/Show Message Center Show Message Center and select a message to view, a window similar to the one below appears. When letter icon at the top of the Rampage Remote window flashes red, it means you have a message. 4-16 November 15, 2006 Rampage Remote Client Rampage Remote Client Compose Click Compose to send a message to a user within the Rampage Remote. You cannot use the Message Center to send messages to anyone outside of your Customer’s Users. Reply/Reply All/Forward/Delete You can Reply, Forward, etc. messages received in the Message Center. You cannot reply to the System notifications. Delete Click Delete to remove messages from the Message Center. Address Book See below. Hide/Show Address Book Shows a list of users within your Rampage Remote database. This list is comprised of Users that are located in your Customer only. You can Send, Forward, or Reply to messages. Pages The last section of the Window menu contains the name of any proofs open. You can select one at a time to make active. You can view more than one proof at a time by changing the size of the proofs window. Help Menu (Mac left, PC right) Release Notes This lists the latest features and fixes in the client. Submit Bug Reports and Enhancement Requests can be sent directly to Rampage. You need an active Internet connection to proceed. Enter the information details in the spaces provided. About Shows the version of Rampage Remote Client currently running. Rampage Remote Client November 15, 2006 4-17 Rampage Remote Client Rampage Remote Window The Rampage Remote Client window contains several elements that help you find and navigate proofs. These consist of the Tools palette, the Page Browser, the Navigator, and, finally, the Proof window. Tools Palette The Tools Palette can be moved from its original location. The Palette can be moved as a floating window by clicking the diagonal bars to the left of the Selection Tool and dragging to a location. If you want to have the Tools Palette to the left or right, click the diagonal bars and move the Palette until it rotates and snaps into place. Each tool except Reject and Approve have keyboard shortcuts. The default shortcuts are shown in ( ) next to the tool name. Selection Tool (v) The Selection Tool is used to expand, move, select and/or append annotations on the page, and also to create and move page guides. Move Tool (Pan Tool) (h) When you are zoomed in to see part of a proof in a Proof Window, the Move Tool allows you to scroll within the window. Densitometer Tool (i) The Densitometer Tool allows you to check the ink densities and mix. Zoom Tool (z) The Zoom Tool allows you to zoom in and out of a proof. To use it, either click-and-drag on the proof or Navigator thumbnail to select an area you wish you zoom into or away from. The default state of the Zoom Tool is to zoom in. If you want to Zoom out, hold down the CTRL key on both the Mac and PC. Annotation Tools: Point(t), Rectangle(r), Oval(o) The three Annotation Tools are used to create annotations. An annotation is a text note that you create on a proof to alert your printer about something that needs to be changed. For more information, see the Annotations section. Message Center Select the icon to open the Message Center window. When the Message Center icon is flashing red, Notifications or Messages are waiting to be read. Reject/Approve Tools The X is for rejecting the Proof. The √ is for Approving the Proof. When you select one of these tools, a window will pop up to type comments and either Reject or Approve. 4-18 November 15, 2006 Rampage Remote Client Rampage Remote Client Page Browser The Page Browser displays the list of pages that you can proof. There are four different views to choose from: Book, Icon, List, Details, the default view is Details. There are status markers to let you know when a page needs attention, is approved, rejected or under review. Double-clicking on pages opens the proof. The top of the Page Browser has four icons. Views This menu allows you to select the view of your Page Browser. The choices are Book, Icon, List, and Details all described below. Sort This menu allows you to sort the pages in the Page Browser by the page status or needs attention column. Refresh Clicking Refresh will update Pages in the right panel of the Page Browser as well as update the left panel where all customers and jobs are located. Stop Clicking Stop will stop updating Page thumbnails while in the Icon or List views. If stopped, the Page box will have a “?” Details View Customers & Jobs Tab This tab area shows a list of Customers and Jobs available. Typically you will only see one Customer, your own, but you could see many Jobs. Once you select a Job(s) to view in the Page Browser, either double-click the Job or click “FIND PAGES” at the top of the column. All of the Pages related to the Job(s) are displayed in the Page Browser. Customer Reference The Customer Reference is in parentheses next to the Job name. This helps the customer determine which Job they are proofing as compared to an internal Job number. Customer Reference is shown only if it was added by the printer. Column length can be resized by clicking on the line between columns and adjusting to the left or right. Each column can be sorted by clicking on the header description. Columns can be hidden by ⌘-click Mac, (right click PC) on column header to get the following contextual menu. Rampage Remote Client November 15, 2006 4-19 Rampage Remote Client Attention The first column doesn’t contain a header description. If an “!” appears in this column it states that this particular Page needs your attention. If it is blank, you have already looked at this Page and either approved or rejected it. ID This is the number of the Page in the Rampage RIPing system. It identifies an internal Page ID number. Page Name This is the name of the page to be proofed. This is the only column that cannot be hidden by the User with the Rampage Remote Client. Status This column will indicate the status of the page. A green “√” states that the Page has been approved. A red “X” states that the Page has been rejected. A magnifying glass indicates that the Page is still under review. Revision This column shows the revision or correction number of the Page. If a Page has been corrected and resubmitted for review, the number will change to “2”. The numbers will continue to change for as many revisions take place. Job Name The Job Name column reflects which pages belong to which job. Customer The name of the customer to which the pages of a job were assigned. The following columns may or may not be viewable to your User. Operator This column identifies the Rampage MacOS client that registered this page into the Rampage RIPing system. Workflow This column indicates whether the Page was RIPed through the ROOM or NORM workflow. Prescan, Trap, Rip, FPO, Plot The columns are the same columns as the ones you see in your Rampage MacOS client. They show the status of a page as it travels through the Rampage workflow. More information can be found in the main Rampage System documentation. 4-20 Note: The contextual menu (⌘-click Mac, right click PC) is a shortcut for changing views, font, and font size for the Details view. November 15, 2006 Rampage Remote Client Rampage Remote Client Icon View In Icon View you see a thumbnail picture of every Page. In this window, you can tell if a Page has been Approved (√), Rejected (X) Under Review (no icon) or Needs your Attention (red box around Page). Note: The contextual menu (⌘-click Mac, right click PC) is a shortcut for changing views, icon size, font, and font size for the Icon view. List View The List view gives you more information than the icon view. You see a thumbnail picture, revision number, whether the Page has been Approved, Rejected, or Under Review and a list of Users and their decision on the Page. If a file name is in red text, the Page needs your attention. Rampage Remote Client November 15, 2006 4-21 Rampage Remote Client Book View The Book view may not be available for every Job. It is only available if implemented by the Rampage Remote site. The Book view shows a thumbnail picture of every Page. In this window, you can tell if a Page has been Approved (√), Rejected (X), Under Review (just the thumbnail, no icon) or Needs your Attention (red box around Page). In book view of the Page Browser, blank pages will display a page icon of a blank page. The name of the page will display as <Blank>. For pages that have not been assigned will display a page icon of a “?” and the name of the page will be <Unassigned> (See graphic above.). Navigator The Navigator shows a thumbnail view of the entire proof. The Show/Hide Navigator is located under the Window menu. This is useful for when you’re zoomed into a particular area of a proof. A box will appear that shows you the area you’re viewing. You can then use the Move tool to move the box elsewhere on the thumbnail, thus changing your view inside the Proof window. 4-22 November 15, 2006 Rampage Remote Client Rampage Remote Client Proof Window The Proof window is where you view the page proof. Open a Proof window by double-clicking on a page. The Proof window elements are described below. Rulers: Horizontal and Vertical Rulers allow you to measure distances. Rulers can be hidden either by using the ⌘-R (Mac) or Ctrl-R (PC) or clicking the View menu, then Hide Rulers. Ruler Zero/Zero Tool Located at the upper left of the Proof Window, where the two rulers meet, is the Zero/Zero tool. Clicking and dragging this area allows you to change where Zero (0) begins. This is useful for measuring between objects in a proof. In order to return Zero/Zero to the upper left of the entire page, double-click the Zero/Zero Tool. Guides With the selection tool, you can pull guides out from each ruler. Guides are useful for checking object alignment or to measure distances between objects. Guides can be hidden either by using the ⌘-G (Mac) or Ctrl-G (PC) or clicking the View menu, then Hide Guides. To delete an individual guide, click-and-drag it off the Proof using the Selection tool. Note: For more information on Guides, see the View menu -> Guides section earlier in this chapter. Proof Status A banner at the top of the Proof Window will state whether the Page has been Approved, Rejected, or Under Review. Note: Annotations also show in the Proof Window. See Annotations for more information. At the bottom of the Proof Window are short-cuts to some of the Views and Rampage Remote Client November 15, 2006 4-23 Rampage Remote Client Status of the Page. Revision Shows the Revision or correction number of the Page. If there is more than one revision (the number is greater than 1), you can click on the Revision to see previous revisions. % Shows the percentage size of the Page being viewed. If you click in that area, a pop-up window appears. Choose between Fit In Window, Zoom In, or Zoom Out. ° Shows the degree the Page is rotated. Click in that area to rotate the Page to be at 0°, 90°, 180°, 270°. This area works differently than the View menu. The View menu rotates by changing the Page view rotation by the degree chosen, not setting it to a specific degree. XY Shows the X and Y coordinates of the curser on the page. Click in the area to select the units of measure to view the coordinates. The choices are Pixels, Inches, Centimeters. Rulers, Guides, Annotations Shows if Rulers, Guides and Annotations are being viewed for the Page. An “X” in the box means to view, an empty box is to not view. Status Shows if a Page is Approved, Rejected, or Under Review. Book View Tools The Book View may not be available for all Jobs. It is only available if implemented at the Rampage Remote site. When you view a page that has the capability of viewing as a book, the bottom of the Proof window changes to the one below. The top half of the area is for viewing pages, either single or reader spreads. You can toggle through each page. Click on one of the icons to the far right to display a single page or reader spreads. Note: When viewing as reader spreads, none of the shortcuts are available. (Revision, percentage, rotate, etc.) Proof Information To the left of the Proof Window is a Tab area. Click on a Tab to open the column. Clicking on the same Tab again will close the column. 4-24 Info Shows you the general information of the currently viewed proof. It contains the status, revision number, document size, and dpi of the proof. November 15, 2006 Rampage Remote Client Rampage Remote Client Compare Gives the ability to compare two revisions of a page on a pixel basis. See Page Revision Compare later in this document. Note: The Compare tab will not be available if the page does not have more than one (1) revision or if a User was not given permission for the Compare access control. Inks Shows all of the inks in the Page. To turn some inks off, uncheck the box next to the ink name. Click “APPLY CHANGES” at the top of the column to view the updated information. Decisions Shows the Approval List and the decision of each user. History Shows the history of each page. This tab can contain information relating to the date and time the page is published for review, annotated, revised, and approved/rejected. Page Revision Compare age Revision Compare gives the ability to compare two revisions of a page P on a pixel basis. The difference is done between the monitor proofs of the two revisions. Using Compare 1. From the Page Browser window, open a revised page. 2. Click on the Compare tab from the left of the Page window. Note: The Compare tab will not be available if the page does not have more than one (1) revision or if a User was not given permission for the Compare access control. 3. Check the box next to Compare to: From the first pop-up menu select the Revision to compare the open page with. This pop-up menu will list all of the revisions of a page. You can select one at a time. Rampage Remote Client November 15, 2006 4-25 Rampage Remote Client 4. The second pop-up menu has two selections Mask Same Pixels and Mask Different Pixels, select one. You can change the Mask Color by clicking on the box and choosing another color. 5. After all of the settings have been selected, click Apply Changes. The following screen shots show the two different Mask selections. Mask Same Pixels If this is selected Rampage will use the color chosen in the Mask Color box to mask all pixels that are the same on both pages. The default mask color is white, leaving the differences in black. Mask Different Pixels If this is selected Rampage will use the color chosen in the Mask Color box to mask (highlight) all pixels that are different from the selected revision page. The default mask color is green unless changed in the preferences of the Rampage Remote client. 4-26 November 15, 2006 Rampage Remote Client Rampage Remote Client Annotations An annotation is a text note that you create on a proof to alert your printer about something that needs to be changed. They can contain anything from instructions to corrections. There are three different types of Annotations; Point, Rectangular and Oval. Each Annotation has a Contextual menu. You can Append, Remove, or Lock an annotation; change the Icon shape and size of the annotation; change the Font and size of the annotation. When an annotation is selected on the proof or in the Annotations Window, ⌘-click Mac, right-click PC to see the contextual menu. Note: Annotations can only be Removed or Locked by the original creator. Creating Annotations 1. Open a proof and zoom in on the area you wish to Annotate. Rampage Remote Client 2. Choose one of the Annotation tools from the Tools Palette. Pointer – Click on the Page to place the Point Annotation and type in the window. When done, the Point Annotation icon will appear on the Page. Rectangular – Click on the Page for the starting point of the Rectangular Annotation and drag to the desired size. Type in the window provided and the Rectangular Annotation icon will appear on the Page. Oval – Click on the Page for the starting point of the Oval Annotation and drag to the desired size. Type in the window provided and the Oval Annotation icon will appear on the Page. 3. When you click on the area of the proof on which you wish to make your Annotation. The following dialogue box appears: November 15, 2006 4-27 Rampage Remote Client 4. Type the note or change you wish to leave for the printer in the box, then click the OK button. 5. The Proof Window will update to show an icon of the corresponding Annotation tool. Each icon represents the actual annotation text. Viewing Annotations There are two ways to view Annotations: using the Selection Tool or the Annotations window. To view/expand an Annotation using the Selection Tool: 1. In the Tools Palette, select the Selection Tool . 2. Click on the Annotation icon you wish to view. A window pops up with a line connecting to the Icon. This annotation window shows the number of the annotation, all of the annotations entered, what user placed the annotation, the date and time it was entered. 4-28 November 15, 2006 Rampage Remote Client Rampage Remote Client To view Annotations through the Annotations Window: 1. Click the Window menu, then select “Show Annotation Window.” A dialogue similar to the one below will open. 2. The window shows a list of all the annotations on the page. Clicking the triangle down next to a number shows all the appends for that particular annotation. The last annotation entered is listed next to the number. Note: If you click the User in the Annotation Window, you will get a window with the User’s Profile information. This is a quick way to identify the User. Appending Annotations Appending an Annotation means to add a comment to an already existing Annotation. You may want to do this if an existing Annotation is inaccurate or there are follow-up changes. When you append an Annotation, the Annotation Window displays the last change at the bottom of the list. To append an Annotation using the Selection Tool: 1. In the Tools Palette, select the Selection Tool 2. Click on the Annotation icon you wish to append. A window will appear displaying the annotations for this particular icon. Rampage Remote Client November 15, 2006 4-29 Rampage Remote Client 3. ⌘-Click (Mac) or right-click (PC) on the expanded Annotation and select Append. 4. The Append Annotation dialogue appears. Enter the new Annotation then click OK. 5. The Annotation window will update placing the latest Append at the bottom. To append an Annotation using the Annotation Window: 1. Click the Window menu, then select “Show Annotation Window.” A dialogue similar to the one below will open. 2. The window shows a list of all the annotations on the page, when the annotation was made and by what User. Click the Annotation that you want to append, ⌘-click (Mac) or right-click (PC), then select Append. 4-30 November 15, 2006 Rampage Remote Client Rampage Remote Client 3. The Append Annotation dialogue appears. Enter the new Annotation then click OK. 4. The Annotations Window will now show the appended Annotation. Click the triangle down to show all appended Annotations. Note: Annotations can only be Removed or Locked by the original creator. Rotating Proof Views 1. Open the proof you want to view. By default, the Proof should be in the heads-up orientation. 2. From the View menu, select the degrees you wish to rotate the proof. The choices: Rotate 90 CW (90 degrees clockwise) Rotate 90 CCW (90 degrees counter-clockwise) Rotate 180 (180 degrees) OR 3. From the bottom of the Proof window select the degree rotation for the Proof to be set. Rampage Remote Client Note: The View menu changes the current view of a Proof by the degree chosen. The bottom of the Proof Window sets the Proof view to the chosen degree. November 15, 2006 4-31 Rampage Remote Client 4. The proof will rotate according to your selection. The image will stay rotated until you select a different rotation or close the proof. Approving / Rejecting Proofs Approval is the final process for a page viewed over the Rampage Remote Client. It tells the printer that a page is ready to continue to the press stage. The following instructions explain how to Approve/Reject a proof. There are a two ways to Approve/Reject a Proof. 1. Click the area flashing “UNDECIDED” at the bottom of the Proof Window. 2. In the Approve/Reject window, type any comments, then click Approve/Reject. OR 1. With the Proof open, click the Approve/Reject icon from the Tools Palette. 2. The appropriate window will appear for the Approval or Rejection of the Proof. Type any comments then click Approve/ Reject. 3. The Global Status in the Page Browser for the page will now be updated to show the appropriate icon or frame color for Approve or Reject. Below shows the Details view. See the section on the Page Browser earlier in this document. 4-32 November 15, 2006 Rampage Remote Client Rampage Remote Client Batch Approve/Reject When viewing pages in the Page Browser, you can select more than one page to Approve or Reject. 1. Select the Pages in the Page Browser, this can be done in any of the views. 2. Access the contextual menu (⌘-click Mac, right click PC). 3. Select either Approve or Reject. One of the following windows will appear depending upon the selection. 4. Prior to clicking Approve or Reject, you can also add comments. The decision will be sent to the Rampage Remote server and the pages will be updated. Rampage Remote Client November 15, 2006 4-33 Rampage Remote Client Approval Lists There are two different views for the Approval List. These views are only seen in the Page Browser when using the List view. The first one below, shows the different global status of Pages as well as individual decisions by Users allowed to Approve/Reject Pages. The second view shows an Approval List with Stages. These Stages are set up by the Rampage Remote Administrator. The List shows the same status of Pages as well as the different Stages. See the rules below on Stages. The Rampage Remote Administrator can create as many stages as needed. All users in all stages will be able to view the pages and make decisions on the page up until the global status of the page has changed to Approved or Rejected. Rule #1: The global status can only change to Approved after each and every user of each stage has approved the page. Rule #2: The global status can only change to Rejected if one of the following criteria is met: All decisions required for Stage 1 are made and one or more of the decisions was to reject the page. 4-34 November 15, 2006 Rampage Remote Client Rampage Remote Client OR All decisions required for a given stage are made and one or more of the decisions was to reject and all previous stages are approved. Take the following example : I have 3 stages for a Job called Remote_1.3. I’ll call stage one Legal, stage two Creative and stage three Final. Each stage contains 3 users. Legal (Requires at least 2 decisions) Legal1, Legal2, Legal3 Creative (All decisions are mandatory) Creative1, Creative2, Creative3 Final (All decisions are mandatory) Final1, Final2, Final3 The following is how a page rejection can happen. • If 2 of 3 users in the Legal stage make their decision and 1 of their decisions is reject, then the global status of the page will trip immediately to Rejected, regardless of any decisions made or not made in the Creative and Final stages. • If 2 of 3 users in the Legal stage approve the page and if all users in the Creative stage make their decision and at least 1 of the decisions is reject, then the global status of the page will trip immediately to Rejected, regardless of any decisions made or not made in the Final stage. • If 2 of 3 users in the Legal stage approve the page and if all users in the Creative stage approve the page and if all users in the Final stage make their decision and at least 1 of the decisions is reject, then the global status of the page will trip to Rejected. The following is how page approval can happen. • If 2 of 3 users in the Legal stage make their decision and their decision is approved then the page passes stage 1. If all 3 users in the Creative stage make their decision and their decision is approved then the page passes stage 2. If all 3 users in the Final stage make their decision and their decision is approved then it passes stage 3. Stage 3 being the final stage and everyone approving, will trip the global page status to Approved. Rampage Remote Client Note: All users in all stages can make their decision at any time. In other words stage 3 users can make their decisions before anyone in stage 1 or 2.) November 15, 2006 4-35 Rampage Remote Client Job Browser Job Browser window has been added for all jobs. This window will display A Job Stats like total pages, total pages ripped, etc. 1. From the Window menu in the Rampage Remote Client select Show Job Browser. 2.The Job Browser window will open to show the list of Jobs. 3. Select a Job from the list on the left and the status of the Job will be displayed in the window. The Job Completion area is based on the criteria of the flats plotted. The Pages and Flats areas display the status of each criteria shown. 4-36 November 15, 2006 Rampage Remote Client Rampage Remote Client Download / Printing / Color Managing Proofs Rampage Remote Client has a feature that allows you to download proofs. You can download a PDF or JPEG file in either RGB or CMYK. One feature available during download is the ability to apply an ICC Profile to an RGB proof as it is downloaded. You can then output the RGB JPEG or PDF to an ICCcapable device to get a fairly accurate representation of final color. Note: If a CMYK JPEG proof or any PDF is downloaded, you must use a separate application to print the file. Only RGB JPEG downloaded files can take advantage of printing directly from the Rampage Remote application. Downloading and Color Managing Proofs To download a proof: 1. Select Download Proof from the File menu. 2. Select the Format, either PDF or JPEG. • In the Pages & Layout window, there is a Stitching option for the PDF File Format. If you have selected more than one page to download you can Stitch the pages into one file or Keep the pages separate. See Multiple Downloads for more information. 3. Select the Quality Options pop-up menu. The options correspond to what you plan to do with the saved PDF or JPEG file. • DPI – Low (150dpi) should be used for screen-proofing. Medium (180dpi) should be used when you want to save disk space, but plan to output to a high-resolution proofer. High (300dpi) should be used for high-resolution proofers. • Image Quality – Use the slider to increase or decrease the size of the file. The smaller the file, the lower the quality. 4. Select the Color Options pop-up menu. Both the PDF and JPEG files have the same selections for RGB and CMYK Color space. Rampage Remote Client November 15, 2006 4-37 Rampage Remote Client • Select RGB or CMYK Color space. If RGB is selected you can then select the ICC Profile you wish to run the proof through and the Rendering Intent. If you do not want to ICC color correct the proof, select None. Note: The ICC Profiles that are listed here are assigned by the Rampage Remote Administrator. Note: Color Correction is not available if CMYK Color space is chosen. 5. Select the Annotation Options pop-up menu. Only the PDF File Format has the options available. • Burn Icons onto Proof – If this is set to Yes, you will see the various Annotation icons on each proof. If set to No, the icons will not be visible on the proof. • List Annotation – If this is set to Yes, a separate page with the Text Annotations will be included in the PDF. If set to No, the Annotations will not be listed. 6. Select the Header/Footer Options pop-up menu. Only the PDF File Format has the options available. Any information set in the Header and Footer menu is saved in preferences, so they do not have to be set for every download. 4-38 November 15, 2006 Rampage Remote Client Rampage Remote Client • Header/Footer – Select the location of the additional information. The Header is placed at the top of the page. The Footer is placed at the bottom of the page. • Font/Size/Color – Select the text variables of the Header/ Footer. • Align – Select the alignment of the additional information, left, center, or right. • Auto Text – The pop-up menu lists some common variables for Header/Footer information. When you select a variable, it is listed in the window below. You can type in custom information in the window provided. See example below. The resulting PDF will contain the header or footer information. The picture below contains the common variables from the pop-up menu. 7. Click Download. In the Download dialogue, type the name of your downloaded file, then choose the location you wish to save your downloaded proof. Click the Download button. Depending upon the number of pages and the options you choose, it may take several minutes to download the file. The Download Manager window will appear, if it was not already open, showing the file name, the size, and the status of the download. If you downloaded a JPEG file and there were any annotations on the file, you will end up with two files. One the JPEG, the other will be the annotations file with the page name “.annots” extension. This is used for printing annotations with a JPEG file. See Printing Proofs section below. If you downloaded a PDF file, the annotations will be included in one file. Rampage Remote Client November 15, 2006 4-39 Rampage Remote Client Downloading Multiple Proofs In any view of the Page Browser, you have the ability to download more than one Proof at a time. 1. Select the Pages to download. 2. ⌘-click (Mac) or right-click (PC), then select Download. 3. Follow the steps explained in the previous section to continue with the Download process. Downloading Books When viewing a Job in the Page Browser using Book view, you have an option in the contextual menu, Download Book. This option will download all pages shown in Book View. Note: The Download Book selection is only available if a Job has been set up by the Rampage Remote site. 1. Open the Page Browser and select a Job from the left column. 2. Make sure Book view is selected. 3. In the Page Browser window, ⌘-click (Mac) or right-click (PC) to bring up the contextual menu. 4. Select Download Book. The Download window appears. Select all of the settings necessary to continue with the download. If the Job contains Blank or Unassigned pages, the resulting PDF will have a Blank page or one that says Not Available (Unassigned). Note: You do not have to have any pages selected to Download Book. 4-40 November 15, 2006 Rampage Remote Client Rampage Remote Client Printing Proofs - OS-X and PC Only Rampage Remote can only print downloaded RGB JPEG files. If any other file type is selected, the following message will appear. To print an RGB JPEG downloaded proof: 1. Select Print Downloaded Proof from the File menu. 2. Locate the downloaded RGB JPEG, select it, then click Print. 3. The following window appears showing you the Print Options. You have the option to Center Proof within the page size chosen in your Page Setup, Scale Proof to Page size chosen in your Page Setup, Print Proof of the Page and Print Annotations for that proof. When you choose to Print Annotations, you will get a separate page off your printer with the annotations listed and the Proof will show the annotation shape (target, rectangle, oval) and number corresponding to the annotation page (see below). 4. In the Page Setup dialogue, choose the paper size that matches the paper in your printer. Click OK. Rampage Remote Client Note: If you are using high quality paper for proofing and choose to print the annotations separately, you just select Print Annotations and send to a laser printer. November 15, 2006 4-41 Rampage Remote Client 4. Finally, choose the printer to which you’ll print the proof. Set any relevant options and click OK. Using Webstart Interface Users don’t have to download and install the Rampage Remote Client. Using Java’s Webstart technology, Users can launch the Rampage Remote Client with a single click within your Internet Browser. Using your Browser application eliminates the need to download the Rampage Remote Client and install it on your computer. With Webstart, you have all of the features of the Rampage Remote Client. Java 1.4 or above is required. 1. Launch your internet browsing application 2. Type the IP address or URL of the Rampage Remote Server, the following window appears. This is the home page of the Rampage Remote Server. 3. Click Webstart in the menu bar, the following window appears, click Run the Application. 4-42 November 15, 2006 Rampage Remote Client Rampage Remote Client 4. The License Agreement window appears, scroll to the bottom of the window and click I Agree. Note: If you receive the following Download Error message when you first try Webstart, contact the Rampage Remote Administrator. 5. The Java Webstart will start the application. Webstart will run on Java Version 1.4 and above. 6. Webstart is a signed application. A security warning window appears. To continue, press Yes or Always. The Remote Client will launch. Rampage Remote Client November 15, 2006 4-43 Rampage Remote Client Note: If Webstart has been launched more than once, you will be prompted to install the application to your hard drive. 7. The Rampage Remote window appears. 8. Proceed to use Webstart like the downloaded version of the Rampage Remote Client. Webstart Cache If a User has been utilizing the Webstart interface to interact with the Rampage Remote server, there is a possibility of the Webstart cache becoming corrupt. A Download Error message similar to the one below will appear when attempting to connect to the Rampage Remote Server. Follow the steps below to clear the Webstart cache. Mac 1. Open the Hard Drive -> Users -> User folder -> Library -> Caches -> Java Web Start -> Cache -> http 2. Delete the folder named with the IP Address or URL of the Rampage Remote site you are trying to connect. 4-44 November 15, 2006 Rampage Remote Client Rampage Remote Client PC 1. Open the Hard Drive -> Documents and Settings -> Administrator -> Application Data -> Sun -> Java -> Deployment -> cache -> javaws -> http 2. Delete the folder named with the IP Address or URL of the Rampage Remote site you are trying to connect. Using Rampage Remote Applet The Rampage Remote Applet is an application running within your Internet Browser. Using your Browser application eliminates the need to download the Rampage Remote Client and install it on your computer. There are some limitations as to what features can be used. See Limitations of the Applet later in this section. Webstart is a similar application that you can run within your Internet Browser as well, but with no Limitations. See the section on Webstart Interface on the previous pages. Java 1.4 or above is required. 1. Launch your internet browsing application 2. Type the IP address or URL of the Rampage Remote Server, the following window appears. This is the home page of the Rampage Remote Server. 3. Click Applet in the menu bar the following window appears, click Run the Applet. Rampage Remote Client November 15, 2006 4-45 Rampage Remote Client 4. The License Agreement window appears, scroll to the bottom of the window and click I Agree. 5. The Java Version Check window appears. This window will display the version of Java found on your local computer. The Applet will run on Version 1.4 and above. 6. If the version of Java is 1.4 or above, click Continue. If it is not, you need to install the latest version. See Checking Java Version in the beginning of this section. 7. After you click Continue, the following window appears. 8. Click Rampage Remote to send a request to run the Applet. 4-46 November 15, 2006 Rampage Remote Client Rampage Remote Client 9. The Rampage Remote window and Open new connection windows appear. Type in the correct Username and Password to log in. Note: The Server address is grayed out and cannot be changed. 10. Proceed to use the Applet like the download version of Rampage Remote. See Limitations below. Limitations of the Applet Since the Applet is run within an Internet Browser application and does not get “installed” on your computer, there are a few features that cannot be performed. 1. Download Proofs 2. Print downloaded Proofs 3. Save/Load Guides 4. Save Preferences or any Settings 5. Change Servers Rampage Remote Client November 15, 2006 4-47 Rampage Remote Client 4-48 November 15, 2006 Rampage Remote Client