1
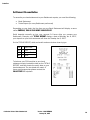
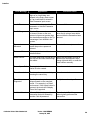
PRIMETREX
OPERATING GUIDE
Technical Support: 1-877-777-6603
TABLE OF CONTENTS
TRANSACTIONS ................................................................................................................3
Debit Card Purchases ..................................................................................................... 3
Debit Card Tipping .......................................................................................................... 4
Credit Card Purchases .................................................................................................... 4
Credit Card Tipping ......................................................................................................... 4
Pre-Authorization............................................................................................................. 5
Pre-Authorization Completion ........................................................................................ 5
Force Post........................................................................................................................ 6
Credit Card Returns ........................................................................................................ 7
Debit Card or Credit Card Voids ..................................................................................... 7
ADMINISTRATIVE UTILITIES..............................................................................................9
Settlement .......................................................................................................................... 9
Report Definitions .............................................................................................................. 9
Detail Report ................................................................................................................. 9
Totals Report ................................................................................................................ 9
Batch Totals and Settlement Report ......................................................................... 9
Settlement Reconciliation .........................................................................................10
Clerk Reports...............................................................................................................11
Detail Report ...............................................................................................................11
Totals Report ...............................................................................................................11
Unadjust Report ..........................................................................................................11
Clerk Table...................................................................................................................12
Tip Report ....................................................................................................................12
Configuration Updates.....................................................................................................13
Host Download. ............................................................................................................13
Other Utilities....................................................................................................................14
Set Up CLERK ID’S .......................................................................................................14
Demo/Training Mode...................................................................................................14
Reprint Last Receipt ....................................................................................................15
Reprint Any Receipt .....................................................................................................15
Change Language ........................................................................................................15
Display Contrast ...........................................................................................................15
TROUBLESHOOTING YOUR PRIMETREX TERMINAL ..................................................... 17
Communication Processing Messages......................................................................18
Application Processing Messages .............................................................................18
PrimeTrex
USING YOUR PRIMETREX TERMINAL
TRANSACTIONS
DEBIT CARD PURCHASES
A debit purchase can be performed in two ways:
1. Place the card in the card swipe with magnetic strip facing
down and out, and swipe the debit card.
-orFrom the Main Menu select F1 SALE, F2 DEBIT
2. Depending on your terminal setup, you may be prompted for
a CLERK ID before the card is swiped. Enter your unique ID.
3. The terminal will prompt for the PURCHASE AMOUNT. Enter
the total amount of the purchase and press OK.
4. Swipe Debit card
5. Depending on your terminal setup, you may now be
prompted for the CASH BACK AMOUNT. Enter the total
amount of cash that you will be disbursing and press OK.
6. At this time the terminal is waiting for cardholder entry on
the PIN pad.
7. Pass the terminal to the cardholder and have the cardholder
begin entering their information.
8. The cardholder will now be prompted to approve or correct various aspects of the
transaction or cancel the transaction entirely pressing by
pressing the OK (the green key), CORR (the yellow key), or
CANC (the red key) buttons respectively.
9. The cardholder will be prompted to approve the Purchase
Amount, enter and approve a Gratuity (if applicable),
approve the Cash Back Amount, approve the Surcharge/Fee
amount, select the appropriate bank account that the funds
are to be withdrawn from, enter their PIN number and press
OK.
10. The terminal will connect to the host and respond by
approving or declining the transaction.
11. The terminal will print a receipt to be given to the cardholder
and then will prompt for printing of a duplicate receipt. To
print duplicate receipts select YES, to cancel select NO.
NOTE: COLLECTIVEPOS recommends keeping a copy of the
receipt for a minimum of 1 year from the date of the
transaction.
©Collective Point of Sale Solutions Ltd.
Version 1.6.8 EMERGIS
January 29, 2007
3
PrimeTrex
DEBIT CARD TIPPING
If you have activated Debit Card Tipping on your terminal, after accepting the
Purchase Amount the cardholder will be prompted to enter a TIP percentage or
amount on the PIN pad and press OK.
CREDIT CARD PURCHASES
A credit purchase can be performed in two ways:
1. Place the card in the card swipe with magnetic strip facing down and out, and
swipe the credit card.
-orFrom the Main Menu press the F1 SALE, F1 CREDIT. (If the credit swipe is nonfunctional you may manually enter the credit card details.)
2. Depending on your terminal setup, you may be prompted for a CLERK ID before
the card is swiped. Enter your unique ID.
3. The terminal will prompt for the PURCHASE AMOUNT. Enter the total amount of
the purchase and press OK.
4. Swipe the Credit Card or you can manually enter the credit card. (If the credit card
was manually entered, you will be prompted to ENTER EXPIRY DATE in MMYY
format (month, then year).
5. The terminal will connect to the host and respond by approving or declining the
transaction.
6. The terminal will print a receipt to be given to the cardholder and then will prompt
for printing of a duplicate receipt. To print duplicate receipts select YES, to cancel
select NO.
7. Have the cardholder sign one of the receipts and keep that copy for your records.
NOTE: COLLECTIVEPOS recommends keeping a copy of the receipt for a minimum of
1 year from the date of the transaction.
CREDIT CARD TIPPING
If you have activated Credit Card Tipping on your terminal, all your Credit Card
transactions will be process as a PRE-AUTH Credit Card transaction. In a transaction
of this nature, the receipt will print with an extra line for the cardholder to write in
both a Tip and a Total. Once the cardholder has decided on a Tip amount and totaled
the transaction, you will need to perform a Pre-Authorization Completion to charge the
cardholder’s credit card (see ‘Pre-Authorization Completion’ section for further
details).
NOTE: Credit Card Tipping is a Pre-Authorization transaction. The cardholder will NOT
be charged until a Pre-Authorization Completion has been performed.
©Collective Point of Sale Solutions Ltd.
Version 1.6.8 EMERGIS
January 29, 2007
4
PrimeTrex
PRE-AUTHORIZATION
A Pre-Authorization transaction puts a hold on a credit card for the amount entered
and will NOT charge the cardholder until a Pre-Authorization Completion has been
preformed. This type of transaction is typically used in hotel and rental environments
where the total amount of the transaction is not known at the outset of a transaction.
To perform a Pre-Authorization:
1. Press the DOWN key
2. Select the F1 PRE-AUTH
3. Depending on your terminal setup, you may be prompted for a CLERK ID before
the card is swiped. Enter your unique ID.
4. The terminal will prompt for the AMOUNT. Enter the Pre-Authorization amount and
press OK.
5. Place the card in the card swipe with magnetic strip facing down and out, and
swipe the credit card.
-orIf the credit swipe is non-functional you may manually enter the Card Number and
Expiry Date in MMYY format (month, then year).
6. The terminal will connect to the host and respond by approving or declining the
transaction.
7. The terminal will print a receipt to be given to the cardholder and then will prompt
for printing of a duplicate receipt. To print duplicate receipts select YES, to cancel
select NO. Have the cardholder enter the pertinent details on one of the receipts,
sign the receipt and return it to you.
PRE-AUTHORIZATION COMPLETION
A Pre-Authorization Completion is used to complete both Pre-Authorization and Credit
Card Tipping transactions. The cardholder will NOT be charged until a PreAuthorization Completion has been performed. To perform a Pre-Authorization
Completion:
1.
2.
3.
4.
5.
6.
7.
8.
Locate RECORD # on the Pre-Authorization receipt.
Press the DOWN key or select the ADJUST key
Select F2 PAuth Completion
You can retrieve the Pre-Authorization transaction by four ways, 1 Clerk ID, 2 Amt,
3 Account #, 4 Record #. (For this example, use the Record #)
Select F4 Rec#
Enter Record # found on the Pre-Authorization receipt
Terminal will prompt you to check the Pre-Authorization to be close, if correct
select F2 YES; if not correct you can use the F3 NEXT to find correct PreAuthorization transaction.
Terminal will prompt you to enter new amount of the transaction, enter in TOTAL
amount of the transaction.
©Collective Point of Sale Solutions Ltd.
Version 1.6.8 EMERGIS
January 29, 2007
5
PrimeTrex
9. The terminal will connect to the host and respond by approving or declining the
transaction.
10. The terminal will print a receipt for your records and then will prompt for printing
of a duplicate receipt. To print duplicate receipts select YES, to cancel select NO.
The cardholder does not need to sign a Pre-Authorization Completion.
NOTE: COLLECTIVEPOS recommends keeping copies of BOTH the Pre-Authorization
and Pre-Authorization Completion transaction receipts for a minimum of 1 year from
the date of the transaction.
FORCE POST
If the event that you cannot connect to the host computer, you may take a manual
imprint of the cardholder’s credit card and call the credit card company that issued
you your merchant number for authorizations over your floor limit. When the
connection to the host computer is restored, you may process these transactions
through your terminal and deposit the proceeds electronically. To perform a Force
Post:
1. Press the F4 FORCE POST
2. Depending on your terminal setup, you may be prompted for a CLERK ID. Enter
your unique ID.
3. Enter the AMOUNT of the transaction
4. Enter the Authorization number provided to you by the credit card company that
issued you your merchant number and press OK.
5. Manually enter the credit card number, and press OK.
6. Manually enter the credit card expiry date in MMYY format (month, then year),
and press OK.
7. The terminal will connect to the host and respond by approving or declining the
transaction.
8. The terminal will print a receipt for your records and then will prompt for printing
of a duplicate receipt. To print duplicate receipts select YES, to cancel select NO.
NOTE: COLLECTIVEPOS recommends keeping a copy of BOTH the manually imprinted
and Force Post transaction receipts for a minimum of 1 year from the date of the
transaction.
©Collective Point of Sale Solutions Ltd.
Version 1.6.8 EMERGIS
January 29, 2007
6
PrimeTrex
CREDIT CARD RETURNS
A Credit Card Return can be performed at any time, without an original record
number and is used to refund amounts to a cardholder. To perform a Credit Card
Return:
1. Press the F3 REFUND
2. Select F1 CREDIT
3. Depending on your terminal setup, you may be prompted for a CLERK ID before
the card is swiped. Enter your unique ID.
4. Enter the RETURN AMOUNT.
5. Place the card in the card swipe with magnetic strip facing down and out, and
swipe the credit card.
-orIf the credit swipe is non-functional you may manually enter the Card Number and
Expiry Date in MMYY format (month, then year).
6. The terminal will connect to the host and respond by approving or declining the
transaction.
7. The terminal will print a receipt to be given to the cardholder and then will prompt
for printing of a duplicate receipt. To print duplicate receipts select YES, to cancel
select NO.
NOTE: COLLECTIVEPOS recommends keeping a copy of the receipt for a minimum of
1 year from the date of the transaction.
DEBIT CARD OR CREDIT CARD VOIDS
A Debit Card or Credit Card Void can only be performed in the same batch as the
original transaction, for the original amount of the transaction and requires the
original record number to be processed. This transaction is used to correct a Debit or
Credit Purchase, Credit Return transaction by eliminating the transaction record.
To perform a Debit Card or Credit Card Void:
1. Select F2 VOID
2. Terminal will ask “VOID LAST TRANS” F1 NO or F2 YES, select F1 NO if the
transaction was not the Last transaction that was performed or select F2 YES if it
was the last transaction was performed. (In this example select NO F1)
3. Terminal will ask “Retrieve By:” F1 Rec # or F2 Acct# (in this example select F1
Rec #)
4. Terminal will prompt you to check transaction to make sure it is the correct
transaction to void, if correct select F2 YES, if not correct select F1 NO or F3 NEXT.
5. Place the card in the card swipe with magnetic strip facing down and out, and
swipe the card.
FOR CREDIT CARDS ONLY: If the credit swipe is non-functional you may manually
enter the Card Number and Expiry Date in MMYY format (month, then year).
6. FOR DEBIT CARDS ONLY: Pass the PIN pad to the cardholder and have the
cardholder begin entering their information. The cardholder will now be prompted
©Collective Point of Sale Solutions Ltd.
Version 1.6.8 EMERGIS
January 29, 2007
7
PrimeTrex
to approve or correct various aspects of the
transaction or cancel the transaction entirely pressing
by pressing the OK (the green key), CORR (the yellow
key), or CANC (the red key) buttons respectively. The
cardholder will be asked to approve the Purchase
Correction amount, select the appropriate bank
account that the funds are to be deposited to, enter
their PIN number and press OK.
7. The terminal will connect to the host and respond by
approving or declining the transaction.
8. The terminal will print a receipt to be given to the
cardholder and then will prompt for printing of a
duplicate receipt. To print duplicate receipts select
YES, to cancel select NO.
NOTE: COLLECTIVEPOS recommends keeping a copy of
the receipt for a minimum of 1 year from the date of the
transaction.
©Collective Point of Sale Solutions Ltd.
Version 1.6.8 EMERGIS
January 29, 2007
8
PrimeTrex
ADMINISTRATIVE UTILITIES
SETTLEMENT
The SETTLEMENT is a merchant define type of batch close. The merchant controls
when the SETTLEMENT occurs. If a merchant does not perform a batch close the
merchant will not receive any deposits, until a batch close has been performed.
1.
2.
3.
4.
Select F4 SETTLEMENT
The DETAIL REPORT and the TOTALS REPORT will print automatically
The terminal will then dial to the host
The terminal will print out the BATCH TOTALS and SETTLEMENT REPORT
REPORT DEFINITIONS
Detail Report: The Detail Report provides a list of all
transaction within the given batch close. The Detail
Report also provides the number of total (debit card
and credit card) transactions. The report breaks out
the TIPS, CASH BACK, PURCHASE FEE, CASHBACK
FEE, REFUNDS, and VOIDS.
THIS REPORT IS FOR
INFORMATION PURPOSES ONLY.
Totals Report: The Totals Report provides totals by
card type of all transactions for a given Operating Day.
An Operating Day is defined as a business day that
typically runs from when a business opens to when it
closes. An Operating Day may vary among days of the
week, months of the year and from merchant to
merchant. THIS REPORT DETAILS THE TRANSACTIONS
THAT WILL BE DEPOSITED TO YOUR BANK.
Batch Totals and Settlement Report: The Batch Totals
and Settlement Report provide totals between the host and the terminal. This report
will indicate if there are any discrepancies between the host and the terminal.
©Collective Point of Sale Solutions Ltd.
Version 1.6.8 EMERGIS
January 29, 2007
9
PrimeTrex
Settlement Reconciliation
To reconcile your bank statement to your Settlement reports, you need the following:
•
•
Bank Statement
Totals Report (for every Settlement performed)
Depending on your bank, the line item on your Bank Statement will display a name
called EMERGIS, THIS IS YOUR DEBIT CARD DEPOSIT.
Debit deposits normally go into your account 24 hours after you process your
Settlement. Example: your TOTALS REPORT display a date of Monday Jan 8, 2007,
your deposit on your bank statement will show as Tuesday Jan 9, 2007.
On the TOTALS REPORT, debit and credit cards are broken down by type
DB
VI
MC
AX
–
–
–
–
Debit Card
VISA
Master Card
Amex
To balance your POS machine to your bank
statement simply located the date on the TOTALS
REPORT, and then locate the next’s date on your
bank statement. The two totals will match. If
there are discrepancies please contact the
COLLECTIVEPOS helpdesk.
©Collective Point of Sale Solutions Ltd.
Version 1.6.8 EMERGIS
January 29, 2007
10
PrimeTrex
CLERK REPORTS
Clerk reports provide the ability to report both on an individual clerks sales
performance and on a group of clerks. This feature is typically used in a restaurant
environment or in an environment where multiple people have access to the
terminal.
NOTE: Clerk ids need to be setup for server reporting to function (see Clerk id Setup).
These reports are for information purposes only and do not affect daily settlement.
DETAIL REPORT
The detail report is designed to provide a running total of individual Clerk sales OR
ALL clerks for a given shift. This report can be run at any time during an employee’s
shift and will provide a total of all sales from the previous Clerk Close to the date and
time that the current Clerk detail report was run. To print a Detail Report:
1. Press the REPORT key
2. Select F3 SERVER REPORTS
3. Select F2 DETAIL REPORTS
4. You now can select either F1 ONE CLERK Report, or F2 ALL CLERKS. IF you select
F2 ALL CLERKS, the report will print.
5. Enter in CLERK ID and press okay
6. Report will print
TOTALS REPORT
The TOTALS REPORT is designed to provide a total of all clerk’s sales for a given shift.
This report can only be run any time during a shift. Once the End of Day process has
been complete the TOTALS REPORT will reset to zero.
To print a TOTALS REPORT:
1. Press the REPORT key
2. Select F3 SERVER REPORTS
3. Select F1 TOTALS REPORT
4. Report will print out
UNADJUST REPORT
The UNADJUST REPORT is designed to show all PRE-AUTH transactions that still need
to be completed. This report breaks up all open PRE-AUTH by Clerk ID.
To print UNADJUST REPORT
1. Press REPORT key
2. Select F3 SERVER REPORTS
3. Select F3 UNADJUST REPORT
4. Report will print out
©Collective Point of Sale Solutions Ltd.
Version 1.6.8 EMERGIS
January 29, 2007
11
PrimeTrex
CLERK TABLE
The CLERK TABLE report is designed to show the manager which clerks are logged in
or out.
To print SERVER TABLE report:
1. Press the REPORT key
2. Select F3 SERVER REPORTS
3. Select F4 SERVER TABLE
4. Report will print out
TIP REPORT
The TIP REPORT is designed to show, how much TIP a clerk has collected for the day.
You can print for either an individual clerk or for all the clerks.
To print TIP REPORT
1. Press the REPORT key
2. Select F3 SERVER REPORTS
3. Press the DOWN key
4. Select F1 TIP REPORT
©Collective Point of Sale Solutions Ltd.
Version 1.6.8 EMERGIS
January 29, 2007
12
PrimeTrex
CONFIGURATION UPDATES
Configuration updates are used to update your terminal to reflect changes in your
terminal setup. The most common updates are required due to address changes
and banking changes. Depending on the nature of the change, a Host Download may
be required. If an update of this nature is required, you will be contacted by technical
support. DO NOT ATTEMPT A CONFIGURATION UPDATE WITHOUT THE ASSISTANCE OF
TECHNICAL SUPPORT. THIS MAY CAUSE YOUR TERMINAL TO STOP FUNCTIONING.
Host Download – This process will download any information (such as Location Name,
Address info) that is on the host, and will also complete a Key Exchange.
1. Press the DOWN key twice
2. Select ADMIN F1
3. Select HOST DOWNLOAD F1
4. The terminal will connect to the Host, download the necessary files and
disconnect when complete. DO NOT INTERRUPT COMMUNICATION. THIS MAY
CAUSE YOUR TERMINAL TO STOP FUNCTIONING.
Key Exchange – This process will compare keys in the Pin Pad to host
1. Press the DOWN key twice
2. Select ADMIN F1
3. Select KEY EXCHANGE F2
4. The terminal will connect to the Host, download the necessary files and
disconnect when complete. DO NOT INTERRUPT COMMUNICATION. THIS MAY
CAUSE YOUR TERMINAL TO STOP FUNCTIONING.
©Collective Point of Sale Solutions Ltd.
Version 1.6.8 EMERGIS
January 29, 2007
13
PrimeTrex
OTHER UTILITIES
Set Up CLERK ID’S
Clerk ID’s may be set up for information and reporting purposes. This functionality
allows for the ability to report both on an individual server’s sales performance and
on a group of server’s. This feature is typically used in a restaurant environment or in
an environment where multiple people have access to the terminal. Setting up clerk
id does not affect daily settlement.
To add a CLERK ID:
1. Press the DOWN key twice
2. Select SERVER SETUP (F2)
3. Select ADD SERVER (F3)
4. Enter in NEW CLERK ID, and press OK
5. Enter in password for new clerk and press OK.
6. Re-Enter in password and press OK
To remove a CLERK ID:
1. Press the DOWN key twice
2. Select SERVER SETUP (F2)
3. Press the DOWN key
4. Select Delete Server (F1)
5. Enter Clerk ID to be deleted, and press OK.
6. Enter Clerk ID password, and press OK
7. Press CANC to return to the main menu.
Demo/Training Mode
Demo Mode can be used for training purposes and/or to experiment and learn about
the various features and functions of your terminal. It is important to note that:
TRANSACTIONS IN DEMO MODE ARE NOT LIVE TRANSACTIONS. CARDHOLDERS WILL
NOT BE CHARGED FOR TRANSACTIONS PROCESSED IN DEMO MODE. The terminal will
display TRAINING MODE on the screen to identify when the terminal is in Demo Mode.
To enter Demo Mode:
1. Press the DOWN key twice
2. Select F3 OTHER SETUP
3. Enter the password: 000000
4. Press OK
5. Select F1 DEMO
6. Terminal will display “Demo Mode=OFF Change Mode?”
7. Select F2 YES
8. Terminal will display “DEMO MODE ON”
To exit Demo Mode:
©Collective Point of Sale Solutions Ltd.
Version 1.6.8 EMERGIS
January 29, 2007
14
PrimeTrex
1.
2.
3.
4.
5.
6.
7.
8.
Press the DOWN key twice
Select F3 OTHER SETUP
Enter the password: 000000
Press OK
Select F1 DEMO
Terminal will display “Demo Mode=ON Change Mode?”
Select F2 YES
Terminal will display “DEMO MODE OFF”
Reprint Last Receipt
1. Press the REPRINT hot key (located above the number 3 key)
2. Select F2 LAST RECEIPT
To print duplicate receipts select YES, to cancel select NO.
Reprint Any Receipt
1. Press the REPRINT hot key (located above the number 3 key)
2. Select F3 ANY RECEIPT
To print duplicate receipts select YES, to cancel select NO.
Change Language
Your terminal is fully bilingual in English and French
1. Press the DOWN key twice
2. Select F3 OTHER SETUP
3. Enter the password: 000000
4. Press OK
5. Press the UP key once
6. Select F4 LANGUAGE
7. Select F1 ENGLISH or F2 FRENCH
Display Contrast
You can change the contrast of the display, to make it lighter or darker
Press the UP key once
Select F2 HARDWARE
Select F1 CONTRAST
Select the ADJUST key to make the screen lighter or select the REPRINT key to
make darker
5. Once you selected the desire contrast press the CANC button
1.
2.
3.
4.
©Collective Point of Sale Solutions Ltd.
Version 1.6.8 EMERGIS
January 29, 2007
15
PrimeTrex
Optional Features - Customized your Terminal
The PrimeTrex terminal offers other features that you the merchant
may require. If at any time you wish to activate or deactivate a feature
please call the Collective POS helpdesk.
List of Features
•
•
•
•
•
•
•
•
•
Customized Headers and Footers (on the receipts text only)
Password on Returns
Password on Voids
Customized Tip percentage on the pin pad (debit tipping)
Auto settle
Select to print the merchant/customer receipt first
One step CC tipping
Phone Card application (fee applicable)
Gift and Loyalty application (fee applicable)
©Collective Point of Sale Solutions Ltd.
Version 1.6.8 EMERGIS
January 29, 2007
16
PrimeTrex
TROUBLESHOOTING YOUR PRIMETREX TERMINAL
Communication Processing Messages
Error Message
Comm Error
Explanation
There is a problem
connecting to the
host.
Corrective Action
Retry transaction. If error persists, verify that the
phone line is securely connected to the terminal
and receives a dial tone.
The line may not be available, busy or the
terminal may be dialing the wrong number. Call
help desk to verify that the proper phone number
is set in the terminal.
Line Busy
Line Already In Use
This message
indicates that the
phone number being
called by the terminal
is busy.
Retry transaction. If error persists, verify that the
phone line is securely connected to the terminal
and receives a dial tone.
Phone line already in
use by another
device
Retry transaction. If error persists, verify that the
phone line is securely connected to the terminal
and receives a dial tone.
This message can also occur if the customer has
to dial a digit such as 9 before they dial out. If
this is the case, add this digit in front of the
primary/secondary auth phone number and
primary/secondary settlement phone number and
retry the transaction again.
The phone line may be used by another device
such as fax or another line might be interfering
with it. Also verify the phone cable. If the cable
is low quality or has been damaged it can lead to
this error message. Finally, if the dial tone
received by the terminal is poor this problem will
occur.
No Answer
No Dial Tone
©Collective Point of Sale Solutions Ltd.
This message
appears while
attempting to
download or when
performing a
transaction during
which the host does
not answer.
If the error occurs during a transaction, retry the
transaction.
No Dial Tone
detected by the
terminal.
Retry transaction. If error persists, verify that the
phone line is connected to the terminal receives a
dial tone. Try using the same phone cable and
connect to a phone. Lift the receiver and verify
that there is a dial tone.
If error persists, verify that the phone line is
connected to the terminal and receives a dial
tone.
Version 1.6.8 EMERGIS
January 29, 2007
17
PrimeTrex
Error Message
No Carrier
Explanation
No Carrier detected
by dialer to establish
connection
Corrective Action
Retry transaction. If error persists, verify that the
phone line is connected to the terminal and
receives a dial tone.
No Host Response
The terminal did not
receive expected
data (ENQ) from the
Host.
Retry the transaction.
No Line
Communication has
failed because the
terminal does not
recognize a working
phone line.
If error persists, verify that the phone line is
connected to the terminal and receives a dial
tone.
Error Response
The terminal did not
receive correct host
response
Retry the transaction.
If error persists, verify that the phone line is
connected to the terminal and receives a dial
tone.
If error persists, verify that the phone line is
connected to the terminal and receives a dial
tone.
APPLICATION PROCESSING MESSAGES
Error Message
Already Voided
Explanation
The user tried to void an already
voided transaction.
Corrective Action
Transaction is already voided, no
action needed.
Already Logged On
Clerk has logged on already
No action needed.
Already Logged Off
Clerk has logged off already
No action needed.
Bad Account #
Swiped card cannot pass the mod
10 check or card length is less than
13
Re-swipe the card. If the error
persists, ask for another card.
Bad Card Length
If OK is pressed and number of
digits entered for PAN was less
than 13 digits
Retry the transaction. If error
persists ask for another form of
payment, as the card may be
fraudulent.
Batch Empty
A function is being requested which
could not be performed due to the
terminal batch being empty.
Retry the function once some
transactions are stored in the
batch.
Bad Parameter
The terminal encountered an error
during the parameter download.
Call CollectivePOS help desk.
©Collective Point of Sale Solutions Ltd.
Version 1.6.8 EMERGIS
January 29, 2007
18
PrimeTrex
Error Message
Card Not
Supported
Explanation
The merchant is not set up to
accept the card type that was
entered.
Corrective Action
Verify that the card being swiped is
setup in the merchant profile.
Check Printer
The terminal is not able to print the
receipt because it is out of paper
Verify that the terminal has paper
and is fed correctly into the printer
module.
Clerk Exists
When trying to add a clerk and
using a number that has already
been configured.
Key new Clerk ID
Download Failed
The terminal has started a
download, but has lost the
connection or the reference number
entered is not consistent with TMS.
Re-initiate a download and enter
the correct reference number. If
error persists call help desk to
verify the download reference
numbers for TMS download.
Expired card
The card’s expiration date does not
pass. (Note: there is no check on
Visa and MasterCard credit cards)
Ask for another form of payment.
No Match Found
Occurs when trying to retrieve
transactions: (1) when keying the
incorrect last 4 digits of the card in
retrieving by Acct# screen.
Re-key the input
(2)When keying a Clerk ID that did
not performed any transaction
when retrieving by Clerk screen;
(3) When keying an amount that
does not exist in the current batch
when retrieving by Amount screen;
(4) When keying an invalid record
number in retrieving by Rec#
screen.
Invalid Clerk Id
The clerk number keyed has not
been setup in the “Server Setup”
menu.
Add the clerk number to the clerk
table through Server Setup.
Invalid Password
The user typed an invalid
password.
Enter a valid password.
©Collective Point of Sale Solutions Ltd.
Version 1.6.8 EMERGIS
January 29, 2007
19
PrimeTrex
Error Message
Invalid Date
Explanation
If OK is pressed and less than 4
digits or an invalid date was
entered in the Expiry Date screen
or If an invalid date is entered in
Date Parameter input screen
Corrective Action
Enter a valid Date
Invalid Time
If an invalid time is entered in Time
parameter or AutoSet Parameter
input screen
Enter a valid time
Out Of Range
Blank or Zero amounts was entered
in Amount Screen or the user
entered a tip amount greater than
the standard percentage or the Tip
percentage is not defined in the
system.
Re-enter the dollar amount or Reenter the tip using a lower dollar
amount than the transaction base
amount.
Password
Mismatch
If the password reentered does not
match the previous password
entered.
Re-enter the correct password
Password Exists
If the password entered has been
entered before.
Re-enter another password.
Read Card Err
The card swipe was not read due to Swipe the card again from top to
the way the card was slide through bottom with the magnetic stripe
the reader.
facing right and down, or enter the
card number manually.
Server Space Full
The terminal will not allow more
clerks ID to be created.
No action needed.
Trans Canceled
The transaction was canceled by
pressing the cancel key.
No action needed.
Trans Not
Supported
The function attempted is not
allowed based on the merchant
profile. For example, in a Retail
environment, if the Adjust button is
pressed, the terminal will display
Trans Not Supported.
Verify the merchant’s profile
Void Not Allowed
When a Clerk is trying to void a
transaction that was entered by
another Clerk id/password
Enter the clerk ID of the person
who originally performed the
transaction.
©Collective Point of Sale Solutions Ltd.
Version 1.6.8 EMERGIS
January 29, 2007
20