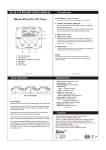
1
The
Manager 3.0
User Guide
47102 Misson Falls Court
Fremont, CA 94539-7818
Phone 510.360.7800
Fax 510.360.7820
an ISO 9001 certified company
Part Number 66110229001 Rev. E
WSE NexSentry Manager
Installation and Administrator’s Guide
-ii
Rev B-Part No. 66110229001
Limited Warranty
WSE warrants to the original user the Equipment manufactured by WSE as described herein (the
Equipment) to be free from defects in material and workmanship for a period of ninety days (90) days
from the date of purchase provided:
I
WSE has been notified within such period by return of any alleged defective equipment, free and
clear of any liens and encumbrances to WSE or its authorized Dealer at the address specified,
transportation prepaid; and
II
the Equipment has not been abused, misused, or improperly maintained and/or repaired during such
period; and
III such defect has not been caused by ordinary wear and tear; and
IV such defect is not a result of voltage surges/brownouts, lightning, water damage/flooding, fire,
explosion, earthquakes, tornadoes, acts of aggression or war, or similar phenomena; and
V
accessories used as integral to any WSE System have been approved by WSE (for example,
coaxial cables and batteries); and
VI the Equipment has been installed, and the installation has been supervised or tested by an
authorized WSE Dealer.
This guide contains proprietary information of WSE and its receipt or possession does not convey any
rights to reproduce, disclose its contents, or to manufacture, use, or sell anything it may describe.
Reproduction, disclosure, or use without specific written authorization of WSE is strictly forbidden.
RESTRICTED RIGHTS LEGEND Use, duplication, or disclosure by the Government is subject to
restrictions as set forth in the subdivision (c)(1)(ii) of the Rights in Technical Data and Computer
Software clause at DFARS 252.227-7013.
WSE
47102 Mission Falls Court
Fremont, CA 94539-7818, USA
www.WSE.com
© 1998 WSE
All rights reserved. Printed in the United States of America.
NexSentry™ is a trademark of WSE.
Microsoft Windows NT® is a registered trademark of Microsoft Corporation.
WSE NexSentry Manager
Installation and Administrator’s Guide
-iv
Rev B-Part No. 66110229001
Contents
.....
...................................
1 Welcome to the NexSentry Manager 3.0........................................1-1
Key Terms..........................................................................................1-1
Understanding the NexSentry Manager 3.0.......................................1-2
Understanding the Database Explorer window ........................................... 1-2
Understanding the Record menu.................................................................. 1-3
Understanding the toolbar............................................................................ 1-5
Understanding the menu bar ........................................................................ 1-6
Understanding the status bar ........................................................................ 1-6
Using this Guide ................................................................................1-6
Using the Online Help .......................................................................1-8
Using the online Help Topics ...................................................................... 1-8
Using the dialog box Help windows............................................................ 1-9
Using the context-sensitive online Help ...................................................... 1-9
System Requirements and Prerequisites ............................................1-10
2 Getting Started .................................................................................2-1
Key Terms..........................................................................................2-2
Checking the Installed Access Control Units ....................................2-3
Checking the connection from the Access Control Units to the PC ............ 2-3
Performing a Loopback and Communications Test .................................... 2-6
Configuring and testing the ACU Server Port ............................................. 2-7
Understanding the TCP/IP Network ..................................................2-8
Understanding the TCP/IP network for separate Client and Server PCs..... 2-8
Understanding the TCP/IP network for a single Client and Server PC ....... 2-9
Preparing an Existing Database for the NexSentry Manager 3.0 ......2-9
Backing up an existing database .................................................................. 2-10
Installing the Software .......................................................................2-11
Testing the Basic Functions ...............................................................2-15
Configuring Windows NT for the NexSentry Manager 3.0 ..............2-18
Revision E, Part Number 66110229001
NexSentry Manager 3.0
v
CONTENTS
Using the NexSentry Manager 3.0 Tools...........................................2-20
Understanding the desktop and menu shortcuts .......................................... 2-20
Understanding the sample databases ........................................................... 2-21
Upgrading an Existing Database........................................................2-22
Restoring an Existing Database .........................................................2-23
Creating a New Database...................................................................2-23
Removing the NexSentry Manager 3.0..............................................2-24
3 Using the System Administration Features ...................................3-1
Key Terms..........................................................................................3-2
Setting the Security Levels ................................................................3-3
Setting the System Users ...................................................................3-4
Setting the ACU Users.......................................................................3-6
Setting the Hosts ................................................................................3-7
Converting Old Transaction Log and Audit Trail Archives ..............3-8
Using the Transactions and the Audit Trail .......................................3-10
Viewing Transactions and the Audit Trail................................................... 3-10
Archiving the Transaction Log and the Audit Trail .................................... 3-12
Viewing the Transaction Log and the Audit Trail archives......................... 3-14
Deleting the Transaction Log and the Audit Trail ....................................... 3-14
Repairing and compacting the database....................................................... 3-14
Editing the Transaction Types ..................................................................... 3-15
Understanding the Edit Transaction Types dialog boxes ............................ 3-15
Setting the Alarm Responses .............................................................3-18
Acknowledging and Silencing Alarms ........................................................ 3-19
Setting the User Defined Fields .........................................................3-20
Understanding the User Defined Fields dialog box..................................... 3-23
Setting the Facility Codes and the Site Codes ...................................3-25
4 Using the Miscellaneous Features ..................................................4-1
Key Terms..........................................................................................4-2
Setting the Time Codes......................................................................4-4
Setting the Time Groups ....................................................................4-5
Setting the Holidays...........................................................................4-6
vi
NexSentry Manager 3.0
Revision E, Part Number 66110229001
.....
CONTENTS
Setting the Actions.............................................................................4-7
Understanding the Action dialog boxes....................................................... 4-8
Setting the Actions for the NexSentry Star I .....................................4-10
Understanding the Actions for NexSentry Star dialog boxes ...................... 4-11
Setting the Action Groups..................................................................4-13
Understanding the Action Groups dialog boxes .......................................... 4-13
Importing the Icons ............................................................................4-15
Understanding the Maps ....................................................................4-16
Creating a Map............................................................................................. 4-16
Using the Maps ............................................................................................ 4-19
Importing the Sounds.........................................................................4-20
Setting the Time Zones ......................................................................4-21
Setting the System Defaults ...............................................................4-22
Understanding the System Defaults dialog box........................................... 4-22
5 Using the Hardware Features .........................................................5-1
Key Terms..........................................................................................5-2
Setting the Pollers ..............................................................................5-5
Understanding the Pollers dialog box .......................................................... 5-5
Setting the Access Control Units .......................................................5-7
Addressing the ACUs .................................................................................. 5-7
Understanding the ACU dialog box............................................................. 5-8
Setting the Doors ...............................................................................5-15
Understanding the Doors dialog box ........................................................... 5-16
Setting the Name Schemes ................................................................5-24
Setting the Elevators ..........................................................................5-25
Understanding the Elevators dialog box ...................................................... 5-25
Setting the Floor Groups....................................................................5-30
Understanding the Floor Groups dialog box................................................ 5-30
Setting the Input Devices ...................................................................5-32
Understanding the Inputs dialog box ........................................................... 5-33
Setting the Output Devices ................................................................5-36
Understanding the Outputs dialog box ........................................................ 5-37
Setting the Reader Configurations .....................................................5-39
Revision E, Part Number 66110229001
NexSentry Manager 3.0
vii
CONTENTS
Understanding the Keypad Readers dialog box........................................... 5-39
Understanding the Digital Readers dialog box ............................................ 5-41
Understanding the Magnetic Stripe Readers dialog box ............................. 5-42
Understanding the Weigand Readers dialog box......................................... 5-44
Setting the Instructions ......................................................................5-46
Setting the Zones ...............................................................................5-47
Understanding the Zones dialog box ........................................................... 5-47
6 Using the Personnel Features..........................................................6-1
Key Terms..........................................................................................6-1
Setting the Access Codes ...................................................................6-2
Understanding the Access Code dialog boxes ............................................. 6-3
Setting the Cardholders......................................................................6-4
Understanding the Cardholder dialog boxes................................................ 6-5
7 Using the System Status and System Monitor Windows..............7-1
Changing the Zone Modes........................................................................... 7-1
Determining the Cardholder’s Anti-Passback Status................................... 7-2
Defining the System Status Icons ................................................................ 7-3
8 Using the Dial-Up Feature ..............................................................8-1
Configuring the ACU and the Server Modems .................................8-2
Configuring the NexSentry Manager 3.0 for Dial-Up .......................8-4
Configuring the ACU for Dial-Up.....................................................8-7
Reverting Back to a Direct Connection From Dial-Up .....................8-9
Reverting Back to Dial-Up From a Direct Connection .....................8-10
9 Troubleshooting ...............................................................................9-1
Questions and Answers......................................................................9-1
Error Messages ..................................................................................9-5
Troubleshooting the TCP/IP Configuration.......................................9-7
Troubleshooting the Dial-Up Connection..........................................9-8
Unable to connect using the modem............................................................ 9-8
viii
NexSentry Manager 3.0
Revision E, Part Number 66110229001
.....
CONTENTS
No response from the ACU when downloading data from the server ......... 9-8
A Planning the Database .....................................................................A-1
B Remote Access Service.....................................................................B-1
Remote Access Service Rules............................................................B-2
Installing the Remote Access Service on the Server PC ............................. B-4
Installing the Remote Access Service on the Client PC .............................. B-8
Working with Remote Access Service ..............................................B-14
Removing Remote Access Service ....................................................B-15
Glossary .................................................................................................G-1
Index.......................................................................................................I-1
Revision E, Part Number 66110229001
NexSentry Manager 3.0
ix
CONTENTS
x
NexSentry Manager 3.0
Revision E, Part Number 66110229001
WELCOME TO THE NEXSENTRY MANAGER 3.0
1
.....
...................................
In the past, a lock and key was a sufficient means for access control.
However, a simple lock and key does not provide the flexibility and
control businesses demand.
The NexSentry Manager 3.0 is the modern answer for today’s access
control needs. You control when and where a Cardholder may enter
the building. In addition, the NexSentry Manager 3.0 monitors the
building—24 hours a day, 7 days a week—for security violations and
can notify the proper authorities if needed.
This chapter covers the following topics:
• “Understanding the NexSentry Manager 3.0” on page 1-2
• “Using this Guide” on page 1-6
• “Using the Online Help” on page 1-8
• “System Requirements and Prerequisites” on page 1-10
KEY TERMS
..........................................................
Database Explorer: The Database Explorer window shows
the directory structure of the database. Use this window to quickly
navigate the database and to add, delete, or edit database items.
Record menu: The Record menu is the most commonly used
menu when working with database items.
Revision E, Part Number 66110229001
NexSentry Manager 3.0
1-1
1
WE L C O M E T O T H E N E X S E N T R Y M A N A G E R 3 . 0
Understanding the NexSentry Manager 3.0
UNDERSTANDING THE
NEXSENTRY MANAGER 3.0
..........................................................
The NexSentry Manager 3.0 simplifies the process of entering and
editing database information, checking the system status, and
reacting to Alarms and events. The following sections provide an
introduction to the most commonly used features of the NexSentry
Manager 3.0.
Un d er stan d i ng th e Da tab as e E xp l ore r wi n do w
The Database Explorer window, one of the most useful
features, allows quick access to the entire database. Having a
recognizable look-and-feel, System Users navigate the Database
Explorer window to find, open, and configure the database.
Database items include Hardware features such as the Access
Control Units (ACUs), Reader Configurations, and, brand-new to the
NexSentry Manager 3.0, Elevator controls. Other database items
include Cardholder and Access Code information as well as System
Administration data and Miscellaneous features such as Maps,
Actions, and Time Zones.
1-2
NexSentry Manager 3.0
Revision E, Part Number 66110229001
.....
WE L C O M E T O T H E N E X S E N T R Y M A N A G E R 3 . 0
Understanding the NexSentry Manager 3.0
Un d er stan d i ng th e Re c ord m e nu
Right-click the features, or existing items—not the folders—from the
Database Explorer window to open the Record menu. From
the Record menu, you can perform the most common database
functions.
Use the Record menu when you create or modify the database. The
following describes each Record menu item.
Record menu item descriptions:
• View allows you to change how the database items appears in the
Database Explorer window. If you choose Details, you
can then set which Columns appears in the window. The
columns in the window determines the information in the
Export reports.
• Add opens a blank Add dialog box.
• Add From opens an Add dialog box with the same values from
the selected item.
• Edit opens the Edit dialog box for the selected item.
• Delete opens the Delete Confirmation dialog box for the
selected item. If you have more than one item selected, the
Delete Confirmation box asks you how many items you
want to delete. In the Count to be deleted text box, simply
type the number of items that you selected.
• Rename allows you to rename the selected item.
• Refresh updates the active window to display the most current
information.
• Filter opens a Filter dialog box that allows you to define
which items you want to view.
Revision E, Part Number 66110229001
NexSentry Manager 3.0
1-3
1
WE L C O M E T O T H E N E X S E N T R Y M A N A G E R 3 . 0
Understanding the NexSentry Manager 3.0
• Show All displays all items and removes any filter
specifications.
• Sort allows you to specify the sorting criteria for the items.
• Find Duplicates, the NexSentry Manager 3.0 finds and
shows any duplicate database items.
• Print opens a Crystal report for the selected item(s). All
available data for the selected item(s) appears in the report,
regardless if you filtered information out, this is in contrast with
Export that allows you to customize the report.
• Export creates a report of the selected item(s) in an HTML file,
saves it in the Temp folder, and then opens the browser. You can
customize this report. The information that appears in the report
depends on which information appears in the Database
Explorer window. For example, if you filtered data not to
appear in the Database Explorer window, that data does not
appear in the report. For more information, see View and
Filter from above.
• Download sends the Cardholder data to the ACU. After adding
or editing Cardholder data, you have to download the new
information to the ACU.
• Show PIN, a window appears showing the PIN for the selected
Cardholder, this only works from the Database Explorer window.
• PIN Report, prints a report of all the Cardholder’s PINs.
1-4
NexSentry Manager 3.0
Revision E, Part Number 66110229001
.....
WE L C O M E T O T H E N E X S E N T R Y M A N A G E R 3 . 0
Understanding the NexSentry Manager 3.0
Menu bar
Toolbar
Database items
Database Explorer
directory
Status bar
Database Explorer window
Un d er stan d i ng th e too lb ar
From the toolbar, you can open windows and dialog boxes. Click the
appropriate icon to open the View Alarms window, the System
Monitor window, the Status windows that respectively displays
the current status of the Doors, the Pollers, the ACUs, the Elevators,
the Input and Output devices—you can even filter the Status
window to display specific Zones. Also from the toolbar you can
open the Add Cardholder, Add Time Group, and Add
Access Code dialog boxes. Finally, from the toolbar you can print
reports, silence an alarm, or use the context-sensitive Help.
Revision E, Part Number 66110229001
NexSentry Manager 3.0
1-5
1
WE L C O M E T O T H E N E X S E N T R Y M A N A G E R 3 . 0
Using this Guide
Un d er stan d i ng th e m en u b ar
Use the menu bar to access many of the NexSentry Manager 3.0
features. What appears on the menu bar depends on the currently
active window. For example, when the Alarm Servicing
window is active, the Alarm menu appears on the menu bar. When
the System Monitor window is active, the Monitor menu
appears, and so forth. The File, View, Database, Window, and
Help menus appears on the menu bar consistently. However, the
items on these menus change depending on the active window.
Un d er stan d i ng th e s tat u s b ar
The status bar appears along the bottom border of the NexSentry
Manager 3.0 window. Right-click icons from the status bar to
perform such tasks as silencing an alarm or reconnecting to the
server. The status bar also contains brief messages and the status of
the Caps, Scroll, and Num Lock keys as well as the current date and
time.
USING THIS GUIDE
..........................................................
The NexSentry Manager 3.0 User Guide is written for System Users.
This guide takes you through a step-by-step process that describes
how to install the software, test the system, configure the database
and how to use the NexSentry Manager 3.0.
• Chapter 2, “Getting Started” describes how to check the
installed Hardware and provides a procedure on how to install the
software as well as introductory information regarding the
NexSentry Manager 3.0 database.
1-6
NexSentry Manager 3.0
Revision E, Part Number 66110229001
.....
WE L C O M E T O T H E N E X S E N T R Y M A N A G E R 3 . 0
Using this Guide
• Chapter 3, “Using the System Administration Features”
covers viewing, editing, and configuring the data for customizing
and controlling access to the system.
• Chapter 4, “Using the Miscellaneous Features” shows you how
to configure features like Time Codes, Holidays, Actions, Maps,
Sounds, Icons, Time Zones, and the System Defaults.
• Chapter 5, “Using the Hardware Features” shows you how to
enter the Hardware and Facility data. This is how the NexSentry
Manager 3.0 knows which devices are installed on the system.
• Chapter 6, “Using the Personnel Features” covers Cardholder
and Access Code information.
• Chapter 7, “Troubleshooting” helps you in case you run into
problems or errors when setting up and using the NexSentry
Manager 3.0 software.
• Appendix A, “Planning the Database” shows you how to plan
and prepare the database.
• Appendix B, “Remote Access Service” describes how to connect
to the NexSentry Manager 3.0 through dial-up phone lines or
through direct dial-up phone lines.
• The Glossary defines the unique terminology for the NexSentry
Manager 3.0 system.
• The Index provides a quick way to find the information you are
seeking.
Revision E, Part Number 66110229001
NexSentry Manager 3.0
1-7
WE L C O M E T O T H E N E X S E N T R Y M A N A G E R 3 . 0
Using the Online Help
1
USING THE ONLINE HELP
..........................................................
The online Help is like having this User Guide appear on the
monitor. The three parts to the online Help system include, the Help
Topics, the dialog box Help windows, and the context-sensitive
Help.
Usi n g t he o nl i n e Hel p T op i cs
The online Help Topics contains procedures, definitions, and general
Help information.
TO USE THE ONLINE HELP TOPICS:
1
From the menu bar, click Help. The Help menu appears.
a To learn how to use the online Help system, from the Help
menu, click Using Help. The Windows Help dialog box
appears. Click the Contents tab and then click the book
icons to open the Help Topics.
-orb To read the Help Topics pertaining to the NexSentry
Manager 3.0, click Index from the Help menu. The Help
Topics dialog box appears.
The Help Topics dialog box has three tabs:
a Click the Contents tab to open the Help Topics by chapter.
Click a book icon to display the Help Topics. Click the Help
topic to open the Help Topic window.
1-8
NexSentry Manager 3.0
Revision E, Part Number 66110229001
E
.....
WE L C O M E T O T H E N E X S E N T R Y M A N A G E R 3 . 0
Using the Online Help
Click the Index tab to open the Help Topics by searching
through the online Help system index. In the text box, type
the word you are looking for or scroll through the list.
c Click the Find tab to search for words, numbers, and
symbols that appears in the online Help system. In the text
box, type the word, number, or symbol you are looking for or
scroll through the list.
Usi n g t he d i al og bo x He l p wi n d ows
Most of the dialog boxes in the NexSentry Manager 3.0 have a Help
button. Click Help from a dialog box to open a Help window that
contains specific information regarding that dialog box. For
example, you are adding a new Cardholder and you have the Add
Cardholder dialog box open. Click Help from that dialog box.
A Help window appears with a screen-shot of the Add
Cardholder dialog box. Click on the different text boxes and
buttons from the Help window. A pop-up window appears with a
definition or useful information.
Usi n g t he c on te xt- s en s i ti ve on l in e He lp
You can open the Help topics regarding specific parts of the
NexSentry Manager 3.0 user interface.
TO USE THE CONTEXT-SENSITIVE HELP:
1 Click the Help icon from the toolbar. A question mark appears
next to the cursor.
Place the cursor over the appropriate portion of the screen and
click. A Help topic window appears.
Revision E, Part Number 66110229001
NexSentry Manager 3.0
1-9
1
WE L C O M E T O T H E N E X S E N T R Y M A N A G E R 3 . 0
System Requirements and Prerequisites
SYSTEM REQUIREMENTS AND PREREQUISITES
..........................................................
First, this guide assumes that all the Hardware, such as the ACUs
and the Readers, have been previously installed. For information
regarding Hardware installation, refer to the appropriate
documentation.
Second, WSE recommends that System Users have a working
knowledge of Windows NT and should have familiarity with concepts
such as configuring a modem, understanding TCP/IP networks, and
performing loop back tests, and so forth.
Last, before you install the NexSentry Manager 3.0 software, take a
moment to review the following system requirements.
Minimum system requirements:
• A PC with a Pentium 200 Mhz or better processor
• Microsoft Windows NT 4.0 or later with Microsoft Service Pack
3.0 or later installed on the PC
• 1.6 GB of free hard disk space
• SVGA Video card with a minimum of 800 x 600 resolution
• 3.5 inch, 1.4 MB floppy hard drive
• One or more external RS-232 serial ports available
• A CD-ROM drive
• A Backup drive—recommended but optional—WSE supports
Jazz, Zip, and Sparq drives
• 64 MB of RAM
After meeting the system requirements, you are ready to get started.
1-10
NexSentry Manager 3.0
Revision E, Part Number 66110229001
GETTING STARTED
.....
...................................
2
Setting up the NexSentry Manager 3.0 system takes careful planning
and consideration. You need to establish several items before you
install the software, such as, was the Hardware properly installed,
will you use one PC or two for the Client and Server software, and
have you backed-up any existing databases?
This chapter covers the following topics:
• “Checking the Installed Access Control Units” on page 2-3
• “Understanding the TCP/IP Network” on page 2-8
• “Preparing an Existing Database for the NexSentry Manager 3.0” on page 2-9
• “Installing the Software” on page 2-11
• “Testing the Basic Functions” on page 2-15
• “Configuring Windows NT for the NexSentry Manager 3.0” on page 2-18
• “Using the NexSentry Manager 3.0 Tools” on page 2-20
• “Upgrading an Existing Database” on page 2-22
• “Creating a New Database” on page 2-23
• “Removing the NexSentry Manager 3.0” on page 2-24
Revision E, Part Number 66110229001
NexSentry Manager 3.0
2-1
2
G E T T I N G ST A R T E D
Key Terms
KEY TERMS
..........................................................
Audit Trail: The Audit Trail consists of all changes made to the
database. When you configure, edit, or delete a database item, it is
recorded as an Audit.
ACUs: Access Control Units (ACUs) are Hardware devices that
sense and react to input from other Hardware devices such as
Readers. ACUs control the Door status as well as send Transaction
Logs to the System Monitor window. The three types of ACUs
used with the NexSentry Manager 3.0 include, the ALTO 818SC, the
NexSentry ACU, and the NexSentry Star ACU.
Cardholders: Cardholders are individuals with a card that allows
access to the controlled areas.
Client PCs: The Client PC contains the NexSentry Manager 3.0
software that allows a System User to enter data and monitor the
system activity. The Client PC provides system control and override
capabilities. The Client PC communicates with the Server PC.
Pollers: A Poller is a Hardware device that controls communications
with the ACUs. There is only one Poller for each communications
port. For example, Poller1=COM1 or Poller2=COM2.
Readers: A Cardholder passes their card in front of a Reader to gain
access through the Door. Readers are Hardware devices that install at
the Door and connects to the ACU.
Server PCs: A PC that controls the Poller operation and feeds data
to and from the ACUs. The Server PC contains the database.
System Administrator: The System Administrator is the default
System User that has all security and database permissions.
Transaction Logs: The Transaction Log is a record of all
Transactions that take place in the controlled areas. Transactions are
defined by events, such as Access Granted, or Server Stopped.
2-2
NexSentry Manager 3.0
Revision E, Part Number 66110229001
.....
GETTI NG STARTE D
Checking the Installed Access Control Units
CHECKING THE INSTALLED
ACCESS CONTROL UNITS
..........................................................
Make sure all of the system Hardware is installed and works
properly before you install or use the NexSentry Manager 3.0
software. The Installer might have already performed the following
procedures during installation. To save time, talk with the Installer to
verify the Hardware system was checked for proper installation. If
the Installer verifies the Hardware was installed correctly and that it
works, you can skip this section and proceed to the section,
“Installing the Software” on page 2-11.
Ch e ck i ng th e c onn e ct io n fr om th e Ac c ess C on tr ol U ni ts to th e PC
The ACUs (Access Control Units) require a proper connection to the
PC for them to work. The following procedure explains how to
check if the ACUs have a proper address to the PC.
Disconnect the Microsoft HyperTerminal program before you make
changes to the HyperTerminal properties. You might need to click the
Disconnect icon from the HyperTerminal toolbar before making
changes. After you make the changes, go back and click the Connect
icon for the changes to take effect.
Revision E, Part Number 66110229001
NexSentry Manager 3.0
2-3
G E T T I N G ST A R T E D
Checking the Installed Access Control Units
2
TO CHECK THE CONNECTION FROM THE ACCESS CONTROL UNITS TO THE PC:
1 Start the HyperTerminal program. From the Windows NT
desktop, click Start>Programs>Accessories>
Hyperterminal>HyperTerminal (not HyperTerminal
BBS.ht).
2
Depending on how the system is set-up, the Location
Information dialog box might open, or you might be
prompted to install a modem. If a modem is installed and
configured, skip to step 3. If a modem is not installed and
configured, you are prompted to install one. You can install and
configure a modem now or you can do it later if needed.
3
If Windows NT is not configured for dialing properties, the
Location Information dialog box opens, and you need to
perform the following sub-steps. If the New Connection
dialog box opens, skip to step 4.
a Set the appropriate country.
b Set the area (city) code.
c If you must dial a specific number to access an outside line,
type in that number.
d Select Tone or Pulse dialing, and then click Close.
The Dialing Properties dialog box appears.
e If needed, edit any items from the Dialing Properties
dialog box, and then click OK.
2-4
NexSentry Manager 3.0
Revision E, Part Number 66110229001
.....
GETTI NG STARTE D
Checking the Installed Access Control Units
4
From the New Connection dialog box, type a name, such as
‘ACU.’ Click the icon you want to represent the connection and
then click OK. You can save this connection for later use.
5
The Connect To dialog box appears. Ignore all of the items but
Connect Using. Select the communications port you want to
connect to the ACUs with—usually COM1 or COM2—and then
click OK.
6
The COM# Properties dialog box appears. From the COM#
Properties dialog box, set the following options:
• Bits per second: 9600, or the rate you plan to use. See your ACU
and communications device—CI-1/8, modem, and so forth—
manuals for the recommended or maximum data rates. Remember
the ACU default is 9600 on the Server port and 300 on the Client
port.
• Data bits: 7
• Parity: Odd Stop
• Bits: 1
• Flow control: None
7
Click Apply, and then click OK. A blank, white screen appears.
If you type any letters, you should see no response on the screen.
If you do, make sure the configuration is correct and that
nothing is plugged into the communications port.
You have now checked that the ACUs have a proper connection to
the Server PC.
Revision E, Part Number 66110229001
NexSentry Manager 3.0
2-5
G E T T I N G ST A R T E D
Checking the Installed Access Control Units
2
Pe rfo rm i ng a Lo opb ac k an d C om mu n ic ati on s Te s t
This section explains how to test the communications ports. Use this
procedure to troubleshoot any RS-232 communications problems.
You can use this procedure at any point in the data path.
Before testing the system, make sure you are connected to the correct
Serial Port on your PC and that you are also connected with the
Terminal port on the ACU.
TO PERFORM A LOOPBACK AND COMMUNICATIONS TEST:
1 From the communications port on the back of the PC that you
are using, probably COM1 or COM2, short pins 2 and 3
together. This is known as a loopback test.
2-6
2
Open the HyperTerminal program. With the Connect To
dialog box open, use the keyboard to press some letters. The
letters appears on the screen. If you do not see the letters on the
screen, short the pins from a different communications port, or
set the HyperTerminal program to a different port. This
determines the correct communications port and to know the
port works properly. You can also perform this test by shorting
out pins 2 and 3 at the end of the RS-232 cable when the cable
connects to the PC. This also works over a modem or a CI-8.
3
Connect one ACU at a time directly to the PC communications
port you just configured in step 1. See your ACU manual for the
pin outs. If you press Enter or Spacebar, the ACU should answer
back with “YOUR PASSWORD?” If not, try reversing pins 2
and 3 (TD and RD) on the ACU. Note that the 818SC/SX and the
4100 default to 9600 baud on the Server port and 300 baud on
the Client port.
NexSentry Manager 3.0
Revision E, Part Number 66110229001
.....
GETTI NG STARTE D
Checking the Installed Access Control Units
You are now ready to test the ACU Server port. Remember, the
Terminal port always answers in English for a laptop or dumb
terminal. The Server port answers in English only until the ACU is
addressed and reset.
Con fi gu r in g an d te sti n g t he A CU S e rve r Por t
The following procedure explains how to configure and test the
ACU Server port.
TO CONFIGURE AND TEST THE ACCESS CONTROL UNIT SERVER PORT:
1 Connect to the ACU Server port, log on, and set the Server port
baud rate and individual ACU address. See the 4100 ACU
manual for details.
a Make sure the battery switch is on.
b Make sure the ACU Server port, the Pollers, and all of the
communications equipment between them—modems,
converters, adapters, and so on—are set at the same baud
rate.
2
Reset the ACU by typing RESET, or by powering the ACU down
and back up. The ACU should no longer answer back when you
press Enter or Spacebar. If it answers with anything in English,
start over at step 1 of this procedure.
3
Try entering the ACU ID command—see the following
diagram—to test the ACU for the correct configuration. When
set correctly, it should answer back with a string of characters,
otherwise the letter ‘N’ appears.
Revision E, Part Number 66110229001
NexSentry Manager 3.0
2-7
G E T T I N G ST A R T E D
Understanding the TCP/IP Network
2
Note: The following diagram uses the number 0 (zero), not the letter
O.
Address #:
1
2
3
4
5
6
7
8
9
10
11
12
13
14
15
16
Command:
L01
L02
L03
L04
L05
L06
L07
L08
L09
L0A
L0B
L0C
L0D
L0E
L0F
L10
Address #:
17
18
19
20
21
22
23
24
25
26
27
28
29
30
31
32
Command:
L11
L12
L13
L14
L15
L16
L17
L18
L19
L1A
L1B
L1C
L1D
L1E
L1F
L20
Repeat this process for each installed ACU. Once you have verified
the Hardware communicates properly, you can install the software.
UNDERSTANDING THE TCP/IP N ETWORK
..........................................................
The TCP/IP network allows PCs to communicate with each other. A
consideration before you install the software is, will you have a
Client PC and a Server PC, or will both functions perform on the
same PC?
Un d er stan d i ng th e T CP /I P n e twor k f or s ep ar ate C li e nt an d S e rve r PC s
If separate PCs are used for the Client and the Server, take a moment
to review the following required TCP/IP network information before
installing the NexSentry Manager 3.0 software.
Review the following TCP/IP network information and
requirements:
• A TCP/IP network is the only supported protocol.
• All PCs must have a static TCP/IP address. DHCP is not
supported.
• All PCs must have a unique name.
• Know the names and the IP addresses of all the PCs you want as
part of the NexSentry Manager 3.0 system.
2-8
NexSentry Manager 3.0
Revision E, Part Number 66110229001
.....
GETTI NG STARTE D
Preparing an Existing Database for the NexSentry Manager 3.0
• All System Users of the NexSentry Manager 3.0 need to have read
and write privileges on the NexSentry Manager Server PC in the
NexSentry Manager directory, \\Program Files\
NexSentry Manager.
• Make sure the Server and Client PCs can “ping” each other with
each TCP/IP address.
Un d er stan d i ng th e T CP /I P n e twor k f or a s i n gl e Cl i en t an d S er ve r PC
You must know the TCP/IP address of the PC when you install the
the NexSentry Manager 3.0 software. When you install both the
Client and the Server software on the same PC, the IP address is the
same for both the Client and the Server settings. During the software
installation, the PC finds the IP address for you. If the IP address
does not match, stop the installation process and review the TCP/IP
network configuration.
P
REPARING AN EXISTING DATABASE
Use the forms found in Appendix A as a Master sheet to create
F
O R You
T Hcan
E also
N Eprint
X Snew
E NMaster
T R Ysheets
M from
ANA
E Rfile3.0
copies.
theGPDF
.found
. . . . .in. .the. . .User’s
. . . . . .Manual
. . . . . . .folder
. . . . .on. . the
. . . the
. . . NexSentry
. . . . . . . . . .Manager
. . . . . . . .3.0. . .
Before you install the NexSentry Manager 3.0 software, WSE
recommends to save and back up the existing database, if any. The
software installation process does create a backup of the existing
database, and any custom reports, and copies them to a sub-folder
called DB_Bakup. Also during the software installation process, a
new, blank database replaces the previously existing database, if any.
After you create a backup of the database, it is advised to delete the
Transaction and Audit Logs from the NexSentry Client. Read the
following sections for details.
Revision E, Part Number 66110229001
NexSentry Manager 3.0
2-9
G E T T I N G ST A R T E D
Preparing an Existing Database for the NexSentry Manager 3.0
2
B ack i n g u p an exi s ti n g d at ab as e
You can back up an existing database with any Windows NT
compatible backup utility or program, including the Windows NT
Backup program. See the appropriate documentation to correctly
configure the Windows NT Backup program. Also make sure that a
Zip drive, or another backup device, is installed on the PC.
TO BACK UP AN EXISTING DATABASE:
1 Stop the NexSentry Server.
a If running as a Service, from the Windows NT desktop, click
Start>Settings>Control Panel. From the Control
Panel window, double-click Services. The Services
dialog box appears. From the Service window, scroll down
to and then click NexMgrService, then click Stop. Wait
until the service stops.
-orb If running as an Application, select the command window
from which the program is running and press CTRL+C. Wait
for the program to shut down.
2
Copy the \\NexSentry Manager\Database folder to
another location, drive, or folder. WSE recommends you create
at least two copies of the database, one back-up copy on the local
PC and one back-up copy on a Zip disk, or another backup
device.
Now that you have successfully backed up the database, you should
delete the Transaction and Audit Logs from the NexSentry Client.
See “Archiving the Transaction Log and the Audit Trail” on
2-10
NexSentry Manager 3.0
Revision E, Part Number 66110229001
.....
GETTI NG STARTE D
Installing the Software
page 3-12 and “Deleting the Transaction Log and the Audit Trail” on
page 3-14.
INSTALLING THE SOFTWARE
..........................................................
Before installing the NexSentry Manager 3.0 software, make sure
you have a backup of any existing databases, see the section
“Preparing an Existing Database for the NexSentry Manager 3.0” on
page 2-9.
Also, make sure you understand the TCP/IP network, see the section
“Understanding the TCP/IP Network” on page 2-8 for details.
Before you install the software, know the following information:
• Name of the System Administrator
• The company or business name
When you have all the information available, you can install the
NexSentry Manager 3.0 software.
Insufficient disk space can result if you have a large number of
Transaction and Audit Logs in the database when you
install the software. See “Archiving the Transaction Log and the
Audit Trail” on page 3-12 and “Deleting the Transaction Log and the
Audit Trail” on page 3-14 Also, do not use the Microsoft Visual
FoxPro program to delete data from the NexSentry Manager 2.xx
database, this could render the data unrecognizable.
Revision E, Part Number 66110229001
NexSentry Manager 3.0
2 -11
G E T T I N G ST A R T E D
Installing the Software
2
TO INSTALL THE NEXSENTRY MANAGER 3.0 SOFTWARE:
1 Log on to Windows NT as an Administrator, or with
Administrator privileges.
2
Insert the NexSentry Manager 3.0 CD-ROM into the CD-ROM
drive of the PC. If the Autorun program is enabled, the
NexSentry Manager 3.0 splash screen appears. If not then follow
the sub-steps.
a From the Windows NT desktop, click Start>Run. The Run
dialog box appears.
b In the Open text box, where d is the CD-ROM drive, type
d:\setup and then click OK.
2-12
3
From the Welcome window, click Next.
4
Click Yes to accept the terms of the license agreement. The
User Information window appears.
5
In the first text box, type the name of the System Administrator.
In the second text box, type the name of the company, and then
click Next. The Type of Installation dialog box appears.
6
Either click New Installation or Feature Upgrade,
depending on the type of installation you are performing, then
click Next. The Default Directory dialog box appears.
7
WSE recommends installing the NexSentry Manager 3.0
software in the default directory. If you must change the
directory, click Browse and set the desired directory, then click
Next. The Installation dialog box appears.
NexSentry Manager 3.0
Revision E, Part Number 66110229001
.....
GETTI NG STARTE D
Installing the Software
8
The default installation installs the NexSentry Client and the
NexSentry Server along with a new, blank database, reports, and
the Help files on the PC. If you want one PC for the Client, and
another PC as the Server, click the application you do NOT want
to install so that no check mark appears. For example, if
installing the Client software on the Client only PC, click
Server to remove the check mark. When using two PCs for the
Client and the Server, install the Server software first and install
it only on one PC. The Server contains the database. You need to
know where the database is when you install the Client software.
After selecting the type of installation, click Next.
9
A TCP/IP network is required if the Server and the Client
software is installed on separate PCs. If this is the case, click Yes
to configure the TCP/IP network and proceed with the following
sub-steps. If you want the Server and the Client software
installed on one PC, click No and proceed to step 10.
a Click the Do you have TCP/IP installed? check
box. A check mark appears.
b From the Select Components screen:
•For the Server PC, select ALL of the components and then
click Next.
•For the Client PC, select only the NexSentry Client, the
Help files, and the Reports, then click Next.
Revision E, Part Number 66110229001
NexSentry Manager 3.0
2-13
2
G E T T I N G ST A R T E D
Installing the Software
c When installing the Client software, The Client
Settings dialog box appears, otherwise proceed to substep e. The installation should find the TCP/IP address of the
PC you are working on. Confirm the number, and leave the
Client Port at the default: 25000, then click Next.
d In the text box, type the name of the Server PC, and then
click Next.
e The Server Settings dialog box appears. The
installation should find the TCP/IP address. Confirm the
number, and leave the Server Port at the default: 25001,
then click Next. The Select Remote database dialog
box appears when installing the Client software.
f In the Select Remote Database File text box, find
the database file on the Server PC. Find the database file by
following this path, NETWORK\Server PC Name\
Program Files\NexSentry Manager\database
file. Click the file name and then click Open to continue.
10
2-14
During installation the NexSentry Manager 3.0 icons are
installed in a default program folder. Depending on your
preference, you can change the folder or create a new folder to
save the icons, click Next to continue.
NexSentry Manager 3.0
Revision E, Part Number 66110229001
.....
GETTI NG STARTE D
Testing the Basic Functions
11
The information settings appears. If the information appears
incorrect, click Back to correct the settings. If the information
appears correct, click Next. A screen appears that indicates the
files are being copied from the CD-ROM to the PC.
12
Click Finish to complete the installation. Restart the PC when
the installation is complete. The NexSentry Manager 3.0 icon
appears on the screen after Windows NT restarts.
The software is now installed on the Server PC. At this point, the
database is blank. To upgrade your existing database, read the
section “Upgrading an Existing Database” on page 2-22.
TESTING THE BASIC FUNCTIONS
..........................................................
Take a moment to verify the NexSentry Manager 3.0 software
installed correctly, communicates over the network with the ACU,
and the Digital Reader performs properly. The NexSentry Manager
3.0 is pre-configured with one Poller on COM1 and a 4100 ACU
with a Digital Reader enabled on the first door. The first procedure in
this section tests that the NexSentry Manager 3.0 installed properly
and communicates effectively with the pre-configured ACU. The
second procedure shows how to add a Cardholder. The last
procedure tests the pre-configured Digital Reader.
Revision E, Part Number 66110229001
NexSentry Manager 3.0
2-15
G E T T I N G ST A R T E D
Testing the Basic Functions
2
TO VERIFY INSTALLATION AND COMMUNICATIONS WITH THE ACCESS CONTROL UNIT:
1 Start the NexSentry Server and/or Client program depending on
the type of installation and the PC being used. The Log In
dialog box appears.
2
In the User Name text box, type Administrator. In the
Password text box, type new123. If the NexSentry Manager
3.0 detects a problem with the database integrity, or if it cannot
establish communication with the Server due to a connection or
a network problem, a respective dialog box appears. Otherwise,
the program opens.
3
From the toolbar, click the Status icon. The Select Status
Type dialog box appears.
4
From the Select Status Type dialog box, click ACU. A
check mark appears in the box, click OK.
5
The Current Status window for the Access Control Units
appears. If the system works properly, a lightning bolt icon
appears in the Communications column.
Now, add a Cardholder so you can test the Reader.
The above procedure used the toolbar to open the ACU Status
window. You can also open the ACU Status window from the
View menu.
The following procedure describes how to add a Cardholder through
the Database Explorer window. To quickly open the Add
Cardholder dialog box, from the toolbar, click the Add
Cardholder icon.
2-16
NexSentry Manager 3.0
Revision E, Part Number 66110229001
.....
GETTI NG STARTE D
Testing the Basic Functions
TO ADD A CARDHOLDER FROM THE DATABASE EXPLORER WINDOW:
1 From the toolbar, click the Database Explorer icon. The
Database Explorer window appears with the database
directory
2
From the Database Explorer window, double-click
Personnel to expand the sub-entries.
3
From the directory, right-click Cardholders. The Record menu
appears.
4
From the Record menu, click Add. The Add Cardholder
dialog box appears. For detailed information on each of the text
boxes, click Help from the dialog box.
5
In the text boxes, type in the appropriate information. Click the
tabs at the top of the dialog box to access the other text boxes.
6
When finished adding Cardholder information, click OK. An
icon for the newly added Cardholder appears in the rightmost
window.
7
Right-click in the rightmost window and then click Download
from the Record menu. This downloads the new information to
the ACU and you can use the newly added card immediately.
Now that a Cardholder is in the database and the ACU, you can test
the Digital Reader.
Revision E, Part Number 66110229001
NexSentry Manager 3.0
2-17
G E T T I N G ST A R T E D
Configuring Windows NT for the NexSentry Manager 3.0
2
TO TEST THE DIGITAL READER:
1 Place the card you just added to the system in front of the preconfigured Digital Reader. A green light appears on the Reader.
2
From the toolbar, click the Monitor icon. The System
Monitor window appears. In the Message column, an Access
Granted Transaction Log appears.
Next, you should configure Windows NT for maximum
performance.
CONFIGURING WINDOWS NT FOR
THE NEXSENTRY MANAGER 3.0
..........................................................
For best performance, configure Windows NT to work with the
NexSentry Manager 3.0 system. First, set the memory
configurations, and then set the Server configurations.
Never set the Initial Size (MB) to less than 100 MB.
TO CONFIGURE THE MEMORY:
1 From the Windows NT desktop, click Start>Settings>
Control Panel. The Control Panel window appears.
2
2-18
From the Control Panel window, double-click System. The
System Properties dialog box appears.
NexSentry Manager 3.0
Revision E, Part Number 66110229001
.....
GETTI NG STARTE D
Configuring Windows NT for the NexSentry Manager 3.0
3
From the System Properties dialog box, click the
Performance tab. Set the Boost to None and then click
Change to set the Virtual Memory. The Virtual Memory
dialog box appears.
4
From the Virtual Memory dialog box, type 120 in the
Initial Size (MB) text box, and then type 150 in the
Maximum Size (MB) text box. Click Set, and then click OK.
The System Properties dialog box appears.
5
From the System Properties dialog box, click Apply and
then click OK.
You have now set the memory for optimum operating performance.
TO CONFIGURE THE SERVER:
1
From the Control Panel window, double-click Services.
The Services dialog box appears.
2
From the Services dialog box, scroll to NexMgrService and
double-click the item. The Service dialog box appears.
3
Click Automatic under Startup Type. A check mark
appears in the box. Click OK and then click Close from the
Services dialog box.
4
After approximately one minute, start the NexSentry Client and
verify the NexSentry Manager 3.0 system operates correctly.
You have now configured the Server.
Revision E, Part Number 66110229001
NexSentry Manager 3.0
2-19
G E T T I N G ST A R T E D
Using the NexSentry Manager 3.0 Tools
2
USING THE NEXSENTRY MANAGER 3.0 TOOLS
..........................................................
The NexSentry Manager 3.0 CD-ROM contains the NSM Tools
folder. Inside the NSM Tools folder are shortcut utilities and sample
databases.
Un d er stan d i ng th e d es k top an d me n u s h ort cu ts
From the NexSentry Manager 3.0 CD-ROM you can install desktop
and menu shortcuts for communications and backup procedures.
Each shortcut is preconfigured for each communications port, 1
through 4, to communicate with the ACUs. You can delete the
shortcuts that you do not need.
TO INSTALL THE DESKTOP AND MENU SHORTCUTS:
•
From the NexSentry Manager 3.0 CD-ROM, double-click
Install.bat to load the shortcuts.
The shortcuts include:
• NexCom-1 through NexCom-4 starts the Windows NT
HyperTerminal program.
• Use the NexClean shortcut to delete the FoxPro temporary files.
Before using the NexClean shortcut, stop the
NexMgrService, see the procedure “To back up an existing
database:” on page 2-10.
• Use the Terminal.exe shortcut to back up the ACU database
directly at the ACU. The Terminal.exe shortcut is saved in
the C:\NexTemp directory during the software installation.
The Terminal.exe shortcut is a DOS based program and is not
completely supported by Windows NT. WSE Technical Services
does use this program with Windows NT often.
2-20
NexSentry Manager 3.0
Revision E, Part Number 66110229001
.....
GETTI NG STARTE D
Using the NexSentry Manager 3.0 Tools
Un d er stan d i ng th e s am pl e d at aba se s
The sample databases provide a starting point to create a new
database. Each sample has one ACU configured on Poller
Communications Port 1. You cannot combine the sample databases
together. Also, use the default login name and password—
Administrator, new123—for each sample database.
Included sample databases:
• SE4100 ACU with four Digital Key Readers (DKR)
• SE4100 ACU with four Magstripe Readers (MSR)
• SE818SC ACU with four Analog Key Readers (2814/15)
• SE818SC ACU with four Digital Key Readers (DKR)
The following procedure overwrites the existing \\NexSentry
Manager\Database folder.
TO USE THE SAMPLE DATABASES:
1
From the NexSentry Manager 3.0 CD-ROM, open the
appropriate folder, for example, 4100 & 4 DKRs.
2
From the folder, find the sub-folder Database. Copy the
database folder and paste it in C:\Program
Files\NexSentry Manager.
3
Clear the Read-Only attribute from the copied database files.
The sample database is now ready to use with the NexSentry
Manager 3.0.
Revision E, Part Number 66110229001
NexSentry Manager 3.0
2-21
G E T T I N G ST A R T E D
Upgrading an Existing Database
2
UPGRADING AN EXISTING DATABASE
..........................................................
The NexSentry Manager 3.0 includes a conversion utility that
upgrades any existing databases. To use the DBConv30.exe
conversion utility, you must have the NexSentry Manager 3.0
software installed.
During the software installation, the existing database is saved to the
following directory, C:\Program Files\NexSentry
Manager\DB_Bakup.
TO UPGRADE AN EXISTING DATABASE:
1
Create a new folder to contain the new database. WSE
recommends using the directory path, C:\Program
Files\NexSentry Manager.
2
From the Windows NT desktop, where C is the local hard disk
drive, click My Computer>(C:)>Program Files>
NexSentry Manager>DBConv3.exe. The NSM Database
Conversion dialog box appears.
3
In the Old NSM (2.0x) database text box, type the
complete path to the existing database.
4
In the New NSM (3.0) database text box, type the complete
path to where you created the new folder from step 1.
5
After typing in the old and new path names, click Go. The
conversion process begins.
6
When the conversion finishes, click Exit.
You have now upgraded the database to work with the NexSentry
Manager 3.0.
2-22
NexSentry Manager 3.0
Revision E, Part Number 66110229001
.....
GETTI NG STARTE D
Restoring an Existing Database
RESTORING AN EXISTING DATABASE
..........................................................
If disaster strikes, use the database backup to restore any lost
information. Following this procedure overwrites the damaged
database.
If the Windows NT backup utility was used to create the backup, use
that program to restore the database.
TO RESTORE THE DATABASE:
1
Stop the Server PC and all Client PCs before you restore the
database.
2
Copy the files in the backup database folder and paste them in
the NexSentry Manager 3.0 database folder, \\NexSentry
Manager\Database.
You have now restored the database.
CREATING A NEW DATABASE
..........................................................
The database is a primary feature of the NexSentry Manager 3.0. All
information regarding the Hardware, Personnel, System
Administration, and so forth is saved in the database. Without a wellplanned and carefully maintained database the NexSentry Manager
3.0 cannot work effectively.
See Appendix A for procedures on how to plan your database. Also
from Appendix A, find the Master Input forms you need to help
organize the database structure.
Revision E, Part Number 66110229001
NexSentry Manager 3.0
2-23
G E T T I N G ST A R T E D
Removing the NexSentry Manager 3.0
2
REMOVING THE NEXSENTRY MANAGER 3.0
..........................................................
Removing the NexSentry Manager 3.0 software is a two-step
process. First, you must remove the NexMgrService program, and
then you can remove the software.
TO REMOVE THE NEXMGRSERVICE PROGRAM:
1
Stop all Client PCs before you remove the NexMgrService
program.
2
Stop the NexMgrService program. See the procedure “To back
up an existing database:” on page 2-10.
3
To remove NexMgrService, from the Windows NT desktop, click
Start>Programs>Command Prompt. The MS-DOS
Command Prompt appears.
4
From the MS-DOS Command Prompt dialog box, change the
directory to where the NexSentry Manager 3.0 installed, the
default is C:\Program Files\NexSentry Manager.
5
From the NexSentry Manager directory, type eagleserver remove.
6
Close the MS-DOS Command Prompt dialog box.
You can now delete the NexSentry Manager 3.0 software.
2-24
NexSentry Manager 3.0
Revision E, Part Number 66110229001
.....
GETTI NG STARTE D
Removing the NexSentry Manager 3.0
TO REMOVE THE NEXSENTRY MANAGER 3.0 SOFTWARE:
1 From the Windows NT desktop, click Start>Settings>
Control Panel>Add/Remove Programs.
2
From the Add/Remove Programs Properties dialog box,
scroll to NexSentry Manager 3.0 and click to highlight the item
and then click Add/Remove. The Confirm File Deletion
dialog box appears.
3
Click Yes from the Confirm File Deletion dialog box.
The UninstallShield program starts. A prompt appears asking if
you want all the files deleted, click Yes.
You have now removed the NexSentry Manager 3.0 software.
Revision E, Part Number 66110229001
NexSentry Manager 3.0
2-25
2
2-26
G E T T I N G ST A R T E D
Removing the NexSentry Manager 3.0
NexSentry Manager 3.0
Revision E, Part Number 66110229001
USING THE SYSTEM ADMINISTRATION FEATURES
.....
...................................
3
The System Administration data refers to the Security Levels,
System Users, ACU Users, Transactions, Alarm Responses, the
Audit Trail, User Defined Fields, Facility Codes, and Site Codes.
When you set up the database, enter the System Administration data
first, before you configure the Hardware or Personnel features. Refer
to your completed Input Forms for the appropriate information when
you configure the database. See Appendix A if you have not filled
out these forms.
Always back up the database before you make changes. See the
section “Backing up an existing database” on page 2-10.
Also remember to download the database to the ACUs after adding
new data.
This chapter covers the following topics:
• “Setting the Security Levels” on page 3-3
• “Setting the System Users” on page 3-4
• “Setting the ACU Users” on page 3-6
• “Setting the Hosts” on page 3-7
• “Converting Old Transaction Log and Audit Trail Archives” on page 3-8
• “Using the Transactions and the Audit Trail” on page 3-10
• “Setting the Alarm Responses” on page 3-18
• “Setting the User Defined Fields” on page 3-20
• “Setting the Facility Codes and the Site Codes” on page 3-25
Revision E, Part Number 66110229001
NexSentry Manager 3.0
3-1
3
USING THE SYSTEM ADMINISTRATION FEATURES
Key Terms
KEY TERMS
..........................................................
Audit Trail: The Audit Trail consists of all changes made to the
database. When you configure, edit, or delete a database item, it is
recorded as an Audit.
ACU Users: A User who is authorized to access ACUs directly from
the ACU Terminal port.
ACU User Ranks: The level of permission assigned to an ACU
User. This Rank determines what the ACU User can do when
connected directly to the ACU through the NSM Lite program. See
the ACU manual for a description of available Ranks.
Facility Codes: A unique identification number assigned to a
facility. Use Facility Codes only for 1030 and 1040 cards.
Hosts: The NexSentry Manager 3.0 allows you to configure Hosts.
Use the Hosts feature to assign passwords to ACU Users. The ACU
Users need a password to log in to NSM Lite.
Security Levels: A Security Level defines a System User’s
permissions.
Site Codes: A unique identification number assigned to a site. Use
Site Codes with ABA/Magstripe cards.
System Users: A person with a log-in password who is authorized to
use the NexSentry Manager 3.0 program.
Transaction Logs: The Transaction Log is a record of all
Transactions that take place in the controlled areas. Transactions are
defined by events, such as Access Granted, or Server Stopped.
User Defined Fields: The User Defined Fields allow you to
configure how certain text boxes and fields appear on the
Cardholder dialog box.
3-2
NexSentry Manager 3.0
Revision E, Part Number 66110229001
.....
U SIN G TH E S YS TEM ADM IN IS TRATI ON FEAT URES
Setting the Security Levels
SETTING THE SECURITY LEVELS
..........................................................
Use the Security Levels to define the functions a System User can
perform. For example, you can set a Security Level that allows a
System User to view and edit the ACUs, but that denies access to the
other features.
TO SET THE SECURITY LEVELS:
1 From the toolbar, click the Database Explorer icon. The
Database Explorer window appears with the database
directory in the leftmost window.
2
From the directory, click System Administration>Security Levels.
The existing Security Levels appears in the rightmost window.
3
To open the Record menu, right-click an existing Security
Level, or right-click Security Levels from the directory.
4
From the Record menu, click Add, Add From, or Edit. The
corresponding dialog box appears.
5
Type an ID number in the ID text box, or click Next unused
ID. In the Description text box, type a name for the Security
Level.
6
From the Available permissions box, select a permission
and then click Add to send the item to the Selected
permissions box. The items in the Selected
permissions box define the functions available to System
Users set with this Security Level.
Repeat this procedure as many times as you need different Security
Levels. When finished setting the Security Levels, you can set the
System Users.
Revision E, Part Number 66110229001
NexSentry Manager 3.0
3-3
USING THE SYSTEM ADMINISTRATION FEATURES
Setting the System Users
3
SETTING THE SYSTEM USERS
..........................................................
A System User logs into the NexSentry Manager 3.0 Client PC with
a password. The functions a System User performs depends on the
Security Level assigned to them.
The default System User is labeled administrator login.
You cannot edit nor delete the default System User, except for the
password, which you should change.
TO CHANGE THE ‘ADMINISTRATOR LOGIN’ PASSWORD:
1 From the Database Explorer directory, double-click System
Administration>System Users. The ‘administrator login’ System
User appears in the rightmost window.
2
Right-click the ‘administrator login’ icon to open the Record
menu. From the Record menu, click Edit. The Edit System
User dialog box appears.
3
In the Password text box, type in the new password, and then
retype the new password in the Verify password text box.
You have now changed the password for the default System User. To
add, edit, or delete System Users, read the following procedure.
3-4
NexSentry Manager 3.0
Revision E, Part Number 66110229001
.....
U SIN G TH E S YS TEM ADM IN IS TRATI ON FEAT URES
Setting the System Users
TO SET THE SYSTEM USERS:
1 From the Database Explorer directory, double-click System
Administration>System Users. The existing System Users
appears in the rightmost window.
2 To open the Record menu, right-click an existing System User,
or right-click System Users from the directory.
3
From the Record menu, click Add, Add From, or Edit. The
corresponding dialog box appears.
4
Type an ID number in the ID text box, or click Next unused
ID. In the Description text box, type a name for the System
User.
5
Click the Security Level text box. The available Security
Levels appears. Click a Security Level from the list to select it.
6
In the User name text box, type in the name the System User
will use to log into the NexSentry Manager 3.0 system. In the
Password text box, type in a password, and then retype the
password in the Verify password text box. User names and
passwords are case sensitive. For example, if the User name is
‘ASmith’ then the System User cannot type ‘asmith’ to log into
the system.
Revision E, Part Number 66110229001
NexSentry Manager 3.0
3-5
USING THE SYSTEM ADMINISTRATION FEATURES
Setting the ACU Users
3
SETTING THE ACU USERS
..........................................................
An ACU User can log directly into an ACU with a password to
control individual components of the system. You can add up to eight
different ACU Users to the NexSentry Manager 3.0 system.
When communicating directly with an ACU through a terminal
program, only the password is used. The default password for all the
ACUs is ‘new.’ The System Administrator should change this
password after the installation is complete or when configuring ACU
Users.
Before you add an ACU User, take a moment to learn about Ranks.
You must assign a Rank to an ACU User. See the ACU manual for a
description of available Ranks.
TO SET THE ACU USERS:
1 From the Database Explorer directory, click System
Administration>ACU Users. The existing ACU Users appears
in the rightmost window.
3-6
2
To open the Record menu, right-click an existing ACU User, or
right-click ACU Users from the directory.
3
From the Record menu, click Add, Add From, or Edit. The
corresponding dialog box appears.
4
Type an ID number in the ID text box, or click Next unused
ID. In the Description text box, type a name for the ACU
User.
NexSentry Manager 3.0
Revision E, Part Number 66110229001
.....
U SIN G TH E S YS TEM ADM IN IS TRATI ON FEAT URES
Setting the Hosts
5
In the Rank text box, click the drop-down arrow and then select
a Rank from the list.
6
In the User name text box, type in the name the ACU User will
use to log into the NexSentry Manager 3.0 system. In the
Password text box, type in a password, and then retype the
password in the Verify password text box. User names and
passwords are case sensitive and limited to 12 characters.
SETTING THE HOSTS
..........................................................
The Host feature assigns a description, name, and password to a
person that has permission to log directly into an NexSentry Star
ACU through the NSM Lite program.
TO SET THE HOSTS:
1 From the Database Explorer directory, click System
Administration>Hosts. The existing Hosts appears in the
rightmost window.
2
To open the Record menu, right-click an existing Host, or rightclick Hosts from the directory.
3
From the Record menu, click Add, Add From, or Edit. The
corresponding dialog box appears.
Revision E, Part Number 66110229001
NexSentry Manager 3.0
3-7
USING THE SYSTEM ADMINISTRATION FEATURES
Converting Old Transaction Log and Audit Trail Archives
3
4
From the Add Host dialog box, type an ID number in the ID
text box, or click Next unused ID. In the Description text
box, type a name for the Host.
5
In the Host name text box, type in the name the Host will use
to log into the NexSentry Manager 3.0 system. In the Password
text box, type in a password, and then retype the password in the
Verify password text box. User names and passwords are
case sensitive and limited to 12 characters.
CONVERTING OLD TRANSACTION
LOG AND AUDIT TRAIL ARCHIVES
..........................................................
The NexSentry Manager 3.0 contains a conversion utility that allows
you to upgrade NexSentry Manager 2.1 archive files. This is useful
since you will not lose any existing Transaction Log or Audit Trail
information. There is no need to convert your existing files if you
were using the NexSentry Manager 2.2. You can use the following
procedure to convert both Transaction Log and Audit Trail archives.
TO CONVERT OLD ARCHIVES:
1 From the menu bar, click Database>Utilities>Transaction
Archive Conversion or Audit Archive Conversion. The
corresponding dialog box appears.
2
3-8
In the Path text box, select the location of the archived file
folder. Click the drop-down arrow to view the four most recently
used paths. To select a new path, click Browse. After you have
selected a file path, click OK.
NexSentry Manager 3.0
Revision E, Part Number 66110229001
.....
U SIN G TH E S YS TEM ADM IN IS TRATI ON FEAT URES
Converting Old Transaction Log and Audit Trail Archives
When you click Extract related information from
current database the utility extracts the required additional
information from the NexSentry Manager database. The extraction
is based on the already existing information in the Archive file,
specifically the ID fields.
The NexSentry Manager 3.0 recycles unused IDs. If an ID is reused
after the archive file is created and before the conversion takes
place, the conversion might not be accurate. For example, assume
the User deletes a point after creating the archive file. Since this
point ID is no longer in use, the NexSentry Manager 3.0 might reuse
this ID for another newly created point in the file. This ID now
represents another point altogether. THis is because the conversion
utility uses Point ID to extract Point Description. The same situation
can occur with other fields as well. If you are unsure about this, do
not check the Extract related information from
current database option.
When you click OK, the utility searches all of the files in the selected
directory and upgrades the files to the new format with a .txt
extension. The utility makes a copy of all of the converted files and
saves them as .old files. You can delete the .old files after you
have reviewed the newly converted files. The utility also creates an
Error.log file in the same directory as the converted files.
Revision E, Part Number 66110229001
NexSentry Manager 3.0
3-9
3
USING THE SYSTEM ADMINISTRATION FEATURES
Using the Transactions and the Audit Trail
USING THE TRANSACTIONS AND THE AUDIT TRAIL
..........................................................
Transaction Logs define the system activities. For example, when a
Cardholder presents their card to a Reader and the Door unlocks, this
is considered an Access Granted Transaction. The Audit Trail Log
tracks changes made to the database, such as when a System User
changes Cardholder information.
The features associated with the Transactions and the Audit Trail
include the Log and the Archives. The Log lists all of the
Transactions or Audits from the entire system. Use the Archive
feature to create a text-based common text file with any spreadsheet
program such as Microsoft Excel or Corel Quattro Pro. You can also
use Windows Notepad.
Do not confuse the term ‘archive’ with ‘backup’ since they are two
separate and different functions. An archive is a record of either
Transactions or Audits while a backup refers to a backup of the
entire database. For information on how to back up the database, see
“Backing up an existing database” on page 2-10.
You can edit the description, the action, the sound, and the display
for the different Transaction Types.
Vi e wi n g Tr an sa cti on s and th e Au d i t Tr ai l
The NexSentry Manager 3.0 monitors system activity as
Transactions occur. This includes the status of individual devices on
the system.
TO OPEN THE SYSTEM MONITOR WINDOW:
• From the toolbar, click the Monitor icon. The System Monitor
window appears.
Open the System Monitor window to view the most recent
Transactions. The System Monitor window provides the date,
3-10
NexSentry Manager 3.0
Revision E, Part Number 66110229001
.....
U SIN G TH E S YS TEM ADM IN IS TRATI ON FEAT URES
Using the Transactions and the Audit Trail
time, and access information about Cardholder, device, and Door
activity.
Click the column headings
to sort the data.
System Monitor Window
The System Monitor window shows Transaction Logs that
occur after you open the window. It does not show Transactions that
occurred before the window was opened. Also, the number of
Transactions shown in the System Monitor window is
determined from the System Defaults dialog box. The screen
refresh time slows when the System Monitor window displays a
large number of Transactions. See “Setting the System Defaults” on
page 4-22. To access Transactions not shown in the System
Monitor window, you must view the Transaction Log.
TO VIEW THE TRANSACTION LOG OR THE AUDIT TRAIL:
1 From the Database Explorer directory, click System
Administration>Transactions or Audit Trail to expand the
subentries.
2 From the directory, click Log. The Transaction Log or the Audit
Trail appears in the rightmost window.
3
From the rightmost window, right-click to open the Record
menu. From the Record menu, you can set the View, Refresh,
Filter, or Sort the data, and print or export a report.
Revision E, Part Number 66110229001
NexSentry Manager 3.0
3 -11
USING THE SYSTEM ADMINISTRATION FEATURES
Using the Transactions and the Audit Trail
3
Ar ch i vi ng th e T r an s act ion L og an d t h e Au d it T r ai l
Archive the Transaction Log and the Audit Trail about every two
months. WSE recommends that the Transaction Log does not exceed
75,000 Logs. Log queries generate much faster when the database
contains under 50,000 entries. Otherwise, queries can take several
minutes depending on the PC and the activity of the system. If you
do not clear the Transaction Log and the Audit Trail, the PC disk
space becomes full, and the system eventually crashes.
TO ARCHIVE THE TRANSACTION LOG AND THE AUDIT TRAIL:
3-12
1
Shut down the NexSentry Manager 3.0 Server program to stop
all communications to the ACUs and the database.
2
Create a backup of the database. See “Backing up an existing
database” on page 2-10.
3
Open the NexSentry Manager 3.0 Client program.
4
From the menu bar, click Database>Archive
Transactions. The Archive Transactions dialog box
appears.
5
In the All or some records section, click All if you want
to archive all the Transactions, or click On or before this
date, and then click the drop-down arrow to open a calendar
from which you can click a date. WSE suggests that you archive
from 30 to 60 days previous.
6
In the File text box, type in the full path and file name of where
you want the archive file saved. You must name the archive files
with an extension for the NexSentry Manager 3.0 to use them for
archive filtering and reporting. For example,
C:\NexTemp\Transactions.csv.
NexSentry Manager 3.0
Revision E, Part Number 66110229001
7
In the Field delimiter section, click Comma.
8
In the Text Qualifier text box, select the “ (double-quote)
option.
9
Do not click Delete after archiving until you are
satisfied with the archiving results. Click OK to finish.
.....
U SIN G TH E S YS TEM ADM IN IS TRATI ON FEAT URES
Using the Transactions and the Audit Trail
Through Excel’s Edit tool, run the REPLACE command to convert
the ID numbers to a descriptive name, if needed. For example, you
can change the following: Point ID from 210 to Front Door, or,
Cardholder ID from 164 to John Doe.
Generated by NexSentry Manager
Transaction Point ID Cardholder Time
ID
ID
Type
Priority
Acknowledge ACU
Login Alarm
Alarm
Time
User ID ID
Remarks Status
Alarm
Card
Response ID Number
9461
20000
0
4/2/92 54
7:22
0
0
0
1
0
0
9473
20500
0
4/2/92 12
7:22
0
0
0
1
0
0
9471
210
164
4/2/92 8
7:29
0
0
0
1
0
99123456
Sample Archive Report
Revision E, Part Number 66110229001
NexSentry Manager 3.0
3-13
USING THE SYSTEM ADMINISTRATION FEATURES
Using the Transactions and the Audit Trail
3
Vi e wi n g t he Tr an sact io n Log a nd th e Au d it Tr ai l ar ch i ves
The following procedure explains how to view archives.
TO VIEW THE TRANSACTION LOG AND THE AUDIT TRAIL ARCHIVES:
1
Shut down all Client PCs.
2
From the Database Explorer directory, click System
Administration>Audit Trail>Archives. The Audit Log dialog
box appears.
3
In the Archive Path text box, type the directory path where
you saved the archive, or click Browse to search through the
PC’s directory.
4
In the Start Date and the End Date text boxes, type in the
date range of the audits you want to view.
De l eti n g th e Tran sac ti on Log an d th e A ud i t Trai l
After you view the archive and you are satisfied with the results,
repeat the archive procedure, but this time click Delete after
archiving. All of the data you archived is removed from the
NexSentry Manager 3.0 database.
Re p air i ng an d c om pac ti n g t h e dat ab as e
After you archive and delete the Transaction Log and the Audit Trail,
you must repair and compact the database.
3-14
NexSentry Manager 3.0
Revision E, Part Number 66110229001
.....
U SIN G TH E S YS TEM ADM IN IS TRATI ON FEAT URES
Using the Transactions and the Audit Trail
TO REPAIR AND COMPACT THE DATABASE:
1 Close all connections to the database.
2
From the Database menu, click Repair. After you repair the
database, click Database>Compact.
3
After you repair and compact the database, check the NexSentry
Manager 3.0 system. If you find any problems, restore the
backup.
Edit in g th e Transac tion Type s
You cannot add or delete Transaction Types, but you can edit them.
TO EDIT TRANSACTION TYPES:
1 From the Database Explorer directory, double-click System
Administration>Transactions to expand the subentries.
2
From the directory, click Types. The Transaction Types appears
in the rightmost window.
3
Right-click the Transaction Type you want to edit. The Record
menu appears.
4
From the Record menu, click Edit. The Edit
Transaction Types dialog box appears. Enter the
appropriate data into each text box. For more information, see
the next section.
Un d er stan d i ng th e E d it T r an s act ion T yp es d i al og bo xes
This section explains the different text boxes and fields from the
Edit Transaction Types dialog box. The Edit
Transaction Types dialog box has three tabbed pages named
General, Actions, and Display Options.
Revision E, Part Number 66110229001
NexSentry Manager 3.0
3-15
3
USING THE SYSTEM ADMINISTRATION FEATURES
Using the Transactions and the Audit Trail
GENERAL PAGE
The General page allows you to edit the Transaction Type and
define it as an Alarm.
ID AND DESCRIPTION
You cannot edit the ID for Transaction Types. In the
Description text box, type a name for the Transaction. You may
change the description to something more specific to your site
requirements.
FACTORY DEFAULT
If the Transaction description has been modified, click Restore to
return the settings to the factory default, if you prefer.
ALARM SETTINGS
If you want to define this Transaction as an Alarm, click Define
as alarm. This makes the Priority text box available. Click
the drop-down arrow to set the priority of this Alarm. The range is 1
to 10, where 1 has the highest priority. When a Transaction defined
as an Alarm occurs, it appears in the Alarm Service window in
order of priority. Alarms that have the same priority appear in order
of occurrence.
ACTIONS PAGE
The Actions page allows you to select where and how this
Transaction is stored on the system or how the System User is
notified. You can send a message to the printer, to a file on disk, or to
the System Monitor window to alert the System User, or to all
three options.
3-16
NexSentry Manager 3.0
Revision E, Part Number 66110229001
.....
U SIN G TH E S YS TEM ADM IN IS TRATI ON FEAT URES
Using the Transactions and the Audit Trail
LOG TO PRINTER
Select Log to printer if you want this Transaction sent to the
printer when it occurs.
LOG TO DISK
Select Log to disk if you want this Transaction stored in the
database on the hard disk. This is the default for all Transactions.
With few exceptions, all Transactions should have Log to disk
selected.
ALERT OPERATOR
Select Alert operator to display this Transaction on the
System Monitor. You might find that routine Transactions are not
necessary to display on the System Monitor window.
ENABLE SOUND
Select Enable sound if you want this Transaction to activate a
Sound. When you select Enable sound, you must select a Sound
from the Sound text box.
SOUND
Click the drop-down arrow to open a list of available Sounds. If none
are available, click Create New. See the section “Importing the
Sounds” on page 4-20 for more information.
CONTINUOUS
Click the Continuous check box if you want the Sound to play
continuously, rather than just once.
Revision E, Part Number 66110229001
NexSentry Manager 3.0
3-17
USING THE SYSTEM ADMINISTRATION FEATURES
Setting the Alarm Responses
3
INSTRUCTION
Select the Instruction that appears on the System Monitor
window when this Transaction Type occurs. See “Setting the
Instructions” on page 5-46 for more information.
DISPLAY OPTIONS PAGE
The Display Options page allows you to configure how the
Transaction appears on the System Monitor window. Select the
icon and the color of the text as desired. To create a new icon, click
Create New. This allows you to import a new icon to the list of
available icons. See “Importing the Icons” on page 4-15 for more
information.
SETTING THE ALARM RESPONSES
..........................................................
You can define an Alarm Response for any given Alarm. It is useful
for System Users to have Alarm Responses appear on the System
Monitor window when an Alarm occurs. In the Alarm
Response dialog box, you can choose the unique ID number, a
description of the Alarm Response, and additional text or comments
about the Alarm Response.
TO SET THE ALARM RESPONSES:
1 From the Database Explorer directory, double-click System
Administration>Alarm Responses to expand the subentries.
The existing Alarm Responses appears in the rightmost
window.
2
3-18
To open the Record menu, right-click an existing Alarm
Response, or right-click Alarm Responses from the directory.
NexSentry Manager 3.0
Revision E, Part Number 66110229001
.....
U SIN G TH E S YS TEM ADM IN IS TRATI ON FEAT URES
Setting the Alarm Responses
3
From the Record menu, click Add, Add From, or Edit. The
corresponding dialog box appears.
4
In the ID text box, type in an ID number or click Next unused
ID.
5
In the Alarm Response text box, type a description for the
Alarm Response.
6
Use the Remarks section to type in additional information for
the System User.
Ac k now l ed gi n g an d S i l en ci n g Al ar ms
When an Alarm sounds, a Transaction Log appears in the System
Monitor window and the Alarm Service icon appears in the status
bar.
Click the Silence Sound icon to turn off the audio Alarm. This does
not acknowledge nor clear the Alarm, but it does stop the Sound.
Right-click the Alarm icon from the status bar to quickly open the
Alarm menu.
TO SERVICE AN ALARM:
1 From the toolbar, click the View Alarms icon. The
Alarm Servicing window appears.
2
From the Alarm Servicing window, click the Transaction
that triggered the Alarm to highlight the item.
3
Right-click to open the Alarm Service menu.
Revision E, Part Number 66110229001
NexSentry Manager 3.0
3-19
USING THE SYSTEM ADMINISTRATION FEATURES
Setting the User Defined Fields
3
4
From the Alarm Service menu, click Acknowledge, ACU
Status, Show Status, or Go To Map depending on the
appropriate action.
You can acknowledge multiple Alarms by selecting more than one
Alarm from the Alarm Servicing window.
Subsequent Alarms from the same Transaction does not cause
additional Alarms until you clear the initial Alarm.
S E T T I N G TH E U S E R D E F I N E D F I E L D S
..........................................................
Use the User Defined Fields to create lists of set data for the purpose
of adding or editing Cardholder data. This allows you to tailor the
Cardholder data in a way that best suits your needs. You must define
the User Defined Fields before you enter the Cardholder data. These
Fields help eliminate multiple entries that have the same meaning.
For example, while entering Cardholder data, one System User
might type ‘human resources’ and another System User might type
‘HR.’ Eliminating multiple, same meaning entries helps you to sort
and search the Cardholder information.
3-20
NexSentry Manager 3.0
Revision E, Part Number 66110229001
.....
U SIN G TH E S YS TEM ADM IN IS TRATI ON FEAT URES
Setting the User Defined Fields
Use the Additional Text Fields to define specific or
individual information about Cardholders, such as their car model or
license plate number.
Label
Text box
Help text
Additional Text Fields dialog box
Revision E, Part Number 66110229001
NexSentry Manager 3.0
3-21
USING THE SYSTEM ADMINISTRATION FEATURES
Setting the User Defined Fields
3
Use the Additional Look-Up Fields to define generic
Cardholder information such as job title or department name.
Label
Drop-down list
with Current
Values
Undefined
Label
Help text
Additional Look-Up Fields dialog box
You cannot add more Fields to the Additional Look-Up Fields or the
Additional Text Fields. You can only edit the existing Fields.
TO SET THE USER DEFINED FIELDS:
1 From the Database Explorer directory, double-click System
Administration>User Defined Fields.
3-22
2
From the directory, click Additional Look-Up Fields or
Additional Text Fields. The existing Fields appears in the
rightmost window.
3
To open the Record menu, right-click an existing Additional
Text Fields or an Additional Look-Up Fields, or click one of the
two from the directory.
NexSentry Manager 3.0
Revision E, Part Number 66110229001
4
From the Record menu, click Add, Add From, or Edit. The
corresponding dialog box appears.
5
Enter data into each field as appropriate. See the following
section for details.
.....
U SIN G TH E S YS TEM ADM IN IS TRATI ON FEAT URES
Setting the User Defined Fields
Un d er stan d i ng th e Use r De fi n ed Fi el d s d i al og b ox
This section explains the different text boxes and fields from the
User Defined Fields dialog box. The information entered
here appears in the drop-down lists from the Cardholder dialog
box.
ID
In the ID text box, type in an ID number or click Next unused
ID.
LABEL
The Label describes the text box of the User Defined Fields in the
Cardholder dialog box. An example of an Additional Look-Up
label is, ‘Department,’ while an example for an Additional Text Field
is, ‘License Plate Number.’
HELP TEXT
Type the text that you want to appear in the Help text box at the
bottom of the Cardholder dialog box. This allows you to display
additional information about that particular field. For example, type
in, ‘Type the Cardholder’s Department name here.’
Revision E, Part Number 66110229001
NexSentry Manager 3.0
3-23
3
USING THE SYSTEM ADMINISTRATION FEATURES
Setting the User Defined Fields
NEW VALUE
This field appears only in the Additional Look-Up dialog box.
The New Value text box allows you to enter a new Current
Value. Type the text in this field, and then click Add to add it to the
Current values list.
CURRENT VALUES
The Current Values defines the drop-down list that appears
next to the label on the Cardholder dialog box. You might want
to create a None or No Selection Value if none of the
Current Values apply to a given Cardholder. An example of
Current Values for a Department label include, Human
Resources, Engineering, and so forth.
3-24
NexSentry Manager 3.0
Revision E, Part Number 66110229001
.....
U SIN G TH E S YS TEM ADM IN IS TRATI ON FEAT URES
Setting the Facility Codes and the Site Codes
SETTING THE FACILITY CODES
AND THE SITE CODES
..........................................................
Facility Codes and Site Codes are unique identification numbers
assigned to a facility or a site, which allows additional access
control. Use Facility Codes for 1030 and 1040 key cards. Site Codes
are used for ABA/Magstripe cards. If you are not using these card
types, skip this section.
TO SET THE FACILITY OR SITE CODES:
1 From the Database Explorer directory, double-click System
Administration>Facility Codes or Site Codes to expand the
subentries. The existing Codes appears in the rightmost
window.
2 To open the Record menu, right-click an existing Code, or rightclick Facility Codes or Site Codes from the directory.
3
From the Record menu, click Add, Add From, or Edit. The
corresponding dialog box appears.
4
Type an ID number, a description, and the Code in the
appropriate text boxes.
5
For the Site Codes only, if you are using a Weigand Reader, click
Weigand type, and then type in a Company Code.
After you have set up the System Administration features, you can
configure the Miscellaneous features.
Revision E, Part Number 66110229001
NexSentry Manager 3.0
3-25
3
3-26
USING THE SYSTEM ADMINISTRATION FEATURES
Setting the Facility Codes and the Site Codes
NexSentry Manager 3.0
Revision E, Part Number 66110229001
USING THE MISCELLANEOUS FEATURES
4
.....
...................................
Configure the Miscellaneous features after you set up the System
Administration features. Refer to your completed Input Forms for
the appropriate information when you configure the database. See
Appendix A if you have not filled out these forms.
Always back up the database before you make changes. See the
section “Backing up an existing database” on page 2-10.
Also remember to download the database to the ACUs after adding
new data.
This chapter covers the following topics:
• “Setting the Time Codes” on page 4-4
• “Setting the Time Groups” on page 4-5
• “Setting the Holidays” on page 4-6
• “Setting the Actions” on page 4-7
• “Setting the Actions for the NexSentry Star I” on page 4-10
• “Setting the Action Groups” on page 4-13
• “Importing the Icons” on page 4-15
• “Understanding the Maps” on page 4-16
• “Importing the Sounds” on page 4-20
• “Setting the Time Zones” on page 4-21
• “Setting the System Defaults” on page 4-22
Revision E, Part Number 66110229001
NexSentry Manager 3.0
4-1
4
US ING THE M ISC ELLANEO US FEA TURES
Key Terms
KEY TERMS
..........................................................
Actions: Actions define when and how the ACU sends Transaction
Logs to the System Monitor window.
Action Groups: Action Groups define which Actions are associated
with Transaction Types.
Armed Building Modes: No one is allowed in the Zone when the
NexSentry Star ACU is set for Armed.
Closed Building Modes: Set the NexSentry ACUs to Closed during
building hours when no one is allowed in the building.
Disabled Zones: Set the NexSentry Star ACU to Disabled when it
does not operate at all.
Disarmed Zones: Set the NexSentry Star ACU for Disarmed during
normal building hours when the most amount of Cardholders are in
the building.
Holidays: Holidays define dates when the building or zone enters
the Closed or Armed modes.
Icons: Icons are computer graphics that can be used with the Maps
feature and the Transaction Types.
Limited Building Modes: Set the NexSentry ACUs to Limited
during building hours when only certain people, such as privileged
Cardholders, occupy the building.
Maps: The Maps feature allows you to view the same data and
perform the same functions from the System Status and
System Monitor windows in picture format rather than text.
Monitored Zones: Use the Monitored setting when the NexSentry
Star ACU is Disabled, but the Tamper Transactions still works
properly.
4-2
NexSentry Manager 3.0
Revision E, Part Number 66110229001
.....
USI NG THE MI SC ELLANEO US FEAT URES
Key Terms
Open Building Modes: Set the NexSentry ACUs to Open during
normal building hours when the most amount of Cardholders occupy
the building.
Shunted Building Modes: The NexSentry Star ACU is set for
Shunted when it does not send Transaction Logs to the System
Monitor window.
Sounds: You can create and import Sounds into the NexSentry
Manager 3.0 system for use with Alarms.
Time Codes: Time Codes consist of a Start time and a Stop time as
well as days of the week, including Holidays. Use Time Codes to
create Time Groups.
Time Groups: Use the Time Groups when you configure features
such as Actions and Access Codes. Time Groups can consist of one
to four different Time Codes.
Time Zones: You can incorporate the NexSentry Manager 3.0 into a
worldwide system. The Time Zone feature allows you to configure a
Time Zone for the ACUs.
Revision E, Part Number 66110229001
NexSentry Manager 3.0
4-3
US ING THE M ISC ELLANEO US FEA TURES
Setting the Time Codes
4
SETTING THE TIME CODES
..........................................................
Time Codes determine when a device, action, or card is active, or
inactive. Use the Time Codes to create Time Groups. You need the
Time Groups to configure features such as Access Codes, ACUs,
Doors, and so forth.
TO SET THE TIME CODES:
1 From the Database Explorer directory, double-click
Miscellaneous>Time Codes. The existing Time Codes appears
in the rightmost window.
2 To open the Record menu, right-click an existing Time Code, or
right-click Time Codes from the directory.
4-4
3
From the Record menu, click Add, Add From, or Edit. The
corresponding dialog box appears.
4
In the ID text box, type in the ID number, or click Next
unused ID.
5
In the Description text box, type in a name for the Time
Code.
6
In the Active times section, set the Start time and the
Stop time in military time (hh:mm) for that code. The active
time ends at the end of the minute shown in the Stop time. For
example, to stop the active time at 6:30 PM, you need to type
18:29. For midnight, use 23:59.
7
In the Active days section, click the days you want the Time
Code active. If you click Holiday, the building is open during
that active Time Code, otherwise the building is closed on dates
set as a Holiday.
NexSentry Manager 3.0
Revision E, Part Number 66110229001
.....
USI NG THE MI SC ELLANEO US FEAT URES
Setting the Time Groups
SETTING THE TIME GROUPS
..........................................................
Use the Time Groups feature to create groups of Time Codes. You
need a Time Group to set features such as Access Codes. You can set
a Time Group with a single Time Code, or up to four Time Codes.
TO SET THE TIME GROUPS:
1 From the Database Explorer directory, double-click
Miscellaneous>Time Groups. The existing Time Groups
appears in the rightmost window.
2 To open the Record menu, right-click an existing Time Group,
or right-click Time Groups from the directory.
3
From the Record menu, click Add, Add From, or Edit. The
corresponding dialog box appears.
4
In the ID text box, type in the ID number, or click Next
unused ID.
5
In the Description text box, type in a name for the Time
Group.
6
In the Unselected time codes box, is a list of available
Time Codes. Click a Time Code, then click Add, that Time Code
appears in the Selected time codes box.
Revision E, Part Number 66110229001
NexSentry Manager 3.0
4-5
US ING THE M ISC ELLANEO US FEA TURES
Setting the Holidays
4
SETTING THE HOLIDAYS
..........................................................
Use the Holidays feature to mark the dates that you want the building
closed. For example, if you set February 21 as a Holiday the building
is closed that day, unless, in the Time Code, you selected the
Holiday check box. If you select Holiday from the Time
Codes dialog box, the building is open for the active time of that
Time Code for all Holidays.
Each ACU can store up to 30 Holidays in memory. When a Holiday
passes, that Holiday is deleted from the ACU memory and the next
Holiday is downloaded.
TO SET THE HOLIDAYS:
1 From the Database Explorer directory, double-click
Miscellaneous>Holidays. The existing Holidays appears in the
rightmost window.
2 To open the Record menu, right-click an existing Holiday, or
right-click Holidays from the directory.
4-6
3
From the Record menu, click Add, Add From, or Edit. The
corresponding dialog box appears.
4
In the ID text box, type in the ID number, or click Next
unused ID.
5
In the Description text box, type in a name for the Holiday.
6
In the Date box, either type in a date (month/date/year), or click
the drop-down arrow to open a calendar from which you can set
a date.
NexSentry Manager 3.0
Revision E, Part Number 66110229001
.....
USI NG THE MI SC ELLANEO US FEAT URES
Setting the Actions
SETTING THE ACTIONS
..........................................................
Actions define when and how an ACU reacts to a Transaction. When
you configure the ACUs, you set an Action for the four different
types of Transactions associated with the ACUs. Actions are referred
to as ACU Reports in the 4100 manual. After you create an Action,
download the data to the ACUs.
Transaction Logs are only created during the times and the modes
you assign to the Action, which in turn is assigned to an ACU.
Otherwise, Logs are not sent to the System Monitor window.
TO SET THE ACTIONS:
1 From the Database Explorer directory, double-click
Miscellaneous>Actions. The existing Actions appears in the
rightmost window.
2 From the Database Explorer directory, double-click
Miscellaneous>Actions. The existing Actions appears in the
rightmost window.
3
To open the Record menu, right-click an existing Action, or
right-click Actions from the directory.
4
From the Record menu, click Add, Add From, or Edit. The
corresponding dialog box appears.
5
Enter data into each field as appropriate. See the following
section for details.
Revision E, Part Number 66110229001
NexSentry Manager 3.0
4-7
4
US ING THE M ISC ELLANEO US FEA TURES
Setting the Actions
Un d er stan d i ng th e Ac ti on d i al og bo xes
There are three tabbed pages to the Action dialog box: General,
Latched Contact, and the Regular Contact page.
GENERAL PAGE
This section explains the text boxes and functions from the
General page of the Actions dialog box.
ID AND DESCRIPTION
In the ID text box, type in an ID number or click Next unused
ID. In the Description text box, type a name for the Action.
PREVENT BUILDING CLOSURE
Prevents the ACU from going into Closed mode.
PRINT ASTERISK
Prints an asterisk (*) on the Report when a Transaction of this type
occurs, if selected. This only works if a printer is directly connected
to the Server PC.
SEND EVENT INFORMATION TO HOST
Set the Building Mode and/or the Time Group that specifies when
the ACU sends Transaction Logs to the System Monitor
window.
LATCHED CONTACT PAGE
The following explains the text boxes and functions from the
Latched Contact page of the Actions dialog box.
4-8
NexSentry Manager 3.0
Revision E, Part Number 66110229001
.....
USI NG THE MI SC ELLANEO US FEAT URES
Setting the Actions
CLOSE LATCHED CONTACT WHEN ACU IS
When an Action of this type occurs, the ACU sends a Close Latch
Contact Transaction Log to the System Monitor window during
the modes selected. A latched contact is an Output device that, once
activated, stays active until a System User silences or clears it.
AND DURING THIS TIME GROUP
Click the drop-down arrow and select the Time Group that specifies
the times when a Close Latch Contact Transaction Log is sent to the
System Monitor window.
REGULAR CONTACT PAGE
This section explains the text boxes and functions from the
Regular Contact page of the Actions dialog box.
CONTACT POINT
Click the drop-down arrow and then select the Output device to
connect to this Action. Output Contact Points are relays that are used
to lock or unlock Doors or turn other devices on or off.
CLOSE REGULAR CONTACT WHEN ACU IS
When an Action of this type occurs, the ACU sends a Close Regular
Contact Transaction Log during the modes selected.
AND DURING THIS TIME GROUP
Click the drop-down arrow and select the Time Group that specifies
the times when a Close Regular Contact Transaction Log is sent to
the System Monitor window.
Revision E, Part Number 66110229001
NexSentry Manager 3.0
4-9
US ING THE M ISC ELLANEO US FEA TURES
Setting the Actions for the NexSentry Star I
4
SETTING THE ACTIONS FOR THE NEXSENTRY STAR I
..........................................................
The new NexSentry Star I ACU provides more options than previous
4100 series ACUs. The NexSentry Manager 3.0 system allows you
to work with both the 4100 series and the Star series. The Actions
that refer to the 4100 versions is listed in the Database Explorer
directory as Actions, and the Star I Actions is labeled Actions
for NexSentry Star I. The two different types are not
compatible with each other.
A difference between the Star series and the 4100 series is that the
Star series works with building Zones, and not building Modes.
Building Modes refer to the status of an ACU and include, Open,
Limited, and Closed. The building Zones also refer to the status of an
ACU, but are defined as Armed, Disarmed, Shunted, Disabled, and
Monitored. See “Key Terms” on page 4-2 for definitions.
TO SET THE ACTIONS FOR NEXSENTRY STAR:
1 From the Database Explorer directory, double-click
Miscellaneous>Actions for NexSentry Star. The existing Actions
for NexSentry Star appears in the rightmost window.
2 To open the Record menu, right-click an existing Actions for
NexSentry Star, or right-click Actions for NexSentry Star from
the directory.
4-10
3
From the Record menu, click Add, Add From, or Edit. The
corresponding dialog box appears.
4
Enter data into each field as appropriate. See the following
section for details.
NexSentry Manager 3.0
Revision E, Part Number 66110229001
.....
USI NG THE MI SC ELLANEO US FEAT URES
Setting the Actions for the NexSentry Star I
Un d er stan d i ng th e Ac ti on s f or Ne xS en tr y St ar d ia log b oxe s
There are three tabbed pages to the Actions for NexSentry
Star dialog box: General, Output Contact, and the Zone
page.
GENERAL PAGE
This section explains the text boxes and functions from the
General page of the Actions for NexSentry Star dialog
box.
ID AND DESCRIPTION
In the ID text box, type in an ID number or click Next unused
ID. In the Description text box, type a name for the Action.
PREVENT ZONE CLOSURE
The ACU sends a Prevent Zone Closure Transaction Log to the
System Monitor window when an Action of this type occurs, if
selected.
PRINT ASTERISK
Prints an asterisk (*) on the Report when a Transaction of this type
occurs, if selected. This only works if a printer is directly connected
to the Server PC.
PRINT TO TERMINAL
Sends a Transaction Log to the System Monitor window, if
selected.
SEND EVENT INFORMATION TO HOST
Select the zone mode that specifies when Transaction Logs are sent
to the System Monitor window.
Revision E, Part Number 66110229001
NexSentry Manager 3.0
4 -11
US ING THE M ISC ELLANEO US FEA TURES
Setting the Actions for the NexSentry Star I
4
AND DURING THIS TIME GROUP
Click the drop-down arrow and select the Time Group that specifies
when Transaction Logs are sent to the System Monitor window.
OUTPUT CONTACT PAGE
This section explains the text boxes and functions from the Output
Contact page of the Actions for NexSentry Star dialog
box.
CONTACT POINT
Click the drop-down arrow and select the Output Device. Output
Contact Points are relays that are used to lock or unlock Doors or
turn other devices on and off.
CLOSE OUTPUT CONTACT WHEN ZONE IS
The ACU sends a Close Output Contact Transaction Log to the
System Monitor window during the modes selected.
AND DURING THIS TIME GROUP
Click the drop-down arrow and select the Time Group that specifies
when Transaction Logs are sent to the System Monitor window.
ZONE PAGE
This section explains the text boxes and functions from the Zone
page of the Actions for NexSentry Star dialog box.
OVERRIDE ZONE SECTION
You can set a Zone to the state of another Zone by setting either a
Specific Zone, or by setting a Zone number.
4-12
NexSentry Manager 3.0
Revision E, Part Number 66110229001
.....
USI NG THE MI SC ELLANEO US FEAT URES
Setting the Action Groups
SETTING THE ACTION GROUPS
..........................................................
Action Groups are groupings of individual Actions. Use the Action
Groups to configure the Doors. This way you can tailor each specific
Door with Actions for each Transaction Type.
TO SET THE ACTION GROUPS:
1 From the Database Explorer directory, double-click
Miscellaneous>Action Groups. The existing Action Groups
appears in the rightmost window.
2
To open the Record menu, right-click an existing Action Group,
or right-click Action Groups from the directory.
3
From the Record menu, click Add, Add From, or Edit. The
corresponding dialog box appears.
4
Enter data into each field as appropriate. See the following
section for details.
Un d er stan d i ng th e Ac ti on G rou p s d i al og b oxe s
There are three tabbed pages to the Action Group dialog box,
including the General, Access, and the Failure page.
GENERAL PAGE
This section explains the text boxes and functions from the
General page of the Action Groups dialog box.
ID AND DESCRIPTION
In the ID text box, type in an ID number or click Next unused
ID. In the Description text box, type a name for the Action
Group.
Revision E, Part Number 66110229001
NexSentry Manager 3.0
4-13
4
US ING THE M ISC ELLANEO US FEA TURES
Setting the Action Groups
FOR USE WITH NEXSENTRY STAR
Click the For use with NexSentry Star check box if you
want to use this Action Group with the Gold Hardware.
GENERAL ACTIONS
Each text box in the General actions section represents a
different Transaction Type. Click the drop-down arrow to open a list
of available Actions to set for the Transaction Type.
ACCESS PAGE
The Access page defines the Actions for Access Transaction
Types. Select the Actions for Access Granted, Access
Denied, Exit Granted, and Exit Denied Transaction
Types.
FAILURE PAGE
The Failure page defines the Actions for Failure Transaction
Types. Select the Actions for Coax, Sensor, MSM, VIP, and SNET
Reader Transaction Types.
4-14
NexSentry Manager 3.0
Revision E, Part Number 66110229001
.....
USI NG THE MI SC ELLANEO US FEAT URES
Importing the Icons
IMPORTING THE ICONS
..........................................................
Use Icons to help define the Transaction Logs that appear on the
System Monitor window. Also, use the Icons to represent
Hardware devices on the Maps.
TO IMPORT THE ICONS:
1 From the Database Explorer directory, double-click
Miscellaneous>Icons. The existing Icons appears in the
rightmost window.
2
From the Database Explorer directory, double-click
Miscellaneous>Icons. The existing Icons appears in the
rightmost window.
3
To open the Record menu, right-click an existing Icon, or rightclick Icons from the directory.
4
From the Record menu, click Add, Add From, or Edit. The
corresponding dialog box appears.
5
In the ID text box, type in the ID number, or click Next
unused ID.
6
In the Description text box, type in a name for the Icon.
7
Click Import, the Choose Icon dialog box appears. The
default opens to the Windows NT Icons folder. From the
Current icon window, double-click an Icon to import the
image. You can also click Browse to select another directory.
You have now imported a new Icon.
Revision E, Part Number 66110229001
NexSentry Manager 3.0
4-15
4
US ING THE M ISC ELLANEO US FEA TURES
Understanding the Maps
UNDERSTANDING THE MAPS
..........................................................
Maps allow you to view the system status with pictures, rather than
text. You can set a Map to show a particular Zone, or a group of
Zones, or even an entire floor of the building. The View Maps
window allows you to operate the Hardware devices in much the
same way as from the Status window.
Map window with Hardware Icons
Cr eat i ng a Ma p
First, ask the building Owner if any electronic files exist of the
building layout. Then determine if that file is compatible with the
NexSentry Manager 3.0. The NexSentry Manager 3.0 supports four
different graphics formats, Windows bitmaps (*.bmp), JPEG images
(*.jpg), Picture images (*.pcx), and TIFF images (*.tif). If no
previously existing electronic map files exist, you must create the
Map background using a graphics program. The Microsoft Paint
program in the Accessories folder of Windows NT produces a
4-16
NexSentry Manager 3.0
Revision E, Part Number 66110229001
.....
USI NG THE MI SC ELLANEO US FEAT URES
Understanding the Maps
Windows bitmap file that you can import directly into the NexSentry
Manager 3.0 as the Map background.
When you first create a Map, the NexSentry Manager 3.0 names it
Map1. Each subsequent Map is named Map2, Map3, and so on.
You can use the default name or click Rename from the Map menu
to change to a more descriptive name.
TO CREATE A MAP:
1 From the toolbar, click the Map icon. The Map window appears
as well as the Map menu.
2
From the Map menu, click New. A blank Map appears.
3
From the Map menu, click Select Background. The Open
dialog box appears. The Background is the building, or Zone,
layout.
4
From the Open dialog box, browse the directory to select the
background file. Click Open to import the image onto the Map.
Now that you have a Map with a background created, you can import
the Hardware Icons. The only Icons you can add to the Map are the
Icons in the Icons folder. To learn how to import new Icons, see the
section “Importing the Icons” on page 4-15.
TO IMPORT THE HARDWARE ICONS:
1 Open the Map window and the Database Explorer window
so that you can see both windows. To do this, from the menu bar,
click Window>Tile.
2
From the database directory, double-click Hardware and then
the appropriate Hardware folder, for example, Access Control
Revision E, Part Number 66110229001
NexSentry Manager 3.0
4-17
US ING THE M ISC ELLANEO US FEA TURES
Understanding the Maps
4
Units (ACU), to expand the sub-entries. The available ACUs
appears in the rightmost window.
3
From the rightmost window with the, for example, ACU Icons,
drag the hardware item to the Map, and place it where it belongs
on the Map background. To continue adding Hardware Icons to
the Map, repeat this step for each type of Hardware you want on
the Map.
4
When you are finished, from the Map menu, click Save.
After you create the Map you might need to move an Icon.
TO MOVE AN ICON FROM THE MAP:
•
Click the Icon and drag it to the appropriate location.
If you don’t want the Icon moved by accident, you can lock it in
place.
TO LOCK THE ICON IN PLACE:
•
4-18
Right-click the Icon, from the pop-up menu, click Lock Icon.
You might decide that you want separate Maps for each Zone of the
building. To open other maps from the Map window, click the tabs at
the bottom of the window, or create Icons that allow you to jump
from one Map to another. Read the following procedure for details.
NexSentry Manager 3.0
Revision E, Part Number 66110229001
.....
USI NG THE MI SC ELLANEO US FEAT URES
Understanding the Maps
TO CREATE JUMPS BETWEEN MAPS:
1 Open the Map window you want to jump from and the
Database Explorer window so that you can see both
windows.
2
From the database directory, click Miscellaneous>Maps. The
existing Maps appears in the rightmost window.
3
From the Database Explorer window, drag the appropriate
Map icon to the Map window and position it accordingly. For
example, drag the Map 3 icon to the Map 1 window.
•
To jump maps, from the Map window, double-click the Map icon.
Usi n g t he Map s
You can use the maps as a substitute for the System Status
window.
TO USE THE MAPS:
1 From the toolbar, click the Map icon. The Map window appears.
2
Right-click a Hardware Icon from the Map window to open the
Status menu for that device. For more information about the
Status menu see “Defining the System Status Icons” on
page 7-3.
Revision E, Part Number 66110229001
NexSentry Manager 3.0
4-19
US ING THE M ISC ELLANEO US FEA TURES
Importing the Sounds
4
IMPORTING THE SOUNDS
..........................................................
Sounds are used as a part of Alarms. You need to import Sounds so
you can use them with the NexSentry Manager 3.0 system. After you
import and name the Sounds, you can assign Sounds to the
Transactions Types as a part of the Alarm. You cannot use two
different Sounds for one Transaction Type. See “Editing the
Transaction Types” on page 3-15 for more information.
To use the Sound feature, you must have a sound card configured for
your PC through the Windows NT Control Panel. If your system
does have a sound card, you can use *.WAV files.
Many .WAV files are already installed as a part of Windows NT.
Browse the folder C:\WINNT\Media or use the Find Files
or Folders from the Start menu to find the already installed
.WAV files. You might even want to record and use your own
Sounds. See Windows Help under the topic “Recording Sound
Files.”
TO IMPORT THE SOUNDS:
1 From the Database Explorer directory, double-click
Miscellaneous>Sounds. The existing Sounds appears in the
rightmost window.
2 From the Database Explorer directory, double-click
Miscellaneous>Sounds. The existing Sounds appears in the
rightmost window.
4-20
3
To open the Record menu, right-click an existing Sound, or
right-click Sounds from the directory.
4
From the Record menu, click Add, Add From, or Edit. The
corresponding dialog box appears.
NexSentry Manager 3.0
Revision E, Part Number 66110229001
.....
USI NG THE MI SC ELLANEO US FEAT URES
Setting the Time Zones
5
In the ID text box, type in the ID number, or click Next
unused ID.
6
In the Description text box, type in a name for the Sound.
7
Click Import, the Import Sound dialog box appears. Browse
the directory and select a sound file, then click Import.
You have now imported a Sound.
SETTING THE TIME ZONES
..........................................................
When you configure the NexSentry Star ACUs, you can set the Time
Zone from which the ACU is located. This is useful if the Server PC
connects to a worldwide system and keeping track of time is an
important consideration.
TO SET THE TIME ZONES:
1 From the Database Explorer directory, double-click
Miscellaneous>Timezones. The existing Timezones appears in
the rightmost window.
2
To open the Record menu, right-click an existing Timezone, or
right-click Timezones from the directory.
3
From the Record menu, click Add, Add From, or Edit. The
corresponding dialog box appears.
4
In the ID text box, type in the ID number, or click Next
unused ID.
5
In the Description text box, type in a name for the Timezone.
Revision E, Part Number 66110229001
NexSentry Manager 3.0
4-21
US ING THE M ISC ELLANEO US FEA TURES
Setting the System Defaults
4
6
Set the GMT Offset appropriately. Click Ahead or Behind,
whichever is more appropriate for the location of the ACU.
7
In the Mnemonic text box, type in the appropriate time zone, for
example, PST.
8
In the Daylight Savings section, click Automatically
adjust for daylight savings changes, if appropriate,
and then type in the mnemonic for standard time and for
daylight savings time.
SETTING THE SYSTEM DEFAULTS
..........................................................
The System Defaults dialog box allows you to specify the
system settings.
TO SET THE SYSTEM DEFAULTS:
1
From the menu bar, click Database>System Defaults. The
System Defaults dialog box appears.
2
Change the System Defaults as needed. See below for details on
each text box.
Un d er stan d i ng th e S ys te m De fau l ts di al og b ox
This section explains the settings for the System Defaults.
COMPANY NAME
In the Company name text box, type in the heading used for
Reports, this is usually the company name.
4-22
NexSentry Manager 3.0
Revision E, Part Number 66110229001
.....
USI NG THE MI SC ELLANEO US FEAT URES
Setting the System Defaults
DOWNLOAD DATABASE ON DISCREPANCY:
Downloads the database at 00:15 (12:15 AM) to all of the ACUs if
database information has changed and the ACUs need an update. It is
recommended that you do not select this option in most
circumstances.
EJECT PAPER FROM LOG PRINTER ON ALARM
Causes a form feed at the printer when a Transaction defined as an
Alarm occurs.
LOG PRINTER PORT
Set the LPT port that connects to the printer.
IMAGE FORMAT
In the Image format text box, click the drop-down arrow and
then select an image type that the NexSentry Manager 3.0 looks for
first when browsing for pictures.
DOWNLOAD ACU AT
Specifies the time when data is downloaded to the ACUs if the
Download database on discrepancy feature is not
selected. Set this time for when the system is not busy, for example,
when the building is closed.
NUMBER OF MONITOR MESSAGES TO TRACK
Defines the number of Transaction Logs that appear in the System
Monitor window at any one time. For optimum system
performance, set this number no higher than 1000.
Revision E, Part Number 66110229001
NexSentry Manager 3.0
4-23
4
4-24
US ING THE M ISC ELLANEO US FEA TURES
Setting the System Defaults
NexSentry Manager 3.0
Revision E, Part Number 66110229001
USING THE HARDWARE FEATURES
5
.....
...................................
The Hardware data refers to the system devices. Check your
completed Input forms for the appropriate information when you
configure the database. See Appendix A if you have not filled out
these forms.
Always back up the database before you make changes. See the
section “Backing up an existing database” on page 2-10.
Also remember to download the database to the ACUs after adding
new data.
This chapter covers the following topics:
• “Setting the Pollers” on page 5-5
• “Setting the Access Control Units” on page 5-7
• “Setting the Doors” on page 5-15
• “Setting the Name Schemes” on page 5-24
• “Setting the Elevators” on page 5-25
• “Setting the Floor Groups” on page 5-30
• “Setting the Input Devices” on page 5-32
• “Setting the Output Devices” on page 5-36
• “Setting the Reader Configurations” on page 5-39
• “Setting the Instructions” on page 5-46
• “Setting the Zones” on page 5-47
Revision E, Part Number 66110229001
NexSentry Manager 3.0
5-1
5
US ING THE H ARD WA RE FEATURES
Key Terms
KEY TERMS
..........................................................
ACUs: Access Control Units (ACUs) are Hardware devices that
sense and react to input from other Hardware devices such as
Readers. ACUs control the Door status as well as send Transaction
Logs to the System Monitor window. The three types of ACUs
used with the NexSentry Manager 3.0 include, the ALTO 818SC, the
NexSentry ACU, and the NexSentry Star ACU.
ACU Zones: An ACU Zone consists of one ACU, a Time Group,
and an Input device.
Action Groups: Action Groups define which Actions are associated
with Transaction Types.
Auto-Forgive: Allows a Cardholder to use the same Reader twice in
a row without using another Reader in-between. However, a
Transaction Log is sent to the NexSentry Manager 3.0 System
Monitor window. Use this feature primarily for parking lot
applications.
Closed Reader mode: A Reader set to the Closed mode grants
access when the Zone is in Disarmed mode. When the Zone is in
Armed mode, privileged Cardholders are granted access.
Doors: ‘Door’ is a generic term for all openings controlled by an
access device. The term ‘Door’ refers to actual doors, turnstiles,
gates, and so forth.
Facility Codes: A unique identification number assigned to a
facility. Use Facility Codes only for 1030 and 1040 cards.
Floor Groups: Use the Floor Groups to assign elevator and floor
access to the Access Codes, which in turn are assigned to
Cardholders.
5-2
NexSentry Manager 3.0
Revision E, Part Number 66110229001
.....
U SIN G TH E H AR DWARE FEAT URES
Key Terms
Hard Anti-Passback: Prevents the reuse of a card on the same Door
in the same direction using the same Reader, thus preventing a card
from being ‘passed-back’ to another person.
High Security: Allows the elevator to travel to one floor and then it
returns to the default floor.
Input Devices: Input devices are Hardware items that detect
changes in the environment and then reports that information to the
ACU.
Instructions: Instructions serve as messages that appear on the
System Monitor window when Transactions occur.
Logical Zones: A Logical Zone can include any combination of
Pollers, ACUs, Input devices, Output devices, Doors, and Elevators.
Name Schemes: The NexSentry Manager 3.0 allows you to name
the floors in the building, this is called a Name Scheme.
Normal Reader mode: A Reader set to the Normal mode grants
access during all Zone modes to Cardholders with a valid card.
Normal Security: Allows the elevator to travel to one floor per
present Cardholder before the elevator returns to the default floor.
Open Reader mode: A Reader set to the Open mode grants access
when the Zone is in Disarmed mode. When the Zone is in Armed
mode, access is denied to all, including privileged Cardholders.
Output Devices: Output devices are Hardware items such as locks,
lights, and alarms. When Output devices are triggered, the ACU
sends a Transaction Log to the System Monitor window.
Pollers: A Poller is a Hardware device that controls communications
with the ACUs. There is only one Poller for each communications
port. For example, Poller1=COM1 or Poller2=COM2.
Revision E, Part Number 66110229001
NexSentry Manager 3.0
5-3
5
US ING THE H ARD WA RE FEATURES
Key Terms
Priority Call: The elevator responds first to certain Cardholders
with special permissions.
REX: A special monitor, such as an electric eye or a pressure pad,
that mounts inside a Door. The REX device allows Cardholders to
unlock a Door when exiting a secured Door.
Site Codes: A unique identification number assigned to a site. Use
Site Codes with ABA/Magstripe cards.
Soft Anti-Passback: Allows access to a Cardholder, but the ACU
sends a Transaction Log to the System Monitor window stating
that a card was used twice on the same Reader in the same direction.
Station Reader: A Reader set to the Station mode operates in the
same manner as a Closed Reader. However, a privileged Cardholder
can change the Zone mode through a Station Reader.
Time Groups: Use the Time Groups when you configure features
such as Actions, Access Codes, and Elevators. Time Groups can
consist of one to four different Time Codes.
5-4
NexSentry Manager 3.0
Revision E, Part Number 66110229001
.....
U SIN G TH E H AR DWARE FEAT URES
Setting the Pollers
SETTING THE POLLERS
..........................................................
A Poller controls communications with devices in the NexSentry
Manager 3.0 system. A Poller communicates through one serial port
at a time, but can communicate with all of the devices connected to
that serial port at the same time. Refer to the completed Input forms
from Appendix A for the appropriate data to use when configuring
the Pollers.
TO SET THE POLLERS:
1 From the Database Explorer directory, double-click
Hardware>Pollers. The existing Pollers appears in the
rightmost window.
2 To open the Record menu, right-click an existing Poller, or right
click Pollers from the directory.
3 From the Record menu, click Add, Add From, or Edit. The
corresponding dialog box appears.
4
Enter data into each field as appropriate. See the following
section for details.
Un d er stan d i ng th e Pol l e rs di al og bo x
The Pollers dialog box has two tabbed pages, the General
page, and the Communications page.
GENERAL PAGE
This section describes the different text boxes and features from the
General page of the Pollers dialog box.
Revision E, Part Number 66110229001
NexSentry Manager 3.0
5-5
5
US ING THE H ARD WA RE FEATURES
Setting the Pollers
ID AND DESCRIPTION
In the ID text box, type in an ID number or click Next unused
ID. In the Description text box, type a name for the Poller.
INSTRUCTION
Select the Instruction that appears on the System Monitor
window when a Transaction set with this Instruction occurs.
SHOW ACTIVITY TIMES
Select a Time Group for when you want the Poller active.
COMMUNICATIONS PAGE
This section describes the different text boxes and features from the
Communications page of the Pollers dialog box.
POLLER TYPE
Select the Poller type from the drop-down list. You can choose from
a Direct Connection, Dial Up, Direct Connection Star, and Dial Up
Star. Remember, you must set Gold Hardware with other Gold
Hardware and that you must set previous versions of the Hardware
with other previous versions of the Hardware.
DIAL UP SECTION
If you select a Dial Up connection, you must set the Phone
number, Modem initialization string, Idle
timeout, Answer timeout, and the Read retries.
SETTINGS SECTION
Select the Port to which the Poller connects. Then, select the Baud
rate at which the Poller and the ACU communicate. Connect all of
the ACUs on this Poller with the same baud rate.
5-6
NexSentry Manager 3.0
Revision E, Part Number 66110229001
.....
U SIN G TH E H AR DWARE FEAT URES
Setting the Access Control Units
PORT CONTROL SECTION
Set the Acknowledge timeout text box with the number of
seconds the Poller waits for a response from each ACU. Set this to
no more than two seconds.
Set the Retries text box to the number of times the Poller tries to
connect to the ACU before sending a Dial Up Failure Transaction
Log to the System Monitor window.
Select Shunted to stop the ACU from sending Transaction Logs to
the System Monitor window.
S ETTING THE A CCESS C ONTROL U NITS
..........................................................
ACUs (Access Control Units) control Door access and report the
status of the Hardware devices to the NexSentry Manager 3.0. Use
the NexSentry Manager 3.0 to download the database information to
the ACUs. There are three types of ACUs used with the NexSentry
Manager 3.0, the ALTO 818SC, the NexSentry ACU, and the
NexSentry Star ACU.
Ad d re s s in g th e AC Us
To configure the ACUs so they communicate with the NexSentry
Manager 3.0, you must first use a terminal-emulation program, such
as the Windows NT HyperTerminal program. HyperTerminal allows
the Server PC to serve as an input/output terminal to communicate
with the ACU. Through a COM port, you can communicate with one
ACU at a time through the ACU Terminal port.
You must first address the ACUs so that the NexSentry Manager 3.0
can locate them. For more information see “Checking the Installed
Access Control Units” on page 2-3.
Revision E, Part Number 66110229001
NexSentry Manager 3.0
5-7
US ING THE H ARD WA RE FEATURES
Setting the Access Control Units
5
The ACU default baud rate is 300. Do not confuse this with the
NexSentry Manager 3.0 default baud rate. The reason the ACU baud
rate is so slow is that some older installations had simple
communications devices that were only capable of 300 baud. You
should use the 9600 baud rate for all of the ACUs to maximize
system communications speed.
TO SET THE ACUS:
1 From the Database Explorer directory, double-click
Hardware>Access Control Units (ACU). Click a particular type
of ACU. The existing ACUs appears in the rightmost window.
2 To open the Record menu, right-click an existing ACU, or rightclick an ACU type from the directory.
3
From the Record menu, click Add, Add From, or Edit. The
corresponding dialog box appears.
4
Enter data into each field as appropriate. See the following
section for details.
To create additional ACUs, right-click an existing ACU, and then
from the Record menu, click Add From. This allows you to
configure a new ACU using the settings from the selected ACU.
Un d er stan d i ng th e AC U d ia lo g b ox
There are seven pages to the ACU dialog box: General, Time
Groups, VIP, Actions, Cards, Reader, and
Miscellaneous. Refer to the completed Input forms from
Appendix A for the appropriate data to use.
5-8
NexSentry Manager 3.0
Revision E, Part Number 66110229001
.....
U SIN G TH E H AR DWARE FEAT URES
Setting the Access Control Units
GENERAL PAGE
This section describes the different text boxes and features from the
General page of the ACU dialog box.
ID AND DESCRIPTION
In the ID text box, type in an ID number or click Next unused
ID. In the Description text box, type a name for the ACU.
SHUNT
Click Shunt if the ACU is not connected or is undergoing
maintenance. This prevents the Poller from reporting the ACU as
offline.
ADDRESS
Each ACU has an Address. Select the ACUs address from the dropdown list. See “Checking the Installed Access Control Units” on
page 2-3 for more information.
SERIAL NUMBER
The Serial Number text box does not apply to the 818SC ACUs.
Type in a unique device number for the ACU in the Serial
Number text box.
POLLER
Select the Poller controlling the ACU.
INSTRUCTION
Select the Instruction you want to appear as a message on the
System Monitor window when a Transaction set with this
Instruction occurs.
Revision E, Part Number 66110229001
NexSentry Manager 3.0
5-9
US ING THE H ARD WA RE FEATURES
Setting the Access Control Units
5
HOST LOGIN
The Host feature applies only to the NexSentry Star ACUs. Select a
Host for this ACU.
NUMBER OF MIROS
Click the drop-down arrow and then select how many MIROs
connect to this ACU.
TIME GROUPS PAGE
This section describes the different text boxes and features from the
Time Groups page of the ACU dialog box.
TIMES WHEN BUILDING SHOULD BE CLOSED
The Time when building should be closed feature
does not apply to the NexSentry Star ACUs. Set a Time Group for
when you want the building closed.
SHOW ACTIVE TIMES
Set the Time Group for when the ACU sends Transaction Logs to the
System Monitor window. Generally, set the ACU to the default
Time Group—All the time—that always sends Transaction
Logs.
AUTO FORGIVE TIMES
Set the Time Group that allows passback status to reset to
“unknown.” Use the Auto forgive times feature when you
enable the Anti-Passback function.
VIP PAGE
The VIP page of the ACU applies only if you use VIP Keypad
Readers.
5-10
NexSentry Manager 3.0
Revision E, Part Number 66110229001
.....
U SIN G TH E H AR DWARE FEAT URES
Setting the Access Control Units
NUMBER OF RETRIES ALLOWED
This does not apply to the NexSentry Star ACUs. Set the number of
times a Cardholder can attempt to enter a proper PIN.
NUMBER OF DIGITS
Set the number of digits for the PIN. The range is 4, 5, or 6 digits for
Keypad Readers and 4 to 8 digits for Keypad-only Readers.
PIN SEED
The PIN Seed feature does not apply to the NexSentry Star ACUs.
Set the seed to calculate the PIN. All ACUs must have the same PIN
Seed and number of digits if you want Cardholders to use the same
PIN for each ACU.
NUMBER OF DIGITS IF USING VIP ONLY
Set how many numbers you want to use for the PIN.
GRACE PERIOD
The Grace Period does not apply to the NexSentry Star ACUs.
Set the number of seconds Cardholders have to enter their PIN.
DISPLAY PIN NUMBER
Set the Display PIN number feature so that the Cardholder’s
PIN appears on the System Monitor window when the
Cardholder accesses a Door. This is for Keypad-only Readers.
DURESS ENABLE
Set Duress enable to allow Cardholders to use their duress PIN
in emergency situations.
Revision E, Part Number 66110229001
NexSentry Manager 3.0
5 -11
US ING THE H ARD WA RE FEATURES
Setting the Access Control Units
5
ACTIONS PAGE
From the Actions page, select the Action to take when the
Transaction occurs.
OPERATOR OVERRIDE
Set the Action for when System User Override Transactions occur.
DURESS
Set the Action for when Duress Transactions occur.
TAMPER
Set the Action for when Tamper Transactions occur. A tamper switch
is a monitor point that tells the ACU when system components
become violated.
POWER FAIL
Set the Action for when Power Failure Transactions occur.
CARDS PAGE
These selections are only for the 818SC ACU. The 4100 ACU is
digital and magstripe only. Select the type of analog cards that are
accepted by the ACU. For 1030 and 1040 cards you must also enter
the Facility Code.
READER PAGE
Do not adjust the Verification Sweeps, Misread filter,
and Reread delay functions. These are for WSE Customer
Service use only.
5-12
NexSentry Manager 3.0
Revision E, Part Number 66110229001
.....
U SIN G TH E H AR DWARE FEAT URES
Setting the Access Control Units
ACCESS DENIED TIME
Set the number of seconds the sensor is disabled after a failed read.
This is only for Access Denied Transactions and not for Memory
Access Denied Transactions.
MISC PAGE
This section describes the different text boxes and features from the
Misc page of the ACU dialog box.
HOST CONNECTION
Set the baud rate for the PC Host connection. The 4100 ACU
supports baud rates up to 19200. The 818SC supports baud rates up
to 9600. Use the same baud rate on the ACUs and the Poller.
XON/XOFF
Set the Xon/Xoff feature to enable the X-Modem protocol. This
setting has no effect on the Server PC.
TERMINAL CONNECTION
Set the baud rate for the Terminal connection. The 4100 ACU
supports baud rates up to 19200. The 818SC supports baud rates up
to 9600.
If you plan to use the 703 Terminal, you must set the Terminal baud
rate to 300.
XON/XOFF
Set the Xon/Xoff feature to enable the X-Modem protocol. This
setting has no effect on the Server PC.
Revision E, Part Number 66110229001
NexSentry Manager 3.0
5-13
5
US ING THE H ARD WA RE FEATURES
Setting the Access Control Units
ENABLE “BUILDING NOT CLOSED” REMINDER MESSAGES AND INTERVAL
Select the Enable building not closed reminder
messages check box to alert the System User that the building is
Closed or Armed. In the Interval text box, type the number of
minutes the ACU waits before sending another reminder message.
TIMEZONE OF ACU
Click the drop-down arrow, and then choose the appropriate
timezone setting.
SITE CODES PAGE
The Site Codes page does not apply to 818SC ACUs.
SITE CODES AVAILABLE
From the Site codes available box, click a Site Code, and
then click Add. The selected Site Code then appears in the Site
Codes selected box.
SITE CODES SELECTED
The Site codes selected box shows the selected Site Codes for
this ACU.
5-14
NexSentry Manager 3.0
Revision E, Part Number 66110229001
.....
U SIN G TH E H AR DWARE FEAT URES
Setting the Doors
SETTING THE DOORS
..........................................................
‘Door’ is a generic term for openings controlled by an access device
including actual doors, turnstiles, gates, and so forth. A Door is
always considered in relationship to the ACU to which it connects.
Different types of ACUs require different information about the
Doors connected to them, based on the performance capabilities of
the ACU.
When setting the Doors, remember that you can only set a
NexSentry Star Door with a NexSentry Star ACU.
Refer to the completed Input forms from Appendix A for the
appropriate data to use.
TO SET THE DOORS:
1 From the Database Explorer directory, double-click
Hardware>Doors. Click a particular type of Door. The existing
Doors appears in the rightmost window.
2 To open the Record menu, right-click an existing Door, or rightclick a Door type from the directory.
3 From the Record menu, click Add, Add From, or Edit. The
corresponding dialog box appears.
4
Enter data into each field as appropriate. See the following
section for details.
Revision E, Part Number 66110229001
NexSentry Manager 3.0
5-15
5
US ING THE H ARD WA RE FEATURES
Setting the Doors
Un d er stan d i ng th e Do ors di al og b ox
There are seven pages to the Doors dialog box: General, Time
Groups, Lock, Proximity Reader, VIP, REX, MSR, and the
Miscellaneous page.
The Proximity Reader, VIP, and REX pages are optional
depending on the specifics of your installation.
GENERAL PAGE
This section describes the different text boxes and features from the
General page of the Doors dialog box.
ID AND DESCRIPTION
In the ID text box, type in an ID number or click Next unused
ID. In the Description text box, type a name for the Door.
ACU
From the drop-down list, select the ACU associated with the Door.
DEVICE NUMBER
This setting applies only to the NexSentry Star Doors. Set the sensor
port to which this Door connects.
SHUNT
Set the Shunt feature to stop the ACU from sending Transaction
Logs when events occur at this Door. Use this feature for a long-term
shunt during installation or maintenance.
READER MODE
Set the Reader mode to either Normal, Open, Closed, or
Continuous.
5-16
NexSentry Manager 3.0
Revision E, Part Number 66110229001
.....
U SIN G TH E H AR DWARE FEAT URES
Setting the Doors
DOOR NUMBER
The Door number setting does not apply to the NexSentry Star
Doors. Set an appropriate number for the door.
TIME GROUPS PAGE
This section describes the different text boxes and features from the
Time Groups page of the Doors dialog box.
AUTO UNLOCK
Click the drop-down arrow to set the Time Group that unlocks the
Door. For the NexSentry Star Doors this feature appears on the
Lock page.
SHOW ACTIVITY
For the NexSentry Star Doors, this feature appears on the Misc
page. Set the Time Group for when the ACU sends Transaction Logs
to the System Monitor window. WSE suggests you set the
default Time Group—All the time—so Transactions are sent at
all times.
LOCK PAGE
This section describes the different text boxes and features from the
Lock page of the Doors dialog box.
DOOR SWITCH
Select a Door Switch for this Door. A Door Switch detects if a
Door is open or closed. Only the Door Switches assigned to the ACU
you have selected for this Door appears in the drop-down list. See
the section “Setting the Input Devices” on page 5-32 for details.
Revision E, Part Number 66110229001
NexSentry Manager 3.0
5-17
5
US ING THE H ARD WA RE FEATURES
Setting the Doors
MAX DOOR OPEN TIME
Set the number of seconds the Door can remain open before a Door
open too long Transaction is sent to the System Monitor
window. WSE recommends thirty seconds or more to prevent
unnecessary Door open too long Transaction Logs.
READ CARDS WHEN OPEN
Set Read Card When Open to enable the Reader to read a Card
while the Door is open. To use this setting, the Door must have a
Door Switch installed. Use this feature for time and attendance
functions or Anti-Passback applications.
RELAY ID
This feature applies only to the NexSentry Door. Set the Relay ID
number.
LOCK OUTPUT
This feature applies only to the NexSentry Star Doors. Click the
drop-down arrow and then select the Output device that locks the
door.
LOCK TYPE
This feature applies only to the NexSentry Star Doors. Set the type of
lock used on this door.
UNLOCK TIME
Set the time, in seconds, when the door unlocks.
5-18
NexSentry Manager 3.0
Revision E, Part Number 66110229001
.....
U SIN G TH E H AR DWARE FEAT URES
Setting the Doors
REVERSE LOCK
Set the Reverse lock feature to enable a reverse action lock.
Reverse action locks, such as magnetic locks, require an electric
current to remain locked. When the current shuts off, the Door
unlocks. Emergency doors often use reverse action locks so in case
of a power failure, personnel can enter or exit in an emergency.
These are sometimes referred to as “fail-safe locks.”
The 4100 ACU has a jumper switch on the MIRO unit that can also
set the Reverse lock feature. If this feature is set from the ACU,
it is not necessary to set this from the Doors dialog box.
PROXIMITY READER PAGE
The Proximity Reader page only applies to the 818SC Doors,
and the NexSentry Doors. The NexSentry Star Doors have a
Reader page with different features. See below for details.
TYPE
Select the type of card supported by the ACU. The 818SC Doors
allow you to choose between Digital Readers and Analog Readers.
The NexSentry Doors allow you to set Digital Readers only.
USED AS
Set the Used as feature to tell the Door how to react to the
Building Modes. If Building Modes are not used, select Normal.
DISABLE MSM
This feature applies to 818SC Doors only. If this door does not have
an MSM (multiple switch monitor), set this feature to disable MSM
Failed Transaction Logs.
Revision E, Part Number 66110229001
NexSentry Manager 3.0
5-19
5
US ING THE H ARD WA RE FEATURES
Setting the Doors
READER PAGE
The Reader page applies only to the NexSentry Star Doors.
READER
You can set one, two, or three different Readers per Door. Click
Reader 1 to configure the first Reader, then click Reader 2 to
configure the second Reader. The VIP Keypad Reader is the third
type of available Reader.
TYPE
Click the drop-down arrow, and then select the Type of Reader
installed on this Door. You should set Reader 1 and Reader 2
as two different types of Readers. The Keypad Reader—that you set
in the VIP section—is the third Reader type that you can set, to be
used either by itself, or in combination with Reader 1 and/or
Reader 2.
CONFIGURATION
After you set the Type of Reader, you must select the actual Reader
installed on the Door. Click the drop-down arrow to choose from the
list.
TIME GROUP
Set the Time Group for this Door’s Reader.
VIP SECTION
In the VIP section, you can configure a Keypad Reader for this
Door. From the Configuration text box, select a Keypad
Reader. From the Time Group text box, select a Time Group.
5-20
NexSentry Manager 3.0
Revision E, Part Number 66110229001
.....
U SIN G TH E H AR DWARE FEAT URES
Setting the Doors
ENABLE WHILE ZONE IS
Click Armed, Disarmed, or click them both, or neither, depending
if you want the VIP Reader to work while the Zone is Armed, or
Disarmed, and so forth.
VIP PAGE
The VIP page does not apply to the NexSentry Star Doors. Use this
page only if this door uses a VIP Keypad. Click Enable to select
the Time Group and Building Modes you want the door active.
REX PAGE
This section describes the different text boxes and features from the
REX page of the Doors dialog box.
ENABLE REX
For the NexSentry Star Doors, this feature appears on the Exit
page. To use a REX (Request-to-Exit) Input, click Enable Rex,
then select the desired REX point and the Valid REX time
group.
UNLOCK ON REX
For the NexSentry Star Doors, this feature appears on the Exit
page. Set Unlock on REX to unlock the Door after a valid REX
request.
MSR PAGE
This section describes the different text boxes and features from the
MSR page of the Doors dialog box.
Revision E, Part Number 66110229001
NexSentry Manager 3.0
5-21
US ING THE H ARD WA RE FEATURES
Setting the Doors
5
ENABLE
Click Enable to set the features on the MSR (Magnetic Stripe
Reader) page.
TYPE
Set the type of MSR Reader as an MSR5, or an MSRK5.
ABA CARD FIELD DATA
The magnetic stripe on the cards contain five series of numbers that
the Reader uses to determine access. Each series of numbers are
labeled Field A, Field B, Field C, Expiration date
start, and Site code start. Each Field has a Start
position, and a Length. The Length represents how many
numbers are in each field. The Fields tell an MSR Reader how to
interpret the numbers on the magnetic stripe.
ABA DENY ACCESS CONDITIONS
Click the conditions that denies access to a Cardholder.
ABA FAILSOFT CONDITIONS
Click the conditions that allow a Cardholder access, as well as create
a Transaction Log.
MISC PAGE
This section describes the different text boxes and features from the
Misc page of the Doors dialog box.
ENABLE ANTI-PASSBACK
For the NexSentry Star Doors, this feature appears on the Exit
page. If using Anti-Passback, select the Enable Anti-
5-22
NexSentry Manager 3.0
Revision E, Part Number 66110229001
.....
U SIN G TH E H AR DWARE FEAT URES
Setting the Doors
passback check box to set the Anti-Passback Method and AntiPassback type features.
Anti-Passback Actions cannot cross ACUs. All Anti-Passback
functions must be done on the same ACU.
ANTI-PASSBACK METHOD
For the NexSentry Star Doors, this feature appears on the Exit
page. Set the Anti-Passback method as Hard or Soft. A Hard
Anti-Passback prevents the reuse of a card on the same Door in the
same direction using the same Reader, thus preventing a card from
being “passed back” to another person. A Soft Anti-Passback does
not prevent a card from being passed back to gain access, but a
Transaction Log is sent stating the card was passed back.
ANTI-PASSBACK TYPE
Set this Door as an Entry or as an Exit.
INSTRUCTION
Select the Instruction you want to appear as a message on the
System Monitor window when a Transaction set with this
Instruction occurs.
ACTION GROUP
Select an Action Group from the drop-down list for this Door.
ZONES SECTION
Click the drop-down arrow to select an Entering and a Leaving
Zone, respectively.
Revision E, Part Number 66110229001
NexSentry Manager 3.0
5-23
US ING THE H ARD WA RE FEATURES
Setting the Name Schemes
5
SETTING THE NAME SCHEMES
..........................................................
The Name Schemes feature allows you to name the floors of the
building. For example, you might name Floor 0, ‘Reception,’ and the
top floor, ‘Executive Row.’ The NexSentry Manager 3.0 keeps track
of the actual floor number in the Logical Floor Number
column from the Name Scheme dialog box. You need a Name
Scheme configuration for the Elevators dialog box. Refer to the
completed Input forms from Appendix A for the appropriate data to
use when you configure the Name Schemes.
TO SET THE NAME SCHEMES:
1 From the Database Explorer directory, double-click
Hardware>Elevator>Name Schemes. The existing Name
Schemes appears in the rightmost window.
2 To open the Record menu, right-click an existing Name Scheme,
or right-click Name Schemes from the directory.
3
From the Record menu, click Add, Add From, or Edit. The
corresponding dialog box appears.
4
In the ID text box, type in the ID number, or click Next
unused ID.
5
In the Description text box, type in a name for the Elevator
Name Scheme.
6
From the Floor Name column, right-click a Floor. A pop-up
menu appears.
7
Click Rename from the pop-up menu and then type in a
descriptive name for the floor. Press Enter to set the name.
Repeat steps 6 and 7 to name all of the floors.
5-24
NexSentry Manager 3.0
Revision E, Part Number 66110229001
.....
U SIN G TH E H AR DWARE FEAT URES
Setting the Elevators
SETTING THE ELEVATORS
..........................................................
The Elevators features are a new addition to the NexSentry Manager
3.0. Use the Elevator features to control Cardholder access to
different floors of the building and at what times Cardholders have
access to those floors. Some of the new features include naming the
floors and creating Floor Groups. You need Floor Groups to
configure the Access Codes. Refer to the completed Input forms
from Appendix A for the appropriate data to use when you configure
the Elevators.
TO SET THE ELEVATORS:
1 From the Database Explorer directory, double-click
Hardware>Elevator>Elevators. The existing Elevators appears
in the rightmost window.
2 To open the Record menu, right-click an existing Elevator, or
right-click Elevators from the directory.
3
From the Record menu, click Add, Add From, or Edit. The
corresponding dialog box appears.
4
Enter data into each field as appropriate. See the following
section for details.
Un d er stan d i ng th e E l evat or s d ia lo g b ox
The Elevators dialog box has five tabbed pages, including the
General, Cab, Reader, Elevator Floors, and the Misc
pages.
GENERAL PAGE
This section describes the different text boxes and features from the
General page of the Elevators dialog box.
Revision E, Part Number 66110229001
NexSentry Manager 3.0
5-25
US ING THE H ARD WA RE FEATURES
Setting the Elevators
5
ID AND DESCRIPTION
In the ID text box, type in an ID number or click Next unused
ID. In the Description text box, type a name for the Elevator.
ACU
From the drop-down list, select the NexSentry Star ACU associated
with this Elevator.
DEVICE NUMBER
Set the sensor port to which this elevator connects.
SHUNT
Set the Shunt feature to stop all Transactions for this Door. Use this
for a long-term shunt of this Door during installation or maintenance.
CAB PAGE
This section describes the different text boxes and features from the
Cab page of the Elevators dialog box.
OPERATING MODE
Set the Operating Mode for this elevator.
Normal security allows the elevator to travel to one floor per
Cardholder. For example, if three Cardholders present their card to
the Elevator Reader, then three floor buttons can be pressed, the
elevator then travels to those three floors and then returns to the
default floor.
High security allows the elevator to travel to only one floor per
calling. For example, regardless of the number of Cardholders at the
elevator, only one floor button can be pressed, the elevator goes to
that one floor, and then returns to the default floor.
5-26
NexSentry Manager 3.0
Revision E, Part Number 66110229001
.....
U SIN G TH E H AR DWARE FEAT URES
Setting the Elevators
Priority call sets the elevator to respond first to certain
Cardholders that have special access codes.
CAB TYPE
Set the Cab type for this elevator to either Type 1 or Type 2.
READ CARDS WHILE FLOOR BUTTONS ARE ENABLED
Set Read cards while floor buttons are enabled
so Cardholders can present their cards to a Reader after the elevator’s
floor buttons have been pushed.
FLOOR BUTTON WAIT TIME
Set the number of seconds a Cardholder has to push an elevator floor
button after they present their card to the Reader.
READER PAGE
This section describes the different text boxes and features from the
Reader page of the Elevators dialog box.
READER
You can configure up to three different Readers per Elevator. Click
Reader 1 to configure the first Reader, then click Reader 2 to
configure the second Reader. The VIP Reader is considered the third
Reader, which you configure in the VIP section of this page.
TYPE
Click the drop-down arrow, and then select the Type of Reader
installed at the elevator. You should set Reader 1 and Reader 2
as two different types of Readers.
Revision E, Part Number 66110229001
NexSentry Manager 3.0
5-27
5
US ING THE H ARD WA RE FEATURES
Setting the Elevators
CONFIGURATION
After setting the Type of Reader, you must select the actual Reader
installed to this Elevator. Click the drop-down arrow to choose from
the list.
TIME GROUP
Set the Time Group for this Elevator’s Reader.
VIP SECTION
In the VIP section, you can set a Keypad Reader for this Elevator.
From the Configuration text box, select a Keypad Reader. From
the Time Group text box, select a Time Group.
ENABLE WHILE ZONE IS
Click Armed, Disarmed, or click them both, or none at all,
depending if you want the VIP Reader to work while the Zone is
Armed, or Disarmed, and so forth.
ELEVATOR FLOORS PAGE
This section describes the different text boxes and features from the
Elevator Floors page of the Elevators dialog box.
FLOOR NAMING SCHEME
Click the drop-down arrow to select a Floor naming scheme.
See “Setting the Input Devices” on page 5-32.
DEFINE FLOOR SECTION
Select a Floor, a Monitor Input, and an Output, then click
Add. The selected settings appears in the Floor control
section.
5-28
NexSentry Manager 3.0
Revision E, Part Number 66110229001
.....
U SIN G TH E H AR DWARE FEAT URES
Setting the Elevators
MISC PAGE
This section describes the different text boxes and features from the
Misc page of the Elevators dialog box.
SHOW ACTIVITY
Click the drop-down arrow to set the Time Group when the ACU
sends Transaction Logs when events from this Elevator occur. WSE
recommends that you set the default Time Group—All the
time—so that you see all Transactions that occur.
INSTRUCTION
Select the Instruction to appear as a message on the System
Monitor window when a Transaction set with this Instruction
occurs.
ACTION GROUP
Select an appropriate Action Group from the drop-down list for this
Elevator.
ZONES SECTION
Click the drop-down arrow and then select an Entering and a
Leaving Zone, respectively.
Revision E, Part Number 66110229001
NexSentry Manager 3.0
5-29
US ING THE H ARD WA RE FEATURES
Setting the Floor Groups
5
SETTING THE FLOOR GROUPS
..........................................................
Create Floor Groups to assign Elevator and floor access to
Cardholders. Assign the Floor Groups to the Access Codes, and then
assign an Access Code(s) to the Cardholders. Refer to the completed
Input forms from Appendix A for the appropriate data to use.
TO SET THE FLOOR GROUPS:
1 From the Database Explorer directory, double-click
Hardware>Elevator>Floor Groups. The existing Floor Groups
appears in the rightmost window.
2 To open the Record menu, right-click an existing Floor Group,
or right-click Floor Groups from the directory.
3
From the Record menu, click Add, Add From, or Edit. The
corresponding dialog box appears.
4
Enter data into each field as appropriate. See the following
section for details.
Un d er stan d i ng th e Fl oor Gr ou p s d i al og b ox
The Floor Groups dialog box has two tabbed pages, including
the Floor Group, and the Floors pages.
FLOOR GROUP PAGE
This section describes the features from the Floor Group page of
the Floor Groups dialog box.
ID AND DESCRIPTION
In the ID text box, type in an ID number or click Next unused
ID. In the Description text box, type a name for the Floor
Group.
5-30
NexSentry Manager 3.0
Revision E, Part Number 66110229001
.....
U SIN G TH E H AR DWARE FEAT URES
Setting the Floor Groups
ELEVATORS AVAILABLE AND ELEVATORS SELECTED
The Elevators available box shows a list of available
Elevators. Click an Elevator, and then click Add. The selected
Elevator appears in the Elevators selected box.
FLOORS PAGE
This section describes the different text boxes and features from the
Floors page of the Floor Groups dialog box.
FLOOR NAMING SCHEME
Click the drop-down arrow to select a Floor naming scheme
for this Floor Group.
FLOORS
The Floors section shows the Floors and Time Groups for this
Floor Group.
CHOOSE FLOOR
In the Floor text box, click the drop-down arrow to select an
available Floor. In the AutoEnable TimeGroup text box, click
the drop-down arrow to select the Time Group for this Floor Group,
then click Add. The Floor and the AutoEnable TimeGroup
appears in the Floors section.
Revision E, Part Number 66110229001
NexSentry Manager 3.0
5-31
US ING THE H ARD WA RE FEATURES
Setting the Input Devices
5
SETTING THE INPUT DEVICES
..........................................................
Input devices are sensors such as door switches, motion sensors, or
temperature sensors. Input devices detect changes such as when a
door is left open. The three types of Input devices include, General
Purpose, Door Switch, and REX (Request to Exit). Refer to the
completed Input forms from Appendix A for the appropriate data to
use when you configure the Inputs.
When the Input devices are installed, make sure the Installer
completes the Inputs form from Appendix A. Make especially sure
the MIRO’s device number, Point number, ACU
sensor/node number, and Contact number fields are
complete and accurate. You need this information to properly
configure the Input devices.
TO SET THE INPUTS:
1 From the Database Explorer directory, double-click
Hardware>Inputs. Click a particular type of Input. The existing
Inputs appears in the rightmost window.
2 To open the Record menu, right-click an existing Input, or right
click an Input type from the directory.
5-32
3
From the Record menu, click Add, Add From, or Edit. The
corresponding dialog box appears.
4
Enter data into each field as appropriate. See the following
section for details.
NexSentry Manager 3.0
Revision E, Part Number 66110229001
.....
U SIN G TH E H AR DWARE FEAT URES
Setting the Input Devices
Un d er stan d i ng th e I n pu t s d i alo g b ox
The Inputs dialog box has two tabbed pages, including the
General page and the Connection page.
GENERAL PAGE
This section explains the different text boxes from the General
page of the Inputs dialog box.
ID AND DESCRIPTION
In the ID text box, type in an ID number or click Next unused
ID. In the Description text box, type a name for the Input
device.
INSTRUCTION
Select the Instruction you want to appear as a message on the
System Monitor window when a Transaction set with this
Instruction occurs.
SHOW ACTIVITY TIMES
Click the drop-down arrow to set the Time Group that allows the
ACU to send Transaction Logs when events occur from this Input.
WSE recommends that you set the default Time Group—All the
time—so that you see all occurring Transactions.
ACTION AND ZONE SECTION
Click the respective drop-down arrow to select an Action Group and
a Zone for this Input device. The Zone text box becomes available
only if a NexSentry Star ACU is chosen from the Connection
page. The Zones that appear on the drop-down list depends on which
Zones are set with the Star ACU you chose from the Connection
page. See “Zone Mode Input” on page 5-48 for more information.
Revision E, Part Number 66110229001
NexSentry Manager 3.0
5-33
5
US ING THE H ARD WA RE FEATURES
Setting the Input Devices
CONNECTION PAGE
The settings on the Connection page depends on the type of ACU
selected. The following section describes all possible settings.
ACU
Select the ACU to which this Input device connects.
SHUNTED
Select Shunted to stop the ACU from sending Transaction Logs
when events occur at this Input device. Use this feature during
installation or maintenance work.
LOCATED ON ACU
Select the Located on ACU feature if the Input device connects
directly to the ACU.
MIRO’S DEVICE NUMBER
If the Input device connects to a NexSentry Star ACU the MIRO’s
device number setting appears. Click the drop-down arrow to
select the MIRO number to which the Input device connects.
POINT NUMBER
If the Input device connects to a NexSentry Star ACU the Point
number setting appears. Type the Point number this Input
device attaches to on the MIRO.
ACU SENSOR/NODE
If the Input device connects to a NexSentry ACU or an 818SC ACU
the ACU sensor/node number setting appears. Set the port
number this Input device connects to on the ACU.
5-34
NexSentry Manager 3.0
Revision E, Part Number 66110229001
.....
U SIN G TH E H AR DWARE FEAT URES
Setting the Input Devices
CONTACT
If the Input device connects to a NexSentry ACU or an 818SC ACU
the Contact setting appears. Select the contact point connected to
this Input.
The Input Number equals the ACU Sensor Node Contact.
Allow the System Installer, or an Electrical Technician, to configure
the Input State and the Normal State.
INPUT STATE
Select either Four state or Two state.
NORMAL STATE
Set the normal state of the ACU—Open, Short, 1K, and
2K—if the ACU enters a state other than the normal, such as due to
tampering, then the ACU sends a Transaction Log to the System
Monitor window.
Revision E, Part Number 66110229001
NexSentry Manager 3.0
5-35
US ING THE H ARD WA RE FEATURES
Setting the Output Devices
5
SETTING THE OUTPUT DEVICES
..........................................................
Different types of Output devices include: electric door locks,
lighting controllers, video monitor switches, onsite audible Alarms,
or remote Alarms that can contact a Central Station. Output devices
install directly to an ACU or a MIRO, and in turn, the ACU sends
Transaction Logs to the NexSentry Manager 3.0 System
Monitor window to alert the System User the Output device has
been triggered. Contact your Installer for more information on
installing Output devices. When you configure the Outputs, refer to
the completed Output forms from Appendix A for the appropriate
data to use.
When the Output devices are installed, make sure the Installer
completes the Outputs form from Appendix A. Make especially sure
the MIRO’s device number, Point number, ACU
sensor/node number, and Contact number fields are
complete and accurate. You need this information to properly
configure the Output devices.
TO SET THE OUTPUTS:
1 From the Database Explorer directory, double-click
Hardware>Outputs. The existing Outputs appears in the
rightmost window.
2 To open the Record menu, right-click an existing Output, or right
click Outputs from the directory.
5-36
3
From the Record menu, click Add, Add From, or Edit. The
corresponding dialog box appears.
4
Enter data into each field as appropriate. See the following
section for details.
NexSentry Manager 3.0
Revision E, Part Number 66110229001
.....
U SIN G TH E H AR DWARE FEAT URES
Setting the Output Devices
Un d er stan d i ng th e Ou tp u ts d i al og bo x
The Outputs dialog box has two tabbed pages, including the
General page and the Connection page.
GENERAL PAGE
This section describes the different text boxes and features from the
General page of the Outputs dialog box.
ID AND DESCRIPTION
In the ID text box, type in an ID number or click Next unused
ID. In the Description text box, type a name for the Output.
INSTRUCTION
Select the Instruction you want to appear as a message on the System
Monitor window when a Transaction set with this Instruction occurs.
SHOW ACTIVITY TIMES
Set the Time Group for when Transaction Logs from this Output
device sent to the NexSentry Manager 3.0. WSE recommends that
you set the default Time Group—All the time—so that you see
all the Transactions.
CONNECTION PAGE
The settings on the Connection page depends on the type of ACU
selected. The following section describes all possible settings.
ACU
Click the drop-down arrow to select the ACU to which this Output
device connects. If the Output device does not connect to an ACU,
from the drop-down list, click <No Selection>.
Revision E, Part Number 66110229001
NexSentry Manager 3.0
5-37
5
US ING THE H ARD WA RE FEATURES
Setting the Output Devices
SHUNTED
Select Shunted to stop the ACU from sending Transaction Logs
when this Output device is triggered. Use this feature during
installation or maintenance work.
LOCATED ON ACU
Select this feature if the Output device attaches directly to the ACU.
MIRO’S DEVICE NUMBER
If the Output device connects to a NexSentry Star ACU the MIRO’s
device number setting appears. Click the drop-down arrow and
then select the MIRO number to which the Output device connects.
POINT NUMBER
If the Output device connects to a NexSentry Star ACU the Point
number setting appears. Type in the Point number from the
MIRO to which this Output device connects.
CONTACT
If the Output device connects to a NexSentry ACU or an 818SC
ACU the Contact setting appears. Select the contact point
connected to this Input device.
Use Point number 0 to send a Transaction to the NexSentry
Manager 3.0 without activating a contact.
OUTPUT TYPE SECTION
From the Output type section, click Latched, Timed, or
Both.
5-38
NexSentry Manager 3.0
Revision E, Part Number 66110229001
.....
U SIN G TH E H AR DWARE FEAT URES
Setting the Reader Configurations
DURATION SECTION
From the Duration section, click Forever, or Other. If you
select Other, then type in the number of seconds in the Other text
box.
S ETTING THE READER CONFIGURATIONS
..........................................................
Cardholders pass their card in front of a Reader to access a Door. The
four types of Readers include, Keypad, Digital, MSR (Magnetic
Stripe Readers), and Weigand. This section explains how to
configure the Readers. Refer to the completed Input forms from
Appendix A for the appropriate data to use.
TO SET THE READERS:
1 From the Database Explorer directory, double-click
Hardware>Reader Configurations. Click a particular type
of Reader. The existing Readers appears in the rightmost
window.
2 To open the Record menu, right-click an existing Reader, or
right-click a Reader type from the directory.
3
From the Record menu, click Add, Add From, or Edit. The
corresponding dialog box appears.
4
Enter data into each field as appropriate. See the following
section for details.
Un d er stan d i ng th e Ke ypa d Re ad er s d i al og b ox
The Keypad Reader dialog box has three tabbed pages, including
the Keypad, Keypad (plus reader) LED Settings, and
the Keypad only LED Settings page.
Revision E, Part Number 66110229001
NexSentry Manager 3.0
5-39
5
US ING THE H ARD WA RE FEATURES
Setting the Reader Configurations
KEYPAD PAGE
This section describes the different text boxes and features from the
Keypad page of the Keypad Readers dialog box.
ID AND DESCRIPTION
In the ID text box, type in an ID number or click Next unused
ID. In the Description text box, type a name for the Reader.
NUMBER OF RETRIES ALLOWED
Click the drop-down arrow to select a number 1 through 5 to set the
number of times a Cardholder can attempt to gain access to a door by
entering their PIN.
GRACE PERIOD
Set the number of seconds the Cardholder has to enter their PIN.
PIN LENGTH
Set the PIN length to either Fixed length or Variable
length.
KEYPAD (PLUS READER) LED SETTINGS PAGE
Use the Keypad (plus reader) LED Settings page when
the door has both a Keypad Reader and another type of Reader. The
Keypad Readers have three LED lights on them. You can choose
which light you want on during Normal/Idle times, Access
pending times, and Access granted times. A check mark
appears next to the LED light that you want on.
5-40
NexSentry Manager 3.0
Revision E, Part Number 66110229001
.....
U SIN G TH E H AR DWARE FEAT URES
Setting the Reader Configurations
KEYPAD ONLY LED SETTINGS PAGE
Use the Keypad only LED Settings page when the Keypad
Reader is the only Reader on the Door. See the Keypad (plus
reader) LED Settings section for details on how to set the
LED lights.
Un d er stan d i ng th e Di gi t al Re ad er s d i al og box
This section explains the Digital Readers Configuration
dialog box. Use the Digital Readers in conjunction with digital cards.
GENERAL PAGE
This section describes the different text boxes and features from the
General page of the Digital Readers dialog box.
ID AND DESCRIPTION
In the ID text box, type in an ID number or click Next unused
ID. In the Description text box, type a name for the Reader.
SETUP SECTION
The Read range text box determines how far away a Cardholder
can pass their card in front of the Digital Reader to have the Reader
recognize the card.
In the Verification time window text box, set the
number—1 unit equals ten milliseconds—that a Cardholder has to
present their card in front of the Reader to gain access.
The Number of verifications is the number of times the
Reader must check the card before granting access.
Click the Forward digit code feature to forward the digital
card number to the ACU continually.
Revision E, Part Number 66110229001
NexSentry Manager 3.0
5-41
5
US ING THE H ARD WA RE FEATURES
Setting the Reader Configurations
BEEPER TIMING, RED LED TIMING, AND GREEN LED TIMING SECTIONS
Set the Beeper Timing, Red LED Timing, and the Green
LED Timing sections all in the same manner. On duration
defines how long the beeper beeps, or the LED light remains on.
Off duration defines how long the beeper is silent, or the LED
light is off. Cycles represents how many times the beeper beeps, or
the LED lights flash. For example, set the Beeper timing On
duration for 10 (100 milliseconds), the Off duration for 10
(100 milliseconds), and the Cycles for 20. This means the beeper
beeps for 100 milliseconds, then is silent for 100 milliseconds, and
then repeats this pattern twenty times.
Click Use Defaults to restore the original factory defaults for a
particular section.
COLORS PAGE
From the Colors page, set how the LED light appears during
Normal/Idle, Access pending, and Access granted
time periods.
Un d er stan d i ng th e M agn et ic St ri p e Re ad er s d i al og b ox
You can use the MSR Readers only with the NexSentry Star Doors.
The MSR Reader Configuration dialog box has three tabbed
pages, including the General, Conditions, and Colors page.
GENERAL PAGE
The following section describes the different text boxes and features
from the General page of the Magnetic Stripe Readers
dialog box.
5-42
NexSentry Manager 3.0
Revision E, Part Number 66110229001
.....
U SIN G TH E H AR DWARE FEAT URES
Setting the Reader Configurations
ID AND DESCRIPTION
In the ID text box, type in an ID number or click Next unused
ID. In the Description text box, type a name for the Reader.
ABA CARD FIELD DATA
The magnetic stripe on the cards contain five series of numbers the
Reader uses to determine access. Each series of numbers are labeled
Field A, Field B, Field C, Expiration date start,
and Site code start. Each Field has a Start position, and a
Length. The Length represents how many numbers are in the
Field. These Fields tells an MSR Reader how to interpret the
numbers on the magnetic stripe.
CONDITIONS PAGE
Set the features in the ABA deny access conditions section
to determine which conditions deny access to the Cardholder.
Set the features in the ABA failsoft conditions section to
determine which conditions send a Transaction Log to the System
Monitor window, but still grants access to the Cardholder.
SEND DATA TO TERMINAL
Click Send data to terminal if you want the Cardholder’s
card information sent to the System Monitor window.
COLORS PAGE
From the Colors page, set how the LED light appears during
Normal/Idle, Access pending, and Access granted
time periods.
Revision E, Part Number 66110229001
NexSentry Manager 3.0
5-43
5
US ING THE H ARD WA RE FEATURES
Setting the Reader Configurations
Un d er stan d i ng th e We i gan d Re ad er s d i al og box
The Weigand Reader Configuration dialog box has four
tabbed pages, including the General, Conditions, Colors,
and Misc pages.
GENERAL PAGE
This section describes the different text boxes and features from the
General page of the Weigand Readers dialog box.
ID AND DESCRIPTION
In the ID text box, type in an ID number or click Next unused
ID. In the Description text box, type a name for the Reader.
MESSAGE LENGTH
Type in a Message length.
ABA CARD FIELD DATA
The magnetic stripe on the cards contain five series of numbers the
Reader uses to determine access. Each series of numbers are labeled
Field A, Field B, Field C, Expiration date start,
and Site code start. Each Field has a Start position, and a
Length. The Length represents how many numbers are in the
field. These Fields tells an MSR Reader how to interpret the numbers
on the magnetic stripe.
CONDITIONS PAGE
Set the features in the ABA deny access conditions section
to determine which conditions denies access to the Cardholder.
Set the features in the ABA failsoft conditions section to
determine which conditions sends a Transaction to the NexSentry
Manager 3.0, but still grants access to the Cardholder.
5-44
NexSentry Manager 3.0
Revision E, Part Number 66110229001
.....
U SIN G TH E H AR DWARE FEAT URES
Setting the Reader Configurations
SEND DATA TO TERMINAL
Click Send data to terminal if you want the Cardholder’s
card information sent to the NexSentry Manager 3.0 System Monitor
window.
COLORS PAGE
From the Colors page, you can set how the LED light appears
during Normal/Idle, Access pending, and Access
granted time periods.
MISC PAGE
This section describes the different text boxes and features from the
Misc page of the Weigand Readers dialog box.
DATA INTERFACE TYPE
Set the Data interface type to either Data0/Data1, or
Clock/Data.
CREDENTIAL FORMAT
Set the Credential format to either HEX, or BCD.
PARITY SECTION
Set the Start Parity and the End Parity to either None,
Odd, or Even. Also set the bit length of the start parity in the
Field length text box.
Revision E, Part Number 66110229001
NexSentry Manager 3.0
5-45
US ING THE H ARD WA RE FEATURES
Setting the Instructions
5
SETTING THE INSTRUCTIONS
..........................................................
An Instruction contains useful information for System Users. They
appear on the System Monitor window when an ACU sends a
Transaction Log set with that Instruction. You can set Instructions to
all individual monitor points and to Transaction Types. The
NexSentry Manager 3.0 system can store up to 500 separate
Instructions.
TO SET THE INSTRUCTIONS:
1 From the Database Explorer directory, double-click
Hardware>Instructions. The existing Instructions appears
in the rightmost window.
2 To open the Record menu, right-click an existing Instruction, or
right-click Instructions from the directory.
3
From the Record menu, click Add, Add From, or Edit. The
corresponding dialog box appears.
4
In the ID text box, type in the ID number, or click Next
unused ID.
5
In the Description text box, type in a name for the
Instruction.
6
In the Instruction box, type the Instruction message that
appears on the System Monitor window.
Repeat this procedure for as many Instructions as needed.
5-46
NexSentry Manager 3.0
Revision E, Part Number 66110229001
.....
U SIN G TH E H AR DWARE FEAT URES
Setting the Zones
SETTING THE ZONES
..........................................................
The Zones are a new feature to the NexSentry Manager 3.0. You can
create ACU Zones and Logical Zones. An ACU Zone refers to a
combination of one ACU, a Time Group, and an Input device. A
Logical Zone can include any combination of Pollers, ACUs, Input
devices, Output devices, Doors, and Elevators.
TO SET THE ZONES:
1 From the Database Explorer directory, double-click
Hardware>Zones. The existing Zones appears in the
rightmost window.
2 To open the Record menu, right-click an existing Zone, or rightclick Zones from the directory.
3
From the Record menu, click Add, Add From, or Edit. The
corresponding dialog box appears.
4
In the ID text box, type in the ID number, or click Next
unused ID.
5
In the Description text box, type in a name for the Zone.
6
In the Type section, click either ACU or Logical. If you select
ACU, then set the ACU Zone Properties section. If you select
Logical, then go to the Points page. See the following
sections for details.
Un d er stan d i ng th e Z on es d ial og b ox
This section explains the features and settings from the Zones
dialog box.
Revision E, Part Number 66110229001
NexSentry Manager 3.0
5-47
5
US ING THE H ARD WA RE FEATURES
Setting the Zones
ACU ZONE PROPERTIES SECTION
Set the ACU Zone Properties section if you set this Zone as an
ACU type.
ACU
Click the drop-down arrow and then select the ACU for this Zone.
ZONE NUMBER
Click the drop-down arrow and then select a number for this Zone.
VEHICLE ZONE
Click the Vehicle Zone check box if this Zone is designated for
cars or trucks, and so forth. For example, a Vehicle Zone could
include delivery sites for loading and unloading packages, or a
parking lot.
ZONE ARMED TIMEGROUP
Click the drop-down arrow and then select a Time Group that
designates when this Zone is considered Armed. When a Zone is
Armed, no one is allowed inside the Zone.
ZONE MODE INPUT
The Zone Mode Input text box allows you to select a General
Purpose Input device that is configured with the same ACU that you
chose from the ACU text box. See “Action and Zone section” on
page 5-33 for more information.
5-48
NexSentry Manager 3.0
Revision E, Part Number 66110229001
.....
U SIN G TH E H AR DWARE FEAT URES
Setting the Zones
POINTS PAGE
Use the Points page to configure a Logical Zone.
POINTS AVAILABLE BOX
The Points available box lists Hardware devices such as
Pollers, Inputs, Outputs, Doors, and Elevators that you can include in
the Logical Zone.
Click a Point to select the item, and then click Add. The item then
appears in the Points selected box.
Revision E, Part Number 66110229001
NexSentry Manager 3.0
5-49
5
5-50
US ING THE H ARD WA RE FEATURES
Setting the Zones
NexSentry Manager 3.0
Revision E, Part Number 66110229001
USING THE PERSONNEL FEATURES
6
.....
...................................
The Personnel features refer to the Access Codes and the
Cardholders. Set up the Access Codes first, before you add the
Cardholders. Refer to your completed Input Forms from Appendix A
for the appropriate information.
Always back up the database before you make changes. See the
section “Backing up an existing database” on page 2-10.
Also remember to download the database to the ACUs after adding
new data.
This chapter covers the following topics:
• “Setting the Access Codes” on page 6-2
• “Setting the Cardholders” on page 6-4
KEY TERMS
..........................................................
Access Codes: A code assigned to a Cardholder that controls where
and when they are granted access. An Access Code consists of a
Door or a set of Doors and a Time Group for each Door.
Cardholders: Cardholders are individuals with a card that allows
access to the controlled areas.
Doors: ‘Door’ is a generic term for all openings controlled by an
access device. The term ‘Door’ refers to actual doors, turnstiles,
gates, and so forth.
Facility Codes: A unique identification number assigned to a
facility. Use Facility Codes only for 1030 and 1040 cards.
Revision E, Part Number 66110229001
NexSentry Manager 3.0
6-1
6
US ING THE PERSO NN EL FEATU RES
Setting the Access Codes
Floor Groups: Use the Floor Groups to assign elevator and floor
access to the Access Codes, which in turn are assigned to
Cardholders.
Privilege Permissions: Regarding Cardholder access, a privileged
Cardholder can access a building, or Zone, when the building is in
Closed or Armed mode.
Time Groups: Use the Time Groups when you configure features
such as Actions, Access Codes, and Elevators. Time Groups can
consist of one to four different Time Codes.
Trace: Use the Trace feature to have a Transaction Log sent to the
System Monitor window every time a Cardholder accesses a
Door.
Visitor: Use the Visitor feature for temporary Cardholders. You can
filter the System Monitor window to display just visitors.
SETTING THE ACCESS CODES
..........................................................
Access Codes consist of a combination of Doors, Floor Groups, and
Time Groups. The NexSentry Manager 3.0 uses the Access Codes to
determine where and when Cardholders are permitted access through
a Door. An Access Code can have an unlimited number of Doors and
Floor Groups.
WSE recommends not creating more than 120 Access Codes that
contain Floor Groups. The NexSentry Manager 3.0 allows you to
make more than 120, but they will not download to the ACUs.
6-2
NexSentry Manager 3.0
Revision E, Part Number 66110229001
.....
US ING THE PERSO NN EL FEAT URES
Setting the Access Codes
TO SET THE ACCESS CODES:
1 From the Database Explorer directory, double-click
Personnel>Access Codes. The existing Access Codes appears in
the rightmost window.
2
To open the Record menu, right-click an existing Access Code,
or right-click Access Codes from the directory.
3
From the Record menu, click Add, Add From, or Edit. The
corresponding dialog box appears.
4
Enter data into each field as appropriate. See the following
section for details.
Un d er stan d i ng th e Ac c es s C od e d ial og b oxe s
The Access Code dialog box has three tabbed pages: General,
Access Code - Doors, and Access Code - Floor
Groups.
GENERAL PAGE
This section describes the text boxes and features found on the
General page of the Access Code dialog box.
ID AND DESCRIPTION
In the ID text box, type in an ID number or click Next unused
ID. In the Description text box, type a name for the Access
Code. For example, use names that describe a shift time or employee
function, like Graveyard Shift, or Janitor.
Revision E, Part Number 66110229001
NexSentry Manager 3.0
6-3
US ING THE PERSO NN EL FEATU RES
Setting the Cardholders
6
ACCESS CODE DOORS AND FLOOR GROUPS PAGES
From the Choose door section, click the drop-down arrow and
select a Door and a Time Group, respectively. Click Add and the
selected Door and Time Group appears in the Doors box. Add as
many Doors and Time Groups to an Access Code as necessary.
Click the Access Code - Floor Groups tab and then add
Floor Groups and Time Groups to this Access Code in the same
manner as described above.
SETTING THE CARDHOLDERS
..........................................................
Cardholders are individuals such as employees, visitors, or
contractors with an access card for the access control system.
TO SET THE CARDHOLDERS:
1 From the Database Explorer directory, double-click
Personnel>Cardholders. The existing Cardholders appears in
the rightmost window.
2 To open the Record menu, right-click an existing Cardholder, or
right-click Cardholders from the directory.
3 From the Record menu, click Add, Add From, or Edit. The
corresponding dialog box appears.
4
6-4
Enter data into each field as appropriate. See the following
section for details.
NexSentry Manager 3.0
Revision E, Part Number 66110229001
.....
US ING THE PERSO NN EL FEAT URES
Setting the Cardholders
Un d er stan d i ng th e Ca rd h ol de r d ial og b oxe s
The Cardholder dialog box has eight tabbed pages: General,
Access, Credentials, Address, Additional Text
Fields, More Additional Text Fields, Additional
Look-Up Fields, and Picture.
GENERAL PAGE
This section describes the text boxes and features found on the
General page of the Cardholders dialog box.
CARDHOLDER ID
In the Cardholder ID text box, type an ID number or click Next
unused ID. WSE recommends using the Cardholder’s Employee
number as their Cardholder ID. Alpha characters are not valid in this
field.
NAME SECTION
In the Name section text boxes, type in the first, middle, and last
name of the Cardholder. For International purposes, use the Middle
text box for maternal or hyphenated names.
DOWNLOAD IMMEDIATELY
Click Download Immediately to send this Cardholder’s
information to the ACU. This allows instant card use as soon as the
download completes. If not selected, the Cardholder information is
downloaded to the ACU as scheduled from the System Defaults. For
more information see “Setting the System Defaults” on page 4-22.
Revision E, Part Number 66110229001
NexSentry Manager 3.0
6-5
6
US ING THE PERSO NN EL FEATU RES
Setting the Cardholders
ACCESS PAGE
From the Access page, set the Trace feature, the Visitor
feature, and the dates the card is active. Also from the Access page,
assign the Cardholder an Access Code(s) as well as if the Cardholder
has privileged access.
OPTIONS SECTION
Click Trace to track the Cardholder by having a Transaction Log
sent to the NexSentry Manager 3.0 when the card is presented to a
Reader.
Click Visitor to indicate the Cardholder is only visiting the
building. This is useful when you filter the System Monitor
window to display just visitors.
DATES SECTION
The Start date is the actual date this Cardholder can gain access
through the Doors and Elevators. The Stop date is the first day the
Cardholder is denied access. For example, if you want a Cardholder
to have access to the building April 17 through April 20, set the
Start date for April 17, and the Stop date for April 21. To set the
dates, click the drop-down arrow, and then click a date from the
calendar. If you don’t want to set a Stop date, then clear the check
box from the Stop text box. A check mark in the Stop text box
indicates the card expires on the Stop date.
ACCESS CODES SECTION
The Access codes section shows the Access Codes set for this
Cardholder, and whether the Cardholder has Privileged
permission.
To set the Access Code, from the Choose Access code and
privilege text box, click the drop-down arrow and select an
6-6
NexSentry Manager 3.0
Revision E, Part Number 66110229001
.....
US ING THE PERSO NN EL FEAT URES
Setting the Cardholders
Access Code. Click the Privileged check box to set this
Cardholder with privileged permission for the selected Access Code.
Then click Add, the selected Access Code appears in the Access
codes section, if you clicked the Privileged check box, Yes
appears in the Privileged column. A Cardholder can have
privileged permission for all the selected Access Codes, or for some
of them, or none at all.
CREDENTIALS PAGE
From the Credential page, set the Card type, the Card
number, the PIN, and, if applicable, the Facility code for this
Cardholder.
CARD TYPE
From the Card type text box, click the drop-down arrow and then
select the appropriate card type. The 1030 and 1040 card types allow
you set a Facility code.
CARD NUMBER
From the Card number text box, type in the number that appears
on the actual card.
It is possible to enter the same card number for more than one
Cardholder. This allows the transfer of a card from one Cardholder
to another and to keep the old Cardholder information in the
database.
PIN
From the PIN text box, type in the PIN (Personal Identification
Number) if you want to assign a PIN to the Cardholder without using
the PIN Seed from the ACU.
Revision E, Part Number 66110229001
NexSentry Manager 3.0
6-7
6
US ING THE PERSO NN EL FEATU RES
Setting the Cardholders
FACILITY CODE
From the Facility code text box, click the drop-down arrow to
select a Facility code.
ADDRESS PAGE
From the Address page, type in the Cardholder’s address. For
example, from Line 1 type in a Street Address; from Line 2 type
in the City and State; and from Line 3 type in a Zip Code.
ADDITIONAL TEXT FIELDS AND MORE ADDITIONAL TEXT FIELDS PAGES
The Additional Text Fields page allows you to set specific
information about the Cardholder. To set up these text boxes see
“Setting the User Defined Fields” on page 3-20. The More
Additional Text Fields page is simply an extension of the
Additional Text Fields page.
ADDITIONAL LOOK-UP FIELDS PAGE
From the respective text boxes, click the drop-down arrow to select
the appropriate data. For example, if the Cardholder you are editing
or adding works in the Engineering department, click the drop-down
arrow from the text box labeled ‘Department,’ and then select
Engineering. See “Setting the User Defined Fields” on page 3-20 for
details.
PICTURE PAGE
The Picture page allows you to import a picture of the
Cardholder. This picture then appears on the System Monitor
window whenever that Cardholder accesses a door.
To import a picture, click Import. The Open dialog box appears.
Browse to the directory you have the employee pictures saved. Click
6-8
NexSentry Manager 3.0
Revision E, Part Number 66110229001
.....
US ING THE PERSO NN EL FEAT URES
Setting the Cardholders
the picture file and then click Open. The employee’s picture now
appears in the Picture dialog box.
If you followed this manual from Chapter 1 all the way through to
the end of this chapter, you have set all of the Hardware, Personnel,
System Administration, and Miscellaneous features. You are now
ready to put the NexSentry Manager 3.0 access control system to
work.
Revision E, Part Number 66110229001
NexSentry Manager 3.0
6-9
6
6-10
US ING THE PERSO NN EL FEATU RES
Setting the Cardholders
NexSentry Manager 3.0
Revision E, Part Number 66110229001
USING THE SYSTEM STATUS AND SYSTEM MONITOR WINDOWS
.....
...................................
7
The System Status windows and the System Monitor
window allow you to view the system’s status. The different
System Status windows provide the current status and setting
for each monitoring point. The System Monitor window shows
all of the current Transaction Logs sent from the ACU.
TO OPEN THE SYSTEM STATUS WINDOWS:
1 From the toolbar, click the Status icon. The Select Status
Type dialog box appears.
2
In the Status type section, click the appropriate Hardware
device(s), or click Check All.
3
From the Zone filter text box, click the drop-down arrow to
view All zones, or a specific Zone for the Hardware device(s)
you selected from the Status type section.
4
Click OK to open the System Status window(s).
5
To view all of the System Status windows on the screen at
once, from the menu bar, click Window>Tile. NexSentry Star
then arranges all of the open windows on the screen.
Ch an gi n g t he Z on e M od es
You cannot change the ACU Zone mode to Armed if a Transaction
Log that is set to prevent Zone closure is active. After the
Transaction Log has been acknowledged, for example, a Door was
closed that had been left open, you can then change the Zone mode.
Revision A, Part Number 6600058
NexSentry Star Security System
7-1
7
US ING THE SY STEM STATUS AND S YSTEM MO NI TOR
WINDOWS
Use the System Status window to identify any activity that
could prevent a Zone from becoming Armed. The System User can
then fix or Shunt the activity to change the Zone mode.
It is important that all personnel have left the controlled Zone before
changing the mode to Armed. Anyone still in the Zone at the time it
is Armed could either set off an alarm or be locked in, depending
upon the type of door locks used.
De te rm i ni n g th e Car d hol d er ’s An ti -P as s b ack S t atu s
When the NexSentry Star is configured for Anti-Passback control of
a certain door, the anti-passback status of each Cardholder is either
Out or In.
7-2
NexSentry Star Security System
Revision A, Part Number 6600058
.....
U S I N G T H E S Y S T E M ST A T U S A N D S Y S T E M M O N I T O R W I N D O W S
De fi n in g th e S ys te m S tatu s I con s
The following table describes the various icons that appears on the
System Status window.
System Status Icons
General Status Icons
Definitions
Green Circle
OK in the Tamper and Power
fields
Building Mode
Green = Open
Yellow = Limited
Red = Closed
Lightning Bolt
Indicates that communication is
established.
Door Status
Definitions
Green Circle
Communication OK
Red Circle
Tamper Failure
Yellow Circle with
Exclamation Mark
Device Failure
White Circle
MSR Tamper Only
Input Status
Definitions
Green Circle
Clear or Normal
Black Circle
Short
White Circle
Device Failure
Red Circle
Active
The 4100 ACU has four states: Clear, Short, Open, and Active. The
818SC ACU has two states: Clear and Active.
Output Status
?
Revision A, Part Number 6600058
Question Mark
Definitions
Unknown status.
This is the only status shown.
NexSentry Star Security System
7-3
7
7-4
US ING THE SY STEM STATUS AND S YSTEM MO NI TOR
WINDOWS
NexSentry Star Security System
Revision A, Part Number 6600058
USING THE DIAL-UP FEATURE
8
.....
...................................
The dialup feature allows the NexSentry Manager 3.0 (NSM) to
communicate with WSE ACUs through modems. NSM can either
call an ACU or receive a call from an ACU using the same modem.
Each ACU that communicates through a modem does require its
own modem. The server only requires one modem to communicate
with multiple ACUs, but may have more if there are significant
number of ACUs being communicated with.
This chapter covers the following topics:
• “Configuring the ACU and the Server Modems” on page 8-2
• “Configuring the NexSentry Manager 3.0 for Dial-Up” on page 8-4
• “Configuring the ACU for Dial-Up” on page 8-7
• “Reverting Back to a Direct Connection From Dial-Up” on page 8-9
• “Reverting Back to Dial-Up From a Direct Connection” on page 8-10
Revision E, Part Number 66110229001
NexSentry Manager 3.0
8-1
USING THE DIAL-UP FEATURE
Configuring the ACU and the Server Modems
8
CONFIGURING THE ACU AND THE SERVER MODEMS
..........................................................
This procedure assumes that a modem is already installed and is
working properly.
For a list of approved modems, please check the www.wse.com web
site. If you do not know how to install the modems in WINNT 4.0,
consult your Windows Administrator.
TO CONFIGURE THE COM PORT PROPERTIES:
1
Turn on the modem.
2
Open the HyperTerminal program, click Start>Programs>
Accessories>Hyperterminal>Hyperterminal (not Hyperterminal
BBS).
3
From the Connect To dialog box, select the appropriate COM
port from the Connect Using drop down box and then click
OK. The COM Properties dialog box appears.
4
In the COM Properties dialog box set the port properties as
follows:
a Bits per second: 19200 (type 9600 for a 9600 modem)
b Data bits: 7
c Parity: Odd
d Stop bits: 1
e Flow control: None
5
Click OK and keep HyperTerminal open.
For the following procedure, WSE used a US Robotics 56k External
Fax modem. Other modem types might require different commands.
8-2
NexSentry Manager 3.0
Revision E, Part Number 66110229001
.....
USING THE DIAL-UP FEATURE
Configuring the ACU and the Server Modems
TO CONFIGURE THE MODEM:
1 In the HyperTerminal window, execute the following commands
to configure the modem. After each of these commands the
modem responds with an OK. If not, the modem has not been
installed correctly.
Command
Function
ATZ
Modem is working
AT&F
Resets the modem
ATE0
Echo is turned off
ATS32=24
VIS.32 mode is turned on
AT&B1
Select fixed serial port
AT&U1
Sets the lowest connection speed to 300 baud
AT&N10
(or AT&N6 for 9600)
Sets the highest connection speed to 19200 baud
ATY0
Selects the power-on/reset configuration to profile 0 setting in NVRAM
AT&W0
Writes the current configuration to profile 0 setting in NVRAM
2
You can now close HyperTerminal.
Revision E, Part Number 66110229001
NexSentry Manager 3.0
8-3
8
USING THE DIAL-UP FEATURE
Configuring the NexSentry Manager 3.0 for Dial-Up
The following procedure shows you how to set the external dip
switches on the modem. Not all modems have external dip switches.
TO SET THE U.S. ROBOTICS 56K EXTERNAL FAX MODEM DIP SWITCHES:
1 Use the below table to set the dip switches on the modem.
DIP Switch Number
Position
Result
1
up
DTR normal
2
up
verbal result codes
3
down
display result codes
4
down
no echo, offline command
5
up
auto answer on first ring
6
up
carrier detect normal
7
up
load NVRAM default
8
down
modem smart mode
CONFIGURING THE NEXSENTRY
MANAGER 3.0 FOR DIAL-UP
..........................................................
This section covers how to configure the NexSentry Manager 3.0 for
use with the Dial-Up feature. You must configure the Poller for DialUp first before you can configure the ACU. For the following
procedures, start the NexSentry Manager 3.0 client. Do not start the
server program yet.
For the following procedure, you need to set the modem initialization
string, check your modem manual for details.
8-4
NexSentry Manager 3.0
Revision E, Part Number 66110229001
.....
USING THE DIAL-UP FEATURE
Configuring the NexSentry Manager 3.0 for Dial-Up
TO CONFIGURE A POLLER FOR DIAL-UP:
1 From the toolbar, click the Database Explorer icon. The
Database Explorer window appears with the database
directory in the leftmost window.
2
3
To open the Record menu, right-click an existing Poller, or right
click Pollers from the directory.
From the Record menu, click Add or Edit. The corresponding
dialog box appears.
4
From the General tab, enter data into each field as
appropriate.
5
Click the Communications tab and set the following text
boxes:
a From the Poller type drop down box, select Dial-Up.
b In the Phone number text box, type in the phone number
used by the ACUs to dial into the poller.
c From the Port drop down box, select the correct port.
d In the Settings section, select the appropriate Port and
Baud.
e If unsure about the values for the other text boxes, accept the
default values.
Now that you have the Poller configured, you can configure the
ACU.
Revision E, Part Number 66110229001
NexSentry Manager 3.0
8-5
USING THE DIAL-UP FEATURE
Configuring the NexSentry Manager 3.0 for Dial-Up
8
TO CONFIGURE AN ACU FOR DIAL-UP:
1 From the Database Explorer directory, double-click
Hardware>Access Control Units (ACU). Click a particular type
of ACU. The existing ACUs appears in the rightmost window.
2 To open the Record menu, right-click an existing ACU, or rightclick an ACU type from the directory.
3
From the Record menu, click Add or Edit. The corresponding
dialog box appears.
4
Click the General tab and set the following text boxes:
a In the Serial Number text box, type in the ACU’s address.
This number can be in the range of 0 through 4095.
b In the Poller section, click the drop-down arrow and select
the Poller that you configured for Dial-Up. The Dial-Up tab
now appears.
5
Click the Dial-Up tab and set the following text boxes:
a In the ACU’s Phone number text box, type the ACU’s
phone number.
b In the Dial daily at text box, type the time you want the
ACU to dial the number. For example, 2:00AM.
c In the Dial interval text box, type in an interval time in
minutes, for example, 120.
6
8-6
Click the ACU to server dialog box configuration
button.
NexSentry Manager 3.0
Revision E, Part Number 66110229001
.....
USING THE DIAL-UP FEATURE
Configuring the ACU for Dial-Up
7
Select a First poller and/or a Second poller and/or a
Third poller for the ACU to dial into.
8
Edit the Phone number text box. If necessary, include any
additional numbers. For example, if you need to dial a 9 to get an
outside line, then include the 9 in the text box, such as 9,510123-4567.
You have now finished with the NexSentry Manager 3.0 software
portion of the Dial-Up set up.
C ONFIGURING THE ACU FOR D IAL -U P
..........................................................
This section covers how to set up the ACU for a modem Dial-Up
connection. You will need to connect the ACU to a dumb terminal or
use the HyperTerminal application to connect to the ACU through
the terminal port. After you have logged in, you are ready to begin
the following procedure.
TO CONFIGURE THE ACU:
1
At the YOUR COMMAND? prompt, type MODEM and then press
Enter.
2
GO TO (1-8)?
From this prompt, you can jump to any of the eight
MODEM command prompts. Press Enter to start at the first
prompt.
3 MODEM ENABLE (Y/N): N? Type Y to enable the modem and then
press Enter.
Revision E, Part Number 66110229001
NexSentry Manager 3.0
8-7
USING THE DIAL-UP FEATURE
Configuring the ACU for Dial-Up
8
4
Leave this prompt blank, simply press Enter
three times. This prompt is currently unused.
5
TELEPHONE(24)
6
WSE recommends that you press Enter to
accept the default value of 4.
7
CALL BACK (Y/N):N? Call
back is not currently supported. Press
Enter to accept the default.
8
MODEM INIT STRING: ATZ?
BUILDING ID(72)
Leave the telephone fields blank, simply press
Enter three times. The server downloads the telephone numbers
later.
TRY CALLING (1-10):4?
Type ATZ ATZ.
9 MODEM SERIAL NUMBER (0-4095):0? Type the same ACU serial
number that you entered in step 4a from the procedure “To
configure an ACU for Dial-Up:” on page 8-6.
10
MODEM DIALOUT THRESHOLD (0-4000): 3600? This prompt sets the
number of messages the ACU stores in its local memory before it
dials the server. Press Enter to accept the default of 3600 if you
are unsure of what to enter.
8-8
11
YOUR COMMAND?
Type SYSTEM and then press Enter.
12
From this prompt, you can jump to any of the 19
SYSTEM command prompts. Press Enter to start at the first
prompt.
GO TO (1-19)?
NexSentry Manager 3.0
Revision E, Part Number 66110229001
13
Type 1 and then press Enter. All Dial-Up
addresses are 1. The MODEM serial number determines which
ACU is referenced.
14
Press Esc to return to the YOUR COMMAND? prompt.
.....
USING THE DIAL-UP FEATURE
Reverting Back to a Direct Connection From Dial-Up
ADDRESS (0-240):0?
Type RESET and then press Enter to set the
ACU to the new configuration.
YOUR COMMAND?
Wait until the MODEM READY prompt appears before you start the
NexSentry Manager 3.0 server program. You must wait for the
MODEM READY prompt to make a connection.
REVERTING BACK TO A DIRECT
CONNECTION FROM DIAL-UP
..........................................................
This section covers how to revert to a Direct connection after you
have installed the hardware and software to support a Dial-Up
connection.
TO REVERT TO A DIRECT CONNECTION:
1 From the Communications tab in the Edit Poller dialog
box, change the Poller type to Direct.
2
Using HyperTerminal, connect to the ACU through the terminal
port. After logging in, type MODEM at the YOUR COMMAND?
prompt.
3
At the MODEM ENABLE (Y/N) prompt, Type N . This disables the
modem.
Revision E, Part Number 66110229001
NexSentry Manager 3.0
8-9
USING THE DIAL-UP FEATURE
Reverting Back to Dial-Up From a Direct Connection
8
4
Press Esc and log off.
5
Unhook the modem and connect the server directly to the ACU.
REVERTING BACK TO DIAL-UP
FROM A DIRECT CONNECTION
..........................................................
This section covers how to revert back to a Dial-Up connection after
you have already installed the hardware and the software to support a
Dial-Up connection.
TO REVERT BACK TO A DIAL-UP CONNECTION:
8-10
1
Re-connect the modems. If using the same modems from before,
you do not need to reconfigure the modems.
2
Configure the NexSentry Manager 3.0 and the ACU as described
in “Configuring the NexSentry Manager 3.0 for Dial-Up” on
page 8-4 and “Configuring the ACU for Dial-Up” on page 8-7.
NexSentry Manager 3.0
Revision E, Part Number 66110229001
TROUBLESHOOTING
.....
...................................
9
This chapter answers some of the most frequently asked questions
regarding the NexSentry Manager 3.0 system.
• “Questions and Answers” on page 9-1
• “Error Messages” on page 9-5
• “Troubleshooting the TCP/IP Configuration” on page 9-7
• “Troubleshooting the Dial-Up Connection” on page 9-8
QUESTIONS AND ANSWERS
..........................................................
This section asks common questions regarding the NexSentry
Manager 3.0, and then provides possible answers.
Q: W
HY DOESN’T THE INSTALLATION PROGRAM WORK?
to make sure the CD-ROM drive works properly. Place
A: Check
the NexSentry Manager 3.0 CD-ROM into the CD-ROM
drive. From the Windows NT desktop, click My Computer. The
My Computer dialog box appears showing the PC’s various
drives. You should see the NexSentry Manager 3.0 icon where the
designated CD-ROM drive is located. Also, make sure to properly
identify the CD-ROM drive during the installation.
that you are logged on the PC as an
A: Double-check
Administrator or with Administrator privileges. Some
Windows NT logon accounts does not allow you to copy and install
files. If this is the case, you need to obtain Administrator privileges.
Revision E, Part Number 66110229001
NexSentry Manager 3.0
9-1
TR O U B L E S H O O T I N G
Questions and Answers
9
Q: W
HY DOESN’T THE INSTALLED SOFTWARE WORK?
if the PC meets the system requirements. See “System
A: Check
Requirements and Prerequisites” on page 1-10. Remember to
shut down the PC after the installation, and then restart the PC.
Q: W
HY DOESN’T THE
NEXSENTRY MANAGER 3.0 COMMUNICATE WITH
SERVER?
Make sure the IP address used during the installation is
correct. You could run the installation program again to
ensure that your network information is correct. Before doing this,
make a backup copy of the database to save the data you might have
already entered.
THE
A:
You should also check that the Network Server assigns the same IP
address each time you log on the NexSentry Manager 3.0. If your
Server uses DHCP and assigns an IP address, contact your Systems
Administrator for a dedicated IP assignment.
If the PC’s IP address changes, you must reinstall the NexSentry
Manager 3.0 to reconfigure the IP setting.
Q: W
HY DOESN’T THE
NEXSENTRY MANAGER 3.0 COMMUNICATE WITH
THE ACUS AND THE ASSOCIATED DEVICES?
Look at how the ACUs are addressed. Each ACU must have
an assigned, unique number. Consult with the Installer and
your completed Input Forms for the correct address. Also see
“Checking the Installed Access Control Units” on page 2-3. When
you address the ACUs, make sure to save the information and to
download the data to the ACU.
A:
to see that the COM ports work. The Installer might be
A: Check
able to test the COM Ports to ensure that they work properly.
9-2
NexSentry Manager 3.0
Revision E, Part Number 66110229001
.....
TR O U B L E S H O O T I N G
Questions and Answers
check that the Pollers were installed correctly. The ACU
A: Also
must have a Poller installed and properly defined in the
NexSentry Manager 3.0 to communicate with the ACUs.
important that the serial cables are securely connected to
A: Ittheisright
connectors on the PC.
sure the address in the ACU dialog box matches the
A: Make
ACU address that you set with the HyperTerminal program.
Q: W
HY CAN’T THE
CARDHOLDERS GAIN ACCESS EVEN THOUGH THE
CORRECT INFORMATION IS IN THE DATABASE?
You need to download the database to the ACUs after adding
new information. Check the System Defaults for download
times and see if the Download database on discrepancy
check box is selected. You might want to manually download the
database to the ACUs after you have entered new Cards or
Cardholders. See “Setting the System Defaults” on page 4-22.
A:
the Access Code setup for the card in question. Also,
A: Check
check the Start and Stop date from the Access page of
the Cardholder dialog box.
Q: W
REPORTS NOT PRINTING?
The System Defaults, the Transaction Types, and the Actions
all have to be configured correctly. Check these three features,
and then reboot the PC for the changes to take effect.
HY ARE THE
A:
Q: C
I LIMIT THE SYSTEM USER TO ONLY VIEW THE SYSTEM MONITOR
WINDOW AND SO FORTH?
Yes, set a Security Level with View Only permissions.
Then, assign this Security Level to the System User.
AN
A:
Revision E, Part Number 66110229001
NexSentry Manager 3.0
9-3
TR O U B L E S H O O T I N G
Questions and Answers
9
Q: W
HY DO I GET ERROR MESSAGES REGARDING
ODBC DURING
INSTALLATION? THE SERVER CONNECTS PROPERLY, BUT THE
CLIENT DOES NOT CONNECT TO THE DATABASE.
From the Regedt32.exe file, check the Registry settings
and make sure the last line reads: STATE: REG_DWORD :
0x1.
A:
Q: W
CLIENT FREQUENTLY RETURN EXCEPTION ERRORS,
STATING IT CANNOT CHANGE OR ALTER THE DATABASE, YET
DELETIONS AND ADDITIONS ARE SAVED?
Shut down the Server and, from the Database menu, click
the Repair and Compact database functions. Then close
the Client, restart the Server, and then restart the Client. The database
should now operate correctly and not return any errors.
HY DOES THE
A:
Q: H
A:
Q: H
SEEP DEVICE POLLED FOR THE SYSTEM STATUS?
The SEEP device is polled once every five seconds for Logs
and once every ten seconds for the system status.
OW OFTEN IS THE
I WAIT FOR AN ACU RESPONSE?
The status is received from the ACU almost immediately, wait
about two seconds by default. If no response, the ACU is set
to the offline mode.
OW MANY SECONDS MUST
A:
Q: W
HEN AN ACU DOESN’T RESPOND TO THE POLLING, HOW LONG DOES IT
WAIT TO POLL AGAIN?
it doesn’t respond to Logs, it keeps polling every five
A: Ifseconds.
If it doesn’t respond to status messages, the ACU
sets to the offline mode. The Host PC checks every 15 minutes to see
if the ACU is online, unless the System User sends an Update Status
request before the 15 minutes are up.
9-4
NexSentry Manager 3.0
Revision E, Part Number 66110229001
Q: H
.....
TR O U B L E S H O O T I N G
Error Messages
OW MANY TIMES DOES THE POLLER TRY TO GAIN COMMUNICATION
ACU?
The default is four, you can change this from the Poller
dialog box, then the Host PC sends the message as many
times as defined.
WITH THE
A:
ERROR MESSAGES
..........................................................
The following table lists the most common error messages.
NexSentry Manager 3.0 Client Error Messages
When it occurs
Messages
Comments
Setting a Poller with a
used port number
(COM1 and so on).
The poller ’Port’ you
Assign another
have specified is
available port number
already used by the
to the Poller.
following poller: Please
change the ’Port’ and
try again.
Setting an ACU with a
used Poller and
Address combination.
The ’Address’ you
Verify that the address
have specified is
for the ACU you are
already used by the
assigning is correct.
following ACU. Please
change the ’Address’
and try again.
Setting a Door with a
The ’Sensor’ you have Verify that the sensor
used ACU and Sensor specified is already
you are assigning is
combination.
used by the following
correct.
Door. Please change
the ’Sensor’ and try
again.
Setting an Input or an
Output with a used
ACU, Sensor, and
Contact combination.
Revision E, Part Number 66110229001
The ’Sensor/Contact’
Verify that the Input or
you have specified is
Output you are
already used by the
assigning is correct.
following record.
Please change the
Sensor and/or Contact
and try again.
NexSentry Manager 3.0
9-5
9
TR O U B L E S H O O T I N G
Error Messages
When it occurs
Messages
Comments
Deleting a record when Cannot delete or
items referencing it still change record. It is in
exist.
use by a record of
type.
You cannot delete an
ACU if it is included in
a Zone, a Door, or any
other device’s
definition.
When a non-existent
Cannot add or change Verify that the item is
item is selected from a record. Referenced
defined in the system.
combo box.
record of type “X” does
not exist. It could have
been deleted by other
users, or lost because
of an error during a
previous operation.
During application
initialization.
Database is secured
for read only access.
Continue anyway?
Contact your System
Administrator.
If Add or Modify is
Operation failed.
attempted with a read- Database is secured
only database.
for read only access.
Contact your System
Administrator.
Setting a record with a The ID you have
Click Next unused
used ID.
entered is already
ID to find the next
used by the following
available ID.
record, “X.” Please
change the ID and try
again. Click Next
unused ID to find the
next available ID.
9-6
Setting a record with
an ID used by a
record. Record is of
different type but
shares the set of IDs.
The ID you have
All of the hardware
entered is already
items must have
used by another
unique number IDs.
record. Please change
the ID and try again.
Click Next unused
ID button to find the
next available ID.
During application
initialization.
Cannot open database Verify network
connection.
communication with
the Server. See
“Questions and
Answers” on page 9-1.
NexSentry Manager 3.0
Revision E, Part Number 66110229001
When it occurs
Messages
Comments
Client/Server
communications
breakdown.
Lost connection to the
server. Either the
server or the network
could be having
problems. If the
connection is not
restored for a long
time, quit and restart
the client.
Try clicking the
Communication Icon to
reconnect to the
Server.
Unable to establish
Client/Server
communications.
Could not establish
communication with
the server. Either the
server or the network
could be having
problems.
See “Questions and
Answers” on page 9-1.
.....
TR O U B L E S H O O T I N G
Troubleshooting the TCP/IP Configuration
TROUBLESHOOTING THE TCP/IP CONFIGURATION
..........................................................
If any errors occur with the TCP/IP configuration, make sure your
network connection is good and that everyone using the NexSentry
Manager 3.0 has privileges—other than ‘Guest’—in the Windows
NT directory \\Program Files\NexSentry Manager.
If you are still having problems, or if problems occur in the future,
you can check the Windows NT Registry.
TO CHECK THE WINDOWS NT REGISTRY:
1 From the Windows NT desktop, click Start>Run. The Run
dialog box appears.
2
In the Open text box, type REGEDIT, and then click OK. The
Registry Editor dialog box appears.
3
Click HKEY_LOCAL_MACHINE>SOFTWARE>Honeywell
Security Products>3.0>CLIENT. The Protocol should be
Revision E, Part Number 66110229001
NexSentry Manager 3.0
9-7
TR O U B L E S H O O T I N G
Troubleshooting the Dial-Up Connection
9
ncacn_ip_tcp and the Address should be the Client PC’s
TCP/IP number.
4
Click HKEY_LOCAL_MACHINE>SOFTWARE>Honeywell
Security Products>SERVER. The Protocol should be
ncacn_ip_tcp and the Address should be the Server PC’s—
the PC that is connected to the ACUs—TCP/IP number. On the
Host PC only, both addresses are the same number.
These entries are written during the software installation and you
should not modify them manually beyond changing the TCP/IP
number, such as if the Network Administrator has reassigned the
static addresses.
TROUBLESHOOTING THE DIAL-UP CONNECTION
..........................................................
This section covers how to troubleshoot problems with the Dial-Up
connection feature.
Un ab l e to con n ec t usi n g th e mod e m
Increase the Answer timeout from the default of 60 seconds to 2
minutes and try again. See “Configuring the NexSentry Manager 3.0
for Dial-Up” on page 8-4. This might considerably slow down the
communication.
No re sp onse f rom th e AC U wh en do wn l oad in g da ta fro m th e ser ver
Increase Port control Acknowledge timeout to 4
seconds and Port control Retries to 5. See “Configuring
the NexSentry Manager 3.0 for Dial-Up” on page 8-4. This might
considerably slow down the communication.
9-8
NexSentry Manager 3.0
Revision E, Part Number 66110229001
.....
P. .LANNING
THE D ATABASE
.................................
A
Take some time and thoroughly consider all of your access control
needs to formulate a plan for creating the database. When you create
the database, you need to fully understand the Hardware installation
and configuration as well as site-specific knowledge of the building
and all of the Personnel information.
This appendix contains the Master Input Forms. Make copies of the
Master Forms to fill out while planning the database. You can print
new Master Input Forms from the PDF file found in the User’s Guide
folder from the NexSentry Manager 3.0 CD-ROM.
Revision E, Part Number 66110229001
NexSentry Manager 3.0
A-1
A
A-2
PLANNING THE DATABASE
NexSentry Manager 3.0
Revision E, Part Number 66110229001
The NexSentry Manager 3.0 Data Input Form
POLLERS
ID
Description
Instruction
Show Activity Times
(Time Group)
Poller Type
Direct Connection
Dial-Up
Direct Connection (Gold)
Dial-Up (Gold)
Phone Number
(if Dial-Up)
Idle Timeout
(if Dial-Up)
Read Retries
(if Dial-Up)
Modem initialization
string (if Dial-Up)
Answer timeout
(if Dial-Up)
Port Settings
Baud Settings
Port Control:
Acknowledge
timeout
Port Control: Retries
Shunt Transactions
Form 1
WSE
NexSentry Manager 3.0
User Guide
Rev E-Part No. 66110229001
Page _____ of _____
The NexSentry Manager 3.0 Data Input Form
INPUTS
ID
Description
Instruction
Show Activity Times
Action Group
Zone
ACU
Shunted
Located on ACU
MIRO’s Device
Number
Point
Number
ACU Sensor/Node
Contact
Input State
Normal State
Four State
Two State
Open Short 1K 2K
ID
Description
Instruction
Show Activity Times
Action Group
Zone
ACU
Shunted
Located on ACU
MIRO’s Device
Number
Point
Number
ACU Sensor/Node
Contact
Input State
Normal State
Four State
Two State
Open Short 1K 2K
ID
Description
Instruction
Show Activity Times
Action Group
Zone
ACU
Shunted
Located on ACU
MIRO’s Device
Number
Point
Number
ACU Sensor/Node
Contact
Input State
Normal State
Four State
Two State
Open Short 1K 2K
ID
Description
Instruction
Show Activity Times
Action Group
Zone
ACU
Shunted
Located on ACU
MIRO’s Device
Number
Point
Number
ACU Sensor/Node
Contact
Input State
Normal State
Four State
Two State
Open Short 1K 2K
Form 2
WSE
NexSentry Manager 3.0
User Guide
Rev E-Part No. 66110229001
Page _____ of _____
The NexSentry Manager 3.0 Data Input Form
OUTPUTS
ID
Description
Instruction
Show Activity Times
ACU
Shunted
Located on ACU
MIRO’s Device
Number
ACU Sensor/Node #
Contact
Point Number
Output Type
Duration
If Duration is other:
Latched
Timed
Both
Forever
Other
Seconds:_________
ID
Description
Instruction
Show Activity Times
ACU
Shunted
Located on ACU
MIRO’s Device
Number
ACU Sensor/Node #
Contact
Point Number
Output Type
Duration
If Duration is other:
Latched
Timed
Both
Forever
Other
Seconds:_________
ID
Description
Instruction
Show Activity Times
ACU
Shunted
Located on ACU
MIRO’s Device
Number
ACU Sensor/Node #
Contact
Point Number
Output Type
Duration
If Duration is other:
Latched
Timed
Both
Forever
Other
Seconds:_________
ID
Description
Instruction
Show Activity Times
ACU
Shunted
Located on ACU
MIRO’s Device
Number
ACU Sensor/Node #
Contact
Point Number
Output Type
Duration
If Duration is other:
Latched
Timed
Both
Forever
Other
Seconds:_________
Form 3
WSE
NexSentry Manager 3.0
User Guide
Rev E-Part No. 66110229001
Page _____ of _____
The NexSentry Manager 3.0 Data Input Form
KEYPAD READER CONFIGURATION
ID
Description
Number of
retries allowed
Grace Period
PIN Length
Shunted
Fixed Variable
(plus Reader)
Normal LED
(plus Reader)
Access pending
LED
(plus Reader)
Access Granted
LED
Keypad Only
Normal/Idle LED
Keypad Only
Access Pending
Keypad Only
Access
Granted
Top
Middle
Bottom
Top
Middle
Bottom
Top
Middle
Bottom
Top
Middle
Bottom
Top
Middle
Bottom
Top
Middle
Bottom
Form 4
WSE
NexSentry Manager 3.0
User Guide
Rev E-Part No. 66110229001
Page _____ of _____
The NexSentry Manager 3.0 Data Input Form
DIGITAL READER CONFIGURATION
ID
Description
Read Range
Verification Time Window
Number of
Verifications
Forward Digit
Code
Yes
Beeper Timing
Red LED Timing
Green LED timing
On Duration:_______
On Duration:_______
On Duration:_______
Off Duration:_______
Off Duration:_______
Off Duration:_______
Cycles:____________
Cycles:____________
Cycles:____________
Normal LED Color
Access pending LED Color
Access Granted LED
Dark
Red
Dark
Red
Dark
Red
Green
Yellow
Green
Yellow
Green
Yellow
ID
Description
Read Range
Verification Time Window
Number of
Verifications
Forward Digit
Code
Yes
Beeper Timing
Red LED Timing
On Duration:_______
On Duration:_______
Off Duration:_______
Off Duration:_______
Off Duration:_______
Cycles:____________
Cycles:____________
Cycles:____________
Access pending LED Color
No
Green LED timing
On Duration:_______
Normal LED Color
No
Access Granted LED
Dark
Red
Dark
Red
Dark
Red
Green
Yellow
Green
Yellow
Green
Yellow
Form 5
WSE
NexSentry Manager 3.0
User Guide
Rev E-Part No. 66110229001
Page _____ of _____
The NexSentry Manager 3.0 Data Input Form
MAGNETIC STRIPE READER CONFIGURATION
ID
Description
ABA Card
Field A
ABA Card
Field B
ABA Card Field C
ABA Expiration
Date
Start:_____
Start:_______
Start:________
Start:_______
Length:___
Length:_____
Length:______
Length:_____
Send Data to
Terminal
ABA Site
Code
ABA Company
Code
ABA Deny Access
Conditions
ABA Failsoft Conditions
Start:_____
Start:________
Card not in ACU
Card not in ACU
Length:___
Length:______
Card Has Expired
Card Has Expired
Site Code not in ACU
Site Code not in ACU
Use Site Code as Card #
Use Site Code as Card #
Company Code not in ACU
Company Code not in ACU
Use Comp. Code as Card #
Use Comp. Code as Card #
Normal LED Color
Dark
Green
ID
Access pending LED Color
Red
Yes
Access Granted LED
Dark
Red
Dark
Red
Yellow
Green
Yellow
Green
Yellow
Description
ABA Card
Field A
ABA Card
Field B
ABA Card Field C
ABA Expiration
Date
Start:_____
Start:_______
Start:________
Start:_______
Length:___
Length:_____
Length:______
Length:_____
Send Data to
Terminal
ABA Site
Code
ABA Company
Code
ABA Deny Access
Conditions
ABA Failsoft Conditions
Start:_____
Start:________
Card not in ACU
Card not in ACU
Length:___
Length:______
Card Has Expired
Card Has Expired
Site Code not in ACU
Site Code not in ACU
Use Site Code as Card #
Use Site Code as Card #
Company Code not in ACU
Company Code not in ACU
Use Comp. Code as Card #
Use Comp. Code as Card #
Normal LED Color
Dark
Access pending LED Color
Red
Green
No
Yellow
Dark
Green
Red
Yellow
Yes
No
Access Granted LED
Dark
Red
Green
Yellow
Form 6
WSE
NexSentry Manager 3.0
User Guide
Rev E-Part No. 66110229001
Page _____ of _____
The NexSentry Manager 3.0 Data Input Form
WEIGAND READER CONFIGURATION
ID
Description
ABA Card
Field A
ABA Card
Field B
ABA Card Field C
ABA Expiration
Date
Start:______
Start:_______
Start:________
Start:_______
Length:____
Length:_____
Length:______
Length:_____
Send Data to
Terminal
ABA Site
Code
ABA Company
Code
ABA Deny Access
Conditions
ABA Failsoft Conditions
Start:_______
Start:________
Card not in ACU
Card not in ACU
Length:_____
Length:______
Card Has Expired
Card Has Expired
Site Code not in ACU
Site Code not in ACU
Use Site Code as Card #
Use Site Code as Card #
Company Code not in ACU
Company Code not in ACU
Use Comp. Code as Card #
Use Comp. Code as Card #
Normal LED Color
Dark
Green
Data Interface
Type
Data0/Data1
Access pending LED Color
Red
Yellow
Red
Dark
Red
Green
Yellow
Green
Yellow
Clock/Data
Start Parity
BCD
None
Odd
End Parity
Even
No
Access Granted LED
Dark
Credential
Format
HEX
Yes
None
Odd
Message Length
Even
Field Length:__________
Form 7
WSE
NexSentry Manager 3.0
User Guide
Rev E-Part No. 66110229001
Page _____ of _____
The NexSentry Manager 3.0 Data Input Form
ZONES
ID
Description
Type
ACU
Vehicle Zone
Yes
Vehicle Zone
Zone Mode Input
Points Selected (applies only to Logical Zones)
Description
Type
ACU
Vehicle Zone
Zone Mode Input
Points Selected (applies only to Logical Zones)
Description
Type
ACU
Logical
Zone Armed Timegroup
Zone Mode Input
Points Selected (applies only to Logical Zones)
Description
Type
ACU
ACU
Vehicle Zone
Zone Number
Logical
Zone Armed Timegroup
Zone Mode Input
Points Selected (applies only to Logical Zones)
Description
Type
ACU
No
ID
ACU
Vehicle Zone
Zone Number
Logical
Zone Armed Timegroup
Zone Mode Input
Points Selected (applies only to Logical Zones)
Description
Type
ACU
No
ID
ACU
Vehicle Zone
Zone Number
Logical
Zone Armed Timegroup
Zone Mode Input
Points Selected (applies only to Logical Zones)
Description
Type
ACU
No
ID
ACU
Vehicle Zone
Yes
Zone Number
No
ID
Yes
Logical
Zone Armed Timegroup
ACU
Yes
Zone Number
No
ID
Yes
Logical
Zone Armed Timegroup
ACU
Yes
Zone Number
No
ID
Yes
ACU
Zone Armed Timegroup
Zone Number
Logical
Zone Mode Input
Points Selected (applies only to Logical Zones)
No
Form 8
WSE
NexSentry Manager 3.0
User Guide
Rev E-Part No. 66110229001
Page _____ of _____
The NexSentry Manager 3.0 Data Input Form
INSTRUCTIONS
ID
Description
Instruction
Form 9
WSE
NexSentry Manager 3.0
User Guide
Rev E-Part No. 66110229001
Page _____ of _____
The NexSentry Manager 3.0 Data Input Form
SYSTEM USERS
ID
Description
Security Level
User Name
Password
Form 10
WSE
NexSentry Manager 3.0
User Guide
Rev E-Part No. 66110229001
Page _____ of _____
The NexSentry Manager 3.0 Data Input Form
ACU USERS
ID
Description
User Name
1-12 Characters
Password
1-12 Characters
Form 11
WSE
NexSentry Manager 3.0
User Guide
Rev E-Part No. 66110229001
Page _____ of _____
The NexSentry Manager 3.0 Data Input Form
HOSTS
ID
Description
Host Name
1-12 Characters
Password
1-12 Characters
Form 12
WSE
NexSentry Manager 3.0
User Guide
Rev E-Part No. 66110229001
Page _____ of _____
The NexSentry Manager 3.0 Data Input Form
TIME CODES
ID
Description
Start
Time
Stop
Time
Sun
Mon
Tues
Wed
Thu
Fri
Sat
Holiday
Form 13
WSE
NexSentry Manager 3.0
User Guide
Rev E-Part No. 66110229001
Page _____ of _____
The NexSentry Manager 3.0 Data Input Form
TIME GROUPS
ID
Time Group Description
Selected Time Code Descriptions
Form 14
WSE
NexSentry Manager 3.0
User Guide
Rev E-Part No. 66110229001
Page _____ of _____
The NexSentry Manager 3.0 Data Input Form
HOLIDAYS
ID
Description
Date
______/______/______
______/______/______
______/______/______
______/______/______
______/______/______
______/______/______
______/______/______
______/______/______
______/______/______
______/______/______
______/______/______
______/______/______
______/______/______
______/______/______
______/______/______
______/______/______
______/______/______
______/______/______
Form 15
WSE
NexSentry Manager 3.0
User Guide
Rev E-Part No. 66110229001
Page _____ of _____
The NexSentry Manager 3.0 Data Input Form
ACTIONS FOR NEXSENTRY ACUS
ID
Description
Prevent
Building
Closure
Print Asterisk
on Printed
Reports
Yes
Yes
No
No
Send Transaction Log
when ACU is
Send Logs during this
Time Group
Open
Limited
Closed
Close Latched
Contact when
ACU is
Close Latched
Contact during
this Time
Group
Contact
Point Output
Close Regular
Contact when
ACU is
Open
Open
Limited
Limited
Closed
Closed
ID
Description
Prevent
Building
Closure
Print Asterisk
on Printed
Reports
Yes
Yes
No
No
Close Regular Contact during this Time Group
Send Transaction Log
when ACU is
Send Logs during this
Time Group
Open
Limited
Closed
Close Latched
Contact when
ACU is
Close Latched
Contact during
this Time
Group
Contact
Point Output
Close Regular
Contact when
ACU is
Open
Open
Limited
Limited
Closed
Closed
Close Regular Contact during this Time Group
Form 16
WSE
NexSentry Manager 3.0
User Guide
Rev E-Part No. 66110229001
Page _____ of _____
The NexSentry Manager 3.0 Data Input Form
ACTIONS FOR NEXSENTRY (GOLD) ACUS
ID
Description
Prevent Zone
Closure
Print Asterisk
Print to Terminal
Send Logs
when Zone is
Armed
Disarmed
Shunted
Disabled
Monitored
Send Logs
during this
Time Group
Contact Point Zone
Close Output
Contact when
Zone is
Close Output Contact
during this Time
Group
Use the state of
this Zone or Zone
number
Form 17
WSE
NexSentry Manager 3.0
User Guide
Rev E-Part No. 66110229001
Page _____ of _____
The NexSentry Manager 3.0 Data Input Form
ACTION GROUPS
ID
Description
Key Trace
Door Open Too Long
Door Forced Open
VIP/ Digital
Tamper
Access Granted
Access Denied
Exit Granted
Exit Denied
Coax
Sensor
MSM
VIP
SNET Reader
ID
Description
Key Trace
Door Open Too Long
Door Forced Open
VIP/ Digital
Tamper
Access Granted
Access Denied
Exit Granted
Exit Denied
Coax
Sensor
MSM
VIP
SNET Reader
ID
Description
Key Trace
Door Open Too Long
Door Forced Open
VIP/ Digital
Tamper
Access Granted
Access Denied
Exit Granted
Exit Denied
Coax
Sensor
MSM
VIP
SNET Reader
ID
Description
Key Trace
Door Open Too Long
Door Forced Open
VIP/ Digital
Tamper
Access Granted
Access Denied
Exit Granted
Exit Denied
Coax
Sensor
MSM
VIP
SNET Reader
Form 18
WSE
NexSentry Manager 3.0
User Guide
Rev E-Part No. 66110229001
Page _____ of _____
The NexSentry Manager 3.0 Data Input Form
ACU, THIS PAGE CONTAINS ALL POSSIBLE TEXT BOXES FOR ALL TYPES OF ACUS
General
ID
Description
Address
Serial Number
Poller
Instruction
Host Log-in
Number of MIROs
Time Groups
Times when building should
be closed
Show Activity Times
Auto forgive times
VIP
Number of
Retries
allowed
Number of
Digits
Number of
Digits if VIP
only
PIN
Seed
Grace Period
Duress
enable
Display PIN
Number
Actions
Operator Override
Duress
Tamper
Power Fail
Cards
Card Type
1030
Facility Code
1040
1050
Alternate Code
1060/Digital
Reader
Verification Sweeps
Misread Filter
Access Denied Time
Do not modify this field.
Customer service use only.
Do not modify this field.
Customer service use only.
Reread Delay
Do not modify this field.
Customer service use only.
Misc.
Host Baud
Xon/Xoff
Terminal Baud
Xon/Xoff
Enable Zone not
Armed messages
Internval
between
messages
Access
Denied
Time
Timezone
of ACU
Site Codes
Site Codes
Form 19
WSE
NexSentry Manager 3.0
User Guide
Rev E-Part No. 66110229001
Page _____ of _____
The NexSentry Manager 3.0 Data Input Form
DOORS, THIS PAGE CONTAINS ALL POSSIBLE TEXT BOXES FOR ALL TYPES OF DOORS
General
ID
Description
ACU
Shunt
Door Number
Time Groups
Auto Unlock
Show Activity Times
Lock
Door
Switch
Max Door Open
Time
Read Cards
When Open
Relay ID
Unlock Time
Reverse Lock
Yes
No
Proximity Reader
Enable
Type
Used As
Digital
Analog
Normal
Disable MSM
Open
Closed
Station
Yes
No
VIP
VIP Enable
Active During Modes
Yes
Open
No
During Time Group
Limited
Closed
REX (Request to Exit)
REX Enable
Yes
REX Point
Valid REX Time Group
No
Unlock on REX
Yes
No
MSR
Enable
MSR
Type
Field A
Field B
Field C
Expiration.
date start
Yes
No
MSR5
MSRK5
Start:___
Length___
Start:___
Length___
Start:___
Length___
Site code start
Card not in ACU
Site Code not in ACU
Card has expired
Use Site Code as card number
Deny
Deny
Deny
Deny
Failsoft
Failsoft
Failsoft
Failsoft
Misc.
Enable Anti-Passback
Method
Yes
Hard
No
Type
Soft
Entry
Instruction
Action Group
Exit
Form 20
WSE
NexSentry Manager 3.0
User Guide
Rev E-Part No. 66110229001
Page _____ of _____
The NexSentry Manager 3.0 Data Input Form
ELEVATORS
General
ID
Description
ACU
Device Number
Shunt
Cab
Operating Mode
Normal
High
Cab type
Priority
Type 1
Type 2
Reader
Reader
1
2
Type
Reader
Configuration
Reader
Time Group
VIP
Configuration
VIP Time
Group
Enable while
zone is
Digital
Armed
MSR5
Disarmed
MSRK5
Weigand
Elevator Floors
Floor Naming Scheme
Floor
Monitor Input
Output
Entering Zone
Leaving Zone
Misc
Show
Activity
Instruction
Action Group
Form 21
WSE
NexSentry Manager 3.0
User Guide
Rev E-Part No. 66110229001
Page _____ of _____
The NexSentry Manager 3.0 Data Input Form
ELEVATOR FLOOR NAME SCHEME, ID:____, DESCRIPTION:_______________
Logical
Floor
Number
Floor Name
Logical
Floor
Number
Floor Name
Logical
Floor
Number
1
27
53
2
28
54
3
29
55
4
30
56
5
31
57
6
32
58
7
33
59
8
34
60
9
35
61
10
36
62
11
37
63
12
38
64
13
39
65
14
40
66
15
41
67
16
42
68
17
43
69
18
44
70
19
45
71
20
46
72
21
47
73
22
48
74
23
49
75
24
50
76
25
51
77
26
52
78
Floor Name
Form 22
WSE
NexSentry Manager 3.0
User Guide
Rev E-Part No. 66110229001
Page _____ of _____
The NexSentry Manager 3.0 Data Input Form
ACCESS CODES
ID
Description
Doors
Door Time
Group
Floor Groups
Floor Group
Time Group
Form 23
WSE
NexSentry Manager 3.0
User Guide
Rev E-Part No. 66110229001
Page _____ of _____
The NexSentry Manager 3.0 Data Input Form
CARDHOLDERS
General
Cardholder
ID
First Name
Middle Name
Last Name
Download
Immediately
Yes
No
Access
Options
Trace
Dates
Visitor
Privileged
Access Code
Start:___/___/___
Stop:___/___/___
Credentials
Card type
Card Number
PIN
Facility Code
Address
Line 1
Line 2
Line 3
Additional Text Fields (1-4)
1
2
3
4
More Additional Text Fields (5-8)
5
6
7
8
Additional Lookup Fields (1-6)
1
2
3
4
5
6
Picture
Picture Available
Yes
No
Form 24
WSE
NexSentry Manager 3.0
User Guide
Rev E-Part No. 66110229001
Page _____ of _____
The NexSentry Manager 3.0 Data Input Form
SECURITY LEVEL DESCRIPTION:____________________________________
Function
Device
Function
Device
Edit
Pollers
View
Edit
Sounds
Edit
ACUs
View
Edit
System Defaults
View
Edit
Doors/Elevators
View
Status
View
Edit
General Purpose Inputs
View
Monitor
View
Edit
Door Switch Inputs
View
Edit
REX Inputs
View
Edit
Outputs
View
Edit
Instructions
Download
System Data
View
Edit
Zones
Download
Cardholders
View
Edit
Cardholders
N/A
Forgive
View
Edit
Access Codes
N/A
Silence
System Users
N/A
Reset
Edit
View
Edit
Security Levels
View
Edit
ACU Users
View
Transaction Log
N/A
View
Ackn
Clear
Shunt/Unshunt
Alarms
ACUs
Change
Building/Zone Mode
Shunt/Unshunt
Doors or Elevators
Lock/Unlock
Doors or Elevators
Shunt/Unshunt
Pollers
Database - Arch/Comp/Rep
Shunt/Unshunt/Enable/Disable
Inputs
Outputs
View
Edit
Transaction Types
Activate/Clear/ Enable/ Disable
View
Edit
Alarm Responses
Lock/Unlock
Doors
View
N/A
Audit Trail
Shunt/Unshunt
Pollers
View
Edit
Additional Lookup Fields
Shunt/Unshunt/Enable/Disable
Inputs
View
Edit
Additional Text Fields
Activate/Clear/ Enable/ Disable
Outputs
View
Edit
Facility Codes
View
Edit
Site Codes
Time Codes
View
Edit
Icons
N/A
View
Edit
Time Groups
View
Edit
Timezones
View
Edit
Holidays
View
Edit
Hosts
View
Edit
Actions
N/A
Monitor Cardholder Pictures
View
Edit
Action Groups
N/A
Change Elev. Security Mode
View
Edit
Maps
N/A
Change Elev. Security Mode
Form 25
WSE
NexSentry Manager 3.0
User Guide
Rev E-Part No. 66110229001
Page _____ of _____
The NexSentry Manager 3.0 Data Input Form
ALARM RESPONSES
ID
Alarm Response
Remarks
Form 26
WSE
NexSentry Manager 3.0
User Guide
Rev E-Part No. 66110229001
Page _____ of _____
The NexSentry Manager 3.0 Data Input Form
FACILITY AND SITE CODES
ID
Description
Code
Form 27
WSE
NexSentry Manager 3.0
User Guide
Rev E-Part No. 66110229001
Page _____ of _____
REMOTE A CCESS S ERVICE
.....
...................................
B
RAS (Remote Access Service) duplicates a network connection
through dial-up phone lines or a direct hardwire RS-232 connection.
RAS allows more than one PC to interact with the NexSentry
Manager 3.0. RAS currently supports only one connection at a time
through a Windows NT Workstation 4.0. RAS does not allow you to
control the Server PC functions such as rebooting, changing Control
Panel options, or seeing the Server PC screen from the remote site.
For this type of configuration, Reachout from Stac software is
recommended and supported. Go to www.stac.com for more
information.
This appendix covers the following topics:
• “Remote Access Service Rules” on page B-2
• “Installing the Remote Access Service on the Server PC” on page B-4
• “Installing the Remote Access Service on the Client PC” on page B-8
• “Working with Remote Access Service” on page B-14
• “Removing Remote Access Service” on page B-15
Revision E, Part Number 66110229001
NexSentry Manager 3.0
B-1
B
REMOTE ACCESS SERVICE
Remote Access Service Rules
REMOTE ACCESS SERVICE RULES
..........................................................
The NexSentry Manager 3.0 functions properly with Windows NT
4.0 Microsoft Service Pack #3 and with the WSE NSM Service
Pack-1b (11/25/97). Please contact WSE Technical Support (WSETS) for up-to-date information on the latest revisions, updates, and
patches regarding software compatibility with other programs.
WSE does not support additional network connections if you use
RAS. This means that neither the NexSentry Manager Client nor the
NexSentry Manager Server can have any other network connections.
Although it is possible to do this, WSE-TS does not currently
support it.
RAS has been tested at modem speeds of 28.8k baud and 115k baud,
through a hardwire connection. Results were best above 38.4k baud.
WSE-TS highly recommends a 56k baud modem for dial-up
connections. Baud speed is increased with the use of Remote Control
software such as Reachout, PCAnywhere, LapLink, rather than using
a RAS connection. See the WSE-TS document “Using the
NexSentry Manager with Remote Control.”
For purposes of clarity, the PC running the NexSentry Manager
Server software is referred to as the Server PC, and the PC that dials
into the Server is referred to as the Client. All procedures are based
on the principle that the Server PC and the Client PC have no other
loaded software and that Networking has not yet been enabled. It is
assumed that Windows NT 4.0 is installed on both PCs.
B-2
NexSentry Manager 3.0
Revision E, Part Number 66110229001
.....
REMOTE ACCESS SERVICE
Remote Access Service Rules
For the NexSentry Manager 3.0 to operate over a network, observe
the following rules:
• Establish Network connectivity before you install the NexSentry
Manager 3.0 software. If the NexSentry Manager 3.0 software is
already installed, back up the database and completely delete the
software. See the WSE-TS document “Procedure for Complete
De-Install of the NexSentry Manager 3.0.”
• Both NetBEUI and TCP/IP are required and are the only
networking protocols currently supported.
• All PCs must have static TCP/IP addresses. DHCP is not
supported, except as indicated.
• All PCs must have a unique name.
• Have available all of the IP numbers and PC names during the
software installation process.
• For the installation, you must log on to Windows NT with
Administrator privileges.
• All System Users of the NexSentry Manager 3.0 must have read
and write privileges on the NexSentry Manager Server PC in the
NexSentry Manager folder. The default folder is \\Program
Files\NexSentry Manager.
• Make sure the Server and the Client PCs can ping each other with
each TCP/IP address.
• Make sure the Server PC has all potential System Users listed as
Windows NT users.
• Set the NexSentry Manager 3.0 folder to shared to allow only
the System Users access.
• All System Users who dial in through RAS must have Dial In
permission in the Windows NT User Manager.
Revision E, Part Number 66110229001
NexSentry Manager 3.0
B-3
REMOTE ACCESS SERVICE
Remote Access Service Rules
B
Inst al li n g th e Re mo te Ac ce ss S e rvi c e on th e S er ve r PC
This procedure installs RAS and the NexSentry Manager 3.0 on a
Windows NT 4.0 Workstation. The first step is to install the modem.
TO INSTALL THE MODEM ON THE SERVER PC:
1 Follow the manufacturer’s instructions to install the modem or
direct wire to the Server PC.
2
Log on to Windows NT with Administrator privileges.
3
From the Windows NT desktop, click Start>Settings>
Control Panel, and then double-click the Modems icon. The
Modem setup wizard guides you through the modem
installation.
When the modem installation is complete, you need to confirm that
the modem is configured correctly. Check that the modem properties
are set to the maximum baud rate and that all options are set the same
on the Server and Client PCs.
Use the Windows NT HyperTerminal program to test the modem by
dialing another modem. Try the Microsoft BBS shortcut located in
the HyperTerminal folder, if needed. See your Windows NT or
modem documentation for additional information.
Next, you want to configure the Server PC file. Read the following
procedure.
B-4
NexSentry Manager 3.0
Revision E, Part Number 66110229001
.....
REMOTE ACCESS SERVICE
Remote Access Service Rules
TO CONFIGURE THE SERVER FILE:
1 From the Windows NT desktop click Start>Programs>
Accessories>Notepad. The Microsoft Notepad program
opens.
2
From the menu bar, click File>Open. The Open dialog box
appears.
3
Open the Servers file by following this path, \\WINNT\
System32\drivers\etc\.
4
Type # in the last line in the file so that it reads: # 127.0.0.1
localhost.
5
Under the line you just edited, type: 127.0.0.1 NSM_Host.
Use the Server PC name where the example states, NSM_Host.
6
Click File>Save, and then click File>Exit.
After you configure the Server file, you should install the Dial-Up
Networking on the Server PC. Make sure to have the Windows NT
installation CD-ROM available. Read the following procedure for
details.
TO INSTALL DIAL-UP NETWORKING ON THE SERVER PC:
1 From the Windows NT desktop, double-click My Computer>
Dial-Up Networking. The Dial-Up Networking dialog box
appears.
2 From the Dial-Up Networking dialog box, click Install.
You are then prompted through the following installation steps.
Revision E, Part Number 66110229001
NexSentry Manager 3.0
B-5
REMOTE ACCESS SERVICE
Remote Access Service Rules
B
3
Windows NT should find the modem you just set up. From the
Remote Access Setup window, select the appropriate device
and then click Configure.
4
Click Receive calls only check box, and then click OK.
5
From the dialog box, click Network.
6
Select the NetBEUI and Configure for This computer
only check box.
7
Select the TCP/IP and Configure for This computer
only check box.
8
In the Static Address Pool section, set
Begin=128.0.0.1, and End=128.0.0.5. You can modify
these numbers if needed—but you must have familiarity with
advanced TCP/IP functions to do so—see your Network
Administrator.
9
Click the Allow remote clients check box, and then click
OK.
10
From the Encryption section, click the Allow any check
box, and then click OK and then click Continue. You can
modify this, but you must have familiarity with Windows NT
encryption and security. Windows NT now installs any
components needed and prompts you to reboot.
You have now installed the Dial-Up Networking feature. To start
RAS, read the following procedure.
B-6
NexSentry Manager 3.0
Revision E, Part Number 66110229001
.....
REMOTE ACCESS SERVICE
Remote Access Service Rules
TO START RAS:
1 After rebooting from the above procedure, click Start>
Programs>Administrative Tools (common)>Remote
Access Admin. The Remote Access Admin window
appears.
2
Click Server, and then Start Remote Access Service.
If needed, type in the Server PC name preceded by two
backslashes. For example, \\NSM_HOST. Click OK, the RAS now
starts and waits for calls.
At this point, you are ready to install the NexSentry Manager 3.0
Client/Server on the Server PC.
TO INSTALL THE NSM NS-CLIENT/SERVER ON THE SERVER PC:
1 Read the NexSentry Manager Readme.html file included on the
installation CD-ROM. Begin the NSM install as outlined in the
NSM Readme file, and proceed all the way through step 8, then
continue with this procedure.
2
Answer YES to the Do you have TCP/IP installed?
option.
3
From the Select Components dialog box, select all of the
options for the Server PC, then click OK. The Client
Settings screen appears.
4
The installation should find the TCP/IP address of the PC you
are working on. Confirm that the TCP/IP number is
127.0.0.1—this is the only TCP/IP address that has been
confirmed at this time for this type of installation—and leave the
Client Port at the default: 25000, click Next.
Revision E, Part Number 66110229001
NexSentry Manager 3.0
B-7
REMOTE ACCESS SERVICE
Remote Access Service Rules
B
5
Type the NexSentry Manager Server name, and then click Next.
6
The Server Settings screen appears. The installation
should find the TCP/IP address of the PC with the NexSentry
Manager Server. Confirm that the TCP/IP number is
127.0.0.1, and leave the Server Port at the default:
25001, then click Next.
7
Proceed with the installation from this point as outlined in the
NSM Readme file.
Once the installation is complete and you have rebooted the PC, you
should start the NexSentry Server application, click the NexSentry
Client icon, or click Start>Programs>NexSentry>NS
ClientApp. Test that the ACU is online and operating properly. If
needed, see the WSE-TS document “Procedures for Connecting the
NexSentry Manager to the 4100 and 818SC.”
Inst al li n g th e Re mo te Ac ce ss S e rvi c e on th e C li e nt P C
After you install RAS on the Server PC, you are ready to install RAS
on the Client PC. Read this section for details.
TO INSTALL THE MODEM ON THE CLIENT PC:
1 Follow the manufacturer’s instructions to install the modem or
direct wire to the PC.
2
Log on to Windows NT with Administrator privileges.
3
From the Windows NT desktop, click Start>Settings>
Control Panel, and then double-click the Modems icon. The
Modem setup wizard guides you through the installation process.
When the modem installation finishes, confirm the modem is
installed and configured correctly. Check that the modem properties
B-8
NexSentry Manager 3.0
Revision E, Part Number 66110229001
.....
REMOTE ACCESS SERVICE
Remote Access Service Rules
are set to the maximum baud rate and that all options are set the same
on the Server and Client PCs.
Use the Windows NT HyperTerminal program to test the modem by
dialing another modem. Try the Microsoft BBS shortcut located in
the HyperTerminal folder, if needed. See your Windows NT or
modem documentation for additional information.
Next, install Dial-Up Networking on the Client PC. Make sure to
have available the Windows NT installation CD-ROM.
TO INSTALL DIAL-UP NETWORKING ON THE CLIENT PC:
1 From the Windows NT desktop, double-click My Computer>
Dial-Up Networking. Windows NT now automatically
installs all of the needed components.
2
If a modem has not been installed on Windows NT, the setup
process prompts you to install one now.
3
After the modem is found and installed within Dial-Up
Networking, click Configure, and set the device for Dial
out only, and then click OK.
4
Click Network, and then select both NetBEUI and TCP/IP.
Click OK, and then click Continue.
Windows NT prompts you to reboot the PC after the installation
finishes. After the PC restarts, return to Dial-Up Networking.
Since there are no phone book entries yet, Windows NT helps you
set up the dial-out properties.
Revision E, Part Number 66110229001
NexSentry Manager 3.0
B-9
REMOTE ACCESS SERVICE
Remote Access Service Rules
B
TO SET THE DIAL-OUT PROPERTIES:
1 From the Dial-Up Networking dialog box, check the box to
edit the properties directly.
2
The first tab is Basic:
D
Type a name for the connection, such as NSM_Host.
E Type in the phone number and use the Telephony properties
if needed.
F Click Configure, and set the modem speed and features.
3
The second tab is Server:
D Select PPP for the type, and check all boxes but IPX/SPX,
and then click Configure.
E Select Server Assigned for both options and then click
OK. You can change the TCP/IP options, but you must have
familiarity with networking.
4
From the Script dialog box, click None.
5
From the Security dialog box, click Accept any. You can
use other security authentications, but you must have familiarity
with NT security functions.
6
The fifth tab is X.25: This configuration does not require X.25.
If X.25 is needed, contact your Network Administrator.
You have now set all of the configurations necessary for the
NexSentry Manager 3.0 to run over the connection.
B-10
NexSentry Manager 3.0
Revision E, Part Number 66110229001
.....
REMOTE ACCESS SERVICE
Remote Access Service Rules
TO TEST THE REMOTE ACCESS SERVICE CONNECTION:
1 From the Client PC, go to the Dial-Up Networking dialog
box and click Dial to test the connection. You are prompted to
enter a user name, password, and domain. Type in the Windows
NT name and password that is configured for the Server PC, and
leave the domain blank. You can select the Save Password
option for future use.
2
After logging in to the Server PC, you need to find the Server
PC. From the Windows NT desktop, click Start>Find>
Computer. The Find: Computer dialog box appears.
3
In the Named text box, type in the Server PC name and then
click Find Now. Windows NT should find the Server PC name
and location. If not, check all of the parameters listed in the
previous steps.
4
Once the Server PC is found, double-click the Server PC icon.
The NexSentryManager shared folder appears. Right-click
the folder, and select Map Network Drive. Do not select
Reconnect at logon.
After you reboot the PC, Windows NT does not save the mapping.
Be sure to repeat steps 2 and 3, from the above procedure, after
reconnecting to the Server PC and before starting the NexSentry
Manager 3.0 on the Client PC. Once configured, you can create a
shortcut. From the Windows NT desktop, right-click My
Computer and select Map Network Drive, and then select the
same drive letter used previously.
Revision E, Part Number 66110229001
NexSentry Manager 3.0
B -11
REMOTE ACCESS SERVICE
Remote Access Service Rules
B
TO INSTALL THE NEXSENTRY MANAGER 3.0 CLIENT OVER THE CONNECTION:
1 Read the NexSentry Manager Readme.html file included on the
installation CD-ROM.
B-12
2
Connect to the Server PC first, and then follow all of the rules
listed from the Readme file.
3
Have available all of the TCP/IP addresses of all the PCs that
will run the NexSentry Manager 3.0 software. The TCP/IP
addresses are in a 3x4 format, such as 123.4.56.123.
4
From the Windows NT desktop, right-click My Computer, and
select Dial-Up Networking.
5
Click More, and then select Monitor Status.
6
Click Details from the Dial-Up Networking Monitor
dialog box and note the TCP/IP addresses of the Client and
Server. In this configuration, you should see 128.0.0.1 for the
Server (NT Dial-Up Server) and 128.0.0.2 for the IP Address
(Client). You need the address for steps 10 and 12. Close all
windows, but stay connected to the Server.
7
Begin the NSM install outlined in the NSM Readme file, and
proceed all the way through step 8.
8
Answer YES to the option “Do you have TCP/IP installed?”
9
From the Select Components dialog box for the Client PCs,
only select the NexSentry Client, Help Files, and
Reports options. Do not select the Database or Server
options.
NexSentry Manager 3.0
Revision E, Part Number 66110229001
.....
REMOTE ACCESS SERVICE
Remote Access Service Rules
10
The Client Settings dialog box appears. The installation
should find the TCP/IP address of the PC you are working on.
Confirm the TCP/IP number, and leave the Client Port at the
default: 25000, then click Next.
11
Type in the NexSentry Manager Server Name, and click Next.
12
The Server Settings dialog box appears. The installation
should find the TCP/IP address of the PC with the NexSentry
Manager Server. Confirm the TCP/IP number, and leave the
Server Port at the default: 25001, then click Next.
13
In the Select Remote Database (.mdb) File text box,
open the NexMgr.mdb file by following this path, \NETWORK\
Computer Name\Program Files\NexSentry
Manager\NexMgr.mdb.
14
Proceed with the installation as outlined in the NSM Readme
file.
Once the installation is complete and you reboot the PC, you can
reestablish the NexSentry Manager Server connection, click Start>
Programs>NexSentry>NS ClientApp.
If any errors occur, check that the network connection is good and
that everyone using the NexSentry Manager 3.0 has privileges other
than “Guest” in the Windows NT directory, \\Program
Files\NexSentryManager.
Revision E, Part Number 66110229001
NexSentry Manager 3.0
B-13
B
REMOTE ACCESS SERVICE
Working with Remote Access Service
WORKING WITH REMOTE ACCESS SERVICE
..........................................................
Read this section for helpful information regarding RAS.
• Confirm that all modem configurations match in the Windows NT
Control Panel – Modem setup. Make sure that settings such as
baud rate, flow control, protocols, and so forth are the same on the
Server and Client PCs.
• There is a Details button from the Dial Up Networking
Monitor, which is accessible from the Modem icon through the
Start menu or from the Dial-Up Networking shortcut. This tells
you the TCP/IP addresses that the Server PC has assigned to the
Client PC and the NetBEUI information.
• “Ping” the Server and Client TCP/IP addresses from the Server
PC and from the Client PC. To do this, click Start>Programs>
Command Prompt. Type, for example, ping 255.255.255.1
and you should see a reply. This confirms the network connection.
Type ping and press Enter for help.
• Double check your User options in Windows NT. All Users who
connect through RAS must have the Dial In option set to Yes.
• The Windows NT ODBC driver must be an earlier release than
version 5.0. See the WSE Technical Support document “ODBC
and the NexSentry Manager.”
• You can set RAS to start automatically every time Windows NT
starts. From the Windows NT desktop, click Start>
Settings>Control Panel>Services. The Services
dialog box appears. From the Service box, choose the
appropriate Service, and then click Startup. From the
Startup Type section, click Automatic and then OK.
• Try using the Windows NT HyperTerminal program on both the
Server and Client PCs to test your connections. After connecting,
B-14
NexSentry Manager 3.0
Revision E, Part Number 66110229001
.....
REMOTE ACCESS SERVICE
Removing Remote Access Service
you can type characters from the Client PC and have the text show
on the Server PC’s HyperTerminal screen.
• The NexSentry Client on the Client PC crashes if communications
is lost between the Client PC and the Server PC during a
connected session. You must close the NS Client and reestablish
the connection to the Server PC to restore the NS Client.
R EMOVING R EMOTE A CCESS S ERVICE
..........................................................
Read this section to learn how to remove RAS.
TO REMOVE RAS:
1 From the Windows NT desktop, click Start>Settings>
Control Panel. The Control Panel window appears.
2
From the Control Panel window, double-click the Network
icon. The Network dialog box appears.
3
From the Network dialog box, click the Services tab.
4
From the Network Services box, click Remote Access
Service and then click Remove. A Warning dialog box
appears, indicating that this action permanently removes the
component from your system and asks if you still wish to
continue, click Yes, and then click Close.
5
When prompted to restart your system, click Yes.
Revision E, Part Number 66110229001
NexSentry Manager 3.0
B-15
B
B-16
REMOTE ACCESS SERVICE
Removing Remote Access Service
NexSentry Manager 3.0
Revision E, Part Number 66110229001
Glossary
.....
...................................
ABA CARD
An industry standard magnetic stripe card.
ACU USER RANKS
The level of permission assigned to an ACU User. This Rank
determines what the ACU User can do when connected directly to
the ACU through the NSM Lite program. See the ACU manual for a
description of available Ranks.
ACU USERS
A User who is authorized to access ACUs directly from the ACU
Terminal port.
ACU ZONES
An ACU Zone consists of one ACU, a Time Group, and an Input
device.
ACCESS CODES
A code assigned to a Cardholder that controls where and when they
are granted access. An Access Code consists of a Door or a set of
Doors and a Time Group for each Door.
Revision E, Part Number 66110229001
NexSentry Manager 3.0
*
GLO SS ARY
ACCESS CONTROL UNITS (ACUS)
Access Control Units (ACUs) are Hardware devices that sense and
react to input from other Hardware devices such as Readers. ACUs
control the Door status as well as send Transaction Logs to the
System Monitor window. The three types of ACUs used with
the NexSentry Manager 3.0 include, the ALTO 818SC, the
NexSentry ACU, and the NexSentry Star ACU.
ACKNOWLEDGE ALARM
The action a System User takes to respond to an Alarm message
from the Alarm Service dialog box.
ACTIONS
Actions define when and how the ACU sends Transaction Logs to
the System Monitor window.
ADDITIONAL LOOK-UP FIELDS
User-defined fields that a System User can use to store additional
information about Cardholders.
ADDITIONAL TEXT FIELDS
User-defined fields that a System User can use to store information
about Cardholders. These text fields contain information that is
unique to each Cardholder.
ALARM
An alarm is an Output device that can notify the appropriate people
in the case of a break-in or other events.
*
NexSentry Manager 3.0
Revision E, Part Number 66110229001
.....
GLOSSARY
ANTI-PASSBACK
A control measure that prevents a Cardholder from reusing the same
Door consecutively. This prevents the practice of a Cardholder going
through a Door and then handing back the card to another person.
See also Hard Anti-Passback and Soft Anti-Passback.
ARCHIVE TRANSACTION LOGS
A process of transferring Transaction Logs from the database to a
back-up disk.
ARMED ZONES
No one is allowed in the Zone when the NexSentry Star ACU is set
for Armed.
AUDIT TRAIL
The Audit Trail consists of all changes made to the database. When
you configure, edit, or delete a database item, it is recorded as an
Audit.
BUILDING MODES
The three building modes include, Open, Limited, and Closed.
CARDHOLDERS
Cardholders are individuals with an assigned card that allows access
to the controlled areas.
CLIENT PCS
The Client PC contains the NexSentry Manager 3.0 software that
allows a System User to enter data and monitor the system activity.
The Client PC provides system control and override capabilities. The
Client PC communicates with the Server PC.
Revision E, Part Number 66110229001
NexSentry Manager 3.0
*
GLO SS ARY
CLOSED BUILDING MODES
Set the NexSentry ACUs to Closed during building hours when no
one is allowed in the building.
DATABASE EXPLORER
The Database Explorer window shows the directory structure
of the database. Use this window to quickly navigate the database
and to add, delete, or edit database items.
DBMS (DATABASE MANAGEMENT SYSTEM)
Software that controls the organization, storage, and retrieval of
data—fields, records, and files—in a database. It also controls the
security and integrity of the database. The DBMS accepts requests
for data from the application program and instructs the operating
system to transfer the appropriate data.
DIGITAL READERS
A sensor that connects to an ACU that reads digital cards.
DIGITAL CARDS
Like a credit-card, digital cards have a magnetic stripe on the back
with encrypted data that is read by digital readers. See also ABA
cards.
DISABLED ZONES
Set the NexSentry Star ACU when it does not operate at all.
DISARMED ZONES
Set the NexSentry Star ACU for Disarmed during normal building
hours when the most amount of Cardholders are in the building.
*
NexSentry Manager 3.0
Revision E, Part Number 66110229001
.....
GLOSSARY
DOORS
‘Door’ is a generic term for all openings controlled by an access
device. The term ‘Door’ refers to actual doors, turnstiles, gates, and
so forth.
DOOR SWITCHES
Monitoring devices that detect if the Door is open or closed.
DURESS CODES
In emergency situations, a Cardholder can use a Duress Code with a
Keypad Reader to send a Transaction Log and/or sound an alarm. To
use the Duress Code, a Cardholder enters their PIN with the first
number moved to the end. For example, the PIN 12345 is entered as
23451.
FACILITY CODES
A unique identification number assigned to a facility. Use Facility
Codes only for 1030 and 1040 cards.
FLOOR GROUPS
Use the Floor Groups to assign elevator and floor access to the
Access Codes, which in turn are assigned to Cardholders.
HARD ANTI-PASSBACK
Prevents the reuse of a card on the same Door in the same direction
using the same Reader, thus preventing a card from being ‘passedback’ to another person.
HIGH SECURITY
Allows the elevator to travel to one floor and then it returns to the
default floor.
Revision E, Part Number 66110229001
NexSentry Manager 3.0
*
GLO SS ARY
HOLIDAYS
Holidays define dates when the building or zone enters the Closed or
Armed modes.
HOSTS
The NexSentry Manager 3.0 allows you to configure Hosts. Use the
Hosts feature to assign passwords to ACU Users. The ACU Users
need a password to log in to NSM Lite.
ICONS
Icons are computer graphics that can be used with the Maps feature
and the Transaction Types.
INPUT DEVICES
Input devices are Hardware items that detect changes in the
environment and then reports that information to the ACU.
INSTRUCTIONS
Instructions serve as messages that appear on the System
Monitor window when Transactions occur.
KEYPAD READERS
A Reader that grants access when a Cardholder enters the correct
PIN.
LAN (LOCAL AREA NETWORK)
A group of connected PCs and devices that enables any device to
interact with any other on the network.
*
NexSentry Manager 3.0
Revision E, Part Number 66110229001
.....
GLOSSARY
LATCHED CONTACT
An Output device that, once active as a result of an event, stays
active until a System User silences or clears it.
LIMITED BUILDING MODES
Set the NexSentry ACUs to Limited during building hours when
only certain people, such as privileged Cardholders, occupy the
building.
LOGICAL ZONES
A Logical Zone can include any combination of Pollers, ACUs,
Input devices, Output devices, Doors, and Elevators.
MAPS
The Maps feature allows you to view the same data and perform the
same functions from the System Status and System
Monitor windows in picture format rather than text.
MONITORED ZONES
Use the Monitored setting when the NexSentry Star ACU is
Disabled, but the Tamper Transactions still works properly.
MONITOR POINTS OR INPUTS
General purpose switches that detect and provide information to the
system. These can be sensors that detect unauthorized movement, a
broken window, or other conditions change.
MSM (MULTIPLE SWITCH MONITORS)
A link between monitor points and the ACU that allows for up to
four monitor points.
Revision E, Part Number 66110229001
NexSentry Manager 3.0
*
GLO SS ARY
MSR (MAGNETIC STRIPE READERS)
A Reader used with ABA magnetic stripe cards.
NAME SCHEMES
The NexSentry Manager 3.0 allows you to name the floors in the
building, this is called a Name Scheme.
NETWORK NODES
One of the software-addressable components on the NexSentry
Manager 3.0 system, such as a MIRO, DKR, VIP-2 Keypad, or
ACU.
NORMAL SECURITY
Allows the elevator to travel to one floor per present Cardholder
before the elevator returns to the default floor.
ODBC (OPEN DATABASE CONNECTIVITY)
An industry-standard Database Management system designed by
Microsoft. In Windows NT, the NexSentry Manager 3.0
automatically configures this setting in the Control Panel during
installation. See also Database Management System (DBMS).
OPEN BUILDING MODES
Set the NexSentry ACUs to Open during normal building hours
when the most amount of Cardholders occupy the building.
OUTPUT DEVICES
Output devices are Hardware items such as locks, lights, and alarms.
When Output devices are triggered, the ACU sends a Transaction
Log to the System Monitor window.
*
NexSentry Manager 3.0
Revision E, Part Number 66110229001
.....
GLOSSARY
PIN (PERSONAL IDENTIFICATION NUMBER)
A unique four to eight digit number a Cardholder enters into a
Keypad Reader.
POLLERS
A Poller is a Hardware device that controls communications with the
ACUs. There is only one Poller for each communications port. For
example, Poller1=COM1 or Poller2=COM2.
PRIORITY CALL
The elevator responds first to certain Cardholders with special
permissions.
PRIVILEGED PERMISSIONS
Regarding Cardholder access, a privileged Cardholder can access a
building, or Zone, when the building is in Closed or Armed mode.
READERS
A Cardholder passes their card in front of a Reader to gain access
through the Door. Readers are Hardware devices that install at the
Door and connects to the ACU.
RECORD MENU
The Record menu is the most commonly used menu when working
with database items.
REPORTS
The NexSentry Manager 3.0 has predefined Report formats—HTML
and Crystal—depending on the active window or dialog box.
Revision E, Part Number 66110229001
NexSentry Manager 3.0
*
GLO SS ARY
REX (REQUEST-TO-EXIT)
A special monitor, usually mounted next to a Door, such as an
electric eye or a pressure pad that allows Cardholders to unlock a
Door when exiting a secured Door.
ROS (RELAY OUTPUTS)
Relay Outputs respond to Input devices by, for example, sounding an
Alarm.
SECURITY LEVELS
A Security Level defines a System User’s permissions.
SEEP (SECURITY ELECTRONICS EXTENDED PROTOCOL)
A proprietary communications protocol designed by WSE,
commonly called SEEP.
SERVER PC
A PC that controls the Poller operation and feeds data to and from
the ACUs. The Server PC contains the database.
SHUNT AND SHUNTED ZONES
A command issued to ignore a device or to stop Transactions from
being sent. The NexSentry Star ACU is set for Shunted when it does
not send Transaction Logs to the System Monitor window.See
also unshunt.
SITE CODES
A unique identification number assigned to a site. Use Site Codes
with ABA/Magstripe cards.
*
NexSentry Manager 3.0
Revision E, Part Number 66110229001
.....
GLOSSARY
S-NET (SECURITY NETWORK)
A data network.
SOFT ANTI-PASSBACK
Allows access to a Cardholder, but the ACU sends a Transaction Log
to the System Monitor window stating that a card was used
twice on the same Reader in the same direction.
SOUNDS
You can create and import Sounds into the NexSentry Manager 3.0
system for use with Alarms.
SYSTEM ADMINISTRATOR
The System Administrator is the default System User that has all
security and database permissions.
SYSTEM USERS
A person with a log-in password who is authorized to use the
NexSentry Manager 3.0 program.
TIME CODES
Time Codes consist of a Start time and a Stop time as well as days of
the week, including Holidays. Use Time Codes to create Time
Groups.
TIME GROUPS
Use the Time Groups when you configure features such as Actions,
Access Codes, and Elevators. Time Groups can consist of one to four
different Time Codes.
Revision E, Part Number 66110229001
NexSentry Manager 3.0
*
GLO SS ARY
TIME ZONES
You can incorporate the NexSentry Manager 3.0 into a worldwide
system. The Time Zone feature allows you to configure a Time Zone
for the ACUs.
TRACE
Use the Trace feature to have a Transaction Log sent to the System
Monitor window every time a Cardholder accesses a Door.
TRANSACTION LOGS
The Transaction Log is a record of all Transactions that take place in
the controlled areas. Transactions are defined by events, such as
Access Granted, or Server Stopped.
USER DEFINED FIELDS
The User Defined Fields allow you to configure how certain text
boxes and fields appear on the Cardholder dialog box.
UNSHUNT
Unshunt a device to restore communications between the NexSentry
Manager 3.0, the ACU, and the particular device that was shunted.
See also shunt.
VIP READER
A type of Keypad Reader. See also Keypad Reader.
ZONE
For the Gold Hardware, Zones replace the Building Modes. The two
types of Zones include, ACU Zones, and Logical Zones.
*
NexSentry Manager 3.0
Revision E, Part Number 66110229001
Index
.....
...................................
Terms in italics represent definitions, terms in bold represent illustrations.
A
audit trail
ABA card G-1
access codes 6-2 through 6-4
access codes 6-1
access control units See ACUs
acknowledge alarm G-2
action groups 4-13 through 4-14
action groups 4-2, 5-2
actions 4-7 through 4-12
actions 4-2
ACUs 5-7 through 5-14
archiving 3-12
converting 2.1 archives 3-8
deleting 3-14
viewing 3-10
audit trail 2-2, 3-2
addressing 5-7
checking the connection 2-3
user ranks 3-2
users 3-6
users 3-2
zones 5-2
ACUs 2-2, 5-2
additional look-up fields 3-22, G-2
Additional Look-Up Fields dialog box 3-22
additional text fields 3-21, G-2
Additional Text Fields dialog box 3-21
alarms
responses 3-18 through 3-19
silencing 3-19
viewing 3-19
alarms G-2
anti-passback
hard 5-3
soft 5-4
archive transaction logs G-3
archiving
audit trail 3-12, 3-14
sample archive report 3-13
transaction logs 3-12, 3-14
armed zones 4-2
Revision E, Part Number 66110229001
auto-forgive 5-2
B
back up the database 2-10
baud rate, ACU default 5-8
building modes
armed 4-2
disarmed 4-2
closed 4-2
disabled 4-2
limited 4-2
monitored 4-2
open 4-3
shunted 4-3
building modes G-3
C
cardholders 6-4 through 6-8
cardholders 2-2, 6-1
client PCs 2-2
closed building modes 4-2
closed reader mode 5-2
codes
access 6-2 through 6-4
access 6-1
facility 3-2, 5-2, 6-1
site 3-2, 5-4
compact the database 3-14
configuring
ACU Host Port 2-7
NexSentry Manager 3.0
I-1
INDEX
Windows NT 2-18 through 2-19
context-sensitive Help, online 1-9
converting 2.1 archives for 3.0 3-8
create a database 2-23
Crystal reports 1-4
custom HTML reports 1-4
D
database
backing up 2-10
compacting 3-14
creating 2-23
repairing 3-14
restoring 2-23
sample 2-21
upgrading 2-22
Database Explorer window 1-2
Database Explorer window 1-5
Database Explorer window 1-1
database management system See DBMS G-4
DBMS G-4
deleting
audit trail 3-14
transaction logs 3-14
desktop shortcuts 2-20
devices
input 5-32 through 5-35
input 5-3
output 5-36 through 5-39
output 5-3
E
editing transaction types 3-15
elevator security
high 5-3
normal 5-3
priority call 5-4
elevators 5-25 through 5-29
floor groups 5-30
name schemes 5-24
error messages 9-5
error messages 9-5
F
facility codes 3-25
facility codes 3-2, 5-2, 6-1
floor groups 5-2, 6-2
floor groups, elevator 5-30 through 5-31
H
hard anti-passback 5-3
hardware, checking the installed 2-3 through 2-8
Help topics, online 1-8
high security 5-3
holidays 4-6
holidays 4-2
hosts 3-2
HyperTerminal program 5-7
I
dialog box Help windows, online 1-9
dial-up feature 8-1
digital
icons 4-2
icons, importing 4-15
importing
cards G-4
readers G-4
digital readers 5-41
icons 4-15
sounds 4-20
input devices 5-32 through 5-35
disabled zones 4-2
disarmed zones 4-2
door switches G-5
doors 5-15 through 5-23
doors 5-2, 6-1
duress codes G-5
input devices 5-3
installing the
I-2
NexSentry Manager 3.0
remote access service on the host PC B-4
remote access service on the remote PC B-8
software 2-11 through 2-15
instructions 5-46
instructions 5-3
Revision E, Part Number 66110229001
K
keypad readers 5-39
keypad readers G-6
L
LAN G-6
latched contact G-7
limited building modes 4-2
Local Area Network See LAN
logical zones 5-3
loopback test 2-6
M
magnetic stripe reader See MSR G-8
map with hardware icons 4-16
maps 4-16 through 4-19
maps 4-2
menu bar 1-6
menu shortcuts 2-20
monitored zones 4-2
MSM
MSR readers 5-42
multiple switch monitor See MSM
N
name schemes 5-3
name schemes, elevator 5-24
network nodes G-8
normal reader mode 5-3
normal security 5-3
O
ODBC G-8
Online Help 1-8 through 1-9
open building modes 4-3
open database connectivity See ODBC G-8
open reader mode 5-3
output devices 5-36 through 5-39
output devices 5-3
P
personal identification numbers See PIN G-9
Revision E, Part Number 66110229001
.....
INDEX
PIN G-9
pollers 5-5 through 5-7
pollers 2-2, 5-3
priority call 5-4
privilege permissions 6-2
R
reader configurations 5-39 through 5-45
reader modes
closed 5-2
normal 5-3
open 5-3
station 5-4
readers
digital 5-41
digital G-4
keypad 5-39
keypad G-6
MSR 5-42
MSR G-8
VIP G-12
Wiegand 5-44
readers 2-2
Record menu 1-3
Record menu 1-1
relay outputs See ROs
remote access service
installing on the host PC B-4
installing on the remote PC B-8
removing B-15
rules B-2
removing
NexMgrService 2-24 through 2-25
NexSentry Manager 3.0 2-24 through 2-25
removing remote access service B-15
repair the database 3-14
reports
Crystal 1-4
custom HTML 1-4
sample archive 3-13
reports G-9
requirements, system 1-10
restore a database 2-23
REX 5-4
NexSentry Manager 3.0
I-3
INDEX
ROs G-10
S
sample databases 2-21
security electronics extended protocol See SEEP G10
security levels 3-3
security levels 3-2
security network See S-Net
SEEP G-10
server PC 2-2
shortcuts
desktop 2-20
menu 2-20
shunted zones 4-3
silencing alarms 3-19
site codes 3-25
site codes 3-2, 5-4
S-Net
soft anti-passback 5-4
software
installing 2-11 through 2-15
uninstalling 2-24 through 2-25
sounds 4-3
sounds, importing 4-20
station reader mode 5-4
status bar 1-6
switches, door G-5
system administrator 2-2
system defaults 4-22 through 4-23
System Monitor window 3-10
system requirements 1-10
System Status Icons 7-3
System Status window 7-1 through 7-3
system users 3-4
system users 3-2
T
TCP/IP network 2-8 through 2-9
time codes 4-4
time codes 4-3
time groups 4-5
I-4
NexSentry Manager 3.0
time groups 4-3, 5-4, 6-2
time zones 4-21 through 4-22
time zones 4-3
toolbar 1-5
trace 6-6
trace 6-2
transaction logs
archiving 3-12
converting 2.1 archives 3-8
deleting 3-14
viewing 3-10
transaction logs 2-2, 3-2
transaction types, editing 3-15
U
uninstalling
NexMgrService 2-24 through 2-25
remote access service B-15
unshunt G-12
upgrade the database 2-22
user defined fields 3-20 through 3-24
user defined fields 3-2
V
viewing
alarms 3-19
audit trail 3-10
audit trail archives 3-14
transaction log archives 3-14
transaction logs 3-10
VIP readers G-12
visitor 6-6
visitor 6-2
W
Wiegand readers 5-44
windows
Database Explorer 1-2
System Monitor 3-10
System Status 7-1 through 7-3
Windows NT, configuring 2-18 through 2-19
Revision E, Part Number 66110229001
.....
INDEX
Z
zones 5-47 through 5-49
armed 4-2
ACU 5-2
disabled 4-2
disarmed 4-2
logical 5-3
monitored 4-2
shunted 4-3
zones G-12
Revision E, Part Number 66110229001
NexSentry Manager 3.0
I-5
INDEX
I-6
NexSentry Manager 3.0
Revision E, Part Number 66110229001
North America
47102 Mission Falls Court
Fremont, CA 94539
510 360-7800
510 360-7820 Fax
http://www.wse.com