1
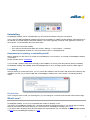
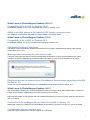
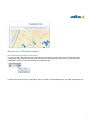
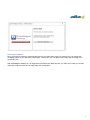
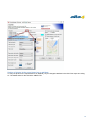
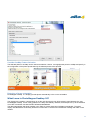
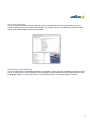
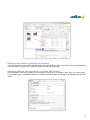
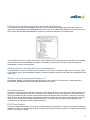
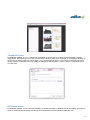
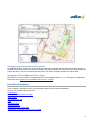
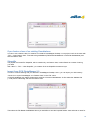
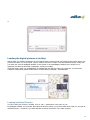
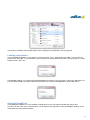
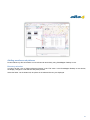
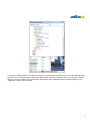
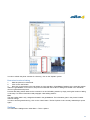
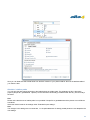
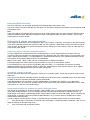
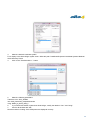
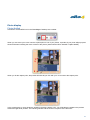
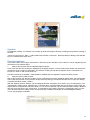
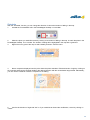
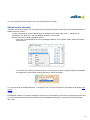
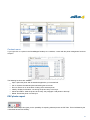
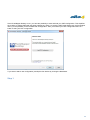
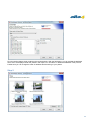
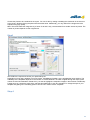
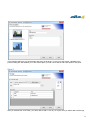
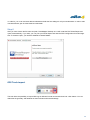
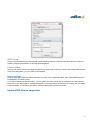
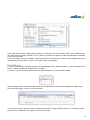
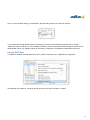
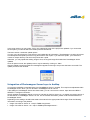
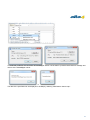
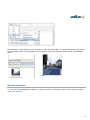
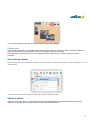
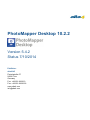
PhotoMapper Desktop 10.2.2
Version 5.4.2
Status 7/10/2014
Publisher:
alta4 AG
Fleischstraße 57
54290 Trier
Germany
Fon: +49.651.96626.0
Fax: +49.651.96626.26
www.alta4.com
[email protected]
Contents
Welcome .............................................................................................................................. 3
Introduction ......................................................................................................................... 3
Installation and Licensing ...................................................................................................... 5
System Requirements ........................................................................................................ 5
Installation ....................................................................................................................... 5
Loading in ArcMap ............................................................................................................. 5
Uninstalling ....................................................................................................................... 6
Requirements for updating, or uninstalling ArcGIS ........................................................... 6
Licensing .......................................................................................................................... 6
What's new? ......................................................................................................................... 6
What's new in PhotoMapper Desktop 10.2.1? ...................................................................... 7
What's new in PhotoMapper Desktop 10.2? ......................................................................... 7
What's new in PhotoMapper Desktop 10.1? ......................................................................... 7
What's new in PhotoMapper Desktop 10? .......................................................................... 11
Function description ............................................................................................................ 16
Geodatabases ................................................................................................................. 17
Loading the digital pictures in ArcMap .............................................................................. 19
Photo display .................................................................................................................. 27
Add photos to the map .................................................................................................... 30
View ............................................................................................................................... 30
PDF photo-report ............................................................................................................. 31
GPS Track import ............................................................................................................. 36
Update EXIF-Data in image data ...................................................................................... 37
Integration of Photomapper Server layer in ArcMap ........................................................... 40
Service functions ................................................................................................................. 42
Use ArcGIS functionality with PhotoMapper Desktop 10.2 ...................................................... 43
Edit photos ...................................................................................................................... 43
Start editing session ........................................................................................................ 44
Attribute tables ............................................................................................................... 44
Layout view .................................................................................................................... 45
Print ............................................................................................................................... 45
Versions ............................................................................................................................. 45
2
Welcome
PhotoMapper Desktop 10.2.2
User Manual
alta4 AG
Fleischstraße 57
54290 Trier
Deutschland
Fon: +49.651.96626-0
Fax: +49.651.96626-26
http://www.alta4.com
[email protected]
Date: 10/07/2014 v.5.4.2
Copyright © 2014 alta4 AG
All rights reserved.
We have compiled the following texts and illustrations with the greatest care. Nevertheless, mistakes can never be
completely ruled out. alta4 can assume neither juristic responsibility nor any kind of liability for faulty information and
its consequences.
We are grateful for suggestions for improvement and indications of mistakes.
Esri, Ricoh and ADOBE are registered trademarks. All other hardware and software designations as well as company
names used in this manual are also registered trademarks of the respective owners and should be considered as such.
In the product descriptions we use generally the producers' spelling.
Introduction
3
How does PhotoMapper Desktop 10.2.2 help me with my work?
Images say more than words. But how can I organize picture libraries with thousands of digital photos?
The solution is linking images with the position where they were taken using the GPS-capable digital camera G700SE
and Caplio 500 SE from Ricoh, with integrated or extern GPS and the software PhotoMapper Desktop 10.2.2.
In many fields of application of object documentation and management, geo referencing of takings is absolutely
necessary. Up to now, this had to be carried out in a time-consuming post-processing, which now becomes
superfluous. Already when the picture is taken, the site coordinates are determined with GPS and saved in the
picture's header.
PhotoMapper Desktop 10.2.2 enables you to make use of this information and embed it in the geographic information
system ArcGIS from Esri. The GIS-user can simply access the photos and manage them without any major effort. The
Thumbnail Viewer facilitates finding photos with preview images, makes it possible to zoom in on a selected photo and
marks pictures without position data.
Older data inventories can be referenced retroactively with PhotoMapper Desktop 10.2.2.
The possible applications are manifold, reaching from disaster control – where staff members can document the
situation exactly on the spot with marks of time and location, making it thus possible for the control center to literally get
a picture of the situation – to classical documentation functions in environmental protection or object documentation,
e.g. in real estate business, tourism industry or for police and Health and Safety.
PhotoMapper Desktop 10.2.2 is an extension for Esri's ArcGIS for Desktop 10.2.2 and cannot be used as a stand
alone module.
Operations layout
First switch on the GPS device and your camera. For the initial startup, please observe the short instruction in the
appendix.
Take photos with the G700SE / Caplio 500SE from Ricoh. With the pluggable GPS or an extern Bluetooth GPS, the
exact time of taking and the geographic coordinates are saved automatically.
First load the digital images from the camera onto your PC and save the data on the hard disk. You can link the
camera to your PC with the provided USB cable or use the W-LAN functionality of the camera.
4
With PhotoMapper Desktop 10.2.2 you can access all digital pictures and work with them in the geographic
information system ArcGIS for Desktop 9.2.
In order to do this, a reference is written into a File-Based Geodatabase, Personal Geodatabase or in a file in the
Shapefile format. This reference can either be relative or absolute.
From the coordinates of the location of the taking, a point layer is created. The pictures are linked with these taking
points.
Besides, an annotation group can be created with the pictures, whose characteristics can be defined by the user.
Installation and Licensing
In this chapter you find all informations, which are necessary for the installation or the licensing.
The topics in special are:
System Requirements
Installation
Loading in ArcMap
Uninstalling
Licensing
System Requirements
Operating
system
Windows 2000, NT, XP, Vista, 7, 8
GIS Software
Esri ArcGIS for Desktop 10.2 / 10.2.1 / 10.2.2 (Basic,
Standard, Advanced).
The extension does not work with prior versions of ArcGIS
Free disc space about 30 MB for PhotoMapper Desktop 10.2.2
Installation
Please make sure you have administrator rights which are necessary for the installation.
1. Start the MSI file with a double click.
2. Read the license agreement and accept it.
3. Select a folder for the program.
Follow up the further instructions of the setup. If any problems have occurred, please contact the technical support of
alta4 AG.
When starting the PhotoMapper Desktop 10.2.2, you can load your licensing file. Read the next chapter for further
information.
Loading in ArcMap
1.
2.
3.
Start the software ArcMap.
Select the option “Extensions“ in the "Tools" menu.
Activate the checkbox for PhotoMapper Desktop 10.2.2.
3.1. If the PhotoMapper Desktop 10.2.2 toolbar does not appear automatically, you can display it manually. In order
to do this, select “Toolbars” in the “View” menu and activate "PhotoMapper Desktop 10.2.2 Toolbar”.
5
Uninstalling
PhotoMapper Desktop can be uninstalled like any other Windows software using the control panel.
In any case uninstall PhotoMapper Desktop before before uninstalling or updating ArcGIS Desktop. Otherwise there is
the risk that an uninstall using the Windows software is not working properly and parts of the application remains on
the computer. To uninstall follow the instructions below:
1.
2.
3.
First of all, end ArcGIS Desktop.
Then open the Windows Start Menu and choose “Settings” > “Control Panel” > “Software”.
Select PhotoMapper Desktop 10.2.2 from the list and click on “Change/Remove”.
Requirements for updating, or uninstalling ArcGIS
Before updating to a new version of ArcGIS and uninstalling the current version, an uninstall of PhotoMapper Desktop
is necessary.
Please read the section "Uninstalling".
If you uninstall / update ArcGIS (does not apply to the installation of service packs and patches) before uninstalling
PhotoMapper Desktop and installing will be acknowledged with an error message, please contact the alta4 support.
Licensing
After purchasing a commercial license, you can convert the software to the full version with all functions without a new
installation. As soon as you start ArcMap with a PhotoMapper Desktop 10.2.2 demo version, the following window
opens:
Registration
Click “change license” to load your licensing file (*.lic) and change to a commercial license with full functional range.
What's new?
PhotoMapper Desktop 10.2.2 is now compatible with ArcGIS for Desktop 10.2.2.
The version of PhotoMapper Desktop 10.2.1 brought new features and improvements. If you want to learn something
about the new features and improvements you can find them for PhotoMapper Desktop 10.2.1 here.
If you want to learn something about the new features and improvements you can find them for PhotoMapper Desktop
10 here and for PhotoMapper Desktop 10.1 here.
6
What's new in PhotoMapper Desktop 10.2.1?
Compatibility with ArcGIS for Desktop 10.2.1
PhotoMapper Desktop 10.2.1 is now compatible with ArcGIS for Desktop 10.2.1.
Ability to sort the photos in the report in PDF format via memo value
It is possible to sort the photos within the PDF reports based on the memo values.
What's new in PhotoMapper Desktop 10.2?
Compatibility with ArcGIS for Desktop 10.2
PhotoMapper Desktop 10.2 is now compatible with ArcGIS for Desktop 10.2.
Alphabetical sorting of directories
The feature to add unreferenced photos the directories are now sorted in alphabetical ascending order if the file
system allows such a sort.
Message when exceeding the path name length
If the limit of the path name length is reached the therefore the thumbnail could not be generated the user gets a
message. The photo is still added to the attribute table of the photo layer but won't be exported to a pdf report.
Directional arrows for features from PhotoMapper Server Import exporting to ArcGIS
for Server 10.1
Arrows can now be displayed for features from PhotoMapper Server under ArcGIS for Server 10.1.
What's new in PhotoMapper Desktop 10.1?
With Photomapper Desktop 10.1 the tool is adapted to newest technologies, which were implemented in ArcGis 10.1 .
Furthermore there were implemented some improvements and new functions.
Especially the creation of PDF-Reports was over-worked and improved. You have now more options to style the PDF
after your wishes.
Connection to PhotoMapper Server based on ArcGIS for Server 10.1
Starting with version 5.2.0 features from PhotoMapper Server based on ArcGIS for Server 10.1 can be accessed.
Customizable title for overview map
In the PDF report, the title for the overview map can be customized.
7
What's new in PDF photo-reports?
Save and load your PDF-Configuration
You can now save your preferences you have done for the creation of PDF photo-reports. To load this saved
configuration you just start the the PDF photo-report tool. The first dialog box offers you one button to load the
configuration. There you just choose the saved configuration file.
To save your PDF photo-report configuration, there is a button in the last dialog box of your PDF configuration tool.
8
New layout options
Now you have more options to customize the layout of your PDF photo-report. For example you can change the
formatting options of your title and the description. Furthermore you can determine the color and the styling of the
surrounding box.
With PhotoMapper Desktop you can integrate an overview and a detail map into your PDF report. Now you can also
determine easily the scales of both maps within the configuration.
9
Sorting of photos in the report based on an attribute
To sort your photos in the report based on an attribute you just change the attribute in the field "Sort report according
to". The default value for this field is the OBJECT ID.
10
Consider ArcMap Feature Selection
The selected photos in ArcMap can be used as a selection criterion. Just highlight the points in ArcMap and specify in
the configuration of the photo-reports that only the selected photos to be exported.
Detection of image orientation
PhotoMapper Desktop 10.1 displays portrait photos automatically in the correct orientation.
What's new in PhotoMapper Desktop 10?
The change to the modern .net-technology is not the only thing that is new. With revised control elements, the new
PhotoMapper Desktop 10 has clearly gained more clarity and usability. Besides, the developers tie up to the standard
of ArcGIS 9.2 with the new data format File-Based Geodatabase.
The data management and photo handling in the Table of Content have been facilitated considerably. The photo
display with MouseOver functionality and the tool control with a context menu facilitate the handling and make it more
intuitive.
11
New user interface
The entire graphical interface has been reworked and the control elements have been simplified and reduced in
number. The tool bar now only contains three elements. The program is largely controlled through windows context
menus, which makes handling very simple and intuitive.
Add photos by Drag&Drop
The image management in PhotoMapper Desktop 10 is automatic. Photos can simply be added to ArcMap using drag
& drop. In order to do this, select the photos in any file explorer and then drag them into the Thumbnail Viewer of the
PhotoMapper Desktop 10. By erasing a picture in the Thumbnail Viewer, the complete dataset is removed.
12
Display of the photos by mouseover function
The new MouseOver function makes working with the map even faster and more comfortable. When moving the mouse
over the location of a picture in the map, the images are displayed dynamically.
Adopting attribute data selectively out of the EXIF Header
The EXIF header of a picture contains much information, not all of which is needed by every user or for every project.
For the sake of clarity, PhotoMapper Desktop 10 makes it possible to select the exif tags to be adopted during the data
import.
13
File-based Geodatabase instead of personal Geodatabase
The storage format used by PhotoMapper Desktop 10 is the File-Based Geodatabase introduced with ArcGIS 9.2.
Unlike the Access-based Personal Geodatabase used up to now, the File-Based Geodatabase is set in a file structure,
which means, the File-Based Geodatabase is a directory in which the data layers are saved as files.
The new data format offers a higher performance, does not depend on the operating system and allows a much bigger
file size than the Personal Geodatabase. Besides, it is possible to compress and encode the files. The Personal
Geodatabase continues to be supported.
Adding photos to existing file-based Geodatabases
The EXIF header of a picture contains much information, not all of which is needed by every user or for every project.
For the sake of clarity, the PhotoMapper Desktop 10 makes it possible to select the data fields to be adopted during the
data import.
What's new in Photomapper Desktop 10?
PhotoMapper Desktop 10 has been structurally improved in many respects. This has led to a considerable gain in
performance. Remarkable features have joined the well-known functions.
Direction indicator
Through the compass module of the Ricoh G700SE / Caplio 500 SE, there are now 2 directional values included in the
EXIF area. Just like before, the direction of movement is recorded and stored in the image file. A new feature is the
direction ascertained by the compass. This directional value indicated the exaction direction in which the picture was
taken. Through the expanded settings, PhotoMapper Desktop 10 enables you to use the compass direction as well as
the direction of moving for the images' display of direction. This is especially important when photographing with
cameras which do not dispose of the compass module yet.
PDF Photo-Report
Through its Wizard functionality, his tool offers a comfortable and fast possibility of exporting your photos including the
attributes you want to in an appealing layout as a PDF file. Through the universal character of the PDF format, the data
transfer is no longer a problem.
14
Thumbnail Cache
PhotoMapper Desktop 10 v. 4.1.1 introduced a thumbnail cache function for a faster access to already compiled
image layers. During the import process a cache will be built which will then be accessed by PhotoMapper Desktop 10
as soon as you want to load your images again. You yourself define where the cache will be created and how much
storage capacity is allocated. You may modify the settings by selecting Menu > Tools > Options > Thumbnail Cache
from the menu.
GPS track import
PhotoMapper Desktop 10 now offers the possibility of importing tracklogs in different formats and display them as line
features. Additional import settings concerning the arrangement of the line feature facilitate later use.
15
Saving location information in the photos
PhotoMapper Desktop 10 allows you to locate not georeferenced photos later and write back the position inormation in
the EXIF section of the photos. This location information will remain independent from the GIS layer. When sharing the
photos with others, now you just need to pass the photos. The position is already included in the photo itself.
Integration of PhotoMapper Server Layer
With version 5.0.0 the possibility of integrating photos from PhotoMapper Server (v. 1.1.7 and higher) is implemented.
Please also read "Integration of PhotoMapper Server layer in ArcMap"
Function description
In this chapter the important functions of Photomapper Desktop are described and explained.
Here you can find the important functions:
Geodatabases
Loading the digital pictures in ArcMap
Photo display
Add photos to the map
View
PDF photo-report
GPS Track import
Update EXIF-Data in image data
Integration of Photomapper Server layer in ArcMap
16
Geodatabases
File-based Geodatabase
With ArcGIS 9.2, Esri has introduced a new Geodatabase type: the File-Based Geodatabase.
Unlike the Access-based Personal Geodatabase used up to now, the File-Based Geodatabase is set in a file structure,
which means, the File-Based Geodatabase is a directory in which the data layers are saved as files.
The advantages over the Personal Geodatabase are the higher performance, the independence of an operating
system, the possibility to compress and encrypt the contents and the bigger maximum file size.
For the future, Esri recommends using the File-Based Geodatabase rather than the Personal Geodatabase.
Personal Geodatabase
The previous version of PhotoMapper Desktop 10 used the Personal Geodatabase as storage format. This Accessbased geodatabase continues to be supported by PhotoMapper Desktop 10, 10.1 and 10.2. If you would like to import
the Feature Classes of your old databases from the previous version, read paragraph "Import from GPS PhotoMapper
2.0".
Create a new file-based Geodatabase
In order to create a new File-Based Geodatabase in PhotoMapper Desktop 10.2, select “New File-Based
Geodatabase” from the “File” menu.
Enter the directory where the geodatabase is to be stored.
Then a feature class can directly be created in this database. Enter a name for it.
Add a new feature class to an existing file-based Geodatabase
If you would like to create an additional feature class within an existing File-Based Geodatabase, select “Add new
feature class to existing File-Based Geodatabase” in the “File” menu. First open the desired database, and then enter a
name for the feature class.
17
Open feature class of an existing Geodatabase
In order to use a feature class, for instance from another PhotoMapper Desktop 10.2.2 project, load it in the menu with
“File” > “Open feature class”. First select the geodatabase (File-Based Geodatabase or Personal Geodatabase) and
then the feature class.
Shapefile
The popular file format Esri Shapefile, which contains only one feature class, is also offered as a means of storing
your data.
With “Menu” > “File” > “New Shapefile” you create a file in the Shapefile format as a layer.
Import from GPS PhotoMapper 2.0
In order to continue working with your old files in PhotoMapper Desktop 10.2.2, you can import your old inventory.
Just click on “Import PhotoMapper v2.0 Feature Class” in the “File” menu.
In GPS PhotoMapper 2.0 feature classes were saved in a Personal Geodatabase. So first select the database file
(*.mdb) from the file dialog and then the feature class.
Then select the File-Based Geodatabase where you would like to save the imported feature class and enter a name for
18
it.
Loading the digital pictures in ArcMap
Start ArcMap. For a better visualization we recommend opening a background map containing the location where your
pictures were taken. For this purpose, open for instance “Search for maps” in the start window and open a map from
your hard disk. If the PhotoMapper Desktop 10.2.2 tool bar or the PhotoMapper Desktop 10.2.2 window is not
displayed, load them as described in paragraph ”Loading in ArcMap”.
Select the feature class of a geodatabase or a Shapefile with the selection menu in the menu bar. You must have
created or loaded these feature classes before, as described in paragraph “Geodatabases”.
Loading individual Pictures
In order to load your pictures in ArcMap, click on “File” > “Add photos” in the menu of your
PhotoMapper Desktop 10.2.2 window. Now select the directory where your pictures were saved. Now you can open an
individual picture – or several, if you have selected more than one with the “Ctrl” button pressed.
19
The photos are added to the selected feature class. A loading bar represents the current progress.
Loading entire folders
In the PhotoMapper Desktop 10.2.2 window, in the menu under “File” > “Add photos from folder” you can open all
pictures from one folder. If you would like to open the photos in the subdirectories as well, confirm the query “Include
subdirectories?” with “Yes”.
PhotoMapper Desktop 10.2.2 searches the selected folders for photos in the .jpg format. In the query that opens now
you can decide whether you want to add the photos which were found to the Shapefile or discard the search.
Add with Drag&Drop
In PhotoMapper Desktop 10.2.2 it is possible to add photos from any file explorer window with drag & drop.
In order to do this, mark one or several photos in a file explorer and drag them into the PhotoMapper Desktop 10.2.2
window with the mouse button pressed.
20
Adding unreferenced pictures
Photos without any GPS information can be referenced retroactively using PhotoMapper Desktop 10.2.2.
Directory selection
In order to do this, click on "Add unreferenced photos" in the "File" menu. In the PhotoMapper Desktop 10.2.2 window,
the display changes to a file selection with photo preview.
Select the folder. On the bottom left, the photos in the selected directory are displayed.
21
If you want to display whether or not the photos listed in the overview are georeferenced, click on the "Evaluate EXIF"
selection box (for directories which have already been loaded, click on the “Refresh” button. Now, when accessing a
directory, the EXIF headers of the photos will be searched for GPS coordinates and the result is displayed in the
"GPS-EXIF" column of the picture list.
22
In order to refresh the photo overview of a directory, click on the "Update" symbol.
Determine location of taking
1.
Mark the photo to be referenced.
2.
Click on the “Add” button.
3.
Now click on the location in the map where on photo was taken. PhotoMapper Desktop 10.2.2 saves the position
data in the geodatabase. From now on, the picture is linked with this location of taking and is listed in the Thumbnail
view as a georeferenced picture.
Pictures with faulty position data can be corrected in an ArcGIS editing session by simply moving the location of taking
on the map. For further information read paragraph “Start editing session”.
Hint
The new position data is only changed and saved in the geodatabase. The information given in the picture's header
does not change.
In order to end the georeferencing, click on the “Close” button. The list of photos in the currently selected layer opens
again.
Settings
You can find the settings menu under Menu > Tools > Options.
23
Here you can determine which data fields from the EXIF header of your photos shall be saved in the attribute table of
your feature class.
Absolute / relative paths
You can save the path names belonging to the loaded photos as relative path. The advantage of this is that entire
projects (Shape file / geodatabase + photos) can be relocated retroactively provided that the directory structure stays
the same.
Hint
Please notice that the use of relative paths is not possible if shape file or geodatabase and the photos are on different
hard disks.
Select the desired mode in the settings under "Extended import settings”.
Hint
The changes in the settings are not retroactive, i.e. the path statements of already pasted photos are not adapted to the
new settings.
24
Embedding EXIG information
The EXIF information can be added selectively to the attribute table of the feature class.
The parts of EXIF information selected here are taken from the photos' headers and transferred into the attribute table
of the feature class.
Hint
If the EXIF settings are changed before importing into an existing feature class, the newly selected categories will be
added to the attribute table. Deselected categories remain in the attribute table, the values, however, are no longer
transferred from the EXIF header.
Dislocation of photos and map projection
It may happen that the photos are not displayed in their correct position in the map. The reason for this lies frequently
in the used coordinate systems and projections. With the wrong settings, a dislocation of about 180 meters is typical.
In this chapter, we will explain the causes and describe which settings you have to select in order to make map and
photo fit each other exactly.
Projection, datum, ellipsoid, coordinate systems
In order to display the curved earth surface (“terrestrial globe”) in a map, map projections are used. There are
numerous projections with different characteristics and for different areas of the earth surface. The real shape of the
earth is hereby approached by a so-called ellipsoid (= mathematical description of the 3-dimensional earth) and the
exact position of the ellipsoid defined with the so-called datum.
Hint: In some cases, “datum” is also used as a collective term for ellipsoid and datum.
Coordinate systems are used to specify an exact position in a map or on the real earth surface.
For the illustration in a map, projected coordinate systems are used, i.e. a combination of projection (including
ellipsoid and datum) and a coordinate system. In Germany, Gauß-Krüger is often used for instance, which applies
DHDN (Deutsches Hauptdreiecksnetz; German Main Triangle Net).
Coordinate systems in ArcGis
All layers used in a data frame are displayed in exactly one coordinate system, namely the coordinate system of the
data frame.
If the layers have different coordinate systems, ArcMap will convert them into the coordinate system of the data frame.
ArcMap converts the projected coordinate systems automatically.
If the ellipsoid/datum of a layer differs from the ellipsoid/datum of the data frame, however, a so-called datum
transformation has to be carried out. ArcMap cannot decide autonomously which datum transformation is to be used.
This is where you, the user, have to take action.
Datum transformation for position correction of the gps photos
The GPS photos are taken by the Ricoh G700SE / Caplio 500SE in the coordinate system WGS 1984, which uses
WGS 1984 as ellipsoid/datum. If you use background map in the data frame with other coordinate systems, e.g.
Gauß-Krüger, there will be a spatial displacement of the locations of taking of about 180 meters. This is caused by the
Gauß-Krüger coordinate system using DHDN as ellipsoid/datum. So you have to select in ArcMap which datum
transformation should be used.
In order to display the GPS photos correctly in the Gauß-Krüger coordinate system as well, proceed as follows:
1.
Click with the right mouse button on the data frame in the table of contents and select "attributes". Here you can
make the settings for the entire data frame.
2.
Click on the index tab "Coordinate system".
25
3.
Select the desired coordinate system.
For a display in the Gauß-Krüger system zone 2 follow this path: Predefined/Projected Coordinate Systems/ National
Grids/ Germany Zone 2
4.
Click on the "Transformations…" button.
5.
Select the following parameters:
Transform from: GCS_WGS84
into: GCS_Deutsches_Hauptdreiecksnetz
using: DHDN_to_WGS_1984_2
6.
If you should use another system than Gauß-Krüger, modify the details in "into:" and "using".
7.
Confirm all windows with "OK".
Now the locations of taking of the GPS photos are displayed correctly.
26
Photo display
Photo-Hotlink
Activate the "Preview/Edit" tool in the PhotoMapper Desktop 10.2.2 toolbar.
When you now move your cursor over the capture point of one of your photos, a preview of your photo will pop up and
show its Filename including the memo content of the picture (works with the Ricoh G700SE / Caplio 500SE).
When you hit the capture point, the preview will show till you click with your cursor next to the capture point.
In the case that two or more photos are located in the same capture point, you will be able to navigate in the preview
window throught those pictures. The matching filename will be shown in first place of the file menu.
27
Symbols
PhotoMapper Desktop 10.2.2 allows you to assign symbols indicating the direction of taking to the positions of taking in
the map.
Just click in the menu on “Edit” > “Add symbols with indication of direction”. Now all positions of taking of the selected
layer are marked with a black arrow.
Direction indicator
In the EXIF header of the image, the direction in which the picture was taken can be saved. It can be registered by the
GPS device in two different ways:
1.
Using a GPS receiver with an integrated digital compass:
In this case, the direction of taking is registered by the digital compass, communicated to the camera and saved in the
moment the picture is taken in the header. The direction of taking is indicated in degrees. North corresponds to 0°,
East to 90°, South to 180° and West to 270°.
The GPS camera Ricoh G700SE / Caplio 500SE is available with an integrated compass and GPS receiver.
2.
Using an ordinary GPS receiver:
With a GPS receiver, the direction of taking can be construed from the last registered position data. The photographer
has to make sure that the moving direction shortly before the taking is the same as the direction of sight. The change
in position should be at least 3 meters.
With the "Display direction settings" you can adapt the direction information to be used to your recording device. The
"automatically" setting checks, where there is a compass value. As the Exif field does not accept any empty fields, we
assume that no compass was used if the value is "0". In the rare case that a picture has been taken exactly in Northern
direction, there may be an error at this place. To exclude that case, please choose the corresponding entry from the
menu. But the direction of taking can be corrected using the software functionality of the PhotoMapper Desktop
10.2.2, see paragraph "Orientate".
28
Orientate
With the “Orientate” function you can change the direction of view at the location of taking in the map.
1.
Activate the "Preview/Edit" tool in the PhotoMapper Desktop 10.2.2 toolbar.
2.
Select the photo you would like to edit by clicking on its location of taking in the map. Or mark the photo in the
PhotoMapper Desktop 10.2.1 window. The location of taking will be highlighted in the map with a green dot.
3.
Right-click on any part of the map or select "Modify direction" from the menu.
4.
Now a compass is displayed over the point where the photo was taken. Edit the direction of sight by clicking on
the compass and drag the compass needle to the desired direction with the mouse button kept pressed. Alternatively,
you can use the control bar under the compass for the setting.
5.
Confirm the direction of sight with "OK" or if you would like to discard the modification, cancel by clicking on
"Close".
29
You can repeat this process anytime, thus correcting the direction of sight.
Add photos to the map
Just like in the previous version, you can add photos to the map as annotation. Either all or just individual pictures are
added to the map content.
· In order to add all photos of the selected layer as annotation to the map, select "Edit" > "Add photos as
annotations" from the menu in the PhotoMapper Desktop 10.2.2 window.
· There are two ways of adding individual pictures:
o Right-click on the desired photo in the PhotoMapper Desktop 10.2.2 window. Select "Add as annotation"
from the menu.
o
The second way is marking the photo directly in the map at the location of taking using the "Preview/Edit"
tool. Right-click on the location of taking and select "Add as annotation".
You can also move the added photos later, or change the size. You find information on this subject in paragraph "Edit
photos".
View
PhotoMapper Desktop 10.2.2 offers two different views for the management of your photos: a thumbnail and a list view.
You can choose between these two possibilities in the PhotoMapper Desktop 10.2.2 window by selecting the menu
item "View".
30
Context menu
If you right-click on a photo in the PhotoMapper Desktop 10.2.2 window, a menu with the photo management functions
will open.
The following functions are available:
· Open: Opens the photo with the standard application you have defined.
· Pan to: Centers the selected photo maintaining the zoom level.
· Zoom to: Zooms in on the location of taking of the selected photo.
· Identify: Displays information concerning the picture entry in the layer.
· Add as annotation: Adds the picture to the map, see paragraph "Add photos to the map".
· Delete: Erases the photo from the layer.
PDF photo-report
The PDF Photo Report tool gives you the possibility of exporting selected photos as PDF files. This is facilitated by the
comfortable Wizard functionality.
31
Since PhotoMapper Desktop 10.2.1 you have the possibility to save and load your PDF-Configuration. This simplifies
the creation of multiple PDFs with the same preferences. When you open the PDF Photo-Report tool, the first window
offers you the possibility to load a saved PDF-Configuration. After you finished your PDF Configuration there is a
button to save your PDF configuration
If you want to start a new configuration just skip the first window by clicking the Next button.
Step 1
32
First choose the feature class containing the required photos. With the field below, you can activate the attributes
which are to be displayed under the photos in the report. You can select or deselect all attributes in the process.
Furthermore you can change the order of attributes and the sorting of your photos.
Step 2
33
Choose the photos to be contained in the report. You can do this by setting or deleting the checkmark in the box next
to the picture. Double-clicking the photo will achieve the same. Additionally, you may define if the images are to be
exported using high quality.
NB!!! This will increase the image size by a factor of 20 and is only recommended for a smaller amount of photos. The
number of photos depends on their original size.
Step3
Give a title to the report and choose your preferred layout.
Depending on how many attributes you have chosen, PhotoMapper Desktop 10.2.2 will adapt the layout options. The
availability of the templates depends on the number of chosen attributes. To better navigate through the report, photo
names are used as bookmarks. Please tick if you want to highlight the respective images in the overview or detail map.
Furthermore you choose the scale of the overview and detail map, if they are activated. To change the style of your
template and getting more formatting options click the "Abc" button next to "Template:"
Step 4
34
In the following dialog box you will be able to title every single photo. In case you have chosen a template in the
previous dialog box, that enables you to add a description, you will now be able to add a description to the photo.
Step 5
After you selected the "next" button, you will be able to add a cover to your report. Now you will be able to add a logo,
35
or a title for your cover and even add text elements and edit the font settings for all your text elements. In order to add
new text elements, just click the blank box underneath.
Step 6
After you have chosen the file name and path, PhotoMapper Desktop 10.2.2 will create the PDF-Photo Report and
opens it automatically. If you wish, you can print your Photo-Report and save the PDF-Configuration from this stage.
Hint: To view the report, you need the Adobe® Acrobat® Reader.
GPS Track import
This tool offers the possibility to import GPS logs in different formats and transfer them into a line feature. You can
determine the geometry and attributes of this line feature with several settings.
36
GPS-Track
Choose a log file. NMEA 0186- and G700SE / Caplio 500SE log files are supported. After the import, the number of
positions, beginning and duration of the track will be displayed.
Feature-Class
Here you can specify where the created line features are to be saved. To do this, choose a line feature class from the
active view. Alternatively, you can create a new shapefile.
Import settings
Enter the name the created line feature shall have in ArcGIS. This is especially helpful, when several GPS logs are to
be displayed in one feature class.
If you want to section the new line feature, you can specify how many points can be combined to one line feature in
each case. If this value equals or exceeds the number of recorded positions, there will be accordingly just one feature.
Another possibility is to divide by time span in which the GPS points have been recorded.
Update EXIF-Data in image data
37
The tool permits to edit and update image's exif data. You may alter all of the information held in the exif data and then
save them within the imagery. Besides, you may add non-georeferenced photos and allocate appropriate coordinates
to the photo's exif data.
If you have images of a Ricoh G700SE / Caplio 500SE Camera the Ricoh memo content can be updated. Please note
that depending on the firmware version 5 or 10 memo values are supported.
Edit EXIF data
To edit exif data, add the respective photos to your PhotoMapper project. More information on how to load data can be
found in chapter “Loading the digital pictures in ArcMap”.
To modify your exif information, please start an ArcMap edit session by using the editor toolbar.
After the editing session has been started, please open the attribute table of the relevant shapefile or feature class
which holds the imagery. Now you may edit the table.
You may then modify or adjust the values. Please be aware not to change the table's structure. If you add any fields,
they will not be considered in the update process of the exif data.
38
Once you have finished making your alterations, stop the editing session and save the changes.
If you add photos lacking spatial reference and then geo-reference them afterwards (please refer to chapter
„Determine location of taking“ for more detailled information), these coordinates will automatically be written into the
attribute table. When you update the pictures' exif data, the respective coordinates are allocated to the picture.
Update EXIF Data
To update the modified exif data within the picture, please choose the menu „Update Exif in image files“.
The following menu allows to control the update process of the exif information in images.
39
In the upper section you may select, if all or only selected pictures of the project are updated. If you choose the
second option you need to select the relevant pictures beforehand.
The lower section controls the update options.
You may copy the pictures to a new directory and update the exif information. The advantage is, that the old picture
are still kept and the update process is only performed for the copies. If you select this option, you have then to
choose an output directory into which the pictures are copied.
Otherwise, you may update the existing images. Here, the original image files loaded into PhotoMapper will be
updated.
Once all options are set, the update process may be started by clicking on “Start“.
After the update process has finished a message box appears informing if the process has been successful. The
update process is then finished.
Integration of Photomapper Server layer in ArcMap
You have the possibility to integrate layers from PhotoMapper Server in ArcMap. This requires an adjustment within
PhotoMapper server, which you can be read in PhotoMapper server manual.
If the settings in PhotoMapper Server have been made, you can connect to the server. Open the menu MENU >
SERVER > Configure Connection.
Specify whether PhotoMapper Server is set up for use with ArcGIS for Server 10.1 or whether a previous version of
ArcGIS Server in PhotoMapper Server is in use. For the relevant information, please contact the administrator of
PhotoMapper Server.
Depending on the settings, the URLs that need to be entered in the appropriate field change. Enter the following
information according to the patterns:
· Usage of ArcGIS for Server 10.1: http://<FQDN>/arcgis/rest/...
· Usage of ArcGIS for Server <10.1: http://<FQDN>/photomapperserver/...
40
To avoid later problems, the connection to PhotoMapper Server can be tested. A positive result returns a message and
version of the PhotoMapper server.
or
The data of the specified user are displayed in ArcMap by selecting "Add feature class to map“.
41
Now select the corresponding layer from the drop box next to the menu button. If no images will appear in the window
below, the feature class must be updated. The point features contain all information that are stored in PhotoMapper
Server.
Service functions
You can reach the PhotoMapper Desktop 10.2.2 service functions by entering the service menu. Click the question
mark in the menu bar.
42
Report PhotoMapper Desktop 10.2.2 bugs
If you remark possible bugs in the software, please notify us. This way, we can correct the error faster and offer you a
bug free product. In order to do this, click on the point "Report bug" in the service menu. Your default email client
should be opened with the target [email protected]. Please give the best possible description. Some screenshots
within the email body will help us reproducing the behavior.
You will receive a confirmation email. After that we'll get in contact with you as soon as possible.
Info Menu
Change license
Click on the point “Registration” in the service menu in order to change your license type. Load your license file (*.lic)
by clicking on the button “Change license”. The license change takes immediate effect without a program restart.
Update check
PhotoMapper Desktop 10.2.2 checks for updates every time it is started. If there is any, it will offer to you downloading
and installing the patch.
Use ArcGIS functionality with PhotoMapper Desktop 10.2
For the perfect results with Photomapper Desktop you can use some functions of ArcGIS. Here you find the
explanations to use these ArcGIS functionalities.
Edit photos
Start editing session
Attribute tables
Layout view
Print
Edit photos
Move annotation photos
In order to position the pictures more exactly, select the "Select elements" tool from the ArcMap symbol bar and mark
the picture with it.
43
Then move the pictures to the desired location using the drag & drop operation.
Change size
You can change the size of the annotation photos later by right-clicking on the picture with the "Select elements" tool
and then selecting the option "Attributes". Here you can specify the size of the picture.
After selecting the picture the size can also be adjusted with the "Resize anchor" points in the corners of the
annotation.
Start editing session
Start an editing session in ArcMap, for instance to move the position of a location of taking or to make modifications in the
attribute table.
To that purpose, select "Start editing" from the Editor menu in the Editor toolbar.
Attribute tables
Just like in every other layer, you can also view and edit the attribute table for the photos loaded into the program.
Right-click on the layer in the content window and select "Open attribute table".
44
Here you can find e.g. your entries concerning the memo functions of the GPS camera, the exact position data, time
of taking, number of satellites and much more.
The direction of sight is contained in the field _imgdirection. 0 means the direction of sight is north, 90 represents
east. In order to make modifications, start an editing session in ArcMap. For instance, you can completely remove the
direction of sight.
Layout view
The annotation photos can also be seen with their labels in the layout view. This function is very convenient for creating
reports for your customers.
Print
If you would like to print photos, you have to add and display them first as an annotation group. Then you can print the
photos from the data view as well as from the layout view.
Versions
Commercial Version
The commercial version offers the full scope of operation.
In addition, we recommend using PhotoMapper Desktop 10.2.2 maintenance license. In this case, you are entitled to
all patches, updates and new product versions.
Demo version
Your demo version of PhotoMapper Desktop 10.2.2 is valid for 30 days. This time limit starts the day you have
downloaded PhotoMapper Desktop 10.2.2. During this period, your demo version is subject to the following limitations:
· With the demo version, can import 20 pictures per layer at maximum.
· Every 10th picture is replaced by the alta4 logo.
Campus version
The campus version offers the full scope of operation of a commercial PhotoMapper Desktop 10.2.2 license. The use
is limited to 12 months.
45