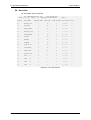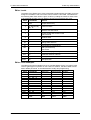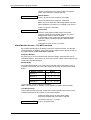
1
PAC 2100/PAC 1100
User Guide
Ref. 17112
Version 1.2
,QWHUQDWLRQDO/WG.
1 Park Gate Close, Bredbury,
Stockport, SK6 2SZ, England
Tel: +44 (0) 161 406 3400
Fax: +44 (0) 161 430 8658
Document History
Revision
Software
Details
1.0
1.5
SL - First Issue
1.1
Declaration of Conformity
1.2
Add KeyPAC reader information
17112 PAC 2100/PAC 1100 User Guide
Ver 1.2
Version 1.2
November 1995
Changes are periodically made to the product, these changes will be incorporated into
new editions of this manual. PAC INTERNATIONAL LTD shall not be liable for errors
contained herein or for any consequential damages connected with the use of this
material.
Copyright and Protective Notices
1. The copyright of this document and the associated drawings is the property of PAC
INTERNATIONAL LTD, and is issued on condition that it is not copied, reprinted or
reproduced, nor its contents disclosed, either wholly or in part, without the consent
in writing of, or in accordance with the conditions of a contract with PAC
INTERNATIONAL LTD.
2. The publication of information in this document does not imply freedom from patent
or other protective rights of PAC INTERNATIONAL LTD, or others.
3. Performance figures and data quoted in this document are typical, and must be
specifically confirmed by PAC INTERNATIONAL LTD before they become
applicable to any tender, order or contract.
Training and Technical Support
Training courses covering the installation and use of all PAC products are regularly
held at PAC INTERNATIONAL LTD, Stockport. For further information on course
availability, or to discuss your specific requirements, contact the Training Manager at
the address below.
It is strongly recommended that any persons installing or commissioning PAC
products attend a suitable training course beforehand.
Technical Support for all PAC products is available during normal office hours:
8:00am to 6:00pm Monday to Friday, excluding public holidays.
Tel: 0161 406 3400
Fax: 0161 430 8658
This service is provided primarily for the use of trained engineers. End users of PAC
products should first of all contact their installation or maintenance company before
contacting PAC.
PAC INTERNATIONAL LTD
1 Park Gate Close
Bredbury
Stockport
SK6 2SZ
England
Ver 1.2
PAC 2100/PAC 1100 User Guide 17112
Table of Contents
About this document ............................................................................................................. 1
Who should read this Guide?......................................................................................... 1
Installers......................................................................................................................... 2
System Overview.................................................................................................................... 3
How the System Works.................................................................................................. 3
Readers.......................................................................................................................... 3
Door Controllers ............................................................................................................. 4
Connecting Door Controllers.......................................................................................... 4
PAC Alarm Modules....................................................................................................... 4
Displays, Alarms and Printing............................................................................................... 5
Normal Operation........................................................................................................... 5
Alarms ............................................................................................................................ 5
Communication Errors ................................................................................................... 7
Other System Messages................................................................................................ 7
Using the Printer ............................................................................................................ 8
Using the Editor...................................................................................................................... 9
Entering the Editor ......................................................................................................... 9
The Command Prompt - CMD ..................................................................................... 10
Leaving the Editor ........................................................................................................ 10
Panel Keyboard............................................................................................................ 10
Key Administration............................................................................................................... 14
The Personnel Database ............................................................................................. 14
Adding Keys - The A command ................................................................................... 16
Deleting (Voiding) Keys - The V Command ................................................................. 17
Editing Keys - The E Command................................................................................... 18
PIN Codes - The N Command ..................................................................................... 19
Controlling Access............................................................................................................... 21
Access Code Overview ................................................................................................ 21
Organising Access Codes............................................................................................ 22
How to Create Access Codes ...................................................................................... 22
Access Levels - The AL Command ............................................................................. 22
Time Profiles ................................................................................................................ 23
Access Codes - The AC Command............................................................................. 24
Holidays - The HP Command and HR Command ....................................................... 25
Time Profiles......................................................................................................................... 27
How Time Profiles Work .............................................................................................. 27
Setting a Time Period - The PR Command ................................................................. 29
Creating a Time Profile - The T Command.................................................................. 30
System Administration ........................................................................................................ 31
Changing the Date and Time - The C Command ........................................................ 31
Manual Lock/Unlock - The L Command ...................................................................... 32
Printer Reports ..................................................................................................................... 33
Reports - P1...P9.......................................................................................................... 33
Header - The HE Command ........................................................................................ 40
Kill Transactions - The K Command ............................................................................ 41
Editor Key Administration ................................................................................................... 42
Editor Keys ................................................................................................................... 42
Alarm Acceptance........................................................................................................ 42
Master Key ................................................................................................................... 42
Editor Keys ................................................................................................................... 42
Assigning Editor Keys - The I Command ..................................................................... 44
17112 PAC 2100/PAC 1100 User Guide
Ver 1.2
Troubleshooting................................................................................................................... 46
Keys and Access.......................................................................................................... 46
Alarms .......................................................................................................................... 47
Installer Commands ............................................................................................................. 48
The DC Command ....................................................................................................... 48
The D Command.......................................................................................................... 50
Data Protection ............................................................................................................ 55
PAC Alarm Modules and Relay Outputs ............................................................................ 57
Overview ...................................................................................................................... 57
Alarm Module Programming ........................................................................................ 59
Relay Programming - The RE command..................................................................... 61
Appendix A: System Specification ..................................................................................... 64
Appendix B: Transactions................................................................................................... 65
Ver 1.2
PAC 2100/PAC 1100 User Guide 17112
17112 PAC 2100/PAC 1100 User Guide
Ver 1.2
© 1993 PAC International
About this document
About this document
This User Guide describes the use of the Front Panel Editor of the PAC 2100 and PAC
1100. This editor uses the keypad, display and reader on the Front Panel of the door
controller to administer keys, respond to alarms and configure the system. Up to 16
doors and 4000 keyholders can be administered using this system. An optional, highly
recommended, printer output may be used for both continuous printing of events and
production of various reports. Another option allows the monitoring of up to 128 extra
alarm inputs.
Both the PAC 2100 and PAC 1100 door controllers operate in exactly the same way,
the only difference being that the PAC 2100 controls 4 doors, the PAC 1100 controls 2
doors.
Note: There are two versions of the PAC 2100/PAC 1100 available:
1. One for use on systems using KeyPAC readers. The front panel keypad text is
blue on grey.
2. One for use on systems using PAC readers. Here the front panel keypad text is
black on grey.
Who should read this Guide?
This document provides both instructions for the End User to perform everyday
administration of the system, as well as details of system programming for the
Installer. The chapters are organised so that the reader need only refer to the sections
concerning their own requirements.
System Overview
All users of the system should read this simple introduction to the PAC 2100 system. It
gives a brief description of how the system works, the various components, the front
panel screen and keyboard.
System Administrators
People administering the access control system should read and understand the
following chapters. Installers or those commissioning the access control system will
also need to understand the subjects described.
Displays, Alarms and Printing
This chapter describes events which may occur in the day-to-day running of the
system. Screen displays, alarms and use of the printer are all covered. Use this
section to find out what a particular screen display or printer report means.
Key Administration
Describes adding, deleting (voiding) and editing of PAC keys. PIN codes for use with
PAC PIN readers are also described.
Controlling Access
Use this chapter to understand how to control access by keyholders. It describes how
organise and create Access Codes that determine who has access where, and when.
Time Profiles
Time Profiles are used in several parts of the system to control events, including when
certain keyholders have access - they form part of the Access Code. They are also
used to automatically open and close doors, control the use of a PAC PIN reader,
automatically engage and isolate additional alarm points and operate relay outputs.
This chapter also describes how to setup system holidays, to prevent access and other
automatic events occurring on special days.
Ver 1.2
1
PAC 2100/PAC 1100 User Guide 17112
About this document
© 1993 PAC International
System Administration
How to change the date and time, particularly for daylight saving clock changes.
How to manually lock and unlock doors.
Printer Reports
This chapter describes all the printer functions, how to obtain different reports such as
personnel list, previous events, system status etc.
Editor Key Administration
Describes how to use editor keys to control access to the Editor.
Troubleshooting
Some common problems the administrator may encounter, and how to solve them.
Installers
Those installing, commissioning or maintaining the system will need to fully understand
these chapters. Most of the information required for installing the door controllers is
contained in the PAC 2100 Installation Manual. However, this User Guide contains
details of the commands needed to configure the system.
Your attention is drawn particularly to the QuickStart chapter in the Installation Manual
which takes you step-by-step through the system configuration process.
Installer Commands
This includes procedures for setting up lock sharing, anti-passback and door
information such as lock release time, lock type, automatic opening etc.
PAC Alarm Modules and Relay Outputs
Covers Alarm Module programming plus programming Door Controller and Alarm
Module Relays.
17112 PAC 2100/PAC 1100 User Guide
2
Ver 1.2
© 1993 PAC International
System Overview
System Overview
How the System Works
Any PAC access control system, very simply, consists of three components; Readers,
Door Controllers and an Administration System.
The Readers will detect the unique code in a key and pass it directly to the Door
Controller. The Door Controller compares the code to the information stored in its
memory and, if the key is valid, will operate the lock and send a report to the
Administration System. The Administration system is the means by which the user
programs the system, who is allowed where and when etc., and also where events are
reported.
Lock Output >
Lock
Access Decision
< Key Code
Reader
Key Code
Key
Door Controller
< Transactions
Administration System
Updates >
Components of a PAC Access Control System
In the case of the PAC 2100 and PAC 1100, the administration system is built in to the
door controller and uses the keypad, display and reader on the front panel. As an
option a printer can be connected to the system that reports events as they happen,
and can also produce listings of personnel, system setup, past events etc.
Note: If the text on the front panel is blue on grey then the system uses KeyPAC
readers, if it is black on grey then it uses PAC readers.
Readers
A reader is a device, usually fitted close to the door, that detects the unique code in a
key and passes it to the door controller where the access decision is made. There are
several types of reader suitable for different purposes and environments. Below are
some of the special types of reading devices.
PAC Low Profile Reader
A reader suitable for interior or exterior use.
PAC Vandal Resistant Reader
A stainless steel reader particularly suitable for exterior use, where resistance to abuse
is important.
PAC Panel Mount Reader
A reader designed for mounting in a steel panel, such as a door entry system.
PAC PIN Reader
This device requires a PIN number to be entered, as well as a key to be presented, as
an extra level of security. The need to use a PIN as well as a key can be controlled
using a time profile.
PAC AVR (Automatic Vehicle Recognition)
A transmitter fitted to a vehicle which sends a unique code that is picked up by a
buried loop aerial.
Ver 1.2
3
PAC 2100/PAC 1100 User Guide 17112
System Overview
© 1993 PAC International
Request to Exit Switch
Sometimes a reader is used on both sides of a door, controlling both entry and exit
from an area. Normally, however, a Request to Exit switch or button is used to open a
door from the secure side. This switch, mounted close to the door, when pressed
sends a signal to the door controller to release the lock. Of course, anyone can press
the switch to open the door when leaving, and therefore no identity of the person can
be recorded.
Door Controllers
The Door Controller is the heart of the access control system, these are its main
functions:
•
•
•
•
•
•
•
Decides whether a person has access at a particular door and at a particular
time.
Provides power to operate the lock.
Monitors doors for unauthorised access or left open.
Automatically opens and closes doors at certain times.
Detects tamper conditions at the reader or its own case.
Monitors any PAC Alarm Modules that may be fitted for extra alarm inputs.
Operates relays either those fitted on the Door Controller itself, or on a PAC
Alarm Module.
The PAC 2100 may have 4 readers connected, the PAC 1100 may have 2 readers
connected. In all other respects both door controllers are identical.
Connecting Door Controllers
What makes these door controllers so flexible is the ability to link controllers together
to allow more than 4 doors to be administered. When programmed from the front
panel, as described in this document, up to 16 doors can be controlled and up to 4000
personnel administered.
In all cases one door controller (PAC 2100 or PAC 1100) is the Master controller, up to
3 further door controllers are Slaves. All administration and reporting occurs at the
Master controller. Apart from some initial setup functions, no administration activity
occurs at the slave controllers.
Master Door Controller
PAC 2100 (4-door) or PAC 1100 (2-door)
Up to 3 Slave Door Controllers,
PAC 2100 (4-door) or PAC 1100 (2-door)
Printer Cable,
Max length: 15m
Six-wire bus, max total length: 1000m
Max. distance between controllers: 500m
Serial Printer
PAC Alarm Modules
PAC Alarm Modules are optional devices that allow extra points (or zones) to be
monitored and report alarms if activated. Each Alarm Module has 8 points that can be
ena bled and disabled manually or automatically at certain times.
The PAC Alarm Modules also have 4 relay outputs that can be activated by alarm
inputs, system events such as door left open, or at certain times.
17112 PAC 2100/PAC 1100 User Guide
4
Ver 1.2
© 1993 PAC International
Displays, Alarms and Printing
Displays, Alarms and Printing
The screen of each door controller displays information concerning the status of doors
and communications. The Master door controller, where all programming of the
system takes place, will show additional information such as alarm reports and
communications errors between the master and any slave controllers.
Normal Operation
The following displays show what to expect when the system is operating normally,
with no errors or alarms.
Master Controller
The display will be blank when no doors are open and
everything is operating normally.
2
Examples:
DOORS OPEN 1234
DOORS OPEN 1
4
Slave Controller
A number, the address of the door controller (2,3 or 4), will
flash at the right of the display. This indicates that the
slave controller is being 'polled' by the master.
Master and Slave
This display indicates one or more doors being unlocked
on the door controller. This may be due to:
•
•
•
•
a valid key being presented to a reader
a request to exit button being pressed
the door being automatically open due to a Time
Profile
the door being opened by a Manual Unlock
command
Alarms
The PAC 2100 system is capable of reporting several types of alarm condition. These
are described below along with the screen display and printer transaction
All alarm conditions, wherever they occur, are reported at the master controller. If, for
any reason, communications are broken between a slave controller and the master,
then the slave itself will report the alarm. When communications are restored then the
alarm will be transferred to the master - even if the alarm was accepted at the slave.
When a printer is fitted, you will have a record of the alarm along with its time, date and
location. When the alarm condition clears, another report will be generated with the
date and time of the event.
Accepting Alarms
All alarm conditions must be accepted at the Master Controller. This is done by
presenting an editor key to the front panel reader. All editor keys, including the Master,
will accept alarms. The printer, if fitted, will show the date, time and identity of the
editor that accepted the alarm.
Alarm Activations
Below are shown examples of alarm activations. In each case the display shown will
appear indicating the type of alarm and its location. At the same time a pulsing bleep
will be generated. The display and bleep will continue until the alarm is accepted by an
editor key.
If more than one alarm occurs then, the next alarm will appear on the display only once
the first is cleared. All alarms, however will be printed as they occur.
Ver 1.2
5
PAC 2100/PAC 1100 User Guide 17112
Displays, Alarms and Printing
DOOR 01 ALARM
Printer:
© 1993 PAC International
Unauthorised Access, a door has opened without a key
being presented or a Request to Exit button pressed.
Anti-Tamper Alarm, a reader cable has been cut, or a
reader has been removed.
Shown below is the Alarm, the Alarm Cleared and Acceptance report
for Unauthorised Access and Anti-tamper.
11/11/93 16:27 FRONT DOOR
11/11/93 16:27 FRONT DOOR
11/11/93 16:28 FRONT DOOR
11/11/93 16:34 FRONT DOOR
11/11/93 16:35 FRONT DOOR
11/11/93 16:36 FRONT DOOR
D/C 1 OVERRIDE
MASTER KEY
Unauthorised Access
Alarm Cleared
Local Alarm Accepted
MASTER KEY
Anti-tamper Alarm
Alarm Cleared
Local Alarm Accepted
Door Controller Override, a Door Controller Override
input has been activated. This causes all the doors on the
Door Controller to open.
Printer: Shown below is the Alarm, Alarm Cleared and Acceptance report.
11/11/93 14:18 DOOR CTRLR 1
11/11/93 14:18 DOOR CTRLR 1
11/11/93 14:18 DOOR CTRLR 1 MASTER KEY
IP 001 ACTIVE
Printer:
Override Alarm
Override Alarm Reset
Local Override Accept
Zone Alarm, an Alarm Module input has been activated.
Shown below is the Alarm, Alarm Cleared and Acceptance report.
11/11/93 17:24 ZONE
11/11/93 17:24 ZONE
11/11/93 17:24 ZONE
1
1
1
DURESS 02 ALARM
Duress Alarm, a PIN Reader Duress alarm. A key holder
has gained entry using a PIN reader, but has entered their
duress code (normal PIN +1).
Printer:
MASTER KEY
Shown below is the Alarm and Acceptance report.
11/11/93 16:17 SALES OFFICE SMITH AB
11/11/93 16:17 SALES OFFICE MASTER KEY
DC 1 TAMPER
Printer:
PIN Reader Duress Alarm
Local Duress Accepted
Case Tamper, a Door Controller cabinet has been
opened.
Shown below is the Alarm, Alarm Cleared and Acceptance report.
11/11/93 17:49 DOOR CTRLR 1
11/11/93 17:50 DOOR CTRLR 1
11/11/93 17:50 DOOR CTRLR 1 MASTER KEY
MODULE 01 ALARM
Printer:
Alarm Zone Active
Zone Restored, ReArmed
Local Alarm Accepted
Anti-tamper Alarm
Alarm Cleared
Local Alarm Accepted
Alarm Module Tamper, a PAC Alarm Module case has
been opened.
Shown below is the Alarm, Alarm Cleared and Acceptance report.
11/11/93 14:16 Alarm Module 01
11/11/93 14:16 Alarm Module 01
11/11/93 14:16 Alarm Module MASTER KEY
17112 PAC 2100/PAC 1100 User Guide
6
Anti-tamper Alarm
Alarm Cleared
Local Alarm Accepted
Ver 1.2
© 1993 PAC International
Displays, Alarms and Printing
Uncleared Alarms
Once one or more alarms have been accepted, the Door Controller will display the
status of any uncleared alarms. Also shown will be the states of any Alarm Module
inputs.
CHn- d iiiiiiii
Master and Slave
This display appears if there are any accepted alarm
conditions present on the door controller. If more than one
channel has an alarm condition then the display will show
each channel for about 2 seconds.
The display only shows the status of the channels
CHn
The reader channel number, n=1-4
d
Door state where d
i
Alarm Inputs where i =-, not used
=I, isolated (manual or auto)
=A, active
=N, normal
=A, alarm condition
=O, door left open
=C, closed
Communication Errors
When a PAC 2100 (or PAC 1100) Master controller has one or more Slave controllers
attached, there is always the possibility of a break in communications. If this occurs
then the Master Door Controller will report this on its display.
If there is more than one error, that is more than one slave door controller is not
communicating, each message will be displayed in turn for about 5 seconds.
D/C 2
ERROR-1
Comms Error 1
A Comms Error 1 indicates that the Master Door
Controller is trying to communicate with a Slave, but is
getting no response. This may be because:
•
•
•
D/C 2
ERROR-2
The Slave is not powered
The Address of the Slave is not set correctly
The cable between the Master and Slave is broken
or disconnected.
Comms Error 2
Comms Error 3
These errors indicate corrupt replies from a Slave Door
Controller are corrupt. This may indicate poor wiring, or
strong interference.
Other System Messages
Other displays that you may see on the front panel display are:
D/C 2 UPDATE-01
Update Progress
If changes are made that affect a Slave Door Controller,
then these will automatically be sent. However if a large
number of changes are made, or the Slave is not
connected, then the changes will be stored. This display
indicates how many updates are currently stored for each
Door Controller. Once the Door Controller
communications are restored you should see the number
decrease to zero.
Ver 1.2
7
PAC 2100/PAC 1100 User Guide 17112
Displays, Alarms and Printing
DOWNLOAD
© 1993 PAC International
26-9
Download Progress
You will see this message on the screen when you leave
the Editor after initiating a download to all the Slave Door
Controllers. It indicates the progress of the download, in
this example 26.9%. The download will be complete when
it reaches 100%.
Using the Printer
Far more information about the system can be obtained if you have a printer attached
to your Master Door Controller. Full details for connecting a printer are included in the
PAC 2100/PAC 1100 Installation Manual.
Setting up the Printer
You will almost certainly have connected a dot-matrix printer using continuous (fan-fold
with sprocket holes) printer paper. You should consult the documentation supplied with
your printer for full details on its correct operation. If you have problems printing
properly make sure of the following:
•
Make sure that the printer is plugged in, switched on and 'on-line'.
•
For neatness, make sure the printer's top of form is set. Do this by manually
setting the paper so that the next line will print just below the perforation, then
either press a top of form button, or switch off the printer for 10 seconds.
•
Ensure that the paper feeds into and out of the printer with no obstructions. Be
particularly careful that power and signal cables do not obstruct the paper.
•
Switch off the printer when it is left unattended for a long time, for instance
overnight or weekends. All unprinted events will be printed when the printer is
switched on again.
On-line Transaction Printing
If the printer is connected to the Master Door Controller, is powered and 'on-line' then
each event should be printed as it happens. This will result in a permanent record of all
events that occur on the system. The Master Door Controller will store about 2500
events in its non-volatile memory. These events can be recalled over a chosen date
range using the P5 command (see Printer Reports).
If the printer is not connected, or switched off, for a period of time, then all the
unprinted events will be stored. When the printer is connected again then these events
will be printed.
No events will be printed while you are using the Editor. They will all be printed when
you leave the Editor, but see the item below on High Priority Events.
High Priority Events
Some events, alarms, alarm acceptance etc. are considered high priority events by
each Door Controller. These will always be reported before any other, low priority
events. This will not be noticed if the printer is permanently connected and reporting
events as they happen. If, however, the printer is reconnected after a period of time, all
the high priority events will be printed first. This will result in the events appearing on
the printer, apparently in the wrong order.
This effect will also be observed if any high priority events occur while you are using
the Editor.
Printing Reports
Nine different reports can be produced from within the Editor. These include a list of
keyholders, past events, system status etc. Full details of these reports can be found
in Printing Reports.
17112 PAC 2100/PAC 1100 User Guide
8
Ver 1.2
© 1993 PAC International
Using the Editor
Using the Editor
New Users
Please read this chapter if you are unfamiliar with programming a PAC 2100 or
PAC 1100 door controller. It contains important information that will help you
understand how the Editor works, what the different keys do and how to make
changes to different items. By reading this chapter you will find it easier to follow the
more detailed descriptions of commands in later chapters.
All programming of the access control system are made using the Editor. The Editor
consists of a set of commands issued by the user. Each command then allows the
user to enter or modify various items, depending on the command. To gain access to
the Editor and issue commands, you present an Editor key to the reader on the front
panel.
A full description of Editor Keys, Editor Levels, passwords and Editor Administration is
given in Editor Key Administration.
Reader
16 character display
48 Key Keypad
Note: If the text on the front panel is blue on grey then the system uses KeyPAC
readers, if it is black on grey then it uses PAC readers.
Entering the Editor
Present the Editor Key to the front panel reader. If the key is a valid Editor, or the
Master then:
•
either you will be prompted to enter a password,
PASSWD
_
In which case use the keypad to enter the password (maximum 8 characters)
and press ENT. If the password is valid then you will see the CMD prompt - see
below.
If the password you enter is not valid, then you will get:
INVALID PASSWORD
and be returned to a blank screen. Present the key and try again. If it still does
not work then ask the person responsible for the system to check your
password.
•
Ver 1.2
or, if no password has been assigned to the key, then you will immediately have
the CMD prompt - see below.
9
PAC 2100/PAC 1100 User Guide 17112
Using the Editor
© 1993 PAC International
Note: If the key you present is not an Editor Key then you will see:
T
This indicates that a key has been presented, but is not recognised as an Editor.
Note: No alarm conditions will be reported while you are using the Editor, nor will any
transactions be printed. When you leave the Editor, any alarms that occurred will be
reported and all the transactions will be printed. Door controller or PAC Alarm Module
relays will operate, however.
The Command Prompt - CMD
The starting point for any operation within the Editor is the CMD prompt:
CMD _
Here you are being prompted to enter one of the commands that either alters the
information stored in the Door Controller, such as adding or deleting personnel, or
initiating an action, such as a manual unlock.
Editor Levels
The commands you can enter are determined by your editor level. This is set by the
person responsible for issuing editor keys. If you try and enter a command that is not
available to you then you will see:
INVALID ED LEVEL
and be returned to the CMD prompt.
Editor Time-out
Once in the Editor, if you do not press any keys for more than 3 minutes, the Editor will
time-out. You will then have to present your editor key again to return to the Editor.
This means you cannot inadvertently walk away from the system leaving it in the
Editor.
Leaving the Editor
Once you are in the Editor you can press the ESC key at the CMD prompt to leave and
return the door controller to its normal operation. Any alarm conditions that occurred
while you were in the Editor will now be reported. Also, if you have printer connected,
then any transactions that have occurred while the Editor was being used will now be
printed.
Panel Keyboard
The keys on the front panel keypad can be grouped into several categories depending
on their function.
The ? Key
Outside the Editor
This is the only key that operates either outside the Editor, or on Slave Door
Controllers. When pressed it will produce a display similar to:
2100 M0
2100 or 1100
M0
V1-50
V1-50
refers to the door controller type, either PAC 2100 or PAC 1100.
is the system type. This will be M0 for the Master Door Controller or
M3 for a Slave.
is the software version number. You may need to know this if
requesting help about the system.
17112 PAC 2100/PAC 1100 User Guide
10
Ver 1.2
© 1993 PAC International
Using the Editor
Inside the Editor
In the Editor the ? key provides extra help. For instance, at the CMD prompt, if you
press ? you will see:
ENTER COMMAND
This display lasts about 3 seconds before returning to the CMD prompt, or the prompt
at which you pressed the key. You should press ? at any time if you are not sure what
is required.
The ESC Key
The ESC key is used to leave the current operation and go back to the previous step.
For instance, pressing ESC while editing data will take you back to the CMD prompt.
Navigation Keys
Moving within a database
Most commands allow you to edit a database, or table. Each database has several
rows, or records, consisting of several columns, or fields. When you first issue a
command you will be placed in the first field of the first record, or, if you prefer, the top
left-hand corner of the table. You use the navigation keys on the keyboard to move this
'window' around the table.
×Ø Use the up and down keys to move from one record to another. Usually there
will be an indication of which record you are in, however, some fields may not
have room to display a record number as well as their value.
When you are on record 1, the up arrow will have no action, on the last record,
the number will vary from one database to another, the down arrow will have no
action.
-+
Use the minus (-) and plus (+) keys to move from field to field across a record.
When you are on the leftmost field the minus key has no action, on the
rightmost field the plus key has no action. If you move up or down, using the
arrow keys, you remain in the same field, but move to the record above or
below.
•
FastFind The dot on the centre of the arrow keys is the FastFind button. In
most commands, if you press this you will receive the prompt:
FIND _
Here you can enter a record number and press ENT, to move directly to that
record. If you enter a number larger than the number of records then you will go
to the last record in the database.
The Void Personnel (V) and Edit Personnel (E) commands give the prompt:
ID _
In this case you have three choices for searching:
1. Enter the record number and press ENT, this works as described above.
2. Type the exact 12 character ID (if used) and press ENT
If the ID is not known you will get the message:
UNKNOWN NAME
and be returned to the ID prompt.
3. Present a key to the front panel reader.
If the key is not known you will get the message:
NOT IN DATABASE
and be returned to the ID prompt.
FastFind in printer commands. In the printer commands (P1-P9), the FastFind
button is used to initiate printing. See Printer Functions.
Ver 1.2
11
PAC 2100/PAC 1100 User Guide 17112
Using the Editor
© 1993 PAC International
Editor Example
The example below shows the Personnel database as seen when the Edit command
(E) is used. The highlighted box shows the first item that will appear in the screen. Use
the keys shown to move the 'window' around the data base. Use the FastFind button (•
) to go directly to a particular record.
- Left
Up ×
DownØ
Right
+
ID 1
AC
1
WHO
ID 1
HOLS
0
ID 2
AC
0
WHO
ID 2
HOLS
0
ID 3
AC
0
WHO
ID 3
HOLS
0
ID 3999
AC
0
WHO
ID 3999 HOLS
0
ID 4000
AC
0
WHO
ID 4000 HOLS
0
The Alphanumeric Keys
These are the keys A-Z, 0-9 and SPC, which take up most of the keyboard. You use
these for entering names or values when prompted. Normally you will not be allowed to
enter characters (A-Z or SPC) when a numeric value, such as an Access Code or
Lock Release Time is required.
Important: When you enter any name or value, you should always press ENT before
moving on to the next prompt. If you do not press ENT, the name or value you entered
will be lost, and the contents of the field will revert to their previous value.
Making Changes
When a field is visible on the screen the flashing underline cursor will appear on the
first character. The cursor is always positioned on the next character to be changed.
You can use the following keys to move and alter the display:
Õ Ö The left and right arrow keys move the cursor to the left and right within the field.
The cursor always starts on the leftmost character of the field, and returns to
that position when you press ENT.
CLR The CLR (clear) key will blank out the existing value. This is convenient
especially when changing long names. If you press CLR followed by ENT, then
numeric values will be set to 0, and alphabetic values set to all spaces.
The next example shows how to make changes to items. Most data items fall into 3
different categories.
1. Alphabetic
These are names given to personnel, editors, doors etc. You may use any of the
alphanumeric characters (A-Z, 0-9) including SPC (space).
Example
ID
DOOR
1
Once you have selected a field to change, then use
the alphanumeric keys to enter a new value.
The cursor, a flashing underline, marks the
character that will be overwritten by the next key
press.
ID
FOOR
1
When a valid key is pressed then the new character
will appear on the screen and the cursor will move
to the next position.
17112 PAC 2100/PAC 1100 User Guide
12
Ver 1.2
© 1993 PAC International
ID
Using the Editor
FRONT DOOR
Continue entering characters until you have
completed the entry.
Use the Õ and Ö keys to move the cursor within
the field. Press ENT.
Important: You must press ENT to save your new
entry. If you do not then when you move to the next
field, or press ESC, your entry will be lost.
2. Numeric
These are values or codes such as Lock Release Time, Access Code etc. In
this case you can only enter numbers (0-9). Each type of entry will have a
maximum and minimum value. If you enter a value outside the range allowed,
then the value you entered will be adjusted to the nearest allowed. E.g. the
maximum value for a Lock Release Time is 255 seconds, if you enter 300 then
the value will change to 255 when you press ENT.
Example
DR1
LRT
5
Once you have selected a field to change, then use
the numeric keys to enter a new value.
The cursor, a flashing underline, marks the
character that will be overwritten by the next key
press.
DR1
LRT
1
When a valid key is pressed then the new character
will appear on the screen and the cursor will move
to the next position.
DR1
LRT
10
Continue entering characters until you have
completed the entry.
Use the Õ and Ö keys to move the cursor within
the field. Press ENT.
Important: You must press ENT to save your new
entry. If you do not then when you move to the next
field, or press ESC, your entry will be lost.
3. Options
These are special fields that allow various options to be set, such as days of the
week to which time periods apply, lock mode options etc. See the example
below.
Example
P1 DAY --------
No cursor appears in this type of field. In order to
make changes, you should press the number
corresponding to the option you wish to change. In
this example Time Period days (PR command) are
shown.
P1 DAY MTWTF---
In this example, to select a day you press the
corresponding number to the day of the week,
Mon=1, Tues=2 etc. To deselect an option press
the number again.
When you have made your selections, press ENT.
Important: You must press ENT to save your new
entry. If you do not then when you move to the next
field, or press ESC, your entry will be lost.
There are other types of entry, such as date, time, locking/unlocking doors, but these
will be described in detail in the relevant sections.
Ver 1.2
13
PAC 2100/PAC 1100 User Guide 17112
Key Administration
© 1993 PAC International
Key Administration
The heart of the Access Control system is the administration of PAC keys. Each key
that is issued will allow the keyholder access through certain doors at certain times.
This chapter describes how to add, delete (or void), and edit keys.
The Personnel Database
Identifying Personnel
There are two ways in which individual keyholders can be identified within the system.
The first is to use an automatically generated ID number, between 1 and 4000. The
second method allows the operator to give a name, of up to 12 characters, to each
keyholder.
Note: You should decide before you start issuing keys which method you will use. The
system has to be set up to use one method or the other. Although this can be changed
later without losing information, it is not recommended.
4 Digit Number
The main advantage of this method is speed of entry, you will not have to enter a
different name for every key that is issued. The disadvantage is that all references
within the system, including printed reports, are to the 4 digit number. This can make
identification of keyholders difficult as you will have to keep looking up your own
records. You are not able to select the number that is issued, the system will always
issue the first free number. For instance if you issue 120 keys, they will be
automatically identified as 0001 to 0120 when added. If you were to delete, say,
numbers 25 and 42, then the next keys issued would be identified as 0025, 0042
followed by 0121, 0122 and so on.
If you use this method then it is vital that you keep an accurate record of the 4 digit ID
issued to each key, and to whom the key is issued. If a keyholder loses a key then,
unless you have an accurate record, you will not be able to delete the lost key from the
system as you will not know the ID number.
12 Character Name
A better method, and easier to administer once all the keys are issued, is to use the 12
character name. In this case whenever a key is issued you will have to enter a unique
name. The name may consist of up to 12 characters using A-Z, 0-9 and space (SPC
on the keypad). Names should not start with a space or a number. You will probably
use the keyholder's name and initials, e.g. SMITH AB or JONES SL. You could, of
course, use any naming system you feel is appropriate, such as payroll or employee
numbers. Remember names must be unique - you will be warned if a duplicate name
is entered.
The Token Code
This is the unique code stored in each PAC key. It is written permanently into the key
during manufacture and never changes. In routine use you will not have to use this
code. However there are some occasions on which it can be used. One of these is the
adding of keys without physically being in possession of the key. This may come about
if one or more keys are accidentally removed from the system, and it may not be
possible or convenient to recall the lost keys from the keyholders. If a record has been
kept of the token codes of all keys then these can be entered instead of presenting the
key itself. The personnel printout (Command P1) contains the token code of each key
and is an ideal record for such purposes.
17112 PAC 2100/PAC 1100 User Guide
14
Ver 1.2
© 1993 PAC International
Key Administration
Another occasion when you will be required to enter a key code is when adding vehicle
transmitters to the system. If you are using PAC's AVR (Automatic Vehicle
Recognition) system then each transmitter is supplied with a 10-character code. You
use this code (ignoring the first 2 characters) in the A command instead of presenting
a key to the front panel reader.
Access Codes
The PAC 2100/PAC 1100 has space for storing 4000 keys. The access that a key is
allowed is determined by assigning it an Access Code. Access codes are fully
described in the next chapter. When routinely adding keys you should know the access
code that will need to be assigned to each key.
Please read the section Controlling Access to understand how Access Codes work.
Holiday Profiles
Each keyholder can be assigned a Holiday Profile. This is a range of date on which the
person will not be allowed access. There are 24 different Holiday Profiles, each of
which may contain up to 20 Holiday Periods. A Holiday Period is a start date and
number of days. You will realise that there will not be enough Holiday Profiles in order
to give every keyholder their own dates. For this reason you are not advised to attempt
to control individual access using these Profiles. However, they may be used to cover
periods, such as a temporary factory closure.
Holiday Profiles can only be applied to a key using the Edit (E) command.
Note: Recent PAC administration systems no longer support individual Holiday
Profiles.
Ver 1.2
15
PAC 2100/PAC 1100 User Guide 17112
Key Administration
© 1993 PAC International
Adding Keys - The A command
This procedure describes how to add a key to a database. Before you start you should
have or know the following:
•
An editor key with an editor level that allows adding of keys
•
One or more keys to add
•
The names of each keyholder (not required if using 4-digit identification)
•
The access code to be assigned to each keyholder
To Add a Key ...
Present an editor key to the front panel reader.
Enter the password and press ENT, if required.
You will now see the CMD prompt.
Type A and press ENT.
CMD A_
ID 27
AC 0
The next available unused ID number will now appear along
with a prompt to enter the Access Code.
Type the Access Code (0 to 128) and press ENT.
Press + to go on to the next prompt.
Note: This prompt will only appear when you are using
12 character IDs.
WHO _
Enter an identification for this key, for instance it may be a
name, a payroll number or a flat/residence name.
You may use any of the characters on the keyboard (A-Z,
0-9, SPC). Do not start a name with a SPC or a number.
DUPLICATE NAME
If you enter an ID that is already being used then a message
(left) will appear for about 2 seconds before returning to the
WHO prompt.
Press + to go on to the next prompt.
KEY
00000000
REPEATED KEY
At this prompt you can either:
•
Present the key to be added to the front panel reader.
If the key is valid then the addition of this key is
complete and you will move directly to a prompt for
the next key. There is no need to press ENT or +.
•
Type the 8 character key code.
If for some reason you are not in possession of the
key, or you are entering AVR codes (see above) then,
provided you know its 8 character code, you can enter
it here. Use only the characters A-F and 0-9.
When complete press ENT.
If the key is valid then the addition of this key is
complete and you will move directly to a prompt for
the next key. There is no need to press +.
If, using either of these two methods, you enter a key that is
already stored you will get a message (left) for about 2
seconds before returning to the KEY prompt.
17112 PAC 2100/PAC 1100 User Guide
16
Ver 1.2
© 1993 PAC International
ID 28
Key Administration
AC 0
If you have no more keys to add then press ESC to return to
the CMD prompt.
If not, then you can now continue adding keys. Note that the
access code remains the same as the previous key you
entered. If adding a large number of keys, then by grouping
them by access code you will speed up entry, as well as
reduce the risk of error.
Once a key has been added it will be recognised by all the readers in the system.
However, this will not be the case if:
•
Slave Door Controllers are disconnected or not communicating with the Master.
•
A download is in progress to a Slave Door Controller, in which case the new
information will not reach the Slave until completion of the download.
Deleting (Voiding) Keys - The V Command
Removing keys from the system is a very simple process. Several options are
available for selecting the key to be removed. They are:
1. When prompted, present the key to the front panel reader.
2. Enter the 4 digit ID number.
3. Enter the 12 character ID, if used.
4. Use the up and down arrow keys to search for the key in the database.
Tip: Instead of voiding a key from the system, consider changing its Access Code to 0
(zero). By doing this you will prevent use of the key (any attempt will result in a
No Access: Locked Out transaction being generated), but you will also have a
record of a 'lost' key being used, unsuccessfully.
To Void a Key...
Present an editor key to the front panel reader.
Enter the password and press ENT, if required.
You will now see the CMD prompt.
CMD V_
Type V and press ENT.
ID _
At the ID prompt you can select the key to be deleted using
one of these methods:
NOT IN DATABASE
1. If you are in possession of the key itself then present the
key to the front panel reader.
If the key is not in the database then you will get a
message (left) for about 2 seconds before returning to
the ID prompt.
2. Type the 4-digit ID of the key and press ENT. Any
number between 1 and 4000 will be accepted.
UNKNOWN NAME
Ver 1.2
3. If you are using 12 character IDs then you can type the
ID and press ENT. You must type the name exactly as it
was originally entered. If no match is found you will get a
message (left) for about 2 seconds before returning to
the ID prompt.
17
PAC 2100/PAC 1100 User Guide 17112
Key Administration
© 1993 PAC International
ID 27
Whatever method you use to find a key you will be
presented with the ID number and Access Code.
Note: If you use 12 character IDs, then press + to view the
name assigned to the key (left).
AC 7
WHO SMITH AB
At this point you can use the up and down arrow keys to
move through the database to find the key you want to
delete. You can also press the FastFind button (•) to return
to the ID prompt.
Once you have selected the key you want to delete, press
ENT.
At the CONFIRM VOID prompt, press Y to confirm and you
will be returned to the CMD prompt. Any other key will return
you to the CMD prompt without voiding the key.
CONFIRM VOID
When a key has been voided it will be rejected by all the readers on the system, a
No Access: Unknown ID transaction will be produced. This will not be the case if:
•
Slave Door Controllers are disconnected or not communicating with the Master.
•
A download is in progress to a Slave Door Controller, in which case the new
information will not reach the Slave until completion of the download.
Editing Keys - The E Command
You can change the Access Code of a key as well as the 12 character name (if used)
at any time. You can also assign a Holiday Profile to a keyholder.
To Edit a Key...
Present an editor key to the front panel reader.
Enter the password and press ENT, if required.
You will now see the CMD prompt.
Type E and press ENT.
CMD E_
ID 1
AC
1_
NOT IN DATABASE
At the ID prompt you can either use the up and down arrow
keys to select a key, or press the FastFind button (•).
Using FastFind you can find a key in three ways:
1. If you are in possession of the key itself then present the
key to the front panel reader.
If the key is not in the database then you will get a
message (left) for about 2 seconds before returning to
the ID prompt.
2. Type the 4-digit ID of the key and press ENT. Any
number between 1 and 4000 will be accepted.
UNKNOWN NAME
ID 27
AC 0
WHO SMITH AB
3. If you are using 12 character IDs then you can type the
ID and press ENT. You must type the name exactly as it
was originally entered. If no match is found you will get a
message (left) for about 2 seconds before returning to
the ID prompt.
Whatever method you use to find a key you will be
presented with the ID number and Access Code.
Note: If you use 12 character IDs then press + to view the
name assigned to the key (left).
At this point you can use the up and down arrow keys to
move through the database to find the key you want to edit.
You can also press the FastFind button (•) to return to the
ID prompt.
17112 PAC 2100/PAC 1100 User Guide
18
Ver 1.2
© 1993 PAC International
ID 27
Key Administration
AC
Once you have found the key you want edit:
7
You can change the Access Code by typing the new
value and pressing ENT.
Press + to go to the next field.
(12 character ID only)
You can enter a new name. Either type over the
existing name, or press CLR to clear the field before
typing a new name. Press ENT when you have
finished.
Press + to go to the next field.
WHO SMITH AB
ID 27
HOLS
0
You can enter a Holiday Profile. Enter a value
between 0 and 24 and press ENT.
Either press ESC to return to the CMD prompt, or use the up
and down arrow keys, or FastFind (•), to search for another
key to edit.
When a key has been edited, the changes to access code and/or holiday profiles will
be observed by all the readers in the system. This will not be the case if:
•
Slave Door Controllers are disconnected or not communicating with the Master.
•
A download is in progress to a Slave Door Controller, in which case the new
information will not reach the Slave until completion of the download.
PIN Codes - The N Command
You may have a special type of PAC reader on your system that requires a PIN
(Personal Identification Number) to be entered in addition to a key being presented.
PAC PIN readers work by calculating a 4-digit (0000-9999) number from the unique
token code embedded in the PAC key. The keyholder must then enter this PIN code
correctly before the key will be allowed access by the door controller.
An additional feature of the PAC 2100/PAC 1100 door controllers allows a Time Profile
(see Time Profiles) to control when a reader requires a PIN with the key or just the key:
•
When the Time Profile is active then the PIN reader operates like a conventional
key reader, requiring no PIN.
•
When the Time Profile is inactive then a key plus the PIN is required to gain
access.
This feature must be set using the D (Doors) command, although the Time Profile is
set using the T (Time Profile) and PR (Time Periods) commands.
PIN Reader Duress
Another feature of the PIN Reader is the ability to generate a Duress alarm. If a
keyholder is being forced to open a door, then by adding one to their PIN the door will
open as normal. However a Duress Alarm will be reported at the Master Controller.
Example: If a keyholder has a PIN of 1234, then if they enter 1235 (PIN plus 1), the
door will open as normal but a Duress Alarm will be generated.
Note that you should add one to the code numerically, i.e. a PIN of 1239 gives 1240 as
the duress code.
How to Find a Key's PIN
The N Command
To find out the PIN of any PAC key (it does not have to be in the database):
Ver 1.2
19
PAC 2100/PAC 1100 User Guide 17112
Key Administration
© 1993 PAC International
Present an editor key to the front panel reader.
Enter the password and press ENT, if required.
Note: The Editor Key must have an editor level that allows
the viewing of PIN codes.
You will now see the CMD prompt.
CMD N_
Type N and press ENT.
* PRESENT KEY *
Present a key to the front panel reader.
PIN NO IS
The 4 digit PIN will be displayed for about 2 seconds.
1234
Either present other keys to determine their PIN codes, or
press ESC to return to the CMD prompt.
The P1 Personnel Report
If a printer is attached to the Master door controller then you can use the P1 command
to print a list of personnel. This list will include the PIN code for each key in the
database. See the section on Printer Reports for full details.
Note: You will only get the PIN codes on the printout if your Editor Level also includes
the right to view PIN codes, as well as to generate reports.
17112 PAC 2100/PAC 1100 User Guide
20
Ver 1.2
© 1993 PAC International
Controlling Access
Controlling Access
This chapter describes how you control the access of individual keyholders. This is
achieved by assigning each keyholder an Access Code. This code is created by
combining Access Levels (where a person has access) and Time Profiles (when a
person has access).
An additional feature allows you to apply a Holiday Profile to a keyholder. This is a
range of dates during which they will be denied access at times their Access Code
would normally allow.
IMPORTANT: In order to administer the system efficiently it is essential that you
maintain careful records of Access Codes, Access Levels, Time Profiles and Time
Periods. If you do then you will find that maintaining the system is much easier and you
will be less likely to make mistakes.
Time Profiles, which can be used to control other functions in the system as well as
keyholder access, are described in detail in the following chapter.
Access Code Overview
An Access Code determines through which doors and at what times a key is allowed
access.
Each Access Code has two sets of doors (Access Levels) both of which may have a
Time Profile attached.
Example: An Access Code may be set up that allows keyholders through certain
doors 24 hours a day, but into other areas only during normal working hours, say
9:00am to 5:00pm, Monday to Friday.
In this case you will create an Access Level consisting of all the doors with no time
restriction, and another Access Level containing the doors where access is restricted
to working hours. A Time Profile will then be needed covering the time restriction, in
this example 9:00 to 5:00, Monday to Friday.
Hazards
7
Development
Canteen
Stores
5
6
11
8
12
Side
Door
9
2
3
Accounts
Reception
Sales
10
Sales Manager
4
Reader
Front Door
1
Request to Exit
The diagram shown above will be used as a model in several examples.
Ver 1.2
21
PAC 2100/PAC 1100 User Guide 17112
Controlling Access
© 1993 PAC International
Organising Access Codes
The best approach to organising Access Codes is to consider all the different groups
of people who may require access within the system. A group of people for access
purposes should consist of those people who will all have the same access
requirements. For instance:
•
The Sales department may consist of Sales Office staff who have access to the
Sales Office, but not the Sales Manager's Office. Other Sales Office staff will
have access to the Manager's Office. This arrangement therefore requires at
least two groups of staff who would be given different Access Codes.
•
Cleaners who require access everywhere (except Hazards) between 5:00pm
and 7:30pm, Monday to Friday.
•
Senior Managers may require access to all areas at all times.
•
Development staff may need access to their area only at all times, but to the rest
of the building only during normal working hours.
Residential Systems
Although the examples given concentrate on a commercial type of system, the
principles apply equally to Residential systems.
Generally speaking, Residential systems have less complex access requirements.
Residents will usually be given an Access Code that allows them access to their
dwelling only, with no time restriction. Separate Access Codes will therefore be created
for each block or landing, depending on where the readers are located.
Other non-residents will probably need access, for instance, deliveries, cleaners,
maintenance etc. either 24 hours a day, or at restricted times.
How to Create Access Codes
To create Access Codes for a group of people you should follow these steps:
1. Decide which doors the group will be allowed through.
2. Decide at what times they will have access through these doors. If necessary
you can have two lists of doors (Access Levels) in one Access Code, one
allowing access on one Time Profile, the second allowing access at a different
Time Profile.
3. Check to see if you already have appropriate Access Levels and Time Profiles
already set up. If not, then create new ones. (The AL command and the PR and
T commands).
Access Levels - The AL Command
Very simply, an Access Level is a list of doors. There is a maximum of 16 doors that
may be controlled by the PAC 2100 system. You use an Access Level to define which
of those 16 doors different people, or groups of people, will be allowed to use.
There are 128 possible Access Levels that you can set up.
Note: In a new system, you should find that Access Level 1 has been automatically set
to all doors. That is, an Access Code which contains Access Level 1 will allow the
keyholder through all the doors in the system.
Before you attempt to use this command you should be aware of the numbers
assigned to each door. In the example above for instance, Door 1 is the Front Door,
Door 3 is the Sales Office (from Reception), Door 11 is the Sales Office (from the
corridor. Door 4 and Door 12 are exit doors.
17112 PAC 2100/PAC 1100 User Guide
22
Ver 1.2
© 1993 PAC International
Controlling Access
The table below shows which doors are associated with which Door Controller.
Door Controller
Door Numbers
Master
1
2
3*
4*
Slave 2
5
6
7*
8*
Slave 3
9
10 11* 12*
Slave 4
13
14 15* 16*
* Not available on PAC 1100
In order to show all the settings for 16 doors in each Access Level, the display has to
be split into two halves. You should use the + and - keys to move between the two
displays.
To create or alter an Access Level:
Present an editor key to the front panel reader.
Enter the password and press ENT, if required.
You will now see the CMD prompt.
CMD AL_
Type AL and press ENT.
L 1
1 12345678
L 1
2 12345678
What you see displayed are the first 8 doors of Access Level
1. The 1 in the centre of the display indicates this is the first
half of the display (doors 1-8).
Press + to see the second set of 8 doors.
The 2 indicates this is the second set of 8 doors (9-16).
In this example Access Level 1 allows access through all the
possible doors in the system.
Use the up and down arrow keys or FastFind (•) to select
the Access Level you want to change.
L 17 1 12----78
L 17 2 ----56--
Once you have selected the Access Level you want to
change, you select or deselect doors by typing the numbers
1-8. If a door is selected, its number will appear on the list, if
it is deselected a dash (-) will replace the number.
Press ENT to save any changes you have made. Press + to
see the second set of 8 doors (9-16). Press ENT again to
save any changes you have made to the second set.
The example shows an Access Level (number 17) that
allows keyholders through doors 1,2,7,8,13, and 14.
Select another Access Level to change, or press ESC to
return to the CMD prompt.
Time Profiles
Note: Time Profiles are used to control several features of the system, as well as
controlling keyholder access. They are fully described in the next chapter.
There are up to 128 Time Profiles available within the system. It is recommended that
you set up individual Time Profiles specifically for controlling keyholder access. For
instance you may have a Time Profile that automatically unlocks the front door
between 9:00am and 5:00 pm, Monday to Friday, for public access. You may be
tempted to use the same Time Profile when limiting access of keyholders to an area
for the same time period. However, if in the future you decide to alter the keyholder
access times, you would also, whether you realised it or not, alter the door opening
times.
Ver 1.2
23
PAC 2100/PAC 1100 User Guide 17112
Controlling Access
© 1993 PAC International
Note: If you have no intention of placing time restrictions on keyholder access, then
there is no need to use Time Profiles at all. If no Time Profiles are used then
keyholders will be allowed 24 hour, 7 day access through doors that their Access Code
allows.
Access Codes - The AC Command
Access Codes are used to combine where a person has access (Access Levels) and
when (Time Profiles).
Each code has a Primary Access Level and Time Profile plus a Secondary Access
Level and Time profile. This allows access to be given to one set of doors at one time,
and another set of doors at another time. If no Time Profiles are assigned then the
keyholders will have access at all times.
Examples:
The simplest example allows keyholders with this code access everywhere at all times.
In a system that has just been initialised this is the case for Access Code 1.
Primary Access Level:
Primary Time Profile:
1
0
Secondary Access Level:
Secondary Time Profile:
0
0
Access Level 1:
12345678 12345678
The next example allows keyholders through the Front and Side doors at all times, but
only into the Sales Office, Accounts and the Canteen between 8:30am and 6:00pm
Mon-Fri, 8:30am and 1:00pm Sat.
Primary Access Level:
Primary Time Profile:
7
0
Access Level 7:
1--4---- 1--4----
Secondary Access Level:
Secondary Time Profile:
8
3
Access Level 8:
Time Profile 3:
-23----8 --3----08:30-18:00 MTWTF--H
08:30-13:00 -----S-H
This example may be used to allow cleaners access early in the morning.
Primary Access Level:
Primary Time Profile:
9
5
Secondary Access Level:
Secondary Time Profile:
0
0
Access Level 9:
Time Profile 5:
123456-8 1234---07:00-09:30 MTWTF--H
The Stores Manager needs access to the building and Stores, but is only allowed into
other areas during office hours.
Primary Access Level:
Primary Time Profile:
11 Access Level 11:
0
Secondary Access Level: 12 Access Level 12:
Secondary Time Profile:
3
Time Profile 3:
1--4-678 1--4---12345678 1-34---08:30-18:00 MTWTF--H
08:30-13:00 -----S-H
Note: Quite often Access Levels or Time Profiles will overlap. For instance the Primary
Access Level may not allow access, but the Secondary Access Level will. In these
cases if either Access Level allows the keyholder access then the door will open.
Printing Access Levels
You can use the P3 command to print a report of the current Access Codes, detailing
Access Levels and Time Profiles. See Printing Reports.
Using the AC Command
To set Access Codes use the AC Command. At this point you should know what
Access Levels are set and what Time Profiles, if any, you are going to use.
17112 PAC 2100/PAC 1100 User Guide
24
Ver 1.2
© 1993 PAC International
Controlling Access
Present an editor key to the front panel reader.
Enter the password and press ENT, if required.
You will now see the CMD prompt.
Type AC and press ENT.
CMD AC_
AC 1
PAL
1
What you see displayed is the Primary Access Level for
Access Code 1.
Use the up and down arrow keys or FastFind (•) to select
the Access Code you want to change.
AC 3
PAL
0
Primary Access Level
Once you have selected the Access Code you want to use,
type the Primary Access Level (0-128) and press ENT.
Press + to go to the next field.
AC 3
PTP
0
Primary Time Profile
Enter the Time Profile you want to apply to the Primary
Access Level. If you want no time restriction then enter zero.
Press ENT.
Press + to go to the next field.
AC 3
SAL
0
Secondary Access Level
Type the Secondary Access Level (0-128) and press ENT.
Press + to go to the next field.
AC 3
STP
0
Secondary Time Profile
Enter the Time Profile you want to apply to the Secondary
Access Level. If you want no time restriction then enter zero.
Press ENT.
Press ESC to return to the CMD prompt.
Holidays - The HP Command and HR Command
The PAC 2100/PAC 1100 allows the setting up of 24 different Holiday Profiles. Each
Holiday Profile consists of up to 20 Holiday Periods, a Holiday Period being a start date
and duration. Up to 254 Holiday Periods can be defined.
Once a Holiday Period been defined it can be applied to any keyholder using the E
command. When a Holiday Profile is active then any keyholder assigned the Profile will
not gain access and a No Access: Holiday event will be recorded.
System Holidays
Holiday Profile 1 is a special case. It contains all the Holiday Periods that can be used
to override Time Profiles (see Time Profiles below for full details). This means that, for
instance a door that automatically opens during office hours, Monday to Friday, will not
open on holidays that may fall during the week, such as public holidays, Christmas
Day. Likewise, a person allowed into a building during the week can be prevented from
gaining access on such days.
For this reason you should refrain from using Holiday Profile 1 for keyholder use, and
reserve it for System Holiday use only.
One technique for maintaining system holidays would be to assign Holiday Periods 1 to
20 to Holiday Profile 1 (see below). Then assign known dates and durations to those
Holiday Periods. Once a year you should enter all the known holidays for the following
year or so. Using this method you only need to replace Holiday Periods that have
passed with holidays in the future.
Ver 1.2
25
PAC 2100/PAC 1100 User Guide 17112
Controlling Access
© 1993 PAC International
Holiday Periods - The HR Command
There are 254 possible Holiday Periods. Each consists of a Start Date and Duration.
The duration includes the start date itself. For instance, if you want a Holiday Period to
cover Christmas Day and Boxing Day, you would enter a Start Date of 25/12/93 and a
duration of 2 days. If you want just a single day, then enter the start date, 4/7/93,
duration 1 day for example.
Creating a Holiday Period
Present an editor key to the front panel reader.
Enter the password and press ENT, if required.
You will now see the CMD prompt.
Type HR and press ENT.
CMD HR_
ST 1
00-00-00
Use the up and down arrow keys or FastFind (•) to select
the Holiday Period you want to change.
ST 5
00-00-00
Holiday Period Start Date
Once you have selected the Holiday Period you want to use,
type the start date. The cursor will 'jump' over the separator
characters as you enter the date. Press ENT.
Press + to go to the next field.
DURATION 1
0
Holiday Period Duration
Enter the numbers of days the Period will last. Press ENT.
Press ESC to return to the CMD prompt.
Holiday Profiles - The HP Command
Up to 20 Holiday Periods can be assigned to a Holiday Profile. A total of 24 Holiday
Profiles are available. Holiday Profile1 has a special purpose, see System Holidays
above.
Using the HP Command
Present an editor key to the front panel reader.
Enter the password and press ENT, if required.
You will now see the CMD prompt.
Type HP and press ENT.
CMD HP_
HOL 1
ON/OFF N
Use the up and down arrow keys or FastFind (•) to select
the Holiday Profile you want to change.
HOL 1
ON/OFF N
Holiday Profile Active
Type Y to make the profile active, N to deactivate it. If you
deactivate an active profile, then any restrictions that were in
force will be removed. Press ENT.
Press + to go to the next field.
HOL 1
PR 1
0
Holiday Period. Enter the Holiday Period and press ENT.
There are 20 fields that you can enter here, press + to go to
the next period.
Press ESC to return to the CMD prompt.
Printing Holiday Periods
Use the P9 command to print details of the Holiday Profiles. See Printing Reports.
17112 PAC 2100/PAC 1100 User Guide
26
Ver 1.2
© 1993 PAC International
Time Profiles
Time Profiles
Time profiles are a powerful tool that have several functions within the access control
system:
•
Restricting the access of personnel as part of their Access Code
•
Automatically open and close doors
•
Automatically enabling an additional Alarm point (PAC Alarm Module)
•
Automatically switching a relay on the Door Controller or a PAC Alarm Module
•
Switching a PAC PIN reader between Key plus PIN and Key only
Typical examples are:
1. A public access door through which anybody can pass between 9:00am and
5:00pm, Monday to Friday, but outside these hours a key is required.
2. Some staff are only allowed access between 8:30am and 5:30pm, Monday to
Friday; 8:30am to 12:00pm Saturday.
3. Cleaners are allowed access only between 7:00am and 9:00am Monday to
Saturday.
4. Shift workers can gain access between 8:00pm and 6:00am Monday to Friday.
Note: If you are never going to use time controls of any type then there is no need to
set up any time profiles at all, just use a time profile of zero where required.
How Time Profiles Work
There are 128 different Time Profiles. Each Time Profile consists of up to three Time
Periods. A Time Period consists of a start time, an end time and the days of the week
to which it applies. For instance example 1 above requires just one Time Period,
9:00am (start time) to 5:00pm (end time), Monday to Friday (days of the week).
Example 2 requires two Time Periods, 8:30am to 5:30pm Monday to Friday plus
8:30am to 12:00pm Saturday only.
You can define up to 32 different Time Periods, and either one, two or three of these
Time Periods can be used to create one of 128 Time Profiles. A Time Period may
appear in more than one Time Profile.
IMPORTANT: The Time Profile is Active from the beginning of the first minute of
each Time Period until the end of the final minute of each Time Period, on the days of
the week to which it applies. In addition, if the Holiday option is set for a Time Period,
then the Time Profile will not be active on any days contained in Holiday Profile 1.
The table below describes the effect that a Time Profile has when applied to the
functions it may control.
Ver 1.2
Function
Command
Active
Inactive
Access Code
Doors
AC
D
Alarm Module
Inputs
MR
Relay Outputs
PIN Reader
RE
D
Access Allowed
Door Unlocked,
free access.
Disabled, no
event when
activated.
Relay is set
Key only
required.
No Access
Door Locked,
key required.
Enabled, alarm
event when
activated.
Relay is not set
Key plus PIN
required.
27
PAC 2100/PAC 1100 User Guide 17112
Time Profiles
© 1993 PAC International
Tip: Use different Time Profiles for different functions even if they are identical. This
means that if a change is required to one function at a later date then these can be
achieved without affecting the other functions.
Tip: When using time profiles it is important to check the time and date at regular
intervals, say once a month, to ensure that the system operates accurately. See
Setting the Clock.
•
A Time Period always starts at the beginning of the first minute of the Time
Period. That is, in example 1 for instance, when the time changes from 8:59 to
9:00.
•
A Time Period always finishes at the end of the final minute. That is when the
time changes from 5:00pm to 5:01pm.
•
A Time Period cannot cross midnight. When, as in example 4 above, it is
necessary to cover such a time then two Time Periods are required, one from
the start time up to midnight (use 23:59), with another Time Period from
midnight (use 00:00) to the end time. See the example below.
Time Profile Status Switch
In addition to the 3 Time Periods, each Time Profile has a status setting, either ON or
OFF. Normally if a Time Profile is being used then its status will be ON. However when
the status is switched OFF, the effect depends on the application:
Access Codes. A Time Profile that is switched OFF will lock out all personnel
with that profile as part of their Access Code, until the Time Profile status is
switched back ON.
Doors. A Time Profile that is switched OFF will stop the door automatically
opening. It will also lock a door that is currently open according to that Time
Profile.
Alarm Inputs. A Time Profile that is switched OFF will prevent the input being
automatically isolated. It will also enable all inputs that are currently isolated
according to that Time Profile.
Relays. A Time Profile that is switched OFF will prevent any relays, either on
Door Controllers or PAC Alarm Modules, assigned that Time Profile from
operating. It will also reset any relays that are currently set according to the Time
Profile.
PIN Reader. A Time Profile that is switched OFF will require keyholders to
present their keys and enter their PIN at a PIN reader assigned that Time
Profile.
Examples
Note: Time Periods are defined using the 24-hour clock, where, for example, Midnight
is 00:00, Noon is 12:00 and six o'clock in the evening is 18:00.
The examples given here are typical of the types of application for which a Time Profile
is used. All the example Time Profiles are setup by using the following Time Periods:
1
2
3
4
5
6
7
8
Start Time
End Time
Days
08:45
08:45
18:00
00:00
00:00
00:00
09:00
00:00
17:30
13:30
23:59
06:00
00:00
00:00
17:00
23:59
MTWTF--H
-----S-H
MTWTF--H
-TWTFS---------------MTWTF--H
-----SS-
17112 PAC 2100/PAC 1100 User Guide
28
Ver 1.2
© 1993 PAC International
Time Profiles
1. A group of people require access to an area during working hours only. In this
case working hours are 9:00am to 5:00pm Monday to Friday and 9:00am to
1:00pm Saturday. They will not be allowed access on public holidays, if these fall
on week days. Notice that some extra time is allowed at the start and end of the
period to allow people to arrive early and leave late.
1:
2:
3:
Period
1
2
0
08:45
08:45
17:30
13:30
MTWTF--H
-----S-H
2. A public entrance door needs to be unlocked during office hours, but not on
public holidays. Note that, unlike the example above, there is no 'spare' time at
the start and end of the period.
1:
2:
3:
Period
7
0
0
09:00
17:00
MTWTF--H
3. Shift workers need access to an area between 6:00pm and 6:00am Monday to
Friday.
Period
18:00
23:59
MTWTF--1: 3
00:00
06:00
-TWTFS-2: 4
3: 0
Note: in this case, because they work over midnight then they need access on
the following day, that is they arrive for work on Friday evening, but leave on
Saturday morning. You may need to be careful whether you allow access on
public holidays in these cases as a 'normal' working day may start or finish on a
holiday.
Setting a Time Period - The PR Command
The first step in creating Time Profiles is to make sure the Time Periods that you
require are defined.
The PR Command
Present an editor key to the front panel reader.
Enter the password and press ENT, if required.
You will now see the CMD prompt.
CMD PR_
Type PR and press ENT.
P1
START 00-00
Use the up and down arrow keys or FastFind (•) to select
the Time Period you want to change.
P1
START 00-00
Period Start
Using the 24-hour clock, enter the start time of the period
and press ENT.
Press + to go to the next field.
P1
END
00-00
Period End
Using the 24-hour clock, enter the end time of the period
and press ENT.
Press + to go to the next field.
Ver 1.2
29
PAC 2100/PAC 1100 User Guide 17112
Time Profiles
© 1993 PAC International
P1 DAY --------
Days of the Week
This is an option field. To make the Time Period active on a
particular day of the week, type a number as follows:
1 Mon, 2 Tue, 3 Wed, 4 Thu, 5 Fri, 6 Sat, 7 Sun, 8 Hol
When you press a number, the initial letter of the day will
appear. To deselect a day press its number again, a dash
will appear at that day.
The Holiday option, 8, indicates that this Time Period will not
be active on a System Holiday.
Press ESC to return to the CMD prompt.
Creating a Time Profile - The T Command
Before creating a Time Profile, ensure that the Time Periods you require have already
been set, see above.
The T Command
Present an editor key to the front panel reader.
Enter the password and press ENT, if required.
You will now see the CMD prompt.
Type T and press ENT.
CMD T_
TP 1
ON
Y
Use the up and down arrow keys or FastFind (•) to select
the Time Profile you want to change.
TP 1
ON
N
Time Profile Status
See the description above in How Time Profiles Work, to
understand the significance of this setting.
Type Y to switch the Time Profile ON, Type N to switch the
Time Profile OFF. Press ENT.
Press + to go to the next field.
TP 1
PER 1
0
First Time Period
Enter the first Time Period number (0-32). Enter zero if you
do not need this Time Period. Press ENT.
Press + to go to the next field.
TP 1
PER 2
0
Second Time Period
Enter the second Time Period number (0-32). Enter zero if
you do not need this Time Period. Press ENT.
Press + to go to the next field.
TP 1
PER 3
0
Third Time Period
Enter the third Time Period number (0-32). Enter zero if you
do not need this Time Period. Press ENT.
Press ESC to return to the CMD prompt.
Printing Time Profiles
Use the P8 command to print details of Time Profiles. See Printing Reports.
17112 PAC 2100/PAC 1100 User Guide
30
Ver 1.2
© 1993 PAC International
System Administration
System Administration
Changing the Date and Time - The C Command
Once set at installation the PAC 2100 door controller will maintain its time using a
battery backed Real Time Clock. You should check the clock regularly to ensure
accuracy. This is particularly important if you use Time Profiles for controlling system
functions and access.
Summertime (or Daylight Saving Time)
You will need to adjust the clock twice a year when the clocks go back (Autumn) and
forward (Spring).
Date Format
The date format is set using the INST command. Three formats are possible, using
23rd January 1994 as an example:
0
23-01-94 (day-month-year)
The default, European style.
1
01-23-94 (month-day-year)
US style
2
94-01-23 (year-month-day)
Japanese/Scandinavian style.
How to Check and Set the Time
To check the date and time use the C Command:
Present an editor key to the front panel reader.
Enter the password and press ENT, if required.
You will now see the CMD prompt.
Type C and press ENT.
CMD C_
DATE
10-11-93
Enter the date:
Type the new date over the existing date, or use the left
and right arrow keys to move the cursor to the figures you
want to change. Note that the cursor moves over the
separator characters (-) to the next digit.
Note: If you press CLR then you should re-enter the date
with spaces between the day, month and year.
Press ENT when complete.
If the date you enter is invalid, then it will be adjusted to the
nearest valid date.
Press + to go to the next field.
ENTER DAY
TUE
Enter the day of the week.
Type MON, TUE, WED, THU, FRI, SAT or SUN and press
ENT.
If you do not type one of the above 3 character names,
then the display will default to MON.
Press + to go to the next field.
Ver 1.2
31
PAC 2100/PAC 1100 User Guide 17112
System Administration
© 1993 PAC International
ENTER TIME 16-01
Enter the current time.
Type the new time over the existing time, or use the left
and right arrow keys to move the cursor to the figures you
want to change. Note that the cursor moves over the
separator character (-) to the next digit.
Note: If you press CLR then you should re-enter the time
with a space between the hours and minutes.
Press ENT when complete.
If the time you enter is invalid, then it will be adjusted to the
nearest valid time.
Press ESC to return to the C prompt.
Manual Lock/Unlock - The L Command
It is possible to manually lock and unlock a door from the Master controller. It may be
necessary to do this, for instance when a door needs to be kept open while contractors
are working in an area, or equipment is being moved around. Also a door normally
open on a Time Profile may need to be locked while a receptionist or guard is not
available.
Doors controlled by a Time Profile
•
Manual lock will lock the door, keys will then be required to gain access. If no
further action is taken the door will still unlock at its next automatic opening time.
•
If the door is manually unlocked then it will lock again, if no further action is taken,
at its next automatic closing time.
Doors not controlled by a Time Profile
•
Manual unlock will unlock the door, it will stay unlocked until manually locked
again.
Use the following procedure to lock/unlock a door:
Present an editor key to the front panel reader.
Enter the password and press ENT, if required.
You will now see the CMD prompt.
Type L and press ENT.
CMD L_
DOOR 1
STATE
N
To select the door you want lock or unlock, you can either
use the up and down arrow keys to select an Access
Level, or press the FastFind button (•).
If you use FastFind (left) then type the Door number you
require and press ENT.
FIND _
DOOR 10 STATE
You now see displayed the state of Door 1. N (Normal)
means that no manual override is in operation - the door
may be locked or open on a Time Profile.
N
Once you have selected the door you require:
Type L and press ENT to lock the door.
Type U and press ENT to unlock the door.
Press ESC to return to the CMD prompt.
Printer Reports
If you have a printer attached you will generate Manual Lock or Manual Unlock
transactions, along with the door name and the editor key that was used.
The P4 command will print the current status of all the doors.
17112 PAC 2100/PAC 1100 User Guide
32
Ver 1.2
© 1993 PAC International
Printer Reports
Printer Reports
There are several reports that can be printed. These include a list of keyholders, most
of the data stored in the system, past transactions and system status. These reports
are produced by entering one of the Printer commands, P1 to P9. The P6 report, which
gives installation details, is only available to the holder of the Master key.
Two other commands that are associated with printer output are:
HE Command
The Header command allows the user to create a custom header to appear at the top
of the report.
K Command
This erases all transactions in the system memory.
Reports - P1...P9
Most of these reports allow you to select a range to print, such as personnel numbers,
date range for transactions etc. Each report that requires a range prompts for a From
and To value. In all cases the default values are the top and bottom of the list, e.g. 1
and 4000 for personnel, 1 and 128 for Time Profiles. Where a range is required you
start the printout with the FastFind button (•).
Present an editor key (Master key for the P6 Report) to the
front panel reader.
Enter the password and press ENT, if required.
You will now see the CMD prompt.
Type:
CMD P1_
P1
P2
P3
P4
P5
P6
P7
P8
P9
Personnel
Door Data
Access Codes
System Status
Transactions
System Setup
Alarm Data
Time Profiles
Holiday Profiles
... and press ENT.
The P2, P4 and P6 commands will start printing
immediately, for other commands, see below.
PRINT FROM
1
P1, P3, P7, P8, P9
These commands ask for a FROM and TO parameter.
PRINT TO
4000
(P1 - Personnel)
The default values are FROM 1, and TO the highest value
(P1: 4000, P3:128, P7: 128, P8: 32, P9: 24). Press ENT.
Press + to go to the TO field.
Press FastFind (•) at any point to accept the entered
values and start the report.
Ver 1.2
33
PAC 2100/PAC 1100 User Guide 17112
Printer Reports
© 1993 PAC International
STRT DT 00-00-00
P5 - Transactions
STRT TIME
This command asks for a start date and time plus an end
date and time. The defaults are the earliest possible date
and time, and the current date and time.
END DT
END TIME
00-00
11-11-93
17-13
Example
*PRINTING PERSON
Use + to any other date and time as the report range.
Press ENT after making any changes.
Press FastFind (•) at any point to accept the entered
values and start the report.
Printing
If the printer is connected then a scrolling display will
appear indicating that the report is being printed.
Press ESC at any time to abort the printout.
Note: The personnel (P1) may appear to spend a long
time showing this display but not printing. This is because
it examines all 4000 possible keyholders for valid entries,
unless the upper limit is reduced.
PRINTER FAULT
Failure to Print
If the printer is not connected or out of paper then you may
get this message, plus a short beep.
Reconnect the printer or fill it with paper and try the
command again.
P1 - Personnel
This report produces a list of all keyholders in the system. The PIN code will only be
printer if your Editor Level allows.
PAC INTERNATIONAL PAC 2100
PERSONNEL REPORT
DATE: 11-11-93 TIME: 16:53 REQUESTED BY MASTER KEY
PERS. ID
0001
0002
0003
0004
0005
0006
0007
0008
0009
0010
0011
NAME
MASTER KEY
JONES A
SMITH J
BROWN IM
BAXTER OT
TAYLOR TB
ROYLE TS
LEE SA
LIDDY BP
BORRELL LA
WALKER STM
TOKEN CODE
D3062425
8824A474
3A33642A
C824B4BC
5503E480
8C25D403
6903F4F4
230314F3
C824942B
4E02C491
74665451
ACCESS CODE
1
1
1
3
3
3
3
3
3
3
3
PAGE 1
PIN NO
1609
5613
3446
8249
4854
1524
9099
9030
2941
5435
6736
Sample P1 - Personnel Printout
17112 PAC 2100/PAC 1100 User Guide
34
Ver 1.2
© 1993 PAC International
Printer Reports
P2 - Door Data
All 16 possible doors are printed.
PAC INTERNATIONAL PAC 2100
DOOR DATA REPORT
DATE: 11-11-93 TIME: 17:32 REQUESTED BY MASTER KEY
RELEASE TIME OPEN TIME
PAGE 1
DOOR NO
DOOR NAME
TIME PROFILE LOCK MODE PIN TP
01
FRONT DR IN
7
15
1
1---5---
0
02
ACCOUNTS
5
15
0
1-----7-
1
03
SALES RECEP
5
15
0
1-------
0
04
FRONT DR OUT
0
0
0
--------
0
05
DEVELOPMENT
5
15
0
1-------
0
06
STORES
5
15
0
1-------
0
07
HAZARDS
5
15
0
1-------
0
08
CANTEEN
5
15
0
1-------
0
09
SIDE DR IN
5
15
0
1-------
0
10
SALES MNGR
5
15
0
1-------
0
11
SALES CORR
5
15
0
1-------
0
12
SIDE DR OUT
0
0
0
--------
0
13
DOOR
13
5
0
0
--------
0
14
DOOR
14
5
0
0
--------
0
15
DOOR
15
5
0
0
--------
0
16
DOOR
16
5
0
0
--------
0
Sample P2 - Door Data Printout
Ver 1.2
35
PAC 2100/PAC 1100 User Guide 17112
Printer Reports
© 1993 PAC International
P3 - Access Data
This report lists all the Access Codes, broken down into the Primary Access Level and
Time Profile, and Secondary Access Level and Time Profile.
PAC INTERNATIONAL PAC 2100
ACCESS DATA REPORT
DATE: 11-11-93 TIME: 10:21 REQUESTED BY MASTER KEY
ACC CODE DOORS ACCESSED
001
1-12
TIME PROFILE
Primary : 000
Secondary : 000
002
1,4,8,9,12
Primary
: 001
Secondary : 000
003
1-12
Primary
: 001
3,11
Secondary : 001
PAGE 1
TIME PERIODS
Period - not
Period - not
Period - not
Period - not
Period - not
Period - not
assigned
assigned
assigned
assigned
assigned
assigned
Period
Period
Period
Period
Period
Period
01 08-45 - 17-30 on MTWTF--H
02 08-45 - 13-00 on -----SSH
- not assigned
- not assigned
- not assigned
- not assigned
Period
Period
Period
Period
Period
Period
01 08-45 - 17-30
02 08-45 - 13-00
- not assigned
01 08-45 - 17-30
02 08-45 - 13-00
- not assigned
on MTWTF--H
on -----SSH
on MTWTF--H
on -----SSH
Sample P3 - Access Data Printout
17112 PAC 2100/PAC 1100 User Guide
36
Ver 1.2
© 1993 PAC International
Printer Reports
P4 - System Status
This report shows the state of doors and alarm zones within the system. The doors
and alarm zones are shown for each door controller in turn.
Doors
Door States
UNLOCKED
LOCKED
OPEN
Door is manually or automatically unlocked, see Override
The door requires a valid key
The door is physically open
Door Alarm States
NO ALARM
No alarm conditions present
TAMPER/FORCED A Tamper or Unauthorised Access
LEFT OPEN
Door left open
Emergency Override?
YES
If doors all doors opened,
NO
Normal condition.
Manual Override?
NORMAL
No override active
UNLOCK
Door manually unlocked (L Command)
LOCKED
Door manually locked (L Command)
Timed Override?
YES
Door opened on a Time Profile
NO
No active Time Profile
Alarm Zone States
Only PAC Alarm Module Inputs that have been assigned responses are shown.
Isolated?
YES
NO
Isolated, either manually or by a Time Profile
Zone is active
State
CLEAR
ALARM
Input is in its normal condition
Input is in alarm state
PAC INTERNATIONAL PAC 2100
DOOR AND ALARM STATUS REPORT
DATE: 11-11-93 TIME: 10:24 REQUESTED BY MASTER KEY
PAGE 1
DOOR CONTROLLER : 01
DOOR DOOR NAME
STATE
ALARM STATE
EMERGENCY
OVERRIDE?
MANUAL
OVERRIDE?
TIMED
OVERRIDE?
01
02
03
04
UNLOCKED
OPEN
LOCKED
UNLOCKED
NO ALARM
FORCED/TAMPER
NO ALARM
NO ALARM
NO
NO
NO
NO
NORMAL
NORMAL
NORMAL
NORMAL
YES
NO
NO
NO
FRONT DR IN
ACCOUNTS
SALES RECEP
FRONT DR OUT
ALARM ZONE STATUS
ZONE NO
ISOLATED?
STATE
1
2
YES
YES
INPUT CLEAR
INPUT CLEAR
Sample P4 - System Status Printout
Ver 1.2
37
PAC 2100/PAC 1100 User Guide 17112
Printer Reports
© 1993 PAC International
P5 - Transaction Printout
The P5 Command prompts you for a date and time range, see above.
Note: the printout will give all the High Priority transactions that have occurred in the
date range first, followed by the rest of the transactions. This may result in a pause
between the two parts of the report.
PAC INTERNATIONAL PAC 2100
TRANSACTION REPRINT
DATE: 11-11-93 TIME: 13:09 REQUESTED BY MASTER KEY
DATE
TIME
DOOR
USER
11/11/93
11/11/93
11/11/93
11/11/93
11/11/93
11/11/93
11/11/93
11/11/93
11/11/93
11/11/93
09:14
09:14
09:14
09:15
09:15
09:15
09:16
09:27
09:27
09:28
SALES
SALES
SALES
SALES
SALES
SALES
SALES
ZONE
ZONE
ZONE
11/11/93
11/11/93
11/11/93
11/11/93
11/11/93
11/11/93
11/11/93
11/11/93
11/11/93
11/11/93
11/11/93
11/11/93
11/11/93
09:00
09:00
09:00
09:11
09:12
09:13
09:14
09:14
09:15
09:15
09:15
09:15
09:15
FRONT DR IN
ZONE 1
ZONE 2
RECEP
RECEP
RECEP
RECEP
RECEP
RECEP
RECEP
1
1
1
SALES RECEP
SALES RECEP
SALES RECEP
FRONT DR IN
SALES RECEP
SALES RECEP
ACCOUNTS
SALES RECEP
SALES RECEP
MASTER KEY
MASTER KEY
MASTER KEY
MASTER KEY
MASTER KEY
BAXTER OT
????
BORRELL LA
TAYLOR TB
TAYLOR TB
ROYLE TS
PAGE 1
TRANSACTION
Anti-tamper Alarm
Local Alarm Accepted
Alarm Cleared
Door Left Open
Door Closed
Manual Unlock
Manual Lock
Alarm Zone Active
Local Alarm Accepted
Zone Restored, ReArmed
Automatic Unlock
Auto Zone Disable
Auto Zone Disable
Editor On (Panel)
Access Authorised
Request to Exit
No Access: Unknown ID
Access Authorised
Access Authorised
Request to Exit
Access Authorised
Access Authorised
Request to Exit
Sample P5 - Transaction Printout
17112 PAC 2100/PAC 1100 User Guide
38
Ver 1.2
© 1993 PAC International
Printer Reports
P6 - System Setup
This command is only available to the Master key.
This report shows information created by using the Installation setup (INST
Command), Data Protection (DP), Door Controller setup (DC) and Editors (I).
Warning: This report contains sensitive information, such as passwords etc. Take
care not to leave it in view or where it can found by unauthorised persons.
PAC INTERNATIONAL PAC 2100
SYSTEM SETUP REPORT
DATE: 11-11-93 TIME: 15:42 REQUESTED BY MASTER KEY
BAUD RATE
HEADER
PRINTER TYPE
POLL TABLE
DATE TYPE
ID type
ADDRESS
:
:
:
:
:
:
:
4800
PAC INTERNATIONAL PAC 2100
EPSON compatible
--D-M-Y format
Alphanumeric
1
DATA PROTECTION SETUP
TRANS ENABLED
POSITIVE ENABLED
TIME PROFILE
EXCLUDED DOORS
PAGE 1
(enabled)
: Y
: Y
: 0
:
ADDRESS
MASTER
02
03
04
TYPE
PAC 2100
PAC 2000N
PAC 2000N
PAC 2000N
DOORS
01 02 03
05 06 07
09 10 11
13 14 15
EDITOR NO.
EDITOR NAME
EDITOR LEVEL
MASTER
1
2
MASTER KEY
JOE SMITH
FRED BROWN
4095
1271
04
08
12
16
PASSBACK CODE PASSBACK TIME READER/LOCK
--00
1--00
---00
---00
-TOKEN CODE
EDITOR PASSWORD
D3062425
8824A474
3A33642A
JOES
FREDDY
Sample P6 - System Setup Printout
P7 - Alarm Data
This report gives details of alarm inputs and responses, as defined by the MR and MS
commands.
PAC INTERNATIONAL PAC 2100
ALARM SETUP REPORT
DATE: 11-11-93 TIME: 13:44 REQUESTED BY MASTER KEY
ZONE
1
2
RESPONSE
1
1
ACTIVE
YES
YES
PROFILE
0
0
PAGE 1
RELAYS
4
0
Sample P7 - Alarm Data Printout
Ver 1.2
39
PAC 2100/PAC 1100 User Guide 17112
Printer Reports
© 1993 PAC International
P8 - Time Profiles
Each Time Profile is printed along with the its Status and the Time Periods assigned.
PAC INTERNATIONAL PAC 2100
TIME PROFILE REPORT
DATE: 11-11-93 TIME: 16:01 REQUESTED BY MASTER KEY
PROFILE
1
ACTIVE
YES
PROFILE DETAILS
Period 01 08:45 - 17:30 on MTWTF--H
Period 02 08:45 - 13:00 on -----SSH
Period - not assigned
2
NO
Period 03 18:00 : 23:59 on MTWTF--Period 04 00:00 - 06:00 on -TWTFS-Period - not assigned
PAGE 1
Sample P8 - Time Profile Printout
P9 - Holiday Profiles
Holiday Profiles are printed with all the assigned Holiday Periods. Holiday Profile 1
contains the System Holidays.
PAC INTERNATIONAL PAC 2100
HOLIDAY REPORT
DATE: 30-11-93 TIME: 16:05 REQUESTED BY MASTER KEY
PROFILE
1
2
ACTIVE START DURATION
YES
25/12/93
2
00/00/00
0
00/00/00
0
00/00/00
0
00/00/00
0
NO
00/00/00
0
00/00/00
0
00/00/00
0
00/00/00
0
00/00/00
0
START DURATION
01/01/94
1
00/00/00
0
00/00/00
0
00/00/00
0
00/00/00
0
00/00/00
0
00/00/00
0
00/00/00
0
00/00/00
0
00/00/00
0
PAGE 1
START DURATION START DURATION
00/00/00
0
00/00/00
0
00/00/00
0
00/00/00
0
00/00/00
0
00/00/00
0
00/00/00
0
00/00/00
0
00/00/00
0
00/00/00
0
00/00/00
0
00/00/00
0
00/00/00
0
00/00/00
0
00/00/00
0
00/00/00
0
00/00/00
0
00/00/00
0
00/00/00
0
00/00/00
0
Sample P9 - Holiday Profile Printout
Header - The HE Command
Two features are provided, the Header text that appears at the top of each page, and
whether or not a new page is started and a header printed at the end of each page of
on-line transactions.
Header Text
The text that appears at the top of every report can be changed to reflect the site name
or any other suitable text. Up to 30 characters can be entered, which are split into 3
'strings' of 10 characters each.
17112 PAC 2100/PAC 1100 User Guide
40
Ver 1.2
© 1993 PAC International
Printer Reports
Header used in On-line Transactions
When on-line transactions are printed they will normally print continuously without
interruption. You can, however, set the transactions to leave a gap at the end of each
page and print the header at the top of the next page.
Present an editor key to the front panel reader.
Enter the password and press ENT, if required.
You will now see the CMD prompt.
CMD HE_
Type HE and press ENT.
STR1
Header Text 1
PAC INTERN
Type the first 10 characters of the header text. Press ENT.
Press + to go to the second 10 characters.
STR2
ATIONAL PA
Header Text 2
Type the second 10 characters of the header text. Press
ENT.
Press + to go to the final 10 characters.
STR3
C 2100
Header Text 3
Type the final 10 characters of the header text. Press ENT.
Press + to go to the next field.
HEADER ENABLE N
Enable Header in On-line Transactions
Press Y for on-line transactions to start a new page and
print the Header. Press ENT.
Press N for continuous transaction printing, without break.
Press ENT.
Press ESC to go back to CMD prompt.
Kill Transactions - The K Command
The PAC 2100/PAC 1100 door controller can store up to 2500 transactions. How long
a time this represents depends, of course, on the amount of activity in the system. For
instance if there are 100 transactions a day (that is ALL events that are printed) then
the memory represents about 25 days activity.
On occasion it might be necessary to clear this memory. Such an occasion will be
where a printer is connected for the first time, after the system has been in use for
some time. Unless the memory was cleared, all 2500 transactions will be automatically
printed, requiring about 50 pages of printer paper.
To Clear all Transactions
Present an editor key to the front panel reader.
Enter the password and press ENT, if required.
You will now see the CMD prompt.
Ver 1.2
CMD K_
Type K and press ENT.
CONFIRM KILL
Type Y to clear all transactions from memory
41
PAC 2100/PAC 1100 User Guide 17112
Editor Key Administration
© 1993 PAC International
Editor Key Administration
Editor Keys
In order to use the Editor to make changes to the system, you need an Editor Key.
This is a normal PAC key that is recognised by the PAC 2100 as allowing the holder to
modify data held in the controller. Up to 32 editor keys may be recognised, each may
have a different Editor Level. The Editor Level determines what commands that
particular key can operate. In addition each Editor Key may be given its own password.
The Master Key is a special Editor Key that can be used to issue all commands, and is
the only key able to create or modify other Editor Keys.
Note: all Editor Keys, including the Master, are normal PAC keys that can be used for
gaining access. However, in order to be used for access control they still have to be
added to the personnel list and given an access code. Likewise, removing an Editor
Key will not have any effect on its use as normal access key. The exception to this is
when a system is initialised for the first time using the SYSTEM START command. In
this case the Master Key is added as key number 1 in the personnel file, with an
access code of 1. (See the QuickStart section at the end of this manual.)
Alarm Acceptance
All Editor Keys, including the Master, are able to accept alarms either at the Master or
Slave controllers (if used), whatever their Editor Level. For instance, a key with an
Editor Level of 0 will only be able to accept alarms and be unable to issue any
commands in the Editor.
Master Key
The Master Key is created when the system is installed and configured. It can be
changed by using the INST command - a command for which the Master Key is
required.
If the Master Key is lost, then a replacement can be programmed, but only by
performing a Reset. This procedure is described in the PAC 2100/PAC 1100
Installation Manual. No data will be lost by this process, but it can only be carried out
by someone with access to the inside of the Master door controller housing.
Editor Keys
Up to 32 Editor Keys can be assigned, each one with its own individual password and
Editor Level. Only the Master Key can add, delete and modify the use of the Editor
Keys.
Passwords
Both the Master Key and the Editor Keys can have a password assigned. This
prevents anyone has possession of an Editor Key gaining access unless they also
know its password. Passwords can only be issued to Editor Keys, or altered, by the
holder of the Master key (using the I command).
17112 PAC 2100/PAC 1100 User Guide
42
Ver 1.2
© 1993 PAC International
Editor Key Administration
Editor Levels
The ability of any Editor Key to issue commands is determined by the Editor Level it is
assigned. The Editor Level is a numeric value, between 0 and 4095, calculated from
the following table. Each action is given a value, by adding the values for each action
to be assigned an Editor Level is obtained. Some typical examples are given.
Value
Commands
Actions
0
none
Accept Alarms Only
1
P1-P9(exc P6)
HE, K
Printer functions
2
L
Manual Lock and Unlock
4
AC, AL
E
Access Codes and Access Levels
Edit Personnel
8
D
Set Door Data
16
T, PR
Time Profile functions
32
C
Change date and time
64
V
Void (delete) a personnel key
128
A
N
Add a personnel key
View a PIN
256
MR, MS, RE
Alarm module programming
512
DC
Passback and door interlock
1024
HR, HP
Holiday functions
2048
DP
Data protection
Editor Level Examples
This table gives some examples of how to calculate Editor Levels. The names used
refer to typical types of operator or user. Note, for instance, that the Installer cannot
add or delete personnel, or the Administrator modify door programming.
Value
0
1
2
4
8
16
32
64
128
256
512
1024
2048
Ver 1.2
Commands
none
P1-P9,HE, K
L
AC, AL, E
D
T, PR
C
V
A,N
MR, MS, RE
DC
HR, HP
DP
Supervisor
Yes
Yes
Yes
Yes
Yes
Yes
Yes
Yes
Yes
Yes
Yes
Yes
Yes
Administrator
Yes
Yes
Yes
Yes
Yes
Yes
Yes
Yes
Total
4095
1271
1850
43
Yes
Yes
Yes
Yes
Installer
Yes
Yes
Yes
Yes
Yes
PAC 2100/PAC 1100 User Guide 17112
Editor Key Administration
© 1993 PAC International
Master Key Commands
The following commands can only be issued when the Master Key is used:
Command
Actions
I
Administer Editor keys
INST
Installer functions
P6
Print setup details
INIT, INITn
Initialise a door controller
DL
Download to door controllers
UL
Upload to PAC 2000AM Office Admin system
SYSTEM START
Initialise a PAC 2100/PAC 1100
The INST and SYSTEM START commands are fully described in the PAC 2100/PAC
1100 Installation Manual, the P6 command is described in the section Printer
Functions, the INIT, DL, and UL commands are described in Installer Functions.
Assigning Editor Keys - The I Command
Up to 32 editor keys can be assigned. Editor keys are maintained by modifying a
database using the I command. Before adding each key you should first of all
determine the Editor Level that key will be assigned, see above.
To Add, Modify or Delete an Editor key
Note: Only the Master Key is able to issue the I command.
Present the Master key to the front panel reader.
Enter the password and press ENT, if required.
You will now see the CMD prompt.
CMD I_
Type I and press ENT.
E3 KEY 00000000
The display will now show the first unassigned editor. An
unassigned editor key is one with a key code of 00000000.
To add a new editor key.
Present a key to the front panel reader.
REPEATED KEY
E3 KEY 8824A474
If the key is already assigned then a REPEATED KEY
message is displayed for about 2 seconds.
If the key is valid then its 8 character code will appear.
Press + to go to the Editor Level field (see below).
17112 PAC 2100/PAC 1100 User Guide
44
Ver 1.2
© 1993 PAC International
Editor Key Administration
To modify an existing editor key
E3 KEY 00000000
NOT IN DATABASE
At the key prompt you can either use the up and down arrow
keys to select a key, or press the FastFind button (•).
Using FastFind you can find a key in two ways:
1. If you are in possession of the key itself then present
the key to the front panel reader.
If the key is not in the database then you will get a
message (left) for about 2 seconds before returning to
the ID prompt.
2. Type the Editor key number (1-32) and press ENT.
You can now change the key, if required, by presenting a
new key to the front panel reader.
Press + to go to the Editor Level field (see below).
To delete an editor key
Select the key to delete as described above.
E9 KEY 28851408
E9 KEY 00000000
When the key code is displayed, press CLR - the key code
will be replaced with zeroes. Press ENT.
Press ESC to return to the CMD prompt.
Editor Level
E3
LEVEL 0
Enter the Editor Level to be assigned to the key, (see above
for Editor Level values). The value must be between 0 and
4095. Zero means the key can only accept alarms, 4095
gives access to all but the Master Key only commands.
Press ENT.
Press + to go to the next field.
Editor ID
The name you enter here will appear on printed reports of
Editor use and alarm acceptance when this editor key is
used. Type a name of up to 12 characters (A-Z, 0-9 and
SPC). Press ENT.
ID
Press + to go to the next field.
Password
Enter an 8 character password (A-Z, 0-9 and SPC). The
password will be required each time the key is used to enter
the Editor. If no password is entered, then no password will
be asked for. Press ENT.
PASSWD
Press ESC to return to the CMD prompt.
ID 27
AC 0
WHO SMITH AB
Whatever method you use to find a key you will be
presented with the ID number and Access Code.
Note: If you use 12 character IDs then press + to view the
name assigned to the key (left).
At this point you can use the up and down arrow keys to
move through the database to find the key you want to edit.
You can also press the FastFind button (•) to return to the
ID prompt.
Printer Reports
The P6 command gives a list of Editor keys, see Printer Reports.
Ver 1.2
45
PAC 2100/PAC 1100 User Guide 17112
Troubleshooting
© 1993 PAC International
Troubleshooting
This chapter is intended to help system administrators solve problems they may
encounter when issuing keys, and organising access. Most problems will either be due
to equipment failure, or errors made when issuing keys or setting up Access Codes
etc.
It is far easier to establish what is going wrong if a printer is connected to the system.
This will then show you any events that are reported (or not) when a key is used.
Keys and Access
"The key you gave me doesn't work (but everybody else's does)"
What is reported when the keyholder uses their key?
•
No Access: Locked Out means that the keyholder has been given an
Access Code of zero. Check what their Access Code should be and use the E
command to assign it to their key.
•
No Access: Level means their Access Code is incorrect for the door they
are trying to use. Either change their Access Code, or explain why they can't use
that door.
•
No Access: Time means that they do not have access at this time. Either
change the Access Code to one that does allow access at the appropriate time,
check the system time - the clock may be ahead or behind, or explain why they
cannot use their key at that time.
•
No Access: Unknown ID means the door controller has no record of that
key. If the door being used is on the Master Door Controller (Doors 1-4) then the
key has not been added. If the door is on a Slave Door Controller (Doors 5-16),
then there may be a communications break between the Master and Slaves.
If a download is in progress then any keys added afterwards may not have
reached the Slaves yet.
Check the key is in the system - use the E command to search for it. If it is not
found then add the key the system (you should establish whether a key really
was issued before, and if so, where it is).
•
No Access: Passback means they need to leave the passback area, or wait
for the timeout, before using their key again.
•
If there is no report at all when the key is used, but other keys do report from the
same door, then you may have a faulty key. Replace the key with another, by
deleting it first (D command), then add it as a new key (A command).
"Nobody can get through door abc (but all other doors are OK)"
What is being reported when people attempt to use the door?
•
If no report at all is coming from the door, but other doors are reporting normally,
then there may well be a faulty reader, a broken cable or a faulty reader channel
on the door controller.
•
If Access Authorised (or Entry/Exit Authorised) reports are coming through,
implying normal operation, then the lock mechanism itself may have failed. The
green LED on the reader should also operate as normal in this case.
•
If No Access: reason reports come through then some changes may have
been made to Access Levels, Time Profiles or Access Codes that have
inadvertently affected a large number of people. Check these settings carefully.
"Nobody can get through doors abc, def, ghi (but all other doors are OK)"
What is being reported when people attempt to use these doors?
17112 PAC 2100/PAC 1100 User Guide
46
Ver 1.2
© 1993 PAC International
Troubleshooting
As above plus:
•
If all the doors that have stopped working are on the same door controller, this
would imply that the door controller itself had failed.
"All the doors have stopped working"
What is being reported when people attempt to use the doors?
•
If No Access: Time reports are being generated then the clock may be
wrong, also check that the system does not consider this to be a holiday (see
Time Profiles, System Holidays).
Check that the any Time Profiles, assigned to doors or to Access Codes, have
not been disabled.
Alarms
"We keep getting DOOR nn Alarms"
The most likely reason for excessive Unauthorised Access alarms is poorly fitted
or adjusted door monitoring switches, or inefficient door closers. The door controller
can only assume that if the switch opens without a key or Request to Exit switch being
used, then the door has been forced.
If, for instance a door does not close properly, but enough for the door contact to
register the door closed, then if the door is pushed, or even blown, open an alarm will
result.
Ver 1.2
47
PAC 2100/PAC 1100 User Guide 17112
Installer Commands
© 1993 PAC International
Installer Commands
Important: This section describes the commands used for configuring the PAC
2100/PAC 1100 door controllers. Care needs to be taken when using these commands
as they can change the way the whole system operates. Only Users and Installers who
are fully aware of the implications of making changes to the system should be allowed
access to these functions. See the section on Editor Keys to see how to restrict the
use of editor keys.
The DC Command
This command controls two important features of the door controller, Anti-Passback
and Lock Sharing. Both these features are described below, followed by details of the
DC command.
The D Command
This is the command that allows you to set the features of each door. These include
the lock release time, door monitoring, automatic opening etc.
Data Protection - the DP Command
This chapter also includes details of the Data Protection facilities. These are used
when local legislation requires that certain individual transactions are not reported or
stored.
The DC Command
Anti-Passback
Anti-Passback is a feature that prevents a key being used to enter an area until it has
also been used to leave the area. This should stop keyholders passing their keys to
others to gain entry.
Anti-Passback can only operate between the doors on one controller. On a PAC 2100
doors 1 and 2 may be used as entry doors, doors 3 and 4 as exit doors. On a PAC
1100, door 1 is the entry door, door 2 the exit door.
When Anti-Passback is set then a keyholder may enter an area through an entry door.
If the same key is used again at an entry door, then a No Entry: Passback
transaction is produced, and the lock will not operate. Access will continue to be
denied until the key has been used at an exit reader.
Note: If door monitoring is used, then anti-passback will only be set if a key is
presented and the door is opened. Simply presenting a key will not set anti-passback.
If door monitoring is not used, then anti-passback will be set when a valid key is
presented.
Timed Anti-Passback
The period for which a key is denied access can be limited by entering a time period.
After the expiry of this time a key will be allowed access again, even if it has not been
used to leave the area. The time may be set to between 10 and 30 minutes.
Using the time-out period means you could use Anti-Passback without an exit reader.
A car park, for instance, may have an entry barrier with a reader. When a key is used
to raise the barrier, that key will not be able to gain access again until the time period
expires. Provided that genuine use of the key is unlikely to be needed within the time
period, then no exit reader is required.
Anti-Passback on Exit
Anti-Passback can also be set on exit. This will prevent a key leaving an area unless it
has entered the area. Timed anti-passback will also operate on exit.
17112 PAC 2100/PAC 1100 User Guide
48
Ver 1.2
© 1993 PAC International
Installer Commands
Lock Sharing
This feature allows a single lock output to be controlled by two separate reader
channels. Normally this is the case when two readers are being used, one each side of
the door, controlling both entry and exit.
PAC 1100
This feature operates slightly differently on a PAC 1100. As the PAC 1100 is a two
door controller, only one door pair is available, Doors 1 and 2.
PAC 2100
When Sharing is set for:Reader Channel ..
PAC 1100
Operates ..
Direction
Transaction
Channels 1&4
Channel 1
Lock 1
IN
Entry Authorised
Channels 2&3
Channel 2
Lock 2
IN
Entry Authorised
Channels 2&3
Channel 3
Lock 2
OUT
Exit Authorised
Channels 1&4
Channel 4
Lock 1
OUT
Exit Authorised
Operates ..
Direction
Transaction
When Sharing is set for:Reader Channel ..
Channels 1&2
Channel 1
Lock 1
IN
Entry Authorised
Channels 1&2
Channel 2
Lock 1
OUT
Exit Authorised
Example: Two readers are fitted on each side of a door, one controlling entry, the
other controlling exit.
The entry reader should be connected to channel 1 of the door controller, the
exit reader to channel 4. Alternatively, you could use channel 2 (entry) and
channel 3 (exit).
Using the DC command (see below), set RDR-LK D/C 1 to 1- (-2 if using 2
and 3, or 12 for both pairs).
From now on a valid key presented to reader 4 (exit) or reader 1 (entry) will
operate lock 1. These actions will generate Exit Authorised and
Entry Authorised transactions respectively.
Using the DC Command
Present an editor key to the front panel reader.
Enter the password and press ENT, if required.
You will now see the CMD prompt.
CMD DC_
Type DC and press ENT.
Use the up and down arrow keys to select the door
controller. D/C 1 is the Master door controller, D/C 2,3
and 4 are Slave door controllers.
Ver 1.2
49
PAC 2100/PAC 1100 User Guide 17112
Installer Commands
© 1993 PAC International
Setting Anti-Passback
PBC D/C 1
---
This is an option field. To change a setting press the
number corresponding to the option you want to change. In
this case 1,2 or 3. If an option is set then its number will be
displayed, if not set then a -(dash) will be displayed.
PAC 2100
Option 1
Option 2
Option 3
PAC 1100
Option 1
Option 2
Option 3
PB-TIM D/C 1
0
Sets anti-passback with door 1 as entry and
door 4 as exit.
Sets anti-passback with door 2 as entry and
door 3 as exit.
Sets anti-passback on exit.
Sets anti-passback with door 1 as entry and
door 2 as exit.
Not applicable.
Sets anti-passback on exit.
Anti-Passback Time
Enter the time, in minutes between 10 and 30, after which
a key may be used again after entry (or exit). Set a time of
0 for no time-out - entry will only be allowed when a key
has left the area.
Press + to go to the next field.
RDR-LK D/C 1
--
Lock Sharing
This is an option field. To change a setting press the
number corresponding to the option you want to change. In
this case 1 or 2. If an option is set then its number will be
displayed, if not set then a -(dash) will be displayed.
PAC 2100
Option 1
Option 2
Channels 1 and 4 operate lock output 1.
Channels 2 and 3 operate lock output 2.
PAC 1100
Option 1
Option 2
Channels 1 and 2 operate lock output 1.
Not applicable.
Press ESC to return to CMD prompt.
Printing Door Controller Data
Use the P6 command to print Door Controller data, see Printer Reports.
The D Command
The D command allows the setting of several features on each door or reader. Each of
these features is described in detail below, followed by a description of the D
command itself.
The features are described in the order in which they appear, and the heading for each
command also includes the prompt displayed when using the D command.
When a PAC 2100/PAC 1100 system is first installed, if the SYSTEM START
command is used (see QuickStart), then some values will already be set. These will be
indicated in the descriptions below.
17112 PAC 2100/PAC 1100 User Guide
50
Ver 1.2
© 1993 PAC International
Installer Commands
Lock Release Time
Prompt:
Range:
Default:
LRT
0-255 seconds
5
The amount of time, in seconds, that a lock will operate when a valid key is presented
or a Request to Exit button is pressed. After the SYSTEM START command has been
used, the Lock Release Time for all doors is set to 5 seconds.
When setting this value, consideration should be given to the way in which the door
operates, its location and the people who will be using it. For instance, elderly or
disabled people may require a longer time to open the door after presenting their keys.
Note: If door monitoring is enabled (see below) then the lock release time will be
cancelled when the door controller detects the door has closed.
Door Open Time
Prompt:
Range:
Default:
DOT
0-255 seconds
0
The value entered here performs two functions, enabling door monitoring and the
length of time a door can be left open before a warning.
Door Monitoring
The fitting of a door monitoring switch is described in the PAC 2100/PAC 1100
Installation Manual.
•
If the value is non-zero (i.e. between 1 and 255) then door monitoring is
enabled. This means that the door controller expects a switch to open when the
door is opened, and to close when the door is closed.
•
If no door monitoring switch is fitted then this value should be set to zero.
•
If a door monitoring switch is fitted and this value is set to zero, then the switch
will be ignored.
•
If no door contact is fitted, but you wish to monitor the reader and its cable for
tamper events, then a non-zero value should be entered here. The DR1 terminal
of the reader channel must also be connected to ground at the reader.
Once door monitoring is enabled then the door controller will respond to alarm events
and warnings. These are:
Unauthorised Access, the door has opened without a valid key being presented or a
request to exit witch being pressed. This event must be accepted by an editor key.
Anti-Tamper, the cable between the door controller and reader has been broken. This
event must be accepted by an editor key.
Door Left Open
This is a warning event generated when a door is left open for a period longer than the
lock release time plus the door open time.
Time Profile
Prompt:
Range:
Default:
TP
0-128
0
See the section Time Profiles for details on creating Time Profiles.
Ver 1.2
51
PAC 2100/PAC 1100 User Guide 17112
Installer Commands
© 1993 PAC International
A Time Profile can be used to automatically lock and unlock a door at set times of the
day and days of the week. A typical example would be a public access door that is
unlocked during office hours, to allow non-keyholders to enter, but requires a key at all
other times. In this case the door would unlock between say, 8:30am and 5:30pm,
Monday to Friday. The Time profile could also prevent unlocking on public holidays,
such as Christmas etc.
If you have no intention of automatically unlocking a door, then set the value to zero.
The value entered is the number of the Time Profile that will control automatic locking
and unlocking. It is recommended that Time Profiles used for controlling doors are not
used for any other purpose. This allows changes to be made to door control, without
inadvertently disturbing other time controlled functions, such as Access Codes, alarm
zones etc.
Automatic Lock and Automatic Unlock transactions are generated on each
occasion.
•
If a value of zero is used then a key will be required at all times.
•
If a Time Profile is disabled, then the door will lock (if it is already unlocked) and
a key will be required at all times until the Time Profile is enabled again.
Lock Mode
M
Prompt:
Option Field, 8 options
Default:
All unset
This option field controls 8 different settings controlling the operation of the reader and
lock. They are:
1
Unset
Lock Type
Power to unlock, fail-secure
Power to lock, fail-safe
If you using a power to lock (or fail-safe) locking device then this option
should be set. In this case power will be provided continuously, and
removed to release the lock. If unset then power will be provided to
operate the lock.
2
Unset
Set
Emergency Override/Free Exit
Normal Operation
Emergency Override/Free Exit
The operation of this option is described in detail in the PAC 2100/PAC
1100 Installation Manual.
When unset the DR1 inputs operate normally:
DR1, the door contact switch, if fitted, monitors the door position
DR2, the Request to Exit switch.
When this option is set, the operation of the DR1 and DR2 inputs is
altered:
DR1, the door contact switch, produces a Free Exit transaction. It may
also operate as a Request to Exit switch, in that if it is opened the lock will
also operate. A door open time must be set to allow this feature to
operate. Door left open reports will also be generated if it is used as a
door monitoring switch.
DR2, when opened produces an Emergency Override On transaction,
when closed produces an Emergency Override Off transaction. This
allows the monitoring of an emergency switch such as a break-glass.
17112 PAC 2100/PAC 1100 User Guide
52
Ver 1.2
© 1993 PAC International
3
Installer Commands
Request for Entry
Unset
Set
Normal Operation
Request for Entry
When set, a Request to Exit switch will produce a Request for Entry
transaction. This is a useful feature, for instance, when the switch is
operated from inside an area to unlock a door once a person outside has
been recognised. This may the case when using audio or video entry
systems.
4
PAC AVR
Unset
Set
No AVR fitted
Automatic Vehicle Recognition
Only set this option when a PAC AVR reader module is attached to the
reader channel.
5
PAC Alarm Module/PAC Alarm Event Manager
Unset
Set
No PAC Alarm Module/PAC Alarm Event Manager fitted
PAC Alarm Module/PAC Alarm Event Manager
Only set this option when a PAC Alarm Module/PAC Alarm Event
Manager is fitted to the reader channel. If you set this option when an
Alarm Module is not fitted then the reader LED will flicker. You cannot
have both option 7 (PIN Reader with Time Profiles) and a PAC Alarm
Module set on the same channel.
6
Unset
Set
Normal Operation
Exit Out Of Hours
When set, this option allows people to use a door when their time profile
has expired. This would normally be the case for an exit door, where
people would be locked in they failed to leave before their time profile
expired. An Exit out of Hours report is generated when set.
7
PIN Reader with Time Profiles
Unset
Set
No PAC PIN Reader with Time Profiles fitted
PAC PIN Reader with Time Profiles fitted.
Only use this option if a PAC PIN Reader with Time Profiles is fitted to the
reader channel. Do not set this option if any other type of PIN Reader is
fitted. You cannot have both option 5 (PAC Alarm Module) and a PIN
Reader with Time Profiles set on the same channel.
8
Not Used
Leave Unset
Door Name
Prompt:
Default:
ID
DOOR
n, where n is 1-16.
Use this field to give the door a useful name. This name, which may contain up to 12
letters (A-Z), numbers (0-9) and spaces (SPC), will appear on all printed reports.
PIN Reader Time Profile
Prompt:
Range:
Default:
Ver 1.2
PINTP
0-128
0
53
PAC 2100/PAC 1100 User Guide 17112
Installer Commands
© 1993 PAC International
A PAC PIN Reader with Time Profiles provides two levels of security. When the Time
Profile is active, a valid key alone will allow access, when the Time Profile is inactive
then a valid key plus the correct PIN is required. If a Time Profile of zero is used here
then a valid key plus PIN will always be required.
An example may be a door that only requires a key during normal office hours, but
requires a key plus PIN at any other time.
Using the D Command
Each of the settings in the D command is fully described above.
Present an editor key to the front panel reader.
Enter the password and press ENT, if required.
You will now see the CMD prompt.
Type D and press ENT.
CMD D_
Use the up and down arrow keys to select the door.
Lock Release Time
DR 1
LRT
5
Enter a value, in seconds, between 0 and 255 for the
amount of time the lock will operate. Press ENT.
Press + to go to the next field.
Door Open Time
DR 1
DOT
0
A non-zero value enables door monitoring. The value itself
is the time, in seconds when added to the lock release
time, after which a door left open warning will be
generated. Press ENT.
Press + to go to the next field.
Time Profile
DR 1
TP
0
Enter a Time Profile that will control the automatic locking
and unlocking of the door. If a Time Profile of zero is
entered then a key will always be required. Press ENT.
Press + to go to the next field.
17112 PAC 2100/PAC 1100 User Guide
54
Ver 1.2
© 1993 PAC International
Installer Commands
Lock Mode Options
DR 1
M --------
This is an option field. To change a setting press the
number corresponding to the option you want to change. In
this case 1 to 8. If an option is set then its number will be
displayed, if not set then a -(dash) will be displayed.
Option 1
Unset: Fail secure lock
Set: Fail safe lock
Unset: Normal RTE, Door Contact
Set: Emergency Override, Free Exit
Unset: Normal RTE report
Set: Request for Entry report
Unset: No AVR Module
Set: AVR Module fitted
Unset: No PAC Alarm Module
Set: PAC Alarm Module fitted
Unset: Normal Operation
Set: Exit out of Hours allowed
Unset: No PIN Reader with Time Profiles
Set: PIN Reader with Time Profiles fitted
Not Used, leave Unset
Option 2
Option 3
Option 4
Option 5
Option 6
Option 7
Option 8
Press ENT when all required options are set.
Press + to go to the next field.
Door Name
DR 1
DOOR
Enter a name for the door. Use up to 12 letters (A-Z),
numbers (0-9) and spaces (SPC). Press ENT
1
Press + to go to the next field.
PIN Reader Time Profile
DR 1
PINTP
0
Only used when a PAC PIN Reader with Time Profiles is
fitted. When the Time Profile is active, only a valid key is
require, when inactive a valid key plus PIN is required for
access. A Time Profile of zero requires a valid key plus
PIN at all times. Press ENT.
Press ESC to return to the CMD prompt.
Printing Door Data
Use the P2 command to print door data, see Printer Reports.
Data Protection
A facility exists within the PAC access control system that allows users to comply with
local Data Protection laws. This may mean that records of authorised key use may not
be reported or stored.
The following transactions are considered to be Positive Transactions, in that they
indicate the authorised use of a key:
Access Authorised
Entry Authorised
Exit Authorised
Ver 1.2
55
PAC 2100/PAC 1100 User Guide 17112
Installer Commands
© 1993 PAC International
The following transactions are considered Negative Transactions, in that they
indicate the unauthorised use of a key:
No Access: Level
No Access: Locked Out
No Access: Time
No Access: Passback
No Access: Holiday
There are several means by which you can prevent the reporting at these transactions,
including by defined doors, and by a Time Profile.
The DP Command has 5 prompts. As the settings may be rather hard to understand,
several examples are given, including the default operation with no data protection.
Prompt
Default
Exclude
Doors
Timed
No Pos
or Neg
TRANS ENABLE
Y
Y
Y
N
POS TRANS ENAB
Y
Y
Y
N
TRANS TP
0
7
0
0
EXCL 1
--------
--------
1--4---8
--------
EXCL 2
--------
--------
1--4----
--------
Default
These are the settings that should be present for all transactions to be printed and
stored.
Timed
Use these settings to suppress positive transactions when the Time Profile is inactive,
all transactions will be reported and stored when the Time Profile is active. You will
probably want to report all transactions outside normal hours, and suppress positive
transactions during normal hours.
Exclude Doors
Indicate which doors will not produce positive transactions. These will usually be doors
with lower importance. EXCL 1 indicates doors 1-8, EXCL 2 indicates doors 9-16. The
example shows doors 1,4,8,9 and 12.
No Pos. or Neg.
This setting means that no positive or negative transactions are reported or stored.
17112 PAC 2100/PAC 1100 User Guide
56
Ver 1.2
© 1993 PAC International
PAC Alarm Modules and Relay Outputs
PAC Alarm Modules and Relay Outputs
Overview
The PAC Alarm Module is an optional device that can be attached to any reader
channel. It can be fitted at any point in the cable between the door controller and
reader. Each module has 8 inputs and 4 relay outputs.
8 Monitored Inputs
Each PAC Alarm Module can monitor up to 8 additional points and generate an alarm
if any enabled point is activated.
Each point may be:
•
•
•
•
Normally Open or Normally Closed (set on the PAC Alarm Module itself)
Enabled/Disabled Manually
Enabled/Disabled using a Time Profile
Programmed to activate a relay.
4 Relay Outputs
The 4 relay outputs on the PAC Alarm Module may be activated by:
•
•
•
An Alarm Module input being activated.
A system event (see below)
A Time Profile
Identifying Alarm Modules, Points and Relays
Each reader channel on a PAC 2100/PAC 1100 door controller may have an Alarm
Module connected. This means a maximum of 16 PAC Alarm Modules per system
(four on each door controller, although only two on a PAC 1100).
Ver 1.2
57
PAC 2100/PAC 1100 User Guide 17112
PAC Alarm Modules and Relay Outputs
© 1993 PAC International
Each Alarm Module has 8 possible inputs. These are numbered 1 to 8 on each alarm
module. When reporting, however, the zone number, from 1 to 128, is used. The zone
number is as shown in the following table.
Location
Zone Numbers
Input Number:
1
2
3
4
1
2
3
4
9 10 11 12
17 18 19 20
25 26 27 28
Door Controller 1
Alarm Module 1
Alarm Module 2
Alarm Module 3 *
Alarm Module 4 *
5
5
13
21
29
6
6
14
22
30
7
7
15
23
31
8
8
16
24
32
Door Controller 2
Alarm Module 5
Alarm Module 6
Alarm Module 7 *
Alarm Module 8 *
33
41
49
57
34
42
50
58
35
43
51
59
36
44
52
60
37
45
53
61
38
46
54
62
39
47
55
63
40
48
56
64
Door Controller 3
Alarm Module 9
Alarm Module 10
Alarm Module 11 *
Alarm Module 12 *
65
73
81
89
66
74
82
90
67
75
83
91
68
76
84
92
69
77
85
93
70
78
86
94
71
79
87
95
72
80
88
96
Door Controller 4
Alarm Module 13
Alarm Module 14
Alarm Module 15 *
Alarm Module 16 *
97 98 99 100 101 102 103 104
105 106 107 108 109 110 111 112
113 114 115 116 117 118 119 120
121 122 123 124 25 26 127 128
* Not available on PAC 1100.
Each Alarm Module has 4 relay outputs, giving a maximum number of 16 on each door
controller, or 64 on the whole system (assuming all door controllers are PAC 2100s). In
addition, the 4 relays on each door controller can be programmed in the same way as
an Alarm Module relay, but only if reader channel 4 does not have an Alarm Module
connected.
Alarm Module Relays
There are three ways an Alarm Module Relay may be activated:
1. By an Alarm Module input being activated. See the MS command.
Each input on an Alarm Module may be programmed to activate a relay on any
Alarm Module connected to the same door controller.
2. By a system event. See the RE command.
System events include Unauthorised Access, Door Left Open and Door Open.
For a complete list, see below.
3. By a Time Profile. See the RE command.
Each relay can be activated by a Time Profile.
Door Controller Relays
The 4 relays on each door controller each have a default action. The relays will operate
according to these defaults, unless programmed to do otherwise.
Relay 1
Activated by an Unauthorised Access or Anti-Tamper
Alarm at any door on the door controller.
Relay 2
Activated by Time Profile 1
Relay 3
Activated by a Door Left Open at any door.
Relay 4
Activated by Case Tamper (T+, T-)
17112 PAC 2100/PAC 1100 User Guide
58
Ver 1.2
© 1993 PAC International
PAC Alarm Modules and Relay Outputs
Door Controller relays are programmed as if they were on Alarm Module 4 (this works
for PAC 1100 Door Controllers as well). Therefore you cannot program relays on the
Door Controller if an Alarm Module is present on channel 4 of the Door Controller.
Door Controller Relays cannot be activated by an Alarm Module input, but they do
respond to system events and Time Profiles.
Alarm Module Programming
There are three stages to programming an Alarm Module.
1. Indicate the presence of the Alarm Module on a reader channel by setting
Option 5 of the Lock Mode using the D command.
2. Define one or more Input Responses using the MR command. A Response
consists of two items, a manual switch and a Time Profile, see below.
3. Assign a response and/or a relay activation to one or more of the Alarm Module
Inputs using the MS command, see below.
Alarm Module Responses - The MR Command
There are 255 possible Alarm Module Responses, each consisting of two items, a
Manual switch and a Time Profile. By assigning one response to several alarm inputs,
several points can be enabled and disabled at once. For instance, if you had 10 fire
doors all monitored by Alarm Module inputs, then by assigning the same response they
can all be enabled/disabled together. Alternatively, if you need to control points
individually, then you should define responses for each point.
Manual Switch
The Manual switch allows an operator to manually enable/disable all inputs that are
assigned the response.
Transactions: Inputs that are enabled manually will produce a Manual Engage
transaction. Inputs that are disabled manually will produce a Manual Isolate
transaction.
Time Profile
If a Time Profile is part or a response, then any alarm inputs that are assigned that
response will be disabled while the Time Profile is active. For instance, a Time Profile
set to 9:00am to 5:00pm, Monday to Friday, assigned to a response, will disable all
inputs with that response between those hours.
For an alarm input to automatically enable/disable with a Time Profile it must be
manually enabled first.
Transactions: Inputs that are enabled automatically will produce an Auto Zone
Enable transaction. Inputs that are disabled automatically will produce an Auto Zone
Disable transaction.
The MR Command
Use the MR command to define Alarm Module responses. These responses can then
be assigned to individual inputs using the MS command.
Present an editor key to the front panel reader.
Enter the password and press ENT, if required.
You will now see the CMD prompt.
CMD MR_
Ver 1.2
Type MR and press ENT.
59
PAC 2100/PAC 1100 User Guide 17112
PAC Alarm Modules and Relay Outputs
© 1993 PAC International
Use the up and down arrow keys to select a response.
There are a maximum of 255 responses.
REC 1
ON
N
Manual Switch
Press Y to switch on the response. Press ENT.
Press N to switch off the response. Press ENT.
Note: Any points that have been assigned this response
will be disabled if you select N, or enabled if you select Y.
Press + to go to the next field.
REC 1
TP
0
Time Profile
Enter the Time Profile number used to control the
response. When the Time Profile is active, any points
assigned this response will be disabled.
A Time Profile of zero means any points assigned this
response will be controlled only by the Manual Switch.
Press ENT
Press ESC to return to the CMD prompt.
Alarm Module Sensors - The MS Command
Each Alarm Module input is enabled by giving it a response number, see the MR
command above. In addition, each input may be programmed to operate a relay on
any Alarm Module on the same door controller.
Response Number
By giving one or more inputs the same response number, several points can be
controlled together. The number you enter is the record number of the response you
create using the MR command.
Module Relay
Any Alarm Module Relay on the same door controller can be set when a point is
activated. The number you enter is the number of the relay according to the table
below:
Module Location
Relays
Channel 1
1
2
3
4
Channel 2
5
6
7
8
Channel 3 *
9
10
11
12
Channel 4 *
13
14
15 n/a
* Not available on PAC 1100 door controllers
Note: The fourth relay on Module 4 is not available for Alarm Input activation.
The MS Command
Use the MS command to assign responses to Alarm Module inputs. Each record
contains responses for all 8 inputs on each Alarm Module
Present an editor key to the front panel reader.
Enter the password and press ENT, if required.
You will now see the CMD prompt.
CMD MS_
17112 PAC 2100/PAC 1100 User Guide
Type MS and press ENT.
60
Ver 1.2
© 1993 PAC International
PAC Alarm Modules and Relay Outputs
Use the up and down arrow keys to select an Alarm
Module. There are a maximum of 16 Alarm Modules.
DR 1
Input 1 Response Number
IP 1 R 0
Enter the response number for this input. If you enter zero,
then the input will not be monitored at all. Press ENT
Press + to go to the next field.
MODULE RELAY
0
Input 1 Module Relay
Enter a relay number, see the table above, that will be set
if the input is activated. Enter zero for no relay activation.
Press ENT
Press + to go to the next field.
DR 1
Input 2 Response Number
IP 2 R 0
MODULE RELAY
0
Input 2 Module Relay
Repeat the above for the inputs you are using.
Press + to go to the next field.
Press ESC when you have finished.
Relay Programming - The RE command
There are two types of relay that can be activated on the PAC 2100/PAC 1100 system.
They are:
1. The 4 relays located on each Door Controller.
2. The 4 relays located on each Alarm Module.
Note: The Door Controller relays can only be used on a PAC 2100 if no Alarm Module
is assigned to reader channel 4. A PAC 1100 has no reader channel 4, therefore can
always use its Door Controller relays
The relays on the Alarm Modules can be activated by Alarm Module Inputs as
described above, in the MS command. This section describes how to use both these
types of relay to respond to other events.
There are two types of event to which these relays can respond; System Events and
Time Profiles. It is unlikely that you will activate a relay on both a system event and
Time Profile, however, it is possible - the relay will stay set until all conditions are clear.
Ver 1.2
61
PAC 2100/PAC 1100 User Guide 17112
PAC Alarm Modules and Relay Outputs
© 1993 PAC International
System Events
Below is a table showing the types of event and their code number, that can be
assigned to a relay.
Relay
Code
System Event
No Response
Door Alarm on any door
Door Left Open on any door
Case Tamper
Door 1 Open
Door 2 Open
Door 3 Open
Door 4 Open
Door 1 Left Open
Door 2 Left Open
Door 3 Left Open
Door 4 Left open
Door 1 Alarm
Door 2 Alarm
Door 3 Alarm
Door 4 Alarm
0
1
2
3
4
5
6
7
8
9
10
11
12
13
14
15
Notes
Note 1
Note 2
Note 3
"
"
"
Note 4
"
"
"
Note 5
"
"
"
Notes:
1. An alarm event, i.e. unauthorised access, cable tamper, at any of the 4
doors on the door controller will activate a relay given this code. The relay
will not be deactivated until all such alarms are cleared. This is the same
as the default action given to relay 1 if not programmed otherwise.
2. This code will activate a relay if any of the 4 doors on the door controller
are left open, it will be deactivated when all the doors are closed. This is
the same as the default action given to relay 3 if not programmed
otherwise.
3. These codes will activate a relay if the particular door is opened, for
whatever reason, it will deactivate when the door is closed.
4. These codes will activate a relay if the particular door is left open, it will
deactivate when the door is closed.
5. These codes will activate a relay if the particular door has an alarm event,
i.e. unauthorised access or cable tamper, it will deactivate when the alarm
is cleared.
Time Profiles
A relay can be made to operate with a Time Profile. When the Time Profile is active
the relay will be set. Examples may the use of external lighting, switching heating or
ventilation systems etc.
Using the RE Command
There are 16 relay records, one for each alarm module.
To program Door Controller relays you should select DR 4, DR 8, DR 12, DR 16 for
Door Controllers 1,2,3 and 4 respectively, provided no Alarm Modules are installed on
these channels.
Present an editor key to the front panel reader.
Enter the password and press ENT, if required.
You will now see the CMD prompt.
CMD RE_
17112 PAC 2100/PAC 1100 User Guide
Type RE and press ENT.
62
Ver 1.2
© 1993 PAC International
DR 1
RLY1
PAC Alarm Modules and Relay Outputs
TP 0
Door 1, Relay 1 Time Profile Number.
Enter a Time Profile number (1-128). When the time
profile is activated the relay will activate, when the time
profile finishes, the relay will deactivate. A Time Profile of
zero will remove any timed activation.
Press + to go to the next field.
DR 1
RLY1 SYS 0
Door 1, Relay 1 System Event
Enter a system event (0-15) as shown in the table above.
Press + to go to the next relay.
There are a total of 4 relays, each with a Time Profile and
System Event value.
Press ESC to return to the CMD prompt.
Examples:
To have each Door Controller use its 4 on-board relays to indicate Door Left Open for
its own individual doors:
1.
2.
3.
4.
5.
Use the RE command and select the DR 4 record for Door Controller 1.
For RLY1 SYS enter a value of 4 and press ENT.
For RLY2 SYS enter a value of 5 and press ENT.
For RLY3 SYS enter a value of 6 and press ENT.
For RLY4 SYS enter a value of 7 and press ENT.
Now, if door 2 is left open relay 2 will activate and stay activated until the door is
closed.
Ver 1.2
63
PAC 2100/PAC 1100 User Guide 17112
Appendix A: System Specification
© 1993 PAC International
Appendix A: System Specification
Features
Access Points
16, one Master 4 door (2 doors on a PAC 1100) controller
controlling up to 3 Slave controllers (Slaves may be PAC 2100,
4 door or PAC 1100, 2 door)
Personnel
4000
Editor Keys
Master plus 32 editors, each with optional password and editor
level.
Access Codes
128, comprising two Access Levels, each with a Time Profile.
Access Levels
128
Time Profiles
128, each comprising 3 time periods (max. 32 time periods).
Holiday Profiles
24, each comprising 20 holiday periods (max. 254 holiday
periods).
System Holidays
20, for controlling access on public holidays.
Transactions
2500 most recent transactions stored in non-volatile memory.
Zone Alarms
128, up to 32 per door controller using PAC Alarm Modules.
Relay Outputs
4 on each door controller, plus 8 on each PAC Alarm Module.
These may be controlled by Time Profile or system event.
Alarms
Unauthorised Access, Anti-Tamper (on reader, alarm module
and door controller), Door Override, Zone Alarms, PIN Reader
Duress.
Warning
Door Left Open
Printer Output
Continuous printing of system events.
9 different reports available on demand.
17112 PAC 2100/PAC 1100 User Guide
64
Ver 1.2
© 1993 PAC International
Appendix B: Transactions
Appendix B: Transactions
The following pages show all the transactions generated by a PAC 2100 or PAC 1100
door controller. Each transaction described below shows:
Description, this is the text produced on the printer.
Priority, all high priority transactions will be sent to the printer before any other
transactions. A list of all high priority transactions is shown below.
An example of the printed report is also given. You will notice that each transaction is
preceded by an Audit Number [in brackets], the date and time.
Description
Priority
Access Authorised
A key has been allowed through an access point. This transaction will always be
generated unless the access point is set as entry or exit, when one of the two previous
transactions will be produced.
[1274] 02/12/93 15:41 DOOR NAME
Alarm Cleared
KEYHOLDER
Access Authorised
high
A door has been secured after an Unauthorised Access or a reader/cable has been
restored after an anti-tamper alarm.
[1268] 02/12/93 15:34 DOOR NAME
Alarm Zone Active
Alarm Cleared
high
An Alarm Module input has activated.
[1235] 02/12/93 15:14 ZONE
2
Anti-Tamper Alarm
Alarm Zone Active
high
A reader has been disconnected or its cable has been broken.
[1263] 02/12/93 15:33 DOOR NAME
Anti-tamper Alarm
Auto Relay Reset
A relay, either on the Door Controller (Main) or an Alarm Module (Relay No.), has been
reset by a time profile.
[1256] 02/12/93 15:21 DOOR CTRLR 1 MAIN 1
[1231] 02/12/93 15:11 DOOR CTRLR 1 3
Auto Relay Reset
Auto Relay Reset
Auto Relay Set
A relay, either on the door controller or an Alarm Module, has been set by a time
profile.
[1224] 02/12/93 15:11 DOOR CTRLR 1 MAIN 1
[1231] 02/12/93 15:11 DOOR CTRLR 1 3
Auto Relay Set
Auto Relay Set
Auto Zone Disable
An alarm module input has been disabled with a time profile.
[1289] 02/12/93 15:54 ZONE
2
Auto Zone Disable
Auto Zone Enable
An alarm module input has been enabled with a time profile.
[1298] 02/12/93 15:55 ZONE
2
Auto Zone Enable
Automatic Lock
A door has automatically locked on a time profile.
[1296] 02/12/93 15:55 DOOR NAME
Automatic Lock
Automatic Unlock
A door has automatically unlocked on a time profile.
[1286] 02/12/93 15:54 DOOR NAME
Ver 1.2
65
Automatic Unlock
PAC 2100/PAC 1100 User Guide 17112
Appendix B: Transactions
© 1993 PAC International
Description
Priority
Door Closed
high
A door has been closed after being left open.
[1272] 02/12/93 15:34 DOOR NAME
Door Left Open
Door Closed
high
A door has been left open beyond the time allowed.
[1270] 02/12/93 15:34 DOOR NAME
Door Left Open
Editor Off (Panel)
An operator has left the Editor, or it has timed out, at the Front Panel.
[1219] 02/12/93 15:02
MASTER KEY
Editor Off (Panel)
Editor On (Panel)
An operator has entered the Editor at the Front Panel
[1218] 02/12/93 15:02
MASTER KEY
Emergency Override Off
Editor On (Panel)
high
Using a special lock mode option, the request to exit input can be used to monitor an
emergency break-glass (manual pull). This transaction occurs when the switch is
restored.
[1326] 02/12/93 16:10 DOOR NAME
Emergency Override On
Emergency Override Off
high
Using a special lock mode option, the request to exit input can be used to monitor an
emergency break-glass (manual pull). This transaction occurs when the switch is
broken.
[1325] 02/12/93 16:10 DOOR NAME
Emergency Override On
Entry Authorised
A key has been allowed through an access point that was set as an entry point. This
would be channel 1 or 2 on a PAC 2100 or channel 1 on a PAC 1100. Entry and exit
points are only set by using Lock Sharing or Passback.
[1321] 02/12/93 16:06 DOOR NAME
KEYHOLDER
Entry Authorised
Exit Authorised
A key has been allowed through an access point that was set as an exit point. This
would be channel 3 or 4 on a PAC 2100 or channel 2 on a PAC 1100. Entry and exit
points are only set by using Lock Sharing or Passback.
[1322] 02/12/93 16:06 DOOR NAME
KEYHOLDER
Exit Authorised
Exit Out of Hours
A key has been allowed to pass through an exit door, although a time profile would not
normally let the key through. A special lock mode option needs to be set on the door to
allow this feature.
[1342] 02/12/93 16:06 DOOR NAME
KEYHOLDER
Exit Out of Hours
Free Exit
This is a special condition where a door contact is fitted but no request to exit button is
used. Every time the door opens without a key being used this transaction will be
generated. A special lock mode option is required.
[1327] 02/12/93 16:10 DOOR NAME
Incorrect PIN Entry
Free Exit
high
A keyholder has made 5 attempts to enter a PIN without success. That key will not be
accepted for 2 hours.
[1306] 02/12/93 15:59 DOOR NAME
17112 PAC 2100/PAC 1100 User Guide
66
KEYHOLDER
Incorrect PIN Entry
Ver 1.2
© 1993 PAC International
Appendix B: Transactions
Description
Priority
Local Alarm Accepted
high
An alarm has been accepted at the door controller by presenting an Editor key.
[1237] 02/12/93 15:14 DOOR NAME
Local Duress Accepted
MASTER KEY
Local Alarm Accepted
high
A PIN Duress Alarm has been accepted by an operator at the door contoller
[1320] 02/12/93 16:03 DOOR NAME
Local Override Accept
MASTER KEY
Local Duress Accepted
high
An Override Alarm has been accepted by an operator.
[1365] 02/12/93 16:20 DOOR CTRLR 1 MASTER KEY
Local Override Accept
Manual Engage
An alarm module input has been switched on by an operator.
[1359] 02/12/93 16:16 ZONE
2
Manual Engage
Manual Isolate
An alarm module input has been disabled by an operator.
[1357] 02/12/93 16:16 ZONE
2
Manual Lock
Manual Isolate
high
An operator has manually locked a door open on a time profile, or previously opened
manually.
[1343] 02/12/93 16:14 DOOR NAME
Manual Unlock
MASTER KEY
Manual Lock
high
An operator has manually unlocked a door.
[1342] 02/12/93 16:14 DOOR NAME
No Access: Holiday
MASTER KEY
Manual Unlock
high
A key has been presented, but a holiday period has been assigned to this key.
[1444] 02/12/93 16:02 DOOR NAME
No Access: Level
KEYHOLDER
No Access: Holiday
high
A key has been presented, but is not allowed through this door.
[1451] 02/12/93 16:03 DOOR NAME
No Access: Locked Out
KEYHOLDER
No Access: Level
high
A key has been presented, but it is not been given any access authority.
[1217] 02/12/93 15:02 DOOR NAME
No Access: Time
KEYHOLDER
No Access: Locked Out
high
A key has been presented, but is not allowed through this door at this time.
[1456] 02/12/93 17:04 DOOR NAME
No Access: Unknown ID
KEYHOLDER
No Access: Time
high
A key has been presented, but it is unknown to the door controller.
[1362] 02/12/93 16:19 DOOR NAME
No Entry: Passback
????
No Access: Unknown ID
high
A key has been presented, but will not allowed through this door until it has left the
pass-back area.
[1466] 02/12/93 17:06 DOOR NAME
No Exit: Passback
KEYHOLDER
No Entry: Pass Back
high
A key has been presented, but will not allowed through this door until it has entered the
pass-back area.
[1475] 02/12/93 17:08 DOOR NAME
Ver 1.2
67
KEYHOLDER
No Exit: Passback
PAC 2100/PAC 1100 User Guide 17112
Appendix B: Transactions
© 1993 PAC International
Description
Priority
Override Alarm
high
An override alarm has opened all the doors attached to the door controller.
[1363] 02/12/93 16:20 DOOR CTRLR 1
Override Alarm Reset
Override Alarm
high
The override input has been cleared, all the doors will close again.
[1364] 02/12/93 16:20 DOOR CTRLR 1
PIN Reader Duress Alarm
Override Alarm Reset
high
A PIN duress code has been entered (PIN +1) and the door has opened.
[1319] 02/12/93 16:03 DOOR NAME
Power Off
KEYHOLDER
PIN Reader Duress Alarm
high
The door controller has had its power removed, or the Reset button has been pressed.
[1222] 02/12/93 15:11 DOOR CTRLR 1
Power On
Power Off
high
The door controller has been powered up, or the Reset button has been released.
[1223] 02/12/93 15:11 DOOR CTRLR 1
Repeated Key Use
Power On
high
The same key has been presented continuously to a reader for 5 lock operations and
the door has closed.
[1252] 02/12/93 15:20 DOOR NAME
KEYHOLDER
Repeated Token Use
Request for Entry
A special lock mode option can be used to allow a Request for Entry transaction. This
may be used when a button is used from inside an area to allow a person access.
[1481] 02/12/93 17:09 DOOR NAME
Request for Entry
Request to Exit
The Request to Exit switch has been used to open a door.
[1240] 02/12/93 15:19 DOOR NAME
RTE Button Held Down
Request to Exit
high
A Request to Exit button has been continuously operated 5 times and the door has
closed.
[1246] 02/12/93 15:20 DOOR NAME
Unauthorised Access
RTE Button Held Down
high
A door has been opened without a key being presented or the Request to Exit being
pressed.
[1258] 02/12/93 15:21 DOOR NAME
Zone Restored & ReArmed
Unauthorised Access
high
An alarm module input has been restored, if reactivated it will cause another alarm.
[1239] 02/12/93 15:14 ZONE
17112 PAC 2100/PAC 1100 User Guide
2
68
Zone Restored, ReArmed
Ver 1.2
© 1993 PAC International
Appendix B: Transactions
High Priority Transactions
These transactions are always sent to the printer before any other transactions.
Alarm Cleared
No Access: Locked Out
Alarm Zone Active
No Access: Time
Anti-Tamper Alarm
No Access: Unknown ID
Door Closed
No Entry: Passback
Door Left Open
No Exit: Passback
Emergency Override Off
Override Alarm
Emergency Override On
Override Alarm Reset
Incorrect PIN Entry
PIN Reader Duress Alarm
Local Alarm Accepted
Power Off
Local Duress Accepted
Power On
Local Override Accept
Repeated Key Use
Manual Lock
RTE Button Held Down
Manual Unlock
Unauthorised Access
No Access: Holiday
Zone Restored & ReArmed
No Access: Level
Ver 1.2
69
PAC 2100/PAC 1100 User Guide 17112
Appendix B: Transactions
© 1993 PAC International
Declaration of Conformity
Application of Council Directives
73/23/EEC
Standard(s) to which conformity is declared
EN55022-B, EN55082-1, EN60950
Manufacturer's Name
PAC International Ltd.
Manufacturer's Address
2SZ.
1 Park Gate Close, Bredbury, Stockport, U.K. SK6
Type of Equipment
Access control systems
Product Equipment
2100/1100 and Power Supply
I the undersigned, hereby declare that the equipment specified above conforms to the above directive(s) and
standard(s).
Date:
Signed
Full Name
Vanda Murray
17112 PAC 2100/PAC 1100 User Guide
Position:
70
9th November 1995
Chief Executive
Ver 1.2