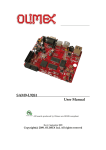
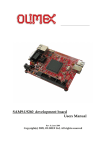
1
SAM9-L9261
User Manual
All boards produced by Olimex are ROHS compliant
Rev.A, October 2008
Copyright(c) 2008, OLIMEX Ltd, All rights reserved
INTRODUCTION:
SAM9-L9261 is a development platform with ARM9 microcontroller, TFT
LCD 3.5" 320x240 pixels with TOUCHSCREEN, 64MB SDRAM and 512MB
NAND Flash. The board has Ethernet 100Mbit controller, USB host, USB
device, RS232 and 20 pin extension port with unused SAM9261 GPIO ports
available for add-on boards. SAM9-L9261 has waste amount of Flash and
RAM and runs a 2.6.27.4 Linux. RTC clock is backed up with 3V Li battery.
FEATURES:
-
MCU: AT91SAM9261 16/32 bit ARM9™ 200MHz operation.
Standard JTAG connector with ARM 2x10 pin layout for programming/
debugging with ARM-JTAG.
TFT LCD 3.5" 320x240 pixels with TOUCH SCREEN supported by Linux
framebuffer.
64 MB SDRAM.
2MB Dataflash used to store bootloaders and the Linux kernel.
512MB NAND Flash (seen in Linux as silicon drive).
Ethernet 100Mbit connector.
USB host and USB device connectors.
RS232 interface and drivers.
SD/MMC/Dataflash card connector.
AT73C213 stereo DAC with Linux ALSA drivers.
Four user buttons and one reset button.
Three status LEDs.
On board voltage regulator 3.3V with up to 800mA current.
Single power supply: regulated 5V DC required.
Power supply filtering capacitor.
18.432 Mhz crystal.
PCB: FR-4, 1.5 mm (0,062"), soldermask, silkscreen component print.
Dimensions: 100 x 80 mm (3.94 x 3.15").
ELECTROSTATIC WARNING:
The SAM9-L9261 board is shipped in protective anti-static packaging. The
board must not be subject to high electrostatic potentials. General practice
for working with static sensitive devices should be applied when working
with this board.
REQUIREMENTS:
Cables:
− 1.8 meter USB A-B cable (needed for restoring the installation).
− NULL-modem RS232 cable (needed for the Linux console).
− UTP LAN cable (needed for connecting SAM9-L9261 to Internet).
Power Supply:
Regulated 5V DC power supply, capable of supplying at least 1A.
SCHEMATIC
GETTING STARTED
Connect a null-modem cable to the board and make sure the RS232
jumpers are in the DRXD and DTXD positions. Start a terminal emulation
program and set it for 115200 bps, 8 bits, no parity, 1 stop bit. Plug a
regulated 5V DC power supply to power up the board. You will see the
bootloaders' and kernel's startup messages. Please be patient - booting can
take a couple of minutes, especially on the first boot. Login as root.
Password is not needed.
NOTE: By default the root account does not have a password. This will
prevent remote logins via ssh. In order to create a password run as root the
following command:
passwd
TOOLCHAIN
The sources for the bootloaders and the Linux kernel must be compiled
under Linux PC host. We don't intend to support Cygwin.
The projects were compiled using Codesourcery G++ lite 2008q1, freely
available from http://www.codesourcery.com. A convenience tarball
is provided that contains the Codesourcery binaries along with some useful
shell scripts. This tarball must be extracted in user's home directory.
Example:
# cd $HOME
# tar xzf codesourcery-toolchain-2008q1-repack.tgz
The latter will create a directory
$HOME/bin/codesourcery-armgcc-2008q1
along with some shell scripts that must be sourced before compilation:
# source $HOME/bin/linux_cross_compile.sourceme
# source $HOME/bin/bootloader_cross_compile.sourceme
BOOT LOADERS
The SAM9-L9261 board requires a three-stage boot loader before booting
the Linux kernel.
RomBOOT
->
(internal ROM)
at91bootstrap ->
(dataflash)
u-boot ->
(dataflash)
Linux kernel
(dataflash)
The typical operation of each boot loader is to load the next stage program
into SDRAM and then execute a JUMP to its start address.
AT91BOOTSTRAP
Version 2.4 of at91bootstrap has been used, along with minor modifications
to add support for the SAM9-L9261 board. To compile from source:
Extract the sources:
tar xzf at91bootstrap-2.4-olimex.tgz
cd at91bootstrap-2.4-olimex
Setup the environment:
source $HOME/bin/bootloader_cross_compile.sourceme
Configure at91bootstrap for SAM9-L9261
make sam9_l9261_defconfig
Compile:
make
The resulting binary is created in:
binaries/sam9_l9261-dataflashboot-2.4.bin
WARNING: Due to AT91SAM9261 chip errata booting from NAND flash is
not supported.
U-BOOT
The used U-Boot is a GIT pull from Oct 13 2008, along with minor
modifications to add support for SAM9-L9261. In order to compile from
sources:
Extract the sources:
tar xzf u-boot-git20081013-olimex.tgz
cd u-boot
Setup the environment:
source $HOME/bin/bootloader_cross_compile.sourceme
Configure at91bootstrap for SAM9-L9261:
make sam9_l9261_config
Compile:
make
The resulting binary is created in the main sources directory:
./u-boot.bin
WARNING: The needed image is "u-boot.bin". The "u-boot" file is an ELF file
that cannot be directly written into dataflash!
LINUX KERNEL
The used kernel is a mainstream 2.6.27.4 slightly modified to include
support for the SAM9-L9261 board. As with the bootloaders, the
modifications were based on the source files for Atmel's AT91SAM9261EK
board.
In order to compile the kernel its sources must be extracted first:
tar xzf linux-2.6.27.4-olimex.tgz
Then setup the needed environment variables:
source $HOME/bin/linux_cross_compile.sourceme
Go to the source directory:
cd linux-2.6.27.4-olimex
Load the default configuration for the SAM9-L9261 board:
make sam9_l9261_defconfig
Optionally, you can tweak the kernel compile-time configuration:
make xconfig
And finally you can compile it:
make uImage
If compilation is successful, the resulting kernel image can be found in:
linux-2.6.27.4-olimex/arch/arm/boot/uImage
NOTE: The linux-2.6.27.4-olimex.tgz archive is pre-patched and ready for
compilation. The file linux-2.6.27.4-olimex.patch.gz, found in the src
directory, is a patch that can be applied to the mainstream 2.6.27.4
distribution to get linux-2.6.27.4-olimex.tgz.
TWEAKING THE KERNEL
We welcome any patches and comments for improving the board support
for SAM9-L9261. The starting point for board-specific initialization is the
following file:
arch/arm/mach-at91/board-sam9-l9261.c
Additional AT91SAM9261 chip specific initialization is located at:
arch/arm/mach-at91/at91sam9261.c
arch/arm/mach-at91/at91sam9261_devices.c
ROOT FILESYSTEM
The root filesystem can be built using http://www.angstromdistribution.org . The other option is to use a ready-made binary
distribution like Debian or some pre-compiled Angstrom image. The root
filesystem used in SAM9-L9261 is a slightly modified version of the official
Atmel Linux demo binary.
Additional software can easily be installed by the command "ipkg", provided
that the board is connected to Internet via Ethernet cable. Run
ipkg
from the SAM9-L9261 shell prompt to see the available options.
RUNNING
KERNEL
USER-COMPILED
BOOTLOADERS
AND
LINUX
In order to use the newly compiled bootloader and/or kernel do the
following:
1. Extract the contents of the sam9-l9261-samba.zip archive .
2. Overwrite the binary files with the newly compiled ones.
3. Run the installation restoration procedure below.
RESTORING THE INSTALLATION
The board Linux installation can be restored using the SAM-BA script in
the sam9-l9261-samba.zip archive. Windows installation along with the
SAM-BA tool from Atmel are required for that.
Restoration procedure:
1. Make sure AT91-ISP v1.12 or higher is installed. It is freely available
from http://www.atmel.com/products/at91.
2. Power down the board.
3. Remove the AT/SD jumper.
4. Power up the board.
5. Connect the PC host to the board USB device connector.
6. Put the AT/SD jumper at the AT position.
7. Windows might ask for drivers. Select automatic driver installation.
Windows should find the necessary drivers from the previous AT91ISP installation.
8. Extract the contents of the sam9-l9261-samba.zip archive to a
temporary directory.
9. Run the sam9_l9261_demo_linux.bat script from that directory.
10. After a couple of minutes Notepad will be opened with the log file of
the write operation.
11. Reset or power cycle SAM9-L9261.
WARNING: All memory contents will be ERASED, including any data stored
in the NAND partition.
TIP: If restoration of the root filesystem in NAND is not required then its
erasure can be spared. Open sam9_l9261_demo_linux.tcl and uncomment
the last few lines concerning the writing of NAND. Lines in TCL are
commented if the first character on the line is '#'. The result should be like
this:
.....lots of TCL code......
puts "-I- === Load the Kernel image ==="
send_file
{DataFlash
AT45DB/DCB}
$df_mapping(kernelOff) 0
"$df_mapping(kernelFileName)"
#puts "-I- === Initialize the NAND access ==="
#NANDFLASH::Init
#puts "-I- === Erase all the NAND flash blocs and test the erasing ==="
#NANDFLASH::EraseAllNandFlash
#puts "-I- === Load the linux file system ==="
#send_file {NandFlash} "$nf_mapping(diskFileName)" $nf_mapping(diskOff) 0
LEDS
The board has three user-controllable
configuration for these is:
LED #
Configuration
LEDs.
The
default
Linux
Description
LED1
nand-disk
LED is switched on on every access to the
NAND flash.
LED2
none
No function assigned.
LED3
heartbeat
Repeatedly switched on and off following the
distinctive heartbeat pattern.
LEDs can be manually controlled from the Linux shell prompt. For
example, to switch on LED2:
echo 255 > /sys/class/leds/led2/brightness
And to switch it off:
echo 0 > /sys/class/leds/led2/brightness
EXTENSION PORT
The board has an extension port EXT with eleven GPIO pins that can be
controlled from user-space Linux applications. The available pins are:
AT91
PIO
Directory name
EXT
under /sys/class/gpio pin#
Notes
--
--
1
+3.3V
--
--
2
GND
PA7
gpio-ext8
8
PA8
gpio-ext9
9
PB4
gpio-ext10
10
PB30
gpio-ext11
11
PC3
gpio-ext12
12
PC4
gpio-ext13
13
PC5
gpio-ext14
14
PC6
gpio-ext15
15
PC7
gpio-ext16
16
PC12
gpio-ext17
17
PC13
gpio-ext18
18
--
--
19
+5V
--
--
20
GND
Not available when SD/MMC is enabled
Not available when SD/MMC is enabled
In order to setup a pin direction user must write the string “high”, “low”,
“out” or “in” to the file /sys/class/gpio/gpio-extX/direction in order to
setup the pin correspondingly as an output with initial high value, output
with initial low value, output or input. Example:
echo high > /sys/class/gpio/gpio-ext8/direction
echo in > /sys/class/gpio/gpio-ext10/direction
Outputs can be controlled by writing to the value file like this:
echo 0 > /sys/class/gpio/gpio-ext8/value
echo 1 > /sys/class/gpio/gpio-ext8/value
Pin sense value can be read regardless of its direction by reading the value
file:
cat /sys/class/gpio/gpio-ext8/value
cat /sys/class/gpio/gpio-ext10/value
Of course user is free to write a C program to access these files instead of
using the shell examples above.
JTAG PORT
The JTAG connector allows a debugger to talk via a JTAG (Joint Test Action
Group) port directly to the core. Instructions may be inserted and executed
by the core thus allowing SAM9261 memory to be programmed with code
and executed step by step by the host software.
For more details refer to IEEE Standard 1149.1 - 1990 Standard Test
Access Port and Boundary Scan Architecture and SAM9261 datasheet.
Pin #
Signal Name
Pin #
Signal Name
1
VCC
2
VCC
3
ICE_NTRST
4
GND
5
TDI
6
GND
7
TMS
8
GND
9
TCK
10
GND
11
RTCK
12
GND
13
TDO
14
GND
15
ICE_NRST
16
GND
17
NC
18
GND
19
NC
20
GND
PLAYING MULTIMEDIA
The default installation includes a command-line multimedia player. To
play audio or video start the media player giving the media files as
command line arguments:
mplayer song1.ogg
mplayer myvideo.avi
The sound volume can be controlled either from the GUI or by the
command-line ALSA application:
alsamixer
Volume channels are selected by the left and right arrow keys, values can
be changed with the up and down arrow keys, mute is controlled by the M
key, and the ESC key exits the application. Note that certain terminal
emulation programs cannot cope with the alsamixer output. HyperTerminal
is known not to work. PuTTY is known to work.
WARNING: By default MPlayer uses the OSS sound interface. But
sometimes the OSS-emulation layer in ALSA does not work properly,
particularly in situations when the original sound stream must be downsampled. In these cases the sound will be distorted. MPlayer can be forced
to use ALSA with the -ao alsa command line argument:
mplayer -ao alsa song1.ogg
USING THE SD/MMC SLOT
A few limitations arise when using the SD/MMC slot:
1. AT73C213 sound cannot work in Linux.
2. ADS7843 touchscreen cannot work in Linux.
3. Generic SPI cannot work in Linux.
4. Before and during booting the jumper AT/SD must be in position
“AT”. After Linux kernel is loaded and running, this jumper must be
placed at the “SD” position.
5. The SMD jumpers WP_E and CP_E must be soldiered.
6. A specially configured version of the Linux kernel must be used. A
precompiled binary can be found in the “sam9-l9261-sambasdmmc.zip” archive. The configuration for this kernel can be loaded
in the kernel source tree with the following command
make sam9_l9261_sdmmc_defconfig
CAVEAT: The AT91SAM9261 MCI controller has a few bugs which can
prevent it from working properly with some SD/MMC cards. Please consult
the chip errata for more information.
COMPILING USER APPLICATIONS FOR EMBEDDED LINUX
The subdirectory linuxapp-testprj has two simple projects that show how to
cross-compile user applications for Linux. The fbtest.tgz archive contains
an example that draws the frame buffer from user space. The evtest.tgz
archive contains an example how to access the board buttons.
TIPS AND TRICKS
TIP: The original Angstrom root filesystem distribution does not enable the
ETHERNET
connection
by
default.
To
change
that
open
/etc/network/interfaces :
vi /etc/network/interfaces
and add the following line:
auto eth0
TIP: It is possible to use an NFS root filesystem. When U-Boot boots press
SPACE or ENTER to enter the U-Boot shell:
Hit any key to stop autoboot: 0
U-Boot>
Then set the kernel boot arguments and point to your NFS exported
directory:
U-Boot> setenv bootargs console=ttyS0,115200 root=/dev/nfs rw
nfsroot=192.168.0.225:/path/to/nfs-root/
ip=192.168.0.239:192.168.0.225::255.255.255.0:emblin::none
And finally boot the kernel:
U-Boot> boot
In the previous example the NFS server has IP address 192.168.0.225, and
the SAM9-L9261 client is assigned IP address 192.168.0.239 and host
name "emblin". The NFS export path is "/path/to/nfs-root"
TIP: After creating a root filesystem using buildroot, Angstrom or similar
method, it must be converted to a JFFS2 image for writing to the NAND
flash. Assuming that the target root directory is located in a directory
sam9-rootfs, the JFFS2 image can be created by issuing:
mkfs.jffs2 --root="sam9-rootfs" -e128KiB -n -p -o"angstrom-x11-imagedemo-glibc-at91.rootfs.jffs2"
The archive angstrom-atmel-demo-olimex-rootfs.tgz contains
directory structure that can be used as a starting point.
the
root
TIP: By default the board is configured to enable eth0 using DHCP for
automatic IP configuration. This can be changed by editing the file
/etc/network/interfaces.
TIP: By default the embedded Linux installation starts a SSH server. In
order to use it, however, the root password must be set. Type as root in
board terminal:
passwd
and type the new root password. Password must be non-empty (it must
contain at least one character).
TIP: By default all Olimex boards ship with the _same_ ethernet MAC
address. This will cause trouble if there are two or more boards in the same
local network. Assigning a custom MAC address is easy. When U-Boot is
starting press a key to enter the U-Boot shell. There set the Ethernet
address:
setenv ethaddr 00-40-91-31-32-33
And then save the settings to dataflash:
saveenv
Another option is to open the programming script
sam9-l9261-samba/sam9_l9261_demo_linux.tcl
and set the Ethernet address there. Search for "ethaddr" to find where to
edit. Then reflash the board memories (see the RESTORING THE
INSTALLATION section).
REFERENCES
http://www.atmel.com/products/at91
http://www.linux4sam.org
http://www.at91.com
http://www.codesourcery.com
http://www.kernel.org
http://maxim.org.za/at91_26.html
http://u-boot.sourceforge.net
http://www.angstrom-distribution.org
ORDER CODE:
SAM9-L9261 – assembled and tested (no kit, no soldering required)
How to order?
You can order to us directly or by any of our distributors.
Check our web www.olimex.com/dev for more info.
Revision history:
REV.A
- created October 2008
Disclaimer:
© 2008 Olimex Ltd. All rights reserved. Olimex®, logo and combinations thereof, are registered trademarks of
Olimex Ltd. Other terms and product names may be trademarks of others.
The information in this document is provided in connection with Olimex products. No license, express or implied
or otherwise, to any intellectual property right is granted by this document or in connection with the sale of Olimex
products.
Neither the whole nor any part of the information contained in or the product described in this document may be
adapted or reproduced in any material from except with the prior written permission of the copyright holder.
The product described in this document is subject to continuous development and improvements. All particulars of
the product and its use contained in this document are given by OLIMEX in good faith. However all warranties
implied or expressed including but not limited to implied warranties of merchantability or fitness for purpose are
excluded.
This document is intended only to assist the reader in the use of the product. OLIMEX Ltd. shall not be liable for
any loss or damage arising from the use of any information in this document or any error or omission in such
information or any incorrect use of the product.