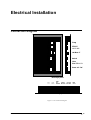
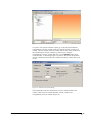
1
L-Vis
User Manual
LOYTEC electronics GmbH
Contact
LOYTEC
Blumengasse 35
A-1170 Vienna
AUSTRIA/EUROPE
[email protected]
http://www.loytec.com
Version 3.0.0
Document No. 88068509
LOYTEC MAKES AND YOU RECEIVE NO WARRANTIES OR CONDITIONS,
EXPRESS, IMPLIED, STATUTORY OR IN ANY COMMUNICATION WITH YOU, AND
LOYTEC SPECIFICALLY DISCLAIMS ANY IMPLIED WARRANTY OF
MERCHANTABILITY OR FITNESS FOR A PARTICULAR PURPOSE.
No part of this publication may be reproduced, stored in a retrieval system, or transmitted, in
any form or by any means, electronic, mechanical, photocopying, recording, or otherwise,
without the prior written permission of LOYTEC.
L-Chip™, LC7093™ and L-CORE™ are trademarks of LOYTEC.
LonTalk©, LonWorks© and Neuron©, LonMaker, LONMARK and LNS are trademarks of
Echelon Corporation registered in the United States and other countries.
Contents
Introduction
1
What is L-Vis?........................................................................................................................... 1
Scope ......................................................................................................................................... 2
Getting Started
3
Installing the L-Vis Configuration Application ......................................................................... 3
Connecting to the Device........................................................................................................... 3
CEA709 Devices ......................................................................................................... 3
BACnet Devices .......................................................................................................... 5
Quick Start Tutorial for CEA709 devices.................................................................................. 6
Step 1: Create the L-Vis device (CEA709 only) ......................................................... 6
Step 2: Create Dynamic NVs (CEA709 only) ............................................................. 6
Step 3: Start the L-Vis Configuration Plug-in ............................................................. 7
Step 4: Create Menu Structure and Pages.................................................................... 8
Step 5: Add Controls ................................................................................................... 8
Step 6: Connect the Data-Points.................................................................................. 9
Step 7: Write the Project to the L-Vis device ............................................................ 10
Step 8: Use the L-Vis ................................................................................................ 11
Mechanical Installation
11
Dimensions and Mounting....................................................................................................... 11
Theft Protection ....................................................................................................................... 13
Electrical Installation
15
Connection diagram................................................................................................................. 15
Electrical Characteristics ......................................................................................................... 16
Touch Panel Cleaning Instructions .......................................................................................... 16
Terminals and Jumpers ............................................................................................................ 16
LEDs and Buttons.................................................................................................................... 17
Interface Configuration
18
Selecting the Interface ............................................................................................................. 18
Configuring the IP-852 interface ............................................................................................. 19
Operating L-Vis
20
Touch Screen ........................................................................................................................... 20
Operation ................................................................................................................... 20
Calibration ................................................................................................................. 21
Data Input ................................................................................................................................ 21
Setup Menu.............................................................................................................................. 22
Custom Setup Menu .................................................................................................. 24
Configuration Software GUI
25
Main Window .......................................................................................................................... 25
Main Menus............................................................................................................................. 25
L-Vis User Manual
Contents • iii
Workflow................................................................................................................................. 25
Common Property Pages ......................................................................................................... 27
General ...................................................................................................................... 27
Common Properties ................................................................................................... 27
Color.......................................................................................................................... 29
Object Description
31
Introduction ............................................................................................................................. 31
Menu........................................................................................................................................ 33
Menu Properties ........................................................................................................ 33
Menu Item................................................................................................................................ 33
Menu Item Properties ................................................................................................ 34
Page ......................................................................................................................................... 35
Page Properties .......................................................................................................... 35
Controls ................................................................................................................................... 35
Text Control .............................................................................................................. 36
Bitmap Control .......................................................................................................... 36
Push Button ............................................................................................................... 37
Numeric Control........................................................................................................ 38
Bar Control ................................................................................................................ 38
Trend Control ............................................................................................................ 40
Date Control .............................................................................................................. 44
Data Log Control....................................................................................................... 45
Schedule Control ....................................................................................................... 46
Alarm-List Control .................................................................................................... 46
Data Point ................................................................................................................................ 47
Data Point Properties................................................................................................. 49
Mapping Table......................................................................................................................... 51
Mapping Table Properties ......................................................................................... 52
Action Objects ......................................................................................................................... 53
Action Properties ....................................................................................................... 53
Collections ............................................................................................................................... 57
Collection Properties ................................................................................................. 57
Collection Handling .................................................................................................. 57
Alarm Generators..................................................................................................................... 58
Alarm Generator Properties....................................................................................... 59
Application Hints ...................................................................................................... 60
Data Point Connectors ............................................................................................................. 61
Mathematic Objects ................................................................................................................. 62
Math Object Properties.............................................................................................. 62
Application Hints ...................................................................................................... 63
Function List.............................................................................................................. 63
Data Point Management
65
Concept.................................................................................................................................... 65
User Interface........................................................................................................................... 66
Folder List ................................................................................................................. 67
Data Object List......................................................................................................... 68
Property View............................................................................................................ 68
Object Creation........................................................................................................................ 68
User Register ............................................................................................................. 68
Local Network Variable (CEA709)........................................................................... 68
Local Server-Object (BACnet).................................................................................. 69
Remote Network Object ............................................................................................ 70
Local Scheduler and Calendar ................................................................................................. 72
Point Creation............................................................................................................ 72
Calendar Point Configuration.................................................................................... 73
Scheduler Point Configuration .................................................................................. 73
Schedule Configuration Data..................................................................................... 74
iv • Contents
L-Vis User Manual
System Resources...................................................................................................... 74
Resource allocation ................................................................................................... 76
Using the Scheduler................................................................................................... 76
Local Alarm Server.................................................................................................................. 76
Intrinsic Reporting..................................................................................................... 76
Algorithmic Reporting............................................................................................... 77
System Resources...................................................................................................... 77
Using Alarm Servers ................................................................................................. 77
Remote Scheduler and Calendar.............................................................................................. 78
Alarm Clients........................................................................................................................... 79
Standard Procedures (CEA709)
79
Device Integration ................................................................................................................... 79
New Device ............................................................................................................... 80
Pre-Programmed Device ........................................................................................... 82
Device Replacement ................................................................................................................ 82
Dynamic NV Projects................................................................................................ 83
Static NV Projects ..................................................................................................... 83
Mixed Projects (static and dynamic) ......................................................................... 84
Configuration Change.............................................................................................................. 85
Same NV Configuration ............................................................................................ 85
Dynamic NV Change ................................................................................................ 85
Static NV Change...................................................................................................... 86
Configuration Recovery........................................................................................................... 87
Change Device Configuration ................................................................................... 87
Change Network Configuration................................................................................. 88
Recover from a failed Update.................................................................................... 88
Special Functions (CEA709)
90
Binding Management............................................................................................................... 90
XIF Export............................................................................................................................... 90
Offline ....................................................................................................................... 91
Online ........................................................................................................................ 91
CEA709.1-A Operation ........................................................................................................... 91
Dynamic Network Variables ................................................................................................... 91
LonMaker® Network Management Tool .................................................................. 92
NL220........................................................................................................................ 94
Alex ........................................................................................................................... 96
Built-in LONMARK® Objects................................................................................................. 99
Timer Object.............................................................................................................. 99
Switch Object ............................................................................................................ 99
Relay / LCD Backlight control................................................................................ 100
HVAC Temperature Sensor .................................................................................... 100
Advanced Topics
101
Project Settings ...................................................................................................................... 101
Page Protection........................................................................................................ 101
Timeout Values ....................................................................................................... 101
System Flags............................................................................................................ 101
Remote Access ........................................................................................................ 102
Sound....................................................................................................................... 102
OEM Bitmaps.......................................................................................................... 102
System Colors.......................................................................................................... 103
System Settings ....................................................................................................... 103
Data Access ............................................................................................................. 103
LCD Backlight ........................................................................................................ 103
System Strings......................................................................................................... 103
Access Control....................................................................................................................... 104
L-Vis User Manual
Contents • v
Remote Network Interface..................................................................................................... 104
Device Model and Firmware ................................................................................................. 105
Avoiding Update Loops......................................................................................................... 106
User defined Fonts................................................................................................................. 106
Font File Location ................................................................................................... 107
Font Recoding ......................................................................................................... 107
PCF File Format ...................................................................................................... 107
Using Color Bitmaps ............................................................................................................. 108
Examples
109
Example 1: Working with Structured Network Variables ..................................................... 109
Text control ............................................................................................................. 109
Bitmap Control ........................................................................................................ 110
Numeric Control...................................................................................................... 111
Example 2: Using Data Point conversion and Hiding of Pages............................................. 112
Example 3: Freeze warning, Alarms and Registers ............................................................... 113
Example 4: Using text mapping and Date Control ................................................................ 115
Solutions
117
Implementing Menus ............................................................................................................. 117
Tab Menus............................................................................................................... 117
Icon Menus .............................................................................................................. 119
Taskbar Menu.......................................................................................................... 120
Bitmap Menu........................................................................................................... 121
Light Control ......................................................................................................................... 122
Animated Bitmaps ................................................................................................................. 122
Sunblind Demo ...................................................................................................................... 123
Split Demo............................................................................................................................. 124
Counter Demo........................................................................................................................ 125
Appendix A: Format strings
126
Format string description ....................................................................................................... 126
Appendix B: Date format string
129
Date format string description ............................................................................................... 129
vi • Contents
Revision History
131
Glossary of Terms
133
Index
135
L-Vis User Manual
Introduction
What is L-Vis?
Vis is a highly
flexible and easy to configure device to display and control data in BACnet and
CEA709 networks. The L-Vis configuration software can be run as a standalone
program as well as an LNS® plug-in and supports the use of both static and
dynamic network variables in a project to allow easy integration in any kind of
CEA709 network.
The key features of the L-Vis device family are:
L-Vis User Manual
•
320x240 graphical color touch LCD display with 256 colors (VGA
Palette) and a dimmable CFL backlight.
•
Simple, graphical programming via the supplied configuration
software.
•
Support for alarming, scheduling and trending.
•
Support for the UCS-16 character set of the Unicode standard
(ISO-10646), to allow for the design of projects in any language,
including Chinese, Japanese, and Korean (CJK).
•
Display of data as numeric value, user-defined text or graphic
elements, horizontal and vertical bars or trend logs. A special
element is available to display date and time in form of digital or
analog clocks.
•
Input of data via a numeric keypad, direct drag of a bar or selection
from a dropdown list of texts or graphic elements.
Introduction • 1
•
Mapping of values to colors, to allow an element to change color
depending on the current value.
•
Supports layers and transparency for all display elements. Layering
is simply defined by the order of objects in the tree view, which
may be changed easily by moving the objects around as required.
•
Support for numeric operations on data points, including a simple
if/else statement.
•
Input voltage: 24V AC or DC
The LVIS-3E100 model (CEA709) also provides:
•
Up to 512 network variables and alias variables.
•
Up to 512 address table entries.
•
FT-10/LPT-10 or Ethernet-IP852 operation selectable via a jumper
on the device. When in FT-10 mode, the device can still be reached
via its Ethernet port for fast project download.
•
A lamp actuator object to control the backlight from the network.
This object was used to control the internal relay on the older
LVIS-3ECTB devices.
•
A switch object to provide a standard switch and dimmer function,
as available on other CEA709 devices. The switch input for this
object is the IN0 connector. Both IN0 and IN1 inputs are also
available as system registers, for internal use.
•
A temperature sensor object which outputs the current value of the
external temperature sensor (optional).
•
A real time keeper object which outputs the current system time.
•
8 L-Vis functional blocks which can be used to place static or
dynamic NVs related to the data points used in the project.
•
Network scanning to find other device on the network and help in
creating the required network variables on L-Vis.
The LVIS-ME200 model (BACnet) provides:
•
Up to 512 server objects, accepting COV subscriptions. Available
object types are analog, binary and multi-state, each as either input,
output, or value object.
•
BACnet/IP or MSTP connectivity (jumper selectable).
•
Network scanning to find other devices and their objects in the
network and use them on the L-Vis device without the need to
manually enter device and object instance numbers.
•
Supports COV subscription and polling of remote server objects
with automatic selection of the best method (COV if available).
Scope
This manual covers the L-Vis device family. Currently available are the LVIS3E100 (CEA709 model) and the LVIS-ME200 (BACnet model), both equipped
with a 320x240 color touch display using the standard 256 color VGA palette.
2 • Introduction
L-Vis User Manual
Getting Started
Installing the L-Vis Configuration Application
To install the L-Vis Configuration software, execute the setup program and
follow the instruction of the installation wizard. The setup program adds an
entry for the L-Vis Configuration software to the start menu. For the use with
LNS® based network management tools, it registers the configuration software
as an LNS® plug-in. Before the LNS® plug-in can be used in a network
management tool, it has to be registered in the LNS® project. Please refer to the
documentation of your network management tool how to register an LNS® plugin in a network management project. During the registration process of the LVis Configuration software plug-in, LNS® device templates are created for the
FT10, and IP10L (Ethernet) versions of the device.
Connecting to the Device
There are several ways in which the configuration software can be run and used
to configure a device. While this is straight forward for BACnet models, it is
important to know the advantages and limitations of each method for CEA709
devices.
CEA709 Devices
CEA709 devices may be configured in several different ways:
•
Through LNS® (software run as LNS® plug-in).
•
Via a TCP/IP connection (using FTP).
•
Via an CEA709 connection (FT-10 or IP852).
Each of these methods has some advantages and some limitations in what they
can do. Please see the following detailed description of the individual connection
methods.
LNS® Connections
This method connects to the device from within the LNS® based network
management tool. The software is run as a plug-in and all communication with
the device is done through LNS®, meaning that you can use any network
interface which is supported by LNS®.
If your device is integrated into the network using an LNS® based tool (your
device is managed by LNS®) and you need to add or remove static network
variables from your project or otherwise change the static interface of the device,
you must use this connection method to download your project, since the
configuration software needs to do several adjustments to the LNS® database
during this process.
L-Vis User Manual
Getting Started • 3
If your changes to the project do not cause changes to the static network
interface, for example you are just working on the graphics, adding or modifying
controls and so on, it is more efficient to use one of the other connection
methods. The configuration software will detect any change in the static network
interface beforehand and display a warning before you commit to the project
download.
ADVANTAGES:
•
No need to set up TCP/IP connectivity.
•
Easy device selection from within your management software.
•
Automatically updates the LNS® database and re-commissions the
device, if necessary.
•
Functions to export and import current bindings to and from the
device into CSV files.
•
Any dynamic network variables created on the device will show up
as usable data points in your project, including the name of the
functional block in which they are located.
LIMITS:
•
Download of large projects or firmware upgrade is slow, due to the
limits of the communication channel. This is especially true for
devices in FT-10 mode.
TCP / IP (Ethernet) Connections
This method connects to the device through a standard TCP/IP channel. Data is
transferred using the FTP protocol, therefore the PC running the configuration
software must be able to establish an FTP connection to the device.
TCP/IP connections are possible even when the device operates in FT-10 mode,
since the IP port is always active. The IP address, network mask and gateway
must be configured via the setup menu on the device. The device must be
restarted once for the new settings to take effect.
In the configuration software, the IP address or DNS name of the device can be
used to establish a connection. Each connection can be named and saved in a
connection list, which is stored in the system so that the list is available when the
software is run the next time.
ADVANTAGES:
•
Very fast data transfer, suitable for large projects.
•
Faster startup of the device, because the project data is transferred
and stored uncompressed, so the device does not need to
decompress the project before it can be loaded.
•
Communication is possible even when the device is not
commissioned or otherwise not reachable on the CEA709 port.
•
No LNS® or special network interface hardware is required. The
standard Ethernet port which is available on every PC is enough.
LIMITS:
•
4 • Getting Started
No connection to LNS (if present) and therefore no way to update
the database in case the new project changes the static interface of
the device. Projects which add or remove static network variables
or otherwise change the static interface may not be loaded via this
method if the device is part of an LNS database, since the database
will be out of sync after the download and cannot be repaired by
L-Vis User Manual
the user (only the configuration software can apply the necessary
changes).
•
Any dynamic network variables which were created on the device
using a network management tool will show up as usable data
points in the project, but the functional block in which they were
created will be unknown, since the device itself does not have this
information (only the management software would know).
CEA709 (FT-10 / CEA852) Connections
In this mode, the communication channel is CEA709 via a LOYTEC NIC such
as a NIC-USB, NIC-PCI or NIC-852. The device must first be commissioned
(assigned a network address), either by using the same network management tool
as used for the other nodes in the network or by entering a suitable unused
address in the CEA709 setup menu. In the connection dialog of the configuration
software, the address of the device may either be entered manually, or can be
detected automatically by either entering the unique node ID or by pressing the
service pin button on the device. Once the address is known, the connection may
be named and saved just like the TCP/IP connections, so that the procedure is
only necessary when the address of the device changes.
Connecting via CEA709 is most suitable when the device is not connected to the
IP network and a non-LNS network management tool is used for integration.
ADVANTAGES:
•
Works even when the device is not connected to an IP network,
thus no need to set up TCP/IP settings for the device.
•
Download is faster compared to LNS® connections, due to an
optimized file transfer protocol.
LIMITS:
•
Only works when the device is commissioned. A download of a
new project which changes the static interface of the device will
therefore break the connection, since the device will have to reset
its CEA709 network configuration in that case. The device must
then be re-commissioned in the network management tool and the
connection must be re-established.
•
Especially in FT-10 mode, project downloads can still be slow. The
same is true for firmware downloads. If possible, the TCP/IP
connection method should be used for such tasks. Transfer speed is
considerably improved when there are no routers with limited
buffer size between the PC and the device. Routers which are able
to handle large packets (254 byte) will have no real impact on the
transfer speed. Routers which allow a maximum packet size of 64
bytes only will degrade the transfer speed.
•
Only network interface hardware from LOYTEC can be used for
this type of connection. Any LOYTEC NIC may be used to run the
configuration software, that is, the software is not registered to a
specific network interface hardware.
BACnet Devices
To configure BACnet devices, the software is always run in standalone mode
and a connection to the device is made over TCP/IP. The PC must be able to
establish an FTP connection to the device (check firewall rules if necessary).
L-Vis User Manual
Getting Started • 5
Quick Start Tutorial for CEA709 devices
This tutorial describes the steps to create a first demo project and load the project
into the L-Vis device. Since the CEA709 models are the more complex devices,
requiring extra steps compared to the BACnet models, the tutorial is tailored for
CEA709 devices. To use this tutorial for BACnet devices, just skip CEA709
related steps (as mentioned in the tutorial for such steps).
The tutorial assumes that the configuration software is already installed and the
LNS® plug-in is registered as described in the prior section (of course only if you
are using CEA709 devices). For this example we use the LonMaker® 3.1
network management tool to commission the L-Vis device in the network. Other
network management tools, which are based on LNS® 3 or above, which support
dynamic network variables and the LNS® Plug-in Interface can be used as well
for this tutorial (e.g. Newron’s NL220, SPEGA’s Alex 3 Professional). BACnet
models do not need to be commissioned and therefore do not need any extra
network management tool.
Step 1: Create the L-Vis device (CEA709 only)
Add the L-Vis device to your network project. Since the L-Vis configuration
plug-in already creates the device templates, the device configuration can be read
from the device template. Choose the device template which matches the
network interface mode (FT-10 or IP-10L) of your device. The Node ID of the
device can be entered manually. Optionally, a service pin message can be sent
by pressing the status button located at the bottom of the device, or by selecting
the Send Service Pin Message command in the SetupÆCommands menu of the
L-Vis device (see Setup Menu).
NOTE: Do not integrate the device into your project by uploading the device
interface properties from the device before you registered the plug-in. This is
important because if you upload the definitions from the device, you will create a
template of your own and the configuration software will then fail to create the
real device template, once you register it. In this case, you must remove the
device and the template from the database and re-run the plug-in registration.
Step 2: Create Dynamic NVs (CEA709 only)
In this example, we will create two dynamic network variables of type
SNVT_switch on the device, one input and one output, and bind them together
(turnaround binding) to show how to display and send out data.
NOTE: If your network management tool does not support dynamic NVs, just
skip this step. The required data points will then be created from within the
configuration software in a later step (as static NVs).
First, we need a functional block to place the new network variables in. Create
one of the 8 available L-Vis functional blocks (for example L-Vis[0]) to hold the
two variables. Next, create the two switch variables. For the complementary NV
required to create the dynamic NV, browse to the Switch object of your L-Vis
device and select one of the two switch variables available there (the direction
does not matter).
NOTE: Make sure to set the poll attribute to CLEAR when you create the output
variable, otherwise you will not be able to send out any values through this NV.
Also, the poll attribute of the input NV should be set, so that L-Vis is able to
fetch an initial value when it boots up.
6 • Getting Started
L-Vis User Manual
Now bind the output NV to the input NV, so that we can send/receive values.
Step 3: Start the L-Vis Configuration Plug-in
Run the configuration software in plug-in mode from within your network
management tool. Open the context menu of the L-Vis device block in your
drawing and select Configure to start the configuration software.
NOTE: For network management tools which do not support plug-ins, start the
program in standalone mode and connect to your device via TCP/IP.
The configuration software contacts the device, finds out what model and
firmware version it is, selects the correct settings and disables the corresponding
menus, so that you may not change them. The main window will show an empty
L-Vis project.
When the L-Vis configuration software is started in plug-in mode, the list of
dynamic network variables in the device is automatically read in and a list of
data points is generated, which will be used in a later step.
NOTE: In case the device was not commissioned yet, or there are other
communication problems, the plug-in will display a warning message, saying
that it could not communicate with the device and therefore was not able to
determine model or firmware version. In this case, you have to commission the
device or find out why it cannot be commissioned. Typical errors are devices in
the wrong mode (jumper set for CEA852 but connected to FT-10 or vice versa)
or communication problems on the channel itself. Especially on a channel as
complex as CEA852, there are a number of possible reasons why you may not be
able to communicate with the device.
The main window is divided in tree major sections:
Tree View: On the left side of the main window is a tree view showing all
objects you created so far and how they relate to each other, for example a menu
object may have menu item objects attached to it, a menu item object may have
page objects and sub-menu objects attached, and a page object contains the
elements to display and enter data (these elements are called controls in this
manual). You may navigate through this tree and select an object from it or drag
and drop objects to move them around in the hierarchy, for example grab a
control from one page and drop it on another page. An empty project contains
only a root menu and a few folder objects, where global objects can be placed,
which are not directly related to the user interface, for example alarm generators.
Property View: On the top right of the main window is a property view, which
shows a number of property pages, where you can adjust the properties of the
currently selected object. The number and kind of property pages changes
according to the selected object, but some of the more basic property pages are
available all the time. Feel free to browse through the available pages and see
what you can adjust there.
LCD Preview: To the lower right of the main window is the preview of the
project as seen on the LCD when the project is downloaded. This is not a
functional simulation of the L-Vis device, but a layout guide and preview of
individual menus and pages. The preview changes according to the currently
selected object. Since the configuration software comes with a library of the
layout code used in the various firmware versions of the device, the preview is
always accurate to the pixel. Should the layout or appearance of controls change
with firmware versions, the configuration software is able to track these changes
and display the page exactly as it will appear on the device you are currently
connected to.
L-Vis User Manual
Getting Started • 7
NOTE: You may select, move, and resize your controls directly inside the LCD
preview. Also, there are context menus available for each control, which you can
open by a right click on the control in the preview. The cursor keys can be used
to move controls one pixel at a time and to resize the control, when the shift key
is held down.
Step 4: Create Menu Structure and Pages
With this basic information, we are now ready to design a simple test page for
this tutorial. The empty project shows the root menu with no entries (menu
items). You may change the name of the root menu as well as its colors and
other properties, such as the width of the menu or its scroll-bar using the
property pages to the right of the tree view (make sure the root menu object is
selected, which should be the case right after you started the plug-in).
Now we add a menu item to the root menu. To do this, right click on the root
menu object in the tree view and select Add Item from the context menu. A new
menu item is created and connected to the menu object. The new menu item is
automatically selected, so that you may browse the property pages and see what
you want to change. We should first change the name of the item object in the
Name box of the General property page, for example to ‘Item 1’. This changes
the name of the object in the object tree and has no effect on the appearance of
the menu item on the device. To change the text of the item itself, go to the
Common Properties page and change the contents of the Text box to ‘Test 1’.
The display in the preview window changes as you type, so you can immediately
see the results. You may want to change the font to the 12x16-ROM-Fixed-R
font, so you get a larger item which is easier to select on the touch screen.
Repeat the steps above to add another menu item and call it ‘Setup’. Again,
change the Text of the item to read something like ‘Setup’ and change the font to
make the item a comfortable size. This item will be used to enter the devices
setup menu.
NOTE: The device will check the last item of the root menu and see if it has any
pages or sub-menus attached to it. If the item has no further objects attached (this
is called a return item), then the device will connect its setup menu to this item.
If the item is used, the device will create a default item to reach the setup menu,
but this will most likely not fit the design of your other menu items, so it is best
to always add a setup item yourself and configure it the way you want it to look.
Finally, we add a page to the first of our two menu items (Item 1). This page will
be displayed, when the user selects the menu item from the root menu. Open the
context menu of the menu item (right click on ‘Item 1’ in the tree view) and
select Add Page. In order to see this page right after the device started, we want
to make this the projects default page. Open the context menu of the page in the
tree view and select Set as Default.
Step 5: Add Controls
The next step is to place some objects on the page which will allow us to view
and control the values of our network variables. These objects are called controls
in this manual, since they allow the user to control the data points and display
their current value. A number of different control styles are available to choose
from. In this example, we want to display the current status of the switch input
using a text control for the state and a numeric control for the value. To control
the switch output, we use a bar control for the value and a bitmap control for the
state.
8 • Getting Started
L-Vis User Manual
To create the required controls, either right click on the page object in the tree
view and choose the control type you want from the context menu, or select the
page in the tree view and right click in the LCD preview area to reach the same
context menu. Add one text control, one bitmap control, one numeric and one
bar control to your page.
Now place the controls on your page so that they do not overlap each other. Grab
and drag them with the mouse or enter position and size in the Screen
Coordinates section of the Common Properties page. To resize the controls
with the mouse, move the pointer to the lower right corner of the controls area in
which the value is displayed, that is, disregard any decorations around the value
area, like the scale of a bar control. For most control types, the value area fills
the entire space of the control, except for the selection frame. For more complex
controls, like bars and trend logs, you can view the value area by changing the
Container color on the Color property page. Then grab the control at the lower
right corner of the container area.
NOTE: The position and size you set on the Common Properties page also
refers to the value area of the control, not to the selection frame around it. This is
done so that for example the width and height of a bar does not change when you
enable or disable tick marks or scale. These are just seen as decoration which can
be turned on and off while the area of the value display remains stable.
Adjust the properties of each control as you like or leave them at the defaults,
which should be fine for this demo. Bitmaps will be added to the bitmap control
in a later step.
Step 6: Connect the Data-Points
At this point, we should start to connect some data points to our controls.
Especially for text and bitmap controls, it helps to connect the data points early,
since the configuration of the controls property will depend on the data point
connected (you will see why this is the case in a minute).
To add a data point to a control, select Add Data Point… from the controls
context menu (same procedure as before). A new dialog will appear which is
used to manage and select data points. This dialog will be explained in detail
later on, for now we just use it to select our data points, which should have been
created for us already. Select the folder Local NVs from the tree view at the left
of the dialog. There should be two items, one for the input NV and one for the
output NV we created in step 2.
NOTE: In case you created the dynamic NVs after you started the plug-in, the
data points will not be there yet. In this case, close the data point dialog and push
the button two positions right from the connect button. The tool-tip of this button
reads ‘Update Data Points’. It will re-scan the currently available dynamic NVs
on the device and create the required data points for you. If you added NVs
while the plug-in was open, hit the update button to get the required data points
added to your project automatically.
If your network management tool does not support dynamic NVs, you have to
create static NVs now. Right click in the top right area of the data point manager
(where the list of data points is shown) and select New Datapoint… to open the
data point creation dialog. From the list of standard NV types, select snvt_switch
and create one input and one output NV.
From the two items available in the data point list, select the input data point and
expand its items by a left click on the small plus sign left of the data point. The
expanded view will show two sub-elements, one for the state component of the
NV and one for the value component. A data point is selected by a double click
or by selecting one or more points and clicking the OK button.
L-Vis User Manual
Getting Started • 9
You should now use the above procedure to add the state of the input NV to the
text control, the value of the input NV to the numeric control, the state of the
output NV to the bitmap control and the value of the output NV to the bar
control.
NOTE: When you add the state of the input NV to the text control, another
object called a mapping table will be created automatically and will be initialized
to map the three known states of the switch state to standard state texts. You may
select this mapping table and change the texts as well as assign different colors
to the individual texts in the mapping table. Mapping tables will be discussed in
detail later on, for now you can leave the table alone.
All the controls should now have one data point connected, with the text control
and the bitmap control having a data point and a mapping table. The bitmap
control needs some more work, since we need to assign graphics to the
individual values of the connected data point.
To do this, select the mapping table object which was created and attached to the
bitmap control. On the Mapping property page, select one of the entries in the
list, for example the entry for the value -1, which maps to the text SW_NUL.
Click on the button Select Bitmap… and select a suitable graphic to show for this
state. A few graphics are installed together with the configuration software,
others may be downloaded from the website or you may draw your own graphics
as well.
NOTE: Almost any bitmap format like BMP, JPG, GIF, PNG and so on may be
used. Vector graphics cannot be imported directly. Use the export function of
your vector graphic software to generate a GIF, BMP or JPG file in a suitable
pixel size first. Working with graphics is covered in a later section of the
manual, explaining the workflow to design your own graphics in more detail.
Once you selected a bitmap file, the bitmap control will resize itself
automatically to fit the selected icon. Repeat the process for the remaining states
until all states have a bitmap assigned to them. Use different bitmaps, so that you
can distinguish between the individual states. The size of the control will always
be the width of the widest icon and the height of the tallest icon.
You can test the look of your bitmap control by selecting the individual states in
the mapping table and watch the LCD preview. The state which is selected when
you write the project to the device will become the default state of the control.
Step 7: Write the Project to the L-Vis device
Finally we are ready to write the project to the L-Vis device. Each project should
also be saved in a file on the PC when you are done. Although it is possible to
read the project back from the device, it should not be considered a 100% safe
place for the project to be, since the device may erase the project in case it finds
a severe error which would otherwise prevent it from booting up again. Also if
the erase jumper is accidentally set, or the Remove Configuration… command is
selected from the File menu, the project in the device may be lost. To save the
project, select Save as… from the File menu and enter a project name. To write
the project to the L-Vis device, press the button with the red down arrow in the
toolbar and confirm the dialog.
NOTE: If you created static NVs, a warning message will appear, stating that
the static interface of the device will change and that the software will need to
adjust the definition of the device in the database. If you commissioned the
device in the database already, make sure to download the project in plug-in
mode. See the chapter about standard procedures for CEA709 devices for
detailed information about this topic.
10 • Getting Started
L-Vis User Manual
The project file is now written to the L-Vis device. After the L-Vis has
rebooted, it shows the tutorial project on the display.
If the NVs were creates statically in the project, they should now be available on
the device. You can now bind the output NV and the input NV together. In case
of dynamic NVs, this was already done in step 2.
Step 8: Use the L-Vis
You should now be able to use the device to set the state and the value of the
output switch NV and immediately see the results on the input NV, since the two
were bound together in step 2.
To change the state, press the bitmap control. A dropdown list with the tree icons
you assigned to the tree states in the mapping table will appear. Now select the
desired icon to set the state.
NOTE: Whenever an element is selected from a dropdown list of icons or texts,
the device will search the mapping table to find the value associated with the
selected element. This value will then be assigned to the output data points
which are connected to the control.
The new state will be sent out and will be received immediately by the input NV.
The new state should now be displayed on the text control, using the texts which
you specified in the mapping table.
To change the value, select the bar control and move the bar up and down. The
current value will be sent out, received back in, and should be visible
immediately on the numeric control.
Mechanical Installation
Dimensions and Mounting
The L-Vis enclosure consists of 2 parts. The frame should be mounted inside the
wall or in a cabinet door. For wall mount and cabinet door mount a hole with
180 x 150 x 57mm should be made.
L-Vis User Manual
Mechanical Installation • 11
Display Mounting Box
7.0 inches/180mm
.2 inches/
5mm
.4 inches/
10mm
.9 inches/
22mm
.3 inches/
7mm
4.75 inches/
120mm
.45 inches/
37mm
1.2 inches/
30mm
5.75 inches/150mm
2.9 inches/
74mm
.45 inches/
12mm
.53 inches/
13mm
2.25 inches/
57mm
Figure 1 Hole dimensions for wall mount and cabin door mount.
For wall mount the frame should be mounted flush with the wall surface, for
cabin door mount the frame can be attached to the cabin door with 4x M4
screws. Countersunk screws are preferred. The front panel has four recesses to
burry the countersunk screw heads.
The L-Vis device slides right into the frame and the spring action of 8 springs
holds the unit in place.
12 • Mechanical Installation
L-Vis User Manual
7.0 inches/180mm
Cut out depth to support
wire clearance
2.5 inches/63mm
.95 inches/
25mm
.3 inches/
7mm
5.75 inches/150mm
Wall Cut Out Hole
8.25 inches/210mm
4.6 inches/
117mm
.4 inches/
10 mm
6.5 inches/
165mm
5.7 inches/
145mm
3.5inches/
89mm
.75 inches/
19 mm
6.75 inches/171 mm
1.82 inches/
46 mm
Front Display Panel
Figure 2: Display dimensions of L-Vis.
Theft Protection
To protect the L-Vis device, the device can be connected to the wall mount
frame with the supplied chain as shown in Figure 3.
L-Vis User Manual
Mechanical Installation • 13
Figure 3: Connecting L-Vis to the wall mount frame.
14 • Mechanical Installation
L-Vis User Manual
Electrical Installation
Connection diagram
T
DATA
E GND
M + 3V
P
Temp
FT Earth
B
/
LPT A
FT/LPT
MSTP/BIP
100
B
A
S
E
-T
S
W GND
I
IN 1
T
IN 0
C
H
C
L
R
Switch
Clear
IP or FT/MSTP
FT
FT
IP
P
O
W
E
R
100 Base -T
Earth
-~
+~
Power AC / DC
GND
Back Display Panel
PKT.
ACT
CNIP
MSTP
LINK
ACT
RESET
ONLINE BUTTON
STATUS
BUTTON
PWR
STAT
Bottom Display Panel
Figure 4:L-Vis connection diagram
L-Vis User Manual
Electrical Installation • 15
Electrical Characteristics
The electrical characteristics are shown in the following Table 1.
Characteristics
Value
Operating voltage
24 VDC or 24 VAC ± 10%
Power consumption
8 W (backlight on), 3W (backlight off)
In-rush current
Up to 1000 mA @ 24 VAC
Operating temperature (ambient)
10°C to +40°C
Storage temperature
-10°C to +50°C
Humidity (non-condensing) operating
10 to 90 % RH @ 50°C
Humidity (non-condensing) storage
10 to 90 % RH @ 50°C
Switch input
Floating contact
Ethernet connection
100Base-T
CEA-709
FT-10/LPT-10
Enclosure
Stainless steel, anodized aluminum front
panel E6C0
IP Code (IEC 60529)
Front: IP54 / Back: IP10
LCD display
320x240 pixels, 256 colors
LED backlight
CTFL backlight, 10000 hours / auto off
Installation
Wall mount
Table 1 Electrical characteristics.
Touch Panel Cleaning Instructions
Clean and soft clothes with neutral detergent or with ethanol may be used for
cleaning. Do not use any chemical solvent, acidic or alkali solution.
Terminals and Jumpers
All connectors and configuration jumpers are accessible from the rear of the
device. The following connectors are available:
LVIS-3E100: Select IP-852
or FT-10 channel first.
LVIS-ME200: Select BIP
or MSTP mode first.
Connect the Earth Ground
wire to the earth ground
stud.
Power is connected to the 3 position terminal labeled
POWER. Please use only power supplies with the
characteristics shown in Table 1. Connect earth ground to the
stud labeled with the earth ground symbol. Loosen the top nut
and attach the earth ground wire to this location.
FT-10, LPT-10 connection
The FT-10 or LP-10 network is connected to the terminal
labeled FT/LPT. The signal wires are connected to terminals
A and B, the shield if available is connected to terminal
EARTH. This EARTH terminal is connected to the main
(LVIS-3E100)
16 • Electrical Installation
The unit can be operated on an IP-852 (IP-10) channel as well
as on an FT-10 or LPT-10 channel (BIP or MSTP for BACnet
devices). The jumper labeled FT/IP or BIP/MSTP
distinguishes between the 2 modes of operation. Please set
Jumper in order to operate the device on an IP-852 or BIP
channel (IP mode) and remove the Jumper in order to operate
the device on an FT-10 / LPT-10 or MSTP channel.
L-Vis User Manual
earth terminal.
BACnet MSTP connection
(LVIS-ME200)
External temp sensor
When in MSTP mode, the RS485 bus is connected to the
terminal labeled MSTP.
Up to four external temperature sensors can be connected to
the terminal labeled TEMP. Compatible temperature sensors
are available from LOYTEC under the part number LTEMP1. The temperature range of this electronic sensor
specified as -55 to +125°C and the accuracy is +/-0.5°Celsius
within the range from -10 to +85°C. The resolution of the
sensor is 0.0625°C. The sensor device contains an integrated
circuit which is connected via a digital interface to the main
unit so that no further calibration is needed. Multiple sensor
devices are connected in parallel (bus topology).
The measured temperature is available in four internal system
registers (Sensor 1 Temp. to Sensor 4 Temp.) where the
sensors are assigned to the registers by increasing serial
numbers of the sensor hardware.
The terminal cannot be used for direct connection of passive
NTC or PTC elements. DO NOT CONNECT ANY
DEVICES OTHER THAN L-TEMP1 SENSORS to this
terminal.
External switch inputs
Two external switches (push button or open-close) can be
connected between terminals IN0 and GND as well as IN1
and GND on the connector labeled SWITCH. The status of
the switches is available on the device in two system registers
Switch Input 1 and Switch Input 2. On the LVIS-3E100
device, IN0 is also used to control the integrated Lamp
Actuator object which is always present as part of the static
interface of the device.
TCP/IP connection
In case a CEA709 unit is connected to an IP-852 channel or a
BACnet unit is connected via BACnet/IP, connect the
Ethernet cable to the connector labeled 100Base-T. The
device also accepts 10Base-T connections via this port.
CLEAR jumper
To remove the currently stored project from the device, set
the jumper labeled CLEAR, disconnect power and connect
power again. Wait until the unit has started and remove the
jumper again.
LEDs and Buttons
All LEDs and buttons are accessible from the front and the bottom side of L-Vis.
Please see the descriptions below for their functionality.
Status button
Pressing the Status button sends out a service pin message on
the IP-852 or the FT-10/LPT-10 channel (CEA709 models) or
send out an ‘I Am’ message (BACnet models).
To remove the CEA709 network configuration (data which
was stored on the device when it was commissioned), hold
the service pin button pressed while the unit boots and release
the button within 10s when instructed to do so by a message
on the display.
L-Vis User Manual
Reset button
Behind the small hole next to the status button is the reset
button. Use a pin to reach the reset button in order to hardreset the device. Doing this may cause trend log data or other
persistent data to be lost or reverted back to earlier data. To
avoid data loss, reset the device via the configuration
software or the setup menu (command page).
Power LED
The power LED lights up green as soon as power is
connected.
Status LED
The status LED lights up red when the internal persistent
Electrical Installation • 17
storage device is accessed. Also, on CEA709 models
operated on an FT-10/LPT-10 channel, this LED indicates the
node status. The LED is off if the node is configured online
and flashing red with a period of 1 Hz if the node is in the unconfigured state.
ACT BAC LED
This LED indicates incoming and outgoing data packets on
the currently active communications channel. Only packets
which are addressed to the device are shown.
LINK Ethernet LED
The LINK ETH. LED indicates a successful Ethernet link.
ACT Ethernet LED
The ACT ETH LED shows activity on the Ethernet network.
ONLINE LED
The ONLINE LED lights-up green if the node is in the
configured online state (CEA709 models only).
CNIP LED
This LED either shows the current status of the IP-852
interface (in IP-852 mode) or the status or the remote network
interface, RNI (in FT-10 mode).
ACT 709 LED
(LVIS-3E100)
IP-852: The LED lights green if the device is properly
configured and member of an IP-852 channel. The LED
lights orange when the device is configured in a channel but
is waiting for updated channel information from the
configuration server. In case of errors, the LED lights red.
RNI: The LED is dark if RNI is not supported by this device
(older devices do not have enough node IDs to support RNI).
The LED is green if the remote network interface is ready for
connections and orange if the device is currently in use. In
case of errors, the LED is red.
MSTP LED
(LVIS-ME200)
This LED shows the status of the MSTP interface, if the
device is operating in BACnet/MSTP mode. The LED is
green for normal operation, orange if there is no token and
red if there are communication errors.
Interface Configuration
Selecting the Interface
Both the CEA709 units and the BACnet units have two network interfaces and
two different types of communication going on, which should be clearly
distinguished:
18 • Interface Configuration
•
Communications with the configuration software, to read and write
configuration data, upgrade the firmware, and retrieve diagnostic
data from the device (configuration).
•
Communication with other devices on the control network, to send
out new data the user entered through the device and to receive
new data which is then displayed (operation).
L-Vis User Manual
One of the two interfaces is the IP interface (Ethernet 10/100Base-T) which is
always available for configuration and may also be used for operation, although
different protocols will be used for the two tasks as shown in the table below.
The second interface is a specialized control network interface, like FT-10 for
the CEA709 devices and MSTP for the BACnet devices. Only the CEA709
models are currently able to use their control network interface for configuration
as well. The BACnet models need the IP interface for configuration.
Model
Interface
10/100Base-T
LVIS-3E100
FT-10
LVIS-ME200
10/100Base-T
MSTP
Task
Protocol
IP Jumper
Configuration
FTP
Any Pos.
Operation
CEA852
SET
Configuration
CEA709
NOT SET
Operation
CEA709
NOT SET
Configuration
FTP
Any Pos.
Operation
BIP
SET
Operation
MSTP
NOT SET
Table 2: Available interfaces
Configuring the IP-852 interface
Before the L-Vis device can be used on a IP-852 channel, the following things
have to be configured in the Setup Menu of the device:
1.
IP Settings: Configure the IP configuration of the L-Vis device.
Enter the setup menu of the L-Vis and configure the IP-Address,
Net mask and Standard Gateway. Reset the device when the IP
configuration is finished.
2.
CEA852 configuration: If required, set the Escrow time,
Aggregation time and the MD5 key on the CEA852/RNI page of
the setup menu. The CNIP port setting should normally be set to
1628 and the NAT mode should be set to automatic.
3.
Configuration Server: Add the L-Vis device to an IP-852
channel. To do this, add the IP address of the L-Vis device to the
channel list in a configuration server, e.g. on an L-IP, and restart
the L-Vis device. L-Vis will then wait for the configuration server
to contact it and provide the necessary channel information. If the
device was a member of a different channel before, it will not wait
an instead boot up with the already known channel information.
The configuration server will then reconfigure the device to
become part of the new channel.
4.
Check configuration server: To check if the L-Vis device was
correctly added to the channel, enter the CEA852/RNI page in the
setup menu. The configuration server field should now display the
IP address of the configuration server.
NOTE: During system start, when the device is used on an CEA852 channel for
the first time, it waits for a configuration server to contact it within 30s. If this is
not successful for 30 seconds, the device will switch back to CEA709 mode and
boot up so that you may make modifications to your settings and try again. The
same applies if DHCP was enabled and the unit is not able to get an IP address
for 30 seconds.
L-Vis User Manual
Interface Configuration • 19
Operating L-Vis
Touch Screen
Operation
This section describes how to operate the touch display of the L-Vis device.
Most operations should be fairly intuitive, so that users of the device do not need
to read a manual before they are able to operate the device.
L-Vis devices use a resistive touch screen. This type of screen can only detect
one touch position at a time, that is, you cannot press two buttons at once. The
screen delivers raw data which must be converted to LCD pixel positions before
it can be used; therefore a touch screen of this type needs calibration. All devices
come pre-calibrated from the factory and should be accurate enough to operate
the device out of the box. To operate a device using very small control elements
or from an unusual viewing angle, it may be necessary for the user to re-calibrate
the screen, using the built-in calibration function which is available in the setup
menu (section commands). The procedure is explained in more detail in the next
section.
The touch pressure is currently not measured and has no effect on the operation.
The touch display is able to detect three different input actions::
•
Touch (one point at a time)
•
Touch and hold
•
Touch and move
The simple and intuitive touch operation is used to select menus, select controls
and enter data on the input keypad. This is straight forward.
The touch and hold operation opens the navigation menu after a configurable
time (0 to 5 seconds). Please note that for correct operation, the touch and hold
action should be executed on a free sport on the display. If the area of an input
control is touched, the control enters input mode and all further input is
processed by the control.
The touch and move operation can be used to adjust values on a bar graph
control or move the cursor in a trend control. If executed in a free space on the
page, there are tree touch gestures which the device can react to:
20 • Operating L-Vis
•
Touch and move up: This will immediately bring up the
navigation menu, so the user does not have to wait for the timeout,
as is the case with the touch and hold action.
•
Touch and move right: This switches to the next page connected
to the currently selected menu item. If there is only one page
connected, this gesture does nothing (it does not move forward to
the next menu item).
L-Vis User Manual
•
Touch and move left: As above, but switches to the previous page
connected to the active menu item.
NOTE: Touch gestures may be disabled in the project configuration, in case the
project uses a button-only navigation through the pages.
Calibration
In case the touch screen has to be re-calibrated, select the command Calibrate
Touch Screen from the command dropdown list in the setup menu. This will
show a black screen with a white cross at the top-left corner of the display.
Touch the middle of the cross, using the same viewing angle and the same touch
device (usually your index finger) as the user would during normal operation of
the device. Once the touch is detected, the cross moves to the next corner. The
procedure repeats until all four corners were measured.
Following the measurements is a verification pass. A white filled circle appears
at the same locations as the cross. Again, touch inside the circle to let the device
verify the data from the measurement pass. If the data is OK, the screen lights up
green, if verification fails, the screen lights up red. The last position for
verification is a circle in the middle of the screen, which must be touched as well
for the calibration process to complete.
If the verification pass was successful, the new calibration data is stored in nonvolatile memory so that it is retained across a power cycle or reboot.
NOTE: If you are unsure about the viewing angle at which the device will be
used, it is best to calibrate for a direct front view, at a right angle to the display
surface. This is the most likely position and will also provide enough margin for
error in all possible directions. For normal control sizes, the small errors
introduced by differing viewing angles are not noticeable
Data Input
As shown in the tutorial, L-Vis uses configurable control elements to display and
input data. Whether a control is selectable for data input depends on the data
points connected to it as well as on the current access level of the user:
•
Data Points: If at least one output data point is connected to a
control, the control becomes an input control, meaning the user
may select the control and input new data, which is then assigned
to all connected output data points, unless they are marked as
Constant Value. If only input data points are connected, the control
is not selectable and will only display the most recent value
received from any of the connected input data points. Some
controls, like trend log controls, may not be used to input new data
but may still be selectable, to navigate through the recorded data.
•
Access Level: If a control is an input control, it will only enter
input mode if the current access level of the user is equal to or
greater than the level defined for the control on the Common
Properties page (option ‘Access Level for Data Input’). To change
the access level, a suitable PIN code must be written to the system
register called Pin Code Enter (for normal login) or the new access
level can be set directly by writing the register Access Level.
NOTE: It is valid to connect input and output data points to the same control at
the same time. This is often done when the control should display the current
state of a network value (for example the current light level) and also allow the
L-Vis User Manual
Operating L-Vis • 21
user to modify this value, using the current value as the starting point. The
control will ignore any values coming in from the input data points while the
user inputs data, so that incoming data does not interfere with the users actions,
but resume displaying the incoming values when input mode is left.
If a control is selected, it enters a special input mode, in which all further touch
actions are routed to and processed by the control. Depending on the control
type, different data input methods are available:
•
Numeric Keypad: For number controls and bar graph controls, a
numeric keypad can be displayed when the input control is
selected. New values can then be entered on this keypad, just like
on a phone or a calculator.
•
Touch and move: For bar graph controls, the bar may be directly
moved to the desired position by touching the bar and moving it to
the desired height. While doing this, the control can be instructed to
send periodic updates to the connected output data points, so the
user gets immediate feedback (useful for light control).
•
Drop down selection: For text controls and bitmap controls, a drop
down list is displayed when the input control is selected. The user
can select the desired item from the list.
•
Push button mode: For text controls and bitmap controls, a push
button mode can be activated. This mode assigns a new value to a
control whenever the control is selected. The next value is
determined by selecting the next or previous entry in the mapping
table, so the user may cycle through the available values.
•
Actions: There is an indirect way of assigning values to output
data points using the Update Data Points action. This is sometimes
useful, for example to store a current value in a register data point
when the user selects or touches a control. These actions are
explained in more detail later on.
The control decides when to leave input mode. This is also called loosing the
Input Focus, since the control returns input processing back to the page which is
currently shown. Upon input focus loss, the control usually sends out the final
value and stores it in non-volatile memory, so that it is retained across a power
outage or reboot.
NOTE: The special persistent flag does not need to be set for these data points
to retain their value. The control forces persistent data storage automatically.
Controls usually return the focus when you touch an area outside of the control
or when you leave the device idle for a specified amount of time. Some controls
(like the keypad) have OK and Esc buttons for you to press, to either close and
accept the new value or close and restore the previous value.
Leaving a control idle while in input mode will usually be interpreted by the
control as a cancel action. The control will then leave input mode, return the
focus to the page and restore the value it had when input mode was entered.
The idle timeout can be set in the Project Settings dialog, together with a
number of other timeout values.
Setup Menu
All devices come with a built-in setup menu, which is used to set device specific
parameters, such as the devices IP address, control network settings, or date and
22 • Operating L-Vis
L-Vis User Manual
time zone. These settings are related to the installation of the device and are
usually configured at installation time.
Once the device is installed and a project is downloaded to the device, the builtin setup menu may be hidden, so that it is no longer accessible to the users of the
device. Alternatively, access to the setup pages may be protected by a PIN code.
Both options are available in the Project Settings dialog, which can be accessed
from the File menu in the configuration software.
The standard setup menu always contains the following pages:
•
TCP/IP: On this page, the IP address, network mask, gateway, and
optionally NTP server addresses for time synchronization can be
configured. Alternatively, the device can be instructed to get the
required settings from a DHCP server in the network (automatic IP
configuration). Changes on this page will not be effective until the
device is restarted.
•
Date/Time: This page is used to set date and time, as well as the
current time zone. Always adjust the time zone first and then set
date and time to the local time. There are various ways to
synchronize the time with external time sources. The current time
source is defined by the loaded project and is displayed at the
bottom of the page. If an external time source is used, only the time
zone needs to be adjusted here.
•
Commands: This page contains a dropdown list of the commands
which can be executed. Some commands are available on all
devices, while others are specific to a device family. The following
commands are defined:
Command
Description
Send Service Pin
Message
CEA709 models only. Send out a service pin
message.
Un-configure Node
CEA709 models only. Set the device back to
un-configured state (forget network address).
Clear System Log
Clear the system log of all entries.
Dump IP Statistics
Dump the current IP statistics to the system
log, useful to debug IP connectivity problems.
Save All Trend Data
Save the data of all persistent trend logs right
now (automatically done when a clean
shutdown of the device is executed).
Lock Pages (Logout)
Consider all protected pages to be locked
again, after the PIN code was entered and the
pages were unlocked before. This basically
sets the current access level back to zero.
Calibrate Touch
Screen
Start the touch calibration routine.
Clear Data and Reset
Clear all persistent data (user data points
forget their stored value).
Reset Device
Perform a clean shutdown and reboot. All
persistent data will be saved before the device
restarts.
•
About: Show the about page (default title page).
•
Exit: Exit the setup menu and return to the main menu.
The CEA709 models provide the following additional pages:
•
L-Vis User Manual
CEA709: On this page, the device can be given a CEA709 address
(domain/subnet/node) and can be set online. This is useful to
Operating L-Vis • 23
connect to the device in standalone mode, before the device is
actually commissioned in a network, for example because the
project needs to be downloaded first to define the static interface of
the device and there is no TCP/IP connectivity available.
•
CEA852/RNI: On this page, the IP-852 parameters or RNI
parameters (depending on the mode of operation) can be specified.
Supported parameters are the escrow and aggregation timeout, the
IP-852 port number, the MD5 key, and the NAT support mode.
Please refer to the documentation of your configuration server for
more information about these parameters. The defaults should
normally be OK, unless your channel uses MD5 encryption, in
which case you need to enter the MD5 key and activate it by
selecting Enable with new key -> from the dropdown list after the
key was entered.
NOTE: The key is displayed as 8 groups of 4-digit hex values, which is a
common representation of MD5 key values. The order to read the key is from
left to right and top to bottom.
It is not possible to enter the configuration server or time server on the L-Vis
device. Instead, the device must be added to the channel on your configuration
server, which will then contact the device and set the channel-wide parameters
such as the time server addresses automatically. The result is displayed at the
bottom of the CEA852 setup page.
NOTE: For security reasons, enabling MD5 with a new key will store and
activate the key and then reset the input fields to all 0000, so that the current key
can not be seen on the display. Once the key is stored that way, it may be
enabled and disabled using the dropdown, even though the input fields always
show 0000. Consider these fields to be used for input of a new key only.
The BACnet models provide the following additional page:
•
BACnet: On this page, the BACnet device ID, MSTP node address
and baud rate (for MSTP mode only) and the BACnet/IP port
number (for BACnet/IP mode only) can be set. The currently active
interface is shown on the bottom of the page.
Custom Setup Menu
Starting with version 2.0 of the device firmware, the project may use standard
controls on standard project pages to set all system parameters, like IP address,
date, time zone and so on. To do this, create a suitable control and connect the
system parameter which it should modify. This way, a project may provide a
completely customized setup menu, matching the design of the other pages in the
project, for example a localized Japanese setup menu may be provided, or a
subset of the complete setup menu, such as specific commands from the
command page, or the setup of date and time only.
NOTE: The example projects that are installed together with the configuration
software include projects for the standard setup menu of the CEA709 and
BACnet models. These projects should provide a good starting point for a
customized setup menu.
24 • Operating L-Vis
L-Vis User Manual
Configuration Software GUI
Main Window
The main window of the configuration software (Figure 5) is divided up into 3
areas, as explained in step 3 of the tutorial.
Figure 5: Main window of the L-Vis configuration software
Main Menus
Many of the items in the main windows menus do not require additional
explanation, as they are commonly found in every PC software. Also, a short
description of every menu item can be seen in the bottom left of the main
window when moving the mouse over the menu item in question.
All items specific to this configuration software are referenced from the
individual sections in this manual which explain the items function, that is, the
function is explained and the menu item via which the function may be accessed
is pointed out, not the other way around.
Workflow
Even though there are a lot of things to configure, creating a new project really is
not that complicated. If this is your first attempt to create a project, it might help
L-Vis User Manual
Configuration Software GUI • 25
to concentrate on one thing at a time to avoid unnecessary confusion caused by
switching back and forth between objects and their different property pages.
A simple workflow is suggested below:
26 • Configuration Software GUI
•
First, build the desired object hierarchy using the tree view at the
left. Use the context menus to add, cut, copy, and paste objects and
use drag and drop inside the tree view to move existing objects
around. It is also possible to have a second instance of the
configuration software running and copy/paste objects between the
projects. In the property view, keep the General property page
open and enter names and descriptions for your objects as you
create them. Do not get lost in detailed object configuration at this
time!
•
You should now have an object tree containing at least the
hierarchy of menus, menu items, pages, and the basic controls
which will be used to display and enter data. All objects should be
clearly named. Now is a good time to go through the menus and
configure their basic appearance. Select one menu at a time from
the tree view and keep the Common Properties page open in the
property view. For each selected menu, enter a menu title in the
Text field and select the desired font.
•
With the Common Properties still open, go through all menu item
objects and enter each items text in the text field. Choosing a
medium sized font, like the 12x16 ROM font, will make it easier to
select the menu item on the touch screen. If the item text does not
fit the width of the menu, don’t worry about it for now. The
required menu width will be set at a later step, when all menu items
have their final text assigned. While you are at the common
properties page, you may also load an icon for the menu item,
which will be shown to the left of the item text.
•
Go back once more to the menu objects of your project and open
the Menu/Page property page. For each menu, set the Container
Width such that the longest item text fits the menu. If your items
use graphical icons as well, you may need to adjust the width
reserved to the left of the item text such that the widest icon will fit.
In case the menu contains more items than fit on the screen, make
the scroll bar wider, so that the user may easily grab and drag it
with the index finger. The default width of the scroll bar is
designed to look good for menus which do not need a scroll bar.
•
Now go through your pages and lay out the controls as desired.
While a page is selected, go to the Common Properties page to
select a background bitmap for the page, or go to the Color page to
select a background color. That’s all you should need to configure
for the page itself at this time. Note that each page for which you
set a full-page background image will require an additional 78kB
of memory. To place small logos or page headers, use a bitmap
control instead and select a suitable background color for the rest of
the page. This will save a large amount of memory.
•
As you lay out the controls, it is a good idea to also set their
properties to modify their appearance, since this will ultimately
change the size of the controls and may have an impact on their
placement on the page. For text and bitmap controls, you should
already have the data points connected and the mapping tables
filled in, bar and trend controls should have their final settings of
scale, tick marks and value range. The individual property pages
are discussed in more detail below.
L-Vis User Manual
•
Add actions, alarm generators, mathematical objects, and other
global objects you require to put functionality into your project.
•
Fine-tune colors and transparency on the Color page and layering
by using drag and drop in the tree view.
This is of course not a complete list of things to do, but should give you an idea
where to start from a blank project.
If objects or complete pages are copied from one project to another project, the
copied objects may contain references to data points or loaded fonts which do
not yet exist in the target project. If possible, any missing data points or fonts
will be created automatically in the destination project. If this is not possible, for
example if an object references a data point from a foreign technology (copy
from a BACnet project into a CEA709 project), these references will be lost.
Common Property Pages
The individual property pages visible in the property view will change according
to the currently selected object. Most property pages are directly related to a
certain type of object and will be discussed together with the object itself. Some
pages are used to set common properties and remain visible all the time. These
common pages are explained below:
General
This is the page which should be open while creating new objects in the tree
view. As you create new objects, give them a suitable name here, to clearly
identify them in the tree view.
NOTE: The object name specified here has nothing to do with the appearance of
the object on the device, if it is a visible object at all. The name on this page is
just the name of the object in the object hierarchy. The name should be chosen
such that looking at the tree view is enough to understand what an object is for.
The large area below the name field can be used freely to enter any description
which might be needed for other people to understand what this object does, why
it is here, how it works, and so on. This can be used to store the projects
documentation together with the project, improving reusability and
maintainability, in case the project is taken over by another person later on.
Additional information shown on this page is the unique ID of the object as well
as the estimated memory usage on the target device.
NOTE: The unique ID of the object is used for identification. If the object
records data which is stored in a file (trend log or data log), the file name will
include this ID in order to match the data files to the respective controls. The
UID is also used to reference other pages in the project (action Show Page).
Common Properties
The Text field is used to configure the textual part of an object. This may be just
ordinary text or a format string, instructing the object how to format its text
output. For menus and items, this field holds the menu or item title as it appears
on the device, for controls which display text or a numbers (text, numeric, and
date controls) this field contains a C style format string. The alignment buttons
allow to adjust the alignment of the text inside the display box (left, middle, or
right aligned). The font window is used to select the font for the text. If other
than the built-in fonts are needed, additional fonts can be loaded into the project
L-Vis User Manual
Configuration Software GUI • 27
using the Load button. Unused fonts can be removed from the device via the
Unload button.
Object Type
Usage of the Text field
Menu
Directly used for the menu title.
Menu Item
Directly used for the menu item text.
Format string which may contain one %s placeholder, which will be
replaced by a string taken from a mapping table or a connected
string data point. For static texts, use a text control and fill in the
static text in the text field, without using a %s placeholder. The %s
placeholder conforms to standard C rules and may include
additional format modifiers between the % and the s:
Text Control
Numeric
Control
Date Control
•
<number> A number following the % sign forces a field
with for the string of at least the given amount of
characters. If the string is shorter, it is padded with white
space at the left (right justified within the given field).
•
- A dash preceding the field width means the string should
be left-justified inside the field (padded to the right).
•
.<number> A decimal point followed by a number is
interpreted as the maximum length of the resulting string.
Format string which may contain one placeholder for a floating
point value, for example %f, %g,, or %e. To display a hexadecimal
value, the placeholder %x may be used together with the option
Convert Data Point Value to Integer which is available on the
Numeric Control property page (detailed below).
There are a number of format modifiers available for the expert user
to tailor the output of the numeric control. Novice users may use the
format string wizard on the Numeric Control property page to
construct a suitable format string without knowledge of the details.
Date/Time format string which may contain a number of different
placeholders to display date and time in textual form. The format
string conforms to the ANSI C strftime() function and is detailed in
the appendix of this document. On the property page of the
Date/Time Control, a format string wizard is available for the user
to create a correct date/time format string without knowledge of the
details. Expert users may also look up the available placeholders in
a C programmers manual for the strftime() function.
Also available on the common properties page are fields to enter the screen
position and size of the selected object, if the object is a control. However,
position and size of controls are usually modified directly in the LCD preview
using the mouse or the cursor keys. For more information about position and size
of controls please see step 5 of the tutorial.
The checkbox Auto-Resize is normally turned on, so that controls which support
it will resize themselves automatically to accommodate the largest content they
need to display according to the elements in the mapping table. The checkbox
may be turned off for text controls to prevent automatic resizing and set the
desired size manually.
NOTE: Manual size for text controls is most often used when the selection area
should be larger than the longest text. In this case, the text is often also centeraligned, using the buttons to the right of the text input field. Another case is text
received from the network. In this case, the configuration software does not now
the size of the longest text at configuration time, therefore the user needs to
reserve a suitable size for the text manually.
Below the screen coordinate section is an area where a bitmap can be loaded. A
number of graphic formats are supported, for example BMP, JPG, PNG, TIFF
28 • Configuration Software GUI
L-Vis User Manual
and others. Not supported are any vector formats. They need to be exported to a
bitmap format first.
When a 256-color GIF or PNG image is loaded (indexed color format), the
configuration software does not change the color indices of the loaded pixels,
that is, the color palette of such an image should match the VGA palette. If you
are unsure or get false colors when loading such an image, save the image in true
color format and let the configuration software do the color conversion/dithering
as required. Graphics import is discussed in detail in a later section.
Depending on the object type, the image is used according to the following table:
Object Type
Page
Bitmap is used for…
Page background. The loaded bitmap should match the screen
resolution of 320x240 pixels. Smaller background pictures are
placed in the top left corner of the display. For example a 320x20
bitmap would appear as a page header, while an 80x240 bitmap
would appear as a vertical bar at the left. Please note that a page
requires an additional 78kB of memory as soon as a background
bitmap is loaded, independent of the bitmap size.
To place smaller static bitmaps anywhere on a page, use a bitmap
control and assign the bitmap to the control instead of the page,
then move the control to the position where the graphic should be
located.
Bitmap
Control
Bitmap to show when the control is created. If the control does not
have a mapping table attached to it, this is the only image which is
shown by the control. It is then similar to a text control containing
static text. Bitmap controls may be used in this way to place logos
or other graphic elements anywhere on the screen.
If a mapping table and a data point is attached to the control, the
images from the mapping table may replace the image specified
here, when new values are received or selected by the user.
On the right side of the property page, the access level required for data input
can be specified if the selected object is an input control. The access level must
be equal to or higher than the level specified here, otherwise the user will see the
control but will not be able to select it and input new data.
The button called Set as Default may be used to save the design of the currently
selected visible object as the default design for new objects of the same type. If a
number of similar objects is to be created, configure the first object, press the
default button and then create the other objects.
NOTE: The set defaults are saved together with the project, so that the same
defaults apply the next time this project is loaded. To change the defaults for an
object, change the design as needed and press the default button again to update
the stored default settings.
Color
The color property page is used to configure color and transparency for all
visible objects. To avoid different color property pages for every object, the
colors are set through this common page, using common names for the different
colors. Not all objects support all colors. When an object is selected, it will
report its color configuration on this page and set all unsupported colors to unset
(black cross). To change a color, click on the corresponding color button and
select the new color from the dialog.
L-Vis User Manual
Configuration Software GUI • 29
NOTE: Most colors are named such that it is clear to which element of an object
the color applies, like Text, Background, Selection and similar. Colors which
need more explanation are the three line colors. How the available line colors are
used by a particular object can be found in the objects documentation.
The right side of the color page allows to set the current color scheme for
multiple objects at once. Applying a color scheme to multiple object means that
all colors which are set in the color scheme will be changed in the object, if the
object supports this particular color, while all colors which are unset in the color
scheme will remain unchanged.
NOTE: This allows to change individual colors and keep others as they were,
for example you may change the background of all controls on a page without
changing any of the other colors
There are two modes of operation available right now:
30 • Configuration Software GUI
•
Apply to all sub-objects: This mode will apply the color scheme
to all sub-objects of the currently selected object. This is used to
control the color design of the whole project (root menu selected)
or individual pages (a page selected).
•
Apply to all objects of this type: This mode will search all objects
of the same type as the currently selected object, on the same
hierarchy level, for example if you select an item of a menu and
use this mode, you can change the colors of all items in THIS
menu, without affecting other menus. If you select a text control on
a page, you can use this mode to change the color of all text
controls on THIS page, and so on.
L-Vis User Manual
Object Description
Introduction
Every L-Vis project is built using a number of different objects. Each of the
objects has a relatively simple function. To build a complex project, the simple
objects are put together and organized in an object tree, which is shown in the
tree view of the configuration software.
Interactions between the objects are defined by their location in this object tree,
for example, a menu item object will always display a menu item on the device,
but it depends on the location of the object in the tree in which menu and at
which position in the menu the item appears.
There are objects to represent menus, menu items, pages, various types of
controls to display and input data, there are objects to perform mathematical
operations on data, or generate alarms. The total number of different object types
is kept to a minimum and the objects are designed as generic as possible, to
ensure a steep learning curve and allow flexible and creative use of the available
objects as the building blocks of more complex applications.
When building the object tree, there are certain limitations in how objects can be
connected to each other. Most of the time, this will be clear from the context, for
example it is clear that you cannot connect a page object to a menu, since a menu
would not know what to do with a page. A menu is used to manage a list of
menu items from which the user may choose. Therefore, a menu object will only
accept menu item objects as child objects. A page object can then be attached to
a menu item object, causing the item to show the attached page, when it is
selected from the menu.
NOTE: Such limits are enforced by the configuration software automatically, so
you cannot drop or paste objects into places where they have no meaning.
Some objects may be connected to a number of other objects, for example a data
point may be connected to all kinds of controls, but a trend control only accepts
input data points, not output data points. Mapping table objects may be
connected to text, bitmap, number, and bar controls, but not trend or date
controls, and so on. Using the context menu of an existing object to create a new
object automatically will show only the kind of objects which can be attached to
the existing object, so there is no room for error.
A typical object hierarchy which shows the most important relationships
between the available objects is shown in Figure 6.
The individual objects are explained in more detail in the following sections.
L-Vis User Manual
Object Description • 31
Figure 6: L-Vis Object Hierarchy
32 • Object Description
L-Vis User Manual
Menu
A menu object is used to manage a collection of menu item objects. On the
device, a menu is a window which opens on the left side of the display and
shows the items which are contained in the menu. The menu can handle more
items than fit on the screen. If this is the case, a scroll bar is provided for the user
to move the contents of the menu up and down to see the hidden items.
NOTE: Every project always has a menu object as the top level object. This is
called the root menu. It must always be there and it cannot be deleted. However,
you may adjust its properties just like any other menu.
Apart from the root menu, the only other places where menu objects may be
created are as child objects of menu items. If a menu object is connected to a
menu item, selecting the item will show the connected menu. This is called a
sub-menu. To navigate back from the sub-menu to the parent menu, the submenu must contain a return item, which is a menu item object which has no
further objects connected to it (no page and no sub-menu to show).
Menu Properties
A menu consists of a frame and an area containing the menu items. The frame
includes the menu title and the scroll bar, whereas the item container is the inside
space of the menu, where the menu items are shown. The assignment of colors
on the Color property page to parts of the menu can be seen in the following
table.
Color Name
Element to which the color applies
Text
Menu title text.
Frame/Axis
Title background and the frame around the scroll bar.
Bar/Bitmap
Scroll bar.
Container
Scroll bar container background.
Background
Background of the menu item area. The background of a menu
cannot be set to be transparent.
On the Menu/Page property page, the width of the menu item area and the scroll
bar can be entered. The value is specified in LCD pixel (the full screen width
being 320 pixels). The Bitmap Width parameter specifies how much space for
icons to the left of the menu item text should be reserved, if an item uses a
bitmap. This is used to have a vertically aligned text column, even when the
icons of individual items do not have the same width.
NOTE: Even though the bitmap width parameter changes the appearance of
menu items, it is a property of the menu because it is the same for all items
which are shown in this menu. Moving an item to a different menu will show the
item according to the bitmap with rule of the new menu.
Menu Item
Menu item objects are used to build the contents of a menu. They are shown in
the menu in the order in which they appear in the object tree. On the device, each
menu item becomes a selectable area of the menu, which the user may select to
open the page or the sub-menu associated with the item.
L-Vis User Manual
Object Description • 33
Each item object can hold zero or more page objects and zero or one menu
object, as shown in the object hierarchy diagram. It depends on the connected
objects, what will happen when the user selects the menu item.
Pages
Menu
Function
None
None
This item is a return item. When the user selects it, the
current menu will close and the parent menu will open.
1
None
A standard item. Upon selection, the menu will close and
the page will be shown.
>1
None
A multi-page item. Upon selection, the menu will close
and the page which was up when the item was active the
last time will be shown (the first page, if this is the first
time the item is selected). The page flip actions, touch
gestures, and page timeouts apply.
None
Yes
A sub-menu item. Upon selection, the connected sub-menu
will be shown for further navigation.
Yes
A combined item. The connected page(s) will be shown in
the background, while the connected menu will open in the
foreground for further navigation. This type of item can be
confusing for the user and should be used with care.
1 or
more
Always add a return item as the last item of your sub-menu, or the user will
not be able to navigate back.
In the root menu, a return item is used in a different way. If a return item is
found in the root menu, the device will use it to connect the system setup submenu to it, making it the setup menu item. This is done so that the user may
provide a menu item for the built-in setup menu and configure it through the
normal configuration software, just like any other menu item.
NOTE: If the project does not provide a return item as the last item of the root
menu and the built-in setup menu was not disabled in the project settings, a
default setup menu item will be created automatically. However, this item will
most likely not fit the design of the other items in your root menu, so it is a good
idea to always provide this item in your project.
Menu Item Properties
On the Common Properties page, a menu item can be assigned a text as well as
an icon bitmap. Obviously, at least one of them should be set to make a usable
menu item. If both icon and text are set, the icon will appear on the left side, the
text on the right side. If the icon is smaller than the reserved bitmap width of the
menu, the icon will be centered inside the bitmap width.
On the Color property page, the following colors can be set for the menu item:
34 • Object Description
Color Name
Element to which the color applies
Text
Menu item text.
Selection
Frame drawn around the selected item.
Bar/Bitmap
Color of a monochrome bitmap.
Background
Color of the bitmaps background. This will be the color which is
shown transparent in the items bitmap. The background of a
menu item is always set to transparent mode.
L-Vis User Manual
Page
Page objects are simple objects to organize the control elements which are
visible on the device. When a page object is connected to a menu item and the
item is selected from the menu, the page and all the controls on it will be shown
on the display. Previously visible controls will be hidden, but will continue to
exist on the device (so that a trend control may continue to record data, for
example). Technically, the function of a page therefore is to group a number of
controls together to show or hide them all at the same time.
Page Properties
On the Common Properties page, a bitmap for the page background may be
specified. Such a bitmap should match the dimensions of the page, which is
320x240 pixels on current models. For a single-color background, select the
desired color on the Color property page.
All other properties of a page object are set on the Menu / Page property page.
On this page, the following settings are available:
•
View Timeout: If this timeout is not zero, and there is no user input for
the specified amount of time, the system automatically switches to the
next page (provided there is more than one page connected to the same
menu item). After the last page was shown, the procedure is restarted
from the first page.
•
Page Access: This defines the minimum access level required to view
the page if it is marked as locked/protected (see below).
•
Locked Page: If this flag is set, the page may only be displayed if the
current access level is equal to or higher than the level specified for this
page (see above). If the access level is not sufficient, a suitable PIN
code must be entered.
•
Invisible Page allows hiding the page on the device, which means that it
will not be accessible for the user until this flag is removed. However,
the controls on a hidden page work as usual, for example a trend control
placed on such a page will still be recording trend data. A hidden page
may also be used as the target of a show page action, so that the page
may only be visited through this action and not directly via the menu.
•
The Default Page flag marks a page as the default page of the device.
The default page is displayed after a configurable amount of idle time
and when the device is started.
Controls
All objects which can be displayed on a page are called controls. This is because
they are usually used to provide to user with an interface to control a data point
value or trigger actions. Controls are also used to display the current value of a
data point and sometimes even display just static content, to enhance the visual
appearance of a page.
NOTE: There are other objects which are used to control or process data point
values and which are not documented in this section, for example mathematical
objects or alarm generators. These objects are not control objects, because they
do not provide a user interface. They have no position and size coordinates or
other visual properties.
L-Vis User Manual
Object Description • 35
Depending on the data point objects connected to the control, the control will
either show static content only, show dynamic content based on values which are
received from connected input data points, or become selectable and accept new
values from the user, which are then written to the connected output data points.
Controls which accept user input are called input controls.
The following sections describe each of the available controls and their
properties.
Text Control
Text controls are used to display one or more lines of text. The text is entered on
the Common Properties page in the Text area, as explained in the section about
the common property pages. Dynamic text from a mapping table or from a
connected string data point may be inserted at the %s placeholder, otherwise the
text remains static.
On the Color property page, the following colors can be set for the control:
Color Name
Element to which the color applies
Text
Text color. This color may be overridden by color specifications
from a connected mapping table.
Selection
Frame drawn around the text, if the control is selected. Also used
to draw the grid of the drop-down list, from which a new text
element is chosen (input controls only).
Background
Color of the controls background. The background of a text
control may be set to transparent using the check box next to the
background color button.
If the text control is an input control, it may be selected by a touch on the
controls text field. A dropdown list will appear, containing all entries of the
mapping table which is connected to the control. From this list, the user may
select a new entry. The value which is associated with this entry in the mapping
table will then be assigned to all connected non-constant output data points.
Instead of opening a dropdown list, text controls may also be used as push
buttons, where each press of the button will change the value. This push button
mode can be enabled on the Text / Bitmap property page, which is explained
below, since it works the same for text and bitmap controls.
Bitmap Control
Bitmap controls are very similar to text controls, only that they display graphic
elements instead of text. Otherwise the same behavior applies for input controls.
A static bitmap may be set on the Common Properties page, which is shown
when no mapping table is attached to the control or no value was set or received,
so the control does not know which entry from the mapping table to choose.
The bitmap control will automatically adjust and fix its size according to the
loaded bitmaps. If there is no bitmap to display, the size can be set manually and
the bitmap controls area will be empty, with just a frame drawn around it in the
selected frame color.
NOTE: Bitmap controls without any bitmap and with the frame color set to the
transparent background color are often used to define clickable areas on a page
which uses a background graphic. In this case, the pages background already
provides the graphic representation of buttons, lamps, building floors, or other
elements, which should be selectable by the user. Using empty transparent
bitmap controls, rectangular regions may be defined on the page, which the user
36 • Object Description
L-Vis User Manual
may select. The control itself usually has an action connected to it, to jump to a
new page or update a data point.
The following colors may be set for bitmap controls on the Color property page:
Color Name
Element to which the color applies
Bar / Bitmap
Color of the frame which is drawn if no bitmap was assigned, or
color in which a monochrome bitmap is drawn. May be
overridden by colors from the mapping table. For color bitmaps,
this color definition is ignored.
Selection
Frame drawn around the text, if the control is selected. Also used
to draw the grid of the drop-down list, from which a new text
element is chosen (input controls only).
Background
Color of the controls background, if no bitmap is shown.
Otherwise this is the color which should be considered the
background of the graphic. If the transparent check box is set, all
pixels using this color will be transparent.
NOTE: In the VGA palette, there is one color (middle grey) defined at two
different color indices (index 7 and index 248), meaning that this color appears
twice in the palette. Graphic elements using transparency may use one of the two
colors (248) to fill all areas which should later be transparent and still have the
same color available for use in the bitmap (7). If you use any other color, for
example black at index 0, you can no longer have black pixels in your graphic,
since all pixels drawn with this color will be transparent, so you loose a color.
Push Button
Push buttons are not provided as a specialized control object type, but are
implemented by a special mode of operation, which can be activated for text
controls and for bitmap controls, to create push buttons showing text or graphic
elements using all the features of these controls.
Push button mode is activated on the Text / Bitmap property page using the
Enable Push Button Mode check box. Once enabled, the mode of operation is
selected on the right via three radio buttons. The options are:
•
Send current value: In this mode, each press of the button will
cause all connected output data points to be updated with the
current value of the control. The current value is defined by the last
value received from any of the connected controls.
•
Select and send next value: This mode will instruct the control to
find the entry in the mapping table which corresponds to the
current value of the control and then select the next entry to
determine the new value which is sent out.
•
Select and send previous value: Similar to the above mode, but
the previous entry in the mapping table is selected to determine the
next value.
Below the radio buttons is a check box, which, when checked, causes the control
to change direction when either the end of the mapping table is reached, that is, it
switches back and forth between mode 2 and 3, walking through all available
entries in the mapping table (up and down).
NOTE: Obviously, mode 2 and 3 only make sense if a mapping table is attached
to the control and the table contains at least two entries. A typical use is a table
with two entries and the control in mode 2, with direction change enabled. This
provides a simple ON/OFF toggle button. To build a push button which only
L-Vis User Manual
Object Description • 37
sends out a fixed value when selected, no mapping table is required. Set up the
control using static properties and connect the output data point which should be
updated with a certain value. Mark the data point to be Constant Value and enter
the desired value as the Default Value of the data point.
Numeric Control
These controls are used to display values as numbers. Most properties can be set
on the Common Properties page, as described earlier in this document. Similar
to text controls, the color of the number, the background, and the selection frame
can be set on the Color property page.
The Numeric Control property page provides access to the specialized
properties of numeric controls, like the allowed value range and a wizard to
generate a suitable format string for your control, if you don’t want to enter it
yourself on the common properties page.
The allowed Value Range is only enforced when the control is an input control
and the user inputs new data. Values received from input data points are always
displayed, even if they are outside the allowed value range, that is, the range is
an input value range only.
The Input Resolution and Acceleration settings are only used by the older LVIS3ECTB model, which has a jog dial instead of a touch screen. The settings
define the amount which is added or subtracted with each turn of the jog dial and
how the dial speed increases this amount.
The check box Convert Data Point Value to Integer needs to be checked, when
you want to use an integer format specifier in the format string, like %x or %d. If
the format string wizard is used to generate the format string, this check box is
also controlled by the wizard as required.
The check box Hexadecimal Input Keypad can be used together with a %x
format to provide a hexadecimal input keypad matching the way the value is
displayed. It would be confusing to enter a decimal value and then see it
converted into hexadecimal on the control, so the display format and the input
keypad should use the same number system.
The check box Password Input Keypad may be used to enter a PIN code. The
keypad starts out empty instead of showing the current control value and for
each digit entered it only shows an star (*).
NOTE: It is possible to add static text around the value defined by the format
string. If you generate the format string using the wizard, first generate the
format string and then switch to the common properties page and add the static
text before and after the format specifier in the text field. Any text can be
entered, with the exception of the percent sign, since this character starts a
format specifier. To output a percent sign, enter %% in the format string.
Bar Control
Bar controls are one of the more complex and versatile control types. In
combination with other controls, they can be used for a large number of
applications which are not immediately obvious, such as a moving sunblind or
an arbitrary area on the screen which can be filled with a variable color (useful to
mark open windows in a building, for example).
The basic application of a bar control uses a scale on one side of the bar,
including tick marks. If the value represents a temperature, a small dot is
sometimes included at the lower end of the bar, to make it look like a
38 • Object Description
L-Vis User Manual
thermometer. In this configuration, the bar control consists of the following
elements:
•
Scale: The numbers on one side of the bar, which are evenly
spaced out and calculated to be easy to read. While resizing the bar
in the LCD preview, the scale is constantly updated to show the
most suitable scale for the given value range and size.
•
Tick Marks: These are the small indicators next to the bar. They
are calculated automatically to be evenly spaced out while
representing a round step value between two tick marks. If the
scale is disabled, the tick marks may be much closer to each other.
•
Dot: At the lower end of the bar, a dot symbolizes a thermometer.
•
Frame: The actual bar which displays the current value has a one
pixel wide frame around it.
•
Bar: Inside the frame is the bar which actually shows the current
value. With increasing values, the bar moves up or to the right.
Position and size of a bar control, as defined on the common properties page,
correspond to the frame of the bar control, as described above. It does not
correspond to the selection frame drawn around the whole bar control.
NOTE: To move a bar control in the LCD preview, you must grab it somewhere
inside the bar frame, not outside, like the scale or tick marks. To resize the bar,
click on the lower right corner of the bar frame.
On the Common Properties page, a font may be selected to be used for the
scale. Color configuration is done as usual on the Color property page. The
following colors are supported by bar controls:
Color Name
Element to which the color applies
Text
Numbers of the scale.
Selection
Frame drawn around the entire control, if the control is selected.
Frame / Axis
Tick marks and the bar frame, as described above.
Bar / Bitmap
Bar which represents the value. This color may be overridden by
color specifications from a connected mapping table.
Container
Empty space inside the bar frame, which is currently not filled by
the bar color.
Background
Color of the background outside the bar frame. If the transparent
check box is set, all pixels using this color will be transparent.
All other properties are set on the Bar Graph property page.
The most important property on this page is the Value Range of the bar. It must
be adjusted to match the actual value range you want to visualize. If the bar is
used to input values, this range also defines what the user may enter. Values
outside the given value range cannot be entered, even using the key pad, which is
optionally available for input bar controls.
NOTE: Set the desired value range, before you determine size and position of
the bar, especially if tick marks and/or a scale is to be drawn. This is important
since the scale which best fits the current size will be determined and drawn as
you resize the control. Depending on the value range, the space requirement of
the scale and the optimum size of the bar will vary.
The Flags below the value range control which components are drawn and how
they are drawn. The flags are pretty self-explanatory if you consider the naming
of the individual components of the control as outlined above. The flag Numeric
L-Vis User Manual
Object Description • 39
Input Panel enables the display of the numeric keypad when the bar enters input
mode. It is then possible to either drag the bar as usual or enter an exact value on
the keypad. The keypad will be positioned on the screen so as to not overlap
with the bar, if at all possible.
NOTE: As you may have noticed, not all of the bar controls elements can
actually be disabled. In particular, there is no flag to disable the bar frame. If the
bar graph is used in an application where the frame is not wanted, it can still be
made invisible. Select the same color for the bar frame as you selected for the
background and check the Transparent box. The frame will now be transparent.
Special Application Hints
A powerful way to use bar controls is provided by colors and transparency. By
disabling all the decoration around the actual bar, it is possible to have a
rectangular area on the screen, which can be filled with a color or made
transparent, depending on the value of a data point. This provides an easy way to
selectively hide certain areas of the screen.
Example 1: Define a solid color for the bar and the transparent background color
for the container and the frame. Now you can prepare a page background,
showing a sunblind which is completely rolled down. Place the bar in front of
this image and you are able to cover up parts of the sunblind with the solid bar
color, making it look like the sunblind is going up and down. If you switch color
assignments, you can use the moving bar to selectively uncover parts of the
background.
Example 2: In front of the above window showing the moving sunblind, a
completely transparent bar control may be placed (both bar color and container
color are set to the transparent background). By connecting an output data point
to this control, it becomes selectable and accepts user input. Now the user may
touch any position on the window, which will result in a value update on the
output data point. This value may now be used as a position indicator and the
sunblind may be moved to the indicated position automatically, without the user
keeping a down or up button pressed all the time.
NOTE: The static sunblind image in the background may be replaced by a
bitmap control with a mapping table to show the current rotation of the sunblind.
Trend Control
Trend controls record and display data point values over time. This type of
control does not allow inputting new values and therefore can not handle output
data points. Only input data points may be connected to a trend control.
On the device, the control shows a graph with the value on the vertical axis and
time on the horizontal axis. The time axis shows the amount of time which has
passed since now, where the rightmost end of the axis represents the present
time, with older data to the left (for example 10 minutes ago, 20 minutes ago,
and so on). As time passes, the recorded data moves to the left and new data is
added to the right. The smaller the time span on the time axis, the faster the
curve moves to the left. When setting the time span, the resulting interval
between two shift operations is calculated and shown on the property page.
The control is able to display three curves per connected data point: the
minimum value, maximum value, and average value. To do this, the control
records all incoming value updates between two shift operations. From this data,
it calculates the minimum value, the maximum value, and a time weighted
average value and adds this data to the right end of each curve.
40 • Object Description
L-Vis User Manual
NOTE: The average value calculated during each shift interval is the time
weighted average of all input values received during that time frame. For
example, if the input has a value of 0 for the duration of 9 seconds and a value of
20 for the duration of 1 second, the time weighted average value for these 10
seconds will be 2, because (0*9s + 20*1s) / 10s = 2. In contrast, the time
independent arithmetic average value would be 10 (0+20)/2.
The scale labels and tick marks, if enabled, are automatically calculated and laid
out. If the page background already provides a graphic representation of the
scale and the control is only used to fill in the data, the scale and tick marks may
be disabled. The best way to lay out the control is to first enable all required
decorations (scale, ticks, and grid) and then change the size and position of the
control to fit the scale.
Regarding color, the trend control is one of the most complex controls to
configure, since it supports a large number of colors. The following colors may
be set for trend controls on the Color property page:
Color Name
Element to which the color applies
Text
Numbers of the value scale and the time scale.
Line1
Horizontal grid lines (if the grid is enabled).
Line2
Vertical primary grid lines (if the grid is enabled).
Line3
Vertical secondary grid lines (if the grid is enabled).
Selection
Frame drawn around the entire control, if the control is selected.
Frame / Axis
Tick marks and axis for value and time.
Container
Background of the graph area, which is the rectangular area
spawned by the value and time axis.
Background
Color of the background outside the graph. If the transparent
check box is set, all pixels using this color will be transparent.
To set the color of the individual curves, select a data point and switch to the
Color property page. You can now set the color of all curves which may be
generated by this data point:
Color Name
Element to which the color applies
Line1
Color for the minimum curve (if enabled).
Line2
Color for the average curve (if enabled).
Line3
Color for the maximum curve (if enabled).
Line4
Color to indicate that the current value of a curve is out of range.
If the value axis is adjusted to fit, the real value will be shown,
that is, a limited value axis does not affect the actual data which
is recorded.
Apart from the colors and the font for the scale, which can be set on the
Common Properties page, all other properties are set on the Trend Control
property page. This page is divided in 4 sections, which are described below.
On the top left, the Value Axis can be configured. Set the desired Range for this
axis and enable or disable the Tick Marks and/or the Scale Labels. On the top
right, the Time Axis is configured. Select a suitable Time Span, which is given
in time per page. For example, if you set this to one hour per page, the graph will
show the values of the last hour together on one page. To keep older data as
well, which is not visible on the first page because it is older than the given time
span, set the desired amount of History Buffer that should be used by this
control. This value is given in pages, that is, if you set the time span to one hour
and configure one history page, the control will store the values of the last two
hours. Older data will be overwritten by new data.
L-Vis User Manual
Object Description • 41
NOTE: After setting the size, time span and history buffer, check the resulting
size of the required data sample buffer at the bottom of the property page. The
memory requirements can get significant if you use a larger number of such
controls and set a high number of history pages.
In the same section, you may set a minimum Shift Interval for the control. The
control normally uses the smallest usable shift interval, which is the time it takes
for the graph to move by one pixel. The graph cannot be shifted earlier than this,
because it needs to move by at least one pixel (can’t move by half a pixel). If this
interval seems unnecessarily small (each shift will require some processing
time), or you want the control to average data over a longer time frame than this,
you may set a minimum time here. The control will then use the next higher shift
interval which results in an integral shift of the graph (in pixels). The Flags to
enable or disable the tick marks and the scale are the same as for the value axis.
Below the time axis section, a small information area shows the resulting update
rate (shift rate) of the graph, the amount of pixels the graph will be shifted each
time, and the amount of memory required for the requested history pages.
On the bottom left, there are some additional Flags to be set. Depending on the
selected object, there are different flags available.
With the trend control selected, the following options can be set:
•
Enable Cursor: This option causes the control to become
selectable. When selected, a cursor appears which allows
navigating through the recorded data (see the next section).
•
Draw Grid: This option enables a grid which is automatically laid
out to fit the current tick mark spacing and allow easier readout of
the displayed data. Set the final control size after enabling the grid
and choose a size which yields a good looking result for the grid.
•
Preserve Data: When enabled, the Control is instructed to store
the recorded data in non volatile memory, in order to preserve the
data across a reboot or power failure. Saving is done in regular
intervals, when enough data was collected, or when the unit is shut
down in a regular way and thus has a chance to save all unsaved
data before shutdown (not possible during a power failure).
•
Auto save data: The interval given here is the maximum time
which may pass before recorded data is saved. This can be used
together with slowly moving trends, where only a small amount of
data is generated over time and thus the normal save operations,
which collect around 4kB of data before saving it, will not be
guarded very well against a sudden power failure.
With a data point selected, the following options are available:
•
Draw Minimum: Enable recording and display of the minimum
curve for the selected data point.
•
Draw Average: Enable recording and display of the average curve
for the selected data point.
•
Draw Maximum: Enable recording and display of the maximum
curve for the selected data point.
NOTE: Use the preserve data option with care and avoid unnecessary saving of
unimportant data, since these operations may take up a significant amount of
system resources and adversely affect performance and life time of the device in
case they are heavily over-used in a project.
42 • Object Description
L-Vis User Manual
To save all unsaved trend data manually, use the command Save All Trend Data
from the command page of the setup menu or build your own save button in the
project, which can be implemented by writing the value 5 to the Command
system register.
NOTE: Even if the preserve data flag is set, a trend control may still discard the
stored data when it reboots. This is the case when the controls properties were
changed such that the new configuration does not match the stored data
anymore, for example because new data points were added to the control or data
points were removed, changing the type and amount of data recorded. Recorded
trend data is also removed from the device, if there is no control matching the
recorded data, which is determined by the UID of the control. That is, if you
remove a trend control from the project and reboot the device, the data which
belonged to the removed control will be deleted from the system.
Trend Data Access
For every trend control which stores the recorded data in non volatile memory, a
file is created on the file system of the device. The file name consists of the
object name of the control (as seen on the tree view) and the unique ID of the
control (as displayed on the General property page. This allows the user to
identify the data file belonging to a certain control on the device. The recorded
data is available in CSV format, in order to ease processing on the PC.
The files may be downloaded from the device using an FTP connection. User
name and password for the FTP account can be set in the project settings (option
Data Access). The files are located under /tmp/trend.
Example: A project contains a trend control with UID 0x122114B1 and has the
name “Trend 1”. The data file for this control will be accessible under
/tmp/trend/Trend_1_122114B1.csv on the device. Spaces in the
object name are replaced by underscores to avoid file names containing spaces,
which may be a problem for some FTP clients.
NOTE: Assign good names to your trend control objects, to make it easy to
identify the data files and relate them to the trends which are visible on the
device. Consider to add the name of each trend to the page where the trend is
shown, so that the user is able to clearly identify each control and its data file.
If the trend control object name contains non-ASCII characters, the resulting file
name will be encoded in ISO-10646 (Unicode) and will be transferred to the
client in UTF-8 encoding, according to the FTP protocol extension RFC2640.
Clients which support this extension can then display these file names correctly.
Most web-browser based FTP clients either detect the UTF-8 encoding
automatically or provide an option where the user may set the desired encoding.
To maximize compatibility to existing FTP clients, it is desirable to use only
ASCII characters for the name of trend control objects.
An easy way to access the files on the device is to use the windows explorer or a
web browser and type the following into the address/URL field:
ftp::<user>@<address>/
Replace <user> with the user name for data access as defined in the project
settings and <address> with the IP address or DNS name of the device, for
example:
ftp::[email protected]/
You will then be asked for the password and the file system contents will be
shown. You can now navigate to the required files and download them to the
local hard disk of your PC for further processing.
L-Vis User Manual
Object Description • 43
NOTE: Since the trend data files are actually symbolic links to a device driver,
you cannot directly open the files on the device. Also, the file size will be shown
as 0, because it is not immediately known (the data is generated on the fly, while
you are downloading it). You may only download the files. Some FTP client
software is known to have problems processing symbolic links to files. They
tend to display these files as being directories but any attempt to open this
directory will fail, since it really is a file. Examples for such programs are
FileZilla and Leech-FTP. If you encounter this problem with your FTP client,
use another client or fall back to the windows explorer or the command line FTP
client (which is known to work as well).
Operating Trend Controls
Trend controls do not allow data input, but they can be marked selectable. If the
control is selectable, touching it on the screen will display a vertical line at the
touch point and open a data window, showing the exact data which was recorded
for the selected point of time. The control will show the absolute date and time
for the recorded data, as well as the value for each of the curves displayed. Each
value is printed in the same color as the corresponding curve, to relate the
displayed numbers with the curves.
The vertical line may be moved around in the control by dragging it around or
touching another location of the curve. The data in the data window will be
updated accordingly.
If there is more than one page (the number of history pages was set to 1 or
more), the user can flip through the pages by moving the cursor to the rightmost
or leftmost end or touching the rightmost or leftmost end of the time axis. Small
arrows will appear on both ends of the time axis to indicate a good place to touch
if you want to flip pages.
The control will return to normal operation when another control is selected or
the user touches any other location outside the selected trend control.
Date Control
The date control is a specialized control to display date, time and calendar
weeks. In most cases, the internal system time data point will be connected to
the date control. However, it is possible to assign any scalar data type to the date
control. In that case, the received value will be interpreted as the number of
seconds since the first of January 1970.
There are two different display modes for a date control: a text based mode and a
graphical analog clock simulation. Even though one date control can only use
one of the two modes at a time, two or more date controls may be used together
to display the time as an analog clock and the date as text on the same page.
A font for the text mode can be selected on the Common Properties page. All
other settings can be done on the Date/Time Control property page. There is a
wizard to generate a suitable format string for text mode, set the Style of the
control (text or graphic) and modify the look of the Graphic Style.
On the Color page, the following colors may be set:
44 • Object Description
Color Name
Element to which the color applies
Text
Text color of the clock in text mode.
Line1
Hour tick marks in graphic style.
Line2
Hour and minute hands.
Line3
Second hand (if enabled).
Selection
Frame drawn around the entire control, if the control is selected.
Frame / Axis
Circle around the clock face (if enabled).
L-Vis User Manual
Color Name
Element to which the color applies
Container
Background of the clock face.
Background
Color of the background outside the clock face or behind the text.
Output data points may be connected to a date control, in which case the date
control becomes a date input control. The user may then input a date and time
using the keypad. The number of seconds which passed since the first of January
1970 and the given date/time will be written to the connected output data points.
This value is suitable to write to the system time set register, to update the
current system time on the device. However, note that due to limits of the
underlying operating system, the system time of the device may not be set to a
date before 1/1/1988.
Data Log Control
Data log controls are used to record data based on events, as opposed to trend
log controls, which record data continuously over time. The result of a data log
is a list of data records which were recorded at specific points in time. Each data
record is composed out of one or more visible elements to display the recorded
data, like text, number, bitmap or date controls.
The individual data records are created in the folder called Data Fields which is
part of every data log control. To add a new log record, select Add Record from
the context menu of the Data Fields folder. Then add the visible elements
required to compose your data record to the new folder and attach the data point
you want to record. As you lay out the visible elements to build a nice looking
data record, the control adjusts its line height to match the area required by your
data record.
You will notice that each added data record already comes with a trigger object
which has similar properties than a math object. Connect the data points you
want to monitor to determine when to store this data record and enter the
required formula on the property page of the trigger object. Then select a trigger
mode from the available choices.
NOTE: If the trigger mode is set to any value update, there is no additional
condition to enter in the formula field, since the trigger will fire as soon as any of
the connected input data points receives an update.
To limit the frequency at which the trigger may fire and cause data to be
recorded, a minimum time between two trigger events can be specified, together
with a maximum burst rate, which is the maximum number of events that are
allowed in fast succession after a long idle period.
It is possible to add as many data record layouts as needed and define a trigger
condition for each of the data records individually. To work on the layout of a
specific data record, first select the record in the tree view to make it visible in
the LCD preview. You can then continue to work on the record in the LCD view.
Properties specific to the data log control are configured on the Data Log
Control page. The options currently allow to define if the control should save
the recorded data in persistent memory, how often it should save the data and the
total number of records to save (when this number is reached, older data is
overwritten with newer data). It is also possible to enable or disable the
navigation bar at the bottom of the control and set the size of the buttons.
As with trend log controls, the recorded data is available in CSV format for
download via FTP. See the section about trend data access for detailed
information about the retrieval of this data from the device.
The following colors may be set for data log controls on the Color property
page:
L-Vis User Manual
Object Description • 45
Color Name
Element to which the color applies
Line1
Highlight color of 3D frames.
Line2
Shadow color of 3D frames.
Line3
Grid lines between data records.
Selection
Frame drawn around the entire control, if the control is selected.
Bar / Bitmap
Button graphics.
Background
Color of the background. If the transparent check box is set, all
pixels using this color will be transparent.
Schedule Control
The schedule control is a specialized control to serve as a schedule configuration
editor for local and remote scheduler objects. It is possible to connect more than
one scheduler data point to the same control. In this case, the title line will allow
the user to select the schedule which he wants to view or edit.
For this type of control, it is usually required to load a user defined font. The
smallest built-in font is too small to operate the control on the LCD and the
medium size built-in font is too wide to be useful for many applications.
Therefore the configuration software automatically searches the list of loaded
fonts for a suitable font and, if none was found, automatically loads a font which
should be a good choice to get started. A specific font may be selected or loaded
any time on the Common Properties page.
The properties to set on the Schedule Control property page control the basic
appearance of the control. The effect of each option can be seen immediately on
the LCD preview. If a local scheduler data point is connected to the control, its
configuration will be shown in the preview as well.
The following colors may be set for schedule controls on the Color property
page:
Color Name
Element to which the color applies
Text
Color for all text areas of the control.
Line1
Highlight color of 3D frames.
Line2
Shadow color of 3D frames.
Line3
Grid line color.
Line4
Scroll bar and scroll arrow graphics.
Selection
Frame drawn around the entire control, if the control is selected.
Bar / Bitmap
Background color of the header lines and color for deactivated
schedules (day names in the left column).
Container
Background of the day list and time table.
Background
Color of the remaining background (only a one pixel wide frame
around the control, where the selection frame will be drawn when
the control is selected). If the transparent check box is set, all
pixels using this color will be transparent.
Alarm-List Control
The alarm list control is a specialized control to display a list of pending alarms
from an alarm server or alarm client data point. It is possible to connect more
than one alarm data point to the same control, in which case the control will
display a list of all alarms from all connected points in chronological order.
46 • Object Description
L-Vis User Manual
The control always displays the newest alarm at the top with older alarms
following further down. At the bottom of the control is a navigation bar which
displays the number of pages the list currently uses and allows to navigate
through the pages.
Alarm entries which may be acknowledged are shown with a small ACK button
at the right end of the alarm entry. Pressing this button will send an alarm
acknowledgment back to the reporting alarm server.
The information displayed for each alarm is the date and time the alarm was first
reported, the type of alarm, the current state of the alarm and, in the second line,
an identification of the alarm source as well as a description and possibly the
value which caused the alarm. Depending on the underlying network technology
and the fact if the alarm was reported by a local or by a remote alarm server, not
all of this information may be available, so that entries may be missing some of
the information printed on the second line. The information in the first line is
always available and will always be printed.
The following colors may be set for alarm list controls on the Color property
page:
Color Name
Element to which the color applies
Text
Color for the text printed by the control.
Line1
Highlight color of 3D frames.
Line2
Shadow color of 3D frames.
Line3
Grid line color.
Line4
Button graphics and page information in the navigation bar and
text color for the label of the ACK button.
Selection
Frame drawn around the entire control, if the control is selected.
Bar / Bitmap
Background color of the acknowledge button.
Background
Color of the control background. If the transparent check box is
set, all pixels using this color will be transparent.
Data Point
Data point objects control the data transfer between a register or a network value
and the controls or other data processing objects on the device. To archive this
data transfer, there are tree objects involved:
•
The control element, which acts as the interface to the user, or any
other object which processes data, like mathematical objects, alarm
generators, or action objects.
•
A data object as the source or sink of data, for example an internal
user register, a system parameter, a network variable or a BACnet
server object or client mapping.
•
A data point object which references a specific data object and
thereby links a control to a data source or sink. It also defines the
properties of this data link, for example when new data is to be
transferred between the data object and the control and how the
data should be converted when it is transferred.
The control is created as part of the object tree, as outlined in the tutorial. It
exists independently of any register or network object. Even if all registers and
network objects were to be deleted, the control would not be affected.
L-Vis User Manual
Object Description • 47
The data object itself is nor represented as an object in the tree view, because it
is not part of the user interface and is not bound to any of the other objects in the
tree. Data objects exist on the device independent from the user interface and are
identified by a unique ID. They are created and managed in a separate window,
the Data Point Management and Selection dialog. In some cases they are
created automatically, like the data objects representing the system parameters or
data objects representing dynamic network variables, which may be present on a
CEA709 device.
NOTE: Data objects may be thought of as the source or sink of a data flow,
where every object has a defined direction (either source or sink, e.g. data
coming in or data going out). For internally created registers, two such data
objects are created, one to write data to the register and one to fetch the current
register value. Input and output network objects are represented by a single data
object with the appropriate direction, BACnet value objects and other objects
which may be read and written are represented by two data objects, one for read
access and one for write access.
Structured network objects, as available on CEA709 devices, are represented by
individual data objects for each of the structure elements, in addition to the
object representing the entire network variable. However, most of the complex
data objects, which represent more than a single scalar value are not supported
by most controls and cannot be attached to them. The following exceptions to
this rule apply for the current devices:
•
SNVT_switch: Data output objects of this type may be directly
connected to an alarm generator to control the entire switch.
•
SNVT_alarm2: As above, data outputs of this type may be
connected to an alarm generator to send out alarm messages.
•
SNVT_str_asc: This and other string data types may be directly
connected to a text control. The string received via these objects
will be displayed directly on the text control, without a lookup in a
mapping table. If the data point is an output point, the string
selected from the mapping table is directly assigned to the data
point, without converting to a number first. If the string contains
non-ASCII characters, they are represented in the ISO-10646
character set and are transferred in UTF-8 encoded format. This
way, it is possible to exchange strings in any language between two
L-Vis devices using a standard ASCII data type.
The data point object is the object created when Add Data Point… is selected
from the context menu of a control to assign a data point to it. The reason why
the assignment of data objects to controls is done via a separate object, instead of
directly connecting a physical data object to the control has a number of reasons.
The most important ones are:
48 • Object Description
1.
Data objects represent network objects which exist on the device.
They must be independent of the existence of any control or other
user interface object. If a data object were to be connected to a
control and the control is deleted, the data object would be deleted
as well. Using a reference object to link the control to an existing
data object solves this problem. Deleting the control will also
delete the reference object (the data point), but not the data object
itself.
2.
Many projects need to link multiple controls to the same data
object, for example to display a temperature which is received by a
certain object from the network on a bar control and on a numeric
control at the same time. This would not be possible if the data
object would be directly connected to a control, since it could only
be at one place in the object tree at a time. A separate link or
L-Vis User Manual
reference object is required, which points to the data object from
which the control should receive its value updates.
3.
Sometimes it is required to apply simple linear transformations to
the data objects raw value before it can be displayed. For example,
an object may receive a temperature value from the network in
degrees Celsius, but the temperature displayed on the device should
show degrees Fahrenheit, or a data object provides a speed in
meters per second, but the display should read mph or km/h. Such
translations can be done by the data point on the fly, while passing
values between the control and the data object. This makes it easy
to display for example a temperature from an input data object both
in degrees Celsius and in degreed Fahrenheit side by side, using
two data points referencing the same data object, but using
different value translations.
It is important to understand this concept to understand what can be configured
on the Data Point property page. The key is that there can and usually will be
multiple data points referencing the same data object.
Data Point Properties
The following properties can be set on the Data Point property page:
Value Translation: If the unit of the data point is known and there are some
commonly used translations available for this unit, one of the pre-defined
translations can be selected from the drop down list. A custom translation can be
defined by filling out the formula below the drop down list. In this formula, NV
stands for the value on the network side (Network Value), that is, the value of
the data point, and DP stands for the value of the data point as seen by controls
or other objects which are connected via this data point.
NOTE: The value translation of a data point can be very useful to modify a
value on its way between a data processing object and a register or network
value. Using this facility, simple data manipulation like the inversion of a state
or the addition or subtraction of a fixed offset can be archived without using a
separate math object. For example, an action which toggles a light switch may be
implemented by assigning the inverted feedback input (current switch state) to
the switch control output. The inversion would be done with DP=-1*NV+1.
The Details section shows details of the referenced data object, like the name of
the underlying network object, the network object type, units, and other
information. Also shown is the unique ID of the referenced data object, by which
the object may be located in the data point management window for further
inspection or modification.
In the Data Point Update Flags section, the value update mode is specified.
There are three basic modes available, together with some additional options:
L-Vis User Manual
•
No Update: This means that this data point will not request the
underlying data object to be updated, even when the value on the
control side changes. Useful if this data point represents one
element of a structured data object, and updates to this element
should not cause the complete object to be transmitted on the
network.
•
Focus Loss: This update mode transmits the new value only when
the input control returned focus and left input mode, that is, when
the final value is known. Intermediate values, which are for
example generated by moving the bar of a bar control around, are
not immediately transmitted.
Object Description • 49
•
Immediate: All values are immediately transmitted to the
underlying data object. This provides direct feedback to the user,
while the control is still in input mode and the user is still
modifying the value. Currently really only useful for bar controls
and controls which use the keypad, since the keypad has + and –
keys, which send out intermediate values.
•
System Startup: The checkbox System Startup should be checked
to instruct the device to update the value on system startup. If the
underlying data object is a value output, the default value or the last
stored value will be sent out, if it is a value input, the device will
try to request the current value from the sender. Both actions can
only be successful if the underlying network technology supports
them. In cases where the requested operation cannot be executed, it
is silently ignored. For example if the polled flag of an input
network variable is not set, the device will not be able to fetch the
current value from the sender, since it has no knowledge of the
senders network address and therefore can not send a request for a
value update.
•
Value Changes Only: This option causes the data point to forward
updates only if the value actually changed. It is very useful to avoid
unnecessary operations caused by repeated updates with the same
value, provided that the data point does not represent an event, in
which case all updates must be processed and this option should
not be used.
•
No Invalid Updates: This option causes the data point to filter out
updates which set the value invalid (for example because the value
cannot be determined from the network). Normally the invalid state
is passed on to the other side. If this option is checked, the update
is not forwarded, so that there is no change to the current value.
•
Map Invalid to Default: This option causes the data point to map
invalid updates to the default value specified in the Default field.
This is useful for input data points which may be unavailable (for
example not bound) and this situation is not considered an error.
Using this option, unavailable data can be replaced by a safe
default. If the invalid state would be forwarded and the value
would be used in a calculation, the entire result of the calculation
would become invalid, which may not be desired.
In the Data Point Value area, the default value for the data point can be set. This
will be the value of the data point until a new value is received from either the
network or the user or a value which was saved to non volatile memory is loaded
after system start. If this field is left blank, the initial value of the data point will
be invalid (this state is also visible on the controls).
NOTE: The default value of a data point ultimately refers to the value of the
underlying data object. Since the referenced data object can only have one value
at a time, the entered default value will apply to all other data points which
reference the same data object as well. The entered value will be run through the
value translation to determine the resulting value for the underlying data object
and this value will be distributed back to all connected data points to maintain
consistency. The only exceptions are constant value data points (see below).
If the Constant Value checkbox is set, the point is marked as constant and the
entered default value will not be overwritten by values received from the
network or data entered by the user. In addition, you may set differing default
values for data points which reference the same underlying data object, if the
data point is marked as constant value.
50 • Object Description
L-Vis User Manual
NOTE: Constant value data points are often very useful together with push
buttons of any kind. Create two or more push buttons, for example three text
controls with the static texts LOW, MEDIUM and HIGH, enable push button
mode and request to always send the current value, then add a temperature
output data point to each of the three controls (always referencing the same data
object). Now you can set the data points to constant value and enter different
values for each of the three points (for example 18, 22 and 24). When the user
now presses the LOW button, the value 18 will be sent out. When he presses the
MEDIUM button, the value 22 will be sent.
The Persistent option is used to request that the current value of the data point
should be preserved across a reboot of the device and be used as the new default
value, until updates are received. Since the value which will be saved is the value
of the referenced data object, this option will also affect all other data points
which reference the same data object.
NOTE: The persistent option is useful for output data points which need to be
sent out after system boot (System Startup flag is set) but are controlled by
actions or math objects instead of direct user input. Such data points must
preserve their last calculated output value across the reboot, but there is no
control which would normally cause the output value to be stored when the user
finishes data input. Checking the persistent flag will solve this problem.
The NV Timing section is used to control the timing of update messages on the
network, resulting from this data point. A minimum and maximum send time
may be specified for output data points, a receive timeout may be specified for
input data points. A value of 0 always means ‘unlimited’. The individual
parameters work as follows:
•
MinSend: At least the specified amount of time has to pass
between two successive update messages on the network. If the
device delivers mode updates than this, intermediate values will not
be sent out, until the minimum send time has passed, at which time
the current (most recent) value is sent out.
•
MaxSend: If this amount of time has passed without any updates,
usually because the value did not change in the meantime, then the
current value will be sent out. This is commonly described as a
heartbeat function, used to allow the receiver to detect if the sender
is still alive and just not sending new information because there is
none, or if the sender has died and therefore no new data is
received.
•
PollTime: Can work as a simple poll interval, or as a receive
timeout. Usually used as receive timeout for bound NVs on
CEA709 devices and otherwise used as poll cycle time. If used as a
receive timeout, it specifies the amount of time after which the
device sends out a poll request, if no value update was received. As
a poll cycle, it specifies the amount of time after which a periodic
poll request should be sent out, independent of any updates which
might have been received in the mean time.
Mapping Table
The mapping table is used to map values of numeric data points to text strings,
bitmaps and/or colors. The mapping table object controls the display of text
controls, bitmap controls, numeric controls and bar controls and may be added to
these objects.
L-Vis User Manual
Object Description • 51
A mapping table can include text, bitmaps and colors at the same time. If
connected to a text control, the text part will be shown together with the color
settings. When the same mapping object is connected to a bitmap control, the
bitmap will be shown. Number and bar controls use the color setting only.
Mapping Table Properties
The properties of a mapping table are set on the Mapping property page. The
New Entry button on this page adds a new entry to the mapping table.
NOTE: If you want to add a new entry, but the New Entry button is grayed out,
you most likely have a control selected in the tree view which does not yet have
a mapping table object attached to it. Go back to the tree view and add a
mapping table object, or use the Load button to load a mapping table from a file.
The value component of the new entry defines the lower limit for the input value
to display the given text, bitmap and/or color. Since multiple entries will be
present in the table, the entered values build up ranges, which define the texts
and bitmaps to display for every possible numeric value. The valid range for
each entry in the mapping table is defined to reach from the value of the entry
itself, up to but not including the value of the succeeding entry. If this is the last
entry, it is used for all values up to +infinite, since there is no more entry to
define an upper bound. For practical reasons, the first entry in the table always
ignores the entered limit and is also used for any value lower than its own limit.
Here is an example with four entries:
Value
Text
Displayed when value is…
0
OFF
< 10
10
LOW
10 – 19.9999
20
NORMAL
20 – 49.9999
50
HIGH
>= 50
Once a mapping is defined, it can be stored to a file (Save button) and loaded
(Load button) to define the mapping for other controls in subsequent projects.
This way, an archive of frequently used mappings can be built for use in various
projects. To use the same mapping for other controls of the same project, just
copy and paste the mapping table object in the tree view.
The same mapping table can be used in both directions. Translating incoming
values to texts, bitmaps, or colors, as well as looking up a value to send out,
when the user selects a given element from the mapping table via a dropdown
list or a push button browses the table to find the next entry.
NOTE: All texts, bitmaps and colors used in a mapping table are included in
the file when the mapping table is saved, so that the mapping file is self
contained and can be loaded and used on different PCs, even when the source
bitmap files may not be available.
To define the color for a single entry, either select the entry from the list and
click the color button to the right of the text input field, or directly click in the
area to the right of the text whose color you want to set (in the color bar). A
color selection dialog will appear, from which you may select the desired color.
NOTE: To define a mapping table entry which should not modify the current
color, set the color of the entry to Unset (shown by the black cross).
To define a color gradient for a number of entries (for example going from red to
green), set the color for all entries which should have a specific color and leave
all others unset (black cross). Then hit the button to the right of the New Entry
52 • Object Description
L-Vis User Manual
button. This will recognize all entries with set colors as fixed and calculate
gradients between them, assigning suitable colors to all previously unset entries.
To set a range of entries back to unset (to re-run the gradient algorithm), you can
multi-select the entries from the list and then reset their color back to unset all at
the same time.
Action Objects
Action objects are used to execute various actions on special occasions. As such,
they are most often assigned to controls, to trigger an action when the user
touches, releases, or selects a control. In some cases, they are assigned to data
point connectors to watch incoming data point values and trigger an action when
a certain value is received.
In any case, the action objects need a parent object which is able to feed the
required information to the connected action, such that the action may monitor
what’s going on and trigger at the right moment. Currently these objects are
controls and data point connectors.
For every action object, there are three basic things which need to be defined:
•
Action: What should be done when the action triggers?
•
Trigger: When should the action be considered for execution?
•
Condition: Once triggered, under what conditions should the
action be executed and how, if at all, should it be repeated?
When a new action is defined, it is important to think about these three
components and make sure the selected choices actually make sense. Each of the
above properties may be controlled individually, but not all of the possible
combinations will actually make sense. Examples of good and bad
configurations and how to avoid the bad ones will be given later on.
Action Properties
Actions are objects which are not visible on the screen of the device, so they do
not use any of the common properties like font, position, size, or color. Aside
from the General properties, which apply to all objects, actions are configured
on the Action property page.
This page is divided in two sections. The top half is used to define the action that
should be executed, when it will trigger, and the conditions under which it will
be repeated. The bottom half is used to set options which may be required for
some of the actions.
From the first dropdown list, select the action you want to execute. Currently
available actions are:
L-Vis User Manual
•
Show menu: Show the current menu, just like performing a press
and hold operation on an empty spot on the display. Useful to build
menu buttons which show the menu when pressed.
•
Show page: Jump to the specified page. To select a page, drag a
page and drop it on the action object in the tree view. The path to
the page will be shown in the option area below.
•
Next page: Show the next page of a multi-page menu item. This is
equivalent to the ‘next page’ touch gesture and is useful to build a
‘next’ button.
•
Prev page: Same as above, but show the previous page.
Object Description • 53
•
Sound buzzer: Output a tone on the internal buzzer. The frequency
and duration of the tone can be adjusted in the Options section.
Useful to create audible alarms when a data point or register
reaches a certain value.
•
Turn on backlight: Turn on the LCD backlight, just as if the user
touched the display. Useful to turn on the backlight based on
information from a presence sensor.
•
Update data points: Assign a value to all connected output data
points. The value to send out can be preset by connecting input data
points to the action object. Useful to update the value of data points
under certain conditions. Often used to save the current value of an
input data point to an internal register when a button is pressed, or
similar applications. When the connected output data point is a
constant value point, the action may be used to write a fixed value
to a register or network object when the action triggers.
•
Service Pin Message: Execute the system command ‘send service
pin message’, which is supported by CEA709 models.
•
Lock Pages (Logout): Immediately protects all locked pages. The
user has to enter the PIN code again to unlock the locked pages.
•
Back one page: Show the page from which the current page was
reached, similar to the ‘back’ button in a web browser. The system
keeps a record of the last 256 pages visited via the show page
action and picks the most recent of them to navigate back one step.
NOTE: The update data points action can also be used to increment or
decrement the value of a register or of a network output / feedback input pair,
which is required to implement up/down buttons to dim light or modify a
temperature set point. To do this, connect the register read point (or the network
feedback point) as well as the register write point (or network output point) to
the action. Use the value translation of the read point to modify the incoming
value as required (add or subtract a fixed value). When the action is executed,
the modified input value will be assigned back to the output value. Since both
refer to the same local register or remote actor, the value of the register or the
remote actor will be changed.
Once the action type is selected, choose the desired trigger mode from the
dropdown list next to the action list (Execute <action> on <trigger>). The
following trigger mechanisms are available:
54 • Object Description
•
selection: The action is triggered when the control is selected. A
control is selected when the user touches the control and releases
the touch screen while still inside the control. If the user moves
outside the control after the touch and releases the screen outside,
the control will not be selected.
•
value update: The action is triggered when the parent object (the
control or data point connector to which the action is assigned)
reports a new value, for example because a new value was received
via an input data point, which is connected to the control (NOT to
the action) or when the user enters a new value using the control.
•
state: This is similar to the value update trigger, but it examines the
first data point connected to the parent object to see if it is a multistate value. If this is the case, the dropdown list next to the action
trigger is initialized with the available states and the user can select
a state from the dropdown list, instead of entering a numerical
value. The action is triggered when the current state equals the state
L-Vis User Manual
selected from the dropdown. If the parents value is not a multi-state
value, this trigger cannot be used.
•
touch: The action is triggered when the control is touched. Note
the difference to the selection trigger, which fires only when the
screen is again released inside the control. A touch is also triggered
when the control was released by moving outside without releasing
the screen, and then returning back inside the control.
•
release: The action is triggered when the touch screen is released
while inside the control, or when the touch position moves outside
the control while the screen is still being touched.
NOTE: The trigger of touch and release actions while moving the touch position
around between controls (without releasing the touch screen) is consistent with
the display of the selection frame. Moving from one control to another without
releasing the touch screen will cause the selection frame to follow the
movement, always marking the control which is currently touched. The touch
and release actions will follow the same pattern, triggering the touch action when
the selection frame appears and triggering the release action when the selection
frame disappears.
While the action type is independent of the parent object to which the action is
connected, the available action triggers vary depending on the capabilities of the
parent object, since the action object needs information from its parent to check
for trigger and execute conditions. The following limits apply:
•
Control: If the action is connected to a control, all available
triggers and conditions may be used, since a control delivers both a
value and user input events (touch, release, select and similar). If a
value-dependent trigger mode or condition is used, at least one
input data point will usually be connected to the control to deliver
new values.
•
Data Point Connector: If the action is connected to a data point
connector, any triggers or conditions which require user input are
not available. A data point connector can only feed a current value
to the action, therefore the only trigger modes which will actually
trigger are value update and state. From the conditions, the ‘while
touched’ condition cannot be used, since it would require the parent
to feed user input information.
NOTE: To avoid confusing situations, it is required that only one object at a
time is processing user input. Therefore, if an action is connected to a control
and the action uses a trigger mode which depends on user input, for example
touch, release, or selection, the normal input behavior of the control will be
disabled, since the user input is forwarded to the connected action.
The action type and trigger mode are now selected. The next step is to select the
condition under which the action may be executed. The following conditions are
available from a dropdown list directly below the action type:
L-Vis User Manual
•
Execute once: When the action trigger fires, the action is executed
once, without further conditions. This is one of the most widely
used settings.
•
Repeat action: As above, but the action is repeated for a fixed
number of times, which is entered in the field to the right of the
dropdown box. This is the total number of times the action is
executed at most, including the first time. After each execution, a
delay which is configured next to the repeat count is inserted. If
there is an additional condition (for example a value condition) and
Object Description • 55
the condition becomes false, any further execution of the action is
stopped immediately.
•
Controlled by value: The action is executed as long as the value
of the parent object meets the requirements specified in the Options
section. Note that if this condition is false at the time the action
trigger fires, the action will not be executed. As long as the
conditions are met, the action will be repeated, again with a
configurable delay between each execution (as above). If the delay
is set to 0, the action will be executed exactly once (like the
condition execute once) but only of the value condition applies.
•
While touched: The action is executed as long as the parent object
is being touched. As above, observe that this condition must be
satisfied at the time the action trigger fires, or the action will not be
executed. In practice, this means that the condition ‘while touched’
is useful only in conjunction with the action trigger ‘on touch’ or,
in rare cases, ‘on value update’, but not together with ‘on selection’
because selection of a control implies release of the touch screen.
At this point, the Execute Action part of the property page should be filled in
completely. The contents of this section should result in a meaningful command
when read as a sentence, for example:
Sound buzzer on touch. Repeat action 3 times, waiting 200ms after each time.
If you read your settings, make sure they make sense and match your goals. For
example, you should not end up with a sentence like this:
Next page on release. While touched, waiting 100ms after each time.
The resulting action, even though it is possible to configure it this way, will not
do what you want. There are two major problem areas:
•
The action is requested to trigger on release of the control, yet, the
condition under which the action is to be executed requests the
control to be touched. This is a contradiction and will not be
satisfied.
•
Even if the trigger were to be corrected, using ‘on touch’, it is very
unlikely that you would want this action to show a new page every
100ms while the control is touched. Aside from the delay, which
would be too small, there is another major problem here: After the
first time the action is executed, a new page will be on the display
and the original control will be gone, so you cannot hold on to it.
NOTE: The delay value (waiting xxx ms after each time) always applies. The
action trigger will always be locked for the given duration after each time the
action fired, preventing the same action to fire again until the wait time expired.
This can be used to limit the frequency at which an action may fire. If the delay
is set to 0, it will be turned off. This also causes any kind of repeated execution
to be skipped, so the action is executed only once per trigger event.
Below the Execute Action part of the property page is the Options section. In this
section, any additional information which may be required by action types,
action triggers, or conditions, can be set here. Options which are settable are
automatically activated, others are grayed out. The following options are
available:
•
56 • Object Description
Value: Used by the trigger value update and the condition
controlled by value. If both are used together, they use the same
settings (differing value settings for the trigger and the execute
condition would not make any sense, since the condition must
match at the time the trigger fires).
L-Vis User Manual
•
Sound buzzer: Used by the action type ‘sound buzzer’ to set the
frequency and the duration of the tone. Useful values for the
frequency range from about 500 up to 8000. The most intense
sound can be archived at around 4000 Hertz. The duration is
normally a value between 100 and 3000ms. (0.1s to 3s). Note that
the repeat delay should be larger than the tone duration, since the
repeat delay starts to run immediately after the action was
triggered, not when it completed.
•
Page: This is not an input field, but a display of the destination
page for a show page action. To set a new page, drag and drop the
desired destination page on the action in the tree view.
Collections
A collection object works like a folder on a file system. It helps the user to
organize objects in groups. Collections can be placed on pages to group objects
together and manipulate them as one unit. It is also possible to create nested
collections to build complex macro blocks which consist out of a number of
smaller building blocks.
At the bottom of the main tree view is a base collection where objects can be
collected which work invisibly in the background, without a graphical
representation on the screen and without a direct relation to any object on the
screen, for example alarm generators, data point connectors, or mathematical
objects. However, it is recommended to keep all objects which are required for a
specific control or control group to function together on the same page. This
way, the page continues to work when it is copied or moved to another project,
because the required invisible objects are copied together with the page. The
base collection outside of the main menu should only hold objects which are
related to the device, rather than specific page functionality.
Collection Properties
Aside from the properties on the General property page, which apply to all
objects, a collection keeps record of the position and size of the bounding box
which can be drawn around all visible objects contained in the collection. This
data can be seen on the Common Properties page.
Collection Handling
If a collection is part of a project page and contains visible objects, a bounding
box around all objects contained in the collection is drawn in the preview when
the collection is selected. Using this box, the entire collection may be moved to
another location on the page. It is also possible to resize the bounding box,
which will evenly spread out the contained objects. For example, if a collection
contains three objects in a horizontal row where the second object is located in
the center, resizing the bounding box will keep the leftmost object at the left
edge, the rightmost object at the right edge and the middle object in the center of
the bounding box, that is, the relative position of each object in the collection
does not change.
NOTE: A collection can only be resized when there are at least two visible
items inside the collection. In addition, resizing is only possible in a direction
where at least two controls are not at the same position. This is a direct
consequence of the way resizing works.
To select a control inside a collection, the easiest way is to select it from the tree
view at the left. If the control is to be selected directly in the preview, there are at
L-Vis User Manual
Object Description • 57
least two objects on top of each other (the collection and the control). If there are
nested collections, or if controls overlap on the page, there may be even more
layers of objects. There are different ways to select a specific object in such a
case: Each of these methods will:
•
Left mouse button double click moves the current selection down
to the next object under the cursor in the layer stack. When the
bottom most control is reached, the selection moves back to the
topmost control.
•
Middle mouse button single click does the same as the left
double-click.
•
Tab key moves the selection down to the next object on the current
page in the tree view. From the last object on the page, the
selection moves back to the first object on the same page.
Using the tab key is especially useful while using the keyboard cursor keys to
move and resize a control. Using the tab key to switch the selection to the next
object on the page can be convenient in this situation.
Alarm Generators
The alarm generator object is used to monitor input data points and issue alarms
based on rules which are set on the Alarm Generator property page. To add a
new alarm generator, use the context menu of a collection object in the object
tree and select ‘Add Alarm Generator’. A new alarm generator object will be
created and connected to the collection object.
Once the alarm generator object is created, connect the input data points which
should be monitored. Each of the connected input data points will show up on
the alarm generators property page, where the monitoring rules can be defined.
NOTE: It is sometimes useful to connect the same input data point twice or
more times to the same alarm generator, when the desired alarm conditions are
too complex to cover in one rule, for example different rules for alarm set and
alarm clear or multiple non-overlapping value ranges which should trigger an
alarm. In this case, assign different names to the connected data points on the
General property page, so that you may distinguish between them later.
Once the required input data points are connected, the alarm generator needs one
output data point to which the result should be written. The desired output data
point must be connected before the alarm generator can be configured, because
the type of data point determines the configuration options. The following data
point types may be used as outputs for the alarm generator:
58 • Object Description
•
Alarm Server: On CEA709 devices, a local alarm server data
point may be connected to deliver the alarm to remote alarm clients
and display the alarm on an alarm list control. The alarm server
keeps record of all pending alarms, delivers them to any connected
clients and manages acknowledgement of alarms.
•
Scalar Value: Any data point representing a single scalar value,
for example a register. In this case, the alarm generator uses the
connected data point as a Boolean value, setting it to either 0 (OFF)
or 1 (ON). Using the data points scaling factors, this input may be
translated into any two values, one to signal ‘alarm clear’ and one
for ‘alarm set’. This is most useful if the generated alarm is to be
processed further or displayed on the L-Vis device, for example to
trigger actions or display warning messages.
L-Vis User Manual
•
Multi-State Value: Similar to a scalar value, but the alarm
generator can be configured to set the output to any of the available
states, which can be selected easily from a dropdown box. Useful
on BACnet devices, where a multi-state point may be used to
signal a number of different alarm conditions.
•
SNVT_switch: Available on CEA709 devices, a data point
representing an entire switch variable may be connected. In this
case, the alarm generator sets both value and state of the connected
switch to either ON/100 or OFF/0. Useful in cases where the
generated alarm is to be processed by a remote device which uses
one switch input for each alarm.
•
SNVT_alarm2: Available on CEA709 models, a data point
representing a SNVT_alarm2 structured NV may be connected. In
this case, the user may set all elements of the alarm2 structure to
the desired values, including the alarm priority and a description.
This is most useful to communicate the result to a remote device
which provides a compatible alarm input variable.
Alarm Generator Properties
Once all inputs and the output are connected, the alarm generator may be
configured on the Alarm Generator property page. For each of the connected
inputs, an independent set of parameters is required. The available input points
are listed in the top left area of the property page.
NOTE: If logic or arithmetic operations are required to determine an alarm
condition (for example signal an alarm when T1 > T2), a mathematic object is
required to conduct the required operations. The result, which is conveniently
stored into an internal register, is then monitored using the alarm generator.
The suggested workflow to configure the alarm generator is as follows:
L-Vis User Manual
•
First, select the input point for which the monitoring rules should
be configured.
•
Define the Alarm Condition using the radio buttons at the bottom
left of the page. The available choices allow basic monitoring
functionality and always define the condition, under which the
alarm should be SET. If the value no longer satisfies the condition,
the alarm will be cleared. To filter out spikes, it is usually good to
set an amount of time which the alarm condition needs to be
satisfied, before the alarm is actually set. The default of one second
is often a reasonable value.
•
Define the Data Point Value Range. Depending on your choice for
the condition, you may need to enter values either for both
(minimum value and maximum value) or only for one of the two. If
your condition is inside or outside range, you need to enter both
values to define the range, for the condition ‘above max’ only the
maximum value is required and for the condition ‘below min’ only
the minimum value needs to be filled in.
•
Define the Action that should be taken. The basic choice here is to
have the alarm generator SET the alarm when the condition is
satisfied and also CLEAR the alarm when the condition is no
longer satisfied. However, you may want to only SET the alarm
when the condition is met and not clear it again, because you may
require the user to manually clear the alarm later. In this case, use
the ‘set on alarm enter’ action, which will only set the alarm, but
will never clear it. To actually clear the alarm, you can either use
Object Description • 59
other means to update the alarm output variable, or you can have a
separate input on your alarm generator and define a rule for this
input, which will eventually clear the alarm, using the ‘clear on
alarm leave’ action.
•
As the last step, define the desired output, either for both conditions
(set and clear) or for only one of them. The required input fields
will be active, while the other ones will be grayed out. Note that the
description field may currently only contain ASCII characters.
The above procedure needs to be repeated for all connected input data points.
Application Hints
While it is pretty straight forward to configure a simple alarm generator to output
an alarm when for example a temperature reaches a certain maximum value, the
alarm generator can be used for more complex applications as well. Two of the
most often used applications are described in more detail in the next sections.
Alarm Condition with Hysteresis
Consider you want to issue an alarm when a temperature rises above T1, but the
alarm should not be cleared unless the temperature falls below T2, which would
be less than T1. Similar to a thermal protection which, once it activates, turns off
the device and does not turn it back on until the device significantly cooled
down, to avoid constant ON/OFF cycles.
Such an application can be done by connecting the temperature data point two
times. To distinguish between them, append SET to the name of the first data
point and CLEAR to the name of the second data point (on the General property
page).
On the Alarm Generator property page, configure the SET data point to cause
the Action ‘set on alarm enter’, enter T1 as the maximum value of the Data Point
Value Range, and select Above Max for the alarm condition. For the Alarm
Output, choose the desired output value for the Set Action. The Clear Action
should be grayed out, since the rule specifies no alarm clear action.
Now there are two options available to configure the CLEAR data point. Here is
the first one:
As for the SET data point, keep the Alarm Condition at Above Max, but enter T2
as the maximum, instead of T1. For the Action, select Clear on Alarm Leave and
select the desired output value from the dropdown list at the right. This time, the
Value for Alarm Clear box will be active, while the others will be grayed out.
This method is the correct way of doing it, but it may be counter-intuitive. Many
people choose Below Min. for the alarm condition, because they want something
to happen when the temperature falls below T2. However, the condition
specified here is always the Alarm Condition. It defines the conditions under
which the alarm is considered to be SET. It does not define when something will
happen. This is done using the Action setting. The alarm condition in this
example is still ‘above a certain temperature’ and action will be taken when this
alarm condition is CLEARED, e.g. the device has cooled down enough. Now, if
this seems unreasonable, here is an alternative approach:
You may configure the CLEAR data point using the alarm condition Below Min.
and enter T2 as the minimum value of the Data Point Value Range. Since you
now defined ‘below T2’ as the alarm condition, you need to take action when the
alarm is SET, so the action must be Set on Alarm Enter. Now select the desired
output value from the Value for Alarm Set Action dropdown list. This value will
represent the cleared alarm, since the temperature now is below T2. Overall, this
way seems more awkward than the first, because the alarm output is cleared by
causing an alarm condition.
60 • Object Description
L-Vis User Manual
Alarm Clear via Data Point
Similar to the first example, but instead of defining a temperature T2 below
which the alarm will clear automatically, a manual input should be used to clear
the alarm. Of course, the two examples may be combined to have both,
automatic clearance below a safe temperature T2 plus manual clearance as long
as the temperature is at least below T1.
First, we need to connect the input data point, via which the alarm should be
clearable. This may be the state component of a switch, a Boolean value, a
register, or any other scalar value. We will assume an internal register for this
example, which we assume will be set by the user pressing a button on the
display. We assume that pressing the button will set the register from 0 to 1 and
releasing the button will set it back to 0 again.
The first part is the same as in the previous example. The temperature variable is
connected to the alarm generator and configured to cause an alarm when the
temperature rises above T1.
To clear this alarm, we configure the connected register data point as follows:
Set the Alarm Condition to Above Max. and enter a time delay of for example 3s.
This will require the user to press and hold the button for 3 seconds, before the
alarm will be cleared. Enter a value between 0 and 1 for the maximum of the
data point value range, for example 0.5 would be a good value. For the Action,
select Set on Alarm Enter and select the desired output value for a cleared alarm
from the dropdown list named Value for Alarm Set Action. This is because we
actually define an alarm condition when the button is pressed. As a result of this
alarm condition, we then reset the ‘real’ alarm.
NOTE: The above examples may of course be combined, to have automatic
alarm clear when the temperature falls below T2 and manual clear via a button
when the temperature is at least below T1.
Data Point Connectors
Data Point Connector objects are used to receive a value from one or more input
data points and copy the received value to all connected output data points or
other objects which accept a value, for example action objects.
A data point connector has no visible representation on the display and is
therefore not related to any of the visible objects. It can only be connected to a
collection object, as described earlier. To create a new data point connector, use
the context menu of the collection object to which you want to add the data point
connector. Other than the general properties like object name and description,
there are no further properties to set.
Whenever a new value is received via one of the connected input data points, the
value will immediately be forwarded to all connected output data points. This
can be useful for example to connect an internal register to a network output. If
the register contains the result of a complex calculation or is controlled by
various objects across the whole project, it is easier to have one single point of
connection to the outside world, instead of connecting the network output in
parallel to the register write data point at every location where the register is
written.
It may also be used to connect input and output data points which are of similar
but incompatible types, for example receive a value from a SNVT_temp variable
and output its value via a SNVT_temp_f variable. If a structured data point
should be connected entirely to another data point of the same type, each of the
structure elements needs to be connected individually using a separate connector,
because each connector is only able to handle single values.
L-Vis User Manual
Object Description • 61
NOTE: The functionality of a data point connector or any other object for which
a change of an input value causes updates to an output value without any further
conditions or limits is inherently dangerous. You must be careful not to cause
endless update loops using these types of objects. See the section about update
loops for a discussion of the problem.
Mathematic Objects
Mathematic objects are used to do calculations on connected input data points
and assign the result to the connected output data points. The object calculates its
formula every time an update is received via one of the connected input data
points, so that the output value is always accurate. If a complex formula is used,
which operates on a large number of input data points, the resulting update rate
of each input data point should be considered, so that the resulting total update
rate remains reasonable.
Math Object Properties
Mathematical objects are configured on the Math Object property page, where
basically the formula is entered. Before doing so, it is important to connect the
required input data points to the object, so that they are available as variables for
use in the formula.
All connected input data points are listed on the left side of the property page
and variable names are assigned to the data points in the order in which they are
connected to the math object. Variable names start with v1 and continue with
increasing numbers, like v2, v3, v4 and so on. There is a limit of 127 input data
points per math object. Formulas using more than 127 input variables must be
split into individual sub-expressions, which should be done anyways since a
formula with such a large number of variables becomes unreadable.
NOTE: Always keep in mind that the order in which the input data points are
connected to the math object in the tree view defines the assignment of variable
names for the formula. If you replace input data points when the formula was
already specified, be careful not to mess up the data point order and thus the
result of your calculations.
Using the assigned variable names, the user may now enter a formula directly
below the list. As you enter the formula, it will be parsed and the resulting
sequence of calculations will be displayed in a list at the right of the property
page. This list shows your formula in reverse polish notation (RPN), also known
as postfix notation, as used by many scientific pocket calculators. Users of such
calculators will be immediately familiar with this list and may find it more
convenient to construct the formula using the list at the right, instead of the input
at the bottom. To learn more about postfix notation, there are a lot of resources
and articles readily available on the internet.
NOTE: When the formula entered at the bottom is still incomplete and does not
yield a meaningful command sequence, the list showing the RPN equivalent will
be empty. This allows the user to immediately see if the current input is valid or
not.
The operators +, -, /, *, %, AND, OR, XOR, ^, &, |, =, !=, <, >, <=, >= can be
used instead of the explicit function calls. Further, it is possible to use
parenthesis to define the precedence of the operations.
The buttons and input fields in the middle of the page are used to directly edit
the formula using the reverse polish notation. To add a variable to the stack,
62 • Object Description
L-Vis User Manual
either double click the variable in the list at the left or select it and click the Add
Variable button. To add a constant value to the stack, enter the value in the input
field above the button Add Value and then press the button. To add a function to
the stack, select the desired function from the dropdown list and press the Add
Function button. When a function is added to the stack, it will first fetch as many
values from the current stack as it needs input values, then execute its operation,
and put the result back on the stack.
NOTE: Even if you use the infix notation at the bottom to enter your formula,
the dropdown list of available functions will be useful, to look up the names of
functions you want to use and see how many arguments they accept.
Application Hints
A few functions end with a … (three dots) in the argument list. This means that
they accept a variable number of arguments. When used in the formula, they will
fetch all available values from the stack (in RPN syntax) and then calculate the
result, which will be put back on the stack and be the only value on the stack,
since all other values were used as input to the function.
This behavior causes some limits in how these functions may be used. You are
on the safe side, if you use such a function only as the outermost function, or, in
RPN, as the last function on the stack, for example:
sum(v1, v2, exp(v3, -1))
If you have to use it as an argument to another function, it may only be the first
argument, otherwise the formula cannot be processed by the math object, which
internally uses an RPN machine, with precompiled instructions for optimal
performance. Example:
add(avg(v1, v2, v3), 5) or the equivalent avg(v1, v2, v3) + 5 will work.
add(5, avg(v1, v2, v3)) or the equivalent 5 + avg(v1, v2, v3) will NOT work.
To limit the number of re-calculations, the data point update option Value
changes only should normally be checked on all connected input data points.
This avoids recalculating the formula and writing a value to the output data point
when it is already clear that the result will be the same, because the input value
did not change. The same option can also be checked for the output data point to
avoid unnecessary writes to the output data point, in case the inputs changed but
the result of the formula is still the same.
NOTE: Especially for projects which use a lot of cascaded formulas, where the
result of one formula is used as input to a number of other formulas, it may cause
a big difference in CPU usage whether results of the same value are forwarded to
other math objects in the system or not, because they will trigger recalculation of
a potentially large number of other formulas, which will generate even more
results of the same value (since the originating value did not change).
Function List
The following function calls are currently supported:
L-Vis User Manual
Function
Return Value
add(v1,v2)
v1 + v2
sub(v1,v2)
v1 - v2
mul(v1,v2)
v1 * v2
Object Description • 63
64 • Object Description
Function
Return Value
div(v,d)
v / d
mod(v,m)
Returns the remainder of dividing v by m, where v and m
should be integer values. Fractional values will be rounded to
the nearest integer automatically
max(v1,...)
Returns the maximum of all values on the value stack
min(v1,...)
Returns the minimum of all values on the value stack
avg(v1,...)
Returns the arithmetic mean value of all values on the stack
log(v)
Returns the natural logarithm of v
log2(v)
Returns the base 2 logarithm of v
log10(v)
Returns the base 10 logarithm of v
exp(v)
Returns the value of e (the base of natural logarithms) raised
to the power of v
exp2(v)
Returns the value of 2 raised to the power of v
exp10(v)
Returns the value of 10 raised to the power of v
sqrt(v)
Returns the non-negative square root of v
pow(v,exp)
Returns the value of v raised to the power of exp
round(v)
Round v to the nearest integer
floor(v)
Round v down to the nearest integer
ceil(v)
Round v up to the nearest integer
sum(v1,...)
Returns the sum of all values on the stack
and(b1,b2)
logical AND of the Boolean values b1 and b2
(b1&&b2)
or(b1,b2)
logical OR of the Boolean values b1 and b2
(b1||b2)
xor(b1,b2)
logical exclusive OR of the values b1 and b2
(b1^b2)
not(b)
logical inverse of the Boolean value b
(!b)
lt(v1,v2)
returns 1 if v1 is lower than v2, else returns 0
(v1 < v2)
le(v1,v2)
returns 1 if v1 is lower or equal v2, else 0
(v1 <= v2)
eq(v1,v2)
returns 1 if v1 equals v2, else 0
(v1 = v2)
ge(v1,v2)
returns 1 if v1 is greater or equal v2, else 0
(v1 >= v2)
gt(v1,v2)
returns 1 if v1 is greater than v2, else 0
(v1 > v2)
if(b,vt,vf)
returns vt if b is true, else returns vf
(b ? vt : vf)
encode(b1,...)
Reads all values from the stack, converts them to Boolean
values and encodes them into an integer value, where the first
value is used as the LSB and the last value as the MSB.
sin(v1)
Returns the sine of v1, where v1 is given in radians
cos(v1)
Returns the cosine of v1, where v1 is given in radians
tan(v1)
Returns the tangent of v1, where v1 is given in radians
sinh(v1)
Returns the hyperbolic sine of v1, which is defined
mathematically as (exp(v1) - exp(-v1)) / 2
cosh(v1)
Returns the hyperbolic cosine of v1, which is defined
mathematically as (exp(v1) + exp(-v1)) / 2
tanh(v1)
Returns the hyperbolic tangent of v1, which is defined
mathematically as sinh(v1) / cosh(v1)
asin(v1)
Returns the arc sine of v1; that is the value whose sine is v1
acos(v1)
Returns the arc cosine of v1; that is the value (in radians)
whose cosine is v1
atan(v1)
Returns the arc tangent of v1; that is the value (in radians)
whose tangent is v1
asinh(v1)
Returns the inverse hyperbolic sine of v1; that is the value
whose hyperbolic sine is v1
acosh(v1)
Returns the inverse hyperbolic cosine of v1; that is the value
L-Vis User Manual
Function
Return Value
whose hyperbolic cosine is v1
atanh(v1)
Returns the inverse hyperbolic tangent of v1; that is the value
whose hyperbolic tangent is v1
gamma(v1)
Returns the value of the Gamma function for the argument
v1. The Gamma function is defined by Gamma(x) = integral
from 0 to infinity of t^(x-1) e^-t dt. It is defined for every real
number except for no positive integers. For nonnegative
integral m one has Gamma(m+1) = m! and, more generally,
for all x: Gamma(x+1) = x * Gamma(x) For x < 0.5 one can
use Gamma(x) * Gamma(1-x) = PI/sin(PI*x)
abs(v1)
computes the absolute value of the argument v1
Data Point Management
Concept
As outlined in the description of the Data Point object, the network variables,
BACnet server objects, client mappings, user defined registers, and system
parameters are represented by objects which exist on the device independent of
any controls or other objects in the object tree. These data objects are only
referenced from the data point objects in the tree by their unique ID.
While some of these objects are created automatically, most of the data objects
need to be created by the user. There are ways to manually create individual data
objects, import object definitions from CSV files or scan the network and create
new data objects based on the information collected by the network scan. Once
created, a data object may be used to exchange data with other devices on the
network, store and load internal registers, or access internal system parameters.
Every data object on L-Vis has a distinct direction of data flow, either read
(input) or write (output). This is important because the data flow direction
determines how a data point will be used by other objects in the tree. For
example, a mathematic object will assign variable names (v1, v2…) to all input
data points and write the result of the calculation to all output data points. For
controls, the direction of the attached data points determine if the control will be
selectable (to input new data) or not.
NOTE: The direction is defined from the point of view of the L-Vis device in
question, referring to the network side, not the application side. Therefore, an
input data object will receive new data from the network and deliver this data to
the application running on the L-Vis device, whereas an output data object will
transmit new data from the L-Vis out to other devices.
All data objects fall into one of the following categories:
L-Vis User Manual
Data Point Management • 65
•
System Parameter: This is a data object which cannot be created
by the user. It is provided by the device to modify certain internal
system parameters, like the time zone, IP address, BACnet instance
number, or others, or read the current value of a system parameter
like the current time, CPU load, free memory, and so on. A system
parameter object is either a read-only or a write-only value,
depending on the direction of the data object.
•
Register: A register is a place to store data internally, instead of
communicating with other devices on a network. Registers are used
to internally transfer data between objects, for example when a
mathematic object calculates a value which should be displayed on
a control, the result of the calculation is stored to a register and the
control reads the value from the register for display. A register is
therefore always represented by two data objects. One to write a
new value to the register and one by which the current value of the
register can be read.
•
Local Network Object: A local network object refers for example
to a static or dynamic network variable (CEA709 models) or a
BACnet server object (BACnet models) which exists on the device.
Most of such objects are either write-only (output NV, BACnet
input objects) or read-only (input NV, BACnet output objects).
They are therefore represented by one data object with the
appropriate direction. One exception to this rule are BACnet value
objects, which may be read and written and which are therefore
represented by two data objects, just like registers.
•
Remote Network Object: A remote network object is a reference
to some object existing on a remote device on the network. Such a
reference is called a client mapping on BACnet devices, since it
maps the value of the existing data object on the L-Vis device to a
data point on a different device. Depending on the direction of data
flow, the mapping can be either read (poll or COV) or write. There
may be more client mappings for the same remote object, for
example to a remote BACnet value object, which can be read and
written and is therefore represented by two client mappings. On
CEA709 devices, external network objects are called external NVs
since they are references to NVs located on other devices. There is
currently only one reference per external NV. A remote network
object is usually only constructed from data retrieved by a network
scan and will only work as long as the referenced object does not
change its configuration.
NOTE: From the data which is retrieved by a network scan, it is possible to
create a local network object from the client mapping. The user will decide if a
client mapping or a local network object is the better solution, which depends on
the network technology and the type of installation. For CEA709, it is usually
better to create local network objects and use a network management tool to
define the bindings to other devices in the network, for BACnet it may be more
convenient to use client mappings instead.
User Interface
Since the data objects are not part of the object tree shown in the main window,
there is a separate window to manage these objects. The same window is also
used to select one or more data objects, when a data point is to be added to the
object tree. It is therefore possible to create and select a data object in one go.
The window is divided into three sections:
66 • Data Point Management
L-Vis User Manual
Folder List
At the left is a list of folders which is used to sort the available data objects by
their category. There are a number of predefined folders available:
•
Import: This folder has two sub-folders. One is used to hold data
retrieved from a network scan, the other one is used to display data
imported from files. Data objects in the import folder are not stored
on the L-Vis device when the project is downloaded. They
represent data objects which are available on remote devices and
are shown here as templates to create suitable data objects for use
on the L-Vis device (see the section Remote Network Object for
details).
•
Local NVs / Server Objects: Objects which represent a local
network variable or local server object are located in this folder.
Select the folder and use the New button or the context menu to
create a new local data object.
•
External NVs / Client Mappings: Objects which reference remote
network variables or server objects on other devices, without
connection to a local network object, are located in this folder.
These are usually data objects which were created from points in
the import folder, by using the option Use on Device from the
context menu of the imported point.
•
Register: This is a folder for internal registers created by the user.
To add a new register, select this folder and then use the New
button or the context menu to add a new register object. As
explained before, a new register will automatically yield two new
data objects (read and write).
•
System: This is the folder in which the available system data
objects are located. All these objects are automatically created and
cannot be removed or modified in any way. They can only be
selected to create a new data point for the object tree.
•
Calendar: This folder is used to hold a locally available calendar
object with its calendar patterns (definitions of day classes like
holiday, maintenance day, and so on). Current devices allow one
local calendar object. To create it, select the folder and use the New
button or the context menu.
•
Scheduler: This folder is used for local scheduler objects. Each of
these objects will connect to a local scheduler on the device and
will be configurable through this data object, that is, the data
objects transfers scheduler configuration data between the actual
scheduler present on the device and the user interface.
•
Alarm: This folder is used for local alarm servers. On CEA709
devices, only one alarm server may be created, which basically
represents the node object of the device which is used to manage
system alarms. On BACnet devices, an arbitrary number of alarm
server objects may be created, where each alarm server object will
be connected to a separate notification class object on the device.
•
Remote Devices: This folder is used to collect all remote
calendars, schedulers and alarm client objects which were created
from network scan data. For each remote device, a subfolder will
be created where the objects referencing this device are collected.
Note that references to normal external data points go into the
External NV or Client Mappings folder.
Using the context menu on a folder, sub-folders may be created to organize the
available objects. If new objects are created automatically, they are usually
L-Vis User Manual
Data Point Management • 67
placed in the base folder and can then be moved by the user to any of his subfolders.
Data Object List
At the top right, a list of all data objects which are available in the selected folder
is shown. From this list, objects may be selected (including multi-select) in order
to modify some of their properties. A double-click will select the data object and
then close the window (same as the OK button), which is useful when adding
new data point objects to the object tree in the main window.
The columns of the list will vary depending on the type of objects shown.
Always visible are the data object name and the unique ID by which this object
may be referenced. Also shown is the number of times this object is currently
referenced from the main object tree (the L-Vis project). Only data objects which
are currently unused (the Use column shows 0) may be removed from the list.
New objects may be created in the selected folder by pressing the New button to
the right of the list or via the New command in the context menu. The list may be
sorted by a click on the desired list column.
When an entry is selected, detailed property information is shown below the list,
in the property view.
Property View
The property view is the area below the data object list and is used to display
detailed information about a selected data object. Some of the properties may be
modified in this area, others (marked with a lock symbol) are read-only.
Object Creation
New objects can either be created manually, or from template objects which
were automatically created based on information provided by a file or a network
scan. The various objects and the way to create them are explained in the
following sections.
User Register
A new user register is very easy to create. Select the folder named Register and
click the New button. A new dialog appears, asking for two names, a Datapoint
Name and a Register Name. The first one is used as a base name for the data
objects which will be created. The suffix _Read or _Write will be appended to
this name, to identify the read and the write point. The second is the name of the
register itself. You may leave either one or even both names empty, in which
case a suitable default will be chosen.
Local Network Variable (CEA709)
For CEA709 models, local network objects refer to local network variables on
the L-Vis device. If there are dynamic NVs present on the device, suitable data
objects will be created automatically. All manually created objects will therefore
create additional static network variables on the device.
NOTE: Adding, removing, or otherwise changing the static network variables of
a CEA709 device may have an impact on the integration of the device in your
network. The configuration software will automatically determine if your
changes need special attention and warn you if the required modifications can
68 • Data Point Management
L-Vis User Manual
not be made automatically. Refer to the chapter Connecting to the Device for
more information about this topic.
To create a new static NV, select the folder named Local NVs and use the New
button or the context menu to add a new data object. A new dialog will open and
request the required information to create the new NV, which is:
•
Datapoint Name: Enter a name for the data object. If this is left
blank, the data objects name will be derived from the programmatic
name of the network variable.
•
Programmatic Name: The programmatic name of the network
variable on the device. There are certain restrictions to this name,
which originate from the underlying network technology. For
example, the name may not exceed 15 characters. Also, the name
should start with the prefix nvi or nvo. If this is not the case, a
suitable prefix will be added to the name automatically (depending
on the selected direction).
•
Resource File: This dropdown list contains all resource files
currently installed on the system. Select the desired resource file,
which contains the data type you want to create. The standard
network variable types (SNVT_xxx) are defined in the resource file
called STANDARD.
•
Type: The desired type of the network variable. The available
types in this dropdown depend on the resource file selected before.
•
Direction: Input or output, as seen from the network side.
•
Functional Block: The functional block in which the NV should
be located. L-Vis provides an array of eight functional blocks to
organize your NVs and keep them separate from other NVs on the
device which are managed by the device firmware.
•
NV Flags: Flags for the newly created NV. You may leave these
untouched. Most of the flags will be handled by the network
management tool later on. The most important one which cannot be
set by other tools is the polled flag. This is automatically set for
newly created NVs as required.
Local Server-Object (BACnet)
On BACnet models, local server objects may be created to communicate with
other devices on the network. The basic object types supported are analog,
binary and multi-state, each available as input, output or value object. Since a
value object may be read and written, much like a register, two data objects will
be created for each value server object.
NOTE: BACnet defines the direction of data flow from the point of view of the
application running on the L-Vis device. An analog input object therefore
accepts input from the user and transmits this data out to other devices on the
network. An analog output object receives data from the network and outputs it
to the application (show data on the display). A BACnet input object is therefore
represented by an output data object, whereas a BACnet output object is
represented by a data input object.
To create a new server object and the required data object(s) to represent it,
select the folder named Server Objects and use the New button or the context
menu to add a new object. A dialog will open, requesting the required
information to create the new server object. The following data may be entered:
L-Vis User Manual
Data Point Management • 69
•
Datapoint Name: This is the name of the data object representing
the BACnet server object. You may leave this empty, in which case
the server object name will be used.
•
Object Name: The name of the server object to be created. This is
the name which will be seen by other devices on the network.
•
Object Type: Select the required object type here. Keep in mind
that ‘input’ and ‘output’ here are according to BACnet naming
rules for objects, as explained above.
•
Engineering Units: Optionally, specify the engineering units for
your server object. This will be available to other devices on the
network as a property of your server object.
•
Description: As above, optionally specify a description which will
be available as a property of your server object for other devices or
system integrators to read.
•
Device Type: Optional property for your object, as above.
Once all the required information has been filled in, the button Create Server
Object is used to create the new server object and the required data object(s) to
represent it. As explained before, you will get two data objects if you create a
server object of type ‘value’, in order to be able to read and write your object.
Remote Network Object
Since there is a lot of information required to create a mapping for a remote
network object, such objects are usually only created from existing templates.
The first step therefore is to either scan the network for remote network objects
or import a file, to get a list of available template objects from which new client
mappings may be created.
CSV / EDE Import
Use the context menu of the file import folder and select the command Import
File. Browse to the CSV file you want to import and select it. For BACnet
models, standard EDE files may be imported through this method. For CEA709
models, a similar file format was specified so that tools may be developed which
are able to output data in a format the configuration software is able to read. An
example CSV file for CEA709 is installed together with the configuration
software.
Once opened, the contents of the file will be parsed and suitable data object
templates will be created in the file import folder. These templates are then used
in a later step to create client mappings for use on the L-Vis device (see the
section Create Mapping below).
Network Scan
Scanning an existing network is another way to generate template points.
Depending on the type of device and the current operating mode of the
configuration software, there are different ways to scan the network:
70 • Data Point Management
•
BACnet, no connection to a device: In this mode, there is
currently no way to scan the BACnet network. To execute the scan,
a connection to a BACnet device must be established first.
•
BACnet, connected to a device via FTP: The network can be
scanned by the L-Vis device, which reports the results back to the
configuration software. To start the scan, use the context menu of
the scan folder and select Scan BACnet Network.
L-Vis User Manual
•
CEA709, no connection to a device: In this mode, network
scanning is currently not possible. Connect to a device first.
•
CEA709, direct connection (not LNS mode): In this mode,
network scan is currently not possible, because the scanner engine
on the device can only be operated over a TCP/IP link.
•
CEA709, connected to a device via FTP: In this mode, the device
is able to execute a network scan and report the results back to the
configuration software, similar to the BACnet scan. Since the
device scans the physical network, the results can only include
information which is stored on the devices in the field, not
information which may be present in an LNS database, like a
device name, functional block names, or NV display names. To
start the scan, use the context menu of the scan folder and select
Scan CEA-709/852 Network.
•
CEA709, connected to a device in PlugIn mode: In this mode,
scanning is done on the LNS database. The devices do not need to
be physically present. The information gathered from this type of
scan will usually include more information, because there is more
information about the devices available in the LNS database.
However, finding a device through this type of scan does not
necessarily mean that the device will actually be available on the
physical network, whereas the results from a direct network scan
will reflect the network as currently seen by the L-Vis device
running the scan. To start the scan, use the context menu of the
scan folder and select Scan LNS Database.
A new window will open, which is used to conduct the network scan. Depending
on the type of scan, the window will contain different controls and options to
conduct the operation. A few things to note are:
•
BACnet Scan: As the first step, the current list of devices should
be updated using the button Refresh Device List. After a while, the
list of available devices on the network will be shown in the device
list. Now one or more devices may be selected from this list and
the objects available on the selected devices can be scanned by
pressing the button Scan Objects. This step may be repeated for all
required devices. For each device, a new sub-folder will be created
and the objects found on the device will be created in this subfolder.
•
CEA709 Scan: Note that the device you are connected to must be
commissioned in order to execute the scan. If it does not yet have a
valid network address, a suitable address may be assigned in the
area called Connected Scanner Device. If you want to see a list of
all reachable devices, use the button Discover Devices,
alternatively start scanning for service pin messages by pressing the
button Discover on Service Pin, then go through all required
devices and press the service button, which will add the device to
the list of available devices, and stop the process using the Done
button when finished. Once the list of devices is ready, use the
button Scan Device to get a list of objects available on the device.
•
LNS Database Scan: The current network will be selected from
the database automatically. Select the desired channel from the list
of channels at the right to see a list of devices on that channel. Now
either scan all devices on the channel using the button Scan
Channel, or select individual devices from the list and use Scan
Device for individual device scan.
When you are done with all the required devices, close the scanner window and
return to the data object management window. The scan folder should now have
L-Vis User Manual
Data Point Management • 71
a sub-folder for each of the scanned devices, containing objects representing the
data points available on these devices. Now the required mappings may be
created from these points (see next section).
Create Mapping
Browse through the available points in the import folder and select the data
points for which mappings should be created. Multi selection within the same
folder is possible. Then open the context menu and select Use on Device. For all
selected points, a suitable remote data object will be created.
NOTE: The data direction of the points created in the import folder are set from
the point of view of the scanned device, since they represent data objects which
are available on the remote device (for a network variable input on a remote
device, you will see an input data object in the import folder). Once the point is
used to create a remote network object on the L-Vis device, the direction will
change, since a network variable output will be required to send data to the
remote devices network variable input.
To simplify the selection and configuration of remote network objects for
CEA709 devices, it is possible to create one device configuration template for
the different program-IDs. The device template defines a set of network variable
objects and their configuration, which can be used as a template when a device
of the specified type is added to the project. To add new network variables to the
device template, select the desired imported points from the import folder and
select the context menu command Use as Template to add them to the respective
device template, which will be automatically created for each device in the
CEA709 Templates folder. On these templates, you can now configure a few
settings like the desired data point name or the type of data point (external or
static NV). These settings will be applied automatically when a point matsching
the template is used on the device.
When the templates are ready, it is possible to use all data points from all
scanned objects which match one of the available templates and have the default
settings applied to the newly created points. To do this, select the command Use
on device and apply all templates on the top level scan folder.
NOTE: A remote network object refers to another device in the network, which
had a certain configuration at the time the scan data was collected. If the
configuration of the remote device changes later on, the remote network object
may stop working until the network is rescanned or the mapping to the remote
device is changed manually to reflect the new configuration.
Local Scheduler and Calendar
To use scheduler and calendar functionality on the device, the appropriate data
objects need to be created first, followed by a few additional configuration steps
which are detailed below.
Point Creation
As the first step, the required data points must be created. Create the calendar
point in the calendar folder and the required scheduler points in the scheduler
folder, as described earlier in this chapter.
72 • Data Point Management
L-Vis User Manual
Calendar Point Configuration
Once the calendar point is created, attach new calendar patterns as required to
describe the individual day classes, like holiday, maintenance day, and so on. Do
this by using the command Create Calendar Pattern from the context menu of
the calendar point. A new dialog appears where you can enter a name for the
calendar pattern and edit the days which should belong to this day class.
When done, close the dialog using the Create Pattern button. Repeat this step to
create all required patterns. All patterns configured here will later be available on
the local schedulers for use.
Scheduler Point Configuration
To configure the local scheduler points, select the command Configure Schedule
from the context menu of the scheduler point. The same dialog which appears
when a new scheduler is created is shown and allows to configure the scheduler.
Of course, this step can also be done directly when the point is created.
First, attach the data points which should be controlled by the scheduler. Switch
to the tab Scheduled Datapoints and use the Attach Datapoints button to select
and attach one or more data points to the scheduler.
NOTE: There may be limits in how many and which data points may be
attached to a scheduler. For example, on a BACnet scheduler, only data points
with compatible data types may be attached to the same scheduler object. On a
CEA709 scheduler, only data points representing an entire NV may be
connected, but not individual elements of a structured NV.
For each of the attached data points, one or more lines appear in the list below
the attach button. If the attached point is a structure, there will be one line fir
each element of the structure.
Enter a Description text in the second column of each line. This text will be
shown when the user changes a value set on the device later on.
Add new value presets by entering a name and pressing the Create button next to
the input field. For each new preset, a new column will appear in the list. In this
column, enter the desired value for each of the attached points, which will be set
when this value template is scheduled. The user may later edit the values for
each preset on the device but cannot add new value presets unless there is only
one line (one value) in the list.
If there are multiple output values which belong together, they can be grouped in
order to save space on the device. For each group, the entered value is stored
only once, even if there are more data points in the same group.
When done with the point and value setup, switch back to the Configuration tab.
You should now see the list of defined value presets in a list at the top right of
the window. Drag and drop presets from this list into the time table area to
define the desired output values throughout the day. Days may be copied to other
days using the Copy to button.
At the bottom left, there is a list of all available days, which consists of the seven
week days which can be used to define default schedules for each day of the
week, plus any additional special days defined by the local calendar. For the
special days, a priority must be assigned, so that the system knows which
schedule to follow on a day which is part of more than one calendar pattern.
NOTE: The priority settings are according to the underlying network
technology. For CEA709, the highest priority is 0, the lowest is 126 (127 is
reserved for the default weekly schedules). For BACnet, the highest priority is 1,
the lowest priority is 16.
L-Vis User Manual
Data Point Management • 73
When the setup is done, save the changes and exit the configuration dialog.
Schedule Configuration Data
It is important to note that the configuration of the scheduler and calendar
objects consists of two parts:
One is the point setup, meaning the number of calendar patterns, number of
scheduler objects, and which points are controlled by which scheduler. This
information is part of the data point setup of the project, similar to the definition
of local and remote network objects. It is always in effect when the project is
downloaded and it will have an influence on the static interface of a CEA709
device.
The other part is the dates entered in calendar patterns and the actual schedule of
each scheduler (when the scheduler should output which value preset as well as
the definition of the value presets themselves). This information is usually
changed during the runtime of the device, that is, it is considered dynamic data,
similar to the current value of a network variable or server object (this data is in
fact the current value of such objects). Therefore, this data is not reset with every
project download, since the user wants to keep the current values if possible.
Only if the scheduler setup itself changed, the device will not be able to take
over the current settings, since they do no longer apply.
NOTE: The scheduler and calendar configuration entered in the configuration
dialogs is stored together with the project. It can also be exported to XML format
or imported from XML format. Once the project itself was downloaded to the
device for the first time, the scheduler configuration should usually be
downloaded as well to initialize the created objects with some data. Since this is
normally not wanted in subsequent project downloads, the configuration
software will normally ask the user if the scheduler and calendar objects should
be initialized with the configuration data from the project or not. The behavior
may be changed in the Project Settings Dialog between ask, always download,
and never download. In any case, the configuration may be downloaded and also
uploaded at any time from the Connection menu.
System Resources
To actually implement the scheduler functionality, there are network technology
dependant software modules required on the device. The scheduler and calendar
data points created here will be connected to these modules and serve as the link
to exchange configuration data between the user and the actual scheduler unit.
NOTE: It is important to understand that the scheduler data points used in the
project are not actually the scheduler units but only serve as a link to exchange
configuration information and thus control the actual scheduler, which may be
located on a completely different device. The device containing the actual
scheduler may even be a third party device which is compliant to the standards
for scheduling defined for the respective network technology.
In case of local scheduler objects, the required scheduler units are either
automatically instantiated (BACnet devices automatically create the required
server objects they need to operate the scheduler) or need to be defined by the
user in a separate dialog.
For CEA709 devices, the configuration software provides a Network Settings
Dialog, where the required number of scheduler units may be instantiated and
their capacity may be configured (how many time/value entries, value templates,
bytes per value template, and so on). The dialog can be accessed through the File
74 • Data Point Management
L-Vis User Manual
menu and contains the following options and settings which are relevant to
calendar and scheduler functionality of the device:
•
Enable Calendar Object: This checkbox enables a LonMark
compliant calendar object on the device. It is automatically enabled
together with local schedulers, since the two are always used
together.
•
Enable Scheduler Objects: This checkbox enables local LonMark
compliant scheduler objects on the device. Checking this box will
automatically enable the calendar as well.
•
Number or calendar entries: Specifies the maximum number of
different exception schedules (day classes like holiday,
maintenance day) supported by this calendar object.
•
Total number of date entries: Specifies the maximum number of
date definitions which may be stored by the calendar. This is the
sum of all date definitions from all calendar entries. A date
definition is for example a single date, a date range, or a week and
day pattern (every last Friday in April).
•
Number of local schedulers: This is the number of local scheduler
objects which should be available on the device. Each local
scheduler data point created in the data point manager will connect
to one of these scheduler objects. There may be more scheduler
objects available on the device than are actually used at a certain
time. It is a good idea to have some spare scheduler objects ready,
in case another scheduler is needed.
•
Number of daily schedules: This is the maximum number of
schedules supported by each scheduler object. This number must at
least be 7, since a scheduler always needs to provide one schedule
for each day of the week (default weekly schedule). For each
special day defined by the calendar, an additional daily schedule is
required to support it.
•
Entries in Time/Value table: This is the total number of entries in
each scheduler defining a value template that should apply on a
specific day starting at a specific time (the time table).
•
Number of value templates: This is the maximum number of
value templates supported by each scheduler.
•
Data size per value template: This specifies the buffer size
reserved to hold the data for each value template. More data points
or bigger data structures require a bigger value buffer.
•
Max. number of data point maps: Specifies the maximum
number of individual data points that this scheduler is able to
control.
As can be seen from the above list, it is not easy to configure a LonMark
scheduler object. There are many technical parameters which need to be set and
which require some knowledge of how these scheduler objects work internally.
Therefore, the configuration software provides the following mechanisms to help
in choosing the right settings:
L-Vis User Manual
•
Current resource usage: The absolute minimum settings required
by the current project are shown in a table at the left side of the
window. This data may be used to fill in the values at the right side,
but some additional resources should be planned to allow for
configuration changes which need more resources.
•
Auto-Set: This button may be used to let the configuration
software decide on the best settings to use, based on the current
Data Point Management • 75
project. Since the current projects resource usage is taken as a
starting point, all schedulers and calendar patterns in the project
should first be configured as required before this button is used.
•
Set Defaults: This button will choose standard values for all
settings. In most cases, these settings will provide more resources
than necessary.
NOTE: It is possible to enter anything here, until the project is actually saved or
downloaded. At this point in time, the software will check that the resources
configured here are sufficient to support the projects configuration. If this is not
the case, this dialog will automatically open so that the settings may be adjusted.
Resource allocation
On BACnet devices, there is always a direct assignment between a local
scheduler point and a server object, because the two are created and deleted
together. Name and instance number of the created server object for the
scheduler may be set in the same way as for any other server object.
For CEA709 devices, resource allocation is more complicated. Once the required
resources are configured in the Network Settings Dialog, the local scheduler data
points will be assigned to the available scheduler objects of the device. Each new
scheduler point will pick the first available scheduler object, until all objects are
used. Scheduler points which cannot be assigned to a free scheduler will remain
unassigned until enough schedulers are created or other scheduler points are
deleted. The assignment is shown in the columns Index and Object in the point
list. These are the functional block index and name of the assigned scheduler.
Deleting a scheduler data point will detach the data point from the respective
scheduler object and make this object available for other scheduler points which
may still be unassigned due to missing resources or which may be created in the
future. The assignment of other scheduler points to their scheduler objects is not
changed.
Using the Scheduler
Once the above setup is done, the scheduler is basically operational. It will
immediately start to work based on the configuration data downloaded through
the configuration software. However, in almost all cases it will be required to
add a control to the visible part of the project, through which the schedules may
be viewed and edited. For this purpose, there is a specialized type of control
available, the Schedule Control. To use it, create a control of this type on the
page and connect one or more scheduler data points to it. Please see the section
about schedule controls for detailed information.
Local Alarm Server
To use a local alarm server, create an alarm server point in the folder called
Alarm. On CEA709 devices, there may only be one alarm server for the entire
device. BACnet devices support an arbitrary number of alarm servers.
There are two different types of alarming available. The current software
supports one type for BACnet and the other type for CEA709 devices:
Intrinsic Reporting
BACnet devices support an alarm mechanism called intrinsic reporting. In this
concept, high and low limits are specified for individual server objects and
76 • Data Point Management
L-Vis User Manual
alarms can be generated by the server object and reported to an assigned alarm
server when the value of the server object exceeds these limits for a specified
time period.
Other devices in the network can register for alarm updates at the alarm server
object (which is a notification class object) and display the current list of alarms
as well as acknowledge individual alarms.
To set up a local alarm server and assign it to server objects, the following steps
are required:
•
Create the needed alarm server points (more than one may be
created to organize alarms into groups.
•
Add alarm conditions to the server objects you want to monitor.
This can be done via the context menu of the server object, using
the command Create Alarm Condition.
•
Assign one of the existing alarm servers to this condition, which is
done in the same dialog where the alarm condition is specified.
Algorithmic Reporting
CEA709 devices do currently not support the mechanism of intrinsic reporting.
Instead, the application needs to provide an algorithm which determines if an
alarm state is reached. On L-Vis devices, the alarm generator objects described
earlier in this document are used for this purpose.
To set up alarming using algorithmic reporting, the following steps are needed:
•
Create the alarm server point.
•
Add alarm generator objects to your project as required.
•
Set up the alarm generator objects. Connect the input data points
which should be monitored and use the alarm server point as the
output point of the alarm generator.
System Resources
On BACnet devices, each alarm server point automatically instantiates a
notification class object to handle alarm subscriptions and notifications. The
object name and instance number for the object can be configured in the same
way as any other server object.
On CEA709 devices, the device firmware must provide a software module to
handle alarming. To activate this module, open the Network Settings Dialog
which is accessible from the File menu and check the option Enable Alarm
Server.
Using Alarm Servers
Each alarm server keeps a list of currently pending alarms, distributes them to
any clients which may be connected to the server and also receives acknowledge
requests from either the application or connected alarm clients.
To access the current list of pending alarms on an L-Vis device, there is a
specialized control available to which alarm server and also alarm client data
points may be connected. Please refer to the section about alarm list controls for
more detail.
L-Vis User Manual
Data Point Management • 77
Remote Scheduler and Calendar
Adding remote access to the configuration of a scheduler and calendar which is
located on another device is done by creating remote scheduler and calendar
points. These points may currently only be created from data obtained by a
network scan. Here are the steps to create the required points:
•
Execute a network scan, as described earlier in this document.
•
From the points in the import folder, select the scheduler points
you are interested in and use the command Use on Device to create
suitable remote scheduler points in your project.
•
Note that any existing calendar is automatically imported as well.
•
Adjust the basic settings for the newly created points, which are
now available in the folder Remote Devices, list the object name
and description. The object name will be used as the name for the
scheduler, as seen on the display later on.
•
For BACnet, also adjust the poll cycle, which will be used to
periodically fetch the current configuration in case the remote
device does not support COV subscriptions.
•
For CEA709, a static NV is created to receive information from the
remote device about changes to the scheduler configuration, so that
the local device does not need to poll the remote device. Set a name
for this NV (default is nviSchedLink<number>) and assign it to a
suitable function block.
NOTE: Due to the static input NV which is required for a remote CEA709
scheduler point, adding remote scheduler points will change the static interface
of the device.
On BACnet devices, the new data points can be used right away to exchange
configuration data with the scheduler on the remote device. Just connect the new
scheduler data point to a schedule control to view and edit the configuration of
the remote devices scheduler.
On CEA709 devices, there is one extra step to take before the new data points
will be operational: The new static input NV representing the remote calendar on
the local device (this NV is normally called nviCalLink) needs to be bound to the
output NV called nvoCalLink located in the Calendar functional block of the
remote device and the new static nviSchedLink NVs which were created for each
remote scheduler point need to be bound to the respective nvoSchedLink variable
located in the Scheduler functional block of the remote device. The binding
between the nvoSchedLink variable on the remote device to the nviSchedLink
variable on the local device defines which of the scheduler data points on the
local device connect to which scheduler unit on the remote device.
NOTE: In the current version of the software, you may only bind to the same
device which you actually scanned and from which you created the remote
scheduler points. This will be changed in future releases, so that it is possible to
create a remote scheduler point even without a network scan and bind it to any
existing nvoSchedLink to connect to the respective scheduler unit.
78 • Data Point Management
L-Vis User Manual
Alarm Clients
Accessing alarm server objects on remote devices is done by creating remote
alarm data points. These points may currently only be created from data obtained
by a network scan. Here are the steps to create the required points:
•
Execute a network scan, as described earlier in this document.
•
From the points in the import folder, select the alarm server points
you are interested in and use the command Use on Device to create
suitable alarm client points in your project.
•
For CEA709, select the new alarm client point and adjust the name
of the local NV (default name is nviAlarm_2). Also, you may
assign this NV to one of the L-Vis functional blocks as required.
NOTE: Due to the static input NV which is required for a CEA709 alarm client
point, adding alarm clients will change the static interface of the device.
On BACnet devices, the new data points can be used right away to exchange
alarm information with the alarm server on the remote device. Just connect the
new alarm client data point to an alarm list control to view and acknowledge
alarms reported by the associated alarm server.
On CEA709 devices, there is one extra step to take before the new data points
will be operational: The new static input NVs representing the alarm clients on
the local device need to be bound to the alarm outputs of the remote device. A
CEA709 device normally delivers alarms through an output NV of type
SNVT_alarm_2 located in the node object of the device, therefore the new input
NV on the local device must be bound to the alarm output NV of the remote
devices node object.
NOTE: Even though alarm client points can currently only be created from a
network scan, the resulting alarm client object has no further reference to the
scanned device. All required information is transmitted over the alarm input NV,
so it is possible to later bind the alarm client to any other alarm server without
rescanning the network.
Standard Procedures (CEA709)
Device Integration
How a new device is integrated into your network depends on the network
management tool in use and the way the configuration software is run. The
available choices are detailed in the following sections.
L-Vis User Manual
Standard Procedures (CEA709) • 79
New Device
Integration of a new device normally starts with an empty device (no project
loaded). Integration of a pre-programmed device is explained further down.
NOTE: To follow the procedures in this section, make sure there is no project
loaded in your device. This can be done by setting the CLEAR jumper, starting
the device, and removing the jumper again. Also, if the device was previously
used in another network, it is a good idea to also reset the network configuration
data by pressing and holding the service button while the device boots up. This
has to be done in an extra step, when the CLEAR jumper is not set.
The integration procedure may vary depending on the type of network variables
used in the project. The following sections detail the three possible variants.
Dynamic NVs
In case your project uses dynamic NVs only, there must be a network database
system which provides support for dynamic NVs. The configuration software
may be run in plug-in mode as well as in standalone mode, since no complicated
database updates are required in this scenario. The followings steps will be
required to integrate a new device.
•
Create a new device in your database using the provided device
template for the L-Vis device you are using (FT-10 or IP-10L).
•
Create all dynamic network variables on the device which are
required for your project.
•
Commission the device, so that the dynamic NVs are created and
the configuration software can communicate with the device.
•
Run the configuration software either as a plug-in on the newly
created device or standalone using a TCP/IP or CEA709
connection. If everything worked OK, the configuration software
will be able to contact the device and determine model number and
firmware. Suitable data points will be automatically created for all
dynamic NVs present on the device. If you have communication
problems, an error message will be displayed and the procedure
cannot continue until communication is possible.
•
Load the project which was already prepared or design a new
project. If a prepared project is loaded, the contained dynamic NV
data points will be synchronized with the existing data points,
based on the NV name, direction and type. If there are any data
points which cannot be assigned automatically, a dialog for manual
assignment will be displayed.
•
Now download the project to the device. The device will restart
and activate the new project. It is now ready to use.
Static NVs
Projects using static NVs have the advantage that they do not require the
network management to support dynamic NVs. Also, it is possible for such
projects to run in a special mode, where the device is compatible to the older
CEA709.1-A network management commands, compared to the extended
network management defined in the CEA709.1-B standard.
To integrate a device using static NVs, the configuration software may be run
either as a plug-in or standalone. The procedure when run as a plug-in is fairly
automatic:
80 • Standard Procedures (CEA709)
L-Vis User Manual
•
Create a new device in your database using the provided device
template for the L-Vis device you are using (FT-10 or IP-10L).
•
Commission the device, so that the configuration software can
communicate with it.
•
Run the configuration software as a plug-in on the newly created
device and load the prepared project or design a new project.
•
Download the project to the device. A warning will appear,
notifying the user of the required database update. The update and
the selection of a new model number are done automatically.
•
After the device restarted and the database was updated, the device
is re-commissioned and ready to use. Keep in mind that during the
download, a new model number was selected and the project
should be saved after the download, so that the model number in
the file on the PC matches the one in the device.
If the network management does not support plug-ins or the project is
downloaded via TCP/IP to reduce the download time, the device is usually first
programmed standalone and then integrated using an XIF file:
•
Connect to the device using TCP/IP or CEA709. The configuration
software will determine the device model and firmware.
•
Load or design the project, similar to the above procedures.
•
Open the Network Settings… dialog and set the Program-ID
Model Number to the desired value. This will be the last byte of the
resulting program ID of the device. Make sure there are no other
devices in the same network using the same model number but a
different set of static network variables. Also, zero is reserved for a
device without static NVs, so the valid range is 1 to 254.
•
If required, activate the CEA709.1-A restricted mode.
•
Download the project to the device. A warning message will
appear, notifying the user that this operation will now change the
static interface of the device and that the configuration software
will not be able to automatically upgrade an existing device in a
network database, since it is run in standalone mode. Since the
device will be integrated for the first time, this is OK.
•
The device can now be integrated into the network. This is usually
done using an XIF file, or, if available, an ‘upload from device’
method, in which the network management reads the static
interface directly from the device and thus requires no XIF file. If
an XIF file is required, generate one using the Export XIF…
function from the Tools menu and use it to integrate and
commission your device.
•
If the network management tool does support plug-ins and the
newly created device should be configurable in plug-in mode in the
future, re-run the plug-in registration for the L-Vis configuration
software. The new device will be identified as an L-Vis device and
the configuration software will register itself as a configuration
plug-in automatically.
Static and Dynamic NVs
This is the most complicated setup, which is not available under all
circumstances. Projects using static and dynamic NVs at the same time can only
be integrated and maintained when the configuration software is run in plug-in
mode. Due to limitations of the network database system, the presence of
L-Vis User Manual
Standard Procedures (CEA709) • 81
dynamic NVs on the device will prevent a manual device integration if there are
static NVs to be created, even if you don’t actively use the dynamic NV points.
NOTE: If possible, try to decide on one method and use either only dynamic or
only static NVs, since this greatly simplifies the integration and upgrade process.
If necessary, a mixed operation is possible, but due to the required operations on
the underlying database is only suggested for advanced users. If used, you are
advised to have a recent backup of your database ready.
The integration procedure for such a project is a combination of the procedures
used for a static NV project and a dynamic NV project in plug-in mode. The
dynamic NVs must be created on the device in a first step, the data points in a
loaded project are synchronized with the available dynamic NVs on the device
and the static NVs defined in the project will be available on the device after a
database update.
The difference is, that during the upgrade of the static interface all dynamic NVs
will be temporarily removed from the device and the database, so that the
upgrade can be executed. The removed NVs will later be recreated
automatically, but they may get a different NV index assigned, so it is necessary
to update the drawing of your device. Existing bindings will be saved and
restored as well. If something goes wrong, restore the database from the backup
or read the section about device recovery.
Pre-Programmed Device
In some cases, it may be necessary to integrate an already programmed device
into a network. This can only be done with static NV projects, since dynamic
NVs are stored in the network database and not the L-Vis project and are
therefore not transportable from one network to another.
The procedure is basically the same as integrating a new device with static NVs
using the configuration software in standalone mode. The only difference is that
the first few steps were already executed by somebody and the device already
contains the final project.
When pre-programming a device in this way, an XIF file should always be
generated as well after the device was programmed, and this XIF file should be
delivered together with the device. If this was not the case and the network
management tool needs an XIF file, it may be created after the device was
programmed using the following procedure:
•
Run the configuration software in standalone mode and connect to
the pre-programmed device for which you need an XIF file.
•
Press the Upload Configuration button from the tool bar to upload
the project which is currently stored in the device.
•
Use the Export XIF… command from the Tools menu to output
the required XIF file.
Now integrate the device like any other CEA709 node, using the XIF file.
If the network management tool supports plug-ins and the new device should be
configurable in plug-in mode, re-run the plug-in registration for the L-Vis
configuration software, so that it registers itself on the new device.
Device Replacement
This section describes the steps necessary to replace an already integrated device
with a new device using the same project as the old device. Depending on the
82 • Standard Procedures (CEA709)
L-Vis User Manual
situation, this may not be a trivial task. The procedures for the possible situations
are detailed in the following sections.
NOTE: The following procedures assume that the L-Vis project file is available
to the PC which runs the configuration software. If this is not the case, the
project must first be uploaded from the old device and saved to a file.
Dynamic NV Projects
Devices using dynamic NVs only are relatively easy to replace, since the device
may physically be replaced right away and the configuration software may then
be run in either mode. The recommended procedure to replace a device using
dynamic NVs is as follows:
•
Physically replace the device in your network, the new device still
being empty, that is, no project is loaded yet.
•
Execute the standard replacement procedure of your network
management tool and use the already existing device template
which was installed by the configuration software. This is the same
template as used to originally integrate the device, since the device
does not change its static interface in such a setup.
•
After the replacement, make sure that the device is commissioned,
so that the dynamic NVs are created on the device.
•
Run the configuration software either in plug-in mode or in
standalone mode, load the project from the file and program it into
the device.
•
The device restarts and is ready to use.
Static NV Projects
A device with a project using static NVs only is easy to replace if it is possible to
connect the new device to an IP network for programming purposes. Here is the
recommended procedure:
•
Connect to the new device in standalone mode, using a TCP/IP
connection (requires to set up the IP settings for the new device).
•
Make sure the device is empty and remove any existing project if
required. This can be done through the configuration software
using the command Remove Configuration… from the File menu.
•
Load the project from the file and download it to the device. A
warning will appear, stating that the static interface will change and
that an already integrated device cannot be upgraded. This is OK,
since we are changing the interface so that it will match the already
integrated device.
•
Once the device restarted, it is ready to use. Connect it at its final
location (replacing the old device) and use the standard procedure
of your network management tool to replace the device. If an XIF
file is required for this operation, you may use the one which was
originally used to integrate the device, or create a new one from
within the configuration software.
In case it is not possible to program the new device using a standalone
connection, the procedure becomes more complicated, because the device needs
to be commissioned in the network to be programmed, but the device currently
in the database does not match the empty device and cannot be used for this task.
The following procedure is recommended in this case:
L-Vis User Manual
Standard Procedures (CEA709) • 83
•
Create a new database or network project in your network
management tool, adding the PCs network interface and a new LVis device and connect them using a suitable channel.
•
Connect the new device physically to the network interface of your
PC, or otherwise make sure that the PC can communicate with the
device in the new network project.
•
Commission the new device.
•
Run the configuration software on the empty device and program
the device with the required project, as explained in the section
about integrating a new device using static NVs and plug-in mode.
•
The device will be programmed, the database will be updated and
the device will be commissioned in your small network project.
•
Decommission the device in your helper network, close it, and
open the final target network, in which the device should be
replaced.
•
Connect the device at its original location in the network and
execute the standard procedure of your network management tool
to replace a device.
NOTE: In both cases, make sure that the stored project which is programmed
into the replacement device has the correct model number set. This can be
checked in the Network Settings… dialog. The number must match the last byte
of the program ID of the device to be replaced. If this is not the case and the
model number is not adjusted before the download, the replacement of the
device may fail with an error stating that the new program interface does not
match the previous program interface.
Mixed Projects (static and dynamic)
These projects are the hardest to replace, since it takes a two-step process to
complete the replacement. First, the new device needs to be loaded with the
project to match the static interface of the original device, then it may be
commissioned in the network to get the dynamic NVs created and then the
project needs to be loaded again, so that the dynamic NVs which were not
available the first time can be used. The recommended procedure is a
combination of the above two procedures.
84 • Standard Procedures (CEA709)
•
Follow the procedure to replace a device with static NVs to prepare
the new device with the original project. When the project is loaded
from the file, a dialog will appear and list all dynamic data points
in the project, stating that they could not be found on the device.
•
Finish the dialog by removing all data points listed. Since the
device does not yet contain any dynamic NVs, these data points
cannot be used for the moment.
•
Download the modified project into the device, but do not save this
project over your original project. Remember that it has all
dynamic NV data points stripped. You may save the project to a
different file, but this is not necessary.
•
Now take the device and execute the procedure for replacing a
device using dynamic NVs, that is, physically replace the device
and continue with the procedure. If an XIF file or a device template
is required for the replacement, use the same XIF which was used
to initially integrate the device or use the same device template as
the device to be replaced. Since the device already has a project
L-Vis User Manual
loaded which matches the final static interface, it will be possible
to replace the device without changing the static interface in the
database. Commissioning the device will create all the dynamic
NVs stored in the database.
•
The original project must now be loaded a second time, but this
time the dynamic NV data points can be assigned to the existing
NVs and the project should load without errors.
Configuration Change
This section describes the necessary procedures to change the configuration of
an already integrated device. It depends on the existing project and the kind of
changes done to the project, how the update may be performed.
NOTE: For all configuration changes it is strongly recommended to first
execute the download procedure and then store the new project on the PC
(usually overwriting the last stored project), since this guarantees that the model
number stored in the file on the PC matches the model number which was
automatically selected during the upgrade procedure and that in cases where the
upgrade must be aborted, the device may easily be restored to the last working
project, since it is still intact on the PC and not already overwritten by the new
project.
Same NV Configuration
This is the easiest of all configuration changes. As long as there are no changes
to either the static or dynamic NVs of the device, there are no special
requirements and no special procedures to follow. The new project may be
downloaded to the device through any of the available methods, where a TCP/IP
connection is usually preferred.
The device will restart after the download and will be ready to operate without
any further steps.
Dynamic NV Change
If the project change includes the addition or removal of dynamic NVs without
any changes to static NVs, the following procedure is recommended:
L-Vis User Manual
•
Execute all required changes to the dynamic NV interface using
your network management software. This includes adding new
NVs and removing old NVs as required.
•
Once the required changes were made, start the configuration
software or, if it is already running, use the Update Data Points
button from the tool bar to read the new set of available dynamic
NVs from the device. The configuration software may run in either
mode for this type of configuration change.
•
Load the project and modify it as required. If the project still uses
some of the dynamic NVs which were removed in the first step,
these will be reported and may be replaced by other data points or
may be deleted all together. Do not replace them with static NVs,
since this would mean a change of the static interface, which
implies a different procedure.
•
Download the modified project (TCP/IP is preferred due to its
speed). The device will restart and be ready to use.
Standard Procedures (CEA709) • 85
Static NV Change
For project changes which result in a change of the static NV configuration,
certain restrictions apply regarding the way such changes may be performed.
There are two possible ways to perform such a change. The automatic and
recommended way is to run the configuration software in plug-in mode, as
detailed below.
•
If there are any changes required for the dynamic NVs on the
device, perform them as the first step using your network
management tool.
•
Run the configuration software in plug-in mode on the device
which is to be changed. This will automatically update the dynamic
data points according to the changes which were made to the
dynamic NVs on the device.
•
Load the current project from a file or from the device and modify
it as required, adding or removing static NV data points. During the
load, the data points used in the project are updated according to
the new set of dynamic NV points. If dynamic NVs were removed
or renamed, the affected data points need to be manually assigned
to other NVs or may be deleted from the project.
•
Download the new project to the device. A warning appears,
stating that this will change the static interface of the device and
that the database needs to be updated to reflect these changes.
•
The configuration software will execute all required steps
automatically, temporarily removing all dynamic NVs and all
bindings to guarantee a correct update of the device. Once the
device restarted and the database was updated, the NVs and the
bindings are restored.
•
The device is then commissioned and ready to operate.
WARNING: It is dangerous to change the static interface while using dynamic
NVs, due to the fact that all dynamic NVs must be removed in order to upgrade
the static interface. If something goes wrong during this process, all dynamic
NVs on the device may be lost and must be recovered using another procedure.
You are advised to have a recent backup of the database ready, in case the
recover mechanism built into the configuration software fails as well.
For network management systems which do not support plug-ins, the new
project must be loaded in standalone mode and a new XIF file must be generated
after the download completed. The network management tool itself must then
provide a way to upgrade the static interface of the already integrated device and
take over the existing bindings. The recommended procedure is as follows:
86 • Standard Procedures (CEA709)
•
Run the configuration software in standalone mode and connect to
the device, preferably using a TCP/IP connection.
•
Load the current project from a file or from the device and modify
it as required, adding or removing static NV data points.
•
Download the new project to the device. A warning appears,
stating that this operation will change the static interface and that
the configuration software will not be able to automatically
upgrade your device in the network.
•
In case you are connected over CEA709, another warning will tell
you that the connection will be lost after the download, because the
device will go unconfigured due to the static interface change. It is
therefore recommended to use TCP/IP for the connection.
L-Vis User Manual
•
After the device restarted, use the Export XIF… function from the
Tools menu to generate a new XIF file, matching the new
configuration of the device.
•
Execute the standard procedure of your network management tool
to replace the old device with a new device and use the new XIF
file to define the new interface.
NOTE: The above procedure assumes that there are no dynamic NVs present
on the device. Manually changing the static interface of a device is not supported
by any of the common network management tools, when there are dynamic NVs
present at the same time. Therefore, updates to the static interface in mixed
projects can only be done in plug-in mode.
Configuration Recovery
This section describes procedures to recover from situations where the current
configuration of the device does not match the current definition of the device in
the network. This may happen as a result of a failed upgrade procedure or
because the definition of the device in the network changed because the network
had to be restored from an older backup.
Basically, there are two ways to resolve any such conflict:
•
Change the configuration of the device to match the current
definition in the network.
•
Change the definition of the device in the network to match the
current configuration.
The decision depends on the desired end result, that is, if the current network
definition or the current device configuration is closer to the desired end result.
Change Device Configuration
In case the current definition of the device in the network represents the desired
end result, the configuration of the device should be set back to match the
definition in the database. This of course is only possible if a matching project is
still available as a file on a PC. Assuming that a suitable project file is available,
the device may be easily restored by following the appropriate procedure for a
device replacement, as outlined earlier in this document.
To determine if a project is suitable or not, it is not necessary to execute the
whole replacement procedure just to find out that the result still does not match
the definition of the device in the database. Instead, check the following things
upfront, before starting the download:
L-Vis User Manual
•
Run the configuration software standalone, without connection to
any L-Vis device and load the project which is considered to match
the current device in the network.
•
Check the program ID of the device definition in the network.
•
If the ID starts with 9000a9… then the interface matches a
standard device, without any static NVs. In this case, only consider
projects which do not contain any static NV data points. The
loaded project must have a Program-ID model number of 0.
•
If the program ID starts with 9000d7… then the device has static
NVs created and therefore uses a non-standard interface. In this
case, check the last byte of the program ID. It is the program ID
Standard Procedures (CEA709) • 87
model number and it must match the model number of the project
which you consider for download.
•
Once a project with matching model number was identified, this
will most likely be compatible as far as the static interface is
concerned. To double check, you may go through the list of static
NVs defined in the project and compare it with the NVs that should
be available on the device according to the devices definition in the
network. If the static interface seems to match, the replace
procedure may be started.
•
During the replace procedure, if the selected project causes data
points to be reported during project load, which cannot be assigned
to any of the existing dynamic NVs, then this project assumes a
different set of dynamic NVs and is most likely not the right
version of the project. Repeat the process with other projects. The
only time when such reports are to be expected is during the first
download in a two-stage replace procedure, as required for mixed
projects (static and dynamic NVs).
Change Network Configuration
There are a few cases where the network definition of the device is changed to
match the current configuration of the device. Such changes are normally
handled by the network management program, but may be supported by
functions of the configuration software as well.
While changing the device configuration requires one of the device replacement
procedures to be executed, changing the network configuration usually means to
restore a database backup which matches the configuration of the current device.
If the device uses static NVs only and the bindings which were originally used
together with this project were saved and are available in a file, the network
configuration may be adjusted by completely removing the old device definition
(if any), executing the integration procedure for a pre-programmed new device,
followed by a binding import to restore the original bindings.
Recover from a failed Update
When a project update including a change of the static interface fails, there may
be some extra steps necessary to restore the last working setup or to resolve the
original problem and finish the upgrade. Which one to use depends on how far
the upgrade procedure ran.
Failure before Database Update
If the procedure failed before the database update, that is, the device template in
the database is still the old version, the device must be rolled back to the last
project as well, so that the database and the device match again. The
recommended procedure is detailed below:
•
88 • Standard Procedures (CEA709)
Follow the standard procedure for device replacement as
appropriate for your project, but do not run the configuration
software in plug-in mode at any time. Only use the software
standalone, including any other configuration tasks you may be
doing to other devices at the same time. If the project used static
and dynamic NVs and the upgrade required a change of the static
interface, your dynamic NVs may be lost and the replace procedure
may report data points which cannot be assigned. Remove them
from the project and continue.
L-Vis User Manual
•
Once the device is replaced and commissioned, run the
configuration software in plug-in mode.
•
If the device lost its dynamic NVs, use the function Recover
DynNVs… from the Tools menu now, to recover the set of
dynamic NVs which were removed during the last upgrade.
•
Most likely, the bindings will be lost as well. Use the function
Recover Bindings… from the Tools menu to recreate the bindings
as they were recorded before the upgrade procedure started.
•
If the replace procedure reported missing dynamic NVs before, the
project has to be loaded again. Clear the current project data from
the editor and re-open it from the project file.
•
Program the device to restore the system to the last working state.
Failure after Database Update
If the procedure failed after the database update, that is, the device successfully
loaded the new project and the database was updated to match the new static
interface, the only things which could still be missing are dynamic NVs and
bindings which would need to be restored after the database update.
There are two possible options from here:
•
Try to find the reason why the NVs or the bindings could not be
restored, possibly checking the Binding Report… which is
available from the View menu for errors, then try to use the
Recover DynNVs… and Recover Bindings… functions from the
Tools menu to first restore the dynamic NVs (if any) and then
restore the bindings.
•
Revert back to the last working setup by removing the device from
the network database and roll back the device configuration by
following one of the procedures for integration of a new device, but
using the last working project. While doing this, do not run the
configuration software in plug-in mode at any time. Also, skip
the step of manually creating dynamic NVs, if instructed to do so
by the standard procedure. If the old project actually used dynamic
NV data points, these will be reported as unusable. Delete them
from the project and continue. Once the device is re-integrated,
recover the dynamic NVs (if any) and the bindings as described
above. If dynamic NVs were recovered, the project needs to be
loaded again so that the NVs can be used.
NOTE: Reverting back to the last working setup is much easier if a backup of
the database is available. In this case, first restore the database from the backup
and then simply follow the appropriate procedure for device replacement, using
the last working project file. In this case, the configuration software may also be
used in plug-in mode during the replace procedure, since the recover functions
are not required.
L-Vis User Manual
Standard Procedures (CEA709) • 89
Special Functions (CEA709)
Binding Management
When the configuration software is run in plug-in mode, additional functions to
export, import, and remove the network bindings of the device are available from
the Tools menu.
The Export Bindings… function scans the database and outputs all current
bindings into a text file in CSV format. This file may be viewed in a text editor
or spreadsheet program and used for documentation purposes or as a security
backup before major changes are done to the device.
The Import Bindings… function reads a file which was previously created by
the export function or manually created in a text editor and creates all the
bindings which are listed in the file.
NOTE: If you use a network management tool with a graphic representation of
your network bindings, you will need to update the drawing based on the
modified database, so that the new bindings created by the configuration
software become visible. This is normally not required for object oriented tools,
where the new bindings immediately appear in the object tree.
The Remove Bindings… function is not normally used, but may be helpful if
the network bindings of the device should be reworked completely without
deleting the device itself.
NOTE: This function is also useful for the rare cases where the static interface
of a device needs to be upgraded manually and the network management tool has
difficulties to take over the existing bindings during the upgrade. In this case,
export the bindings, remove them, then do the manual upgrade and as the last
step restore the bindings from the file.
XIF Export
When the selected model is an CEA709 model and the current project uses at
least one static network variable, the menu item Export XIF… becomes
available in the Tools menu. This can be used to create an XIF file for the current
project, for later device integration. This is normally used when the network
management software cannot run the configuration software in plug-in mode and
the device must therefore be integrated manually, after it was programmed
outside the network management with the configuration software running in
standalone mode.
To generate an XIF that matches the actual device, there are two options:
90 • Special Functions (CEA709)
L-Vis User Manual
Offline
A project may be designed completely offline, without any connection to a
physical device. The target device type and firmware version are selected from
the menu. In this scenario, the following extra steps are necessary:
•
Select Model Number: Since the project is never downloaded to a
device, the model number is not set automatically. Before
exporting the XIF file, open the Network Settings… Dialog from
the File menu and enter the desired model number for your device.
•
Select Transceiver: Since no device is connected, the
configuration software cannot automatically determine the
transceiver used. Therefore, a dialog will appear and ask for the
transceiver type which will be used by the device.
When the project for which this XIF file was created is later actually
downloaded into a device, make sure to use the same model number as you
entered before the XIF was exported.
NOTE: If the device already contains a project using the same model number,
but the static interface of this project does not match the new project, the
configuration software will automatically change the model number and the
result would no longer match your XIF file. In this case, remove the
incompatible project first and then download the new project.
Online
In cases where the project is designed online (while connected to a device), all
required data can be determined automatically. To make sure that the model
number in the XIF file matches the model number which is automatically
selected during project download, first download the finalized project to your
device and then export the XIF file.
CEA709.1-A Operation
The CEA709 models normally support the CEA709.1-B standard, which means
that the device accepts the extended network management commands used to
configure the extra resources available on such devices (for example up to 512
address table entries on L-Vis). However, since the standard requires devices
which were once configured using extended network management commands to
no longer accept any of the older commands, such a device would no longer be
usable together with older management software, which does not provide
support for the extended command set.
To guarantee that the device will be usable together with older tools, the
Network Settings dialog which is accessible from the File menu has a checkbox
to enable a so called CEA709.1-A restricted mode. In this mode, the device will
not accept any of the extended commands and react according to the old
standard. This also means that the device is limited to 15 address table entries.
Dynamic Network Variables
Some of the installation scenarios for CEA709 L-Vis devices make use of
dynamic network variables. This section gives a short description of how
dynamic network variables are created in different network management tools.
L-Vis User Manual
Special Functions (CEA709) • 91
LonMaker® Network Management Tool
To create a dynamic network variable, create a functional block (e.g. L-Vis1) for
the device as shown in Figure 7.
Figure 7: Create a function block
Drag a input or output network variable shape from the LonMaker® network
management tool shape sheet and drop it on the function block. The dialog in
Figure 8 is shown.
Figure 8: Choose network variable dialog
Select ‘Create NV’ and in the displayed dialog (Figure 9), enter the name for the
new network variable and click on ‘Browse”.
92 • Special Functions (CEA709)
L-Vis User Manual
Figure 9: Create network variable dialog
In the dialog (Figure 10), select the network variable on the node to which the
new dynamic network variable will be connected afterwards. The dynamic
network variable will get some attributes of the selected variable, like the SNVT
type, assigned. Click on OK to confirm your choice.
Figure 10: Select complementary variable dialog
Now the source NV name in the Create Network Variable dialog is filled in
(Figure 11). Set the poll attribute for the new dynamic network variable. When
Finished, press the OK button and also confirm the Choose a Network Variable
dialog with OK.
L-Vis User Manual
Special Functions (CEA709) • 93
Figure 11: Create network variable dialog
This completes the creation of the new dynamic network variable (Figure 12).
The dynamic network variable can now be bound to other network variables like
a normal network variable and can also be used as a data point source or data
point sink in the L-Vis configuration software.
Figure 12: New dynamic network variable
NL220
To create dynamic network variables in NL220, add the L-Vis device to your
project. In the context menu of the L-Vis device, go to Virtual interfaces and
select New interfaces. Enter a name for the new virtual interface (e.g. L-Vis 1)
and click on OK. Figure 13 shows the L-Vis device with the new virtual
interface.
94 • Special Functions (CEA709)
L-Vis User Manual
Figure 13: Create new virtual interface
To create a new dynamic network variable, go to the node which holds the
complementary network variable of the new dynamic network variable to be
created. The new dynamic network variable will use some of the properties of
the complementary network variable (e.g. SNVT type). Drag the
complementary network variable and drop it on the Interface object of the
virtual interface. In the dialog (Figure 14), enter a name for the new dynamic
network variable and set the direction and the poll attribute. When done, click
on OK.
Figure 14: Add network variable dialog
This finished the creation of the dynamic network variable and shows the
window which allows to bind the dynamic network variable to the
complementary network variable (Figure 15).
L-Vis User Manual
Special Functions (CEA709) • 95
Figure 15: Network variable connection window
Alex
To create dynamic network variables in Alex, add the L-Vis device to your
project. Select Virtuelle Funktionseinheiten and click on Neue Virtuelle
Funktionseinheit (Figure 16).
Figure 16: Alex main window
Enter a name in the dialog (Figure 17) and press OK.
96 • Special Functions (CEA709)
L-Vis User Manual
Figure 17: Virtuelle Funktionseinheit dialog
Open the Netzwerkvariablen collection in the tree view and select Neue
Netzwerkvariable (Figure 18).
Figure 18: Create new network variable
In the Netzwerk Variable dialog (Figure 19), select the device template
(Gerätevorlage) and the network variable to which the new dynamic network
variable will be connected.
L-Vis User Manual
Special Functions (CEA709) • 97
Figure 19: New network variable dialog
The dynamic network variable will get attributes like the SNVT type from this
network variable. Select the direction of the new dynamic network variable and
enter a name for the network variable. Finally, click on OK to confirm the
creation of the new network variable (Figure 20).
Figure 20: Finished creation of new network variable
98 • Special Functions (CEA709)
L-Vis User Manual
Built-in LONMARK® Objects
The CEA709 models of L-Vis provide a number of static function blocks which
are available for use, even when no project is loaded. These blocks are described
in the following sections.
Timer Object
The timer object implements a LONMARK® Real Time Keeper object according
to the LONMARK® Functional Profile #3300. It sends out the current time in the
nvoDateTime network variable of type SNVT_time_stamp. The object is
configured using the standard configuration properties:
•
SCPTmanualAllowed
•
SCPTmasterSlave
•
SCPTobjMajVer
•
SCPTobjMinVer
•
SCPTsummerTime
•
SCPTupdateRate
•
SCPTwinterTime.
The configuration properties are defined in the LONMARK® functional Profile
#3300 document.
Switch Object
The switch object implements a LONMARK® Switch object according to the
LONMARK® Function Profile #3200. It sends out an nvoSwitch network variable
of type SNVT_switch and receives a feedback over nviSwitchFb. The object is
configured using the configuration properties
•
SCPTmaxOut
•
SCPTmaxSendTime
•
SCPTminSendTime
•
SCPTstepValue
•
SCPTtimeout.
The configuration properties are described in detail in the LONMARK® Function
Profile documentation.
On L-Vis, the switch object is controlled by a switch or push button connected to
the Switch terminal IN0 of the device. The object can operate in 3 different
modes:
L-Vis User Manual
1.
Switch mode: Use this mode when a two position switch is connected
to the input terminals. To select switch mode, set SCPTstepValue and
SCPTtimeout to zero.
2.
Push button mode: Use this mode when a push button is connected to
the terminals and you want to toggle the light on and off with each push
of the button. To select push button mode, set SCPTstepValue to zero
and SCPTtimeout to a value greater than zero
3.
Dimmer mode: Use this mode when a push button is connected to the
input terminals and you want to use the button to toggle the light on and
off with each short press of the button and ramp the light intensity up
and down when holding down the button. To select and configure
Special Functions (CEA709) • 99
dimmer mode, set SCPTstepValue to the amount of change wanted for
each step when ramping up or down and set SCPTtimeout to the desired
maximum push time, which is detected as a short press (the time to wait
before starting to ramp the light intensity up or down). The speed at
which value updates are sent out during ramping is controlled by
SCPTminSendTime.
Relay / LCD Backlight control
The relay object implements a LONMARK® Lamp Actuator object according to
the LONMARK® Functional Profile #3040. It receives the input value of type
SNVT_switch in the variable nviSwitch and sends out a feedback of the current
state in nviSwitchFb. The output network variable reflects the state of the relay
input of the old LVIS-3ECTB device. The newer touch screen models do not
provide a relay and the lamp actuator object on these models is used to control
the LCD backlight.
To overrule the value which is adjusted in the L-Vis Plugin Software, the state
part of the nviSwitch network variable has to be set to 1. In that case, the value
part of the network variable controls the brightness of the display from 0 to
100%. If the state part of the variable is set back to 0 again, the backlight
automatically uses the values which are adjusted in the L-Vis Plugin software.
This feature can be used to adjust the backlight in relation to the ambient
brightness, which could be measured with a sensor.
On newer firmware revisions, the backlight may also be controlled via an
internal system register, which is available as a data point and may be used
freely across the project. This is the preferred way of controlling the backlight.
HVAC Temperature Sensor
The temperature object implements a LONMARK® Temperature Sensor object
according to the LONMARK® Functional Profile #1040. It sends out the current
temperature in the nvoHVACTemp network variable of type SNVT_temp_p.
The object is configured over the configuration properties
•
SCPTmaxSendTime
•
SCPTminDeltaTemp
•
SCPTminSendTime
•
SCPToffsetTemp.
The configuration properties are described in detail in the LONMARK®
Functional Profile specification.
On the L-Vis device, the temperature sensor object reads the current temperature
value from an external temperature sensor connected to the input terminals
labeled 'TEMP' on the device.
The same temperature is also available via a system register, which is the
preferred way to read the temperature if it is used directly on the L-Vis device.
100 • Special Functions (CEA709)
L-Vis User Manual
Advanced Topics
Project Settings
Using the command Project Settings from the File menu, a number of advanced
options can be controlled which apply to the entire project. The dialog is
organized in a number of sections, which are explained below.
Page Protection
In this area, all options related to access control can be configured. The
following data can be set:
•
Setup PIN Codes: This button opens a new dialog where the 16
available access levels can be configured. For each level, a name
and a PIN code can be entered, except for level 0 (the lowest level)
which cannot be protected.
•
Next download sets PIN codes: If this checkbox is selected, the
next project download will reset the PIN codes stored on the device
with the codes entered in this project. Otherwise the PIN codes of
the devices are not modified. PIN codes can be changed on the
device during runtime by writing new PIN codes to the PIN code
Set system registers.
•
Lock open pages after: This sets a timeout after which the system
resets the current access level back to 0, if no user input was
detected (auto-logout).
•
Go to default page after: This sets a timeout after which the
system will switch back to the page marked as the default page, if
no user input was detected.
Timeout Values
This section is used to define various time limits. The meaning of them should
be clear from the description of the parameter.
System Flags
The following system flags are currently available:
L-Vis User Manual
•
Lock pages in setup menu: If this option is checked, the pages of
the built-in system setup menu will be protected at level 15,
otherwise they will be public. If the default setup menu is not used,
this option has no effect.
•
Hide setup menu: This option instructs the device not to add a link
to the built-in setup menu, so that the built-in setup is not
accessible. The user may provide customized setup pages instead,
Advanced Topics • 101
matching the local language and the design of the other pages. See
the section about custom setup menus earlier in this document.
•
Disable touch gestures: This option causes the touch gestures to
flip pages and open the setup menu to be turned off.
•
Ignore data point value state: This is a compatibility option
which will be checked automatically when an older project is
loaded. Turn it off to enable the new feature of tracking the state of
a data point in addition to its value. For example if an input NV has
a receive timeout set and does not receive a value, the point will go
OFFLINE and the display will indicate that the value shown is no
longer considered valid. Note that using invalid values in a formula
will automatically invalidate the result, therefore it is possible to
turn state tracking off for individual data points (see the description
of the data point object). The checkbox here is a master switch to
turn state tracking off for the entire project.
Remote Access
The option Enable VNC Server may be checked to enable a built-in VNC
server on the device, if supported by the firmware (version 3.0.0 or newer). To
use it, a TCP/IP connection to the device must be possible, since VNC is a TCP
based protocol. The remaining options are used to set the TCP port on which the
VNC server should listen for incoming connections, the maximum number of
simultaneous connections that the server should accept and an optional password
to protect access to the device.
A device with a firmware supporting VNC which has no project loaded will
automatically enable a VNC server on port 5900 and accept one connection
without password. This can be used to simplify device installation. If a fresh
project is started, the VNC option is turned off by default.
To connect to the VNC server, install one of the available VNC clients on your
PC or other device (VNC clients are available for PDA and even some cell
phones) and connect to the device. You can then remotely access the LCD
display of your device and use the mouse to operate the touch screen.
If more than one user is connected to the same device, everyone will see the
same display, just like VNC used on a PC.
NOTE: The display of L-Vis currently uses a VGA color map (256 colors). It is
therefore most efficient to transfer the color map to the client and then only
transmit the color index for each pixel (one byte per pixel). If the VNC client
supports this mode (color map mode), the VNC server on the L-Vis device will
tell the client that this is the preferred display mode to optimize speed and
bandwidth usage. However, many clients only support true color modes, where
either two or more bytes per pixel need to be transferred or the color resolution
will be reduced. A client which supports color maps is RealVNC.
Sound
This section controls the sounds produced when touching the display and
entering values. The frequency of a low pitch and a high pitch sound may be
entered and the sound output can be turned on and off.
OEM Bitmaps
In this section, bitmaps can be specified to customize the about page (shown
during system boot) and the PIN code entry page (shown when a protected page
is accessed and the current access level is not sufficient). The bitmaps must
102 • Advanced Topics
L-Vis User Manual
match the resolution of the display (320x240). Suitable template bitmaps are
installed together with the configuration software.
System Colors
This section is used to adjust the general system colors. They will be used on the
device by elements which are created dynamically, for example the keypad, and
will be used by the configuration software as default colors for new objects when
no other defaults are set by the user (using the button Set as Default) on the
Common Properties page.
System Settings
The settings which can be made in this section are:
•
Device Name: A device name can be given using this field. It will
be used as the host name when the device requests an IP address at
a DHCP server and it will be used as a server name by the built-in
VNC server. The device name will also be available on the device
in a system register, so it can be displayed or connected to other
data points so that it can be seen on the network.
•
Time Source: This dropdown list allows to set a specific source for
time synchronization. This avoids possible conflicts if there is a
time signal coming in from more than one source and the time is
not the same. Select the desired source for time synchronization
from the list.
•
Update Scheduler Config: This dropdown list is used to set the
behavior of the configuration software when a project was
downloaded to the device or uploaded from the device and there
are local schedulers configured. Depending on the setting here, the
configuration software will either automatically synchronize the
scheduler configuration data, ask the user if the configuration
should be updated, or not update the configuration, in which case
the user may manually update using the commands from the
connection menu.
•
Keypad Button Size: Specifies the desired size of the keypad
buttons on the display (width x height) in millimeters.
Data Access
To access trend and event logs created by the respective controls, a dedicated
FTP access is available. Using the user name and password specified here, it is
possible to log in using an FTP client and download the required data friles.
LCD Backlight
This slider is used to set the brightness of the LCD backlight when the unit is
active. Good settings are between normal and bright, where the bright setting
consumes more power. The life time of the backlight is not significantly affected
by the brightness setting.
System Strings
Pressing the button Setup System Strings opens another dialog, where a number
of strings can be translated to match the requirements of the project. These
strings are used by the specialized controls on the device to edit schedules,
calendars or display alarm lists. A set of translations may be given a name in the
L-Vis User Manual
Advanced Topics • 103
Preset field, which can then be saved using the Add button. The translation is
then stored on the system and will be available in the Preset dropdown list for reuse in other projects.
Access Control
Access control is organized in 16 levels. Pages and input controls can be
assigned a minimum access level required to view the page or enter data on an
input control. Any access level higher than the specified minimum level
automatically grants access to the protected object.
To reach a specific access level, there are a number of possible options:
•
Switching to a page which cannot be viewed at the current access
level will automatically bring up a system page where a PIN code
can be entered in order to increase the access level and access the
page.
•
On a normal project page, a numeric input control can be placed to
allow the user to write a PIN code value to the system register
called PIN Code Enter. Any value written to this register will be
interpreted as a PIN code and the system will try to log the user in
using this code. If none of the defined access levels has a matching
PIN code, the access level is set to 0 (log out). To construct a
suitable control, make sure to set the input value range to 00009999 and check the Password Input Keypad option.
•
Using a data point connector, a PIN code can be received from the
network and forwarded to the PIN Code Enter register to allow
remote login using a PIN code.
•
The desired access level may be set directly by writing a value
between 0 and 15 to the system register called Access Level. This is
less useful if allowed from a control on a project page, but may be
convenient if there is an external access controller in the network,
where the user was already authenticated (for example using an
RFID card). The access controller can communicate the successful
authentication over the network to the L-Vis device, where a
suitable access level can be set directly, without using a PIN code.
For security reasons, it is possible to change the PIN code for each level by
writing the new PIN code to the respective PIN code Set register. There is one
register for each of the access levels 1 through 15. The new PIN codes will be
stored on the device and remain in effect until a new project is loaded with a
special option set, telling the device to reset its PIN codes to the values stored in
the project.
Remote Network Interface
On newer hardware of the CEA709 model, there is support for remote network
interface functionality, similar to that of a NIC-IP. The function is only available
if the device is operated in FT-10 mode (not IP-852 mode) and only if the
hardware can support it. If active, the device accepts connections from a PC on
the TCP/IP interface and can act as a remote network interface, providing access
to the FT-10 channel to which the device is connected. It also provides
functionality to run the LPA software on this interface to monitor the FT-10
channel.
104 • Advanced Topics
L-Vis User Manual
NOTE: Using this feature will cause additional load on the device, which should
be considered at the time of project design. If the project already requires a lot of
CPU time to run, it may not be feasible to use the same device as a remote
network interface at the same time.
The current state of the RNI module is available in a system register called RNI
State. It may be used to make a running RNI connection visible on the display,
as a warning message or other element to alert the user.
Device Model and Firmware
When the configuration software is started in standalone mode and is not
connected to a device, the Model menu can be used to select the model for which
a project should be created and the Firmware menu can be used to select the
firmware version of the intended target device. This enables the user to create or
edit a project, which is intended to run on an older firmware version, even when
the firmware version to use cannot be queried from the device. The real time
LCD preview is automatically adjusted to match the behavior of the selected
model and firmware version, so that the preview is always accurate down to the
pixel level (what you see in the preview is exactly what the device will display,
pixel by pixel).
When started as a plug-in or connected via TCP/IP or CEA709 in standalone
mode, the menu items to select model and firmware version are grayed out, so
that the firmware version cannot be arbitrarily changed by the user. The menu
items or the correct model and firmware version, as reported by the device, are
automatically checked. The real time preview of the LCD is automatically
adjusted to reflect the behavior of the reported firmware version and the project
is saved in a format readable by the firmware of the connected L-Vis device.
The configuration software is always backwards compatible to older firmware
versions, so that it is possible to use newer configuration software with older
devices. Also, the devices are backwards compatible to older project versions, so
it is possible to use older configuration software with newer devices as well.
NOTE: When using older configuration software to connect to newer devices,
the software will not recognize the firmware version reported by the device,
since this firmware was not available at the time the configuration software was
built. In this case, the software will output a warning and save the project in the
most recent version it knows. This will be readable by the device, due to the
devices backwards compatibility to older project files, but you may not be able
to use all features and the LCD preview may not accurately reflect the behavior
of the device. It is therefore suggested to first upgrade the configuration software
and then upgrade the devices.
The firmware of the L-Vis device can be upgraded as newer firmware versions
become available. To find the current firmware version of your device, use the
Device Info… menu item in the View menu, which will be enabled when the
software is connected to a device or go to the About Page on your device.
To upgrade the device with a new firmware, select the Upgrade Device… menu
item from the Firmware menu, which will be available when connected to a
device.
NOTE: While older versions of the firmware also allowed to upload the current
firmware from the device, this is not possible anymore in current firmware
versions, due to technical limitations. It is therefore suggested to keep a copy of
the downloaded firmware somewhere on a PC, in case the device needs to be set
back to this version at a later time.
L-Vis User Manual
Advanced Topics • 105
Avoiding Update Loops
Especially when a lot of data point connectors and mathematical objects are used
in a project, the danger of accidentally creating update loops increases and the
user needs to be aware of this problem.
An update loop means that a single update of one data point causes a chain of
following updates which does not end, because one of the following updates
again triggers the original update. For example, register A is used as input for a
mathematical object which writes its result to register B, while at the same time
the value of register B is copied into register A using a data point connector.
The configuration software is able to check for such loops when they are caused
entirely by internal objects. In such a case, the project cannot be downloaded
into the device and a warning message appears, showing the objects which cause
the infinite update loop.
However, the configuration software cannot check loops which are closed via the
network, because it does not have enough information to do this. For example, if
a data point connector is used to connect a switch input SI to a switch output SO,
this in itself does not constitute a loop at all. But when the update of SO on the
network is sent to a lamp actuator and the lamp actuators feedback output is
connected to the switch input SI, the result may be an infinite update loop
between the L-Vis device and the lamp actuator, depending on how the actuator
behaves. Once the L-Vis sends out an update on SO, it will be received by the
lamp actuator. This may cause the actuator to send out an update on the feedback
output, which will be received by L-Vis on the input SI, which in turn will be
copied by the data point connector to the output SO and so on. The result can
have adverse effects on the network performance and the performance of the
devices in the loop, so special care should be taken to avoid such setups.
User defined Fonts
Every device has a set of three basic fonts which cover the ISO8859-1 (Latin-1)
code set in three different sizes. To extend the available choices, the
configuration software and the device support user loadable fonts in most
common formats, including TrueType, Type1, BDF, PCF and others.
The L-Vis configuration software is shipped with a set of selected freeware PCF
fonts to cover Western (ISO8859), CJK (Chinese, Japanese, and Korean) and
also Unicode (UCS16) character sets. These should cover your immediate needs
for a large number of languages.
The provided PCF fonts are fixed size fonts, meaning that each of them is
designed and optimized to a specific resolution. Most fonts are therefore
available in a number of variants, starting at very small sizes, up to about 24
pixel resolution. For larger sizes or other designs you may load vector fonts as
well, in which case you will have to specify a font size in points (1/72 inch) and
the configuration software will render the font in the desired size for you. If the
loaded font file is a font catalog (for example *.ttc), you may also select the
desired face which should be rendered.
NOTE: It is recommended to use fixed size fonts, like the provided PCF fonts,
for small sizes (up to 24 pixel resolution) and load vector fonts for large sizes.
Since the L-Vis device has a limited LCD resolution and cannot support antialiased fonts due to hardware limitations, a small rendition of a vector font will
not look as clean as a fixed size font which was designed and optimized to a
specific target resolution.
106 • Advanced Topics
L-Vis User Manual
Font File Location
When a project contains a user defined font, it is necessary to have access to the
original font file when working with the project. This is guaranteed as long as
only the pre-installed fonts are used, since they are located in a known place on
every installation of the configuration software. However, if fonts from an
external source are used, they too must be available whenever the project is
loaded and modified and the user has to make sure to deliver the font file
together with the L-Vis project file, if the project is to be edited on a different
PC, where the font may not be available at the same location.
To locate the original font file, the configuration software will automatically try
the following locations in the given order until a suitable font is found:
•
The full path from where the font was built the last time.
•
The directory containing the project file.
•
The fonts directory of the configuration software installation.
If the font cannot be located in any of these places, the user is asked to provide
an alternative font file.
Based on the above search order, the easiest way to make sure that a project can
be used on any PC is to store all custom fonts which are used in the project in the
same place where the project file itself is located. For example create a folder to
store the project file together with all custom font files in one place. Now the
entire folder may be copied to any other PC and the required font files will
always be found automatically.
Font Recoding
The L-Vis configuration software as well as the L-Vis device itself are Unicode
enabled. All text entered in the configuration software and displayed on the
device is encoded using the 16-bit international Unicode standard UCS-16. PCF
and BFD fonts may use other encodings, such as ISO8859, JISX0212, Big5,
IBM, or Microsoft codepages (for example MS-CP1250). If such a font is
loaded, it is automatically recoded to UCS-16 before it is used, since the L-Vis
device does not recognize encodings other than UCS-16. The font recoding is
done using the coding tables found in the directory Encodings, located in the
program directory. New encodings may be added to make them available for the
import of fonts.
NOTE: Fonts in other formats than BDF or PCF should contain an ISO8859-1
or ISO10646 (Unicode) codepage, or Adobe Type-1 glyph names in order to
facilitate recoding to UCS-16. While there are practically no vector fonts which
do not provide any of this information, it may be an issue when loading old
Windows fonts for other than western languages. Such fonts may be converted to
BDF format in order to allow recoding using the installed encoding tables.
PCF File Format
The PCF Font file format is a free, open file format, designed to store bitmap
fonts. The specification of the file format can be found at
http://pfaedit.sourceforge.net/pcf-format.html.
NOTE: Since PCF is a free format, there is information available on the internet
about font conversion utilities to convert existing fonts from other formats (e.g.
True Type fonts) to PCF format. These fonts can then be used on the L-Vis
device. Tools which are freely available to convert from Windows TTF fonts to
L-Vis User Manual
Advanced Topics • 107
PCF format include otf2bdf to convert the TTF or OTF font to BDF format of
a given pixel size and bdftopcf to convert the BDF file into a PCF font.
Using Color Bitmaps
Current L-Vis devices use a 256 color display with a standard VGA palette. If a
true color image is loaded, like for example a JPG, 32-bit BMP or similar, the
configuration software will automatically adjust the image to fit the VGA
palette, using a Floyd-Steinberg dithering algorithm. This algorithm, which is
based on error dispersion, is applied in conjunction with an alternating raster
scan technique to provide the best possible result, so it is not necessary to run
your JPG through the same color reduction algorithm using a separate graphic
editor. You will not be able to see any difference.
However, due to the limited resolution, dithering will be noticeable when
viewing the images from a close distance, which will be OK for photo-realistic
color graphics, but might be unwanted for line-art graphics, which contain large
areas of uniform color. In such areas, dithering to the exact color would not look
as good as just picking one color from the VGA palette which is closest to the
intended color.
If this is required, it is best to design the graphics already using the VGA palette
and saving them in 256-color indexed format, like for example 8-bit BMP or
GIF. It is important to make sure that the palette used by the graphic tool is in
fact the VGA palette, because when you later load the indexed color image into
your project, the software will make no further modifications to the image, to
guarantee a 1:1 match of what you designed and to avoid double-dithered images
resulting in poor quality (see note below). If color number 0 in your image does
not refer to black, or color number 255 does not refer to white, as the VGA
palette does, the image will look different. However, you will see this
immediately in the LCD preview window.
NOTE: If you import an already existing bitmap and it appears in wrong colors,
the bitmap is already in indexed color format but uses a different (non-VGA)
color table, most likely optimized to the contents of the picture. As explained
above, the configuration software does not modify the pixel data in such a case.
This is because images like this are most likely already dithered to fit the 256
colors in which they were saved. To convert such a picture to VGA colors, the
already dithered image would have to be run through the dithering algorithm
again, which is likely to result in very poor quality images. In such a case, it is
better to get the original versions of the pictures (true color or vector graphics)
and create suitable VGA graphics from this source. If this data is not available,
the existing pictures may also be converted to true color images before use,
which will then trigger dithering to the VGA color palette.
The following image file types are supported:
•
Bitmaps (*.bmp)
•
Icons (*.ico)
•
Joint Photographic Experts Group / JPEG (*.jpg)
•
Tagged Image File Format / TIFF (*.tif)
•
Portable Network Graphics /PNG (*.png)
•
Graphics Interchange Format / GIF (*.gif)
The file open dialog automatically shows all supported graphic files it finds in
the directory. Unsupported files are hidden. True color or high color images will
automatically be dithered and converted to the fixed VGA color palette used by
108 • Advanced Topics
L-Vis User Manual
L-Vis, as explained above, 8-bit indexed color files (like GIF) will be loaded asis without any changes.
Examples
This section shows how to use the different controls in a sample project. The
project can be found in the Projects directory of the L-Vis configuration
software install directory (Users_Manual_Color.lcp).
Example 1: Working with Structured Network
Variables
This example describes how to work with structured network variables like
SNVT_switch. It explains how structured input and output network variables
can be used with different controls.
This example assumes that a dynamic input variable of type SNVT_switch
(nviSwitch) and a dynamic output network variable of type SNVT_switch
(nvoSwitch) is already present on the node. We will use the output variable to
update the value on the network and will use the input variable as a feedback
value from the network. The example explains how to use this setup with
different controls.
Text control
With this example, we will be able to show the state of a SNVT_switch (e.g. a
lamp) and control the state from the L-Vis device, using a text control. Text
controls are typically used to display a complex text or to allow input where the
user can select between several different input strings (e.g. HIGH-MID-LOW).
To use the SNVT_switch variables with a text control, perform the following
steps. The control only changes the state value of the output network variable
and fixes the value element of the network variable to 100%.
L-Vis User Manual
1.
Add a text control to the page
2.
In the common properties tab, add a label to the format string in the
Text field. (e.g. Switch: %s).
3.
Add data points to the control. To do this, select Add Data Point
from the context menu of the control. Add an input data point for
nviSwitch.state and output data points for nvoSwitch.state and
nvoSwitch.value. A default mapping between the state input
values and the displayed text is automatically added to the control.
4.
For the input data point (nviSwitch.state), set the System Startup
flag on the Data Point configuration tab.
Examples • 109
5.
For the nvoSwitch.value network variable, go to the Data Point
configuration tab, configure the Default Value to 100 and set the
Constant Value flag. Set the NV Update Flags value to
Focus Loss.
6.
For the nvoSwitch.state network variable, set the NV Update
Flags value to Focus Loss.
7.
The configuration now looks similar to Figure 21. The project can
now be loaded into the L-Vis device.
8.
To change the state of the output network variable, select the text
control by operating the jog dial until a frame is displayed around
the text control. Select the control with a short click.. Now the
frame starts flashing which signals that the control is in input
mode. Turn the jog dial to change the state. Pressing the jog dial
again deselects the text control.
Figure 21: SNVT_switch with a text control
Bitmap Control
Bitmap controls are typically used for information which has only a few states
(like heating on/off, light on /off).
This example shows how to use a SNVT_switch together with a bitmap control.
It also fixes the value part of the SNVT_switch network variable to 100 and
toggles only the state part.
110 • Examples
1.
Add a bitmap control to the page
2.
Add data points to the control. To do this, select Add Data Point
from the context menu of the control. Add a input data point for
nviSwitch.state and output data points for nvoSwitch.state and
nvoSwitch.value. A default mapping between the state input
values and the displayed text is automatically added to the control.
3.
For the input data point (nviSwitch.state), set the System Startup
flag on the Data Point configuration tab.
4.
For the nvoSwitch.value network variable, go to the Data Point
configuration tab, configure the Default Value to 100 and set the
L-Vis User Manual
Constant Value flag. Set the NV Update Flags value to
Focus Loss.
5.
For the nvoSwitch.state network variable, set the NV Update
Flags value to Focus Loss.
6.
Select the mapping item in the tree view and go to the Mapping
tab. In the value list, select OFF. Click on Select Bitmap and
choose a bitmap which should be displayed when the switch is
OFF. After this, select ON in the value list and select the bitmap
for the ON state.
7.
The configuration now looks similar to Figure 22. The project can
now be loaded into the L-Vis device.
Figure 22: SNVT_switch on a bitmap control
Numeric Control
A numeric control is used whenever a data point needs a continuous numerical
output or input, like a percentage value or a temperature value.
This example shows how to use a SNVT_switch together with a numeric control.
The state element of the SNVT_switch network variable is fixed to 1, whereas
the value part can be set between 0 and 100.
L-Vis User Manual
1.
Add a numeric control to the page
2.
Add data points to the control. To do this, select Add Data Point
from the context menu of the control. Add an input data point for
nviSwitch.value and output data points for nvoSwitch.state and
nvoSwitch.value. A default mapping between the state input
values and the displayed text is automatically added to the control.
3.
For the input data point (nviSwitch.value), set the System
Startup flag on the Data Point configuration tab.
4.
For the nvoSwitch.state data point, go to the Data Point
configuration tab, configure the Default Value to 1 and set the
Constant Value flag. Set the NV Update Flags value to
Focus Loss.
Examples • 111
5.
For the nvoSwitch.value data point, set the NV Update Flags
value to Focus Loss, adjust the Value Range to values between
0 and 100 and set the Acceleration to 2.
6.
The configuration now looks similar to Figure 23. The project can
now be loaded into the L-Vis device.
Figure 23: SNVT_switch on a numeric control
Example 2: Using Data Point conversion and Hiding of
Pages
This example will use an input value of type SNVT_temp_p. It will provide the
temperature value on a bar graph and a numeric control. The data will be shown
in two versions, one for degree Celsius and one for Fahrenheit. The two display
versions will be placed on different pages. The example will show how to use
the hide flag in order to load the project into the L-Vis device with the localized
configuration. The example walk-through description assumes that a dynamic
network variable nviTemp of type SNVT_temp_p is already created on the LVis device.
112 • Examples
1.
Create a menu item and add a page to the menu item. Name the
page, e.g. to Temp Example (C). Add a text control to the page
and enter a header text for the page (e.g. Temperature).
2.
On the page, create a bar control (select Add Bar from the context
menu of the preview frame). Name the bar graph (e.g. Temp Bar)
in the General tab.
3.
On the Bar Graph tab, enter the value range for the bar graph (e.g.
-20 to +40) and set the flag for Thermometer Style.
4.
Select Add Data Point from the context menu of the bar graph.
From the data point template list, select the nviTemp input data
point.
5.
Make sure that the Value Translation Setting on the Data
Point tab is set to OFF.
L-Vis User Manual
6.
Select the page in the tree view. In the context menu of the page,
choose Copy. Go to the menu item (e.g. Example 2), open the
context menu and choose Paste. A copy of the page is inserted n
the menu.
7.
Change the name and text of the page to Temp Example (F).
8.
Select the input data point which is connected to the bar graph in
the newly created page. Set the Value Translation Setting to °C->°F.
9.
Depending on whether the Temperature should be shown in
Fahrenheit or Celsius, set the Invisible Page flag on the
Menu/Page tab of the corresponding page.
10. Load the project into the L-Vis device. Only the page, which does
not have the Invisible Page flag set, shows up in the L-Vis device
(see Figure 24).
Figure 24: Hiding pages
Example 3: Freeze warning, Alarms and Registers
This example shows how to create a translation table which converts a numeric
value to a text value and to generate an alarm output on special occasions. It
also shows how to use registers to exchange data between internal objects. The
example takes an nvoTemp input data point and checks if it is below 0°C (freeze
warning) or not. It controls an output text and an alarm output register of type
SNVT_alarm_2.
L-Vis User Manual
1.
Generate a new menu item (Example 3) and a page for this menu
item and name the menu item and the page. Generate a header for
the page (Freeze Warning).
2.
Add a new text control to the page. Set a label for the text control
(e.g. Temperature State: %s) in the text field of the Common
Properties tab.
3.
Add the nviTemp data point to the text control. Select the
Mapping tab on the data point. Select New, enter 0 for the value
Examples • 113
and FREEZE for the text. Add two more mapping values (0,1,
ATTENTION and 3, NORMAL) to the mapping table. This will
cause that for input values up to 0,1°C, the FREEZE text will be
shown. Values between 0,1°C and 2,99°C will show
ATTENTION, where as values starting with 3°C will show
NORMAL in the text control. Figure 25 shows a screenshot of the
mapping table.
Figure 25: Mapping table
114 • Examples
4.
In the tree view, open the context menu of Global Objects and
add an alarm generator. Label the alarm generator with ‘Freeze
Alarm”.
5.
On the context menu of the alarm generator, select Add Data Point.
Since we have no output network variable of type SNVT_alarm_2,
we will generate a register, which stores the value of the alarm
generator. To create a new register, click on the New button, and
edit the field on the bottom of the dialog window. For the Name,
enter ‘rwFreezeAlarm’, for Type select ‘Reg.Write’. Change the
Name in the Register Properties field to ‘FreezeAlarm’ and set the
Type to alarm_2(164). For Element keep the value ‘*’. Select the
new element in the list and click on OK.
6.
Select Add Data Point again on the context menu of the alarm
generator and add the nviTemp data point to the alarm generator.
7.
In the Alarm Generator tab (Figure 26) of the alarm generator, set
the alarm conditions for the alarm. We will trigger an alarm when
the temperature falls below 3°C. For the Data Point Value
Range, set the minimum value to 3. For the Alarm Condition,
select Below Min. In the Action field select Set and Clear Alarm.
For Alarm Set Type select AL_ALM_CONDITION. For Alarm
Clear Type select AL_NO_CONDITION. In the Description
field, enter ‘Freeze Alarm’. The different alarm types and their
meaning can be found in the LONMARK® description of the
SNVT_alarm_2 network variable type.
L-Vis User Manual
Figure 26: Alarm Generator configuration tab
8.
To display the alarm output we will draw a bitmap which shows an
ice symbol in alarm state. To do this add a bitmap control to the
page. Enter a label for the bitmap in the Text box of the
Common Properties tab.
9.
Select Add Data Point on the context menu of the bitmap control.
Add a Reg.Read data point as described above and use the same
name (FreezeAlarm) for the Name in the Register Properties
field. Set the Type to alarm_2(164) and select alarm_type for the
Element.
10. On the Mapping tab of the data point, select the
AL_ALM_CONDITION. Click on Select Bitmap and choose a
bitmap which is displayed when the alarm condition is met.
11. Load the project into the L-Vis device.
Figure 27: Freeze alarm with text and bitmap controls
Example 4: Using text mapping and Date Control
This example describes how to integrate a date control into a project. The date
control will display an analog clock. It will get the time value from the internal
real time clock. In addition, three text fields will be created which display the
actual time in a textual format. The time value for this text will be received from
a turnaround binding of the real time keeper object.
L-Vis User Manual
Examples • 115
1.
Create a new menu item and assigned a page to this menu item. On
the page, add a text control for the header text, name it (e.g.
‘Header’ and enter a text in the Text field of the Common
Properties tab (e.g. ‘Text Watch’)
2.
In the context menu of the new page, select Add Date.
3.
In the context menu of the date control, select Add Data Point.
In the dialog window, select the System Time parameter and click
on OK.
4.
On the Date/Time Control tab, select Graphic for the Style and
choose a Graphic Style.
5.
For the text display, we need a turnaround bound dynamic network
variable which allows to access hours, minutes and seconds
separately. Create a dynamic network variable of type
SNVT_time_stamp and bind the nvoDateTime variable of the LVis device to this input variable (see Figure 28).
Figure 28: Turnaround binding for the time network variables
116 • Examples
6.
Add a text control to the page and name it ‘Hour”. Use the context
menu of the text control to add a data point. Select the new time
stamp input network variable and select hour in the Element.
7.
Create two more text controls, one for the minutes and one for the
seconds. Assign the minutes and seconds Elements from the time
stamp input data point to the controls.
8.
On the mapping tab of one of the text controls, create new entries
for the numbers from 0 to 59 and add the text for the numbers (e.g.
one for 1, two for 2,…). Save this mapping table to a file (button
Save).
9.
Go to the mapping tabs of the other text controls and load the
stored mapping table.
1.
Load the project to the L-Vis device. To show the correct text the
update interval of the timer object has to be set to 1 second.
L-Vis User Manual
Figure 29: Text Watch project
Solutions
This section describes solutions for some standard applications. The solution
projects can be found in the Projects directory of the L-Vis configuration
software install directory.
Implementing Menus
By default, the user can navigate in a project using the main menu, submenus
and push and drag operations. With the help of bitmap controls, text controls
and action objects it is also possible to implement alternative ways to navigate
inside an L-Vis project. The project Menu_example1.lcp shows different
solutions.
Tab Menus
To switch between multiple pages, a tab menu can be implemented using bitmap
controls, text controls and action objects (see Figure 30).
L-Vis User Manual
Solutions • 117
Figure 30: Page navigation using Tabs
Each page contains four bitmap controls. There are two types of bitmaps: one
for the active page (Figure 31) and one for the inactive page (Figure 32).
Figure 31: Active page bitmap
Figure 32: Inactive page bitmap
The bitmaps are aligned to form a row of tabs. On each tab, a text control is
placed with identifies the page and the page links (in the example it is called
Page 1, Page 2,…). To each of the inactive page bitmap controls an action
object is assigned. The action to execute is to change to the respective page.
This setup has to be copied for each page, but he location of the active page
bitmap changes according to the page on which the controls are placed.
The same mechanism can be used to build tabs on the bottom, which is also
shown in the menu project (Tab Menu Bottom, Figure 33).
118 • Solutions
L-Vis User Manual
Figure 33: Bottom tab menu solution
Another tab solution in the project shows how to implement flat tabs, but using
only line bitmaps. In that solution, the action objects are assigned to the text
controls. The leftmost button in that case opens the main menu (Figure 34).
Figure 34: Flat tabs and menu button
Icon Menus
Another common implementation to navigate in menu trees is to use icon menus
as shown in the icon menu example (see Figure 35).
L-Vis User Manual
Solutions • 119
Figure 35: Icon menu
On an empty page as set of bitmap controls is placed. Each bitmap represents a
page or a submenu. In the example, a text control is placed below each bitmap
icon. An action object, which executes a switch to a linked page, is assigned to
each bitmap control.
On the bottom of the example page, three additional bitmaps are placed, which
have action assigned to switch pages back and forth and to open the system
menu.
Using the icon menus, it is also possible to implement the whole navigation
without the default menu. In that case, the main menu page should have the
checked the default page checkbox in the Menu/Page tab.
Taskbar Menu
To simulate a PC environment, a system with a setup with a task bar can be
created (Figure 36).
120 • Solutions
L-Vis User Manual
Figure 36: Taskbar menu
The taskbar is formed by a bitmap control. The bitmap for the menu button is
placed on top of the taskbar bitmap. An action object is assigned to the menu
button bitmap. This action object opens the main menu. In the example a date
control which displays the current time is placed on the task bar.
It would also be possible to add further icons to the taskbar, which open other
pages. Also icons which are only displayed when an alarm occurs, could be
added.
Bitmap Menu
The bitmap menu shows a navigation using full screen bitmaps with touch
sensitive zones. On the main page, the Floor 1 can be selected, and on the floor
page the upper left room. The back button brings the user one level back.
Figure 37: Bitmap menu configuration
L-Vis User Manual
Solutions • 121
Light Control
The project “Solution_examples_manual.lcp” contains a “Switch Demo” page.
Figure 38: Switch demo page
The example uses a bitmap control in push button mode to switch the state of a
SNVT_switch on or off. Two arrows allow to increase and decrease the value
part of the SNVT_switch variable. To increase and decrease the values, action
controls are assigned to the bitmap controls. The increase and decrease
operations are executed by two mathematic objects. The operation results are
exchanged between the mathematic object and the bitmap controls using a
register.
Animated Bitmaps
The project “Solution_examples_manual.lcp” contains a “Animation Demo”
page.
122 • Solutions
L-Vis User Manual
Figure 39: Animation Demo configuration
The animation demo shows how to generate animated bitmap controls.
A bitmap control in push button mode starts and stops the animation. The
animated bitmap is built of a bitmap control together with a mapping table. The
input for the animated bitmap is generated by a mathematic object. The
mathematic object is feed by the system time and performs a modulo operation
on this input. An additional enable register parameter allows to enable or disable
this modulo operation.
Sunblind Demo
The project “Solution_examples_manual.lcp” contains a “Sunblind Demo” page.
L-Vis User Manual
Solutions • 123
Figure 40: Sunblind demo configuration
Like in the switch example, the sunblind demo uses bitmap controls together
with action objects to move a sunblind to special positions or move the sunblind
up, down or stop the sunblind.
Split Demo
The project “Solution_examples_manual.lcp” contains a “Split Demo” page.
Figure 41: Split example configuration
124 • Solutions
L-Vis User Manual
The split demo shows how to merge the input of a SNVT_state variable into a
single bitmap control. In some projects it is required to evaluate the input of a
SNVT_state variable, where only one bit is set, and display the result in a single
bitmap or text control. The example uses the single bits of the SNVT_state
variable to feed a mathematic object. The mathematic object encodes the bit to a
single numeric value and passes the result to a register. The register feeds the
mapping table of a bitmap control, which displays different bitmaps according to
the register contents.
Counter Demo
The project “Solution_examples_manual.lcp” contains a “Counter Demo” page.
Figure 42: Counter demo configuration
The counter demo shows how to use a bar graph control to simulate the fill level
of a container. An empty container is formed by a bitmap control. On top of the
bitmap control, a bar graph control is placed. All relevant colors except the
Bar/Bitmap color are set transparent, so that the bar graph forms the filling of the
container.
L-Vis User Manual
Solutions • 125
Appendix A: Format strings
Format string description
The format string used in text controls and numeric controls is equivalent to the
format strings used by the ANSI-C printf function. L-Vis will always use the
given format string to format exactly one argument, which will be a string, an
integer, or a double precision floating point number, depending on the type of
control and its configuration. Therefore, there should always be exactly one
conversion specifier in an L-Vis format string and its type needs to match the
argument provided by the control. For example, it will not work to use a %d
specifier for a text control or a %s specifier for a numeric control.
The format string is composed of zero or more directives: ordinary characters
(not %), which are copied unchanged to the output stream; and conversion
specifications, each of which results in fetching zero or more subsequent
arguments. Each conversion specification is introduced by the character %, and
ends with a conversion specifier. In between there may be (in this order) zero or
more flags, an optional minimum field width, an optional precision and an
optional length modifier. The arguments must correspond properly (after type
promotion) with the conversion specifier. By default, the arguments are used in
the order given, where each ‘*’ and each conversion specifier asks for the next
argument (and it is an error if insufficiently many arguments are given). One
can also specify explicitly which argument is taken, at each place where an
argument is required, by writing ‘%m$’ instead of ‘%’ and ‘*m$’ instead of ‘*’,
where the decimal integer m denotes the position in the argument list of the
desired argument, indexed starting from 1. Thus, "%*d" and "%2$*1$d" are
equivalent. The second style allows repeated references to the same argument.
The C99 standard does not include the style using ‘$’, which comes from the
Single Unix Specification. If the style using ‘$’ is used, it must be used
throughout for all conversions taking an argument and all width and precision
arguments, but it may be mixed with ‘%%’ formats which do not consume an
argument. There may be no gaps in the numbers of arguments specified using
‘$’; for example, if arguments 1 and 3 are specified, argument 2 must also be
specified somewhere in the format string. For some numeric conversions a radix
character (‘decimal point’) or thousands’ grouping character is used. The actual
character used depends on the LC_NUMERIC part of the locale. The POSIX
locale uses ‘.’ As radix character, and does not have a grouping character.
The flag characters
The character % is followed by zero or more of the following flags:
# The value should be converted to an ‘‘alternate form’’. For o conversions, the
first character of the output string is made zero (by prefixing a 0 if it was not
zero already). For x and X conversions, a nonzero result has the string ‘0x’ (or
‘0X’ for X conversions) prepended to it. For a, A, e, E, f,F, g, and G
conversions, the result will always contain a decimal point, even if no digits
follow it (normally, a decimal point appears in the results of those conversions
only if a digit follows). For g and G conversions, trailing zeros are not removed
from the result as they would otherwise be. For other conversions, the result is
undefined.
126 • Appendix A: Format strings
L-Vis User Manual
0 The value should be zero padded. For d, i, o, u, x, X, a, A, e, E, f, F, g, and G
conversions, the converted value is padded on the left with zeros rather than
blanks. If the 0 and − flags both appear, the 0 flag is ignored. If a precision is
given with a numeric conversion (d, i, o, u, x, and X), the 0 flag is ignored. For
other conversions, the behavior is undefined.
− The converted value is to be left adjusted on the field boundary. (The default is
right justification.) Except for n conversions, the converted value is padded on
the right with blanks, rather than on the left with blanks or zeros. A − overrides a
0 if both are given.
’ ’ (a space) A blank should be left before a positive number (or empty string)
produced by a signed conversion.
+ A sign (+ or -) always be placed before a number produced by a signed
conversion. By default a sign is used only for negative numbers. A + overrides a
space if both are used.
The field width
An optional decimal digit string (with nonzero first digit) specifying a minimum
field width. If the converted value has fewer characters than the field width, it
will be padded with spaces on the left (or right, if the left-adjustment flag has
been given). Instead of a decimal digit string one may write ‘*’ or ‘*m$’ (for
some decimal integer m) to specify that the field width is given in the next
argument, or in the m-th argument, respectively, which must be of type int. A
negative field width is taken as a ‘-’ flag followed by a positive field width. In no
case does a non-existent or small field width cause truncation of a field; if the
result of a conversion is wider than the field width, the field is expanded to
contain the conversion result.
The precision
An optional precision, in the form of a period (‘.’) followed by an optional
decimal digit string. Instead of a decimal digit string one may write ‘*’ or ‘*m$’
(for some decimal integer m) to specify that the precision is given in the next
argument, or in the m-th argument, respectively, which must be of type int. If the
precision is given as just ‘.’, or the precision is negative, the precision is taken to
be zero. This gives the minimum number of digits to appear for d, i, o, u, x, and
X conversions, the number of digits to appear after the radix character for a, A,
e, E, f, and F conversions, the maximum number of significant digits for g and G
conversions, or the maximum number of characters to be printed from a string
for s and S conversions.
The length modifier
Here, ‘integer conversion’ stands for d, i, o, u, x, or X conversion.
hh A following integer conversion corresponds to a signed char or unsigned
char argument, or a following
n conversion corresponds to a pointer to a signed char argument.
h A following integer conversion corresponds to a short int or unsigned short int
argument, or a following
n conversion corresponds to a pointer to a short int argument.
l (ell) A following integer conversion corresponds to a long int or unsigned long
int argument, or a following n conversion corresponds to a pointer to a long int
argument, or a following c conversion corresponds to a wint_t argument, or a
following s conversion corresponds to a pointer to wchar_t argument.
ll (ell-ell). A following integer conversion corresponds to a long long int or
unsigned long long int argument, or a following n conversion corresponds to a
pointer to a long long int argument.
L-Vis User Manual
Appendix A: Format strings • 127
L A following a, A, e, E, f, F, g, or G conversion corresponds to a long double
argument.
j A following integer conversion corresponds to an intmax_t or uintmax_t
argument.
z A following integer conversion corresponds to a size_t or ssize_t argument.
t A following integer conversion corresponds to a ptrdiff_t argument.
The conversion specifier
A character that specifies the type of conversion to be applied. The conversion
specifiers and their meanings are:
d,i The int argument is converted to signed decimal notation. The precision, if
any, gives the minimum number of digits that must appear; if the converted
value requires fewer digits, it is padded on the left with zeros. The default
precision is 1. When 0 is printed with an explicit precision 0, the output is
empty.
o,u,x,X The unsigned int argument is converted to unsigned octal (o), unsigned
decimal (u), or unsigned hexadecimal (x and X) notation. The letters abcdef are
used for x conversions; the letters ABCDEF are used for X conversions. The
precision, if any, gives the minimum number of digits that must appear; if the
converted value requires fewer digits, it is padded on the left with zeros. The
default precision is 1. When 0 is printed with an explicit precision 0, the output
is empty.
e,E The double argument is rounded and converted in the style [−]d.ddde±dd
where there is one digit before the decimal point character and the number of
digits after it is equal to the precision; if the precision is missing, it is taken as 6;
if the precision is zero, no decimal point character appears. An E conversion
uses the letter E (rather than e) to introduce the exponent. The exponent always
contains at least two digits; if the value is zero, the exponent is 00.
f,F The double argument is rounded and converted to decimal notation in the
style [−]ddd.ddd, where the number of digits after the decimal point character is
equal to the precision specification. If the precision is missing, it is taken as 6; if
the precision is explicitly zero, no decimal point character appears. If a decimal
point appears, at least one digit appears before it.
g,G The double argument is converted in style f or e (or F or E for G
conversions). The precision specifies the number of significant digits. If the
precision is missing, 6 digits are given; if the precision is zero, it is treated as 1.
Style e is used if the exponent from its conversion is less than −4 or greater than
or equal to the precision. Trailing zeros are removed from the fractional part of
the result; a decimal point appears only if it is followed by at least one digit.
a,A For a conversion, the double argument is converted to hexadecimal notation
(using the letters abcdef) in the style [-]0xh.hhhhp±d; for A conversion the
prefix 0X, the letters ABCDEF, and the exponent separator P is used. There is
one hexadecimal digit before the decimal point, and the number of digits after it
is equal to the precision. The default precision suffices for an exact
representation of the value if an exact representation in base 2 exists and
otherwise is sufficiently large to distinguish values of type double. The digit
before the decimal point is unspecified for non-normalized numbers, and
nonzero but otherwise unspecified for normalized numbers.
c If no l modifier is present, the int argument is converted to an unsigned char,
and the resulting character is written. If an l modifier is present, the wint_t (wide
character) argument is converted to a multi-byte sequence by a call to the
wcrtomb function, with a conversion state starting in the initial state, and the
resulting multi-byte string is written.
s If no l modifier is present: The const char * argument is expected to be a
pointer to an array of character type (pointer to a string). Characters from the
128 • Appendix A: Format strings
L-Vis User Manual
array are written up to (but not including) a terminating NUL character; if a
precision is specified, no more than the number specified are written. If a
precision is given, no null character need be present; if the precision is not
specified, or is greater than the size of the array, the array must contain a
terminating NUL character. If an l modifier is present: The const wchar_t *
argument is expected to be a pointer to an array of wide characters. Wide
characters from the array are converted to multi-byte characters (each by a call to
the wcrtomb function, with a conversion state starting in the initial state before
the first wide character), up to and including a terminating null wide character.
The resulting multi-byte characters are written up to (but not including) the
terminating null byte. If a precision is specified, no more bytes than the number
specified are written, but no partial multi-byte characters are written. Note that
the precision determines the number of bytes written, not the number of wide
characters or screen positions. The array must contain a terminating null wide
character, unless a precision is given and it is so small that the number of bytes
written exceeds it before the end of the array is reached.
p The void * pointer argument is printed in hexadecimal (as if by %#x or %#lx).
n The number of characters written so far is stored into the integer indicated by
the int * (or variant) pointer argument. No argument is converted.
% A ‘%’ is written. No argument is converted. The complete conversion
specification is ‘%%’.
Appendix B: Date format string
Date format string description
The format string used by L-Vis date controls is equivalent to the format string
used by the ANSI-C function strftime. The locale setting on the L-Vis device for
the purpose of formatting dates is fixed to U.S. setting, therefore the names of
weekdays and months will be in English language only.
Conversion specifiers are introduced by a ‘%’ character, and are replaced as
follows:
%a The abbreviated weekday name.
%A The full weekday name.
%b The abbreviated month name.
%B The full month name.
%c The date and time in American writing.
%C The century number (year/100) as a 2-digit integer. (SU)
%C The century number (the year divided by 100 and truncated to an integer).
%d The day of the month as a decimal number (range 01 to 31).
L-Vis User Manual
Appendix B: Date format string • 129
%D Equivalent to %m/%d/%y.
%e Like %d, the day of the month as a decimal number, but a leading zero is
replaced by a space.
%E Modifier: use alternative format, see below.
%G The ISO 8601 year with century as a decimal number. The 4-digit year
corresponding to the ISO week number (see %V). This has the same format and
value as %y, except that if the ISO week number belongs to the previous or next
year, that year is used instead.
%g Like %G, but without century, i.e., with a 2-digit year (00-99).
%h Equivalent to %b.
%H The hour as a decimal number using a 24-hour clock (range 00 to 23).
%I The hour as a decimal number using a 12-hour clock (range 01 to 12).
%j The day of the year as a decimal number (range 001 to 366).
%k The hour (24-hour clock) as a decimal number (range 0 to 23); single digits
are preceded by a blank. (See also %H.)
%l The hour (12-hour clock) as a decimal number (range 1 to 12); single digits
are preceded by a blank. (See also %I.)
%m The month as a decimal number (range 01 to 12).
%M The minute as a decimal number (range 00 to 59).
%n A newline character..
%O Modifier: use alternative format, see below.
%p Either ‘AM’ or ‘PM’ according to the given time value, or the
corresponding strings for the current locale. Noon is treated as ‘pm’ and
midnight as ‘am’.
%P Like %p but in lowercase: ‘am’ or ‘pm’ or a corresponding string for the
current locale
%r The time in a.m. or p.m. notation. In the POSIX locale this is equivalent to
‘%I:%M:%S %p’
%R The time in 24-hour notation (%H:%M). (SU) For a version including the
seconds, see %T below.
%s The number of seconds since the Epoch, i.e., since 1970-01-01 00:00:00
UTC.
%S The second as a decimal number (range 00 to 61).
%t A tab character.
%T The time in 24-hour notation (%H:%M:%S).
%u The day of the week as a decimal, range 1 to 7, Monday being 1. See also
%w.
%U The week number of the current year as a decimal number, range 00 to 53,
starting with the first Sunday as the first day of week 01. See also %V and %W.
%V The ISO 8601:1988 week number of the current year as a decimal number,
range 01 to 53, where week 1 is the first week that has at least 4 days in the
current year, and with Monday as the first day of the week. See also %U and
%W.
%w The day of the week as a decimal, range 0 to 6, Sunday being 0. See also
%u.
%W The week number of the current year as a decimal number, range 00 to 53,
starting with the first Monday as the first day of week 01.
130 • Appendix B: Date format string
L-Vis User Manual
%x The preferred date representation for the current locale without the time.
%X The preferred time representation for the current locale without the date.
%y The year as a decimal number without a century (range 00 to 99).
%Y The year as a decimal number including the century.
%z The time-zone as hour offset from GMT. Required to emit RFC822conformant dates (using "%a, %d %b %Y %H:%M:%S %z").
%Z The time zone or name or abbreviation.
%+ The date and time in date(1) format.
%% A literal ‘%’ character.
Some conversion specifiers can be modified by preceding them by the E or O
modifier to indicate that an alternative format should be used. If the alternative
format or specification does not exist for the current locale, the behavior will be
as if the unmodified conversion specification were used. (SU) The Single Unix
Specification mentions %Ec, %EC, %Ex, %EX, %Ry, %EY, %Od, %Oe, %OH,
%OI, %Om, %OM, %OS, %Ou, %OU, %OV, %Ow, %OW, %Oy, where the
effect of the O modifier is to use alternative numeric symbols (say, roman
numerals), and that of the E modifier is to use a locale-dependent alternative
representation.
Revision History
Date
Version
Author
Description
2004-11-03
1.1
NR
Initial revision V1.1
2004-06-04
1.2
NR
New screenshots, added configuration chapter, fixes
2006-01-24
1.3
NR
Changes for L-VIS 3E100
2006-04-04
1.5.1
NR
Added documentation for color mapping, theft protection. Updates after
review.
2006-10-13
2.0.0
CZ
Rewrote a large part of the manual to make it more useful (hopefully)
based on user feedback. The example and solution sections remain
unchanged for now. The new BACnet model LVIS-ME200 is now also
covered by this manual.
2006-02-08
2.0.4
CZ
Added new sections about data point management and standard solutions,
as well as some smaller improvements and corrections.
L-Vis User Manual
Revision History • 131
Glossary of Terms
Dynamic Network Variable
Network variable, which is generated dynamically during system integration.
L-Vis User Manual
Glossary of Terms • 133
Index
A
Alarm Generator 53
Alex 96
Animated Bitmaps 122
C
Configuration 27
D
Dynamic Network Variables 91
E
Electrical Characteristics 16
Electrical Installation 15
I
Installation 11
J
Jumper 16
L
LEDs 16, 17
LNS Plugin Installation 3
M
Mechanical Installation 11
Menu 8, 22
N
NL220 94
T
Terminals 16
L-Vis User Manual
Index • 135