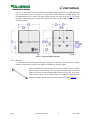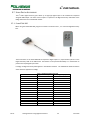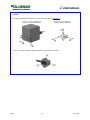
1
4 G™ 4 G USER MANUAL URM10PH238 JULY 2013 Rev. D Copyright © 2010-2013 by Alken, Inc. dba Polhemus Colchester, Vermont, U.S.A. All rights reserved. No part of this publication may be reproduced, stored in a retrieval system, or transmitted, in any form or by any means, mechanical, photocopying, recording or otherwise, without the prior written permission of Polhemus. No patent liability is assumed with respect to the use of the information contained herein. While every precaution has been taken in the preparation of this manual, Polhemus assumes no responsibility for errors or omissions. Neither is any liability assumed for damages resulting from use of the information contained herein. 4 G ™ and PowerTRAK 360™ are trademarks of Polhemus. ® Windows is a registered trademark of Microsoft Corporation. Linux® is the registered trademark of Linus Torvalds in the U.S. and other countries. Medical Device Use Polhemus is a Good Manufacturing Practices (GMP) Contract Manufacturer under U.S. FDA Regulations. We are not a manufacturer of Medical Devices. Polhemus systems are not certified for medical or bio-medical use. Any references to medical or bio-medical use are examples of what medical companies have done with the Products after they have obtained all necessary or appropriate medical certifications. The end user/OEM/VAR/Distributor must comply with all pertinent FDA/CE regulations pertaining to the development and sale of medical devices and all other regulatory requirements. Rev. D A JULY 2013 G4 USER MANUAL FCC Statement 4 All components of the G system comply with Part 15 of the FCC rules. Operation is subject to the following two conditions: 1. This device may not cause harmful interference; and 2. This device must accept any interference received, including interference that may cause undesired operation. Class B Digital Device. This equipment has been tested and found to comply with the limits for a Class B digital device pursuant to Part 15 of the FCC Rules. These limits are designed to provide reasonable protection against harmful interference in a residential installation. This equipment generates, uses, and can radiate radio frequency energy and, if not installed and used in accordance with the instructions, may cause harmful interference to radio communications. However there is no guarantee that interference will not occur in a particular installation. If this equipment does not cause harmful interference to radio or television reception, which can be determined by turning the equipment off and on, the user is encouraged to try to correct the interface by one or more of the following measures. EC – Declaration of Incorporation This product complies with the following European Community Directives: 4 G RF transceiver in the Hub and USB dongle conform with R&TTE Directive (1999/5/EC) Wideband transmission equipment operating in the 2.4GHz ISM band and using spread spectrum modulation techniques: EN 300 328 v1.7.1 (2006-10) EMC Emission Requirements: EN 301 489-1 v1.8.1:2008/EN 301 489-3 v.1 2002 EN 55022-2006 Conducted Emissions Immunity Requirements: EN 301 489-1 v1.8.1:2008/EN 301 489-3 v.1 2002 EN61000-4-2:2001 Electrostatic Discharge EN61000-4-3:2002 Radiated Immunity EN61000-4-4:2004 EFT/Burst Power Leads EN61000-4-5:2001 Surge Immunity EN61000-4-6:2003 Conducted Immunity, Power Leads EN61000-4-11:2004 Voltage Dips and Interrupts 4 The G Source complies with the EMC directive 2004/108/EC Radiated and Conducted Emissions: EN61326-1 Clause 7.2 Class B Immunity Requirements: EN 61326-1 Table 2 EN61000-4-2: 2001 Electrostatic Discharge EN61000-4-3:2002 Radiated Immunity EN61000-4-4:2004 EFT/Burst Power Leads EN61000-4-5:2001 Surge Immunity EN61000-4-6:2003 Conducted Immunity, Power Leads EN61000-4-8:1993 A1 2000 Power Frequency Magnetic Fields EN61000-4-11: 2004 Voltage Dips and Interrupts EMC Directive 2004/108/EC Low Voltage Directive 2006/95/EC 4 Note: The conducted emission herein only applies if a Polhemus-supplied power supply is used with the G unit. Rev. D B JULY 2013 G4 USER MANUAL Rev. D C JULY 2013 G4 USER MANUAL HOW TO USE THIS MANUAL 4 This user manual serves as a reference guide for the setup and operation of the Polhemus G tracker. To quickly set up and run a new G4 system, refer to Section 3. Getting Started. This section offers a step-by-step approach to guide you in installing, configuring and running your device in a simplified scenario of one Source and one Hub. The manual is divided into several parts: Section 1. G4 System Overview provides detailed descriptions and physical information about the 4 hardware and software components and accessories that make up the G system. Section 2. Operation provides general description of how the tracker can be deployed and some advice on physical installation. Section 3. Getting Started is a detailed step-by-step guide to installation, setup and simple operation of a minimal system. This section is designed to familiarize you with the basic process of setting up a system without delving into details of larger or more complex installations. Section 4. Troubleshooting covers installation and operation troubleshooting help. Section 5. Programming and Alternate Platforms provides a brief listing of programming tools and packages for supported host platforms. APPENDIX A. , APPENDIX B. , APPENDIX C. and APPENDIX D. provide more detailed step-by-step guides and tutorials for more complex setup and installation scenarios as well as in-depth examinations of magnetic tracker science: Finally, APPENDIX E. , APPENDIX F. and APPENDIX G. provide specifications, warranty and Customer Service contact information. Rev. D D JULY 2013 G4 USER MANUAL SAFETY NOTICES This apparatus has been designed and tested in accordance with Low Voltage Directive 2006/95/EC. WARNINGS • • • • • • Before powering up the instrument, be aware that the mains plug shall only be inserted in a socket outlet provided with a protective ground contact. You must not negate the protective action by using an extension cord (power cable) without a protective conductor (grounding). Grounding one conductor of a two-conductor outlet is not sufficient protection. Whenever it is likely that the ground protection is impaired, you must make the instrument inoperative and secure it against any unintended operation. This instrument contains no user serviceable parts. Do not attempt to service the unit. Return it to Polhemus for repair. Do not perform any unauthorized modification to the instrument. Do not operate the instrument in the presence of flammable gasses or fumes. Operation of any electrical instrument in such an environment constitutes a definite safety hazard. Do not use the instrument in a manner not specified by the manufacturer. TO CLEAN THE INSTRUMENT If the instrument requires cleaning: (1) Remove power from the instrument. (2) Clean the external surfaces of the instrument with a soft cloth dampened with a mixture of mild detergent and water. Make sure that the instrument is completely dry before reconnecting it to a power Source. 4 THE G HUB CONTAINS A LITHIUM ION BATTERY (which is not accessible to the user)* GENERAL GUIDELINES AND HANDLING RECOMMENDATIONS FOR LITHIUM ION OR LITHIUM POLYMER BATTERIES • Keep Lithium ion/Lithium polymer batteries away from children. If a battery is swallowed promptly call your doctor. • Do not allow any Lithium ion/Lithium polymer battery to come into contact with water or liquid of any kind. Do not leave the battery near flames, heaters, (microwave) ovens, stoves, fireplaces or other high-temperature locations. Excessive heat could cause the battery to deteriorate. Do not heat the battery or throw it into a fire. This can damage the safety vent and cause the electrolyte to catch fire. • Do not leave the battery in a hot condition like strong direct sunlight, inside automobiles behind the windscreen, etc. This can overheat the cell and will reduce the battery’s performance. • Do not damage the battery in any way by nailing, hammering, crushing, etc. This can cause the cell to leak and/or to short circuit internally. • Do not combine batteries of different capacities, types or brands. • If a battery leaks or emits a strange odor during use or storage, stop using the cell immediately. Leaking electrolytes are flammable. • If any fluid that has leaked from the battery comes into contact with skin or clothing, rinse with tap water or other clean water immediately. Contact with skin can cause irritation or burns. • If fluid from a battery gets into a person’s eye, rinse the eye immediately with clean water and seek medical attention promptly. Do not rub the eye. *If battery becomes unusable, see APPENDIX G. Rev. D E JULY 2013 G4 USER MANUAL TABLE OF CONTENTS HOW TO USE THIS MANUAL ................................................................................................................................................ D SAFETY NOTICES ................................................................................................................................................................. E WARNINGS........................................................................................................................................................................ E TO CLEAN THE INSTRUMENT ................................................................................................................................................. E 4 1. G SYSTEM OVERVIEW ..........................................................................................................................................1 1.1 INTRODUCTION ......................................................................................................................................1 1.2 COMPONENTS .......................................................................................................................................2 2. 3. 1.2.1 1.2.2 1.2.3 1.2.4 1.2.5 1.2.6 1.2.7 2.1 2.2 2.3 2.4 3.1 3.2 3.3 3.4 OPERATION .........................................................................................................................................................7 WIRELESS .............................................................................................................................................7 WIRED .................................................................................................................................................7 HUB AND SENSOR MOUNTING AND CONNECTIONS.......................................................................................7 SOURCE PLACEMENT ..............................................................................................................................7 GETTING STARTED ................................................................................................................................................8 INSTALLATION AND SETUP OVERVIEW ........................................................................................................8 INSTALL HOST SOFTWARE ........................................................................................................................8 CONFIGURE RF SETTINGS ......................................................................................................................14 SOURCE SETUP AND CONFIGURATION ......................................................................................................20 3.4.1 3.4.2 DEFINITIONS .................................................................................................................................................... 20 SOURCE PLACEMENT....................................................................................................................................... 21 3.4.3 CREATE SOURCE CONFIGURATION FILE .......................................................................................................... 22 3.7.1 3.7.2 POWERTRAK 360 ............................................................................................................................................. 34 DIGITAL ACCESSORY CABLE AND CONNECTOR ............................................................................................... 35 3.5 3.6 3.7 3.8 3.9 4. 5. 4 G HUB............................................................................................................................................................... 2 RF/USB MODULE ............................................................................................................................................... 3 SOURCE ............................................................................................................................................................. 3 SENSORS ............................................................................................................................................................ 4 POWERTRAK 360™ ............................................................................................................................................ 5 DIGITAL ACCESSORY CABLE ASSEMBLY ............................................................................................................. 6 HOST TRACKING ENGINE SOFTWARE ................................................................................................................ 6 3.9.1 3.9.2 3.9.3 3.9.4 3.9.5 3.9.6 4.1 4.2 4.3 5.1 5.2 Rev. D 3.4.2.1 3.4.2.2 Select Reference Location Measure carefully 21 22 MAKE CONNECTIONS ............................................................................................................................29 4 START A G TRACKING SESSION ..............................................................................................................29 USING DIGITAL ACCESSORIES..................................................................................................................34 RF RANGE ..........................................................................................................................................35 RUNTIME TRACKING PARAMETERS ..........................................................................................................36 FILTERS ............................................................................................................................................................ 36 BORESIGHT ...................................................................................................................................................... 37 INCREMENT AND AUTO-INCREMENT .............................................................................................................. 37 FRAME OF REFERENCE .................................................................................................................................... 37 TIP OFFSET....................................................................................................................................................... 38 P&O OUTPUT UNITS OF MEASURE .................................................................................................................. 38 TROUBLESHOOTING ............................................................................................................................................39 INSTALLATION ON WINDOWS VISTA, WIN7 AND WIN8 ..............................................................................39 .NET 3.5 INSTALLATION ON WINDOWS VISTA AND WINDOWS XP ................................................................40 ADDITIONAL HELP ................................................................................................................................41 PROGRAMMING AND ALTERNATE PLATFORMS .........................................................................................................44 WINDOWS..........................................................................................................................................44 LINUX ................................................................................................................................................44 I JULY 2013 G4 USER MANUAL APPENDIX A. APPENDIX B. APPENDIX C. APPENDIX D. APPENDIX E. APPENDIX F. APPENDIX G. Rev. D Source Configuration .................................................................................................................... A-1 Understanding Distortion ............................................................................................................. B-1 4 Using the G Source Orientation Measurement App (Windows).................................................. C-1 Another Two-Source Setup and Sample Configuration ................................................................ D-1 Specifications ................................................................................................................................ E-1 Limited Warranty ...........................................................................................................................F-1 Customer Service .......................................................................................................................... G-1 II JULY 2013 G4 USER MANUAL LIST OF FIGURES 4 Figure 1. G Hub ..............................................................................................................................................2 4 Figure 2. G Hub dimensions, Inches (CM) ......................................................................................................2 Figure 3. RF/USB Module Dimensions, Inches (CM)........................................................................................3 4 Figure 4. G Source Dimensions, Inches (CM) .................................................................................................4 4 Figure 5. G Sensor Dimensions, Inches (CM) .................................................................................................5 Figure 6. PowerTRAK 360 Dimensions, Inches (CM) .......................................................................................5 Figure 7. PowerTRAK 360 EM center, Inches (CM) .........................................................................................6 Figure 8. Digital Accessory Cable Wiring DIagram .........................................................................................35 Figure 9. Component placement for Eddy Current Elimination .................................................................. B-1 Figure 10. Sample Source Setup, Bird’s Eye Perspective ............................................................................. D-1 Figure 11. Sample Source Setup, Eye-Level Perspective ............................................................................. D-1 LIST OF TABLES Table 1. PowerTRAK 360 Button States.........................................................................................................34 Table 2. Runtime Tracking Parameter Scope ................................................................................................36 4 Table 3: PiMgr filter Presets for G ................................................................................................................37 DUE TO SOFTWARE AND HARDWARE MODIFICATIONS SCREEN OR PRODUCT EXAMPLES APPEARING IN THIS MANUAL MAY VARY SLIGHTLY FROM THE ACTUAL SCREENS OR PRODUCTS THE USER ACCESSES. Rev. D III JULY 2013 G4 USER MANUAL Rev. D IV JULY 2013 G4 USER MANUAL 1. G4 SYSTEM OVERVIEW 4 Congratulations on your purchase of the Polhemus G . With a system electronics unit the size of most 4 mobile phones, G harnesses the powerful performance that only AC electromagnetic technology offers. 4 Incorporating a sleek, compact design, G allows for uninhibited movement. It boasts true 6 Degree-OfFreedom (6DOF) technology, and delivers consistent, high-quality data, without the complications of 4 hybrid technologies. As you read through the set-up and operations, you will find the G to have numerous configuration capabilities and flexibility to succeed in countless motion tracking and measurement applications. 1.1 INTRODUCTION 4 The Polhemus G tracking system is comprised of wireless tracking electronics driven by PC-hosted software. Proprietary RF communication with each tracking unit is achieved via an RF/USB Module on the host PC. Each wireless tracking unit (“Hub”) drives up to three magnetic Sensors. The tracking area is 4 defined by the placement of up to eight (8) standalone G electromagnetic Sources. The modular nature of this architecture offers unprecedented scalability and versatility in Polhemus motion tracking. Rev. D 4 G System Overview 1 JULY 2013 G4 USER MANUAL 1.2 COMPONENTS 1.2.1 G4 HUB 4 The G Hub is a lightweight and compact wireless tracking unit. It can be worn comfortably on the body via the belt attachment. It drives up to three (3) Polhemus Sensors at 120 samples per second. The Hub delivers tracker data to the host PC wirelessly via the RF Module, but wired operation is also possible by connecting it directly to the PC’s USB port. Figure 1 depicts and identifies the controls and connection ports on the Hub chassis. FIGURE 1. G4 HUB 4 The G Hub lithium ion rechargeable battery powers the Hub for more than 10 hours. It is recharged by the Host PC or an included AC wall charger, via the micro-USB port on the top of the Hub. The battery is not intended to be user-replaceable. NOTE: As with all batteries, capacity (run-time) will diminish over time due to battery age and charging cycles. FIGURE 2. G4 HUB DIMENSIONS, INCHES (CM) Rev. D 4 G System Overview 2 JULY 2013 G4 USER MANUAL 1.2.2 RF/USB MODULE 4 4 The G RF/USB Module enables wireless communication with multiple G Hubs. The Module aggregates 4 raw tracker data received from detected wireless Hubs and delivers it via USB to the G Tracker Engine Software residing on the host computer. The RF/USB Module communicates with 4 multiple Hubs using the proprietary Polhemus G RF protocol by ‘pairing’ the Module with each Hub in its domain. NOTE: The RF/USB Module extension cable should always be used for optimum performance. 1.2.3 SOURCE FIGURE 3. RF/USB MODULE DIMENSIONS, INCHES (CM) 4 The G Source produces the electromagnetic (EM) field necessary to track the position and orientation of the Sensors within range of the Source. The three-dimensional space in which this field is detectable by the Sensors is known as the motion tracking area. Up to eight (8) Sources may be employed to define and expand this area. When more than one Source is used, each Source must operate at a different frequency so that it can be detected and distinguished from others by the Sensors. (Source frequency is not a configurable feature; Sources are manufactured to operate at specific frequencies, and may be purchased accordingly.) 4 The G Source is a standalone 4-inch cube that is powered by a DC power supply plugged into a 110V/240V AC outlet. Each Source is factory calibrated and is shipped with a unique calibration file (.g4s) that is used by the tracking system. The Source is normally mounted off the floor on a non-metallic surface or on a stand in a fixed location in proximity to where the Sensor tracking takes place. The usable 4 motion tracking area around a G Source is dependent on the EM quality of the environment. An environment with few or no large metal structures/furniture (‘distorters’) in close proximity to the tracking hardware produces the most optimal distortion-free usable space. Don’t be afraid of most metals: For example, Polhemus uses aluminum tripods to mount sources without any degradation of signal. For more information about magnetic distortion, see APPENDIX B. In addition, the usable motion tracking area depends heavily upon the needs of the application in which 4 G motion tracking is employed. If an application depends more heavily on the accuracy of the position and orientation (P&O) data collected, then the usable tracking area around a single Source is generally smaller. When a Sensor is close to a Source, the P&O measurements are more accurate. As the Sensor moves away, the collected data may become noisier or more distortion-prone. When the Sensor is about 15 feet away, the detected Source signal will be very weak and the Sensor will discard signal from that Rev. D 4 G System Overview 3 JULY 2013 G4 USER MANUAL Source. Here the usable area may be extended by employing additional Sources. If an application relies less on accuracy and more on coverage area, a single Source may be sufficient, or multiple Sources may be placed farther apart to extend the usable motion tracking area. Refer to Section 2.4 for further 4 discussion of Source placement. In general, the Polhemus G system can be configured to operate well in most environments. FIGURE 4. G4 SOURCE DIMENSIONS, INCHES (CM) 1.2.4 SENSORS 4 4 G Sensors detect the electromagnetic field generated by the G Source(s). Up to three Sensors may be 4 driven by a single wireless G Hub. Sensor cables are available in a variety of lengths. P&O is calculated from the electrical center of the Sensor device, relative to a userdefined location in the tracking area. This chosen Cartesian origin may be the 4 location of a G Source, so all calculated P&O is relative to that Source, or it may be 4 another location chosen for the specific needs of the application employing the G tracking technology. Physical dimensions of the Sensor are detailed in Figure 5. Rev. D 4 G System Overview 4 JULY 2013 G4 USER MANUAL FIGURE 5. G4 SENSOR DIMENSIONS, INCHES (CM) 1.2.5 POWERTRAK 360™ 4 The G PowerTRAK 360 is a handheld device that combines a sensor with four push buttons. It connects 4 to any Sensor Port and the Digital Accessory Port on the G Hub. The push buttons can be pressed individually or in combination to produce events on the Hub’s Digital Accessory Port. The state of these digital inputs is reported in the 4 “Digital Accessory State” field of the G P&O data frame. In effect, each button or button-combination can be given a different function in custom application. Physical dimensions of the PowerTRAK 360 are detailed in Figure 6 and Figure 7. FIGURE 6. POWERTRAK 360 DIMENSIONS, INCHES (CM) Rev. D 4 G System Overview 5 JULY 2013 G4 USER MANUAL FIGURE 7. POWERTRAK 360 EM CENTER, INCHES (CM) 1.2.6 DIGITAL ACCESSORY CABLE ASSEMBLY 4 For custom-made digital input applications, the G Digital Accessory Cable Assembly is available to take 4 advantage of all 8 digital inputs in the G Hub Digital Accessory Port. For details about using this option, see Section 3.7.2. 1.2.7 HOST TRACKING ENGINE SOFTWARE 4 The final major component in the Polhemus G tracking system is the tracking engine software resident on 4 the host computer: the G4Track DLL. Host applications using G technology link to this DLL at runtime or 4 compile time. G4Track manages the USB runtime session with the G RF/USB Module, collecting tracker data gathered from active wireless Hubs and computing P&O. The user application accesses P&O data and applies tracking parameters such as filtering, boresighting, offsets and frames of reference via G4Track DLL functions. 4 The G system software set includes Windows® and Linux versions of G4Track with full documentation. Both versions of G4Track can be used directly. On Windows®, the comprehensive Polhemus Developer Interface (PDI) SDK can also be used. Rev. D 4 G System Overview 6 JULY 2013 G4 USER MANUAL 2. OPERATION 4 The central hardware component of the G tracking system is the wireless Hub. Each Hub drives up to 4 three (3) wired G Sensors. This design allows one or more Hubs to be worn on the body or on any untethered object. The three Sensors are connected to the Hub via customizable cable lengths so that each moving body can be outfitted in an orderly ergonomic fashion. 2.1 WIRELESS 4 Wireless management of the G Hubs is accomplished using a 2.4 GHz radio frequency (RF) link. The proprietary RF protocol operates on twenty (20) frequencies in a pseudo-random sequence to ensure 4 compatibility with other RF devices. Multiple channel groups are provided so that multiple G systems may be operated on different channels in the same environment, or in different tracking areas within RF range of one another. 2.2 WIRED If wireless operation is not a viable option in the operating environment due to excessive interference, an 4 individual G Hub may be managed directly by connecting the micro-USB port on the Hub to the host computer USB port. When connected this way, the G4Track host software module manages the Hub directly and seamlessly. Only one Hub may be managed when using this connection method. 2.3 HUB AND SENSOR MOUNTING AND CONNECTIONS 4 The G Hub features an optional belt clip attachment. 4 G Sensors feature two mounting holes for #4 threaded fasteners (supplied) for applications that require 4 fixed Sensor mounting. G Sensors are available in a variety of cable lengths. 2.4 SOURCE PLACEMENT When arranging one or more Sources in the tracking area, keep the following in mind: 4 G performance is best when Sensors are within 2 to 6 feet (0.6 to 1.83 m) of a Source, but more than 4 inches (10 cm) away. Sources should be arranged and mounted no more than 16 feet (4.88 m) apart. The tracking area can be expanded by installing more Sources and placing them strategically. 4 The G Source features mounting holes for attachment to fixed surfaces, which should fit a camera-style tripod perfectly. Sources should not be mounted directly on metal and should be placed away from magnetic distorters if possible. For more information about magnetic distortion, refer to Section 3.4.1 (see page 20). 4 Do not place the Source’s power supply directly on the G Source. Rev. D Operation 7 JULY 2013 G4 USER MANUAL 3. GETTING STARTED The setup and operation procedures detailed below demonstrate the use of the Windows software 4 utilities that accompany the G system. Polhemus also provides a set of Linux utilities, applications and 4 libraries for use with G . Refer to Section 5.2 for an overview of the Linux utilities. Whether your target platform is Windows or Linux, the procedures described here are worth studying to 4 get an understanding of the overall operation of the Polhemus G system. In fact, the entire setup process can be performed on Windows. A system set up on Windows can be operated on Linux without error. 3.1 INSTALLATION AND SETUP OVERVIEW 4 Installation and setup of the G tracking system involves the following operations: 1. 2. Install host software on the computer. Perform the RF configuration procedure. The purpose of this procedure is to 4 a) Join the G RF/USB Module (RFM) and Hub(s) to each other for wireless communication; and b) To assign an identity to each Hub. 4 This is done by first configuring the RFM and then configuring each of the G Hubs that will be joined 4 with it. The Hub IDs configured in this step are used at runtime to identify Hubs when processing G Position and Orientation (P&O) data. The RF configuration may be preserved in a file on the host computer but this is not a requirement. 3. 4 4 The last step to complete G installation is to place the Source(s) and define the G Source configuration. In this step, the position and orientation of each Source in the system is measured and stored in a source configuration file (.g4c) on the host computer. Proper definition of this file is crucial for correct tracking. This procedure is described in detail in Section 3.4 (see page 20). 3.2 INSTALL HOST SOFTWARE 4 This section details installation of the G Host Software on Windows systems. 4 To install Linux G Host Software, refer to 5.2, page 44. See Section 4.1 for additional Install tips on Windows Vista, Windows 7 and Windows 8. Rev. D Getting Started 8 JULY 2013 G4 USER MANUAL Rev. D 4 1. The G Host Software CD contains all of the software and drivers needed to begin using the system or developing software for it. Begin by loading the CD into the host computer’s CD or DVD drive. If the computer is configured to auto-run disks when they 4 are loaded into the drive, the G Host Software Installation screen will appear automatically. If it does not, navigate to the CD using Windows Explorer and run the Setup program found on the CD. 2. From the Host Software Installation screen you can review the contents of the CD, view system manuals and install the host software. Select Install Host Software to proceed. 3. The Host Software Setup wizard will appear. Select Next to advance the wizard to the next step. Getting Started – Install Host Software 9 JULY 2013 G4 USER MANUAL Rev. D 4. Review and accept the license agreement and select Next. 5. Browse to highlight the destination location. The default location is C:\Program Files\Polhemus. The most common practice is to use the default location. Select Next. 6. Select the components to install. By selecting Full Installation in the drop-down box, all software components on the CD will be installed. The available selections are: 4 • G Software Components – These are the drivers, utilities and the G4Track tracking engine 4 necessary to configure and run the G system, plus documentation for these. • PiMgr Files – Executables and help files associated with the PiMgr tracker management demonstration utility for Polhemus trackers. • SDK Files – Libraries, sample programs and online help associated with the Polhemus Developer Interface (PDI), Polhemus’ comprehensive Windows software development kit. Select Next. Getting Started – Install Host Software 10 JULY 2013 G4 USER MANUAL 7. Before installation of the selected components commences, a summary page is displayed. Review the selections made and select Back to change the selections. Select Install to begin the installation. 8. Installation of the Windows device files cannot 4 proceed without specific user input. The Polhemus G Windows USB Driver Package Installer Welcome page will display. Select Next to continue. 9. Driver installation continues with the display of the Driver Installation Page. Windows Security displays a confirmation window to verify that you wish to add device software to your Windows system. If you anticipate future installations of Polhemus devices and software, opt to “always trust” Polhemus software installation. Select Install to continue. 10. Driver installation ends with the display of the Driver Installation Finish page. Select Finish to complete the installation. 4 When the G RF/USB Module is plugged into the host computer’s USB port for the first time, the Windows USB driver will be loaded automatically. Rev. D Getting Started – Install Host Software 11 JULY 2013 G4 USER MANUAL A progress window appears briefly, indicating that G Setup Utilities are being installed. 4 4 The G Setup Utilities require that Microsoft .NET 3.5 be installed on the host computer. Windows 7 and Windows 8 already include .NET 3.5. However, Windows XP and Vista systems that do not already have it require .NET 3.5 to be installed before 4 the G Setup Utilities installation can continue. The .NET installation begins automatically, and requires a system restart upon completion. 4 When the restart is completed, the G Setup Utilities installation resumes. You may choose to restart your PC immediately or you may postpone the restart. Either approach is acceptable, but the PC must be restarted before continuing to Section 3.3 (see page 14). For detailed step-by-step guide to .NET 3.5 installation, see Section 4.3 (page 41). 4 11. G Host Software Installation concludes with the display of the completion page. Select Finish to complete the installation, and to display any release notes associated with the installation. Rev. D Getting Started – Install Host Software 12 JULY 2013 G4 USER MANUAL 4 12. G Host Software Release Notes are presented in an HTML file displayed by your default browser. The Release Notes are also accessible via the Windows Start menu: 13. If Microsoft .NET 3.5 was installed but the computer has not been restarted (Postpone was selected), restart the computer now via the Windows Start button. 14. When the restart has completed, the G Utilities installation will resume. 4 Setup Continue to the Configure RF Setting section (see page 14). Rev. D Getting Started – Install Host Software 13 JULY 2013 G4 USER MANUAL 3.3 CONFIGURE RF SETTINGS The procedure detailed below configures the RF communication between the RFM (dongle) and Hub(s) using the Windows G4SystemSetup utility. On a Linux system, the G4DevCfg utility is used. The 4 instructions below do not apply to the Linux utility. However, a G system that has been configured with the Windows utility can be operated on a Linux host without error. See 5.2, page 44 for more information 4 about the Polhemus G utilities for Linux. 1. Start the RF Configuration process by launching the G4SystemSetup utility. This utility steps you through the process of assigning an RF Channel Group and 4 joining the G RF/USB Module (RFM, or ‘Dongle’) to 4 each G Hub in your system. A Windows shortcut to this utility is installed on the desktop. 2. 4 The G RF Setup start window is displayed, and the first instruction is presented. Select Start Setup. 3. 4 Plug the G RFM (the ‘RF Dongle’) into any USB port on the host computer. The setup program will wait for the RFM to be plugged in. The first time the RFM is plugged in after the host 4 software is installed, Windows will install the G USB drivers, which requires user input. When the device driver has been installed, Windows displays a success notification as shown below. Rev. D Getting Started – Configure RF Settings 14 JULY 2013 G4 USER MANUAL 4. 4 The G RF Setup utility detects the RFM. This status 4 is displayed at the bottom of the G Setup screen. The next step to perform is displayed in the highlighted area at the top: “Select the RF Channel Group.” Selection of the RF channel group is determined by 4 the number of G systems that are to be operated within RF range of one another. If there are no 4 other G systems in the environment, any selection will do. It is often simplest in this case to choose the default selection, channel group 1. Select Next to continue. 4 At any time during the G Setup process, additional detail about the process step or an input field is accessed by hovering the cursor over the help icon or over any input field. 5. Rev. D Getting Started – Configure RF Settings Select Program Dongle Configuration Now to configure the RF/USB Module. 15 JULY 2013 G4 USER MANUAL 6. The RF configuration summary for the RF/USB Module is now displayed as depicted in the screenshot to the left. • RFM Serial Number – The factory serial number assigned by Polhemus to the RFM hardware. • RF Channel Group – The channel group selected in the previous steps. • Hub Count – The number of Hubs currently joined with these RF settings. (Zero) • RF Address – Automatically generated unique address that is used in conjunction with the channel group identifier to uniquely identify components joined to this RFM. A new RF address is assigned each time an RFM is configured. • Device ID – Automatically generated RFM identifier for internal use. You are now ready to configure the RF settings for each Hub that will be joined with this RFM. Each Hub will be plugged into the host computer USB port successively until all Hubs are joined. To prepare, have the first Hub ready to connect via USB. It is not necessary to disconnect the RFM. Select Continue to Hub Setup. 7. 4 The G Hub Setup screen appears. The status display at the bottom of the screen indicates that it is searching for a Hub to join. Connect the first Hub to join to the computer’s USB port using the Hub USB cable connected to the micro-USB port on the top of the Hub. Power ON the Hub. It is not necessary to disconnect the RFM if there is an additional USB port available on the host computer. 4 As with the RFM, the first time a G Hub is plugged in to a new USB port after the host software is 4 installed, Windows will again install the G USB drivers for the device. No user input should be required. When the device driver installation has completed, 4 the G Hub Setup will detect the Hub. If the Hub is not detected, make sure that the Hub’s power switch is in the ON position. Rev. D Getting Started – Configure RF Settings 16 JULY 2013 G4 USER MANUAL 8. The serial number of the detected Hub is displayed in the highlighted area. The first Hub to be joined to the RFM will be identified as Hub 1. Select Join Hub 1 to configure the Hub and join it to the RFM. If the Hub hardware connected at this time is not intended to be designated as Hub 1, select Skip to ignore this Hub and move on to another one. The Hub will not be configured. 9. The Joined Hubs summary in the lower half of the screen is updated to include the Hub that has just been joined. 4 Each time a new Hub is joined during the G setup process, it is added to the display. The list of joined Hubs may be cleared at any time by selecting the Clear button. Subsequent Hub numbering will begin with Hub 1. 10. Select More Hubs to continue to the next Hub to be joined. Select Finished if all Hubs have been joined. 11. If more Hubs are to be joined, unplug Hub 1 and select Next. 12. Connect the next Hub to configure to the computer’s USB port using the Hub USB cable connected to the micro-USB port on the top of the Hub. 13. The serial number of the detected Hub is displayed in the highlighted area. Select Join Hub 2 to configure the Hub and join it to the RFM, or select Skip to ignore this Hub. Rev. D Getting Started – Configure RF Settings 17 JULY 2013 G4 USER MANUAL If it is preferred that the Hub be configured with a duplicate ID so that there will be more than one Hub joined with the same ID, specify this by selecting the Hub ID that you wish to duplicate in the Joined Hubs display. Note that Hubs joined with duplicate IDs should not be used at the same time, as they will be indistinguishable from one another by the RFM. Duplicate IDs are allowed for the purpose of pre-configuring backup or alternate hardware. 14. When all Hubs have been joined, select Finished. Rev. D Getting Started – Configure RF Settings 18 JULY 2013 G4 USER MANUAL 15. After the Hub has been joined, select Update RF/USB Module Configuration Now to save the Joined Hub List back to the RFM. Select Skip to bypass this step. It is not functionally necessary for the Joined Hub list to be saved on the RFM; it is a ‘housekeeping’ convenience for the operator to recall this list. 4 16. The final step is to save the G RF Configuration to a .g4d file on the host computer. The name given to the configuration file is the RFM factory serial number. The location of the file may be selected by the operator. Select Save to proceed with saving the .g4d file. Select Skip to bypass this step. It is not 4 functionally necessary to preserve the G system RF configuration in a file; it is a housekeeping convenience for the operator. 4 17. G System RF Configuration is complete. Select Exit. Rev. D Getting Started – Configure RF Settings 19 JULY 2013 G4 USER MANUAL 3.4 SOURCE SETUP AND CONFIGURATION 4 Each G Source set includes a factory calibration file (.g4s) produced by Polhemus manufacturing. For 4 optimal performance in each installation, the G tracking engine requires this Source calibration data, as well as the location and attitude of each Source. Together this information describes the unique Source 4 configuration of the G installation. This data is provided to the G4Track Tracker Engine Software in a custom-compiled Source Configuration (.g4c) file. 4 The procedure for G Source installation, setup and generation of the Source Configuration (.g4c) file is detailed in this section. The procedure is detailed here using the Windows G4CreateSrcCfg and G4SrcOrientMeasApp utilities. The instructions below do not apply to the Linux utilities. On a Linux system, the CreateCfgFile utility is 4 used. However, a G Source Configuration (.g4c) created using the Windows utilities may be used 4 successfully on a Linux-hosted G system at runtime. See Section 5.2, page 44 for more information about 4 the Polhemus G utilities for Linux. 3.4.1 DEFINITIONS In the sections that follow, the following terms are used frequently. It is important to understand their meanings. Refer back to this section as you proceed with setting up your system. P&O. Position and Orientation. Cartesian position coordinates (x, y, z) of an object in three dimensions and Euler angle coordinates Azimuth, Elevation, and Roll (a, e, r) describing the attitude of the object. (Orientation may also be expressed as an Orientation Quaternion for mathematical disambiguation, but the discussions to follow in this manual will discuss orientation in terms of Euler angles exclusively.) Origin. The position where (x, y, z) equals (0,0,0). The origin is the point from which all positions are measured: Sensor positions calculated by the tracker are measured from the origin. Position of Sources installed in the tracking area is measured from the origin. The physical location of the origin in the 4 tracking area is selected by the human operator installing and setting up the G system. Frame of Reference. The position and orientation in physical space in which an object placed there would measure (0, 0, 0) in position and (0, 0, 0) in orientation. When speaking of the Frame of Reference, the positional Origin of (0,0,0) is usually implied. But the term may be used when discussing orientation 4 angles specifically. The Frame of Reference that the G system uses for measuring sensor P&O is established by the operator during setup. Also called “Reference Frame” or “Reference Location.” Virtual Frame of Reference. Same as Frame of Reference. This term is used specifically when the Frame 4 of Reference established during setup is a point outside of a physical G source. In the simplest system 4 demonstration in Section 3.4.3, a G source is used as the Frame of Reference, so that all measured P&O is relative to the center of that physical source cube. If a point in space outside of that cube is defined as the Frame of Reference, it may be referred to as a Virtual Frame of Reference. This scenario is explored in depth in APPENDIX A. XYZAER. Abbreviation for (x,y,z) position and (a,e,r) orientation coordinate inputs. Rev. D Getting Started –Source Setup and Configuration 20 JULY 2013 G4 USER MANUAL 3.4.2 SOURCE PLACEMENT 4 Refer to the following guidelines when installing G Sources: • • • • • • To minimize magnetic distortion (see inset below), secure Sources away from magnetic distorters. Mount Sources at least three (3) feet off the floor. 4 Use only nylon, fiberglass or stainless steel 302 screws. The G Source features mounting holes for attachment to fixed surfaces or a camera-style tripod. Do not mount Sources directly on metal surfaces. Sources should be arranged no more than 16 feet (4.88 m) apart. Do not place the power supply directly on the Source. About Magnetic Distortion and Floor Compensation 4 For best accuracy, it is recommended to use the G system in an environment that is free of large amounts of conductive metal. While it is often possible to move items such as metal desks, a common obstacle in many types of buildings is the structure of the floor. Rebar or corrugated steel can affect the 4 magnetic field generated by the G Source. Polhemus Engineers have approximated this effect and have developed compensation algorithms that have been shown to dramatically improve performance in many situations where the floor has been determined to be altering P&O data. If needed, these floor compensation algorithms are applied to the G4 system in the Source Configuration File (.g4c) based on the distance of the G4 Source from the floor. This process is detailed in Section 3.4.3, page 22. For more detailed information about magnetic distortion, refer to APPENDIX B. 3.4.2.1 S ELECT R EFERENCE L OCATION For proper measurement, first determine a reference location (origin) from which the position and orientation (P&O) of each Source will be measured. It does not matter where this location is, but it is important that the P&O of each Source in the system be measured accurately from this location. The reference location can be the actual location of one of the Sources in your installation. In such a scenario, all sensor P&O would be in reference to that Source. Note that the tracking frame of reference can be modified at runtime with the Translation and Rotation Frame Of Reference runtime parameters, which are described in Section 3.9.4. Details on how to apply these parameters at runtime with the PiMgr application or with custom software through the PDI or G4Track DLL are found in online help and other documentation accompanying those host software components. Rev. D Getting Started –Source Setup and Configuration 21 JULY 2013 G4 USER MANUAL 3.4.2.2 M EASURE CAREFULLY Carefully measure the position and orientation of each Source from the reference location. When measuring Source position, you are measuring the distance of the Electro-Magnetic (EM) center of the source from the reference location in 3 dimensions X, Y, and Z. Refer to Figure 4 for the location of the Source’s EM center. Use the most accurate means possible of measuring Source position. The orientation of the Sources in your installation can be measured with the help of the Source Orientation Measurement App (G4SrcOrientMeasApp). G4SrcOrientMeasApp can be run independently from your Windows Start Menu or as a step in the creation of your Source Configuration (.g4c) file. This process is detailed below and in APPENDIX A. , APPENDIX C. and APPENDIX D. 3.4.3 CREATE SOURCE CONFIGURATION FILE 4 In order to determine the Position and Orientation of each Sensor, the G Tracker requires information about (a) the placement and physical characteristics of Sources in the tracking area, and (b) the frame of 4 reference (or origin) from which P&O is measured. This information is provided at startup in a G Source Configuration (.g4c) file. On Windows, the .g4c file is created with the Create Source Configuration File (G4CreateSrcCfg) utility 4 that is automatically installed with the G Host Software (see G4 System Overview, page 1.) This section details the creation of the .g4c file using G4CreateSrcCfg. This procedure will configure the simplest possible setup: a single Source system in which P&O is referenced to the Source itself. For an example of a multi-Source system setup using a Virtual Frame of Reference (in which the frame of reference is not a physical Source) please see APPENDIX A. and APPENDIX D. 4 1. Start the G Source configuration file creation process by launching the G4CreateSrcCfg utility. A Windows shortcut to this utility is installed on the desktop. 2. Instructions for using the utility are listed at the top of the display. The screen displays fields for each possible 4 Source. A G system may employ up to eight (8) Sources. With this utility you will enable fields for each Source in your system, and then fill in the fields you enable. Rev. D Getting Started –Create Source Configuration File 22 JULY 2013 G4 USER MANUAL 3. Enable a Source. It does not matter which Source is first. For this demonstration, the first Source will be our single and only Source. 4. Set Measurement Units. The G4CreateSrcCfg utility defaults to measurements in Inches for position and degrees for orientation. If you will be using different units to express the measured position and orientation of your source(s), change the settings now. Note that if unit selections are changed after data is input into the XYZAER fields, the values in the fields are converted to the new units automatically. 5. Input XYZAER position and orientation measurements for the Source. In defining the position and orientation of the Source, we are establishing the Origin/Frame of Reference for the G system as a whole. 4 For this simple example, we set the origin to be the center of this Source and maintain the reference orientation to match its physical orientation. To do this, enter X,Y,Z as 0,0,0 and A,E,R as 0,0,0. By doing this, we are saying that the Source is positioned at (0,0,0) in the tracking area and oriented at 0 degrees in Azimuth, Elevation, and Roll. These values may be pasted in from another program such as notepad or the G4SrcOrientMeasApp. This is helpful in a multiple-Source installation. See the inset below or APPENDIX C. for more information. For a multiple Source example with the origin outside of the Source and the Sources turned, requiring a virtual frame of reference, see APPENDIX A. and APPENDIX D. Rev. D Getting Started –Create Source Configuration File 23 JULY 2013 G4 USER MANUAL G4SrcOrientMeasApp : For multi-Source installations and with sources mounted in various orientations, it may be confusing to determine the orientation of the Sources relative to the chosen frame of reference. In scenarios like 4 this, at this point it may be helpful to use the G Source Orientation Measurement utility to automatically 4 determine the orientation of the Sources. This application uses the G itself to detect and save the orientation of sources. G4SrcOrientMeasApp can be launched either from the Windows Start menu or directly from G4CreateSrcCfgFile. The Source orientation information gathered by G4SrcOrientMeasApp can then be pasted back into the XYZAER input fields in the G4CreateSrcCfg utility. See APPENDIX C. for details on using G4SrcOrientMeasApp. Rev. D Getting Started –Create Source Configuration File 24 JULY 2013 G4 USER MANUAL 6. Select the Source’s Startup Hemisphere. The startup hemisphere of a Source describes the direction with respect to that Source from which Sensors enter the tracking area or approach that Source. In this example, the startup hemisphere for the Source is +Y (POS Y) because tracked objects (Sensors) are going to enter the space (or be initially powered on) on the +Y side of the Source. Note: After power up, Sensor tracking is not confined to the +Y side of the Source. This is only a requirement for initial startup. See inset below. About Startup Hemisphere • At runtime, Sensors begin tracking by detecting the presence of the magnetic field produced by one or more Sources in the tracking area. Correct computation of the Sensor’s position relative to a detected Source depends upon prior knowledge about which side of the Source the Sensor is expected to be on when the Source is initially detected. (This moment of initial detection may occur dynamically, when a powered ON Hub and Sensor moves into the tracking area, or if the Hub is powered on when it is already in the tracking area.) • When Startup Hemisphere is not configured correctly, sign errors in calculated sensor position may result, or the sensor may appear to jump from one quadrant in the tracking area to another. • After the initial detection, the Sensor may pass above, below or around to any side of the Sources and the position will always be computed correctly. This behavior is known as “hemisphere tracking.” • When more than one Source is employed, the system will automatically align the Sensor to the correct P&O and hemisphere once the Sensor detects more than one Source. • In many circumstances, it is not practical to dictate from which side of a Source the Sensors will always begin tracking. In scenarios such as these, the placement of Sources is very important to the practicality and usability of the tracking area. Depending on what is being tracked, a solution to this problem might be to mount the Sources above the tracking area rather than around the perimeter or throughout. This allows tracked bodies to move freely about through the area and always on one side of the Source or Sources. 7. Select Floor Compensation level (if needed). Floor compensation is an optional feature to compensate for magnetic distortion caused by building floor structures. See the inset below. The Source in the sample setup is 3 feet above the floor. If Floor Compensation is desired, choose a level that is closest to the actual distance of the Source from the floor. Rev. D Getting Started –Create Source Configuration File 25 JULY 2013 G4 USER MANUAL Ideally, Sources would be mounted at 50- 75- or 100 cm above the floor if Floor Compensation is used. However, in our example the Source is assumed to be 3 feet (91.4 cm) above the floor, so the closest Floor Compensation level is 100 cm. 4 In an actual G installation, it may be necessary to experiment with different Floor Compensation levels, starting with None. About Floor Compensation 4 For best accuracy, it is recommended to use the G system in an environment that is free of large amounts of conductive metal. While it is often possible to move items such as metal desks, a common obstacle in many types 4 of buildings is the structure of the floor. Rebar or corrugated steel can affect the magnetic field generated by the G Source. Polhemus Engineers have approximated this effect and have developed compensation algorithms that have been shown to dramatically improve performance in many situations where the floor has been determined to be altering P&O data. Floor compensation algorithms are available for 50-, 75- and 100-cm distances from the floor. Not all rebar and floor materials are the same and floor compensation may or may not improve performance. For this reason, when applying Floor Compensation in your G4 installation, the best approach is to experiment with different levels, starting with None. For more detailed information about magnetic distortion, refer to APPENDIX B. 8. Load the calibration file for the Source by removing the Software Install CD and loading the Source Calibration CD. 4 Each G Source is calibrated during manufacture. The unique calibration data associated with each Source is provided on a CD-ROM accompanying the Source. In this step, the calibration file is selected and loaded into the G4CreateSrcCfg program. Rev. D Getting Started –Create Source Configuration File 26 JULY 2013 G4 USER MANUAL 4 9. Choose the G Source Calibration .g4s file that corresponds with the Source being configured. Each .g4s file is named with the serial number of 4 the G Source to which it applies. The serial number can be read from the label on the 4 bottom of the G Source. 10. When the Source Calibration file is loaded, the serial number is displayed, as well as the frequency ID of the Source. The Source’s configuration information is now complete. 11. The last step is to create and save the new .g4c file. Select the Save button and choose a name for the .g4c file that reflects the purpose of this Source configuration. Rev. D Getting Started –Create Source Configuration File 27 JULY 2013 G4 USER MANUAL 12. Exit the G4CreateSrcCfg program by selecting the Close button at the bottom of the display or the Window Close control. 13. Unplug Dongle. 14. Unplug Hub. 15. Power off Hub. 4 You have now created a custom source configuration file for your G setup, but the file is not yet being used. The file you have created will be employed at system startup in Section 3.6 ahead. Rev. D Getting Started –Create Source Configuration File 28 JULY 2013 G4 USER MANUAL 3.5 MAKE CONNECTIONS • • • Plug a single Source into an AC outlet and power on. Plug RF/USB Module (“RFM” or “Dongle”) into host PC USB port (if you have unplugged it). 4 Plug one or more Sensors into Sensor ports of G Hub. Start install of Sensors with Sensor Port 1. Hot Swapping Sensors If the GUI and the Hub are running in Continuous mode and you wish to add or remove a Sensor, stop continuous mode, add or remove the Sensor, and restart Continuous mode. • Power on Hub. Observe the blue signal strength LEDs display a power-up sequence of one long flash followed by two short flashes. Next, the Hub searches for an RF connection. The LEDs strobe while the Hub searches. When an RF connection is established the blue signal strength LEDs stop strobing and stay lit: more lit LEDs indicate a stronger RF signal. Experiment with signal strength by moving the Hub away from the RFM and observing a change in the signal strength indicators. 3.6 START A G4 TRACKING SESSION 4 Here is where all the setup and configuration comes together. Start a custom G tracking session using the Polhemus PiMgr and the Source Configuration (.g4c) you created in Section 3.4.3. 1. Launch the PiMgr application from the desktop shortcut. To employ the Source Configuration, the created .g4c file is supplied to the G4Track Tracker Engine Software at startup. For custom applications, the file path for the .g4c file is specified when starting the G4Track DLL. For experimentation and testing on Windows, apply the .g4c file created in Section 3.4.3 with the PiMgr application. Rev. D Getting Started –Make Connections 29 JULY 2013 G4 USER MANUAL 2. Open the Source Configuration dialog from the Device Menu. 4 3. The G Source Configuration dialog appears. Browse to the new .g4c file. 4. Open the .g4c file. Rev. D Getting Started –Start a G4 Tracking Session 30 JULY 2013 G4 USER MANUAL 5. Apply the .g4c file. 4 6. The G Tracker Engine Software reads the .g4c file upon startup. To apply the Source configuration, restart the 4 G. This may take several seconds to update. 4 7. When the PiMgr connection to G is re-established, the new Source Configuration .g4c file path is observed in the Status View pane. The configured Sources are depicted in the graphics pane. From this point forward, until a different .g4c is selected, PiMgr defaults to this new .g4c. 4 This .g4c may also be applied to G via a custom application using the PDI Software Development Kit. It is the responsibility of the application to employ the correct .g4c when 4 launching G . Rev. D Getting Started –Start a G4 Tracking Session 31 JULY 2013 G4 USER MANUAL 8. Collect a single P&O data frame 4 from G by selecting the Single Frame toolbar icon, or by typing “P”. The text pane at the top of the PiMgr screen displays the P&O of the active 4 G Sensors. The fields displayed there are: • • • • • • • • • • Hub ID Sensor Num Frame Count Digital Accessory State Position X Coordinate (Inches) Position Y Coordinate (Inches) Position Z Coordinate (Inches) Azimuth (Degrees) Elevation (Degrees) Roll (Degrees) 9. Collect continuous P&O frames by selecting the Toggle Continuous Mode toolbar button, or type “C”. Experiment with the P&O data. Move Sensors to known positions at known attitudes and verify the data displayed on the PiMgr screen and in the graphical display. Rev. D Getting Started –Start a G4 Tracking Session 32 JULY 2013 G4 USER MANUAL Two things to be aware of when viewing P&O data with PiMgr: • Point of View (POV). The default PiMgr POV uses tracker coordinates from the origin. In this example, the Source is located at (0,0,0) and so the POV also coincides with the Source. The PiMgr’s POV has the eye looking in the direction of Positive X (+X) from the Source. Positive Y (+Y) is to the right, and Positive Z (+Z) is down. The PiMgr POV can be manipulated using the controls on the Graphics Toolbar. Enable the graphics toolbar via the ViewToolbars menu. Refer to PiMgr online help for details about the use of this toolbar. • Display Update. The frame data displayed in the upper text portion of the PiMgr includes a frame count field. It is possible that data displayed in this text field may appear to ‘skip’ one or more frames. The reason for this is that PiMgr is NOT guaranteed to display every frame of data received from the tracker. PiMgr is designed to run cooperatively with other processes and applications running in the Windows operating system. Therefore, PiMgr renders graphics and displays frames only during system idle time. This generally produces no noticeable gaps in the animated graphics portion of the display, but it may be observed by studying the actual frame count data displayed in the text portion. Rev. D Getting Started –Start a G4 Tracking Session 33 JULY 2013 G4 USER MANUAL 3.7 USING DIGITAL ACCESSORIES 4 The G Hub’s digital accessory port allows up to eight (8) digital inputs to be collected and reported alongside P&O output. The state of these inputs is reported in the Digital Accessory State field of the PiMgr P&O record as a hexadecimal number. 3.7.1 PowerTRAK 360 When using the PowerTRAK 360, plug the connectors into Sensor Port 1, 2 or 3 and the Digital Accessory Port. The four buttons on the PowerTRAK 360 correspond to digital Inputs 1-4, represented by bits 0-3 in the Digital Accessory field of the P&O frame. The buttons can be pushed individually or in combination to produce 16 unique digital input states. In PiMgr, the digital accessory field appears in hexadecimal notation. The table below details the button states and their appearance in PiMgr. Button Pressed 1 2 3 4 1&2 1&3 1&4 2&3 2&4 3&4 1&2&3 1&2&4 1&3&4 2&3&4 1&2&3&4 Rev. D TABLE 1. POWERTRAK 360 BUTTON STATES Digital Accessory field 0000 0001 0000 0010 0000 0100 0000 1000 0000 0011 0000 0101 0000 1001 0000 0110 0000 1010 0000 1100 0000 0111 0000 1011 0000 1101 0000 1110 0000 1111 Getting Started –Using Digital Accessories PiMgr Display 0x0001 0x0002 0x0004 0x0008 0x0003 0x0005 0x0009 0x0006 0x000a 0x000c 0x0007 0x000b 0x000d 0x000e 0x000f 34 JULY 2013 G4 USER MANUAL 3.7.2 DIGITAL ACCESSORY CABLE AND CONNECTOR 4 For custom-made digital input applications, use the G Digital Accessory Cable Assembly. The input lines in this assembly are represented by bits 0-7 in the Digital Accessory field of the P&O frame. The digital inputs are pulled up in the hub through a 22K resistor to 3.3V. FIGURE 8. DIGITAL ACCESSORY CABLE WIRING DIAGRAM 3.8 RF RANGE 4 The G system utilizes a radio frequency (RF) data link that moves data between each active Hub and the RF/USB module in real time. The RF link can operate reliably up to 40-60 feet in optimal conditions. Various circumstances may affect performance such as environmental factors and other 2.4GHz RF devices. The proprietary protocol includes a pseudo-random frequency hopping pattern over 20 different frequency channels to ensure good coexistence with other devices in the 2.4GHz band. The RF/USB Module extension cable should always be used for optimum performance. 4 The RF data rate can accommodate 8 G Hubs and still maintain a 120Hz update rate per hub. If less than eight Hubs are active, the RF protocol implements multiple transmissions for the most robust performance. Whenever possible, maintain a clear line of sight between the RF/USB module and the Hub. An extension cable is provided to facilitate this. A Single-Hub system offers the highest reliability to avoid data frame drops. As additional Hubs are added to the system, random data frame drops can occur. Rev. D Getting Started –Using Digital Accessories 35 JULY 2013 G4 USER MANUAL 3.9 RUNTIME TRACKING PARAMETERS 4 All tracker parameters are runtime settings only. Settings must be re-applied each time the G session is started in the PiMgr or a custom application. The application of tracking parameters varies in scope. Table 2 summarizes the scope of these parameters. Some parameters can be applied to Hubs and Sensors that are not yet detected by the tracking engine. 4 The purpose of this section is to describe the configurable features of G tracking. Details on how to apply these parameters at runtime with the PiMgr application or with custom software through the PDI or G4Track DLL are found in the reference documentation and online help accompanying those host software components. TABLE 2. RUNTIME TRACKING PARAMETER SCOPE PARAMETER Filters Boresight Increment, auto-increment Frame of reference Tip Offset Units of measure SCOPE Applied per-Hub or for all Hubs in system. Applied per Sensor or for all detected Hubs and Sensors in system. Applied per Sensor or for all Hubs and Sensors in system. Affects entire system. Not Hub- or Sensor-specific. Applied per Sensor or for all Hubs and Sensors in system. Affects entire system. Not Hub- or Sensor-specific. 3.9.1 FILTERS 4 The G tracking engine contains an adaptive filter that is designed to control noise (jitter) in the data output. The filter can be applied to position or orientation or both. It may be applied on a per-Hub basis or for all Hubs in the system. With heavy filtering, P&O data may appear to have a slightly slower dynamic response, even though the data are transferred at the normal rate of 120 frames per second. Default setting is Heavy. About Polhemus Filters 4 The filter used by G is a single-pole, low-pass filter with an adaptive pole location. The pole location is constrained within user-specified boundary values FLow and FHigh but is continuously self-adaptive between these limits as a function of a user-specified sensitivity parameter F and the sensed input conditions (ambient noise plus rotational rate). For input “rate” conditions that fall within the adaptive range, the adaptive feature varies the pole location between the FLow and FHigh limits to maximize the output resolution for static inputs while minimizing the output lag for dynamic inputs. Whenever the input conditions cause the filter to make a transition to a narrower bandwidth (i.e., increased filtering), the transition rate of the pole location is constrained to a user-specified maximum allowable rate. Rev. D Getting Started –Runtime Tracking Parameters 36 JULY 2013 G4 USER MANUAL 4 G filtering is controlled by the adjustment of four parameters: boundary values Flow and Fhigh, 4 Sensitivity F, and a Maximum Transition Rate. To simplify the use of G Filtering at the user level, the Polhemus PiMgr application (Windows) uses application-level filtering presets defined in Table 3. FILTER PRESET Light Medium Heavy SENSITIVITY (F) 0.2 0.05 0.02 TABLE 3: PIMGR FILTER PRESETS FOR G4 BOUNDARY( FLOW) 0.2 0.05 0.02 BOUNDARY (FHIGH) 0.8 0.8 0.8 MAX TRANSITION RATE 0.95 0.95 0.95 The default position and orientation filter setting for all Hubs is Heavy. 3.9.2 BORESIGHT Boresighting causes one or more Sensors to be mathematically aligned in orientation with user system coordinates, regardless of the physical orientation of the Sensor. The effect of boresighting a Sensor is that orientation outputs for the Sensor will equal the specified boresight reference angles at the current physical orientation of the Sensor hardware. 4 Boresight reference angles may be specified in all orientation units of measure supported by the G interface. See Section 3.9.6 to review the supported units of measure. Boresight reference orientation may be applied to any active Sensor or to all Sensors in the system. 4 Sensors that are not detected by the G tracking engine cannot be boresighted. Sensor boresighting can be reset (undone) at any time. 3.9.3 INCREMENT AND AUTO-INCREMENT Position and orientation data output for any Sensor or collection of Sensors can be configured to be updated only when a specified delta threshold has been exceeded. When position and/or orientation increment is applied, P&O data are reported in a continuous stream as usual but do not change unless the change is greater than the increment threshold. Position data for each axis changes only when the position threshold has been exceeded on that axis, and only that axis’ position changes. Orientation changes when the total rotation vector changes by the attitude threshold. 4 The G tracking engine may be configured to operate in Auto-Increment mode. In this mode, new P&O data are reported only when changes in the position and/or orientation data have satisfied internal predefined criteria. The criteria are dynamic, depending on electromagnetic (EM) signal strength and noise values. The effect of auto-increment is virtual jitter-free performance with coarse resolution at large separation distances. 4 Increment threshold values applied to G are expressed in the unit of measure configured for P&O output. See Section 3.9.6 to review the supported units of measure. 3.9.4 FRAME OF REFERENCE 4 A rotation and/or translation frame of reference can be applied to G P&O data output as a whole. Frame 4 of reference may be specified in all units of measure supported by the G interface. See Section 3.9.6 below. Rev. D Getting Started –Runtime Tracking Parameters 37 JULY 2013 G4 USER MANUAL 3.9.5 TIP OFFSET 4 The tip offset parameter is a means of causing the G tracking engine to produce P&O for a point other than the electromagnetic (EM) center of a Sensor. This is useful when a Sensor is mounted on an instrument. In this type of scenario, the P&O of the tip of the instrument is of interest, not the P&O of the 4 Sensor itself. The tip offset is applied to G as a floating-point 3-tuple describing the location of the ‘tip’ with respect to the Sensor. The tip offset is specified in any position unit of measure (see Section 3.9.6) 4 supported by the G interface. Tip offset can be applied to any or all Sensors. 3.9.6 P&O OUTPUT UNITS OF MEASURE 4 For expressing position in Cartesian coordinates, G supports the following units of measure: • Inches (Default) • Feet • Centimeters • Meters Orientation may be expressed as: • Euler Angles, Degrees (Default) • Euler Angles, Radians • Orientation Quaternion 4 Units of measure parameters are applied to all G P&O output. Certain other runtime parameters expressed as position coordinates or orientation (Boresight, Increment, Frame Of Reference, Tip Offset) may be applied in units other than configured P&O units. Doing so does not change the current setting of the P&O output units of measure. Rev. D Getting Started –Runtime Tracking Parameters 38 JULY 2013 G4 USER MANUAL 4. TROUBLESHOOTING 4 The Polhemus G tracker is supported by a variety of management utilities and tools for setup and data collection on the Windows platform. 4.1 INSTALLATION ON WINDOWS VISTA, WIN7 AND WIN8 On Windows Vista, Windows 7 and Windows 8 systems, Windows User Account Control (UAC) may prevent the install from starting. An error box like the one below appears. 4 If this happens, proceed with the following steps to run the G Host Installation as Administrator: Select OK to exit the error window. 4 Select Exit to end the G Host Software Installation. Right-click the Setup program on the CD and select Run as Administrator from the menu. Rev. D Troubleshooting 39 JULY 2013 G4 USER MANUAL 4.2 .NET 3.5 INSTALLATION ON WINDOWS VISTA AND WINDOWS XP 4 The G Setup Utilities requires that Microsoft .NET 3.5 be installed on the host computer. Windows 7 and later already includes .NET 3.5. However, Windows XP and Vista systems that do not already have it require .NET 3.5 to be installed 4 before the G Setup Utilities installation can continue. The .NET installation begins automatically, and requires a system restart upon completion. 4 When the restart is completed, the G Setup Utilities installation resumes. You may choose to restart your PC immediately or you may postpone the restart. Either approach is acceptable, but the PC must be restarted before continuing. 1. If Microsoft .NET 3.5 is not present on the installing 4 computer, it is installed after G Drivers are installed. Select Accept to allow the installation .NET 3.5 to continue. Progress windows appear as the installation proceeds: 2. When .NET 3.5 installation is complete, the system must be restarted.There may be multiple windows requesting permission to restart. The system may be restarted immediately by selecting Yes or Restart Now, or the restart may be postponed by selecting No or Postpone. Either option is fine. If you choose to restart immediately, refer to Section 3.3 (see page 14). Rev. D Troubleshooting 40 JULY 2013 G4 USER MANUAL 3. If you choose to Postpone, restart manually via the Windows start button: 4. When the restart has completed, the G Setup Utilities installation will resume: 5. Continue G setup with as per Section 3.3 Configure RF Setting (see page 14). 4 4 4.3 ADDITIONAL HELP Problem Solutions and Workarounds 1. P&O data reported is all zeros, or ’90.0 -0.00 90.00’ in orientation. Make sure Source(s) are powered on. Rev. D Make sure Hub/Sensor is in range of configured Source(s). Troubleshooting 41 JULY 2013 G4 USER MANUAL 2. Hubs that are no longer active appear in PiMgr graphics and Status views. (And in the G4Track Active Hub Map.) RFM discovers new Hubs continuously and reports them in the Active Hub Map. Criteria are not yet established for ‘aging’ inactive Hubs out of the Active Hub Map. Start Hub installs with Sensor Port 1. Solution: As of version 1.0.4, the only way to clear the Active Hub Map of ‘old’ Hubs is to stop the G4Track DLL and reset the RF module by unplugging it. If using the PiMgr, quit and restart the PiMgr as well: 1. 2. 3. 4. 5. 6. Shut down PiMgr Turn off Hub(s). Unplug RF module from USB port. Plug RF module back into USB port. Turn on Hub(s). Restart PiMgr. Workaround: P&O data never includes inactive Hub data. Using assumptions appropriate to the end-user application, it is possible to develop logic to ignore Hubs in the Active Hub Map based on Hubs reporting P&O. 3. Hub does not appear in Active Hub Map and does not produce P&O. Make sure that the Hub is powered ON and that the battery is not depleted. Make sure that the Hub is joined with the RF module. See Section 3.3. 4. Hub does not complete the full startup LED flash sequence. The Hub battery may be depleted. Recharge the unit. 5. Hub strobes continuously, never discovers RFM. Solutions: Make sure Hub and RF module have been joined properly with the RF Setup Utility (Section 322.) Make sure RF module is seated properly in USB port and end LED is illuminated. Make sure Hub is within RF range of the RF module. Make sure other RF devices are not interfering. Workaround: If the RF environment prohibits wireless connection with the Hub, plug the Hub directly into the PC. Caveat: You can only run one Hub at a time this way. Rev. D Troubleshooting 42 JULY 2013 G4 USER MANUAL 6. RF link only works at very short distances. Solutions: Be sure to use the extension cable on the RFM. Position the RFM in an unobstructed area. The RF signal should have objects to reflect off of for good performance when human body blocks the Hub from the RFM. Make sure that there are walls and/or ceilings to provide this reflection. 7. P&O is incorrect, especially in Z, elevation and/or roll as Sensors move away from Source, and Source is near the floor. Distortion from rebar or steel-reinforced flooring may be affecting accuracy. Solutions: Raise Source higher off floor, or Add Floor Compensation to Source Configuration (.g4c) 8. P&O data is missing, frames are dropped, etc. Determine if the problem is occurring on the Host PC or in the tracking electronics. To eliminate the Host PC as the problem, make sure no other Source-intensive applications are running on the PC. Disable graphical display or real-time processing of the data if possible. If the PC is not the problem, verify that the RF environment is not causing frame drops and retries. Reposition the RFM antenna by using the USB extension cable to move the RFM away from the PC and/or other RF shields. Bring the Hub in close to the RFM and, or plug the Hub directly to the PC. 9. Random non-existent Hub IDs appear in Active Hub Map. Rev. D RF collisions may have caused an erroneous Hub ‘discovery.’ The invalid Hub will not produce P&O data, but will appear in the Hub map. To clean the Hub map, see Step 2 (above). Troubleshooting 43 JULY 2013 G4 USER MANUAL 5. PROGRAMMING AND ALTERNATE PLATFORMS 5.1 WINDOWS 4 Like all the Polhemus trackers, the Polhemus G is accompanied by the comprehensive Polhemus Developer Interface (PDI) SDK and programming APIs for Windows. These tools are installed automatically 4 by the G Host Software CD installer, along with the management and configuration utilities. For programming reference, please refer to Online Help and sample code projects included in the SDKs for all supported platforms. 5.2 LINUX 4 The Polhemus G set also includes a software toolkit for Linux. The Linux kit is found on the Host Software 4 CD that accompanies a new G system. It contains the following: 4 G4Track_lib_dist APIs: • • • G4Track library to manage G SrcCfgLib library used to create .g4c files MAN pages for all libraries Setup Utilities: • • G4DevCfg Hub-RFM pairing application CreateCfgFile .g4c creation application (open source) User Applications: • • G4Term console/terminal application (open source) G4Display graphical UI application (open source) The Linux toolkit does not include a USB driver. It depends on the public Linux libusb-1.0 and SDL libraries which are available for download online. 4 To install the Linux tools, find the G4_Linux.tar.gz archive file on the G Host Software CD and extract it onto a Linux system. 4 Please refer to the MAN pages and README files included in the toolkit for more Polhemus G Linux documentation. Rev. D Programming and Alternate Platforms 44 JULY 2013 G4 USER MANUAL APPENDIX A. Source Configuration This Appendix examines in detail the discovery and configuration of the Position and Orientation (P&O) and 4 Hemisphere values for Sources in hypothetical one- and two-Source G system installations. These values would be input into the G4CreateSrcCfg utility during the setup of these systems. 1. EXAMPLE 1 – SINGLE SOURCE SETUP Setting up the Source Configuration file can be simple for a single Source system. In the simplest case the origin (the point (0,0,0) where X, Y, and Z are zero) and the reference frame (the directions of the X, Y, and Z axes) are aligned with a single physical Source. To use this default scenario, enter X,Y,Z as 0,0,0 and A,E,R as 0,0,0 in the XYZAER fields of the CreateSrcCfgFile utility. With this set of numbers the system will calculate Sensor position from the center of the source cube, and it will calculate Sensor orientation relative to the Source’s reference frame described by the markings on the Source shell. Moving the Origin Alternately, the origin could be mathematically translated to a virtual point that is not in the center of the 4 physical Source. For example, you may want G to report 0 in X and Y at a new origin point in space 12 inches in front (+X) of the physical Source and 24 inches to the right (+Y) of the physical Source. When a Sensor is placed at that point it will report a position of (0,0,0). To do this, you measure from the origin to the Source and enter (-12,-24,0) for X,Y,Z. For this example you want the sensor orientation to remain relative to the Source’s reference frame so you leave 0,0,0 for A,E,R. Rev. D A-1 JULY 2013 G4 USER MANUAL 2. EXAMPLE 2 – DUAL SOURCE SETUP For a multiple Source system the setup process can become confusing because there is greater flexibility (both physically and virtually) in setting up the system. 4 The G system offers huge flexibility for tracking over large areas by referencing multiple Sources placed around the area to be tracked. This keeps a strong magnetic signal that will always be available to the Sensors within the tracked area and allows for shaping the area of coverage (such as a long narrow area, a rectangular area, or an L-shaped area.). The system is similar to a cell phone system in that the Sensors (cell phones) listen to the closest Sources (cell towers)—as the Sensors move out of one Source’s area of coverage they move into 4 another’s coverage. The G software keeps track of this geometry and reports the Sensors’ P&O within the coverage space. In order to report the P&O data, a frame of reference needs to be established by the user. In this example two Sources are set 10 feet (120 inches) apart on a stage 10 feet wide by 20 feet long. One Source (frequency A) is located on a pedestal 4 feet (48 inches) tall, placed 5 feet (60 inches) left of center stage and another Source (frequency B) is located on a similar pedestal 5 feet to the right of center stage. Both Sources are 10 feet back from the front of the stage and they are mounted on the pedestal with the mounting screw holes down and the power switch is toward the rear of the stage. In this example, the frame of reference for P&O will be defined as follows: the horizontal axis of the stage is to be the X direction, the vertical axis is to be the Y direction, and the front-to-rear axis is to be the Z axis, as in a traditional graphics coordinate frame. Center stage will be Zero X, the floor will be Zero Y, and the Zero Z plane will be 7 feet (84 inches) from the front of the stage. To understand this frame of reference, use a Right Hand Rule. The pointing finger is the +Z Axis, the thumb is the +Y Axis and the middle finger is the +X Axis: Rev. D A-1 JULY 2013 G4 USER MANUAL Standing on the stage and facing the audience, using your right hand to match the desired output reference frame, +Z (pointing finger) will be pointing at the audience, +Y (thumb) will be pointing up and +X (third finger) will be pointing left. This sets a virtual frame of reference (VFR) that is not only translated but also rotated from all of the actual 4 physical Sources. To calculate correct P&O in this new VFR, the G needs to know the position and orientation of each Source relative to the VFR. Measure Source Position Determining the position of each Source relative to the VFR is straightforward. Using the Bird’s Eye View above we see that: Source A position is physically translated from the origin/VFR by X=-60, Y=+48 and Z=-36. Source B position is physically translated from the origin/VFR by X=+60, Y=+48 and Z=-36. The key question to answer here is “How far is the Source FROM the origin?” Always measure source position FROM the origin/VFR TO the Source. Do NOT measure from the Source to the VFR! Measure Source Orientation Note: The discussion that follows is a detailed examination of how to determine a Source’s orientation referenced to a Virtual Frame of Reference. It is important to have a general idea about how these angles are calculated, and Polhemus recommends studying the process below. In large systems with several Sources or with a different Virtual Frame of Reference than the hypothetical system used here, it may be preferable and less error-prone to use Polhemus’ automated method with the G4SrcOrientMeasApp. This method is detailed in APPENDIX C. The orientation of each Source relative to the VFR is arrived at by calculating (in order) the azimuth, elevation and roll rotations needed to apply to the VFR to equal each physical Source’s native frame of reference. Rev. D A-2 JULY 2013 G4 USER MANUAL Definitions – Rotations in the Source’s Frame of Reference Positive Azimuth Rotation Positive Elevation Rotation Positive Roll Rotation A rotation from the +X-axis toward the +Y axis around the Zaxis A rotation from the +Z axis toward the +X axis around the Yaxis. A rotation from the +Y axis toward the +Z axis around the Xaxis. These rotations must be applied in the frame of reference that we are working in. That is, we apply (in order) azimuth, elevation and roll rotations in the new VFR: Source A Look carefully at the Source A Frame of Reference below and determine the relationship between the X, Y, Z axes with the X, Y, Z axes of the VFR: Rev. D A-3 JULY 2013 G4 USER MANUAL 1. Rotate in Azimuth By superimposing the axes of the two coordinate systems together, we see that the Y-axis of the VFR (in gray) can be rotated 90 degrees to align with the Y-axis of Source A (black). Remember that the rotation must occur in the VFR coordinate system. The rotation we require is a 90 degree rotation from the Y-axis to the negative X-axis (Y-X) of the VFR coordinate system. From the definitions above we know that a rotation from the positive X-axis to the Y-axis (XY) is positive rotation in azimuth. This is equivalent to the rotation we want here: a 90 degree rotation in azimuth (-90° Az). The entire VFR is rotated 90 degrees in Azimuth. The result of this rotation in Elevation in the VFR: 2. Rotate in Elevation Superimpose again. Now it can be seen that the X-axis of the VFR can be rotated 90 degrees to align with the X-axis of Source A. In the VFR coordinate system, this is a rotation from the X-axis to the Z-axis. A rotation from the Z-axis to the X-axis is a positive rotation in elevation. Therefore the rotation we want here is a negative 90 degree rotation in elevation (-90° El). This final rotation aligns the VFR with the Source A frame of reference: Rev. D A-4 JULY 2013 G4 USER MANUAL The sum of these rotations is azimuth, elevation and roll of (90, -90, 0) Source B Refer again to the Birds-Eye View above. In our setup, Source B is physically oriented the same as Source A, so the orientation of Source B in the VFR is the same as that of Source A. The final Source Position and Orientation values are: Rev. D A-5 JULY 2013 G4 USER MANUAL Note: The process described above arrives at the Source A orientation by first determining the Azimuth rotation and then the Elevation rotation. No Roll rotation was required in this example. However, the resulting orientation of (90, -90, 0) is not the only solution! There is another equally valid Source Orientation that could be used here. In general, it is best to start the rotation process with an Azimuth rotation as we did in this solution. However, if there is no Azimuth rotation, one could start with Elevation. If we do that with this hypothetical Source A orientation, the process proceeds like this: The resulting orientation using this approach is (0, -90, 90), which is equivalent our previous result of (90, -90, 0). In this hypothetical system, either could be used successfully as inputs to the CreateSrcCfgFile utility. This dual solution a result of the ambiguity of Euler Angles at cardinal angles. More often this ambiguity may be encountered when tracking P&O in Euler Angle units, and in those cases the use of Quaternion orientation will eliminate the problem. It is not practical or intuitive to use Quaternions in a tutorial example of this nature and so we chose to use a method more instructive of the concepts herein. This ambiguity and complexity can be avoided in most cases by employing the G4SrcOrientMeasApp utility described in APPENDIX C. Rev. D A-6 JULY 2013 G4 USER MANUAL 3. HEMISPHERES 4 As with other magnetic trackers, G computes position with two possible answers due to the symmetry of magnetic fields; these answers are equal and opposite to each other. Obviously only one answer is correct, so the system requires definition of which hemisphere is correct at the start of tracking; from that point on, the system will keep track of the hemisphere and produce the correct answer. 4 G will automatically figure out the correct hemispheres when there is more than one Source configured 4 and in use. However, in order to do this G needs to sense at least two Sources. It may not always be the 4 case that upon initial entry into a tracking space multiple Sources are within range of the Sensor, so G may momentarily self-select the wrong hemisphere until it senses another Source; once found, the hemisphere ambiguity is resolved automatically. The starting hemisphere selection in the CreateSrcCfgFile utility is offered to eliminate the confusion time for multi-Source setups and is important for a single Source setup. The starting hemisphere selection is relative to each individual Source. Use the markings on the Source shell to determine which hemisphere of coverage the Sensor will be in at startup. Once the system starts in the indicated hemisphere, all hemispheres are automatically tracked for total freedom of movement. In the stage example above, at initial startup (before the VFR has been mathematically recalculated by 4 G ), when tracking a user’s head, entry into the tracking area would always be above the Sources on the pedestal, so the –Z starting hemisphere would be selected for each Source. This would produce nonambiguous tracking from the start (no auto-correction would occur). If a starting hemisphere cannot be defined, use the best guess and let the system resolve the hemispheres automatically, but realize that there can be a short period of time required before the hemisphere is resolved. Rev. D A-7 JULY 2013 G4 USER MANUAL APPENDIX B. Understanding Distortion 4 The AC magnetic tracking technology employed by G and by other Polhemus trackers is based on the 4 presence of a magnetic dipole field created by a closed loop of electric current. G Sources produce these dipoles on three axes, and Sensors detect them on three axes. In an ideal benign environment, the dipole fields produced by the Source behave predictably according to theoretical models, and position and orientation (P&O) solutions can be found with a high degree of accuracy. However, the theoretical dipole behavior may be disrupted by the presence of magnetic distortion in the tracking environment. There are two kinds of magnetic distortion that are explained by material physics: eddy current distortion and permeability distortion. In practice, AC magnetic tracking technology is usually more susceptible to eddy current distortion. Eddy current distortion is created by the presentation of large loops of conductive material (e.g., a window frame made of conductive material or a sheet of highly conductive metal, such as aluminum, copper or silver). The conductive loop tends to create a magnetic field (B). To counteract this unstable condition, the material supports small, closed-loop electronic eddy currents that produce a reverse magnetic field to counteract B. In situations where eddy currents are strong enough, they might distort the pure dipole produced by the Source by combining with it. The extent of the effect of magnetic distortion depends on the material, its size and shape, and its proximity to the Source-Sensor field path. Polhemus has found that the effects of eddy current distortion on P&O measurement can be eliminated by placing large eddy current distorters away from the SourceSensor field lines on the order of three times the distance between Source and Sensor (p>3d); often the effects are negligible at a distance of 1d–2d, depending on the size of the distorter. FIGURE 9. COMPONENT PLACEMENT FOR EDDY CURRENT ELIMINATION Polhemus finds that in the majority of cases consideration of the above guidelines results in a successful implementation. Magnetic permeability distortion is produced by ferromagnetic materials such as iron, nickel or cobalt. These materials exhibit strong attraction to one another and are easily magnetized. Electrons in these materials act as tiny electromagnets, aligning themselves so that their magnetic fields reinforce one Rev. D B-1 JULY 2013 G4 USER MANUAL another. When the fields produced by magnetic tracker electronics come near a ferromagnetic material, the dipole field geometry is distorted by the tendency of the field to couple with the ferromagnetic field. AC magnetic tracking technology is not immune to this type of distortion, but circumstances that produce it are very rare in practice. To cause magnetic permeability distortion, would require an unusual circumstance such as placing the magnetic material directly on the sensor. Rev. D B-2 JULY 2013 G4 USER MANUAL APPENDIX C. Using the G4 Source Orientation Measurement App (Windows) 4 One of the two fundamental operations in setting up a G System is to create the Source Configuration 4 File (.g4c) that identifies the location, orientation and calibration data of the sources in the G installation. This operation is performed by using the Create Source Configuration File utility (CreateSrcCfgFile): Manually enable and input each Source’s Position and Orientation, load a unique Source Calibration File (.g4s), configure the Startup Hemisphere and select an optional Floor Compensation setting. 4 When there are multiple G Sources installed, it can be confusing to figure out the correct orientation to apply for each source, relative to the overall system frame of reference. This is especially true if the Sources are mounted at different orientations from one another. (APPENDIX A. provides a good example 4 of this.) To make this task easier, Polhemus has developed the G Source Orientation Measurement App for Windows (G4SrcOrientMeasApp). This app can be launched directly from the CreateSrcCfgFile utility, right when you need it. With the G4SrcOrientMeasApp, you can detect and save the orientation of all 4 installed sources using the G itself. In addition, CreateSrcCfgFile allows you to input the Source P&O measurements all at one time with a single “paste” operation. How it works 4 After connecting to the G , the task of G4SrcOrientMeasApp is to determine the orientation of each Source in the installation. It uses Sensor 1 to do this. You will move the Sensor around your installation, approaching each Source. As you move the Sensor around, the app will tell you when the Sensor is too close or too far away from a Source. When a Source is detected, the app will tell you that it is “Ready To Measure,” at which time you will click a button to take the measurement and move on to the next Source. The measurements can be saved to a text file or to the Windows clipboard. If you save to the clipboard then you can go back to the CreateSrcCfgFile utility and paste the measurements directly into the program in one operation. If you save the measurements to a text file, you can then edit the text file by adding the Position information for each Source. Then copy the entire contents of the file and paste it directly into the CreateSrcCfgFile XYZAER fields in one paste operation. Preparation The instructions that follow will familiarize you with the process of using the default features of the G4SrcOrientMeasApp. Rev. D C-1 JULY 2013 G4 USER MANUAL • • To get started, you should already have the Dongle and one Hub paired using the G4SystemSetup utility. • There should be a sensor plugged in to the Sensor 1 position on the Hub. • If you have a PowerTrak360, plug that in too. It can be used as the Sensor 1 position (above), but this is not a requirement; it may also be used as an addition to a standard Sensor plugged into the Sensor 1 position. Your source(s) should already be mounted in your tracking area, aligned with the X, Y, and Z axes of the desired frame of reference. IMPORTANT Note: This utility will detect source orientation to the nearest 90°. If the sources in your installation are not aligned on the axes, you will not get precise measurements. However, it may be possible to use these measurements to find the correct quadrant. Then you would need to do manual fine-tuning of the measurements to your actual source orientation. Rev. D C-2 JULY 2013 G4 USER MANUAL Rev. D C-3 • Next, launch the CreateSrcCfgFile utility. • Select the desired Position Units (inches/cm/feet/meters) and Orientation Units (degrees/radians/quaternion). • Start the G4SrcOrientMeasApp by clicking on the big square button on the lower right. JULY 2013 G4 USER MANUAL G4SrcOrientMeasApp – Step By Step 1. 4 Connect to G . When a connection has been established, the status message changes from Not Connected to Connected. Rev. D C-4 JULY 2013 G4 USER MANUAL 2. Review Orientation Units. These fields already contain the Orientation Units that you selected previously in CreateSrcCfgFile. Note: When you change the Orientation units, only measurements taken subsequently will be saved in the new units. Measurements already saved to the clipboard or to a file cannot be converted to the new units. If you have already taken several measurements and you wish to change orientation units, the best course of action is to either: Start over by clearing the Clipboard (step 3 below) or Continue collecting source orientation measurements in the current units. Later, after you paste all of the measurements into the CreateSrcCfgFile program, you can change the units of all the measurements in that program. Just be sure that when you paste the measurements that the Units setting in the CreateSrcCfgFile program is set to the units that the measurements were collected in with G4SrcOrientMeasApp. 3. Review Save Options. By default, measurements will be saved to the Windows Clipboard. At any time you can Clear the Clipboard or View the measurements that you have collected. Rev. D C-5 JULY 2013 G4 USER MANUAL 4. Position Sensor 1 in alignment with the desired system Frame of Reference. The orientation of your sensor is very important. It must be oriented in alignment with the desired system frame of reference that you are now configuring: a. b. The +X direction of Sensor 1 should be aligned with the +X direction of the desired system frame of reference. The bottom of Sensor 1 should point in the +Z direction of the desired system frame of reference. Rev. D C-6 JULY 2013 G4 USER MANUAL Example: 4 Recall the hypothetical dual-Source G system setup described in APPENDIX A. Sensor 1 should be oriented in alignment with the virtual frame of reference: Rev. D C-7 JULY 2013 G4 USER MANUAL 5. Move Sensor 1 toward a Source. Move toward a Source from any direction. While you are too close or too far away from a Source, messages will be displayed in red telling you to get closer or move away. A Ready To Measure message will appear when your distance from the Source is just right. 6. Measure when Ready. When the green Ready To Measure message is displayed, save the measurement by clicking on the Measure Source Orientation button. This may require the help of another person to click the button while you position the Sensor near the Source. Note: If you have a PowerTrak360 connected to the hub, you can take the measurement remotely by clicking on any button on the PowerTrak360. Rev. D C-8 JULY 2013 G4 USER MANUAL 7. Repeat Steps 5 and 6 with the rest of the installed Sources. If you wish to review the measurements you have already taken, click on the “View..” button in the Save Measurements To box. If you wish to start over, click on the “Clear” button next to the Clipboard option. Rev. D C-9 JULY 2013 G4 USER MANUAL 8. Paste the collected measurements. In CreateSrcCfgFile, enable a Source, then hover your mouse over the first Orientation field. A Tooltip appears, indicating that you can paste source orientation data there. Right-click and select Paste. All of the measured source orientations in the clipboard are pasted into the correct fields and enabled. Note: In order for the Paste operation to work, the source measurements must be in the Windows Clipboard memory: Take care to go directly from the G4SrcOrientMeasApp to the CreateSrcCfgFile without doing any Windows copy operations that would overwrite the Clipboard. Rev. D C-10 JULY 2013 G4 USER MANUAL 9. Continue your .g4c file creation as usual. Measure Source Positions. Select the Startup Hemisphere and Floor Compensation. Load the Calibration File. Save the .g4c. 4 Don’t forget to close the G4SrcOrientMeasApp that is still running with an active G connection. Note: It is possible to paste ALL source measurements (position and orientation) into the CreateSrcCfgFile program at one time. To do this, Select Save Measurements to File when you start G4SrcOrientMeasApp (step 3). Then after you have collected all of the Source Orientation measurements, open the file you saved with a text editor and type in the position measurements for each source. Then copy the text contents of the file and paste into the first X position field in CreateSrcCfgFile. Now all Source position and orientation measurements are pasted in at once. Rev. D C-11 JULY 2013 G4 USER MANUAL APPENDIX D. Another Two-Source Setup and Sample Configuration 4 Each G Source set includes a factory calibration file (.g4s) produced by Polhemus manufacturing. For 4 optimal performance in each installation, the G tracking engine requires this Source calibration data, as well as the location and attitude of each Source. Together this information describes the unique Source 4 configuration of the G installation. This data is provided to the Tracker Engine Software in a customcompiled Source Configuration (.g4c) file. 4 The procedure for G Source installation, setup and generation of the Source Configuration (.g4c) file is detailed in this section. The Sources in this system are mounted facing each other three (3) feet off the floor and seven (7) feet apart. (The measurements shown in these diagrams are in inches.) The tracked objects (upon which Hubs/Sensors are mounted) enter the tracking area from the direction depicted. FIGURE 10. SAMPLE SOURCE SETUP, BIRD’S EYE PERSPECTIVE FIGURE 11. SAMPLE SOURCE SETUP, EYE-LEVEL PERSPECTIVE PLACEMENT When arranging one or more Sources in a tracking area, keep the following in mind: 4 G performance is best when Sensors are within 2 to 6 feet (0.6 to 1.83 m) of a Source but not closer than 4 inches (10 cm). Sources should be arranged and mounted no more than 16 feet (4.88 m) apart. The tracking area can be expanded by installing more Sources and placing them strategically. To minimize magnetic distortion (see inset below), secure Sources at least three (3) feet off the floor to 4 non-metallic surfaces with nylon, fiberglass or stainless steel 302 screws. The G Source features mounting holes for attachment to fixed surfaces. Do not place the power supply directly on the Source. Rev. D D-1 JULY 2013 G4 USER MANUAL About Magnetic Distortion and Floor Compensation 4 For best accuracy, it is recommended to use the G system in an environment that is free of large amounts of conductive metal. While it is often possible to move items such as metal desks, a common obstacle in many types of buildings is the structure of the floor. Rebar or corrugated steel can affect the 4 magnetic field generated by the G Source. Polhemus Engineers have approximated this effect and have developed compensation algorithms that have been shown to dramatically improve performance in many situations where the floor has been determined to be altering P&O data. If needed, these floor compensation algorithms are applied to the G4 system in the Source Configuration File (.g4c) based on the distance of the G4 Source from the floor. This process is detailed in Section 3.4. For more detailed information about magnetic distortion, refer to APPENDIX B. For more detailed information about magnetic distortion, refer to the POLHEMUS G SYSTEM MANUAL. 4 SELECT FRAME OF REFERENCE For correct motion tracking, the fixed P&O of the Sources in the tracking area must be measured and 4 input to G at runtime. For proper measurement, first determine a reference location from which the position and orientation of each Source will be measured. It does not matter where this location is, but it is important that the P&O of each Source in the system be measured accurately from this location. In this example, the reference orientation, the Virtual Frame of Reference The reference point in the layout depicted above is in the middle of the tracking area. This reference point is the chosen origin, with coordinates (0,0,0). The orientation of this re Alternatively, the reference location may also be located at the center of one of the Sources, so that one Source is positioned at the origin, and the others are measured in relation to it. This simplifies the Source setup somewhat. However, it is often advantageous to choose a different point in the tracking area to which the Sensor P&O will be referenced. Note that the tracking frame of reference can be modified at runtime with the Translation and Rotation Frame Of Reference runtime parameters. Details on how to apply these parameters at runtime with the PiMgr application or with custom software through the PDI or G4Track DLL are found in the reference documentation and online help accompanying those host software components. MEASURE CAREFULLY Carefully measure the position and orientation of each Source relative to the reference location. Rev. D D-2 JULY 2013 G4 USER MANUAL SOURCE CONFIGURATION FILE GENERATE SOURCE CONFIGURATION FILE 4 Information about the placement and characteristics of the Sources is needed by the G tracking engine to produce P&O solutions. The Source Configuration (.g4c) file is generated and supplied to the tracking engine on startup. The .g4c file is created with the Create Source Configuration File utility that is 4 automatically installed with the G Host Software. (See G4 System Overview.) The instructions that follow demonstrate generation of a .g4c file for the sample Source setup depicted in Figure 10 and Figure 11 (see page D-1). 4 Start the G Source configuration file creation process by launching the G4CreateSrcCfg utility. A Windows shortcut to this utility is installed on the desktop. Instructions for using the utility are listed at the top of the display. The screen displays fields for each possible Source. 4 A G system may employ up to eight Sources. With this utility you will enable fields for each Source in your system, and fill in the fields you enable. Enable fields for the first Source. It does not matter which Source is first. For this demonstration, the first Source will be Source C, the one on the left in Figure 10 and Figure 11. Rev. D D-3 JULY 2013 G4 USER MANUAL Input XYZAER measurements for the Source. These may be entered individually or pasted from the Windows clipboard as a block. (See below.) Measuring from the reference location, the position coordinates of Source C are (30, -42, 0), measured in inches. Source C is turned 90 degrees to the right, so the Euler orientation coordinates in degrees with respect to the reference are (90, 0, 0). The orientation of Sources C and D in this example are easily determined because they differ from the virtual frame of reference by only one rotation in Azimuth. A more complex scenario is described in APPENDIX A. with a detailed step-by-step description of how the Source Orientation inputs for the AER fields in the G4SrcCfgFile utility are discovered. Alternatively, Source Orientation values can be measured automatically using the G4SrcOrientMeasApp. The process for using this tool is detailed in APPENDIX C. To express Source P&O measurements in units other than inches and degrees, select input Position and Orientation units in the lower right-hand corner of the display. The current selections are displayed in the XYZAER field heading. Note that if unit selections are changed after data is input into the XYZAER fields, the values in the fields are converted to the new units automatically. Rev. D D-4 JULY 2013 G4 USER MANUAL If you have Source Position and Orientation values saved to the Windows clipboard, you can paste them directly into the XYZAER fields in CreateSrcCfgFile. For example, if you have edited the P&O for multiple Sources in Windows Notepad, you can select and copy all of the numbers from Notepad into CreateSrcCfgFile as one block of data. When data for multiple Sources are pasted into an active field, Source fields receiving the data will become active. Rev. D D-5 JULY 2013 G4 USER MANUAL Select the Source C Startup Hemisphere. The startup hemisphere of a Source describes the direction with respect to that Source from which Sensors enter the tracking area or approach that Source. In this example, the startup hemisphere for Source C is +Y (POS Y) because in the tracking area described by this Source layout, tracked objects (Sensors) are meant to enter the space (or be initially powered on) on the +Y side of Source C. Note: After power up, Sensor tracking is not confined to the +Y side of Source C. This is only a requirement for initial startup. When more than one Source is employed, the system will automatically align the Sensor to the correct P&O and hemisphere once the Sensor detects more than one Source. About Startup Hemisphere • At runtime, Sensors begin tracking by detecting the presence of the magnetic field produced by one or more Sources in the tracking area. Correct computation of the Sensor’s position relative to a detected Source depends upon prior knowledge about which side of the Source the Sensor is expected to be on when the Source is initially detected. (This moment of initial detection may occur dynamically, when a powered ON Hub and Sensor moves into the tracking area, or if the Hub is powered on when it is already in the tracking area.) • In the depicted sample setup, tracked objects enter the area from the left-hand side of Source D and from the right-hand side of Source C. The axes of the Cartesian coordinate system around each Source are displayed in the diagrams: +X is always in the forward direction away from a Source, +Y is to the right, and +Z is straight down. Using these axes, the tracked objects in this setup always enter the tracking areas from +Y side of Source C; therefore the startup Source hemisphere for Source C is the +Y hemisphere. Likewise, the approach is from the -Y side of Source D and the startup Source hemisphere for Source D is the -Y hemisphere. • When Startup Hemisphere is not configured correctly, sign errors in calculated sensor position may result, or the sensor may appear to jump from one quadrant in the tracking area to another. • After the initial detection, the Sensor may pass above, below or around to any side of the Sources and the position will always be computed correctly. This behavior is known as “hemisphere tracking.” • When more than one Source is employed, the system will automatically align the Sensor to the correct P&O and hemisphere once the Sensor detects more than one Source. • In many circumstances, it is not practical to dictate from which side of a Source the Sensors will always begin tracking. In scenarios such as these, the placement of Sources is very important to the practicality and usability of the tracking area. Depending on what is being tracked, a solution to this problem might be to mount the Sources above the tracking area rather than around the perimeter or throughout. This allows tracked bodies to move freely about through the area and always on one side of the Source or Sources. Rev. D D-6 JULY 2013 G4 USER MANUAL Select Floor Compensation height, if needed. The Sources in the sample setup are 3 feet above the floor. If Floor Compensation is desired, choose a level that is closest to the actual distance of the Source from the floor. Ideally, Sources would be mounted at 50- 75- or 100 cm above the floor if Floor Compensation is used. However, in our example the Sources are 3 feet (91.4 cm) above the floor, so the closest Floor Compensation level is 100 cm. 4 In an actual G installation, it may be necessary to experiment with different Floor Compensation levels, starting with None. Load the calibration file for the Source. 4 Each G Source is calibrated during manufacture. The unique calibration data associated with each Source is provided on a CD-ROM accompanying the Source. In this step, the calibration file is selected and loaded into the G4CreateSrcCfg program. 4 Choose the G Source Calibration .g4s file that corresponds with the Source being configured. Each .g4s file is named with the serial number 4 of the G Source to which it applies. The serial number can be read from the label on the 4 bottom of the G Source. Rev. D D-7 JULY 2013 G4 USER MANUAL When the Source Calibration file is loaded, the Loaded status is displayed, as well as the frequency ID of the Source. The first Source’s configuration information is now complete. Enable the input fields for the next Source configuration to be entered. This time, the information for Source D in sample diagrams is input. Source D is placed symmetrically to Source C. The values input here differ only in sign. The last step is to create and save the new .g4c file. Select the save button and choose a name for the .g4c file that reflects the purpose of this Source configuration. Rev. D D-8 JULY 2013 G4 USER MANUAL Exit the G4CreateSrcCfg program by selecting the Close button at the bottom of the display or the Window Close control. Rev. D D-9 JULY 2013 G4 USER MANUAL APPENDIX E. Specifications COMPONENTS System Electronics Unit (Hub) The Hub contains embedded hardware and software necessary to compute the position and orientation of each Sensor and wirelessly transmit this data to your PC. Dimensions: Approx. 4.2 in. (10.6 cm) L x 0.75 in. (1.9 cm) W x 2.6 in. (6.6 cm) H Weight: Approx. 4 ounces (114 grams) Source (See Figure 4) Dimensions: Approx. 4.07 in. (10.34 cm) L x 4.07 in. (10.34 cm) W x 4.05 in. (10.29 cm) H Weight: 1.60 lbs. (726gm) Thread size 1/4” x 20 Sensor (See Figure 5) Dimensions: Approx. .90 in. (2.29 cm) L x 1.11 in. (2.82 cm) W x.60 in. (1.52 cm) H Weight (approximate weight of Sensor head only): 0.32 oz. (9.1 gm) PowerTRAK 360 (See Figure 6) Dimensions: Approx. 2.92 in. (7.42 cm) L x 1.73 in. (4.39 cm) W x .71 in. (1.80 cm) H Weight: Approx. .08 lbs. (37.0gm) without cable; .11 lb (50.0gm) with cable SPECIFICATIONS Update Rate 120 Hz per Sensor, simultaneous samples, with optimal RF communication conditions. Latency Less than 10 milliseconds in optimal RF communication conditions Static Accuracy Range 1 meter/3.3 ft 2 meter/6.5 ft 3 meter/9.8 ft Orientation 0.50 degrees RMS 0.75 degrees RMS 1.00 degrees RMS Position 0.08 inches/0.20 cm RMS 0.25 inches/0.64 cm RMS 0.50 inches/1.27 cm RMS Interface Proprietary RF Link; 2.4 GHz frequency-hopping architecture Software Tools • PiMgr Graphical User Interface (GUI) for Windows® • Setup and Configuration Utilities for Windows • PDI Software Development Kit for Windows • C Programming APIs for Windows Operating Temperature 10°C to 40°C at a relative humidity of 10% to 95%, noncondensing Power Requirements Source: 5 volt, 1 amp RF/USB Dongle: 5 volt, 30 ma Hub: 5 volt, 500 ma Internal battery, rechargeable via USB or included power supply. Battery is not user serviceable. Regulatory FCC Part 15, Class B 2.4 GHz Radio Approval: Rev. D EN61326-1: 2006 emission EN61326-1: 2006 immunity FCC Part 15 IC RSS 210 EN301489-1 V1.8 2008 emission EN301489-3 V1.4.1 2002 immunity E-1 JULY 2013 G4 USER MANUAL APPENDIX F. Limited Warranty Polhemus warrants that the Product shall be free from defects in material and workmanship for a period of two years from the date of Polhemus’s delivery to the Buyer, or two years and 30 days from the date ownership of Product passed to the Buyer, whichever occurs first, with the exception of Hub battery which has a warranty period of one year against material defects. As with all batteries, capacity (run-time) will diminish over time due to battery age and charging cycles. Diminished battery capacity does not constitute material defect. Polhemus shall, upon notification within the warranty period, correct such defects by repair or replacement with a like serviceable item at Polhemus's option. This warranty shall be considered void if the Product is operated other than in accordance with the instructions in Polhemus's User Manual or is damaged by accident or mishandling. Parts or material which are disposable or expendable or subject to normal wear beyond usefulness within the warranty period such as lamps, fuses, etc., are not covered by this warranty. In the event any Product or portion thereof is defective, Buyer shall promptly, and within the warranty period, notify Polhemus in writing of the nature of the defect and return the defective parts to Polhemus at the direction of Polhemus’s Customer Service representative. Upon determination by Polhemus that the parts or Products are defective and covered by the warranty set forth above, Polhemus, at its option shall repair or replace the same without cost to Buyer. Buyer shall be responsible for any import/export duties/tariffs and pay all charges for transportation and delivery costs to Polhemus's factory for defective parts where directed to be sent to Polhemus, and Polhemus shall pay for transportation costs to Buyer's facility only for warranty replacement parts and Products. Removed parts covered by claims under this warranty shall become the property of Polhemus. In the event that allegedly defective parts are found not to be defective, or not covered by warranty, Buyer agrees that Polhemus may invoice Buyer for all reasonable expenses incurred in inspecting, testing, repairing and returning the Products and that Buyer will pay such costs on being invoiced therefor. Buyer shall bear the risk of loss or damage during transit in all cases. Any repaired or replaced part or Product shall be warranted for the remaining period of the original warranty or thirty (30) days, whichever is longer. Warranties shall not apply to any Products which have been: • repaired or altered other than by Polhemus, except when so authorized in writing by Polhemus; or • used in an unauthorized or improper manner, or without following normal operating procedures; or • improperly maintained and where such activities in Polhemus's sole judgment, have adversely affected the Products. Neither shall warranties apply in the case of damage through accidents or acts of nature such as flood, earthquake, lightning, tornado, typhoon, power surge(s) or failure(s), environmental extremes or other external causes. Warranties shall not apply to any Products if the Products are defective because of normal wear and tear; or • used for any purpose without obtaining any applicable regulatory approvals. POLHEMUS DOES NOT WARRANT AND SPECIFICALLY DISCLAIMS THE WARRANTY OF MERCHANTABILITY OF THE PRODUCTS OR THE WARRANTY OF FITNESS OF THE PRODUCTS FOR ANY PARTICULAR PURPOSE. POLHEMUS MAKES NO WARRANTIES, EXPRESS OR IMPLIED, EXCEPT OF TITLE AND AGAINST PATENT INFRINGEMENT, OTHER THAN THOSE SPECIFICALLY SET FORTH HEREIN. IN NO EVENT SHALL POLHEMUS BE LIABLE UNDER ANY CIRCUMSTANCES FOR SPECIAL INCIDENTAL OR CONSEQUENTIAL DAMAGES, INCLUDING, BUT NOT LIMITED TO LOSS OF PROFITS OR REVENUE. WITHOUT LIMITING THE FOREGOING POLHEMUS'S MAXIMUM LIABILITY FOR DAMAGES FOR ANY CAUSE WHATSOEVER, EXCLUSIVE OF CLAIMS FOR PATENT INFRINGEMENT AND REGARDLESS OF THE FORM OF THE ACTION (INCLUDING BUT NOT LIMITED TO CONTRACT NEGLIGENCE OR STRICT LIABILITY) SHALL BE LIMITED TO BUYER'S ACTUAL DIRECT DAMAGES, NOT TO EXCEED THE PRICE OF THE GOODS UPON WHICH SUCH LIABILITY IS BASED. Rev. D F-1 JULY 2013 G4 USER MANUAL The Products are not certified for medical or bio-medical use. Any references to medical or bio-medical use are examples of what medical companies have done with the Products after obtaining all necessary or appropriate medical certifications. The end user/OEM/VAR must comply with all pertinent FDA/CE and all other regulatory requirements. Rev. D F-2 JULY 2013 G4 USER MANUAL APPENDIX G. Customer Service 4 If problems are encountered with the G or if you are having difficulty understanding how the commands work, help is just a telephone call away. Call Polhemus at the numbers listed below and select “2” for Customer Service and then “1” for Technical Support. Polhemus is open Monday through Friday, 8:00 AM to 5:00 PM, Eastern Standard Time (US). For the most part, our customer service representatives are usually able to solve problems over the telephone and get you back into the fast lane right away. Help is also available on our web page at www.polhemus.com. Simply double-click Technical Support, and then select [email protected] to send us an email describing the problem or question. If a problem requires repair of your system, the customer service representative will issue a Return Merchandise Authorization (RMA) number and you may then return the system to the factory. Do not return any equipment without first obtaining an RMA number. Please retain and use the original shipping container, if possible, to avoid transportation damages (for which you or your shipper would be liable). If your system is still under warranty, Polhemus will repair it free of charge according to the provisions of the warranty as stated in APPENDIX F. of this document. The proper return address is: Polhemus 40 Hercules Drive Colchester, VT 05446 Attention RMA #_______ From within the U.S. and Canada: (800) 357-4777 From outside the U.S. or Canada: (802) 655-3159 Fax #:(802) 655-1439 Rev. D G-1 JULY 2013 G4 USER MANUAL INDEX A AC Wall Charger .........................................................2 Accuracy ................................................................ E-1 Additional Help ........................................................41 Address (Polhemus) ............................................... G-1 Appendix A............................................................. A-1 Appendix B ............................................................. B-1 Appendix D ............................................................ D-1 Appendix E ............................................................. E-1 Appendix F ..............................................................F-1 Appendix G ............................................................ G-1 Auto-Increment .......................................................37 Azimuth (Def.)........................................................ A-3 B Battery .......................................................................2 Charging .................................................................2 Handling ................................................................. E Belt Clip Attachment..................................................7 Boresight.............................................................. 6, 37 C Cartesian ....................................................................4 Centimeters .............................................................38 Charger ......................................................................2 Charging Battery ........................................................2 Cleaning The Instrument ........................................... E Components ............................................ 2, 10, 11, 36 Conductive Metal .................................................. B-1 Configure RF Settings................................... 13, 14, 41 Connections (Making) ..............................................29 Contact Information .............................................. G-1 Copyright .................................................................. A Create Source Configuration File .............................22 Customer Service ................................................... G-1 D DC Power Supply .......................................................3 Default File Location ................................................10 Definitions ...............................................................20 Destination Location ................................................10 Developer Interface ...................................................6 Digital Accessory ............................................ 5, 32, 34 Digital Accessory Cable ............................................35 Rev. D Digital Accessory Cable Assembly........................ 6, 35 Dimensions Hub ........................................................................2 Powertrak 360 ............................................ 5, 6, E-1 RF/USB Module......................................................3 Sensor ....................................................................5 Source ....................................................... 4, 22, E-1 Display Update.........................................................33 Distortion ...................................................................3 Distortion (Understanding) ............................. A-1, B-1 DLL .............................................................................6 Dual Source Setup ..........................................A-1, D-1 E Eddy Current .......................................................... B-1 Electromagnetic Field ................................................3 Elevation (Def.) ...................................................... A-3 EM...................................................................... 3, 5, 6 EM Field ................................................................. 3, 4 E-Mail Contacts ...................................................... G-1 Euler Angles .............................................................38 Degrees ................................................................38 Radians ................................................................38 Example Dual Source Setup.......................................A-1, D-1 Single Source Setup ........................................... A-1 F Feet ..........................................................................38 Figure Hub ........................................................................2 Hub Dimensions .....................................................2 RF/USB Module Dimensions ..................................3 Sensor Dimensions ................................................5 Source Dimensions ................................................4 Figures, List Of .......................................................... Iii Filter ..................................................................... 6, 36 Floor Compensation ................................................21 Frame Of Reference ..................................... 6, 37, A-1 Frame Of Reference (Def.) .......................................20 Frequency ..................................................................3 G G4c File ....................................................................22 JULY 2013 G4 USER MANUAL G4createsrccfg Utility ..............................................22 G4devcfg Linux Utility .................................. 13, 14, 41 G4s File ................................................................ 3, 27 G4srcorientmeasapp20, 22, 23, 24, A-2, A-6, C-1, C-3, C-4, C-5, C-10, C-11, D-4 G4systemsetup Utility ................................. 13, 14, 41 G4Track ................. 6, 7, 10, 20, 21, 29, 36, 42, 44, D-2 G4Track DLL ...............................................................6 Getting Started ..........................................................8 H Help..........................................................................41 Hemisphere Tracking ...............................................................25 Hemisphere ........................................................... A-7 Startup .................................................................25 Host Software ............................................ 8, 9, 14, 20 Host Software ............................................................8 Host Tracking Engine Software ..................................6 Hot Swapping Sensor ...............................................29 How To Use This Manual .......................................... D Hub ............................................................................2 Hub Mounting And Connections ...............................7 I Inches (Default) .......................................................38 Increment ................................................................37 4 Install G Host Software ................................. 8, 14, 20 Install Host Software .................................................8 Install On Windows ..................................................39 Installation And Setup ...............................................8 Introduction ...............................................................1 L License Agreement ..................................................10 Limited Warranty ....................................................F-1 Linux .................................................... 6, 8, 14, 20, 44 Lithium Ion/Lithium Polymer Batteries ..................... E M Magnetic Distortion .................................................21 Measure P&O Output Units Of ...........................................38 Measuring ................................................................22 Medical Device Use .................................................. A Metal (Conductive) ................................................ B-1 Rev. D Meters .....................................................................38 Motion Tracking Area ................................................3 Mounting Hub............................................................7 Mounting Sensor .......................................................7 N NET 3.5.....................................................................40 O Offset .........................................................................6 Offset (Tip) ...............................................................38 Operation...................................................................7 Origin ..................... 4, 20, 21, 22, 23, 33, A-1, A-2, D-2 Origin (Def.) .............................................................20 Output Units Of Measure ........................................38 P P&O................................................................ 3, 4, 6, 8 P&O (Def.) ................................................................20 P&O Output Units Of Measure ................................38 PDI ................................ 6, 10, 21, 31, 36, 44, D-2, E-1 Pimgr.... 10, 21, 29, 31, 32, 33, 34, 36, 37, 42, D-2, E-1 Pimgr Files................................................................10 Placement ................................................................21 Placement Of Source .................................................7 Point Of View (POV) .................................................33 Polhemus Developer Interface ................................10 Position And Orientation ...........................................3 Position And Orientation ...........................................8 POV (Point Of View) .................................................33 Power ..................................................................... E-1 Power Supply .............................................................3 Powertrak 360 ..................................................... 5, 34 Programming ...........................................................44 Q Quaternion ..............................................................38 Quaternion ................................................ 20, 38, A-6 R Radians ....................................................................38 Radio Frequency ........................................................7 Reference Frame ............................................. 37, A-1 Reference Location ..................................................21 Regulatory Certifications ....................................... E-1 Repair..................................................................... G-1 Return Merchandise Authorization (RMA) ............ G-1 JULY 2013 G4 USER MANUAL Returning Product ................................................. G-1 RF ...............................................................................7 RF Configuration ........................................................8 RF Range ..................................................................35 RF/USB .......................................................................8 RF/USB Module .........................................................3 RFM........................................................................ 3, 8 RMA (Return Merchandise Authorization) ............ G-1 Roll (Def.) ............................................................... A-3 Runtime Tracking Parameters .................................36 S Safety ......................................................................... E Screen Examples ....................................................... Iii SDK .............................................................................6 SDK Files...................................................................10 Select Reference Location .......................................21 Sensor ................................................................ 3, 4, 7 Hot Swapping.......................................................29 Sensor Dimensions ....................................................5 Sensor, Mounting And Connections ..........................7 Single Source Setup ............................................... A-1 Software ....................................................................8 Software Components .............................................10 Software Development Kit ......................................10 Solutions And Workarounds ....................................41 Source .G4c File ...............................................................22 .G4s File .................................................................3 Configuration .......................................................22 Measuring ............................................................22 Placement ............................................................21 Source ........................................................................3 Source (Measure P&O Relative To Reference Location ...............................................................22 Source Configuration File ........................................22 Source Dimensions ....................................................4 Source Frequency ......................................................3 Source Orientation Measuring .......................................................... A-2 Source Orientation Measurement App ................. C-1 Source Placement ......................................................7 Source Position Measuring .......................................................... A-2 Source Setup (Dual) ........................................A-1, D-1 Source Setup (Single) ............................................. A-1 Rev. D Source Setup And Configuration .............................20 Specifications ......................................................... E-1 4 Start A G Tracking Session ......................................29 Startup Hemisphere.................................................25 Summary Page .........................................................11 System Overview .......................................................1 T Table Of Contents .......................................................I Tables, List Of............................................................ Iii Technical Support .................................................. G-1 Threaded Fasteners ...................................................7 Tip Offset .................................................................38 Tracking Area ................................................. 3, 7, A-1 Tracking Engine Software ..........................................6 Tracking Parameters ................................................36 Trademark ................................................................ A Troubleshooting ......................................................39 Two-Source Setup .................................................. D-1 U Units Of Measure .....................................................38 Untethered ................................................................7 Update Rate ........................................................... E-1 USB ............................................................................3 Utilities G4systemsetup ........................................ 13, 14, 41 Utilities G4createsrccfg .....................................................22 V VFR ............................................. 20, A-2, A-4, A-5, A-7 Virtual Frame Of Reference ................................... A-2 Virtual Frame Of Reference (Def.) ...........................20 W Wall Charger ..............................................................2 Warnings .................................................................... E Warranty.................................................................F-1 Win7 ........................................................................39 Win8 ........................................................................39 Windows Device Files ..............................................11 Windows Driver Installation ....................................11 Windows USB Driver Package..................................11 Windows Vista .........................................................39 Windows XP .............................................................40 JULY 2013 G4 USER MANUAL Wired .........................................................................7 Wireless ................................................................. 4, 7 Wireless Communication ...........................................3 Workarounds And Solutions ....................................41 Rev. D X XYZAER (Def.) ...........................................................20 JULY 2013