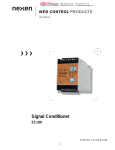
1
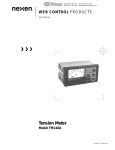
®
MEX (55) 53 63 23 31
DIST. AUTORIZADO QRO (442) 1 95 72 60
MTY (81) 83 54 10 18
[email protected]
AIR CHAMP PRODUCTS
User Manual
Tension Meter
Model TM210
(i)
FORM NO. L-20226-B-0501
®
MEX (55) 53 63 23 31
DIST. AUTORIZADO QRO (442) 1 95 72 60
MTY (81) 83 54 10 18
[email protected]
In accordance with Nexen’s established policy of constant product improvement, the specifications contained in this
manual are subject to change without notice. Technical data listed in this manual are based on the latest information
available at the time of printing and are also subject to change without notice.
Technical Support:
800-843-7445
(651) 484-5900
www.nexengroup.com
WARNING
Read this manual carefully before installation and operation.
Follow Nexen's instructions and integrate this unit into your system with care.
This unit should be installed, operated and maintained by qualified personnel ONLY.
Improper installation can damage your system or cause injury or death.
Comply with all applicable codes.
Nexen Group, Inc.
560 Oak Grove Parkway
Vadnais Heights, Minnesota 55127
Copyright 2000 Nexen Group, Inc.
ISO 9001 Certified
(ii)
®
MEX (55) 53 63 23 31
DIST. AUTORIZADO QRO (442) 1 95 72 60
MTY (81) 83 54 10 18
[email protected]
TABLE OF CONTENTS
Introduction ---------------------------------------------------------------------------------------------------------------------------------------- 1
Tension Meter Operation -------------------------------------------------------------------------------------------------------------------- 2
Installation ----------------------------------------------------------------------------------------------------------------------------------------- 2
Electrical Connections ------------------------------------------------------------------------------------------------------------------------ 3
Calibration ----------------------------------------------------------------------------------------------------------------------------------------- 4
Operation ------------------------------------------------------------------------------------------------------------------------------------------ 8
Maintenance -------------------------------------------------------------------------------------------------------------------------------------- 8
Check Pin Locations & Values ------------------------------------------------------------------------------------------------------------- 9
Warranties --------------------------------------------------------------------------------------------------------------------------------------- 10
(iii)
®
MEX (55) 53 63 23 31
DIST. AUTORIZADO QRO (442) 1 95 72 60
MTY (81) 83 54 10 18
[email protected]
INTRODUCTION
Read this manual carefully, making full use of its explanations and instructions. The “Know How” of safe, continuous,
trouble-free operation depends on the degree of your understanding of the system and your willingness to keep all
components in proper operating condition. Pay particular attention to all NOTES, CAUTIONS, and WARNINGS to avoid
the risk of personal injury or property damage. It is important to understand that these NOTES, CAUTIONS, and
WARNINGS are not exhaustive. Nexen cannot possibly know or evaluate all conceivable methods in which service may
be performed, or the possible hazardous consequences of each method. Accordingly, anyone who uses a procedure
that is not recommended by Nexen must first satisfy themselves that neither their safety or the safety of the product will
be jeopardized by the service method selected.
The TM210 receives tension data from the Tension
Sensors, and displays actual tension with a digital read
out on its front panel. There is also a 0 to 10VDC analog
signal available on the terminal strip that is proportional to
0 to full scale as defined in the set up of the TM210. This
0 to 10VDC signal can be buffered for use with a remote
meter, or as a real time output for control purposes.
Nexen’s TM210 Tension Meter measures tension in a
continuous web, strip, or strand of material as it is being
processed. This material can be paper, film, rubber,
metal strip, wire, textiles, or any other product used in a
continuous process.
The TM210 used together with two Nexen-Nireco MB
Tension Sensors (Load Cells), and a sensing roller
measures actual material tension during the process.
For very narrow webs, wire, stranded material, the
Tension Meter may be used with only a single Tension
Meter.
1
FORM NO. L-20226-B-0501
®
MEX (55) 53 63 23 31
DIST. AUTORIZADO QRO (442) 1 95 72 60
MTY (81) 83 54 10 18
[email protected]
TENSION METER OPERATION
Nexen’s “TM210” provides a 6VDC excitation signal to
the MB Tension Sensors. The Tension Sensors then
provide an output (proportional to a load applied to their
load plates), between 0 and 400 millivolts.
Static, or Tare Weight, of the sensor roll and its bearings
will cause the Tension Sensors to put out a signal, which
must be zeroed out, or negated. Once Tare Weight has
been zeroed out, any additional force applied to the
sensor roll will cause a proportional increase in the output
signal. This signal is then span adjusted to make the
digital readout record actual web tension.
The signal from each Tension Sensor is amplified
separately, and then added. The result or total tension is
available at the Control Output Terminals Number 10,
and 11 on the terminal strip (See Fig. 1).
FIGURE 1
The two amplified signals also go to the Read Out
Selector (located on the front panel) where either one, or
the sum of the two can be selected to pass through the
analog to digital transducer (A/D) for display on the
Digital Read Out.
INSTALLATION
2. TM210 may be panel mounted (See Fig. 2)
1. Install MB Tension Sensors as described in
Installation and Maintenance Manual L-20127,
provided with the MB Tension Sensors.
NOTE: TM210 is an electronic component, and
should be mounted in a shock and vibration
free area which has an ambient temperature
greater than 32oF, but less than 122oF [0o –
50oC].
FIGURE 2
FORM NO. L-20226-B-0501
2
®
MEX (55) 53 63 23 31
DIST. AUTORIZADO QRO (442) 1 95 72 60
MTY (81) 83 54 10 18
[email protected]
ELECTRICAL CONNECTIONS
NOTE: All Electrical Connections are made at the
Terminal Strip located on the TM210 rear panel.
Ground both Cable Shields (WHITE
Terminals on braided cable) to Terminal 9.
1. Connect MB Tension Sensors to Terminal Strip,
using cables provided with the MB Tension Sensors
(See Fig. 3).
If MB11 or MB25 are used with a reverse wrap (the
web tending to pull the sensor roll away from the
sensors), reverse the connection of the GREEN and
YELLOW or WHITE wires for both Sensors at the
TM210 Terminal Strip.
FIGURE 3
NOTE: The TM210 AC Select Electrical Connection
default setting is 240V AC. Select alternative
AC Input Voltage setting to match the AC
Power Supply Input Voltage that the unit is
to be connected to.
If TM210 is to be used with only one Sensor, connect
cable as normal for Number 1, then provide a Jumper
Wire to short Terminals 5 and 6.
NOTE: Cables my be extended up to 1,500 feet
with 18AWG Shielded Cable.
2. The 0 to 10 volt (5mA) Control Output Signal can be
taken from Terminals 10 (PLUS) and 11 (MINUS)
load impedence > 2K ohm.
3. Connect the provided Jumper Wire to Terminal 19,
and to the correct voltage as applied to Terminals 12
and 13 (See Back of TM210 for Jumper Terminals).
4. Provide Single Phase AC Power to Terminal 12
(POWER), 13 (COMMON), and 14 (GROUND). AC
Power can be in the range of 110, 120, 220, or 240
VAC, either 50 or 60 Hertz.
3
FORM NO. L-20226-B-0501
®
MEX (55) 53 63 23 31
DIST. AUTORIZADO QRO (442) 1 95 72 60
MTY (81) 83 54 10 18
[email protected]
CALIBRATION
DIGITAL INDICATOR RANGE SETTING.
1. Set Power Switch to ON (See Fig. 4.
2. Rotate the knob in the upper portion of the Front
Panel to release the catch, then open the Front
Panel (See Fig. 4).
Rotate
knob.
3. Set No. 2 Dip Switch to ON. This sets the TM210
to the Scaling Mode (See Fig. 5).
4. Rotate Scaling Mode TEST variable resistor to full
counter clockwise position (See Fig. 5).
Power
Switch
5. Set DECIMAL POINT switch to the correct
position (See Fig. 5 & Table 1).
6. With the DECIMAL POINT switch in the correct
position (as defined in Step 5), adjust ZERO
variable resistor until the Digital Display shows “000”.
FIGURE 4
7. Rotate the TEST variable resistor to the full clockwise position (See Fig. 5)
8.
Adjust the FS variable resistor until the Digital Display
indicates the desired maximum range (50.0, 200,
500, etc.) (See Fig. 5).
9. Set No. 2 Dip Switch to OFF. This sets the
TM210 to the Normal Operating Mode (See Fig. 5).
Test
Zero
FS
10. Close Front Panel.
11. Set Power Switch to OFF (See Fig. 4).
Decimal
Point
No. 2
FIGURE 5
TABLE 1
FORM NO. L-20226-B-0501
4
INDICATOR
MAX. SCALE
DECIMAL POINT
DISPLAY SETTING
1.00 - 9.99
0
10.0 - 99.9
00
100 - 999
000
®
MEX (55) 53 63 23 31
DIST. AUTORIZADO QRO (442) 1 95 72 60
MTY (81) 83 54 10 18
[email protected]
TENSION SENSORS TO TM210 CALIBRATION (Dual Sensors).
Rotate knob.
Make sure Sensors, Sensor Roll, and
Bearings are correctly mounted (See Installation and Maintenance Manual L-20127),
and that no force is being applied to the
Sensor, Sensor Roll, or Bearings by an
external force, web, etc.
Readout
Selector
Switch
1. Set Power Switch to ON (See Fig. 6).
Power
Switch
2. Rotate the knob in the upper portion of the Front
Panel to release the catch, then open the Front Panel
(See Fig. 6).
FIGURE 6
3. Set No. 1 Dip Switch to ON. This sets the
TM210 for ZERO and SPAN Setting (See Fig. 7).
4. Set the Readout Selector Switch to No. 1 (See
Fig. 6)
5. Rotate No. 1 ZERO variable resistor to obtain 0 on
the indicator (See Fig. 7).
6. Set the Readout Selector Switch to No. 2 (See
Fig. 6).
No. 1
Zero
7. Rotate No. 2 ZERO variable resistor to obtain 0 on
the indicator (See Fig. 7).
No. 1
Span
8. Set the Readout Selector Switch to TOTAL, the
Indicator must still read 0 (See Fig. 6).If not, repeat
steps 4 through 7.
9. Thread a rope or cable through the normal web path
in such a way as to duplicate the web wrap angle
around the Sensor Roll. Hang a known weight W
which is less than the full scale of the Indicator to one
end of the rope or cable (See Fig. 8).
No. 2
Zero
No. 2
Span
No. 1
FIGURE 7
10. Set the Readout Selector Switch to No. 1 (See
Fig. 6).
11. Rotate No. 1 Span variable resistor until the Indicator
reads one half the weight or W/2 (See Fig. 7).
12. Set the Readout Selector Switch to No. 2 (See
Fig. 6).
13 Rotate No. 2 Span variable resistor until the Indicator
reads one half the weight or W/2 again (See Fig. 7).
FIGURE 8
5
FORM NO. L-20226-B-0501
®
MEX (55) 53 63 23 31
DIST. AUTORIZADO QRO (442) 1 95 72 60
14. Set the Readout Selector Switch to TOTAL. The
Indicator must now read the known weight or W.
MTY (81) 83 54 10 18
[email protected]
15. Remove the rope or weight.
16. Set the No. 1 Dip Switch to OFF. This sets the
TM210 to the Normal Operating Mode (See Fig. 7).
NOTE: The Digital Display must show the known
weight W. If not, return to Step 1 and
recalibrate Span. If calibration is still
impossible, return to DIGITAL INDICATOR
RANGE SETTING.
17. Close Front Panel.
18. Set POWER SWITCH to OFF (See Fig. 6)
TENSION SENSOR TO TM210 CALIBRATION (Single Sensor)
NOTE: Normal operation of the TM210 requires two
sensors. Narrow webs, wire, filaments, and other
narrow products can often be sensed with only
one MB Tension Sensor. Make sure that the
Jumper Wire described in ELECTRICAL CONNECTIONS is installed before attempting to
calibrate the TM210 with only one sensor.
Rotate knob.
Make sure Sensors, Sensor Roll, and
Bearings are correctly mounted (See
Installation and Maintenance Manual L20127), and that no force is being applied to
the Sensor, Sensor Roll, or Bearings by an
external force, web, etc.
Readout
Selector
Switch
Power
Switch
1. Set Power Switch to ON (See Fig. 9).
FIGURE 9
2. Rotate the knob in the upper portion of the Front
Panel to release the catch, then open the Front Panel
(See Fig. 9).
3. Set No. 1 Dip Switch to ON. This sets the TM210
for ZERO and SPAN Setting (See Fig. 10).
4. Set the Readout Selector Switch to No. 1
(See Fig. 9)
5. Rotate No. 1 ZERO variable resistor to obtain 000 on
the indicator (See Fig. 10).
No. 1
Zero
No. 1
Span
6. Set the Readout Selector Switch to No. 2 (See
Fig. 9).
7. Rotate No. 2 ZERO variable resistor to obtain 000 on
the indicator (See Fig. 9).
No. 2
Zero
FIGURE 10
FORM NO. L-20226-B-0501
6
No. 2
Span
No. 1
®
MEX (55) 53 63 23 31
DIST. AUTORIZADO QRO (442) 1 95 72 60
MTY (81) 83 54 10 18
[email protected]
8. Thread a rope or cable through the normal web path
in such a way as to duplicate the web wrap angle
around the Sensor Roll. Hang a known weight W
which is less than the full scale of the Indicator to one
end of the rope or cable (See Fig. 11).
9. Set the Readout Selector Switch to No. 1 (See
Fig. 9).
10. Rotate No. 1 Span variable resistor until the Indicator
reads the known weight or W (See Fig. 10).
11. Set the Readout Selector Switch to No. 2 (See
Fig. 9).
FIGURE 11
12 Rotate No. 2 Span variable resistor until the Indicator
reads 000 (See Fig. 10).
13. Set the Readout Selector Switch to TOTAL. The
Indicator must now read the known weight or W.
NOTE: The Digital Display must show the known
weight W. If not, return to Step 1 and
recalibrate Span. If calibration is still
impossible, return to DIGITAL INDICATOR
RANGE SETTING.
14. Remove the rope or weight.
15. Set the No. 1 Dip Switch to OFF. This sets the
TM210 to the Normal Operating Mode (See Fig. 10).
16. Close Front Panel.
17. Set POWER SWITCH to OFF (See Fig. 9)
SELECT OUTPUT CONFIGURATION
NOTE: Output of the TM210 is 0 to 10 Volts DC,
which is proportional to the Zero to Full Scale
maximum range defined in DIGITAL
INDICATOR RANGE SETTING. This output
can be filtered or buffered for use with meters,
and other equipment that might be damaged
by electrical spikes, or it can be raw data from
the Tension Sensors or Amplifiers.
Rotate knob.
1. Rotate the knob in the upper portion of the Front
Panel to release the catch, then open the Front Panel
(See Fig. 12).
FIGURE 12
7
FORM NO. L-20226-B-0501
®
MEX (55) 53 63 23 31
DIST. AUTORIZADO QRO (442) 1 95 72 60
MTY (81) 83 54 10 18
[email protected]
2. Set the No. 3 Dip Switch to ON to provide
FILTERED output, or OFF to provide UNFILTERED
output (See Fig. 13).
3. Close the Front Panel.
No. 3
FIGURE 13
OPERATION
The TM210 will constantly read out tension applied to the
Sensor Roll as long as the Power Switch is set to the ON
position. The signal at Terminals 10 and 11 will always
be the total signal of Sensor No. 1, and Sensor No. 2,
regardless of Readout Selector Switch position.
The Digital Display will read either tension at Tension
Sensor No. 1, or Tension Sensor No. 2, or the Total of the
two as selected with the Readout Selector Switch.
MAINTENANCE
Regular scheduled maintenance is not required for either
the TM210 or the MB Tension Sensors. If precise
accuracy is required, periodic recalibration of the Zero,
and Span Circuits is recommended.
FORM NO. L-20226-B-0501
8
®
MEX (55) 53 63 23 31
DIST. AUTORIZADO QRO (442) 1 95 72 60
MTY (81) 83 54 10 18
[email protected]
CHECK PIN LOCATIONS & VALUES
FIGURE 14
LOGIC CIRCUITS
C/P
CIRCUIT TESTED
1
2
3
4
5
10
Amplifier output No.1 Sensor.
Amplifier output No.2 Sensor
Summing Amplifier No.1 & No.2
Input Voltage "No. 1" Sensor
Input Voltage "No. 2" Sensor
Selector Switch output to A/D Convertor
15
Common Circuit
CORRECT VALUE
0–5VDC
(varies with Sensor Load)
0–5VDC
(Varies with Sensor Load)
0–10VDC (CP3=CP1+CP2) Unfiltered
0-400 mV (Varies with Sensor Load)
0-400 mV (Varies with Sensor Load)
0—10VDC
(varies with Readout Switch position,ie., No.1 position
CP1=Cp4, No.2 position CP2=CP4, Total position
CP1+CP2=CP3=CP4) Filtered
0
POWER SUPPLY CIRCUITS
C/P
CIRCUIT TESTED
6
12
13
14
11
8
Input Voltage A/D Convertor
Sensor Excitation Voltage
Op Amp Supply Voltage
Op Amp Supply Voltage
A/D Converter & Indicator Voltage
A/D Converter & Indicator Voltage
CORRECT VALUE
1 VDC + 0.1
+6VDC
+15VDC
–15VDC
+5VDC
–5VDC
TENSION SENSORS
TERMINALS
CIRCUIT TESTED
CORRECT VALUE
1&2
3&4
Sensor No.1 output
Sensor No. 1 excitation
0–600mV
6VDC
9
(Varies with Sensor Load)
FORM NO. L-20226-B-0501
®
MEX (55) 53 63 23 31
DIST. AUTORIZADO QRO (442) 1 95 72 60
MTY (81) 83 54 10 18
[email protected]
WARRANTIES
Warranties
Nexen warrants that the Products will be free from any defects in material or workmanship for a period of 12 months
from the date of shipment. NEXEN MAKES NO OTHER WARRANTY, EXPRESS OR IMPLIED, AND ALL IMPLIED
WARRANTIES, INCLUDING WITHOUT LIMITATION, IMPLIED WARRANTIES OF MERCHANTABILITY AND
FITNESS FOR A PARTICULAR PURPOSE ARE HEREBY DISCLAIMED. This warranty applies only if (a) the Product
has been installed, used and maintained in accordance with any applicable Nexen installation or maintenance manual
for the Product; (b) the alleged defect is not attributable to normal wear and tear; (c) the Product has not been altered,
misused or used for purposes other than those for which it was intended; and (d) Buyer has given written notice of the
alleged defect to Nexen, and delivered the allegedly defective Product to Nexen, within one year of the date of
shipment.
Exclusive Remedy
The exclusive remedy of the Buyer for any breach of the warranties set out above will be, at the sole discretion of Nexen,
a repair or replacement with new, serviceably used or reconditioned Product, or issuance of credit in the amount of the
purchase price paid to Nexen by the Buyer for the Products.
Limitation of Nexen’s Liability
TO THE EXTENT PERMITTED BY LAW NEXEN SHALL HAVE NO LIABILITY TO BUYER OR ANY OTHER PERSON
FOR INCIDENTAL DAMAGES, SPECIAL DAMAGES, CONSEQUENTIAL DAMAGES OR OTHER DAMAGES OF
ANY KIND OR NATURE WHATSOEVER, WHETHER ARISING OUT OF BREACH OF WARRANTY OR OTHER
BREACH OF CONTRACT, NEGLIGENCE OR OTHER TORT, OR OTHERWISE, EVEN IF NEXEN SHALL HAVE
BEEN ADVISED OF THE POSSIBILITY OR LIKELIHOOD OF SUCH POTENTIAL LOSS OR DAMAGE. For all of
the purposes hereof, the term “consequential damages” shall include lost profits, penalties, delay images, liquidated
damages or other damages and liabilities which Buyer shall be obligated to pay or which Buyer may incur based upon,
related to or arising out of its contracts with its customers or other third parties. In no event shall Nexen be liable for
any amount of damages in excess of amounts paid by Buyer for Products or services as to which a breach of contract
has been determined to exist. The parties expressly agree that the price for the Products and the services was
determined in consideration of the limitation on damages set forth herein and such limitation has been specifically
bargained for and constitutes an agreed allocation of risk which shall survive the determination of any court of
competent jurisdiction that any remedy herein fails of its essential purpose.
Limitation of Damages
In no event shall Nexen be liable for any consequential, indirect, incidental, or special damages of any nature whatsoever, including without limitation, lost profits arising from the sale or use of the Products.
Warranty Claim Procedures
To make a claim under this warranty, the claimant must give written notice of the alleged defect to whom the Product
was purchased from and deliver the Product to same within one year of the date on which the alleged defect first
became apparent.
Nexen Group, Inc.
560 Oak Grove Parkway
Vadnais Heights, MN 55127
800.843.7445
Fax: 651.286.1099
www.nexengroup.com
ISO 9001 Certified
FORM NO. L-20226-B-0501
10