Transcript
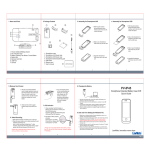
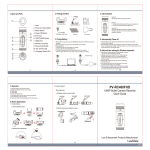
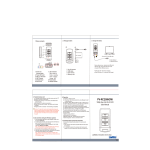
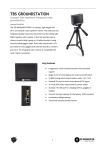
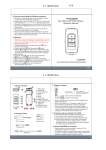
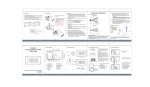
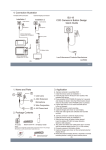
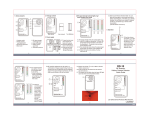
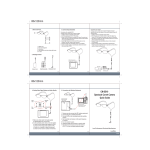
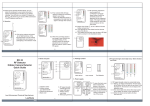
LCM Operation Interface
■Enter setting:
Slide the POWER key on side of the unit to turn on the device, press and hold the
SETUP key for 3 seconds then release it. The icon will be blinking on the LCM (the
smaller screen), scroll the SETUP key upward or downward to change setting.
■Change setting:
Press the SETUP key once to confirm change and to move on next setting.
■Exit setting:
WCH-250X
Wireless Camera Hunter Operation
Manual
Press and hold the SETUP key again for 3 seconds.The device will return to scanning mode.
Scanning
Mode
Signal Dwell
Time
00
Receiver
Sensitivity
30
1080
EX
1080
30
30
EXT. AV input mode
UH
30
4 seconds
30
a60
2
B
Alert on/Vibrate Off
30
H (High/-60dBm)
MH
B
00
Alert on/Vibrate On
2
30
60 sec. interval mode
B
4
30
30 Sec. interval mode
2
30
1080
UH (Ultra High
/ -75dBm)
8 seconds
30
30
UH
30
1080
Audio & Vibration
Alert Setting
2 seconds
MH
30
MH (Medium High
/-50dBm)
MH
Alert Off/Vibrate Off
00
30
30
M
Standard scanning mode
M (Medium/-40dBm)
30
M
Alert Off/Vibrate On
ML
ML (Medium Low
/-30 dBm)
60
Law Enforcement Products Manufacturer
L
L (Low/-20dBm)
LawMate
(3)
V1.0
Names and Parts
2.4 & 5.8GHz ant. mount
■Installing the battery
1.2GHz ant. mount
SETUP key
Signal In/Out socket
Remove battery cover on back of the
unit. Slide the supplied battery at
about 15 degree angle to the battery
compartment. Please be aware of +/direction.
■Charging the battery:
Connect the supplied power adaptor to an AC wall outlet and attached the other end
of the cord to the DC 5V In socket.
■Power indication:
UP
When charging the battery, a red color LED light will illuminate. Once the battery is
fully charged, the LED light will turn off. (The charging time is approximately 3 ~ 4
hours depending on the battery remaining power.) Please charge the battery for 8
hours on the first-time use.
PUSH
DOWN
DC 5V In
■Antenna connector
2
1
Plug antenna 1 to port 1 and antenna 2 to port 2. You can
find the indication printed on the antennas as well as on
the ports. Turn the antenna’s base clockwise until it locks
into place.
96.00 mm
■Power switch:
The power switch is on the side of the device. When the unit is turned on, it starts
scanning the signal automatically. Make sure the antenna is screwed tightly to its
allocated position to avoid poor reception.
■Frequency scanning:
Whenever a wireless A/V signal is detected, the image will be displayed on the
screen and stays for few seconds. The length of time depends on your setting. You
have the option to lock the channel by scroll upward or downward the SETUP key on
side of the device to lock the channel or else it will pass on and continue scanning.
67.00 mm
21.20 mm
■Manual scanning:
Scroll upward or downward the SETUP key to scan manually.
■Low battery alert:
When the battery gets low, the battery icon will blink. Charge your battery immediately.
LCM screen
LCD screen
(1)
Power Switch
■External video input:
To connect external video to the device, change the setting to EX mode. Make sure
the connector is plugged properly to the Signal In/Out socket on side of the device,
otherwise it will result non-signal input.
(2)