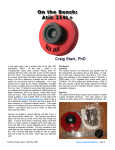
1
A Digital Astrophotography Primer
- OR This is NOT your Daddy’s SLR!
Page 1 of 22
Table of Contents
A Digital Astrophotography Primer...........................................................................................................................................................1
Table of Contents.......................................................................................................................................................................................2
Introduction............................................................................................................................................................................................3
What is an SLR, anyways? ....................................................................................................................................................................3
SLR, DSLR, What’s the Difference?.....................................................................................................................................................4
The Viewfinder ......................................................................................................................................................................................4
The Focus Mechanism ...........................................................................................................................................................................5
The Capture Medium .............................................................................................................................................................................6
The Four Thirds Standard System .........................................................................................................................................................7
What you see is NOT always what you get ! .........................................................................................................................................8
Tracking .................................................................................................................................................................................................9
Stacking ...............................................................................................................................................................................................10
Lens selection ......................................................................................................................................................................................10
Getting started......................................................................................................................................................................................11
How to setup your digital SLR ............................................................................................................................................................11
Manual Mode...................................................................................................................................................................................11
ISO Settings .....................................................................................................................................................................................11
Anti shock ........................................................................................................................................................................................12
Focus....................................................................................................................................................................................................12
Diopter Focus.......................................................................................................................................................................................12
White Balance..................................................................................................................................................................................13
The Hutech Mod ..................................................................................................................................................................................14
Taking the Shot ....................................................................................................................................................................................15
Saving Images - Image Quality............................................................................................................................................................16
RAW format ........................................................................................................................................................................................17
Converting Raw files ...........................................................................................................................................................................17
So what is the best way to handle astrophotos? ...................................................................................................................................18
Processing Images - Imaging Software................................................................................................................................................18
Amp Glow............................................................................................................................................................................................19
Battery Glow........................................................................................................................................................................................20
Archiving .............................................................................................................................................................................................20
Credibility ............................................................................................................................................................................................21
Summary..............................................................................................................................................................................................21
Sources & Suggested Reading .............................................................................................................................................................22
Page 2 of 22
Introduction
I was prompted to write this article when I realized that the copious notes I’d been taking lended themselves to
an article and when I realized that doing so would make a nice handy reference for myself and might even save
a few other folks from some of the blunders and traps that I fell prey to upon entering the realm of digital SLR
astrophotography.
I had a hard time with the title for this paper. Originally I though that “a digital astrophotography primer” was a
good title. After all, we’re discussing digital astrophotography here. As the article progressed I realized that the
main thrust of the article was shifting toward the camera and the similarities and difference between what we
already know about film cameras and what we need to know/learn about digital cameras.
The first thing that needs to be said is mentioned in the title. This is NOT your Daddy’s SLR. The digital
camera manufacturers go to great lengths to make this camera look and feel and act like your Daddy’s SLR. I
give them an “A +” for the look and feel. But act? Sure, in auto mode this camera even acts a lot like your
Daddy’s SLR. It’s got aperture control, shutter speed control, ASA settings, built in flash, autofocus, and many
of the other bells and whistles your Daddy’s SLR had. And I’ll be the first to admit that for conventional use a
digital SLR does a pretty good job of mimicking your Daddy’s old SLR. But when it comes to doing
astrophotography, digital SLR’s are totally different beasts than your Daddy’s old SLR.
What is an SLR, anyways?
For the younger folks out there, an slr is a Single Lens Reflex camera. Early cameras had two lenses. One was
for framing the image (pointing the camera) and the other lens was utilized for taking the photo.
Understandably, this was a poor system. With zoom lenses you could change the apparent size of the image on
the film but not the image in the viewfinder. You could not see depth of field or focus with these early cameras,
either. Often range finders and some amount of guesswork was involved with focusing these old cameras.
The slr allowed us, by the use of a strategically placed mirror, to look through the same lens that took the
picture. When in the down position the mirror would allow us to look through the lens, compose our shot,
preview the depth of field of the image and focus. When the shutter button was depressed the mirror flipped up
and allowed the light to fall on the film plane, exposing our image.
As a result, this made the slr the film camera of choice for amateur astrophotographers.
Then, along came the Digital slr. About the only thing these cameras have in common is that they are cameras
and slr’s. The biggest error in judgement when buying a digital slr is thinking that it is simply your Daddy’s old
slr with a ccd instead of a film plane in it. That it will act and react just like Daddy’s slr and that you can expect
the same results you used to get with Daddy’s slr.
That’s what I expected. I thought I would just lay my old OM-1 Astrocamera on the shelf, attach my new digital
SLR to my scope and everything would be as it was before.
WRONG!
I was in for a rude awakening!
Page 3 of 22
SLR, DSLR, What’s the Difference?
Let’s look at some of the crucial differences between your digital SLR and your Daddy’s SLR. We’ll get into
some advanced stuff later, but let’s start with the 3 most basic of the differences, which are:
•
•
•
Viewfinder –bright vs. dim
Focus mechanism – manual vs. automatic
Capture medium – film vs. charge coupled device
The Viewfinder
The Viewfinder in your Daddy’s SLR consisted of a mirror which
directed light focused from the lens onto a porro (or roof) prism, which
then directed the light onto the viewfinder. Simple, sweet and effective.
Olumpus even made a front surface matte mirror which increased the
amount of light passed to the viewfinder. If this wasn’t good enough,
you could purchase an adjustable magnifying ocular to enhance the
image.
Most digitals are much more complex than this. Designed to be used in
bright light conditions, the viewfinder appears to almost be an
afterthought in the design. Look at a cutaway drawing of your camera for
specifics, but the story goes something like this. Your mirror may be a
partial mirror, in which half of the light incoming from the lens is passed
through the mirror onto photo eyes which help the camera setup the shot. The other half of the light gets
directed onto a porro prism above the mirror, which directs the light to the left onto another porro prism, which
directs the light toward the back of the camera, which is then directed onto another porro prism which directs
the light back to the center of the camera onto another prism which directs the little bit of light that hasn’t
already been absorbed by this long optical train onto the eyepiece. Wow, that was a mouthful. The only thing I
know that’s longer than the above sentence is
the distance light travels in my digital camera
from the mirror to the eyepiece. And yes, you
can buy a magnifier for your digital camera
eyepiece. I did. Only to ask myself, what
good does it do to magnify an image that is
already too dim to see?
I haven’t found a good solution to the
viewfinder problem, yet. I did get the
opportunity to look thru a friend’s Canon
30D. It has a viewfinder similar to your
Daddy’s SLR. I recently purchased one and
have had a fair amount of success focusing it.
Also, Olympus has recently introduced the
E-400 which has a single porro prism
viewfinder just like your Daddy’s SLR and it
has a optional flat matte mirror, just like the
old OM-1 astrocamera. Unfortunately, it’s
not available for sale in the U.S.…..
Page 4 of 22
The Focus Mechanism
The Focus Mechanism in your Daddy’s SLR consisted of mechanical gears and slides that moved the lenses
toward and away from the film plane. These movements were calculated and scribed on the lens. Your better
lenses had an infinity symbol on them. You could turn the focusing ring until the infinity symbol lined up with
the line of demarcation and your lens would be at infinity. You didn’t even need to look in the viewfinder at
smaller focal lengths to assure you had focus.
The focus mechanism in a digital SLR is more
complex. They are designed to auto focus. I won’t
attempt to go into any great detail here since I don’t
know (or care to know) exactly how they work. Suffice
it to say that at the light levels used in astrophotography
auto focus does not work. This leaves us with the
alternative method. Manually focusing the image.
We’ve already discussed the problem with the
viewfinder, so if you’ve been paying attention, you’re
probably wondering at this stage, “How do you
manually focus on something that’s too dim to see?”
And therein lies the problem inherent to most Digital
SLR’s.
I’ve tried to focus by constructing several variations of
Hartman’s masks. The trouble with any type of
focusing mask is that they further reduce the incoming
light. I’ve tried focusing on a bright star nearby the
object I wanted to shoot and then slewing back.
However, mirror flop & flexure makes this method practically useless. The most successful method I’ve found
so far is using Images Plus software. This program has a feature which allows one to take a short exposure and
download it to a laptop. The software then asks you to select a star and it counts the pixels in the star and their
brightness. Then you take another shot and the program compares it to the first. It tells you if the second image
is better or worse than the first by calculating the size and brightness of the selected star in the second image.
Using this method you can be photographing pin point stars within a matter of minutes.
The only drawback to this method is that it requires you to have a laptop available at your observing session.
Page 5 of 22
The Capture Medium
The Capture Medium in your Daddy’s SLR consisted of 35mm film medium. Older astrophotographers are
familiar with this process. Expose film to light and it leaves a negative image when the light strikes the photo
elements on the film. We all knew that various films had different characteristics. Certain films were more
affected my mercury vapor than sodium vapor & vice versa. Certain films added blue casts to the night sky,
while some lended a green cast and some a ruddy brown. Films had different sensitivity to light. Some films
were fast and some were slower. All films had reciprocity failure, which is basically a limit or threshold where
their sensitivity to light became nil. We understood all this and chose our film to match the subject matter we
were shooting. I’m not going to go into detail here because all this knowledge of film characteristics is mute
with a digital SLR.
The Capture Medium in the digital world is a charge coupled device. To use
this medium we have to package up everything we know about how Daddy’s
SLR worked and toss it out the window. In addition to that, we have to face
an entirely new gamut of monsters that are inherent to ccd’s. But before we
can face these monsters we have to learn their names and what manner of
attack they will use.
The very first day I got my digital I couldn’t wait until dark. Finally, I took it
out back, set it up on a tripod and pointed it skyward and set it on 8 minutes. I
wanted a nice star trail picture. Imagine my surprise when the camera finally
finished and proudly displayed a perfectly white image on it’s little LCD
screen.
OK, not to be chagrined I set it up for a 30 second exposure. Imagine my surprise when the camera finally
finished and proudly displayed a streaked constellation image with a background that was not a deep inky black,
but a mottled brown, interspersed with little red, green and blue dots.
OK, not to be chagrined I set it up for a 5 second exposure. Imagine my surprise when the camera finally
finished and proudly displayed a beautiful constellation shot just like my Daddy’s SLR would have made in
about 1 ½ minutes.
I still have this image. It gave me hope. And with it dawned the realization that this camera was indeed not my
Daddy’s SLR. With this photo came the knowledge that I had to perform the one deed that all real men dread.
Yes, I was going to have to sit down and read the user’s manual. I was going to have to go online and join a
digital slr forum and dreg thru the drivel there for useful information. In spite of my intrepidations I did just
that! In the process I actually learned a few new things. Actually, setting aside all modesty for a moment I
learned a LOT! So, now that we’ve got a few basics out of the way, here’s some things you’ll need to know if
you plan on pursuing digital astrophotography.
Page 6 of 22
The Four Thirds Standard System
The single most important reason for the popularity of the 35mm slr was it’s ability to accurately represent in
the viewfinder exactly what would appear on the final image. Lenses were designed to match what was seen in
the viewfinder to exactly fit the 35mm film format. Slide copiers, tele-converters and other accessories were
also designed to fit this format. Digital slr’s do not provide the same scale and thus play havoc with our
astronomical pursuits.
My first DSLR was a huge disappointment.
The first discovery came when I dug out my old boxes of 35mm slides. I have a Spiratone slide duplicator and
my plans were to copy all my old 35mm slides over to digital format. Imagine my chagrin when I discovered
that none of my slides would fit onto the frame of the DSLR. It wasn’t so bad with star fields, the edges just got
cropped off, but my eclipse pictures were worthless. How poignant is a photo of a total eclipse when you can’t
fit the entire disk of the sun and/or moon onto the image?
Prime Focus w/35mm camera
Same Prime focus image w/four thirds sensor
The second disappointment came when I hooked the camera up to my telescope and looked at the Sun. It didn’t
fit. That night I tried the Moon. It didn’t fit either. Believe me, I was ready to throw this camera in the
weeds………….
But, I didn’t. Instead I found a forum on the web and learned about the four thirds conversion. Designed by an
optician for Olympus the four thirds standard was designed to be compatible with a small camera such as the
OM-1 as well as having the ability to create a high quality image. The four thirds system was spearheaded by
Katsuhiro Takada, an Olympus optical designer and researcher. He wanted to find a balance between image
quality and sensor size and to create a community wide standard for the next generation of DSLR users. The
standard defines things like sensor size and aspect ratio, lens mount size and distance from sensor and lenscamera communication protocol.
Because Four Thirds is an open standard which, among other things, regulates lens and body mount
information, users are not bound to a single provider for their lens requirements. This means photographers
have the freedom and flexibility to mix and match four thirds camera bodies and lenses supplied by the
participating manufacturers completely according to their needs.
Page 7 of 22
Unlike older SLR systems, Four Thirds was designed from the ground up to be entirely digital. Lens design has
been tailored to the requirements of digital sensors, most notably through telecentric designs. The advantages of
the system include more compact telephoto lenses (a four thirds lens with a 300 mm focal length would cover
about the same angle as a 600 mm focal length lens for the 35 mm film standard) and more even delivery of
light to different parts of the sensor.
The sensor size is 18 mm × 13.5 mm, which is considerably smaller than that used in 35 mm cameras (36 mm ×
24 mm). Sensor size normally relates directly to image quality, however, the manufacturers involved claim that
it should be possible to exceed the quality of 35mm film using the system and that the better optics will take
better advantage of digital sensors than could be done in the traditional 35 mm camera.
So, while the four thirds conversion does not support our old technology it does embrace a a new philosophy of
standardization. While this means our old tech toys will be mostly incompatible, it offers a lot of opportunities
for the future. Standardization will drive prices down and will ultimately benefit our community.
What you see is NOT always what you get !
In your Daddy’s old SLR what you saw was what you got. That was a huge selling point of slr’s. Photographers
demanded a camera where they could look into the viewfinder, compose their shot and know that what they saw
in the viewfinder would be exactly what turned out in their final image. We astrophotographers depended on
this also. When doing lunar and solar imagery, and when shooting eclipses, we need to be able to get the entire
lunar or solar globe into the image. To assure that we have the entire globe in the image we need to be able to
see the entire globe.
Digital slr manufacturers don’t seem compelled to follow this long standing tradition. While some
manufacturers do design a 1 to 1 ration, (what you see IS what you get) others offer much less. My Olympus E500 is a case in point. I cannot see the entire disk of the Sun or Moon in my viewfinder. Fortunately, though, I
can capture the entire disk. Through trial and error I’ve come to learn that I can’t see the area of an image that
correlates to the bottom of the camera. So, when I “shoot the moon” I’ve learned to make sure that I position the
“top” of the moon in the “top” of the viewfinder. When I do this, I can’t see the bottom of the moon, but it does
show up in my images.
Moon as it appears in viewfinder
Camera actually captures full disk
Page 8 of 22
Tracking
A CCD chip records light a lot faster than the old film medium. Since the image recorded on film is an
accumulation of photons that build up over a long period of time,
tracking objects is not quite as critical. If you centered an object in
your scope and used your slo-mo controls you could keep the object
centered in the crosshairs most of the time. As it drifted away you
would speedily move it back to center. Since the object was in the
center MOST of the time, the photons struck the film there MOST of
the time, so an image was built up over time with mostly round stars.
The movement areas or tracking error areas never accumulated
enough light to affect the image.
However, a ccd records much fainter light at much faster speeds. Any
movement of an object across a ccd will cause a streaked image. Hand
guiding with slo-mo controls onto a ccd will invariably result in
streaked images.
Most astrophotographers using digital SLR’s today have very sturdy
mounts with low periodic error and computer or ccd controlled
controllers. While hand guiding can be accomplished it is extremely
difficult and requires lots of patience and a very delicate touch indeed.
In actuality you need a mount that can track stars accurately enough that you don’t have to touch the telescope
while taking an exposure. A good rule of thumb is, you can expose an image for whatever length of time your
mount can track without showing an error. In a cheap mount your exposure time is probably a matter of mere
seconds. In a medium quality mount you may get an exposure as long as 30 seconds and a high quality mount
could actually yield you minutes of exposure time. This is exactly the reason you see those beautiful, sharp
detailed images in the magazines that show their exposure times as 60 images at 30 seconds. The owner of the
photo recognized the limitations of his mount and stayed within those limits.
The only way to determine the accuracy
of your drive system is to experiment
with it. Of course, general rules which
apply to your Daddy’s SLR still apply
here. Shorter focal lengths will allow
longer exposure times before errors
creep into your system. Balancing your
components is still critical. Mirror flop
is still mirror flop and flexure is still
flexure. However, the speed at which
your digital camera gathers light could
compound these nuisances and make
them much more apparent than in the
old film camera days. That old mount
that served you so well back in the day,
may just be totally unsuitable for digital
astrophotography.
Page 9 of 22
Stacking
Since guiding is so critical, most astrophotographers have found an easy way of eliminating drive and guiding
problems inherent to long exposure astrophotography. They simply make many, many images at short exposure
times and then stack the images using a software stacking program. These programs achieve the same end result
as taking a long exposure, by taking one short exposure and adding the light from successive images into it.
We’ll get more into software later, but suffice it to say that if you are going to do astrophotography you are
going to have to eventually add a computer and several software suites to your shopping list.
A single 30 second Image
8 of these Images stacked together
There are numerous stacking programs out there today. They range in price from free to hundreds of dollars.
The cheaper ones simply stack images. More expensive ones can stack and field de-rotate for those folks
running computer controlled alt azimuth mounts. Some can perform other image processing functions as well.
Being relatively new to digital astrophotography myself I don’t feel comfortable recommending any specific
program. I’ve used several in different price ranges but haven’t really made up my mind yet which one I like
best.
This is my personal plan for evaluating software. I recommend you try the freeware versions first. You have no
monetary loss, so that’s a plus. The freeware usually doesn’t have a lot of bells and whistles, so the learning
curve is a lot smaller generally. It shows you what the program actually does and usually you gain the added
benefit of learning the program’s drawbacks and limitations, as well.
Next, look for programs that allow you a 30 day free trial. Download the manuals with the programs and then
learn each one inside and out, and compare them to each other. Look for programs that address the limitations
you found in the freeware programs. Look at each program closely. Is their gui easy? Is the manual clear and
concise? More importantly, which one fulfills the need you want to address. Ignore the fluff, and the bells and
whistles. If you want to stack images, you want a program that stacks images. You don’t need a program that
stacks images, adjusts your system clock and then starts up your favorite solitary game for you.
Lens selection
To encourage consumers to purchase a camera and give them the feeling of “the most bang for the buck” most
manufacturers offer “kit” lenses with the purchase of their camera bodies. These kit lenses usually not fixed
focus lenses and are not usually high quality lenses.
Page 10 of 22
Needless to say, we want a high quality, low dispersion fixed focus lens for capturing our low light dim
pinpoint images. While good results can be obtained with these lenses, don’t expect to achieve the same levels
of quality as you would with a high end, high quality, high dollar, coated fixed focus lens.
Getting started
OK, let’s say you’ve got
your new camera, a scope, a
computer and all the right
software. Now you’re ready
to take a picture. Where do
you begin?
First, you need to attach the
camera to the scope. You
can purchase piggyback
mounts
from
many
reputable dealers for any
type and style of scope.
You
should
try
piggybacking first.
If you want to proceed to
shooting through the scope you will first need a t-mount (telescope mount) which attaches the front barrel of
your camera, minus a lens to the prime focus of the telescope. Then you’ll need to buy an attachment for either
doing prime focus or eyepiece projection photography.
Once you’ve got all the right equipment you’re almost ready to set up your camera and shoot. Don’t forget,
however you attach the camera, you must counterbalance it for optimal results. Also, if you’re doing prime
focus astrophotography, you will need an alternate guiding system.
How to setup your digital SLR
This section will mostly deal with generalities since each camera uses different methods of setup and utilizes
different control features. First, find your cameras MANUAL setting……
Manual Mode
This will turn off a lot of, but not all, of the features and bells and whistles in the camera and will set it in
shutter priority mode. Then set your shutter speed appropriately: Full Moon about 1/30 sec; Crescent about 1/8
sec; Constellation about 5 seconds and prime focus about 15 seconds. This is a good starting point and you can
refine your shutter speeds from here.
ISO Settings
Next find your ISO setting and set the speed. Remember that the higher the ISO number the higher the noise
levels and graininess. The lower you set the ISO setting, the less sensitive to light your will become. For bright
objects use about 400 ISO and for dim objects use 800 or 1600 ISO. Some cameras have a 3200 ISO setting, but
Page 11 of 22
it is not a true ISO setting. It doesn’t increase the speed at which the ccd receives light. It records at 1600 and
then performs an artificial bit shift calculation on the image.
Anti shock
Most cameras have a self timer button. I keep
mine set at 2 seconds. To determine your
setting attach the camera to the scope and look
in the viewfinder. Touch the camera with about
the same pressure you would if you were
depressing the shutter button, then let go. Count
the seconds until the image in the viewfinder
stops shaking. Add +2 seconds to this number
and you can be sure that the camera will be still
when the exposure begins. Additionally, look
for a mirror lock or anti-shock feature. One of
the drawbacks of an SLR occurs when the big
mirror inside slams upward into the top of the
camera while moving out of the focal plane. Set
this feature to about +3 seconds.
So, when you depress the shutter button the
camera will wait +2 seconds before it does
anything. Then it will lift the mirror and wait
+3 more seconds. Then your astrophoto will
begin. This process adds about 5 seconds to your total elapsed time between exposures, but I’ve found that it is
extremely helpful in getting good sharp images.
Focus
Find your manual focus feature and set it. Take your time and fiddle with the focus as long as you
feel is necessary to achieve the best possible focus you can. Read your manual. My Olympus E-500
has a feature called RESET LENS. When activated it will set the lens to infinity, as a default, every
time the power to the camera is turned on. This will not always give you perfect focus at infinity but
will put your focus in the ballpark when doing piggyback photography with a lens attached. Use any
aid you need to achieve pinpoint focus. It WILL be worth the extra effort.
Diopter Focus
Another consideration to a good focus is the eyepiece diopter. Different cameras have different variations. My
Olympus has a -1-+3 setting and my Canon has a -3- +3 adjustment. You don’t want to try to adjust the diopter
under dark skies on dimly lit objects. Set your diopter up beforehand.
I’ve found that a good practice is to focus the diopter using the small grids placed on the front mirror of the slr
that are used for spot setting or focus points. You can do this with the lens attached or removed. Aplain
background works best as it eliminates distractions. I prefer to go into a dark room and use a mini-mag
flashlight, shined into the front of the camera, slightly off axis. You don’t want to be able to see the light, but
Page 12 of 22
you want enough light to enter to illuminate the small grids on the mirror. Focus your diopter until these
gridlines are at pinpoint focus.
If you use a right angle finder, attach it and focus it’s diopter using the same method. Some folks recommend
taping or gluing the right angle diopter in place after focusing. I suppose this is fine as long as you only use the
right angle finder on one camera, but I think it would be a good idea to occasionally re-check the focus, at least
at the beginning of each observing session.
White Balance
White balance is a totally new aspect of astrophotography for those of us who grew up using Daddy’s SLR. Our
only prior concept of this was with the use of certain filters to adapt/enhance/filter astrophotos. Digital cameras
cover a large portion of the color spectrum and can produce dire results if we’re not careful with them. Most
cameras have presets, say for bringing out the red and orange hues in sunsets, for shooting bright colors, for
dimming bright colors, etc.
On the other hand we can use
white balance to achieve positive
results. The chart to the right
illustrates some of the white
balance settings I can select on my
Olympus E-500. As you can see I
can enhance or negate certain
portion of the spectrum to suit my
needs.
Recently I went to my favorite dark sky site in Wellington, Ohio and took a series of photographs of the
constellation of Orion. I shot them in rapid succession so time and temperature, weather effects, etc would be
kept to a minimum. Each shot was taken with a different white balance setting and you can see from the
illustration below that they had a dramatic effect on the outcome of the photos.
The last photo (bottom right) is the result of stacking the prior 8 images. So, as you can see, white balance is
definitely something you need to pay attention to. I’ve noticed that if an image is too dim for white balance to
register, the camera defaults to the last setting used. To avoid this simply save your images as RAW files. (More
on this later.)
Note: The photos above are a very small cutout just to illustrate color shift.
Page 13 of 22
The Hutech Mod
Another drawback to digital slr’s is their inherent insensitivity to redder portions of the visible spectrum. All
astrophotographers desire to shoot faint nebulosities at some point, and are quite disappointed at their first
results. When you spend the night shooting the Orion Nebula, only to find out it turned out blue in your
pictures, it can be a little disenheartening.
A company named Hutech can mod your digital slr to access
the redder portions of the spectrum. The mod requires you
sending the camera to them, where they remove the infared
screen and add their Hutech filter. Unfortunately, this makes
daytime use of the camera difficult. It can still be used in
daylight but the images all require additional processing to
return them to a normal looking appearance and white
balance. Since the mod is quite expensive it’s probably not
justifiable unless the camera is going to be dedicated to
astrophotography.
To the right is a comparison of a typical color palette shot
with a conventional digital slr (bottom) and a Hutech modded
slr. (top) Note that some muted blues and greens get through
the filter and lots of reds.
Page 14 of 22
Taking the Shot
With Daddy’s SLR we used a cable release. We depressed the button on the end of a long cable, locked it and
counted down many seconds or minutes until the exposure was over. Digital cameras offer more advanced
options. Most come with software to run the camera from a laptop or pc. Here’s an example of the camera/pc
interface on a Canon 30D.
From this interface you can set shooting parameters such as white
balance, ISO speed, bracketing, etc. More importantly you can set
the length of exposures as well as the number of frames to shoot.
In essence, if you have a good guiding setup you can tell the camera
to take 30 one minute exposures and go have a cup of coffee or
warm your cold feet while the camera does it’s job.
If you don’t want to use a laptop, most camera manufacturers
provide optional remotes that perform similar functions. Some offer
wireless capabilities while other still use wire to connect the remote
to the camera. Some simply fire the camera, while others offer
advanced features similar to the pc interfaces.
Page 15 of 22
Saving Images - Image Quality
Now that you’ve got all your equipment in line, your camera set up properly and are about to begin capturing
images there’s one more consideration you need to take into account before you actually depress the shutter
button. After all, capturing the image of a star field is not the end of the process, it’s only the first step in the
process. Once you capture the image you need to process it. With your Daddy’s SLR this meant taking the film
to KODAK, or even better yet taking the film to your own darkroom for development and processing. With
your digital SLR this means dumping the image onto your computer and processing it using digital
enhancement software.
To use the imaging software you need to format the image properly for the software to be used to it’s full
advantage. There are several ways to save graphics files. RAW, TIFF (Targeted Inter Face File) and JPEG (Java
Postscript Encapsulated Graphic) are the three basic formats. RAW is probably the best for astrophotography.
The raw format is pretty much defined by it’s name. It’s a raw image presented exactly as the camera took it
without any processing or compression. Compression is a tool used by imaging software to reduce file size. It
works by eliminating “unnecessary” information in the image. However, the folks who wrote the compression
software weren’t doing astrophotography. Often, the unnecessary information they delete is absolutely essential
to our astrophotos.
The drawback to using the raw format is that raw files, having no compression applied are HUGE files. A
memory card capable of holding 300 jpg files may only hold 20 raw files.
Next is the TIFF format. A tiff file is also very large and is similar to a raw file. The difference is that a tiff file
will carry some extra pre processing information such as white balance and other settings defined by your
particular brand of camera. The problem with a tiff file is that the extra information from your camera may not
necessarily be what you want in your image. Pre processing performed on the image by your camera was also
not written for astrophotographers and may be detrimental to the ultimate outcome of your image. Since
different cameras have different firmware and have software written that is specific to it, it’s beyond the scope
of this article to go into all the variances. You will need to play with tiff images and your particular camera to
determine the usability of tiff images.
JPG or jpeg files are the most commonly used file formats, and have the most compression. This also means
they contain the least information, pixel size and resolution. Check your camera specs for the jpg formats
available to you.
So, your best option is to save files in the raw format, manipulate them in your favorite software program and
then apply compression to reduce the file size.
Page 16 of 22
RAW format
So, what exactly is a RAW image? Raw is a generic format for a variety of proprietary file formats such as
Canon’s CRW or CR2, Minolta’s MRW, Nikon’s NEF and Olympus’s ORF file format. I found it interesting to
learn that RAW files produced from digital cameras are commonly grayscale.
Basically, a RAW file is a record of the data that was captured by your
camera when you exposed it to light. While there are many different
ways of encoding this information after the fact, the raw file contains the
actual unprocessed sensor data that was gathered onto your camera’s
CCD (charge coupled device) or CMOS (complimentary metal oxide
semiconductor) sensor. These sensors are basically counters. All they
actually do is count the photons, then produce an electrical charge or
current that’s directly proportional to the amount of photons they
counted.
In front of the CCD or CMOS sensor is a tri-color filter consisting of
a red, green and blue filter usually laid out in a Bayer pattern. The
red filtered elements produce a grayscale value proportional to the
amount of red light reaching the sensor. The green filtered elements
produce a grayscale value proportional to the amount of green light
reaching the sensor and the blue filtered elements produce a
grayscale value proportional to the amount of blue light reaching the
sensor.
So, basically a RAW file is an image that contains the raw data that
was captured on your sensor when you exposed it to light.
And that’s exactly why it behooves us as astrophotographers to
capture raw files.
Converting Raw files
When a RAW image is opened in any format other than
RAW, a conversion takes place. The RAW conversion
process takes the image and applies processing to it. It
correlates the color information so we can see the
image in color. It adds white balance information. Lots
of different algorithms are used to adjust brightness,
luminosity, contrast, etc based on the most popular
usages (terrestrial photography), since that is actually
what 99% of the people are using digital cameras for.
However, we sometimes need strikingly different
processing for our astrophotos. If you look at a
histogram from a conventional photograph you will see
a nice centered mound with the majority of the
information in the center. A normal terrestrial
histogram usually tapers off quite abruptly and contains
very little information at each side of the graph.
Page 17 of 22
Conventional terrestrial histogram
normal astrophoto histogram
A normal astro histogram looks quite differently. Typically there is a quite long flat line on each end of the
graph and a tall narrow spike in the center of the graph. The information we want to enhance is in the far ends
of the graph. As you can see from the photos above, the histograms are strikingly different. So why would we
want to process them in the same way?
Because the primary usage of digital cameras is for terrestrial photography the conversion process is tailored to
terrestrial type histograms.
So, when we convert our astrophotos, our cameras try to convert the histogram to terrestrial standards. This
widens the spike, rounds it off and lops off the ends of our histograms. It lightens the night sky, and reduces the
amount of nebulosity we captured because it’s trying to conform our photo to a terrestrial standard.
So what is the best way to handle astrophotos?
First, shoot and save your astrophotos in RAW format. Then open them in RAW format. Do your preliminary
proccesing while in RAW format. Bring out and enhance your faint nebulosities and adjust your color balance,
contrast, ect while in the RAW mode.
In other words tailor the astrophoto with it’s own unique attributes. Then when you do the conversion to jpg or
other format you will have a much better photo. Now you’ve got something to work with.
Processing Images - Imaging Software
After you finally take your first image and copy it into your computer you will be ready to tweak it. There are
many photo manipulation programs on the market. I’ll mention a few.
JASC Paint Shop Pro is a simple and cheap way to start. About $50.oo
ImagesPlus has some nice advanced features for about $170.oo
PixInsight is a nice program for fine turning histograms
NeatImage is a nice program for dealing with noise in your photos
Adobe Photoshop is the premier photo manipulation software at about $360.oo
Registax is a nice image stacking program
Below left is a 30 second exposure of Orion’s Belt. It is straight out the camera with no editing. Notice how the
sky looks brownish/green. This is probably a result of Mercury Vapor light getting scattered into the camera.
The stars are all pretty washed out, too. Below right is the same image after processing. Notice the improved
Page 18 of 22
color, enhanced contrast and increased sharpness, as well as the crisp, dark sky background, deplete of any hint
of light pollution or vignetting.
Amp Glow
Amp glow is a problem inherent to all digital cameras with a CCD chip. Each sensor in the chip is actually a
small photo eye. When light strikes the photo eye a small electrical current charge takes place. These currents
are very small. In order for the currents to be processed and produce an image these small currents are amplified
and sent through a processor. The amplifier generates heat while processing all the information sent from photo
eyes and therein lies the problem. Photo eyes have a hard time distinguishing between heat and light input.
Since the amplifier is placed necessarily close to the ccd array it invariably effects a portion of the array that it
is closest to. That’s why we normally see one corner of our image much brighter than the rest of the image on
long exposures.
There are a couple of ways to counter this problem.
First, is to shorten exposure lengths. However, in astrophotography this defeats our purpose, so is mostly
impractical.
Second, put on your lens cap and make a blank exposure the same length as your astrophoto. This is called a
Dark Frame. The dark frame will show the same glow as your astrophoto. Later you can use this dark frame to
subtract the amp glow from your astrophoto.
Third, get a digital slr with a CMOS sensor instead of a CCD chip. CMOS sensors handle light a little
differently and are less prone to amp glow.
Below left is a dark frame. Notice the amp glow in the bottom right portion of the frame. To the right is an
actual astrophoto taken at the same exposure length as the dark frame with amp glow evident.
Page 19 of 22
After subtracting the dark frame image from the astrophoto we end up with a nice image without amp glow.
Battery Glow
Battery glow looks just like amp glow and is also caused by heat. When taking long exposures the battery gets
warm and can affect the image by heating the portion of the sensor closest to the battery. The easiest fix for this
problem is to purchase an optional ac adapter. This will effectively move the heat source away from the camera.
(While adding yet another cord to the tangle.) Barring this, I’ve found that it helps to keep the portion of the
camera where the battery resides on top with the sensor below. Since heat rises, this slows the problem but does
not eliminate it. If your battery has a lock you can also open the battery compartment door to allow heat to
escape the camera body.
Archiving
Probably one of the most intimidating arguments I’ve heard against digital photography is the insecurity of
digital media. We’ve all had an electronic device crash and burn at one time or another. Many of us have lost
data when a hard drive, CD, DVD or backup drive crashed. Face it, we don’t want to take our pictures and then
lose them to a random occurrence such as a lightning strike or power spike.
Just like we had to take precautions to secure the longevity of the pictures we took with our Daddy’s old SLR,
we have to take precautions with our digital pictures. Instead of buying acid free paper, sleeves, binders, storage
containers and providing the proper humidity controlled environment for our negatives and/or slides, we now
have to purchase electronic storage devises. Whether this be tape drives, external drives or high end dvd’s, it’s a
step we will all have to take at some point if we want to keep our photos well into the future.
For those folks who insist upon relying on the old archiving methods there is still hope. They can take their
digital cards to their local (fill in the blank) Mart and have them produce film negatives and prints for a small
fee.
Page 20 of 22
Credibility
Another concern about digital photography is credibility. Since digital images are so easy to “fake” or
manipulate, lots of people are rightfully concerned about the credibility of digital images. With Daddy’s old
SLR we could ask that a negative be produced if the authenticity of an image was in question. Since digital
cameras don’t produce negatives how do we determine if a photo is authentic or if it was manipulated?
At this point in time it’s a difficult question. As is often the case, technology has gotten ahead of our ability to
create laws and/or rules to govern our concerns. However, the question is being addressed. A group called “The
Digital Negative” or DNG is working toward a new standard of making a sort of digital “negative”.
The new digital negative will be vastly superior to the old film negative in terms of information stored. Since
most camera manufacturers are currently offering a raw image format on digital cameras, the “DNG” group is
using this new technology to adopt the means of making a digital negative. Their contention is that the raw
image from a camera can be used as a digital negative. To do this camera manufacturers would be required to
handle raw images in a similar format. The DNG group is lobbying to create a standardized raw format.
Currently Extensis, Canto, Apple, and iView have developed support for DNG. And
respected camera manufacturers Hasselblad, Leica, Ricoh, and Samsung have
introduced cameras that provide direct DNG support. In addition to the Digital
Negative specification, Adobe provides the free Adobe DNG Converter, for Mac
and Windows platforms, which easily translates raw files from many of today's
popular digital cameras. (Canon, Olympus, Nikon, etc.) The current DNG Converter
3.6, is available as a Universal Binary for Intel-based Macintosh computers. In the
future, if there is a concern about the authenticity of an image you may be asked to provide your raw or digital
negative image.
Raw images already hold a large amount of data, including:
• Type of camera body and firmware version information for camera and lens
• Type of Lens & if a zoom lens, what focal length the lens was set at
• Date & time photo was taken
• Exposure info, shutter speed, aperture setting, ISO, exposure time, white balance
In the future the digital negative will provide photographers the same credibility as the old film negative did.
Summary
This paper is not intended in any way to be an inclusive treatise on digital cameras and/or astrophotography.
Each item I’ve touched on in this article could probably have a book written on it. (And probably has!) This
article is intended more as a beginner’s guide to provide a starting point for your personal exploration of digital
astrophotography.
Information for this article came from my personal experiences and numerous sources, some of which I’ll list
below.
Page 21 of 22
Sources & Suggested Reading
Olympus E-500 Users Manual
Canon 30D Users Manual
Jerry L’s E-Book on astrophotography
Hutech Website
Recommended Telescope Accessories
•
•
•
•
•
•
•
•
•
Astro-Physics 2 Inch Adapter and T-ring $65
Canon TC-80N3 $135 - Can be adapted for use with most cameras made by different
manufacturers
Extra Lithium-Ion Camera Battery
o Canon BP-511A $50
o Nikon EN-EL3 $40
12 Volt Deep-Cycle battery (75 - 100 amp-hours) $75 - $125
Lexar 80x Compact Flash Card (Price varies depending on size)
Lumicon Off-axis guider $190 for a 2 inch OAG for refractors.
Kendrick's Dew Removal system
o Standard Controller $85
o Heater strap for a 5 inch refractor $55
Webcam for autoguiding - Logitech Quickcam Pro 4000 $75
IDAS LPS Light Pollution Suppression filter $189 for 48mm size.
Recommended Computer and Accessories
•
•
•
•
•
•
•
Dell Notebook - Computer for field work $1,000
SightSaver - Red plexiglass for laptop computer $30
Images Plus - Image focusing, acquisition, calibration and processing. $175
Hap Griffin offers cables for controlling the DSLR from a computer via a serial or parallel port. $36 $49.
Dazzle Video Creator 80 Analog video to USB adapter $70
VirtualDub $Free
GuideDog - Software for autoguiding with a webcam $Free.
Page 22 of 22