1
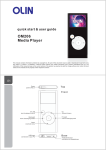
DM110
OPERATION
INSTRUCTIONS
1
Index
1. Ports Connection and Buttons……………………………………….5
2. Use the Media Player…………………………………………………6
3. Driver Installation……………………………………………………...6
4. USB Connection……………………………………………………….7
5. Format Hard Disk under Windows 2000/ Windows XP……………7
6. Download or Edit files on PC…………………………………………8
7. Transfer Data from Memory Card……………………………………8
8. Auto Power off Function………………………………………………9
9. Recharge the Battery………………………………………………….9
10. If an erroneous display / operation occurs………………………...9
11. Tare care of the Hard Drive and the unit…………………………..9
12. Troubleshooting……………………………………………………...11
2
CAUTION
Please be aware that you should not try to repair the system by yourself under any circumstances, as
this will invalidate the warranty. Please do not open the system as there is a risk of danger.
IMPORTANT WARRANTY INFORMATION
z
To reduce the risk of danger, please do not expose this equipment to rain, any liquid or
moisture environment.
The repairs and replacement service will not apply to the products which are misused or
repaired without authorization.
Any replacement of faulty product may be either new or looks like new, provided it works
properly.
We are not responsible for any data stored on the returned products, please backup any data
before you send back the unit.
The limited warranty for accessories (included battery) is only valid for 6 months from the date
of purchasing..
All OUT OF WARRANTY repairs may subject to a normal repair fee. Please contact your
dealer for details.
z
z
z
z
z
FEATURES
z
z
z
z
z
z
z
z
z
USB 2.0 High speed compatible
Stand -alone, Palm-sized rechargeable storage device. No PCs required
Supports SmartMedia, SD/MMC, Memory Stick, Memory Stick Pro and Compact Flash
Type I/II, IBM MicroDrive, Mini-SD(with adapter), RS-MMC (with adapter), MS Duo (with
adapter),MS Pro Duo (with adapter)
Infinite memory & storage expansion configuration with internal Hard Disk
Ability to copy data from memory card(s) into the internal hard drive
Fast & easy file transfer and storage with a simple button operating
Back up all kinds of files to the 2.5" external HDD
USB Card reader/ writer
Convenient charged by a generic AC/DC adapter
PACKAGE CHECKLIST
Main unit
USB cable
Carry Pouch
Warranty Card
User Manual
Driver CD
Power Adapter (100-240V auto switched)
3
SPECIFICATIONS
ITEM
Supported Memory Card
Formats.
DESCRIPTION
Hard Disk Size
SM, SD/MMC, MS, MS Pro and CFType I/II,
MicroDrive, Mini-SD (with adapter), RS-MMC (with
adapter), MS Duo (with adapter), MS Pro Duo (with
adapter).
Battery power
File transfer status
Main storage (HDD) capacity
Memory card / HDD error indicator
USB Access
Charge Status
2.5 inch
Hard Disk Capacity
Unlimited ( Any 9.5mm 2.5" HDD )
Power Source
Download interface
Internal Power: Li-ion rechargeable battery 3.7V x
1 (1100mA)
Model Number: Fuji-NP60
External Power: 5V adapter (2.5A)
USB 2.0 interface port
Files System
Support Standard FAT 12/16/32
LCD Status Indicators:
Supported OS
Windows98/98SE with driver installation required
Win 2000 SP3 above without driver installation
required
Linux Kernel version 2.4 or above without driver
installation required
Mac OS 10.01 above without driver installation
required
Note: DM110 doesn’t support Windows SP1 ,
SP2.
Please upgrade your system to SP3 or above.
Accessories
Operating Temperature.
Power Adapter / USB Cable / User's Guide /
Driver Disc/Carrying Bag
0。C ~70。C
Storage Temperature
-40。 ~70。C
Humidity
90% RH
Weight
230g ( Included 2.5” HDD & battery pack )
Dimension ( LxWxH )
116 x78x23mm
4
1. Ports Connection and Buttons
RESET
USB Port:
Insert USB cord mini jack
CF card slot:
For the CF card / Micro Drive insertion
SM, Memory Stick, MMC/SD card
slot:
DC IN:
Insert Ac adapter Jack
Power on /off
Copy / Stop Copying
5
2. Using the Media Player
2.1
Starting up
1) Charge the batteries
z
Charge the batteries for 4 hours before the first use
2)
Power On /Off
z
To turn on the unit, long press the Power button for 2 seconds.
z
The green light indicates the unit is operating.
z
To shut off the unit, long press the power button for 2 seconds.
3. Driver installation
Windows 98/98 SE
1
Insert your driver CD into your CD-ROM.
2
Run "setup.exe "to begin driver installation. Press "Next" and follow
the installation instructions.
3
Restart your computer after installation is completed.
4
Under Windows 98, the 4 removable disk drives will look like
the following:
Macintosh MacOS 9.x
1
Insert your driver CD into your CD-ROM.
2
Follow the installation instructions to install the driver.
3Res
Restart your computer after installation is completed.
6
4. USB CONNECTION:
When the Media Player is connected to the computer, the “HD TRANSFER” message will appear on
the screen. During file transferring process,
PLEASE DO NOT:
1. Unplug the USB cable
2. Remove memory card(s) from the card slot.
Note:
(a) Keep it plugged into the AC adapter/charger while it is connecting to your computer,
hence to avoid any low battery.
(b) To safely disconnect the Media Player from computer, click on the system tray remove
icon
and wait till you get a message saying that you can safely unplug the device.
5. Format Hard Disk under Windows 2000/ Windows XP
Due to Windows 2000 / Windows XP does not support Disk Formatting for Hard Drive with
capacity of 30G or above, please use the Application Program called “FDisk AP” from the included
CD-ROM. It has a simple interface which you can use it to format the Hard Disk.
Note: If you are using the new Hard Disk, please remember to initialize the HDD first. Learn more
information about your partitioning and formatting options, please link to http://support.microsoft.com.
z
Follow instructions to format drives.
c Type the drive letter
2 Tick FDiskSel
③ Start formatting
Note: The Hard Drive normally pre-formatted as FAT before ex-factory.
7
6 . Downloading or Editing the files on PC:
z
z
z
z
Power on the Media Player
Connect the Media Player and PC with the provided USB cable
Double Click on the " My computer" icon, the operating system will
display 4 icons identifying the media types correspondingly.
You can then read, edit, copy, and remove data on the PC.
7. Data Transfer from Memory Card
Insert memory card(s) into the card slot .
Press the " COPY" button , files transfer function can be performed.
If the message [ COPY OK ] pop on the screen , it indicates the files are successfully copied
And the HDD free memory will be displayed.
8
All the files transfered from each memory card are stored onto the Hard Disk in folders numerically,
under the name “CF0001“, "MS0001", "SM0001", "SD0001".
When the same card was inserted and copied twice, two different folders will be created, DM110 won’t
overwrite the old folder.
To stop transferring the data, just depress the Copy button and, the message [COPY STOP] will pop
on the screen, and then you can switch off the device.
8. Auto Power off Function
_________________________________________________________________
There is an auto screen-off function to save battery power .Therefore if it is idle for 80 seconds, the
device will shut off automatically.
9. Battery Recharge:
_________________________________________________________________
1) To charge the batteries, please connect the AC adapter to the DC 5V jack of the main unit. When
the Power LED indicator goes off, it indicates that the batteries are fully charged.
2) Please only use the FUJIFILM NP-60 1100mA 3.7V rechargeable Li-ion battery.
3) For additional battery packs, please contact your dealer or you can purchase it from Digital Camera
Stores.
10. If an erroneous display/operation occurs:
_________________________________________________________________
1) If there is an error message displayed on the screen, there may be a chance of data corruption
or damage of memory card, you can try to change to another memory card.
2)
If there is any shut down caused by erroneous operation, you can depress the [reset] button
located on the bottom to switch off the main unit.
3)
If the unit is operated via USB on PC while the battery is low, erroneous display /operation may
occur, if this happens, unplug the USB cable, and press the [reset] button.
11. Take care of the Hard Drive and unit:
_________________________________________________________________
1) If the computer or the Media Player does not detect the Hard Drive, it be may caused by several
reasons:
z
The flat connector is not plugged securely.
z
Driver is not installed properly.
z
It is not recommended to format the 32G above Hard Disk under Windows 2000 or Windows
XP.
Note: Windows 2000/ Windows XP do not support Format Disk for Hard Drive with
capacity of 30G or above 30G.
2) Please don't force to connect the flat cable to the unit and Hard Drive.
3) To keep your hard drive with better operating performance, we recommend to periodically run
Scan Disk and Disk Defragmenter.
9
4) Hard Drive must be formatted to the FAT or FAT-32 format, NTFS format is not compatible with
this function.
5) Please carefully insert and remove the memory card from each slot.
6) Do not drop, jar, bump, shock the unit, or expose to severe vibration while data is being
transmitted.
7) To reduce the risk of electronic shock, do not remove cover (or back).
8) To reduce the risk of fire or shock hazard, do not expose this equipment to rain, any liquid or
moisture environment.
9) Keep it plugging into the AC adapter/charge while it connect to your computer.
10
12. Troubleshooting.
WARNING
If faulty occurs, please first check the following points before taking the unit to get repaired. If you are
still unable to solve the problem, please contact your dealer or service center then.
Problem
USB Connection issues
Solutions
Under Windows 98SE, the Media Player should not be connected to the
system before the driver has been installed.
If you are currently using a USB port in the front of your computer, try the USB
ports in the back. Front USB ports are often non-powered.
If you are currently using a laptop computer with a docking station, try to
disconnect the docking station.
If you cannot see the files on the device after copied files to the Media Player
via USB from computer, you must properly remove (un-mount) the Media
Player from the computer before disconnecting the USB cable to avoid loss of
data or freezing of the computer or device.
Problem
MacintoshTM OS issues
Solutions
MacOS 10.0.x does not adequately support FAT volumes. Upgrade to 10.1 or
later.
The FAT-32 format made by MacOS X´s Disk Utility is incorrect. Formatting
must be done under MacOS 9.
The FAT volumes do not appear or disappear until the mouse is moved.
Problem
Corrupt data , General Error , Can’t open Source File
Solutions
Due to file allocation table (FAT) has been corrupted, the data in memory card
transferred into the Media Player may look faulty, please backup the data and
run ScanDisk, Disk Defragmenter or reformat the memory card.
The browser will show a “?” icon indicating that it is not one of the standard file
types that it can play.
Problems
Formatting, and partitioning
Solutions
To work in the stand-alone mode, both the disk and the memory cards must be
formatted to the FAT or FAT-32 file systems.
Note: Windows 2000/ Windows XP can not support Format Disk for 30G or
above Hard Drive.
Please find the FDisk AP inclued in the driver disc or use the
built-in “Format Disk” function to format the HDD.
11
Hard Disk Assembly Chart
1. Remove the screws1~4.
c
e
d
f
2. To avoid bending the pins, carefully slide the HDD into the chassis,
D
3. Inside the accessories pack, you will see the spongy rubbers, please stick it
underneath the back case to secure the assembly.
12
Battery Installation Chart
2. Remove the screws1~4.
c
d
e
f
2. To avoid bending the pins, carefully slide the battery into the chassis.
13
Thank you for choosing this product.
If you experience problems
with Olin DM 110
And cannot find answer in the previous
troubleshooting sections ,
please contact your dealer.
or mail to
[email protected]
14