1
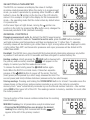
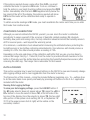
If the primary readout shows a value other than 0.0%, you must
calibrate the meter to operate in MI mode. To do so, continue to
hold the meter in your hand (touching nothing) and press the ZERO
button. Immediately after the term ZERO appears briefly below the
bar graph at the left of the display, the primary readout will show
0.0% and the meter will be calibrated and ready to operate in
MI mode.
To obtain accurate readings in MI mode, you must recalibrate the meter each time you re-enter
that mode from another mode.
CHECKING CALIBRATION
Although you cannot calibrate the RH700 yourself, you can check the meter’s calibration
periodically to assure yourself of the accuracy of humidity-related readings (RH, absolute
humidity, dew point and mixing ratio). Factory calibration should minimize the humidity sensor’s
drift for several years—well beyond the warranty period.
At a minimum, a calibration check should entail immersing the slotted structure protecting the
humidity sensor in two bottles containing saturated salts. One reference salt should produce a
reading of a 33%; the other should produce a reading of 75%.
Depending on the size and shape of the calibration salt bottle that you use, you may have to
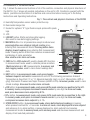
remove the hanger tab (Fig. 1, Callout B) from the meter to provide sufficient clearance for the
bottle to fit snugly over the slotted structure protecting the humidity/temperature sensor (after
removing the dust cap). The hanger tab is removable for that reason.
DATA LOGGING
This section explains how to use front-panel buttons on the RH700 to view and manually change
data logging settings and to clear logged data from the meter's memory.
The final section of this manual—Using the Included Software, beginning on p. 15—outlines how
to do the same tasks more quickly and easily by pressing soft buttons on the X-In-1 application
included with the meter.
Viewing Data Logging Settings
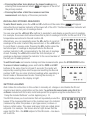
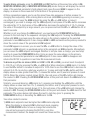
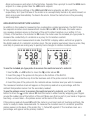
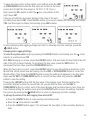
To view your data logging settings, press the LOG/SET button. If
the mode selector does not appear above TM, press the <DN or
UP> button to move the selector above TM, at the left side of the
top line of the display. Once the selector is above TM, the two-digit
date portion of the system clock setting (09:18, or September 18,
2012 in the upper screen shot at right) will be visible on the
secondary readout.
12