1
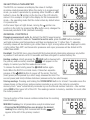
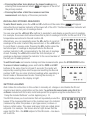
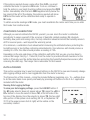
● Complete the process by pressing the HOLD button to return to displaying real-time
readings.
Starting and Stopping Data Logging
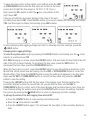
To initiate data logging, make sure the RH700 is not operating
in settings viewing or changing mode. Then disable the meter’s
Auto Power Off (APO) function by pressing and holding the ZERO
button while pressing the /HOLD button. Next, press and hold
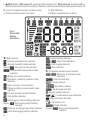
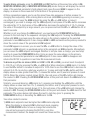
the LOG/SET button for at least 2 seconds. The terms LOG and
JOB and the current real-time data readout will appear on-screen.
The unit will begin logging data according to stored settings. Note that the term APO has
disappeared from the screen, indicating that the meter’s Auto Power Off function has been
disabled.
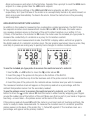
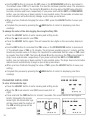
To stop data logging, press and hold the LOG/SET button for at least 2 seconds. The terms LOG
and JOB will disappear from the screen.
Each time logging is started or stopped, the JOB working group number will automatically be
increased by 1 up to a maximum of 99 groups. When 98 groups have been stored, the term JOB
will be replaced by the term FL (full). Additional logging cannot occur until existing logs are
cleared.
USING THE INCLUDED SOFTWARE
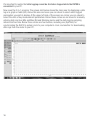
The main purpose of the X-In-1 application on the mini-disc supplied with the RH700 is to
display data logs captured and stored by the meter. The program’s secondary function is to make
it easy to set the meter’s system clock and to change its data logging settings and temperature
and moisture alarm setpoints.
To install the X-In-1 program, place the mini-disc face-up in the tray of your computer’s optical
drive, open the <Volume> folder, and double-click the <setup.exe> file. Run the installation
Wizard, which will also automatically locate and install the correct driver for your PC’s operating
system.
After the program installs, do not open it yet. First, connect the RH700 to your computer by
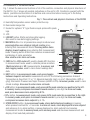
inserting the mini-plug end of the included USB cable into the mini-USB jack on the bottom of the
meter (Fig. 1, Callout N) and inserting the full-size plug at the other end of the cable into a USB
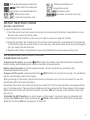
port of your computer. Note that inserting the cable causes the
icon to appear on the meter’s
LCD.
The icon indicates that a two-way link has been established between the meter and the
software. Working in one direction, the link enables data logs stored in the meter to be
downloaded to your PC and displayed by the program as a table or graph. Working in the
opposite direction, the link allows you to set the system clock and change data logging and alarm
settings using your mouse and have those changes reflected inside the meter.
15