1
Strategy Runner
V 3.1
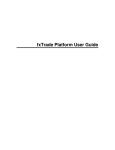
User’s Guide
Strategy Runner User’s Guide
Getting Started
Table of Contents
CHAPTER 1.
GETTING STARTED...................................................................................................... 5
DOWNLOADING AND INSTALLING THE PROGRAM ...................................................................................... 5
STARTING THE PROGRAM ......................................................................................................................... 5
MAIN W INDOW ........................................................................................................................................... 5
Menu Bar ............................................................................................................................................. 7
The Toolbar ......................................................................................................................................... 7
Status Bar............................................................................................................................................ 7
Contracts Table .................................................................................................................................. 8
Strategies Table ................................................................................................................................. 8
Viewing and Hiding Strategies Table........................................................................................................... 8
Chart Tab............................................................................................................................................. 8
Charts............................................................................................................................................................... 8
Working Orders Table and Last Completed Orders Table ....................................................................... 9
Historical Chart Tab ........................................................................................................................... 9
Additional Information Tabs .............................................................................................................. 9
CHAPTER 2.
MANAGING CONTRACTS ......................................................................................... 10
CUSTOMIZING CONTRACTS TABLE.......................................................................................................... 11
ADDING CONTRACTS ............................................................................................................................... 13
DELETING CONTRACTS ........................................................................................................................... 14
DDE EXCEL LINK FOR STREAMING REAL-TIME CONTRACT DATA ........................................................ 15
CONNECTING TO STRATEGY RUNNER’S DDE SERVER.......................................................................... 16
CHAPTER 3.
REAL-TIME & HISTORICAL CHARTS..................................................................... 18
REAL TIME CHART ................................................................................................................................... 18
Chart Toolbar .................................................................................................................................... 19
Modifying Chart Resolution............................................................................................................. 20
Selecting Chart Style ....................................................................................................................... 20
Displaying Studies............................................................................................................................ 20
Session Hours .................................................................................................................................. 25
Chart Studies Settings..................................................................................................................... 25
Order Display Settings..................................................................................................................... 26
Chart Style Settings ......................................................................................................................... 26
Chart Window Settings .................................................................................................................... 27
Displaying Lines ............................................................................................................................... 27
Defining Custom Pivot Lines .......................................................................................................... 28
Zooming............................................................................................................................................. 28
Drawing Additional Lines................................................................................................................. 28
Viewing multiple Charts................................................................................................................... 29
Change Displayed Contract............................................................................................................ 30
Trading From Chart.......................................................................................................................... 30
Displaying Cursor ............................................................................................................................. 30
HISTORICAL CHART ................................................................................................................................. 30
Setting Data Range.......................................................................................................................... 31
Modifying Chart Resolution............................................................................................................. 31
CHAPTER 4.
MANAGING STRATEGIES......................................................................................... 32
CUSTOMIZING STRATEGIES TABLE ......................................................................................................... 33
ADDING STRATEGIES............................................................................................................................... 34
LIQUIDATING STRATEGIES ....................................................................................................................... 36
1
Strategy Runner User’s Guide
Getting Started
STOPPING STRATEGIES........................................................................................................................... 36
DELETING STRATEGIES ........................................................................................................................... 36
RUNNING STRATEGIES ............................................................................................................................ 37
VIEWING STRATEGY DETAILS.................................................................................................................. 37
EDITING STRATEGY DEFINITIONS............................................................................................................ 39
INTERVENING IN STRATEGY EXECUTION................................................................................................. 40
Lots..................................................................................................................................................... 40
Market Direction ............................................................................................................................... 40
CHAPTER 5.
DIRECT ORDER ENTRY (MANUAL TRADING) .................................................... 42
ORDER TYPES ......................................................................................................................................... 42
Smart Orders .................................................................................................................................... 42
Smart Market Orders ................................................................................................................................... 42
Smart Stop Orders ....................................................................................................................................... 43
Smart Limit Orders ....................................................................................................................................... 43
Smart Stop Limit Orders .............................................................................................................................. 43
Conditional Stop Order .................................................................................................................... 43
ENTERING ORDERS ................................................................................................................................. 44
W ORKING ORDERS .................................................................................................................................. 44
Customizing Working Orders Table............................................................................................... 46
LAST COMPLETED ORDERS .................................................................................................................... 47
Customizing Last Completed Orders Table ................................................................................. 48
COMPLETED ORDERS.............................................................................................................................. 50
Customizing the Completed Orders Table ................................................................................... 51
MODIFYING ORDERS ............................................................................................................................... 52
CANCELING ORDERS ............................................................................................................................... 52
THE MANUAL USER_TRADER, OVERNIGHT AND END TIME PARAMETERS............................................. 53
OVERNIGHT POSITIONS ........................................................................................................................... 53
SETTING TRADING DEFAULTS ................................................................................................................. 54
Trading Mode.................................................................................................................................... 55
Save Trading Lots ............................................................................................................................ 55
Confirming Trades............................................................................................................................ 55
Notify about Working Orders on Exit ............................................................................................. 55
CHAPTER 6.
ORDER TICKET ........................................................................................................... 56
THE ORDER TICKET................................................................................................................................. 56
PLACING SIMPLE ORDERS ...................................................................................................................... 57
MODIFYING & CANCELING ORDERS ........................................................................................................ 58
PARKING ORDERS ................................................................................................................................... 58
ACTIVATING PARKED ORDERS ................................................................................................................ 58
SETTING TRADING DEFAULTS ................................................................................................................. 58
Trading Mode.................................................................................................................................... 58
Order Ticket Width ........................................................................................................................... 58
Close Ticket on Transmit Order ..................................................................................................... 58
CHAPTER 7.
TRADING FROM LEVEL II SCREEN........................................................................ 58
TRADING PAD .......................................................................................................................................... 58
TRADING WITH TRADING PAD .................................................................................................................. 58
Placing Orders from Trading Pad .................................................................................................. 58
Canceling Orders from Trading Pad.............................................................................................. 58
Modifying Orders from Trading Pad .............................................................................................. 58
One Click Trading............................................................................................................................. 58
Hot Keys ............................................................................................................................................ 58
SETTING TRADING PAD TRADING DEFAULTS ......................................................................................... 58
Setting Order Types......................................................................................................................... 58
Stop Limit Order Settings ................................................................................................................ 58
2
Strategy Runner User’s Guide
Getting Started
Canceling Orders on Reverse and Trade Out ............................................................................. 58
Navigating Trading Pad Grid .......................................................................................................... 58
Setting Display and Navigation Defaults................................................................................................... 58
Setting Trading Pad Table Size.................................................................................................................. 58
Centering Price ............................................................................................................................................. 58
Showing Selected Price............................................................................................................................... 58
Displaying Orders from Automated Strategies......................................................................................... 58
Displaying or Hiding P&L in Trading Pad.................................................................................................. 58
CHAPTER 8.
TRADING FROM CHARTS......................................................................................... 58
CHART PAD.............................................................................................................................................. 58
TRADING WITH CHART PAD ..................................................................................................................... 58
Placing Orders from Chart Pad ...................................................................................................... 58
Setting Order Types......................................................................................................................... 58
Canceling Orders from the Chart ................................................................................................... 58
Modifying Orders from the Chart.................................................................................................... 58
One Click Trading............................................................................................................................. 58
Reverse and Trade Out................................................................................................................... 58
CHAPTER 9.
TRADING FROM FOREX VIEW ................................................................................ 58
FOREX VIEW PAD .................................................................................................................................... 58
TRADING WITH FOREX VIEW PAD............................................................................................................ 58
Placing Orders from Forex View Pad ............................................................................................ 58
One Click Trading............................................................................................................................. 58
CHAPTER 10.
EXIT STYLES AND TOOLBOX............................................................................. 58
Bracket............................................................................................................................................... 58
Bracket & Trailing Stop.................................................................................................................... 58
Exit Market on Time & Trailing Stop .............................................................................................. 58
Scale Out with 2 Targets (_Lots) ................................................................................................... 58
Scale Out with 2 Targets & Break Even ....................................................................................... 58
Scale Out with 2 Targets & Trailing Stop...................................................................................... 58
Scale Out with 3 Targets (_lots)..................................................................................................... 58
Scale Out with 3 Targets & Break Even ....................................................................................... 58
Scale Out with 3 Targets & Trailing Stop...................................................................................... 58
Bracket Stop Loss & Profit Target Orders Settings..................................................................... 58
TOOLBOX OR PLACING ADVANCES ORDERS DETACHED FROM ENTRY ORDER .................................... 58
Bracket Stop Loss & Profit Target Orders Settings..................................................................... 58
CHAPTER 11.
TRADING MODE ..................................................................................................... 58
COMMON FEATURES ............................................................................................................................... 58
MANUAL TRADING MODE ........................................................................................................................ 58
COMBINED TRADING MODE..................................................................................................................... 58
CHAPTER 12.
YOUR ACCOUNT REPORT .................................................................................. 58
ACCOUNT REPORT .................................................................................................................................. 58
Viewing your Account Report ......................................................................................................... 58
Viewing your Account Report in htm format................................................................................. 58
MONEY MANAGEMENT ............................................................................................................................ 58
Setting Daily Limits........................................................................................................................... 58
Profit Management........................................................................................................................... 58
CHAPTER 13.
MESSAGES AND ONLINE .................................................................................... 58
Messages .......................................................................................................................................... 58
Online................................................................................................................................................. 58
3
Strategy Runner User’s Guide
CHAPTER 14.
Getting Started
MODIFYING GRAPHICS SETTINGS ................................................................... 58
GRAPHICS SETTINGS DIALOG BOX.......................................................................................................... 58
Modifying Colors............................................................................................................................... 58
Modifying Fonts ................................................................................................................................ 58
Copying Color or Font Definitions.................................................................................................. 58
Returning to System Default Settings ........................................................................................... 58
Generating a problem report .......................................................................................................... 58
4
Strategy Runner User’s Guide
Getting Started
Downloading and Installing the Program
To download and install Strategy Runner Paper Console:
Go to http://www.strategyrunner.com/Content/Downloads.htm and click the link for
Strategy Runner Paper. Follow the Installation instructions.
To download and install Strategy Runner Real Console:
Contact your broker.
Starting the Program
To run Strategy Runner:
1. Connect to the Internet.
2. On your desktop, double click Strategy Runner icon.
3. Click Settings button, and enter Naming Service and Server Name as instructed in the
confirmation e-mail you have received (you need only do this once).
4. Enter your login and password, which were supplied in the confirmation e-mail you
have received.
Main Window
After you start the program and enter your name and password, the main window opens,
displaying your Portfolio (see Figure 1-1 on page 6). The window is divided into the
following areas:
Table 1-1: The Main Window Explained
No.
1
Area
Menu Bar
2
Toolbar
3
Contracts table
4
Strategies table*
Purpose
Includes menus for managing the product’s main
functions.
Includes icons for quick activation of the product’s
most frequently used functions.
Lists the current contracts in your Portfolio and their
details. It also contains Forex view for viewing
prices and one-click order entry.
Lists the strategies for the selected contract and their
5
Strategy Runner User’s Guide
No.
5
6
7
8
9
Getting Started
Area
Purpose
details.
Chart tab
Displays real-time contract prices, studies,
working/completed orders, and possibility of trading
from charts.
Historical Chart tab
Displays historical contract data charts and studies
Buy/Sell/Toolbox/Trading Preparing order tickets, automated exits and level II
Pad Buttons
trading pads, and placing orders
Working Orders table
Part of the Contract tab. Displays the working
orders, which are not yet filled.
Last Completed Orders
Part of the Contract tab. Displays the latest
table
completed orders.
10
Additional Information
Tabs
Includes the Completed Orders tab, Messages tab
and Online tab.
11
Status bar
Displays the current time, connection status and
update notifications.
*
As a default this table is not displayed in Strategy Runner Lite version
1
2
3
4
5
6
7
8
9
10
11
Figure 1-1: Main Window
6
Strategy Runner User’s Guide
Getting Started
Menu Bar
Menu Bar includes menus for managing Strategy Runner’s main functions. Using the
menus you can:
•
Save and print your Portfolio.
•
Manage contracts and strategies.
•
Set System and Chart Options.
•
Set profit/loss limits and view Account information.
•
Open Order Tickets, Trading Pads and more…
The Toolbar
The toolbar comprises icons for quick activation of the product’s functions which are
used most often. These include:
•
Save Portfolio
•
Add / Delete Contracts
•
Add Strategy
•
Delete Strategy
•
Run Strategy
•
Stop Strategy
•
Liquidate Strategy
•
Strategy Details
•
System Options
•
Account Report
•
Help
•
Messages
•
Show Forex View
Status Bar
Status bar displays the current time, connection status and update notification.
7
Strategy Runner User’s Guide
Getting Started
Contracts Table
Contracts table displays all the contracts in your Portfolio and trading information for
each contract. Forex View displays the Forex contracts in your Portfolio and trading
information for each contract it also allows entering market order with one-click.
NOTE: As a default, Forex View is not displayed if there are not any Forex contracts in
the Portfolio.
Strategies Table
Strategies table displays all the strategies associated with the selected contract, and
information about each strategy.
NOTE: As a default, this table is not displayed in the Strategy Runner Lite version.
Viewing and Hiding Strategies Table
For contracts for which you are not using any automated strategies, you may wish to hide
Strategies table. If you choose to do so, Strategies table will appear only for those
contracts in your Portfolio that have automated strategies.
To always view Strategies table:
1. From Settings menu, select System Options. Settings dialog box appears.
2. In Tables tab, in Strategies tab, click Always radio button under Show Strategies
Table.
3. Click Apply to apply, or click OK to apply and save.
To hide Strategies table for contracts without strategies:
1. From the Settings menu, select System Options. Settings dialog box appears.
2. In the Tables tab, in the Strategies tab, click the Auto radio button under Show
Strategies Table.
3. Click Apply to apply, or click OK to apply and save.
NOTE: If you choose this option, you will not be able to see the User_Trader (see The
Manual User_Trader, Overnight and End Time parameters on page 53).
Chart Tab
Chart tab, on the bottom half of the Main Window, displays current trading information
for the selected contract. This includes a graphical display of the contract and your
strategies/trades, and Working Orders table.
Charts
Chart display area is on the left hand side of Chart tab. This area displays a chart of the
selected contract, your strategies and your orders. Various display options are available
for your convenience, including several types of charts, studies, line-drawing and more.
For a detailed explanation of charts and chart options see Real Time Chart on page 18.
For Trading from the Chart go to Chapter 8: Trading from Charts on page 58.
8
Strategy Runner User’s Guide
Getting Started
Working Orders Table and Last Completed Orders Table
Working Orders table is on the right hand side of the Chart tab. This area shows the
active orders for the selected contract. It also enables you to manage these orders. Last
Completed Orders table, below Working Orders table, displays information about the
latest completed orders.
See Working Orders on page 44 and Last Completed Orders on page 47 for a detailed
explanation of these tables.
Historical Chart Tab
Historical Chart tab, on the bottom of the Main Window, displays historical trading data
for the selected contract. For a detailed explanation of charts and chart options see
Historical Chart on page 30.
Additional Information Tabs
The additional information tabs are alongside the Chart tab. They include Completed
Orders tab (see Completed Orders on page 50), and Messages and Online tab (see
Messages and Online on page 58).
9
Strategy Runner User’s Guide
Managing Contracts
When you activate Strategy Runner, it displays your Portfolio, which includes your
contracts and their respective strategies, where they have been added. Contracts table
displays the active contracts (see Figure 2-1 below). If you wish, you can customize the
table view by removing and adding columns. You can also resize columns as required
and sort the table according to the desired column.
Except for deleting and adding contracts, you cannot modify the data in this table.
Figure 2-1: Contracts Table
The following table describes the data displayed in each column of contract table:
Table 2-1: The Contracts Table Explained
Column Heading
Explanation
Id
Contract id number
Contract
Contract name
Bid Vol
Current bid volume
Bid
Current bid price
Ask
Current ask price
Ask Vol
Current ask volume
Last
Last transaction price
Vol
Last transaction volume
Exch Time
Time of last transaction
Low
Lowest price for day
High
Highest price for day
Open
Open price for day
Prev Close
Close price for previous day
10
Strategy Runner User’s Guide
Managing Contracts
Column Heading
Explanation
Change
The difference between last
price and previous close
Total number of working
orders for contract
Total number of open positions
for contract
Average price of your current
open positions
Total number of points for
contract
Profit and loss of your current
open positions
Cumulative profit and loss of
your closed positions
Total daily profit and loss
# Orders
Pos
Avg
Points
Open P&L
Cum P&L
P&L
If Forex contracts are available, by clicking on the
button on the toolbar, you
can switch from contracts table display to Forex View, for Forex contracts only.
Figure 2-2: Forex View
Customizing Contracts Table
If you wish, you can customize the table view by removing or adding columns. You can
also resize columns as required and sort the table according to the desired column.
Finally, you can also choose to modify display of Forex contracts represented in Forex
View.
To add or remove columns:
1. From the Settings menu, select System Options. Settings dialog box appears.
11
Strategy Runner User’s Guide
Managing Contracts
Figure 2-2: Contract Settings dialog box
2. In Tables tab, in the Contracts tab, click to check the checkbox for the columns you
wish to display, and to uncheck the columns you wish to hide.
3. Click Apply to apply and save, or click OK to save and exit.
To resize columns:
Place the pointer on the vertical line you wish to move and drag it to the desired position.
To sort the table:
•
Click the column heading of the column according to which you wish to sort. The
table is now sorted according to the selected column. An arrow appears to the right of
the column heading, showing the sort direction (up arrow for ascending, down arrow
for descending.)
•
To change the table sort direction, click the column heading again.
See Table 2-1 on page 10 for a detailed explanation of this table.
Modifying display of Forex contracts
Display of Forex contracts in Forex View is defaulted to Auto Align. This option can be
modified to display any number of contracts in a single column.
To modify display of Forex contracts:
1. From the Settings menu, select System Options. Settings dialog box appears.
12
Strategy Runner User’s Guide
Managing Contracts
2. In Tables tab, in the Contracts tab, in Forex View section choose Set Column
Number.
3. Modify number displayed by clicking the up or down arrow.
4. Click Apply to apply and save, or click OK to save and exit.
Adding Contracts
Available contracts are predefined on the Strategy Runner server, including:
•
multiple expiration months contacts (e.g. miniS&P Dec 05, Mar 06, and Jul 06);
•
exchange spreads (e.g. miniS&P:Dec 05Mar 06);
•
continuous contracts (e.g. miniS&P:Dec05(cont)), contract month specified by
(cont) is the most liquid contract;
•
synthetic spreads
•
Forex contracts
You can add contracts from the predefined list to your Portfolio as desired.
To add a new contract:
1. From the Contract menu, select Manage Contract, or click
The Manage Contracts dialog box appears:
icon on main Toolbar.
13
Strategy Runner User’s Guide
Managing Contracts
Figure 2-3: Manage Contracts dialog box
2. Check the desired boxes and click Apply or OK. The selected contracts now appear
in the Contracts table.
WARNING: If you want the new contracts to be included in your Portfolio in the future,
you must save the Portfolio.
NOTE: If you don’t see certain contract in the Manage Contracts dialog box, please
contact your broker.
To save your Portfolio:
In the Portfolio menu, select Save,
OR
From the toolbar, click Save Portfolio button
.
Deleting Contracts
Just as you may add contracts to your Portfolio, you may also delete contracts from your
Portfolio as desired.
14
Strategy Runner User’s Guide
Managing Contracts
To delete a contract:
1. If the contract has associated strategies, delete all strategies for the contract first, as
explained in Deleting Strategies on page 36.
2. Select the contracts you wish to delete. (To select consecutive contracts, click and
drag the mouse). The selected contracts are highlighted.
3. From the Contract menu, select Delete Contract. The deleted contracts no longer
appear in the Contracts table.
WARNING: If you want the deleted contracts to be excluded from your Portfolio in the
future, you must save the Portfolio.
To save your Portfolio:
From the Portfolio menu, select Save,
OR
From the toolbar, click Save Portfolio button
.
DDE Excel Link for Streaming Real-Time Contract Data
You can streaming real-time contracts data link into your excel.
Using this option means that real-time contract data will be displayed in specified Excel
spreadsheet and will include the following fields: Contract Name, Ask, Ask Vol, Bid,
Bid Vol, Last Price, Vol, Exchange Time, Low, High, Open, Prev Close, Change,
Orders, Pos, Avg, Points, Open P&L, Cum P&L, Total P&L.
To link data to excel:
1. From the Settings menu, select System Options. Settings dialog box appears.
2. In the Misc tab, under ‘DDE Excel Conversation’ specify name of the spreadsheet in
Worksheet Name box (suggested default is Sheet1).
3. Click Connect button to start receiving all the contacts data.
4. Check Auto-Connect on Start to start receiving contracts data every time you open
the console.
To view data in excel:
1. Open MS Excel
2. In MS Excel, under ‘Sheet Name’ enter the Worksheet Name you have entered in
step 2 above.
3. In Strategy Runner Setting options, in the Misc Tab under ‘DDE Excel Conversation’
click on ‘Connect’ button to enable DDE Excel conversation.
4. Your Excel Sheet should now receive streaming data from Strategy Runner Console.
15
Strategy Runner User’s Guide
Managing Contracts
Figure 2-2: Settings in SR Console and Excel for DDE Excel Conversation
Connecting to Strategy Runner’s DDE Server
Using this option, Strategy Runner operates as a DDE server, thus, you may receive
streaming data using any DDE client (not only Excel). Unlike DDE Excel conversation,
using DDE Server conversation, you may edit and configure the data (e.g., fields)
displayed on your DDE Client.
To send data to DD Client:
1. Make sure your client DDE Client application (e.g., Excel) is closed.
2. From the Settings menu, select System Options. Settings dialog box appears.
3. In the Misc tab under DDE Server Conversation click Connect button to start sending
contacts data to excel.
4. Check Auto-Connect on Start to start sending contracts data every time you open the
console.
5. Check Last Price Only if you want data updates to be sent only when current price
changes (data update will not be sent if ask/bid price is changed)
To view data in DD Client:
To start receiving at certain field some price value use the following formula:
= Application Name|Conversation Name|Topic Name, where
• Application Name: Console
• Conversation Name: CONTRACT_NAME
• Topic Name: FIELD_NAME
The CONTRACT_NAME is a short contract name. All blanks and any character which is
not a letter are replaced by an underscore '
_'
.
For example:
• “J-Yen” contract name should be specified as “J_Yen”
• “MINI S&P” contract name should be specified as “MINI_S_P”
16
Strategy Runner User’s Guide
•
Managing Contracts
“Cd. Dollar” contract name should be specified as “Cd__Dollar”
The FIELD_NAME is a contract filed name. All blanks and any character which is not a
letter are replaced by an underscore '
_'
.
A Complete FIELD_NAME list: Bid_Vol, Bid, Ask, Ask_Vol, Last, Vol, Low, High,
Open, Prev_Close, Change, Exch_Time
Examples of formula:
• =Console|MINI_NSDQ!Bid_Vol
• =Console|MINI_S_P!Bid_Vol
• =Console|MINI_NSDQ!Exch_Time
NOTE: In order to see properly time field - format it as '
Time'Category
17
Strategy Runner User’s Guide
Real-Time & Historical Charts
Strategy Runner provides real-time & historical charts, which displays the contract
prices, studies and your working and filled orders (real-time charts only). 24 hours
session data and one-click trading from charts (see Chapter 8: Trading from Charts on
page 58) are now also available.
Real Time Chart
The chart display area is on the bottom half of the main screen, on the left hand side of
the Chart tab. This area shows the real-time price feed for the selected contract, and the
orders generated by your strategies and/or by your manual input. In addition, you can also
display various studies and lines, zoom on price scale, print chart and use multiple charts
per given contract.
Figure 3-1: Chart
18
Strategy Runner User’s Guide
Real-Time & Historical Charts
Chart displays the following information:
Table 3-1: Chart
Data Type
Contract price feed
Working Orders
Represented By
Line/bars/candlesticks
Blue line with small circle for Buy order
Red line with small circle for Sell order
Dotted blue line with small circle for Buy
order
Dotted Red line with small circle for Sell
order
Blue bubble for buy order
Red bubble for Sell order
Parked Orders
Filled Orders
In Chart tab, you may customize many features. You can select the chart style, modify its
resolution, display studies, draw lines and more.
Chart Toolbar
The toolbar comprises icons for quick activation of chart functions, which are used most
often. These include:
•
Price Scale
•
Period
- chart period
•
Interval
- chart interval
– vertical price scale
•
change style
•
add study
•
session hours
•
draw lines
•
erase lines
•
zoom
•
setting Chart Options
•
new chart window
19
Strategy Runner User’s Guide
•
hide application.
•
list of contracts.
•
•
Real-Time & Historical Charts
trade of the chart.
print chart
Modifying Chart Resolution
The chart resolution, i.e. the displayed price range and time range, may be changed to suit
your needs.
To modify price range:
1. In Chart toolbar, click down arrow on Price Scale drop-down menu.
2. In the drop-down menu, select the desired scale, or simply type in the desired value.
(The higher the value, the less prices are displayed).
To modify time range:
1. In Chart toolbar, click the down arrow on Interval drop-down menu.
2. In the drop-down menu, select the desired time range (in minutes), or simply type in
the desired value. Chart update may take a few seconds.
Selecting Chart Style
Three chart styles are available: Tick, Bar and Candlestick.
To select a chart style:
icon. Menu appears.
1. In Chart toolbar, click
2. In the menu, select the desired style. Chart update may take a few seconds.
In the case of a Bar or Candlestick chart, you can choose the bar size (interval).
To select the bar size for Bar/Candlestick chart:
1. In Chart toolbar, click the down arrow on the Interval drop-down menu.
2. In the drop-down menu, select the desired interval, or simply type the desired value.
Chart update may take a few seconds
Displaying Studies
Several studies are available for display on your Chart.
To display a study:
1. In Chart toolbar, click Study
icon. Menu appears.
2. From the menu, select the desired study. Study line appears on the chart.
3. In the case of a study that requires entering parameter values, e.g. the Double Moving
Average, enter the desired values in the spaces provided and press Enter.
20
Strategy Runner User’s Guide
Real-Time & Historical Charts
To remove study from the chart:
icon. A menu appears.
1. In Chart toolbar, click Study
2. From the menu, select to de-select the displayed study. The study no longer appears
on the chart.
Table 3-2: Chart Studies
Study Name
AD
Parameters
None
AD Oscillator
Fast Period
Slow Period
ADXR
Period
APO
Fast Period
Slow Period
Aroon
Period
Aroon
Oscillator
Period
ATR
Period
Bollinger
bands
Period
Deviation
Exponential
CCI
Period
Description
The Accumulation/Distribution (AD) is a
momentum study that associates changes in price
and volume. The study is based on the premise
that the more volume that accompanies a
price move, the more significant the price move.
Chaikin Oscillator (ADOCS) is moving average
oscillator based on the Accumulation /
Distribution study.
The Directional Movement Rating function
determines the momentum in the Average
Directional Movement, effectively adding
another layer of smoothing to the Directional
Movement Index.
Price Oscillator Absolute (APO) can use any
time periods. A buy signal is generated when the
Price Oscillator rises above zero. When it falls
below zero sell signal is generated.
The Aroon study allows to anticipate changes in
security prices from trending to trading range. It
is a system which can be used to determine
whether a stock is trending or not and how
strong the trend is.
The Aroon Oscillator is the difference between
the Aroon Up and Aroon Down lines. An
upward trend is indicated as the Aroon oscillator
passes upward through the zero line.
Average True Range (ATR) study measures a
security'
s volatility.
Bollinger bands measure the support for, and
resistance to price changes of any particular
stock, by plotting the standard deviation of the
moving average of a price.
The Commodity Channel Index (CCI) measures
the variation of a security'
s price from its
statistical mean. High values show that prices are
unusually high compared to average prices
whereas low values indicate that prices are
unusually low.
21
Strategy Runner User’s Guide
Study Name
CLV
Parameters
None
Directional
Movement
ADX Period
+DI, -DI Period
DX
Period
Exponential
MA
Double
Period
Source = {Open,
Low, High, Close}
Period
KAMA
Linear
Regression
Period
MA
Double
Period
Source = {Open,
Low, High, Close}
Fast Len
Slow Len
MACD Len
MACD
Maximum
Period
Real-Time & Historical Charts
Description
The Close Location Value (CLV) Accumulation
Distribution study uses the relationship between
the open and the close of the bar, and the range
of the bar, to weight and characterize the volume
as Accumulation (buying) or Distribution
(selling).
The +DI indicates the up average.
The -DI indicates the down average.
The ADX, average directional movement index,
shows whether a trend is in effect by smoothing
the difference between the +DI and -DI.
The Directional Movement Index function
determines the strength of the current price trend
by comparing the positive movement to the
negative movement.
Exponential moving average (EMA) is a moving
average that gives extra weight to more recent
price data.
Kaufman'
s Adaptive Moving Average study is an
EMA using an Efficiency Ratio to modify the
smoothing constant, which ranges from a
minimum of Fast Length to a maximum of Slow
Length.
The Linear Regression study is based on the
trend of a security'
s price over a specified time
period. The trend is determined by calculating a
linear regression trendline using the "least
squares fit" method. The least squares fit
technique fits a trendline to the data in the chart
by minimizing the distance between the data
points and the linear regression trendline.
Moving Average is calculated by adding together
the closing prices of a financial instrument over a
certain number of days and then dividing the
sum by the number of days involved.
Moving Average Convergence/Divergence is a
trend following momentum study that shows the
relationship between two moving averages of
prices.
Highest value over a specified period.
22
Strategy Runner User’s Guide
Study Name
MFI
Parameters
Period
MidPoint
MidPrice
Minimum
Momentum
Period
Period
Period
Period
Momentum
Divergence
Period
OBV
None
Parabolic SAR
None
PVO
None
ROC
Period
RSI
Period
Stochastic
Slow
%K Period
%D Period
Real-Time & Historical Charts
Description
The Money Flow study (MFI) illustrates the
inflows and outflows of cash in regards to a
particular stock. While a stock'
s price simply
provides a snapshot in time, Money Flow can
show if the market may be discounting some
future, significant event.
Simply (highest value + lowest value)/2.
Simply (highest high + lowest low)/2.
Lowest value over a specified period.
The Momentum study measures the amount that
a security'
s price has changed over a given time
span.
The Momentum Divergence (MomentumDiv) is
a method to compare how strong a stock'
s price
action is compared to the stock'
s underlying
momentum. This study takes the Moving
Average Convergence Divergence (MACD)
study with the standard 12,26,9 setting and
converts MACD on a scale from 0 to 100,
similar.
On Balance Volume (OBV) is the weighted sum
of volume used to quantify buying or selling
pressure to either confirm the current price trend
or warn of a possible reversal.
Parabolic Stop And Reverse (SAR) study
calculates entry and exit points indicating the
time in which to stop and reverse current
position.
Price Volume Oscillator (PVO) study calculates
a fast, or short, moving average and a long, or
slow, moving average. The difference between
these two values is then plotted.
The Rate of Change (ROC) is an oscillator that
displays the difference between the current price
and the price x-time periods ago. As prices
increase, the ROC rises and as prices fall, the
ROC falls. The greater the change in prices, the
greater the change in the ROC.
Relative Strength Index (RSI) study calculates a
value based on the cumulative strength and
weakness of price, specified in the input Price,
over the period specified in the input Length.
Slow Stochastic indicator calculates the location
of a current price in relation to its range over a
period of bars.
23
Strategy Runner User’s Guide
Study Name
Stochastic Fast
Oscillator
Parameters
%K Period
%D Period
Stochastic Full
Oscillator
%K Period
%K Slow Period
%D Period
T3
Period
Volume Factor
TEMA
Period
TRIX
Period
True Range
None
TRIMA
Period
TSF
Period
Volume
None
Williams %R
Period
Real-Time & Historical Charts
Description
Slow Stochastic indicator calculates the location
of a current price in relation to its range over a
period of bars.
The Full Stochastic Oscillator is more advanced
and more flexible than the Fast and Slow
Stochastic. For example, a (14, 1, 3) Full
Stochastic is equivalent to a (14, 3) Fast
Stochastic while a (12, 3, 2) Full Stochastic is
identical to a (12, 2) Slow Stochastic.
T3 is an adaptive moving average. It tracks the
time series more aggressively when making large
moves.
TEMA (Triple Exponential Moving Average) is
a unique composite of a single exponential
moving average, a double exponential moving
average, and a triple exponential moving average
that provides less lag than either of the three
components individually.
The triple exponential average (TRIX) indicator
is an oscillator used to identify oversold and
overbought markets, and it can also be used as a
momentum indicator.
True Range is defined as the largest of the
following:
- The distance from current bar'
s high to current
bar'
s low.
- The distance from previous bar'
s close to
current bar'
s high.
- The distance from previous bar'
s close to
current bar'
s low.
The Triangular Moving Average (TRIMA) is
simply a double-smoothed simple moving
average where the middle portion of the data has
more weight.
The Time Series Forecast (TSF) function
displays the statistical trend of a security'
s price
over a specified time period based on linear
regression analysis
Volume is the number of shares traded on a
stock exchange for a given period, also known as
market turnover.
Williams %R (aka Persent R) is a momentum
study that measures overbought/oversold levels.
24
Strategy Runner User’s Guide
Real-Time & Historical Charts
Session Hours
You can specify Session Hours to display fixed start and end times for the contract data.
By selecting 24 Hours, the data displayed on the chart will be set using Period.
By selecting specific Session Hours the data displayed on the chart will start from
specified hour and end at the current or specified hour.
To set session hours range:
1. In Chart toolbar, click Session Hours
icon. Session Hours dialog will appear.
2. Check 24 Hours box, or specify start and end times of the session.
Chart Studies Settings
You may adjust the chart settings in order to modify the display, as well as to set chart
parameters, line color etc.
To adjust chart settings:
1. Click Chart Settings
icon on Chart toolbar, or click Chart title on Chart. Chart
Settings dialog box opens:
Figure 3-2: Chart Settings dialog box
2. In Studies tab, select the desired study by clicking the appropriate checkbox.
3. For those studies where is applicable, set the desired parameters.
4. Set the desired Line Color, Line Style, Title Color and Title Font Color.
25
Strategy Runner User’s Guide
Real-Time & Historical Charts
5. Click Apply to apply and save, or click OK to save and exit.
Order Display Settings
The following additional chart settings may be set: Show/Hide Orders, Buy/Sell bubble
colors, Buy/Sell bubble size, Show/Hide marks and Mark Legs Size (i.e., distance from
bubble center to bubble mark).
To adjust Order Display Options settings:
1. Click Chart Settings
icon on Chart toolbar, or click Chart title on the chart.
Chart Settings dialog box opens.
2. Click Order Options tab.
Figure 3-3: Order Options Settings dialog box
Chart Style Settings
The following additional chart settings may be set: Bars/Candles Size, Up/Down
Candle/Bar color, Candle Border color, Bar Width, Tick Color and Width, and Separate
Time Axis for each study.
26
Strategy Runner User’s Guide
Real-Time & Historical Charts
To adjust Chart Style Display Options settings:
icon on Chart toolbar, or click Chart title on the chart. The
1. Click Chart Settings
Chart Settings dialog box opens.
2. Click Chart Style tab.
Chart Window Settings
The following additional chart settings may be set: Background Color, Vertical and
Horizontal Grid Lines, Chart Margins, Studies Titles, and Snapshot Captions.
To adjust Chart Window Settings:
1. Click Chart Settings
icon on Chart toolbar, or click Chart title on the chart.
Chart Settings dialog box opens.
2. Click Window tab.
Adjusting Background Color:
Time axis and labels will be changed to the contrast color automatically, white for black,
green for red etc.
Displaying Snapshot Captions:
Current OHLC, P&L and position are displayed (can be enabled/disabled) separately for
each data window.
To set Chart Margins:
1. In General tab, in Chart Margins group box, use the arrows to set the desired left and
right chart margins.
2. Click Apply, or click OK to apply and save.
Displaying Lines
Some additional lines are available for you to add to your chart. These include:
•
Average price (in the Real version only)
•
High
•
Low
•
Open
•
Previous close
•
User Defined and Third-Party Pivot Lines
To display these lines:
1. In Chart Settings dialog box, click Lines tab.
2. Select lines by clicking the checkbox next to the desired line type.
27
Strategy Runner User’s Guide
Real-Time & Historical Charts
3. For each line type, you may set the desired color and/or style using the Color and
Pen buttons.
4. Click Apply, or click OK to apply and save.
Defining Custom Pivot Lines
You can define Pivot Lines to be displayed on your console.
If you are a Study Vendor, you can define Pivots Lines for your subscribers. They will
see these custom lines defined by you in real-time.
To define custom lines:
1. In the Chart Settings dialog box, click the Custom Lines tab.
2. Click New Line Button.
3. For each line type, you may set the Name, Price, and Style using controls in Line
Settings.
4. Click Apply, or click OK to apply and save.
Zooming
You may zoom in to magnify a section of the chart display.
To zoom in:
icon.
In Chart toolbar, click Zoom
As long as Zoom icon is pressed, draw rectangular area by left-clicking the mouse from
top left corner and keeping the left mouse button pressed until to bottom right corner.
To return to original chart display, click again Zoom
icon.
To zoom into Price Scale:
In Chart toolbar, click Zoom
icon.
Navigate your mouse to the price scale, when mouse cursor is converted to an index
finger you may zoom in and out of price scale as long as you keep the left mouse button
pressed.
To return to original chart display, click again Zoom
icon.
Drawing Additional Lines
You may draw additional straight lines as well as Fibonacci Lines, as shown below.
These lines can be rotated, dragged and erased.
To draw a line:
In the chart toolbar, click Draw Lines
icon menu and choose Draw Line.
You may draw any straight line by left-clicking the mouse when you want to start a line,
and keeping the left mouse button pressed until you want to end the line.
28
Strategy Runner User’s Guide
Real-Time & Historical Charts
To rotate a line:
Point to the end of the line and wait for a double-ended arrow to appear.
When a double-ended arrow appears, rotate the line as needed.
To drag a line:
Point at the line (anywhere but the ends) and wait for a crossed double-ended arrow to
appear.
You can now drag the line as desired.
To erase a single draw line:
Click the line you want to erase. An X appears at both ends of the line.
Press Delete key on your keyboard.
To erase all draw lines:
From the Draw Line menu choose Erase Draw Lines.
To add Fibonacci Lines:
icon menu and choose Fibonacci > Price
In the chart toolbar, click Draw Lines
Retracement Lines. Keep your left mouse button pressed while dragging it on the chart
to form the Fibonacci Lines.
Setting Fibonacci lines:
After you have added Fibonacci Lines to your chart, you may set each of your Fibonacci
Lines to different values. From the Draw Line menu choose Fibonacci > Settings…
In the Chart Settings box that opens, choose “Fibonacci Retracement” tab and set each
line individually.
To erase Fibonacci Lines:
From the Draw Line drop down menu click Erase Fibonacci Lines
Viewing multiple Charts
You can view multiple charts of same of different contracts by adding new chart window
from the main application window.
To add new chart window:
1. In Chart toolbar, click New Chart Window
icon.
2. Additional chart window will be detached from main window.
Attach
icon attaches current chart back to main window. (This is no longer relevant
and can be deleted)
Hide App
icon hides the main application window.
Click
icon again to show main window while keeping current chart detached and on
top of application.
Print Chart (Add Icon) icon prints the chart.
29
Strategy Runner User’s Guide
Real-Time & Historical Charts
Change Displayed Contract
You may switch to display new contract, as shown below.
To switch displayed contract:
In the chart toolbar, click the List of Contracts
contract new contract name.
icon and choose from list of available
Trading From Chart
You may use Charts as a stand-alone trading application and to trade directly from chart.
To open Trading from Chart functionality, click
icon in the chart toolbar. For
details see Chapter 8: Trading from Charts on page 58.
Displaying Cursor
You can define Crosshair cursor to be displayed on your charts.
To display cursor on charts:
1. In Chart tab, click right-mouse. A menu appears.
2. In the menu, select the desired display options.
Or
1. In Chart tab, click Chart Settings. A chart settings window appears.
2. In Cursor tab, select the desired display options.
Historical Chart
Historical Chart display area is on the bottom of the main screen under the Historical
Chart tab. This area shows the historical price for the selected contract for selected period
of time, and you can also display various studies and lines.
You can select chart style, modify its resolution, display studies, draw lines, erase lines,
set session hours, create multiple historical charts, hide application, print the charts and
attach/detach chart window to display multiple historical chart windows.
30
Strategy Runner User’s Guide
Real-Time & Historical Charts
Figure 3-4: Historical Chart
Setting Data Range
To set data range:
In Historical Chart tab:
1. Click down arrow on Data up to Date calendar, and select the end date of displayed
period.
2. Click down arrow on Period and select how far back you want to see the data.
To display data range:
In Historical Chart tab:
1. Click Get Data button to retrieve historical data. Chart update may take a few
seconds.
2. If for any reason you want to stop data retrieval, you can click Stop button to abort
the retrieval process.
3. Click Prev/Next Date buttons to set the end date of the display period on day
back/forth of current end date and display it.
Modifying Chart Resolution
Similar to real time charts, you can select the desired resolution for the viewing interval.
In historical charts, you can select resolution from 1min to 1 day for period up to 5 days,
for bigger periods the Interval automatically becomes 1 day.
To modify time/date resolution:
1. In the Historical Chart tab, click the down arrow on the Interval drop-down menu.
2. In the drop-down menu, select the desired resolution for the viewing interval, or
simply type in the desired value. Chart update may take a few seconds.
31
Strategy Runner User’s Guide
Managing Strategies
NOTE: This section applies only to users of Strategy Runner Professional (full) version.
It does not apply to Lite version users, and Strategies table may not be viewable to these
users. In cases where it is viewable, it only displays the manual strategy called
User_Trader. (For more information about the User_Trader, see The Manual
User_Trader, Overnight and End Time parameters on page 53).
When you select a contract in the Contracts table, Strategies table (located below the
Contracts table) displays a list of the strategies associated with the selected contract. Each
line displays the relevant data for a particular strategy (see Figure 4-1 below). You can
modify some of the fields in this window.
Figure 4-1: Strategies table
Table 4-1 below explains the meaning and use of each column:
Table 4-1: Strategies table Explained
Column
Heading
Id
Explanation
Modification enabled?
strategy id
NO
Name
name of strategy
NO
Lots
number of contracts traded
YES (see Lots on page 40.)
Direction
market direction (bullish/bearish)
Start Time
time strategy starts running
YES (see Market Direction on
page 40.)
NO
End Time
time strategy stops running and exits
all positions
NO
32
Strategy Runner User’s Guide
Column
Heading
Enter End
Status
# Wins
# Losses
# Orders
Pos
Points
Open P&L
Cum P&L
P&L
Managing Strategies
Explanation
Modification enabled?
time strategy stops entering new
orders
current status of this Strategy. Status
can be standby, running,
stopped or
error.
current number of wins for this
strategy
current number of losses for this
strategy
current number of working orders for
this strategy
current number of open positions for
this strategy
current total of points for this strategy
NO
profit and loss of current open
position of this strategy
cumulative profit and loss of closed
positions of this strategy
total daily profit and loss for this
strategy
YES (see Running Strategies
on page 37 and Liquidating
Strategies on page 36).
NO
NO
NO
NO
NO
NO
NO
NO
Customizing Strategies Table
If you wish, you can customize the table view by removing and adding columns. You can
also resize columns as required and sort the table according to the desired column.
To add or remove columns:
1. From Settings menu, select System Options. Settings dialog box appears.
2. In Tables tab, click Strategies tab. Strategies Settings dialog box appears:
33
Strategy Runner User’s Guide
Managing Strategies
Figure 4-2: Strategies Settings dialog box
3. In Strategies Settings dialog box, click to check the checkbox for the columns you
wish to display, and to uncheck the columns you wish to hide.
4. Click Apply to apply and save, or click OK to save and exit.
To resize columns:
Place the pointer on the vertical line you wish to move and drag it to the desired position.
To sort the table:
•
Click the column heading of the column according to which you wish to sort. The
table is now sorted according to the selected column. An arrow appears to the right of
the column heading, showing the sort direction (up arrow for ascending, down arrow
for descending.)
•
To change the table sort direction, click the column heading again.
See Table 4-1 on page 32 for a detailed explanation of this table.
Adding Strategies
Strategies in Strategies table may be strategies developed by Strategy Runner, fully
automated strategies as well as online discretionary strategies developed by strategy
vendors and sold or leased to you, or your own, proprietary strategy. Strategies are stored
in a library, and you may add strategies from the library, as desired.
34
Strategy Runner User’s Guide
Managing Strategies
NOTE: Strategies which have been added to your Portfolio are started daily,
automatically, according to their predefined Start Time parameter.
To add a new strategy:
1. In Contracts table, select a contract to which you want to add a strategy.
2. From Strategy menu, select Add Strategy,
OR
.
On the toolbar, click Add Strategy button
Select Strategies dialog box appears (see Figure 4-3 below).
Figure 4-3: Select Strategies dialog box
This dialog box shows a list of strategy providers for the selected contract on the left,
and a list of the strategies for the selected provider on the right.
• To view provider description, click Provider Description.
• To view strategy description and statistics, click Strategy Description.
3. Check the strategies you wish to add and click Add. The selected new strategies now
appear in Strategies table.
WARNING: If you want the added Strategies to be included in your Portfolio in the
future, you must save the Portfolio.
To save your Portfolio:
From the Portfolio menu, select Save,
OR
From the toolbar, click Save Portfolio button
.
35
Strategy Runner User’s Guide
Managing Strategies
Liquidating Strategies
The system runs strategies automatically, according to their predefined start time.
However, if you wish, you may liquidate strategies. Stopping a strategy is also necessary
before setting lots or market direction (see Intervening in Strategy Execution on page 40.)
Also you can liquidate exit strategies or manual strategies.
This operation will stop the strategy, cancel all working orders and close strategy
position.
To liquidate strategies for the selected contract:
1. In Strategies table, select the strategies you wish to liquidate.
2. From Strategy menu, select Liquidate Strategy,
OR
From the toolbar, click the Liquidate Strategy button
. Confirm dialog box
appears.
3. Click Yes to stop strategies. The Strategies you have selected are now in stopped
status.
To liquidate all strategies for all contracts:
From Strategy menu, select Liquidate All Strategies. Confirm dialog box appears. Click
Yes to liquidate all strategies. The Strategies you have selected are now in stopped
status.
Stopping Strategies
If you want to stop strategy without liquidating its open position, you can use Stop
Strategy option. This operation will stop the strategy, cancel all working orders and
move open positions to manual strategy User_Trader.
To stop strategies for the selected contract:
1. In Strategies table, select the strategies you wish to stop.
2. From Strategy menu, select the Strategy menu,
OR
.
From the toolbar, click the Stop Strategy button
3. Confirm dialog box appears. Click Yes to stop strategies. The Strategies you have
selected are now in stopped status.
Deleting Strategies
If you wish, you may delete strategies from your Portfolio.
To delete strategies for a selected contract:
1. Select strategies you wish to delete.
2. Stop the strategies which are not in stopped status
3.
On the toolbar, click Delete Strategy button
run on current trading day.
. The strategy is deleted and will not
36
Strategy Runner User’s Guide
Managing Strategies
WARNING: If you want the deleted strategies to be excluded from your Portfolio in the
future, you must save the Portfolio.
To save your Portfolio:
From Portfolio menu, select the Strategy menu,
OR
From the toolbar, click Save Portfolio button.
Running Strategies
The system runs strategies automatically according to their predefined start time (unless a
start time is not defined). However, if you want to activate a stopped strategy or a newly
added strategy, you can run the strategy.
To run strategies:
1. In the Strategies table, select the strategies you wish to run.
2. From Strategy menu, select Run Strategy,
OR
.
From the toolbar, click Run Strategy button
The strategies you have run are now in standby or
their Start Time definition.
running status, depending on
Viewing Strategy Details
Strategies in Strategies table may be demo strategies, strategies developed by strategy
vendors or your own proprietary strategy. Strategy definitions can be viewed in, and in
the case of your own proprietary strategy, edited.
To view Strategy details:
From Strategy menu, select Strategy Details,
OR
From the toolbar, click Strategy Details button
,
OR
In Strategy table, double-click desired strategy.
Strategy Details dialog box opens (see Figure 4-3 below).
37
Strategy Runner User’s Guide
Managing Strategies
Figure 4-4: Strategy Details dialog box
In Strategy Details dialog box, you can see strategy’s online description, including its
definitions and historical results.
To view online description and up-to-date statistics:
In Strategy Details dialog box, click Description and Statistics. You will be connected
to the strategy’s online description on Strategy Runner’s website.
To view strategy definitions:
In the left pane, click + sign next to the element name to expand definition elements. The
parameter Name and Value appear in the right-hand pane. Table 4-2 below explains the
parameters:
Table 4-2: Strategy Details
Definition Element
VTrader
Name
description
Explanation
Strategy name
notes
Notes
packageName
Name of Strategy’s DLL
(Dynamically Linked Library)
Basic strategy on which this
strategy is based
Maximum no. of losses allowed
before stopping strategy
Total no. of wins and/or losses
allowed
templateName
Counts
losses
total
38
Strategy Runner User’s Guide
Definition Element
Time
Managing Strategies
Name
wins
limit
Explanation
Maximum no. of wins allowed
before stopping strategy
Time when strategy closes open
positions, cancels orders and
then stops
No orders are sent past this point
in time
Orders start being sent at this
time
Strategy starts observing the
contract at this time
Profit target (as % of price)
stop
Stop loss (as % of price)
afterEntrance
Duration of wait following
opening position, before placing
next order
Duration of wait before restarting after loss
Duration of wait before restarting after win
Strategy name
endTime
enterEnd
enterStart
startTime
ClosePosition
Wait
afterLoss
afterWin
Strategy
Name
openPosition
Epsilon
startPoint
changeAfterLoss
changeAfterLossWait
changeAfterWin
changeAfterWinWait
Threshold for buy or sell signal
(as % of price)
change start point to the price
value after Loss
change start point to the price
value after Loss after specified
Wait
change start point to the price
value after Win
change start point to the price
value after Win after specified
Wait
When you are done viewing the Strategy details, click Close.
Editing Strategy Definitions
If you have your own proprietary strategy installed on Strategy Runner server, you may
change its definitions.
To edit strategy details:
1. From Strategy menu, select Strategy Details,
OR
39
Strategy Runner User’s Guide
From the toolbar, click Strategy Details button
Managing Strategies
,
OR
In Strategy table, double-click the desired strategy.
Strategy Details dialog box opens (see Figure 4-4 on page 38).
2. In Strategy Details dialog box, click Edit. (If this is not your proprietary strategy,
“No Permission to Modify Strategy” message appears).
3. Modify desired definitions.
4. To save changes, click Save.
NOTE: If strategy status is standby, stop it, as explained in Liquidating Strategies on
page 36. (If strategy is in Running mode, it is not advisable to liquidate it, as this will
cause a liquidation of the positions opened by this strategy).
Intervening in Strategy Execution
At times, you may want to make some changes to strategies. In addition to adding or
deleting strategies as explained above, there are several other options you may use. These
include changing the number of lots you wish to trade for a specified strategy and
changing its direction.
Lots
You can modify the number of lots (contracts) to be traded on with a specific strategy, as
desired.
To modify the number of lots for a specified Strategy:
1. If strategy is in Standby status, stop it, as explained in Liquidating Strategies on page
36. (If the Strategy is in Running mode, it is not advisable to liquidate it, as this will
cause a liquidation of the positions opened by this strategy).
2. Click on the lots field of the desired strategy. Arrows appear.
3. Click the arrows until you reach the desired value.
WARNING: If the total number of lots exceeds the limit set by your broker, your orders
will be rejected
4. To re-activate the strategy, run it (see Running Strategies on page 37).
Market Direction
You can change the direction field to Bull or Bear in order to suit the current market
direction. This means that the strategy will not enter a short/long position (respectively)
upon its initialization.
To modify market direction for specific strategy:
1. If strategy is in Standby status, stop it, as explained in Liquidating Strategies on page
36. (If Strategy is in Running mode, it is not advisable to liquidate it, as this will
cause a liquidation of the positions opened by this strategy).
40
Strategy Runner User’s Guide
Managing Strategies
2. Click direction field of the desired strategy. A check mark appears.
3. Click again to display options.
4. Click the desired value. Selected direction value now appears in the direction field,
and the strategy will take the new value into account.
5. To re-activate the strategy, run it (see Running Strategies on page 37).
41
Strategy Runner User’s Guide
Direct Order Entry (Manual Trading)
!
!
"
"
#
# $$
%
%
&&
If you are a user of the Strategy Runner Lite version, your Portfolio consists of a chosen
set of contracts. Strategy Runner allows you to perform direct (manual) order entry in
order to trade these contracts at any time. These orders can either be simple manual
orders, which you enter using the
• Simple order entry ticket from Chapter 6: Order Ticket;
• Trading Pad (one-click trading) from Chapter 7: Trading from Level II Screen;
• Chart Pad from Chapter 8: Trading from Charts;
• Forex View from Chapter 9: Trading from Forex View;
More advanced orders and exits strategies can be entered from Exit Styles pane from
Chapter 10: Exit Styles and Toolbox, in which you may define both the entry into the
market and your exit orders.
You may open and trade simultaneously from multiple order tickets, multiple trading
pads, multiple charts and Forex View.
NOTE: These features are also available to users of the Strategy Runner Professional
version.
Order Types
Strategy Runner supports the following orders types: Market, Limit, Stop, Stop Limit,
MIT, Smart Orders and Conditional Orders.
Some orders are sent directly to Exchange (native orders) and some simulated by
Strategy Runner server (synthetic orders). For most Futures Exchanges market and limit
are native orders and all other order types are synthetic.
Smart Orders
Slippage is the difference between the price that exists at the moment your order is sent,
and the actual price at which it is filled. In order to reduce slippage, we have introduced
synthetic Smart Market and Stop orders for trading futures contracts. The use of Smart
orders is optional.
Smart orders work as follows:
Smart Market Orders
Instead of a Market order, a Limit order is placed at the last price plus the Slippage you
define, for the length of time (Timeout) you specify. If Limit order is not filled during the
specified Timeout, it is cancelled, and Market order is sent. The default settings are a
slippage of 0 and timeout is 30 seconds.
42
Strategy Runner User’s Guide
Direct Order Entry (Manual Trading)
Smart Stop Orders
Once the Stop price is triggered, a Limit order is placed at the Stop price plus the
Slippage you define, for the length of time (Timeout) you specify. If the Limit order is
not filled during the specified Timeout, the Limit order is cancelled, and Market order is
sent. The default settings are slippage of 0 and 30 second timeout. (If there is a partial fill
of the Limit order, then the unfilled limit orders are cancelled, and a Market order is sent
for the remaining lots).
Smart Limit Orders
Smart Limit orders are set as Limit orders. Once Limit price is reached, if Limit order is
not filled during the specified Timeout, the Limit order is cancelled, and a Market order
is sent.
Smart Stop Limit Orders
Stop Limit orders are not affected by Smart orders settings, i.e. there are no Smart Stop
Limit orders.
NOTE: Smart Orders are for Futures only.
To set Smart Order Parameters for Smart Market and Smart Stop orders:
1. In Trading Settings dialog box, in General tab, click the Use Smart Order checkbox.
2. Set the required Slippage and Timeout values in appropriate edit boxes. (A positive
value in Slippage edit field means Limit price which is worse than the Market/Stop
price, whereas a negative value means Limit price which is better than the
Market/Stop price. Therefore, you will probably want to enter a negative value).
3. Click Apply to apply and save, or click OK to save and exit. From this point onward,
all your orders will be Smart orders.
To remove Smart Order Parameters for Smart Market and Smart Stop orders:
1. In Trading Settings dialog box, in General tab, click the Use Smart Order checkbox.
2. Un-check the Use Smart Order checkbox located in the Trading Settings dialog box
under Smart Order.
3. Click OK to save and exit.
Conditional Stop Order
Stop orders are used to either close/reverse position that was opened in opposite direction
with the market, or to open position in the same direction with market.
The main problem with stop orders is that sometimes stop orders are “falsely” triggered,
i.e. when market touches the stop price and immediately rallies back.
Conditions for execution of Stops/Stop Limit orders can now be defined by the user,
delaying trigger of these orders accordingly. These conditions are R.Volume and B/A
Ratio.
Conditional Buy Stop order will be triggered:
If last price reaches the Buy Stop value and goes through, Buy Stop is triggered
immediately. If last price reaches the Buy Stop value, but does not go through, Buy Stop
will be triggered only if:
43
Strategy Runner User’s Guide
•
•
Direct Order Entry (Manual Trading)
Ask Volume < R.Volume, AND
Bid Volume * B/A Ratio > Ask Volume
Conditional Sell Stop order will be triggered:
If last price reaches the Sell Stop value and goes through, Sell Stop is triggered
immediately. If last price reaches the Sell Stop value, but does not go through, Sell Stop
will be triggered only if:
• Bid Volume < R.Volume, AND
• Ask Volume * B/A Ratio > Bid Volume
NOTE: B/A Ratio for the sell stop is referring to Ask Volume to Bid Volume Ratio.
NOTE: Conditional stop orders are synthetic orders that run from SR server.
Entering Orders
Strategy Runner allows you to perform direct (manual) order entry in order to trade
contracts at any time. These orders can be simple manual orders, which you enter using:
• Simple order entry ticket from Chapter 6: Order Ticket;
• Trading Pad (one-click trading) from Chapter 7: Trading from Level II Screen;
• Chart Pad from Chapter 8: Trading from Charts;
• Forex view from Chapter 9: Trading from Forex View;
More advanced orders and exits strategies can be entered from Exit Styles pane from
Chapter 10: Exit Styles and Toolbox, in which you may define both the entry into the
market and your exit orders.
You may open and trade simultaneously from multiple Order Tickets, multiple Trading
Pads, multiple Charts and Forex View.
Working Orders
Working Orders table, to the right of the chart, displays information about your working
orders (see Figure 5-1 below). Some of these orders may be generated by automated
strategies, while others may be orders which you have entered directly using Order
Ticket, Trading Pad, Trading from Chart or Forex View. You may modify, cancel or
activate these orders, depending on their type.
Figure 5-1: Working Orders table
44
Strategy Runner User’s Guide
Direct Order Entry (Manual Trading)
In Action Type column, Buy orders appear with blue background, and Sell orders appear
with red background.
When you click order in Working Orders table, the line that represents this order in the
chart is highlighted.
When you click the order line in the chart, the order is highlighted in Working Orders
table. (The row with the darker highlight is the order you have clicked, and the row with
the lighter highlight is its reciprocal order).
The following table describes the data displayed in each column:
Table 5-1: Working Orders table
Column Heading
Explanation
Strategy id
Strategy ID (given by system)
Package id
Id which identifies OCO orders
Strategy Name
Strategy name (for strategies)
Status
W (working), P (parked)
Action Type
Action/Order Type (Original order
types, i.e. Smart Buy Market,
Conditional Sell Stop)
Price at which order will be filled
Price
Lots
Sent time
Number of contracts x/y, where
x=Number of instances of the
contract already filled for this order
y=Number of instances of the
contract on which the working
order is initiated
Time at which order was sent
Id
System Order ID
Exchange id
Exchange Order ID
Four buttons appear above Working Orders table:
Table 5-2: Working Orders table Buttons
Button
Function
Usage
Activate
Activating parked orders
Modify
Modifying order price
Cancel
Canceling selected order*
See Activating Parked
Orders on page 58 below
See Modifying Orders on
page 52 below
See Canceling Orders on
page 52 below
45
Strategy Runner User’s Guide
Cancel All
Direct Order Entry (Manual Trading)
Canceling all orders*
See Canceling Orders on
page 52 below
*May be used for canceling orders entered manually. Does not apply to orders generated by automated
strategies.
Customizing Working Orders Table
If you wish, you can customize the table view by removing or adding columns. You can
also resize columns as required and sort the table according to the desired column.
To add or remove columns:
1. From Settings menu, select System Options. Settings dialog box appears.
2. In Tables tab, click Working Orders tab. Working Orders Settings dialog box
appears:
Figure 5-2: Working Orders Settings dialog box
3. In Working Orders Settings dialog box, click to check the checkbox for the columns
you wish to display, and to uncheck the columns you wish to hide.
4. Click Apply to apply and save, or click OK to save and exit.
NOTE: Some columns are mandatory and cannot be removed.
46
Strategy Runner User’s Guide
Direct Order Entry (Manual Trading)
To resize columns:
Place the pointer on the vertical line you wish to move and drag it to the desired position.
To sort the table:
•
Click column heading of a column according to which you wish to sort. The table is
now sorted according to the selected column. An arrow appears to the right of the
column heading, showing the sort direction (up arrow for ascending, down arrow for
descending.)
•
To change the table sort direction, click the column heading again.
To resize table horizontally:
Drag the left border of the table in the desired direction.
Last Completed Orders
The Last Completed Orders table, below Working Orders table, displays information
about the latest completed orders:
Figure 5-3: Last Completed Orders Table
The following table describes the data displayed in each of the table’s columns:
Table 5-3: Last Completed Orders Table
Column Heading
Explanation
Strategy
Strategy ID
Strategy name
Strategy name
Lots
Number of contracts x/y, where
x=Number of instances of the contract
already filled for this order
y=Number of instances of the contract on
which the working order is initiated
Price at which order was filled/cancelled
Price
Action type
Status
Order Type (Original order types, i.e. Smart
Buy Market, or Conditional Stop)
Filled, Cancelled or Rejected
47
Strategy Runner User’s Guide
Direct Order Entry (Manual Trading)
Column Heading
Explanation
Sent time
Time at which order was sent
Completed time
Time at which order was filled or cancelled
Id
System order ID
Package id
Package ID
Exchange id
Exchange order ID
Reason
For rejected order, reason for rejection
Customizing Last Completed Orders Table
If you wish, you can customize the table view by removing or adding columns. You can
also resize columns as required and sort the table according to the desired column.
An additional option is filtering orders according to order status (filled, cancelled and/or
rejected), or according to selected strategies. Finally, you can choose to display specified
number of orders in Completed Orders Table.
To add or remove columns:
1. From Settings menu, select System Options. Settings dialog box appears.
2. In Tables tab, click Last Completed Orders tab. Last Completed Orders Settings
dialog box appears:
48
Strategy Runner User’s Guide
Direct Order Entry (Manual Trading)
Figure 5-4: Last Completed Orders Settings dialog box
3. In Last Completed Orders Settings dialog box, click to check the checkbox for the
columns you wish to display, and to uncheck the columns you wish to hide.
4. Click Apply to apply and save, or click OK to save and exit.
To resize columns:
Place the pointer on the vertical line you wish to move and drag it to the desired position.
To sort the table:
•
Click the column heading of the column according to which you wish to sort. The
table is now sorted according to the selected column. An arrow appears to the right of
the column heading, showing the sort direction (up arrow for ascending, down arrow
for descending.)
•
To change the table sort direction, click the column heading again.
To filter orders:
In Last Completed table header line, click the check box for the required status type.
Orders with this status are displayed. You may choose one or more status types.
To set number of displayed orders:
1. From Settings menu, select System Options. Settings dialog box appears.
2. In Tables tab, click Last Completed Orders tab.
3. In Show Last Completed Orders Table click to check Show Table checkbox.
49
Strategy Runner User’s Guide
Direct Order Entry (Manual Trading)
4. Set number of displayed orders in the Number of Displayed Orders box.
Completed Orders
Clicking Completed Orders tab displays Completed Orders table. This table provides
information about all filled orders and cancelled orders for the selected contract (see
Figure 5-5 below).
Figure 5-5: Completed Orders Tab
The following table describes the data displayed in each of the table’s columns:
Table 5-4: Completed Orders Table
Column Heading
Explanation
Strategy id
Strategy ID
Strategy name
Strategy name
Lots
Number of contracts
Price
Action type
Price at which order was
filled/cancelled
Order type
Status
Filled, Cancelled or Rejected
Sent time
Time at which order was sent
Completed time
Id
Time at which order was
filled or cancelled
System order ID
Package id
Package ID
Exchange id
Exchange order ID
Reason
For rejected order, reason for
rejection
50
Strategy Runner User’s Guide
Direct Order Entry (Manual Trading)
Customizing the Completed Orders Table
If you wish, you can customize the table view by removing or adding columns. You can
also resize columns as required and sort the table according to the desired column.
An additional option is filtering orders according to order status (filled, cancelled and/or
rejected), or according to selected strategies.
To add or remove columns:
1. From Settings menu, select System Options. Settings dialog box appears.
2. In Tables tab, click Completed Orders tab. Completed Orders Settings dialog box
appears:
Figure 5-6: Completed Orders Settings dialog box
3. In Completed Orders Settings dialog box, click to check the checkbox for the
columns you wish to display, and to uncheck the columns you wish to hide.
4. Click Apply to apply and save, or click OK to save and exit.
To resize columns:
Place the pointer on the vertical line you wish to move and drag it to the desired position.
To sort the table:
•
Click the column heading of the column according to which you wish to sort. The
table is now sorted according to the selected column. An arrow appears to the right of
51
Strategy Runner User’s Guide
Direct Order Entry (Manual Trading)
the column heading, showing the sort direction (up arrow for ascending, down arrow
for descending.)
•
To change the table sort direction, click the column heading again.
To filter completed orders:
1. In the Completed Orders header line, click the check box for the required status type.
Orders with this status are displayed. You may choose one or more status types.
2. To view orders for a selected strategy, select the strategy by clicking it in Strategies
table and click the Selected Strategy checkbox. You may choose more than one
strategy by depressing the Shift key and clicking the strategies.
Modifying Orders
Working Orders table displays manual orders, along with orders that are generated by
automated strategies for the selected contract. All orders in Working Orders table can be
modified, i.e. their price and the number of lots can be changed (see note immediately
below). You can also modify orders from Trading Pad – see Modifying Orders from on
page 58, and from Chart – see Modifying Orders from the Chart on page 58.
NOTE: For orders generated by automated strategies, the number of lots cannot be
modified.
To modify the price or the number of lots of an order:
1. In Working Orders table, select the order you wish to modify.
2. At the top of Working Orders table, click Modify. Order Ticket dialog appears.
3. In Order Ticket, select the new price and set the number of lots as needed.
4. Click Buy or Sell. The new price and/or number of lots now appear for this order in
Working Orders table.
OR
1. In Working Orders table, click Price column for the selected order. A drop-down
menu appears.
2. Select the new price. Order Ticket appears. If you wish, change the number of lots as
well.
3. Click Buy or Sell. The new price and/or number of lots now appear for this order in
Working Orders table.
NOTE: When you modify bracket orders, the modification will work as follows: If you
change the number of lots for one of the OCO orders (i.e. Profit Target), and there is a
partial fill of that order, then the number of lots for the opposite order (i.e. Stop Loss
order) is changed as well, so that both orders have the same number of lots.
Canceling Orders
Working Orders table displays manual orders, along with orders that are generated by
automated strategies for the selected contract. Orders which you enter directly can be
cancelled (see note immediately below). You can also cancel orders from Trading Pad –
see Canceling Orders from on page 58, and from Chart – see Canceling Orders from the
Chart on page 58.
52
Strategy Runner User’s Guide
Direct Order Entry (Manual Trading)
NOTE: Cancelation of any orders generated by automated strategy will stop the
strategy.
To cancel an order:
1. In Working Orders table, select the desired order.
2. At the top of Working Orders table, click Cancel. A dialog box appears asking to
confirm cancellation.
3. Click Yes to confirm cancellation, or No to avoid cancellation.
To cancel all orders:
1. At the top of Working Orders table, click Cancel All. Dialog box appears asking to
confirm cancellation.
2. Click Yes to confirm cancellation, or No to avoid cancellation.
The Manual User_Trader, Overnight and End Time parameters
When you place orders through Order Ticket, a User_Trader is created. The User_Trader
is a composite tracker of all manual orders, and the resulting positions and P&L, for the
selected contract. The User_Trader is not relevant to automated strategies.
The User_Trader appears in Strategies table with the name username_Trader (if your user
name is ABC, it will appear as ABC_Trader). In order to view it, you must be able to
view Strategies table (see Viewing and Hiding Strategies Table on page 8).
You can only choose to liquidate User_Trader, in which case all manual orders for this
contract are cancelled, and all positions are closed with a Market order. User_Traders are
liquidated in the same way in which strategies are liquidated. For an explanation of how
to liquidate a strategy, see the Liquidating Strategies section on page 36. As a rule, the
system deletes User_Traders and all associated orders automatically at the end of each
session, even if you save your Portfolio.
You can also specify End time parameter by clicking on End time field of User_Trader
strategy, then all working orders will be cancelled and all open position will be closed on
a specified time you define
There is one exception to this rule - see Overnight Positions feature below.
Overnight Positions
Open positions in the User_Trader will be left overnight unless End Time is specified. If
you leave a position open overnight, all orders associated with the User_Trader are
cancelled, but the User_Trader remains in your Portfolio until the next session, and
retains the overnight position.
If an End Time is specified, open positions will be closed with Market order at the
specified time. By specifying End Time near to the exchange close, you can simulate
what is known as Market on Close or MOC order.
To specify an End Time:
1. In Strategies table, click End Time column for the User_Trader. Dialog box appears
with checkbox Keep overnight and time setting.
53
Strategy Runner User’s Guide
Direct Order Entry (Manual Trading)
2. Uncheck Keep overnight checkbox and select End Time. User_Trader will close any
open positions with Market order at the time specified.
Setting Trading Defaults
Some of the definitions for the orders and the order placement procedure need to be set in
advance. You can do this in Trading Settings dialog box (see Figure 5-7 below). These
definitions include the following:
•
General settings include definition of Trading Mode, Size of Order Ticket,
Confirmations, etc
•
Trading Pad settings include definition of table, Reverse and TradeOut buttons, order
types, feeding protocol, etc.
•
Brackets Stop Loss and Profit Target Order definitions
•
Smart Order definition
To open Trading Settings dialog box:
1. From Settings menu, select System Options. Settings dialog box appears.
2. In Trading tab, click General tab. The following Dialog box appears:
Figure 5-7: General Trading Settings dialog box
54
Strategy Runner User’s Guide
Direct Order Entry (Manual Trading)
Trading Mode
For users of Strategy Runner Professional (Full version), who wish to trade with
strategies and to place orders manually on the same screen, we provide two trading
modes: Manual and Combined. For details see Trading Mode on page 58.
Save Trading Lots
If you wish, you can save number of trading lots settings.
To set save number of trading lots option:
1. In Trading Settings dialog box, click General tab.
2. Check Save Trading Lots box.
3. Click Apply to apply and save, or click OK to save and exit.
Confirming Trades
The system default is to display the Confirm dialog box whenever you place, park or
cancel an order.
Figure 5-8: Confirm dialog box
You can choose whether you want to display Confirm dialog box, or to hide it.
To hide the Confirm dialog box:
1. In Trading Settings dialog box, in General tab, click to uncheck Confirm Trades
checkbox.
2. Click Apply to apply and save, or click OK to save and exit. Trades are now
executed with no confirmation required.
Notify about Working Orders on Exit
When you exit Strategy Runner Console, you may wish to be notified about working
orders, in case you hadn’t noticed them. Note: these orders continue to work even if you
exit.
To be notified about working orders on exit:
1. In Trading Settings dialog box, in General tab, click Notify about Working Orders on
Exit checkbox.
2. Click Apply to apply and save, or click OK to save and exit.
55
Strategy Runner User’s Guide
'
'
Order Ticket
!
!
(
(
A simplest option for direct order entry is entering orders from Order Ticket.
You may open multiple ticket orders for different contracts in order to trade several
contracts simultaneously.
You can do the following from this dialog box:
•
Place orders (including parked orders and exits styles)
•
View positions
•
View Ask/Bid/Last Price
The Order Ticket
When you click
or
appears (see Figure 6-1 below).
button from the toolbar, Order Ticket dialog box
Figure 6-1: Buy and Sell Order Tickets
56
Strategy Runner User’s Guide
Order Ticket
Note that the Buy Order Ticket dialog box has blue background, whereas the Sell Order
Ticket dialog box has red background.
The order ticket title displays the selected contract, and a number that follows Pos: is the
number of positions you currently have in this contract.
If you click the top button of the dialog box, you can open Exit Strategies dialog
described in Chapter 10: Exit Styles and Toolbox on page 58.
Right click will open list of available exit styles.
Order Ticket dialog box is divided into several areas, as described in the following table:
Table 6-1: The Order Ticket dialog box
Area
Fields
Use this field to:
Pos:
Pos:
Display only
Type
Market
Stop
Limit
Stop limit
Conditional
Stop
MIT
Lots
Stop
Select Market order
Select Stop order
Select Limit order
Select Stop Limit order
Select Conditional Stop order
Limit
Set limit price
Stop Limit
Set stop limit price
Action
R. Volume
A/B Ratio
Action
Bid
Bid
Set R. Volume and A/B Ratio
values
Switch between Sell and Buy
orders
Display only
Ask
Ask
Display only
Price
Price
Display only
Top Button
Details
Exit Style
Set Exit Style
Select Market If Touched order
Set number of Lots
Set stop price
Remarks
Click to set Exit Style
parameters
Current position for this
contract
Simulated on SR server
Simulated on SR server
Simulated on SR server
Simulated on SR server
Enabled for Stop and
Stop Limit orders only
Enabled for Limit orders
only
Enabled for Stop Limit
orders only
Enabled for Conditional
Stop orders only
Current Buy or Sell
action
Current bid price for this
contract
Current ask price for this
contract
Current price for this
contract
Placing Simple Orders
The process of preparing Buy order tickets and Sell order tickets is identical. Follow the
exact same steps for Buy order tickets and Sell order tickets.
57
Strategy Runner User’s Guide
Order Ticket
1. Click
button or
button from the toolbar,
OR
from Trade menu, select Buy or Sell.
Order Ticket dialog box appears.
2. In Type area, click radio button for the desired order type.
3. In Details area, select values according to the type of order, as explained in the
following table:
Table 6-2: Order Details
Order Type
Market
Limit
MIT
Stop
Stop Limit
Conditional
Stop
Select the following values
-Lots
-Lots
-Limit price
-Lots
-Price
-Lots
-Stop price
-Lots
-Stop price
-Stop Limit price
-Lots
-Stop price
- R. Volume
- A/B Ratio
4. To place the order, click Buy (or Sell) button on the bottom of the screen. Confirm
dialog box appears. (If you do not want to show this dialog box, see Confirming
Trades on page 55).
5. In Confirm dialog box, click Yes to place order. The order appears in Working Orders
table and on Chart.
WARNING: If you wish to place a single simple order, make sure “None” is chosen as an
Exit Style.
Modifying & Canceling Orders
Order ticket cannot be used as a stand-alone application. To see how you can modify and
cancel orders, refer to previous chapter Modifying Orders on page 52 and Canceling
Orders on page 52.
Parking Orders
Orders, both simple and Bracket orders, are placed by clicking Buy or Sell button on
Order ticket. If you wish, you may choose to delay placement of an order, by Parking it,
and activating it at a later time.
58
Strategy Runner User’s Guide
Order Ticket
To park an order:
1. In Order Ticket, after filling in all the required data, click Park button instead of
clicking Buy or Sell.
2. The parked orders appear in Working Orders table, and Status column displays the
highlighted letter P.
Activating Parked Orders
To activate a parked order:
1. In Working Orders table, select a Parked order.
2. Above Working Orders table, Click Activate. The order’s status changes from P to
W, and is now working order.
NOTE: If the activated order is associated with a bracket, then if this order is filled, the
bracket orders are activated, too.
Setting Trading Defaults
Some of the definitions for the orders and the order placement procedure need to be set in
advance. You can do this in Trading Settings dialog box. These definitions include the
following:
•
General settings include definition of Trading Mode, Size of Order Ticket,
Confirmations, etc
•
Brackets Stop Loss and Profit Target Order definitions
•
Smart Order definition
To open Trading Settings dialog box:
1. From the Settings menu, select System Options. Settings dialog box appears.
2. In Trading tab, click General tab. The following dialog box appears:
59
Strategy Runner User’s Guide
Order Ticket
Figure 6-2: General Trading Settings dialog box
Trading Mode
For users of Strategy Runner Professional (Full version), who wish to trade with
strategies and to place orders manually on the same screen, we provide two trading
modes: Manual and Combined. For details see Trading Mode on page 58.
Order Ticket Width
If you wish, you can change the width of Order Ticket.
To set Order Ticket width:
1. In Trading Settings dialog box, click General tab.
2. In Order Ticket group box, set the desired width by dragging the track bar.
3. Click Apply to apply and save, or click OK to save and exit.
Close Ticket on Transmit Order
As a default, Order Ticket closes once you transmit the order. You may turn off this
default, which means that Order Ticket remains open after you transmit the order.
To leave Order Ticket open after order transmission:
1. In Trading Settings dialog box, click General tab.
2. Click to uncheck Close Ticket on Transmit Order checkbox.
3. Click Apply to apply and save, or click OK to save and exit.
60
Strategy Runner User’s Guide
)
)
Trading from Level II Screen
**
+
+ ,
,
----
An additional option for direct order entry is Level II Screen trading using Trading Pad
dialog box (see Figure 7-1 on page 58).
You can do the following from this dialog box:
•
View several price levels
•
Place orders (including brackets) and perform additional functions with just one
mouse click
•
Cancel orders (including brackets) with just one mouse click
•
Reverse your market position
•
Trade out of your market position
•
View positions and working orders
•
And more…
Trading Pad can be customized to suit your trading needs. For example, you can choose
the number of price levels you wish to display.
NOTE: Scale-outs, Brackets and Trailing stops are available on Trading Pad. See
See Chapter 10: Exit Styles and Toolbox on page 58.
NOTE: You can use Trading Pad as a stand-alone application for your trading.
To open Trading Pad dialog box:
In Contracts table, double-click the contract name
OR
button.
Click
Trading Pad dialog box opens (see Figure 7-1 on page 58).
61
Strategy Runner User’s Guide
Trading from Level II Screen
1
24
23
2
25
3
4
5
6
7
9
10
11
12
13
8
14
15
16
17
18
19
20
21
22
Figure 7-1: Trading Pad dialog box
Trading Pad
The title bar of Trading Pad dialog box displays contract name.
Below it, you can see the number of open positions for this contract (Pos:). To the right
of the number of positions, you can set and view the number of lots being traded.
Trading Pad table consists of 5 columns (from left to right):
62
Strategy Runner User’s Guide
Trading from Level II Screen
Table 7-1: Trading Pad Table
Column
Displays
W. orders
Number of Buy working orders for the
price that appears in the same row
Bid volume for price
Current price (bold) and prices above
and below it
Ask volume for price
Number of Sell working orders for the
price that appears in the same row
Bids
Price
Asks
W. orders
The total number of buy orders, denoted by B: appears below Buy working orders
column. The total number of sell orders, denoted by S: appears below Sell working
orders column.
If you are also running automatic strategies, you can view the total number of working
orders originating in these strategies in Trading Pad. (To indicate whether you want to
display this number, see Displaying Orders from Automated Strategies on page 58).
The last price is highlighted and bold, and so is the average price of your positions (in
the Real version only).
Various function buttons are available for your convenience. These buttons are denoted
by numbered arrows on Figure 7-1 on page 58. Table 7-2 below explains each button,
edit box and display box.
Table 7-2: Buttons in Trading Pad and their usage
Number Button/Box
1
2
3
4
Pos:
P&L:
Open P&L:
Lot size edit
box
Lot size
buttons
5
6
Clear
Trade Out
7
8
Buy Market
Sell Market
Usage
Displays number of open positions
Displays P&L for contact
Displays Open P&L for contract
Set desired lot size here
Use to set lot size with one click.
To customize, right click one of the buttons, set the
desired lot size, and click Set.
Click to set lot size to 0.
Click to send a market order to cover your current
market position. If you wish, you may also cancel all
working orders (see Canceling Orders on Reverse and
Trade Out on page 58).
Click to buy the preset number of lots at market price.
Click to sell the preset number of lots at market price.
63
Strategy Runner User’s Guide
Number Button/Box
9
Reverse
10
Buy Ask
11
Sell Bid
12
13
14
16
17
Join Bid
Join Offer
Cancel X (blue
font)
Cancel Y (red
font)
Cancel All
LIM (limit)
17
(right
button)
MIT (Market
if
Touched)
15
18
18
(right
button
19
19
(right
button
20
21
22
23
24
Trading from Level II Screen
Usage
Click to send Market order to cover your position and
to enter a market position in the opposite direction
(e.g. if you are 2 contracts long, clicking this button
will sell 4 contracts, thereby making you 2 contracts
short)
Click to place a Buy by Ask order a specified number
of ticks above the current Ask, with an optional
Timeout
Click to place a Sell by Bid order a specified number
of ticks below the current Bid, with an optional
Timeout
Click to place an order at the current Bid
Click to place an order at the current Ask
Click to cancel all working bids
Click to cancel all working offers
Click to cancel all working orders*
Click this button before clicking the desired Limit
order. This button is used in case that you set MIT
(Market if Touched) as your default limit order.
Click this button before clicking the desired MIT
(Market if Touched) order. This button is used in
case that you set Limit as your default limit order.
SM (Stop
Market)
Click to place a Market order when the stop price is
reached. (Click this button before clicking the desired
stop price).
SL (stop limit) Click to place a Limit order with your preset limit
when the stop price is reached. (Click this button
before clicking the desired stop price).
Click to place a Market order when stop price is
SC (Stop
reached and predefined conditions of R Volume and
Market
Bid/Ask Ratio are met. (Click this button before
Conditional)
clicking the desired stop price).
SLC (stop limit Click to place a Market order when stop price is
reached and predefined conditions of R Volume and
conditional)
Bid/Ask Ratio are met. (Click this button before
clicking the desired stop price).
Click to show higher prices
Up arrow
Click to freeze ask/bids
Freeze (Ctrl)
Click to show lower prices
Down arrow
Click to hide main console application.
Hide App
Click to choose different contracts from list of
List of
available contracts in contracts grid
contracts
64
Strategy Runner User’s Guide
Number Button/Box
25
Exit Style
Trading from Level II Screen
Usage
Click to modify exit style. Right click will open list of
available exit styles.
* does not apply to positions opened by automated strategies
**does not apply to orders generated by automated strategies
Trading with Trading Pad
You can use Trading Pad pane to place and cancel orders, and to track your market
position. You can also choose the one-click trading option, which is a faster method for
placing and canceling your orders.
You may open multiple Trading Pad dialog boxes, one for each contract you wish to
trade.
NOTE: Before placing orders from Trading Pad, it is important that you read the Setting
Trading Defaults section on page 58, and the section below.
Placing Orders from Trading Pad
The first thing you need to do is to set the number of lots you wish to trade. You can then
place orders, as explained below. Orders are placed according to the predefined settings
(see Setting Trading Defaults on page 58).
To set lots:
In Trading Pad, in the lot size edit box above the price table, set the desired number of
lots by using the up or down arrows, or by typing it in. You may also click one of the four
Lot Size buttons below the edit box (these buttons are customizable, see Table 7-2 on
page 58.
To place orders:
1. For a Buy order, click the Bids column next to the desired price. For a Sell order,
click the Asks column next to the desired price. If you are using the One-Click
Trading option, the order is placed immediately. You can see the order in the W.
orders column of Trading Pad table, as well as in Working Orders table and in the
Chart.
2. If you are not using One-Click Trading option, Confirm dialog box appears. Click
Yes to confirm. The order is placed. You can see the order in the W. orders column of
Trading Pad table, as well as in Working Orders table and in Chart.
To configure and place Buy by Ask / Sell by Bid orders:
1. To set Buy Ask / Sell Bid order parameters, right-click on Buy Ask / Sell Bid button.
In the dialog box that appears select the order type: Limit or FOKT (Fill Or Kill after
Timeout) Limit. Select the desired slippage (the number of ticks above the current
Ask or below the current Bid), and for FOKT Limit order also select the Timeout.
The default settings are a slippage of 0 ticks and a 30 second timeout. Click OK to
save the settings or Cancel to exit without saving.
2. To place a Buy by Ask order, click the Buy Ask button. To place a Sell by Ask order,
click the Sell Ask button. If you are using the One-Click Trading option, the order is
65
Strategy Runner User’s Guide
Trading from Level II Screen
placed immediately. You can see the order in the W. orders column of Trading Pad
table, as well as in Working Orders table and in the Chart.
3. If you are not using One-Click Trading option, Confirm dialog box appears. Click
Yes to confirm. The order is placed. You can see the order in the W. orders column of
Trading Pad table, as well as in Working Orders table and in Chart.
4. If the FOKT Limit order is not filled during the specified Timeout, the order is
cancelled. If there was a partial fill then the order for the remaining lots is cancelled.
5. Buy by Ask and Sell by Bid orders can only be sent from the Trading Pad or by hot
keys.
NOTE: Trading Pad’s operational mode is that the last ask (or bid) is always centralized.
To ensure correct order placement click Freeze button on the bottom of Trading Pad
window, or to click Ctrl key to freeze prices and ask/bids volume values, while order
fields and last price volume will still be updated.
Canceling Orders from Trading Pad
In addition to placing orders, you can also cancel orders using Trading Pad.
To cancel orders for a specific price:
1. In the W Orders column, click the order for the price you wish to cancel. All orders
for this price are cancelled. If you are using the One-Click Trading option (see
Confirming Trades on page 55), the orders are cancelled immediately.
2. If you are not using the One-Click Trading option, a Confirm dialog box appears.
Click Yes to confirm, and the orders are cancelled.
To Cancel All Orders:
1. Click Cancel All button. If you are using One-Click Trading option (see Confirming
Trades on page 55), all orders are cancelled immediately.
2. If you are not using One-Click Trading option, Confirm dialog box appears. Click
Yes to confirm, and all orders are cancelled.
NOTE: Only manual orders are cancelled in this situation. Orders generated by
automated strategies are not cancelled.
Modifying Orders from Trading Pad
If you wish to modify the price of an order from Trading Pad, you can do so.
To modify orders from Trading Pad:
1. In the W Orders column, right click orders for the price you wish to modify.
2. Drag the orders to the desired new price, and drop. The price is now modified.
You can also modify orders through Working Orders table. See Modifying & Canceling
Orders on page 58.
66
Strategy Runner User’s Guide
Trading from Level II Screen
One Click Trading
If you wish, you may skip the Confirm dialog box, and place orders with one button
click. For an explanation of how to hide Confirm dialog box, see Confirming Trades on
page 55.
Hot Keys
When trading from Trading Pad, hot keys are available to facilitate your trading.
To view the available hotkeys:
1. From the Settings menu, select System Options. Settings dialog box appears.
2. Click the Misc tab. All hot keys are viewable.
To disable the hot keys:
1. From the Settings menu, select System Options. Settings dialog box appears.
2. In Misc tab, in Hot Keys group box, click the checkbox to disable the hot keys.
3. Click Apply to apply and save, or click OK to save and exit.
Setting Trading Pad Trading Defaults
Several defaults need to be preset in order to trade through Trading Pad. This is
especially true for order types and order settings. Use Trading Pad Settings dialog box to
set these defaults.
To open Trading Pad Settings dialog box:
1. From Settings menu, select System Options. Settings dialog box appears.
2. In Trading tab, click Trading Pad tab. Trading Pad Settings dialog box appears.
67
Strategy Runner User’s Guide
Trading from Level II Screen
Figure 7-2: Trading Pad Settings dialog box
Setting Order Types
When you use Trading Pad, you need to predefine your order types. Four options are
available:
•
Limit orders only
•
Auto-detect type of orders, depending on the price and order type as explained in the
following table:
Order
Order Price
Auto-detected order type
Buy
Buy
Lower than current price
Higher than current price
Sell
Sell
Higher than current price
Lower than current price
Limit, MIT, Smart Limit
Stop, Stop Limit, Smart Stop,
Conditional Stop, Conditional
Stop Limit
Limit, MIT, Smart Limit
Stop, Stop Limit, Smart Stop,
Conditional Stop, Conditional
Stop Limit
To set order types:
1. In Trading Pad Settings dialog box, in Default Order Types group box, click the radio
button for the desired order type defaults.
2. Click Apply to apply and save, or click OK to save and exit.
68
Strategy Runner User’s Guide
Trading from Level II Screen
Stop Limit Order Settings
If you select Stop Limit as the Bracket Stop Loss order (see previous paragraph), you
need to preset the distance of the Limit price from the Stop price.
To enter Stop Limit settings:
1. In Trading Settings dialog box, click Trading Pad tab.
2. In Bracket Stop Loss Order group box, set Limit price by entering the number of ticks
it should be from Stop price. You can do this using Up or Down arrows, or simply by
typing the desired value in the edit box.(A positive value means Limit price which is
worse than Stop price, whereas a negative value means Limit price which is better
than Stop price. For example, for a BUY Stop Limit order, a negative value for the
Limit price means Limit price is lower than the Stop price, and a positive value means
Limit price is higher than Stop price).
3. If you enter a negative value, a warning appears. Click Continue or Reset to 0. (If
you do not want this message to appear in the future, see NOTE below.
4. Click Apply to apply and save, or click OK to save and exit.
NOTE: We assume that most users want Stop Limit orders to be set so that Limit price is
either equal to, or worse than, Stop price, which means entering 0 or a positive value. A
default warning appears if you try to enter a negative value.
To turn off this default warning:
In Trading Settings dialog box, in General tab, click to uncheck the checkbox next to “For
Stop Limit Orders, warn if Limit price is better than Stop price”. Then click Apply to apply
and save, or click OK to save and exit.
OR
When the warning appears, select “Don’t Show this message Again” option.
Canceling Orders on Reverse and Trade Out
As explained in Table 7-2 on page 58, you can use the Reverse button to send the order
that will reverse your market position, while Trade Out button will send the order that
will close your current position.
By default, all working orders are cancelled when you click this button.
After clicking Reverse or Trade Out button, the system will, on default:
1. Wait until all your working orders are cancelled (This action will take up to five
seconds)
2. Send corresponding market order
You can switch off these defaults if you wish.
Note: In versions before 2.1, Reverse and TradeOut did not wait till your working orders
were cancelled before sending out an opposing market order.
69
Strategy Runner User’s Guide
Trading from Level II Screen
Navigating Trading Pad Grid
In Trading Pad the last price (or last bid/ask) is always centralized, and to ensure correct
order placement click Freeze button on the bottom of Trading Pad window, or to click
Ctrl key to freeze prices and ask/bids volume values, while order fields and last price
volume will still be updated.
You can move inside the grid using the keyboard arrows.
To view prices higher than the prices currently displayed, click the up arrow button.
To view prices lower than the prices currently displayed, click the down arrow button.
Setting Display and Navigation Defaults
Some of the display and navigation features described above can be modified. These
modifications are performed in Trading Pad Settings dialog box.
To open Trading Pad Settings dialog box:
1. From the Settings menu, select System Options. Settings dialog box appears.
2. In the Trading tab, click Trading Pad tab. The following Dialog box appears:
All the settings options described below are performed in this dialog box.
Setting Trading Pad Table Size
Trading Pad table size can be set so that it displays more or less prices, as desired.
To set grid size:
1. In Trading Pad Table section, set the value in the Table Size box to suit your needs
(the number shown is the number of prices which are displayed above and below the
current price).
2. Click Apply to apply and save, or click OK to save and exit.
To set grid Up/Down Arrow button step:
1. In Trading Pad Table section, set the value in the Up/Down Button Step box to suit
your needs (the number shown is the number of prices which are jumped when you
click the Up/Down button).
2. Click Apply to apply and save, or click OK to save and exit.
Centering Price
To set default for centering price automatically:
1. Select Last ask, or Last bid criteria to be centered automatically.
2. Select Freeze table on Ctrl to freeze Trading Pad prices on Ctrl to ensure correct
order placement.
3. Click Apply to apply and save, or click OK to save and exit.
NOTE: To ensure correct order placement click Freeze button on the bottom of Trading
Pad window, or to click Ctrl key to freeze prices and ask/bids volume values, while order
fields and last price volume will still be updated.
70
Strategy Runner User’s Guide
Trading from Level II Screen
Showing Selected Price
If you wish, you may choose to show the selected price. This means the border around
the cell showing the selected price is emphasized.
To show selected price:
1. In Trading Pad Table section, click the Show Selection Checkbox.
2. Click Apply to apply and save, or click OK to save and exit.
Displaying Orders from Automated Strategies
If you run automated strategies in addition to using Trading Pad, you can indicate
whether you want to display the number of working orders originating in these strategies
in Trading Pad pane.
To display orders from automated strategies:
1. In Trading Pad Table section, click the Show Selection Checkbox.
2. Click the Show Strategies Orders (st) checkbox to indicate that you want to display
the number of orders originating in strategies. The number will be displayed in
Trading Pad next to (st).
Displaying or Hiding P&L in Trading Pad
You may choose to display the P&L on Trading Pad, or to hide it.
To hide P&L:
1. In Trading Pad Table section, click to uncheck the Show P&L checkbox. (To show
P&L, click to check the Show P&L checkbox).
2. Click Apply to apply and save, or click OK to save and exit.
71
Strategy Runner User’s Guide
.
.
Trading from Charts
**
Strategy Runner allows traders to trade off the chart using the Chart Pad functionality
(see Figure 8-1 on page 58).
You can do the following from this pane:
•
Place orders (including brackets) and perform additional functions with just one
mouse click and with auto-detect of order type
•
Cancel orders (including brackets) with just one mouse click
•
Reverse your market position
•
Trade out of your market position
•
Modify orders
•
And more…
NOTE: All exit styles e.g. Scale-outs, Brackets and Trailing stops are available on Chart
Pad. See Exits: Scale-Outs.
NOTE: You can use Chart Pad as a stand-alone application for your trading.
To open Chart Pad functionality:
On the charts toolbox click
button
OR
From the Chart main menu, select Trading from Charts.
Chart Pad functionality opens (see Figure 8-1 on page 58).
72
Strategy Runner User’s Guide
Trading from Charts
1
3
2
4
5
6
7
8
9
10
11
12
13
14
Figure 8-1: Charting Pad dialog box
Chart Pad
Various function buttons are available for your convenience. These buttons are denoted
by numbered arrows on Figure 8-1 above. Table 8-1 below explains each button, edit box
and display box.
Table 8-1: Buttons in Chart Pad and their usage
Number Button/Box
3
Charting Pad
Working order
handler
Pos: P&L:
4
Exit Style
5
Lot size edit
box
Auto-Detect
order type
Last Price
1
2
6
7
Usage
Displays orders and space for entering order space
Displays triangular working order handler for order
cancelation and modification
Displays number of open positions and P&L of
contracts
Click to modify exit style parameters. Right click will
open list of available exit styles.
Set desired lot size here
Click auto-detect option to auto-detect Buy-Sell
action depending on price and chosen order type.
Displays last price, display only
73
Strategy Runner User’s Guide
Number Button/Box
8
Limit
9
Stop
10
11
12
13
Ask/Bid
Values
Buy Market
Sell Market
Trade Out
14
Reverse
Trading from Charts
Usage
Click Limit order to place Limit order types. Right
click to change Limit to MIT order type.
Click Stop order to place Stop order types. Right click
to change Stop to Stop Limits or Conditional Stop
order type.
Displays pink square for Ask price, and blue square
for Bid price. Display only
Click to buy the preset number of lots at market price.
Click to sell the preset number of lots at market price.
Click to send a market order to cover your current
market position. If you wish, you may also cancel all
working orders (see Canceling Orders on Reverse
and Trade Out on page 58).
Click to send a market order to cover your position
and to enter a market position in the opposite direction
(e.g. if you are 2 contracts long, clicking this button
will sell 4 contracts, thereby making you 2 contracts
short)
Trading with Chart Pad
You can use Chart Pad pane to place and cancel orders, and to track your market position.
You can also use the one-click trading option, which is a faster method for placing and
canceling your orders.
You may open multiple Chart Pad dialog boxes, one for each contract you wish to trade.
NOTE: Before placing orders from Chart Pad, it is important that you read the section
below.
Placing Orders from Chart Pad
The first thing you need to do is to set the number of lots you wish to trade. You can then
place orders, as explained below.
To set lots:
In Chart Pad, in the lot size edit box (label #5), set the desired number of lots by using the
up and down arrows, or by typing it in.
To place an order:
1. For a Buy order, click on the chart at the desired price below the current price. For a
Sell order, click on the Chart at the desired price above the current price. If you are
using the One-Click Trading option, the order is placed immediately. You can see the
order in Working Orders table and on the Chart.
2. If you are not using the One-Click Trading option, a Confirm dialog box appears.
Click Yes to confirm. The order is placed. You can see the order in Working Orders
table and on the Chart.
74
Strategy Runner User’s Guide
Trading from Charts
Setting Order Types
When you use Chart Pad, you need to predefine your order types.
Three options are available:
•
•
•
Auto-detect type of orders, depending on the price and order type as explained in the
following table:
Order type
Order Price
Auto-detected Order
Limit, MIT, Smart
Limit
Stop, Stop Limit,
Smart Stop,
Conditional Stop,
Conditional Stop Limit
Limit, MIT, Smart
Limit
Stop, Stop Limit,
Smart Stop,
Conditional Stop,
Conditional Stop Limit
Lower than current
price
Higher than current
price
Buy
Higher than current
price
Lower than current
price
Buy
Sell
Sell
Buy orders option is chosen, auto-detect order type depending on the price as
explained in the following table:
Order
Order Price
Auto-detected order type
Buy
Buy
Lower than current price
Higher than current price
Limit, MIT, Smart Limit
Stop, Stop Limit, Smart Stop,
Conditional Stop, Conditional
Stop Limit
Sell orders option is chosen, auto-detect order type depending on the price as
explained in the following table:
Order
Order Price
Auto-detected order type
Sell
Sell
Higher than current price
Lower than current price
Limit, MIT, Smart Limit
Stop, Stop Limit, Smart Stop,
Conditional Stop, Conditional
Stop Limit
To set order types:
1. In Chart Pad click on Limit or Stop button.
2. To change Limit order type, right click on the Limit button and choose from drop
down menu MIT option.
3. To change Stop order type, right click on the Stop button and choose from drop down
menu new order type (Stop Limit, Conditional Stop or Conditional Stop Limit).
Canceling Orders from the Chart
In addition to placing orders, you can also cancel orders using Chart Pad.
75
Strategy Runner User’s Guide
Trading from Charts
To cancel orders for a specific price:
1. Click the small triangular handler of the line representing working order you wish to
cancel. All orders for this price are cancelled. If you are using One-Click Trading
option, the orders are cancelled immediately.
2. If you are not using One-Click Trading option, Confirm dialog box appears. Click
Yes to confirm, and the orders are cancelled.
NOTE: Only manual orders are cancelled in this situation. Orders generated by
automated strategies are not cancelled.
Modifying Orders from the Chart
If you wish to modify the price of an order from Chart Pad, you can do so.
To modify orders from Chart Pad:
1. Right click small triangular handler of the line representing working order you wish
to modify.
2. Drag orders to the desired new price, and drop. The price is now modified.
You can also modify orders through Working Orders table. See Modifying & Canceling
Orders on page 58.
One Click Trading
If you wish, you may skip Confirm dialog box, and place orders with one button click.
For an explanation of how to hide Confirm dialog box, see Confirming Trades on page
55.
Reverse and Trade Out
As explained in Table 8-1 on page 58, you can use Reverse button to send the order that
will reverse your market position, while Trade Out button will send the order that will
close your current position.
By default, all working orders are cancelled when you click this button.
After clicking Reverse or Trade Out button, the system will, on default:
1. Wait until all your working orders are cancelled (This action will take up to five
seconds)
2. Send an corresponding market order
You can switch off these defaults if you wish.
Note: In versions before 2.1, Reverse and TradeOut did not wait till your working orders
were cancelled before sending out an opposing market order.
76
Strategy Runner User’s Guide
Trading from Forex View
/
/
**
0
0
1
12
2 3
3
An additional option for direct order entry for Forex contract is trading from Forex View
(see Figure 9-1 on page 58).
You can do the following from this dialog box:
•
Place market orders with exits styles
•
View ask/bid prices
Forex View Pad
icon on the main toolbar, Forex View Contract table
When you click the
appears (see Figure 2-2: Forex View on page 11).
NOTE: Scale-outs, Brackets and Trailing stops are available on Forex View. See
Chapter 10: Exit Styles and Toolbox on page 58.
To open Forex View Pad functionality:
On the main toolbar click
icon.
Select Forex contract on Forex View (see Figure 9-1 below).
1
8
3
2
4
5
6
7
Figure 9-1: Forex View Pad
77
Strategy Runner User’s Guide
Trading from Forex View
Table 9-1: Labels and Buttons in Forex View Pad and their usage
Number Button/Label
3
Contract
Name
Lot size edit
box
Size of the lot
4
5
6
7
8
Bid price
Ask price
Sell
Buy
Exit Style
1
2
Usage
Displays the contract name
Set desired lot size
Display only, 10K for mini-accounts and 100K for
regular trading accounts
Current bid price with two last sized-up digits
Current ask price with two last sized-up digits
Click to send Sell Market Order
Click to send Buy Market Order
Click to modify exit style. Right click will open list of
available exit styles.
Trading with Forex View Pad
You can use Forex View Pad to place Market orders. You can also use One-click trading
option, which is a faster method for placing and canceling your orders.
Placing Orders from Forex View Pad
Your initial action should be setting the number of lots you wish to trade. You can then
place Market orders, as explained below.
To set lots:
In Forex View Pad, in Lot Size edit box above the price table, set the desired number of
lots by using up or down arrows, or by typing it in.
To place an order:
1. For a Buy Market Order, click Sell blue button. If you are using One-Click Trading
option (see One Click Trading section below), the order is placed immediately. You
can see the order in Working Orders table and in Chart.
2. If you are not using One-Click Trading option, Confirm dialog box appears. Click
Yes to confirm. The order is placed. You can see the order in Working Orders table
and in Chart.
One Click Trading
If you wish, you may skip Confirm dialog box, and place orders with one button click.
For an explanation of how to hide the Confirm dialog box, see Confirming Trades on
page 55.
78
Strategy Runner User’s Guide
4
4 "
"1
1
Exit Styles and Toolbox
#
#
5
5 1
1
In all order entry pads - Order Ticket, Trading Pad, Chart Pad and Forex View Pad - an
Exit Style pane is available and chosen Exit Style name is displayed on the top button.
The various exits allow you to set several Profit Targets and manage your Loss. These
exits may be linked to a market entry order, in which case they are activated only upon
the entry order being filled, or they may be used to cover open positions, or they may be
stand-alone orders.
By default, exits are attached to the entry order on Order Ticket, Trading Pad, Chart Pad
or Forex View Pads. Thus, reference price for Profit and Loss is the entry price. In this
case, the exit will become active only once the entry order is filled.
You may also use the exits to cover your market position, to cover any number of lots or
even to enter the market (see Toolbox or Placing Advances Orders Detached from Entry
Order on page 58). In this case, you may set the reference price for Profit and Loss to be
the average price, the last price, or any other price you choose.
To set an exit for the attached entry order:
1. Click Exit Style top button. Exit Style Pad opens:
Figure 10-1: Exit Style Pad
79
Strategy Runner User’s Guide
Exit Styles and Toolbox
2. To choose Exit Style right click Exit Style name and select corresponding item from
drop down list of available Exit Styles.
3. Set parameters in the grid below (see table below).
4. Click OK.
The Trailing Stop is an advanced feature of Bracket. This feature allows you to change
Stop Loss value dynamically as the price changes, thus enabling you to lock your profits
or reduce your potential loss.
Table below summarizes the exit types:
Table 10-1: Exit Types
ID
Exit Type
Bracket
1
Bracket &
Trailing Stop
2
3
4
5
6
7
8
Exit with
Market on Time
& Trailing Stop
Scale Out with 2
Targets
Scale Out with
2 Targets &
Break Even
Scale Out with 2
Targets Lots
Scale Out with 2
Targets &
Trailing Stop
Scale Out with 2
Targets Lots &
Exit Functionality
One profit Target and one Stop Loss are
placed. In the case of a partial fill of one of
the orders, the number of lots for the
reciprocal order is updated accordingly.
The Trailing Stop is an advanced feature of
the Bracket. This feature allows you to
change the Stop Loss value dynamically as
the price changes, thus enabling you to
reduce your potential loss. Supports partial
fill.
This feature allows you to change the Stop
Loss value dynamically as the price
changes, thus enabling you to lock up the
profits and/or reduce your potential loss.
Exit your position with Stop Loss order or
with Market Order at the End Time.
Two Profit Targets and one Stop Loss are
placed to provide this simplest scale out.
Once the first Profit Target is filled, the
number of lots for the Stop Loss is updated,
and it is moved to the break-even point.
Two Profit Targets and one Stop Loss are
placed to provide this scale out. You can
define how many lots will be placed on
each of profit target orders. Break Even
option is also available.
Scale Out with two Profit Targets and
Trailing Stop.
Scale Out with two Profit Targets, number
of lots for each Profit Target with Trailing
Exit Style Name
Bracket
Bracket
(with Trailing
Stop checked)
Exit_MOT_TS
ScaleOut2Targets
ScaleOut2Targets
(with Break Even
checked)
ScaleOut2Targets
_Lots
ScaleOut2Targets
_TS
ScaleOut2Targets
_Lots_TS
80
Strategy Runner User’s Guide
ID
10
11
12
13
14
Exit Type
Trailing Stop
Scale Out with 3
Targets
Scale Out with
3 Targets &
Break Even
Scale Out with 3
Targets Lots
Scale Out with 3
Targets &
Trailing Stop
Scale Out with 3
Targets Lots &
Trailing Stop
Exit Styles and Toolbox
Exit Functionality
Stop.
Three Profit Targets and one Stop Loss are
placed, and as the Profit Targets are filled,
the number of lots for the Stop Loss is
updated accordingly.
Once first Profit Target is filled, the number
of lots for the Stop Loss is updated, and it is
moved it to the break-even point.
Three Profit Targets and one Stop Loss are
placed to provide this scale out. You can
define how many lots will be placed on
each of profit target orders. Break Even
option is also available.
Scale Out with three Profit Targets and
Trailing Stop.
Scale Out with three Profit Targets, number
of lots for each Profit Target and Trailing
Stop.
Exit Style Name
ScaleOut3Targets
ScaleOut3Targets
(with Break Even
checked)
ScaleOut3Targets
_Lots
ScaleOut3Targets
_TS
ScaleOut3Targets
_Lots_TS
Below is a description of each exit type, and how to use it.
Bracket
Description: A bracket is essentially two OCO (One Cancels the Other) orders. A pair of
orders – Profit Target and Stop Loss - is placed as defined, and once one of the pair is
filled, the other is cancelled automatically. In the case of a partial fill of one of the orders,
the number of contracts for the reciprocal order is reduced accordingly.
Parameters: Profit Target and Stop Loss are defined in points.
Figure 10-2: Two possible scenarios of bracket execution
81
Strategy Runner User’s Guide
Exit Styles and Toolbox
Bracket & Trailing Stop
Description: Trailing Stop is an advanced feature of the Bracket. This feature allows you
to change the Stop Loss value dynamically as the price changes, thus enabling you to
reduce your potential loss. Supports partial fill.
Parameters: Profit Target, Stop Loss, Price Change and Stop Change are defined in
points.
Figure 10-3: Two possible scenarios of bracket execution with trailing stop.
Exit Market on Time & Trailing Stop
Description: This feature allows you to change the Stop Loss value dynamically as the
price changes, thus enabling you to lock up the profits and/or reduce your potential loss.
Exit your position with Stop Loss order or with Market Order at the End Time.
Parameters: EndTime defined in seconds; Stop Loss, Price Change and Stop Change are
defined in points.
Figure 10-4: Two possible scenarios of execution with market on time and trailing stop.
82
Strategy Runner User’s Guide
Exit Styles and Toolbox
Scale Out with 2 Targets (_Lots)
Description: Three orders are set: two Profit Targets, and a Stop Loss with double the
number of Profit lots. Once Profit Target 1 is filled, the number of lots for the Stop Loss
is reduced accordingly. Alternatively, if the Stop Loss is filled, the remaining Profit
Targets are cancelled.
Parameters: Profit Target 1, Profit Target 2 and Stop Loss are defined in points.
Figure 10-5: Two possible scenarios of execution of Scale Out with two targets.
One version of this exit (ScaleOut2Targets) automatically allocates the number of lots
equally between two profit targets, and if the number of lots is odd, one more lot is
Strategy Runner User Manual Direct Order Entry (Manual Orders) allocated to Target 1
than to Target 2.
The second version of this exit (ScaleOut2Targets_Lots) allows you to set the number of
lots for each Target manually. In this case, you may set any number of lots.
NOTE: If you use the second version of this Scale Out, the total number of lots
allocated to the Targets may be different than the total number of lots to be
covered. The Stop Loss order will still be for the total number of lots.
Scale Out with 2 Targets & Break Even
Description: Same as Scale Out with 2 targets, with automated modification of the Stop
Loss; Once Profit Target 1 is filled, the number of lots for the Stop Loss is reduced, and if
you so choose, it is moved to the break-even point.
Parameters: Profit Target 1, Profit Target 2 and Stop Loss are defined in points.
83
Strategy Runner User’s Guide
Exit Styles and Toolbox
Figure 10-6: Two possible scenarios of execution of Scale Out with two targets and break-even.
Scale Out with 2 Targets & Trailing Stop
Description: Same as Scale Out with 2 targets, with automated modification of the Stop
Loss; Once Profit Target 1 is filled, the number of lots for the Stop Loss is reduced
accordingly. Stop Loss is trailing as the price changes, thus enabling you to lock up the
profits and/or reduce your potential loss.
Parameters: Profit Target 1, Profit Target 2, Stop Loss, Price Change and Stop Change
are defined in points.
Figure 10-7: Two possible scenarios of execution of Scale Out with two targets and trailing stop.
Scale Out with 3 Targets (_lots)
Description: Four orders are set: three Profit Targets and a Stop Loss with triple the
number of Profit lots. Once Profit Target 1 is filled, the number of lots for the Stop Loss
is reduced accordingly. Then, once Profit Target 2 is filled, the number of lots for the
84
Strategy Runner User’s Guide
Exit Styles and Toolbox
Stop Loss is again reduced accordingly. Alternatively, if the Stop Loss is filled, the
remaining Profit Targets are cancelled.
Parameters: Profit Target 1, Profit Target 2, Profit Target 3 and Stop Loss are defined in
points.
Figure 10-8: Two possible scenarios of execution of Scale Out with three targets.
One version of this exit (ScaleOut3Targets) automatically allocates the number of lots
equally (or as close as possible) between the three profit targets. The second version of
this exit (ScaleOut3Targets_Lots) allows you to set the number of lots for each Target
manually. In this case, you may set any number of lots.
NOTE: If you use the second version of this scale-out, the total number of lots
allocated to the Targets may be different than the total number of lots to be
covered. The Stop Loss order will still be for the total number of lots.
Scale Out with 3 Targets & Break Even
Description: Same as Scale Out with 3 targets, with automated modification of the Stop
Loss; Once Profit Target 1 is filled, the number of lots for the Stop Loss is reduced
accordingly, and if you so choose , it is moved it to the break-even point. Once Profit
Target 2 is filled, the number of lots for the Stop Loss is again, reduced accordingly.
Parameters: Profit Target 1, Profit Target 2, Profit Target 3 and Stop Loss are defined in
points.
85
Strategy Runner User’s Guide
Exit Styles and Toolbox
Figure 10-9: Two possible scenarios of execution of Scale Out with three targets and break even.
Scale Out with 3 Targets & Trailing Stop
Description Same as Scale Out with 3 targets, with automated modification of the Stop
Loss; Once Profit Target 1 is filled, the number of lots for the Stop Loss is reduced
accordingly. Once Profit Target 2 is filled, the number of lots for the Stop Loss is again,
reduced accordingly. Stop Loss is trailing as the price changes, thus enabling you to lock
up the profits and/or reduce your potential loss
Parameters: Profit Target 1, Profit Target 2, Profit Target 3, Stop Loss, Price Change
and Stop Change are defined in points.
Figure 10-10: Two possible scenarios of execution of Scale Out with three targets and trailing stop.
Bracket Stop Loss & Profit Target Orders Settings
When you set a Stop Loss and Profit Target prices in a Bracket, the system determines
the order type from the predefined settings. For Stop you can set either to be Stop order,
Stop Limit Order, or Smart Stop order. For Profit you can set either to be Limit order,
MIT Order, or Smart Limit order.
86
Strategy Runner User’s Guide
Exit Styles and Toolbox
To set Bracket Stop Loss & Profit Target order type:
1. In Trading Settings dialog box, click Brackets tab.
2. In Bracket Stop Loss exit order and/or Profit Target exit Order group boxes, click the
desired radio button. (If you are using Smart Orders, then Stop Loss order type is
automatically set to Smart Stop and Profit Target to Smart Limit).
3. Click Apply to apply and save, or click OK to save and exit.
Figure 10-11: The Bracket Settings dialog box
Toolbox or Placing Advances Orders Detached from Entry Order
You may also use the exits to cover your market position, to cover any number of lots or
even to enter the market. To do so, you must use Toolbox. In this case, you may set the
reference price for the Profit and Loss to be the average price, the last price, or any other
price you choose.
To set an advanced order:
1. Click
on the main application. The toolbox dialog will appear:
87
Strategy Runner User’s Guide
Exit Styles and Toolbox
Figure 10-12: Toolbox dialog box
2. Click Exit Style to choose desired Exit Style from drop-down menu.
3. In the grid, set required Exit Style parameters values.
4. In Lots edit box: If you wish to use exit to cover you open position, click Set Open
Pos button. If you wish to set a different number of lots, set desired number of lots in
corresponding edit box.
5. In Reference group box, click desired button to determine reference price for your
Profit and Loss values (you may choose Last Price or the Average Price, or you may
set another price in Set Price edit box).
6. Click Transmit. Exit Style orders are placed.
Table 10-2: Exit style parameters
Field
Profit
Loss
Used in the
following exits:
Bracket
Description
Bracket
ScaleOut2Targets
Stop loss
Profit Target
Value
expressed as
Points away from
price
Points away from
price
88
Strategy Runner User’s Guide
Field
Trailing Stop
Used in the
following exits:
ScaleOut2Targets_Lots
ScaleOut3Targets
ScaleOut3Targets_Lots
Bracket
Price Change
Bracket
Stop Change
Bracket
Profit_1
ScaleOut2Targets
ScaleOut2Targets_Lots
ScaleOut3Targets
ScaleOut3Targets_Lots
ScaleOut2Targets
ScaleOut2Targets_Lots
ScaleOut3Targets
ScaleOut3Targets_Lots
ScaleOut3Targets
ScaleOut3Targets_Lots
ScaleOut2Targets
ScaleOut2Targets_Lots
ScaleOut3Targets
ScaleOut3Targets_Lots
ScaleOut2Targets
ScaleOut2Targets_Lots
ScaleOut3Targets
ScaleOut3Targets_Lots
ScaleOut3Targets
ScaleOut3Targets_Lots
Profit_2
Profit_3
Lots_1
Lots_2
Lots_3
Breakeven
ScaleOut2Targets
ScaleOut2Targets_Lots
ScaleOut3Targets
ScaleOut3Targets_Lots
Exit Styles and Toolbox
Description
Value
expressed as
Optional. If
checked, you
may set a trailing
Stop
If price changes
by this number
of points, the
Stop will be
Moved
Stop will be
moved by this
number of points
First profit target
Click the checkbox
if you want a
trailing stop
Second profit
target
Points away from
price
Third profit
Target
Number of lots
allocated to first
profit target
Points away from
price
number
Number of lots
allocated to
second profit
Target
Number of lots
allocated to
second profit
Target
Optional. If
checked, stop
loss is moved to
the breakeven
point (i.e. entry
price) once first
profit target is
number
points
points
Points away from
price
number
Click the checkbox
if you to move
your Stop to
breakeven
89
Strategy Runner User’s Guide
Field
Exit Styles and Toolbox
Used in the
following exits:
Description
Filled
Value
expressed as
NOTE: Before placing bracket orders, it is important that you read Setting Trading
Defaults section below.
Bracket Stop Loss & Profit Target Orders Settings
When you set a Stop Loss and Profit Target prices in a Bracket, the system determines
the order type from the predefined settings. For Stop you can set either to be a Stop order,
a Stop Limit Order, or a Smart Stop order. For Profit you can set either to be a Limit
order, a MIT Order, or a Smart Limit order.
To set the Bracket Stop Loss & Profit Target order type:
1. In Trading Settings dialog box, click Brackets tab.
2. In Bracket Stop Loss exit order and/or Profit Target exit Order group boxes, click
desired radio button. (If you are using Smart Orders, then Stop Loss order type is
automatically set to Smart Stop and Profit Target to Smart Limit).
3. Click Apply to apply and save, or click OK to save and exit.
Figure 10-13: Bracket Settings dialog box
90
Strategy Runner User’s Guide
Trading Mode
For users of Strategy Runner Professional (Full version), who wish to trade with
strategies and to place orders manually on the same screen, we provide two trading
modes:
•
Manual trading
•
Combined trading
Common Features
In both modes the following information is displayed:
In the Contract table: average price, P&L and all positions are displayed
In the Working Orders, Last Filled and Completed Orders tables all orders are displayed.
In Working Orders table, the Modify button works as follows:
•
Enables modification of price and lots for manually placed orders
•
Enables modification of price for any order generated by a strategy
Manual Trading Mode
In manual trading mode the following display and trading operations are provided:
In Trading Pad:
Orders, positions, average price and P&Ls are displayed for manually placed orders only;
Cancel buttons, TradeOut button and Reverse button apply to manually places orders
only.
In Order Ticket:
Positions, average price and P&L are displayed for manually placed orders only.
Cancel and Cancel All buttons apply to manually placed orders only.
Combined Trading Mode
In the combined trading mode the following display and trading operations are provided:
In Trading Pad
All orders, positions, average price and P&Ls are displayed.
Cancellation of orders: stops all strategies which orders are selected for cancellation and
cancels orders.
91
Strategy Runner User’s Guide
Trading Mode
TradeOut & Reverse: stops all strategies and then TradeOut or Reverses all manual
positions, and keeps or cancels all orders depending on TradeOut and Reverse settings.
In Order Ticket:
All positions, average price and P&L are displayed
Cancel and Cancel All: same as cancellation in Trading Pad
To set your preferred trading mode:
1. From Settings menu, select System Options. Settings dialog box appears.
2. In Trading tab, click General tab.
3. In Trading Mode group box, choose your preferred mode.
4. Click Apply to apply and save, or click OK to save and exit.
92
Strategy Runner User’s Guide
6
6 %
% 7
7
Your Account Report
%
%
Your trading account and risk control settings, i.e. the contracts you may trade and the
contract limits, are determined by your broker and set by your broker on his/her backoffice system. The clearing firm that manages your account provides you with a daily
report, which includes the trades for that day, your profit and loss, total fees and
commissions due and the balance.
Strategy Runner provides you with an additional account report, which shows your
account status in real-time. This report displays part of the data for your account, and in
no way replaces or overrides the clearing firm’s report.
In addition, Strategy Runner enables you to set daily limits for your trading. These limits
determine the maximum profit and loss for the day’s trading.
Account Report
Strategy Runner provides you with a day-by-day, up to the minute status report of your
account. The report includes:
•
Totals for your account.
•
A summary of strategies per contract.
•
A summary of orders per contract.
Viewing your Account Report
To view your Account Report:
From Account menu, select Account Report
OR
From the toolbar, click Account Report button
.
Account Report dialog box opens (see Figure 12-1 below).
93
Strategy Runner User’s Guide
Your Account Report
Figure 12-1: Account Report dialog box
You can view the current status of your account at any given moment.
To update Account Report:
In Account Report dialog box, click Refresh. The report is updated.
Viewing your Account Report in htm format
For additional options, such as printing report or searching it, you can open the report as a
HTM file.
To open Account Report in your default browser:
In Account Report dialog box, click Open button. The report opens in your default
browser.
NOTE: The Account Report provided by Strategy Runner in no way replaces or
overrides the clearing firm’s report. Be sure to read the disclaimer, which appears at the
bottom of the account report!
Money Management
Strategy Runner enables you to set your maximum daily profit or loss, and to perform
additional profit management. If you use this feature, the system behaves as follows
when your predefined settings are reached:
•
All strategies are stopped.
94
Strategy Runner User’s Guide
Your Account Report
•
All working orders are cancelled.
•
All open positions are closed with Market order.
•
No new orders can be placed.
Any change in the money management settings is effective immediately. The settings are
saved until subsequent changes, if any, are made.
Note: Please be aware that your actual profit or loss for the day may be higher or lower
than the values set, depending on market conditions. The values only determine the
point at which the actions described above are performed.
Setting Daily Limits
Strategy Runner enables you to set your maximum daily profit or loss.
To set daily limits:
1. From Account menu, select Account Limits. Account Limits dialog box opens.
Figure 12-2: Account Limits dialog box
2. Click Max. Daily Profit and/or Max. Daily Loss checkbox, and set the desired
values.
3. Click OK to save and exit.
95
Strategy Runner User’s Guide
Your Account Report
Profit Management
You may further manage your profit by setting minimal P&L which is activated once you
have made predefined profit. For example, you may wish to set a $200 minimal profit to
be activated once a $1000 profit is made. This ensures that once you have reached that
$1000 profit, your P&L will not go below $200 as you continue to trade.
To set a minimal P&L:
1. In Account Limits dialog box, click Profit Management checkbox.
In Activate at Profit edit box, enter the profit at which you want the minimal P&L
settings to take effect. In the above example, this is 1000 (also see Figure 12-2
above).
2. In Initial Min. P&L edit box, enter the minimal P&L below which you do not want
your profit to go. In the above example, this is 200 (also see Figure 12-2 above).
3. Click OK to save these settings.
You may also use Trailing Profit feature, which changes the value of the minimal P&L
according to a predefined increase that occurs in the profit. To continue the example
given above, this means that if you reach a $1100 profit, which is a $100 increase of the
predefined $1000 profit, then the initial minimal profit of $200 changes according to your
Change settings. If the initial profit is set to $300, for example, the minimal P&L value
changes to $500. When the P&L continues to grow and passes $1200, your minimal P&L
changes to $ 800, and so on.
To set a trailing profit:
1. Set Profit Management values as described above.
2. Click Trailing checkbox.
3. In When Profit Increases By edit box, enter increase in profit which triggers the
change in the minimal P&L setting. In the above example, this is $100 (also see
Figure 12-2 above).
4. In Change Min. P&L By edit box, enter the desired change in Change Min, P&L By
edit box. In our example, this is 300 (also see Figure 12-2 above).
5. Click OK to save these settings.
96
Strategy Runner User’s Guide
Messages and Online
!
!
Two additional information tabs are available behind Chart tab: Messages and Online.
Messages
Messages table (see Figure 13-1 below) displays various system messages. When a
message is sent, an audio alarm is sounded, and the Messages tab is highlighted. It is
important to read these messages, as some of them may require you to take action.
Figure 13-1: Messages Tab
To view messages:
Click Messages tab, OR Click Messages button in the toolbar.
To sort Messages table:
1. Click the column heading of the column according to which you wish to sort. The
table is now sorted according to the selected column. An arrow appears to the right of
the column heading, showing the sort direction (up arrow for ascending, down arrow
for descending.)
2. To change the table sort direction, click the column heading again.
Online
Online tab displays pages from Strategy Runner’s web site, or your broker’s customized
web site (see Figure 13-2 on page 58). This is particularly helpful when you require
information about available trading strategies, such as their description and trading
97
Strategy Runner User’s Guide
Messages and Online
results. Using the available sub-links, you can connect to Strategy Catalog, Strategy
Runner Forum, and News and Events section.
Figure 13-2: Online Tab
To view Online Info: Click Online tab.
98
Strategy Runner User’s Guide
Modifying Graphics Settings
**#
#
Many of the graphic elements in Strategy Runner console may be modified. For
example, you may wish to change the font used in a column heading, or the background
color of the average price displayed in Trading Pad.
Graphics Settings Dialog box
From Settings menu, select Graphics Settings. Graphic Settings dialog box appears,
listing the modifiable items (see Figure 10-1 below).
Figure 14-1: Graphics Settings dialog box
99
Strategy Runner User’s Guide
Modifying Graphics Settings
The modifiable items are as follows:
Root items (denoted by a plus sign)
You can expand Root items to display elements, by clicking the plus sign to the left of the
item name. The plus sign changes to a minus sign. Root items can also be collapsed to
hide elements, by clicking the minus sign. The minus sign changes back to a plus sign.
Root items are where you view and change color definitions.
Element items (belonging to the root item)
You can view elements by expanding the root element (see description of root items
above). Elements are where you view and change font definitions.
Modifying Colors
To set colors:
1. Select the root item you wish to set. The colors for the item’s various components are
displayed in the table on the right-hand side of the dialog box. The components
appear in Name column, and the components’ colors appear in Value column.
2. Double click the desired component. Or, select the desired component and click
Color. The Color dialog box opens.
3. From the Color dialog box, select the desired color and click OK.
Alternatively, if you know the desired color’s value, you can select the component’s
color value, click it again, and edit it.
4. Click Apply to apply and save. You can see how the change affects the screen.
5. Click OK to save and exit.
Modifying Fonts
To set fonts:
1. Select the font element you wish to set. The font definitions for the item are displayed
in the table on the right-hand side of the dialog box. The parameters appear in the
Name column, and the values for each parameter appear in the Value column.
2. Double click the desired element. Or, select the desired element and click Font. The
Font dialog box opens.
3. From the Font dialog box, select the desired definitions and click OK.
Alternatively, you can select the desired parameter’s value, click it again, and type in the
new value.
4. Click Apply to apply and save. You can see how the change affects the screen.
5. Click OK to save and exit.
Copying Color or Font Definitions
If you wish, you may copy color or font definitions from one item to another.
To copy definitions:
1. Select the value you wish to copy.
2. Click the selected value again.
3. Copy it using Ctrl-C, and then paste it in the desired location using Ctrl-V.
100
Strategy Runner User’s Guide
Modifying Graphics Settings
Returning to System Default Settings
If you wish, you may return to the system’s default graphic settings.
To return to system default graphics setting:
4. From Graphics Settings dialog box, click Default. The screen will return to the
system’s settings.
5. Click Apply to apply and save, or Click OK to save and exit.
WARNING: Whenever a software upgrade takes place, the graphics settings are
automatically updated. If you do not wish your settings to be updated, un-check Auto
Update checkbox in Graphics Settings dialog.
Generating a problem report
If you wish, you may generate a problem report and send it to SR Support Team for
observation.
To generate a problem report:
1. From the Help menu, click Problem Report.
2. Specify the problem, indicating the time and date it occurred.
Note: You may choose to attach a screenshot and/or logs by checking the appropriate
checkbox on the lower left corner of the problem report pane.
101