1
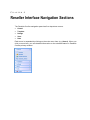
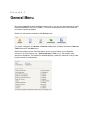
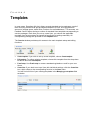
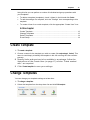
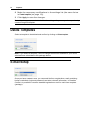
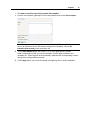
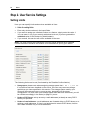
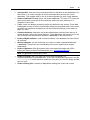
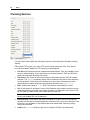
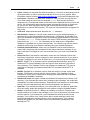
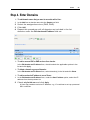
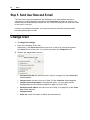
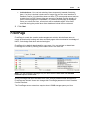
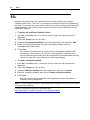
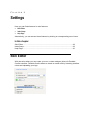
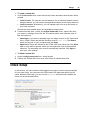
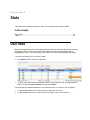
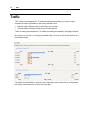
® Parallels Confixx Legal and Copyright Notice ISBN: N/A Parallels th 660 SW 39 Street Suite 205 Renton, Washington 98057 USA Phone: +1 (425) 282 6400 Fax: +1 (425) 282 6444 © Copyright 2008, Parallels GmbH All rights reserved Distribution of this work or derivative of this work in any form is prohibited unless prior written permission is obtained from the copyright holder. Product and service names mentioned herein are the trademarks of their respective owners. Contents Preface 4 Typographical Conventions ........................................................................................................... 4 Feedback ....................................................................................................................................... 5 Terms 6 Reseller Privileges 7 Reseller Interface Navigation Sections 8 General Menu 9 Change Password ....................................................................................................................... 10 Language/Design......................................................................................................................... 11 Messages .................................................................................................................................... 11 Templates 12 Create Template .......................................................................................................................... 13 Change Templates ...................................................................................................................... 13 Delete Templates......................................................................................................................... 14 E-mail Setup ................................................................................................................................ 14 Users 16 Circular to All Users ..................................................................................................................... 17 Create User ................................................................................................................................. 17 Step 1. Select Template .................................................................................................... 17 Step 2. User Service Settings ........................................................................................... 18 Step 3. Enter Personal Data .............................................................................................. 22 Step 4. Enter Domains ...................................................................................................... 23 Step 5. Send User Data and E-mail .................................................................................. 24 Change User ................................................................................................................................ 24 FrontPage .................................................................................................................................... 25 SSL .............................................................................................................................................. 26 MySQL ......................................................................................................................................... 27 Settings 28 Skin Editor ................................................................................................................................... 28 Index Setup .................................................................................................................................. 29 Help Page .................................................................................................................................... 30 Stats 31 User Stats .................................................................................................................................... 31 Traffic ........................................................................................................................................... 32 CHAPTER 1 Preface In this chapter: Typographical Conventions ............................................................................... 4 Feedback .......................................................................................................... 5 Typographical Conventions Before you start using this guide, it is important to understand the documentation conventions used in it. The following kinds of formatting in the text identify special information. Formatting convention Type of Information Example Special Bold Items you must select, such as menu options, command buttons, or items in a list. Go to the System tab. Titles of chapters, sections, and subsections. Read the Basic Administration chapter. Italics Used to emphasize the importance of a point, to introduce a term or to designate a command line placeholder, which is to be replaced with a real name or value. The system supports the so called wildcard character search. Monospace The names of commands, files, directories, and domain names. The license file is located in the http://docs/common/ licenses directory. Preface Preformatted Preformatted Bold On-screen computer output in your command-line sessions; source code in XML, C++, or other programming languages. What you type, contrasted with on-screen computer output. 5 # ls –al /files total 14470 # cd /root/rpms/php CAPITALS Names of keys on the keyboard. SHIFT, CTRL, ALT KEY+KEY Key combinations for which the user must press and hold down one key and then press another. CTRL+P, ALT+F4 Feedback If you have found a mistake in this guide, or if you have suggestions or ideas on how to improve this guide, please send your feedback using the online form at http://www.parallels.com/en/support/usersdoc/. Please include in your report the guide’s title, chapter and section titles, and the fragment of text in which you have found an error. CHAPTER 2 Terms The following terms are repeatedly used in this manual: End user / User has a home directory and one or more domains on the server. Reseller may create and manage users. User and Reseller each have their own Parallels Confixx web interface. This manual describes the Reseller interface. CHAPTER 3 Reseller Privileges A Reseller can log on to their User’s interfaces using his Parallels Confixx password. To access a certain User’s interface, enter the appropriate URL in your browser (in the format: “the main Parallels Confixx URL/User’s Parallels Confixx username”). Enter User’s Parallels Confixx username as login and your Reseller password as password. After logging on you can access the entire User interface, browse through personal settings and information, excluding protected User sections, such as FTP and POP3 accounts. To access Webalizer stats, enter your Reseller username and password. All Users’ usernames are organized according to a pattern “web+number” – e.g., web1, web2, web3, etc. By default Parallels Confixx Reseller is provided with his default User account (web0). You can access User interface of web0 by a corresponding username (web0) and your Reseller password. You may find that some features and menu items described in this Manual are missing from your Parallels Confixx interface. This means one of the following: either these services have been restricted (or disabled) by Admin, or your server configuration doesn’t support these features. CHAPTER 4 Reseller Interface Navigation Sections The Parallels Confixx navigation pane has five drop-down menus: General Templates Settings Users Stats Each menu is expanded by clicking on the main menu item (e.g. General). When you click on menu item, you see detailed information on the selected feature in Parallels Confixx primary window. CHAPTER 5 General Menu By clicking Overview in each Parallels Confixx menu, you can see the shortcuts to major features available in this menu (Tools). Tool icons correspond to menu items and are provided for quick navigation. Below you can see the toolbar for the General menu. For easier navigation, the General -> Overview toolbar also contains shortcuts to Stats and Traffic features of the Stats menu. Below the toolbar you will find information on the current status of your Reseller account. For each service (e.g., Used storage space, Traffic, etc.), the actually used amount is displayed. The maximum allowed capacity (either by maximum or by a hard limit) is shown in parentheses. 10 General Menu If you exceed a maximum, the corresponding row in the table will be highlighted in color. If Administrator had set a hard limit for a service, Parallels Confixx won’t let you exceed this limit, and will notify you by displaying alert messages. The only service which cannot be restricted by a hard limited is Traffic. In this chapter: Change Password ............................................................................................. 10 Language/Design .............................................................................................. 11 Messages .......................................................................................................... 11 Change Password Your Parallels Confixx Reseller password is also used to log on to your Users’ interfaces. To change your password: 1 Enter your current password in the Old password field. 2 Enter your new password twice and confirm by clicking Change password. For security reasons, your password must contain not less than 6, but not more than 12 characters. General Menu 11 Language/Design On the Language/Design page you can select the language and design of your web interface. Choose the applicable language and design scheme from the drop-down lists. These settings will be used for all newly created Users by default. Users can change their default language at a later stage; but the design scheme is changed by Reseller only. When you set up a new User you can select an individual design scheme for him. In Parallels Confixx 3.x it is possible to use old skins from Parallels Confixx 2.0 if this feature is activated by Administrator. These skins can be recognized by the “Parallels Confixx 2.0” prefix. Note: By selecting an old skin, you change not only the design scheme, but the menu structure as well. Messages Server messages are generated by Parallels Confixx. On the Messages page you can view different error messages listed in chronological order. There are two types of messages in Parallels Confixx Reseller interface: Errors: error messages are generated when Parallels Confixx fails to perform certain operations - for example, if a directory could not be created or deleted. Notices: displayed when Users log on/off and when Users, subdomains etc., are created or deleted. In Parallels Confixx 3.1 and up it is possible to sort messages by type (Errors, Notices, All) and to specify a number of messages to be displayed per page. CHAPTER 6 Templates In most cases, Resellers offer their Users several standard service packages, each of them involving certain limits and privileges available to a User, such as maximum amount of storage space, traffic limits, number of e-mail addresses, FTP accounts, etc. Parallels Confixx allows storing a number of standard User templates corresponding to service packages. Each time you set up a new User, you choose the applicable template from the drop-down list instead of specifying all settings manually. All corresponding settings are provided in the Templates menu. The Overview window provides quick access to the main template setup and editing functions: Create template: If you wish to set up a new template, choose Create template. Edit template: To edit an existing template, choose this template from the drop-down list above and click Edit template. E-mail setup: Use E-mail setup to create a standard registration e-mail for your new Users. Create User: If you wish to set up a User with individual settings, click the Create User icon, which refers to the corresponding function in the Users menu. You will find a full list of your existing templates in the Managing your templates field set below. Templates 13 Using this list you can perform a number of individual and group operations with your templates. To delete a template (templates), check it (them) in the list and click Delete. To edit the settings of a template, click the “Change” icon corresponding to this template. To create a User for a certain template, click the appropriate “Create User” icon. In this chapter: Create Template................................................................................................ 13 Change Templates ............................................................................................ 13 Delete Templates .............................................................................................. 14 E-mail Setup ...................................................................................................... 14 Create Template To create a template: 1 Choose a name for the template you wish to create (like webpackage1, limited). This name is used simply to identify the template in this list or during the User creation process. 2 Specify limits and services to be available in a package: f ollow the instructions of the Create User (on page 17) section. Fields marked with * are required. 3 Click Create template to save your settings. Change Templates You can change your template settings at a later time. To change a template: 1 Select the template from the drop-down list and click Edit template. 14 Templates 2 Make the necessary modifications in the settings list (the same list as in Create template (on page 13)). 3 Click Apply to save the changes. Note: Any changes you make don’t affect the settings of any users you have previously created using this template. Delete Templates Select a template to be deleted and confirm by clicking on Delete template. Note: If you delete a template, it will not change the services available to your Users who had been subscribed to this package before. E-mail Setup Once you have created a user, you can send him/her a registration e-mail containing his/her credentials (login and password) and other relevant information. In Parallels Confixx it is possible to create a standard registration e-mail for each User template (package). Templates 15 To create an e-mail for a previously created User template: 1 Choose this template (package) from the drop-down list and click Select template. Note: To create a default registration e-mail template for Parallels Confixx (to be sent to all individual Users, that means, assigned no template), choose No template/individual setting in the drop-down list. 2 The E-mail template page will open. Fill in the appropriate fields. When composing the text you can use Parallels Confixx tags provided in the variables list. These tags will be automatically replaced with corresponding content during the e-mail generation process. 3 Click Apply after you have finished configuring the e-mail template. CHAPTER 7 Users In the Users menu you will find all features you need for creating new Users and editing the settings of existing Users. The Overview section contains the following field sets: In the Tools field set you will find a Create User (on page 17) icon and controls pertaining to major services provided to Users: FrontPage (on page 25), SSL (on page 26), MySQL (on page 26)). The Edit User Data field set enables access the settings of individual Users. Enter the User’s username into the User field and click the applicable icon. If you don’t remember the username, leave the window blank and click on the corresponding tool. In the list of Users that appears, choose the one whose settings you wish to modify. The Change user field set shows the list of users, their status (Enabled or Disabled), their domains and allows to quickly access and change User settings (on page 24). In this chapter: Circular to All Users ........................................................................................... 17 Create User ....................................................................................................... 17 Change User ..................................................................................................... 24 FrontPage ......................................................................................................... 25 SSL ................................................................................................................... 26 MySQL .............................................................................................................. 26 Users 17 Circular to All Users You can use Parallels Confixx to send e-mail notifications (circulars) to all users. To create and send an e-mail notification: 1 Compose your e-mail, specify the required details and click Next. 2 A list of all the Users will appear. If necessary, you can remove certain Users from the list. To select Users, hold CTRL and click on User records. 3 Click Send to selected recipients. It may take a few minutes for the e-mail to be sent to all addresses. Create User Choose the Create User submenu of the Users menu and proceed with a 5-step wizard for creating a new user. In this section: Step 1. Select Template .................................................................................... 17 Step 2. User Service Settings ............................................................................ 18 Step 3. Enter Personal Data .............................................................................. 22 Step 4. Enter Domains ...................................................................................... 23 Step 5. Send User Data and E-mail ................................................................... 24 Step 1. Select Template If you have created a template (on page 12) and wish to use it, select it now. Otherwise keep the default setting No template/Individual setting option in the selection list. If you use a template, you will still have the option to verify and manually change the data in the next step. Note: At any step of the wizard you can always return to the previous page by clicking Back, or proceed by clicking Next. 18 Users Step 2. User Service Settings Setting Limits Here you can specify limits and services available to User. Hints for setting limits: Enter only whole numbers in the input fields. If you want to assign an unlimited number to a feature, simply enter the value 1. You can enter 1 only if you are duly authorized to do so (if you are granted the unlimited value for this feature by Administrator). If you enter 0, this service will not be available to the user. Note: You may not see some values as not every server supports all of Parallels Confixx features or because this feature is not activated for you by your Admin. The following limits can be set (if activated by the Parallels Confixx Admin): Storage space: please note when assigning storage space that 1 MB = 1,024 KB. If a quota has not been installed on the server, the user may use more storage space than you have specified in this section. The storage space used by your Users will be measured once or more per day, depending on the server configuration. If a User uses more storage space than has been authorized, you will be notified accordingly in the Stats (on page 31) menu. Number of POP3 boxes: set up as many e-mail addresses (at least) as many POP3 boxes you specified. Number of e-mail addresses: e-mail addresses are forwards either to POP3 boxes or to existing e-mail addresses. If User is not authorized to create POP3 boxes, he/she can create forwards only to e-mail addresses. Users 19 Autoresponders: User can set up autoresponders for individual e-mail addresses. For that reason, it is useful to assign as many autoresponders as there are e-mail addresses. This enables User to set up an autoresponder for each e-mail address. Number of additional FTP users: Users can create additional FTP users. FTP users are users on the web server with a home directory within the home directory of a Parallels Confixx User. Traffic: a user can always exceed the traffic limit defined in this section. These data is displayed in order to inform User/Reseller about the generated traffic. In the event the traffic limit has been exceeded you will be notified accordingly in the Stats (on page 31) menu. Creatable subdomains: end users can create subdomains and have them point to a certain directory within their home directory. The subdomains will function only if the user’s domains are entered as a wildcard (*.domain.tld) on the name server. Number of MySQL databases: under normal conditions, one database per User should be sufficient. Wildcard subdomain: you can authorize your users to create a catchall subdomain (*.domain.tld). These ones use considerably more server capacity than regular subdomains. Number of @domains. With @ domains Users can create web pages with URLs looking the same as their e-mail addresses (e.g., [email protected]). Note: for @domains JavaScript is used. Number of cronjobs: With cron jobs end users can automatically run scripts/commands at a scheduled time. A cron job corresponds to an entry in the file /etc/crontab. If a User wants to create two cron jobs, you need to assign at least two cron jobs. Number of mailing lists: a number of Majordomo mailing lists a User can create. 20 Users Choosing Services You can select and enable the following services (if activated by the Parallels Confixx Admin): FTP: enable FTP to give your users FTP access using their main User. This feature must be activated if additional FTP users are to be assigned. PHP, SSI: these features can be activated and deactivated. They are available in the server’s default setting. If you deactivate any of these features, PHP and SSI files cannot be executed using the web server. PHP upload: only Users for whom this feature is activated can use the PHP upload features. The phptmp temporary folder will be created in the User’s home directory for this purpose. If this feature is activated for a User later, the temporary folder should also be created and proper permissions should be set (chmod 777). WAP: enables the usage of *.wml files if this feature is activated for a User. SSL: If this feature is activated, Users of this Reseller will be able to perform secure online transactions from their web pages via https. If the Reseller has exclusive IPs, he’ll be able to create his/her own certificates for these IPs. Note: You have to enable SSL service for the User which has an exclusive IP, so he/she can enable SSL on his domains. DirectoryListing: if this feature has been activated for a User, the User can specify whether the web server should display the content of the user’s home directory if an index file is not available. If this feature has been deactivated, Directory Listing cannot be activated. CGI/Perl: the CGI-BIN directory will not be created if CGI/Perl is deactivated. Users 21 Python: disables or activates files with the postfix.py. You have to distinguish normal cgi scripts written in Python and scripts that are to be run by mod_python. More information can be found at http://www.modpython.org. (http://www.modpython.org) Shell access: if Reseller activates Shell access for User, the user can log onto the Linux Shell using the main user (for example, www1). Shell access should be assigned only in exceptional cases as this involves a substantial security risk for the server. We recommend using scp/sftp instead, provided this function is supported by your server. With scp/sftp a User will get a restricted shell access without permissions to execute files remotely. The user can only transfer files encrypted via scp or sftp. ColdFusion: deactivates/activates files with the .cf extension. Webalizer/stats: Webalizer is a well known web server log file analysis program. It analyses the log files generated by the Web server. If Webalizer is activated for a User, the Webalizer configuration file will automatically be generated on the server. The folder Webalizer will be created in the User’s HTML directory and passwordprotected by an .htaccess file. Depending on the web server configuration, Webalizer is updated one or more times per day. You can also log onto the User’s Webalizer stats using your Reseller username and your Reseller password. Password protected directories: Users can use Parallels Confixx web interface to protect their directories with a password if this feature has been activated. If you wish to activate FrontPage for your user at a later time, you must not activate this feature. Define error files: If this feature is activated, Users can use Parallels Confixx web interface to create their own error pages for their website directories. If you wish to activate FrontPage for your user at a later time, you must not activate this feature. WebFTP: WebFTP is an interface used to upload and download files using FTP. Additional FTP users created by User can log onto their sections in this User’s home directory. The Parallels Confixx web interface for additional FTP users is restricted to changing the password and WebFTP, provided that WebFTP is available. WebMail: WebMail is an interface used to send and receive e-mails via the web browser. POP3 users can log onto the User’s section. The Parallels Confixx interface for POP3 users is restricted to changing the password and to WebMail, provided that WebMail is available. Standard CGI scripts: this option installs pre-defined CGI scripts into the Users’ CGI directory. If you activate this option when changing User’s settings, the scripts are reinstalled in the User’s home directory. Existing end User data are not overwritten, though. Only files that previously did not exist are placed in the directory Spam filter: if you activate this feature, your Users will have an effective spam filter. User can modify spam filter settings for each mailbox using the WebMail feature. Backup: In Parallels Confixx 3.1 Backup is available as a service. Reseller can choose whether to include in the package or not. From a drop-down list choose one of three options. If you choose No, you will disable the backup service for this package. If you choose Yes, Users will be able to make backups of their web content and databases and store them in their home directory. If you choose Backup and upload, you will enable Users to automatically upload place their backups on FTP. 22 Users Step 3. Enter Personal Data Required fields are marked with *. Other information is optional but may be helpful, for example, when sending e-mail notifications (circulars (on page 17)) to all Users. You can select if these data should appear on your User’s Parallels Confixx home page. Definable fields: Three additional fields are available which you can label and fill out with any additional information you want. You can specify a password for the newly created User. Alternatively, you can leave the password fields blank, and have Parallels Confixx provide User with its own alphanumeric password. Users can change their passwords afterwards from their Parallels Confixx Web interface. Users 23 Step 4. Enter Domains To add domain names that you want to associate with a User: 1 In the Add form a domain name into the Domain text field. 2 Select the assigned services (DNS, DNR). 3 Click Add. 4 Repeat this procedure until all domains are included in the list domains under the Edit domain and IP address field set. To add or remove DNS or DNR services for a domain: In the Edit domains and IP address form, check/uncheck the applicable options in the list and click Apply. To delete a domain or group of domains: In the Edit domains and IP address form, select domain(s) in the list and click Delete. To add an exclusive IP address to one of Users: 1 In the Edit domains and IP address form, under the Own IP address option, select the IP address from the drop-down list 2 Check only for this user and click Apply. A User may need an exclusive IP address, e.g., if he wishes to set up a personal SSL certificate. 24 Users Step 5. Send User Data and E-mail The new User’s login and password are displayed. If you have already created a registration e-mail template as described in the E-mail setup (on page 14) section, the access data are automatically inserted into the e-mail text, and you can send the e-mail to the User in one click. If there is no predefined template, you can enter the text and other missing details manually and send the e-mail. Change User To change User settings: 1 Enter the username of the User. Alternatively, click Show user list above the form. In the list of users that appears, click Select in front of the User. You will be returned to the Change User form. 2 Select the applicable service: Change personal data: the same form as in Step 3 (on page 22) of the Create User wizard appears Change services: the same form as in Step 2 of the Create User wizard appears Change services using templates: choosing this option, you can apply service settings defined in an existing template (on page 12) to the User. Edit domain and IP address: the same form as in Step 4 (on page 23) of the Create User wizard appears. Change password: Delete user: check this option to delete the selected user. Users 25 Lock/unlock user: You can lock existing Users temporarily instead of deleting them. If a User is locked, he/she can no longer log onto the user interface of Parallels Confixx. A locked User does not have FTP access and cannot retrieve e-mails from his POP3 boxes (they are stored in Parallels Confixx though). A User’s Internet pages are unavailable, or a default neutral page is displayed. Once you unlock the User, all services will be available again. All e-mails received during the period when User had been locked can be retrieved. 3 Click Next. FrontPage FrontPage is a web site creation and management solution which allows users to create professionally-looking web sites and web pages without extensive knowledge of HMTL, web design and other web technologies. FrontPage is by default deactivated for new users. You can activate or deactivate FrontPage for a User by clicking on the status icon in the User list. Note: You can activate FrontPage only for users with the Error Files and Password Protection options deactivated. Once FrontPage has been activated for a User, his/her password and username for FrontPage are issued. Users can change their FrontPage password in their Parallels Confixx interface. The FrontPage server extensions require about 150KB storage space per User. 26 Users SSL Reseller can provide User with a personal SSL certificate (besides the common Parallels Confixx one). To do this, it is necessary to assign an exclusive IP address for this User. This can be done either when creating a User or by editing his domain and IP address settings. Then you will need to acquire a private key and certificate from the certification authority. To register this certificate in Parallels Confixx: 1 Click SSL in the Users menu. You will see a list of Users who have exclusive IP addresses. 2 Click the Change icon for a User. 3 Choose Private key and certificate from the drop-down list and click Next. 4 Enter the acquired private key and certificate details into the corresponding data fields 5 Click Save. You can also use this feature to create your own self-signed (unofficial) SSL certificates for your Users or for yourself. A self-signed SSL certificate is not from an official authority and will not be recognized by the web browser as being valid for the login URL, which will result in warning messages. To create a self-signed certificate: 1 Click SSL in the Users menu. You will see a list of Users who have exclusive IP addresses. 2 3 4 5 Click the Change icon for a User. Choose Nothing is available from the drop-down list and click Next. Edit the company details and check Create a self-signed certificate Click Save. Now the common shared certificate, when displayed to Users, will read the Company name you specified. Note: You can create an official or a self-signed SSL certificate only if you have at least one exclusive IP address. For more information about SSL certificates read http://httpd.apache.org/docs2.0/ssl/ssl_intro.html#certificates. Users 27 MySQL If authorized by the Admin, you can clear individual databases for access from external servers. Click MySQL to see a list of Users who have MySQL databases. You can enable of disable external access to the databases by clicking on the corresponding status icon in front of a User. CHAPTER 8 Settings Here you can find shortcuts to main features: Skin Editor Index Setup Help Page Alternatively, you can access these features by clicking on corresponding menu items. In this chapter: Skin Editor ......................................................................................................... 28 Index Setup ....................................................................................................... 29 Help Page ......................................................................................................... 30 Skin Editor With the skins editor you can create your own, custom designs (skins) for Parallels Confixx interface. Parallels Confixx allows to create a custom skin by selecting interface colors and uploading your logo. Settings 29 To create a custom skin: 1 In the Create new skin form, enter the new skin name and select how the skin will be created. Create from skin: The new skin can be based on one of existing Parallels Confixx design schemes; you can choose an applicable scheme from the drop-down list. Create from archive: Alternatively, you can upload a skin from a zip file stored on your local computer. Choose the most suitable option and click Next to create a skin. 2 Customize the skin: under the Adjust custom skin form, select the skin you want to change from the list of custom skins and choose one of the two options: Upload logos: If you want to upload a logo, the image must be in GIF format with a size 158x67 pixels and that the filename must be logo.gif. Click Browse, select the logo file on your computer and click Apply. Adjust colors: Colors are defined by the HTML color code. When you click Select color, a color table is opened, where you can select the color for all specified elements. The according color code is automatically inherited. Click Apply to save your color settings. To delete a custom skin: 1 Under the Adjust custom skin form, select the skin 2 Check the Delete skin box and click Next to delete the skin. Index Setup In this section, you can create an Index page (home page) to be set up automatically for your new Users. You can enter the HTML code of the page and specify the file name. Besides HTML tags, you can use the ##user## tag (username variable) as shown on the screenshot below. 30 Settings Users can overwrite the Index page file later by uploading their own Internet pages into their home directory on the server. Help Page In this section, create a Help page to be displayed in your Users’ interface. You have the option of specifying information, such as contact information or a link to the Parallels Confixx user manual. Content (in HTML) is added in the same manner as this is done in the Index setup (on page 29) section. No tags other than HTML are possible. CHAPTER 9 Stats The Stats menu allows resellers to view user monthly and summary traffic In this chapter: User Stats ......................................................................................................... 31 Traffic ................................................................................................................ 32 User Stats Below is the general overview showing pertinent stats on all Users and major services provided to them. If the service limit is exceeded, the corresponding table cell is highlighted in color. You can specify the number of Users to be displayed per page. You can run a query on your Users’ stats: Use Search to filter users by username. To filter users who have exceeded the limit set by Reseller (e.g., storage space or traffic), check the Show exceeders box and click Search. You can also get detailed statistics on a particular User or a service (for all Users) To get detailed stats of one User, click on this User in the list. To get a particular service overview (for all Users), click on the service. 32 Stats Traffic The Traffic menu displays all FTP and web traffic generated by your Users. It also includes the traffic generated by previously deleted users. Monthly traffic displays stats for each day of the month General traffic summary below shows monthly figures. Traffic is distinguished between FTP traffic and traffic generated by web page retrieval. By clicking on a month, you will get a detailed daily overview for this month and for two preceding months. The traffic is calculated by a special script. Depending on the web server configuration, this script is executed one or more times per day.