1
Appendix F: CIMPac
45
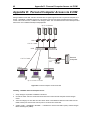
Note: Prior to installation all UMT8 units and CIMPac units must be powered OFF. Computers and User
Stations (UST1s) to be connected can be in a powered ON state.
3.
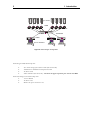
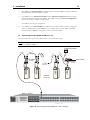
Install one CIMPac, creating an 16 user by 8 server configuration:
a)
Attach server(s) to CIMPac:
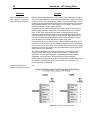
Note: Up to 8 servers can be connected to one CIMPac. Each 3-port cluster on the CIMPac
represents one DB25 server connection, with two associated Cat 5 CIMPac user ports. When each
CIMPac user port in a cluster is attached to a separate Paragon UMT8, 16 users (2 CIMPac user
ports x 8 users per UMT8) can have access to each server.
b)
·
Connect one end of a CCPnn cable to server, attaching the male HD15 video leg and the male 6-pin
mini-DIN keyboard and mouse legs to appropriate video, keyboard, and mouse ports on server.
·
Connect the other end of the CCPnn cable to the CIMPac, attaching the male DB25 end of the
cable to female DB25 port 1 on the CIMPac.
·
·
Power ON server.
Repeat above steps to connect the remaining servers, connecting the CCPnn cable to the CIMPac
at the DB25 2, 3, 4, 5, 6, 7, and 8 port for each consecutive server (2 through 8) added.
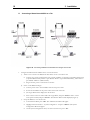
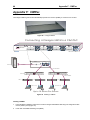
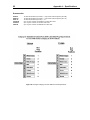
Connect the CIMPac to each UMT8 by repeating all of the following steps for each 3-port cluster on the
CIMPac:
Note: There are 8 three port clusters on the CIMPac. For each cluster the number under the DB25 port
represents the cluster number. In the instructions below “X” represents the cluster number (1 through 8).
·
Connect one end of a Category 5e UTP cable to the RJ45 Cat 5 Port immediately to the right of
DB25 port X.
·
·
Connect the other end of the cable to channel port # X on the back of UMT8 number 1.
·
Connect the other end of the cable to channel port # X on the back of UMT8 number 2.
Connect one end of a Category 5e UTP cable to the second RJ45 Cat 5 Port to the right of DB25
port X.
4.
Connect power cord to back of CIMPac. Power ON CIMPac.
5.
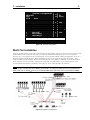
A CIMPac represents 8 servers, and utilizes 8 channels on each UMT8. Since 32 channels are abailable on
each UMT8, up to 3 more CIMPacs can be added for a full 16 user by 32 server configuration. Follow steps
3 & 4 above for each additional CIMPac to be added.
6.
Power ON each of the UMT8s.
Channel Configuration
Paragon recognizes a CIMPac as an extension of a CIM, rather than as a device. As a result, each server
connected to the CIMPac can be configured as a directly connected server would be.
1.
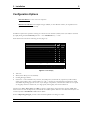
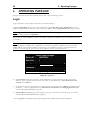
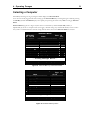
On the Selection Menu (by channel ID number) each green line indicates an active channel
(CIM/computer). Highlight the CIM/server to be selected by using the <á>, <â>, or <PageUp>,
<PageDown> keys. Press <Enter>.
2.
Normal computer access indicates successful connection. If necessary, adjust the computer’s video quality
by keying on <+> or <-> while in Hot Key mode.
3.
Enter a meaningful name for each server (channel).
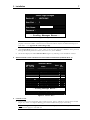
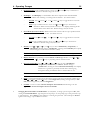
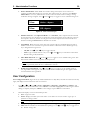
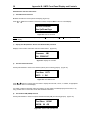
a) Press <F5> for Administration Menu. Select Channel Configuration submenu with <á> or <â> keys
and press <Enter>.
b) Channel Configuration Menu. Press <á> or <â> to highlight (in yellow) Name field for channel ID
where CIM/computer was just installed. Press <Enter>. Highlight turns light blue.
c) Edit name (turns green when typing begins). Press <Enter> when completed. Press <S> to save new name.
d) Press <F2> to return to Selection Menu (by channel ID number). Verify that new name appears on
Selection Menu in green.
4.
Repeat for each CIM/server desired (up to 32).