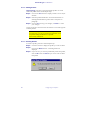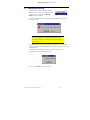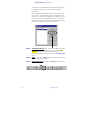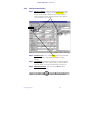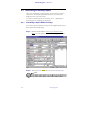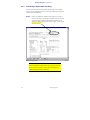
1
Instant Merge® for Windows Client User’s Guide Release 2.0 TM-001-5001 April 1999 Copyright First American CREDCO 1997. All rights reserved. First American CREDCO♦12395♦Poway, CA 92064♦(800)423-1150 Instant Merge® for Windows Statements CONDITIONS ON WHICH THIS MANUAL AND ANY RELATED SOFTWARE AND SERVICES ARE PROVIDED TO RECIPIENT By accepting or using this manual and any related software (Software) and services (Services) provided by First American CREDCO, the recipient agrees to the following terms and conditions: PROPRIETARY INFORMATION This manual and any Software contain confidential information constituting trade secrets of First American CREDCO. This manual and any Software are furnished to recipient solely to enable recipient to utilize Instant Merge for the purposes permitted under recipient’s agreement with First American CREDCO (Subscriber Agreement), and recipient shall not use this manual or any Software for any other purpose. Recipient shall make this manual and any Software available only to its employees who have an actual need to access them in order to enable recipient to obtain Instant Merge credit reports from First American CREDCO. Recipient shall not provide this manual or any Software (or any part thereof) to any third party. Recipient shall not reproduce any Software (except for backup purposes), and shall not reproduce this manual (or any part thereof) without First American CREDCO’s prior written consent. At the termination of the Subscriber Agreement, or earlier at the request of First American CREDCO, recipient shall promptly return this manual and any Software (and any copies made by recipient) to First American CREDCO. Recipient shall take reasonable steps to ensure that its employees comply with the foregoing restrictions. RELEASE AND LIMITATION OF LIABILITY RECIPIENT RELEASES FIRST AMERICAN CREDCO FROM ANY AND ALL DEMANDS, ACTIONS, LOSSES, COSTS, EXPENSES, DAMAGES, LIABILITIES, PENALTIES, AND OTHER CLAIMS IN CONNECTION WITH THIS MANAUAL OR ANY SOFTWARE, INSTANT MERGE CREDIT REPORTS, CREDITWORTHINESS SCORES, OTHER PRODUCTS OR SERVICES PROVIDED BY FIRST AMERICAN CREDCO. IN NO EVENT WILL FIRST AMERICAN CREDCO HAVE ANY LIABILITY TO RECIPIENT OR ANY THIRD PARTY FOR INCIDENTAL, SPECIAL, CONSEQUENTIAL, OR ANY OTHER DAMAGES IN CONNECTION WITH THIS MANUAL OR ANY SOFTWARE, INSTANT MERGE CREDIT REPORTS, CREDITWORTHINESS SCORES, OR OTHER PRODUCTS OR SERVICES PROVIDED BY FIRST AMERICAN CREDCO. DISCLAIMER OF WARRANTIES FIRST AMERICAN CREDCO DOES NOT MAKE ANY REPRESENTATION OR WARRANTY, EXPRESS OR IMPLIED, INCLUDING BUT NOT LIMITED TO IMPLIED WARRANTIES OR MERCHANTABILITY OR FITNESS FOR A PARTICULAR PURPOSE, OR AS TO NONINFRINGEMENT, WITH RESPECT TO THIS MANUAL OR ANY SOFTWARE, INSTANT MERGE CREDIT REPORTS, CREDITWORTHINESS SCORES, OR OTHER PRODUCTS OR SERVICES PROVIDED BY FIRST AMERICAN CREDCO, NOR ARE THERE ANY WARRANTIES CREATED BY COURSE OF DEALING, COURSE OF PERFORMANCE, OR TRADE USAGE, AND FIRST AMERICAN CREDCO EXPRESSLY DISCLAIMS ALL SUCH REPRESENTATIONS OR WARRANTIES. IN ADDITION, FIRST AMERICAN CREDCO DOES NOT WARRANT THAT THIS MANUAL OR ANY SOFTWARE, INSTANT MERGE CREDIT REPORTS, CREDITWORTHINESS SCORES, OR OTHER PRODUCTS OR SERVICES PROVIDED BY FIRST AMERICAN CREDCO WILL BE FREE FROM ERRORS, WILL MEET RECIPIENT’S NEEDS, OR WILL BE PROVIDED ON AN UNINTERRUPTED BASIS. RIGHT TO RETURN Recipient may indicate that it will not be bound by the foregoing terms by returning this manual and all Software to First American CREDCO within five days after receipt. ii Instant Merge® for Windows Registered Marks First American and the eagle logo are registered service marks of The First American Financial Corporation. CREDCO is a registered service mark and Instant Merge is a registered trademark of First American CREDCO. Trans Union is a registered mark of Trans Union Corporation. References to TUC in this document refer to Trans Union. References to XPN in this document refer to Experian. References to EFX in this document refer to Equifax Credit Information Services, Inc. SprintNet is a service mark of US Sprint Communications Company Limited Partnership. CompuServe is a registered trademark of CompuServe Incorporated and H&R Block Inc. Microsoft, Windows 95, and Windows 98 are registered trademarks and Windows is a trademark of Microsoft Corporation. iii Instant Merge® for Windows Ordering Publications Copies of this publication or copies of any other First American CREDCO publication can be obtained by contacting your First American CREDCO representative or by writing to: First American CREDCO Attn: Publications Dept. 12395 First American Way Poway, CA 92064 When ordering publications, include the document title, the document number, and the edition date. iv Instant Merge® for Windows Table of Contents 1 Introduction................................ Introduction ............................................................ ............................................................ 1 1.1 Features...................................................................... 3 1.2 System Requirements............................................... 4 1.3 Technical Support..................................................... 4 2 Installing the Software Software................................ ........................................... ........................................... 5 2.1 Automatic Installation ............................................. 6 2.2 Manual Installation ................................................ 10 2.3 Uninstalling the Software ...................................... 16 3 Starting the Software................................ Software ........................................... ........................................... 19 3.1 Enter UserID and Password.................................... 20 3.2 Getting to Work...................................................... 21 3.3 Exiting the Software............................................... 22 4 Configuring the Software................................ Software ..................................... ..................................... 23 4.1 Profile Setup ............................................................ 24 4.1.1 Profile Window ............................................ 24 4.1.2 Server Options Window .............................. 27 4.2 Connection Settings ............................................... 28 4.2.1 Phone Settings.............................................. 28 4.2.2 TCP/IP Settings ........................................... 30 4.3 Timeout Settings .................................................... 31 5 Learning The Environment Environment................................ ................................... ................................... 33 5.1 Moving Between Window Items........................... 34 5.1.1 Mouse ........................................................... 34 5.1.2 Keyboard....................................................... 34 5.2 Menus and Buttons ................................................ 35 5.2.1 Menu Bar ...................................................... 35 5.2.2 Button Bar .................................................... 44 5.3 Request Window..................................................... 47 5.3.1 Create a New Request Window ................. 47 5.3.2 Batch Process Selector.................................. 48 5.3.3 Type Indicator.............................................. 48 5.3.4 Selecting Repository Access ........................ 48 5.4 The Request Status Window ................................. 50 5.4.1 Profile............................................................ 50 5.4.2 Notes............................................................. 50 5.4.3 Set Batch....................................................... 51 5.4.4 Comments.................................................... 52 5.4.5 Finding an Active Client.............................. 52 5.5 The Communication Status Bar ............................ 53 v Instant Merge® for Windows 6 Entering Applicant Information........................... Information ........................... 55 6.1 Entering Name Information................................... 55 6.2 Entering Address Information................................ 56 6.2.1 Address Type Normal.................................. 57 6.2.2 Address Type P.O. Box ................................ 58 6.2.3 Address Type Rural Route .......................... 59 6.3 Entering Military Addresses ................................... 60 7 Security and User Administration ....................... 61 7.1 7.2 7.3 7.4 7.5 7.6 8 Enabling the Security Function ............................. 62 Adding the System Administrator......................... 63 Adding Users ........................................................... 65 Deleting Users ......................................................... 66 Deactivate Security................................................. 67 Working with Security Enabled............................. 68 Ordering Reports ................................................. ................................................. 69 8.1 Ordering a Single Report ........................................ 70 8.2 Ordering Multiple Reports ..................................... 71 8.2.1 Group Identification.................................... 71 8.2.2 Individual Identification.............................. 73 8.3 Reordering an Existing Report ............................... 74 8.3.1 Reordering a Report Within Five Days....... 74 8.3.2 Reordering a Report After Five Days.......... 76 8.4 Reordering an Incomplete Report.......................... 78 9 Viewing, Printing, and Deleting Reports............. Reports ............. 79 9.1 Viewing Reports ..................................................... 80 9.2 Printing Reports ...................................................... 83 Automatic Printing ................................................. 83 9.2.2 Manual Printing ........................................... 84 9.2.3 Reprinting an Existing Report .................... 85 9.3 Deleting Reports ..................................................... 86 9.3.1 Deleting Records by Name.......................... 86 9.3.2 Deleting Records by Date............................ 87 10 Viewing and Clearing Logs and Records............. Records............. 89 10.1 Viewing the Error Log............................................. 90 10.2 Viewing the Transaction Log................................. 93 10.3 Clearing the Transaction Log................................. 96 10.4 Viewing the Customer Report............................... 97 vi Instant Merge® for Windows 1 Introduction Instant Merge® for Windows is a credit report ordering and processing product from First American CREDCO. Instant Merge® for Windows is a system of hardware and software used to produce fast, accurate credit reports. Using the Instant Merge® for Windows software and your computer, applicant data is sent to First American CREDCO’s host computers, repository data is obtained and processed, and the final merged report arrives back at your PC in about one minute. Introduction 1 Instant Merge® for Windows Instant Merge® for Windows provides a quick pull of tradeline data from any, or all, of the three credit bureaus Equifax [EFX], Experian [XPN], or Trans Union [TUC]. Credit data for a particular borrower can be reported differently by each of the three national bureaus. These bureaus may also vary their data collection and coverage by geographical areas in the country. Instant Merge® for Windows simplifies the credit report process for you by using its powerful patented merge logic to compare twelve credit and public record variables, and eliminate duplicate tradelines. Instant Merge® for Windows then presents the strongest tradeline or public record data in an easy-to-read report. 2 Introduction Instant Merge® for Windows 1.1 Features The Instant Merge® for Windows application includes the following features: ♦ Easy to use interface ♦ Native Windows application ♦ Easily filled-in window for applicant data collection ♦ Rapid report generation and delivery ♦ One, two, or three credit repository requests are merged into a single credit report ♦ Incorporates TAPI to allow use of any installed modem ♦ Communicates via the public telephone system or dedicated leased telephone lines ♦ Provides its own telecommunications software (no other communications software is required) ♦ Allows a variety of transmission options ♦ Single credit report application ♦ Multiple credit report applications ♦ Batch transmission of any subset of the applications, or all of the applications ♦ Provides for a variety of configuration options ♦ Prints reports to any installed printer ♦ File and program access security ♦ Transaction logging ♦ Communication error logging ♦ Easy to understand error messages Installing the Software 3 Instant Merge® for Windows 1.2 System Requirements The following list defines the Instant Merge for Windows system requirements: ♦ ♦ ♦ ♦ ♦ ♦ 1.3 486 DX-66 (or higher) IBM Compatible PC Microsoft Windows 95 or 98 VGA (or higher) Video Adapter 10 to 32 Megabytes Available Hard Drive Space depending on components installed (An additional 10 Megabytes is recommended to store saved reports.) 16 Megabytes RAM (32 Megabytes RAM is recommended) Hayes Compatible Data-Fax Modem - 14.4 KBPS (or higher) Technical Support Technical support is available through the First American CREDCO Help Desk. For assistance, call: (800) 423-1150 Technical Support is available Monday through Friday from 6:00 a.m. to 8:00 p.m. Pacific Time, on and Saturday and Sunday from 10:00 a.m. to 3:00 p.m. Pacific Time... 4 Introduction Instant Merge® for Windows 2 Installing the Software The Instant Merge for Windows software is installed on the PC using a floppy disk, or CD-ROM drive, and a hard disk drive. Each drive has a letter designator that the operating system recognizes as belonging to that drive. A typical computer configuration offers a 3.5” floppy diskette as “Drive A:” or “Drive B:” , a hard disk as “Drive C:”, and a CD-ROM drive as “Drive D”. Therefore, the installation in this configuration would be from floppy drive “A:” or “B:” to hard drive “C:”, or from CD-ROM drive “D” to hard drive “C”. To determine the correct letter designator for each drive on your computer, refer to your computer’s documentation, double-click on the “My Computer” icon, or check with your System Administrator. The installation of the Instant Merge for Windows software requires between 10 and 32 Megabytes of disk space, depending on which of the required components are already installed on your PC. If your PC has Windows 98, or Windows 95 with Internet Explorer 4.01, already installed, your installation will require only about 10 Megabytes of space. If these components are not already installed, the extra required files will bring your total space requirements to approximately 32 Megabytes. Additionally, we recommend that you have an extra 10 Megabytes of disk space available after installation for storing saved reports. CAUTION: Remember to close all open Windows applications prior to installing Instant Merge. Installing the Software 5 Instant Merge® for Windows 2.1 Automatic Installation Most Windows 95/98 PC’s ship with a CD-ROM drive that features an “auto-play” option. If this option has been enabled, software installation, and music CD’s, inserted into the drive will automatically start whenever the drive door is closed. Most software installation CD’s now provide an “auto-start” capability to take advantage of this unique feature. The Instant Merge installation CD will automatically load the software installation program for you if your CD’s “auto-play” option has been enabled. Because Instant Merge for Windows is a powerful 32-bit application tightly integrated with Windows 95 and Windows 98, it may require some additional Windows tools to be installed on your PC. If you are not running Windows 98, or Windows 95 with Internet Explorer 4.01, you will initially be advised of the requirement to install the Microsoft DCOM software which is required for Instant Merge for Windows to function. If you see this window, simply “click” the Yes button to install this software. CAUTION: Your PC will automatically shutdown and restart once the DCOM software has finished installing. You must have shutdown all other programs prior to “clicking” the Yes button, otherwise you could lose any unsaved work. The installation program will automatically continue when your PC restarts. 6 Installing the Software Instant Merge® for Windows If you do not need to install the above components, the first installation window you will see is the Welcome Window. Please read the information presented before continuing. You should close all active programs before continuing — if you have not already done so. You may do this by clicking on the Cancel button, closing each open program individually; and then restarting the installation process. If all of your active programs have been shutdown, “click” on the Next button to continue Installing the Software 7 Instant Merge® for Windows You will next be asked if you want to install the Instant Merge for Windows Client software, Instant Merge Server software, or both.. The default installation is for the Instant Merge for Windows Client software. Instant Merge can be used without a requirement for any other piece of software. However, it can be used in conjunction with Instant Merge Server software to gain greater credit reporting flexibility for your organization. If you want to install the Instant Merge Server software at this time, simply click the box to add a ✔ to the Instant Merge Server box. Then click “Next” to finish the installation. NOTE: The amount of space required for this installation, and the amount of space available, are identified in this window. The differences between space requirements of individual components, such as Instant Merge for Windows Client and Server, and total space requirements represent necessary system files being installed with the various software components. 8 Installing the Software Instant Merge® for Windows You may customize the Instant Merge installation by changing the default options during the installation process. The following window allows you to target the installation to a different directory However, for the simplest installation, we recommend you accept the default choices. When you are ready, “click” the “Next” button to continue. When the installation is complete, you will need to start the software and setup your configuration options to finish the installation and get ready to work. Installing the Software 9 Instant Merge® for Windows 2.2 Manual Installation If you have the diskette version, or if the Instant Merge for Windows installation program does not automatically start when you insert the installation CD, you will need to install Instant Merge for Windows manually. The simplest method is to click on your computer’s Start Button; then click on the Settings option on the Start Menu; and finally click on Control Panel option. When the Control Panel window appears, click on the “Add/Remove Programs” icon to manually start the installation process. Using this feature, Windows will automatically search your floppy disk drive, or your CD-ROM drive, for the Instant Merge for Windows installation program and then automatically start it for you. 10 Installing the Software Instant Merge® for Windows However, if you prefer to do everything yourself, the following steps will guide you through a completely manual installation. Step 1: Place Disk 1 of the Instant Merge for Windows installation diskettes in the floppy disk drive, or place the Instant Merge installation CD in the CD-ROM drive. Step 2: From the Start menu, select Run. Step 3: In the Run dialog box, enter: A:\SETUP or D:\SETUP NOTE: You can also use the Browse button to browse your computer to locate the installation program. For more information on how to do this please consult your operating system manual. Step 4: Click on OK to launch the installation program Installing the Software 11 Instant Merge® for Windows Because Instant Merge for Windows is a powerful 32-bit application tightly integrated with Windows 95 and Windows 98, it requires that some additional Windows tools are installed on your PC. If you are not running Windows 98, or Windows 95 with Internet Explorer 4.01, you will initially be advised of the requirement to install the Microsoft DCOM software which is required for Instant Merge for Windows to function. If you see this window, simply “click” the Yes button to install this software. CAUTION: Your PC will automatically shutdown and restart once the DCOM software has finished installing. You must have shutdown all other programs prior to “clicking” the Yes button, otherwise you could lose any unsaved work. The installation program will automatically continue when your PC restarts. If you do not need to install the above components, the first installation window you will see is the Welcome Window. Please read the information presented before continuing. 12 Installing the Software Instant Merge® for Windows You should close all active programs before continuing. You may do this by clicking on the Cancel button, closing each open program individually; and then restarting the installation process. If all of your active programs have been shutdown, “click” on the Next button to continue. Installing the Software 13 Instant Merge® for Windows You may customize the Instant Merge installation by changing the default options during the installation process. The following window allows you to target the installation to a different directory. However, for the simplest installation, we recommend you accept the default choices. When you are ready, click the “Next” button to continue. 14 Installing the Software Instant Merge® for Windows You will next be asked if you want to install the Instant Merge for Windows Client software, Instant Merge Server software, or both. The default installation is for the Instant Merge for Windows Client software. Instant Merge can be used without a requirement for any other piece of software. However, it can be used in conjunction with Instant Merge Server software to gain greater credit reporting flexibility for your organization. If you want to install the Instant Merge Server software at this time, simply click the box to add a ✔ to the Instant Merge Server box. Then click “Next” to finish the installation. NOTE: The amount of space required for this installation, and the amount of space available, are identified in this window. The differences between space requirements of individual components, such as Instant Merge for Windows Client and Server, and total space requirements represent necessary system files being installed with the various software components. When the installation is complete, you will need to start the software and setup your configuration options to finish the installation and get ready to work. For information on starting Instant Merge for Windows, please refer to Chapter 3, Starting the Software. For information on configuring Instant Merge for Windows, please refer to Chapter 4, Configuring the Software. Installing the Software 15 Instant Merge® for Windows 2.3 Uninstalling the Software Instant Merge for Windows also includes an uninstall utility to allow you to easily uninstall the software should the need ever arrive. To uninstall Instant Merge for Windows just follow these simple steps: Step 1: Open the Windows Control Panel by “clicking” on the Start button, then “clicking” on the Settings option. Step 2: Next select the Control Panel option. Step 3: Then select the Add/Remove Programs icon. 16 Installing the Software Instant Merge® for Windows Step 4: When you see the following window, browse through the list of installed programs until you find IMW32 and “click” on it to select it. Then “click” on the Add/Remove button to start the automatic uninstall process. WARNING: If you have both Instant Merge for Windows Client and Instant Merge Server for Windows installed, they will both be uninstalled at this time. DO NOT CONTINUE UNLESS YOU WISH TO REMOVE BOTH PROGRAMS Installing the Software 17 Instant Merge® for Windows This page left blank intentionally. . 18 Installing the Software Instant Merge® for Windows 3 Starting the Software The following section details the steps to start Instant Merge for Windows software. Step 1: Click on the Start menu button. Step 2: Select Programs → Instant Merge for Windows 2.0 → Instant Merge for Windows 2.0. Step 3: When Instant Merge for Windows is started for the first time, you will be required to enter the configuration information for your organization. Instant Merge will prompt you to establish a new user profile, based on information provided by account setup, and to select which modem you desire to use (if your PC has more than one modem installed). For more details on how to complete these configuration windows please refer to Chapter 4, Configuring the Software. Starting the Software 19 Instant Merge® for Windows 3.1 Enter UserID and Password Instant Merge for Windows provides a security function that protects access to the Instant Merge for Windows program and your credit files. If the security feature has been setup and activated, Instant Merge for Windows displays the following Security window each time the software is started. To access the Instant Merge for Windows program: 1. 2. Enter your user identification and password. Click on the OK button. To learn how to configure security for your system, or to add new users, refer to Chapter 7, Security and User Administration. 20 Starting the Software Instant Merge® for Windows 3.2 Getting to Work When Instant Merge for Windows is started, you will see the following window: Now you can put the power of Instant Merge for Windows to work. You will find the following sections in this manual very helpful. ♦ Chapter 4, Configuring the Software ♦ Chapter 5, Learning the Environment ♦ Chapter 6, Entering Request Information ♦ Chapter 7, Security and User Administration ♦ Chapter 8, Ordering Reports ♦ Chapter 9, Viewing, Printing, and Deleting Reports ♦ Chapter 10, Viewing and Clearing Logs Starting the Software 21 Instant Merge® for Windows 3.3 Exiting the Software To exit the Instant Merge for Windows program, “click” on the Exit button in the top right corner of the window. You may also click on the File menu and select the Exit option. 22 Starting the Software Instant Merge® for Windows 4 Configuring the Software All of the configuration windows can be accessed from the Setup menu within the Instant Merge for Windows program. These options allow you to maintain Profiles, Connection Settings, and Timeout Settings. Configuring the Software 23 Instant Merge® for Windows 4.1 Profile Setup The Customer Profile window is used to enter your First American CREDCO account specification. This window has two tabs. The first tab, Profiles, is used to configure a profile with your account information. The second tab, Server Options, is used to configure Instant Merge for Windows to work with Instant Merge Server. NOTE: If you do not have Instant Merge Server installed, you must not use the Server Options tab — entering information in this window without having Instant Merge Server installed could cause you some problems. 4.1.1 Profile Window 4.1.1.1 Profile Setup To setup a new profile, just follow these simple steps: Step 1: DESCRIPTION: Enter a description of the profile in the Description text box. The description is for your own use. It is recommended that you enter information about the account, such as FICO scores, number of bureaus, etc. 24 Configuring the Software Instant Merge® for Windows Step 2: CUSTOMER ID: Enter your four (4) or five (5) digit customer identification number in the Customer Id text box. This number is your Instant Merge account number and is supplied by First American CREDCO. Step 3: PASSWORD: Enter your customer password in the Password text box. This password is supplied by First American CREDCO. Step 4: REGION CODE: The default Region Code of 00 is already entered in the text box. Do not change this number unless directed to do so by Account Setup. Step 5: DATA FORMAT: Select the report format, F1, RD, or X3, from the Data Format drop down list box. The default is F1, which requests formatted Instant Merge reports. The F1 is the only report format you should use unless directed to do so by Account Setup. CAUTION: Do not select RD or X3 formats unless specifically directed by Account Setup. These formats are reserved for companies doing something unique requiring the reports to be formated differently than normal. Step 6: ENCRYPT FILE: To enable file encryption, click on the Encrypt File check box, so that an ✔ appears in the box. When file encryption is enabled, files stored on the hard disk are encrypted and can be read by Instant Merge only. Step 7: NOTES MANDATORY: To require the use of notes, click on the Notes Mandatory check box, so that an ✔ appears in the box. This means that each client credit request generated with this profile will require a note, or comment, to be entered. Step 8: SAVE: “Click” on Save to save the information entered for this profile, or Cancel to “undo” your changes. Step 9: MAKE CURRENT: If you want the current profile used when ordering reports, click on the Make Current button. NOTE: The status bar contains the message Current Profile when the current profile is displayed. Step 10:EXIT: Click the Exit Button to quit. Configuring the Software 25 Instant Merge® for Windows 4.1.1.2 Adding Profiles Instant Merge for Windows supports multiple profiles. To create additional profiles follow these simple steps: Step 1: Click on the New button to display a blank Customer Profile window. Step 2: Enter the profile information. For more information on entering this information, please refer to the previous paragraph. Step 3: Click on Save to keep your changes, or Cancel to “undo” your changes. Use the scroll bar at the bottom of the window to scroll through the available profiles. NOTE: You may choose to add different profiles to accommodate your unique business requirements, such as separate billing identification or specific functionality differences. 4.1.1.3 Deleting Profiles To delete a profile, just follow these simple steps: Step 1: Use the scroll bar to display the profile you want to delete. Step 2: Click on the Delete button. A warning window is displayed. Step 3: If you are sure you want to permanently delete the profile, click on OK. Click on Cancel if you do not want to delete this profile. 26 Configuring the Software Instant Merge® for Windows 4.1.2 Server Options Window Leave this blank unless you are using Instant Merge Server WARNING: Do not fill in any blanks on the Server Options window unless you have also installed the Instant Merge Server software. Entries on this screen, when Instant Merge for Windows is used as a “stand-alone” program, will cause problems. For information on setting up the Server Options, please refer to the Instant Merge Server Reference manual. Configuring the Software 27 Instant Merge® for Windows 4.2 Connection Settings The Connection Settings window is used to set up the method and means of connecting to the First American CREDCO facility. At present, two methods are available — Dial Phone connections and TCP/IP for large, leased line customers. 4.2.1 Phone Settings Dial-up access is available through CompuServe and SprintNetSM. To setup your system for dial-up access, follow these simple steps: Step 1: SERVICE: You must first choose the Service you will be using. Simply click on the desired Service so that an ● appears adjacent to your selection. Step 2: DIAL PHONE NUMBER: Enter the local CompuServe or SprintNetSM telephone number in the Dial Phone Number text box. You may obtain a local access for your Service by calling the below information numbers, or the Instant Merge Technical Support. (800)635-6225 — CompuServe (800)890-5128 — SprintNetSM (800)423-1150 — Instant Merge Technical Support 28 Configuring the Software Instant Merge® for Windows The CompuServe and SprintNetSM telephone numbers are automated systems requiring a touch-tone telephone. Simply answer the questions using the keypad on your telephone. These automated systems will provide you with a local telephone access number. If you prefer to speak to someone in person, you can also get an access number from our Technical Support personnel during the normal working hours listed in Chapter 1, paragraph 1.3, Technical Support. Then enter that number is the Dial Telephone Number text box above. Step 3: LOCAL PHONE NUMBER: Enter the telephone number of your PC in the Local Phone Number text box. Step 4: SERVER ID NUMBERS: The CompuServe Server and Sprint Server ID Number boxes have already been completed for you. CAUTION: Do not change these fields without specific instructions from Technical Support. Step 5: The Connect Using box is a “drop-down” box from which you can select, or configure, a modem to be used to send and receive your credit requests. This list will contain a list of all modems installed on your PC. In most cases, you will have only one modem on your list. Simply click on the modem you desire to use and it will be displayed in this box. If you desire to change the modem’s configuration, then “click” on the Configure button. You will be presented with the standard Windows modem properties windows to allow you to change the configuration. For more information on reconfiguring your modem, please refer to your Windows 95 or 98 User Manual, your modem documentation, or contact your System Administrator. Configuring the Software 29 Instant Merge® for Windows Step 6: The From Location: box will use the default location that has been identified during the installation of your modem. If you need to change the default location’s configuration, them “click” on the Configure button. You will be presented with the standard Windows dialing properties windows to allow you to change the configuration. For more information on reconfiguring your dialing properties, please refer to your Windows 95 or 98 User Manual, your modem documentation, or contact your System Administrator. NOTE: If you are in a Metro dialing area you should call Technical Support if you need help. Step 7: Click on OK to save the telephone numbers. 4.2.2 TCP/IP Settings The TCP/IP Settings window is used by large customers with dedicated CREDCO “leased lines.” All boxes on this window should be blank unless the Technical Support staff provides you with specific information for these fields. When directed by the Technical Support staff to enter information in this window, you must first “click” on the Connect using Local Area Network check box. An ✔ in this box will activate the remaining fields. 30 Configuring the Software Instant Merge® for Windows 4.3 Timeout Settings The Timeout Settings menu allows you to control the timeout delays. The default settings will typically work fine on most systems. When you “click” on the Timeout Settings option you will see the following window. A brief description of these values and their use is as follows: Connect Timeout: The number of seconds Instant Merge for Windows will wait to connect before generating a “timeout” error. Response Timeout: The number of seconds Instant Merge for Windows will wait for a response from the CREDCO host computer before generating a “timeout” error. Report Timeout: The number of seconds Instant Merge for Windows will wait for reports to be received. NOTE: These settings should not typically be modified unless directed by Technical Support. However, if adjustments are necessary, simply make the changes and click on the OK button. Configuring the Software 31 Instant Merge® for Windows This page left blank intentionally. 32 Configuring the Software Instant Merge® for Windows 5 Learning The Environment The Instant Merge for Windows screen consists of five parts: ♦ ♦ ♦ ♦ ♦ Menu Bar Button Bar Request Window Request Status Window Communications Status Bar The Menu Bar provides easy access to the powerful features offered by Instant Merge for Windows. The Button Bar offers rapid access to the most commonly used features. The Request Window is used to enter all pertinent information about the primary applicant and spouse. The Request Status Window is used to select a profile, enter notes or comments, and manage batch transmission. The Communications Status Bar provides the order and print status of the current request and additional transmission information. Menu Bar Request Window Button Bar Request Status Window Communication Status Bar Learning The Environment 33 Instant Merge® for Windows 5.1 Moving Between Window Items You may use either of the two standard Windows methods of moving between items on your screen. 5.1.1 Mouse To use your mouse to move between text boxes, button, combo boxes, radio buttons, etc. on your screen, simply place the mouse cursor over the item of your choice and “click” the left mouse button. Placing your mouse over different sections of the Instant Merge for Windows screen and “clicking” the right mouse button will “pop-up” different shortcut menus. Over the Button Bar, Request Window, Request Status Window, and Communication Status Bar areas a “right mouse click” will “pop-up” this shortcut menu. For a description of these menu choices refer to Section 5.2.2 Button Bar later in this chapter. Whenever you “right mouse click” inside any editable field you will receive this “pop-up” shortcut menu. This menu lets you use the standard Windows editing features more easily. 5.1.2 Keyboard To move to the next text box, press v To move back to the previous text box, press u+v 34 Learning The Environment Instant Merge® for Windows 5.2 Menus and Buttons The menu bar, located above the button bar, contains “drop-down” menus with easy-to-use choices to help you setup your system or rapidly create, submit, retrieve, print, and review credit requests — singly, or in batches. Menu Bar 5.2.1 Button Bar Menu Bar The menu bar provides the following menus: File, Setup, Security, and Help. A description of these menu items and their use is provided below. 5.2.1.1 File Menu The File Menu lets you choose a different database to store your credit report information, process report requests, control printing, view logs and reports, and exit Instant Merge for Windows. Learning The Environment 35 Instant Merge® for Windows A description of these menu choices is provided below: Select Database Use this option if you need to use a database other than the default database installed with Instant Merge for Windows. For example, you may choose to locate a copy of the database in a common location, such as a network server or other joint file area, so that more than one person can easily access the same information base. Using this method, individuals would still process credit requests independently, but store the results in a central location. To select another database, simply “click” on the Select Database option to display a selection window. You can browse to any location on your PC, or your network using standard Windows 95/98 techniques. When you find the database you want, simply select it, and “click” the Open button. NOTE: The database you select must be named credco.mdb, and it must be an exact copy of the default database installed with this version of Instant Merge for Windows to work properly. 36 Learning The Environment Instant Merge® for Windows Send This menu choice may be used interactively with the Send button on the Button Bar. “Clicking” on either one will automatically activate your modem and send a credit request for the active client. Disconnect This menu choice may be used interactively with the Disconnect button on the Button Bar. “Clicking” on either one will interrupt the current transmission and disconnect the modem. Print This menu choice may be used interactively with the Print button on the Button Bar. “Clicking” on either one will send the credit report for the active client to your default printer. View This menu choice may be used interactively with the View button on the Button Bar. “Clicking” on either one will open the credit report for the active client so that you may view it on your PC. Batch This menu choice may be used interactively with the Batch button on the Button Bar. “Clicking” on either one will automatically activate your modem and send a credit request for all clients previously identified for batch processing. AutoPrint This menu choice is used to setup Instant Merge for Windows to automatically print all incoming credit reports. This feature is active if you have ✔ in the margin beside the menu choice. “Clicking” on this option will toggle the feature “on” or “off”. All credit reports will be printed to your default printer. Learning The Environment 37 Instant Merge® for Windows Select Printer Use this option to select a printer that is not your default printer. When you “click” on this menu item, you will be presented with the following Print Setup Window. Use this arrow to open the “drop-down” list of available printers. Simply “click” on the printer you want to use. The printer name will appear in the Name window. If this is the printer you want, simply “click” on the OK button. Then print your report using the Print button on the Button Bar, or the Print menu choice on the File menu. 38 Learning The Environment Instant Merge® for Windows View Error Log Use this option to view the Instant Merge for Windows Error Log. When you “click” on this menu item, you will be presented with the following Error Log Window. For more information on the Error Log, please refer to Chapter 10, Viewing, Printing, and Clearing Logs. Learning The Environment 39 Instant Merge® for Windows View Trans Log Use this option to view the Instant Merge for Windows Transaction Log.. : When you “click” on this menu item, you will be presented with the following Transaction Log Window. For more information on the Transaction Log, please refer to Chapter 10, Viewing, Printing, and Clearing Logs. 40 Learning The Environment Instant Merge® for Windows View Customer Report Use this option to view the Instant Merge for Windows Customer Report.. : When you “click” on this menu item, you will be presented with the following Customer Report Window. For more information on the Customer Report, please refer to Chapter 10, Viewing, Printing, and Clearing Logs. Learning The Environment 41 Instant Merge® for Windows Clear Transactions Use this option to clear the Instant Merge for Windows Transaction Log.. When you “click” on this menu item, you will be presented with the following warning window. To delete all entries in the Transaction Log, “click” on the OK button. An information window confirms that the Transaction Log was successfully deleted. “Click” on the OK button to continue. Exit Use this option to exit Instant Merge for Windows. 42 Learning The Environment Instant Merge® for Windows 5.2.1.2 Setup Menu The Setup Menu lets you configure Instant Merge for Windows. For more information of configuring your system, refer to Chapter 4, Configuring the Software. 5.2.1.3 Security Menu The Security Menu lets you activate and configure a security system for Instant Merge for Windows. For more information of configuring your system, refer to Chapter 7, Security and User Administration. 5.2.1.4 Help Menu The Help Menu gives you direct access to H-E-L-P !! You can access an electronic copy of this manual; a “search” capability; quick reference telephone number to Technical Support; and information “about” this version of Instant Merge for Windows. Learning The Environment 43 Instant Merge® for Windows 5.2.2 Button Bar The button bar is used to help you easily maintain, or process, credit report information. A description of the buttons on the bar and their function is: Send Disconnect Print Preview Batch Send the current request. If this button is “grayed-out” you should review the record for missing information. Cancel the report transmission currently in process Print the current report View the current report, with an option to print Batch process all marked entries New Create a new, empty Request window Save Save the current request information Cancel Cancel additions or modifications to the current request. Delete Brings up the Delete Records window You may select the clients individually using standard selection methods or simply click on the Select All button if you wish to mark all clients for deletion. 44 Learning The Environment Instant Merge® for Windows To actually delete the selected records, “click” on the Delete Selected button. Note: No client records/reports are actually deleted until you click the Delete Selected button. Be careful, selected records will be permanently deleted — there is no “undo”. You will be given one last chance to change your mind, when the following window “pops-up”. “Clicking” the OK button will permanently remove the selected records. “Clicking” the Cancel button will return you to the Delete Records window without deleting any records. To delete records based on the date they were entered, enter the date in the Delete Before window. You may also use the up or down scroll arrows to find your desired date. You can also “click” on the W arrow to search for your date. This will bring up a calendar that can be used to select the date desired. Simply find your desired date by using the scroll bars at the bottom of the calendar to find the correct month and year. When you “click” on the day of the month that you want, that date is reflected in the Delete Before window. Learning The Environment 45 Instant Merge® for Windows After you have identified and entered the date in the Delete Before window, “click” on the Delete By Date button to delete these records. NOTE: This feature will delete records entered On and Before the date in the window. “Click” on the OK button to return to the primary Request Information window. 46 Learning The Environment Instant Merge® for Windows 5.3 Request Window The Request portion of the Instant Merge for Windows window is used to request repositories and enter applicant and address information. Required applicant information is displayed in red. This window contains information specific to an individual credit request. This information consists of the following areas: 5.3.1 Batch Indicator This check box identifies if this client request will be part of a Batch process. Type Indicator These Radio Buttons identify if this will be an Individual or a Joint request. Repositories These boxes identify how many, and which, repositories will be used for this credit request. Client Information The Primary Applicant, Spouse, Address, and Previous Address sections provide necessary information for the credit request. Create a New Request Window To create a new, blank Request window, click on the New button on the button bar. Learning The Environment 47 Instant Merge® for Windows 5.3.2 Batch Process Selector Placing an ✔ in the Batch check box will identify this client’s request as being a part of a Batch Process request. 5.3.3 Type Indicator When a new Request window is displayed, the Individual option button is selected. If the request is for a joint report, click on the Joint option button, so that an O appears in the button. This selection allows access to the Spouse portion of the window. NOTE: Do not request a joint report for unmarried applicants. A separate request must be completed for each individual. 5.3.4 Selecting Repository Access When your account was established with Account Setup, the number, priority, and selection of repositories were initially determined. The Repositories section allows you to temporarily alter that initial selection as required to meet a current requirement. The following information is provided to help you make these temporary changes. 5.3.4.1 Repository Text Box The Repository text box is mutually exclusive of the EFX, XPN, and TUC text boxes. Entering a 0 (zero) in this text box, allows you to access the specific repository check boxes which may be selected individually by clicking the desired repository box. Your selection(s) will be identified by an ✔ in the adjacent box. NOTE: The ability to use a specific number of repositories, or specific repository access, varies from customer to customer. You may not have the ability to use these options. At the time your company first became an Instant Merge customer, a representative decided how many credit repositories Instant Merge would normally access when processing your company’s credit reports. The Repository text box is used to override that default. 48 Learning The Environment Instant Merge® for Windows For example, entering a 2 in the Repository text box, causes Instant Merge to access only two credit repositories for the report. Conversely, if your company is set up to access only two repositories for each report, you can access all three repositories by entering a 3 in the Repository text box. 5.3.4.2 Specific Repository Text Boxes The EFX, XPN, and TUC check boxes are mutually exclusive of the Repository text box. A 0 (zero) must be entered in the Repository text box to allow access to these check boxes. The EFX, XPN, and TUC check boxes are used to specifically order a credit report from the selected repository. Enter a ✔in the check box to specifically access that repository. NOTE: You should only use the above information if you wish to deviate from your standard Repository setup. When your account was initially established, you should have selected one, two, or three Repositories, and an order of preference. This selection is the standard for your account and does not need to be changed, unless you have specific requirements for a specific credit report(s). Learning The Environment 49 Instant Merge® for Windows 5.4 The Request Status Window The Request Status section of the window is used to select a profile, enter notes, and select batch transmission of report requests. The upper portion of this window identifies the active profile; provides a text box for entering notes regarding the active client; a Set Batch button for managing batch processing; and a Comments button to allow you to enter comments for the active client. The lower portion of this window displays a list of active clients. This portion also provides sorting of the active clients to help you quickly find the client you seek. Information on these features is provided below. 5.4.1 Profile The Profile window is a “drop-down” list box which allows selection of the profile you want to make active. You cannot edit this field. Changes to profiles can only be made through the Profile menu located on the Setup menu. NOTE: Profiles are preconfigured by your system administrator. If you are the system administrator, please refer to Chapter 3, Configuring the Software for more information on profiles. 5.4.2 Notes The Notes text box is used to enter notes regarding the request, or enter the reference number when reordering an existing report. If the Notes label is RED, then notes are mandatory. The use of notes is controlled by the profile and can only be changed in the Profile Setup. Please refer to Chapter 3, Configuring the Software for more information on notes. 50 Learning The Environment Instant Merge® for Windows 5.4.3 Set Batch The Set Batch button brings up the Set Batch selection window where you can use standard Windows selection techniques to identify the clients you want to include in batch processing. You can easily manage your batch processing requirements by using the following options: Select All Selects all clients for inclusion in batch processing. NOTE: To select multiple individual clients, use your mouse and the <CTRL> key to selectively choose those clients to be included. To select only a small group of clients, use your mouse to select the top member of the group. Then hold down the <Shift> key and “click” the bottom member of the group. The whole group is now selected. Turn Batch On Activates batch processing. Turn Batch Off Deactivates batch processing. OK Learning The Environment Saves your changes and exits this window. 51 Instant Merge® for Windows 5.4.4 Comments The Comments button brings up a comment window to enter more detailed comments regarding this client or credit report. To save your comments, “click” OK. To exit without saving your comments, “click” Cancel. To review comments for a specific client, “click” on the client’s name in the Request Status Window, then the Comments button. 5.4.5 Finding an Active Client To sort your active client list alphabetically by last name, or first name simply “click” on the Last Name, or First Name buttons. To sort your active client list by Social Security Number simply “click” on the SSN button. When you find the client you want, simply “click” on the client’s name and the client’s information will be displayed in the Request Window for review, update, or further processing. 52 Learning The Environment Instant Merge® for Windows 5.5 The Communication Status Bar The Communication Status Bar displays various aspects of the communications process when Instant Merge for Windows transmits requests and receives reports. The information displayed in the communication status bar is useful in the troubleshooting process. 1st 2nd 3rd 4th 5th 6th The Communication Status Bar consists of the following components: Component Description 1st Message area — Used to display program activity during report transmission and receipt. 2nd Received Data Indicator — Monitors the receipt of report data by displaying the total number of bytes received for each report. 3rd Pre-Report Status — Reflects the present status of the current client’s report. 4th Post-Report Status — Reflects whether or not your report has been printed. 5th Category — Indicates whether this Instant Merge for Windows profile is presently being used as a “Stand-alone” program (“User”), or if it is being used with Instant Merge Server (“Client”). 6th Activity Timer — Shows the connection time.. Learning The Environment 53 Instant Merge® for Windows This page left blank intentionally. 54 Learning The Environment Instant Merge® for Windows 6 Entering Applicant Information When entering information in the Request Window, the text boxes accept alpha or numeric values only: ♦ ♦ ♦ 6.1 Required information is identified in RED. Do not use punctuation within any text box. Do not use control characters within text box. Entering Name Information The first set of name text boxes is for the primary applicant. The second set of name text boxes is for the applicant’s spouse. When ordering an Individual report, only the Primary Applicant text boxes are accessible. ♦ ♦ Do not request a joint report for unmarried applicants. If an applicant’s name is hyphenated or uses an accent, do not enter the hyphen or accent in the name field. 1. Enter the applicant’s last name, first name, and middle initial in the respective text boxes. Enter the Social Security Number in the SSN text box. Do not use hyphens when entering Social Security Numbers. The system enters the hyphens automatically. Enter the applicant’s age or date of birth in the DOB text box. When entering the date of birth, use the format MMDDYY (month, day, year) or MMYY (month, year). The Gen drop down list box is used to indicate generation. Select a valid entry from the list. Valid entries are JR, SR, 2, 3, and 4 . If this is a joint request, enter the spouse information in the Spouse portion of the window. 2. 3. 4. 5. Entering Applicant Information 55 Instant Merge® for Windows 6.2 Entering Address Information The Request Window provides two sections for address information. The first set of address fields is for the applicant’s current address. The second set of address fields is for a previous address. When entering address information, the text boxes accept alpha or numeric values only: ♦ ♦ Do not use punctuation within any text box. Do not use control characters within text box. There are three address types available for selection: Normal, P.O. Box and Rural Route. When an address type is selected the text boxes change to represent that address type. The Normal option button is selected when you first enter the address sections. Use the <Down Arrow> key to move to the option button for the correct address type. A O in the button indicates the option button is selected. 56 Entering Applicant Information Instant Merge® for Windows 6.2.1 Address Type Normal NOTE: Military addresses are entered using the address type Normal. For detailed information, refer to Entering Military Addresses later in this chapter. 1. Enter the number of the house address in the Num text box. When entering the number of the house address, the system does not allow you to enter spaces between numbers. WARNING: If the numeric address is followed by a fraction (such as ½ or ¼), leave out the fractional value. The system does not allow you to enter fractional values. The system also does not allow alpha characters in this field. 2. Enter only the street name in the Street Name text box. Direction, such as SW, is entered in the Dir field. 3. When applicable, enter the apartment number in the Apt text box. When entering an apartment number, do not enter the # (number) sign. 4. When applicable, select the direction code from the Dir drop down list box. Valid entries are N, S, E, W, NE, NW, SE, and SW. 5. Enter the city in the City text box. 6. Enter the 2-character state code in the State text box, or select the state code from the drop down list. 7. Enter the ZIP code in the Zip text box. The ZIP code must be a valid code for the state entered in the State text box. NOTE: Only the 5-digit ZIP code is accepted. Entering Applicant Information 57 Instant Merge® for Windows 6.2.2 Address Type P.O. Box When P.O. Box is selected as the address type, the text boxes change to represent that address type. 58 1. Enter the box number in the Box No text box. Do not enter the letters PO or leave spaces within the box number. When <Tab> is pressed, the system deletes the PO entry, leaving only the numbers. 2. Enter the city in the City text box. 3. Enter the 2-character state code in the State text box, or select the state code from the drop down list. 4. Enter the ZIP code in the Zip text box. The ZIP code must be a valid code for the state entered in the State text box. Entering Applicant Information Instant Merge® for Windows 6.2.3 Address Type Rural Route When Rural Route is selected as the address type. The text boxes change to represent that address type. 1. Enter the box number in the Box No text box. CAUTION: Do not enter the letters PO, or leave spaces within the box number. When <Tab> is pressed, the system deletes the PO entry, leaving only the numbers. 2. Enter the rural route in the Rural Route text box. Do not enter the letters RR or leave spaces within the rural route number. When <Tab> is pressed, the system deletes the RR entry, leaving only the numbers. 3. When applicable, enter the apartment number in the Apt text box. When entering an apartment number, do not enter the # (number) sign. 4. Enter the city in the City text box. 5. Enter the 2-character state code in the State text box, or select the state code from the drop down list. 6. Enter the ZIP code in the Zip text box. The ZIP code must be a valid code for the state entered in the State text box. Entering Applicant Information 59 Instant Merge® for Windows 6.3 Entering Military Addresses When entering military addresses, use the following guidelines: ♦ ♦ Select Address Type Normal Enter military addresses such as “CO B 56th HGG BN, FPO New York, NY 09540” as follows: Num field: 56 Street Name field: CO B HGG BN City field: FPO New York State field: NY ♦ ZIP field: 09540 Enter military addresses such as “3199 Barrack D, FPO New York, NY 09540” as follows: Num field: 3199 Street Name field: Barrack D City field: FPO New York State field: NY ♦ ZIP field: 09540 Enter military address such as “945382104 USS Enterprise, APO, Miami, FL 34002” as follows: Num field: 945382104 Street Name field: USS Enterprise City field: APO Miami State field: FL ZIP field: 34002 60 Entering Applicant Information Instant Merge® for Windows 7 Security and User Administration Instant Merge for Windows provides a Security function that protects access to the Instant Merge for Windows program. This function allows the system administrator and multiple users to be setup with user identifications and passwords. In addition, add, delete, and update permissions can be allowed or disallowed for each user. Security and User Administration 61 Instant Merge® for Windows 7.1 Enabling the Security Function In order to enable the Security function, you must access the Instant Merge Security window and set up user identifications, passwords, and privileges. “Click” the Enable Security menu choice to open the Instant Merge Security window and let you configure your security system. 62 Security and User Administration Instant Merge® for Windows 7.2 Adding the System Administrator When the Instant Merge Security window is first displayed, notice that the Administrator option button is the only one you can select. Simply “click” on it to add a O to the Administrator button and a to the Add, Delete, and Update check boxes. To finish setting up the user identification, password, and permissions for the system administrator, follow these simple steps: Step 1: USERID: Enter the system administrator’s user identification in the UserID text box. Step 2: PASSWORD: Enter the system administrator’s password in the Password text box. Step 3: VERIFY: To verify the password, re-enter the password in the Verify text box. Step 4: PRIVELEGES: Ensure that the system administrator has add, delete, and update privileges. “Click” on the Add, Delete, and Update check boxes, so that an appears in each box. Step 5: SAVE: Click on Save to save the information. Security and User Administration 63 Instant Merge® for Windows After the information is saved, you can access all of the other buttons at the bottom of the window. Button Action New Displays a blank Instant Merge Security window Delete Deletes the currently displayed user Save Saves the information entered in the window Cancel Cancels the window and discards unsaved information View Password Displays the password in the Password text box Exit Exits the Instant Merge Security window The Security window has a Scroll Bar at the bottom of the window to allow you to administer the users by simply scrolling through the users’ records. NOTE: The UserID name is displayed in the center of the Scroll Bar for your convenience. 64 Security and User Administration Instant Merge® for Windows 7.3 Adding Users Additional Instant Merge for Windows users can be added through the Instant Merge Security window. Simply “click” on the Maintain Security menu option on the Security menu to activate the Instant Merge Security window. Then follow these simple steps: Step 1: NEW: Click on the New button on the Instant Merge Security window. A blank window is displayed. Step 2: USERID INFO: Enter the new user identification, password, and the access privileges you want this user to have. Step 3: SAVE: “Click” on Save to save the information. Step 4: CONTINUE: Continue to add users by clicking on New, entering the user information, and clicking on Save. Step 5: EXIT: When you have entered all users, click on Exit to close the Instant Merge Security window. Security and User Administration 65 Instant Merge® for Windows 7.4 Deleting Users To delete a user from the system simply “click” on the Maintain Security menu option on the Security menu to activate the Instant Merge Security window. 66 1. Use the scroll bar at the bottom of the Instant Merge Security window to scroll to the user you want to delete. 2. Press the Delete button. 3. You will be asked if you really want to delete this security record. If you do, “click” on the OK button, if not then “click” the Cancel button. Security and User Administration Instant Merge® for Windows 7.5 Deactivate Security To deactivate security, simply “click” on the Deactivate Security menu option on the Security menu to activate the Instant Merge Security window. You will be warned that this will permanently remove all security from the system. NOTE: Removing security from your system will require that you start over entering users and their access the next time you want to add security back to your system. To permanently remove security from your system, “click” the Yes button, otherwise “click” the No button to keep your present security configuration. The complete removal of security from your system will be confirmed with the following window. “Click” on the OK button to continue. Security and User Administration 67 Instant Merge® for Windows 7.6 Working with Security Enabled Once the Security function is setup and activated, Instant Merge for Windows displays the Security window each time the software is started. You must enter your user identification and password to access the Instant Merge for Windows program. 68 Security and User Administration Instant Merge® for Windows 8 Ordering Reports Credit data for a particular borrower can be reported differently by each of the three national bureaus. These bureaus also have geographical areas in the country where their data collection and coverage vary. Instant Merge for Windows simplifies the credit report process for you. Instant Merge for Windows uses powerful patented merge logic to compare twelve credit and public record variables, and eliminate duplicate tradelines. Instant Merge for Windows then presents the strongest tradeline or public record data in an easy-to-read report. Instant Merge for Windows allows you to order single or multiple reports (batch processing). Additionally, you can reorder an existing report, or reorder an incomplete report. Under normal circumstances, Instant Merge for Windows delivers a single standard credit report in minutes — depending on the speed of your computer and your modem. Ordering Reports 69 Instant Merge® for Windows 8.1 Ordering a Single Report To transmit a single request for an Instant Merge credit report follow these simple steps: Step 1: Select the client you wish to submit a request on. This must be the client visible in the Request Window. If not, select the client by clicking on the client’s name in the Request Status Window. When the name of the client you want to submit a report on appears in the Request Window you are ready for Step 2 below. Step 2: Then click on the Send button located on the Button Bar. 70 Ordering Reports Instant Merge® for Windows 8.2 Ordering Multiple Reports To transmit multiple requests, commonly referred to as batch processing, follow these simple steps: 8.2.1 Group Identification Step 1: Identify the clients to be included in the batch request. In the Request Status window, “click” the Set Batch button to identify the requests you want to transmit. Step 2: SET BATCH: The Set Batch button brings up the Set Batch selection window. You can easily select all clients for inclusion in batch processing by using the Select All button. Ordering Reports 71 Instant Merge® for Windows You may also use standard Windows selection techniques to identify the clients you want to include in batch processing. To select multiple individual clients, use your mouse and the <CTRL> key to selectively choose those clients to be included. To select only a small group of clients, use your mouse to select the top member of the group. Then hold down the <SHIFT> key and click on the bottom member of the group. The whole group is now selected. Step 3: TURN BATCH ON: Once you have identified the clients to be included in the batch process, “click” on the Turn Batch On button to activate batch processing. To deactivate batch processing, “click” on the Turn Batch Off button. Step 4: EXIT: “Click” on the OK button to leave this window and return to the Request Window. Step 5: PROCESS BATCH: “Click” on the Batch button located on the Button Bar. 72 Ordering Reports Instant Merge® for Windows 8.2.2 Individual Identification Step 1: SELECT CLIENT: Select the client you wish to include in the batch request by “clicking” on the client’s name in the Request Status Window. When the name of the client you want to submit a report on appears in the Request Window you are ready for Step 2 below. Step 2: SET BATCH: “Click” on the Batch check box so that a appears in the box, thus adding this client to a batch request. Step 3: CONTINUE: Continue to add clients to the batch process by repeating Steps 1 and 2 above until you have identified all of the clients you want included in the batch request. Step 4: PROCESS BATCH: Then click on the Batch button located on the Button Bar. Ordering Reports 73 Instant Merge® for Windows 8.3 Reordering an Existing Report Have ever wished that you had not been is such a hurry to delete a report? If so, the following information will be very useful, and might even save you some money. You can reorder that report in one of two ways — depending on how long ago you originally got the report. 8.3.1 Reordering a Report Within Five Days To reorder a report within five (5) days of the original report request date, follow these simple steps: Step 1: Reenter the information exactly as you did for the initial report. You can specify a different format type at this time. Step 2: Then click on the Send button located on the Button Bar. 74 Ordering Reports Instant Merge® for Windows The First American CREDCO computers store reports for ready access for five days. The computers compare the information you send and, if it exactly matches a report that was run within five days, the report is recreated without querying the repositories. NOTE: A report that is reordered within five days of the original report must be ordered with all information (except format type) exactly as the original. Any deviation, or altered information, is interpreted as a new report request and does not result in a reorder. Ordering Reports 75 Instant Merge® for Windows 8.3.2 Reordering a Report After Five Days If more than five days have passed from the date of the original report, use the following steps to request an additional copy from First American CREDCO. Step 1: Locate the reference number of the report you wish to reorder. The key to obtaining a duplicate of a report that was previously ordered is the reference number. This reference number is found at the top, right, corner of the returned report. NOTE: You must know this number in order to obtain a duplicate of the report. If you have no record of the reference number, contact the First American CREDCO Help Desk for assistance. 76 Ordering Reports Instant Merge® for Windows Step 2: Find a Request window to work from. You can use an existing Request window that has been completed, even though the data belongs to another applicant, or you can use a blank Request window. CAUTION: If you reorder using an existing Request window, the reordered report overwrites the existing report of the other applicant. This results in the loss (deletion) of that applicant’s report. Step 3: If you choose to work from a blank Request window, you must enter information in all mandatory fields. Step 4: Enter the 15-digit reference number in the Notes field of the Request Status window using the following format: REF-############### where the REF entry signals Instant Merge that a duplicate report is requested and each # indicates a digit in the reference number of the report being reordered. Note: Even though the reference number on the report contains hyphens, do not enter these hyphens when reordering a report. The reference number must be entered exactly as shown above. WARNING: If it is not entered in the correct format, you do not receive a duplicate report. Instant Merge returns an error message or processes a completely new report. Step 5: Then click on the Send button located on the Button Bar. Ordering Reports 77 Instant Merge® for Windows 8.4 Reordering an Incomplete Report When a report is ordered from Instant Merge, Instant Merge accesses the credit repositories to obtain the requested information. One or more of these repositories may not be available at the time of your request. When this occurs, the returned report contains the message “possible incomplete data”. Reorder the report using the procedures in the previous section — Reordering an Existing Report. When the report is reordered, Instant Merge again attempts to obtain information from any repositories that were unavailable at the time of the initial request. NOTE: Instant Merge does not charge for access to an unavailable repository until it successfully obtains the requested information. 78 Ordering Reports Instant Merge® for Windows 9 Viewing, Printing, and Deleting Reports Instant Merge reports are delivered to your computer after processing is completed. You can view, print, and delete the reports at any time after receiving the completed report. Viewing, Printing, and Deleting Reports 79 Instant Merge® for Windows 9.1 Viewing Reports To view a report, follow these simple steps: Step 1: In order for Instant Merge for Windows to display the proper report, the client’s name must first be visible in the Primary Applicant text box in the Request Status window. You may need to “click” on the client’s name in the Request Status Window to make that client “active”, before you will be able to view the correct report. You can view Andy American’s report. You cannot view Charlie Credco’s report until his name appears in the Primary Applicant text box. “Click” on his name to make Charlie Credco the active client. Step 2: Check to see the report has been successfully returned from Instant Merge. If so, the message “Ordered” or “Completed” will be visible on the Communications Status Bar. If you are using Instant Merge for Windows as a “stand-alone” application, the message will be “Ordered”. If you are using it with Instant Merge Server, the message will change to “Ordered” when the credit request is sent to the Server, and changes to “Completed” when the Server completes its processing and returns the final report. Step 3: “Click” on the View button, located on the button bar. 80 Viewing, Printing, and Deleting Reports Instant Merge® for Windows Step 3: The Print Preview window allows you to preview the Instant Merge report on your screen. The sample report shown below was created using the F1 data format. The current page number of the report is shown on the Print Preview tool bar, at the bottom of the window. Additional functions can also be selected from the tool bar. Click this icon to move to the beginning of the report file. Click this icon to move one page to the left in the report file. Click this icon to move to the end of the report file. Click this icon to move one page to the right in the report file. Viewing, Printing, and Deleting Reports 81 Instant Merge® for Windows Use the Zoom drop down text box to enlarge or reduce the size of the displayed report. You can use the Scroll Bar at the bottom of the screen to move “left” or “right” to see more of the transaction log. Print: “Click” the printer icon to print the report on your default printer. Exit: “Click” this icon to close the Print Preview window and return to Instant Merge for Windows. Margins: “Click” this icon to adjust the margins for your printed report. Use the margin windows to adjust the top, bottom, left, or right margins. When you are finished, click OK to save your changes and exit. Click Cancel to exit without saving your changes. To restore your margin settings to the default system margins ( ½”), click the Default button. 82 Viewing, Printing, and Deleting Reports Instant Merge® for Windows 9.2 Printing Reports Instant Merge for Windows stores completed reports as a permanent part of each client’s record. When you delete the client record, you delete the associated report. Reports may be printed automatically or manually. 9.2.1 Automatic Printing To automatically print reports when they are received select the Auto Print option on the File menu to setup Instant Merge for Windows to automatically print all incoming credit reports. This feature is active if you have ✔ in the margin beside the menu choice. “Clicking” on this option will toggle the feature “on” or “off”. All credit reports will be printed to your default printer. Other printing options, such as selecting which printer to print to, are available from File → Select Printer on the menu bar. For additional information, refer to your Windows documentation, or contact the First American CREDCO Technical Support. Viewing, Printing, and Deleting Reports 83 Instant Merge® for Windows 9.2.2 Manual Printing To print a report manually, follow these simple steps: Step 1: In order for Instant Merge for Windows to print the proper report, the client’s name must first be visible in the Primary Applicant text box in the Request Status window. You may need to “click” on the client’s name in the Request Status Window to make that client “active”, before you will be able to print the correct report. You can print Andy American’s report. You cannot print Charlie Credco’s report until his name appears in the Primary Applicant text box. “Click” on his name to make Charlie Credco the active client. Step 2: “Click” on the Print button, located on the button bar. You may also use the Print option on the File menu, or “right click” with your mouse to bring up the “pop-up” menu. Then select the Print option.. 84 Viewing, Printing, and Deleting Reports Instant Merge® for Windows 9.2.3 Reprinting an Existing Report When Instant Merge returns a report, it electronically stores the report on your computer. Provided you have not, at any time, selected the report for deletion, you can print an additional copy of the report from your computer. To reprint an existing report refer to the preceding paragraph, Manual Printing. If you have previously received a report and since deleted it from your computer, refer to Reordering an Existing Report. Viewing, Printing, and Deleting Reports 85 Instant Merge® for Windows 9.3 Deleting Reports Instant Merge for Windows stores completed reports as a permanent part of each client’s record. In order to delete a report, you must delete the associated client record. To delete a report or multiple reports, follow these simple steps: 9.3.1 Deleting Records by Name Step 1: Click on the Delete button on the button bar. Step 2: The Delete Records window is displayed. Step 3: SELECT ALL: You may select the clients individually using standard selection methods or simply click on the Select All button if you wish to mark all clients for deletion. To select multiple individual clients, use your mouse and the <CTRL> key to selectively choose those clients to be included. To select only a small group of clients, use your mouse to select the top member of the group. Then hold down the <SHIFT> key and click on the bottom member of the group. The whole group is now selected. 86 Viewing, Printing, and Deleting Reports Instant Merge® for Windows Step 4: DELETE SELECTED: To actually delete the selected records, “click” on the Delete Selected button. Note: No client records/reports are actually deleted until you click the Delete Selected button. Be careful, selected records will be permanently deleted — there is no “undo”. Step 5: You will be given one last chance to change your mind, when the following window “pops-up”. Step 6: FINISH: “Clicking” the OK button will permanently remove the selected records. “Clicking” the Cancel button will return you to the Delete Records window without deleting any records. 9.3.2 Deleting Records by Date To delete records based on the date they were entered, follow Steps 1 and 2 above first, then follow these additional steps. Step 3: DELETE BY DATE: Enter the date in the Delete Before window. You may also use the up or down scroll arrows to find your desired date. You can also “click” on the W arrow to search for your date. This will bring up a calendar that can be used to select the date desired. Viewing, Printing, and Deleting Reports 87 Instant Merge® for Windows Simply find your desired date by using the scroll bars at the bottom of the calendar to find the correct month and year. When you “click” on the day of the month that you want, that date is reflected in the Delete Before window. Step 4: After you have identified and entered the date in the Delete Before window, “click” on the Delete By Date button to delete these records. NOTE: This feature will delete records entered on and before the date in the window. Step 5: To actually delete the selected records, “click” on the Delete Selected button. Note: No client records/reports are actually deleted until you click the Delete Selected button. Be careful, selected records will be permanently deleted — there is no “undo”. Step 6: You will be given one last chance to change your mind, when the following window “pops-up”. Step 7: “Clicking” the OK button will permanently remove the selected records. “Clicking” the Cancel button will return you to the Delete Records window without deleting any records. 88 Viewing, Printing, and Deleting Reports Instant Merge® for Windows 10 Viewing and Clearing Logs and Records Instant Merge for Windows provides an active customer report and transaction and error logging. The Customer Report displays a list of active clients and their associated comments. The Error Log displays the date, time, error code, and a description of the error. The Transaction Log displays the date and time of each transaction. All users can view and clear the Transaction Log, They may also view the Error Log and the Customer Report. Viewing and Clearing Logs 89 Instant Merge® for Windows 10.1 Viewing the Error Log To view the Error Log, select File → View Error Log. The Error Log window is displayed. The current page number of the Error Log is shown on the Error Log tool bar, at the bottom of the window. 90 Viewing and Clearing Logs Instant Merge® for Windows Additional functions can also be selected from the tool bar. Click this icon to move to the beginning of the error log file. Click this icon to move one page to the left in the error log file. Click this icon to move to the end of the error log file. Click this icon to move one page to the right in the error log file. Use the Zoom drop down text box to enlarge or reduce the size of the displayed error Log. You can use the Scroll Bar at the bottom of the screen to move “left” or “right” to see more of the error log. Click on the printer icon to print the error log on your default printer. Click on this icon to close the View Error Log window and return to Instant Merge for Windows. Click this icon to adjust the margins for your printed report. Viewing and Clearing Logs 91 Instant Merge® for Windows Use the margin windows to adjust the top, bottom, left, or right margins. When you are finished, click OK to save your changes and exit. Click Cancel to exit without saving your changes. To restore your margin settings to the default system margins ( ½”), click the Default button. 92 Viewing and Clearing Logs Instant Merge® for Windows 10.2 Viewing the Transaction Log To view the Transaction Log, select File → View Trans Log. The Transaction Log window is displayed. The current page number of the Transaction Log is shown on the Transaction Log tool bar, at the bottom of the window. Viewing and Clearing Logs 93 Instant Merge® for Windows Additional functions can also be selected from the tool bar. Click this icon to move to the beginning of the transaction log file. Click this icon to move one page to the left in the transaction log file. Click this icon to move to the end of the transaction log file. Click this icon to move one page to the right in the transaction log file. Use the Zoom drop down text box to enlarge or reduce the size of the displayed Transaction Log. You can use the Scroll Bar at the bottom of the screen to move “left” or “right” to see more of the transaction log. Click on the printer icon to print the transaction log on your default printer. Click on this icon to close the View Transaction Log window and return to Instant Merge for Windows.. Click this icon to adjust the margins for your printed report. 94 Viewing and Clearing Logs Instant Merge® for Windows Use the margin windows to adjust the top, bottom, left, or right margins. When you are finished, click OK to save your changes and exit. Click Cancel to exit without saving your changes. To restore your margin settings to the default system margins ( ½”), click the Default button. Viewing and Clearing Logs 95 Instant Merge® for Windows 10.3 Clearing the Transaction Log To clear the Transaction Log, select File → Clear Transaction Log. A delete warning window is displayed. To delete all entries in the Transaction Log, click on the OK button. An information window confirms that the Transaction Log was successfully deleted. Click on the OK button. 96 Viewing and Clearing Logs Instant Merge® for Windows 10.4 Viewing the Customer Report To view the Customer Report, select File → Customer Report. The Customer Report window is displayed. The current page number of the Customer Report is shown on the Customer Report tool bar, at the bottom of the window. Viewing and Clearing Logs 97 Instant Merge® for Windows Additional functions can also be selected from the tool bar. Click this icon to move to the beginning of the Customer Report file. Click this icon to move one page to the left in the Customer Report file. Click this icon to move to the end of the Customer Report file. Click this icon to move one page to the right in the Customer Report file. Use the Zoom drop down text box to enlarge or reduce the size of the displayed Customer Report. You can use the Scroll Bar at the bottom of the screen to move “left” or “right” to see more of the Customer Report.. Click on the printer icon to print the transaction log on your default printer. Click on this icon to close the View Customer Report window and return to Instant Merge for Windows.. Click this icon to adjust the margins for your printed report. 98 Viewing and Clearing Logs Instant Merge® for Windows Use the margin windows to adjust the top, bottom, left, or right margins. When you are finished, click OK to save your changes and exit. Click Cancel to exit without saving your changes. To restore your margin settings to the default system margins ( ½”), click the Default button. Viewing and Clearing Logs 99 Instant Merge® for Windows This page intentionally left blank. 100 Viewing and Clearing Logs