1
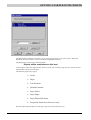
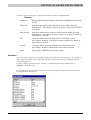
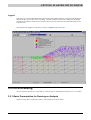
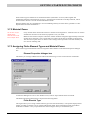
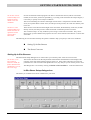
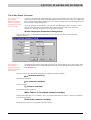
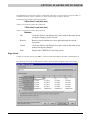
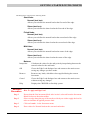
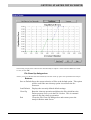
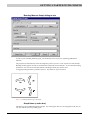
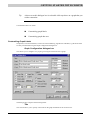
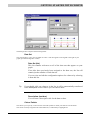
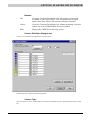
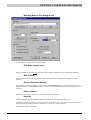
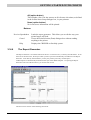
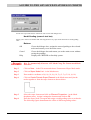
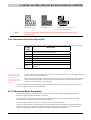
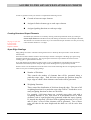
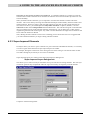
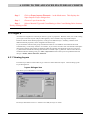
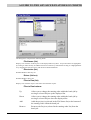
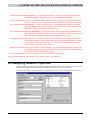
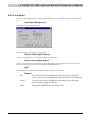
Guide To The Pre And Post Processor Menus Load Post Processor (button) Opens the Post-Processor and loads the current file Note This button only loads the Post-Processor and does not run the analysis. Any alterations made to the file in the pre processor will only effect the results if the analysis has been run using Run Analysis in the File menu. Layers (button) Opens the Layers dialog box, enabling you to create, edit or delete layers. 2.7.2 Status Bar The Status Bar at the bottom of the window displays the following information: Description of any processing operation that is taking place, e.g. Importing Geometry Data. Percentage fill bar showing how much of the processing operation has been completed. Displays the current action mode, e.g. ‘SELECT EDGE’. On start-up, this field is blank. Date and time. GRID box. The text is black if the grid is currently displayed, otherwise it is grey. The Grid Options dialogue box may be loaded by double clicking on the GRID box. Cursor co-ordinates (measured in the current length units). The coordinates displayed relate directly to the co-ordinates of points within the mesh. 2.8 Introduction To The Post-Processor The Post-Processor includes a set of utilities that allow you to look at output from your analysis in a number of different ways. You can view output data as it changes from increment to increment, or plot variations across the mesh. You can also compare output from separate (parent/child) analyses. Contour plots, status plots and displacement plots allow you to look at the overall picture of what has happened to the mesh throughout the course of the analysis. 2-22