1
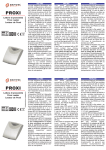
CA824 CA824 Alarm System User Manual CA824 Alarm System User Manual May 2003 Disclaimer: The manufacturer reserves the right to change the specifications of the equipment described in this manual without notice This document contains information proprietary to the manufacturer. No part of this publication may be reproduced, photocopied, stored on a retrieval system or transmitted, without prior written permission of the manufacturer. While every effort has been made to ensure that the information in this manual is accurate and complete, no liability can be accepted for any errors or omissions Contents: GENERAL INFORMATION 4 Limited Warranty Warnings 4 4 DESCRIPTION 5 Overview LCD Keyboard Sound indication LED Indication LCD Display Keypad 5 5 5 6 6 7 OPERATION 9 Arming Full Arming Stay Arming Force Arming Instant Arming Disarming Troubles Review Event Memory Review Bypassing Programming User Codes User Limitations Changing own user code Changing User Names, Codes, Permissions and Attributes by a Manager Adding and Setting a Proxy Card Removing a Proxy Card Date and Time Setting Chime Switching Display Setting Private Display Changing the logo Stopping the Alarm and Clearing the Memory Indication Special Key Combinations 9 9 9 9 9 17 18 19 22 23 23 24 25 27 32 35 37 38 39 41 43 45 46 APPENDIX 47 Service Messages on the LCD Complete Menu Map 47 48 CA824 Alarm System User Manual 3 General Information Limited Warranty The manufacturer warrants that for period of 12 months from the date of purchase, the product shall be free of defects in material and workmanship under normal use and that in fulfillment of any breach of such warranty, the manufacturer shall, at its opinion, repair or replace the defective equipment upon return of the equipment to its factory. This warranty applies only to defects in parts and workmanship and not to damage incurred in shipping or handling, or damage due to causes beyond the control of the manufacturer such as lightning, excessive voltage, mechanical shock, or damage arising out of abuse, alternation or improper application of the equipment. The foregoing warranty shall apply only to the original buyer, and is and shall be in lieu of any and all other warranties, whether expressed or implied and of all other obligations or liabilities on the part of the manufacturer. This warranty contains the entire warranty. The manufacturer neither assumes, nor authorizes any other warranty or liability concerning this product. In no event shall the manufacturer be liable for any direct or indirect or consequential damage, loss of anticipated profits, loss of time or any other losses incurred by the buyer in connection with the purchase, installation or operation or failure of this product. The manufacturer recommends that the entire system be completely tested on a regular basis. However, despite frequent testing, and due to, but not limited to, criminal tampering or electrical disruption, it is possible for this product to fail to perform as expected. Warnings Before using the CA824, please ensure that you have read and understood the following instructions. Always ensure that the CA824 is operated correctly. Do not attempt to disassemble or alter any part of the equipment that is not expressly described in this guide. Internal inspections, alterations and repairs should be conducted by qualified service personnel only. Do not use substances containing alcohol, benzene, thinners or other flammable substances to clean or maintain the equipment. The use of these substances may lead to fire. Do not allow liquids to enter the interior. The equipment is not waterproof. 4 CA824 Alarm System User Manual Description Overview This manual provides information for the daily operation of the CA824 Alarm System. CA824 is modular system that can be split in up to eight areas and supports up to 31 separate user codes. The CA824 Alarm System is operated through a keyboard with an LED and/or an LCD indication. LCD Keyboard LCD display LED indication Keypad door (opened) AR M DIS PRG AR M BPS TRB 1 2 3 4 5 6 7 8 9 CLR 0 ENT L ME M Keypad Figure 1. LCD Keyboard Front View Sound indication There are eight different sound combinations that indicate seven different conditions: CA824 Alarm System User Manual 5 Symbol Description Click Single short beep indicating button pressing Confirm One long and three short beeps indicating the system confirmation to executed operation (arming, disarming, settings change, etc.) Reject Single long beep indicating incorrectly executed operation Entrance time Continuous sound indicating intrusion into the entrance zones Exit time Short beeps indicating the system is armed and the user is required to leave the zone. Ten seconds before the exit time is over beeps frequency is increased. Two short beeps indicating problem with the system (battery low, no supply voltage, etc.) Chime-like sound beeps indicating intrusion into a zone with a “Chime“ option activated (usually the entrance door) Trouble Chime Alarm LED Indication LED Indication description Mains Power Supply LED (Green). Lit at 220V mains power supply. Trouble LED (Yellow). Lit at system trouble. The trouble type is displayed in the troubles list. Alarm LED (Red). Lit at system alarm status or alarm memory. Fire alarm LED (Red). Lit at system fire alarm status or fire alarm memory Service LED (Red). Lit at system programming by service technician. LCD Display The keyboard is equipped with a 2-row 16-colomn matrix LCD providing different system trouble and event memory alpha-numerical messages. 6 CA824 Alarm System User Manual TeleTek CA824 Wed. 09/05 11:52 Figure 2. LCD Keypad AR M DIS PRG AR M BPS TRB 1 2 3 4 5 6 7 8 9 CLR 0 ENT L ME M Figure 3. Keypad Key AR M DIS AR M Action Key Action Arms the system CLR Clears entered data or transfers to a higher menu level Disarms the system ENT Confirms entered data or transfers to a lower menu level BPS Bypasses certain zone(s) Scrolls right the cursor in a field or scrolls to the next menu item in the same level TRB Reviews the system troubles Scrolls left the cursor in a field or scrolls to the previous menu item in the same level ME Reviews the event memory Enters user codes or other data L M CA824 Alarm System User Manual 7 Key Action PRG Key Activates the programming mode Action 1 2 3 4 5 6 7 8 9 0 The key pad can be used to enter also Latin and Cyrillic letters and special symbols. See the table bellow for the correspondence between the number of the pressings of a certain key and the character displayed on the LCD: Key 1 2 3 4 5 6 7 9 8 1 2 0 0 8 Number of pressings 3 4 5 6 7 8 . , : ! < > 1 - = + $ % @ / 2 A B C Á Â Ã Ä 3 D E F Æ Ç È É 4 G H I Ê Ë Ì Í 5 J K L Î Ï Ð Ñ 6 M N O Ò Ó Ô Õ 7 P Q R S Ö × Ø 8 T U V Ù Ú Ü Û 9 W X Y Z Ý Þ ß CA824 Alarm System User Manual Operation Arming Full Arming Full arming means all zones are secured. Anyone coming into the entrance zone is required to enter a code. Otherwise the alarm is started after the entrance time is over. After the arming procedure is completed, short beeps indicate the exit time and the user is required to leave the zone. Ten seconds before the exit time is over beeps frequency is increased. There are three methods to Full arm the system: Method1 This is a standard method, applied when the user has the permission to arm the system in more than one of the four ways (Full, Stay, Force and Instant). The arming sequence is described by Figure 4 on Page 11. Method 2 This method is applied when the user is permitted to only Full arm the system. The arming sequence is described by Figure 5 on Page 12. Method 3 This fast method is applied when a certain area can be armed without entering a user code. The only possible way to arm the system is Full. The arming sequence is described by Figure 6 on Page 13. Stay Arming Stay arming means the user is allowed to stay in certain zone(s), but the entrance zone is secured. Anyone coming into an Entry zone is required to enter a code. Otherwise the alarm is started after the entrance time is over. The arming sequence is described by Figure 7 on Page 14. Force Arming Force arming means the system is armed despite that in certain zone(s) there may be a presence or a trouble. All such zones will be bypassed automatically at the system arming, if they are allowed. The arming sequence is described by Figure 8 on Page 15. Instant Arming Instant arming means the user is allowed to stay in certain zone(s) marked as Stay zones, but the entrance zone is secured. CA824 Alarm System User Manual 9 The Entry zones are armed immediately (without exit time). The difference with the Stay arming is that the Entry zones are armed immediately (without exit time) and an intrusion into the Entry zones immediately starts the alarm. The arming sequence is described by Figure 9 on Page 16. In the following figures: XX stays for the area number ZZ stays for the zone number S stays for the respective area status. It can be: - – the area is not armed and is in normal state + – the area is not armed and has an active zone f – the area is Full armed p – the area is Stay armed s – the area is Instant armed o – exit time is running out M – the area is Stay armed A – the area is in an Alarm state F – the area is in an Fire alarm state – the area is not supported by the respective keyboard or not used 10 CA824 Alarm System User Manual CA824 Wed. 09/05 11:52 3 User code 2 M Area No 3 3)Full arming Access denied User is not permitted to arm the system 3)Full arming Access denied User is not permitted to Full arm the system 2 3)Full arming A. XX S AreaXX or ENT 2 3 ARMing 3)Full arming 3 1 Invalid user code entered User Menu ARMing AR 1 CA824 Access denied 3 A. XX AreaXX armed User is permitted to operate one area only and the keyboard supports this area or the keyboard supports one area only and the user is permitted to operate this area A. XX S AreaXX Access denied User is not permitted to operate the area A. XX S AreaXX Area isn’t ready or 6 Area is not ready to be armed (open zones) A. XX AreaXX armed 5 A. XX S AreaXX First disarm or The area is already armed A. XX S AreaXX ZZ ZoneZZ Open zones are listed 5 Figure 4. Full Arming Method 1 CA824 Alarm System User Manual 11 CA824 Wed. 09/05 11:52 3 User code 2 M Area No 3 or A. XX AreaXX armed 3)Full arming Access denied User is not permitted to arm the system 2 3)Full arming A. XX S AreaXX ENT 2 Invalid user code entered User Menu ARMing AR 1 CA824 Access denied 3 A. XX AreaXX armed 5 User is permitted to operate one area only and the keyboard supports this area or the keyboard supports one area only and the user is permitted to operate this area A. XX S AreaXX Access denied User is not permitted to operate the area A. XX S AreaXX Area isn’t ready or 6 Area is not ready to be armed (open zones) A. XX S AreaXX First disarm or The area is already armed A. XX S AreaXX ZZ ZoneZZ Open zones are listed 5 Figure 5. Full Arming Method 2 12 CA824 Alarm System User Manual CA824 Wed. 09/05 11:52 AR M 1 Area No A. XX AreaXX armed 5 The keyboard supports one area only or ENT 2 2 3)Full arming A. XX S AreaXX 3 A. XX S AreaXX Access denied User is not permitted to operate the area A. XX S AreaXX Area isn’t ready or 6 Area is not ready to be armed (open zones) A. XX AreaXX armed A. XX S AreaXX First disarm or The area is already armed A. XX S AreaXX ZZ ZoneZZ Open zones are listed 5 Figure 6. Full Arming Method 3 CA824 Alarm System User Manual 13 CA824 Wed. 09/05 11:52 3 User code 2 M Area No 3 3)Full arming Access denied User is not permitted to arm the system or A. XX AreaXX armed 4)Stay arming Access denied User is not permitted to Stay arm the system 2 4)Stay arming A. XX S AreaXX ENT 2 3 ARMing 3)Full arming 4 1 Invalid user code entered User Menu ARMing AR 1 CA824 Access denied 3 A. XX AreaXX armed 5 User is permitted to operate one area only and the keyboard supports this area or the keyboard supports one area only and the user is permitted to operate this area A. XX S AreaXX Access denied User is not permitted to operate the area A. XX S AreaXX Area isn’t ready or 6 Area is not ready to be armed (open zones) A. XX S AreaXX First disarm or The area is already armed A. XX S AreaXX ZZ ZoneZZ Open zones are listed 5 Figure 7. Stay Arming 14 CA824 Alarm System User Manual CA824 Wed. 09/05 11:52 3 User code 2 M Area No 3 3)Full arming Access denied User is not permitted to arm the system 5)Force arming Access denied User is not permitted to Stay arm the system 2 5)Force arming A. XX S AreaXX or ENT 2 3 ARMing 3)Full arming 5 1 Invalid user code entered User Menu ARMing AR 1 CA824 Access denied 3 A. XX AreaXX armed User is permitted to operate one area only and the keyboard supports this area or the keyboard supports one area only and the user is permitted to operate this area A. XX S AreaXX Access denied User is not permitted to operate the area A. XX S AreaXX Area isn’t ready or 6 Area is not ready to be armed (open zones) A. XX AreaXX armed 5 A. XX S AreaXX First disarm or The area is already armed A. XX S AreaXX ZZ ZoneZZ Open zones are listed 5 Figure 8. Force Arming CA824 Alarm System User Manual 15 CA824 Wed. 09/05 11:52 3 User code 2 M Area No 3 3)Full arming Access denied User is not permitted to arm the system or A. XX AreaXX armed 6)Instant arming Access denied User is not permitted to Stay arm the system 2 6)Instant arming A. XX S AreaXX ENT 2 3 ARMing 3)Full arming 6 1 Invalid user code entered User Menu ARMing AR 1 CA824 Access denied 3 A. XX AreaXX armed 5 User is permitted to operate one area only and the keyboard supports this area or the keyboard supports one area only and the user is permitted to operate this area A. XX S AreaXX Access denied User is not permitted to operate the area A. XX S AreaXX Area isn’t ready or 6 Area is not ready to be armed (open zones) A. XX S AreaXX First disarm or The area is already armed A. XX S AreaXX ZZ ZoneZZ Open zones are listed 5 Figure 9. Instant Arming 16 CA824 Alarm System User Manual Disarming Coming into the entrance zone, the user is required to enter a personal code. A continuous sound indicates the entrance time. If the system is not disarmed within the entrance time, the alarm is activated. Certain users may not be allowed to disarm the system. The arming sequence is described by Figure 10. 4 CA824 Wed. 09/05 11:52 3 User code 2 AR Area No M 3 6 Invalid user code entered DISARMing Access denied or 3 6 User is not permitted to disarm the system 2 DISARMing A. XX S AreaXX ENT 2 CA824 Access denied User Menu ARMing DIS 1 6 A. XX S AreaXX disarmed User is permitted to operate one area only and the keyboard supports this area or the keyboard supports one area only and the usre is permitted to operate this area A. XX S AreaXX Already disarmed The area is already disarmed or A. XX S AreaXX Access denied User is not permitted to operate the area A. XX S AreaXX disarmed Figure 10. Disarming CA824 Alarm System User Manual 17 Troubles Review The troubles review sequence is described by Figure 11. When a trouble occurs, call your technical support service. CA824 Wed. 09/05 11:52 3 User code 2 CA824 Access denied Invalid user code entered User Menu ARMing TRB L 1 TRBL (troubles) trouble message All current system troubles are listed here one after the other 6 User Menu TRBL (troubles) Figure 11. Troubles Review All trouble messages and their meanings are shown bellow: Message Meaning ACC loss 220V mains power loss AUX Power Failed Blown AUX fuse of the main module Batt Loss Low or no battery or blown system battery fuse Buss Error Connection with the module has failed along the bus PGM Power Failed Blown PGM fuse of the main module TelFailure Communication failure in the build-in communicator TL Fault Telephone line failure 18 CA824 Alarm System User Manual Event Memory Review The CA824 Alarm System has a memory that stores all events that have taken place during the system operation. Only users that have permission can review the event memory. The event memory review sequence is described by Figure 12. CA824 Wed. 09/05 11:52 3 User code 2 Invalid user code entered User Menu ARMing 1 ME M 1 CA824 Access denied User Menu MEMory(Log file) User is not permitted to review the event memory RXXX Cnn Message A.XX dd/mm hh:mm ENT ENT ENT 1 Long Message A.XX Cause Figure 12. Event Memory Review CA824 Alarm System User Manual 19 In the above figure: R indicates the event is restoring XXX is the event sequential number C stands for the event cause. It can be: d – for device u – for user z – for zone A.XX displays the number of the area, where the event has taken place dd/mm is the date (day/month), when the event has taken place hh:mm is the time (hour:minutes), when the event has taken place All short and long messages and their meanings are shown bellow: Message Long message Medical Medical alarm Fire Fire alram Panic Panic alram Duress Duress Alarm Burglary alarm Alarm 24 hour alarm Tamper Tamper ExpFail Exp. module fail SenrTmp Sensor tamper Meaning Medical type zone ZZ has been activated or a Medical signal has been manually triggered off from keyboard/device DD Fire type zone ZZ has been activated or a Fire signal has been manually triggered off from keyboard/device DD Panic type zone ZZ has been activated or a Panic signal has been manually triggered off from keyboard/device DD A UU code has been entered for duress An Entry Delay, Follow or Instant type zone ZZ has been activated A 24h Burglary type zone ZZ has been activated A tamper type zone ZZ has been activated Connection with module DD has failed along the bus A self-arming zone ZZ sensor has been activated Exp.Tmp Exp. module tmp. A self-arming module DD has been activated 24h nB A 24h non-burglary zone ZZ has been activated 24h non-burglary SystTrb System trouble A PGM or AUX fuse of the main module has failed AC loss 220V mains power loss AC loss Battlow Low system Batt. 20 Low system battery voltage CA824 Alarm System User Manual Message Long message Meaning SystRst System reset System hardware has been reset BattFlt Batt test failed No battery or blown system battery fuse C-tion Communication failure in the build-in communicator Fail to commun. UserO/C User Open/Close User arming via code UU Arm Q Quick Arming Single click arming from keyboard/device DD C-tion CommunicationERR Telephone line failure KeyOpen Key switch Op/Cl Arming from Key-switch type zone ZZ Bypass Bypassing zone ZZ Zone Bypass TestRep Per.Test report Regular text test via the build-in communicator TimeRST Time/Date reset System date and time resetting Cancel Cancel Cancel day mode alarm System System shutdown System power failure TestMan M-ual T-ger Test CA824 Alarm System User Manual Manual communication test 21 Bypassing Bypassing means that when an area is for example Full armed, all bypassed zones are not armed. This may be necessary, when a malfunctioning of the sensors in the zone or a presence in the zone obstruct the normal arming of that zone. It is advisory to bypass zones when it is really needed. Bypassing sequence is described by Figure 13. CA824 Wed. 09/05 11:52 3 User code 2 Invalid user code entered User Menu ARMing 3 BPS 1 CA824 Access denied BPS(Bypass zone) Access denied User is not permitted to bypass zones BPS(Bypass zone) ZZ ZoneZZ Zone No or ENT 1 2 ZZ 2 ZoneZZ Not bypassed ZZ ZoneZZ bypassed 0 ENT ENT Figure 13. Bypassing 22 CA824 Alarm System User Manual Programming Each user can access certain menus for setting of parameters concerning the every day system operation. To program some parameters, the user needs to be given permissions by the system engineer or a system manager. Advanced users may utilize the Complete Menu Map, shown on Page 48, to navigate the programming menus. User Codes The CA824 Alarm System supports 31 user codes and one system engineer code. The system engineer code grants access to all system parameters. Each user has the following properties: a name; a code; rights (permission to operate certain areas); attributes (permissions to perform certain procedures). The user name and code can be set the respective user and by a system engineer or manager. The other parameters can be set by the system engineer or a system manager only. The user name can be eight characters long and comprises figures, capital or small Latin or Cyrillic letters. See the table on Page 8 for the correspondence between the number of the pressings of a certain key and the character displayed on the LCD. Each user can be given the right to operate any area. The user attributes apply to all areas, the user is given the right to operate. I.e. the user can not be given different attributes for the different areas. The attributes and the corresponding actions are revealed in table on Page 31. Note: If a user is not assigned any attribute, the user code is not active! The user code can contain the figures from 0 to 9 only. Its length can be programmed by the system engineer to be either four or six figures long. The CA824 Alarm System support ambush codes. Ambush code is a personal code that disarms the system, but still sends alarm signal. Its purpose to indicate that the user is forced to disarm the system against his or her will. The ambush code is produced from a personal code by increasing the last number by one. If the last number is 9, it is replaced by 0 in the ambush code. Note: When an ambush code is entered, the alarm is not activated and no indication of an alarm condition is displayed on the LCD! A user code can not be the same as an ambush code! CA824 Alarm System User Manual 23 According to the attributes, the users can be classified as: Basic user with permission to Full arm and disarm the system; Standard user with permission to Full arm and disarm the system and to bypass zones; Special user with permissions of the standard user as well as the permission to Force, Stay and Instant arm the system; Manager with permission to fully operate the system. There is no limit for the number user that can be managers. User Limitations Managers obey the following rules: A manager can not assign a user more attributes than the manager has been assigned; A manager can not grant a user more rights than the manager has been granted; A manager can not change his own rights and attributes; A manager can not change the rights or the attributes of an user that has more rights than the manager. All users, including the managers obey the following rules: A user code is accepted only by keyboards/devices that are allowed to operate at least one area that the user is also allowed to; Even memory review for certain areas can be performed by users that are assigned the Log View attribute and have the right to operate the respective areas. 24 CA824 Alarm System User Manual Changing own user code CA824 Wed. 09/05 11:52 3 User code 2 CA824 Access denied Invalid user code entered User Menu ARMing PRG 1 PROGramming 1)Own code 1 1 1)Own code 0)Rename 0 1 0)Rename code new:_ User name 1 ( PRG Switches between upper and lower case) 0)Rename new:UserName CA824 Alarm System User Manual Continues on the next page 25 0)Rename code new:UserName Continues from the previous page ENT 2 1)Own code 0)Rename The user name is changed. 1 1 1)Change code new:[_ ] New code 2 1)Change code code is changed 1)Change code already exists New code rejected 1)Change code try again 1)Change code confirm:[_ ] Re-enter the new code 2 3 3 1)Change code confirming ERROR The re-entered new code is not the same as the first one The code is changed. The old code is not valid any more Figure 14. Changing own user name and code 26 CA824 Alarm System User Manual Changing User Names, Codes, Permissions and Attributes by a Manager CA824 Wed. 09/05 11:52 3 User code 2 CA824 Access denied Invalid user code entered User Menu ARMing PRG 1 PROGramming 1)Own code 2 1 User No Not a manager’s code 2)User codes C. XX * UserName or ENT 1 3 2)User codes Access denied C. XX * UserName 0)Rename code CA824 Alarm System User Manual 3 C. XX * UserName Access denied Manager is not allowed to change the respective user name and code Continues on the next page 27 C. XX * UserName 0)Rename code Continues from the previous page 0 1 0)Rename code new:_ User name ( PRG Switches between upper and lower case) ENT 2 C. XX * UserName 0)Rename code The user name is changed. 1 1 1)Change code new:[_ ] New code 1 28 1)Change code confirm:[_ ] To erase a combination, press and hold the CLR for two seconds 3 key 1)Change code already exists New code rejected Continues on the next page CA824 Alarm System User Manual 1)Change code confirm:[_ ] 3 Re-enter new code 2 Continues from the previous page 1)Change code code is changed 1)Change code confirming ERROR The re-entered new code is not the same as the first one The code is changed. The old code is not valid any more C. XX * UserName 1)Change code 2 1 2)User rights Areas:12345678 ENT 1 Areas:12345678 _ 0/1 :----*--- Select area 0 1 Set Unset 1 1 Areas:12345678 _ 0/1 :*---*--- CA824 Alarm System User Manual Continues on the next page 29 Areas:12345678 _ 0/1 :*---*--- Continues from the previous page ENT 2 2)User rights Areas:12345678 User rights are set. The user is allowed to operate areas marked with * and is not allowed to operate areas marked with -. CLR 1 C. XX * UserName 2)User rights 3 1 3)UserAttributes - Attribute Select attribute 0 1 Set Unset 1 1 30 3)UserAttributes * Attribute Continues on the next page CA824 Alarm System User Manual 3)UserAttributes _ * Attribute Continues from the previous page ENT 2 C. XX * UserName 2)UserAttributes User attributes are set. The user is allowed to perform actions marked with * and is not allowed to perform actions marked with -. Figure 15. Changing User Codes by a Manager Attribute Action Full Arming Permission to Full arm the system Force Arming Permission to Force arm the system Stay / Instant Arming Permission to Stay and Instant arm the system Manager Manager permissions – creating and changing user codes Bypass Permission to bypass zones Disarming Permission to disarm the system Time / Date Set Permission to set the system time and date Log View Permission to review the event memory for the areas, which correspond to the respective user CA824 Alarm System User Manual 31 Adding and Setting a Proxy Card CA824 Wed. 09/05 11:52 3 User code 2 CA824 Access denied Invalid user code entered User Menu ARMing PRG 1 PROGramming 1)Own code 2 1 User No 32 1)Own code Access denied Not a manager’s code 2)User codes C. XX * UserName or ENT 1 3 C. XX * UserName 0)Rename code 3 C. XX * UserName Access denied Manager is not allowed to change the respective user settings Continues on the next page CA824 Alarm System User Manual C. XX * UserName 0)Rename code Continues from the previous page 4 1 4)User ProxiCard 0)Add Card 0 1 0)Add Card start? ENT 1 0)Add Card approach card Card Reader 2 Proxy Card 0)Add Card success 3 0)Add Card Access denied The card already exists Card added CLR 1 4)User ProxiCard 0)Add Card CA824 Alarm System User Manual Continues on the next page 33 4)User ProxiCard 0)Add Card Continues from the previous page 1 1 1)Arm/D. Rights to Area N: XX _ Area No 2 4)User ProxiCard 1)Arm/D. Rights Arm / Disarm rights set. The respective area can be armed and disarmed, using the proxy card 2 1 Areas:12345678 _ 0/1 :----*--- Select area 0 1 Set Unset 1 1 Areas:12345678 _ 0/1 :*---*--- ENT 2 4)User ProxiCard 2)Entry rights Entry rights set Figure 16. Adding and Setting a Proxy Card Note: A user can be assigned a proxy card and no code and vice versa! 34 CA824 Alarm System User Manual Removing a Proxy Card CA824 Wed. 09/05 11:52 3 User code 2 CA824 Access denied Invalid user code entered User Menu ARMing PRG 1 PROGramming 1)Own code 2 1 User No Not a manager’s code 2)User codes C. XX * UserName or ENT 1 3 1)Own code Access denied C. XX * UserName 0)Rename code CA824 Alarm System User Manual 3 C. XX * UserName Access denied Manager is not allowed to change the respective user settings Continues on the next page 35 C. XX * UserName 0)Rename code Continues from the previous page 4 2 4)User ProxyCard 0)Add Card 3 1 3)Remove Card start? ENT 2 3)Remove Card success Card removed Figure 17. Removing a Proxy Card 36 CA824 Alarm System User Manual Date and Time Setting CA824 Wed. 09/05 11:52 3 User code 2 CA824 Access denied Invalid user code entered User Menu ARMing PRG 1 PROGramming 1)Own code 3 1 3 3)Time set Access denied User is not allowed to set the system date and time 3)Time set 20yy dd/mm hh:mm and ENT 2 PROGramming 3)Time set 3 PROGramming 3)Time set Incorrect date or time Date and time are set Figure 18. Date and Time Setting CA824 Alarm System User Manual 37 Chime Switching CA824 Wed. 09/05 11:52 3 User code 2 CA824 Access denied Invalid user code entered User Menu ARMing PRG 1 PROGramming 1)Own code 4 activate 1 2 4)Chime 0/1 7 OFF 4)Chime 0/1 ON deactivate 0 ENT 1 PROGramming 4)Chime ENT Chine is deactivated 1 PROGramming 4)Chime Chime is activated Figure 19. Chime Switching 38 CA824 Alarm System User Manual Display Setting CA824 Wed. 09/05 11:52 3 User code 2 CA824 Access denied Invalid user code entered User Menu ARMing PRG 1 PROGramming 1)Own code 5 1 5)LCD settings 0)Contrast 0 1 0)Contrast <-...-> CA824 Alarm System User Manual Continues on the next page 39 0)Contrast <-...-> Continues from the previous page ENT 1 5)LCD settings 0)Contrast Contrast is set 1 1 1)Back light <-...-> ENT 1 5)LCD settings 1)Back light Back light is set Figure 20. LCD Settings 40 CA824 Alarm System User Manual Private Display CA824 Wed. 09/05 11:52 Figure 21. Standard Display 123456789‚ƒ„…†‡ˆ --f---pFigure 22. Private Display The standard to private switching sequence is shown by Figure 23. CA824 Alarm System User Manual 41 CA824 Wed. 09/05 11:52 3 User code 2 CA824 Access denied Invalid user code entered User Menu ARMing PRG 1 PROGramming 1)Own code 5 1 5)LCD settings 0)Contrast 2 2 activate 1 2 2)PrivateDisplay 0/1 OFF 2)PrivateDisplay 0/1 ON deactivate 0 4x CLR CA824 Wed. 09/05 11:52 4x CLR 123456789‚ƒ„…†‡ˆ SSSSSSSS Figure 23. Private Display Switching 42 CA824 Alarm System User Manual Changing the logo Logo is the first row on the standard display. The Logo changing sequence is shown by Figure 24. CA824 Wed. 09/05 11:52 3 User code 2 CA824 Access denied Invalid user code entered User Menu ARMing PRG 1 PROGramming 1)Own code 5 1 5)LCD settings 0)Contrast 3 1 enter new Logo _ CA824 CA824 Alarm System User Manual Continues on the next page 43 enter new Logo _ CA824 New Logo and Continues from the previous page ( PRG Switches between upper and lower case) ENT 1 5)LCD settings 0)Contrast 3)Edit Logo Logo is changed Figure 24. Changing the Logo 44 CA824 Alarm System User Manual Stopping the Alarm and Clearing the Memory Indication 0 CA824 Wed. 09/05 11:52 3 User code 2 CA824 Access denied Invalid user code entered User Menu ARMing DIS AR 1 Group No M A. XX A AreaXX disarmed The alarm for this group can be stopped by entering only a code or 3 ENT 2 2 DISARMing A. XX A AreaXX A. XX A AreaXX Access denied User is not permitted to operate the area A. XX S AreaXX disarmed Figure 25. Stopping the Alarm To clear the memory indication, enter a valid user code. CA824 Alarm System User Manual 45 Special Key Combinations Panic Button Pressing simultaneously the ENT and CLR keys invokes a Panic alarm. Medical Alarm Pressing simultaneously the 1 and 3 keys invokes a Medical alarm. Fire Alarm Pressing simultaneously the 4 and 6 keys invokes a Fire alarm. Ambush Code Ambush code is a personal code that disarms the system, but still sends alarm signal. Its purpose to indicate that the user is forced to disarm the system against his or her will. The ambush code is produced from a personal code by increasing the last number by one. If the last number is 9, it is replaced by 0 in the ambush code. Example: Personal code: 4615 → Ambush code: 4616 Personal code: 4619 → Ambush code: 4610 46 CA824 Alarm System User Manual Appendix Service Messages on the LCD Message Meaning armed System is armed disarmed System is disarmed Already disarmed Area has been already disarmed First disarm Area is armed – needs to be disarmed first Leave area User is required to leave the area Area isn’t ready Area is not ready to be armed (open zones) Code not in use! Code is not in use at the moment already exist! Entered code is already used (when changing codes) try again Enter the code again (at confirming error) confirm:[ Confirm the new code confirming ERROR Code confirming error code is changed Code has been successfully changed code is cleared Code has been successfully removed bypassed Zone is bypassed Not bypassed Zone is not bypassed CA824 Alarm System User Manual 47 Complete Menu Map Arming 3) Full arming Area 01 .. 08 4) Stay arming Area 01 .. 08 5) Force arming Area 01 .. 08 6) Instant arming Area 01 .. 08 7) Arm All areas Disarming Area 01 .. 08 Programming 1) Own code 0) Rename 1) Change code 2) User codes User 01 .. 31 0) Rename code 1) Change code 3) Time set 2) User rights 4) Chime 3) User Attributes 5) LCD settings 0) Contrast 1) Backlight 2) Private Display 3) Edit Logo 4) User ProxiCard Area 01 .. 08 - Full Arming - Time Set - Disarming - Bypass - Manager - Stay arming - Force arming - Log view 0) Add Card 1) Arm/D. Rights Memory (Log file) All Areas TRBL (troubles) System troubles BPS (Bypass zone) Zone 01 .. 24 2) Entry rights 3) Remove Card Figure 26. Complete Menu Map 48 CA824 Alarm System User Manual