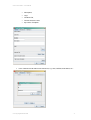
1
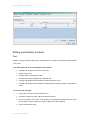
LEO Course Editor
User Manual
LEO Course Editor – User Manual
© Young Digital Planet SA 2009
Young Digital Planet SA, ul. Słowackiego 175, 80-298 Gdańsk
tel. +4858 768 22 20, fax +4858 768 22 11
e-mail: [email protected]
www.ydp.eu
© Young Digital Planet 2009
2
LEO Course Editor – User Manual
Table of contents
Introduction __________________________________________________ 5
Product description _________________________________________________ 5
Technical requirements _____________________________________________ 5
Working in the Editor ___________________________________________ 6
Interface __________________________________________________________ 6
Editor's elements ___________________________________________________ 7
Command Menu _________________________________________________________ 7
Button Menu ___________________________________________________________ 13
Module Menu ___________________________________________________________ 14
Page Structure Area _____________________________________________________ 18
Module Properties Area ___________________________________________________ 20
Page Editing Area _______________________________________________________ 21
Page editing ______________________________________________________ 22
Page properties _________________________________________________________ 23
Inserting modules in a page _______________________________________________ 24
Page preview ___________________________________________________________ 25
Page feedbacks _________________________________________________________ 25
Actions ________________________________________________________________ 26
Properties common to all modules ___________________________________ 27
Background ____________________________________________________________ 28
Border ________________________________________________________________ 29
Width and height ________________________________________________________ 30
Position coordinates X and Y ______________________________________________ 31
Creating a course _________________________________________________ 31
Creating table of contents __________________________________________ 33
Creating a simple learning unit ______________________________________ 35
Editing presentation modules _______________________________________ 36
Text __________________________________________________________________ 36
Shape_________________________________________________________________ 39
Picture Player __________________________________________________________ 40
Tabbed Sheet __________________________________________________________ 41
Action Button ___________________________________________________________ 41
Vocabox _______________________________________________________________ 43
Chart _________________________________________________________________ 44
Media Player ___________________________________________________________ 45
Dialogue _______________________________________________________________ 45
Map module ____________________________________________________________ 46
Math module ___________________________________________________________ 47
Plot ___________________________________________________________________ 50
In-page Report __________________________________________________________ 51
Sync Text ______________________________________________________________ 53
Actions' player __________________________________________________________ 54
Scrolling Container ______________________________________________________ 54
Arrow _________________________________________________________________ 55
Page-in-Page ___________________________________________________________ 56
Animated Panel _________________________________________________________ 56
© Young Digital Planet 2009
3
LEO Course Editor – User Manual
In-Page Report-Progress __________________________________________________ 57
Simple page switcher_____________________________________________________ 58
Editing exercise modules ___________________________________________ 59
Container ______________________________________________________________ 59
Source List _____________________________________________________________ 60
Multiple Choice _________________________________________________________ 62
Connection _____________________________________________________________ 64
Jigsaw ________________________________________________________________ 65
Labeling _______________________________________________________________ 66
Marking _______________________________________________________________ 66
Grouping ______________________________________________________________ 67
Calculations ____________________________________________________________ 68
SonoLab ______________________________________________________________ 70
Paint __________________________________________________________________ 71
Color ID _______________________________________________________________ 72
SpeechRec ____________________________________________________________ 73
Word Jumble ___________________________________________________________ 73
Source Text ____________________________________________________________ 73
Counters ______________________________________________________________ 74
Hidden Words __________________________________________________________ 74
Editing ________________________________________________________________ 75
Module Jigsaw __________________________________________________________ 76
© Young Digital Planet 2009
4
LEO Course Editor – User Manual
Introduction
Product description
LEO Course Editor is a complex and multifunctional programme used for creating multimedia
educational material. With the help of numerous presentation and exercise modules as well as
plenty of other tools, the application allows the user to create both visually and functionally
attractive courses. In the process of creating course pages, the author has a number of
different modules at their disposal. Due to this, they can create various exercises and present
the educational material in a diverse way, according to the purposes and needs of a course.
Educational material can be presented on course pages created in LEO Course Editor with the
help of text, illustrations, pictures, films and sound files. By using exercise modules, it is
possible to construct tasks that will check the users' mastered knowledge. There is also a
possibility to count the results of a completed course as well as to add hints to the exercises.
In short, the LEO Course Editor is used for:
•
creating new electronic courses,
•
creating and editing the table of contents,
•
creating and editing course pages.
Technical requirements
For the LEO Course Editor to work efficiently, the Author's computer needs to match the
following technical requirements:
•
latest Java Runtime Environment,
•
at least 256 MB RAM,
•
Windows 2000,
•
20 MB free disk space.
© Young Digital Planet 2009
5
LEO Course Editor – User Manual
Working in the Editor
Interface
The LEO Course Editor's interface has been divided into a few separate areas:
•
Command Menu which includes basic commands used for programme operation:
Page, Edit, Project, Module, Course, Learning unit and Tools,
•
Button Menu which includes the most frequently used options from the command
menu, e.g. opening a new file, saving, etc.
•
Module Menu which allows the user to insert the most frequently used presentation
and exercise modules in a page,
•
Module Menu in the drop-down list which shows the rest of the presentation and
exercise modules that can be used,
•
Page Structure Area which shows the hierarchy of all modules inserted in a page in
form of a tree structure ("Structure" tab),
© Young Digital Planet 2009
6
LEO Course Editor – User Manual
•
Module Properties Area which displays the properties of an active module
("Properties" tab), as well as the feedbacks defined for the module ("Feedbacks" tab)
and the module's position on a page ("Position" tab),
•
Page Editing Area which displays a page with inserted modules that can be freely
edited in order to create a final shape of a course page,
•
Tabs which make it possible to move between the opened projects (e.g. NONAME in
the picture below), as well as switch the view between project view ("Zpg") and Flash
view ("Flash"). Here, it is also possible to block or unblock a page ("Lock/Unlock
page"), as well as switch the page view to a view without the module outlines ("Toggle
outlines").
Editor's elements
The Editor's elements have been grouped in separate categories and areas in the interface:
•
Command Menu,
•
Button Menu,
•
Module Menu,
•
Page Structure Area,
•
Module Properties Area,
•
Page Editing Area.
Command Menu
The Command Menu includes basic commands needed in the process of editing course pages.
The Command Menu bar consists of the following command groups:
•
Page,
•
Edit,
•
Project,
•
Module,
•
Course,
•
Learning unit,
•
Tools.
© Young Digital Planet 2009
7
LEO Course Editor – User Manual
1. The commands from the Page group allow the user to:
•
create new pages from templates (New from Template),
•
open a new, empty page (New Page),
•
open an existing page,
•
save a page (Save Page),
•
select recently opened pages (Recent Files),
•
close a document,
•
save a page under another name (Save As),
•
save a page as a template (Save Page as Template),
•
select file storage (Select Storage),
•
configure file storage (Configure Storage),
•
export "Question & Test" file (Export Question & Test file),
•
close the Editor (Close).
© Young Digital Planet 2009
8
LEO Course Editor – User Manual
2. The commands from the Edit group allow the user to:
•
copy (Copy),
•
cut (Cut),
•
paste (Paste),
•
delete (Delete),
•
select all (Select All).
3. The commands from the Project group allow the user to:
•
open a new project (New project),
•
open an existing project (Open project),
•
save a project under another name (Save as),
•
reload a project (Reload project),
•
edit a project (Edit project),
•
close a project (Close project).
© Young Digital Planet 2009
9
LEO Course Editor – User Manual
4. The commands from the Module group allow the user to:
•
add a predefined module (Add Predefined Module),
•
delete a predefined module (Delete Predefined Module),
•
add a predefined module to a project (Add predefined module to project),
•
move modules: to front/on top (Bring to Front),
•
move modules up one level on the tree structure (Up one level),
•
move modules: to back/underneath (Send to Back),
•
move modules down one level on the tree structure (Down one level).
5. The commands from the Course group allow the user to:
•
create a new course (Create New Course),
•
open an existing course (Open Course),
© Young Digital Planet 2009
10
LEO Course Editor – User Manual
•
edit a course (Edit Course),
•
export a course (Export course),
•
export a course in AICC format (Export course in AICC format),
•
close a course (Close Course),
•
edit the contents (Edit Contents),
•
edit keywords for a current page (Edit keywords for current page).
6. The commands from the Learning unit group allow the user to:
•
create a new lesson (New simple learning unit),
•
open a lesson (Open simple learning unit),
•
create new Flash contents (New Flash contents),
•
open Flash contents.
© Young Digital Planet 2009
11
LEO Course Editor – User Manual
7. The commands from the Tools group allow the user to:
•
open the Style Editor (Style Editor),
•
show/hide the module labels (Show/Hide Module Labels),
•
group the module icons in the menu (Edit Menu Category),
•
restore the page from backup (Restore from backup),
•
save the state (Save State),
•
load the state (Load State),
•
edit the default page properties (Edit Default Page Properties),
•
edit the grid properties (Edit Grid Properties),
•
rescan the components (Rescan children),
•
export a page [Quick page export (.zpg->.page)],
•
preview the export to Flash (Export preview),
© Young Digital Planet 2009
12
LEO Course Editor – User Manual
•
preview with advanced embedding (Preview with advanced embedding),
•
preview with embedded fonts (Preview with embedded fonts),
•
find a module (Find module.),
•
make and edit units with HTML titles (Make/Edit unit with HTML titles),
•
edit the colours of gaps (All gaps colors),
•
open the Translations Editor (Translations Editor).
Button Menu
The Button Menu includes the most frequently used functions from the Command Menu,
which provides a quick and easy access to them. The buttons are as follows:
•
– New Page,
•
– Open Page,
•
– Save Page,
•
– Close document,
•
– Save as New Module Template,
•
– Delete Module Template,
•
– Show/Hide Module Labels,
•
– Edit Menu Clusters,
•
– Undo,
•
– Copy,
•
– Cut,
•
– Paste,
•
– Display/Hide the group window,
© Young Digital Planet 2009
13
LEO Course Editor – User Manual
•
– Page Preview,
•
– Export preview,
•
– Quick page export (.zpg->.page),
•
– Help,
•
– Preview with advanced embedding,
•
– Preview with embedded fonts,
•
– Find module,
•
– Make/Edit unit with HTML titles,
•
– All gaps colors,
•
– Translations Editor,
•
– Split text module.
Module Menu
The Module Menu includes a set of icons representing modules that an Author may insert in a
course page:
•
– Text Module is used for inserting informative texts (e.g. instructions),
editing them as well as creating two types of exercises: 1) filling the gaps in a text and
2) identifying and marking fragments of texts. The module also enables the user to
insert links to the Internet sites and files in a course page.
•
– Shape is used for inserting and editing various shapes (e.g. triangles,
polygons) or text in different size, colour, shape position, etc.
© Young Digital Planet 2009
14
LEO Course Editor – User Manual
•
– Picture Player is used for displaying pictures, illustrations, photos and
animations in .jpg or .swf formats on course pages.
•
– Tabbed Sheet is used for inserting tabs including text, graphics or
exercises.
•
– Action button is used for inserting different types of icons which have
various functions on course pages, e.g. icons which start audio or video recordings,
etc.
•
– Container is used for placing exercises inside of it. It is a module that
determines the working of exercises. Therefore, each exercise should be inserted in a
container.
•
– Source List is used for displaying possible answers (text or graphics)
which the user of a course is supposed to insert in gaps by means of drag-and-drop
method.
•
– Vocabox is used for adding lists of words or expressions (e.g. new
vocabulary). The elements of the module may be translated. It is also possible to add
a soundtrack to each of the Vocabox elements.
•
– Multiple Choice is used for creating multiple choice exercises.
•
– Connection is used for creating exercises that are based on connecting
the pairs of words, phrases or graphic elements which are grouped in two columns or
rows.
•
– Jigsaw is used for creating exercises that are based on putting text or graphic
elements in the right order.
© Young Digital Planet 2009
15
LEO Course Editor – User Manual
•
– Chart is used for inserting and editing data in columns and rows. The module
is used as a traditional chart or an element of an exercise in which a chart is to be
filled in with data or certain elements.
•
– Labeling is used for creating exercises in which a student is asked to assign
suitable labels to certain places in a picture.
•
– Marking is used for creating exercises which are based on marking a certain
area in a picture. The module also makes it possible to create multiple choice
exercises.
•
– Grouping is used for creating exercises which are based on moving and
grouping text elements or illustrations.
•
– Media Player is used for playing audio and video files.
•
– Calculations is used for inserting written calculations.
•
– Dialogue is used for reproducing and recording dialogues.
•
– Map module is used for inserting maps within course pages and handling
their close-up (zoom option).
•
– MathModule is used for creating complicated maths exercises, editing
symbols and displaying mathematical operations.
•
– Plot is used for inserting, editing various graphs in a course page and exercises
based on these plots.
•
– SonoLab is used for creating pronunciation exercises which are
based on voice recording and comparing it with a native speaker's pronunciation
presented on a diagram.
•
Paint is used for creating exercises which are based on filling empty areas within a
picture with colours.
© Young Digital Planet 2009
16
LEO Course Editor – User Manual
•
Color ID is used for creating exercises which are based on assigning colours to words
or sentences.
•
– SpeechRec is used for practising pronunciation. The user has the
possibility to record their own voice and is informed about the correctness of the
pronunciation.
•
– In-page Report is used for viewing percentage results from
completed exercises.
•
– Sync Text is used for displaying the transcription of a text while an
audio file is being played.
•
– Word Jumble is used for creating exercises which are based on
dragging the words from a list into an exercise and putting them in the right order.
Unlike Jigsaw, the number of elements which can be inserted in one gap is not
limited.
•
– Actions' Player is used for reproducing sequences of actions
(e.g. playing a film, sound, etc.) which have been defined earlier.
•
– Source Text, like Source List, is used for creating source lists to
other exercises. Here, instead of a list consisting of single words, there is a list with a
text whose fragments constitute the elements to be dragged into the gaps.
•
– Scrolling Container is used for inserting larger fragments of
texts scrolled with the help of scrollbars.
•
– Arrow is used for inserting and editing arrows.
•
– Page-in-Page is used for inserting a page in a panel/navigation
page.
•
– Dummy is used for creating template pages.
•
– Animated Panel is used for presenting various elements, such
as pictures, texts, films or sounds, on one panel that has been unrolled e.g. by clicking
on a button.
•
– In-Page Report-Progress is used for viewing the
results from exercises in form of a progress bar.
•
– Simple page switcher is used for switching between
pages in a lesson (.flo). The switcher is inserted together with the Page-in-page
module in a panel/navigation page.
© Young Digital Planet 2009
17
LEO Course Editor – User Manual
•
– Counters is a module that plays the selected actions when certain
conditions are met.
•
– Hidden Words is used for creating exercises which are based on
finding words among letters which fill a rectangle.
•
– Editing is used for inserting an empty space to be filled in with text.
•
– Module Jigsaw is used for creating jigsaw puzzles from a few
active modules, e.g. illustration and text at the same time.
Page Structure Area
The Page Structure Area is situated on the left just below the module menu. It contains a list
of modules to be found on the currently opened course page. The modules are displayed in
the form of a tree structure which describes the hierarchy of modules inserted in a page, e.g.:
This property is important because it helps to keep the order in the lesson structure and insert
a module inside of another one. The most frequent case of such a hierarchical structure are
exercise modules inserted in the Container module. All exercise modules should be always
inserted in the Container.
© Young Digital Planet 2009
18
LEO Course Editor – User Manual
Selecting a module on the list in the Page Structure Area equals selecting it on the page.
Simultaneously, in the Properties Area below, the actual properties of a selected module are
displayed. Right-clicking on a chosen module in the Page Structure Area results in opening a
context menu with the most basic editing options being displayed:
•
options Bring to Front and Send to Back enable the user to determine the order of
modules inserted in a page in layers,
•
options Up one level and Down one level enable the user to determine the hierarchy
of modules on the tree structure and the order of modules inserted in layers,
© Young Digital Planet 2009
19
LEO Course Editor – User Manual
•
options Show hidden module and Hide module show or hide a module on a page.
This function is especially useful when there is a large number of modules inserted in
a page – in such cases it is possible to hide some of the modules. This increases the
legibility of Page Editing Area,
•
the Copy, Cut and Paste commands enable the user to copy, cut and paste modules
in another place in the Page Editing Area or on the tree structure,
•
the Delete command enables the user to remove modules,
•
the Lock Module enables the user to block modules in order not to make any
accidental changes while editing other modules.
Module Properties Area
The Module Properties Area is situated below the Page Structure Area. It enables to edit the
properties of a currently active (marked) module in the Page Editing Area or on the tree
structure:
Some properties are common to all modules. These are:
•
Background,
•
Border,
•
Width and Height,
•
position coordinates X and Y.
© Young Digital Planet 2009
20
LEO Course Editor – User Manual
Next to each property there is its value. In order to change the value of a certain property, click
on the Value field which may be presented in form of:
•
a drop-down list
•
a button
•
editing field (X and Y).
,
,
The Module Property Area often contains the Customize button which starts an editing window
for most of the modules (especially exercise modules).
Page Editing Area
The Page Editing Area is the largest of all elements of the Editor. In this area, the current
state of an edited page is being displayed. From the context menu, displayed after rightclicking in the Page Editing Area, it is possible to choose basic editing options (copying,
cutting, pasting, etc.). The menu also offers Horizontal/Vertical Guidelines which enable the
user to line up the elements on a page. The contents and the looks of modules inserted in the
Page Editing Area can be modified in the Module Properties Area.
According to the Editor's default settings, all modules' borders are visible in the Page Editing
Area. All modules that are inserted in the Page Editing Area may be marked and moved with a
mouse. By dragging the red square in the down-right corner of the module border it is possible
to enlarge or to minimize the size of a module. If you click within the border of a module, it will
be marked in the Page Structure Area and its properties will be displayed in the Module
Properties Area.
The default looks of the Page Editing Area can be changed in Tools > Edit Grid Properties.
Below follows an example of a Page Editing Area with a few modules:
© Young Digital Planet 2009
21
LEO Course Editor – User Manual
Page editing
A page edited in LEO Course Editor is a set of modules inserted in it in a certain configuration.
The type, number and placing of the modules on a course page depends on the course's use
and character, but also on the author's creativity while using the Editor's functions.
The Editor makes it possible to create page templates. Thanks to this function, it is easier to
create lessons of the same layout and design.
To create a set of pages that look the same:
•
open a new page (Page > New Page),
•
choose appropriate page properties in the Page Properties Area (Properties: Page),
•
insert modules (optional),
•
save the page as a template (Page > Save Page as Template).
Before creating each of the next pages, you should choose Page > New from Template and
click on the name of the chosen template.
© Young Digital Planet 2009
22
LEO Course Editor – User Manual
To remove a template:
•
choose Page > New from Template,
•
click on Organize Templates,
•
highlight the name of the template,
•
click on Delete, and then on OK.
Page properties
By marking the page on the tree structure, the properties and values of a page are displayed
in the Module Properties Area (Property and Value columns).
The basic properties of each page are as follows:
•
background with the following values to choose from:
— no background,
— solid,
— gradient fill,
•
border with the following values:
— no border,
— empty,
— line,
— raised bevel,
— lowered bevel,
— rounded,
•
width counted in pixels,
•
height counted in pixels.
© Young Digital Planet 2009
23
LEO Course Editor – User Manual
In order to define the background and border colour, as well as the border line thickness, you
should click on the button beside the drop-down lists with the values for background and
border (see: picture above).
Inserting modules in a page
To insert a module in a course page:
•
choose its icon from the module menu,
•
click on any place in the Page Editing Area,
•
adjust the module's size by dragging the red square situated in down-right corner of
the modules or write its value in pixels in the appropriate editing fields (Width, Height)
in the Module Properties Area:
•
move the module to the chosen place on the page by grasping one of the black
squares on the module's border or write the appropriate values in the editing fields (X,
Y) in the Module Properties Area:
© Young Digital Planet 2009
24
LEO Course Editor – User Manual
To insert a module in a module:
•
insert a module in a page,
•
insert another module inside the first one by clicking on it,
•
if you are not sure if the second module is inside the first one, mark it on the tree
structure and drag it on the chosen module on the tree structure.
Page preview
The Page preview is a useful function which makes it possible to view the pages and the
layout of its components as well as to test the functioning of exercises, feedbacks, etc.
To open a page preview click on:
•
the Export Preview icon in the same menu.
Page feedbacks
Feedbacks are interactions between modules and users solving the exercises.
Basic types of feedbacks are:
•
Type 1 – general feedbacks of the Container module, common to all exercises
inserted in it:
— feedback to every correct answer (On OK),
— feedback to every wrong answer (On Wrong),
— feedback to an exercise with all correct answers (On All OK),
— feedback requested by the user (On Demand),
— feedback requested by the user after giving a specified number of answers
(On demand if answers),
•
Type 2 – general feedback resulting from a specific operating mode of the container in
which exercises have been inserted:
— Standard – accepts all answers inside the container,
© Young Digital Planet 2009
25
LEO Course Editor – User Manual
— Mark Wrong – automatically selects wrong answers,
— Only Correct – accepts only correct answers,
— Mark Correct – automatically selects correct answers,
— Mark Correct And Wrong – automatically selects correct and wrong answers,
•
Type 3 – specific feedbacks of exercise modules; specific feedbacks can be defined
for every specific response in each exercise module. To edit specific feedbacks use
the Customize button.
Feedbacks can be presented on pages in numerous ways. They can appear as a comment, a
separate window with an arbitrary content (text, graphic or video) or in the form of audio
information.
Actions
Available actions (only in Flash technology) make it possible to define events based on
unique values entered by the author.
You can add the following actions:
•
Block – locks a selected activity container. No actions with the mouse cursor are
possible at this stage,
•
Unblock – unblocks the selected activity container,
•
Show URL – is used to show the object in a defined place, it is linked to an action
button,
•
MarkCorrect – marks correct answers,
•
showAnswers – shows answers in the container,
•
showErrors – shows errors in the container,
•
requestFeedback – displays a feedback on request,
•
checkActivity – checks the activity,
•
CloseMyPopup – is used to close a popup. The popup is closed by itself. The base
page can not close the popup which was opened by this page,
•
ClosePopup – is used to close a popup. It has just one argument – a path to the page
which has to be closed. The popup cannot be closed by itself,
•
Activate – activated exercise's results will be counted in the report,
•
Deactivate – deactivated exercise's results will not be counted in the report,
•
Show – shows a module if it was hidden; there is no change if it was visible,
•
Hide – hides a module if it was visible; there is no change if it was hidden,
•
MoveTo – moves a module to a defined point,
© Young Digital Planet 2009
26
LEO Course Editor – User Manual
•
Move – moves a module by a defined value. It has two arguments: horizontal
displacement and vertical displacement (a positive value means the displacement to
the right, a negative – to the left),
•
Reset – restores the activity's initial state,
•
SwitchTab – makes it possible to switch to a tab. It has just one argument – tab
number. Tabs are numbered from 1,
•
ExecuteAndWait – sends a command to an external swf file,
•
reset – resets the whole activity,
•
resetWrong – resets only wrong answers in the activity.
Properties common to all modules
Each module has a number of various properties displayed and edited in the Module
Properties Area. The properties and their values differ depending on the module and its
functions. However, some of the properties are the same for all modules:
•
background/module background,
•
border/module border/outline,
•
width,
•
height,
•
position coordinate X,
•
position coordinate Y.
Each property has its value. If a chosen property is editable, the following items are displayed
next to its name:
•
a button unrolling a drop-down list:
•
a button displaying a property editing window:
•
an editing area where numerical values are to be inserted:
© Young Digital Planet 2009
27
LEO Course Editor – User Manual
Background
The Module Background has the following values:
•
no background,
•
solid,
•
gradient fill:
By choosing the solid option, the module background is filled with a regular colour chosen
from the colour palette window, displayed after clicking on the button next to the property's
name:
© Young Digital Planet 2009
28
LEO Course Editor – User Manual
By choosing the gradient fill, the module background is filled with a smooth tonal passing
between at least two colours. The type of the gradient fill may be as follows:
•
noise,
•
checkerboard,
•
blur,
•
glass Bevel,
•
weave.
The gradient fill's editing window is displayed after clicking on the button next to the property's
name:
Border
The Module Border has the following values:
•
no border,
•
empty,
•
line,
•
raised bevel,
© Young Digital Planet 2009
29
LEO Course Editor – User Manual
•
lowered bevel,
•
rounded:
After choosing the line, raised bevel, lowered bevel or rounded options, an editing window is
displayed where the following values can be defined:
•
line Colour,
•
thickness,
•
margins,
•
show Shadow,
•
highlight,
•
curve radius.
Width and height
The width and height of each module are counted in pixels. Chosen values need to be typed
in suitable editing areas:
© Young Digital Planet 2009
30
LEO Course Editor – User Manual
Position coordinates X and Y
The position coordinates X and Y are also measured in pixels. Suitable values need to be
typed in editing areas:
More detailed data concerning the position of modules are found in the Module Properties
Area, in the "Position" tab:
Creating a course
To create a course:
•
choose Course > Create New Course from the command menu,
•
in the "General" tab fill in the data for the course:
— Course Name,
— Course ID,
— Duration,
© Young Digital Planet 2009
31
LEO Course Editor – User Manual
— Description,
— Logo,
— Contents File,
— Course structure name,
— My Lesson Template:
•
in the "Resources" tab add course resources, e.g. html, swf files, animations, etc.:
© Young Digital Planet 2009
32
LEO Course Editor – User Manual
•
in the "Services" tab add special services to the course:
•
to save the course, click OK.
Creating table of contents
To create table of contents:
•
choose Course > Edit Contents from the command menu,
•
right-click in the editing window in order to display the context menu,
•
click "Insert":
© Young Digital Planet 2009
33
LEO Course Editor – User Manual
•
in the "Add New" window, in the "Name" area write the name of a folder with the
"Folder" option marked:
•
click OK,
•
right-click on the newly created folder,
•
click "Insert",
•
in the "Add New" window, in the "Name" area write the name of a page with the
"Page" option marked:
© Young Digital Planet 2009
34
LEO Course Editor – User Manual
•
click OK,
•
mark the page on the tree structure and click the button next to "Path",
•
navigate to the course page file,
•
click Open,
•
click OK.
Creating a simple learning unit
To create a simple learning unit:
•
choose the Learning unit > New simple learning unit from the command menu,
•
in the "General" tab write the title of the lesson in the "Learning unit title" area,
•
below, in the "Page template path" area choose the address of the navigation panel,
•
add a chosen number of pages by clicking on the long Add page button,
•
click on the "Page path" area next to each next course page and click on the
button,
•
choose paths for the pages,
•
click on the "Page title" area next to each next course page and click on the
button
to write page titles,
•
click on the remaining areas in order to finish defining the course pages,
•
navigate to the rest of the tabs to define additional lesson properties,
•
click OK:
© Young Digital Planet 2009
35
LEO Course Editor – User Manual
Editing presentation modules
Text
Text is a module used for editing texts, inserting them in a page and creating exercises based
on the text.
The main functions of the Text module are as follows:
•
creating and editing instructions to exercises,
•
editing longer texts,
•
inserting links to web pages or files,
•
inserting and editing ordered and unordered lists,
•
creating and editing exercises based on filling in gaps in a text,
•
creating and editing exercises based on identifying and marking words or fragments of
a text.
To insert a text in a page:
•
choose the Text icon from the module menu,
•
insert the module in a page, adjust its size and position,
•
click on the button next to the "Text" property in the Module Properties Area or press
the F3 button on your keyboard in order to display the editing window,
•
type in and format the text,
© Young Digital Planet 2009
36
LEO Course Editor – User Manual
•
click OK.
To insert a link to a web page or a file:
•
insert the Text module in a page and adjust its parameters,
•
open the module's editing window,
•
type in and format the text,
•
mark the fragment of the text which is to become a link,
•
right-click on the marked fragment and choose the Insert URL option,
•
right-click on the created link and choose the URL Properties option,
•
in the "General" tab type in the www address or choose a file by clicking on the button
next to the editing area,
•
in the "Mouse-over" tab define the link's properties (colour and font),
•
click OK.
To insert an ordered or an unordered list:
•
insert the Text module in a page and adjust its parameters,
•
open the module's editing window,
•
right-click inside the editing area,
•
choose Insert Ordered List or Insert Unordered List option,
•
click OK.
To create an exercise based on filling in gaps in a text:
•
choose the Container icon from the module menu,
•
insert the module in a page, adjust its size and position,
•
choose the Text module and insert it inside the container,
•
adjust the Text module's size,
•
in the editing area, type a text and mark a word or fragment that is to become a gap,
•
right-click on the marked fragment and choose the Insert Gap option,
•
right-click on the created gap and choose the Gap Properties option,
•
in the "textPane" tab choose a gap exercise type:
— editable,
— dropdown,
— image dropdown,
— draggable,
•
define the rest of the properties for the chosen exercise type,
•
in the "sizePane" tab define the size of the gaps,
•
in the "feedbackPane" tab define the feedbacks' conditions,
•
click OK.
© Young Digital Planet 2009
37
LEO Course Editor – User Manual
To create an exercise based on identifying and marking words or fragments of texts:
•
choose the Container icon from the module menu,
•
insert the module in a page, adjust its size and position,
•
choose the Text module and insert it inside the container,
•
adjust the Text module's size,
•
in the editing area, type a text and mark a fragment that is to be identified and marked
in the exercise,
•
right-click on the marked fragment and choose the Insert Identification option,
•
right-click on the created identification and choose the Identification Properties option,
•
in the "Identification" tab define the identification properties,
•
in the "Feedback" tab define the feedbacks' conditions,
•
click OK.
Below follows an example of text editing in LEO Course Editor:
© Young Digital Planet 2009
38
LEO Course Editor – User Manual
Shape
Shape is a module used for inserting and editing various types of shapes – polygons, lines,
text, etc. – in a course page.
To insert a shape in a page:
•
choose the Shape icon from the module menu,
•
insert the module in a page, adjust its size and position,
•
in the Module Properties Area click on the button next to the "Shape" property,
•
in the editing area define the shape type:
— h-line,
— v-line,
— triangle,
— rectangle,
— polygon,
— circle,
— text,
•
define the final shape of a chosen figure by choosing from the below-mentioned
options:
— rotate,
— scale,
— h-scale,
— v-scale,
— h-skew,
— v-skew,
— round corners,
•
click on OK.
The Shape module has a few interesting features which can be defined in the Module
Properties Area:
•
Show Outline – choosing this option gives a shape an outline,
•
Outline Neon Effect – choosing this option gives the outline a neon-like look,
•
Show Shadow – choosing this option activates a shadow in the down-right corner of
the figure,
•
Keep Aspect Ratio – checking this option makes it possible to change the size of a
shape and preserve its proportions (all sides will be enlarged or minimized equally):
© Young Digital Planet 2009
39
LEO Course Editor – User Manual
Picture Player
Picture Player is a module used for inserting drawings, illustrations and pictures in jpg
formats as well as illustrations and animations in swf format in a course page.
To insert a drawing, illustration, picture or animation in a page:
•
choose the Picture Player icon from the module menu,
•
insert the module in a page and adjust its position,
•
choose a file, which is to be displayed in a page, by clicking on the catalogue icon
next to "Image" property in the Module Properties Area,
•
after choosing a proper file, click Open.
To link a file to the Picture Player module:
•
insert the Text module in a page and adjust its position,
•
choose a file which is to be displayed in a page, e.g. a button's icon,
•
choose a file, which is to be displayed after clicking on the module (e.g. a button's
icon), by clicking on the catalogue icon next to "Hyperlink" in the Module Properties
Area,
•
after navigating to a proper file, click Open.
© Young Digital Planet 2009
40
LEO Course Editor – User Manual
Tabbed Sheet
Tabbed Sheet is a module used for inserting tabs in which text, graphics or exercises can be
added. This module can work as independent pages, in which exercises can be inserted, or as
an integral part of a page where tabs are used for displaying longer texts, a few pictures,
multi-level exercises, etc.
To insert tabs in a page:
•
choose the Tabbed Sheet icon from the module menu,
•
insert the module in a page and adjust its position,
•
type in the number of tabs next to the "Number of Panels" property in the Module
Properties Area,
•
click on the Customize button in the Module Properties Area in order to define such
properties as:
— tab labels (arrows, images, text),
— tab placement (top, bottom, left, right),
— tab alignment (left, right, center),
— distance between tabs.
To insert text, graphics or exercise in tabs:
•
click on an appropriate tab on the tree structure in the Page Structure Area,
•
insert the chosen module (Text, Picture Player and/or other exercise module),
•
do the same with the rest of the tabs.
Action Button
Action Button is a module used for inserting function buttons in a page:
•
check – starts the exercise check mode,
•
video – starts a video,
•
sound – plays a sound (most often a single word, sentence, etc.),
•
question – starts help,
•
exclamation – important information,
© Young Digital Planet 2009
41
LEO Course Editor – User Manual
•
curiosity – shows additional, interesting material,
•
text – displays a pop-up with a text,
•
window – opens an additional window,
•
left – shows the direction for moving on course pages,
•
right – shows the direction for moving on course pages,
•
up – shows the direction for moving on course pages,
•
down – shows the direction for moving on course pages,
•
vocabulary – opens a vocabulary tool,
•
do – suggests that a certain thing should be done,
•
microphone – suggests that a student should record their own voice,
•
cassette – plays a sound (most often longer speeches, songs, etc.),
•
print – prints a text,
•
solid – displays a (mathematical) figure filled with colour,
•
stop rotating – stops a rotating picture,
•
wireframe – displays a (mathematical) transparent figure,
•
zoom in – zooms in a picture,
•
zoom out – zooms out a picture,
•
translate – opens a translation,
•
map 1 – displays a (world) map,
•
map 2 – displays a map,
•
biography – opens a pop-up with a biography of a certain person,
© Young Digital Planet 2009
42
LEO Course Editor – User Manual
•
picture – displays an illustration,
•
speaker – plays a sound (smaller icon than the sound button),
•
grammar – displays a window with grammar explanations,
•
sonolab – displays a window with parameters of a recorded voice.
To insert a button in a page:
•
choose the Action Button icon from the Module menu,
•
insert the module in a page and adjust its position,
•
click on the catalogue icon next to the "FramePath" property in order to define the
looks of the button (choose a suitable swf file),
•
click on the catalogue icon next to the "Hyperlink" property in order to choose a file
which will be displayed after clicking on the button.
Vocabox
Vocabox is a module used for creating lists with new vocabulary from a course page. There is
a possibility of adding sound files with pronunciation as well as translations of elements from
the list.
To create a list with vocabulary:
•
choose the Vocabox icon from the Module menu,
•
insert the module in a page, adjust its size and position,
•
click on the Customize button in the Module Properties Area,
•
in the "Items" tab type in words that are to be in the list,
•
click on the Browse button and choose a sound file for each word,
•
in the "Layout" tab define the layout of the vocabulary list,
•
click OK.
To add translations e.g. to the elements of the Vocabox list:
•
click on the Translations Editor button in the Button menu,
•
choose the Vocabox catalogue in the window,
•
mark a word by clicking on it,
•
type in the translation in the text window below:
© Young Digital Planet 2009
43
LEO Course Editor – User Manual
•
click OK.
Chart
Chart is a module used for inserting and editing charts.
To create a chart:
•
choose the Chart icon from the Module menu,
•
insert the module in a page and adjust its position,
•
click on the Customize button in the Module Properties Area,
•
define the looks and contents of the chart in the editing window:
— the number of lines and columns,
— the distance between the lines and columns,
— the type of frame and fill,
— the type of cells,
— the type of font,
and clicking on any chart cell, define the properties of a single cell,
•
click OK.
© Young Digital Planet 2009
44
LEO Course Editor – User Manual
Media Player
Media Player is a module used for inserting and playing sound and video files.
To insert a sound or video file in a page:
•
choose the Media Player icon from the Module menu,
•
insert the module in a page and adjust its position,
•
click on the Customize button in the Module Properties Area,
•
in the "Tracks" tab click on the Add button to choose the sound or video file,
•
in the "Action Button" tab choose the type of button from the drop-down list on the
right and click Add,
•
click OK.
The "Action Button" tab enables the user to add the following buttons:
•
Play,
•
Play/Pause,
•
Play/Stop,
•
Stop,
•
Full Screen,
•
Record/Stop,
•
Next,
•
Previous.
Dialogue
Dialogue is a module used for playing dialogues on course pages. It also enables the user to
record dialogues read with their own voice.
The module consists of the following elements:
•
the Play icon,
•
the Record icon,
•
the Play Me icon,
•
the list of the dialogue's participants,
•
the list of utterances made by the dialogue's participants.
To insert a dialogue in a course page:
© Young Digital Planet 2009
45
LEO Course Editor – User Manual
•
choose the Dialogue icon from the Module menu,
•
insert the module in a page, adjust its size and position,
•
click on the Customize button in the Module Properties Area,
•
in the "Persons" tab click on the Add button (each click is equivalent to one dialogue
participant),
•
mark each participant in turns and write their names below,
•
in the "Column Panel" tab click on the Add button,
•
click on the "Person" field and choose the first dialogue participant from the dropdown list,
•
below click on the button next to the "Track" field and choose a sound file for the first
participant,
•
in the text editing window below type in text for the first participant,
•
click on OK.
Map module
Map module is a module used for inserting maps in course pages with the help of zoom
option.
To insert a map in a course page:
•
choose the Map module icon from the Module menu,
•
insert the module in a page, adjust its size and position,
•
adjust the size of the yellow element ("display") situated inside the module – the map
will be displayed inside this element:
•
mark the module on the tree structure and click on the catalogue icon next to the Map
source property in the Module Properties Area,
© Young Digital Planet 2009
46
LEO Course Editor – User Manual
•
choose an appropriate file and click Open,
•
mark each of the module's elements in turn ("zoom_in", "zoom_out" and "no_zoom")
in the Page Structure Area and click on the catalogue icon next to the FramePath
property in the Module Properties Area in order to define the looks of the abovementioned buttons,
•
after choosing appropriate files click Open.
Math module
Math module is a module used for creating mathematical exercises, editing mathematical
symbols and presenting mathematical operations.
To insert a mathematical operation in a course page:
•
choose the Math module icon from the Module menu,
•
insert the module in a page, adjust its size and position,
•
click on the Customize button in the Module Properties Area,
•
in the "General Settings" tab, in the "Expression" editing field, type in a mathematical
operation (see: Defining mathematical expressions: below),
•
click on the Add button situated above (the operation will be displayed in the "Math
Expressions" field),
•
click OK:
© Young Digital Planet 2009
47
LEO Course Editor – User Manual
© Young Digital Planet 2009
48
LEO Course Editor – User Manual
To create a mathematical exercise:
•
insert Math module in a page and adjust its parameters,
•
open the modules editing window,
•
type in a mathematical operation with a gap/gaps (see: Defining mathematical
expressions: below),
•
click OK.
Defining mathematical expressions:
•
each mathematical operation written in the editing window must end with a semicolon
(;),
•
basic mathematical symbols should be written in the following way:
— addition (+),
— subtraction (–),
— multiplication (*),
— division (/),
— equals (=),
— greater-than, less-than (<, >)
— greater-than or equal to, less-than or equal to (<=, =<, =>, >=),
— comma in a fraction (,),
•
hidden multiplication (*&),
•
the root of a – root(a), the n-th root of a – root(a,n),
•
modified comma symbol (,&),
•
space (_),
•
hidden brackets (|),
•
gap – gap(symbol,name_of_the_gap), e.g. gap(3,b), where "3" is the correct
answer, and "b" is the name of the gap,
•
raising to the power (^),
•
subscript (#),
•
absolute value – abs(x),
•
array – array((a,b,c),(1,2,3)),
•
bold letters – bold(expression).
Examples:
a+b–c;
© Young Digital Planet 2009
49
LEO Course Editor – User Manual
b*c;
b*&c;
a/b;
A*&(1,&2);
|a+b|/c=d;
a^b=c;
a#b=c;
root(a);
root(a,n);
abs(x);
gap(2,a)+gap(1,b)=3;
Plot
Plot is a module used for creating exercises and presentations based on a coordinate system
with X and Y axes.
To insert a plot in a page:
•
choose the Plot icon from the Module menu,
•
insert the module in a page, adjust its size and position,
•
click on the Customize button in the Module Properties Area,
•
in the "Coordinate System" tab define the properties for the X and Y axes (such as
grid density, colour, thickness and length of the axis, etc.),
•
in the "Functions" tab click on the Add Function button and type in the function's
formula in the "Adding Function" field, click OK,
© Young Digital Planet 2009
50
LEO Course Editor – User Manual
•
in the same tab you can add point to the plot, define the looks of the plot, etc.,
•
in the "Exercises" tab choose the exercise type e.g. for the previously defined function
and define the correct answer,
•
click OK.
The exercise types based on functions:
•
Presentation – the module is running in the presentation mode (static or interactive)
and no verifiable exercises for learners are available,
•
Selecting Function Plot – the exercise is based on defining several function plots and
specifying which one is the correct answer,
•
Selecting Points on Plot – for each plot you should define the number of points that
learners need to select,
•
Selecting Range On X Axis – on the X axis you need to select range,
•
Selecting Range On Y Axis – on the Y axis you need to select range,
•
Selecting Points On X Axis – learners select point or points on X axis,
•
Selecting Points On Y Axis – learners select point or points on Y axis,
•
Formula's Coefficients Modification – the function's coefficients should be modified in
such a way that the function fulfils the requirements described in the exercise,
•
Drawing linear function plot – select two points on the grid of different coordinates
which designate line intersecting with the points,
•
Marking multiple segment on X axis – 1 to 10 segments should be marked on the X
axis ,
•
Function diagram dragging – learners move the function diagram to fulfill the condition
assumed in the activity,
•
Marking points in the coordinate system – learners' aim is to mark a specified point or
points within the specified function diagram (which may be invisible) in the coordinate
system.
In-page Report
In-page Report is a module used for displaying percentage results.
To create a report page with percentage results:
•
choose the In-page Report module and insert it on the page or inside the Container,
© Young Digital Planet 2009
51
LEO Course Editor – User Manual
•
in the Module Properties Area choose the type of reported objects from a drop-down
list next to the "Activities included in Report" property:
— Report Pages (results from individual pages),
— Report Activities (results from individual exercises),
•
below choose the type of presented data:
— Percentage result,
— Points – done,
— Points – to do,
— Points – errors,
— Average percentage result,
— Hints – only Container,
— Mistakes – only Container,
•
below choose the number of object in the report corresponding with the number of
objects on course pages:
© Young Digital Planet 2009
52
LEO Course Editor – User Manual
Sync Text
Sync Text is a module used for displaying the transcription of a sound file.
To insert a Sync Text module on page:
•
Choose the Sync Text icon from the Module menu,
•
insert the module in a page, adjust its size and position,
•
mark the module on the tree structure in the Page Structure Area,
and click on the button next to the "Sounds/Texts" property in the Module Properties Area in
order to add sound files and insert their transcriptions,
•
in the editing area click on the Add button:
•
click on a button next to the "Sound" editing field in order to add an appropriate sound
file,
•
click on a button situated below; it will open the text editing window,
© Young Digital Planet 2009
53
LEO Course Editor – User Manual
•
click OK.
Actions' player
Actions' player is a module used for playing a sequence of actions, e.g. showing a film,
switching over to the next tab, etc. This function is especially useful in presentations because
you can programme a script for individual pages and play actions when it is needed.
To insert an Action player module on page:
•
Choose the Actions' player icon from the Module menu,
•
insert the module in a page, adjust its size and position,
•
mark the module on the tree structure in the Page Structure Area:
and click next to the "Action list" property in the Module Properties Area in order to add and
define actions for the chosen module.
Scrolling Container
Scrolling Container is a module used for inserting course content into containers with
scrollbars.
To insert a container with scrollbars:
•
choose the Scrolling Container icon from the Module Menu,
•
insert the module in a page, adjust its size and position,
•
in the Module Properties Area click on the four catalogue icons one after another in
order to choose skins for the scrollbars:
© Young Digital Planet 2009
54
LEO Course Editor – User Manual
To insert content in a scrolling container:
•
choose e.g. the Text module and place it inside the Scrolling Container module in the
Page Editing Area or in the tree structure in the Page Structure Area,
•
the size of the recently inserted module is automatically adjusted to the size of the
Scrolling Container module:
Arrow
Arrow is a module used for inserting and editing arrows in course pages.
To insert an arrow in a course page choose the Arrow icon from the Module Menu, insert it in
a page, adjust its size and position.
To define the arrow's looks go to the Module Properties Area and define the following:
•
Colour,
•
Direction:
— down right,
— down left,
— up right,
— up left,
•
Ending Style:
© Young Digital Planet 2009
55
LEO Course Editor – User Manual
— default,
— rounded,
— pointed,
•
Thickness:
Page-in-Page
Page-in-Page is a module used for inserting pages in a panel/navigation page of a course.
Thanks to that, single pages of a lesson will be situated on the same panel, and switching
between them will be ensured by a page switcher (see: Simple page switcher).
To create a panel/navigation page:
•
open a new page and save it as panel.page or navigation.page,
•
choose the Page-in-page icon from the Module Menu and insert it in a page,
•
enter the module's size in the Module Properties Area:
— the size of the module cannot be smaller than the size of the pages you will
add to the panel page,
— for X and Y coordinates you need to enter 0,0,
— use the block function to block the changes in the module position,
•
choose the Simple page switcher icon from the Module Menu and insert it in the page.
Animated Panel
Animated Panel is a module used for inserting elements, such as pictures, texts, films or
sounds, in a panel which is unrolled with the help of a button.
© Young Digital Planet 2009
56
LEO Course Editor – User Manual
To create a panel with content unrolled with the help of a button:
•
choose the Animated Panel icon from the Module Menu,
•
insert the module in a page, adjust its size and position,
•
mark the Container module on the tree structure in the Page Structure Area or in the
Page Editing Area:
•
insert the following modules in the Container: Picture Player, Text, Media Player, Map
module, etc.:
In-Page Report-Progress
In-Page Report-Progress is a module used for displaying reports in the form of a progress
bar.
To create a report page with a progress bar:
•
choose the In-Page Report-Progress module and insert it in the page or inside the
Container,
•
in the Module Properties Area define the following properties:
© Young Digital Planet 2009
57
LEO Course Editor – User Manual
— bar background colour,
— frame colour,
— maximum, minimum number of points,
— position,
— progress bar alignment:
o horizontal,
o vertical,
— progress thickness,
— presented data; see: In-page Report),
— activities included in report; see: In-page Report),
— the number of object in the report that corresponds with the number of object
in course pages (see: In-page Report).
Simple page switcher
Simple page switcher is a module used for inserting a page switcher in a panel/navigation
page of a course. The switcher makes it possible to switch between lesson pages.
The switcher is inserted in a panel/navigation page together with the Page-in-page module.
After inserting the module in a page and adjusting its position, define the following properties
for the switcher in the Module Properties Area:
•
show page numbers,
•
"next" and "previous" buttons,
•
"go to first page" and "go to last page" buttons,
•
title,
•
learning unit title,
and choose icons for the following buttons:
•
"next" after the last page,
•
"previous" for the first page.
© Young Digital Planet 2009
58
LEO Course Editor – User Manual
Editing exercise modules
Container
Container is a module used for inserting exercises in course pages. Each exercise module
should be inserted in the Container module. It makes it possible to count the results of the
exercises. First you need to insert the Container in a page, next adjust its properties, and then
insert a chosen exercise module in it.
After inserting the module in a page, define the following properties:
•
Active – this property should be checked if inside the container there is an exercise
whose results are to be counted in the report,
•
Container id – the unique name of the container,
•
Feedback Button – if checked, it activates a feedback button,
•
Feedback Pane – if checked, it activates an area for the feedback's text,
•
Feedback Sound – which defines the feedback's sound,
•
Work Mode – which defines the container's work mode:
— standard,
— mark wrong,
— only correct,
— mark correct,
— mark wrong and correct.
In the Module Properties Area or in the "Feedbacks" tab in the same area you can
define the following feedbacks:
•
OnSetShowAnswers – this feedback is displayed after clicking the "show answers"
button,
•
OnClearShowAnswers – this feedback is displayed after unclicking the "show
answers" button,
•
OnReset – this feedback is displayed after clicking the "reset" button,
•
OnSetShowErrors – this feedback is displayed after clicking the "show errors" button,
•
OnClearShowErrors – this feedback is displayed after unclicking the "show errors"
button,
•
OnCompletedWrong – is used to define actions that are displayed when an exercise
is completed and contains errors/incorrect answers,
© Young Digital Planet 2009
59
LEO Course Editor – User Manual
•
OnCompleted – is used to define actions that are displayed when an exercise is
completed,
•
OnSetMarkCorrect – this feedback is displayed after clicking the "mark correct"
button,
•
OnClearMarkCorrect – this feedback is displayed after unclicking the "mark correct"
button,
•
OnResetWrong – this feedback is displayed after clicking the "reset wrong" button,
•
OnGoodAnswer – is used to define actions that are displayed when a correct answer
is given,
•
OnWrongAnswer – is used to define actions that are displayed when an incorrect
answer is given.
Additional options can be defined and modified in an editing window displayed after
clicking on the Customize button in the "Properties" tab in the Module Properties Area:
•
in the "Action Button" tab you can add one or more buttons to the module,
•
the "Result Viewer" tab is used to add check buttons to the module,
•
the "Feedbacks" tab is used to define different types of feedback displayed after
giving an answer,
•
in the "Result Page" tab you can create a button which will bring you to a result page,
•
the "Convert results" tab is used for converting the results from the container into
other scales.
Source List
Source List is a module which constitutes a part of an exercise based on inserting text or
graphical elements in gaps.
To create a list with elements to be inserted in gaps:
•
choose the Container icon from the Module Menu,
•
insert the module in a page, adjust its size and position,
•
choose the Source List module and insert it inside the Container,
•
adjust the size of the Source List module,
•
in the Module Properties Area next to the "Type" property choose the type of elements
that are to be placed in the list:
— text,
© Young Digital Planet 2009
60
LEO Course Editor – User Manual
— images,
•
click on the Customize button in the same area,
•
in the "Items" tab in the editing window (which may be different, depending on the
elements of the list) define fragments of text or illustrations:
•
in the "Layout" tab define the position of the elements in the list,
© Young Digital Planet 2009
61
LEO Course Editor – User Manual
•
click OK.
Multiple Choice
Multiple Choice is a module used for creating and editing exercises that are based on
choosing answers by marking one or more buttons.
With the help of the Multiple Choice module you can create the following types of
exercises:
•
single correct answer:
•
single correct answer per cell:
•
many correct answers:
© Young Digital Planet 2009
62
LEO Course Editor – User Manual
To create an exercise that is based on choosing correct answers by marking them:
•
choose the Container icon from the Module Menu,
•
insert it in a page, adjust its size and position,
•
choose the Multiple Choice module and insert it inside the Container,
•
adjust the size of the Multiple Choice module,
•
click on the Customize button in the Module Properties Area,
•
in the "Layout" tab choose the position of buttons, space between the buttons and
space between text cells,
•
below define the colours and size of the buttons or select a skin for them by choosing
an external file,
•
in the "Exercise" tab define the following:
— exercise type,
— number of text cells,
— number of buttons per cell,
— if the buttons are to have captions,
— text that is to be displayed in the exercise,
— height of text cells,
— correct answers,
— random position of the text items in the exercise,
•
in the "Feedback" tab click on the "number 1" button and click Add,
•
from the drop-down list below choose the type of feedback:
— Text,
— URL,
— Scriptable,
— Empty,
— Compound,
•
below define the chosen type of feedback,
•
follow the same steps with all other buttons,
© Young Digital Planet 2009
63
LEO Course Editor – User Manual
•
click OK.
Connection
Connection is a module used for creating and editing exercises that are based on connecting
elements arranged in columns. These elements can be text cells (single words, sentences or
longer fragments) or illustrations.
To create an exercise that is based on connecting elements from two columns:
•
choose the Container icon from the Module Menu,
•
insert the module in a page, adjust its size and position,
•
choose the Connection module and insert it inside the Container,
•
adjust the size of the Connection module,
•
click on the Customize button in the Module Properties Area,
•
in the editing window in the "Connections" tab define the following properties of the
exercise:
— vertical or horizontal layout:
— number of items in columns/rows,
— possibility of single or multiple connections,
— height of cells,
— text in cells,
•
in the "Feedback" tab define the exercise's feedbacks,
© Young Digital Planet 2009
64
LEO Course Editor – User Manual
•
in the "Colours" tab define the colours of lines connecting the items and the colours of
buttons,
•
click OK.
Jigsaw
Jigsaw is a module used for creating exercises that are based on arranging words, phrases or
graphical items in the correct order.
To create an exercise that is based on arranging items in the correct order:
•
choose the Container icon from the Module Menu,
•
insert the module in a page, adjust its size and position,
•
choose the Jigsaw module and insert it inside the Container,
•
adjust the size of the Jigsaw module,
•
in the Module Properties Area next to the "Type" property choose the type of elements
that are to be arranged in the exercise:
— text,
— images,
•
click on the Customize button in the same area,
•
in the "Items" tab in the editing window (which may be different, depending on the
elements of jigsaw) define the fragments of text or illustrations:
© Young Digital Planet 2009
65
LEO Course Editor – User Manual
•
in the "Layout" tab define the following properties:
— adjacent to border (word wrap),
— orientation,
— vertical text alignment,
— height,
— width,
— item alignment,
— adjust to item size,
— start with random item position,
— space between items,
•
click OK.
Labeling
Labeling is a module used for creating exercises that are based on labelling illustrations with
corrects labels.
To insert an exercise with labels:
•
choose the Container icon from the Module Menu,
•
insert the module in a page, adjust its size and position,
•
choose the Labeling module and insert it inside the Container,
•
adjust the size of the Labeling module,
•
click on the Customize button in the Module Properties Area,
•
in the "Settings" tab in the "Gaps" field type in the name of a gap and click on the Add
button,
•
in the "Correct Answers" field type the correct answer and press Enter on the
keyboard,
•
repeat the operation for each gap,
•
click OK.
Marking
Marking is a module used for creating exercises that are based on marking check boxes that
may be situated e.g. under pictures.
© Young Digital Planet 2009
66
LEO Course Editor – User Manual
To insert check boxes to an exercise that is based on marking pictures:
•
choose the Container module from the Module Menu,
•
insert the module in a page, adjust its size and position,
•
choose the Marking module and insert it inside the Container,
•
adjust the size of the Marking module,
•
click on the Customize button in the Module Properties Area,
•
in the "Exercise" tab click on the Add icon button and insert the number of check
boxes,
•
define if marking for each check box should be treated as a correct answer,
•
define the maximum number of possible markings,
•
click OK.
Place the check boxes under the pictures inserted in the page.
Grouping
Grouping is a module used for creating exercises that are based on grouping elements in
suitable categories.
To create an exercise with grouping elements in categories:
•
choose the Container module from the Module Menu,
•
insert the module in a page, adjust its size and position,
•
choose the Grouping module and insert it inside the Container,
•
insert the size of the Grouping module,
•
click on the Customize button in the Module Properties Area,
•
in the "Areas" tab add a suitable number of areas by clicking on the New button,
•
in the "Items" tab define the number of elements to be grouped and choose an area in
which they are to be displayed in the beginning,
•
in the "Answers" tab define the correct area for each element and click on the "arrow"
buttons between "Wrong Areas" and "Correct Areas",
•
click OK,
•
mark one of the areas in the Page Structure Area,
•
in the Module Properties Area define the looks of each area:
— background,
© Young Digital Planet 2009
67
LEO Course Editor – User Manual
— border colour,
— border shape,
— border thickness,
— item position:
o
o
o
o
o
o
o
o
o
o
o
o
none,
grid,
regular grid,
radial,
raster, one row, left to right,
raster, one row, right to left,
raster, one column, top to bottom,
raster, one column, bottom to top,
diagonal, top-left corner,
diagonal, top-right corner,
diagonal, bottom-left corner,
diagonal, bottom-right corner.
Calculations
Calculations is a module used for presenting simple mathematical operations and creating
exercises based on these operations.
To insert a simple mathematical operation in a page:
•
choose the Container module from the Module Menu,
•
insert the module in a page, adjust its size and position,
•
choose the Calculations module and insert it inside the Container,
•
click on the Customize button in the Module Properties Area,
•
define the module in the editing window in the "Exercises" tab,
© Young Digital Planet 2009
68
LEO Course Editor – User Manual
•
in the "Layout" tab define the looks of the operation,
•
click OK.
To create a simple mathematical exercise:
•
choose the Container module from the Module Menu,
•
insert the module in a page, adjust its size and position,
•
choose the Calculations module and insert it inside the Container,
•
click on the Customize button in the Module Properties Area,
•
define the exercise in the editing window in the "Exercises" tab,
•
make sure that the "Auto Calculate" option is NOT checked:
© Young Digital Planet 2009
69
LEO Course Editor – User Manual
•
in the "Layout" tab define the looks of the operation,
•
click OK.
SonoLab
SonoLab is a module used for creating pronunciation exercises that are based on recording
voice and comparing it with the pronunciation from attached sound files presented on a
diagram.
The SonoLab module consists of the following elements:
•
time chart,
•
spectrogram,
•
spectrogram 3d,
•
intonation,
•
media player,
•
chart of original sound,
•
chart of recorded sound,
•
progress of original sound,
© Young Digital Planet 2009
70
LEO Course Editor – User Manual
•
progress of recorded sound:
To define the properties for each element mark them one after another and go to the Module
Properties Area below.
Paint
Paint is a module used for creating exercises that are based on painting the areas of a picture
with given colours.
To insert an exercise that is based on painting a picture with given colours:
•
choose the Container module from the Module Menu,
•
insert the module in a page, adjust its size and position,
•
choose the Paint module and insert it inside the Container,
•
adjust the size of the Paint module,
•
mark the SWF Image element on the tree structure in order to define the path to a
prepared picture that is to be painted in the exercise,
•
mark the Palette element in order to define the colours that will be used for painting:
© Young Digital Planet 2009
71
LEO Course Editor – User Manual
Color ID
Color ID is a module used for creating exercises that are based on matching colours to the
elements of a text.
To insert an exercise that is based on matching colours to the elements of a text:
•
choose the Container module from the Module Menu,
•
insert the module in a page, adjust its size and position,
•
choose the Color ID module and insert it inside the Container,
•
adjust the size of the Color ID module,
•
mark each element of the module one after the other on the tree structure in the Page
Structure Area and then go to the Module Properties Area below in order to define the
properties for the elements:
© Young Digital Planet 2009
72
LEO Course Editor – User Manual
SpeechRec
SpeechRec is a module used for creating exercises in which students record their own
pronunciation.
The module can work in two modes:
•
students practise the pronunciation of given phrases,
•
students practise the pronunciation of the phrases which they type in the exercise.
Word Jumble
Word Jumble is a module used for creating exercises that are based on dragging words from
a list, inserting them in an exercise and arranging the words in the right order.
To insert an exercise based on the Word Jumble module:
•
choose the Container module from the Module Menu,
•
insert the module in a page, adjust its size and position,
•
insert the Source List module with text or graphical elements,
•
choose the Word Jumble module and insert it inside the Container,
•
adjust the size of the Word Jumble module,
•
define its properties in the Module Properties Area.
Source Text
Source Text is a module used for creating source lists for other exercises. Here, it is possible
to drag longer fragments of texts.
To create a source list with longer fragments of texts:
•
choose the Container module from the Module Menu,
•
insert the module in a page, adjust its size and position,
•
choose the Source Text module and insert it inside the Container,
•
adjust the size of the Source Text module,
•
in the Module Properties Area, next to the "Text" property click on the Edit button,
© Young Digital Planet 2009
73
LEO Course Editor – User Manual
•
copy a text that is to be displayed in the exercise and then click on the "Paste" icon in
the editing window,
•
mark a fragment of the text and click on the
•
click OK.
icon,
Counters
Counters is a module used for scripting pages and modules that are on a page. Depending
on the conditions defined for the counter, the module can send commands to other modules
that are on the page to do certain operations.
Hidden Words
Hidden Words is a module used for creating exercises that are based on finding hidden
words from among scattered letters in a rectangle.
To create an exercise with a rectangle filled with scattered letters from which words can
be built:
•
choose the Container module from the Module Menu,
•
insert the module in a page, adjust its size and position,
•
choose the Hidden Words module and insert it inside the Container,
•
adjust the size of the Hidden Words module,
•
in the Module Properties Area click on the Words button next to the "Words layout"
property,
•
in the editing window define the exercise:
— number of cells in the "Size" field,
— words that are to be found from among the scattered letters in the "Words"
field,
— in the "Unused" area you can clean the rectangle (the Reset button), fill it with
random letters (the Fill button) or edit the rectangle filled with letters (the
Phrase button):
© Young Digital Planet 2009
74
LEO Course Editor – User Manual
•
click on OK.
Editing
Editing is a module used for creating exercises in which students fill in empty spaces with
text.
To create an exercise based on the Editing module:
•
choose the Container module from the Module Menu,
•
insert the module in a page, adjust its size and position,
•
choose the Editing module and insert it inside the Container,
•
adjust the size of the Editing module,
•
in the Page Structure Area mark the EditBoxCloze element on the tree structure,
•
in the Module Properties Area define the following properties:
— background,
— border,
— text colour,
— text font.
© Young Digital Planet 2009
75
LEO Course Editor – User Manual
Module Jigsaw
Module Jigsaw is a module used for creating puzzles from other active modules.
To create an exercise that is based on arranging modules in the right order:
•
choose the Container module from the Module Menu,
•
insert the module in a page, adjust its size and position,
•
choose the Module Jigsaw module and insert it inside the Container,
•
adjust the size of the Module Jigsaw module,
•
in the Page Structure Area mark the Module Jigsaw, _item* element on the tree
structure,
•
adjust the element's size so that you can insert another module in it,
•
choose a module's icon, e.g. Text or Picture Player,
•
follow the steps for every other element of the Module Jigsaw.
© Young Digital Planet 2009
76