1
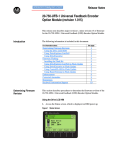
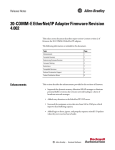
Application note
PowerFlex 525 – USB application
Objective
The purpose of this document is to describe the USB functionality of the PowerFlex 525 and how to work with
the files created by the utility. It serves as an addition to the PowerFlex 525 user manual.
Description
Once the control module is removed from the control section (procedure described in the user manual) you will
find a USB port at the back of the control module.
Once you connect a USB type B cable (i.e. USB printer cable) from the drive to a computer it will open up a
window containing a folder. Depending on the AUTOPLAY settings in Windows the window may not popup
automatically. Change this via Windows Control Panel Autoplay. The files can also be located on the
removable disk in Windows Explorer.
This folder contains a small pdf document with the most common fault code and parameter list as well as the
following executable file.
Double-clicking on the PF52XUSB.EXE file will open the following utility. It allows the users to upload and
download parameter-files and to modify the drive’s firmware. Parameter files are saved with a .p5f file
extension.
Application note
Downloading a file via USB
Click on Download Drive Parameter Data and locate the stored .p5f file. Click on next then download to
complete the action.
The second selection “Download Peripheral…” becomes visible if an optional DeviceNet or Profibus card is
installed.
Application note
Close the download window and the PowerFlex 520-USB application. Disconnect the USB cable and mount the
control module back on the drive to start operating.
If the stored parameterfile had been uploaded from a differently sized drive a “mismatch warning” will popup.
Click OK to continue.
Uploading a file via USB
Tick the box for Upload Drive parameter data then click Next. Browse to the folder where the file needs to
stored and enter a name, then press save. The second selection “Upload peripheral…” becomes visible if an
optional DeviceNet or Profibus card is installed.
Then click Upload.
Application note
Click Close to complete the action.
Importing-Exporting a .p5f file in Connected Components Workbench
There are 2 ways to import a stored .p5f file in Connected Components Workbench CCW (>V3.x).
1. Select Import Drive File from the Tools pull down menu. Browse to the file location, select the file and
click open.
This will open the .p5f file for editing.
Application note
2. Select Import from the drive properties window. Double click on a drive in the Project Organizer then
open the drive properties window as shown below.
Select the USB import tab then click Import.
Application note
You will be prompted to Import Entire Device (Drive and options) or Import Only Port 0 (Drive only). The
import action will overwrite the existing drive configuration in the project organizer.
All the parameters can be edited when the file is opened in CCW. Once all the modifications have been
done the export function can be used to store the new file as a .p5f file. Go to the drive properties,
select the USB Import/Export. Click on Export then browse to the location where you want to store the
file and click save.
Application note
Importing/exporting a .p5f file in RSLogix 5000 or Studio 5000
Open the drive module Properties window once a drive is added to the controller IO configuration. Click on the
Drive tab and click on the Properties button.
The same view, as shown on the Connected Components Workbench section, will be opened. Follow the same
steps for Upload or download as described previously.
Application note
Flash the firmware using the USB application
Click on Flash
Select the right firmware version (V1.003.80 = original release) and click Next.
Firmware files can be downloaded from http://www.ab.com/support/abdrives/webupdate/
Application note
Click Flash to start the flashing process which takes about 6 minutes to complete (using the serial USB
connection).