
1
InterForm A/S
Hyldalvej 11
DK-9541 Suldrup
Denmark
tel:
+45 98 37 80 17
fax:
+45 98 37 87 99
e-mail: [email protected]
[email protected]
web:
2
www.interform400.com
Manual for InterFormNG
Version 2014R09
Docum ent NGE-2014
User Manual for InterForm NG version 2014.R37
Printed in Denm ark 2015
No part of this guide m ay be photocopied or reproduced in any way, except where noted,
without the written consent of Interform A/S.
All the nam es in this m anual are fictional and any resem blance to existing people or firm s is
purely coincidental.
© Copyright Interform A/S 2015. All rights reserved.
AS/400, iSeries , i5 and ‘System i’ are registered tradem arks of the IBM Corporation.
HP-PCL is a tradem ark of Hewlett Packard
All other tradem arks m entioned in this docum ent are registered tradem arks of their respective
owners.
InterForm A/S 3
Table of Contents
Table of Contents. . . . . . . . . . . . . . . . . . . . . . . . . . . . . . . . . . . . . . . . . . . . . . . . . . . . . . . . . . . 4
W hat is new in the 2014 Versions.. . . . . . . . . . . . . . . . . . . . . . . . . .
Designer. . . . . . . . . . . . . . . . . . . . . . . . . . . . . . . . . . . .
E-m ail output.. . . . . . . . . . . . . . . . . . . . . . . . . . . . . . . .
PDF output. . . . . . . . . . . . . . . . . . . . . . . . . . . . . . . . . .
PDF Security Module. . . . . . . . . . . . . . . . . . . . . . . . . .
PCL output. . . . . . . . . . . . . . . . . . . . . . . . . . . . . . . . . .
W orkflow. . . . . . . . . . . . . . . . . . . . . . . . . . . . . . . . . . . .
W eb interface. . . . . . . . . . . . . . . . . . . . . . . . . . . . . . . .
Conversion of Designs/Tem plates. . . . . . . . . . . . . . . .
New Module: JD Edwards EnterpriseOne connector. .
License code is now required. . . . . . . . . . . . . . . . . . . .
4
.
.
.
.
.
.
.
.
.
.
.
.
.
.
.
.
.
.
.
.
.
.
.
.
.
.
.
.
.
.
.
.
.
.
.
.
.
.
.
.
.
.
.
.
.
.
.
.
.
.
.
.
.
.
.
.
.
.
.
.
.
.
.
.
.
.
.
.
.
.
.
.
.
.
.
.
.
.
.
.
.
.
.
.
.
.
.
.
.
.
.
.
.
.
.
.
.
.
.
. 9
. 9
. 9
10
10
10
10
10
11
11
11
Getting Started. . . . . . . . . . . . . . . . . . . . . . . . . . . . . . . . . . . . . . . . . . . . . . . . . . . .
Prerequisites. . . . . . . . . . . . . . . . . . . . . . . . . . . . . . . . . . . . . . . . . . .
Installation . . . . . . . . . . . . . . . . . . . . . . . . . . . . . . . . . . . . . . . . . . . .
Im portant upgrade Inform ation:.. . . . . . . . . . . . . . . .
Installing Java Runtim e Environm ent. . . . . . . . . . . .
Installing Java Runtim e Environm ent on W indows. .
Installing InterForm NG. . . . . . . . . . . . . . . . . . . . . . .
The license code.. . . . . . . . . . . . . . . . . . . . . . . . . . . . . . . . . . . . . . .
The Trail Licence.. . . . . . . . . . . . . . . . . . . . . . . . . . .
Obtain a license. . . . . . . . . . . . . . . . . . . . . . . . . . . .
Alternative way to retrieve technical inform ation. . . .
Install a licence. . . . . . . . . . . . . . . . . . . . . . . . . . . . .
Installed plugins. . . . . . . . . . . . . . . . . . . . . . . . . . . . . . . . . . . . . . . .
Modules for InterForm NG. . . . . . . . . . . . . . . . . . . . . . . . . . . . . . . . .
The PDF Security Module. . . . . . . . . . . . . . . . . . . . .
The TxtToXML Module. . . . . . . . . . . . . . . . . . . . . . .
The JD Edwards Connector Module. . . . . . . . . . . . .
Configuring InterForm NG. . . . . . . . . . . . . . . . . . . . . . . . . . . . . . . . .
Set the language. . . . . . . . . . . . . . . . . . . . . . . . . . . .
Set the m easure unit. . . . . . . . . . . . . . . . . . . . . . . . .
Background im age. . . . . . . . . . . . . . . . . . . . . . . . . .
Revision log.. . . . . . . . . . . . . . . . . . . . . . . . . . . . . . .
Problem solving. . . . . . . . . . . . . . . . . . . . . . . . . . . . . . . . . . . . . . . .
Unable to start the designer - corrupted license. . . .
Unable to start the services.. . . . . . . . . . . . . . . . . . .
Error printing <xxx> docum ent: already printing. . . .
.
.
.
.
.
.
.
.
.
.
.
.
.
.
.
.
.
.
.
.
.
.
.
.
.
.
.
.
.
.
.
.
.
.
.
.
.
.
.
.
.
.
.
.
.
.
.
.
.
.
.
.
.
.
.
.
.
.
.
.
.
.
.
.
.
.
.
.
.
.
.
.
.
.
.
.
.
.
.
.
.
.
.
.
.
.
.
.
.
.
.
.
.
.
.
.
.
.
.
.
.
.
.
.
.
.
.
.
.
.
.
.
.
.
.
.
.
.
.
.
.
.
.
.
.
.
.
.
.
.
.
.
.
.
.
.
.
.
.
.
.
.
.
.
.
.
.
.
.
.
.
.
.
.
.
.
.
.
.
.
.
.
.
.
.
.
.
.
.
.
.
.
.
.
.
.
.
.
.
.
.
.
.
.
.
.
.
.
.
.
.
.
.
.
.
.
.
.
.
.
.
.
.
.
.
.
.
.
12
12
12
12
12
12
13
18
18
18
19
19
20
21
21
21
21
21
21
21
22
22
24
24
24
24
Configuring InterFormNG. . . . . . . . . . . . . . . . . . . . . . . . . . . . . . . . . . .
Configuring via the web interface. . . . . . .
Changing the web interface port num ber.
System Configuration. . . . . . . . . . . . . . . . . . . . . . . . . . . .
General System s Settings.. . . . . . . . . . . .
Setting the log level. . . . . . . . . . . . . . . . . .
User configuration. . . . . . . . . . . . . . . . . . .
Input Configuration. . . . . . . . . . . . . . . . . . . . . . . . . . . . . .
File System Configuration. . . . . . . . . . . . .
Txt to XML Configuration. . . . . . . . . . . . .
.
.
.
.
.
.
.
.
.
.
.
.
.
.
.
.
.
.
.
.
.
.
.
.
.
.
.
.
.
.
.
.
.
.
.
.
.
.
.
.
.
.
.
.
.
.
.
.
.
.
.
.
.
.
.
.
.
.
.
.
.
.
.
.
.
.
.
.
.
.
.
.
.
.
.
.
.
.
.
.
25
25
25
28
28
28
29
30
30
31
Manual for InterFormNG
Version 2014R09
.
.
.
.
.
.
.
.
.
.
.
.
.
.
.
.
.
.
.
.
.
.
.
.
.
.
.
.
.
.
.
.
.
.
.
.
.
.
.
.
.
.
.
.
.
.
.
.
.
.
.
.
.
.
.
.
.
.
.
.
.
.
.
.
.
.
.
.
.
.
.
.
.
.
.
.
.
.
.
.
.
.
.
.
.
.
.
.
.
.
.
.
.
.
.
.
.
.
.
.
.
.
.
.
.
.
.
.
.
.
.
.
.
.
.
.
.
.
.
.
.
.
.
.
.
.
.
.
.
.
.
.
.
.
.
.
.
.
.
.
.
.
.
.
.
.
.
.
.
.
.
.
.
.
.
.
.
.
.
.
.
.
.
.
.
.
.
.
.
.
.
.
.
.
.
.
.
.
.
Database Configuration. . . . . . . . . . . .
Network configuration. . . . . . . . . . . . . .
Enterprise Integration Configuration. . .
Scheduled Trigger Configuration. . . . .
Socket Trigger Configuration. . . . . . . .
Processing. . . . . . . . . . . . . . . . . . . . . . . . . . . . . . . . . .
Transform ZPL to PDF Configuration. .
GS1 Databar Configuration. . . . . . . . . .
Standard Barcode Configuration. . . . . .
Im age Im port Configuration. . . . . . . . .
PCL Configuration. . . . . . . . . . . . . . . . .
PDF Configuration.. . . . . . . . . . . . . . . .
ZPL Configuration. . . . . . . . . . . . . . . . .
Output Configurations. . . . . . . . . . . . . . . . . . . . . . . . . .
Printer configuration. . . . . . . . . . . . . . .
Archive Configuration. . . . . . . . . . . . . .
Em ail Configuration. . . . . . . . . . . . . . . .
.
.
.
.
.
.
.
.
.
.
.
.
.
.
.
.
.
.
.
.
.
.
.
.
.
.
.
.
.
.
.
.
.
.
.
.
.
.
.
.
.
.
.
.
.
.
.
.
.
.
.
.
.
.
.
.
.
.
.
.
.
.
.
.
.
.
.
.
.
.
.
.
.
.
.
.
.
.
.
.
.
.
.
.
.
.
.
.
.
.
.
.
.
.
.
.
.
.
.
.
.
.
.
.
.
.
.
.
.
.
.
.
.
.
.
.
.
.
.
.
.
.
.
.
.
.
.
.
.
.
.
.
.
.
.
.
.
.
.
.
.
.
.
.
.
.
.
.
.
.
.
.
.
.
.
.
.
.
.
.
.
.
.
.
.
.
.
.
.
.
.
.
.
.
.
.
.
.
.
.
.
.
.
.
.
.
.
.
.
.
.
.
.
.
.
.
.
.
.
.
.
.
.
.
.
.
.
.
.
.
.
.
.
.
.
.
.
.
.
.
.
.
.
.
.
.
.
.
.
.
.
.
.
.
.
.
.
.
.
.
.
.
.
.
.
.
.
.
.
.
.
.
.
.
.
.
.
.
.
.
.
.
.
.
.
.
.
.
.
.
.
.
.
.
.
.
.
.
.
.
.
.
.
.
.
.
.
.
.
.
.
.
.
.
.
.
.
.
.
.
.
.
.
.
.
.
32
32
32
32
33
33
33
33
34
34
34
34
34
35
35
36
37
.
.
.
.
.
.
.
.
.
.
.
.
.
.
.
.
.
.
.
.
.
.
.
.
.
.
.
.
.
.
.
.
.
.
.
.
.
.
.
.
.
.
.
.
.
.
.
.
.
.
.
.
.
.
.
.
.
.
.
.
.
.
.
.
.
.
.
.
.
.
.
.
.
.
.
.
.
.
.
.
.
.
.
.
.
.
.
.
.
.
.
.
.
.
.
39
39
39
41
42
Import external resources. . . . . . . . . . . . . . . . . . . . . . . . .
Im porting a new font. . . . . . . . . . . . . . . . . . .
Im porting XML file(s).. . . . . . . . . . . . . . . . . .
Using m ultiple XML files - an
Im porting another tem plate.. . . . . . . . . . . . .
Im porting a new im age. . . . . . . . . . . . . . . . .
Setting the im age size. . . . . .
Im porting a Resource. . . . . . . . . . . . . . . . . .
Im porting a translation table. . . . . . . . . . . . .
Exam ple of translation files.. . . . . . . . . . . . .
........
........
........
exam ple.
........
........
........
........
........
........
.
.
.
.
.
.
.
.
.
.
.
.
.
.
.
.
.
.
.
.
.
.
.
.
.
.
.
.
.
.
.
.
.
.
.
.
.
.
.
.
.
.
.
.
.
.
.
.
.
.
.
.
.
.
.
.
.
.
.
.
.
.
.
.
.
.
.
.
.
.
.
.
.
.
.
.
.
.
.
.
.
.
.
.
.
.
.
.
.
.
.
.
.
.
.
.
.
.
.
.
.
.
.
.
.
.
.
.
.
.
.
.
.
.
.
.
.
.
.
.
.
.
.
.
.
.
.
.
.
.
.
.
.
.
.
.
.
.
.
.
.
.
.
.
.
.
.
.
.
.
.
.
.
.
.
.
.
.
.
.
.
.
.
.
.
.
.
.
.
.
.
.
.
.
.
.
.
.
.
.
46
46
47
47
50
52
52
53
54
55
Designing templates. . . . . . . . . . . . . . . . . . . . . . . .
Viewing Input and/or Result window. .
Using Styles in InterForm NG. . . . . . .
Text style. . . . . . . . . . .
Geom etry style. . . . . .
Barcode style.. . . . . . .
Im age Style. . . . . . . . .
Color style. . . . . . . . . .
Page Style. . . . . . . . . .
Label Style.. . . . . . . . .
Locale Style. . . . . . . . .
Print Style. . . . . . . . . .
Error Style. . . . . . . . . .
The Design Elem ents. . . . . . . . . . . . .
Text Elem ent. . . . . . . .
Line Elem ent. . . . . . . .
Box Elem ent. . . . . . . .
Barcode Elem ent.. . . .
Im age Elem ent. . . . . .
Page Elem ent. . . . . . .
.
.
.
.
.
.
.
.
.
.
.
.
.
.
.
.
.
.
.
.
.
.
.
.
.
.
.
.
.
.
.
.
.
.
.
.
.
.
.
.
.
.
.
.
.
.
.
.
.
.
.
.
.
.
.
.
.
.
.
.
.
.
.
.
.
.
.
.
.
.
.
.
.
.
.
.
.
.
.
.
.
.
.
.
.
.
.
.
.
.
.
.
.
.
.
.
.
.
.
.
.
.
.
.
.
.
.
.
.
.
.
.
.
.
.
.
.
.
.
.
.
.
.
.
.
.
.
.
.
.
.
.
.
.
.
.
.
.
.
.
.
.
.
.
.
.
.
.
.
.
.
.
.
.
.
.
.
.
.
.
.
.
.
.
.
.
.
.
.
.
.
.
.
.
.
.
.
.
.
.
.
.
.
.
.
.
.
.
.
.
.
.
.
.
.
.
.
.
.
.
.
.
.
.
.
.
.
.
.
.
.
.
.
.
.
.
.
.
.
.
.
.
.
.
.
.
.
.
.
.
.
.
.
.
.
.
.
.
.
.
.
.
.
.
.
.
.
.
.
.
.
.
.
.
.
.
.
.
.
.
.
.
.
.
.
.
.
.
.
.
.
.
.
.
.
.
.
.
.
.
.
.
.
.
.
.
.
.
.
.
.
.
.
.
.
.
.
.
.
.
.
.
.
.
.
.
.
.
.
.
.
.
.
.
.
.
.
.
.
.
.
.
.
.
.
.
.
.
.
.
.
.
.
.
.
.
.
.
.
.
.
.
.
.
.
.
.
.
.
.
.
.
.
.
.
.
.
.
.
.
.
.
.
.
.
.
.
.
.
.
.
.
.
.
.
.
.
.
.
.
56
57
58
58
64
64
66
67
67
68
68
69
70
71
71
76
76
76
77
77
Starting the Designer. . . . . . . . . . . . . . . . . . . . . . . . . . . .
Before starting the designer the first tim e. .
Getting started . . . . . . . . . . . . . . . . . . . . . .
Opening an XML file for designing. . . . . . .
A “Hello W orld” exam ple.. . . . . . . . . . . . . .
.
.
.
.
.
.
.
.
.
.
.
.
.
.
.
.
.
.
.
.
.
.
.
.
.
.
.
.
.
.
.
.
.
.
.
.
.
.
.
.
.
.
.
.
.
.
.
.
.
.
.
.
.
.
.
.
.
.
.
.
.
.
.
.
.
.
.
.
.
.
.
.
.
.
.
.
.
.
.
.
.
.
.
.
.
.
.
.
.
.
.
.
.
.
.
.
.
.
.
.
.
.
.
.
.
.
.
.
.
.
.
.
.
.
.
.
.
.
.
.
.
.
.
.
.
.
.
.
.
.
.
.
.
.
.
.
.
.
.
.
.
.
.
.
.
.
.
.
.
.
.
.
.
.
.
.
.
.
.
.
.
.
.
.
.
.
.
.
.
.
.
.
.
.
.
.
.
.
.
.
.
.
.
.
.
.
.
.
.
.
.
.
.
.
.
.
.
.
.
.
.
.
.
.
.
.
.
.
.
.
.
.
.
.
.
.
.
.
.
.
.
.
.
.
.
.
.
.
.
.
.
.
.
.
.
.
.
.
.
.
.
.
.
.
.
.
.
.
.
.
.
.
.
.
.
.
.
.
.
.
.
.
.
.
.
.
.
.
.
.
.
.
.
.
.
.
.
.
.
.
InterForm A/S 5
Label Elem ent. . . . . . . . . . . .
Group Elem ent. . . . . . . . . . .
Include Elem ent. . . . . . . . . .
Fixed Area. . . . . . . . . . . . . . .
Flow Area. . . . . . . . . . . . . . .
New line Elem ent. . . . . . . . .
Colum nBreak Elem ent. . . . .
PageBreak Elem ent. . . . . . .
Link Elem ent. . . . . . . . . . . . .
ForEach Elem ent. . . . . . . . .
Repeat Elem ent. . . . . . . . . .
Define Cursor Elem ent. . . . .
Select Cursor Elem ent. . . . .
Offset.. . . . . . . . . . . . . . . . . .
Offset update.. . . . . . . . . . . .
Variable Elem ent. . . . . . . . . .
Variable Update Elem ent. . .
Metadata Elem ent. . . . . . . . .
Com bining Styles and groups. . . . . . . . . . . .
Other im portant icons and design settings. .
Design examples and tips. . . . . . . . . . . . . . . . . .
Reuse groups. . . . . . . . . . . . . . . . .
Create Fixed areas when possible.
The Flow area. . . . . . . . . . . . . . . . .
The Page Static group. . . . . . . . . .
Solution to: Elem ent unreachable.
There are errors in the tem plate. . .
6
.
.
.
.
.
.
.
.
.
.
.
.
.
.
.
.
.
.
.
.
.
.
.
.
.
.
.
.
.
.
.
.
.
.
.
.
.
.
.
.
.
.
.
.
.
.
.
.
.
.
.
.
.
.
.
.
.
.
.
.
.
.
.
.
.
.
.
.
.
.
.
.
.
.
.
.
.
.
.
.
.
.
.
.
.
.
.
.
.
.
.
.
.
.
.
.
.
.
.
.
.
.
.
.
.
.
.
.
.
.
.
.
.
.
.
.
.
.
.
.
.
.
.
.
.
.
.
.
.
.
.
.
.
.
.
.
.
.
.
.
.
.
.
.
.
.
.
.
.
.
.
.
.
.
.
.
.
.
.
.
.
.
.
.
.
.
.
.
.
.
.
.
.
.
.
.
.
.
.
.
.
.
.
.
.
.
.
.
.
.
.
.
.
.
.
.
.
.
.
.
.
.
.
.
.
.
.
.
.
.
.
.
.
.
.
.
.
.
.
.
.
.
.
.
.
.
.
.
.
.
.
.
.
.
.
.
.
.
.
.
.
.
.
.
.
.
.
.
.
.
.
.
.
.
.
.
.
.
.
.
.
.
.
.
.
.
.
.
.
.
.
.
.
.
.
.
.
.
.
.
.
.
.
.
.
.
.
.
.
.
.
.
.
.
.
.
.
.
.
.
.
.
.
.
.
.
.
.
.
.
.
.
.
.
.
.
.
.
.
.
.
.
.
.
.
.
.
.
.
.
.
.
.
.
.
.
.
.
.
.
.
.
.
.
.
.
.
.
.
.
.
.
.
.
.
.
.
.
.
.
.
.
.
.
.
.
.
.
.
.
.
.
.
.
.
.
.
.
.
.
.
.
.
.
.
.
.
.
.
.
.
.
.
.
.
.
.
.
.
.
.
.
.
.
.
.
.
.
.
.
.
.
.
.
.
.
.
.
.
.
.
.
.
.
.
.
.
.
.
.
.
.
.
.
.
.
.
.
.
.
.
.
.
.
.
.
.
.
.
.
.
.
.
.
.
.
.
.
.
.
.
.
.
.
.
.
.
.
.
.
.
.
.
.
.
.
.
.
.
.
.
.
.
.
.
.
.
.
.
.
.
.
.
.
78
79
79
79
81
82
82
82
82
86
86
87
87
87
88
88
88
89
90
92
93
93
93
95
96
97
98
.
.
.
.
.
.
.
.
.
.
.
.
.
.
.
.
.
.
.
.
.
.
.
.
.
.
.
.
.
.
.
.
.
.
.
.
.
.
.
.
.
.
.
.
.
.
.
.
.
.
.
.
.
.
.
.
.
.
.
.
.
.
.
.
.
.
.
.
.
.
.
.
.
.
.
.
.
.
.
.
.
.
.
.
.
.
.
.
.
.
.
.
.
.
.
.
.
.
.
.
.
.
.
.
.
.
.
.
.
.
.
.
.
.
.
.
.
.
.
.
.
.
.
.
.
.
.
.
.
.
.
.
.
.
.
.
.
.
.
.
.
.
.
.
.
.
.
.
.
.
.
.
.
.
.
.
.
.
.
.
.
.
.
.
.
.
.
.
.
.
.
.
.
.
.
.
.
.
.
.
.
.
.
.
.
.
.
.
.
.
.
.
.
.
.
.
Setting up InterFormNG for autom atic conversions.
Installing/Uninstalling the Services. . . . . .
Configuring the Services.. . . . . . . . . . . . .
Starting and stopping the Services. . . . . .
Using the Docum ent Processor Service. .
Setting up autom atic printing. . . . . . . . . .
Setting up autom atic PDF creation. . . . . .
Setting up e-m ailing. . . . . . . . . . . . . . . . .
Selecting the output via m etadata. . . . . .
General m etadata. . . . . . .
Em ail m etadata. . . . . . . . .
Print m etadata. . . . . . . . . .
.
.
.
.
.
.
.
.
.
.
.
.
.
.
.
.
.
.
.
.
.
.
.
.
.
.
.
.
.
.
.
.
.
.
.
.
.
.
.
.
.
.
.
.
.
.
.
.
.
.
.
.
.
.
.
.
.
.
.
.
.
.
.
.
.
.
.
.
.
.
.
.
.
.
.
.
.
.
.
.
.
.
.
.
.
.
.
.
.
.
.
.
.
.
.
.
.
.
.
.
.
.
.
.
.
.
.
.
.
.
.
.
.
.
.
.
.
.
.
.
.
.
.
.
.
.
.
.
.
.
.
.
.
.
.
.
.
.
.
.
.
.
.
.
.
.
.
.
.
.
.
.
.
.
.
.
.
.
.
.
.
.
.
.
.
.
.
.
.
.
.
.
.
.
.
.
.
.
.
.
.
.
.
.
.
.
.
.
.
.
.
.
.
.
.
.
.
.
.
.
.
.
.
.
.
.
.
.
.
.
.
.
.
.
.
.
.
.
.
.
.
.
.
.
.
.
.
.
.
.
.
.
.
.
.
.
.
.
.
.
.
.
.
.
.
.
.
.
.
.
.
.
.
.
.
.
.
.
.
.
.
.
.
.
.
.
.
.
.
.
.
.
.
.
.
.
.
.
.
.
.
.
.
.
.
.
.
.
.
.
.
.
.
.
.
.
.
.
.
.
.
.
.
.
.
.
.
.
.
.
.
.
.
.
.
.
.
.
.
.
.
.
.
.
. 99
. 99
. 99
100
101
101
102
102
103
103
106
106
The InterFormNG W orkFlow . . . . . . . . . . . . . . . . . . . . .
Enabling the W orkflow. . . . . . . . . . . . . . .
W orking with Tem plate Selections. . . . . .
W orking with actions. . . . .
Setting m eta data values..
W orking with Output Configurations. . . . .
Exam ple Rule setups. . . . . . . . . . . . . . . .
.
.
.
.
.
.
.
.
.
.
.
.
.
.
.
.
.
.
.
.
.
.
.
.
.
.
.
.
.
.
.
.
.
.
.
.
.
.
.
.
.
.
.
.
.
.
.
.
.
.
.
.
.
.
.
.
.
.
.
.
.
.
.
.
.
.
.
.
.
.
.
.
.
.
.
.
.
.
.
.
.
.
.
.
.
.
.
.
.
.
.
.
.
.
.
.
.
.
.
.
.
.
.
.
.
.
.
.
.
.
.
.
.
.
.
.
.
.
.
.
.
.
.
.
.
.
.
.
.
.
.
.
.
.
.
.
.
.
.
.
.
.
.
.
.
.
.
.
.
.
.
.
.
.
.
.
.
.
.
.
.
.
.
.
.
.
.
.
.
.
.
.
.
.
.
.
.
.
.
.
.
.
.
.
.
.
.
.
.
109
109
110
112
112
113
114
Transforming and Splitting XM L files. . . . . . . . . . . . . . . . . . . . . . . . .
Activating the transform function. . . . . . . . . . . . . . . . . . .
Adding actions for the transform ed files. . . . . . . . . . . . . .
Sam e action for all transform ed files.. . . .
Different action for each transform ed file.
.
.
.
.
.
.
.
.
.
.
.
.
.
.
.
.
.
.
.
.
.
.
.
.
.
.
.
.
.
.
.
.
.
.
.
.
.
.
.
.
.
.
.
.
.
.
.
.
.
.
.
.
.
.
.
.
.
.
.
.
.
.
.
.
.
.
.
.
.
.
.
.
.
.
.
115
115
118
118
118
Version 2014R09
.
.
.
.
.
.
.
.
.
.
.
.
.
.
.
.
.
.
.
.
.
.
.
.
.
.
.
.
.
.
.
.
.
.
Manual for InterFormNG
.
.
.
.
.
.
.
.
.
.
.
.
.
.
.
.
.
.
.
.
.
.
.
.
.
.
.
Creating xm l files in specific folders.
Introducing XSLT. . . . . . . . . . . . . . . . . . . . . . . . . . .
Advanced transform ing.. . . . . . . . . . . . . . . . . . . . . .
Splitting the intro_demo.xm l file. . . .
.
.
.
.
.
.
.
.
.
.
.
.
.
.
.
.
.
.
.
.
.
.
.
.
.
.
.
.
.
.
.
.
.
.
.
.
.
.
.
.
.
.
.
.
.
.
.
.
.
.
.
.
.
.
.
.
.
.
.
.
.
.
.
.
.
.
.
.
.
.
.
.
.
.
.
.
119
120
120
121
Appendix A: Using XPath with InterFormNG - in short. . . . . . . . . . . . . . . . . . . . . . . . . . 123
Using variables in Xpath expressions. . . . . . . . . . . . . . . . . . . . . . . . . . . . . . . 125
Appendix B: Edit printing setup in setup files. . . . . . . . . . . . . . . . . . . .
Selecting the printer via XML. . . . . . . . . . . . . . . . . . . . . . . .
Structure of printConfig.xm l . . . . . . . . . . . . .
Scripting. . . . . . . . . . . . . . . . . . . . . . . . . . . .
Access to m eta data. . . . . . . . . . . . . . . . . . .
Printing labels on Zebra printers. . . . . . . . . . . . . . . . . . . . . .
Requirem ents. . . . . . . . . . . . . . . . . . . . . . . .
Connecting and installing the Zebra printer.
Updating the Print Configuration. . . . . . . . . .
Installing the ZPL rendering plugin. . . . . . . .
ZPL rendering plugin configuration. . . . . . . .
.
.
.
.
.
.
.
.
.
.
.
.
.
.
.
.
.
.
.
.
.
.
.
.
.
.
.
.
.
.
.
.
.
.
.
.
.
.
.
.
.
.
.
.
.
.
.
.
.
.
.
.
.
.
.
.
.
.
.
.
.
.
.
.
.
.
.
.
.
.
.
.
.
.
.
.
.
.
.
.
.
.
.
.
.
.
.
.
.
.
.
.
.
.
.
.
.
.
.
.
.
.
.
.
.
.
.
.
.
.
.
.
.
.
.
.
.
.
.
.
.
.
.
.
.
.
.
.
.
.
.
.
.
.
.
.
.
.
.
.
.
.
.
127
128
128
136
137
137
137
138
138
139
139
Appendix C: Socket based XM L processing. . . . . . . . . . . . . . . . . . . .
Input form at. . . . . . . . . . . . . . . . . . . . . . . .
Header keys. . . . . . . . . . . . . . . . . . . . . . .
Result form at.. . . . . . . . . . . . . . . . . . . . . .
Initiating a connection - A Java exam ple..
Plugin configuration.. . . . . . . . . . . . . . . . .
A Groovy web server exam ple. . . . . . . . .
.
.
.
.
.
.
.
.
.
.
.
.
.
.
.
.
.
.
.
.
.
.
.
.
.
.
.
.
.
.
.
.
.
.
.
.
.
.
.
.
.
.
.
.
.
.
.
.
.
.
.
.
.
.
.
.
.
.
.
.
.
.
.
.
.
.
.
.
.
.
.
.
.
.
.
.
.
.
.
.
.
.
.
.
.
.
.
.
.
.
.
140
140
140
140
141
141
142
.
.
.
.
.
.
.
.
.
.
.
.
.
.
Appendix D: Installing on other platform s.. . . . . . . . . . . . . . . . . . . . . . . . . . . . . . . . . . . . 145
Installing on Linux. . . . . . . . . . . . . . . . . . . . . . . . . . . . . . . . . . . . . . . . . . . . . . 145
Installing on AIX. . . . . . . . . . . . . . . . . . . . . . . . . . . . . . . . . . . . . . . . . . . . . . . 146
Appendix E: Processing a Database. . . . . . . . . . . . . . . . . . .
The Database. . . . . . . . . . . . . . . . . . . . . . . . . . .
JDBC Driver. . . . . . . . . . . . . . . . . . . . . . . . . . . .
Configure InterForm NG's Database plugin.. . . .
Testing. . . . . . . . . . . . . . . . . . . . . . . . . . . . . . . .
Exam ple: Transferring m eta data values from a
................
................
................
................
................
Database into NG. .
.
.
.
.
.
.
.
.
.
.
.
.
.
.
.
.
.
.
.
.
.
.
.
.
.
.
.
.
.
.
.
.
.
.
.
.
148
148
148
149
149
152
Appendix F: The TxtToXM L M odule. . . . . . . . . . . . . . . . . . . . . . . . . . . . . . . . . . . . . . . . . . 154
Appendix G: The PDF Security M odule. . . . . . . . . . . . . . . . . . . . . . . . . .
Encryption and password protection.. . . . . . . . . . . . . . . . . .
Adding a digital signature. . . . . . . . . . . . . . . . . . . . . . . . . . .
Prerequisites. . . . . . . . . . . . . . . . . . . . . . . . .
Getting a digital certificate file. . . . . . . . . . . .
Retrieve the alias from the certificate file. . .
Install Java Cryptography Extension (JCE). .
Signing a PDF file. . . . . . . . . . . . . . . . . . . . .
Trusting signatures. . . . . . . . . . . . . . . . . . . .
Verifying Digital Signatures. . . . . . . . . . . . . .
.
.
.
.
.
.
.
.
.
.
.
.
.
.
.
.
.
.
.
.
.
.
.
.
.
.
.
.
.
.
.
.
.
.
.
.
.
.
.
.
.
.
.
.
.
.
.
.
.
.
.
.
.
.
.
.
.
.
.
.
.
.
.
.
.
.
.
.
.
.
.
.
.
.
.
.
.
.
.
.
.
.
.
.
.
.
.
.
.
.
.
.
.
.
.
.
.
.
.
.
.
.
.
.
.
.
.
.
.
.
.
.
.
.
.
.
.
.
.
.
.
.
.
.
.
.
.
.
.
.
156
156
156
156
157
160
160
161
162
164
Appendix H: Conversion of pre 2014 Templates. . . . . . . . . . . . . . . . . . . . . .
Testing tem plates when upgrading to a 2014 Version or newer..
Conversion tool. . . . . . . . . . . . . . . . . . . . . . . . . . . . . . . . . . . . . . .
Problem when opening tem plates in pre 2014 Versions. . . . . . .
.
.
.
.
.
.
.
.
.
.
.
.
.
.
.
.
.
.
.
.
.
.
.
.
.
.
.
.
.
.
.
.
.
.
.
.
165
165
165
167
InterForm A/S 7
Using unconverted tem plates. . . . . . . . . . . . . . . . . . . . . . . . . . . . . . . . . . . . . 167
Appendix I: Using a M essage Queue for input. . . . . . . .
Enabling m essage queue in InterForm NG. .
External m essage queue. . . . . . . . . . . . . . .
Sending data to m essage queue. . . . . . . . .
.
.
.
.
.
.
.
.
.
.
.
.
.
.
.
.
.
.
.
.
.
.
.
.
.
.
.
.
.
.
.
.
.
.
.
.
.
.
.
.
.
.
.
.
.
.
.
.
.
.
.
.
.
.
.
.
.
.
.
.
.
.
.
.
.
.
.
.
.
.
.
.
.
.
.
.
.
.
.
.
.
.
.
.
.
.
.
.
.
.
.
.
.
.
.
.
.
.
.
.
168
168
168
169
Index. . . . . . . . . . . . . . . . . . . . . . . . . . . . . . . . . . . . . . . . . . . . . . . . . . . . . . . . . . . . . . . . . . . 171
8
Manual for InterFormNG
Version 2014R09
What is new in the 2014 Versions
This m anual describes the functionality of the InterForm NG 2014 versions. Below are the
additions/changes since the last official InterForm NG 2013 version.
Designer
•
Details/settings of text elem ents are show n in the elem ent list as a m anually added
description would do in the previous versions. This helps to get a better overview of
what the individual elem ents do. This is described on page 71.
•
Design elements in error are shown with a red dot (instead of a blue) to indicate a
problem . (An exam ple is shown on page 98)
•
You will get a warning w hen saving a tem plate if there are one or m ore errors inside
the tem plate. This is described on page 98.
•
An ELSE option has been added for the IF elem ent. Elem ents placed in the ELSE
folder will be executed if the condition in the IF is not true. The ELSE option is
described on page 85.
•
The Text style has been enhanced to m ake it possible to align the text - even if the
text is set to a specific width. The new param eter is called W idth adjustment and is
described on page 58. The param eters of the text style has been rearranged and this
is also described on this page.
•
A new function, PAGE_NUM BER_TOTAL (which outputs the total num ber of pages) is
added. This and the other functions are described on page 72.
•
You do no longer need to rem em ber the various function nam es (e.g.
PAGE_NUMBER_TOTAL). All supported functions are now selectable via a drop
dow n list. This is shown on page 72.
•
The definition of barcodes in the barcode style has been changed. This m eans, that
existing custom ers m ay experience m inor differences when com paring the barcodes to
the result prior to the upgrade. The new barcode style is described on page 64. Please
also note the rem ark about tem plate conversion on page 11.
•
Xpath functions supported are now not only Xpath 1.0, but also Xpath 2.0 (Saxon
hom e edition). This gives you even m ore possibilities for doing advanced calculations
of e.g. the contents of the input XML files. Appendix A on page 123 lists som e
exam ples of how you can use Xpath.
•
The barcode elem ent can now select the barcode type itself. The settings for the
barcode type is expected to be set with a prior barcode style. Previously you needed a
barcode style each tim e you selected a different barcode type. The barcode elem ent is
described on page 76.
E-mail output
•
The e-m ail contents can not only be written as an .rtf file, but you can now also use an
htm l file as well. This is covered on page 102.
InterForm A/S 9
PDF output
•
The texts and images can now also link to a URL. The URL can be set not only as a
constant, but e.g. also as an Xpath expression to m ake it possible to build up the link
partially from inform ation found in the XML file. Refer to page 71 for the text elem ent
and 77 for the im age elem ent, where this can be set.
•
Easy interface for archiving. Now you can m ake InterForm NG generate an XM L file
w ith index values for ‘real’ archiving e.g. in InterArchive. The XML file will be nam ed
the sam e as the output PDF file - if you are creating a PDF file. This option is
described on page 74.
PDF Security Module
•
A new module has been added: ‘PDF Security’. W ith this m odule you can both
encrypt and password protect the output PDF files, lim it the access to prevent users
from printing, editing or copying the PDF contents and digitally sign the output PDF
files. This new m odule is described in Appendix G on page 156.
PCL output
•
It is now possible to select the draw er (or tray) from which the printer should take the
paper in PCL. This feature is added on the page style elem ent, which is described on
page 67.
•
Support for black/w hite printers (printers that does not support color com m ands)
has now been added. The PCL output form at is as default in color (which m ost B/W
printers are able to print out), but you can now also set the output to be in black/white
by setting this m eta data key to false:
interform.destination.printer.pcl.image.fullcolor
The new m eta data key is described on page 107.
•
A new meta data key called: multiup can now be used for placing 2 pages of output
on one page also called N-up or pages per side. For this function you should norm ally
use the label elem ent (as m entioned on page 78), but this m eta data key can be used
for creating a double sized output with 2 input pages - without changing the tem plate
design. This new m eta data key is described on page 103.
Workflow
•
The split function, that was previously added have been rem oved and exchanged for
a transform option in the workflow. The transform is able to split xm l files as before,
but in a m ore sim ple way. The transform option is also able to transform xm l files hence the nam e. The transform feature is described on page 119.
•
M issing/no condition for a rule now selects all xm l files in the workflow. In the older
versions of InterForm NG you needed a non-em pty condition to select the files. This
m akes it easier to use the workflow. Refer to page 110 for details.
Web interface
•
10
The default port number for the w eb service has been changed from 8080 (in the
earlier versions) into 1885. If you are upgrading from an older version the old port
Manual for InterFormNG
Version 2014R09
num ber will be preserved during the upgrade. Page 25 describes how to specify a
specific port num ber for the web service.
Conversion of Designs/Templates
•
W hen upgrading from a pre 2014 version to a 2014 version (or newer) the tem plates
will be converted into a new form at. This has only im portance if you are using barcode
styles. If you are not using barcode styles you will not see any difference in the output
and you can also open a tem plate in any version of the designer no m atter what
version that created the tem plate. If you are using barcode styles you cannot directly
open a converted tem plate in a pre 2014 version as the barcode styles are stored in a
different m anner. Refer to Appendix H on page 165 for details.
•
A template conversion tool is started when you upgrade to a 2014 version - as
described on page 17. The conversion can also be run after the upgrade as described
on page 165.
New Module: JD Edwards EnterpriseOne connector
•
Creates XML files from JD Edwards EnterpriseOne, which can be used as input in
InterForm NG. Based on UBE (Universal Batch Engine) and handles standard and
custom ized reports. The m odule is listed on page 21.
License code is now required
•
In older versions you could use InterForm NG without a license code. This caused a
‘TRIAL EDITION’ text to be added to the output. Now a license code is required for the
processor service and the designer. You can request a 7 days test license during
installation/upgrade and via the web interface. This is described on page 14 and 18.
InterForm A/S 11
Getting Started
The idea of the following procedure is to give you a safe and easy start with the InterForm NG
system . No knowledge on InterForm NG is required, and only m inor W indows knowledge is
needed. Knowledge of Xpath can be useful, but a short introduction is included in an appendix.
The m ain features of InterForm NG is, that it is able to transform XML files into PDF files or a
printed result. The product is java based, so it is a platform independent application. During
the transform ation a design (including graphics, fonts, fram es, lines etc.) is added. Here the
installation and use is m ainly shown when used with Microsoft W indows.
Prerequisites
•
Java Runtim e Environm ent 1.6 or newer m ust be installed. It is recom m ended always to
use the latest update of Java Runtim e Environm ent. W e have e.g. found a problem in JRE
version 1.6.0 Update 45, which had an negative effect on InterForm NG, which is solved
sim ply by updating to the newest 1.6.0 update. JRE 1.8 and future JRE versions are not
supported for 2014 versions of NG.
•
Regarding accessing the windows m achine via Remote Desktop: The user under which
the InterForm NG processor service is running should not be used for signing on when
accessing the m achine on which InterForm NG is running. If it is necessary to do that, then
you need to m ake sure, that no printers are shared on the client m achine, that is
accessing via rem ote desktop (or m ake sure, that there is not printer nam ed the sam e as
a shared printer on the client).
(If printers are shared the printer setup in the InterForm NG processor m ay be affected and
the error m essage ‘Error processing print job: Error printing <xxx> document:
already printing’ can be found in the service log file, while no print result can be found).
Installation
Important upgrade Information:
Please check out the im portant inform ation in Appendix H on page 165 for the changes
involved when upgrading from a pre 2014 version to a 2014 version or higher.
The section below describes installation on the W indows platform . Refer to Appendix D on
page 145 for details of how to install on Linux. Installation on AIX is described on page 146.
For installing InterForm NG on the System i platform the InterXM L (iForm NG400) product is
recom m ended (which includes the InterForm NG product).
Installing Java Runtime Environment
Before installing InterForm NG you need to install Java Runtim e Environm ent version 1.6 or
1.7. You should use a newer version if possible. Currently you can download Java Runtim e
Environm ent (JRE) version 1.7 from here:
h t t p ://www.oracle.com/technetwork/java/javase/downloads/java-se-jre-7-download-432155.html
(Installing Java on windows require you to run the actual installer - not copying the JRE
directory to the m achine.)
Installing Java Runtime Environment on Windows
If you are already using the InterForm 400 graphical designer, then JRE is already installed.
If you already have installed a 32bit JRE on a 64 bit m achine, then you need also to install a
12
Manual for InterFormNG
Version 2014R09
64bit JRE and m ake sure, that InterForm NG is using the 64 bit JRE. That can be ensured by
adding an envirom ent variable called INTERFORM_NG_JAVA_HOME. The value for this
should be the path to the Java library e.g. C:\Program Files\Java\jre7.
You can add/change an environm ent variable via Control Panel, System and Advanced
System settings on the left. Now click Environment variables.. in the bottom of the next
window and then click New .. under System variables:
Installing InterFormNG
In order to install you first need to unzip the distribution file and then run the unzipped
installation file. Now you will see these screens:
InterForm A/S 13
You need to accept the agreem ent in order to be able to proceed:
If this is a first tim e installation (no licence code is found), then this screen is displayed:
You need to register with som e inform ation about your PC in order to get a file with a license
code. W hen you press Enter a contact is m ade to a licence server which will provide you with
a free 7 day trial license. If this does not work you can later order a test code via the web
interface as shown on page 18
14
Manual for InterFormNG
Version 2014R09
Now state the place where InterForm NG should be installed. The path below is suggested:
The next screen asks for the path for where data files and configuration files should be placed.
The default path is:
C:\Program Data\InterFormNG
(Please check/correct the exact path in your installation).
Please m ake sure if this path is OK and change it if needed. You will need to use this path
whenever InterForm NG is exchanging files e.g. XML files, so a m ore sim ple path m ay be a
good idea.
On the next screen you can decide which servers to install and if they should be started:
(Below I have chosen to start the services after install. As default they will not be started.).
InterForm A/S 15
The next screen specifies where InterForm NG is placed in the Start m enu folder. Alternatively
you can chose not to create a Start Menu folder:
This screen asks if you want to create a desktop icon and a quick launch icon:
16
Manual for InterFormNG
Version 2014R09
The final screen shows you all the settings for the installation:
Now click ‘Install’ to start the installation.
After the installation the screen below is shown if the installation was actually an upgrade from
a 2013 version (or earlier):
Unless you disable the ‘Run Tem plateConverter’ option, then the convert tool will now start.
InterForm A/S 17
The license code
The Trail Licence
W hen you install and start InterForm NG for the first tim e, you can register and get a 7 day trial
licence, which you can request during the installation. A trial licence has all features enabled.
You can also request and install a licence via the web interface. InterForm NG will not run
without a licence code.
You can request a trial licence via the web interface if no licence file is found. This is described
below.
Obtain a license
W hen you decide to order a licence to run InterForm NG, you m ust provide som e inform ation
about your installation; either directly during installation, via the web interface or by em ail.
Beside providing your personal details you should provide som e technical inform ation as well.
The sim plest way to find this inform ation is to install and start the (web) server. W hen
accessing the web interface by selecting ‘Start’, ‘All Program s’ and run
/InterForm NG/InterForm NG web adm in’. Sign on e.g. as ‘adm in’ with the password ‘password’
and then click ‘System Configuration’ followed by ‘Licensing’ to display the required
inform ation.
Then you will see a screen like below. Please copy and paste the characters (do not send a
screen shot) to avoid any typos when the licence code is generated if you want to order a
licence code via em ail.
You can install a licence code file by copying it directly into {INTERFORM_NG}\licence.
18
Manual for InterFormNG
Version 2014R09
If you already have a licence code installed then the screen above looks like this:
Here you can load a new licence file if e.g. you want to try out an extra m odule or have
purchased it. You sim ply click ‘Select licence file..’, select the file and press ‘Upload’ in the
bottom right.
Alternative way to retrieve technical information
An alternative (for windows installations) is to run an .exe file which provides the inform ation
needed. The file can be used instead of installing InterForm NG to obtain the inform ation. You
can download the exe file via these links:
For 32bit windows machines:
http://download.interform 400.com /shares/SW /W indowsSystem Info32.exe
For 64 bit windows m achines:
http://download.interform 400.com /shares/SW /W indowsSystem Info64.exe
W hen running the .exe file you will see a window like this:
Click the ‘Copy to clipboard’ icon and paste the text into an em ail (as text) to request a license
code.
Install a licence
You can install a licence code via the web interface as shown above or by copying the licence
file into the licence directory (a subdirectory to the InterForm NG hom e directory containing all
settings and resources). You need to restart the designer and services to use the new licence
file.
InterForm A/S 19
Installed plugins
The standard installation com es with these preinstalled plugins:
Plugin
archive-m anager
basic-printm anager
database-printjob
em ail-m anager
filesystem -printjob
gs1-databar-renderer
pdf-renderer
standard-barcode-renderer
transform -zpl-to-pdf
webadm -m anager
zpl-renderer
20
Manual for InterFormNG
Version 2014R09
Description
Archive docum ents to a folder
Process printed docum ents and send them to the correct printer
This plugin reads XML data from database records and converts
it to PDF using an InterForm NG tem plate
Em ail docum ent
This plugin will scan a directory in the file system for XML files
and print these files to PDF
Render GS1 Databar fam ily barcodes
Render XML docum ents into PDF form at
Render standard barcode types
Transform ZPL script into readable PDF using an actual Zebra
printer as a rendering engine
Container for the adm inistration web application
Render XML docum ents into ZPL (Zebra) form at
Modules for InterFormNG
InterForm NG is delivered with a lot of functionality, but for those that want m ore, we also offer
som e m odules, to enhance the product even m ore:
The PDF Security Module
If you purchase this m odule you can both encrypt and password protect the output PDF files,
lim it the access to prevent users from printing, editing or copying the PDF contents and
digitally sign the output PDF files. This new m odule is described in Appendix G on page 156.
The TxtToXML Module
Apart from the core of InterForm NG it is also possible to purchase the TxtToXML m odule. The
m odule m akes it possible to use text files (e.g. csv files) as input in InterForm NG. They are
then converted into XML before they are processed. Refer to Appendix F on page 154 for
additional inform ation.
The JD Edwards Connector Module
Creates XML files from JD Edwards EnterpriseOne. Based on UBE (Universal Batch Engine)
and handles standard and custom ized reports. Please contact your local InterForm NG support
for m ore inform ation.
Configuring InterFormNG
After installing InterForm NG you should now start InterForm NG and configure a few things:
Set the language
If you want to change the language of InterForm NG you select this via ‘Setup’ and ‘Language’
as below:
A change of language will be active after restarting the designer. Currently only english is
available.
Set the measure unit
The m easure unit (when inserting layout elem ents) can be set to either of these:
Inches
and pels
All m easurem ents are typed in as inches as pels. Inches are entered before the
com m a (or decim al point) and pels are entered after. 240 pels equals 1 inch, so
e.g. the value 1,120 equals one and a half inch.
InterForm A/S 21
Inches
All m easurem ents are entered in inches with a norm al com m a or decim al point.
This m eans e.g. that the value 1,500 here equals one and a half inch.
CM
All m easurem ents are in centim eters with a com m a or decim al point. This
m eans e.g. that the value 3,81 equals one and a half inch.
Background image
It is possible to scan an im age of a preprinted form and use this as a background to create a
tem plate with the sam e contents. To do this you select the im age (bm p, jpg, pgn) via Setup
and ‘Select background im age’and then select the im age:
To enable the im age you need to click on this icon on the lower left:
(This icon indicate that the background im age has been enabled).
Possible options for the background im age are:
Keep image ratio
The background im age is scaled to fit the page - but still keeping the ration between height
and width, so that the whole page will not be filled out (unless the ratio between height and
width are the sam e for the page). Disable this to fit both the height and the width to the page
i.e. the im age will fill up the com plete page.
Display transparent background
You can m ake the background transparent to clearly see the new design/tem plate. Enable this
to do that.
Revision log
It is possible to activate a revision log on each tem plate. W hen activated you are prom pted for
a description of the changes you have done (no journal of the changes is saved). Under Setup
you can chose to activate a revision log for all tem plates, that you change by activating ‘Force
revision during save’:
You can also set a revision log flag on each tem plate, so any colleague (or custom er) editing
the sam e tem plate will be prom pted for a description and version num ber:
22
Manual for InterFormNG
Version 2014R09
You can set the revision flag on the tem plate here:
InterForm A/S 23
Problem solving
If you are unable to start the designer or the services stop with an error, then you could consult
the list below:
Unable to start the designer - corrupted license
If you get this error you could try to right click the link for the designer and chose ‘Run as
adm inistrator’. Alternatively you can chose to open up the authority of the InterForm NG
directories - or chose to use another directory for the resources. On page 27 it is described
how to change the authority to directories and files on windows.
Unable to start the services
If you are unable to start one or both of the services or if they are com plaining of a corrupt
license, then you can consider to open up authority to the used directories as described above
- or chose to run the services under a specific user profile as shown on page 99.
Error printing <xxx> document: already printing
If you see the error m essage ‘Error processing print job: Error printing <xxx> document:
already printing’ in the service log file, while no print result can be found, then som eone
probably accessed the windows m achine via Remote Desktop: The user under which the
InterForm NG processor service is running should not be used for signing on when accessing
the m achine on which InterForm NG is running. If it is necessary to do that, then you need to
m ake sure, that no printers are shared on the client m achine, that is accessing via rem ote
desktop (or m ake sure, that there is not printer nam ed the sam e as a shared printer on the
client).
The web service stops to work
Take care if you clean up the C:\windows\tem p diretory as InterForm NG has som e work files
here. InterForm NG creates a subdirectory inside this. If you delete this, then the web service
will stop working with this error m essage in the log file: File "/login.jsp" not found. In the
future the tem p directory will be m oved elsewhere. To solve the issue you should just restart
the web service.
24
Manual for InterFormNG
Version 2014R09
Configuring InterFormNG
W hen InterForm NG is to convert new XML files into PDF files, e-m ails with an attached PDF
file or a printed result, you will need to configure InterForm NG and the necessary plugins.
Below it is described how to setup InterForm NG to enable each of these outputs and other
options. The setup can be done either via editing the setup files via e.g. Notepad or via the
InterForm NG web interface. The setup file for the service is stored as:
\InterForm NG\profiles\default\application.properties within the configuration directory. The
setup files for the plugins are stored in the configuration directory under
\InterForm NG\profiles\default\plugins\.
Remember to alw ays restart the processor service to activate any changes of the
configuration. The only area, where this is not needed is for the workflow, if you have
activated the Auto refresh W orkflow option.
Below we will use the web interface to edit the configuration when possible:
Configuring via the web interface
You can use the web interface to setup the plugins. You can start it in W indows by selecting
‘Start’, ‘All program s’, ‘InterForm NG’ and ‘InterForm NG web adm in’. A browser session will
open and you will be asked for a User and Password. For the user you can state ‘user’ or
‘adm in’ and you should state ‘password’ as the password. Please notice, that the password is
case sensitive. If you logon as ‘user’ you can only view the settings; as ‘adm in’ you can also
edit the settings.
Changing the web interface port number
As default the web service will use this address: http://127.0.0.1:1885/webapp-springm vc
If you want to use a different port num ber you can change that in two ways:
Via the web interface: You can set that as the Jetty port via General system settings as
shown on page 28.
Via an XM L configuration file. If you are unable to start the web server (e.g. because the port
num ber is already used for som ething else), then you can change it by opening the xm l
configuration file inside {INTERFORMNG_HOME}/Profiles/default/webapplication.properties
with Notepad and set the new port num ber to use as the Jetty port:
InterForm A/S 25
The changed port num ber will take effect from the next restart of the web server. Refer to
page 100 for how to restart it.
After changing the port num ber you m ight want to change the link you have installed for
accessing the web interface:
Now right-click on ‘InterForm NG web adm in’ and click ‘Properties’ to find the file to change:
Now you should find the file and right-click it and select ‘Properties’ to change it:
26
Manual for InterFormNG
Version 2014R09
Now you can change the port num ber in the URL above. You m ight get an error m essage after
the change when clicking ‘OK’:
Even though it is not clear, the problem is m ost likely, that you do not have authority to change
the file. You can give yourself write authority in this m anner:
On the Properties for the webadm file you click the ‘Security’ tab, select your user and click the
‘Edit..’ icon. This will open the window on the right. Here you activate ‘Allow’ for ‘W rite’ and
click OK:
After the change you can click the ‘W eb Docum ent’ tab and change the port num ber.
InterForm A/S 27
System Configuration
General Systems Settings
Setting the default tem plate and the polling interval is done on the screen below, which you
find by clicking ‘System Configurations’ and ‘General Systems Settings’:
Keep Log (days)
InterForm NG creates log files for designer, the web server and the processing
service inside {INTERFORMNG_HOME}/profiles/default/logs. Here you set for
how long they should be kept.
Default Tem plate
This is where you setup the tem plate to use for all m erges in the server.
Norm ally this tem plate should then include another other tem plate depending on
the contents of the XML file. This is not used if you are using the workflow,
which is norm ally recom m ended.
Enable Polling
Select if you want the server to m onitor an input directory via polling.
Polling Interval
The num ber of seconds between each tim e that the server will check for any
new XML file in the m onitored input directory.
Enable Trigger
If you want InterForm NG to run m ore efficient and react faster, then you should
not use polling, but use a trigger instead. You enable the use of a trigger via this
option.
Trigger Port
If you enable the trigger as described above then this trigger port will be used.
You signal that a new XML file is available by opening and closing a connection
to this port. This technique works for both databases and files.
Return to the previous screen by clicking either ‘Close’ or ‘Save’ on the lower right (not shown
above).
Setting the log level
To set the log level you logon to the web server and click ‘System Configurations’ and ‘Log
Settings’:
28
Manual for InterFormNG
Version 2014R09
This is where you the level of details, that you would like to have included in the log files
generated by the service, web server and the designer. You m ight be asked to change this to
include m ore inform ation in the log files in case of a support issue.
Notice that including a lot of details in the log files can have a negative im pact on the
perform ance of the product.
User configuration
As default InterForm NG is delivered with 2 users: Adm in and user. The adm in user is able to
change anything, while the user is only able to display the setup. You reach this option from
the web interface by selecting ‘System Configurations’ and ‘User Configuration’:
InterForm A/S 29
Input Configuration
In the web interface you can setup the different input options by selecting ‘Input
Configurations’:
Each option is described below.
File System Configuration
This is where you setup which directory to m onitor for new XML files. This is setup by selecting
‘Input Configuration’ and then ‘File System Configuration’:
These are the configuration param eters:
Active
Select ‘Yes’ to activate this plugin.
Source Folder
Here you can active the m onitoring of new incom ing XML files and state the
directory to m onitor for new files.
${INTERFORMNG_HOME} refers to the hom e directory, which is stored in the
system s environm ent variable. Instead of using this you can also specify the
com plete path.
W hen used new subdirectories (in the m onitored directory) will be created when
needed:
/Processing
The XML files that are currently being processed.
/Processed
The XML files, that has successfully been processed.
/Errors
XML files that could not be processed (an error occurred during
processing). Look to the service.log file to find out what went
wrong.
It is possible to m onitor m ultiple directories. If you want to do that you sim ply
separate each path with a com m a like this:
${INTERFORMNG_HOME}/xml_inbox,Z:/xml_inbox,//192.168.250.250/apf3812home/xml_inbox
(Please notice, that we are here m onitoring a directory on a different server,
which is also possible).
Split active
30
Manual for InterFormNG
If you want to split up an XML file, then you should activate it via this option.
Version 2014R09
Stylesheet
The path to the XSLT, which is used for the split. An XSLT file m akes it possible
to define a transform ation from one XML file into one or m ore output XML files.
Refer to page 115 for an in dept description and exam ples of how this can be
defined.
Xpath
This also refers to the split. You should define a path here. If InterForm NG finds
that there are m ultiple branches with this path e.g. m ultiple detail nodes in the
root in the exam ple above, then InterForm NG will consider this to be an
unsplitted XML file and use the XSLT to create new XML files.
Please m ake sure to double check and test your split setup as you potentially can setup a
loop, which will constantly create new XML files.
Processing Priority
Here you can set the priority of the file system plugin. You can set the priority to:
Im m ediate, Norm al or Batch.
Txt to XML Configuration
This is m odule for InterForm NG, so you cannot use it unless you have a license code which
opens up for this functionality. This m odule m akes it possible to convert text and csv files into
xm l files, which can be handled by InterForm NG.
The m odule has these configuration param eters:
The param eters specific for this m odule are:
Source Folder
The path to the folder, which is scanned for new text files.
File extension
The extension of the files, that you want to convert into XML.
File encoding
The expected encoding of the incom ing text files.
Separation Regex
The delim iter which defines the next elem ent on each line in the text file. Each
elem ent will be inserted as a separate node in the XML file.
Trim W hitespace
If yes, any leading or trailing spaces after/before the delim iter will be rem oved
before copying the file to XML.
InterForm A/S 31
Database Configuration
Instead of placing XML files in a m onitored directory like above you can also place the XML file
into a field in a database (while even setting one or m ore meta data keys) with the database
plugin:
The database should be accessed via a JDBC driver. An exam ple using a MYSQL database is
included in Appendix D on page 148.
Network configuration
The network configuration sets som e of the network properties for the Socket option, which is
described later:
Here you enable the network processing and set the port num ber and priority used for socket
requests.
As seen the possible priorities are: Im m ediate, Norm al and Batch.
Enterprise Integration Configuration
W ith this you are using a m essage queue for telling InterForm NG when a new XML file is
available:
Scheduled Trigger Configuration
Use this option to activate the trigger e.g. every 5 seconds. W ith this you can gradually convert
a polling setup into a setup using triggers by enabling this until you have fully im plem ented the
trigger functionality.
32
Manual for InterFormNG
Version 2014R09
Interval sets the num ber of seconds between each activation of the trigger.
Socket Trigger Configuration
You can use the socket call to issue a tim e critical conversion in InterForm NG. You can e.g. a
URL back linking to the resulting PDF file. You setup various properties in the Network
Configuration above and you enable the socket function here:
The socket trigger is described in Appendix C on page 140.
Processing
InterForm NG is able to generate m ultiple types of output. You can setup the properties for
each under ‘Processing’ in the web interface:
Below each of the configurations are described:
Transform ZPL to PDF Configuration
W hen designing a tem plate for ZPL output you can view the output in the Result window, but if
you want to see exactly how the final result would look, then you can setup InterForm NG to
use a physical printer to generate an im age of the output. Such a printer should not be used
for production printing and should be standing idle for this to work. If you want to use this
feature you select ‘Processing’ and ‘Transform ZPL to PDF Configuration’:
GS1 Databar Configuration
If you want to use GS1 barcodes you should activate the feature here:
InterForm A/S 33
Standard Barcode Configuration
If you want to use barcodes in InterForm NG, then this should be activated:
Image Import Configuration
If you want to use im ages in InterForm NG, then this should be activated:
PCL Configuration
Not used.
PDF Configuration
Here you activate the possibility to create PDF files. If you set the Disable Font Reduction
feature to Yes, then the PDFs will be larger, but will be created a little bit faster.
ZPL Configuration
If you want to be able to print the ZPLII data stream , then this should be activated:
34
Manual for InterFormNG
Version 2014R09
Output Configurations
Here you set the attributes for the outputs, that can be generated by InterForm NG:
Printer configuration
Under the ‘Printers’ tab you can change settings for the printers and activate/disable installed
printers. Only activated printers can be used in InterForm NG. The m ain settings are these:
(The default printer refers to the default printer on the m achine. If you deselect/deactivate this
printer, then it will disappear).
Nam e
The nam e of the printer. As default this will be the sam e as the windows printer.
M ime Type
The print data type, that will be sent to the printer. Choose between ’pcl’,
‘postscript’ and ‘zpl’. For norm al laser printers pcl is recom m ended.
Resolution
The printers resolution (in dots per inch). This is norm ally 600 for laser printers
and either 200 or 300 for ZPL label printers.
By clicking on the icons on the left you can set a lot of other printer settings.
Documents (Printer selection)
The printer can be selected directly in the used tem plate by setting m eta data key,
‘interform .destination.printer.printerNam e’ (selecting via the nam e), via
‘interform .destination.printer.printerId ‘ (via the printer ID, which is found in the config.xm l
docum ent) or better by setting the m eta data key ‘docum entType’ in the tem plate and linking
the docum entType with a printer here. You get here by selecting ‘Output Configurations’,
‘Printer Configuration’ and the ‘Documents’ tab in the top:
InterForm A/S 35
For the docum ent type you can set a single one with the value of ‘*’, if you want only to use
one specific printer and then link this value with the printer in question. Alternatively you can
add various docum ent types e.g. ‘invoice’ and ‘label’ and select that as the m eta data
‘docum entType’ in the tem plate.
Enable printing
Before you can actual print you will need to enable printing. This is done by selecting ‘Output
Configurations’, ‘Printer Configuration’ and the ‘General Settings’ tab in the top:
Set the ‘Active’ field to ‘Yes’ to enable printing.
Archive Configuration
If you want to generate PDF files, then you set it up here. You find this by selecting ‘Output
Configurations’ and then ‘Archive Configuration’:
Default File Nam e
This is the file nam e, that will be created as default. If the file happens to exist,
then a file nam ed archive(1).pdf will be generated. For subsequent runs a new
num ber is added (archive(2).pdf etc...). The Default File Nam e can be
overridden in the tem plate by setting a m eta data key called
‘interform .plugin.archiver.fileNam e’.
Filename conflict resolution strategy
Here you specify how InterForm NG should react if InterForm NG is trying to
create a file when it already exists:
Renam e existing file to include date: Renam es the existing file with a tim e
stam p and creates the new file with the requested nam e.
Append version number to new file: Creates files as e.g. default(1).pdf
Overw rite existing file: Overwrites the existing file
36
Manual for InterFormNG
Version 2014R09
Target Folder
The target folder in which the PDF files will be created. This works with the m eta
data key ‘interform .plugin.archiver.folderNam e’, which can be defined within the
tem plate, so that the path written in this m eta data key is the path within the
target folder specified here. (You could think of the target folder as the root
folder for the pdf/archive generator).
Active
You need to set this to ‘Yes’ to enable the possibility to create PDF files.
Email Configuration
By selecting ‘Output Configurations’ and then ‘E-mail Configuration’ you reach this screen:
The fields sets this:
BCC
A BCC receiver.
Default subject
The subject of the outgoing e-m ail.This can be overridden in the used tem plate
by setting a value for the m eta data key ‘email.subject’.
Default Tem plate
This refers to an e-m ail tem plate (an .rtf or htm l file) setting the contents of the
e-m ail. You can overridde this choice in the (form ) tem plate via the m eta data
key ‘em ail.tem plateNam e’ and here state a different file (em ail tem plate).
Disable attachment
Norm ally the em ail will be sent out with a pdf file containing the result of the
m erge between a tem plate and the XML file. This attachm ent can be disabled
with this.
From
The e-m ail address specified as the sender.
Passw ord
Notice that the password is not shown as readable text, but is saved
unencrypted in a configuration file.
Reply To
The em ail address to reply to.
Active
Set this to ‘Yes’ to enable e-m ailing.
The rest of the fields are setup for the outgoing e-m ail server. Above the settings for gm ail are
used. You should check with the adm inistrator of your em ail server to find the settings, that
you should use. Generally used port num bers are: 25, 465 and 578.
InterForm A/S 37
Port 25 is norm ally not using SSL, so for that you should try with these settings:
Protocol:
sm tp
Use SSL:
*No
Hidden gem s
W hen a program tries to send m ail, it sends the com m and EHLO followed by its hostnam e.
In som e cases it only sends the hostnam e, but the m ail server expect a fully qualified dom ain
nam e (FQDN).
If m y PC is named Egon-PC and is on the dom ain interform 400.com , it should send the
following com m and
EHLO Egon-Pc.interform 400.com
But it only sends
EHLO Egon-Pc
To force it to send the FQDN you can add the line:
email.smtp.localhost=Egon-Pc.interform400.com
- to the plugin.properties file in the directory:
{INTERFORM NG_HOM E}\InterFormNG\profiles\default\plugins\em ail-manager\conf\
And restart the service.
To see what is sent to/from the m ail server, you can turn debugging on by adding this line to
the plugin.properties file as well:
email.debug=true
You also have to add the startparam eter 'log4j' to the service:
You can now find this in the service.log file: EHLO Egon-Pc.interform 400.com
38
Manual for InterFormNG
Version 2014R09
Starting the Designer
If you have chosen the default path in the Start Menu you can start it by selecting
‘InterForm NG', ‘Designer’ as below:
Notice: The tem plates are stored as .itpl files. You should not edit these files in any other way
than the InterForm NG designer. Editing the files with another application m ay m ake the
tem plates unusable.
Before starting the designer the first time
Before using the designer for the first tim e, you will probably want to copy one or m ore fonts to
the resource directory. You can e.g. do that by copying True Type Fonts (TTF) from
C:\W indows\Fonts into the Fonts directory in the InterForm NG Resource directory. That
m akes the fonts available for InterForm NG. Details of font im port can be found on page 46.
If the designer was running while you copied the fonts, then you should restart the designer to
m ake the fonts ‘visible’ for the designer.
The designer is shipped with som e preinstalled resources (fonts, tem plates, im ages and xm l
files), so even if you do not copy any resources to the resource directory you can still start to
work with the product ‘out of the box’.
Getting started
The first tim e you start the designer you will see this:
This is a com bined introduction and dem o of the designer. The leftm ost ‘window’
displays the list of design elem ents, the m iddle contains a dem o xm l file and the
rightm ost window displays the result. For a first tim e user it is recom m ended to read
InterForm A/S 39
the all the pages in the result view to get a fast introduction. You can click through the pages
with the arrow icon on the top right:
40
Manual for InterFormNG
Version 2014R09
the resources for this intro tem plate are stored in subdirectories called ‘intro’.
Disabling the Intro template
The intro tem plate is shown each tim e you open the designer - unless you select ‘Setup’ and
‘Dem o options’ and rem ove the flag for ‘Open Dem o tem plate on startup’.
You can create a new tem plate either by selecting ‘File’ and ‘New overlay’ in the upper m enu
or by clicking on this icon on the upper left:
Changing the settings for a new template
The new tem plate is ‘born’ with predefined elem ents to help you to get starting. The basis for
the new tem plate is a tem plate called ‘default.itpl’, so if you want new tem plates to open with
other elem ents or different settings, then you can sim ply save it to a tem plate called
default.itpl. You can use this if you e.g. want to change the default page size (in the page style)
into the letter size - as used in e.g. US.
If you want to open an existing tem plate, you select ‘File’ and ‘Open’ or click this 2 nd icon on
the upper left of the screen:
Opening an XML file for designing
W hen you want to design create a tem plate you should use it to redesign an XML file. By
selecting the yellow ‘Im port’ folder and then the subfolder ‘XML docum ents’ and the ‘Top’
inside you can refer to an XML file by clicking this icon on the left:
W hen you click the icon you add a reference to an XML docum ent. You refer to the docum ent
by clicking this icon in the bottom of the screen:
Right here:
Please notice: The XML file M UST be in the right directory in order to be shown in the
designer. The correct directory is /Resources/docum ent in the InterForm NG data directory as
specified during installation.
It m ight be necessary to save the tem plate and close and open the tem plate again to be able
to view the XML file in the designer in the XM L Documents window:
InterForm A/S 41
A “Hello World” example
Here we will go through a sim ple “Hello W orld” exam ple. W e want to create an output with the
sim ple text ‘Hello W orld’ on a page and then also include a text from an XML file.
Before you start the designer you need to copy som e fonts to the /resources/fonts directory as
m entioned on page 46. If you have an XML file you can also copy that to the
/resources/docum ent directory in the InterForm NG data directory - or you can use one of the
dem o XML files, which are included in /resources/docum ent/Intro.
Now start the designer. The designer starts up with a new tem plate (=form or overlay). You
can now im port your XML file by selecting this icon:
42
Manual for InterFormNG
Version 2014R09
Then select your XML file:
Before proceeding you should now save, close and reopen the tem plate. That will m ake it
possible to see the XML contents in the Designer.
As the next thing you select the text style:
- and specify a font, font size and other attributes you want for the text:
Now you should add a page style to let InterForm NG know how the form at/size of the output:
Select this:
- and specify the paper size to use.
Now add a Page elem ent within which you should insert your design
elem ents:
InterForm A/S 43
Then click the ‘Statics’ folder inside the Page elem ent and insert a Text elem ent:
For the Text elem ent you can now sim ply type a position and the text:
- then click in the result window to tell the designer where to place this text in the output.
If you also want to output data from your XML file you should first display the XML file in the
designer. You can e.g. do that by selecting this in the top:
This divides the right of the screen in two: The upper part is the input XML file and the lower
part is the result.
If you now select the previous text elem ent in the elem ent list and now insert a new text
elem ent, you can now refer to the contents of the XML file:
44
Manual for InterFormNG
Version 2014R09
Type the position of this text elem ent and change the selection input into ‘Xpath’. Now you can
select contents from the XML file sim ply by first m arking the field in the XML file and clicking
the ‘Select from docum ent’ icon and then the path is copied into the Xpath expression. You
can also enter this m anually or alter this to include various Xpath functions.
Now you can verify the final result in PDF by clicking this icon on the upper right:
If you get an error regarding a m issing print setup you can set the output to be PDF by adding
a m eta data elem ent. Click on this elem ent on the left:
Now state the m eta data key: mediaType (case sensitive) and archive (case sensitive) as the
value as below:
Now you should be able to preview. If not you should verify that the server has been setup
correctly and the necessary plugins has been activated.
Now you can continue to build in additional functions your first tem plate. If you e.g. insert a
Flow area and inside of this insert a ForEach then you can loop through all nodes with a
sim ular path and print each node with the Text elem ent - rem em ber to insert a NewLine
elem ent to force a line break:
InterForm A/S 45
Import external resources
W hen creating your design, you m ight want to refer to external resources. This can be fonts,
tem plates, im ages or translation tables. You need to im port them first before they can be used
in the tem plate design.
Importing a new font
If you want to install a new font to be used in InterForm NG, then you first need to copy the
True Type Font file (TTF), onto the font directory inside the configuration directory. The
configuration directory is defined during the installation as shown on page 15 and is default:
C:\Docum ents and Settings\All Users\Application Data\InterForm NG
W ithin the configuration directory you find the font directory here: \resources\font, so this is
the com plete default path:
C:\Docum ents and Settings\All Users\Application Data\InterForm NG\resources\font
After copying the TTF file here, the font is available for selection in the designer. You just need
to restart the designer, if it is already running.
Before you copy any TTF file you should m ake sure, that you are not violating any copyrights!
Please notice that font styles like italic and bold are only supported as real fonts. Other
system s "calculate" italic and bold, and in this case output m ay look different on different
renderers. W e have decided to support only real fonts to be sure printers will display output
100% accurate. So you will need to install both the bold and the italic versions of the font, if
you want to use them as well.
J TIP J
If you only have a TTC file you will need to convert it into TTF. You can e.g. do that with this
online converter: http://www.freefontconverter.com/
46
Manual for InterFormNG
Version 2014R09
Importing XML file(s)
In order to design your tem plate (form ) you will norm ally need at least one sam ple XML file,
that you want to m erge the tem plate with. The XML file(s) m ust be placed in the
/resources/docum ent directory (or a subdirectory inside of this) inside the InterForm NG_Hom e
directory.
You can im port an XML file into the tem plate if you open the tem plate and select Import, XM L
docum ents and click this icon:
Now you are asked for the XML file, that you want to im port:
As default InterForm NG that you will im port a prim ary XML file. If you only want to refer to a
single XML file within the tem plate, then it should be a prim ary XML file. This will be the file,
that is substituted when you use the Service to autom atically m erge incom ing XML files with a
tem plate.
Using multiple XML files - an example
If you want to be able to refer to m ore than a single XML file, then the other files should be
im ported as Named XML files. Below an exam ple is used to illustrate the possibilities:
The first XML file (Invoice XML) is the prim ary file, but in this case we want to refer to a list of
the em ployees of the com pany to include the nam e of our contact person in the final output
(That inform ation is not found in the invoice - only an em ployee num ber).
The ContactInform ation.xm l file looks like this:
InterForm A/S 47
Inside the invoice XML file we have a reference to the ID above - as ContactID (in the bottom ):
Now we can define an XML cursor to point to the nam ed XML file by clicking this icon:
Next we retrieve the ContactID from the Invoice XML file into variable, ID:
48
Manual for InterFormNG
Version 2014R09
And finally we can do a lookup in the ContactInform ation.xm l file in this way to print the nam e
of the contact person:
There are three things to notice above:
1) The lookup in the ContactInform ation.xm l file is done by use of variable, ID which is
referenced via {@ ID} - this is how you refer to a variable in Xpath.
2) The expression /Root/contact[ID={@ ID}]/Nam e returns the value of the Nam e node, for
which the ID is the sam e as the variable, ID.
3) The cursor nam e is ContactID_cursor. In this way we are referring to the second, nam ed
xm l file.
InterForm A/S 49
Importing another template
Instead of having the com plete design in one single tem plate you can refer to other tem plates
and include them several tim es in various tem plates thus reusing the sam e design m any tim es
over. The other tem plate can then in its turn refer to other tem plates, but you do not need to
im port them here.
Click on the this elem ent below to im port a tem plate:
In the properties in the bottom you refer to the tem plate (norm ally placed in
C:\Docum ents and Settings\All Users\Application Data\InterForm NG\resources\tem plate).
The nam e you state at the very bottom is the nam e you refer to in the tem plate when elem ents
from this sub tem plate should be inserted.
You can use the im port/export of tem plates to e.g. define your com pany styles, which should
always referred to or by creating a com m on header or footer tem plate, that m any other
tem plates refer to.
Below an exam ple of such an export is shown:
50
Manual for InterFormNG
Version 2014R09
In the im port you can now im port these styles to be referred to later via an include elem ent:
The properties of the include elem ent could look like this:
In the exam ple we activate ‘Keep styles’, so that the styles are available outside the included
group.
This way of including another tem plate can be used with the m ain tem plate which you specify
for the processor. This tem plate can e.g. inspect the contents of the incom ing XML file and
include the right tem plate depending on the contents found. (Use the error style to ignore any
invalid xpath expressions to avoid an error for other XML files without the sam e node(s)).
InterForm A/S 51
Importing a new image
Im ages are installed sim ular to fonts. You copy the BMP/JPG/JPEG/PNG im age(s) to the
\resources\image directory within the hom e directory (the default path is:
C:\Docum ents and Settings\All Users\Application Data\InterForm NG\resources\im age).
M WARNING M
Currently PNG files are only supported for PDF output.
After copying the im age you can refer to the im age in the designer in this m anner: Open the
‘Im port’ tab and the yellow ‘Im ages’ folder, click on ‘Top’ inside and press this icon:
Now the properties window in the bottom is opened and you can open an im age file with the
open icon. You also state a nam e for the im age, which you can refer to in the tem plate design
later.
Setting the image size
You set the size of the im age under the ‘Size’ tab:
Here you can set either a resolution or a fixed size (Measure).
If you select Resolution,then the im age size will depend on the resolution selected. The higher
resolution you select the sm aller the im age will be. The reason is, that the im age is a certain
num ber of dots in height and width. The resolution is set as a num ber of dots per inch (DPI),
so if you set a large DPI, then each dot will take up a very sm all space and the im age will be
sm all.
W hen selecting the m easure you can set the size of the im age via the Aspect ratio.
The aspect ratio can be set to these values:
(The m easurem ent used is the m easure, that you have chosen under ‘Setup’ and ‘Measure’).
Keep, set width
Keep, set height
Do not keep
52
Manual for InterFormNG
Sets the width below.The height is adjusted to keep the ratio between
height and width.
Sets the height below. The width is adjusted to keep the ratio between
height and width.
If you select this you will need to set both the width and the height of
the im age.
Version 2014R09
Importing a Resource
If you are going to create PDF files with em bedded files, you m ight want to refer local files
instead of dynam ically retrieving the files for each preview - e.g. to save tim e or perhaps these
files are not even available in the environm ent you are currently using.
Such local files m ust first be im ported and this is what you can do by selecting ‘Im port’,
‘Resources’, click ‘Top’ and then the icon on the left:
Now you can select any file to be em bedded, that are placed in /resources/Design. These
im ported files can now be referenced for the Link elem ent. Refer to page 82 for details.
InterForm A/S 53
Importing a translation table
Translation tables can be used for m aintaining texts in various languages. W ith InterForm NG
you can then e.g. let inform ation found in the XML file determ ine which translation table to use,
which e.g. could determ ine the language of all fixed text elem ents in the resulting PDF file.
The translation tables are built up of a list of key values and translated values. The
test.properties file contains this:
NORW AY = Norway
DENMARK = Denm ark
SW EDEN = Sweden
GERMANY = Germ any
The leftm ost values are the keys and the rightm ost are the translated values. The key can be a
string without any spaces. The translated value can be a longer text with spaces. Later you
can set the locale style in the tem plate and thereby selecting the right translation table.
After you have created a sim ple text file e.g. in Notepad with keys and values specified like
above, you then save it into /resources/translation in the configuration directory as specified
during installation. The default full path is:
C:\Documents and Settings\All Users\Application Data\InterFormNG\resources\translation
Before you can refer to the translation table in the designer, you need to im port it like other
resources. So click the ‘Im port’ tab, open the ‘Translations’ folder, click ‘Top’ and then this icon
on the left:
Now you can refer to the translation file either by typing in the nam e or by clicking the ‘Open’
icon and selecting the file. The ‘Nam e’ field indicates the internal nam e to use in the tem plate
whenever you want to use this translation table.
54
Manual for InterFormNG
Version 2014R09
Example of translation files
W hen you refer to the used translation files you refer to the root (or default) translation file.
You create an additional file for each language, that you want to handle like below:
(Please notice the fixed nam ing of each file and language below).
As you can see the specific languages need to be included in the file nam e as shown above.
You can use the Locale style to see all possible values for the languages. If you refer to a
language, that is not listed, then the default/root file (here: translate.properties) file is used.
Also if you refer to a key value not found in the specific language, then the value from the
default file is used (if found).
InterForm A/S 55
Designing templates
In this section we will describe how you can design the tem plate layouts. In order to start
designing you need to open the tem plate (or create a new tem plate) and click the Layout tab in
the top then click on ‘Top’ or any other elem ent below to add or change design elem ents:
Now the design elem ents on the left are shown:
If you place the m ouse over an icon a pop-up text will describe the icon. If you place the
m ouse over the rightm ost icons additional elem ents (sim ular to the first one) is also shown like this:
In the case above you can see that the current icon is a text elem ent. The icon to the right of it
is the text style elem ent (marked with a blue S in the bottom right corner).
The style elem ents has an effect on the subsequent design elem ents in the tem plate. This
m eans e.g. that the top text style elem ent with the icon looking like this:
- Can set the font type (e.g. arial), the size and if the texts inserted
56
Manual for InterFormNG
Version 2014R09
now should be bold, italic or underlined. All styles takes effect until another
style of the sam e type overwrites the settings.
It is a good idea to start your tem plate by setting styles for m ost of the elem ent types especially the Text style (the icon above) before adding a page elem ent. This m akes it easier
to find the styles if you later would want to change them . The text style m ust also be set before
the page elem ent to avoid an error.
For the ‘physical’ elem ents like e.g. the text elem ent, you should first select the elem ent type
by clicking on it with the left m ouse key and then click in the result window to state where in
output the elem ent is to be inserted. Then the elem ent is added to the elem ent list.
Notice that there is not yet a ‘drag and drop’ graphical designer, so you need to type in the
m easurem ents for positioning by hand. You can however preview the result at any tim e by
clicking the rightm ost icon in the upper part of the screen:
- or by looking in the result window as explained below.
Also notice that all m easurem ents are in inches and pels separated by a com m a. 1 inch
equals 240 pels, so this m eans that e.g. 1,120 is the sam e as one and a half inch. You can
change the m easurem ent into either ‘norm al’ inches (without pels) or centim eters as described
on page 21.
M WARNING M
Changing the templates by other means than the InterFormNG designer is unsupported (at
your own risk) and may result in unpredictable results.
Viewing Input and/or Result window
Via this drop down m enu you can select if you want to view the input XML file and/or the final
result in the right part of the screen:
If you e.g. chose ‘Place windows vertically’ you divide the screen, so you can see both like this:
InterForm A/S 57
Using Styles in InterFormNG
W hen you design your tem plate layout, you can use the m any styles to tell InterForm NG how
to form at the output. In this section each style is described.
Any property that is set to the value ‘Unset’ sim ply is unchanged, so it will have whatever value
it had before this style elem ent, or the default value if it was never set.
Text style
This is a text style. Insert this style to tell InterForm NG what font (and font
attributes) you want to use for the subsequent text elem ents. The style elem ent
has these properties:
Family
The type of font to use. The possible fonts are lim ited to the fonts, that you have
im ported as described on page 46. You can also specify ‘Unset’ for this field, if
you want to keep a font fam ily previously set.
Size
The size of the font m easured by the height in dots.
Bold/Italic/Underline
Chose if the font should be Bold, italic or underlined.
W idth adjustment
If you have set the text elem ent to a fixed width like described on page 73, then
you can use this to horizontally position the text inside the reserved area.
Left:
Positions the text on the left.(Default)
Center: Centers the text relative to the area.
Right:
Place the text to the right inside the area.
Exam ple: This is a text with a fixed width of 120 pels (½ inch), which is using
width adjustm ent=Right:
The green box shows the area for the text elem ent. The blue dot shows, where
the text is positioned (1 cm from the top and 2 cm from the left). The horizontal
adjustm ent m entioned below will set the origin (alignm ent) of the com plete area.
58
Manual for InterFormNG
Version 2014R09
Bounding control
Bounds control
The bounds control sets how the boundaries (or actually the preceeding/trailing
spaces) of the text should be considered. The values are:
Logical (Default):
The trailing/leading spaces are a part of the text and will
be used when aligning.
Physical:
Any leading/trailing blanks are ignored when you set the
text to be left or right aligned. (Currently the leading
blanks are not ignored..)
You can at the m om ent think of this param eter as ‘Ignore trailing blanks’, where
‘Physical’ sets this to ‘Yes’.
Bounds overflow
On the text elem ent you can (under advanced settings) set a m axim um width of
the text elem ent. If you do that, then this setting is used.
Break:If you set it to ‘break’, then a line break (like the NewLine elem ent) will be
added when the m ax. width is reached. You should only use the ‘break’ option
within a flow area to m ake sure, that the line break will do a line feed.
Cut: Set it to ‘cut’ to sim ply cut the text elem ent at the specified width.
On the Origin tab of the text style you see this:
Vertical origin
W hat reference point to use when positioning the text.
Top
m eans that the top of the text will be placed on the vertical position
stated and that the text will ‘grow’ downwards if you later increase the
size.
Center
The m iddle of the text is used.
Bottom
The very bottom of the text is the reference/origin.
Baseline The baseline of the text is used as reference - as shown below:
You should avoid using ‘Bottom ’ unless necessary as this is not supported for
rotation 90,180 and 270 for ZPL output.
InterForm A/S 59
Horizontal origin
How to place the text relative to the position stated. Here you can e.g. m ake the
text right adjusted or centred.
Auto
W orks like left origin.
Left
(Default). Use the left of the text as origin/reference.
Center
Centers the text around the origin.
Right
Use the right of the text as the origin:
Numeric origin
The num eric origin setting is used for texts, that have been set to be num eric. It
sets the horizontal alignm ent for those
The possible values are:
Standard
(Default) Use whatever is setup for norm al texts, which are as
default using the left edge as the origin.
Numeric
Use the decim al point, which m ust be a dot (.) for the texts,
that has been defined as num eric.
Format
The Form at folder contains possible ways to represent dates, tim es and
num bers. In order to form at a date, tim e or num ber, then the data m ust fit the
xm l requirem ents for a valid date, tim e or num ber. You can chose to specify a
m ask for the output.
Num eric format
To recognize a num ber as num eric the form at of the data m ust be -###.## i.e.
no thousand separator and a dot as decim al point and a preceding m inus for
negative num bers. However if you want a different form at in your output you can
use the table below for a reference of how you can alter various input form ats
into a new output form at:
Input format
1234.5
(numeric)
1,234.5
1.234,5
1234,5
1234.5
Mask: ####.#
Locale: en-US
translate("{@in}",",","")
translate
("{@in}",",.",".")
translate
("{@in}",",",".")
1,234.5
Mask: #,###.#
Locale: en-US
No action needed
translate
("{@in}",",.",".,")
translate
("{@in}",",",".")
1.234,5
Mask: #,###.#
Locale: de-DE
translate("{@in}",",.",".,")
No action needed
translate
("{@in}",",",".")
Mask: ####.#
Locale: de-DE
translate("{@in}",".,",",")
translate
("{@in}",".","")
Mask: ####.#0
Locale: en-US
translate("{@in}",",","")
Mask: ####.#0, en-US
translate
("{@in}",",.",".")
No action
needed
translate("{@in}",",","")
translate
("{@in}",",.",".")
1234,5
Output format
1234.50
Numeric
calculations
(* )
(* )
No action
needed
(* )
translate
("{@in}",",",".")
(* )
translate
("{@in}",",",".")
These tricks can be used for setting the output form at:
1) In the form ulas above {@ in} indicates a variable, in that contains the input
data.
2) The function, translate is able to translate one character into another. This will
60
Manual for InterFormNG
Version 2014R09
e.g. replace any com m a with a dot in the variable, in:
translate(“{@in}”, ”,” , ”.”)
Refer to page 124 for details.
3) The locale style decides what characters the decim al point and the thousand
separator should be (if used). Above en-US is used for a com m a as thousand
separator and a dot as decim al point. The de-DE selects the opposite. You m ay
use your own locale - if it fits the output you want.
4) The trailing 0 in the form at ###.#0 selects a 2 decim al form at. This is e.g.
often used for am ounts.
5) Negative values m ust be written with a preceding m inus to be recognized
correctly. If you want a different output form at you write the form at for negative
values after a sem icolon like e.g.: ###.#;###.#- (if you want a trailing m inus for
negative values).
6) For all cells m arked with a (*) above you need to use the sam e num eric
form atting as in the leftm ost colum n.
7) To use the num eric form atting the text elem ent m ust also be set as num eric.
8) For m ost of the form ulas above the result is not ‘real’ num eric i.e. it cannot
use the num eric form atting. If you want to use num eric form atting use the
form ulas in the bottom row (num eric calculations) and use the num eric m ask in
the leftm ost colum n.
Date format
A date m ust be written in the form at YYYY-MM-DD (Year-Month-Day) with
preceding zeroes i.e. 2014-08-31 is valid while 2014-8-31 is not valid. The input
date form at found in the XML file m ight however be different from this and the
requested output form at m ight of course also be different. Refer e.g. to this link
for explanation of how to type a date m ask:
http://docs.oracle.com/javase/7/docs/api/java/text/SimpleDateFormat.html
The table below should also help you to convert dates. You can convert the date
form at in two ways:
1) Use the concat and substring xpath functions to build up the requested form at
- this is not always sim ple.
2) Convert the input form at into the correct form at (YYYY-MM-DD) and convert
the date into the right output form at via the form atting in the text style.
InterForm A/S 61
Input form at
2014-08-31
(date form at)
2014-08-31
2014-31-08
08-31-2014
N o action
needed
M ask:
yyyy-dd-M M
M ask:
M M -dd-yyyy
2014-31-08
concat(substring
(
"{@ date}",1,4),"",substring("{@ d
ate}",9,2),"-",sub
string("{@ date}"
,6,2)
N o action
needed
concat(substring
("{@ date}",9,2),"
-",substring("{@
date}",6,2),"-",su
bstring("{@ date}
",1,4))
08-31-2014
31-08-14
31-8-14
concat(substring(
"{@ date}",7,4),"-",
substring("{@ dat
e}",1,2),"-",substri
ng("{@ date}",4,2)
)
concat("20",s
ubstring("{@
date}",7,2),"-"
,substring("{
@ date}",4,2),
"-",substring(
"{@ date}",1,2
))
concat("20",substring-after(s
ubstring-after("{@ date}","-"),"
-"),"-",substring("0",1,2-string
-length(substring-before(sub
string-after("{@ date}","-"),"-")
)),substring-before(substringafter("{@ date}","-"),"-"),"-",su
bstring("0",1,2-string-length(s
ubstring-before("{@ date}","-"
))),substring-before("{@ date}
","-"))
concat(substring(
"{@ date}",7,4),"-",
substring("{@ dat
e}",4,2),"-",substri
ng("{@ date}",1,2)
)
concat("20",s
ubstring("{@
date}",7,2),"-"
,substring("{
@ date}",1,2),
"-",substring(
"{@ date}",4,2
))
concat("20",substring-after(s
ubstring-after("{@ date}","-"),"
-"),"-",substring("0",1,2-string
-length(substring-before("{@
date}","-"))),substring-before(
"{@ date}","-"),"-",substring("0
",1,2-string-length(substringbefore(substring-after("{@ dat
e}","-"),"-"))),substring-before
(substring-after("{@ date}","-"
),"-"))
concat(substr
ing("{@ date}"
,4,2),"-",subst
ring("{@ date}
",1,2),"-","20"
,substring("{
@ date}",7,2))
concat(substring("0",1,2-strin
g-length(substring-before(su
bstring-after("{@ date}","-"),""))),substring-before(substrin
g-after("{@ date}","-"),"-"),"-",
substring("0",1,2-string-lengt
h(substring-before("{@ date}"
,"-"))),substring-before("{@ da
te}","-"),"-","20",substring-afte
r(substring-after("{@ date}",""),"-"))
concat(substr
ing("{@ date}"
,1,2),"-",subst
ring("{@ date}
",4,2),"-","20"
,substring("{
@ date}",7,2))
concat(substring("0",1,2-strin
g-length(substring-before("{
@ date}","-"))),substring-befor
e("{@ date}","-"),"-",substring(
"0",1,2-string-length(substrin
g-before(substring-after("{@
date}","-"),"-"))),substring-bef
ore(substring-after("{@ date}"
,"-"),"-"),"-","20",substring-aft
er(substring-after("{@ date}","
-"),"-"))
N o action needed
Output format
31-08-2014
14-08-31
31-08-14
62
Manual for InterFormNG
M ask:
dd-M M -yyyy
M ask:
yy-M M -dd
M ask:
dd-M M -yy
Version 2014R09
concat(substring
("{@ date}",6,2),"
-",substring("{@
date}",9,2),"-",su
bstring("{@ date}
",1,4))
concat(substring
("{@ date}",3,2),"
-",substring("{@
date}",9,2),"-",su
bstring("{@ date}
",6,2))
concat(substring
("{@ date}",6,2),"
-",substring("{@
date}",9,2),"-",su
bstring("{@ date}
",3,2))
concat(substring(
"{@ date}",4,2),"-",
substring("{@ dat
e}",1,2),"-",substri
ng("{@ date}",7,4)
)
concat(substring(
"{@ date}",9,2),"-",
substring("{@ dat
e}",1,2),"-",substri
ng("{@ date}",4,2)
)
concat(substring-after(substri
ng-after("{@ date}","-"),"-"),"-"
,substring("0",1,2-string-lengt
h(substring-before(substringafter("{@ date}","-"),"-"))),sub
string-before(substring-after(
"{@ date}","-"),"-"),"-",substrin
g("0",1,2-string-length(substri
ng-before("{@ date}","-"))),su
bstring-before("{@ date}","-"))
concat(substring(
"{@ date}",4,2),"-",
substring("{@ dat
e}",1,2),"-",substri
ng("{@ date}",9,2)
)
concat(substring("0",1,2-strin
g-length(substring-before("{
@ date}","-"))),substring-befor
e("{@ date}","-"),"-",substring(
"0",1,2-string-length(substrin
g-before(substring-after("{@
date}","-"),"-"))),substring-bef
ore(substring-after("{@ date}"
,"-"),"-"),"-",substring-after(su
bstring-after("{@ date}","-"),""))
Input form at
2014-08-31
(date form at)
2014-31-08
08-31-2014
31-08-14
31-8-14
31-8-14
M ask:
d-M -yy
U se date form at
U se date form at
U se date
form at
N o action needed
S unday, 31.
A ugust 2014
M ask:
E E EE ,
d.M M M M
YYYY
U se date form at
U se date form at
U se date
form at
U se date form at
S un., 31.
A ug. 2014
M ask:
E E E .,
d.M M M
YYYY
U se date form at
U se date form at
U se date
form at
U se date form at
M ask:
M M M M d.
YYYY
U se date form at
U se date form at
U se date
form at
U se date form at
concat("20",s
ubstring("{@
date}",7,2),"-"
,substring("{
@ date}",4,2),
"-",substring(
"{@ date}",1,2
))
concat("20",substring-after(s
ubstring-after("{@ date}","-"),"
-"),"-",substring("0",1,2-string
-length(substring-before(sub
string-after("{@ date}","-"),"-")
)),substring-before(substringafter("{@ date}","-"),"-"),"-",su
bstring("0",1,2-string-length(s
ubstring-before("{@ date}","-"
))),substring-before("{@ date}
","-"))
A ugust 31.
2014
O utput form at
D ate form at
N o action
needed
concat(substring
("{@ date}",1,4),"
-",substring("{@
date}",9,2),"-",su
bstring("{@ date}
",6,2))
concat(substring(
"{@ date}",7,4),"-",
substring("{@ dat
e}",1,2),"-",substri
ng("{@ date}",4,2)
)
For the dates these tricks are used:
1) For the form ulas above {@ date} indicates a variable, date containing the
date. You should replace this with the XML node or your variable.
2) The concat function concatenates (puts together) m ultiple string into one.
3) The substring(string, start, length) function returns a part of the string, starting
at position ‘start’ and with the length of ‘length’.
4) The function, substring-before(string,search-string) searches for the searchstring in ‘string’ and returns the part of string, that is to the left of the searchstring.
5) The function, substring-before(string,search-string) searches for the searchstring in ‘string’ and returns the part of string, that is to the left of the searchstring.
6) string-length(string) returns the length of a string.
7) For the cells above m arked with ‘Use date form at’ you can get to the output
form at by selecting the date form at function and use the date form at ask in the
leftm ost cell in the sam e row.
InterForm A/S 63
Geometry style
The geom etry style sets attributes of subsequent lines and boxes.
The properties are these:
Stroke
The width of the lines used. This is m easured in whatever m easurem ent you
have chosen, so usually this will not be a whole num ber but rather e.g. 0.05 or
sim ular.
Box corner rounding (circle radius)
The radius of the circle for which a circle arc is used as a corner. Specify 0 for a
sharp corner or the radius of the circle for a round corner.
Notice: Round corners are not supported for ZPL output. Any rounded corners
are in ZPL printed as sharp.
Box fill
Set this to ‘On’ if you want to fill out the inside of the boxes inserted after the
style.
Barcode style
The barcode style determ ines what kind of barcode you insert the com ing tim es
a barcode elem ent is executed. The properties of the barcode style are these:
Alignment
How the barcode will be positioned relative to reference point. You should avoid
using ‘Bottom ’ unless necessary as this is not supported for rotation 90,180 and
270 for ZPL output.
Type
The type of barcode e.g. Code39, Code128 etc.. The displayed selection of the
rem aining options will depend on what you select here. If you have upgraded to
a 2014 version (or newer) from a pre 2014 version and you defined the type to
be ‘Unset’, then the barcode style will look like this:
64
Manual for InterFormNG
Version 2014R09
As you can see the ‘Unset’ value is shown as ‘Select...’ and the elem ent is
shown in red to indicate an error. This barcode style is ignored until you select a
specific barcode type. After selecting a specific type you can also edit it.
For details of how barcode styles are converted please refer to page 165 in
Appendix H.
Height
The height of the barcode in the m easurem ent you have chosen via ‘Setup’ and
‘Measure’.
M odule w idth
The size of the sm allest bar/unit in the barcode. This is m easured in 1/1000
parts of an inch, so that a width of 1000 equals 1 inch. InterForm NG will select a
width that is as close as possible to this value - rounded up to the nearest
num ber of whole dots. The width of a dot depends on the printer resolution (and
for PDF the printer style setting). Here are the widths of a dot in som e
resolutions:
1 dot in 203 dpi is (1/203) = 0.0049 inch wide
1 dot in 300 dpi is (1/300) = 0.0033 inch wide
1 dot in 600 dpi is (1/600) = 0.0017 inch wide
So the width of a barcode m ay vary depending on the select m odule width and
the printer resolution setup in output configuration (in the web interface).
Som e ‘golden’ m odule widths should be considered if you want the barcode size
to be as close as possible for 203,300 and 600 dpi. These ‘golden’ values are:
4, 9,12,13,19,22,23.
If you want to see a barcode size close to the actual output it is a very good idea
to select the sam e resolution in a print style (refer to page 69 for details).
Display text
Activate this if you want the text in the barcode to be written as hum an
readable text below the barcode.
Checksum
W ith this you can chose to add a checksum to the barcode. The possible values
are:
Unset:
Keep the previous value. As default a checksum will not be added.
Check:
Tests the checksum of the input data. Invalid checksum results in an
error.
Ignore: The checksum is not tested and is not added unless it is included in
the input data. This is the default.
In pre 2014 versions you could also select ‘Auto’ as the value. This is no longer
supported, so if used the barcode style will be m arked in red and an error will
InterForm A/S 65
occour after an upgrade: 001010:Invalid barcode (Illegal value for checksum:
AUTO) will be issued - until you change the value.
M odule ratio
The m odule ratio is the ratio between the wide and narrow lines in the barcode.
A value of e.g. 2,5 will m ake the wide lines 2,5 tim es as wide as the narrow
lines. The ratio will be rounded down to fit a whole num ber of dots in the specific
printer resolution (as specified in the output configuration).
For the preview and result wind the size of the barcodes are m ainly defined by
the settings in the barcode style, but is also affected by the printer resolution set
in the print style (refer to page 69), so it is recom m ended to set the print style to
the actual resolution you want to use for printing.
For the 2D barcodes (PDF417 and QR) a few extra fields m ay appear on the
barcode style:
Error correction
This sets the error correction for the barcode. The Error correction for a PDF417
barcode can be set as a value between 0 and 8. The larger the value the larger
the barcode will be - and easier to scan. The Error correction for QR can be L,
M, Q or H (listed after size).
Layout direction
The layout direction can be set for the PDF417 barcode. This sets in which
direction the barcode will ‘grow’ - or rather a m axim um height or width.
Columns
(default) sets a fixed (or rather m axim um ) width.
Row s
sets a fixed (or rather m axim um ) height.
The selected layout direction decides if the specified number of columns or
row s will be used (the other will be ignored).
Image Style
As default the reference point of an im age is the lower left corner:
W ith the Im age style you can change the reference point:
This has effect on the next im age elem ents inserted. Refer to page 77 for details
of the im age elem ent.
66
Manual for InterFormNG
Version 2014R09
Color style
Set the color of the following elem ents and the color to be used when filling out
boxes:
Instead of selecting one of values from the drop down list you can also enter the
2 digit hexadecim al values for the Red, Green and Blue com bination of the color
you want. Here are a few exam ples:
Red:
Green:
Blue:
FF0000
00FF00
0000FF
The color on the right:
7198BF
Page Style
The page style sets the page size (e.g. A4, Letter etc...) and orientation (portrait
or landscape). You can also select Custom size to select a specific output size
(you are then asked for the height and width of the output). As with m ost styles
both can also be set to ‘Unset’ indicating that this property should not be
changed and the previous set value is to be used.
Paper Type: This selects the paper type to use when printing in PCL. You can
use this to select the draw er (or tray) from which the paper should be taken.
You need to select the equivalent paper type on the printer you intend to print
out on. The paper type is language independent, so you need to select the
sim ilar type of paper on the printer m enu in your own language if the printer
m enu is not in english.
Under Flow settings you can set the bottom m argin for any flow area within the
page elem ent. This m argin will be added to the bottom padding of the flow area.
InterForm A/S 67
Label Style
The label style sets the way you want to place labels on the resulting page. You
can decide to put m ultiple labels on one page. The properties are these:
W idth
The width of one label. State this in inches as pels - as all the other
m easurem ents.
Height
The height of the label.
M argin
The m argins for the page. This is the em pty space that is reserved around the
edge of the output page - not be used for labels.
Spacing
The free space between the labels - m easured also in inches and pels.
Border
You can chose to print lines at the border of each label.
Locale Style
The Locale Style sets the location which can be used for triggering the right
translation table. It can e.g. be com bined with a conditioned section that
determ ines the location from contents in the XML file. The property of this style
is sim ply the location as selected via the drop down list as shown below:
The locale style also affects the output of num bers and dates, so that they are
outputted in the form at used locally.
68
Manual for InterFormNG
Version 2014R09
Print Style
The Print Style sets the resolution to be used for any included im ages. This also
sets the resolution of the barcode im ages that InterForm NG is generating for the
PDF output. In order to get the right barcode output, it is very im portant to select
the right resolution to avoid resizing. Resizing can result in possible barcode
scanning problem s.
The default value (if no print style is specied) is 600 dpi. It is recom m ended to
select a value, which is dividable with the printer resolution without rem ainder, so
for a 600 dpi result you should avoid 72, 203, 240 and 1200 dpi - especially if
you are generating barcodes. If you select one of these values for the PCL
output, then the barcode will be scaled to fit the output resolution, which will
create a barcode of a different size com pared to PDF and Postscript (to m ake
the barcode as scannable as possible).
Reduce the output size
If the output is getting too large or if you have perform ance issues, you can
reduce the resolution and check if the result is still acceptable - rem em ber to
test all types of output that you want to generate (PCL, PDF and Postscript).
InterForm A/S 69
Error Style
The Error Style tells InterForm NG what to do if a problem should
occur. The list of m onitored errors can be seen here:
For each possible problem 4 settings are possible:
70
Unset
This is undecided. Use whatever value that m ay have been selected earlier.
Ignore
Ignore the problem and proceed.
W arning
Issue a warning in the log, but continue processing the file.
Fatal
Stop processing and issue a fatal error.
Manual for InterFormNG
Version 2014R09
The Design Elements
For all elem ents (and styles) you can state a short description:
- By clicking the Description tab. This will be shown in the list of the elem ents like shown
above. If you do not add a short description the properties of som e elem ents (texts and text
styles) will be shown in the list instead.
You can also add a longer description which will not be shown (unless you click the
Description tab). You can search for this and other settings and contents via the search field
in the top of the screen.
The design elem ents of InterForm NG (which can be found on the left in the designer) are
listed below from the top and down. Most of them are inserted by first clicking the elem ent type
on the left and then the position in the result window.
Text Element
The Text elem ent sim ply inserts a text in the output. The font used will be the
one specified in the last text style elem ent. The origin of the text is set in the
properties of the elem ent. It can be one of the below:
A constant text. Sim ply type the text to be inserted.
Xpath. A text/value from the XML file is inserted in the output. If you select the
Xpath option, you will be asked to specify the XML value via Xpath (the path in
the XML file) and a cursor reference nam e. The Xpath defines the path from the
referenced cursor - or if this field is blank: The path from the default cursor. The
cursor is a ‘pointer’ pointing to the place in the XML file, that is currently worked
on.
InterForm A/S 71
If you want to refer to the value of a variable in an Xpath expression, you state it
like this: {@ variable}. This will be substituted before the Xpath expression is
calculated.
Below the cursor is set via a previous ‘For Each’ elem ent, which has set the
cursor to the ‘Label’ branch. This is the XML tree:
Below the text ‘Dr.Ing.h.c. F. Porsche AG’ in the output by referring to the xm l
contents.
The Xpath expression refers to Receiver/ReceiverLine inside the ‘Label’ node.
The [@ sequence=1] tells InterForm NG to only select the ReceiverLine node(s),
where the sequence is 1.
The sim plest way to refer to xm l nodes is to click on the node in the XML tree
and then click on the icon Select from document in the text elem ent above.
Refer to Appendix A on page 123 for additional inform ation about Xpath.
Variable. Include the value of a variable in the output. If you want to com bine the
value of the variable you should chose Xpath instead.
Function. This refers to an internal function in InterForm NG. Available functions
are: PAGE_NUMBER, PAGE_NUMBER_TOTAL and TIMESTAMP. The
function, PAGE_NUMBER will return the current page num ber of the output
m aking it possible to e.g. print the num ber via the text elem ent. The function
PAGE_NUMBER_TOTAL inserts the total num ber of pages in the output. This
will show up as 99999 in the result view in the designer and only show the
correct in the final result. The TIMESTAMP function returns the current date and
tim e. You select the function via a drop down list.
Translation. You can refer to a translation table. If you select this you are asked
for a resource and a key. The resource field is one of the available translation
tables. In order to m ake a translation table available you need to im port it first.
The key is the key value for which you are doing a lookup in the translation table.
The resulting value is inserted in the output. The translations are described on
page 54.
Data type
To the right of the elem ent type (Constant/Variable, Function..), which is
described above, you set the data type of this elem ent. This can be set to Text,
Boolean, Num ber or Date. The data type will have an effect on how the data is
72
Manual for InterFormNG
Version 2014R09
printed out, but you can also use num eric Xpath functions if you set the data
type to num eric.
It is very im portant, that the text really is the correct type when defining it as
boolean, num ber or date. The requirem ents are these:
Boolean
Values 0 and 1 or a boolean xpath expression are allowed.
Invalid values are currently not shown and no error m essage
is issued.
Num ber
Num eric values using a dot as a decimal point - without any
thousand separator are allowed. Invalid data are currently not
shown and no error m essage is issued.
Date
Only dates in the form at YYYY-M M -DD is supported. Invalid
dates/strings m ay result in a strange date to be shown.
In the text style (under ‘form at’) you can then even tell InterForm NG how to
present this specific data type. Refer to page 58 for details.
Advanced settings
The options are placed under the advanced settings tab of the text elem ent:
Rotation
The rotation of the text elem ent. Possible rotations are: None, 90, 180 and 270
degrees.
Frame w idth
This is the width of text. If you leave it blank, then the width of the text is
undefined i.e. it will be as long as needed.
W ith a value below you can chose to set either a fixed or a maximum width:
Fixed width: If you set the width value to be a fixed width, then the width of the
text will be exactly as wide as the size set below. If you use the text inside a flow
area, then you can use a fixed width to set colum ns for som e detail lines - if you
set the bounds overflow (on the text style) to either ‘cut’ or ‘break’. If you want to
align the text inside the designated ‘fram e’, then you need to use the W idth
adjustment option of the text style.
M aximum width: The m axim um width allowed of the text elem ent. This option
also works closely with the Bound overflow option of the text style. Refer to the
text style on page 58 for details.
Selection input: In the bottom you set the width of the text counted as ‘pels’.
(240 pels equals 1 inch, which is 2,54 cm .). Rem em ber to set this to be a
number. The size above of 200 pels equals 0.83 inches or 2.12 cm
=2.54*200/240.
InterForm A/S 73
You need to remember to set the type to num ber (instead of the default ‘text’).
If you forget, then this width setting is ignored.
Index Settings - Index label
In the bottom of the advanced tab (of the text elem ent) you can decide if you
want to include the text elem ent in an xm l file, that is intended for archiving in
e.g. in InterArchive. The output xm l file is created if the index label is defined
for one or m ore text elem ents and only if you are creating an output PDF file.
The output XML file will be created in the sam e directory as the output PDF file
and with the sam e nam e - except the extension .xm l. The XML file contains
each index label and the value (the text that is the output in the text elem ent)
and som e general m eta values e.g. the nam e of the original input xm l file, the
path of that input file and the total num ber of pages.
74
Manual for InterFormNG
Version 2014R09
Url Settings
You can add a link in the PDF output for the text via the Url settings tab above.
The actual link can be a constant like above, an Xpath expression, a variable,
function or translation. Please note, that the url will not be highlighted as default
(e.g. in blue with underscore), so if you want that you will need to set that up with
e.g. the Color style (refer to page 67 for details).
InterForm A/S 75
Line Element
W hen inserting a line elem ent you state the coordinates of the two endpoints.
The endpoints are inserted in inches and pels and by first stating the distance
from the top of the paper edge and then the distance from the left of the paper
edge. The attributes of the line elem ent is set via the Geom etry style. The
exam ple below creates a vertical line which is 2 inches from the left edge of the
paper. It starts line 1½ inch from the top and ends 3 inches from the top:
(m easurem ents are here in inches and pels).
The settings of the line (as well as for the box elem ent) are defined in the
geom etry style as described on page 64.
Box Element
The box elem ent inserts a box (or fram e) in the output. The coordinates and the
other settings are set exactly like for the line elem ent above.
Barcode Element
The barcode elem ent works exactly like the text elem ent above:
Com pared to the text elem ent, there are only 2 differences:
1) The barcode attributes are set via the barcode style (refer to details on page
64).
2) The barcode type field can be used for selecting a specific barcode type. If
this is ‘Select..’ like above, then the barcode type selected in the last barcode
style is used (or a code39 barcode if no barcode style was found).
Refer to the description of the text elem ent above for additional details.
76
Manual for InterFormNG
Version 2014R09
Image Element
Inserts an im age. The im age should first be im ported as described on page 52.
You set the reference point (or alignm ent) in the Im age style as shown on page
66.
The im age elem ent sim ply states the im age and where to put it:
The reference is a drop down list of all im ages, that have been im ported into this
tem plate.
If you have just im ported the im age you m ight need to save, close and reopen
the tem plate before the new im age will fully work.
Please notice, that the print style should be set correctly to get the best result
when printing. Refer to page 69 for details for this.
The size of the im age is set during im port. Refer to page 52 for details.
If you click the ‘Url settings’ tab you will see this:
W ith this you can link the im age with a url. The url does not need to be a
constant, but can be a variable or e.g. even an xpath expression, which e.g.
selects inform ation from the input XML file(s).
Page Element
W hen you insert the page elem ent a new tree in the layout window is inserted.
This is where the contents of the page is defined. You insert this to let
InterForm NG know that a new page is to be inserted in the output. Unless you
only want to export a group you should norm ally only insert design elem ents
within a Page elem ent. Styles (including a page style) can however be stated
before the first page elem ent. The Page Elem ent has these attributes:
InterForm A/S 77
Keep styles. If you activate this, then any styles defined in this page ‘tree’ will
stick and also be used after this page. Otherwise the styles defined in the ‘tree’
will not have any effect outside the page.
Labels. If you activate ‘Use labels’ you are telling InterForm NG, that there could
be labels on this page. You will then be asked for how m any labels there should
be in both the horizontal and vertical direction. Also the sequence in which the
labels are filled out is also defined here. If there is m ore labels defined than can
be fitted into a single page an autom atic page break is issued.
W hen you insert the page elem ent a subgroup called Static will also be inserted
as below:
The Statics group has 2 other subgroups: ‘Pre’ and ‘Post’. The Pre subgroup will
be executed before the other elem ents of the page will be inserted, so this will
norm ally be used for the header elem ents as indicated above. If you use flow
you can place the detail lines directly after the header elem ents. The Post
subgroup is executed as the last thing before a page break. This can e.g. be
used for printing a total, when all detail lines (for the current page) has been
printed.
Label Element
The label elem ent is to be inserted within a Page elem ent tree as m entioned
above. W ith the label elem ent you insert m ultiple labels per page in the pattern
as indicated on the page elem ent. These are the properties of the label elem ent:
The page elem ent decides for the actual positions of the labels, so the position
here is the position relative to this. W ith the keep styles option you tell
InterForm NG to keep the styles defined within the label elem ent subtree even
after the label - influencing the rest of the page. Rem em ber to set the properties
with the label style before inserting a label. The label style is m entioned on
page 68.
You need to enable the labels and set properties on the page element (in the
label tab) and then you can insert the label elem ents inside the page elem ent.
You would norm ally insert the label elem ent inside a ForEach elem ent (to add a
label for each node in the xm l file) or e.g. inside a Repeat elem ent (to insert e.g.
a constant or calculated num ber of labels).
78
Manual for InterFormNG
Version 2014R09
Group Element
W ith the group elem ent you create a subtree or group of elem ent, that can
be exported and used in other tem plates. You can also use the group elem ent to
divide your layout into logical sections m aking it easier to m aintain your tem plate.
You group elem ents by placing them in the sam e group elem ent, This m akes it
very easy if you want to change the position for them all (or change another style
attribute).
You also need to group all elem ents in the tem plate if you want it all be executed
when included e.g. from the m ain tem plate used for the processor service.
Scope control: Keep styles you can m ake InterForm NG rem em bering the
styles after exiting the subtree. This is the sam e as for the Label elem ent above.
Include Element
The Include elem ent includes a section/elem ent from this or another tem plate.
In order to do this you will first need to:
1) State an export nam e in the section/elem ent in the other tem plate.
2) Im port the other tem plate in this tem plate.
Sim ply refer to the tem plate and elem ent above. If you want to include an
elem ent from the current tem plate, then you just leave the tem plate field blank.
Note, that you can even do recursive includes.
Fixed Area
InterForm A/S 79
Use the elem ent to group elem ents physically together. Then you can m ove all
elem ents inside by m oving the com plete area. This can also be used inside a flow
area when you want to create colum ns for all the detail lines. Refer to the flow area
below for the settings available.
80
Manual for InterFormNG
Version 2014R09
Flow Area
You can m ake InterForm NG position each elem ent relative to each other with
this feature. This m akes it possible e.g. to place elem ents (especially text)
relatively - both horizontally and vertically as well as insert either line or page
breaks when necessary. Use NewLine elem ent with this style to position
elem ents relatively below each other.
Top/Left
Start position of the flow area. The flow are will position the elem ent
relative to this position and m ove from left to right relative to the last text
elem ent inserted with the flow area.
Use Offset variable
If you enable this, then the flow area is positioned via the value of an Offset
variable instead of a fixed point as specified above. This can e.g. be used if you
want a flexible layout, where the detail lines (flow area) starts in one position on
page 1 and in another position on the following pages.
Scope Control / Keep Styles
If you activate ‘Keep styles’ any styles defined within the flow area will ‘stick’
even after exiting the flow area. If this is not enabled, then all styles defined in
the flow area will only have effect within this area.
Break Settings / Protect area from autom atic page/coloumn break
If you want InterForm NG to consider everything within this flow area to be a
block (and avoid a page or colum n break in the m iddle), then you should enable
this option.
Break Settings / Protect area from autom atic line break
If this is disabled, then the text will not force a line break - even if it cannot fit
within the width set for this flow area. If it enabled the text will be m oved onto the
next line if there is not room enough.
Line height
The distance set here is the line height when a new line is inserted. This can e.g.
be used for keeping a fixed line height even if som e of the lines are using a
sm aller font. (The line height will norm ally e.g. adapt to the height of the
characters used for the text elem ents and always go below any elem ents
inserted in the flow).
Under the Columns tab you have these two settings:
InterForm A/S 81
Number of Columns
As default only one colum n will be added to each page and a page break is
issued if a NewLine is added and there is no m ore room on the page.
Alternatively you can here set a num ber of colum ns to add for each page.
Space betw een Columns
If you set a num ber larger than 1 for the ‘Num ber of Colum ns’ above, then you
can here set the distance that you want between each colum n.
Under the Styles tab these last options are found:
Paint borders
Enable this and you will get lines around the borders of the flow area. This can
e,g. be used for creating tables or if you tem porarily want to see the actual
borders.
Padding
A distance between the leftm ost/rightm ost/top/lowest elem ent within the flow
area and actual borders of the flow area. If you enable the border to be painted
above, then this padding is clearly shown.
Spacing
If you want additional spacing between each elem ent in the flow area, then you
can state it here - both in the vertical and horizonal direction. Enabling horizontal
or vertical lines will insert a line between each elem ent. These lines can be used
for building up a table within the flow area.
Refer to page 95 for a couple of exam ples of how to use the flow area.
New line Element
The elem ent, New Line works with the flow area (Refer to page 81 for
exam ples) and sets the position of the following elem ents to be just below the
elem ents, that have just been placed. It will adapt the line distance to the size of
the elem ents, unless you have specified a specific line height in the flow area. If
you e.g. change the font size for som e texts, then this elem ent will increase the
line height.
ColumnBreak Element
W orks like the NewLine elem ent except that this elem ent force a colum n break
i.e. force the flow area to continue on a new colum n (if m ore than 1 colum n is
defined). If the current colum n is the last on the page a new page is issued.
PageBreak Element
W orks like the NewLine and Colum nBreak elem ents. The PageBreak elem ent
will force a page break if used inside a flow area.
Link Element
W ith the link elem ent you can em bed a file in the PDF files that you create. You
can em bed any file form at. This can e.g. be used for adding a descriptive
docum ent for each detail line in the m ain docum ent like below or e.g. for adding
the general term s and conditions into invoices:
82
Manual for InterFormNG
Version 2014R09
You open the em bedded file by clicking this icon:
You can also specify a display nam e which is shown when your m ouse pointer is
set to this position. This is shown above on the right.
The links/em bedded files above have been setup inside a ForEach loop
like below:
The positions above specifies an area in which this will be inserted:
The clip will fit the size of this area.
As the Design resource you can refer to a file, which you have previously
im ported (refer to page 53). This will be used for previews in the designer
instead of the real resource referred to later.
W ith the ‘Display nam e’ tab you can set a text to be displayed, when the m ouse
pointer is just above this link:
(The result is shown on the previous page as the yellow fram e on the right).
In this exam ple we are using Xpath to state a dynam ic text, where the fixed text
‘Data sheet for ‘ is followed by a value found in the XML file (Product).
Alternatively you can also select a constant, variable, function or even a value
from a translation table.
InterForm A/S 83
The Resource location tab is for selecting the file to be em bedded:
In the case above the com plete Xpath com m and is:
concat("file:///C:/Temp/",Product,".pdf")
- using the Product field from the XML file as a part of the dynam ic file, that we
want to include.
If Element
The If elem ent executes a subtree only if a certain condition is m et. The
properties are these:
So above you set the datatype (select between Text, Boolean, Num ber or Date)
and set the com parator (‘=’, ‘<‘, ‘>’....). The keep styles option can m ake
InterForm NG rem em ber the styles after exiting the If-subtree, which is
necessary if you want to use the IF function to conditionally set a style e.g. the
locale style.
Both the left and right side of the com parison can be set like this:
84
Manual for InterFormNG
Version 2014R09
So both the left and right side can be a constant value, a value from the XML file
found via Xpath, a variable, a function or a value from a translation table. If you
refer to XML, you can also chose to refer to a special cursor (pointing to a place
in the XML file) instead of the default cursor via ‘Cursor reference nam e’.
The IF includes an ELSE folder. In case the condition in the IF is not true, then
all elem ents in the ELSE folder are executed. Below we output a text constant
depending on if the condition is true or not.
InterForm A/S 85
ForEach Element
The ForEach elem ent tells InterForm NG to run a DO-loop for all branches in the
XML file with a specific nam e. W ith the ForEach Elem ent you can e.g. do a loop
for all detail ‘lines’ in the XML file. The properties are these:
The Xpath is the path to the branches that are to be handled. This is relative to
the default cursor - alternatively it can be relative to another cursor - just state it
under ‘Cursor reference nam e’. Finally you can with the scope control: Keep
styles tell InterForm NG to rem em ber any styles defined in ForEach subtree.
Repeat Element
Use the repeat elem ent to execute a subtree a specific num ber of tim es. The
num ber to run can be set as seen below:
In the exam ple above the num ber of runs is determ ined by a num ber which is
found in the XML file to the right. As the num ber found is 3 the repeat loop is run
3 tim es. Any styles defined are kept after exiting the repeat loop because of the
selected scope control. The num ber of repeats can also be set to a constant,
variable, function and even a translation value.
86
Manual for InterFormNG
Version 2014R09
Define Cursor Element
Use the ‘Define Cursor’ elem ent to define/create a new cursor (or pointer),
which is pointing to a position in the XML file. This cursor can later be
referenced in other elem ents like e.g. Text, If and ForEach. In the properties
you sim ply state the nam e of the cursor. Refer to page 47 for an exam ple of
how this can be used.
Select Cursor Element
The ‘Select Cursor’ elem ent sets an existing cursor to a path in the XML file
defined by Xpath. State the cursor nam e in properties unless you want to set
the default cursor. The cursor can later be used in other elem ents when
referencing to XML file data (then you just need to refer to the relative path from
this cursor).
Offset
Norm ally the design starts from position 0,0 from the top and left and elem ents are
positioned relative to this. Instead you can also nam e a specific position on the
page and then place elem ents referring to this nam ed offset. An advantage with
this function is that you can then later reposition elem ents by changing the value
of such an offset.
On the right you see an exam ple of how the Offset can be com bined with a flow
area to have different sized headers on page 1 and subsequent pages in the
output: The offset has one value when entering the flow area (to be used for
page 1) and is im m ediately change to the size of the subsequent pages.
InterForm A/S 87
Offset update
W ith this elem ent you can change the value of an existing offset already defined:
Refer to the Offset elem ent above for an exam ple of how to use this.
Variable Element
W ith this elem ent you declare/create a new variable elem ent. The variable nam e
and value is set like shown below, where the variable, Test is assigned the value
‘This is the value of m y variable’:
The exam ple on the right defines the value of the new variable based on another
variable. Notice, that you need to use Xpath when referring to a variable - both
for this and the variable update elem ent.
Variable Update Element
This elem ent is used for updating an existing variable. You use this elem ent to
to change the value of an existing variable. The variable elem ent above is used
for creating new variables. Here is an exam ple (left): Here we use Xpath to
assing a new value to the variable called counter, sim ular to this:
counter = counter +1
88
Manual for InterFormNG
Version 2014R09
Refer to page 125 for another exam ple using a longer Xpath expression.
Metadata Element
The m etadata elem ent is used for adding docum ent m etadata inform ation.
Som e of the possible m etadata fields are shown on page 103. The m etadata
can e.g. be used for specifying what kind of output(s) the incom ing XML file
should be converted to.
InterForm A/S 89
Combining Styles and groups
W hen you insert a style elem ent, then this elem ent is norm ally only active within the current
group. A group is defined as a subtree, which can be created by inserting one of these
elem ents:
Page elem ent
Label elem ent
Group elem ent
Fixed Area
Flow Area
IF elem ent
ForEach elem ent
Repeat elem ent
This m eans, that unless you activate the ‘Keep styles’ option of the surrounding elem ent, then
the style will be forgotten when leaving the actual subtree.
Here is an exam ple:
W e want to output an am ount from the XML file, but it should be written in red, if the am ount is
less than 0. W e can do that in this way:
90
Manual for InterFormNG
Version 2014R09
Please note, that the text elem ent is outside the scope of the If elem ent, so that it is always
inserted in the output. The If elem ent checks if the am ount is less than 0 and im portantly:
Activates: Keep styles. This m akes the color style within the IF scope (which sets the color to
red) active - even after exiting the If scope.
That m akes the new pen color red (for the text elem ent) if needed. After the text elem ent the
color is set to black - setting the color back if it was previously changed.
InterForm A/S 91
Other important icons and design settings
Apart from the elem ents and styles there are a few other icons, that can help you during the
design process.
On the very left of the screen you have these icons:
Press this icon to m ove the m arked elem ent upwards in the list.
Press this icon to m ove the m arked elem ent downwards in the list.
Deletes the m arked design elem ent. You can also just m ark an elem ent and
press the <Delete> key.
On the top of the screen these icons can be found:
Press this icon to create a new tem plate.
Opens an existing tem plate for editing.
Saves the current tem plate.
Closes the opened tem plate.
Click this icon (on the upper right) to preview the resulting design in PDF.
You can also use the norm al clipboard option cut/copy/paste to change the elem ents as well
as ‘undo’ and ‘redo’ the last changes.
All elem ents are placed between ‘Top’ and ‘Bottom’. Activate the position between ‘Top’ and
‘Bottom’, where you want to insert the elem ent. The new elem ent will be placed after this
position.
92
Manual for InterFormNG
Version 2014R09
Design examples and tips
W hen you design your tem plates it is very often worth while to really consider the structure of
the tem plate, that you are designing. Before you design anything you should consider the tips
below:
Reuse groups
Are there any groups in existing tem plates, that could be reused in this tem plate?
(If yes you should of course m ake them available by exporting them in the other tem plate and
im port them in the current tem plate).
You do that by first giving the group an export nam e in the other tem plate:
Now other tem plates can refer to it. Before we can reuse the group in the other tem plate we
first need to im port it as described on page 50.
Finally you can use the include elem ent to refer to this group by inserting the include
elem ent:
- and then state the tem plate and elem ent to use.
The type of elem ents that you want to reuse could of course be any elem ent. Just rem em ber,
that if you want to share and reuse styles via such a group, then you need to activate ‘Keep
styles’ for the group in question. If you forget the styles defined are forgotten after the group
have been executed.
Are there any groups of elem ents in the current tem plate, that could be reused m ore than
once? If yes: Group the elem ents together and give the group an export nam e. Now you can
refer to these groups with the include elem ent as well. (You do not need to im port groups that
are within the sam e tem plate).
Create Fixed areas when possible
Try whenever you can to group elem ents together in fixed (or flow) areas. It m akes it m uch
easier to m aintain in the longer run. It is e.g. m uch easier to reposition a com plete area instead
of repositioning each individual elem ent inside. Rem em ber, that you can even create sub
areas within areas.
W ith the fixed area below we state where the group of text elem ents is to be placed on the
InterForm A/S 93
output:
And the first text elem ent is placed as starting in position 0,0 and relative to the fixed area:
In the final output the 2 texts are printed under each other 3 inches from the top and 1 inch
from the left.
94
Manual for InterFormNG
Version 2014R09
The Flow area
Consider the Flow area, if you are handling a very flexible design, where you want elem ents to
be placed relatively to each other. Such an exam ple are detail lines. Here you can even use
the NewLine elem ent to force a line break.
W ith a setup like below we are printing all the detail lines of an xm l docum ent:
The flow area will position the detail lines starting 1 inch from the top of the paper and 1 inch
from the left.
The ForEach will loop over all the detail branches found in the XML file.
Each detail line is to presented as nice colum ns, so that is why a Fixed area is used.
The NewLine elem ent will m ake the output advance one line for each detail line - within the
flow area only. The term ‘line’ should here be thought of as any elem ent or even a group of
m any elem ents (not just text elem ents). Use the NewLine elem ent to advance the flow to
below the elem ents inserted - unless you specify a specific line height on the flow area.
An exam ple of com bination of m ultiple elem ents and the NewLine elem ent can be seen below:
InterForm A/S 95
The Page Static group
Consider the design you want: Are there any elem ents, that should be included in fixed
positions on each page (e.g. a header, a footer or even a waterm ark) ?
If so it should be considered to place these elem ents inside the static group of the used page
elem ent. Elem ents inside the static group (of the page elem ent) are executed autom atically on
each page. Here we even use the function, PAGE_NUMBER for conditioning the elem ents
based on the current page num ber - with the If elem ent. In this m anner we can create one
header for page 1 and another for the other pages.
An exam ple of such a setup is shown below:
Notice, that the ‘Pre’ subgroup under the ‘Statics’ is executed before the page is filled out
(stated outside Statics), and the ‘Post’ subgroup is executed after the page is filled out (and a
page break is executed right after this). The ‘Post’ can e.g. be used for triggering a page total
or sim ular.
The If conditions look like this:
96
Manual for InterFormNG
Version 2014R09
Solution to: Element unreachable
If you get an error like this when trying to preview the result of your tem plate:
Then you have inserted a design elem ent outside a page elem ent e.g. like below:
The error m essage indicates, that at least one design elem ent is placed outside a page
elem ent like above. (The text elem ent should have been placed within the scope of a page
elem ent). You can verify if it is outside by m inim izing the Page folder (Clicking on the ‘-‘ next to
Page): If the text elem ent is not shown, then it really is inside the Page elem ent.
Norm ally you will get this error because you have m isplaced the design elem ent, but in som e
situations you m ight want to do this, if you e.g. want to build up one or m ore groups (to be
reused in the design). Such a tem plate could contain a range of groups offering predefined
designs that you could use in all tem plates in the com pany.
InterForm A/S 97
If you want such a setup, you can actually tell InterForm NG to ignore this error (if it should
occour) by inserting an error style with this setting:
So set ‘Elem ent unreachable’ to ‘Ignore’ and then you will not get the error above.
There are errors in the template
W hen you save a tem plate this window m ight pop up:
By clicking ‘OK’ you can chose to save the tem plate in spite of any errors. If you want to
identify the exact errors, then you can click this icon on the lower right of the designer to list all
errors:
Then you can click each error in the list on the right to highlight the corresponding elem ent in
the list on the left:
98
Manual for InterFormNG
Version 2014R09
Setting up InterFormNG for automatic conversions
After you have setup one or m any tem plates you can now setup InterForm NG to autom atically
convert new XML files into PDF. You do that via Docum ent Processor service.
Installing/Uninstalling the Services
If you have not installed the services during the installation of InterForm NG you can also install
them later by selecting this in W indows:
Select: <Start>, ‘All Program s’, ‘InterForm NG', ‘Service’ and ‘Install Service’.
You uninstall the services by selecting:
<Start>, ‘All Program s’, ‘InterForm NG', ‘Service’ and ‘Uninstall Service’.
Configuring the Services
Before you start the service you should determ ine the source directory (of the XML files to be
converted), the output type and destination and also what tem plate to use for the conversion.
Even though you currently can only refer to one tem plate for the conversion you can still use
conditions in the tem plate to use other tem plates depending on the contents of th incom ing
XML file.
Refer to page 25 to see how you can configure the services via the web interface.
Rem em ber to always restart the Docum ent Processor service to activate any changes of the
processor configuration.
In som e installations you m ight want to run the services under a specific user (e.g. an
adm inistrator). If you want to do that you can set the user in this m anner:
In windows go into the Control panel and select ‘Adm inistrative Tools’ and then ‘Services’:
InterForm A/S 99
Now double click on the service in question and after selecting the ‘Log on’ tab you can set a
specific user to use for this service:
Starting and stopping the Services
After installing and configuring the service you can now start and stop the service by selecting
this in W indows:
Starting the Docum ent Processor service:
<Start>, ‘All Program s’, ‘InterForm NG', ‘Service’ and ‘Start Service’
Stopping the Docum ent Processor service:
<Start>, ‘All Program s’, ‘InterForm NG', ‘Service’ and ‘Stop Service’
Starting the W eb service:
<Start>, ‘All Program s’, ‘InterForm NG', ‘Service-web’ and ‘Start W eb-Service’
Stopping the W eb service:
<Start>, ‘All Program s’, ‘InterForm NG', ‘Service-web’ and ‘Stop W eb-Service’
A DOS window m ay briefly be opened and closed to indicate that the request is being
executed.
Alternatively you can start, stop and restart these services from the W indows Control panel in
this way:
1.
2.
Go into Control Panel.
Select ‘Adm inistrative Tools’ and then ‘Services’ or e.g. type ‘Services’ here:
- or select ‘Start’ and type in ‘Services’ here:
100
Manual for InterFormNG
Version 2014R09
3.
Now you can chose to stop, start or restart both InterForm NG services:
Using the Document Processor Service
You can envoke the Docum ent Processor service in a few ways:
1.
You can m ake the processor m onitor a directory for new XML files and m ake it react
whenever a new XML file arrives here.
2.
You can include the XML file as a field in a database and use a JDBC driver to m ake
the processor react to that. Refer to page 148 for details.
3.
You can use the workflow in com bination with both options above to configure how the
XML files should be processed. The workflow setup is described on page 109.
4.
Instead of the workflow you can also let the default tem plate of the processor branch
out to the relevant tem plate and itself set all necessary m eta data to specify the output
that you want.
5.
You can also call the processor via a socket call e.g. for previewing the result of a
m erge between the XML file and the default tem plate. The socket call is described on
page 140.
Below the com bination of option 1 and option 4 is described in details.
In order to use the service you sim ply m ove or copy the XML files onto the xm l_inbox as
configured above. If the service ist started it will autom atically convert the file and either print,
create a pdf file or em ail - depending on the configuration and the m eta data setup in the
tem plate.
W hen the incom ing XML files are processed they will be m oved: First they are m oved to the
subdirectory called ‘Processing’ and after processing the files will be m oved to either the
‘Processed’ or ‘Errors’ subdirectory depending on if the m erge when OK or not.
Setting up automatic printing
W hen a PDF docum ent has been produced, Interform NG allows the docum ent to be printed
on any printer that supports PostScript or PCL5 printing. Label printing on ZPLII com patible
printers (norm ally Zebra printers) is also supported. The m eta data key called ‘m ediaType’
should be set to ‘print’ in the used tem plate in order to enable printing and you should norm ally
select the printer by stating a docum entType (m eta data) in the tem plate and linking the
docum entType (m eta data) with a printer in the server configuration.
All m eta data keys are listed below.
Refer to page 35 for the printer setup of the server.
InterForm A/S 101
Setting up automatic PDF creation
If you want to create PDF files you need to enable this option in the web interface and set the
m eta data ‘m ediaType’ to ‘archive’. The path to state where the PDF files will be created is
com bined of 2 parts:
1) The ‘root’ directory within all PDF files will be created. This is setup in the server via
the web interface.
2) The directory above will be com bined (or concatenated) with the path stated in the
m eta data key ‘interform .plugin.archiver.folderNam e’, which you should assign in the
used tem plate.
The output file nam e will be the default nam e setup in the web configuration unless you have
specified the file nam e via the m eta data key ‘interform .plugin.archiver.fileNam e’ in the
tem plate.
The setup of the pdf attributes for the server is setup as shown on page 36.
Setting up e-mailing
E-m ailing from InterForm NG require, that you setup the em ailing (refer to a m ail server) in the
web config e.g. as shown on page 37. Here you can also state default subject and the default
contents (defined in an .rtf or .htm l file). Both of these can however be overridden by
assigning values to these m eta data keys: email.subject and em ail.tem plateNam e. Notice
also, that the em ail tem plate (rtf or htm l) can refer to m eta data set in the tem plate. You can
also refer to an em ail local via the 3 m eta data keys for em ail.locale as shown below. They
should be added to the em ail tem plate nam e in the sam e sequence as listed below:
em ail-tem plate_language_country_variant.rtf.
You can even define your own m eta data keys in the tem plate and let the em ail tem plate (rtf or
htm l file) refer to the m eta data in this m anner:
In the .rtf or .htm l em ail tem plate:
Dear @ [receiver.fullname],
According to our agreement we now forward you a test email.
This is variable1 from the template=@ [variable1]
E-mailed from InterFormNG
Best regards,
Peter Sørensen
InterForm A/S
Notice the bold text above, where we refer to the meta data key, variable1 which is defined
like this in the tem plate:
The final em ail contain this:
102
Manual for InterFormNG
Version 2014R09
Dear Kim Egekjaer,
According to our agreem ent we now forward you a test em ail.
This is variable1 from the tem plate=Text1
E-m ailed from InterForm NG
Best regards,
Peter Sørensen
InterForm A/S
The em ail tem plates m ust be stored in {INTERFORMNG_HOME}/resources/m ail-tem plate or
a subdirectory inside this.
Selecting the output via metadata
You can let the tem plate use inform ation from the XML file to set the actual output e.g.
depending on the contents of the XML file. The m etadata elem ent looks like this:
(Refer to page 89 for additional inform ation)
The m ost im portant m etadata fields are these:
General metadata
These are the m etadata, that can be generally used for all outputs:
mediaType
This m etadata determ ines the output that is wanted. It can be set to these
values:
print
Prints the result on a printer.
email
Em ails the pdf file, that is the result of the m erge with the
tem plate.
archive
Archives the result as a PDF file.
If you want m ultiple outputs you can assign m ultiple values separated with a
com m a like this:
(In this case the XML file will be m erged with the tem plate and saved as a
PDF file and after that it will also be em ailed).
multiup
Possible values are true and false. (False is default).
If you want to place m ultiple ‘form s’ or pages on a single page of output (often
also referrred to as N-up, Multi-up or ‘pages per side’), you should norm ally
use the label feature of the tem plate as described on page 78.
InterForm A/S 103
Prerequisites
The m ulti-up feature has been built especially for the PCL output. Currently it
also works for PDF and ZPL output, but the result for PDF and ZPL cannot be
guaranteed. For this to work you need to design a portrait design (where the
width is sm aller than the length of the m edia). You need to respect the nonprintable m argin in PCL which is around 6 m m .
This m ultiup feature m akes it possible to reuse the exact sam e tem plate for 2
different sizes of output.
If you set this option to true, the output will place 2 pages on one page in the
final output and the output size will be the double of what you have defined in
the tem plate. The tem plate must be designed in portrait and the height of the
page m ust be equal to or larger than the width. You can set the m eta data key
in either the tem plate or in the workflow.
The option will m ove to a new output page if there is a change of paper size
between an odd page to the following even page.
Exam ples: If you set do not change this or set it to false your output will be
like defined if you e.g. are creating 4 pages of A4 pages in your tem plate:
If you now set m ultiup to true, then the output will change:
You now get only 2 pages of output, where the original pages are rotated and
inserted in the output page, which is now twice as large as the original (Here:
A3 instead of the original A4).
If we consider a setup where the page size change, then InterForm NG will
adapt to the new size e.g. like below:
multiup=false:
104
Manual for InterFormNG
Version 2014R09
multiup=true:
As you can see above InterForm NG will change to a new output page if the
input page size should happen to change out of sequence with the page
breaks of the output (i.e. if the page size changes from an odd page to the
following even page).
InterForm A/S 105
Email metadata
These are the em ail m etadata available:
em ail.to
The nam e or nam es (com m a separated) of the recipient(s) to receive
the e-m ail.
email.tem plateNam e The (file)nam e of the tem plate to use for the contents (body) of the
m ail, relative to the m ail-tem plate folder. This can be either an htm l or
rtf file. See above for m ore inform ation.
email.attachment
The nam e of the attachm ent to create. You can use this to change the
som ewhat technical attachm ent nam e generated by default to
som ething m ore m eaningful, like "q4 report.pdf".
email.locale.language Indicate which language you would like the m ail to use. The plugin
uses this value to select a language specific tem plate. Exam ple: 'en'
for english.
email.locale.country Indicate which country you would like the m ail to use. The plugin uses
this value to select a country specific tem plate. Exam ple: 'US' for The
United States of Am erica.
email.locale.variant
Indicate which country you would like the m ail to use. The plugin uses
this value to select a country specific tem plate. Exam ple: 'aaland' for a
Swedish variant used in Finland.
email.subject
Allows you to specify which subject the e-m ail should have.
email.from
Allows you to specify which sender the e-m ail should appear to com e
from .
Print metadata
These are the print m etadata available:
interform .destination.printer.printerNam e
Force a nam ed printer to be used. Norm ally print is sent to a printer according to the rules
defined in printConfig.xm l, which is a configuration file belonging to the print m anager plugin.
Following these rules, a printer is selected based on what docum ent type is being printed.
However, it m ay be that in som e cases a tem plate designer wants to force the print to go to a
specific, nam ed printer, regardless of any rules defined other places. Note: To avoid having to
m odify the tem plate when the nam e of a printer changes, we recom m end using the m etadata
key interform .destination.printer.printerId in stead.
interform.destination.printer.interactive
Possible values: "true", "false"
Display an interactive print dialog prior to printing a docum ent. If the end user needs to be able
to m anually m odify print attributes, a dialog sim ilar to the one found in typical word processors
m ay be displayed to the user, allowing any value to be changed. Note that when Interform NG
runs as a service, it is undesirable to enable interactive m ode, since the runtim e environm ent
m ay prohibit such dialogs from being shown.
interform.destination.printer.doPrint
Possible values: "true", "false"
Enable printing, yes or no. If this value is set to false, the docum ent will not be printed.
interform.destination.printer.sides
Possible values: "one-sided", "two-sided-long-edge", "two-sided-short-edge"
Specify how pages are printed. Typically this value is derived from the docum ent type
according to rules defined in printConfig.xm l.
interform.destination.printer.copies
Specify the num ber of copies to print. Typically this value is derived from the docum ent type
according to rules defined in printConfig.xm l.
interform .destination.printer.printerId
Select a printer based on id, as defined in printConfig.xm l. By selecting a printer by its id in
printConfig.xm l rather than by specific nam e, a printer m ay be renam ed without breaking all
the tem plates that refer to it using the m etavalue interform .destination.printer.printerNam e.
106
Manual for InterFormNG
Version 2014R09
interform.destination.printer.pcl.image.fullcolor
Possible values: "true", "false"
Specify if the PCL output should be in color or black and white. Default value is true m eaning
that the output is in color. Most black/white printers are able to convert the color im ages in to
black/white so the default value should norm ally be fine. W ith ‘false’ the output is in black/white
and you should also expect a sm aller output data stream with this value. W ith the default value
(true) you m ight see a problem when printing on older black/white printers, so for those
printers you need to set this to false.
interform.destination.printer.mediaSize
Possible values: "iso-a4", "executive", "ledger" etc.
Force selection of a specific paper size. Typically this value is derived from the docum ent type
according to rules defined in printConfig.xm l. Allowable values vary from one runtim e
environm ent to the next. The printConfig com m and line tool can be used to produce a
com plete list of m edia sizes for each printer.
interform.destination.printer.mediaTray
Possible values: "top", "bottom ", etc.
Force selection of a specific printer tray. Typically this value is derived from the docum ent type
according to rules defined in printConfig.xm l. Allowable values vary from one runtim e
environm ent to the next. The printConfig com m and line tool can be used to produce a
com plete list of m edia trays for each printer.
interform.destination.printer.orientation
Possible values: "portrait", "landscape", "reverse-landscape", "reverse-portrait"
Force print to be output in landscape or portrait m ode. Typically this value is derived from the
docum ent type according to rules defined in printConfig.xm l
interform.destination.printer.pcl.pcl
W ith this m eta data you can add extra PCL com m ands in the begining of the PCL print out
from InterForm NG. You can e.g. use this to select a specific paper drawer on the printer (e.g.
to select between plain paper and preprinted paper.).
The best way to select the drawer is to set the paper type of each drawer on the printer and
then insert a PCL com m and to select the sam e paper type.
Here is a list of the available paper types:
Paper type
Command
Plain
EC6W dPlain
Bond
EC5W dBond
Color
EC6W dColor
Labels
EC7W dLabels
Recycled
EC9W dRecycled
Letterhead
EC11W dLetterhead
Cardstock
EC10W dCard Stock
Prepunched
EC11W dPrepunched
Preprinted
EC11W dPreprinted
Transperancy
EC13W dTransparency
Please notice, that the PCL com m ands m ust be written exactly as above. They are case
sensitive and the space between ‘d’ and ‘S’ in ‘EC10W dCard Stock’ m ust be included.
InterForm A/S 107
Notice, that even though the printer m enu m ight show each of these printer types in your local
language you should still use the english com m and shown above.
If the printer does not support selection of the drawer via the paper type, you can use an
alternative com m and: EC&l#H, where the # is a PCL drawer num ber. So if you e.g. want to
select PCL drawer 5 the com m and is: EC&l5H.
Please notice, that the PCL drawer num ber can range from 1 to 255 and is NOT the sam e
num ber as the physical drawer on the printer and that the num ber depends on the exact
printer m odel used. For som e printer you even need to select drawer num bers in the range
250-255.
If you want to insert m ultiple PCL com m ands you just concatenate them into the sam e m eta
data.
interform .destination.printer.pcl.pjl
This m eta data key works like interform.destination.printer.pcl.pcl except that this
com m and inserts a PJL com m and in the begining of the PCL print out. This PJL com m and
can e.g. be used to add extra PJL com m ands to call functions on the printer.
interform.destination.printer.finishings
Possible values: "none", "staple", "cover", "bind" etc.
Specify finishings, such a stapling. Typically this value is derived from the docum ent type
according to rules defined in printConfig.xm l. Note that your printer m ay support m any different
values for this attribute, according to its physical capabilities. The printConfig com m and line
tool can be used to produce a com plete list of finishings values for each printer.
interform.destination.printer.zebra.clearBuffer
Possible values: "true", "false".
This value is specific to Zebra label printers. If the value is true, the system will output a ~JA
com m and im m ediately before printing the label, thus clearing any previous print jobs that the
Zebra printer m ay have queued.
108
Manual for InterFormNG
Version 2014R09
The InterFormNG WorkFlow
You can do autom ated m erges like described in the previous section, but InterForm NG also
contains an alternative which m ay help you for m ore com plicated setups. This is called
W orkFlow. W ith the workflow you can select specific XML files from nam e, directory or
contents and the specify one or m ultiple actions for the XML files fitting the condition.
In general the workflow settings overrules the m eta data settings, that you m ay have done in
the used tem plates - when activated. You can setup the workflow via the InterForm NG web
interface.
The workflow consists of 2 elem ents:
Template selections and Output configurations. The Template selections sets the
tem plate and what kind of output you want and the output configurations are only needed if
you want to override the printed output to a specific printer (or specific printing features) after
running the tem plate.
Enabling the Workflow
In order to use the W orkflow you should enable it. It is a good idea first to setup the W orkflow
so that the service will run as before and then enable the W orkFlow. The W orkFlow is enabled
from the web interface by selecting ‘System Configurations’ and ‘General System Settings’:
In the bottom of the screen you can enable the W orkflow and enable Auto refresh for the
W orkflow. If Auto refresh is enabled you will not need to restart the InterForm NG Processing
service to put workflow changes into production.
Rem em ber to restart the processor service after enabling/disabling the workflow - as shown
on page 100.
InterForm A/S 109
Working with Template Selections
Select ‘W orkflow configurations’ and ‘Tem plate Selections’ in the top to see all the rules:
A rule is a selection of XML files. W hen a new XML file arrives in the XML_inbox directory as
defined in the configuration, then the W orkflow (if activated) will com pare the attributes and
contents of the XML file with each of the rules listed until a condition for a rule is validated as
true. Only the first true rule is executed, so the sequence of the rules is quite im portant. You
can rearrange the rules sim ply by dragging a rule up or down in the list.
(For each rule you can later setup one or m ore actions, but we will com e back to that later).
W hen adding a Rule you are prom pted for a nam e. After entering the nam e you can on the
right specify the condition for the XML file selection:
The condition can be built up with these:
Condition:
You can com bine conditions with either ‘AND’ or ‘OR’ for this. The first line for
a rule should be blank.
Type:
This is the type of condition you want to use. Possible values are:
XPATH
Use this to condition the rule on the contents of the XML file.
Via the Xpath language you extract inform ation from the.
DIR
Select the rule by com paring the directory where the XML file
is found.
FILENAM E
M ETADATA
110
Manual for InterFormNG
Version 2014R09
If you set the operator to EQUALS, then the full path m ust be
specified e.g. like C:\XM L_inbox\processing.If you state
LIKE then you should specify a unique directory in the path without any ‘\’ e.g. XM L_inbox.
The file nam e of the XML file can be used for conditioning the
rule.
W hen calling InterForm NG either via the database plugin or
via a socket call, you can set one or m ore m etadata keys. W ith
this you can condition the rule on these m etadata keys.
Specification: If you select XPATH for the type above, then you should insert the Xpath
expression here. For other types this should not be used.
Operator:
Possible values are:
LIKE
Here you can use a com pare text as the value using various
special conditions for the com parison - se Value below.
EQUALS
The expression selected in type (and specification) m ust be
exactly what is specified in the Value field.
Value:
Here you can specify either a fixed string - if you are using ‘EQUALS’ as the
Operator or a com pare expression if you are using ‘LIKE’. For the LIKE option
you can use these features:
%
\\
[abc]
[^abc]
[a-zA-Z]
[a-d[m -p]]
[a-z&&[def]]
[a-z&&[^bc]]
[a-z&&[^m -p]]
.
\d
\D
\s
\S
\w
\W
Signifies any string which is has a length of 0 or m ore.
The backslash character
a, b, or c (sim ple class)
Any character except a, b, or c (negation)
a through z or A through Z, inclusive (range)
a through d, or m through p: [a-dm -p] (union)
d, e, or f (intersection)
a through z, except for b and c: [ad-z] (subtraction)
a through z, and not m through p: [a-lq-z](subtraction)
Any character (m ay or m ay not m atch line term inators)
A digit: [0-9]
A non-digit: [^0-9]
A whitespace character: [ \t\n\x0B\f\r]
A non-whitespace character: [^\s]
A word character: [a-zA-Z_0-9]
A non-word character: [^\w]
Other valid expressions can be found via this link:
http://docs.oracle.com /javase/1.5.0/docs/api/java/util/regex/Pattern.htm l#sum
The expression in the screen above is a dum m y condition, which is always true, so if you only
want one rule, then you could start out with this. If you later want to select special XML files
you should insert new rules prior the one using the dum m y condition as only one rule will be
selected (the first one in the list).
A blank condition (or rather a rule without a condition) will function as a dum m y condition,
which is always true.
InterForm A/S 111
Working with actions
For each rule you can setup one or m ore actions to be executed. Click the ‘Actions’ tab to
view the actions for the specific rule:
A blank action selects the norm al, default action. This will m ean: If the tem plate is blank, then
the default tem plate setup in the System configuration will be used and that will decide what
output to generate.
If you leave the output type and m eta data blank in the screen above, then the outputType and
m eta data m ust be setup in the used tem plate and then this will be used. If you specify
anything in the screen above, then these settings will override the specifications in the
tem plate.
You can add one or m ore actions by clicking the ‘Add Action’ icon above.
Setting meta data values
For each action you can set som e m eta data keys if needed. To work with them you just m ark
an Action to view the m eta data keys already set for this action. To add a new m eta data key
you click the Add M eta Value icon:
The drop down list of keys will adapt to whatever you have setup for the output type above.
Above we have selected achive (for creating PDF files) thus the m eta data keys listed are the
ones interesting if you want to create PDF files. If you want to insert a m eta data key not listed
112
Manual for InterFormNG
Version 2014R09
you can still just type in key. In the exam ple above we have specified the output file nam e to
be MyFile.pdf.
Working with Output Configurations
You can chose to redirect the printed output after the XML file has been processed. This
functionality has been added to offer the m axim um flexibility to those users, what are not
working from a fixed location, so that they would like to select different printers depending on
where they are currently working. Norm ally you would e.g. let the tem plate select the output
printer, but with an output configuration you can override that selection if a certain condition is
m et and select a different printer for those situations.
The output configurations are working independently of the tem plate selections above, so you
can here insert general overriding rules for the printed output.
You select the output configuration for the workflow from the web interface via ‘W orkflow
Configurations’ and ‘Output Configurations’:
You add new Output configution rules via the ‘Add Rule’ on the left. The rules works as for the
Tem plate Selections:
A rule is a selection of XML files. W hen a new XML file arrives in the XML_inbox directory as
defined in the configuration, then the W orkflow (if activated) will com pare the attributes and
contents of the XML file with each of the rules listed until a condition for a rule is validated as
true. Only the first true rule is executed, so the sequence of the rules is quite im portant. You
can rearrange the rules sim ply by dragging a rule up or down in the list.
The selection of the output configurations works independently of the tem plate configurations.
W e are selecting the XML files nam ed M yfile.xm l above. This specific XML file is printed on a
specific printer specified by setting the associated m eta data value:
(W e have clicked the ‘Meta Values’ tab to see this).
InterForm A/S 113
By clicking the ‘Add Meta Value’ icon you can one or m ore m eta data values to set the output
printer or other printer settings. In the case above we override the printer set in the tem plate
and set the output printer to be HP4700. (The HP4700 printer m ust be registered in the
InterForm NG printer configuration).
Example Rule setups
The rules that you setup for the tem plate and output selection can be quite advanced. To help
you to define the right condition a few exam ples are listed below:
In this case I want to print out all on a default printer - except the cheques, which are identified
by the contents:
W e can identify this type of XML file with this rule in the tem plate selection:
Notice, that the first rule is checking for cheques before the default one. Under Action each
rule selects different printers.
The default print out rule use a condition which is always true:
The cheques XML files m ight also be identified by a special file nam e e.g. Cheques_ followed
by a date like Cheques_2013-12-12.xm l. A test only valid for such file nam es and contents
above could be:
You can even use a m eta data value as a part of the condition. The m eta data value could
com e from a database plugin - or when using the workflow output configuration it could also
have been set in the tem plate. In the tem plate you could e.g. do som e
com parisons/calculations to find out what kind of paper, that should be used and signal that
back to the workflow as an extra m eta data:
114
Manual for InterFormNG
Version 2014R09
Transforming and Splitting XML files
In som e situations you m ight need to transform or split up the original XML file. This can e.g.
be necessary if m ultiple docum ents are included in a single XML file and you want to distribute
them individually as e.g. em ails or separate PDF files.
The function can not only split up an XML file, but also transform it into a different structure
hence this nam e: Transform .
An exam ple of an XML file (exam ple.xm l) is here:
<orders>
<header>InterFormNG Transform Demo</header>
<footer>Copyright (C) 2013</footer>
<customer>
<customernumber mail="[email protected]">A</customernumber>
<invoice>
<invoicenumber>101</invoicenumber>
<orderline>alpha</orderline>
<orderline>bravo</orderline>
</invoice>
<invoice>
<invoicenumber>102</invoicenumber>
<orderline>charlie</orderline>
<orderline>delta</orderline>
<orderline>echo</orderline>
</invoice>
</customer>
<customer>
<customernumber>B</customernumber>
<invoice>
<invoicenumber>103</invoicenumber>
<orderline>foxtrot</orderline>
<orderline>golf</orderline>
<orderline>hotel</orderline>
<orderline>india</orderline>
</invoice>
</customer>
</orders>
This functionality will be described while working on this xm l file.
The XML file contains elem ents, that are in com m on, which m ight be included in each of the
resulting XML files and it contains m ultiple nodes (Invoices) which is the basis of the split, so
that each Invoice branch will result in a new XML file.
If you do not want to include any com m on nodes in the new xm l files, then you can skip the
XSLT description below and just define the path for the node, that should be the used as basis
for the split.
Activating the transform function
The transform function is activated only via the workflow via the web interface, so in order to
use this you first need to activate the workflow (refer to page 109 for details). Under ‘W orkflow’
and ‘Tem plate Selections’ you can setup the transform :
The next thing is to add a rule to be triggered for the xm l file(s), that should be transform ed.
You should refer to the description of the W orkflow on page 110 for details of that. W hen you
select a rule you can now setup a transform by clicking the ‘Transform ’ tab:
InterForm A/S 115
The fields are:
Split Xpath Expression:
The path to the detail node. If there are m ultiple nodes with this path, then m ultiple XML files
will be created (split). This will later be referred to as the detail path. If you (e.g. by accident)
have specified a path for the Split Xpath Expression, which does not exist, then the file will
not be transform ed. If you are afraid of typing in the wrong path (it m ust be 100% accurate and
it is case sensitive), then you can use the graphical designer and use the text elem ent, set it to
xpath and use ‘select from docum ent’ (refer to page 71) and copy if from there.
Transform stylesheet:
Here you can enter an XSLT stylesheet to setup the contents of the new XML file(s). If you
keep this blank, then only the detail path will be included in the new XML file(s).
Folder:
Here you can type a path to where the transform ed file(s) will be created. You can state a
relative path (relative to {INTERFORMNG_HOME}) or the full path. If you keep this blank, then
the XML files will be created in {INTERFORMNG_HOME}/transform _box. The use of the
folder is described on page 119.
If you add any actions under the Actions tab, then these will be executed for all the new,
transform ed XML files.
Before we run the transform ation it is a good idea to check out if the transform ed/splitted XML
files are used as input in the workflow. You can set that via ‘Input Configurations’ and ‘File
System Configuration’:
The Process transform ed xmls setting defines if you want to run the transform ed xm l files
through the norm al processing. This could be relevant if you want to handle each new xm l file
in a different m anner i.e. som e should em ailed and others should be printed. For first tim e
testing you could set this to ‘No’. If you set this to ‘Yes’ and you set the output folder of the
transform to the ‘XML_inbox’ directory, then the transform ed
If you run the exam ple.xm l file as shown on page 115 through the transform definition above,
then the output will be these 3 files in {INTERFORMNG_HOME}/transform _box:
-------------------------------------------------------------<?xm l version="1.0" encoding="UTF-8"?>
<invoice>
<invoicenum ber>101</invoicenum ber>
<orderline>alpha</orderline>
<orderline>bravo</orderline>
</invoice>
-------------------------------------------------------------<?xm l version="1.0" encoding="UTF-8"?>
<invoice>
<invoicenum ber>102</invoicenum ber>
<orderline>charlie</orderline>
<orderline>delta</orderline>
<orderline>echo</orderline>
116
Manual for InterFormNG
Version 2014R09
</invoice>
-------------------------------------------------------------<?xm l version="1.0" encoding="UTF-8"?>
<invoice>
<invoicenum ber>103</invoicenum ber>
<orderline>foxtrot</orderline>
<orderline>golf</orderline>
<orderline>hotel</orderline>
<orderline>india</orderline>
</invoice>
So by sim ply stating the path, that should trigger the split you will get each branch in separate
files like above. So that is the sim plest way to split, but the contents of the output is fixed.For
m ore advanced splitting and transform ing we will need to use XSLT, which is described on
page 120.
The files created by the transform function will (as default) be created in the
{INTERFORMNG_HOME}/transform _box directory nam ed the sam e as the original file with a
counter added at the end e.g. Exam ple-1.xm l, Exam ple-2.xm l etc..
The files created in the tranform _box (or whatever output directory you specify) will not
autom atically be deleted, but will be overwritten if you transform an XML file with the sam e
nam e again.
If you want to build a tem plate for the splitted files you can e.g. copy one of them from
{INTERFORMNG_HOME}/transform _box into
{INTERFORMNG_HOME}/resources/docum ent and im port it in the tem plate.
InterForm A/S 117
Adding actions for the transformed files
You can add actions for the transform ed file(s) in one or two m anners. The easiest way is to
add the sam e actions for all the transform ed files:
Same action for all transformed files
If you want to do the sam e action for all the files, then you can sim ply add the actions inside
the sam e rule in the workflow:
You can then let the tem plate set the m etadata to steer the actual output epending on the
contents. Here we set the output pdf file nam e to be the the text “invoice” followed by the
invoicenum ber from the XML file and ending with “.pdf”:
Thus creating 3 files: invoice 101.pdf, invoice102.pdf and invoice 103.pdf.
Different action for each transformed file
If you instead want to execute different actions for each splitted file, then you need to feed the
transform ed files back into the workflow processor. That m eans, that you need to rem ove any
action for the workflow rule, which transform s:
118
Manual for InterFormNG
Version 2014R09
You also need to m ake sure, that you tell InterForm NG to process any transform ed files via
Input Configurations and File System Configuration and set Process transform ed xmls
to Yes:
(You do not need to set the output folder for the transform ed files).
Here we have defined, that only invoice 101 should be converted into a PDF file:
Creating xml files in specific folders
Please notice the folder option of the transform :
If you m ake sure, that the output folder for the transform is blank, then you can be sure, that
your setup cannot loop where rule where the transform ed files will be transform ed again and
so on. This is a hidden safety feature in InterForm NG: If the folder is blank, then the
transform ed files cannot trigger a rule using a transform definition.
However if you specify an output folder, then you can e.g. create the xm l files in a folder
handled by another application - or place them in the inbox directory and let the workflow
decide what to do. W ith set setup you can transform already transform ed files, but now it is
your responsibility to avoid a logical loop in the setup with an infinite loop, which will just keep
on creating new xm l files.... (as the safety feature above is disabled when you specify a folder.)
InterForm A/S 119
Introducing XSLT
You can define the transform ation/split via an XSLT. The stylesheet is called once for each
detail branch (the exact path of the branch was defined earlier) and a detail branch (Split
Xpath expression). In short the detail branch is the ‘trigger’ for the split - each branch will
trigger a new XML file. The branch is transferred as a param eter with the nam e: “detail”, so
you need to define this param eter in the stylesheet:
<xsl:param nam e="detail"/>
In the stylesheet you can then refer to the value of this param eter as: “$detail”. W e will use
this param eter to insert the detail branch when building up the structure of the new XML files.
For the exam ple above the stylesheet could be this:
<?xml version="1.0" encoding="UTF-8"?>
<xsl:stylesheet xmlns:xsl="http://www.w3.org/1999/XSL/Transform" version="1.0">
<xsl:param name="detail"/>
<xsl:template match="/">
<order>
<xsl:copy-of select="/orders/header"/>
<xsl:copy-of select="/orders/footer"/>
<xsl:copy-of select="$detail/parent::*/customernumber"/>
<xsl:copy-of select="$detail"/>
</order>
</xsl:template>
</xsl:stylesheet>
The first two lines defines the stylesheet and the 3 rd line defines the param eter, detail.
Lines 4-11 retrieves the header, footer and custom er num ber from the input XML file and
stores them in the new xm l file(s).
Next the new XML file is defined by copying the com plete branches and inserting them in the
structure as we want.
Before you use xslt you m ake yourself fam iliar with the form at e.g. via online introductions like:
http://www.w3schools.com /xsl/
W e save the xslt as the file: split_example.xslt in the transform folder within the resource
folder. W e will use the xslt for advanced transform ing below:
Advanced transforming
On page 115 we defined a sim ple split of the exam ple.xm l file. This resulted in 3 files, which
contained the data from the detail path (Split Xpath Expression), but not the parents of this, so
you could not see which custom er each invoice belongs to. You can see the original xm l file on
page 115. Here you can see, that invoice 101 and 102 belongs to custom er num ber A, and
invoice 103 belongs to custom er B.
To use an XSLT (splt_exam ple.xlst) as defined above, we refer to this in the workflow:
Please rem em ber, that the paths and nodes m ust be written exactly as in the XML file - the
Xpath expression is case sensitive.
The resulting xm l files looks like this:
120
Manual for InterFormNG
Version 2014R09
<?xml version="1.0" encoding="UTF-8"?>
<order>
<header>InterFormNG Transform Demo</header>
<footer>Copyright (C) 2013</footer>
<customernumber mail="[email protected]">A</customernumber>
<invoice>
<invoicenumber>101</invoicenumber>
<orderline>alpha</orderline>
<orderline>bravo</orderline>
</invoice>
</order>
<?xml version="1.0" encoding="UTF-8"?>
<order>
<header>InterFormNG Transform Demo</header>
<footer>Copyright (C) 2013</footer>
<customernumber mail="[email protected]">A</customernumber>
<invoice>
<invoicenumber>102</invoicenumber>
<orderline>charlie</orderline>
<orderline>delta</orderline>
<orderline>echo</orderline>
</invoice>
</order>
<?xml version="1.0" encoding="UTF-8"?>
<order>
<header>InterFormNG Transform Demo</header>
<footer>Copyright (C) 2013</footer>
<customernumber>B</customernumber>
<invoice>
<invoicenumber>103</invoicenumber>
<orderline>foxtrot</orderline>
<orderline>golf</orderline>
<orderline>hotel</orderline>
<orderline>india</orderline>
</invoice>
</order>
These XML files are now being handled by the workflow again (as we told it to), but only the
first XML file fits the condition in the workflow:
W e have told it to create a pdf file in the ‘101' directory inside the default pdf_outbox directory:
W e could have added new rules to handle the other 2 xm l files, so that they could be sent as
em ail and/or print, but that should be trivial.
Splitting the intro_demo.xml file
For the Intro_dem o.xm l file, which is included in InterForm NG inside
{INTERFORMNG_HOME}/resources/docum ents/Intro you can also split up this for each
Docum ent node. This is done with this path:
InterForm A/S 121
Using this xslt creates one xm l file for each docum ent - including the inform ation from the
parent node:
<?xml version="1.0" encoding="UTF-8"?>
<xsl:stylesheet xmlns:xsl="http://www.w3.org/1999/XSL/Transform" version="1.0">
<xsl:param name="detail"/>
<xsl:template match="/">
<Root>
<xsl:copy-of select="$detail/parent::*/CompanyInfo"/>
<xsl:copy-of select="$detail/parent::*/Greeting"/>
<xsl:copy-of select="$detail/parent::*/Barcode"/>
<xsl:copy-of select="$detail"/>
</Root>
</xsl:template>
</xsl:stylesheet>
122
Manual for InterFormNG
Version 2014R09
Appendix A: Using XPath with InterFormNG - in
short
In InterForm NG you use the language XPath hen referencing to data from the XML file. There
are m any sources of inform ation if you want to know m ore about XPath, but you can also
sim ply read the few exam ples below to have a good idea of how it can be used with
InterForm NG:
In XPath you can e.g. refer to data in this XML file:
If you type this in InterForm NG as the XPath:
/Data/Header/Type , then the actual text retrieved is: VDA4902.
Also the Xpath: /Data/Header/Type/text() will retrieve this value.
Please note that the Xpath is case sensitive!
Starting with a ‘/’ indicates that you are referring to the node from the root of the XML file. It the
Xpath does not start with a ‘/’, then the path is relative to a an XML file cursor. This cursor can
in InterForm NG previously have been set via a Select Cursor Elem ent in InterForm NG or via a
ForEach Elem ent:
/Data/Body/Label
If you insert the XPath above in a ForEach Elem ent, then InterForm NG will run the loop for
each label node in the XML file.
You can then inside of the ForEach loop refer to the data inside the label e.g. with an Xpath
like this:
Receiver/ReceiverLine[@ sequence=1]
This will retrieve the value ‘Dr. Ing. H.c.F. Porsche AG’ in the label above by selecting the
ReceiverLine elem ent, where the attribute ‘sequence’ equals “1".
InterForm A/S 123
You can also retrieve an attribute. If you e.g. consider this addition to the type elem ent above:
W ith this XPath specification you will retrieve the value of the attribute m ytype of the Type
elem ent: /Data/Header/Type/@ mytype
So use the @-sign to refer to attributes.
If you only specify the Xpath to a level with subelem ents, then all subelem ents are also
included in the result. If you e.g. state the XPath: /Data/Header you will get this result:
VDA4902 A5 PORSCHE STANDARD wernert 1 001 1 DEFAULT DEFAULT
If you want to concatenate constants with data from the XML file you can use the concat
function e.g. like this:
concat('ABCD',/Data/Header/Type,'EFGH')
This inserts the XML data right in between the constants: ‘ABCDVDA4902 EFGH’.
You m ay notice, that there above is a blank between the XML data and the trailing constant.
You can rem ove that by rem oving leading and trailing blanks of the XML data like so:
concat('ABCD',norm alize-space(/Data/Header/Type),'EFGH')
You can also substring data like this: substring(/Data/Header/Type, 2,3)
The first param eter of the substring com m and is the string, that should be subset, the second
is the start position and the third is the length, so if /Data/Header/Type contains the string
‘VDA4902', the result will be ‘DA4'.
Other string functions are:
substring-before(expression1 ,expression2)
substring-after(expression1 ,expression2)
replace(expression1, expression2, expression3)
substring-before searches for the text, expression2 inside expression1 and returns the part
of expression1, that precedes the found position. This form ular returns a ‘c’:
substring-before("c:\dir", ":\")
substring-after searches for the text, expression2 inside expression1 and returns the part of
the expression1, that follows the found position. This returns ‘dir’:
substring-before("c:\dir", ":\")
replace replace any occurrence of expression 2 in expression1 with expression3. So the
expression replace('abc@ def','@ ','123') will result in the string: ‘abc123def’.
translate
The function, translate is able to translate a character with another. It will search the first string
for any character in the second string and if found it will use the sam e num ber in the list from
the third string instead. This will e.g. replace any com m a with a dot in the variable, in:
translate(“{@in}”, ”,” , ”.”)
–S1–
S2
S3
124
Manual for InterFormNG
Version 2014R09
If the third string is em pty the character will be replaced with nothing: (com m as are rem oved)
translate(“{@in}”, ”,” , ””)
You can also convert from lower case to upper case in this way:
translate(“{@in}”, ”abcde” , ”ABCDE”)
If substring-before and substring-after is not able to find the text, then an em pty string is
returned.
Num eric operations:
You can also do norm al calculations as adding, subtracting, m ultiplicating, dividing in XPath.
This can e.g. also be stated as an XPath expression:
substring(/Data/Header/Type, 4,3)*5 div 6 (you need blanks around ‘div’)
W ith the value (‘VDA4902') as m entioned above (for /Data/Header/Type) this will be
calculated as 490 m ultiplied with 5 (equal 2450) divided by 6 m aking the result:
‘408.3333333333333'.
So as you can see divide is stated as ‘div’ and m odulo is ‘mod’.
A num eric result is converted to a string when returning the value so you can e.g. com bine
substring functions to the result, so we can even lim it the num ber above to 2 decim als in this
m anner:
concat(substring-before(substring(/Data/Header/Type, 4,3)*5 div 6,'.')
,'.',substring(substring-after(substring(/Data/Header/Type, 4,3)*5 div 6,'.'),1,2))
Num bers m ust be written with a dot as decim al point without any thousand separator. To
convert a decim al com m a into a dot and to rem ove any dots (used as 1000 delim iter) you can
use the translate function like this: translate(string,”,.”,”.”). Assum ing you are using a dot as a
decim al point and a com m a as thousand separator you can rem ove the com m as with this
expression: translate(string,”,”,”“).
The result can then be used in num eric expressions.
The explaination of the above is, that we concatenate the substrings consisting of:
1) The part of the am ount, that is in front of the ‘.’ i.e. ‘408' in this case.
2) The ‘.’.
3) Only the 2 first characters of the part of the am ount, that is after the ‘.’ i.e. ‘33' in this case.
- m aking the final result: ‘408.33'.
A m ore sim ple round of can also be done if you set the data type (in the text elem ent) to
num eric and then use this form ula:
round(100*(/Data/Header/Type*5 div 6)) div 100
(The round function will round off to the nearest integer).
Rem em ber that you can com bine the XPath functions, and that there are m any other functions
not m entioned here. This appendix hopefully gives you an idea of how strong a tool this is. You
can e.g. refer to this link for additional inform ation:
http://www.w3schools.com /xpath/xpath_functions.asp
Using variables in Xpath expressions
Xpath is a strong tool in itself, but you can even use
variables in your Xpath expressions. The way it
works is by referring to a variable as: @ {variable}
Here is an exam ple:
InterForm A/S 125
Here the value of variable, filenam e is set as value of variable, invoice_text (which in this case
is language dependent and contains e.g. the value “Invoice” or “Rechnung”) concatenated with
the docum ent num ber, which is found in the XML file and finally the extension “.pdf” is added,
so that a possible value of filenam e could be “Invoice1001.pdf”.
126
Manual for InterFormNG
Version 2014R09
Appendix B: Edit printing setup in setup files
W hen setting up InterForm NG for printing, the norm al way would be to configure this in the
web interface as described on page 25. You can however add m uch m ore functionality into the
configuration files if needed. You can even write your own scripts in the configuration files to
e.g. dynam ically select the printer without changing the tem plates. Here the setup files behind
the scenes are described.
Setting up InterForm NG for printing require these steps:
(InterForm NG_Hom e refers to the path saved in the InterForm NG_Hom e environm ent
variable)
•
Edit the file {InterForm NG_Hom e}/Profiles/default/application.properties. The file can
have this content:
# Service resource settings
service.pdf.outputPath=c:/temp
service.xmlengine.defaultTemplate.filename=order_PS.itpl
# Log settings
service.log.daysToKeep=30
designer.log.daysToKeep=30
poll.enabled=true
# interval in seconds
poll.interval=5
trigger.enabled=false
trigger.port=9999
trigger.answer=Request is being processed
In the file above you should select the tem plate (design) to m erge with when printing
out. That is specified as ‘service.xmlengine.defaultTemplate.filename’ above
(So here it is set to order_PS.itpl).
•
The tem plate used should state what kind of output you want. That is done by adding
this m etadata in the tem plate: (m etaType=print)
InterForm A/S 127
•
You also need to specify which printer to use for the output. This is setup in the file
{InterForm NG_HOME}/basic-printm anager/conf/printConfig.xm l. The structure is
described below, but you can also add the necessary data in this m anner: Open the
com m and tool by selecting the <Start>, ‘All Program s’, ‘InterForm NG' and ‘Cm dTool’.
W hen selecting this option a Dos W indow will open.
If you here run the com m and ‘Printconfig’ an exam ple XML configuration is displayed.
Now you can copy the output into the printConfig.xm l file by right clicking on the head
of the dos window and select ‘Edit’ and ‘Select All’. Now right click again on the head of
the window and select ‘Edit’ and ‘Copy’. Finally paste the clipboard contents into the
printConfig.xm l file.
Now edit the printConfig.xm l file and change the last lines, so that you select the printer
num ber, that you want to use - e.g. printer1:
<documentTypes>
<documenttype name="*">
<print>
<value>true</value>
</print>
<printer>
<value>printer1</value>
</printer>
<interactive>
<value>false</value>
</interactive>
</documenttype>
</documentTypes>
Selecting the printer via XML
The actual printer used for printing out is selected via the basic-printm anager plugin.
The basic-printm anager plugin reads configuration data from a file called “printConfig.xm l”,
stored in the plugin's “conf” directory (the path is defined during install as described on page
15). If this file is not available, it is created autom atically by the plugin and initialized with
default values that will ensure that docum ents are printed on the default printer connected to
the current com puter, and an interactive dialog sim ilar to the print dialog found in windows
applications is shown to the user just before printing the docum ent.
Structure of printConfig.xml
The XML configuration file has the following general structure:
<printConfig>
<printerTypes>
128
Manual for InterFormNG
Version 2014R09
</printerTypes>
<printers>
</printers>
<docum entTypes>
</docum entTypes>
</printConfig>
For a good exam ple of som e of the attributes available you can e.g. run the InterFormNG
Cm d application in this way: Under ‘All Program s’ you select ‘InterForm NG' and ‘Cm dTool’.
W hen selecting this option a Dos W indow will open. If you here run the com m and
‘Printconfig’ an exam ple XML configuration is displayed:
> printconfig
<?xm l version="1.0" encoding="UTF-8" standalone="yes"?>
<PrintConfig xm lns="http://interform 400.com /xm l/schem as/2010/01/01/">
<printerTypes>
<printerType>
<id>printer1Type</id>
<supportedAttributes>
<supportedAttribute nam e="copies"/>
<supportedAttribute nam e="orientation">
<value>portrait</value>
<value>landscape</value>
</supportedAttribute>
<supportedAttribute nam e="m ediaSize"/>
<value>iso-A4</value>
<supportedAttribute nam e="m ediaTray">
<value>m anual</value>
</supportedAttribute>
<supportedAttribute nam e="chrom aticity">
<value>m onochrom e</value>
</supportedAttribute>
</supportedAttributes>
</printerType>
</printerTypes>
<printers>
<printer type="printer1Type">
<id>printer1</id>
<nam e>HP Color LaserJet 4700</nam e>
</printer>
</printers>
<docum entTypes>
<docum enttype nam e="Letter">
<print>
<value>true</value>
</print>
<printer>
<value>*</value>
</printer>
<interactive>
<value>true</value>
</interactive>
<attributes>
<attribute nam e="m ediaSize">
<value>na-letter</value>
</attribute>
<attribute nam e="sides">
<value>two-sided-long-edge</value>
</attribute>
</attributes>
</docum enttype>
<docum enttype nam e="A4">
<print>
InterForm A/S 129
<value>true</value>
</print>
<printer>
<value>*</value>
</printer>
<interactive>
<value>true</value>
</interactive>
<attributes>
<attribute nam e="m ediaSize">
<value>iso-a4</value>
</attribute>
</attributes>
</docum enttype>
</docum entTypes>
</PrintConfig>
(The actual display depends on the printers installed. The XML file has been changed.)
The first level under PrintConfig contains these elem ents:
PrinterTypes
Printers
Docum entTypes
Each one are described below including the attributes available within:
PrinterTypes
The printerTypes block is a list of printer types, each having a definition of which param eters
are supported for that type, and which values are valid for each param eter.
Note that these values are som ewhat technical and not easy to write in m anually. Fortunately
they m ay be retrieved autom atically through the com m and line tool as shown above.
The list of supported attributes typically contain several nam es and value lists. As you will see
later, these attributes m ay be set to specific values for individual docum entTypes, and no
value can or should be set unless the relevant printer supports that value.
Note that the “id” elem ent contains a printer type nam e. This is a local nam e of a printer type,
which you can freely define. Having these printer type definitions allows you to define a long list
of identical printers that all support the sam e attributes by sim ply referencing the sam e printer
type.
Printers
The printers block defines a list of printers, each referencing a printer type. Each entry in the
list also identifies the printer network nam e to use.
The reason for having the printers list is so that docum ent types can specify destination
printers based on a logical id rather than the nam e of a specific printer. This way if a printer on
the network needs to be replaced, only the nam e in the corresponding printer elem ent needs
to be changed – the docum entType definitions can rem ain as they are.
DocumentTypes
At the end of the XML exam ple above you can see how to define a docum ent type. This block
is where a docum ent of a logical type, such as a letter or a label, is m atched to a concrete
printer along with a set of print attributes. An exam ple of such a configuration m ight be that
docum ents of type “Letter” should go to the HP printer on the first floor, and should be printed
in color and stapled if there are m ore than one page. This could be done via this addition to the
printConfig.xm l file:
<documentTypes>
130
Manual for InterFormNG
Version 2014R09
<documenttype name="Letter">
<print>
<value>true</value>
</print>
<printer>
<value> printer2</value>
</printer>
<interactive>
<value>false</value>
</interactive>
<attributes>
<attribute name="Chromaticity">
<value>color</value>
</attribute>
<attribute name="Finishings">
<value>staple</value>
</attribute>
</attributes>
</documenttype>
</documentTypes>
You can define several docum ent types to cover the possible printing preferences there m ight
be. W ithin each docum ent type you can set these basic settings (as shown above):
print
If true the PDF file will be printed. If false nothing will be printed.
printer
W hat printer to use. Refer to the printer ID as defined above under
‘Printers’.
interactive Should an interactive dialog be opened to ask for printing preferences? Set
this to true or false.
Below is the list of printing attributes and exam ples of possible values. Rem em ber that
docum ent types should only select attributes and values, that are supported by the used
printer (as listed in the printer type).
Som e printers m ight offer support for m ore or fewer values - check the specific printer with the
printconfig com m and as described above.
InterForm A/S 131
Attribute
Description / Examples of values
Copies
An integer valued that specifies the num ber of copies to be printed.
On m any printers the supported num ber of collated copies will be lim ited by
the num ber of physical output bins on the device, and m ay be different from
the num ber of uncollated copies which can be supported.
Sides
duplex
An alias for two-sided-long-edge one-sided
Im poses each consecutive print-stream page upon the sam e side of
consecutive m edia sheets.
tumble
An alias for "two sided short edge"
two-sided-long-edge
Im poses each consecutive pair of print-stream pages upon front and back
sides of consecutive m edia sheets, such that the orientation of each pair of
print-stream pages on the m edium would be correct for the reader as if for
binding on the long edge.
two-sided-short-edge
Im poses each consecutive pair of print-stream pages upon front and back
sides of consecutive m edia sheets, such that the orientation of each pair of
print-stream pages on the m edium would be correct for the reader as if for
binding on the short edge.
132
Manual for InterFormNG
Version 2014R09
Finishings
Supported values include:
none
Perform no binding.
staple
Bind the docum ent(s) with one or m ore staples.
cover
This value is specified when it is desired to select a non-printed (or
pre-printed) cover for the docum ent.
bind
This value indicates that a binding is to be applied to the docum ent; the type
and placem ent of the binding is site-defined.
saddle-stitch
Bind the docum ent(s) with one or m ore staples (wire stitches) along the
m iddle fold.
edge-stitch
Bind the docum ent(s) with one or m ore staples (wire stitches) along one
edge.
staple-top-left
Bind the docum ent(s) with one or m ore staples in the top left corner.
staple-bottom-left
Bind the docum ent(s) with one or m ore staples in the bottom left corner.
staple-top-right
Bind the docum ent(s) with one or m ore staples in the top right corner.
staple-bottom-right
Bind the docum ent(s) with one or m ore staples in the bottom right corner.
(Continues on next page)
Attribute
Description / Examples of values
InterForm A/S 133
Finishings
(continued)
edge-stitch-left
Bind the docum ent(s) with one or m ore staples (wire stitches) along the left
edge.
edge-stitch-top
Bind the docum ent(s) with one or m ore staples (wire stitches) along the top
edge.
edge-stitch-right
Bind the docum ent(s) with one or m ore staples (wire stitches) along the right
edge.
edge-stitch-bottom
Bind the docum ent(s) with one or m ore staples (wire stitches) along the
bottom edge.
staple-dual-left
Bind the docum ent(s) with two staples (wire stitches) along the left edge
assum ing a portrait docum ent.
staple-dual-top
Bind the docum ent(s) with two staples (wire stitches) along the top edge
assum ing a portrait docum ent.
staple-dual-right
Bind the docum ent(s) with two staples (wire stitches) along the right edge
assum ing a portrait docum ent.
staple-dual-bottom
Bind the docum ent(s) with two staples (wire stitches) along the bottom edge
assum ing a portrait docum ent.
Chrom aticity
An enum eration that specifies monochrom e or color printing. This m ay be
used to instruct the printer to output m onochrom e (grey-scale) print even if
the docum ent was originally produced in color.
Supported values are:
color
Color printing
monochrom e
Monochrom e printing
Attribute
134
Manual for InterFormNG
Description / Examples of values
Version 2014R09
Orientation
Supported values are:
landscape
The content will be im aged across the long edge of the m edium .
portrait
The content will be im aged across the short edge of the m edium .
reverse-landscape
The content will be im aged across the long edge of the m edium , but in the
opposite m anner from landscape.
reverse-portrait
The content will be im aged across the short edge of the m edium , but in the
opposite m anner from portrait.
MediaTray
An enum eration that specifies the m edia tray or bin to use for this print. The
list of form ally supported values is shown below.
Note that the target printer m ay contain paper trays not listed below or offer
an “Autom atic” setting. Som e printers support trays with custom nam es. You
can specify any value that the printer understands.
bottom
The bottom input tray in the printer.
envelope
The envelope input tray in the printer.
large-capacity
The large capacity input tray in the printer.
main
The m ain input tray in the printer.
manual
The m anual feed input tray in the printer.
middle
The m iddle input tray in the printe.
side
The side input tray.
top
The top input tray in the printer.
InterForm A/S 135
Attribute
Description / Examples of values
MediaSize
Specifies the m edia nam e on which to print. The list of form ally supported
values is shown below.
Note that the target printer m ay support m edia sizes not shown in this list,
and m ay reject som e of the m edia sizes shown. You can specify any value
that the printer understands.
a|b|c|d|e
Specify value to indicate the general paper form at to use. For exam ple, “a”
for A sized paper.
executive
folio
invoice
iso-a0 ... iso-a10 | iso-b0 … iso-b10 | iso-c0 … iso-c6
Standard iso sized paper, for exam ple iso-a4 for A4 size.
iso-designated-long
italy-envelope | monarch-envelope | na-letter | na-10x13-envelope |
na-10x14-envelope | na-10x15-envelope | na-6x9-envelope |
na-7x9-envelope | na-8x10 | na-9x11-envelope | na-9x12-envelope |
na-number-10-envelope | na-number-11-envelope |
na-number-12-envelope | na-number-14-envelope |
na-number-9-envelope | personal-envelope
Italic and North Am erican envelope sizes
japanese-double-postcard | japanese-postcard
Special postcard paper sizes
jis-b0 ... jis-b10
Japanese paper size variations
ledger | na-5x7 | na-legal | na-letter | tabloid
North Am erican paper size variations
quarto
Scripting
In the exam ple above you will notice that values are set using the <value> elem ent. Typically
you will be setting values this way, but there is another option available that allows scripting to
determ ine the value to use. Here is an exam ple of how to specify the “copies” attribute using
scripting:
<attribute nam e="copies">
<expr><![CDATA[
Calendar cal = Calendar.getInstance();
cal.setTim e(new Date());
if (cal.get(Calendar.MONTH) == Calendar.JANUARY) {
return 3;
} else {
return 1;
}
]]></expr>
</attribute>
136
Manual for InterFormNG
Version 2014R09
In this som ewhat contrived exam ple, the <value> elem ent has been replaced by an <expr>
elem ent containing a snippet of script code. The logic in the code states that in january, the
num ber of copies should be 3, otherwise it should be 1. The value of the outlying elem ent will
becom e the result of the return value from the script.
The scripting engine used is BeanShell, which offers a syntax that is sim ilar to Java. For m ore
inform ation please refer to the official BeanShell hom e page, which m ay be found here:
www.beanshell.org
Access to meta data
In som e cases, print param eters depend on m eta data from the docum ent being printed. For
exam ple, if a docum ent is m ore than 4.000 pages long it should be printed in black and white
rather than in color, or if a docum ent is generated by a specific group of users or from a
workstation in a specific departm ent, it should be directed to a printer in that physical location.
To give adm inistrators this level of print param eter control, script code is given access to m eta
data for the docum ent being printed, in the form of a variable called m etaData. This variable is
a java Map consisting of key-value pairs with key being a String type and value being in
principle any type of object, but m ost often another String.
One problem that m ight require scripting is, if a custom er wants special print attributes applied
to print for a specific departm ent. An exam ple of how this m ight be solved is shown here:
<attribute nam e="chrom aticity">
<expr><![CDATA[
String departm entNum ber = m etaData.get(“departm entNum ber”);
if (deptNum ber.equals(“4711”)) {
// Executive departm ent
return “color”;
} else {
return “m onochrom e”;
}
]]></expr>
</attribute>
In the code fragm ent above, the departm ent num ber of the docum ent is exam ined and if this
num ber equals 4711, the docum ent is printed in color. Otherwise it is printed in m onochrom e.
Please note that the m etaData key “departm entNum ber” is used only as an exam ple.
Interform NG doesn't by itself have any special fields for departm ent num bers, the field and its
value would have to be supplied along with the docum ent.
Som e types of m eta data are collected or generated during the conversion from XML to PDF,
and is m ade available to scripts through the m etaData variable. This could be the value of
docum ent variables, the total num ber of pages or the nam e of the current user.
Printing labels on Zebra printers
InterForm NG includes a plugin which is capable of rendering ZPL2 for use on Zebra printers.
This allows you to use your design tem plates to output labels on Zebra printers.
Requirements
In order to print labels on Zebra printers you m ust com plete the following steps:
•
•
Connect a Zebra or ZPL2 com patible printer to the m achine on which the InterForm NG
service runs.
Update the Print Configuration XML docum ent to include a reference to the Zebra
printer (Described on page 128).
InterForm A/S 137
•
Ensure that the ZPL rendering plugin is correctly installed and configured
Connecting and installing the Zebra printer
Begin by physically connecting the printer to the network or to the local m achine. Please refer
to the Zebra operating m anuals for m ore inform ation on how to do this.
Next you m ust add the printer to your operating system s list of printers. For windows you can
download the relevant printer drivers from the Zebra support web site. For other operating
system s your options are lim ited to whatever support is available natively. You m ay use any
printer driver that supports sending a raw byte stream to the device. For Linux you can use the
Local Raw printer driver.
Updating the Print Configuration
Before you can print any labels you m ust configure InterForm NG to use the printer. This is
done in the Print Configuration XML file.
First you m ust include a description of the printer type, as shown below:
...
<printerTypes>
...
<printerType>
<id>ZebraPrinter</id>
<supportedAttributes>
...
</supportedAttributes>
</printerType>
...
</printerTypes>
In this exam ple a printer type called ZebraPrinter is defined. The list of known attributes m ay
be retrieved using the com m and line tool (as described on page 129), and is usually lim ited for
Zebra printers. Please also note that there is currently no support in Interform NG for Zebra
specific printer attributes.
Next, add a printer that references the type
<printers>
...
<printer type="ZebraPrinter">
<id>zebra01</id>
<nam e>zm 400</nam e>
<inputForm at>
<m im eType>x-application/zpl</m im eType>
</inputForm at>
</printer>
...
</printers>
The fragm ent above tells InterForm NG that a printer of type "ZebraPrinter", with the logical id
"zebra01", is available with the system nam e "zm 400". It further includes a new <inputForm at>
configuration, which m arks this printer as being capable of printing ZPL.
Next you m ust configure which docum ent types render as ZPL rather than postscript. Once
again edit the print configuration XML file as shown below:
<docum entTypes>
<docum entType nam e="YourLabelDocum entType">
<printer>
<value>zebra01</value>
</printer>
138
Manual for InterFormNG
Version 2014R09
<print>
<value>true</value>
</print>
<attributes>
...
</attributes>
</docum entType>
</docum entTypes>
In the exam ple above, a docum ent type nam ed YourLabelDocum entType is configured to be
sent to the printer with the logical id zebra01. Any docum ent which has a docum ent type of
YourLabelDocum entType will autom atically be rendered as ZPL and sent to the zebra01
printer.
Installing the ZPL rendering plugin
Interform NG allows your design tem plates and the associated XML input data to be rendered
to different form ats. It is sim ilar to the PDF rendering plugin in that it im plem ents the
RendererPlugin API interface, but it produces ZPL rather than PDF.
The ZPL rendering plugin should be installed by default by the product installer. To verify that it
is correctly installed, exam ine the profile plugin directory for a folder called zpl-renderer. On
W indows you m ay find it here:
C:\Users\Default\Application Data\Interform \Interform NG\profiles\default\plugins
Verify that the zpl-renderer subfolder exists, and that it contains a lib folder with several jar files
inside.
ZPL rendering plugin configuration
Like other plugins, the ZPL rendering plugin reads configuration inform ation from a file called
plugin.properties stored in the conf folder:
C:\Users\Default\Application
Data\Interform \Interform NG\profiles\default\plugins\zpl-renderer\conf\plugin.properties
The following configuration option is available:
zpl.targetResolution
In order to render elem ents at the correct sizes and positions, the plugin needs to know what
the final resolution of your ZPL printer is. Typical values are:
For printers using a 6 dot/m m printhead the “dots per inch of printer” value is 152.4
For printers using a 8 dot/m m printhead the “dots per inch of printer” value is 203.2
For printers using a 12 dot/m m printhead the “dots per inch of printer” value is 304.8
For printers using a 24 dot/m m printhead the “dots per inch of printer” value is 609.6
Please refer to the docum entation that cam e with your Zebra printer for inform ation on what
the resolution for your specific printer is.
InterForm A/S 139
Appendix C: Socket based XML processing
The InterForm NG service provides several ways for XML to enter the system for processing. A
database m ay be queried periodically, a directory m ay be scanned and - as a recent addition,
a client m ay connect directly to the service process and send XML over a socket for
processing. This functionality is im plem ented by a plugin called "network-printjob".
This docum ent provides docum entation on the expected input form at, the form at of the
processing receipt, as well as a sim ple exam ple program that posts a processing request to
the service and prints the results to the console.
Input format
A request to process XML is sim ilar to a HTTP 'POST' request. It is structured as a series
key/value pairs, followed by a m essage body of arbitrary length.
Header values are expected to be sent using a sim ple form at resem bling that of typical
property files:
key1: value 1 (cr lf)
key2: value 2 (cr lf)
(cr lf)
The list of key/value headers is term inated by an em pty line. After this you m ay send the actual
XML to be processed.
Header keys
Header keys are expected to follow a nam ing convention in order to be recognized as
InterForm NG m eta values. For exam ple:
x-interform-metadata-documentType: invoice
Notice the nam ing convention where a special prefix nam e is used to indicate that the value
should be attached as m eta data to the new job. Any key that begins with
"x-interform -m etadata" is autom atically set as m eta data on the resulting job. The key will be
everything following the prefix, and the value will be everything following the colon. In the
exam ple above, the m eta data key will be "docum entType" and the value "invoice".
Result format
The result of a processing request is a sequence of key/value headers containing status
inform ation. In som e cases a body containing additional inform ation m ay follow the headers.
For exam ple:
x-interform-response: 200 (cr lf)
x-interform-response-message: Operation completed normally (cr lf)
x-interform-result-url:
file:/tmp/InterFormNG/service/127_0_0_1-01109543659659647700.pdf (cr lf)
(cr lf)
body... (optional, only used for extended error information at the moment)
Each key begins with "x-interform ". Below is a table of the currently supported response
codes:
140
Manual for InterFormNG
Version 2014R09
Response key
Description
x-interform-response
A response code similar to a HTTP response code is always returned.
Positive response codes are in the 2xx range, whereas error response
codes are in the 5xx range. If an error code in the 5xx range is returned, a
stack trace is typically returned in the response body.
x-interform-responsemessage
A textual message describing the operation result. If a job ended in error,
the message will indicate the cause of the error.
x-interform-result-url
If a PDF was produced as a result of the processing, this header will return
an URL pointing to the actual file. Note that depending on the value of the
mediaType meta value, a PDF may not necessarily be available as a result
of processing the XML. In this case no result url header will be returned.
Initiating a connection - A Java example
The following is a sm all snippet of Java code that shows how to connect to the service and
provide som e XML data for processing. Note that for the sake of sim plicity, a lot of the typical
error handling and other scaffolding has been left out.
// Establish connection
System.out.println("Sending request");
Socket socket = new Socket("127.0.0.1",9091);
// Send XML request
PrintWriter pw = new PrintWriter(socket.getOutputStream());
pw.println("x-interform-metadata-documentType: invoice");
pw.println("x-interform-metadata-otherKey: other value");
pw.println("");
pw.println("<xml/>");
pw.flush();
// Tell the service that we are done. VERY IMPORTANT.
socket.shutdownOutput();
// Read results
System.out.println("Reading response");
BufferedReader br = new BufferedReader(new
InputStreamReader(socket.getInputStream()));
String line = br.readLine();
while (line != null) {
System.out.println(line);
line = br.readLine();
}
br.close();
Although the exam ple is sm all it does illustrate a few key points. First of all it shows how to
send m etadata along with your request, and secondly it dem onstrates how to properly close
the output stream before waiting for input. It is im portant that you use the shutdownOutput()
m ethod on the socket, rather than calling close() on the output stream . Otherwise the socket
itself will be closed and you will not be able to receive a response.
Plugin configuration
The network-printjob accepts TCP connections on a port, which by default is 9091. If you wish
to change this port num ber, you m ay do so by editing the file
<plugin-hom e-directory>/network-printjob/conf/plugin.properties for the network-printjob plugin.
For exam ple, the following configuration will change the port num ber to 7777:
network.printjob.portNumber=7777
Note that the InterForm NG service m ust be restarted in order for this change to take effect.
InterForm A/S 141
A Groovy web server example
The Groovy exam ple below shows how to define a web server to prom pt for a nam e, insert it
in an XML file, use a socket call (in InterForm NG) to convert the XML file into PDF and present
the resulting PDF file in the browser:
-----------------------------------------------------------------@ Grab('org.apache.cam el:cam el-core:2.9.0')
@ Grab('org.apache.cam el:cam el-groovy:2.9.0')
@ Grab('org.apache.cam el:cam el-jetty:2.9.0')
//@ Grab('org.slf4j:slf4j-log4j12')
im port org.apache.cam el.Processor
im port org.apache.cam el.im pl.DefaultCam elContext
im port org.apache.cam el.language.groovy.GroovyRouteBuilder
def W EB_PAGE = '''
<htm l>
<body>
<form action="/" m ethod="post">
Please enter your nam e: <input type="text" nam e="nam e" />
</form >
</body>
</htm l>
'''
def XML = '''
<xm l>
<nam e>_NAME_</nam e>
</xm l>
'''
def TEMPLATE = 'Hello.itpl'
def generatePdf = { exchange ->
def inputForm = new Properties()
inputForm .load(exchange.in.body)
def nam e = inputForm .nam e ?: 'W orld'
def xm l = XML.replace('_NAME_', nam e)
def m ap = [
'x-interform -m etadata-com .interform 400.xm l.Tem plate': TEMPLATE
]
def props = new Properties()
props.load(new FileInputStream (new File(System .env.INTERFORMNG_HOME,
'profiles/default/plugins/network-printjob/conf/plugin.properties')))
if (props.enabled == 'false') throw new Exception("Network-printjob not enabled")
def port = props.'network.printjob.portNum ber'.toInteger()
def encoding = 'UTF-8'
def socket = new Socket('127.0.0.1', port)
def os = socket.outputStream
def request = new BufferedW riter(new OutputStream W riter(os, encoding))
m ap.each { key, value -> request.write "$key: $value\n" }
request.newLine()
request.write(xm l)
request.flush()
socket.shutdownOutput()
def response = new BufferedReader(new InputStream Reader(socket.inputStream ,
encoding))
props = new Properties()
142
Manual for InterFormNG
Version 2014R09
props.load(response)
response.close()
socket.close()
if (props.'x-interform -response' == '200') {
def url = props.'x-interform -result-url'?.substring(6)
exchange.out.body = new File(url).bytes
} else {
exchange.out.body = props
}
} as Processor
def context = new DefaultCam elContext()
context.addRoutes new GroovyRouteBuilder() {
void configure() {
//
new File('_W ORKSPACE').m kdirs()
//
context.properties.put('Cam elJettyTem pDir', '_W ORKSPACE')
//
Jetty needs this
from ('jetty:http://0.0.0.0:1234/')
.choice()
.when { it.in.getHeader('Cam elHttpMethod') == 'GET' }
.transform ().sim ple(W EB_PAGE)
.otherwise()
.process(generatePdf)
}
}
println 'Starting...'
context.start()
addShutdownHook {
context.stop()
println 'Stopped!'
}
synchronized(this) { wait() }
-----------------------------------------------------------------Prerequisites:
•
Groovy is installed (http://groovy.codehaus.org/)
•
InterForm NG is running
•
InterForm NG is accepting request from socket (Input Configurations > Network
Configuration)
Run the script:
groovy W ebFrontEnd.groovy
It m ight take som e tim e to start the first tim e, as it is downloading Cam el
(http://cam el.apache.org/).
Open a browser:
http://localhost:1234/
Enter your nam e and press Enter.
How it works.
Cam el is started at line 69 in W ebFrontEnd.groovy.
At line 75 Cam el starts a Jetty server that listens on port 1234.
W hen a GET request is received (line 77) , it replies with the web page (line 11).
W hen a POST request is received (line 79), it
•
extracts the form data (line 30-32)
•
generates xm l-data (line 34)
•
opens a socket connection to InterForm NG (line 46)
InterForm A/S 143
•
•
•
•
•
144
sends m etadata - what tem plate to use (line 49)
sends the generated xm l-data (line 51)
receives the response (line 55)
extracts the PDF-file (line 62)
and, finally, returns the PDF-file (line 63)
Manual for InterFormNG
Version 2014R09
Appendix D: Installing on other platforms
Installation of InterForm NG on the windows platform is described on page 12. InterForm NG
can in principle be installed on any java enabled platform , but the installation procedure (and
som e few functions) are specific for the platform you are installing it on. Below the specifics for
various platform s are m entioned.
Installing on Linux
First download the InterForm NG-shell.7z file intended for this specific version. There is no
standard unzipper, but Ubuntu should find the program , p7zip itself, which you then install to
unzip the file.
It is not im portant where the InterForm NG library is saved, but a suggestion could be /usr/local.
The Shell scripts are not executables, you need to add that:
chm od u+x service-linux.sh service-web-linux.sh
Java is not standard in e.g. Ubuntu, so you need to install it yourself:
sudo apt-get install default-jre
Then you are finally ready to go.
First you start the service:
./service-linux.sh &
Then the service web is started:
./service-web-linux.sh &
W ait a few m inutes and then open a browser:
http://localhost:1885/webapp-springm vc
Now you can start to configure the service as described in this m anual.
W hen running the designer on Linux you m ight see a few ‘issues’:
W hen you first open a tem plate or resource the folder m ight be em pty. If that is the case, then
just click ‘cancel’ and try again.
The preview m ight return with the error ‘rundll32'
To m ake preview run under Linux you need to add a line to the client.properties file (inside
user/profiles/default)
In the bottom of the file you will find this:
## External programs for displaying PDF and PCL files
PDFviewer=
rundll32 url.dll,FileProtocolHandler
PDF application
previewCommand=
/usr/bin/evince "@{absoluteFileName}"
## previewCommand.zpl=
notepad "@{absoluteFileName}"
## External programs for displaying HTML files
HTMLviewer=
rundll32 url.dll,FileProtocolHandler
HTML viewer
## Use default windows
## Use default windows
The line to add is written in bold above.
InterForm A/S 145
Installing on AIX
To install InterForm NG on the AIX platform you should go through the procedure below:
1) Download the InterForm NG-shell.7z file to a PC.
2) Unzip the file with 7-zip. You can download this application (freeware) from here:
http://www.7-zip.org
3) Now you need to copy the com plete unzipped directory onto the AIX. For that you can e.g.
FTP it with FileZilla (freeware). Filezilla can be download from here:
http://filezilla-project.org
4) Now we need to set the execute-bit for the used files. First change to the uploaded directory
and the change the bit for the files: (we assum e, that you have uploaded to the interform ng
directory, just replace this with the path you are using).
cd /interformng
chmod u+x *-aix.sh
5) Start designer (if the AIX is not headless), service and service-web with these com m ands:
(It is assum ed, that you are still in the right directory)
./designer-aix.sh
Start the service and then set the service.log file for the output log.
./service-aix.sh
tail -f user/profiles/default/logs/service.log
Start the web service and then set the service-web.log file for the output log.
After a few m inutes (you can check when no m ore data is added to the log file) the web server
should be running and you can access it via this link:
http://localhost:1885/webapp-springmvc
(Localhost should of course be replaced with the IP-address or nam e of the AIX server).
6) Now we can do a sm all test to verify that the service is running by copying a dem o xm l file
into the default xm l_inbox. W ith the second com m and we check if a PDF file has been
generated - if not you should check the service.log file. The third com m and should created a
printed output in the system s default output queue:
cp user/resources/document/Intro/Intro_demo.xml user/xml_inbox
ls user/pdf_outbox
cp user/resources/document/Intro/Intro_demo_print.xml user/xml_inbox
7) The sh scripts should be updated to set the right path for InterForm NG and the right path for
Java e.g. like below: W e use the vi editor to change the contents:
vi designer-aix.sh
Now change the begining of the file to this:
(/interform ng should be replaced with the path to where you have placed InterForm NG. The
third line could also refer to the Java_hom e environm ent variable.)
cd /interformng
export INTERFORMNG_HOME=./user
/usr/java6/jre/bin/java …
146
Manual for InterFormNG
Version 2014R09
vi service-aix.sh
(/interform ng should be replaced with the path to where you have placed InterForm NG. The
third line could also refer to the Java_hom e environm ent variable.)
cd /interformng
export INTERFORMNG_HOME=./user
/usr/java6/jre/bin/java …
vi service-web-aix.sh
(/interform ng should be replaced with the path to where you have placed InterForm NG. The
third line could also refer to the Java_hom e environm ent variable.)
cd /interformng
export INTERFORMNG_HOME=./user
/usr/java6/jre/bin/java …
Here is an exam ple of the changed contents:
(Above the path to InterForm NG is /ng/2013.R525).
8) Now we want to install service-aix.sh and service-web-aix.sh as daem ons with these
com m ands:
mkitab interform:2:respawn:/interformng/service-aix.sh
mkitab interformWeb:2:respawn:/interformng/service-web-aix.sh
9) Fix preview in designer
You need to do the equivalent to this - dependent on the operating system :
vi user/profiles/default/client.properties
previewCommand= /usr/bin/open "@{absoluteFileName}"
# OSX
previewCommand= /usr/bin/evince "@{absoluteFileName}"
# Linux
InterForm A/S 147
Appendix E: Processing a Database
It is possible to let InterForm NG use database entries as input. The XML file is here to be
inserted into a field. Below this possibility is described when im plem ented with MySQL and
Linux.
InterForm NG uses JDBC and Hibernate to connect to the database.
In this exam ple we will use MySQL, running on the sam e server as InterForm NG.
But any database server should work, as long as there is a suitable JDBC driver.
Using Hibernate it is possible to let InterForm NG create the needed table(s) and fields.
But you can also use an existing database.
In that case you'll have to edit job.hbm .xm l to use the correct table and fields.
To access the database, InterForm NG needs a usernam e/password and the authorization to
read and update the database.
In this exam ple we will use a database nam ed 'interform Database' and a user called
'interform User' with the password 'interform Password'.
But you can change that, if you want to.
The Database
Make sure the database is running.
If it is not running, MySQL can be started with the following com m and
service mysqld start
But it should be running as a daem on.
Make sure the database and user is created and that the user has the needed authorization.
On MySQL you'll have to do som ething like
mysql -u root -p
create database interformDatabase;
create user 'interformUser'@ 'localhost' identified by 'interformPassword';
grant alter, create, delete, drop, index, insert, select, update on interformDatabase.* to
'interformUser'@ 'localhost';
InterForm NG don't need all the granted privileges.
alter, drop, etc. is only needed if you want InterForm NG to create the needed table(s) and
fields.
InterForm NG only needs insert, select and update priviledge.
insert is only needed if you use the m etadata-table (m ore on this later).
On a running production server it m ight be a good idea to only grant insert, select and update.
JDBC Driver
Make sure InterForm NG can find the JDBC-driver.
One way to do that, is to copy the JDBC-driver to Java's lib/ext/ directory.
On Fedora Linux with OpenJDK that would be som ething like
cp /usr/share/java/mysql-connector-java.jar /user/lib/jvm/jre-1.7.0-openjdk.x86_64/lib/ext
You can download the JDBC-driver from MySQL's hom epage.
148
Manual for InterFormNG
Version 2014R09
Configure InterFormNG's Database plugin
Open a browser and go to http://localhost:8080/webapp-springm vc
Select 'Input Configurations' > 'Database Configuration'
On the first tab, General Settings, enter the following
Driver Nam e
com .m ysql.jdbc.Driver
Password
interform Password
Database URL
jdbc:m ysql://localhost:3306/interform Database
Usernam e
interform User
Active
Yes
Processing Priority
Norm al
If you are using another database server, driver, database, user, etc. you'll have to change it.
On the second tab, Hibernate Settings, enter the following
Hibernate Dialect
org.hibernate.dialect.MySQL5InnoDBDialect
DDL Strategy
update
Show SQL
No
If you are using an existing database and table(s), the Hibernate Dialect m ight not be needed.
But if you want InterForm NG to create the database and table(s), it is needed.
BE VERY CAREFULL W ITH THE DDL STRATEGY!!
On a running system it should ALW AYS be em pty.
But you can use it to m ake InterForm NG create or update the database and table(s).
For m ore inform ation, google hibernate.hbm 2ddl.auto or see any book about Hibernate.
On the third tab, Hibernate Configuration, you can change the way the database table(s) is
m apped to InterForm NG data.
Enter the following
<?xm l version="1.0"?>
<!DOCTYPE hibernate-m apping PUBLIC "-//Hibernate/Hibernate Mapping DTD 3.0//EN"
"http://hibernate.sourceforge.net/hibernate-m apping-3.0.dtd">
<hibernate-m apping package="com .interform 400.xm l.plugin.db.m odel">
<class nam e="Job" table="JOB">
<id nam e="id" colum n="C_PERSIST_ID">
<generator class="native" />
</id>
<property nam e="processingStatus" colum n="C_W AS_PROCESSED" />
<property nam e="createdDate" colum n="C_CREATED_DATE_TIME" />
<property nam e="xm lData" colum n="C_XML" not-null="true"
type="com .interform 400.xm l.plugin.db.hibernate.BlobUserType" update="false" />
</class>
<query nam e="Job.findUnprocessedJobs"><![CDATA[
from Job job where job.processingStatus = 0 order by createdDate, id
]]></query>
</hibernate-m apping>
Testing
If the database server is running, we are now ready to go.
Save you changes and (re)start service-linux.sh
Open a term inal and start a m ysql session
InterForm A/S 149
mysql -u root -p
show databases;
+-------------------+
| Database
|
+-------------------+
| ...
|
| interformDatabase |
+-------------------+
use interformDatabase;
show tables;
+-----------------------------+
| Tables_in_interformDatabase |
+-----------------------------+
| job
|
+-----------------------------+
describe job;
+---------------------+----------+------+-----+---------+----------------+
| Field
| Type
| Null | Key | Default | Extra
|
+---------------------+----------+------+-----+---------+----------------+
| c_persist_id
| int(11) | NO
| PRI | NULL
| auto_increment |
| c_was_processed
| int(11) | YES |
| NULL
|
|
| c_created_date_time | datetime | YES |
| NULL
|
|
| c_xml
| blob
| NO
|
| NULL
|
|
+---------------------+----------+------+-----+---------+----------------+
insert into job (c_xml, c_was_processed) values ('<xml/>', 0);
select * from job;
+--------------+-----------------+---------------------+--------+
| c_persist_id | c_was_processed | c_created_date_time | c_xml |
+--------------+-----------------+---------------------+--------+
|
1 |
1 | NULL
| <xml/> |
+--------------+-----------------+---------------------+--------+
Depending on what you InterForm NG tem plate does you m ight get an error.
Let's add som e m ore inform ation (fields) to the database.
On the tab 'Hibernate Configuration' add the following before the line '</class>'
<property nam e="referenceId" colum n="C_JOB_REFERENCE" />
<property nam e="serviceLockIdentifier" colum n="C_JOB_ID" />
<property nam e="statusCode" colum n="C_STATUS_CODE" />
<property nam e="severityCode" colum n="C_SEVERITY_LEVEL" />
<property nam e="statusMessage" colum n="C_STATUS_MESSAGE">
<type nam e="com .interform 400.xm l.plugin.db.hibernate.TruncatingStringUserType">
<param nam e="m axLength">1024</param >
</type>
</property>
<property nam e="processedDate" colum n="C_PRINTED_DATE_TIME" />
<property nam e="processingPriority">
<colum n nam e="C_PRIORITY" default="1" />
</property>
<m ap table="METADATA" nam e="m etaData" lazy="false">
<key colum n="id" />
<index colum n="C_METADATA_KEY" type="string" />
<elem ent colum n="C_METADATA_VALUE" type="string" />
</m ap>
Save and restart service-linux.sh
In the m ysql session you'll notice that there are now 2 tables
150
Manual for InterFormNG
Version 2014R09
show tables;
+-----------------------------+
| Tables_in_interformDatabase |
+-----------------------------+
| job
|
| metadata
|
+-----------------------------+
describe job;
+---------------------+--------------+------+-----+---------+----------------+
| Field
| Type
| Null | Key | Default | Extra
|
+---------------------+--------------+------+-----+---------+----------------+
| c_persist_id
| int(11)
| NO
| PRI | NULL
| auto_increment |
| c_was_processed
| int(11)
| YES |
| NULL
|
|
| c_created_date_time | datetime
| YES |
| NULL
|
|
| c_xml
| blob
| NO
|
| NULL
|
|
| c_job_reference
| varchar(255) | YES |
| NULL
|
|
| c_job_id
| varchar(255) | YES |
| NULL
|
|
| c_status_code
| varchar(255) | YES |
| NULL
|
|
| c_severity_level
| int(11)
| YES |
| NULL
|
|
| c_status_message
| varchar(255) | YES |
| NULL
|
|
| c_printed_date_time | datetime
| YES |
| NULL
|
|
| c_priority
| int(11)
| YES |
| 1
|
|
+---------------------+--------------+------+-----+---------+----------------+
describe metadata;
+------------------+--------------+------+-----+---------+-------+
| Field
| Type
| Null | Key | Default | Extra |
+------------------+--------------+------+-----+---------+-------+
| id
| int(11)
| NO
| PRI | NULL
|
|
| c_metadata_value | varchar(255) | YES |
| NULL
|
|
| c_metadata_key
| varchar(255) | NO
| PRI | NULL
|
|
+------------------+--------------+------+-----+---------+-------+
Try creating a new record.
This time we also get some metadata back.
insert into job (c_xml, c_was_processed) values ('<xml/>', 0);
select * from metadata;
+----+------------------------+-------------------------------------------+
| id | c_metadata_value
| c_metadata_key
|
+----+------------------------+-------------------------------------------+
| 3 | HP Color LaserJet 4700 | documentType
|
| 3 | media
| interform.destination.printer.mediaSize
|
| 3 | portrait
| interform.destination.printer.orientation |
| 3 | archive
| mediaType
|
+----+------------------------+-------------------------------------------+
This data will, of course, depend on what you do in your tem plate.
InterForm A/S 151
Example: Transferring meta data values from a Database into NG
This is an exam ple showing how you can transfer Meta data inform ation from your database
into InterForm NG.
Let's say that you want to im plem ent the following ER-diagram :
+-----------+
| JOB
|
+-----------+
PK | ID
|<--+
| PROCESSED |
|
| CREATED
|
|
| XML
|
|
+-----------+
|
| +----------+
| | METADATA |
| +----------+
| | ID
| PK
+--| JOB_ID
| FK
| MD_KEY
|
| MD_VALUE |
+----------+
On the SQL Server you could create the tables with the following com m ands:
SET ANSI_NULLS ON
SET QUOTED_IDENTIFIER ON
SET ANSI_PADDING ON
CREATE TABLE [dbo].[JOB](
[ID] [int] IDENTITY(1,1) NOT NULL,
[PROCESSED] [int] NULL,
[CREATED] [datetime] NULL,
[XML] [text] NOT NULL,
PRIMARY KEY CLUSTERED
(
[ID] ASC
)WITH (PAD_INDEX = OFF, STATISTICS_NORECOMPUTE = OFF, IGNORE_DUP_KEY = OFF,
ALLOW_ROW_LOCKS = ON, ALLOW_PAGE_LOCKS = ON) ON [PRIMARY]
) ON [PRIMARY] TEXTIMAGE_ON [PRIMARY]
CREATE TABLE [dbo].[METADATA](
[ID] [int] IDENTITY(1,1) NOT NULL,
[JOB_ID] [int] NOT NULL,
[MD_KEY] [varchar](255) NOT NULL,
[MD_VALUE] [varchar](255) NULL,
PRIMARY KEY CLUSTERED
(
[ID] ASC
)WITH (PAD_INDEX = OFF, STATISTICS_NORECOMPUTE = OFF, IGNORE_DUP_KEY = OFF,
ALLOW_ROW_LOCKS = ON, ALLOW_PAGE_LOCKS = ON) ON [PRIMARY]
) ON [PRIMARY]
SET ANSI_PADDING OFF
ALTER TABLE [dbo].[METADATA] WITH CHECK ADD
KEY([JOB_ID])
REFERENCES [dbo].[JOB] ([ID])
CONSTRAINT [FK_JOB_ID] FOREIGN
ALTER TABLE [dbo].[METADATA] CHECK CONSTRAINT [FK_JOB_ID]
The Hibenate m apping (job.hbm .xm l) could look like:
<?xml version="1.0"?>
<!DOCTYPE hibernate-mapping PUBLIC "-//Hibernate/Hibernate Mapping DTD 3.0//EN"
"http://hibernate.sourceforge.net/hibernate-mapping-3.0.dtd">
<hibernate-mapping package="com.interform400.xml.plugin.db.model">
<class name="Job" table="JOB">
<id name="id" column="ID">
<generator class="native" />
</id>
<property name="processingStatus" column="PROCESSED" />
<property name="createdDate" column="CREATED" />
<property name="xmlData" column="XML" not-null="true"
type="com.interform400.xml.plugin.db.hibernate.ClobUserType" update="false" />
<map table="METADATA" name="metaData" lazy="false">
<key column="JOB_ID" />
<index column="MD_KEY" type="string" />
<element column="MD_VALUE" type="string" />
</map>
152
Manual for InterFormNG
Version 2014R09
</class>
<query name="Job.findUnprocessedJobs"><![CDATA[
from Job job where job.processingStatus = 0 order by
createdDate, id
]]></query>
</hibernate-mapping>
Note that you'll have to do the m apping for METADATA inside the m apping for JOB.
As we don't want InterForm NG/Hibernate to m ess around with the tables we created, we set
hibernate.hbm 2ddl.auto= in hibernate.properties, so that the hibernate.properties file looks like
this:
hibernate.dialect=org.hibernate.dialect.SQLServerDialect
hibernate.show_sql=false
hibernate.hbm2ddl.auto=
Start "InterForm NG Docum ent Processing Service".
Create a new record in the database:
begin transaction;
INSERT INTO JOB (XML, PROCESSED) VALUES ('<xml><greeting>Hello</greeting></xml>', 0);
INSERT INTO METADATA (JOB_ID, MD_KEY, MD_VALUE) VALUES ((SELECT MAX(ID) FROM JOB),
'someKey', 'someValue');
commit;
Exam ples of relevant m eta data keys could e.g. be the actual printer onto which the output
should be printed or e.g. the pdf file nam e and/or path when creating PDF output or even the
em ail receiver when sending out em ails.
InterForm A/S 153
Appendix F: The TxtToXML Module
InterForm NG offers various ways of m erging/transform ing XML input, but with the TxtToXML
m odule you can even also use text files directly as input. Currently text files can only be used
as input via a m onitored folder like described below.
You can configure the m odule via the web interface. Here you select ‘Input Configurations’ and
‘Txt to XML Configuration’:
Each param eter is explained below:
Active
Select Yes to activate this m odule.
Processing Priority
The relative priority of this plugin. Select between immediate, normal and
batch.
Source folder
The folder/directory to m onitor for new text files.
File extensions
The file extensions handled by this m odule. Please notice, that this is case
sensitive. Multiple file extensions are separated with a com m a like
‘txt,TXT,csv,CSV’.Files with extensions not listed are ignored.
File encoding The encoding of the input text file, use e.g. utf-8, Utf-16, iso-8859-1 etc..
Separation Regex
The character used as separator between each field/node.
Trim W hitespace
State if any leading and trailing blanks/whitespaces should be rem oved when
converting into XML.
Line number attribute
If activated each line in the text file will be num bered in the output XML file. If
activated it is possible to select a specific line from the node nam e.
Token index attribute
If activated each field/token/node on each lines will be num ered. If not
activated all fields/nodes will be nam ed the sam e
Copy enabled Norm ally the resulting XML files goes directly into the ‘engine’ of
InterForm NG, but if this is set the XML files will also be copied to the directory
set below.
154
Manual for InterFormNG
Version 2014R09
Copy Target Folder
The path of the directory where the XML files are copied to if the ‘Copy
enabled’ option above is activated.
InterForm A/S 155
Appendix G: The PDF Security Module
If you want encrypt and password protect or digitally sign the PDF files created by
InterForm NG, then you need to purchase the NG PDF Security Module. No additional
installation is needed as the objects are included in the InterForm NG core.
You create the PDF files in the norm al m anner, and set som e m eta data keys for either
encrypting or digitally signing the PDF files.
The settings are done by assigning values to m eta data keys. Assigning m eta data keys can
be done in 3 ways:
1) In a tem plate as described on page 89.
2) In the workflow as shown on page 112.
3) By transferring values with the XML file in a database - refer to page 152.
Encryption and password protection
In order to encrypt and password protect the PDF files you need to assign values to these
m eta data keys:
M eta data Key:
pdfProtection.ownerPassword
pdfProtection.userPassword
pdfProtection.restrictions
Value:
<Password>
<Password>
copy, edit, print
The first two sets the password for the owner and the user. W hen you open the PDF file you
will be prom pted for a password. If you type in the owner password the PDF file will be opened
with full rights.
pdfProtection.restrictions can be assigned to these values (Case sensitive):
<Blank>
copy
edit
print
The user password gives full access.
Copy of text in the PDF is not allowed.
Edit/changes of the PDF is not allowed.
Print of the PDF is not allowed.
You can com bine m ultiple restrictions with a com m a like shown above.
M WARNING M
If you do not assign a value to the user password or if the user password is blank, then the
PDF file will NOT be encrypted.
Adding a digital signature
W ith the m odule it is possible to add a digital signature. You can use the digital signature to
prove, who created the PDF file - in order to m ake it a legal docum ent - and to prove that no
one altered the docum ent after you added your signature.
The digital signature is added as a digital certificate, that you will need to create yourself or buy
from a trusted issuer.
Prerequisites
Before you can create PDF files with a digital signature you need these things:
(Apart from InterForm NG with a license, which includes the PDF Security m odule.)
156
Manual for InterFormNG
Version 2014R09
•
•
•
A digital certificate file (.pkcs12 or pfx), which includes the private key.
You need retrieve the alias of the digital certificate - a procedure for getting that is
included below.
You need to install ‘Java Cryptography Extension (JCE) Unlimited Strength
Jurisdiction Policy Files’, which enables the use of ‘stronger’ encryption.
Below each of these prerequisites are covered:
Getting a digital certificate file
A digital pkcs12 certificate can be bought from various, trusted suppliers. As an exam ple we
will here show to get a free test certificate file from Verisign, which is valid for 25 days:
Goto this site: http://www.sym antec.com /verisign/digital-id
Now click ‘Buy now’ on the upper right:
You now type in your em ail address and select ‘25 days - free’ - unless you want to buy:
- and click ‘Next’.
After accepting conditions you will now receive 2 em ails: One with a link and another with a
password. After signing on you can install the certificate in your browser - e.g. MS Internet
Explorer.
InterForm A/S 157
From the browser you now need to export the certificate as a pkcs12 file - including the private
key. That is in MS Internet Explorer done by selecting ‘Tools’, ‘Internet options’ and the
‘Content’ tab - and finally the ‘Certificates’ icon:
Now m ark the certificate in question and click ‘Export..’:
158
Manual for InterFormNG
Version 2014R09
Now rem em ber to export the private key:
Do not activate any of the extra settings here:
It is highly recom m ended to protect the certificate file with a password:
InterForm A/S 159
Finally we specify the path and file nam e:
You can place the certificate file anywhere and later refer to the com plete path or you can
place it is {INTERFORMNG_HOME}/resources/certificates and then you only need to refer to
the file nam e and subdirectories - if used.
Retrieve the alias from the certificate file
You can find the alias from a certificate file by opening a DOS session and running this
com m and:
keytool -list -keystore "C:\tem p\m yfile.pfx" -storetype pkcs12 -storepass password
Inside the “” after ‘keystore’ you write the file (including the path), that contains the certificate.
(Above the file is ‘C:\tem p\m yfile.pfx’) and the final word is the password used for locking down
the certificate file (above it is ‘password’).
The com m and returns this:
The alias is what is preceding the first com m a. In this exam ple the alias is:
‘le-7e788873-11e0-4384-9f8b-38ac1ced5d1b’. You need to save your alias as this is needed
when you want to digitally sign a PDF file.
Install Java Cryptography Extension (JCE)
Additional software is needed to do the strong encryption, which is used. You will need to
download and install this into the existing java installation. The com plete nam e of the software
is called: ‘Java Cryptography Extension (JCE) Unlimited Strength Jurisdiction Policy
Files’.
The software to download depends on which version of JRE you are running. If you are
running JRE 7, then you can currently use this link:
http://www.oracle.com /technetwork/java/javase/downloads/index.htm l
W here it is found in the bottom . After downloading you should read the ‘README’ file for
instruction of how to install, but it is actually just a question of copying two .jar files into the
/lib/security directory where java is installed. This could be here:
C:\Program Files\Java\jre7\lib\security
160
Manual for InterFormNG
Version 2014R09
Inside the ‘security’ directory you m ay find two existing files nam ed the sam e as the files you
want to copy. If you want to be sure you can e.g. renam e the existing files - then you can
always com e back if som ething should go wrong.
If you are running JRE 6 you can currently download Java Cryptography Extension (JCE) via
this link:
http://www.oracle.com /technetwork/java/javasebusiness/downloads/java-archive-downloads-ja
va-plat-419418.htm l#jce_policy-6-oth-JPR
Signing a PDF file
If you have fixed the prerequisites you can now start to digitally sign PDF files. This is sim ply
done by assigning values to these m eta data keys:
M eta data key:
pdfCertificate.fileNam e
pdfCertificate.alias
pdfCertificate.passw ord
Description:
The certificate file. Should contain the absolute path or the
path relative to
{INTERFORMNG_HOME}\resources\certificates.
A pkcs#12 is able to contain m ultiple certificates. So you need
to state the alias of the one to use.
The password needed to open certificate file.
Here is an exam ple of how this can be setup:
Above the certificate file is placed in {INTERFORMNG_HOME}\resources\certificates, has an
alias that is ‘le-7e788873-11e0-4384-9f8b-38ac1ced5d1b’ and the password for the file is
sim ply ‘password’.
The signed PDF file m ay now look som ething like this:
You m ight think this indicates a problem , but it only states, that the signature is trusted (and
the issuer is also not trusted), so you will need to trust the issuer or the current certificate.
InterForm A/S 161
Trusting signatures
W hen you receive a PDF file with a digital signature you need to decide if the signature can be
trusted or not. If the signature (and its parent certificate is not trusted either) you will see
som ething sim ular to this under 'Signatures' in Acrobat Reader 5.0 or later:
Recipient Signatures
The following people have digitally signed this docum ent
Signed by XXXXX YYYYYY
Signature validity is unknown:
Docum ent has not been m odified since the signature was applied
Signers identity is unknown because it has not been included in your list of
Trusted Identities and none of itss parent Certificates are Trusted Identities
........
Now you would probably want to trust this identity. You can do this in these m anners:
1) Right click on the 'Signed by XXXX' text above. Click 'Properties..' and you will see this:
162
Manual for InterFormNG
Version 2014R09
Then select 'Show certificate' and then another window will open (where you click the ‘Trust’
tab:
If you here click 'Add to Trusted Identities..' you can decide to trust the included signature in
Acrobat Reader'. Note, that you will get a warning telling you that this is usually unwise as you
then need to be 100% sure, where this docum ent com es from ...
2) Another way to trust a digital signature in Acrobat Reader is to select 'Docum ent' and
'Trusted Identities' in Acrobat Reader. Then click 'Add Contacts..' and then 'Im port' or 'Browse'
to find a file with the public key of the digital signature, that you want to trust.
3) The third way to trust certificates in Acrobat Reader is to trust those, that has been trusted
in W indows. You can set that up by selecting 'Edit', 'Preferences', 'Security', 'Advanced
preferences' and 'W indows integration'.
InterForm A/S 163
Verifying Digital Signatures
Som e digital signatures are som etim es stolen or m isused. To handle that situation each issuer
of digital signatures lists a num ber of digital signatures that are revoked (Revocation lists RCL's). So it is a good idea to check with the issuer that the current signature still is valid. You
can verify the signature in at least two m anners:
1) Verify during open:
You can e.g. setup Acrobat Reader to verify digital signatures when opening a PDF file by
selecting 'Edit', 'Preferences' and 'Security'. Here you will see an option 'Verify signatures
when the docum ent is opened'. If you activate this option Acrobat will check the signatures
when opening the PDF file. The downside is, that opening takes a bit longer.
2) Verify the signature manually:
Find the signature of the PDF docum ent and right click on the 'Signed by XXXX'. Then select
'Validate Signature'.
164
Manual for InterFormNG
Version 2014R09
Appendix H: Conversion of pre 2014 Templates
W hen upgrading from a pre 2014 version to a 2014 version (or newer) the tem plates will be
converted into a new form at. This has only im portance if you are using barcode styles. If you
are not using barcode styles you will not see any difference in the output and you can also
open a tem plate in any version of the designer no m atter what version that created the
tem plate. If you are using barcode styles you cannot directly open a converted tem plate in a
pre 2014 version as the barcode styles are stored in a different m anner.
The changes to the barcode style are in short:
•
•
•
•
•
•
•
The barcode style MUST have a specific barcode type, where you could previously
use the ‘Unset’ value as well to set a general value for whatever barcode type you use.
M in. and max. values are converted into one value for the module width and module
ratio. The new values represents the sam e outcom e as the original set of m in. and
m ax. Barcode styles where the type is ‘Unset’ are ignored in the 2014 versions until
you set a specific barcode type.
The ratio was previously specified in 1/1000 (or prom ille). During conversion it is
converted into the ‘real’ ratio between the wide and narrow lines (typically a value
around 2 to 3). In the 2014 versions you specify this real ratio.
The properties of a barcode style now adapts to the specific barcode type you
select. Previously all properties where displayed for all types. This change m akes it
easier to define barcodes as only the relevant properties are shown.
The error correction for QR and PDF417 barcodes was previously not im plem ented
and thus ignored. Now the value is used and m ay result in a different size of the 2D
barcode in PDF, PCL and postscript.
The resulting size of the barcode may change slightly when you com pare the
postscript/PCL output with the result prior to the upgrade.
As checksum you could previously select the value, ‘Auto’. This value was not fully
im plem ented and the support for this value has been rem oved. Any tem plate using
‘Auto’ will fail with an error in the 2014 versions.
The barcode style is described in dept on page 64.
Testing templates when upgrading to a 2014 Version or newer
After an upgrade of InterForm NG it is recom m ended to do test print outs to verify that the
barcodes has been converted OK. If you have any concerns about this conversion: Please
contact your local InterForm support. Feel free to contact Us also prior to the upgrade if you
want a free analysis of what changes you m ay expect if/when upgrading.
Conversion tool
W hen you do an upgrade from a pre 2014 version to a 2014 version or newer, then all
tem plates need to be converted. The m ost efficient way to do that is to use the conversion
tool, which you asked to start as the last step of the upgrade.
InterForm A/S 165
You can also chose to only convert som e of your tem plates at a tim e and run the conversion
tool by selecting ‘Start’, ‘Program s’, ‘InterForm NG’ and ‘Tem plateConverter’:
You can also find the Conversion tool here:
C:\Program Files\InterForm NG\Tem plateConverter.exe
It is recom m ended to convert the tem plates. If you do not, then the tem plates will be converted
each tim e the tem plate is opened in either the designer or the processor service causing a
slower perform ance. Saving an open tem plate from the designer will save it as a converted
tem plate - but not any referenced tem plates.
W hen you start the conversion tool you will see this:
The norm al directory (and subdirectories) containing the tem plates is used as default, but you
can open another directory via File and Open if you want to convert tem plates outside this
directory.
The conversion tool first scans all the tem plates and lists them like above.
These are the colum ns:
Select
A click box, where you can select/deselect the tem plates. As default any
unconverted tem plates are selected.
Tem plate Nam e
The relative path and file nam e of the tem plate(s).
Template Version
The version of the tem plate. This indicates if the converted tem plate can be
used in pre 2014 versions or not and also if any barcodes are used. These are
the values:
1:
The tem plate can be used by any version of InterForm NG.
2:
The tem plate can only be used by 2014 versions and newer.
Blank: The tem plate has not been converted.
166
Manual for InterFormNG
Version 2014R09
Designer Version
This is the indicator if a tem plate has been converted and if so: To which level
it has been converted.
Blank: The tem plate has not been converted.
2:
The tem plate has been converted into level 2 - it is com pliant with the
2014 versions.
Status
The status of each tem plate. The status can be:
Up to date
The tem plate has previously been converted OK.
Convert
The tem plate has not been converted yet.
Converted
The tem plate has just been converted.
Error...
Potential error during conversion.
M WARNING M
If you open a template in an older version of the designer and the template was created/edited
in an newer version of the designer and the template is using newer functionality not
implemented in the older version, then any references to the newer functionality may forgotten
when the template is opened and saved in the old designer.
Click the Convert Selected icon to start the conversion.
The original unconverted tem plates are stored in a zip file in
{INTERFORMNG_HOME}\resources\tem plate nam ed Convert_yyyyMMdd_HHm m ss.zip
Problem when opening templates in pre 2014 Versions
If you try to open a tem plate in a pre 2014 version, which has been converted in a 2014
version or newer, then you will get this error m essage if it contains a barcode style:
(The schem a http://interform 400.com /xm l/schem as/2013/01/01 indicates the new layout)
This indicates, that the tem plate was created for a newer version and that the barcode styles
are not supported in the current (pre 2014) version.
Using unconverted templates
Each tim e you open a tem plate created in a pre 2014 version, the tem plate will be converted
into the 2014 form at. If you open and save a tem plate in the designer then it will be saved in
the converted form at. (Any barcode style in the tem plate will prevent it from being
opened/used in a pre 2014 version). Please notice that any im ported/referenced tem plate are
not updated and saved when you open the m ain tem plate - they are only tem porarily converted
for the current ‘job’.
Any referenced tem plate (also used by the processor service) will tem porarily be converted at
runtim e each tim e when used. So until you have converted all your tem plates you m ay
experience lower perform ance in the designer and the processor service.
InterForm A/S 167
Appendix I: Using a Message Queue for input
One way to get XML files into InterForm NG is to let the application m onitor a m essage queue
for entries. Below it is described how you can set that up:
Enabling message queue in InterFormNG
First you need to tell InterForm 400 to start to m onitor a m essage queue. To do that you open
the InterForm NG web interface and select Input Configurations > Message Queue
Configuration:
Change Active to Yes:
Now save the change and restart the processor service as described on page 100.
InterForm NG is now using an em bedded MessageMQ. It is possible for other program s to
access it on port 61616.
External message queue
If you are using an external ActiveMQ, you'll have to change the Broker URL.
The default for ActiveMQ is tcp://localhost:61616.
W hen using an external m essage queue it m ight be a good idea to let the InterForm NG
Docum ent Processing Service depend on it.
Execute the following com m and as Adm inistrator
sc config InterFormNGProcessor depend= Spooler/ActiveMQ
Now InterForm NG service is dependent on ActiveMQ
Now starting the InterForm NG service, will also start ActiveMQ and stopping ActiveMQ will
also stop the InterForm NG service.
168
Manual for InterFormNG
Version 2014R09
Sending data to message queue
Using a m essage queue with InterForm NG is standard JMS.
It doesn't m atter if you use plain Java or a fram ework like Spring or Cam el.
For sim plicity I'll use Cam el.
InterForm NG will use the queue interform.xmlProcessingRequestQueue and the JMS
m essage type javax.jms.BytesMessage.
For InterForm NG an XML-file com ing via a m essage queue is no different form an XML
com ing from the filesystem .
If workflow is disabled, the default tem plate will be used (System Configurations > General
System Settings).
If workflow is enabled, the first rule where the conditions m atches will be used (W orkflow
Configurations > Tem plate Selections).
The sim plest possible scenarie is to send the XML-data only.
But you can add headers to control the processing.
All InterForm NG m etadata is prefixed with the string "x-interform -m etadata-" and to m ake
Cam el unescape the "-" I've added jm sKeyForm atStrategry=passthrough to the endpoint.
Pom.xml:
<?xml version="1.0"?>
-<project xsi:schemaLocation="http://maven.apache.org/POM/4.0.0
http://maven.apache.org/xsd/maven-4.0.0.xsd"
xmlns:xsi="http://www.w3.org/2001/XMLSchema-instance"
xmlns="http://maven.apache.org/POM/4.0.0">
<modelVersion>4.0.0</modelVersion>
<groupId>com.interforn400</groupId>
<artifactId>messagequeue</artifactId>
<version>0.0.1-SNAPSHOT</version>
-<dependencies>
-<dependency>
<groupId>org.apache.activemq</groupId>
<artifactId>activemq-camel</artifactId>
<version>5.9.0</version>
</dependency>
</dependencies>
</project>
x-interform-metadata-mediaType
x-interform-metadata-documentType
x-interform-metadata-com.interform400.xml.Template
x-interform-metadata-xmlFromSocket
x-interform-metadata-interform.printjob.processingpriority
x-interform-metadata-interform.plugin.integration.folderName
archive, email or print
all the usual metadata
for archive, email and
print
which template to use
skip final step - only
create artifact, but
don't save, mail or
print
0=Immediate, 1=Normal,
2=Batch
where to store temporary
files
The MQDem o.java source:
package com.interform400.messagequeue;
import
import
import
import
import
java.io.File;
java.io.FileOutputStream;
java.io.OutputStream;
java.util.HashMap;
java.util.Map;
import
import
import
import
import
org.apache.activemq.ActiveMQConnectionFactory;
org.apache.camel.CamelContext;
org.apache.camel.ProducerTemplate;
org.apache.camel.component.jms.JmsComponent;
org.apache.camel.impl.DefaultCamelContext;
InterForm A/S 169
public class MQDemo {
public static void main(String[] args) throws Exception {
String url = "tcp://localhost:61616";
ActiveMQConnectionFactory connectionFactory = new
ActiveMQConnectionFactory(url);
CamelContext context = new DefaultCamelContext();
context.addComponent("jms",
JmsComponent.jmsComponentAutoAcknowledge(connectionFactory));
ProducerTemplate producer = context.createProducerTemplate();
String endpoint =
"jms:queue:interform.xmlProcessingRequestQueue?jmsKeyFormatStrategy=pas
sthrough";
String body = "<xml/>";
// or get input data from an XML-file
Map<String, Object> headers = new HashMap<String, Object>() {
{
put("x-interform-metadata-mediaType", "archive");
// archive, email or print
put("x-interform-metadata-documentType", "postscript");
// all the usual metadata for archive, email and print
put("x-interform-metadata-com.interform400.xml.Template",
"Pangrams.itpl");
// which template to use
put("x-interform-metadata-xmlFromSocket",
"__XML_FROM_SOCKET__");
// skip final step - only create artifact, but don't save, mail
or print
put("x-interform-metadata-interform.printjob.processingpriority"
, "2");
// 0=Immediate, 1=Normal, 2=Batch
put("x-interform-metadata-interform.plugin.integration.folderNam
e", "C:/ProgramData/InterFormNG/temp2");
// where to store temporary files
}
};
byte[] result = (byte[]) producer.requestBodyAndHeaders(endpoint,
body.getBytes(), headers);
// the generated artifact is returned
File pdfFile = File.createTempFile("MQDemo", ".pdf");
// change extension to match MIME-type of the returned artifact
OutputStream os = new FileOutputStream(pdfFile);
os.write(result);
os.close();
Runtime.getRuntime().exec(new String[] { "rundll32",
"url.dll,FileProtocolHandler", pdfFile.getAbsolutePath() });
System.exit(0);
}
}
170
Manual for InterFormNG
Version 2014R09
Index
Archiving
Create index xml file. . . . . . . . . . . . . . . . . . . 74
Background image. . . . . . . . . . . . . . . . . . . . . . . . 22
Configuration
Users.. . . . . . . . . . . . . . . . . . . . . . . . . . . . . . 29
Conversion
of templates.. . . . . . . . . . . . . . . . . . . . . . . . 165
Current
Date.. . . . . . . . . . . . . . . . . . . . . . . . . . . . . . . 72
Time. . . . . . . . . . . . . . . . . . . . . . . . . . . . . . . 72
Data types
Boolean. . . . . . . . . . . . . . . . . . . . . . . . . . . . . 73
Date.. . . . . . . . . . . . . . . . . . . . . . . . . . . . . . . 73
Number. . . . . . . . . . . . . . . . . . . . . . . . . . . . . 73
Date
Format.. . . . . . . . . . . . . . . . . . . . . . . . . . . . . 61
Design elements
Append. . . . . . . . . . . . . . . . . . . . . . . . . . . . . 88
Barcode. . . . . . . . . . . . . . . . . . . . . . . . . . . . . 76
Box. . . . . . . . . . . . . . . . . . . . . . . . . . . . . . . . 76
ColumnBreak.. . . . . . . . . . . . . . . . . . . . . . . . 82
Define Cursor. . . . . . . . . . . . . . . . . . . . . . . . 87
Fixed area. . . . . . . . . . . . . . . . . . . . . . . . . . . 79
Flow area.. . . . . . . . . . . . . . . . . . . . . . . . . . . 81
ForEach.. . . . . . . . . . . . . . . . . . . . . . . . . . . . 86
Group. . . . . . . . . . . . . . . . . . . . . . . . . . . . . . 79
If. . . . . . . . . . . . . . . . . . . . . . . . . . . . . . . . . . 84
Image. . . . . . . . . . . . . . . . . . . . . . . . . . . . . . 77
Include.. . . . . . . . . . . . . . . . . . . . . . . . . . . . . 79
Label. . . . . . . . . . . . . . . . . . . . . . . . . . . . . . . 78
Line. . . . . . . . . . . . . . . . . . . . . . . . . . . . . . . . 76
Link. . . . . . . . . . . . . . . . . . . . . . . . . . . . . . . . 82
New Line. . . . . . . . . . . . . . . . . . . . . . . . . . . . 82
Offset.. . . . . . . . . . . . . . . . . . . . . . . . . . . . . . 87
Offset update.. . . . . . . . . . . . . . . . . . . . . . . . 88
Page. . . . . . . . . . . . . . . . . . . . . . . . . . . . . . . 77
PageBreak.. . . . . . . . . . . . . . . . . . . . . . . . . . 82
Repeat.. . . . . . . . . . . . . . . . . . . . . . . . . . . . . 86
Select Cursor.. . . . . . . . . . . . . . . . . . . . . . . . 87
Text. . . . . . . . . . . . . . . . . . . . . . . . . . . . . . . . 71
Variable. . . . . . . . . . . . . . . . . . . . . . . . . . . . . 88
Variable update. . . . . . . . . . . . . . . . . . . . . . . 88
Digital signature. . . . . . . . . . . . . . . . . . . . . . . . . 156
Embed files in PDF. . . . . . . . . . . . . . . . . . . . . . . . 82
Error
Element unreachable.. . . . . . . . . . . . . . . . . . 97
Fixed Area.. . . . . . . . . . . . . . . . . . . . . . . . . . . . . . 79
Flow Area. . . . . . . . . . . . . . . . . . . . . . . . . . . . . . . 81
Functions. . . . . . . . . . . . . . . . . . . . . . . . . . . . . . . 72
PAGE_NUMBER. . . . . . . . . . . . . . . . . . . . . . 72
PAGE_NUMBER_TOTAL. . . . . . . . . . . . . . . 72
TIMESTAMP. . . . . . . . . . . . . . . . . . . . . . . . . 72
Getting started. . . . . . . . . . . . . . . . . . . . . . . . . . . 12
Setting up the system. . . . . . . . . . . . . . . . . . 39
If..Else.. . . . . . . . . . . . . . . . . . . . . . . . . . . . . . . . . 85
Image
Import. . . . . . . . . . . . . . . . . . . . . . . . . . . . . . 52
Size. . . . . . . . . . . . . . . . . . . . . . . . . . . . . . . . 52
Index xml file. . . . . . . . . . . . . . . . . . . . . . . . . . . . . 74
Intro template
Disable. . . . . . . . . . . . . . . . . . . . . . . . . . . . . 41
JD Edwards Connector. . . . . . . . . . . . . . . . . . . . . 21
Multi language output. . . . . . . . . . . . . . . . . . . . . . 54
Multiup. . . . . . . . . . . . . . . . . . . . . . . . . . . . . . . . 103
N-up. . . . . . . . . . . . . . . . . . . . . . . . . . . . . . . . . . 103
New default template. . . . . . . . . . . . . . . . . . . . . . 41
Numeric
Format.. . . . . . . . . . . . . . . . . . . . . . . . . . . . . 60
Page number. . . . . . . . . . . . . . . . . . . . . . . . . . . . 72
Pages per side. . . . . . . . . . . . . . . . . . . . . . . . . . 103
Password protect PDF. . . . . . . . . . . . . . . . . . . . 156
PCL color support. . . . . . . . . . . . . . . . . . . . . . . . 107
PDF security. . . . . . . . . . . . . . . . . . . . . . . . . . . . 156
PDF Security Module. . . . . . . . . . . . . . . . . . . . . . 21
Printing
On Zebra printers. . . . . . . . . . . . . . . . . . . . 137
Setup.. . . . . . . . . . . . . . . . . . . . . . . . . . . . . 127
Reduce the output size. . . . . . . . . . . . . . . . . . . . . 69
Revision log. . . . . . . . . . . . . . . . . . . . . . . . . . . . . 22
Setting up the system. . . . . . . . . . . . . . . . . . . . . . 39
Splitting XML files. . . . . . . . . . . . . . . . . . . . . . . . 115
Styles
Barcode style.. . . . . . . . . . . . . . . . . . . . . . . . 64
Color style. . . . . . . . . . . . . . . . . . . . . . . . . . . 67
Error style. . . . . . . . . . . . . . . . . . . . . . . . . . . 70
Geometry style. . . . . . . . . . . . . . . . . . . . . . . 64
Label style. . . . . . . . . . . . . . . . . . . . . . . . . . . 68
Locale style. . . . . . . . . . . . . . . . . . . . . . . . . . 68
Offset style. . . . . . . . . . . . . . . . . . . . . . . . . . 87
Page style. . . . . . . . . . . . . . . . . . . . . . . . . . . 67
Print style.. . . . . . . . . . . . . . . . . . . . . . . . . . . 69
Text style. . . . . . . . . . . . . . . . . . . . . . . . . . . . 58
Support information.. . . . . . . . . . . . . . . . . . . . . . . . 2
Template
Conversion. . . . . . . . . . . . . . . . . . . . . . . . . 165
Text to XML.. . . . . . . . . . . . . . . . . . . . . . . . . . . . 154
Time stamp. . . . . . . . . . . . . . . . . . . . . . . . . . . . . . 72
Total number of pages. . . . . . . . . . . . . . . . . . . . . 72
Transform XML files. . . . . . . . . . . . . . . . . . . . . . 115
Translation tables. . . . . . . . . . . . . . . . . . . . . . . . . 54
Workflow. . . . . . . . . . . . . . . . . . . . . . . . . . . . . . . 109
xml_inbox. . . . . . . . . . . . . . . . . . . . . . . . . . . . . . . 30
Xpath
Explained.. . . . . . . . . . . . . . . . . . . . . . . . . . 123
XSLT.. . . . . . . . . . . . . . . . . . . . . . . . . . . . . . . . . 120
Zebra support. . . . . . . . . . . . . . . . . . . . . . . . . . . 137
InterForm A/S 171


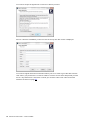
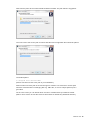
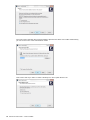


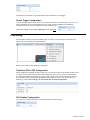

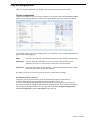

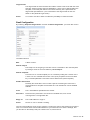
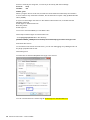


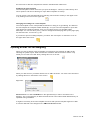

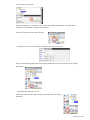

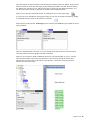


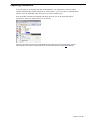
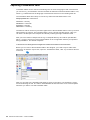

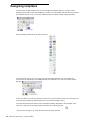
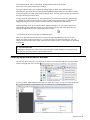
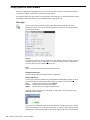
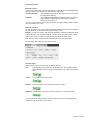
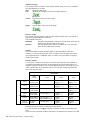


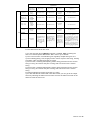
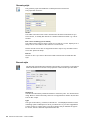
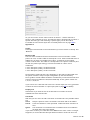
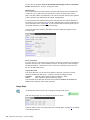
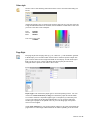
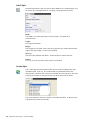
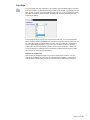

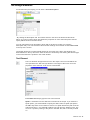
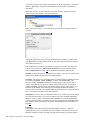
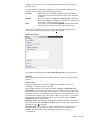


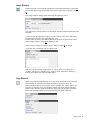
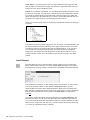


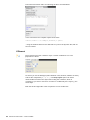


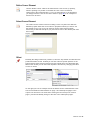
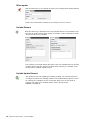

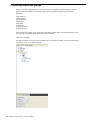


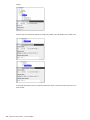
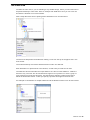
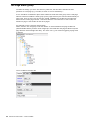


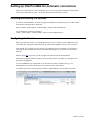


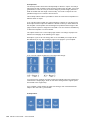
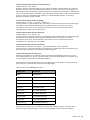


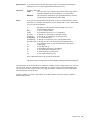
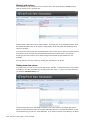

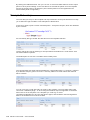
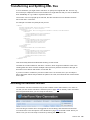
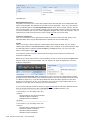

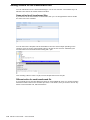


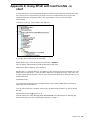


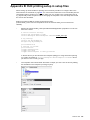
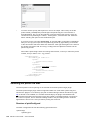


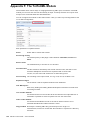


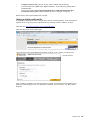
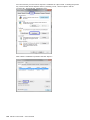
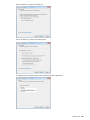
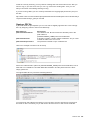
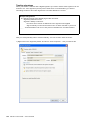


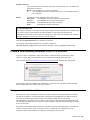


![Gamasutra - Features - "Exploring Spring Models" [10.05.01]](http://vs1.manualzilla.com/store/data/005896042_1-02f40a023a4cddfa5805ee6df6df7cf0-150x150.png)