1
1. Preparation
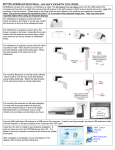
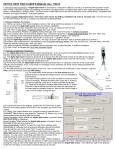
If there is a previous version of MINT Interactive already installed on your computer, please remove it before new installation.
Click Start > Programs > PNF > MINT > uninstall MINT.
2. Install new driver (MINT Control) & ACEeBoard software (MINT interactive)
Insert the installation CD into CD-ROM. Then Installation menu will pop up
automatically. You may Install MINT software on your computer
(recommended) or Launch MINT interactive directly from the CD.
If installation menu does not pop up automatically, please execute
POPStarter.exe manually from the installation CD.
When “execution warning message” is displayed on Windows Vista /
Windows 7, please ignore it.
Click Install to start the installation. After installation is completed, click
“finish”. Two icons will be added to the desktop:
3. ..Calibration
Calibration is always necessary after initial hardware installation, or repositioning the receivers, or changing the size of projected
image, or whenever you want to fine tune the accuracy.
3.1 Preparation.
3.1.1. Installing location: Do not install ACEeBoard too close to operating machinery which generates noise.
3.1.2. Infrared interference: ACEeBoard uses Infrared as a reference signal, therefore external Infrared source might
interfere with the functions of the ACEeBoard. It is better to turn off other infrared devices on your computer before using
ACEeBoard. For Windows PC, you can temporarily disable infrared devices found in device manager, such as IR data port,
IR touch screen, etc.
3.1.3. Check connection: Double click and open the MINT Control. Check if the ACEeBoard is connected. Under
information tab, your should see “eBoard” as connected device. If not, try to connect the cable to another USB port. If it is
connected through a USB hub, try connecting it to computer's USB port directly. Exit MINT Control and restart it.
3.1.4. Check receivers' mounting: The computer image must be projected within the two receivers. The receivers should
be mounted at least 1” (2.5 cm) above the projected image area. They may need to be mounted higher when using on flat
panel displays as described in Hardware Installation Manual.
3.2 Calibration
3.2.1. Open MINT Control: Double click Mint control to open the control panel. For the first-time calibration after the hardware
setup, click “initial setup”. For recalibration in the future, click “screen calibration”.
3.2.2. Quick Setup: In the next screen, click “Next” to continue. You will need to select “Quick setup” or “Fine setup”. Quick
setup is normally recommended. If you experience difficulty of achieving the accuracy of touch, you may run “Fine setup”.
2