1
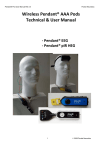
Pocket A3 Technical Manual Rel 1.1
Pocket Neurobics ©
Pocket A3
Wireless Trainer
for
EEG, pIR HEG & nIR HEG
Technical
Manual
• Release 1.0 first release, 1 July 2005
• Release 1.1 Howto upload new firmware using BioExplorer, 17 July 2005, returns: email address
IMPORTANT NOTICE: Minder Labs PL MAKES NO WARRANTIES, EXPRESS OR IMPLIED, INCLUDING, BUT NOT
LIMITED TO, ANY IMPLIED WARRANTY OF MERCHANTABILITY OR FITNESS FOR A PARTICULAR PURPOSE, beyond
product defect warranties expressly given in the body of this document. The User is responsible for determining whether this
product is fit for a particular purpose.
IMPORTANT NOTICE: This product is NOT FOR MEDICAL USE and is solely for PERSONAL USE. Not for use by children.
Not for use by photosensitive epileptics. The prospective user is advised that some individuals with sensitive nervous
systems may have negative reactions to neurofeedback and/or light & sound training. This can be the case even under
professional guidance. Reports of negative reactions are rare & mostly anecdotal. If headaches or discomfort arise, cease
use. Prior to use, READ USER MANUAL in its entirety, particularly the Section on USER SAFETY.
1
Pocket A3 Technical Manual Rel 1.1
Pocket Neurobics ©
Contents
OVERVIEW ...................................................................................................................................................................................................4
SAFETY .........................................................................................................................................................................................................5
MODES OF OPERATION ..................................................................................................................................................................................5
EEG SIGNAL QUALITY ASSURANCE .............................................................................................................................................................6
PROTOCOL QUALITY ASSURANCE .................................................................................................................................................................6
USER SAFETY ..............................................................................................................................................................................................7
CONDUCTION OF ELECTRICITY THROUGH EEG ELECTRODES .......................................................................................................................7
INFECTION RISK ............................................................................................................................................................................................7
PRODUCT CARE & MAINTENANCE – KEYS TO LONG PRODUCT LIFE .....................................................................................7
SYSTEM RESET ..............................................................................................................................................................................................7
RECHARGEABLE BATTERY ............................................................................................................................................................................7
LCD DISPLAY SENSITIVITY ..........................................................................................................................................................................8
STATIC DISCHARGES .....................................................................................................................................................................................8
WARRANTY...................................................................................................................................................................................................8
PACKING LIST ...............................................................................................................................................................................................8
CONNECTORS..............................................................................................................................................................................................9
FIRST USE .....................................................................................................................................................................................................9
MAIN MENU ................................................................................................................................................................................................11
MORE… SUB MENU....................................................................................................................................................................................15
PUSHBUTTON FUNCTION ......................................................................................................................................................................16
DISPLAYS ....................................................................................................................................................................................................16
CHECKING VALIDITY OF EEG SIGNALS ..........................................................................................................................................17
LOGGING DATA ........................................................................................................................................................................................18
SUPPORT FUNCTIONS.............................................................................................................................................................................18
SET CLOCK .................................................................................................................................................................................................18
SET ALARM .................................................................................................................................................................................................18
WIRELESS LINK...........................................................................................................................................................................................18
APPENDIX 1: MANAGING THE WIRELESS LINK .............................................................................................................................................19
APPENDIX 2: PROCEDURE TO PLACE ELECTRODES AND THE 10-20 SYSTEM ................................................................................................19
2
Pocket A3 Technical Manual Rel 1.1
Pocket Neurobics ©
Pocket-sized, wireless Biofeedback…
EEG, nIR HEG & pIR HEG…
3
Pocket A3 Technical Manual Rel 1.1
Pocket Neurobics ©
Overview
This User Manual describes the Pocket A3 biofeedback trainer.
The Pocket A3 combines EEG biofeedback (generally referred to as EEG in this document) and HEG biofeedback. EEG
biofeedback refers to the method of using electrical signals generated by the brain to train the brain’s response to stimuli.
HEG biofeedback feedback a measure of brain metabolism. There are two types supported by the instrument: nIR HEG (near
infrared HEG) uses a measure of the oxygenation of blood flow in the brain to train the brain to elevate these levels. pIR HEG
(passive infrared HEG) uses a measure of the energy radiated by the brain in a particular infrared band and seeks to increase
this energy. EEG Biofeedback uses one or two channels, as does nIR HEG, whilst pIR HEG is a single channel. All three
modes can be operated concurrently.
For EEG biofeedback, protocols allow for a range of synchrony & up-training, down-training & ratio protocols,
independently set for each channel. The unit is supplied with a set of pure silver electrodes. The electrode set comprises
earclip electrodes for neutral & reference electrodes, and conventional cup electrodes for the Active1 and Active2 electrodes.
For one channel operation, the Active2 electrode is not used. One channel ‘bipolar montage’ is also possible with the bipolar
signal being the difference between the Active1 and Active2 electrodes. An adaptor for industry-standard ‘touch-proof’
electrode sets is also available.
For HEG biofeedback, a special HEG headset is supplied as an optional extra. The nIR HEG headset is a sophisticated device
used to inject light signals through the scalp to measure blood oxygenation. Either a one channel or two channel (future)
headset can be provided. More details on nIR HEG are available here: http://www.biocompresearch.org/heg_instructions.htm
pIR HEG uses a sophisticated infrared filter and accompanying thermocouple to measure the energy being radiated. This
signal is measured in degrees Fahrenheit or Celcius. The Pocket is also a Binaural Beat generator. ‘Binaural Beat’ is the term
used to describe a system whereby a tone presented to one ear is at a slightly different frequency to the tone presented to the
alternate ear. This difference, or ‘beat’ can promote relaxation & release of tension.
To simplify the unit’s operation, a large number of Presets are pre-programmed, whilst still allowing users to override these
Preset settings, making the unit very flexible. User-defined settings may be saved as one of three User Presets. EEG
protocols, HEG fine tuning, audible feedback mechanisms, and binaural beat sessions all may be programmed by the user.
The user may monitor progress both within a session (by visible displays of recent history), and from session to session (by
time & date stamped records of session variables).
The Pocket can also act as a data acquisition device or “Pod” for PC-based neurofeedback software such as BioExplorer and
BioEra. Communication with the PC is over a 2.4GHz wireless Port which can concurrently stream four data channels to a
‘serial-USB-wireless’ dongle supplied with your unit.. These data streams can be raw EEG or HEG data, or processed data
(called ‘outcomes’ – ie the output of filtering on the Pocket-I). The Pocket broadcasts ‘protocol outcome’ packets to (future)
wireless enabled feedback devices. It requires installation of a Windows driver to support the ‘serial-USB-wireless’ dongle.
The driver and installation instructions are available here: http://www.Pocket-Neurobics.com/windows.htm .
The Pocket includes a number of other features including:
• Automatic detection of artefact signals including
• EMG ‘muscle’ artefact detection (in the band 100 to 200Hz)
• EEG electrode offset voltage detection
• EEG low signal detection (excessive 50/60Hz interference)
• EEG excessive signal detection (likely displacement of EEG electrode)
• Test mode to seek out benign 50/60Hz environments
• Ability to inject randomised noise as a pseudo-EEG or pseudo-HEG signal (for blind studies or for demonstration
purposes)
• Selectable Automatic Level Control on the EEG & HEG signals , & auto-scaling of displays
• Selectable ‘anti-pinking’ filter for flattening the spectrum of EEG signals
• real-time alarm clock: timer shut-down/power-up
• 2 x AA NiMH rechargeable battery with 7+ hours continuous
• firmware reprogrammable by downloading a file over the net
4
Pocket A3 Technical Manual Rel 1.1
Pocket Neurobics ©
Safety
• Rechargeable battery operation
• Infrared (ie non-metallic) links to other units/PC (Abh II)
• Double insulated EEG probe leads
• Currents through EEG electrodes compliant with IEC601 standards
Modes of Operation
•
EEG mode: 1 or 2 channels of eeg with referential or bipolar montage with protocols set on each channel
individually. There are a total of four pairs of filters which can be used to implement a variety of protocols. The
first filter of the filter pair is used for up-training, the second for down-training, and when both filters of the pair
are selected, the ratio of the output of the two filters is trained. In this document, these three types of training
regime are generically referred to as “protocol outcomes”. For single EEG channel operation (including single
channel Bipolar montage), all four pairs of filters can be brought to bear on the EEG signal to implement quite
sophisticated protocols. These filter pairs are referred to as A1, A2, B1 & B2. For two EEG channel operation,
each EEG channel has two pairs of filters that can be applied. In this case the filter pair designations for each eeg
channel are Protocol A and Protocol B. Note that not all filter pairs need be active, and the relationship between
the filter pairs and the feedback signals varies base don wheterh one or two channel operation is selected. This is
best illustrated with an example: a single EEG channel protocol can be defined in the menus thus
A1
A2
Ratio Training: Beta2/Theta1
Beta2/Theta1
B1
B2
Up Training:
Beta1/0
Beta1/0
The software recognises that the protocol is duplicated and shall activate only the A1 and B1 filter pairs. To
select 2ch synchrony training, set all 4 pairs of protocol filters to the same (non-zero) band. Synchrony is defined
as the magnitude of the cross-correlation coefficient of the complex fourier coefficients within the band selected.
Improvement, rather than absolute value, is rewarded. Reward thresholds are auto adjusting with one of three
time constants selected under menu control. A choice of three time constants also applies to the ‘instantaneous’
outcome of protocol filters, allowing user control over the responsiveness of the unit. Rewards are presented both
via the LCD display and via an audio reward subsystem. Audio rewards can be selected to be chimes, chords, or
tones. For the latter there are two variations: firstly, a continuous tone whereby the pitch is proportional to the
current protocol outcome, & secondly, a tone triggered by the reward subsystem, the pitch of the tone being
proportional to the difference between the current protocol outcome and the protocol outcome at the time the
reward was triggered. The audio reward system utilises a fuzzy logic inference engine to issue rewards. This
inference engine takes as inputs, the instantaneous protocol outcome, the smoothed protocol outcome, and the
duration since the previous reward was issued. In general, rewards are issued when the instantaneous protocol
outcome is greater than the smoothed protocol outcome, but not decreasing in amplitude, modulated by the
duration since the previous reward. The amount by which the instantaneous protocol outcome need exceed the
smoothed value is under menu control (see Thres A & Thres B controls).
•
HEG mode: For nIR HEG, two light sources in the Red and Infrared bands respectively shine into the scalp and
the strength of the scattered light is measured. The ratio of these two signals is a measure of blood oxygenation.
This modality is a type of Near InfraRed Spectroscopy. For pIR HEG, the radiation from the brain in a particular
infrared band is passively monitored.
nIR HEG has both 1 channel and 2 channel (future) headsets. pIR HEG uses a single channel headset. In the
More… submenu there is a control to specify which HEG headset is present (either 1ch pIR HEG, or 1ch nIR
HEG, or 2ch nIR HEG headsets). Specifying which type of headset is present allows the unit’s protocols and
feedback to automatically adjust as the user changes between 1ch & 2ch operation (for both EEG &/or HEG).
Selecting 1ch pIR HEG or 1ch nIR HEG determines which of the two modalities is selected when 1ch standalone
operation is chosen. However both nIR and pIR channels (or both nIR channels in the case of a two channel nIR
headset) are transmitted over the wireless link to the PC. Two channel nIR HEG can also use the Ch1-Ch2 or
‘bipolar’ mode used by EEG. Here, the protocol outcome is the difference between the two HEG signals
(nominally the left & right channels). And indeed, one could also choose the difference between nIR & pIR
channels as the protocol outcome.
The nIR HEG signal is set for a nominal value of 100, although this is depends on the placement of the headset,
with changes in locale causing variations of typically 20-30% around this value. Changes during a training
5
Pocket A3 Technical Manual Rel 1.1
Pocket Neurobics ©
session can vary from -5% to about +15%. pIR HEG is reported in degrees Fahrenheit, with a nominal value of
98 degrees. Variations thru training of 0.5 to 1.0% in the pIR HEG signal can be expected.
Since these variations in the HEG signal are relatively small, the approach adopted is to ‘baseline’ the HEG
signal once it is stable, then feedback the variations from this baseline. In most displays a momentarily pressing
the right button will initiate this baselining action, and the feedback signals will then automatically be in the
correct operation range. If at any time the HEG signal drifts out of range, momentarily pressing the right button
will re-baseline the signal.
There are also some (optional) manual adjustments available in the menus: HEG Offset & HEG Gain. Let’s say
that the HEG signal has an instantaneous value of ‘85’. [This value of 85 appears at the bottom of the screen.] For
purposes of providing a very sensitive feedback signal, the HEG Offset is subtracted from the value of ‘85’ to
bring it to a value around 0..10. HEG Gain is then applied as a multiplicative factor. A HEG Gain setting of '0'
will multiply the resultant by 0. A HEG Gain setting of ~’99’ will multiply the resultant with a number four times
that of the menu’s nominal value of '25'.
HEG uses the same audible reward subsystem as EEG: a choice of chimes, chords, or tones.
•
Binaural Beat mode: generates pure sine waves and background pink noise, according to an 8-segment sequencer,
each segment with programmable tones, beat frequency, left-right volume, pink noise volume, and duration. Each
preset has an individually user-programmable tone and beat frequency to supplement 9 pre-configured values.
•
Mixed modes: the Binaural Beat system can run concurrently with the EEG or HEG systems. In this instance,
however, audible rewards are limited to Chimes. Chords & the continuously variable pitch tone is not available.
In HEG+Binaural Beat mode, the flash rate of the HEG IR & Red LEDs is controlled by the binaural beat
sequencer (whereas in HEG mode the flash rate is fixed at ~40Hz, and in HEG+EEG mode the flash rate is
fixed at ~50Hz). In EEG+Binaural Beat mode the beat frequencies generated are a randomised selection
between the preset beats of 0/7/14/21/28/35/42/49 Hz, changing from one beat frequency to another at the rate of
4 times per second. However, those beat frequencies adjacent to the current peak signal in the EEG (filtered by
the anti-pinking filter) will be substituted by a 0Hz beat frequency. The carrier frequency used to generate the
beat frequencies is determined by location of the peak frequency of the EEG, unless the EEG signal is determined
to be artefacted, then the carrier frequency is controlled by the tone selections of the Binaural Beat Sequencer. In
HEG+EEG mode, HEG & EEG operate concurrently. In this instance, EMG detection on the EEG signals is
disabled. In this mode, as well as two channels of EEG, there are two channels of HEG sent over the wireless link
to the PC, either one channel of nIR and one channel of pIR, or two channels of nIR HEG (if 2ch nIR headset is
selected.
EEG Signal Quality Assurance
•
•
•
•
•
•
Each of the EEG channels uses a high quality instrumentation amplifier to reject noise and 50/60Hz hum
A ‘driven right leg’ circuit reduces 50/60Hz hum further whilst ensuring currents through the electrodes are at
safe levels
A ‘Test 50/60Hz’ mode produces a tone the pitch of which is proportional to the amplitude of the 50/60Hz
interference – this can be used to quickly identify poor locales and benign locales
The unit constantly monitors the potential across the electrode-scalp interface to ensure the amplifier is not
saturated. This status information is available in most displays
Each EEG channel has a high quality 8th order elliptic anti-aliasing filter to allow clean bandwidth up to 40Hz for
50Hz mains countries (Europe, Asia), and 45Hz for 60Hz mains countries (North America, Japan)
Each EEG channel has a true ‘anti-pinking’ filter which can be switched in or out. Anti-pinking filters
compensate for the natural 1/f power spectrum response of eeg signals
Protocol Quality Assurance
•
•
•
•
•
Each EEG channel has individually programmable wanted (‘reinforce’) and unwanted (‘suppress’) bands.
9 pre-defined protocol bands: delta, theta1, theta2, alpha, beta1, beta2, beta3, gamma, all, nil
selecting ‘nil’ for either wanted or unwanted invokes amplitude rather than ratio training
selecting ‘nil’ for both up & down-training invokes the all-stop filter
bands are defined by 10th-order band pass filters ensuring fast response to changing EEG signals
6
Pocket A3 Technical Manual Rel 1.1
•
Pocket Neurobics ©
frequency domain displays are driven from a 128-point Fast Fourier Transform which is 8:1 overlapped and
windowed to improve response time.
User Safety
Conduction of Electricity through EEG Electrodes
To operate, EEG systems require a low resistance path to the scalp. Should these paths come into contact with lethal voltages,
serious injuries or death could result. Safety is thus an imperative and MinderLabs.com have adopted best practice in this area
of design:
• battery operation
• infrared external links to remove the possibility of PC failure & dangerous voltages conducted via wires
• double insulated EEG cable to prevent the cable to the head finding exposed dangerous voltages.
• EEG currents between the unit and the user are strictly limited in accordance with international standard IEC601
ENSURE THAT THE UNIT IS OPERATED IN SAFE RESIDENTIAL OR OFFICE ENVIRONMENTS – DO NOT USE
IN INDUSTRIAL OR HOSPITAL ENVIRONMENTS. CONNECT EEG CABLE TO POCKET-I UNIT ONLY – DO NOT
COONECT TO ANY OTHER DEVICE OR CONNECTOR.
Infection Risk
Traditional approaches to the placement of EEG electrodes on the scalp involve abraiding the skin to reduce electrode-scalp
impedance (less than 5K ohms is traditionally recommended). Breaking the skin creates the risk of infection from blood-born
pathogens such as HIV, Hepatitis-C, and Creutzfeldt-Jakob disease. Although there have been no reported cases of such
infections resulting from EEG sessions, the U.S. Centre for Disease Control has issued guidelines recommending that
electrodes be sterilised prior to re-use.
With modern instrumentation amplifiers as used in the Pocket-I, an electrode-scalp impedance of less than 5K ohms is not
necessary. Values less than 40K ohms are quite serviceable. It is therefore recommended that skin not be abraided. Both cup
electrode and saline-solution electrodes can perform satisfactorily without abrasive skin preparation. When using conductive
electrode paste & metallic cup electrodes, the recommended procedure is to first rub conductive paste on the site, then add
more paste to the site for bulk, then apply the electrode (filled to excess with paste).
Product Care & Maintenance – keys to long product life
System Reset
The Pocket is designed to reset itself in the event of incorrect operation. It is possible however that on occasion the display
will blank (eg in the event of a lightning discharge). Holding the right button for more than two seconds should shutdown the
device, and pressing the right button should restart it. If this is not the case, the Pocket can be reset by momentarily removing
the batteries.
Rechargeable Battery
Two sets of 2 x AA NiMH rechargeable batteries are supplied with the unit. If the unit is in heavy demand, and since the unit
can operate continuously for up to 7 hours after recharge, batteries can simply be swapped on a daily basis. The second set of
batteries should be placed in the trickle charger supplied. If the Pocket unit is used only irregularly, please remove the
batteries from the unit prior to storage. Shelf-life for a fully charged battery is many weeks.
Battery management within the unit includes:
• upon switch-on, if the battery is below operating voltage threshold, the unit will display the battery state then go
directly to shutdown procedures
• in the startup and ‘user guide’ phase, the unit will automatically shutdown if start is not initiated within 5 minutes
• if in menu mode, the unit will automatically go to shutdown should no buttons are pressed within 1 minute
• if in normal operating modes, the unit will automatically go to shutdown if no buttons are pressed within 2 hours
15 min
• in most displays ‘bat’ will commence to flash approximately 15 minutes before the shutdown threshold is
reached, at which time the unit will automatically go to shutdown.
7
Pocket A3 Technical Manual Rel 1.1
Pocket Neurobics ©
LCD Display Sensitivity
The LCD display is sensitive to liquids on its surface. It can cause failure to parts of the display area.
Static Discharges
The Pocket is electrically isolated and static discharges should not be a problem. Nevertheless, in static prone areas (cold
and/or low humidity) we recommend that, prior to use, the user ground him/herself. This can be achieved by touching
exposed metallic parts of computers or whitegoods.
Warranty
The Pocket unit is warranted against electrical failure for 30 days from date of purchase (see exceptions below). If, within this
30 day period, the unit ceases to function with it not having experienced physical damage to the case, it may be returned to
the factory for free repair or replacement (do NOT return electrodes or charger). For details on shipping, please email
[email protected].
Shipping costs to the factory are the responsibility of the user (typically about US$30). Pocket Neurobics shall repair or
replace the unit and pay for return shipment.
The unit is not warranted against abuse, nor against
• failure of the battery
• partial failure of LCD display area (invariably due to liquids coming into contact with the LCD screen whilst
• operational)
• failure of EEG electrodes
Replacement battery units can be obtained from local electronics stores such as Tandy. Replacement electrodes can be
ordered from e-stores such as www.rochestermed.com. Note that silver or tin electrodes are recommended. Gold electrodes
should not be used since wear or scratching thru to the base metal can cause excessive offset voltages and flatlining of the
EEG signal.
For units which fail whilst out of warranty, and not having suffered physical damage, a service fee of US$100 for repair or
replacement shall be applicable.
Packing List
9
Optional
User suppplied
User suppplied
9
9
9
9
Accompanying CD or Download from
www.Pocket-Neurobics.com/windows.htm
Pocket with rechargeable battery
pIR and/or nIR HEG Headband
EEG electrodes
EEG electrode conductive paste
‘Behind the head’ headphones
USB-wireless dongle
AA NiMH battery charger
User Manual
Windows driver for Wireless dongle (Pocketw)
8
Pocket A3 Technical Manual Rel 1.1
Pocket Neurobics ©
Connectors
First Use
Before using the HEG/ EEG functions of the unit for the first time, it is recommended that this manual be read in its entirety.
If the unit is received with batteries removed, remove the battery cover from the back of the unit and install the 2 x AA-size
NiMH rechargeable batteries supplied. Ensure battery polarities are correct.
Simply pressing the right-hand button for a few seconds will cause the LCD display to show a logo, then date & time, battery
state and ‘Start’. To go to the menu display, press the right pushbutton. If this button is not pushed within a few seconds, a
‘User Guide’ indicating the function of buttons and connectors, will cycle for 5 minutes. If the start button is not pushed
during this period, the unit will automatically power down.
Turning off the unit is achieved by depressing the right button until the shutdown screen appears, asking whether or not you
wish to log protocol values. If not answered within 5 seconds, values are not logged & the unit powers down.
Menu selections are identified in this manual by bold typeface. A train of menu selections are separated by “ | ”.
Rub conductive paste onto the scalp, then add more paste to the site for bulk. Fill the cup electrode to excess. Affix the
electrodes to the scalp: the Neutral & Reference earclips to be affixed to the earlobes and the Active 1 to Cz (1 channel
operation – Active 2 left floating) or Active 1 and Active 2 to C3 & C4 respectively (see Appendix 2: 10-20 system). Having
connected electrodes to the Pocket, the first step is to verify that the EEG signal is valid The Pocket provides some tools to
help do this:
•
•
Ensure that the eeg signals are within the range of the Pocket’s offset potential control. Select Preset | 1ch EEG > PC. Then select Go!. The default display is Probes. Towards the centre of the display is displayed the offset
potential. It can range between +1.7 & -2.3V, however to ensure continued good operation the offset should be
between +1.5 & -2.0V. If not, adjust the placement of the electrodes.
To find a relatively benign environment (ie free of excessive 50/60Hz interference) the Pocket provides a test
mode. To select the Test mode go to More…| 1ch, and scroll thru Ch1-Ch2, 2ch to find Test 50/60Hz. Connect
electrodes, and then connect headphones. Selecting Test mode will produce tones in the left and right ear whose
9
Pocket A3 Technical Manual Rel 1.1
Pocket Neurobics ©
pitch is proportional to the strength of the 50/60Hz interference. Move about and adopt various postures (eg feet
off the ground) to minimise the pitch. Also note that the pitch of the tone in the left ear is twice that of the tone in
the right ear. This can be used to confirm the correct orientation of the headphones.
Now ensure that the EEG signal looks valid. Towards the left of Display | Probes, the size of the EEG signal is measured in
microVolts peak-peak. For correct operation, this should be between 4..20uV. A good EEG signal will show discernable
wave shape without excessive fuzziness. Excessive fuzziness will ususally be accompanied by an excessively large EEG
signal and indicate that the electrodes are not in firm contact with the scalp. A ‘flat-lined’ EEG will indicate excessive
50/60Hz interference.
Now the Pocket is ready for an EEG session and the preferred protocol can be selected by choosing a Preset or by manually
adjusting the Protocol and Reward menus. The training objective, be it ratio training or amplitude training, is to either
increase or decrease the pitch of the tone or the frequency of the rewards. Up-training means that the pitch of the tone or
frequency of rewards increases as the protocol outcome increases. Down-training means that the feedback falls as the
protocol outcome increases. The polarity of ratio training can equally be alternated by swapping the numerator and
denominator protocol bands. Further, simply ‘telling yourself’ that the training objective is either to increase or decrease the
feedback, switches the training objective. For relaxation protocols it may be desirable to have as the training objective the
reduction of the feedback, whereas for focus protocols it may be desirable to increase the feedback.
For HEG operation, having placed the HEG headset on the head and connected it to the Pocket, select Preset | pIR HEG>PC or Preset | 1ch nIR HEG->PC, or select Mode | HEG and then choose 1 or 2 channel operation in the More…
submenu. Select Go! The default is Display | Trace which gives a 1 minute or 10 minute history of the HEG signal. After 15
seconds or so to allow the HEG signal (ie blood oxygenation level or infrared temperature) to stabilise, momentarily press the
right button to baseline the HEG signal. The HEG signal will adjust to the lower half of the Trace display allowing room for
training to move the signal to the upper half of the display. Also note that momentarily pressing the right button starts a
timer displayed in the top left of the display. HEG training is typically conducted sessions, and the duration of the session
(1..9 minutes) is set in the Sequencer submenu as the duration of the first segment. Session duration might typically be set to
3 minutes. When it times out, the timer initiates a short audible alarm – this can be used as a prompt to log session variables.
Momentarily pressing the left button will toggle between a 1 minute history display (the default) and the 10 minute history
display. The default feedback is the continuous tone, and the training objective is to increase it’s pitch and to sustain this as
long as possible. Alternative audible feedback tones can be selected.
For Binaural Beat sessions only headphones are required (electrodes & HEG headset are not required). Select Preset |
Binaural Beat and then Go! To select other pre-defined Binaural Beat sessions, choose other Presets, then change to Mode |
Binaural Beat. Then Go! To define your own Binaural Beat session, go the Sequence submenu and program each of the
eight segments.
To save User-defined sessions, either Binaural Beat sequences or HEG/EEG protocol configurations, once having set the
preferred parameters, go to More… | UserPreset1/2/3 and select. This User-defined configuration will be stored and
subsequently be accessible via Preset | User1/2/3.
10
Pocket A3 Technical Manual Rel 1.1
Pocket Neurobics ©
Menu Screens
Main Menu
The left pushbutton is for scrolling/rolling between menu options. The right pushbutton is for selection of menu options. The
left hand side of the menu screen lists the main menu functions. The right hand side of the menu display shows the current
setting for that function. For example, in the figure above, the function Reward is currently configured as Chimes. However
when More… is selected, more functions appear on the right hand side of the menu screen. Some menu functions ‘roll’, that
is, the different options available cycle ‘in situ’ , whilst other functions when selected open a ‘scroll’ list on the right side of
the menu screen.
• Preset – predetermined system configurations (which can be overridden by adjusting individual parameters).
Once the preset has been selected, simply use the left button to scroll down to Go! and then hit the right button to
action.
• Binaural Beat - Binaural beat only, EEG/HEG disabled
• EEG-driven Binaural Beat – randomised beat frequencies, except no beats in vicinity of current EEG
peak frequency, and the carrier tone is modulated by the current EEG peak frequency
• Test 50/60Hz – with electrodes connected, can be used to find an enviroment relatively free form
50/60Hz interference, also displays emg signal in Display | Frequency (as Prot B)
• SMR 1ch – 1ch EEG, up SMR/down Theta, continuous Tone reward
• Quash 1ch – wideband suppression
• Alpha Sync 2ch – trains up magnitude of alpha synchrony across 2 channels
• Alpha-Theta 1ch - 1ch EEG with multiple targets: up Theta2/down Delta AND up Theta2/down Beta3.
Chord reward allows multiple targets
• Alpha 1ch - 1ch EEG, up Alpha, continuous Tone reward
• nIR/pIR/EEG->PC – transmits 2ch EEG, 1ch nIR, and 1ch pIR to PC
• pIR HEG->PC – 1ch pIR HEG transmitted to PC
• nIR HEG->PC – 1ch nIR HEG tramitted to PC
• 1ch EEG->PC – transmits single eeg channel to PC (non-pinking filter no applied)
• 2h EEG->PC – transmits two eeg channel to PC (non-pinking filter no applied)
• User 1 – user defined preset
• User 2 – user defined preset
• User 3 – user defined preset
• Mode - how the EEG, HEG & Binaural Beat systems relate to each other. Selecting this function with the right
button will allow the left button to override the values selected by the current Preset setting.
• Binaural Beat – the EEG channels are turned off (to save battery) & only sound functions are active
• EEG – the binaural beat function is disabled, allowing all Reward options to be used
• EEG+Binaural Beat – with Binaural Beat system active, EEG system audible rewards are restricted to
Chimes only, beat & carrier freqeuncies determiend by EEG peak frequency
• HEG – Binaural Beat and EEG systems disabled
• HEG+Binaural Beat – HEG system audible rewards are restricted to Chimes only. nIR HEG IR & Red
LED pulsing controlled by the Binaural Beat sequencer (in the range 3..50Hz)
• HEG+EEG – audible reward system allows multiple targets. EMG artefact detection is disabled.
11
Pocket A3 Technical Manual Rel 1.1
Pocket Neurobics ©
• Display - selecting this function with the right button will allow the left button to override the values selected by
the current Preset setting.
• Probes – EEG modes: time-domain display of the signal on each EEG channel
• Frequency – EEG modes: frequency domain display of the signal on each EEG channel
• Mirror – EEG modes: left hemisphere-right hemisphere display of the peak signal in each of seven
protocol bands. For 1ch EEG operation, the single channel spectrum is displayed in both left & right
• Targets – HEG/EEG modes: bar graphs of actual and smoothed ratio values in each of the 2/4 channels
with accumulators of reward hits over 3 minute epochs, remembering the highest reward accumulation,
providing a target for future epochs.
• Halleys – EEG modes: a game where the size of the bats which deflect the ball is determined by the ratio
of the wanted to unwanted bands selected under Protocol for each of the four EEG channels. The length
of the top of the left bat is controlled by the wanted to unwanted band ratio for the front left probe, and so
on
• Binaural Beat – All modes: displays the state of the light & sound functions as programmed under
Sequencer
• Trace/Log – Trace displays recent history of the protocol outcome over 1 minute or 10 minutes (toggled
by momentarily pressing the left button) 1 minute history means that the protocol outcome is sampled
each 0.5sec, and 10 minute history means that the outcome is sampled every 5 seconds). Pressing the left
button for greater than 1 second will invoke the ‘Log’ display – this displays the previous 16 timestamped records of the session variables stored in non-volatile memory.
• Synchrony – Synchrony display is accessible when synchrony condition is set: all up & down protocol
filters set to the band over which the cross correlation will operate, eg: α/α,α/α,α/α,α/α sets alpha
synchrony whereby the cross correlation of the complex fourier coefficients within the band for each of
ch1 and ch2 are calculated. The magnitude of this cross-correlation is the key variable for feedback
purposes and appears at the bottom of the screen, whilst the scatter display represents about a 15 second
history of the real and imaginary components of the cross-correlation operation, with real being on the
vertical axis, and imaginary on the horizontal access. Perfect positive correlation will produce a cluster at
the top of the screen, whilst perfect negative correlation will produce a cluster at the bottom of the screen.
Where there is clustering to the left and right will indicate one hemisphere leading the other (phase
discrepancy), whilst clustering at the centre of the display will indicate poor correlation (ie ch1 eeg signal
and ch2 eeg signal are independent).
• Samadhi – Samadhi display is similarly only accessible for synchrony. It present a visual feedback
display of the degree of synchrony (magnitude of the complex cross correlation coefficient) between the
eeg signals of ch1 and ch2 within the band selected, using classical buddhist contemplative poses.
•
Protocol – this function allows overriding the value selected by the current Preset setting, by setting the required
wanted & unwanted protocol bands and various threshold sensitivities. There are four protocol filter pairs which
can be brought to bear on either 1ch EEG or 2ch EEG configurations. In 1ch EEG, all four pairs (A1,A2,B1,B2)
can be deployed to effect very complex protocols. In 2ch EEG, two pairs (A & B) can be deployed to each
channel.
• Protocol A & B - allows the user to set the required wanted (up-training) & unwanted (down-training)
protocol band (δ, θ1, θ2, α, β1, β2, β3, γ or 0) by rolling through the list with the left button and
selecting with the right button. Selecting 0 as the wanted or unwanted band will invoke amplitude
training of the band selected in the paired unwanted or wanted band. Selecting a non-0 band for each of
wanted and unwanted will invoke ratio training. Selecting 0 for both will invoke the all-stop protocol.
• Gain – adjusts the sensitivity of reward system to the HEG signal. For example, increased Gain will
increase the change in pitch of the feedback Tone as the HEG signal changes
• Thres A / HEG Offset – Thres A adjusts the fuzzy logic output threshold, a low value will allow
rewards to be generated more easily. HEG Offset translates the HEG signal to a range in which the
reward system can operate effectively. This is adjusted by listening to the feedback Tone whilst adjusting
the value until the Tone is at a pleasant pitch.
• Thres B – adjusts the fuzzy logic output threshold, a low value will allow rewards to be generated more
easily.
• Smoothing – selects one of three time constants to smooth the ‘instantaneous’ protocol outcome, and one
of three (longer) time constants to apply to the long term smoothed protocol threshold. When in HEG
modes it also effects a choice of three time constants to be applied to the HEG signal. “1” is the shortest
time constant, and “3” is the longest time constant.
12
Pocket A3 Technical Manual Rel 1.1
•
•
Pocket Neurobics ©
Artefact – conventional threshold used to detect presence of emg artefacts. EMG signals are measured in
the band 80..200Hz.
Reward – selecting this function with the right button will allow the left button to override the values selected by
the current Preset setting, by rolling through the following options for protocol settings when EEG modes are
active. Whilst in Binaural Beat mode, audible rewards are disabled, and whilst in combined EEG+Binaural beat
or HEG+ Binaural Beat modes only Chime rewards are available – Chords & Tones are inhibited. There are four
protocol filter pairs
1ch or Ch1-Ch2 operation:
A1
B1
A2
B2
•
A1 = A2 = A3 = A4 : a single protocol filter pair is active, together with a single audible reward. Reward
threshold is under the control of Thres A. Audible rewards are as follows:
• Chimes: A1 reward is stereo
• Chords: satisfying A1 produces base tone
• Tones: A1 rewards is stereo continuously variable pitch
• A1 = B1 & A2 = B2 : two separate protocols with a single threshold control of ThresA. Audible rewards
are as follows:
• Chimes: A1/B1 rewards presented to left ear, A2/B2 presented to right ear
• Chords: satisfying one filter pair produces base tone, satsfying two produces chord
• Tones: A1/B1 rewards presented to left ear, A2/B2 presented to right ear
• A1 = A2 & B1 = B2 : separate A & B protocols with separate thresholds ThresA & ThresB. Audible
rewards are as follows:
• Chimes: A1/A2 rewards are stereo hi pitch, B1/B2 are stereo lo pitch
• Chords: satisfying one filter pair produces base tone, satsfying two produces chord
• Tones: A1/A2 rewards presented to left ear, B1/B2 presented to right ear (future: stereo)
• A1 != A2 != B1 != B2 : four separate filter pairs with separate A & B protocols under the control of
separate thresholds ThresA & ThresB. Audible rewards are as follows:
• Chimes: A1 reward presented to left ear, A2 to the right, B1 is stereo hi pitch & B2 is stereo lo
pitch
• Chords: simultaneously satisfying succesive filter pairs produces successively higher complexity
chords
• Tones: either A1 or A2 rewards presented to left ear, & either B1 or B2 presented to right ear,
toggling between the two with the right pushbutton (future: stereo)
2ch operation:
Left
Right
A1
A2
B1
B2
• A1 = A2 = A3 = A4 : separate left-right protocol filter pairs are active, together with left-right audible
rewards. Reward threshold is under the control of Thres A. Audible rewards are as follows:
• Chimes: A1/B1 rewards presented to left ear, A2/B2 presented to right ear
• Chords: satisfying one filter pair produces base tone, satsfying two produces chord
• Tones: A1/B1 rewards presented to left ear, A2/B2 presented to right ear
• A1 = B1 & A2 = B2 : separate left-right protocol filter pairs are active, together with left-right audible
rewards. Reward threshold is under the control of Thres A. Audible rewards are as follows:
• Chimes: A1/B1 rewards presented to left ear, A2/B2 presented to right ear
• Chords: satisfying one filter pair produces base tone, satsfying two produces chord
• Tones: A1/B1 rewards presented to left ear, A2/B2 presented to right ear
• A1 = A2 & B1 = B2 : separate A & B protocols with separate thresholds ThresA & ThresB. Audible
rewards are as follows:
• Chimes: A1/A2 rewards are stereo hi pitch, B1/B2 are stereo lo pitch
• Chords: satisfying one filter pair produces base tone, satsfying two produces chord
• Tones: A1/A2 rewards presented to left ear, B1/B2 presented to right ear (future: stereo)
• A1 != A2 != B1 != B2 : four separate filter pairs with separate A & B protocols under the control of
separate thresholds ThresA & ThresB. Audible rewards are as follows:
13
Pocket A3 Technical Manual Rel 1.1
•
•
•
•
Pocket Neurobics ©
Chimes: A1 (hi pitch) & B1 (lo pitch) rewards are presented to left ear, A2 (hi pitch) & B2 (lo
pitch) are presented to the right
Chords: simultaneously satisfying succesive filter pairs produces successively higher complexity
chords
Tones: either A1 or A2 rewards presented to left ear, & either B1 or B2 presented to right ear,
toggling between the two with the right pushbutton (future: stereo)
•
Sequence - selecting this function allows overriding binaural beat parameter values set by the current Preset
setting. Selecting this function brings up a sub menu on the right side of the screen. In this sub-menu, sequencer
functions can be scrolled with each function having eight individually programmable segments. The functions
selectable in the submenu are:
• Tone – for binaural beat operation, two tones separated in frequency by the beat frequency are generated.
This function sets the mean frequency of the two binaural beat tones. One of nine frequencies can be
selected for each segment individually:
• 0 – 73.6 Hz
• 1 – 110 Hz
• 2 – 165 Hz
• 3 – 197 Hz
• 4 – 246 Hz
• 5 – 393 Hz
• 6 – 440 Hz
• 7 – 492 Hz
• 8 – 526 Hz
• U – User defined: 000.0..999.9Hz- defined in the first 4 segments in last line of the sub-menu.
• Beat – selects the frequency separation of the two binaural beat tones for each segment individually:
• 0 – 0 Hz (no beat frequency)
• δ1.234 Hz
• θ1 –
4.389 Hz
• θ2 –
6.583 Hz
• α9.875 Hz
• β1 –
13.17 Hz
• β2 –
19.75 Hz
• β3 –
26.33 Hz
• γ 39.50 Hz
• U - User defined: 00.0..99.9Hz- defined in the last 3 segments of the last line of the sub-menu
• Volume Left – programmes the volume in the left audio channel for each segment individually
• Volume Right – programmes the volume in the right audio channel for each segment individually
• Mask – programmes the volume of the background pink noise for each segment individually
• Time – programmes the duration of each segment individually [0..9 minutes]. The sequencer will
continue to cycle through the segments indefinitely unless a segment has a duration of 0 minutes, upon
which the sequencer will stop and pass control back to the main menu
•
- selecting this symbol will close the sub-menu & pass control back to the main menu
14
Pocket A3 Technical Manual Rel 1.1
Pocket Neurobics ©
More… Sub Menu
•
More… - selecting this function pulls up a sub-menu on the right side of the screen which has additional
functions
• Wireless off - raw>PC– raw<RF - protocol>PC – RF ChX roll submenu : activates the wireless
2.4GHz link. raw>PC transmits raw HEG/EEG data to the PC, raw<RF allows the unit to act as a
monitor receiving signals from other wireless Pendants or Pockets, protocol>PC transmits protocol
outcomes to the PC, whilst selecting RF ChX allows the RF channel to be scrolled thru RF1..RF8.
Selecting RF ChX again will cause the display to flash whilst the Pocketw is transmitting commands to
devices listening (eg PC dongle) to change to the newly selected channel. Selecting RF ChX one more
time will cause the Pocketw to begin transmitting on the newly selected channel.
• Probes setup: the following roll submenus are multiplexed onto the second item in the More.. submenu
list. Rolling through this submenu will display the currently selected item of each list. Selecting an item
will activate rolling of the respective ‘sub-submenu’ list:
1ch - 1ch pIR Headset - Noise on - ALC on - BW 40Hz - AntiPink On - Lock On
|
|
|
|
|
|
|
2ch
1ch nIR Headset Noise off
ALC off
BW 48Hz
AntiPink Off Lock Off
|
|
|
1ch Bipolar 2ch nIR Headset
BW 56Hz
|
Test 50/60Hz
|
Code Upload
• 1ch - Ch1-Ch2 – 2ch – Test 50/60Hz – Code Upload roll sub-submenu: this function is usually set to
1ch, ie 1 channel (‘referential’) operation. 2ch accepts signals from the Ch1 & Ch2 electrodes. Ch1-Ch2
accepts signals from the two channels then, in software, derives a single bipolar channel as Ch1 – Ch2. In
this mathematical operation the common reference signal is cancelled. Code Upload is for updating the
program code in the micro-controller (see Appendix 3). Test 50/60Hz mode sets the following:
• 50/60Hz deviner: produces a continuous tone in the earphones proportional to the strength of
50/60Hz interfering signals – used to find benign environment
• the tone in the left earpiece is twice that in the right – used to check orientation of earphones
• 40/48/56 Hz anti-aliasing filter replaced with a 62.5 Hz filter to allow the magnitude of the 50/60
Hz mains hum to be monitored in Probes or Frequency display
• ALC is on, and anti-pinking filter is off
• HEG Headset 1ch –2ch roll submenu: sets whether the current HEG headset is a one channel or two
channel version. When HEG 1ch is selected, setting Mode | EEG+HEG, and setting the electrodes
configuration to 2ch will mean operation is two channel EEG and one channel HEG.
• ALC on – ALC off roll sub-submenu: this function switches on or off the automatic level control (ALC)
function. Whilst off, the gain of each EEG channels is fixed at 20,000 times (V/V). Whilst on, the ALC
will vary the gain between 10,000x ..40,000x effectively increasing the dynamic range of the EEG signal
from 10-bit to 12-bit resolution. The gain of Channel 1 & 2 will be set by the channel with the larger
15
Pocket A3 Technical Manual Rel 1.1
•
•
•
•
•
•
Pocket Neurobics ©
signal (ie a common gain setting for the two channels). Channel gain is updated approximately eight
times per second. ALC allows the protocols to work more effectively & should normally be on
• Noise on-off roll sub-menu: when ‘on’, the HEG/EEG inputs are replaced with a randomised noise
signal. This can be used for ‘blind’ testing or for demonstrating the function of the unit without having to
‘wire’ subjects
• EEG Bandwidth 40 – 48 – 56 Hz roll sub-submenu: should normally be set to 40Hz. When the unit is
used as a front-end for PC-based neurofeedback programs, and in countries with 60Hz mains supply
(North America, Japan), the PC program can shutdown the unit’s display and set 48Hz bandwidth. (Note
that the LCD display circuits produce interference at about 45Hz, sometimes lower.)
• Anti Pinking Filter on – off roll sub-submenu: eeg signals have a natural roll-off in energy as their
frequency increases (this gradual roll-off in energy with increasing frequency is called ‘pinking’ in
reference to the numerous natural phenomenon which exhibit this characteristic). To flatten the spectrum
of the EEG signal, allowing the protocols to work more effectively, a compensating filter can be inserted.
This anti-pinking filter should normally be on when the Pocket is used standalone, and off when used as
a pod with a PC biofeedback application
• Lock on – off roll submenu: when set, the lock limits access to User Presets only & inhibits access to
menus which modify protocols
Set Clock – allows programming of hours(0..23) : minutes, day : month : year, for use in time stamping logged
values, and to allow power-up & power-down by setting a time-of-day alarm
Set Alarm – allows programming of a time-of-day alarm – hours(0..23) : minutes. Once Set Alarm is selected,
during the subsequent 24 hours a match between the Set Alarm time and the current real-time clock will cause
the unit to power-down if currently operating, or cause the unit to turn itself on and resume operation with the
previous parameter settings, if the unit is off at the time of the alarm
User 1-2-3 Preset roll submenu: selecting this function will allow rolling between User 1 – 2 – 3 preset
programming. Selection of one will cause the unit’s current parameters to be stored in non-volatile memory and
thus enable those parameter values to be recovered at any time by selecting the respective Preset | User Preset
value in the main menu
Volume – adjustment of the volume of binaural beat sequences and chime, chord & tone rewards
Contrast – adjustment of the LCD display contrast to compensate for temperature & light conditions
- selecting this symbol will close the sub-menu & pass control back to the main menu
Pushbutton Function
The functions performed by the left and right pushbuttons varies depending on the Display chosen. Actions can be initiated
by short pushes, long pushes (> 1 sec), or dual pushes (both left & right pushbuttons). This is summarised below.
Left
Both
Right
Display
Short
Long
Short
Long
Short
Long
Menu
display
Most
displays
scroll
scroll
nil
nil
select
shutdown
freeze
display*
Binaural beat:
pure sine /
bauble
-> Log Display
log
current
session
log
current
session
cycle
displays
menu &
shutdown
scroll
logged
records
nil
nil
ProtA/B session
variable toggle.
baseline HEG
ProtA/B session
variable toggle.
baseline HEG &
init timer
nil
Trace
display
timebase
1m/10m
toggle*
Log
Record
Readout
scroll
logged
records
cycle
displays
menu &
shutdown
return to
Trace
display
* with raw>PC active, rather than freezing the display, the display is turned off – this turns off any
interfering signals around 40Hz that can be produced by the display..
Displays
Selecting main menu list item Display will enable a rolling sub-menu of the various displays available. Note that:
• cycling through displays is activated by depressing both pushbuttons and holding for greater than one second
16
Pocket A3 Technical Manual Rel 1.1
•
•
Pocket Neurobics ©
a short press of the left button will freeze the display. A second short press will release the freeze
a long press of the left button will cycle through options for the binaural beat tone (pure sine waves or a baubling
effect)
EEG Displays
The display depicted here is Display | Mirror and is typical of the displays. The following are features common to most or all
displays:
• In the lower right of the display you will see either ‘prA/B’ or ‘A&B’, ‘emg’ indicating whether Protocol A or B
or both session variables are being displayed. (‘emg ‘ is displayed only when in Test & Display | Frequency
only ). When wireless is on, this display will alternate with the wireless RF channel number (eg “rf1”)
• In the upper right of the display the screen magnification (‘1x, 2x, 4x, or 8x’ for time domain displays and ‘2x,
4x, 8x, 16x, 32x or 64x’ for frequency domain displays) will be displayed. Screen magnification is the
autoranging of the unit to improve the resolution of the display. If, as usual, Automatic Level Control (ALC) is
on, alternating at a 1 second rate with the screen magnification will be the channel gain (eg ‘15.6k x’). With ALC
off, channel gain is fixed at 20.0k x and is not displayed. With ALC on, channel gain can range from 10.0k
x..40.0k x, depending on the strength of the eeg signal
• In the lower left corner, ‘log’ will be displayed when both pushbuttons are pressed. The screen will also
momentarily freeze as data is written to non-volatile memory Session Variables: These numbers at the lower
centre of the screen are the Protocol A and Protocol B session measures:
• % reward – percentage of time that the inference engine is issuing a reward
• protocol outcome – smoothed value of output of the protocol filters, either a ratio, up-training energy , or
down-training energy, depending on the protocol settings. This value can be logged.
• protocol outcome variance – square of the difference between protocol outcome and the long-term
averaged protocol outcome, smoothed. This value can be logged.
• In HEG operation the session variables are:
• % gain – percentage HEG value is greater than baselined valued. This value can be logged
• HEG value, a measure of blood oxygenation, nominally a value of 100.0. This value can be logged.
Left/Front (A1/B1 or A)
Right/Back (A2/B2 or B)
% reward
outcome
variance
% reward
outcome
variance
EEG OK
% reward
|correl coeff %|
na
na
SynchronyOK
X/O/-/V
X/O/-/V
X/O/-/V
X/O/-/V
EEG fail*
% HEG gain
HEG signal
% HEG gain
HEG signal
HEG OK
X/O
X/O
X/O
X/O
HEG fail*
*see signal validity tests below.
• In 2 eeg channel operation, at dead centre lower appears ‘..’. These dots advise in real-time whether the two eeg
electrodes are within offset voltage control range of about ±1.7V. (Note that the actual voltage is displayed in
Display | Probes) Thus the left dot represents the left electrode, and so on. A dot may extinguish if, for example,
the electrode is not making good contact with the scalp. The dot being extinguished means that the respective
electrode may not be functioning correctly
Checking Validity of EEG Signals
The Pocket provides a number of tools to help ensure good performance of the electrodes:
• connect the EEG electrodes cable to the upper, smaller connector on the unit. Select Preset | Setup EEG. This
will bring up the Probes display. Observe the offset voltage in the centre top (eeg channel 1) and centre bottom
(eeg channel 2). This voltage should be below +1.7..-2.2V
17
Pocket A3 Technical Manual Rel 1.1
•
•
Pocket Neurobics ©
Observe the waveform on the Probes display. Practice will enable the user to readily recognise valid EEG signals
from noise and/or mains hum.
In most displays the default readout at the bottom of the display is of session variables. When artefacts are
detected, the EEG-health auto-sensing will over-write these session variables with the following warnings:
• OOOO
no signal (probably flatlined thru excessive 50/60Hz)
• XXXX
excessive signal (electrode probably fallen off)
• - - - - emg artefact (probably muscle/eye artefact)
• VVVV
electrode offset potential range exceeded
Logging data
Session variables can be logged at any time by momentarily pressing both buttons. A 'record' (the Pocket can remember the
previous 16 loggings) consists of time & date when the unit was most recently switched on, the duration since that start-time,
the number of HEG/EEG channels active, the A & B protocols in force, and the session variables associated with each
protocol.
The session variables logged have been averaged across the session. The averaging process involves the following steps:
• During the fist 15 seconds after leaving the menu (by selecting Go!), various smoothing time constants are forced
to their minimum value to speed settling time
• At 15 seconds, smoothed session variables are set to the current (‘unsmoothed’ or ‘instantaneous’) value
• Session variables are subsequently averaged at 15 second intervals – thus the first averaged value is available 30
seconds after leaving the menu.
• After 64 minutes, averaging stops and any subsequent logging shall store the values as they are at the 64 minute
mark.
Note that this averaging process is recommenced every time the menu is exited. So to access displays other than the current
display, without resetting the averaging process, press both buttons for greater than 1 second to initiate scrolling between
displays (without entering the menus). Also note that the session time recorded in the log record (measured in minutes), is the
time since the unit was last powered up, and is not the time since the menu was last exited.
Support Functions
Set Clock
At the time of power-up of the unit, the time & date is displayed, and if observed to be in error, selecting More… | Set Clock
will bring up a small sub-menu to enable updating the date & time. The format is hours(0..23) : minutes, day : month : year.
Set Alarm
A match between the time-of-day alarm setting and the Clock will switch the unit off if it is currently on, and switch the unit
on if it is currently off. This will not recur. Thus the Alarm needs to be reset each time the alarm function is required.
If it is desired to, say, use the light & sound in bed prior to going to sleep, selecting More… | Set Alarm will allow automatic
shutdown of the unit at a time of the user’s choosing. Alternatively, if you wish to wakeup to a selected ‘Preset’ or
configuration, selecting that configuration, setting the time-of-day alarm, then turning the unit off, will cause the unit to turn
on upon a time-of-day alarm and go directly to the most recent configuration , and then automatically Go!.
Wireless Link
The Pocket transmits 4 channels of data over the IR or 2.4GHz wireless link: the content of those four channels will depend
on menu selections. For More…| raw>PC, raw HEG/EEG data is transmitted. For More…| protocol>PC, protocol are
transmitted.
Mode
EEG
1/2filterPr
1/2filterPr
mode
raw
protocol
4filterPr
4filterPr
raw
protocol
Operation
EEG/EEG+BB
wireless
Ch1
Ch2
Ch3
Ch4
EEG1
EEG filterPr1/
|corel coeff|
EEG1
EEG filterPr1
EEG2
EEG filterPr2
|corel coeff|
EEG2
EEG filterPr2
EMG1
EEG pkFreq1
|corel coeff|
EMG1
EEG filterPr3
EMG2
EEG pkFreq2
|corel coeff|
EMG2
EEG filterPr4
18
Pocket A3 Technical Manual Rel 1.1
HEG/HEG+BB
EEG+HEG
Binaural Beat
Pocket Neurobics ©
1/2filterPr
raw
nIR HEG1
pIR/ nIR2
HEG_Red_1
1/2filterPr
protocol
NIR1 BASELINED
HEG2 baselined
EEG filterPr3
undefined/
HEG_Red_2
EEG filterPr4
4filterPr
4filterPr
raw
protocol
pIR/ nIR2
HEG2 baselined
HEG_Red_1
EEG filterPr3
HEG_Red_2
EEG filterPr4
1/2filterPr
1/2filterPr
raw
protocol
NIR1 BASELINED
pIR/ nIR2
HEG2 baselined
4filterPr
4filterPr
-
raw
protocol
raw
protocol
nIR HEG1
HEG1 baselined
undefined
undefined
pIR/ nIR2
HEG2 baselined
undefined
undefined
EEG1
EEG filterPr3
|corel coeff|
EEG1
EEG filterPr3
undefined
undefined
EEG2
EEG filterPr4
|corel coeff|
EEG2
EEG filterPr4
undefined
undefined
nIR HEG1
NIR1 BASELINED
nIR HEG1
* for 1ch eeg operation, EEG2=EEG1, EMG1=EMG2; for 1ch HEG headset, HEG2=HEG1
To communicate with a PC, connect the wireless dongle and configure the virtual COM port assigned to the dongle’s driver
at installation for 38,400 Baud, 8-bit, even parity, one stop bit.
PC-based applications utilise this capability to do all or some of:
• Receive raw eeg/heg data acquired by the Pocket for processing by neurofeedback protocols on the PC
• Receive emg artefact signal (100..200Hz) from the Pocket (EEG mode only)
• Extend the range of neurofeedback Rewards and eeg data displays using the PC’s multimedia capability
• Uploading new firmware upgrades to the Pocket
• Upload logged data from a unit and store in a client database (future)
See website for updated details on 3rd party PC applications which support this interface and for instructions on uploading
new firmware for the Pocket. Currently, PC-aaplications supported are BioExplorer (www.cyberevolution.com) and BioEra
(http://bioera.sourceforge.net/index.html )
Appendix 1: Managing the wireless link
2.4GHz wireless communication utilises the ‘serial-USB-wireless’ dongle pictured. Similar to USBserial adaptor cables, the
dongle requires a Windows driver to be installed. The driver and installation instructions can be found here:
http://www.Pocket-Neurobics.com/windows.htm
The 2.4Ghz band is shared with Bluetooth, some wireless LANs, microwave ovens, and some video and sound surveillance
systems. To help prevent interference, and to allow multiple devices to operate in close proximity, eight RF channels are
provided. The RF channel can be selected in the More.. submenu. With the wireless link active, the RF channel number is
flashed in the lower right corner of most displays. The dongle too can operate on each of each channels and this can be set
either manually by pressing the button the number of times to set the respective channel (eg twice for channel 2, etc) or
automatically by changing the channel on the Pocketw.
The LED on the dongle will periodocally flash to indicate the current rf channel (eg it will periodically flash twice to indicate
channel 2). Also, if no raw signals are being received (perhaps the Pocket_I is off), the LED will be mostly off and will flash
on. If the dongle is receiving a signal, then the LED will be mostly on and will flash off.
Appendix 2: Uploading new Firmware versions to the Pocket
Steps to Upload new Firmware version to the Pocket over the wireless link:
1. Download new firmware file from here and store in a temporarydirectory on you computer...
http://www.pocket-neurobics.com/upgrade.htm (Look in the section for the Pocket.)
2. On the Pocket, go to the "More.." submenu, second line, double right click on which probably says "1ch" or "2ch", then
scroll using left button till you reach "Code Upload". Right click. The Pocket will display "Searching..." and is now ready to
receive the new firmware.
3. Run BioExplorer, then select "BioExplorer" in the menu Bar, then "Devices.."
19
Pocket A3 Technical Manual Rel 1.1
Pocket Neurobics ©
4. If there is not already a Pendant EEG driver listed, select "Add..", "Pendant EEG", "OK". Choose the "Port" to which the
wireless Dongle is connected. [Your Pocket A1 or Pocket A3 driver will already be looking at this particular COM port.]
Finally select "OK".
5. In the BE Device Manager window, untick all drivers except the Pendant EEG driver to ensure that it has precedence in
connecting to the wireless dongle.
6. Highlight the Pendant EEG driver by left clicking on it with the mouse, then select "Properties", then the "Pendant" tab.
7. Select "Upload Firmware" and choose the file earlier downloaded into a temporary directory. Clicking "Open" will cause
the file to begin uploading to the Pocket over the wireless link. You should see the firmware's data scolling in the window as
it is transferrd. This process takes about 2 minutes.
8. If the file is successfully received by the Pocket, it will automatically reboot and display the new firmware version at
startup. If the transfer was corrupted, then the Pocket will stay "Searching...", ready for a new attempt to upload the firmware.
To try again, simply "Open" the firmware file once more.
Appendix 3: Procedure to place Electrodes and the 10-20 system
To measure a brainwave signal, the electrodes can either be in pairs, with the difference in voltage between the two electrodes
captured (this is called bipolar mode), or there can be a common probe to which all other (unpaired) electrodes are referenced.
This is called referential or monopolar mode. The bipolar mode has the advantage of being able to measure the differences
between various parts of the brain, whilst the referential mode allows multiple signals whilst minimising the number of
electrodes. Of recent times the referential mode is the more common. Note that the reference probe can be attached to the
body anywhere, however most commonly it is attached to the ear on the side of the brain being studied. If both hemispheres
are being exercised, the reference probe can be attached to either ear or to both, or along the mid-line of the brain.
It is also required to attach a neutral connector to the user to ensure that the user and the eeg machine are of equal potential.
This must be done in such a way so as to ensure only minute currents flow between the user and the instrument. A simple
approach is to link the user and the instrument through a high impedance resistor. However the preferred approach is to use
an active circuit called a Driven Right Leg (DRL) circuit. This is somewhat of a misnomer since the neutral connector can be
placed anywhere on the body. In the case of AbhayamudrPocket, the neutral electrode is an earclip. The 10-20 system
describes the locations on the scalp as shown below.
The symbols F, C, P, O, and T are short hand for the major lobes of the brain: frontal, central, parietal, occipital and temporal
respectively, whereas the numeric subscripts describe a location on the lobe, with odd numbers on the left hemisphere and
even numbers on the right. Note that a subscript of "z" denotes the midline point.
For a single active probe (ie 1 channel referential montage) the most commonly used point for the active electrode is Cz with
the reference on one or both ears. For two active electrodes the most common points are C3 and C4, with a reference at the
ears or on the mid-line. For four active electrodes there are not any standard locales. For bipolar montage, a common
placement is C3-C4 (ie an “interhemispheric” montage). In a clinical environment it would be common for the electrodes to
be relocated from time to time during a session, with specific regimens to treat specific conditions.
20