1
LED Studio
LED Studio
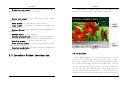
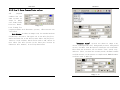
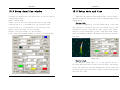
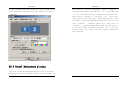
single click on it, a dialog box will appear, as shown in iamge
3-8. Use your mouse to drag the adjusting button for
brightness, contrast, and color, you can change the settings.
Then choose “Save” to save the changes or choose Restore
to reset. Also you can tick in the box in front of “Enable
Adjust Bright Auto” to let it automatically adjust the
brightness according to the environment.
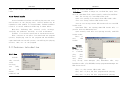
Screen Area: to setup the display area on the monitor,
from the color of the LED screen. After single click on it,
there will be a dashed-line frame on your monitor, left click
it can drag and adjust the display area. Or right click to
exit Screen Area Setting.
Virtual/Real LED screen: switch between virtual and real
pixel display mode.
Play Foreground/background: used for background playing.
When selected, contents will not be shown on the monitor, but
only on the LED screen.
Lock/Unlock LED Screen Properties: Lock the current
contents on the monitor to the LED screen, and do not refresh.
Vice versa.
Turn on/off LED Screen Power: for remote control to turn
on or off the power of LED screen.
Schedule Table: to setup some schedule for the LED screen,
such as turn on/off timing. Pleas refer to Chapter 16 for
details.
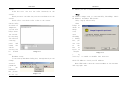
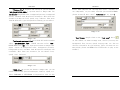
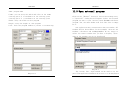
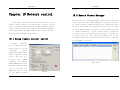
Schedule Hide Setup: Enable/disable schedule hide, a
window as shown in image 3-9 will appear after selecting it.
Language: setup the operating langue of the software,
options like auto, English, French, simplified Chinese,
traditional Chinese will be available.
Show/Hide Play
window:
Used to
show or hide the
playing window.
Allow/Forbid
Edit: Used to allow
or forbid editing
Image 3-9
current LED Studio
file.
Software Setup: to setup software options. (Details refer
to software setting chapter)
User Setup: setup the purview of users. (Details refer
to User Setup Chapter)
Test (only for LED screen producer, user program may not
contain this menu)
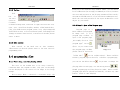
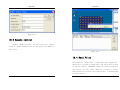
As shown in
image
3-10,
it
contains grey test,
grid test, dot test,
color bar test,
check
position,
check color, switch
help, and Hardware
setup.
Image 3-10
Grey test: can
operate grey test on the LED screen.
Grid test: can test whether the image on the screen is
correct or not.
Dot test: Can test the high frequency character of the
12
13