1
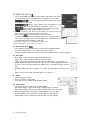
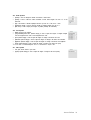
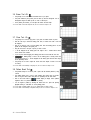
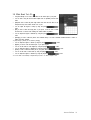
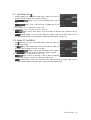
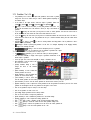
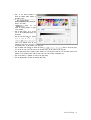
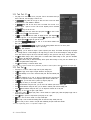
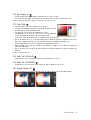
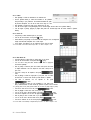
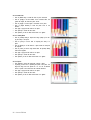
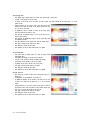
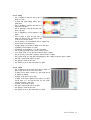
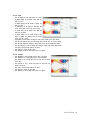
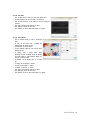
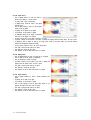
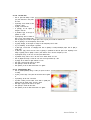
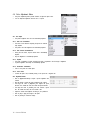
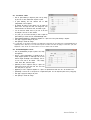
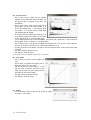
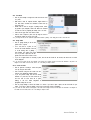
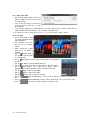
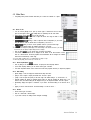
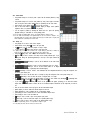
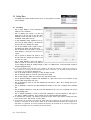
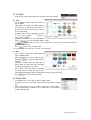
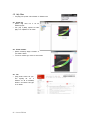
Ÿ
Ÿ
Ÿ
Ÿ
Ÿ
Click on
[Color Profile Conversion] to convert the photo color by using the ICC Profile and the Color
Engine.
Click on
[Source Color Profile] to set the ICC Profile used as the photo color area. You can
use the camera’s ICC Profile or the standard RGB ICC Profile.
Click on
[EzPhoto Color Application] to supplement the quality of photos processed as batch jobs. Photos
shot by a DSLR camera registered in EzPhoto will use the ICC profile for each camera mode. If a photo is not shot
by a camera registered in EzPhoto, you can adjust its brightness, color and clarity.
Click on
[Target Color Profile] to set the ICC Profile used as the color area of target
subject to color conversion. If you need to print a photo, set the ICC Profile for your printer.
Click on
[Conversion Method] to set the method for converting colors in the color engine.
v For more details on the ICC Profile, the color engine and the conversion method, refer to '4.6.1. Color Setting' in 'Chapter 4. Menu'.
Ÿ
Ÿ
Ÿ
Ÿ
Ÿ
Ÿ
Ÿ
Ÿ
Ÿ
Ÿ
Ÿ
Ÿ
Ÿ
Click [Curve Application] to supplement a fine difference between photo colors resulting
from the [Batch Job].
Click the [Arrow Button(▼)] to display the saved curves. Select a
desired curve for use.
If you want to check or modify the details of the selected curve or
create a new curve, click the [Detail] button. If you want to delete
the current curve, click the [Delete] button.
In the [Batch Job Curve] window, you can see the selected curve
setting and change the curve values.
As fine color error corrections are made, you can enter the desired
value in the density field to change the curve.
In [Channel], select the color channel to correct.
If you want to use the corrected curve value in [Batch Job], click the [OK] button.
Click [Cancel] to cancel the curve works and return to [Batch Job].
Click [Save as New] to save the changed curve value with the desired name.
Click [Unsharpen Mask Application] to supplement the quality by using the
[Unsharpen Mask] tool for all the photos processed by [Batch Job].
Click the [Arrow Button(▼)] to display the Unsharpen Mask values saved. Select
the desired value for use.
Click the [Detail] button to display or change the settings of the selected
Unsharpen Mask. The changed Unsharpen Mask value can be saved as the new
unsharpen mask setting value by using [Save as New].
v For more details on [Unsharpen Mask], refer to '4.3.12.3. Unsharpen Mask Filter' in 'Chapter 4. Menu'.
Ÿ
Ÿ
Ÿ
When all the settings are complete, click [Start Job(
)] to start the [Batch
Job].
Click
[Close] to close the [Batch Job] window.
Click
[View Log] to display the detailed information of [Batch Job], such as working time and errors for each
photo.
Hancom EzPhoto 51