1
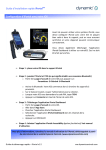
iPortal
the wheelchair display
interface for powered
wheelchairs
User Manual
compatible with
iPortal User Manual Issue 5.06, May 2012
1. About this manual
This User Manual describes how to use DYNAMIC CONTROLS’ iPortal system; the intended
audience is the user of a powered-wheelchair, with the iPortal system already
installed on the wheelchair.
The iPortal connects with a DYNAMIC CONTROLS’ Shark, DX, or DX2 Control System.
Please note that the words iOS device in this manual refer to iPhone, and iPod touch.
The following symbols are used throughout this manual to outline important and
helpful information:
WARNING
Warnings provide important information that must be followed in order to
install, configure, and use the product safely and efficiently. Not following
the instructions given in a warning can potentially lead to equipment
failure, damage to surrounding property, injury or death.
CAUTION
Cautions provide supporting information in order to install, configure, and
use the product. Not following the instructions given in cautions can lead to
equipment failure.
NOTE
Notes provide supporting information that may be important to the user,
but which does not involve risk to life, or injury, or damage to the
equipment.
REFERENCE
Reference directs the reader to a source of further or more detailed
information on a given topic.
Key information follows such as a mechanical or electrical specification.
2
About this manual
CAUTION
The Shark, DX and DX2 Systems are not user serviceable. Specialised tools
are necessary for the repair of any component. Any attempt to gain access
to, or in any way abuse the electronic components and associated
assemblies that make up the powered wheelchair system, renders the
manufacturer’s warranty void and the manufacturer free from liability.
NOTE
Due to continuous product improvement, DYNAMIC CONTROLS reserves the
right to update this manual. This manual supersedes all previous issues, which
must no longer be used.
NOTE
DYNAMIC CONTROLS reserves the right to change the product without
notification.
iPhone, iPod touch, Safari, Mac and iTunes are trademarks of Apple Inc., registered in the U.S.
and other countries. The Bluetooth® word mark and logos are registered trademarks owned by
Bluetooth® SIG, Inc. and any use of such marks by Apple is under license. Apple is not a
participant in or sponsor of this promotion.
“Made for iPod” means that an electronic accessory has been designed to connect
specifically to iPod and has been certified by the developer to meet Apple performance
standards.
“Made for iPhone” means that an electronic accessory has been designed to connect
specifically to iPhone and has been certified by the developer to meet Apple performance
standards.
Apple is not responsible for the operation of this device or its compliance with safety and
regulatory standards. iPod is a trademark of Apple Inc., registered in the U.S. and other
countries. iPhone is a trademark of Apple Inc.
DYNAMIC CONTROLs, the Dynamic logo, the Shark, DX, DX2, iPortal and Dashboard logos are
trademarks of DYNAMIC CONTROLS. All other brand and product names, fonts, and company
names and logos are trademarks or registered trademarks of their respective companies.
DYNAMIC CONTROLs owns and will retain all trademark rights and DYNAMIC CONTROLS or its licensors
own and will retain all copyright, trade secret and other proprietary rights, in and to the
documentation.
All materials contained within this manual, in hardcopy or electronic format, are protected by
copyright laws and other intellectual property laws.
© Copyright 2012 DYNAMIC CONTROLS. All rights reserved.
3
About this manual
2. Contents
1.
About this manual ........................................................................................2
2.
Contents .......................................................................................................4
3.
Introduction..................................................................................................6
3.1.
iPortal overview ................................................................................................. 6
3.2.
The iPortal in detail ............................................................................................ 6
3.3.
The iPortal system components .......................................................................... 7
4.
Setting up the iPortal with your iOS device ....................................................8
4.1.
Step 1 - place your iOS device in the iPortal cradle ............................................... 9
4.2.
Step 2 - pair the iPortal and the iOS device ........................................................ 11
4.3.
Step 3 - download the iPortal Dashboard application......................................... 12
4.4.
Step 4 - optionally activate the iPortal Accessibility feature ............................... 14
5.
Using the iPortal Dashboard features.......................................................... 14
5.1.
Drive mode....................................................................................................... 14
5.2.
Seating mode ................................................................................................... 14
5.3.
About menu ..................................................................................................... 15
5.4.
Settings menu .................................................................................................. 16
5.5.
System messages .............................................................................................. 17
5.6.
Status icons ...................................................................................................... 17
6.
Charging or powering a second device ........................................................ 19
7.
iPortal Accessibility ..................................................................................... 20
7.1.
Firmware Upgrade ............................................................................................ 21
7.2.
Supported remotes and operating modes.......................................................... 21
7.3.
Activating iPortal Accessibility .......................................................................... 22
7.3.1.
7.4.
Using iPortal Accessibility with Apple’s VoiceOver ............................................. 24
7.4.1.
7.4.2.
7.4.3.
7.4.4.
7.4.5.
7.5.
Navigating the iOS device ............................................................................................... 30
Using Applications .......................................................................................................... 35
Using iPortal Accessibility with Apple’s AssistiveTouch ...................................... 42
7.6.1.
7.6.2.
7.6.3.
7.6.4.
4
Joystick Commands......................................................................................................... 24
Navigation mode ............................................................................................................ 25
Text mode ....................................................................................................................... 26
Number mode................................................................................................................. 28
Alternative mode actions ............................................................................................... 29
Tutorials for iPortal Accessibility with VoiceOver ............................................... 30
7.5.1.
7.5.2.
7.6.
Completion of purchase ................................................................................................. 23
Introduction .................................................................................................................... 42
Enabling AssistiveTouch .................................................................................................. 43
Moving and selecting with the AssistiveTouch cursor .................................................... 43
The AssistiveTouch menu ............................................................................................... 47
Contents
8.
Appendices ................................................................................................. 51
8.1.
Quick Start Guide to iPortal Accessibility ........................................................... 51
8.1.1.
8.1.2.
8.1.3.
8.1.4.
8.1.5.
8.1.6.
8.1.7.
8.2.
9.
5
DX-ACU3B ....................................................................................................................... 51
DX-REM24SD................................................................................................................... 51
DX-REM34, DX-REM34B, DX-REM41D, DX-REM41E ....................................................... 51
DX-REMG90 .................................................................................................................... 52
DX-REMG91 .................................................................................................................... 52
DX2-REMA-ACS2, DX2-REMB-ACS2, DX2-REM420, DX2-REM421 .................................. 52
DX2-REM550, DX2-REM551 ............................................................................................ 52
Apple disclaimer ............................................................................................... 53
Index .......................................................................................................... 54
Contents
3. Introduction
3.1. iPortal overview
DYNAMIC CONTROLS’ iPortal is a powered-wheelchair display interface. When combined
with an iOS device, the iPortal provides the powered-wheelchair user with essential
information such as battery state, driving speed, seating adjustments, and an
emergency call function.
With additional, and optional software (see the iPortal Accessibility section, later on),
the powered-wheelchair‟s remote joystick can be used to navigate and interact with
your iOS device.
3.2. The iPortal in detail
The iPortal is the front-runner of a new generation of powered-wheelchair accessories
that present a whole new approach to meeting a powered-wheelchair user‟s needs
and wishes.
The iPortal, which is compatible with DYNAMIC CONTROLS’ Shark, DX, and DX2
wheelchair controllers, can connect to an iOS device to display powered-wheelchair
information in real time.
The iPortal has the following features:
6
connects with DYNAMIC CONTROLS‟ Shark, DX or DX2 wheelchair control systems
without reprogramming the wheelchair
an adjustable mounting arm and cradle that attaches to the wheelchair and
conveniently positions the iOS device for the user
an Apple USB charging port to keep the iOS device fully charged
Introduction
an auxiliary USB port (charging-only), for other devices
wheelchair fault logging
the iPortal Dashboard application displays wheelchair information in real time.
®
Using Bluetooth technology to connect with the wheelchair system, the
following is provided:
o
speed and speed range indicator
o
compass heading (iPhone 3GS (or later) only)
o
seat adjustment indicator
o
battery state
o
drive profile indicator
o
emergency call function (iPhone only)
3.3. The iPortal system components
The following components are provided with the iPortal system. Note the names of
the components, as they will be referred to throughout the rest of this manual.
Note: iPhone and iPod touch are not included in the packages. The cables (DK BUS, DX BUS, and Y-cable
(for Shark)) must be ordered separately.
7
Introduction
4. Setting up the iPortal with your iOS device
Before you can use your iPortal system, you will need to set up the iPortal with your iOS
device by placing your iOS device securely in the cradle, and then making sure that
the iPortal and your iOS device can communicate correctly. As a one-off set-up
process, you will also have to download the iPortal Dashboard application to run on
your iOS device.
The following section describes how to get your iPortal working with your iOS device
for the first time. The process is as follows:
step 1 - place your iOS device in the iPortal cradle
step 2 - pair the iPortal and the iOS device (this means establish a Bluetooth
connection)
step 3 - download the iPortal Dashboard application
step 4 - optionally activate the iPortal Accessibility feature
These topics are explained in more detail, in the sections following.
REFERENCE
For more details of iOS device features, capability, and minimum
system requirements visit www.apple.com
The iPhone, and iPod touch User Guides are available from
www.apple.com/support
NOTE
Dashboard can only display information it receives from your
wheelchair control system. Dashboard does not send any information
back to your control system, and cannot control the wheelchair.
8
Setting up the iPortal with your iOS device
4.1. Step 1 - place your iOS device in the iPortal
cradle
Make sure that you have the correct cradle for your device. Check the identifier as
shown below. Put your iPhone or iPod touch into the iPhone or iPod touch cradle on
your wheelchair. When your device is in position, you will feel a click.
Put your iPhone or iPod
touch into the cradle at
the bottom first. Be sure
that your device is
correctly located.
Push the top of your
device into the cradle.
You will feel the device
click into position.
The cradle identifier is
on the back of the
cradle above the
charging cable park.
iPhone
Be sure your device is
secure in the cradle
before driving your
wheelchair.
iPod touch
CAUTION
iOS devices are not intended for use in the
rain or other wet environments. To protect
the iOS device from damage when in a wet
environment, remove it from the cradle and
store it in a dry place. Put the charging
cable connector in the charging cable park.
NOTE
The iPod touch 4 is slimmer than the iPod touch 3. If you are using the
iPod touch 4, add some padding to the iPod cradle to make sure
that the iPod fits securely into the cradle.
9
Setting up the iPortal with your iOS device
Adjust the mounting arm to position your device for comfortable operation.
WARNING
Do not position the cradle outside the frame of the wheelchair
otherwise it can strike objects or passers-by, causing injury. Adjust the
cradle such that it remains inside the frame of the wheelchair.
Connect the charging cable to your device. When you turn on the power at your
Remote, your iOS device will beep or vibrate to confirm that it is receiving a charge
from the wheelchair battery.
10
Setting up the iPortal with your iOS device
4.2. Step 2 - pair the iPortal and the iOS device
Your iOS device communicates with the Shark, DX or DX2 wheelchair control system
via the iPortal module, using a Bluetooth® wireless link. Before using your iOS device
with your wheelchair control system, you must first pair (this means establish a
Bluetooth connection) your iOS device with the iPortal.
To pair the devices, start from your iOS device Home screen. (The numbers in square
brackets refer to the images below).
- Browse to Settings [1] ► General [2] ► Bluetooth [3]
- Turn on Bluetooth [4]. Your iOS device will start searching for nearby devices
- On the wheelchair, turn the power off and on [5]
- On your iOS device, when asked for a PIN, enter 7654 [6]
- Tap Connect at the top of the iOS device‟s screen [6]
NOTE
Allow between 30 and 60 seconds for the Enter PIN screen to be
displayed.
NOTE
When you see an instruction on your iOS device to “cycle the
power”, turn the power off at your Remote, and then turn it on
again.
11
Setting up the iPortal with your iOS device
After your device and the iPortal have successfully paired,
the connection is listed on the Bluetooth® menu [7].
Note that sometimes when attempting to pair your iOS
device with the iPortal, one or the other may time out
waiting for input from you. If the procedure does not work
the first time, repeat the steps above.
Make a note of the PIN (7654) in case your iOS device
becomes unpaired and you do not have this manual with
you.
If your chair is programmed to go into sleep mode after only
one minute of inactivity, the chair may enter this mode
during pairing, causing pairing to fail. If this is the case, ask
your therapist or dealer to increase the sleep time-out
value.
4.3. Step 3 - download the iPortal Dashboard
application
To download the iPortal Dashboard application you must have an iTunes Store
account and an active internet connection. You can use either your iOS device or
your computer to connect to the Internet and the iTunes Store. You can set up an
iTunes account at www.apple.com/itunes.
To download the iPortal Dashboard using your iOS device:
Start from the iOS device Home screen.
- Browse to the App Store
- Search for iPortal Dashboard
- Select iPortal Dashboard from the search results
- Tap INSTALL
If you use your iPhone to download the iPortal Dashboard application, the
application is installed automatically on your iPhone and is ready to use.
REFERENCE
For more details of how to download and install an application from the
iTunes Store refer to the iPhone or iPod touch User Guides.
The iPhone, and iPod touch User Guides are available from
www.apple.com/support
12
Setting up the iPortal with your iOS device
To download iPortal Dashboard using your computer:
Start your Internet connection and start iTunes.
- Browse to the iTunes Store, and then browse to the App Store
- Search for iPortal Dashboard and select iPortal Dashboard from the search results
- Click INSTALL
If you use your computer to download the iPortal Dashboard application, the
application will be installed automatically on your iOS device next time you sync.
After downloading
When a new Dashboard application is started for the
first time, it will check the firmware on the iPortal
module. If the firmware of the iPortal module is outof-date, the iPortal Dashboard application will ask
you to upgrade the firmware of the iPortal module.
If you see this screen, and if the time is convenient
for you, press Upgrade Now. The process can take
several minutes, after which the Dashboard
application will restart.
DO NOT CYCLE THE POWER during the upgrade process, even if the screen shows
"unable to connect" and advises you to cycle the power. The connection will
automatically resume after the upgrade process is complete.
If you press Later, the Dashboard application will start normally. You will be asked
again to upgrade the next time Dashboard is started after 24 hours has passed.
13
Setting up the iPortal with your iOS device
4.4. Step 4 - optionally activate the iPortal
Accessibility feature
Please see the iPortal Accessibility section, later on.
5. Using the iPortal Dashboard features
The iPortal Dashboard is simple and intuitive to use. Change between Drive and
Seating modes on your Remote and Dashboard will follow.
To navigate to the About menu screen or to the Setting menu screen simply tap an
icon on the navigation bar along the bottom of your screen.
5.1. Drive mode
To change to Drive mode switch your Remote to Drive
and Dashboard will follow.
When in Drive mode, Dashboard displays the following
information:
A
Wheelchair battery state
B
Drive profile
C
Master / Attendant Remote control indicator
D
Speed pot setting
E
Speed
F
Compass heading (iPhone 3GS (or later) only)
5.2. Seating mode
To change to Seating mode, switch your Remote to
Seating and Dashboard will follow.
When in Seating mode, Dashboard displays the following
information:
- Wheelchair battery state
- The active part of the seat is highlighted
- While the seat moves, the graphic flashes
Note On some systems it may be necessary to tap Seating
on the navigation bar at the bottom of the application
screen.
14
Using the iPortal Dashboard features
5.3. About menu
To enter the About menu, tap the About icon on the
navigation bar along the bottom of your screen.
When in the About Your Chair menu, the following
options are available:
1. Call a pre-set Emergency Contact number
(iPhone only).
2. Inspect your chair‟s fault log. Tap any list item to
see a brief description and suggested actions.
3. Visit the DYNAMIC CONTROLS‟ Home Page. Access
product and product support information.
4. Turn off the Bluetooth® wireless link in the iPortal
module. The Bluetooth® link will remain disabled
until you next cycle the power on your chair.
CAUTION
In areas where wireless is restricted, you must set Airplane Mode to ON
on your iPhone.
CAUTION
Except in an emergency, do not cycle the power of your chair in areas
where wireless is restricted. When the power is switched on at the
Remote unit, the iPortal module activates its Bluetooth® wireless link
and searches for an iOS device to connect to. Cycling the power of
the chair resets the Bluetooth® disabled state that was previously set in
Dashboard.
To call the pre-set Emergency Contact number (iPhone only):
- In the About menu, tap Call Emergency Contact
- your iPhone dials the number
To inspect the Fault Log:
- In the About menu, tap View Fault Log
- Tap on a fault listing for more information about the fault.
15
Using the iPortal Dashboard features
The most recent fault is shown at the top of the fault list.
5.4. Settings menu
To enter the Settings menu, tap the Settings icon on the
navigation bar along the bottom of your screen.
When in the Settings menu, the following options are
available:
1. Set an Emergency Contact number ready to call
for help in an emergency (iPhone only).
2. Adjust the length of time Alerts stay on screen.
3. Switch between smooth 3D on-screen graphics
and flat high contrast graphics that may be
easier to see in difficult lighting conditions. Users
with poor eyesight may prefer to set High
Contrast UI to ON.
To set an Emergency Contact number (iPhone only):
- In the Settings menu, tap Set Emergency Contact
- Select one contact to be your Emergency Contact
- Select the number to call (a contact may have more than one listed number)
16
Using the iPortal Dashboard features
5.5. System messages
Unable to Connect
You need to set up your Bluetooth® connection. Cycle the power on
your chair, and allow 30 seconds for re-connection. If the message
persists check that the iOS device is paired correctly with the iPortal
(see Step 2 - pair the iPortal and the iOS device, in the section Setting
up the iPortal with your iOS device).
No Drive Info Available
Your wheelchair battery may be charging. If you see this message
momentarily, you can ignore it. If the message persists contact an
approved dealer.
Can't Drive in this Mode
Your Remote unit is in a mode that does not permit driving. On your
Remote unit, select a drive profile. This screen will show when your
wheelchair is charging.
OONAPU Detected
OONAPU means Out Of Neutral At Power Up. Your Remote is not in
the neutral position, and you are trying to power up your system. This
is a safety feature. Place your Remote in the neutral position, and try
again.
Locked
Your wheelchair control system is locked. To unlock it, follow the
normal procedure for your system.
5.6. Status icons
In Drive and Seating mode, three icons are visible at the top of the Dashboard
screen. If inactive, the icons are greyed out. If active, they are yellow. Also, a number
indicating a fault code appears if a fault is active on the wheelchair control system.
Active fault code
Lights are on
(if fitted)
17
Drive inhibit is in force
Using the iPortal Dashboard features
NOTE
Not every feature is available on every device. For example, the
compass feature is only available on iPhone 3GS and later, and the
Emergency Contact number is only available on iPhone, not on iPod
touch. The chair lock status may not be available on some DX Remotes.
For further information about a specific installation contact an
approved dealer or DYNAMIC CONTROLS.
NOTE
Dashboard can only display information it receives from your
wheelchair control system. Dashboard does not send any information
back to your control system.
18
Using the iPortal Dashboard features
6. Charging or powering a second device
A second device can be charged or powered by connecting it to the auxiliary USB
charging port on the top of the iPortal module. This USB port provides power only.
When the auxiliary USB connector is not in use, please make sure that the protector is
inserted. The word "TOP" on the USB protector plug refers to the top of the USB
connector socket, not the top of the iPortal.
NOTE
Not all devices can be charged by this port. Check your device to
make sure that it is being charged when connected.
CAUTION
No Apple devices should be connected to the top auxiliary USB
charging port. Only Apple devices should be connected to the bottom
USB port. Do not connect your device to the wrong USB port. Damage
will not be caused to your device or the iPortal module, but your
device battery will not be charged until the correct connection is
made.
CAUTION
The protector shown in the diagram above must be replaced when the
auxiliary USB charging port is not in use. The purpose of the protector is
to prevent dirt and moisture getting into the auxiliary USB connector. If
water enters the USB connector the module will not be damaged, but it
will not work until it is fully dry.
19
Charging or powering a second device
7. iPortal Accessibility
The iPortal Accessibility feature is an optional upgrade* for the iPortal unit that
provides you with the ability to navigate and control your iOS device using a DX/DX2
Remote. Wheelchair users with limited hand function can operate iOS devices using
this feature. iPortal Accessibility is very easy to configure and operates in one of two
modes:
with Apple‟s VoiceOver, or
with Apple‟s AssistiveTouch
iPortal Accessibility with VoiceOver
can be used with iOS devices using
Apple‟s operating systems iOS 4 or
later.
iPortal Accessibility with
AssistiveTouch can only be used with
iOS 5 or later.
The operation of both modes is
described in the following section in
this manual.
iOS devices with iOS 5 (or later) installed can easily switch between the two modes of
operation The mode that you choose to work with depends on what you want to
achieve and what you feel comfortable with.
NOTE
The iPortal Accessibility feature is not currently available for
Shark remotes.
No Wizard reprogramming is required for the Accessibility
feature.
* The iPortal Accessibility feature is an optional software upgrade for the iPortal, which
can be purchased from the AppStore via „In App Purchase‟ within the Dashboard
application. The iPortal is also available with the iPortal Accessibility feature already
enabled from the factory (Dynamic Part No: DJ-BTINT-ACC). Please see your dealer /
therapist for more details.
20
iPortal Accessibility
7.1. Firmware Upgrade
An upgrade to the iPortal firmware may be required to access the Accessibility
feature. If this is the case, then first, go to iTunes and download the latest Dashboard
version. After this, refer to the After downloading section on Page 13 to upgrade the
iPortal firmware.
If the firmware of the iPortal module is up-to-date and the iPortal Dashboard
application does not ask to upgrade the firmware of the iPortal module, then
proceed to the Purchasing iPortal Accessibility section.
7.2. Supported remotes and operating modes
The following table identifies the supported remotes and how they can be set up to
use the Accessibility feature. For more information on setting up your Remote to work
with the Accessibility Functionality, see section Quick Start Guide to iPortal
Accessibility (8.1).
Remote
To use iPortal
Accessibility
DX-ACU3B
Drive Profile 0
DX-REM24SD
ECU1
DX-REM34
Drive Profile 0
DX-REM34B
Drive Profile 0
DX-REM41D
Drive Profile 0
DX-REM41E
Drive Profile 0
DX-REMG90
ECU1
DX-REMG91
ECU1
DX2-REMA-ACS2
Drive Profile 0
DX2-REMB-ACS2
Drive Profile 0
DX2-REM420
Drive Profile 0
DX2-REM421
Drive Profile 0
DX2-REM550
ECU1
DX2-REM551
ECU1
WARNING
The iPortal Accessibility feature is seen by the DX system as an “ECU1”. For
this reason, ensure that there are no DX-ECUs in the system configured as
“ECU1”.
21
iPortal Accessibility
7.3. Activating iPortal Accessibility
To activate the iPortal Accessibility feature you must have an active internet
connection on your iOS device, and be paired with the iPortal module (see section
4.2 to see how to pair the iOS device with the iPortal).
NOTE
When activating the iPortal Accessibility feature, it is important that you DO
NOT:
press the iOS device Home button
turn off the wheelchair’s power
drive the wheelchair
To activate the iPortal Accessibility feature, proceed as shown below:
- Start the Dashboard application.
- Browse to Settings -> Available Upgrades
- Connect to iPortal Store
- Buy the Accessibility feature
After performing the steps above,
- Select Buy from the AppStore
- Tap Buy on the confirm purchase screen
- Tap Use Existing Apple ID on the Sign In screen (To buy from the AppStore, you must
have an active AppStore account. If you do not have an AppStore account, you
can create one by selecting Create New Apple ID on the Sign In screen)
- Enter your Apple ID and password and tap Ok
- Wait for the Thank You screen to pop up to confirm your successful purchase
- Click Ok
22
iPortal Accessibility
7.3.1. Completion of purchase
When the purchase is successfully completed, the
iPortal module will restart.
Once the iPortal reconnects to the iOS device, the
iPortal Store screen on your iOS device will show
the Accessibility feature as Installed and will
automatically be activated on your iOS device.
NOTE
If the unit does not restart automatically, then you can power-cycle the
unit (power off, then power on) to enable the Accessibility feature.
23
iPortal Accessibility
7.4. Using iPortal Accessibility with Apple‟s VoiceOver
iPortal Accessibility with Apple‟s VoiceOver allows you to access most of the
functionality of the iOS devices with the help of the Remote or speciality input device.
With this feature, operating in conjunction with the iOS device‟s „VoiceOver‟
accessibility feature, you can control the iOS device to navigate Left, Right, Enter,
Home and operate alphanumeric text entry; iPhone users can even make calls with
the help of this feature.
7.4.1. Joystick Commands
To use iPortal Accessibility with VoiceOver, there are three types of joystick
commands to learn:
1) Short: with this command, the joystick position is held for less than 1s.
2) Medium: with this command, the joystick position is held for 1s to 2s.
3) Long: with this command, the joystick position is held for 2s to 3s.
These commands are shown in the image below. The purpose of each command
changes depending on the Mode (Navigation, Text Entry, Number Entry) as
described in the following sections.
Note that the commands shown with the diagonal red lines are not joystick
commands – these are alternative mode actions which are described in section
Alternative mode actions (7.4.5).
NOTE
To avoid the iOS device going to sleep, set the Auto-lock (Settings>General) to Never.
24
iPortal Accessibility
7.4.2. Navigation mode
The Navigation mode allows you to navigate through the iOS device screens and
access various applications on the iOS device. The joystick commands and iOS
device actions for this mode are as below:
Joystick Command
iOS device Action
Left-Short
Move Cursor Left
Right-Short
Move Cursor Right
Up-Short
Select
Down-Short
App Switcher
Left-Medium
Page Up
Right-Medium
Page Down
Up-Medium
Home
Down-Medium
Home
Left-Long
Page top
Right-Long
AssistiveTouch (iOS 5 and
later, otherwise Page End)
Up-Long
Enter “Text Mode”
Down-Long
No action
The diagram below summarises the joystick movements for the table above. Note
that the red actions refer to alternative „Select‟ and „Home‟ options depending on
which mode you are in (navigation, text etc.), and which remote you are using. For
more information, see the Alternative mode actions table in section 7.4.5.
Navigation
Mode
25
iPortal Accessibility
7.4.3. Text mode
Text mode is used for text input to various applications of your iOS device, such as
writing messages, notes, iTunes search etc. This is a faster alternative to using the iOS
device‟s on-screen keyboard. Morse code is used to enter text to your iOS device in
Text mode. This mode is activated by holding the joystick “Up-Long”. The joystick
commands and iOS device actions for this mode are as below:
Joystick Command
iOS device Action
Left-Short
Morse code dot
Right-Short
Morse code dash
Up-Short
Confirm character: enters current Morse
entry, or space if no character selected
Down- Short
Enter “Number Mode”
Left-Medium
Cycles : Shift, Caps lock on, Caps lock
off
Right-Medium
Repeat last Morse character
Up-Medium
Backspace
Down-Medium
No action
Left-Long
Morse code dot repeat
Right-Long
Morse code dash repeat
Up-Long
Exit “Text Mode”
Down-Long
No action
Centre-Long
Cancels current Morse character entry
Leaving the joystick centred for 1s-2s cancels the last Morse character entry, if it was
not selected.
The diagram below summarises the joystick movements for the table above. Note
that the red actions refer to alternative „Select‟ and „Home‟ options depending on
which mode you are in (navigation, text etc.), and which remote you are using. For
more information, see the Alternative mode actions table in section 7.4.5.
Text Mode
26
iPortal Accessibility
The Morse code for entering text characters is given below:
Character
a
-
Character
n
d
-
--
-
e
r
s
b
c
o
p
q
g
--
h
u
i
v
f
j
k
l
m
return (CR)
comma
?
&
“
@
;
+
(
1
2
3
4
5
27
Code
----
-------
----
---
-
---
--
------
t
w
x
y
z
Full stop (FS)
$
!
/
„
_
:
=
*
)
6
7
8
9
0
Code
-
----
---
-
------
----
-----
----
-----
--
---
-
--
---
----
----
iPortal Accessibility
7.4.4. Number mode
While Text mode can be used to enter all numbers, Number mode allows faster entry
of numeric characters and operators. Morse code is used for input to your iOS device
in number mode. You can switch from Text mode to Number mode by holding the
joystick “Down-Short”. The joystick commands and iOS device actions for this mode
are as below:
Joystick Command
iOS device Action
Left-Short
Morse code dot
Right-Short
Morse code dash
Up-Short
Confirm character: enters
current Morse entry, or space
if no character selected
Down-Short
Enter “Text Mode”
Left-Medium
Decimal Point
Right-Medium
Repeat last Morse character
Up-Medium
Backspace
Down-Medium
No action
Left-Long
Cycles : + , - , * , / , =
Right-Long
Move cursor to start / end of
line (toggle)
Up-Long
Exit “Text Mode”
Down-Long
No action
Centre-Long
Cancels current Morse
character entry
Leaving the joystick centred for 1s-2s cancels the last Morse character entry, if it was
not yet selected.
The diagram below summarises the joystick movements for the table above. Note
that the red actions refer to alternative „Select‟ and „Home‟ options depending on
which mode you are in (navigation, text etc.), and which remote you are using. For
more information, see the Alternative mode actions table in section 7.4.5.
Number
Mode
28
iPortal Accessibility
The Morse code for entering numeric characters is given below:
Character
Code
Character
1
6
2
3
4
5
+
/
=
-
7
8
-
--
-----
9
0
X
Return (CR)
Code
---
-
---
--
7.4.5. Alternative mode actions
The table below outlines the alternative mode actions (the diagonal red lines in the
joystick movement diagrams in sections 7.4.2 , 7.4.3 , and 7.4.4) available for specific
Remotes.
Remote
DX2-REM55x
DX-REMG91
DX-REMG90
DX-REM24SD/C
29
Alternative 'Select' options
- Function 1
- ECU1 - channel 7 (UCI
programmed 'Alarm' option)
- Auxiliary Input switch
- Left Indicator (only while in ECU1
Mode)
- Left Indicator (only while in ECU1
Mode)
Alternative 'Home' options
- Function 2
- Right indicator (only while in
ECU1 mode)
- Right indicator (only while in
ECU1 mode)
iPortal Accessibility
7.5. Tutorials for iPortal Accessibility with VoiceOver
This section demonstrates how to use the iPortal Accessibility with VoiceOver feature
with a typical iOS device. Please note, that as all iOS devices are highly customisable,
the screen shots may look slightly different to your own. However, the fundamentals of
the Accessibility feature are the same. The tutorials are split into two main sections:
Navigating the iOS device
Using Applications
It is recommended that you begin with the Navigating the iOS device (7.5.1) section.
7.5.1. Navigating the iOS device
In this section we‟ll learn how to do some basic navigation around the iOS device.
7.5.1.1.
Basic Navigation – joystick
To move from one application icon to
another on the Home screen, you have
to move the screen cursor either left or
right as shown in the image on the right
– there is no ability to move through the
icons vertically.
Screen
cursor
To move the screen cursor to the right
by one application icon, move the
joystick to the right (Right-Short) once.
Similarly, to move the screen cursor to
the left by one application icon, move
the joystick to the left (Left-Short) once.
As an example, in the image to the right
(top screen), you can see that to get
from the Calendar app, to the App
Store app, you will have to move the
screen cursor eleven (11) times to the
right (that is: 11 x Right-Short).
30
iPortal Accessibility
7.5.1.2.
Basic Navigation - function keys
A number of remotes support alternative
shortcut navigation (Select and Home)
through their function keys, or other input
mechanisms.
As an example, the DX2-REM550, shown
in the image to the right, uses the
Function 1 button to Select an item or
application, while the Function 2 button is
used to take you to the Home page
quickly.
For a list of remotes and their alternative
navigational abilities, see section
Alternative mode actions (7.4.5).
7.5.1.3.
Function 1
Select
Function 2
Home
Selecting another page
To select another page on your iOS
device, simply navigate the screen cursor
to the position shown in the image to the
right.
Select the next page by either moving
the joystick up once (Up-Short), or, if your
remote supports alternative navigation
functions, press the Select shortcut
button.
To return to the Home page, either move
the joystick Up-Medium, or, if your remote
supports alternative navigation functions,
press the Home shortcut button.
31
Page
selection
iPortal Accessibility
7.5.1.4.
Page Up/Down
To scroll through list type displays, such as
the Settings > General page, or playlists in
your iPod application, use the Page Up
(Left-Medium) and Page Down (RightMedium) commands. Each command
will scroll the page up or down, one page
at a time.
Scroll with
Page
Up/Down
7.5.1.5.
Page Top/End
To move quickly between the top and
bottom of a page, use the Page Top, and
Page End commands (iOS 4 devices
only), or Page Top and Page Top/ Left for
iOS 5 (and later) devices.
Page End
iOS 4 devices
Right-Long
To move the screen cursor from the
Calendar icon to the Safari icon, in the
image to the right, move your joystick to
the right, and hold for one/two seconds
Page Top
(Right-Long).
iOS 4 only
Left-Long
Similarly, to move the screen cursor from
iOS 4 / iOS 5+
the Safari icon back up to the Calendar
icon, move your joystick to the left, and
hold for one/two seconds (Left-Long).
iOS 5 (and later)
With iOS 5 (and later) devices, the RightLong command is used for selecting the
AssistiveTouch feature rather than Page
End.
iOS 5 (and later)
To perform a similar function to Page End, simply move and hold your joystick left for
two seconds (Left-Long) to move the screen cursor to the topmost left position, and
then move the cursor left again with a Left-Short – this will place the cursor at the
bottom of the screen.
To move the screen cursor from the bottom of the screen back up to the Calendar
icon, move your joystick to the left, and hold for one/two seconds (Left-Long).
32
iPortal Accessibility
7.5.1.6.
Selecting an application
To select (open) an
application, simply navigate
the screen cursor to the
appropriate application icon,
and either move the joystick up
for one second (Up-Short), or, if
available, use the appropriate
Select shortcut button (see
section Alternative mode
actions (7.4.5)).
NOTE
The standard VoiceOver command “double-tap to open” refers to a
double-tap on the iOS device screen – when using iPortal Accessibility,
simply open or select with the Up-Short command as shown above.
33
iPortal Accessibility
7.5.1.7.
Exiting an application
To exit an application, use the Home
command by either moving the
joystick up for one/two seconds (UpMedium), or moving the joystick down
for one/two seconds (Down-Medium).
Alternatively, if your joystick supports
Alternative mode actions (7.4.5), then
you can exit the application with the
Home shortcut button. For example, on
the DX2-REM550 below, pressing
function button 2 will exit the
application and return you to your
Home page.
7.5.1.8.
Using the application switcher
The application switcher provides a
quick way of switching between
open, or recently opened,
applications.
To open the application switcher
page, select the „App Switcher‟ with a
Down-Short command. Navigate to
the application you want to open,
and select it with an Up-Short
command.
To exit the application switcher, enter
a Home command (Up-Medium, or
Down-Medium, or an appropriate
function button).
7.5.1.9.
Unlocking auto-lock mode
If the iOS device is asleep, then you can wake it up by moving the joystick up for
two/three seconds (Up-Long) - this will wake up the iOS device, but it will still be
locked. To unlock the iOS device, move the screen cursor to the unlock slider (move
joystick three times to the right (3 x Right-Short)), and then slide the slider with a Select
command (Up-Short).
34
iPortal Accessibility
7.5.2. Using Applications
In this section we‟ll see how we can accomplish some simple tasks with a few
common applications.
7.5.2.1.
Notes - adding a note
In this tutorial, we‟ll add a note in the
Notes application as a reminder to “pick
up bread”. There are two ways to add
alphanumeric text to your notes:
„Add‟
button
1. using the keyboard
2. using Morse code
Both methods will be shown in this tutorial.
Although the keyboard method may be
more familiar to you, we recommend
that you use the Morse code entry as this
can improve the speed of alphanumeric
text entry. To add a new note in the
Notes application, ensure that your
joystick is in Navigation Mode, and from
your Home page:
navigate to the Notes app
Select the Notes app (Up-Short)
When the Notes app opens:
„Done‟
button
Soft
keyboard
navigate to the „Add‟ button
Select the „Add‟ button (Up-Short)
1. Using the keyboard
Navigate to the keyboard by moving the joystick to the right for less than one
second (Right-Short); the screen cursor will be on the „Q‟ key.
To add text with the keyboard, simply navigate (left or right) to each character key,
and select it with Up-Short. To write “Pick up bread”, and with the screen cursor at the
„Q‟ key:
Navigate to the „P‟ key (9 x Right-Short)
Select „P‟ (Up-Short)
Navigate to the „I‟ key (2 x Left-Short)
Select „I‟ (Up-Short)
Navigate to the „c‟ key (15 x Right-Short)
Select „c‟ (Up-Short)
Navigate to the „k‟ key (5 x Left-Short)
Select „k‟ (Up-Short)
……and so on until the note is complete (Space,u,p,Space,b,r,e,a,d).
At this point, the screen cursor will be on the letter „d‟ (last letter of bread). To
complete the note, move the screen cursor to the „Done‟ button by sending the
screen cursor to the top of the page with the Page Top command (Left-Long).
Move the joystick left for two/three seconds (Left-Long) (Page Top)
Navigate to the „Done‟ button (2 x Right-Short)
Select „Done‟ (Up-Short)
That completes the note.
35
iPortal Accessibility
2. Using Morse code
To use the Morse code text input, change from Navigation mode to Text mode.
Hold the joystick up for longer than two seconds (Up-Long)(Text mode)
To add the text, follow the table below:
Action
Code
Character/Operation
Left-Short
●▬▬●
p
Right-Short
Right-Short
Left-Short
Up-Short
Left-Short
Select „p‟
●●
I
Left-Short
Up-Short
Right-Short
Select „I‟
▬ ●▬ ●
C
Left-Short
Right-Short
Left-Short
Up-Short
Right-Short
Select „c‟
▬ ●▬
K
Left-Short
Right-Short
Up-Short
Select „k‟
Up-Shor
Space
……and so on until the note is complete (u,p,Space,b,r,e,a,d).
Note that if you are not entering Morse code, then the Up-Short command is used to
add a Space character, as shown in the last row of the table above.
To complete the note, change the mode back to Navigation (Up-Long), and move
the screen cursor to the „Done‟ button by sending the screen cursor to the top of the
page with the Page Top command (Left-Long).
Change mode to Navigation (Up-Long)
Move the joystick left for two/three seconds (Left-Long)(Page Top)
Navigate to the „Done‟ button (2 x Right-Short)
Select „Done‟ (Up-Short)
That completes the note.
36
iPortal Accessibility
7.5.2.2.
Calculator – using Number Entry mode
The calculator can be used with
Navigation mode, standard Text Entry
mode or Number Entry mode. Number
entry mode provides abbreviated Morse
codes for numerals and quick access to
mathematical operators for more
efficient use when working with
numbers. In this tutorial, we‟ll find the
product of two numbers using the
Number Entry mode.
In Number Entry mode, each number is
entered in Morse code. Functions, such
as multiply (*), subtract (-) etc., are
selected by a Left-Long command – as
the joystick is held to the left, the
VoiceOver scrolls through the functions
available. When the required function is
mentioned, simply return the joystick to
the neutral position, and then select the
function with an Up-Short command.
The two numbers that we‟ll enter are:
617.28, and 200. Follow the instructions
and table below to enter the two
numbers and see the result.
From your Home page, navigate to the Calculator app (this is found under
the Utilities folder), and select it with the Up-Short command.
Set your iPortal to Number Entry mode by first selecting Text mode (UpLong), and then followed by a Down-Short command.
The table below shows the number and function entries:
Action
Code
Character/Operation
Right-Short
▬▬
6
Right-Short
Up-Short
Left-Short
Select „6‟
●
Up-Short
Left-Short
1
Select „1‟
●▬▬
7
Right-Short
Right-Short
Up-Short
Select „7‟
Left-Long
. (decimal point)
Note: decimal point is
37
iPortal Accessibility
called “period”.
Up-Short
Right-Short
Select „.‟
▬
Up-Short
Left-Short
2
Select „2‟
●●▬
8
Left-Short
Right-Short
Up-Short
Select „8‟
Left-Long (Hold to scroll
through options)
* (multiply)
Note: multiply is called
“star”
Up-Short
Right-Short
Select „*‟
▬
Up-Short
Right-Short
2
Select „2‟
▬●●
0
Left-Short
Left-Short
Up-Short
Right-Short
Select „0‟
▬●●
0
Left-Short
Left-Short
Up-Short
Select „0‟
Left-Long (Hold to scroll
through options)
= (equals)
Up-Short
Select „=‟
That completes the calculation.
38
iPortal Accessibility
7.5.2.3.
Camera - taking a picture
To take a picture or video
navigate to the Camera app
using Left-Short or Right-Short
commands and select it with UpShort.
Zoom
Camera mode
Take a picture
To take a picture, navigate to the
„Take picture‟ button using LeftShort or Right-Short commands,
and take the picture with UpShort.
Zoom
Take
picture
button
Video mode
To zoom in to your subject,
navigate to the Zoom slider using
Left-Short or Right-Short
commands. When the slider is
selected, increase the zoom by
using the Up-Short command.
Each Up-Short command will
increase the zoom level by 1%.
Start/stop
video
Mode
(camera/video)
Start video
To record a video, navigate to the Mode slider and change the mode from camera
to video using the Up-Short command. Navigate to the Start/Stop video button, and
select start with an Up-Short command.
Stop Video
Stop recording a video by selecting the Start/Stop video button with the Up-Short
command.
7.5.2.4.
Photos - viewing your photos
To view your photos, navigate to the
Photos app, and select it with the UpShort command.
When the Camera Roll page opens,
navigate to a photo and open it with the
Up-Short command.
To view the next picture in the camera
roll, navigate to the Next button, and
select it with the Up-Short command.
Similarly, to view the previous picture,
navigate to the Previous button and
select it with the Up-Short command.
39
Previous
Next
iPortal Accessibility
7.5.2.5.
iPod - playing your music
Navigate to the iPod app (iPhone), or
Music app (iPod), and select it with the
Up-Short command.
Use the Left-Short and Right-Short
commands to navigate through the
playlists, artists, and songs. Select a song
to play by using the Up-Short command.
Don‟t forget to use the Page Down (RightMedium), and Page Up (Left-Medium)
commands to navigate through long lists.
When a song is playing, you can move
on to the next song or previous song by
navigating to the Next and Previous
buttons and selecting one of them with
the Up-Short command.
7.5.2.6.
Phone - making a call (iPhone only)
To make a phone call you can use the
Navigation mode, Text Entry mode, or the
Number Entry mode to enter the number.
However, you will have to ensure that you
are in Navigation mode to dial (call) the
number.
To enter and dial a number (using the
Navigation mode):
40
From your Home page, navigate
to the Phone app.
Navigate to each number and
enter the number with the UpShort command.
When the number is complete,
navigate to the Call button and
select it with the Up-Short
command.
iPortal Accessibility
7.5.2.7.
Safari - searching the Internet
In this tutorial, we‟ll open the Safari application and use Google to search for the
iPortal system.
From your Home page
navigate to the Safari
application, and select it
with the Up-Short
command.
Navigate to the Google
search bar (3 x Right-Short),
and select it with the UpShort command.
Enter “iportal” as a search
term in the Google search
box. Use either Text entry
mode (Morse code), or
alternatively use the
Navigation mode to enter
the text with the keyboard.
Finally, navigate to the
Search button, or select the
search term from the
suggestions list – select with
the Up-Short command.
When Google presents its results, navigate to the appropriate link in the search results
page and select with the Up-Short command.
41
iPortal Accessibility
7.6. Using iPortal Accessibility with Apple‟s
AssistiveTouch
7.6.1. Introduction
iPortal Accessibility with Apple‟s
AssistiveTouch allows you to access all
the functionality of the iOS devices
with the help of the Remote or
speciality input device.
iPortal Accessibility with AssistiveTouch
provides an intuitive, easy-to-learn,
cursor-driven approach to navigating,
selecting and running applications on
your iOS device.
AssistiveTouch with the AssistiveTouch
cursor, the blue circle in the images to
the right, can be used for:
Navigating the screens up, down, left and right
Simulating a touch event to select an item
Performing a flick, or drag that uses 2, 3, 4 or 5 fingers
Performing a pinch gesture – ideal for zooming in or out of maps and pictures
Creating your own gestures
Locking the screen
Rotating the screen
Adjusting the volume
Simulating an iOS device shake
Simulating a Home button press
The rest of this section will show you how to enable AssistiveTouch on your iOS device,
and then how to use some of the functionality with the joystick or other speciality
input device.
NOTE
AssistiveTouch is only available for iOS devices that have Apple’s iOS 5 (or
later) operating system installed. Please refer to Apple’s documentation for
more information (www.apple.com/support ).
42
iPortal Accessibility
7.6.2. Enabling AssistiveTouch
When the iPortal is powered up, iPortal Accessibility with VoiceOver is enabled by
default. To enable AssistiveTouch simply move and hold the joystick right for two
seconds. To revert back to VoiceOver, move and hold the joystick right for two
seconds again.
7.6.3. Moving and selecting with the AssistiveTouch cursor
7.6.3.1.
Mouse-click mode and cursor-move mode
The joystick can operate in two modes:
Mouse-click
Cursor-move
In mouse-click mode, which is the default mode, you can use the joystick to tap on
the screen, open the AssistiveTouch menu, or change the mode to cursor-move
mode. When cursor-move mode is selected, use the joystick to move the cursor
around the screen. The joystick will automatically return to mouse-click mode from
cursor-move mode when left in the neutral position for just under a second.
The tables below summarise the modes and iOS device actions.
Mouse-click mode
Joystick Command
iOS device Action
Left for less than 1
second
Tap screen at cursor
Left for 2 seconds or
greater
Select and hold
Right
Open AssistiveTouch
menu
Right for 2 seconds
or greater
Switch between
VoiceOver and
AssistiveTouch
Up
Select cursor-move
mode
Down
Select cursor-move
mode
43
iPortal Accessibility
Cursor-move mode
Joystick Command
iOS device Action
Left
Move cursor left
Right
Move cursor right
Up
Move cursor up
Down
Move cursor down
Pause in neutral
Return to mouseclick mode
44
iPortal Accessibility
7.6.3.2.
Moving the cursor
To move the cursor around the screen:
change from mouse-click mode to cursor-move mode by moving the joystick
either up or down momentarily and then release the joystick back to the
neutral position
move the joystick in the required direction
As long as you maintain moving the joystick, the cursor will continue to move. When
you release the joystick back to the neutral position for more than the timeout (less
than 1 second), the mode will revert back to mouse-click mode.
NOTE
7.6.3.3.
The cursor movement will accelerate in the held direction the longer the
joystick is held out of neutral.
The first time 'cursor-move' is activated following a power cycle the
iPortal will assume the presence of a 'Proximity Head Control' (See
below) and until after cursor-move-down is used for the first time 'cursormove-up' will toggle directions as for 'Proximity head controls' below.
Moving the cursor with a Proximity Head Control
To move the cursor around the screen with the proximity head control:
change from mouse-click mode to cursor-move mode by activating the
centre pad momentarily
move the cursor in the required direction by activating the centre, left or right
pads
the vertical direction of the cursor is toggled each time the centre pad is
activated. For example, if the cursor is moving up, briefly move your head
away from the centre pad and then back again to cause the cursor to move
in the down direction.
As long as you maintain activating the centre, left and right pads, the cursor will
continue to move. When you stop activating the pads for more than the timeout, the
mode will revert back to mouse-click mode.
7.6.3.4.
Tracking speed
The speed at which the cursor moves around the
screen depends on the Tracking Speed setting. If the
speed of the cursor is not to your liking, then change
the Tracking Speed setting by selecting from the
Home page:
Settings → General → Accessibility → AssistiveTouch.
Move the Tracking Speed slider to the desired cursor
speed – left is slowest, right is fastest.
45
iPortal Accessibility
7.6.3.5.
Tap / Select
To tap on, or select an item,
AssistiveTouch simulates a
finger tap on the screen when
you are in mouse-click mode
(default) and when you
momentarily move the joystick
left (or activate the left pad on
the proximity head control).
Tap /
Select
To indicate a tap, the cursor
changes from a circle to a
circle within a circle.
To tap on an item, simply
position the cursor over the
item, and after a second, tap
on the item by moving the
joystick left momentarily.
7.6.3.6.
Scrolling
AssistiveTouch allows you to reposition and move items around your iOS device using
a longer tap/select command. Repositioning and scrolling involves selecting and
holding an item, moving the item, and then releasing the item. To hold an item, rather
than just tapping it, hold the joystick left for longer than 2 seconds, and until an
audible „chirp‟ sound is heard.
In the example below, we will drag Page 3 of the Home page across to the right so
that we can view Page 2:
1) Move: change the mode to cursor-move mode and position the cursor to the
left of the screen – release the joystick back to the neutral position
2) Hold: after a second or two, move the joystick to the left and hold for a
couple of seconds
3) Drag: drag the page to the right
4) Release: return the joystick to the neutral position, and after a couple of
seconds, move the joystick momentarily to the left
Move
46
Hold
Drag
Release
iPortal Accessibility
7.6.3.7.
Text Entry
Adding text is a straightforward task with
AssistiveTouch. Using the on-screen
keyboard, simply navigate the cursor to
the appropriate key, and select it with a
momentary left push of the joystick.
Remember to move the cursor in a
vertical direction (to select cursor-move
mode) after selecting a key so that you
can start moving the cursor again.
7.6.4. The AssistiveTouch menu
7.6.4.1.
Overview
The AssistiveTouch menu can be
displayed by momentarily moving the
joystick to the right (or activating the right
pad on Dynamic Controls‟ Proximity
Head Control). The menu is shown in the
image, right, and provides the following
further menus and actions:
Gestures
Home
Device
Favourites
Selecting a menu item
Use the AssistiveTouch cursor to select a menu item. Don‟t forget to move the cursor
up or down first to select cursor-move mode. When the desired menu item turns blue,
you can select it by returning the joystick to the neutral position for more than two
seconds, and then moving the joystick momentarily left.
Closing the AssistiveTouch menu
To close the AssistiveTouch menu, simply move the joystick momentarily left or right.
47
iPortal Accessibility
7.6.4.2.
Gestures
The Gestures menu offers a
convenient way to simulate
actions requiring more than
one finger such as flicking or
dragging.
When you select one of the gestures, as
shown right, the AssistiveTouch cursor will
display the corresponding number of
circles on the screen, as shown below.
To drag or flick with the gesture, follow
the Move, Hold, Drag, Release process
described earlier in 7.6.3.6 Scrolling.
7.6.4.3.
Home
Select the Home icon in the AssistiveTouch
menu to take you back to the Home page.
48
iPortal Accessibility
7.6.4.4.
Device
When you select Device from
the AssistiveTouch menu, a
sub-menu is displayed with the
following items:
Rotate Screen* - rotate the screen
left, right, portrait or upside down.
Lock Screen – lock the screen
Volume Up – increase the volume
Volume Down – decrease the volume
Shake* - shake the device
* If the application permits the action
7.6.4.5.
Favourites
When you select Favourites, a
sub-menu is displayed showing
the Pinch action. The empty
boxes with the addition (+)
sign are used as placeholders for
creating and storing your own gestures.
Using the Pinch action
The pinch action is used for zooming in or
out in applications such as photos, maps
or text documents.
It operates in two modes:
Cursor-move mode
Zoom mode
Cursor-move mode
Zoom mode
After selecting the Pinch action in Favourites, the screen cursor changes to the cursormove mode cursor as shown above, left. When in this mode, you can position the
cursor over the point at which to zoom in or out. When the cursor is in position,
change to zoom-mode by momentarily moving the joystick left – the cursor will
change as shown above, right.
49
iPortal Accessibility
50
To zoom in, move the joystick up.
To zoom out, move the joystick down.
To change back to cursor-move mode, move the joystick left.
To exit the pinch action, move the joystick right.
iPortal Accessibility
8. Appendices
8.1. Quick Start Guide to iPortal Accessibility
The following section provides a quick start guide for getting your particular Remote
working with the iPortal Accessibility feature. Simply choose your type of Remote, and
follow the instructions. For most cases, it‟s as simple as pressing the Drive, or Accessory
button on your Remote, and waiting until a particular mode is displayed on your LED
or LCD display.
If your wheelchair has been set up so that you do not get the required display, then
contact your wheelchair specialist and ask them to enable the relevant mode using
the Wizard notes that are detailed below each set-up instruction.
8.1.1. DX-ACU3B
Instructions:
Press the Drive button until it displays „0‟
on the LED.
Drive button
LED
Wizard note: set Allow Non-Driving
Profile to Yes
8.1.2. DX-REM24SD
Instructions:
Press the Accessory button until the
LEDs display the pattern as shown in the
image to the left.
Wizard note: set ECU1 Mouse Mode
Enable to Yes, and ECU1 Enable to Yes
Accessory button
LEDs
8.1.3. DX-REM34, DX-REM34B, DX-REM41D, DX-REM41E
Instructions:
Press the Drive button until it displays „0‟
on the LED.
Drive button
51
LED
Wizard note: set Allow Non-Driving
Profile to Yes
Appendices
8.1.4. DX-REMG90
Instructions:
Press the ASK button until the ECU icon
lights up.
ASK button
ECU Icon
Wizard note: set ECU1 Mouse Mode
Enable to Yes
8.1.5. DX-REMG91
Instructions:
Press the ESK button until the ECU1
Mode Indicator lights up.
ESK button
ECU1 Mode
Indicator
Wizard note: No Wizard setup
8.1.6. DX2-REMA-ACS2, DX2-REMB-ACS2, DX2-REM420, DX2REM421
Instructions:
Press the minus (-) side of the Drive
Profile button until the Drive Profile LEDs
display the pattern as shown in the
image to the left.
Drive Profile button
Drive Profile LEDs
Wizard note: set Allow Non-Driving
Profile to Yes
8.1.7. DX2-REM550, DX2-REM551
Instructions:
Press the Drive Mode button up until the
LCD displays the ECU1 mode as shown
in the image to the left.
Drive Mode
52
LCD display
Wizard note: set ECU1 CH1-6 Mouse
Mode Menu to Yes
Appendices
8.2. Apple disclaimer
You agree that the use of this software together with an iPod, iPhone or iPad ("Apple
Product") shall only be as a personal organization or supplemental data display tool
and not as a source of medical advice. You agree that this software will never be
used to replace the advice of a doctor, or your own common sense and
independent judgment, and that you will not at any time rely on any information
presented on your Apple Product as the basis for health care, medical or other
decisions that may result in injury or other ill effects. You agree to take sole
responsibility for your health care decisions, including contacting a physician or other
health care professional regarding all medical conditions, tests, diagnoses and
treatment options and agree that Apple shall have no liability for any action You or
anyone using the software may take, regardless of the information received,
displayed, calculated or transmitted by your Apple Product. Apple assumes no risk
for your use of the software and makes no warranties whatsoever, express or implied,
regarding the accuracy, completeness or usefulness of any information presented on
your Apple Product as a result of using the software.
53
Appendices
9. Index
A
About menu · 15
Airplane Mode · 15
Alerts · 16
Alternative mode actions · 29
App Store · 13
Apple · 12
Application switcher · 34
AssistiveTouch cursor · 42
AssistiveTouch menu · 47
B
Battery state · 14
Bluetooth · 15
Bluetooth connection · 8, 11
DX-REM41D · 21
DX-REM41E · 21
DX-REMG90 · 21
DX-REMG91 · 21
E
Emergency Contact · 15
Enabling AssistiveTouch · 43
F
Fault log · 15
Favourites · 47, 49
Firmware · 13, 21
G
C
Gestures · 47, 48
Calculator · 35
Camera · 39
Can't Drive in this Mode · 17
Centre-Long · 26
Charging · 19
Charging cable · 7, 10
Charging cable retainer · 7
Closing the AssistiveTouch menu · 47
Compass heading · 14
Cradle · 7, 8, 9
Cradle securing nut · 7
Cursor-move mode · 43, 49
H
D
Dashboard · 8
Device · 47, 49
DK socket · 7
Down- Short · 26
Down-Long · 25, 26, 28
Down-Medium · 25, 26, 28
Down-Short · 25, 28
Drive mode · 14
Drive profile · 14
DX socket · 7
DX2-REM420 · 21
DX2-REM421 · 21
DX2-REM550 · 21
DX2-REM551 · 21
DX2-REMA-ACS2 · 21
DX2-REMB-ACS2 · 21
DX-ACU3B · 21
DX-REM24SD · 21
DX-REM34 · 21
DX-REM34B · 21
54
Home · 47, 48
I
iPhone · 40
iPod · 40
iPortal Accessibility · 8, 20, 22
iPortal Accessibility with VoiceOver · 24
iPortal AssistiveTouch · 42
iPortal Dashboard · 8, 12, 13
iPortal Store · 22
iTunes · 12
iTunes Store · 13
J
Joystick commands · 24
Joystick commands, Long · 24
Joystick commands, Medium · 24
Joystick commands, Short · 24
L
LED, Bluetooth · 7
LED, status · 7
Left-Long · 25, 26, 28
Left-Medium · 25, 26, 28
Left-Short · 25, 26, 28
Locked · 17
Index
M
S
Master / Attendant Remote control indicator · 14
Morse code · 26
Mounting arm · 7, 10
Mouse-click mode · 43
Moving the cursor · 45
Safari · 41
Screen graphics · 16
Scrolling · 46
Seating mode · 14
Selecting a menu item · 47
Settings · 16
Speed · 14
Speed pot setting · 14
Status icons · 17
N
Navigation mode · 25, 35
Navigation, function keys · 31
Navigation, joystick · 30
No Drive Info Available · 17
Number Entry mode · 35
Number mode · 28
T
Tap · 46
Text Entry · 47
Text mode · 26
Tracking Speed · 45
P
Page Down · 32
Page Up · 32
Pairing · 8, 11, 22
Photos · 39
PIN · 11
Pinch · 42, 49
Power, cycle the · 11
Protective bung · 7
Proximity head control · 45
R
Remotes, operating modes · 21
Remotes, supported · 21
Right-Long · 25, 26, 28
Right-Medium · 25, 26, 28
Right-Short · 25, 26, 28
U
Unable to Connect · 17
Unlock · 34
Up-Long · 25, 26, 28
Up-Medium · 25, 26, 28
Up-Short · 25, 26, 28
USB cover · 7
USB, Apple · 7
USB, auxiliary · 7, 19
V
Video · 39
VoiceOver · 24, 35
Z
Zoom-mode · 49
55
Index