1
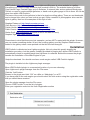
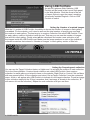
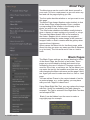
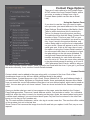
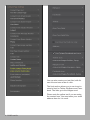
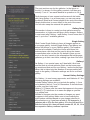
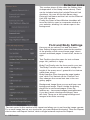
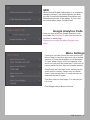
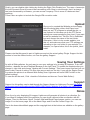
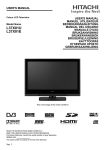
LRB Portfolio User Guide LRB Portfolio - 1 2 - LRB Portfolio LRB Portfolio (http://lrbportfolio.com) from Lightroom-Blog.com is a true website in a gallery. Everything you need to create a website from scratch is built in. The website features a Home Page, About Page, Contact Page, up to 6 Galleries, 2 external links and an optional Blank page. There’s no need to create multiple galleries, or hand code a gallery page to link to them. All can be done from within LRB Portfolio. The base of the code for the galleries is that of a simple scrolling gallery. There are no thumbnails, and no image links, what you see is what you get. Quite a number of photographer sites use this style of gallery. Here’s a few examples of this style of site: Stephen Eastwood: http://stepheneastwood.com Clicio Barroso: http://clicio.com.br/english/beauty.html Patrick Hoelck: http://www.patrickhoelck.com/home.html Pablo Vicente: http://pablovicente.com/female_models_01.htm Stefan Soell: http://stefansoell.de (some of this is not safe for work) Stephen Vigar http://www.stevenvigar.com Please bear in mind that these are just examples, and are NOT created with this plugin. However, you can create something similar. In fact, the scrolling gallery used by Stephen Eastwood was added to the gallery when a user pointed out that his site had changed. Installation LRB Portfolio is distrubuted as a Lightroom plugin. Not only does this greatly simplify the installation procedure, but the greater flexibility provided to plugins also allows LRB Portfolio to automatically check for updates each time Lightroom is restarted. Behind the scenes the plugin handles the installation of the Web Engine for you. Unzip the download. You should now have a web engine called ‘LRB Portfolio.lrplugin’. The plugin is installed via the Lightroom plugin manager. Move LRB Portfolio.lrplugin to a convenient location of your own choosing. Open Lightroom’s plugin manager from the File menu. Click the “Add” button. Browse to the plugin and click “OK” on a Mac or “Add plugin” on a PC. If you have paid for the web engine you should unlock the trial version using the registration code that you should have received. Open the plugin manager from the File menu. Choose “LRB Portfolio” from the list of plugins. Enter your registation code into the User Registration section LRB Portfolio - 3 Using LRB Portfolio As with all Lightroom Web Galleries, LRB Portfolio will be found in the Layout Style panel, in the Web Module. Click the arrow to the left of Layout Styles to open the panel, revealing all currently installed Engines. Click on LRB Portfolio to select. Setting Up: Number of required images. With the 2.1 update of LRB Portfolio, the ability to choose the number of images in each gallery was added. For the website, you’ll need to work out the total number of images you need and the number in each gallery. The best way is to create a Collection Set called LRB Portfolio. Then for each gallery, create a collection inside the set. That way you can see the number of images that will be in each gallery. Finally select all the collections and create a new collection of all the images inside the LRB Portfolio set. Make sure the image numbers in each of the individual collections matches that entered in ‘Number of Images’ in each gallery section of Site Info. Setting Up: Preparing each collection You can use the Target Collection feature of Lightroom 2 to aid with the creation of each collection. Go to the Library Module. Create a blank collection set called LRB Portfolio. Next create a collection for each gallery you intend to have on the website. Right Click (or Control Click on Macs with one mouse button) on the collection and select ‘Set as Target Collection’ from the contextual menu. A little + will appear after LRB Portfolio to indicate it is the target collection. To add an image to this collection simply hit the ‘B’ key (remember that if an image is already in the collection, ‘B’ will remove it from the collection). Repeat for each collection until you are done. 4 - LRB Portfolio Once this is done, make the large collection of all the images as suggested above. Then sort them into the correct order, making sure you match the numbers and gallery order. So if you want Landscapes to be the first gallery, sort them at the beginning, then work on the next gallery. Remember Lightroom can only deal with one collection, the others are there to help with image numbers and selection only. Once preparation is complete, go to the Web Module and select LRB Portfolio from the Engine panel. We’re now ready to begin creating the website proper. The first panel we’ll go to is the Site Info panel. Intro and Home Page The first section of Site Info introduces the gallery and allows you to select an appropriate character set for your HTML. There’s a large bunch there, so hopefully there will be something appropriate for your language. Next we have the Home Page section. First up is the Show Home Page Link. This put a link to the Home page in the menu. The tick box Home Page Text will remove the both the Site Text and Title and center the image on the home page. The Home Page drop down menu allows you to choose between 3 different style of home page. Normal Home Page gives a single image and optional text. Gallery Index lets add slices of images as links to the galleries. The image is chosen in each gallery section. The width of the slice is chosen in the Appearance Panel. First Gallery Gallery changes into the home page, automatically naming it index. html. A new feature is the addition of Home Page Menu Title, allowing the home page to have any name. This is especially useful for where you use Gallery 1 as the home page. I use it with the Gallery Index as home page and rename it to Galleries. The Site Title, which alters the headline on the page (and the page title) and Site Text which changes the text on the page. In the text section (and in that of About and Blank pages) use the HTML tag <br> to create a new line, or use <p></p> to create paragraph sections. Note: You can select a different character set from the drop down list, depending on your needs. Google charset for more info Page Title writes to the header bar of your browser. SEO experts say you should put a good description of your work here e.g. Commercial Photographer Galway. The Home Page image number sets which image appears on the page as a Normal Home Page. The number is how far along the image is in the filmstrip. Tip: Going back to Grid lets you see the number of the image. Finally at the bottom, the page footer/copyright message can be added. Use the © tag to insert the copyright symbol. If you want to cheat is a different footer, add a <div style=””> type div with whatever style you require. LRB Portfolio - 5 About Page The About page can be used to talk about yourself or your work. It’s not a requirement, as you can enter any text and call the page anything you like. The first option decides whether or not you want to use this page. The About Page Image Number works similarly to that of the Home Page Image Number. Enter a number corresponding to the location in the filmstrip of the photo you wish to use on this page. The Use Avatar checkbox includes a small picture to give a chance to insert a picture of yourself, or a logo. The next field About Avatar URL is the location fo the Avator. Replace this to remove my mugshot. I recommend putting the avatar image in the resourse/ images/ folder so that it remains with the gallery when exported from Lightroom. About names the Menu link for the About page, while About link lets you enter any name you like as filename (e.g. bio.html). The Link must end in .htm or .html to work. Blank Pages The Blank Pages settings are almost identical to those of the About Page, bar the lack of an Avatar. These pages are not included by default and needs to be included by the user if required. This page could be used for Price Lists, or services, etc. As per About, you can enter the text for the headline and main text, along with changing the Menu reference and the page it links too. Again you need to make sure this is a .htm or .html page. You can add an iFrame in the centre instead of text for an external page, e.g. a client gallery you may have with your Lab. Support is basic here. Using Show Right Side Text, you can replace the image with text. Useful for embedding YouTube videos for example. The Text is entered in the Right Side Text box, and accepts HTML. Blank 2 can be hidden from the menu to make a copyright page for example. 6 - LRB Portfolio Contact Page Options There are 2 main options for the Contact Page: A PHP contact form and Contact Details, where you enter a number of things from a list of Contact Name (which can also be an Email Link). Using the Contact Form If you elect to use the form you need to make sure you enter your email address in the Contact Page Settings ‘Email Address (No Mailto:) field. There’s yellow text above this to remind you. This is a a change from all previous versions. To enable the form click the ‘Show Contact Form’ checkbox. Note: This form uses PHP, so your server should have it installed if you want to use this. It won’t work in the preview window, only online. Being able to use the form is dependant on your server. Some will appear to work, but no email gets sent. If this is the case, there is only the option of using the Contact Details section. In the resources folder there is a test.php to check the php settings on the site once uploaded. To use type add /resources/test.php to your site location and search for safe mode and make sure it’s set to off. There are some other settings in the php which prevent it working, so it’s not a 100% guarantee that it’ll work, which is why you can enter separate contact details. Send yourself a test email with the form. If you get it, you know this works correctly. If not, use the Contact Details instead. Contact Details Contact details can be added to the page along with, or instead of the form. Each of the checkboxes shown on the left here allow a different detail to be added: Contact Name, Contact Name as a Link, Email, Phone, Mobile/Cell, Fax and Address details. If you want to add Twitter, MySpace or Facebook details, these automatically become links. Make sure you enter the correct http address! Also there is a user defined option, which can be used as a link. You can also opt to use icons instead. There are icons included in the Resources/images folder. Once you decide what you want to have appear on the page, enter the details in the Contact Page Settings section. There are 2 email address entries, one includes a ‘mailto:’ for a clickable email link, while the other is merely for showing on the page. Again, be warned about using such a visible email address if you are worried about spam. Any text can be entered in the other text boxes, so it’s okay to Ext. numbers etc. Tip: To create multiline Addresses, add a <br> tag to create a new line. The new line will be visible on the preview, but not in the text box. Show Contact Text removes the image from the file and lets you replace it with Text, as per user request. LRB Portfolio - 7 You can also create your text field, with it’s own title and even make it a link. The final section allows you to use icons instead of text for Twitter, MySpace and Facebook. The links go to the images used. Please note the yellow text if you are using the contact form. You must enter your email address here for it to work. 8 - LRB Portfolio Galleries The next sections are for the galleries. In the figure on the left, I’ve shown 3 of the gallery controls, but there are actually 7, but 4-7 are each identical in operation to 2 & 3. Swap Partly because of user request and because it sits better with using Gallery 1 as a home page, you can now swap the About, Blank and Contact pages to the end of the menu. Simply tick the box to move these to the end of the menu. You can also swap the external link positions Gallery Setup This section is there to remind you that galleries must be consecutive, or Lightroom will ignore those images. Gallery 2 must come after Gallery 1 and Gallery 3 must come after 2 and 1, up to the 7 available galleries. Single Gallery Click Create Single Gallery to have all images appear as a one page gallery. Include Single Gallery Text places text before the photos in a non CMotion gallery. The headine and text are editable. Finally the Home and Home link buttons place a link that can be used to bring the viewer to somewhere else on the site. By default it goes up one level on the site, based on the assumption that single page galleries go in their own folder, making it go down one level. Gallery 1 As Gallery 1 is a special case, we’ll deal with it first here and the look at normal galleries. Back on the home page we mentioned that we can use Gallery 1 as the home page. When this is ticked only the Number of Images setting will apply to the gallery. Otherwise settings are as for a normal gallery. Normal Gallery Settings For Gallery 1 in non home page mode, and Galleries 2-7 the following settings are available: Include Gallery tickbox lets you include the gallery. 1-3 are on by default, while 4-7 are off. Remember to include these in order, and don’t skip one! Gallery [1-7] Name sets the name that appears in the menu. Gallery [1-7] Link allows to to name the page as you like.. e.g. people.html Number of Images sets the number of images you want to appear in this gallery. Make sure to have exactly the right number selected based on your image selection in the collections,e.g. if you have a total of 100 images for 4 galleries with a 35 in the first gallery, 25 in the 2nd and 20 in both the 3rd and 4th. then put these number 35, 25, 20, 20 in the respective Gallery numbers input box. LRB Portfolio - 9 External Links This section places 2 links after the Gallery links (independent of the Swap control above). Each can be included using the Include External Link checkbox. You can set the link Name using External Link Name and the Link via the External Link URL text box. Finally the Open in New Window checkbox will force the links to open in a separate window to your website, allowing it to remain open in the background. Font and Body Settings Here we set up various Font and text items. Non Gallery Image position controls the position of the photos on the normal home page, about, contact and blank pages. It can be left, center or right. Text Position does the same for text on these page: left, justified, or righy. Body Font Family sets the face used in your text. The Body Font size can be used to change the height of the menu area. I guess this is a feature rather than a bug! Body Headline Size changes the page header size, while Font Variant can be Content Font Size changes the normal text size in the non gallery pages. Background Image.Here you can add your own background image. Place it inside the gallery plugin file in resources/images. Enter the address as ../resources/images/yourbgfilename. If you don’t want a background image, clear this field. There are a few sample background images in the filder currently. The last control in this section is BG repeat and allows you to set how the image repeats. For a small image that act as a top border, you need Repeat Horizontal. Tiles use Repeat, side borders use Repeat Vertical, while a single instance requires No Repeat. 10 - LRB Portfolio SEO While Search Engine Optimisation is a constantly changing science, I’ve added options too allow the user to add both Metadata Description and Metadata Keywords to the gallery. If you’re not sure what these mean, Google them! Google Analytics Code Here you can switch on Google Analytics code and paste the Analytics ID from your account for insertion on each page. Please do not paste the whole Google code here! Menu Settings From here you can choose the font used in the Menu. Bear in mind that there are only a limited amount of Fonts that available on all machines. If a user doesn’t have a font you specifiy, they won’t see your text the same way. If you have to have a particular font, then use images instead. Font-Family sets the face used. Variant can be small-caps or normal. Please only use Small Caps if you actually like it. It’s only set here to demonstrate that it works! Font Size sets the font height. You can use px, pt, or em. Font Weight can be Bold or Normal. LRB Portfolio - 11 Menu Images Menu Images This is where you can choose to use images instead of text in the menu. A good way to design these is to decide in advance what you want the menu to look like, then create it in Photoshop, or app of your choice. Slice this menu image up and then add the slices to the resources/images folder. Edit the fields to match the slice names and everything should fit nicely. About the resources folder We’ve seen this folder used for the Avatar and Background images. You may be wondering why? Well, everything in the resources folder is automatically copied over when Lightroom generates the gallery, so it’s a very easy way to have Lightroom include things from each individual user. Being tidy in the code (rather than real life!) I’ve included images, css and js folders for different file types. If you don’t want to use images in the menu in general, but want to use a single image (say for a stock site), then this blog post will be a help: http://lightroom-blog.com/2009/08/lrb-portfolioadding-single-images-to.html 12 - LRB Portfolio Color Palette The Color Palette is where you change the colours to set the look of the website. The base model is based on Black, White and shades of Grey, but there’s no need to use such simple colouring. A good idea would be to look at Adobe Kuler: http://kuler.adobe. com/ to see some useful colour palettes for design. I’ve included a few sample colour sets in Template forum in the package, just for show, rather than anything else. First up are the main colours: Body Text and Body Colour, followed by the central Image Area Colour. There’s also a top and bottom border colour, controlled by Image Area Border Colour. Next is the Menu section, where you control the colour of the 4 states of the menu link: normal, active, hover and visited. The last part controls the colour of the menu and that of the ID Plate section. The penultimate section deals with links also, but just normal links in the text, like when ‘Use Contact Name as Link’ is selected. The normal link colours may not live update, but will change when other settings are applied. Finally the Photo Border Colour chip sets the colour of the area surrounding each picture. The width of this is set in the next panel: Appearance. LRB Portfolio - 13 Appearance The appearance section sets the look of the internal elements of the gallery. First we have the Identity plate. To edit the ID Plate, click the triangle on the bottom right of the ID Plate window. Next is the Web or Mail Link section. By default it’s set to the home page. You can enter in any relative or absolute web address here, or an email address by adding ‘mailto:’ before the email address. Logo Alt text lets you put in Alt text for the image. The Identity Plate Position control has 3 settings: Left, Centre and Right, corresponding with the physical location on the page. It can be nudged with ID Plate Offset. Logo Position puts it top or bottom. Similarly Menu Position places the menu text on the left, centre, or right of the screen. Even if these don’t preview correctly on your system (they do look fine on most), they export correctly. Menu Offset lets you balance the position of the menu, useful if it’s near the ID plate. Menu Page Position controls whether the menu appears over the main text/gallery area, or under. Under is the default. Menu Offset allows you to move the menu up or down. This is useful for situations where the Identity plate is on one side, with the menu on the other. The offset can bring the menu level with the Identity Plate. Gallery Thumb Width sets how wide the images slices are in the Gallery Index. Options are 100px, 200px, 300px, and 400px. Top Gap pushes the whole site further down the page. Text Area Width allows you to control the width of the text sections in Home/About/Contact/Blank. Text Area Width sets the width of text in non gallery pages. Gallery Padding sets the width between images. This is there from feature requests in the original non website version of this gallery. Photo Border sets the width of the border on each image on the site. Set Body Width turns on a fixed width in the Body, while Body Width sets the width. Make sure that the the width is wide enough to accomodate the images in the home/about/blank/contact and mail pages. If in doubt use a vertical image. Image Info The Title information here is added to the Alt and Title sections of the image, appearing as a tooltip on the image. When the Cmotion scroll controls are added, these tooltips go off. 14 - LRB Portfolio Output Settings The Output Settings section is where we apply our image controls. The first Slider sets the amount of JPEG compression applied. This affects 2 things: Size and Quality. 70% will create files that are roughly 120K at 600X400 pixels, but look good. 50% will produce much smaller and faster loading images, but will cause banding in graduated sections of your image. It’s best to try the settings to see what works for the website. Metatdata has 2 settings: All, which applies all metadata from the original to the web version, or Copyright Only, which applies only the Copyright information from the original file. It’s the equivalent of ‘Minimize Metadata’ from the Export Dialog box. switch it off. Add Copyright Watermark writes whatever is in the Copyright section of Metadata over the image as a watermark. Cmotion The next section is the Cmotion section. This activates a very cool script from DynamicDrive.com, which removes the scroll bars and uses the mouse position to the scroll the gallery. In the middle the gallery is static. The further left or right you go from there, the faster the gallery will scroll. Auto Scroll starts the scroll automatically when the page loads. Keep Scrolling on Mouse Out lets the gallery keep scrolling when the mouse moves off the gallery Cmotion Margin allows you to match the menu position between the Home page and the Gallery. Rest Area sets the width of the central area where the gallery doesn’t scroll. Max Speed sets the speed of scrolling at the edges of the gallery. Max Wdth sets the width of the scroll area. You need it to be larger than the page size to keep the full width. Start position decides where the gallery begins. You can also change the end of gallery message, or After the section break we have the Photo Width and Photo Height controls. Use these to fix the height you require. These controls do interact so if you are mixing portraits and panoramas, you may have a height of 400 mixed with a width of 1000. The images ratio will not allow images go to 1000 if the height is already 400. For even height, you may need to also increase the width.. A new feature of Lightroom 2 galleries is Sharpening. You can use the tick box to turn it on and apply 3 levels of sharpening: Low, Standard and High. This is not visible in the Preview, but shows on Export. LRB Portfolio - 15 Finally, you can disable right clicking by clicking the Right Click Disable box. The uses a Javascript file from Dynamic Drive to prevent users accessing a file. Bear in mind though, that if an image has been accessed by a browser, you can access it anyway. This is more of a deterrent than anything. There’s also an option to include the Google IE8 correction code. Upload Once you’ve created the Website and are happy with the whole thing, either click Export and then use an FTP program to upload the site, or use Upload. In that case set up the FTP Server settings as recommended by your host. If you want to test the website first, Tick the ‘Put in Subfolder’ box and choose the name of the test folder. Otherwise, if this is to be a main website, turn this off, and make sure that your FTP settings are uploading to the root folder on your website. For example, on Cpanel sites, this is the /public_html/ folder. Please note that this panel is part of Lightroom and not the actual gallery Plugin. Support for this section is from the Adobe forums, not from the gallery Support. Saving Your Settings As with all Web galleries, the only way to save your settings is by creating a Template. To do this click the + besides the word Template Browser in the Left Panel. To update the template after you change it, right click and choose ‘Update with Current Settings’. This saves layout and text, but not photo order. A word of advice? Do this often as you work on the site. If you use the Engine Panel to preview the photos in a different Web Gallery, then Lightroom will reset LRB Portfolio to the default settings. To save the all the work, Click + besides Collections and choose ‘Create Web Gallery’. Support Support for this gallery can be had through the Support thread on Lightroom Forums http://www. lightroomforums.net/showthread.php?8265-LRB-Portfolio-Website-in-a-Gallery-for-Lightroom-2amp-3 Notes Even if you’re only displaying 50 images, Lightroom will generate all photos in a collection. So if you have 60 images total in the galleries you can cheat a bit and make a collection with 65 images. Then for the Home, About, Contact, Mail and Blank Page Images section, you can use image 61 on the home page, 62 on the About Page and 63 on the Contact Page. etc. Text in the home/about/blank page and the copyright text at the bottom are editable on the gallery page 16 - LRB Portfolio